True Track Manual - Great Lakes Metal Detecting
True Track Manual - Great Lakes Metal Detecting
True Track Manual - Great Lakes Metal Detecting

Create successful ePaper yourself
Turn your PDF publications into a flip-book with our unique Google optimized e-Paper software.
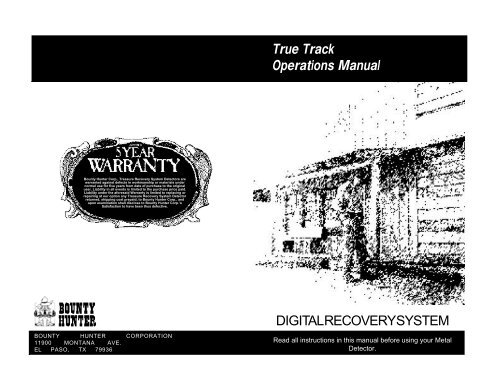
<strong>True</strong> <strong>Track</strong>Operations <strong>Manual</strong>Bounty Hunter Corp., Treasure Recovery System Detectors arewarranted against defects in workmanship or materials undernormal use for five years from date of purchase to the originaluser. Liability in all events is limited to the purchase price paid.Liability under the aforesaid Warranty is limited to replacing orrepairing at our option any Treasure Recovery System Detectorreturned, shipping cost prepaid, to Bounty Hunter Corp., andupon examination shall disclose to Bounty Hunter Corp.’sSatisfaction to have been thus defective.BOUNTY HUNTER CORPORATION11900 MONTANA AVE.EL PASO, TX 79936DIGITAL RECOVERY SYSTEMRead all instructions in this manual before using your <strong>Metal</strong>Detector.
TABLE OF CONTENTSWARRANTY INFOI. INTRODUCTION..................................................................................3General Info on the HobbyII. ASSEMBLY...................................................................................4 & 5S-Rod AssemblyMounting the CoilMounting the Control PanelIII.TOPDECK CONTROL PANEL..........................................................6On/Off Sensitivity ControlDisc/Notch ControlIV. TOUCHPAD CONTROLS..........................................................7 & 8All <strong>Metal</strong>sDiscNotchV. LCD READOUT.........................................................................9 & 10Visual Target IdentificationVI.VII.TESTING YOUR DETECTOR.........................................................11Step-By-Step ProcedureAUDIO OUTPUT................................................................................12Audio Target IdentificationThree-Tone Target IDVIII. IN THE FIELD.........................................................................13 & 14Proper Coil SweepSignal ResponsesIX.PINPOINTING...................................................................................15Step-By-Step ProcedureX. BATTERIES........................................................................................16Increasing Battery LifeUse of HeadphonesXI.XII.XIII.TROUBLE SHOOTING....................................................................17False SignalsImproper ReadoutCARE & FEEDING............................................................................18Proper Care and StorageWARRANTY INFO...........................................................................19We don’t want you to have any problems with your detector, but itdoes happen occasionally. If your detector fails to operate at all, firstcheck the batteries. If the unit still does not operate, try clicking thePower Switch on and off a few times. Sometimes they stick in theoff position.If you have any questions you may want to call the factory and askfor assistance.This <strong>True</strong> <strong>Track</strong> metal detector has a limited 5-Year Warranty tothe original purchaser. If your detector requires service while underwarranty, please return it to Bounty Hunter Corporation at theaddress below. It will be serviced and promptly returned. Units notunder warranty will be serviced for a nominal charge.BOUNTY HUNTER CORPORATION11900 MONTANA AVE.EL PASO, TX 79936(915) 855-4206219
CARE & FEEDINGINTRODUCTIONPROPER CARE FOR YOUR DETECTOR<strong>Metal</strong> detectors are sensitive electronic instruments. Althoughyour <strong>True</strong> <strong>Track</strong> does not need to be handled with constantprotection, reasonable care must be taken to help insure a longtrouble-free life for your detector.KEEP IT CLEAN… Take a few minutes after each use to removedirt and dust. Wipe the housing and wash the coil—especially if ithas been dipped in saltwater. A plastic bag over the control box atthe beach will help protect the unit from sand and preventcorrosion due to salt air.KEEP IT COOL… Never store your detector in an extremely hotenvironment, such as an automobile trunk in the summer, forextended periods of time. The prolonged heat will not only shortenbattery life considerably but can causeelectronic components to break down.KEEP IT SAFE… Never transport your detector in such a mannerthat will subject it to extreme vibration or shock. The unit may becushioned by wrapping it in a blanket or by putting it in a carryingbag or case designed for that purpose.COIL… The coil is waterproof and may be submerged in eitherfresh or saltwater. Caution should be exercised to prevent waterfrom entering the chassis. After the coil is used in saltwater, thecoil should be rinsed with fresh water to prevent corrosion of themetal parts.Welcome to the fascinating world of metal detecting.Your new Bounty Hunter <strong>True</strong> <strong>Track</strong> was designed for versatility inall areas of treasure hunting. Coin-shooting, relic hunting, and goldnugget shooting are some of the many ways your detector can beutilized.<strong>Metal</strong> detecting is a fun, rewarding hobby that is in completeharmony with the environment. So be sure to use your detector withconsideration and respect for others’ property. Always fill in yourholes and use small trowels for digging. If you are digging in a lawn,plug the grass properly and there will be no damage to the grass. It’salso polite to always gain permission upon entering private property.<strong>Metal</strong> <strong>Detecting</strong> is a lifelong pursuit available to all ages. The hobbyis completely dependent on the type of equipment being used and theoperator’s expertise. With the electronically advanced <strong>True</strong> <strong>Track</strong>metal detector and diligent practice you will achieve a level ofexpertise making the hobby of metal detecting very rewarding. Thefirst step towards this goal is to carefully read this manual beforeattempting to operate your new <strong>True</strong> <strong>Track</strong> metal detector.Happy hunting!18 3
ASSEMBLYTROUBLESHOOTINGAssembly of this unit is easy and requires no special tools. The onlyassembly required is to attach the search coil and lower stem to theupper stem and on to the control housing. Fresh batteries can thenbe installed and the detector will be ready for use.1. Press the button on the upper end of the lower stemand slide the lower stem into the upper stem.2. Using the supplied bolt and nut with knobs, attachthe searchcoil to the lower stem.3. Wind the search coil cable around the stem.CAUTION: Provide enough slack in the cable nearthe search coil so that the coil may be rotatedeasily.4. Insert the coil’s plug into the matching connectoron the control housing. Be sure the holes and pinsline up correctly.The following troubleshooting steps may assist you in caseyou’re having problems with your <strong>True</strong> <strong>Track</strong>.YOUR DETECTOR IS EMITTING FALSE SIGNALS WHENYOU’RE IN THE FIELD.Your SENSITIVITY may be set too high. Try cutting back theSENSITIVITY slightly until the false signaling disappears. Remember,to swing your coil slowly. Some signals will occur on highlyrusted metals, but if the signal does not repeat over the same areawhile passing the coil over it, then the target is usually notworthwhile.YOUR LCD READOUT IS NOT LOCKING IN OR ID’ING WHILEPASSING OVER A TARGET & THERE IS MORE THAN ONETONE BEING EMITTED BY THE DETECTOR OVER THE SAMETARGET.This will usually occur when there is more than one object over thearea you’re sweeping. If it is an odd piece of metal that the detectorcannot recognize, the meter will also not lock in. Sometimes,oxidation can also make the meter ID arrows and tones jumparound. This may also occur if the Sensitivity is set too high.YOUR DETECTOR IS NOT STABLE AND HAS A PULSING,DISTORTED TONE INSTEAD OF A CLEAR TONE.This can occur if you’re operating near another detector or nearpower lines that can interfere with the frequency that the detectoroperates on.YOUR DETECTOR IS EMITTING A CONSTANT LOUD TONEThis usually occurs when the batteries are low. Try replacing yourbatteries with two new alkalines to determine if this is the cause.4 17
BATTERIESASSEMBLYApproximately 90% of metal detector problems are caused byweak, dead or improperly connected batteries. If the unit does notcome on, or comes on and has weak volume, will not tune properly,or has erratic operation or drifts, CHECK THE BATTERIES. Alwaysremove batteries for prolonged storage of unit.The Low Battery indicator will come on and stay on whenever thebatteries need replacing. It will always “flash” momentarily wheneverthe Power Switch is turned on. This lets you know it is workingproperly and batteries are good.WaterproofSearch CoilThe Search Coilis mounted onto the lower stem with one thumbscrewand bolt—23BATTERY REPLACEMENT:The <strong>True</strong> <strong>Track</strong> uses two 9 volt Alkalinetransistor batteries. Access tothe batteries is gained by pulling offthe two snap-on covers located onthe bottom of the detector. Attachbatteries to battery snaps and replacethe covers. USE ALKALINEBATTERIES ONLY!!14NOTE: Batteries will last longer with the use of headphones.A headphone jack is provided and can be used with any1/4" stereo-type headset.The Control Panelis mounted onto the upper stem with the two thumbscrewsincluded—16 5
TOPDECK CONTROL KNOBSPINPOINTINGOFFPOWERBounty Hunter Corporation • El Paso, TX 79936SENSITIVITYHIGHLOWDISC / NOTCHON/OFF POWER:Used to turn the unit on and to set the level of SENSITIVITY. Alwaysadjust as high as possible for maximum depth. Reduce as necessaryif false signals or chatter occurs.DISC/NOTCH:Only applies when unit is not operating in the All <strong>Metal</strong> mode. Adjustsfor different levels of discrimination when operating in Disc or Notchmodes.HIGHAccurate pinpointing takes practice and is best accomplished by“X-ing” the suspected target area.1. Once a buried target is indicated by a good tone response,continue sweeping the coil over the target in a narrowing sideto-sidepattern.2. Take visual note of the place on the ground where the “beep”happens as the coil is slowly moved side-to-side.3. Stop the coil directly over this spot on the ground.4. Now move the coil straight forward and straight back towardsyou a couple of times.5. Again make visual note of the spot on the ground at which the“beep” occurs.6. If needed “X” the target at different angles to “zero in” on theexact spot on the ground at which the “beep” happens.When pinpointing a target, try drawing an “X”, as illustrated, over where the tone isbeing emitted.6 15
IN THE FIELD TECHNIQUESTOUCHPAD CONTROL OPERATIONThe <strong>True</strong> <strong>Track</strong> is a very sensitive and deep-seeking detector. It willloudly respond to many targets that other detectors would only emita weak signal for. Because of this, trash-induced signals and othersources of interference may emit signals that seem confusing. Themain key to handling these types of false signaling is to dig only thosetargets that emit a strong repeatable signal. As you sweep thesearch coil back and forth over the ground, learn to recognize thedifference between the signals that occur at random and signalsthat are stable and repeatable.When searching very trashy ground, it is best to scan small areaswith slow, short overlapping sweeps.COIL MOVEMENT: When swinging the coil, be careful to keep itlevel with the ground about one to two inches from the surface.Never swing the coil as if it was a pendulum.WRONGALL METALPRESS TO SELECT TARGET MODEDI SCNOTCHALL METAL: By pressing the “All <strong>Metal</strong>” touchpad, the unit willthen respond to all types of metal without any discrimination.The detector will still require motion to detect a target in thismode of operation.DISC: After pressing this touchpad, the detector will automaticallyreject iron and can then be adjusted by the DISC/NOTCHcontrol for increased discrimination. By turning the DISC/NOTCH control clockwise the detector will eliminate most trashitems such as foil and aluminum while still detecting silver andcopper—depending on how high it is set. Most gold and nickelswill also be eliminated if tuning the DISC/NOTCH controlclockwise for higher discrimination. When the DISC/NOTCHcontrol is placed fully counterclockwise (Low), the detector willpick up all nickels and gold rings along with pull tabs andcopper/silver coins, but still reject iron.RIGHT14 7
TOUCHPAD CONTROL OPERATIONIN THE FIELD TECHNIQUESALL METALPRESS TO SELECT TARGET MODEDI SCNOTCHNOTCH: This mode will automatically reject iron and most pull tabsyet retain detection of nickels and most small gold rings. The DISC/NOTCH control will increase the width of the NOTCH as it is turnedtowards High, making possible the rejection of screw caps and zincpennies, yet still detect Nickels and small gold rings.NOTE: When operating in the DISC or NOTCH modes, use only thelowest level of discrimination necessary to reject bothersometrash. Digging an occasional trash item might pay big dividends bykeeping more possibilities open.After selecting your choice of mode for operation, swing the searchcoil gently side-to-side, slightly overlapping eachsweep as you move forward. Make sure youkeep your search coil approximately 1" aboveground as you search. Raising it in the sweepor at the ends of your sweep will cause falsereadings. Move slowly, hurrying will only causeyou to miss targets.The coil should be swung in a half-circlemovement as illustrated above. Repeat thismotion every step you take to guaranteethat the area is being covered thoroughly.Most good objects will respond with a good repeatable signal. If asignal does not repeat after swinging the coil directly over thesuspected target a few times, it is more than likely trash metal.When in the Disc mode iron and steel objects generally do notrespond. False signals can be caused by trashy ground, electricalinterference, or by large irregular trash objects. These signals areeasily recognized by their often broken or nonrepeatable nature.SIGNAL ➞SWEEP➟WHAT READSLIKE THIS…MAY ACTUALLY BE THIS8 13
AUDIO OUTPUTLCD READOUTALL METAL MODE: All targets will emit a medium tone whenoperating in the ALL METAL mode.P R O B A B L E T A R G E T I DGOLD RANGEDISC & NOTCH MODE: When operating in the DISC or NOTCHmode, targets will be differentiated by three different tones classifiedby the Audio Target Identification.IRONFOIL10¢AUDIO TARGET IDENTIFICATION: The <strong>True</strong> <strong>Track</strong> offers threetones for audio identification of what types of metal are beingdetected. These three tones are only emitted in the Disc and Notchmodes.ALLMETALLOWDISCMODEBATNOTCHMODET A R G E T M O D ENOTE: The only time the unit will display all arrows simultaneously, as illustratedabove, is when the unit is first turned on.NORESPONSEIron & SteelLOWTONEGold & NickelMEDIUMTONEOld & NewPull TabsHIGHTONECopper, Silver &BrassIRON & STEEL: On most iron and steel objects there usually will notbe any detection. On occasion, if the iron is highly oxidized, a tonemay be emitted. For instance, some rusted bottle caps will emit ahigh tone and lock on penny or silver on the meter readout.GOLD & NICKEL: All nickels and small gold items will emit a lowtone. There is a percentage of gold rings, around 15% that emit amedium tone, but the meter will still read under the gold spectrum.OLD & NEW PULL TABS: These will usually emit a medium toneor no tone at all if in the Notch mode. If a pull tab is broken in half,the “Beaver Tail” part will emit a low tone. There are also pull tabsthat are bent and folded that may also emit a low tone.COPPER, SILVER & BRASS: These metals usually will all emit ahigh tone in the Discrimination mode. Chains (Necklace, Bracelet,etc.) will sometimes emit a low or medium tone.The LCD will give a visual readout of the probable type of metal beingtargeted and what denomination of coins are detected. The LCD willusually lock on when a good target is being detected.GOLD/SILVER range: Indicated on the top of the readout. The goldspectrum is to the left of the meter and the silver spectrum is to theright. Other types of metal fall under both spectrums such as iron,foil and nickel under the gold spectrum and copper pennies underthe silver spectrum.1¢ ZINC: Indicates that the target probably is a zinc penny. Willusually emit a medium tone when targeted. Other targets, such aslarge gold, will also fall into this category.12 9
LCD READOUTTESTING YOUR DETECTORSCREW CAP: Indicates that the target probably is a Screw Cap orother types of metal such as bottle caps. Medium size gold will alsofall into this range, as well as large aluminum items.PULL TAB: Indicates that the target is a Pull Tab. Some small goldwill also read as Pull Tab.IRON/FOIL: Indicates that the target is either iron or foil. Somerusted oxidized iron will occasionally register in the silver range.NOTE: All of the target indications are used as symbols and a visualreference of what is being targeted. Many other types of metal canfall under any one of these indications. There is always a trash toTreasure ratio when detecting; the LCD allows a visual reference tominimize the trash only—it will not completely eliminate all trashitems.LOW BAT INDICATOR: Will blink when turning the unit on toindicate that it is working. If the indicator comes on and stays on, thebatteries need replacement.1. While testing the unit for its capability to pick up coins and otherobjects, always test away from other metals such as outside on theground. You cannot test a unit indoors on the floor, because thereis usually other metal in the floor that may conflict with thedetector’s signal or even mask the signal completely.2. If you’re not picking up coins or metal, even though your coil isclose to the objects to be detected, there is a chance that you arenot maneuvering the coil properly. Do not move the coil too quicklyand try not to sweep the coil less than an inch away from the object.3. No matter what mode of operation you’ve chosen (All <strong>Metal</strong>,Disc or Notch), your coil needs to be in movement before the unitwill recognize a target. If you’re air testing, you need to point the coilto the ceiling and make sure there is no metal near the coilwhatsoever. The object you’re testing with needs to be swung in aside to side motion before the detector will be able to recognize it.4. Not all gold rings will give you a low tone. Some gold rings fall inthe pull tab range and may emit a medium tone similar to the pulltab. Some pull tabs, especially if they are broken in half, will give youa low tone similar to most gold rings and nickels.ALLMETALDISCMODET A R G E T M O D ENOTCHMODETARGET MODE: Each arrow will lock on and stay on whateverchoice of mode the user has selected. Each mode of operation canbe set by choosing one of the three Touchpads on the control panelafter the unit is turned on.5. Zinc pennies will emit a medium tone instead of a high tone asdo copper pennies, quarters, and dimes.6. Do not swing the coil, or the test object, too quickly or it may giveyou a false signal. When repetitively passing the coil over the object,allow a few seconds to pass to give the detector a chance torecover from its last reading.10 11