Online Visa Photo Upload Process - Online Indian Visa Form
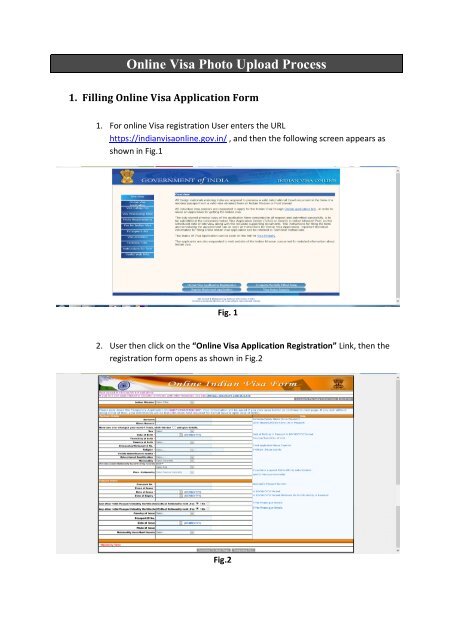
Online Visa Photo Upload Process - Online Indian Visa Form
Online Visa Photo Upload Process - Online Indian Visa Form

Create successful ePaper yourself
Turn your PDF publications into a flip-book with our unique Google optimized e-Paper software.
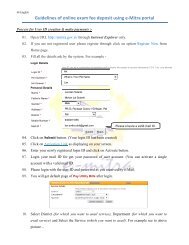
Fig.3User clicks on “Details” tab to view the dimension, Height and widthof the image. As shown in Fig. 4
Fig.4d) How to change the Parameters of the <strong>Photo</strong>graph and make them according toParameters guideline.1. To change the parameter of the <strong>Photo</strong>graph user first Right Click on theimage, then click on “Open With” option then click on “Paint”.2. Then that image will opens in the paint , as shown in Fig.5
Fig. 53. In paint user click on “View” tab , as shown in Fig.6User clickson the viewtab.Fig.6
Size of Image – Minimum 10 KB – Maximum 300 KB The height and width of the <strong>Photo</strong> must be equal.o The minimum dimensions are 350 pixels (width) x 350 pixels(height).o The maximum dimensions are 1000 pixels (width) x 1000pixels (height).5. All these are the mandatory condition to upload photo, if any of thesecondition is not fulfilled during photo uploading then, the application willshows an appropriate error message.6. User clicks on “Browse” button to select the photo of the applicant to beuploaded.7. If uploaded photo is not in the JPEG format then a pop window will openscontains a message “Only JPEG files can be uploaded”, as shown in Fig. 15Fig. 158. Now, user clicks on the “OK” button and start uploading the photo again.9. Once the photo gets uploaded it appears in the photo window as shown inFig. 16.
Fig.1610. If user wants to upload the photo again, then clicks on “<strong>Upload</strong> <strong>Photo</strong> Again”button.11. If user wants to Confirm the photo then clicks on “Confirm” button. Once the confirm button is pressed , then a pop window openscontains a message “Confirm You want to upload the photo”as shown in the fig.17User clicks on the “OK” button to upload the photo or“Cancel” button to cancel the process.Fig. 1712. On clicking on the “OK” button the photo gets uploaded and shown in theregistration form in the photo section. As shown in the Fig. 18
Fig.18