HotStart Pro Manual - System 96
HotStart Pro Manual - System 96
HotStart Pro Manual - System 96

Create successful ePaper yourself
Turn your PDF publications into a flip-book with our unique Google optimized e-Paper software.
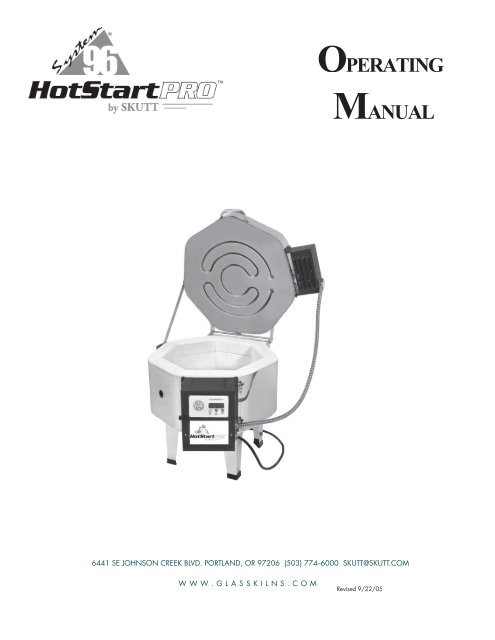
OPERATINGMMANUAL6441 SE JOHNSON CREEK BLVD. PORTLAND, OR 97206 (503) 774--6000 SKUTT@SKUTT.COMW W W . G L A S S K I L N S . C O MRevised 9/22/05
S T A R T I N G4WELCOMEWELCOME TO THE WORLD OF GLASS FUSING!Congratulations on the purchase of your new <strong>HotStart</strong> PRO glass fusing kiln. Finally a kiln has been developed withthe needs of the beginning fuser in mind. We hope you get years of enjoyment with this kiln and it serves as a springboard indeveloping your skills as a glass artist.THE COMPANIESSpectrum Glass, the largest manufacturer of art glass in the world has teamed up with Skutt Kilns, the largest manufactureof hobby kilns in the world, to produce the <strong>HotStart</strong> Kiln. Both Skutt and Spectrum have a strong commitment toquality products and outstanding customer service. It is our goal to make entering the hobby of glass fusing both enjoyableand affordable.THE KILNAll Skutt kilns are made with precision milled, hand selected brick and top-of-the-line electrical components. Thesekilns are built to last.The <strong>HotStart</strong> is designed to run on standard household voltage.Just unpack it, plug it in and you are ready to go.The 15” (38 cm) chamber is large enough for most beginningprojects and is heated by elements routed in the lid to ensure evenheating. Each <strong>HotStart</strong> comes with a stand and a porcelain viewinghole plug.THE CONTROLLEROne of the best features of the Hot Start <strong>Pro</strong> Kiln is the Glass-Master LT Controller. Now beginners can start fusing glass successfullyright away. With it’s stored factory programs all you needto do is select what you want to do with the glass and how fast youwant to fire based on it’s size.The controller is designed to grow with your needs. As youbecome more familiar with the glass and take on more advancedprojects you can unlock more advanced features. You can designcustom programs or edit existing programs to achieve the results youneed.READ THE MANUALLike the kiln, the manual was developed with the beginningfuser in mind. There is a lot of good information on how to fireglass, not just operate the kiln. We recommend you read the entiremanual before getting started.We have placed easy access tabs for each section of themanual for your convenience. Some of the description on how to use the features may seem a little confusing at first, especiallythe advanced features, so give yourself a little time to play around with it. After a while it will seem like second natureto you.We wish you the best of luck with your new hobby.
LOCATING THE KILN1. Locate your kiln near a 120V outlet. Position the kiln to the left of your electrical outlet so the cord will have a directpath to the outlet. Never use an extension cord.2. Install it in a well ventilated, sheltered area such as a carport, garage, utility or hobby room. It should be convenient towhere you are working, and out of the way of traffic areas.3. Allow at least 18” (46 cm) of space between your kiln and adjacent walls.4. Do not locate the kiln where flammable materials will be stored.BEFORE YOU START5. Never fire your kiln within a four sided cabinet or closet. The fourth side must always be open to room air to preventthe kiln from overheating surrounding surfaces. It is best to leave at least two sides open for easy access to controlsand viewing holes. Fully automatic kilns should not be located in a room that exceeds 105 °F (40.5 °C) or is less than32 °F (0 °C) as damage to the electronic components may result.6. The kiln must be placed on a non combustible surface such as cement, brick, metal or ceramic tile.7. When installing a kiln in a room with a fire control sprinkler system, please check the sprinkler head rating to insurethat heat emitted from the kiln will not activate the sprinkler system.7S T A R T I N GTEST FIRINGThe test fire ensures you that the kiln is functioning properly and has not been damaged in shipping. Be sure thatthe coating on the shelves is dry before your first test fire.TEST FIRE PROCEDURE• Place a shelf in the kiln chamber on three 1” (2.5cm) posts.• Place a sample glass project using scrap fusible glass in the kiln and program the kiln using the instructions onpage 14. As a precaution you may want to provide a dam or barrier around the glass when fusing more than 2layers. With more than 2 layers, the glass will spread until it reaches a thickness of 1/4” (6.5 mm).• Let the kiln fire and then cool to room temperature before opening the lid. If the project is fused or slumped toyour satisfaction the kiln is operating correctly. The need for slight adjustments to temperature are not uncommon.The first time the elements are fired they will give off some smoke. This is normal and expected. It is also commonfor hairline cracks to appear in the floor and lid of a kiln. This is caused by the expansion and contraction of the mortaredbrick and is considered normal. It will not affect the firing nor the life of the kiln.
S T A R T I N G8UNDERSTANDING THE CONTROLLER3 <strong>Pro</strong>gramming LevelsThere are 3 different skill levels that you can set on your Hot Start <strong>Pro</strong> controller. Each level increases the programmingoptions as well as the complexity of the controller. As your needs grow your controller can grow withyou.◊◊◊BeginnerBeginner Plus MGFAdvancedBEGINNER LEVELAll <strong>HotStart</strong>s are shipped from the factory set in the Beginner Level. In the Beginner Level, Auto Mode and EditMode are the only programming modes you will see. This helps by keeping the choices simple. As you progressin your skill level you can explore new levels. For a description of these Modes see the following page. If youever get lost and want to revert back to the beginner level just press down on the ENTER key until you hear abeep (4 seconds). Then Press down on the DOWN key until you hear a beep (4 seconds).BEGINNER PLUS MGFThis programming level includes Auto Mode and Edit Mode as well “Modify Glass Fire Mode”. This is a featurethat you can toggle on that allows you to change the process temperature and hold time in a GlassFire <strong>Pro</strong>gram.So now when you run a GlassFire program it will ask you if you want to change these values. This is very helpfulwhen you want to “tweak” the factory programs a little to get a little more aggressive tack fuse or a deeperslump. See the “OPTIONS MODE” section for instructions on how to toggle on the MGF mode.ADVANCEDThe Advanced Mode opens up all of the options for programming available to you. At this level you can designyour own programs, load stored programs you have written and change factory defaults. Again, if you ever getlost and want to revert back to the beginner level just press down on the ENTER key until you hear a beep (4 seconds).Then Press down on the DOWN key until you hear a beep (4 seconds).Many people will probably never even need to open the Advanced Level of programming. However, it’s nice toknow it is there if you need it.IDLE STATENo matter what programming mode you are in most programming begins when the kiln is in an IdLE state. Thekiln is in an IdLE state when “IdLE” is flashing alternately with the temperature in the kiln. You can always getback to an IdLE state by pressing the ENTER key down for 4 seconds. Once in the IdLE state press ENTER tobegin programming.
Five <strong>Pro</strong>gramming ModesUNDERSTANDING THE CONTROLLERThe GlassMaster LT now has Five programming modes. Each controller is shipped from the factory in “AUTO” mode.When your skills improve you can access the advanced modes simply by pressing the Up Arrow key for 4 seconds. Press theDown Arrow key while in Idle state for 4 seconds to return to the Beginner Level.9S T A R T I N GBEGINNERADVANCEDAUTOPROLOADOPTIONSEDITAUTO MODEAuto Mode, more commonly referred to as GlassFire Mode, is an easy and convenient programming mode that allowsyou to successfully fuse and slump glass as a beginner. These factory set firing programs were designed by professionalglass artists to fire the majority of the projects that will fit in your <strong>HotStart</strong> <strong>Pro</strong> kiln. To access and run one of the 9 programsavailable, simply select a process (Fuse, Slump or Tack Fuse) and a firing speed (Fast, Medium, or Slow ) based on the sizeof your piece.PRO MODEPRO Mode, commonly referred to as Ramp and Hold Mode, allows you to input, store and run your own firingprograms. Each program can be up to 8 segments and there is room to store up to 5 programs. <strong>Pro</strong>gram # 5comes programed with a casting program already installedLOAD MODEThe Load Mode allows you to access, review and start your stored Ramp and Hold (PRO) programs.OPTIONS MODEThe OPTIONS Mode gives you access to change certain factory settings such as Temperature Scale and ModifyGlass Fire Mode. It also lets you completely RESET the controller back to original factory settings.EDIT MODEThe EDIT Mode can be considered a “Live Mode”. It is accessed through the Up Arrow key only when the kilnis firing. It allows you to Skip a Segment during any point in a firing or Add Time or Add Temperature in theprocess segment of a GlassFire Mode or Ramp and Hold <strong>Pro</strong>gram.
Display MessagesThe GlassMaster LT has a 7 segment LED display. This sometimes requires creative ways for representing letters. Forexample the number “5” is also used to represent the letter “S”. Below is a list of all the display messages along with a descriptionof their meaning.°FThis represents degrees Fahrenheit. When it appears the controller is asking you to enter a Temperature or select a temperaturescale.°cThis represents degrees Celsius. When it appears the controller is asking you to enter a Temperature or select a temperaturescale.Auto, <strong>Pro</strong>, LoAd, OPtThe controller is asking you to select a programming mode. Use the Up or Down arrow to cycle to the mode you want andpress ENTER to select it. If you are in AUTO mode it will be necessary to press the Up arrow for 4 seconds from IDLE to accessthe other 3 modes.CHG°This is displayed when the controller is in OPTIONS Mode and it is asking you to select this feature if you want to “Change”the temperature scale which is currently selected.CPLtThis indicates that the program is “Complete”. The kiln may still be hot. Wait until the kiln has cooled before opening the lid.EdItThe controller is asking if you would like to access the Edit Mode features. (See pg. 21)HLdThis represents HOLD. When it appears the controller is asking you to enter a Hold time in Hours and Minutes.IdLEThe controller is in Idle Mode. The display will flash “IdLE” alternately with the current temperature of the kiln. This shouldbe the starting point for programming the kiln.MGFThis message represents Modify Glass Fire Mode. (See “OPTIONS MODE” pg. 22)ONThis indicates that the program has been started and the kiln is ON.PFThis message indicates that a Power Failure has occurred. Pressto clear it.rAThis represents Ramp or Rate. The controller is asking you to enter a temperature rate for a Ramp & Hold segment.rEdIUNDERSTANDING THE CONTROLLERThe controller is in Ready Mode. The controller will display this after a program has been loaded and the kiln is “ready” tostart firing.rSEtThis is a feature found in the OPTIONS Mode that allows you to RESET the controller to factory settings.SLo, MEd, FAStThe controller is in the process of programming a GlassFire program and is asking for a firing speed: Slow, Medium, or Fast.SLP, tAC, FULLThe controller is in the process of programming a GlassFire program and is asking for a <strong>Pro</strong>cess: Slump, Tack Fuse, or FullFuse.11S T A R T I N G
第 26 期商 業 生 態 系 發 展 歷 程 中 包 含 幾 個 重 要 階 段 , 大 致 上 有 四 項 循 序 漸 進 的 承 繼 現 象 ,這 四 個 階 段 是 開 拓 (Pioneering), 生 態 系 的 基 本 典 範 在 此 階 段 產 生 ; 擴 張 (Expansion),這 段 期 間 群 落 延 展 了 它 的 範 疇 , 並 消 耗 各 式 的 資 源 ; 權 威 (Authority), 群 落 的 架 構 至此 大 致 穩 定 , 生 態 系 內 部 領 導 權 與 利 潤 的 爭 奪 戰 變 得 嚴 酷 ; 最 後 則 是 更 新 (Renewal),生 態 系 必 須 以 持 續 的 創 新 來 保 障 其 繁 榮 , 不 然 就 是 死 亡 (Moore, 2001)。 以 下 條 列 這 四個 階 段 的 說 明 :( 一 ) 階 段 一 : 開 拓 一 個 生 態 系企 業 結 合 相 關 能 力 創 造 核 心 貢 獻 , 並 以 之 為 發 展 的 基 礎 , 進 而 創 造 比 現 況 還要 更 好 的 價 值 , 決 策 領 導 者 必 須 構 思 如 何 才 能 夠 建 立 一 個 比 現 在 更 有 效 創 造價 值 的 完 整 體 系 , 憑 著 想 像 創 造 力 把 所 需 的 能 力 串 連 起 來 。( 二 ) 階 段 二 : 生 態 系 的 擴 張從 一 組 核 心 的 協 同 (Synergistic) 關 係 出 發 , 並 投 資 以 擴 大 它 的 規 模 與 範 疇 , 並在 依 附 與 開 拓 的 利 基 市 場 疆 域 裡 建 立 決 定 性 的 份 量 。 從 競 爭 的 觀 點 來 看 , 處於 階 段 二 的 生 態 系 為 了 爭 取 潛 在 顧 客 、 合 作 夥 伴 與 供 應 商 , 不 但 要 與 其 它 生態 系 相 互 競 爭 , 而 且 還 必 須 要 能 夠 脫 穎 而 出 。( 三 ) 階 段 三 : 在 已 建 立 的 生 態 系 裡 建 立 權 威全 心 全 意 在 生 態 群 落 的 核 心 深 植 企 業 的 貢 獻 , 商 業 生 態 系 為 求 穩 定 而 進 化 ,必 須 維 持 企 業 在 商 業 生 態 系 裡 的 權 威 。( 四 ) 階 段 四 : 更 新 或 死 亡生 態 系 必 須 奮 力 跟 上 潮 流 , 面 對 以 更 優 秀 的 方 式 運 作 的 生 態 系 的 威 脅 , 需 要找 出 方 法 將 新 觀 念 加 入 舊 秩 序 之 中 , 否 則 當 權 的 生 態 系 隨 時 都 可 能 被 淘 汰 。為 了 求 生 存 , 所 有 的 商 業 生 態 系 不 但 都 必 須 仰 賴 一 組 特 定 的 環 境 條 件 , 更 必12
BASIC FIRING STEPS13To make things easy to understand we have identified 6 steps to fusing and slumping in your Hot Start Kiln. Here are afew tips which should help you get started.SHELVES1 - LOADINGThe kiln accessory kit comes with a 13” (33 cm) shelf and three 1” (2.5 cm) support posts. Place the posts on the bottomof the kiln in a triangular pattern and then place the shelf on top of the posts. Make sure the gap between the shelf andthe kiln wall is as uniform as possible. Never load more than onelevel of shelves in a kiln with elements in the lid.Never place the kiln shelf directly on the bottom slab. Itwill act as a heat sink and may cause your piece to heat unevenly.THINFIRE SHELF PAPERB E G I N N E RYour accessory kit included both kiln wash and thin shelfpaper. While the shelf paper is not required, it will allow you tofire multiple projects without having to re-coat the shelves withkiln wash. Simply add a new piece to each load.ThinFire is a heat-resistant lightweight ceramic impregnatedpaper. It provides separation between the kiln shelf and theglass in firing applications up to 1600 °F (871°C).Compared to kiln wash, it reduces shelf preparation timeand improves surface release. A single layer will prevent molten glass from sticking to your shelf.Edge curl: paper will sometimes pull into or curl over the glass edge. Contact with the glass surface may cause anundesirable mark or haze. To prevent curling over, weight the outer corners and edges of the paper with small pieces of scrapglass.Cleanup & Safety: on firing, ThinFire disintegrates to a dusty tissue. As with all ceramic fiber material, avoid breath-ing residual dust. Wear a respirator (NIOSH approved for dusts) during disposal. If possible, clean shelves with HEPAvacuum.POSITIONING PIECESIt is important to make sure pieces are not too close together, too close to the edge of the shelf or to close to theedge of the shelf paper. If any of your projects are thicker than .25” (6.5 mm) the glass will expand beyond it’s originalfootprint.If you are working on a piece you wish to be thicker then .25” (6.5 mm) after it is fully fused, it will be necessary tobuild dams with ceramic fiber to contain the glass.We recommend that you allow at leastone inch of space between the glass and the lid of the kiln. If you have a slumpmold which is too tall to fit on the shelf you can fire the project on shelf paper directly on the slab. This is not recommendedfull fused projects.
14BASIC FIRING STEPS2 - AUTO MODE (GLASSFIRE)The GlassMaster LT controller is designed with the beginning fuser in mind. It is important to have a goodgeneral understanding of the principals of glass before programming your kiln. Therefore we recommend reading theGeneral Firing Guidelines section of this manual before programming the kiln.B E G I N N E RSTEP 1 - START IN IDLE STATETo start programming the kiln must be in an IdLE state. This can be verified by the display alternating between the cur-rent temperature and the message IdLE. When the kiln is first plugged in it will read “PF” indicating that there was a powerinterruption. To return to IDLE Mode PressPress once you are in IDLE Mode to begin the programming process.STEP 2 - SELECT FIRING MODETo Display Current Firing Mode PressThe display will read either “AUTO” or “PRO”. If the display reads “AUTO” it is currently set in the GlassFireMode.Pressto select this mode..If the display reads “PRO” it is currently set in the Ramp and Hold Mode. Press or to scroll to “AUTO”.Pressto select this mode.STEP 2 - SELECT SPEEDThe controller will display the current firingspeed. The display will read SLo, MEd, orFASt for slow, medium, or fast heating rates.Use the chart to the right to help select theappropriate speed for the size of your project.Press or to scroll to the desired firingspeed.FASTMEDIUM1/8” Thick - 18” diameter or smaller1/4” Thick - 4” diameter or smaller3/8” Thick - Not recommended1/8” Thick - 20” diameter or smaller1/4” Thick - 8” diameter or smaller3/8” Thick - 5” diameter or smallerPress to select the displayed heating rate.STEP 3- SELECT PROCESSNext the controller will display the currentprocess. The display will read SLP, tAC, orFULL for slump, tac-fuse, or full-fuse processes.Press or to scroll to the desired<strong>Pro</strong>cess.Press to select the displayed <strong>Pro</strong>cess.SLOW1/8” Thick - 24” diameter or smaller1/4” Thick - 18” diameter or smaller3/8” Thick - 12” diameter or smaller1/2” Thick - 8” diameter or smallerFor a metric conversion of this chart visitour website at http://www.skutt.com/glass/products/hotstart.php
BASIC FIRING STEPS15STEP 4 - VERIFY SETTINGSThe next two entries allow you to modify the ending temperature and hold time of the factory-set programs. Fordetailed instruction on how and when to adjust these settings see Glass 101. If the controller is not set in Modify Glass FireMode go directly to Step 5. (If the controller asks you to change the temperature and hold time it is currently set in ModifyGlass Fire Mode)Press to verify the temperature.Press to verify the hold time.STEP 5 - STARTThe kiln is now ready to be started and will flash rEDI.Pressto start the program.When the program advances or is advanced from the <strong>Pro</strong>cess phase it enters the Pre- Annealing cooling segment.During this segment the kiln will cool quickly down to <strong>96</strong>0 °F (516 °C) . It is very important not to open the lid after it hasentered this phase. If the kiln is forced to cool beyond <strong>96</strong>0 °F (516 °C) it can introduce stress into the glass. (For more informationon programs and program segments see Glass 101).After Pre-Annealing the program enters the final segment which is the Annealing segment. Again, do not open thekiln lid during this segment. The kiln will shut off and cool at a natural rate after the temperature reaches 800 °F (427 °C).Opening the lid during this period may cause pieces to crack.When The Firing is CompleteWhen the program is complete the controller will beep for 15 seconds and flash “CPLt” alternately with the currenttemperature of the kiln and the amount of time it took to fire the program. Important - The kiln could still be very hot. Besure to check the internal temperature of the kiln before touching it or opening the lid. We recommend waiting until thekiln temperature is below 100 ˚F. to prevent glass from thermal shocking.B E G I N N E R4 - UNLOADINGTo be safe you should wait until the kiln is below 100 °F (38 °C) to unload it. If you open the lid prematurely thermalshock may occur causing pieces to crack. Inspect the pieces as you unload them and make note of any changes you maywant to make to your next program.Shelf paper may be stuck to the bottom of some pieces. This can usually be removed with water and light scrubbing.5 - VISUAL INSPECTIONThe GlassFire <strong>Pro</strong>grams in the GlassMaster LT Controller were designed to Fuse, Tack Fuse and Slump basic <strong>System</strong><strong>96</strong> glass projects without having to open the lid for visual inspection. Given the diversity of glass projects it is not alwayspossible to get the specific results you want without visually inspecting the glass and making adjustments.There are two basic ways to inspect the glass and make adjustments, inspecting the glass after it is fired and inspectingit while it is firing.We recommend that beginners start by looking at the glass after it has fired and has cooled. Adjustments can then bemade by changing the <strong>Pro</strong>cess Temperature or Hold Time on the next firing. The draw back to this method is that you maylose a little glass before perfecting the program so you may want to start with some scrap glass.
16BASIC FIRING STEPS6 - MODIFYING GLASSFIRE PROGRAMSAs mentioned earlier, after visual inspection of your glass you may decide you want to modify your process temperaturevalues to create more or less heatwork in your next firing. In GlassFire Mode you can only change the <strong>Pro</strong>cess values.The <strong>Pro</strong>cess Values include the peak temperature and hold time at peak temperature in the program. In order to make thesechanges you must first toggle the Modify Glass Fire Mode Feature to the on position. For instructions on how to toggleModify Glass Fire Mode to the on position consult the Options Mode Instructions on pg. 21 of the manual.B E G I N N E RYou can also modify a GlassFire program while the kiln is firing using the Edit Mode feature. This is covered in theAdvanced section of the manual under Edit Mode Features.WHEN TO MODIFY A PROGRAMA program should be modified when it consistently results in either too much or too little heatwork.A Full Fuse program should result with the glass completely fused together to a 0.25” (6.4 mm) thickness. The edgesshould be rounded yet the shape should not be distorted.A successful Tack Fuse can have different looks depending on the effect desired. The least aggressive tack fuse, commonlyreferred to as a “Fuse to Stick”, will bond the 2 pieces of glass together without rounding the edges. More aggressiveTack Fuses will range from slightly rounded edges to almost completely fused. These are commonly referred to as “TextureFuses”. Factory programs are set to result in a slightly more aggressive “Fuse to Stick”.Slumping programs tend to require the most adjusting due to the fact that every slump mold is different and the degreeof slump desired can change.HOW MUCH TO MODIFY PROGRAMSAs you gain experience you will get a feel for how much to adjust programs. It is best to start in small increments, 5°F or 5 minutes. If you are using Add Time or Add Temp to adjust the programs you can always add more during the sameprogram.TIME OR TEMPERATURETo a certain extent both can have the same effect on the finished piece since they both add heatwork. (See General FiringGuidelines - Heatwork). However, they both have different benefits and draw backs.Increasing Hold Time allows the piece to “soak” in the heat uniformly. This is good for thicker pieces that may havedifferences in temperature between the outside and the center of the piece. A drawback to long holds is they can contributeto devitrification. (See General Firing Guidelines). When holds exceed 20 minutes or devitrification becomes a problem youshould consider increasing the temperature.CHANGING THE PROCESS TEMPERATUREthe kiln will flash the cur-After you have entered the <strong>Pro</strong>cess (Slump, Fuse, or Tac) in a program and have pressedrent <strong>Pro</strong>cess Temperature alternately with °F ( °C).Press or once. The controller will quit flashing and only show the <strong>Pro</strong>cess Temperature.Single presses (pressing and letting go) will now adjust the temperature up or down in 1 °F (1 °C) increments.Holding these keys down will change the temperature at an increasingly faster rate.After the desired temperature has been reached PressThe maximum temperature that can be entered is 1650 °F (899 °C).to lock in the temperature and continue programming.
BASIC FIRING STEPS176 - MODIFYING GLASSFIRE PROGRAMS (CONTINUED)CHANGING THE PROCESS HOLD TIMEAfter you have entered the <strong>Pro</strong>cess Temperature in a program and have pressed Enter, the kiln will flash the current<strong>Pro</strong>cess Hold Time alternately with HLd.Press or once. The controller will quit flashing and only show the <strong>Pro</strong>cess Hold Time in hours and minutes.Everything to the left of the decimal is hours and everything to the right is minutes.Single presses (pressing and letting go) will now adjust the Hold Time up or down .After the desired Hold Time has been reached Pressto lock in the Hold Time and continue programming.If large changes in time are required you can hold either or down. Holding these keys down will change thetime at an increasingly faster rate. The maximum time that can be entered is 99 Hours and 99 Minutes.B E G I N N E R
18ADVANCED PROGRAMINGRAMP & HOLD PROGRAMING (PRO MODE)With PRO Mode you can design and run Ramp and Hold programs that meet the specific needs of your glass. Youcan program up to 8 segments and store up to 5 programs. For more information regarding defining and designing Ramp andHold <strong>Pro</strong>grams consult the Glass 101 section of this manual.STEP 1 - SET CONTROLLER TO ADVANCED LEVELThe Controller ships from the factory set at the beginning level. To unlock the advancedlevel from IDLE STATE press and hold it down until you hear a beep (around 4seconds).STEP 2 - START IN IDLE STATETo start programming the kiln must be in IDLE STATE. This can be verified by the displayalternating between the current temperature reading and the message IdLE. Whenthe kiln is first plugged in it will read “PF” indicating that there was a power interruption.To return to IDLE Mode PressA D V A N C E DSTEP 3 - SELECT FIRING MODETo Display Current Firing Mode PressThe display will read either “AUTO” or “PRO”. If the display reads “PRO” it is currentlyset in the <strong>Pro</strong>grammable Mode.Pressto select this mode..If the display reads “AUTO” it is currently set in the Glass Fire Mode. Pressto scroll to “PRO”.orPressto select this mode..STEP 4 - SELECT WHERE TO STORE YOUR CUSTOM PROGRAMThe display should be flashing “PRO” alternately with the number of the custom or to select a number between 1 and 4 to storeprogramcurrently loaded. Pressyour new custom program. Be careful not to select a program number that has aprogram you do not wish to overwrite. You may also choose to use segment 5 howeverbe aware that you will be overwriting a factory program developed for casting.Press to select the program number.
ADVANCED PROGRAMMING21EDIT MODE FEATURESThe Edit Mode Features were designed to allow the artist to adjust the program while it is running. These features aregenerally used after a visual inspection of the project indicates a change in the program is needed. Edit Mode Features can beaccessed from both a GlassFire program and a Ramp and Hold <strong>Pro</strong>gram. Inspecting the glass while it is firing allows you tomake certain adjustments on the very first firing however there are some precautions that should be observed.The first is of course safety. Whether you are viewing your project by looking through the peephole or lifting the lid,be sure to observe all of the safety tips on page 5.When lifting the lid to inspect the glass do not hold the lid open too long. The kiln will lose heat and take time torecover. It is important to note that when you release heat from the kiln during the process phase, the final temperature atwhich your piece is completed may change.SKIP SEGMENTThe Skip Segment feature advances the program from the current segment to the next segment in the program. TheSkip Segment feature can be used to stop the heatwork and advance the program to the annealing segments of the program.This feature should be used after a visual inspection of the glass indicates the effects you desire.Skip Segment may also be used to speed up a GlassFire program when a slower firing rate is not required. This shouldonly be used with very small jewelry sized items.To increase the heating portion of the program you can use Skip Segment to advance from the first segment of anyprogram to the second segment. Since segment 2 in all GlassFire programs has a faster heating rate, it will reach the processtemperature faster.To decrease the amount of time spent during the Annealing segment of the program (segment 4) you may pressanytime after the desired process has been achievedPress while the kiln is firing. The display will first show the current segment and then display EdIt for approxi-mately 2 seconds. Pressseconds. While it is displayed Presswhile EdIt is displayed in the screen. The display will then read SSEG for approximately 6to advance the program.You may now use the View Segment feature to verify the segment change.A D V A N C E DADD TIMEThe Add Time feature adds time in 5 minute increments to the Hold Time in segment two. This is considered the <strong>Pro</strong>cessHold Time since it is holding at the peak temperature of the program. You will only be able to access this feature whenthe program is currently in the Segment 2 Hold. To verify the current segment use the View Segment Feature. It shoulddisplay HLd2.Presswhile the program is in Hold 2. The display will read the current segment then display EdIt for approximate-ly 6 seconds. Presswhile EdIt is displayed. The display will then show SSEG for 6 seconds.Presswhile SSEG isdisplayed, to advance it to tME. Press to add 5 minutes to the Hold Time. The display will then return to showing thecurrent temperature alternately with the changed Hold Time.
22ADVANCED PROGRAMMINGADD TEMPERATUREThe Add Temperature feature adds temperature in 5 °F (3 °C) increments to the temperature in segment two. This isconsidered the <strong>Pro</strong>cess Temperature since it is holding at the peak temperature of the program. You will only be able to accessthis feature when the program is currently in the Segment 2 Hold. To verify the current segment, use the View SegmentFeature. It should display HLd2.Presswhile the program is in Hold 2. The display will read the current segment then display EdIt for approximate-ly 6 seconds. Presswhile EdIt is displayed. The display will then show SSEG for 6 seconds.Presswhile SSEG isdisplayed, to advance it to tME and then Press again to display tMP. Press to add 5 °F (3 °C) to the <strong>Pro</strong>cess Temperature.The display will then return to showing the current temperature alternately with the Hold Time. The Hold Timewill not reset so you may need to use the Add Time Feature to allow it enough time to reach the new temperature.LOADING A STORED RAMP AND HOLD PROGRAMLOAD MODEA D V A N C E DIt is possible to store up to five Ramp and Hold (PRO) programs in the GlassMaster LT. In order to recall a programfrom memory perform the following steps:Make sure the controller is in the Advanced State. From Idle Press to access the Mode menu. Use the or keysto select “LOAD” and then Press .The display will show the last Ramp and Hold (PRO) program selected. Use the or to select a program numberand pressto Load the program.The display will now read “REDI”. Press to start the program or to Review it first.EDITING FACTORY SETTINGSOPTIONS MODEThe Options Mode allows you to toggle on or off Modify Glass Fire Mode and toggle between Fahrenheit and CelsiusTemperature Scales. It also allows you to RESET all of the factory settings to their original values. Remember when youuse the RESET feature it will clear out all of the Ramp and Hold <strong>Pro</strong>grams that you have stored (there is a factory set castingprogram that will be restored in <strong>Pro</strong>gram 6), change the temperature scale to Fahrenheit, and reset any adjustments you mayhave made in Modify Glass Fire Mode. To access these Options features follow these instructions:Make sure the controller is in the Advanced State. From Idle Press to access the MODE menu. Use the orkeys to select “OPt” and then Press .Use the or to select the feature you wish to edit and press to select it.Use the or to toggle to your selection and press to select it. For RESET simply press to select it.
GLASS 10123The following guidelines just scratch the surface of the knowledge base associated with firing glass. We highlysuggest you take a firing class from your local dealer. If classes are not available in your area there are numerous booksavailable on the subject that can be found at bookstores and on the internet.What is a Firing <strong>Pro</strong>gram?Glass is very sensitive to changes in temperature below 1000 °F. If itis heated or cooled too quickly through certain temperature ranges it createsstress within the glass which can cause breakage. Firing programs are used tocontrol these temperature rates and limit the amount of stress created withinthe glass as well as create the desired effect on the glass.A firing program is composed of one or more firing segments that dictatethe heating or cooling rate throughout the program. Each one of the linesin the chart represents a segment or hold time within a segment and the slopeof the line represents the rate of firing. A firing program is either entered intoa kiln controller or on kilns without controllers it is replicated by turning up and down temperature switches .Type of GlassThe art of firing glass has been around for centuries however, comparatively speaking, it has only been recentlythat companies have begun manufacturing glass specifically designed to fuse together. Glass, like most everything onearth, expands when exposed to heat and contracts when it is cooled. It expands at a measurable rate, known as theCOE, or coefficient of expansion, and as it becomes liquid it flows at different rates which is referred to as it’s viscositylevel.These variables and a host of others must be carefully managed to create glass that can be fused together withoutcrazing, cracking, warping, or breaking. Always consult with your supplier of glass to determine if the glass you wish tofuse is compatible. All <strong>System</strong> <strong>96</strong> Glass is compatible.HeatworkHeatwork is a term used to describe the relationship of time and temperature and their combined effects on glass.To a certain extent the two are inversely related. This means that the higher the temperature the less time is needed tocreate the same effect and likewise, the lower the temperature the more time is needed.This concept becomes most useful at the “<strong>Pro</strong>cess” temperature range of glass. This is the temperature rangewhere the glass is fused, slumped or sagged. Most fusing glass will fuse between 1450 °F (788 °C) and 1480 °F (804°C). It is possible to get the same results (or the same amount of heatwork), by bringing the kiln to 1450 °F (788 °C) andholding it at that temperature for 30 minutes as you would by bringing the kiln to 1480 °F (804 °C) and holding it foronly 10 minutes. There may be other factors that make you choose one working temperature over the other such as thethickness of the project.Size and MassThe size of the piece is one of the most influential factors for creating a firing program. One of the keys to successfulheatwork is having the entire piece go through critical temperature ranges at the same moment. When a pieceis thick it takes longer for the center to heat up then it does the outside of the piece. When it is a large diameter, slightdifferences in temperature throughout the chamber of the kiln can cause the piece to expand at different rates.G L A S S 1 0 1The key to firing larger and thicker pieces is to slow the firing rates through critical temperature ranges. Determininghow slow is often a trial and error proposition, therefore it is best to start with a conservatively slow program. Moreprojects are ruined by going too fast than too slow.
24GLASS 101Critical Temperature RangesA “Critical Temperature Range” is any temperature or temperature range in the firing cycle that has a high level ofpotential for limiting the success of the project. Limited success can be expressed as overfired, underfired, breakage,devitrification or bubbles, just to name a few. It can be argued that there are numerous critical temperature ranges. Tokeep things simple we are going to discuss the primary four: Heating Range , <strong>Pro</strong>cess Range, Pre- Annealing CoolingRange, and Annealing Range.HEATING RANGEThe Heating Range goes from room temperature to the first set of data in the <strong>Pro</strong>cess Range. The only concernduring this range is heating the pieces too fast. Small pieces can normally be heated faster than larger pieces.PROCESS RANGEThe <strong>Pro</strong>cess Range is the temperature range where the material begins to visibly change. It is this stage that determinesthe final shape of the piece. During the <strong>Pro</strong>cess Range temperatures and hold times are key. If you are unsure ofthe desired peak temperature you may want to start on the low end of the range with a longer hold time. This will helpinsure that thicker pieces receive the proper heatwork throughout the entire piece.PRE-ANNEALING COOLING RANGEAfter the process range is through, it is desirable to cool the piece quickly for several reasons. The first reason is tostop the heatwork. This is especially important on a project such as a less then 100% fuse or a drop mold.The second reason is that an undesirable reaction known as devitrification can occur during this cooling period ifthe kiln is cooled to slow. Devitrification is a scummy white crystallization on the glass surface that is difficult if notimpossible to remove. Be sure to slow down the cooling before you enter the Annealing Range.Opening the kiln lid to increase the rate of cooling, while practiced, is not always recommended. On certainmodels the thermocouple is in the rear of the kiln and the temperature from front to back can vary causing one part of thepiece to enter the annealing phase before another.ANNEALING RANGEThe final critical range is the Annealing Range. This is the temperature range where it is important to cool theglass slow so it can even-out in temperature. This process prevents stress from building in the glass which could causethe piece to break.G L A S S 1 0 1Our pre-programmed firing schedules anneal from <strong>96</strong>0 °F (516 °C) to 800 °F (427 °C), which should be adequatefor most tested compatible glass. By incorporating such a broad range, the risk of breakage is limited. Be sure to keepthe lid or door of the kiln closed until the kiln reaches room temperature. Opening the lid too soon can cause pieces tobreak.Firing <strong>Pro</strong>cessesThere are many different processes or techniques used for manipulating glass with heat inside a kiln. In thismanual we will focus on two, Fusing and Slumping. Other techniques include but are not limited to Drop Molds, Patede Verre, Casting, Painting, and Combing. For more information on using your kiln with these techniques please consultyour glass supplier.
GLASS 10125FUSINGFusing is the process of joining 2 or more pieces of glass together by the application of heat. The glass may be inthe form of sheets, stringers, frit or a host of other forms. There are different degrees of fusing. You may want to fuseglass so it sticks to another piece of glass without deforming. This is known as a “Fuse to Stick”. If you were to applymore heatwork to the piece the edges would round slightly. This is known as a “Tack Fuse”. A “Full Fuse” is createdwhen the pieces have melted completely together and are 1/4” thick (6.4mm). A “Texture Fuse” is any point in-betweena “Fuse to Stick” and a “Full Fuse”.There is a temperature range at which glass can be fused. The point at which it begins to fuse is influenced by therate at which the temperature is climbing when it reaches the fusing range. Most fusing glass will begin to fuse at around1325 °F (718°C).. Remember that heatwork is a function of time and temperature.Starting with glass that has been determined to be compatible is only the beginning to a successful fusing or slumpingproject. The temperature and various temperature rates in a firing program must be designed to the specific needs ofthe project you are creating. The size, thickness, shape, and type of glass all must be considered when designing a firingprogram.SLUMPINGSlumping can be defined as the controlled bending of glass under the influence of heat and gravity within a kiln.This is generally done over or into a mold. Molds can be made out of a variety of different materials and can be foundat art glass supply businesses.When slumping it is necessary to take into account the shape of the mold, the thickness of the piece, and the degreeof heatwork desired.Gravity plays a very important role in slumping, especially slumping over a mold as opposed to into a mold. If theshape of the mold dictates that the unbent glass is largely unsupported, the weight of the unsupported glass will pull theglass over the mold quicker then if only a small portion is unsupported.A thin piece of glass will bend quicker than a thick piece of glass. A thick piece of glass requires more Hold timein the final segment of the process phase.In some cases the artist may want to control the amount of bend by visually inspecting the kiln. Be sure to followthe safety guidelines listed in this manual when using this technique. When the proper amount of heatwork is reachedthe artist can use the Skip Segment feature to advance the kiln into the cooling cycle. Slumping projects that receive toomuch heatwork can take on unwanted texture from the mold or in extreme cases fuse to a puddle.G L A S S 1 0 1
26GLASS 101The BasicsBy Lisa VogtGlass fusing is simply the process of stacking two or more layers of compatible glass together to make adesign. The stacked glass is placed in the super heated environment of a kiln where it melts together.THE FUSING PROCESSThere are two basic fusing stages; heating and cooling. During the heating process the fusible glassis slowly taken from room temperature up to 1300 – 1500 °FF, depending upon the finished “look” wedesire. When the glass is in this temperature range you can stop the fusing process at any time. This iswhen you will make the decisions that make your work unique. It’s your opportunity tobe the artist.• At 1300°FFthe project will have slightly rounded, polished edges and a textured surface.• At 1500 °F the top layer of glass will sink down into the bottom layer. The project will have asmooth surface and rounded edges.During the cooling process we control the rate at which the glass cools and slowly bring it back to roomtemperature. The length of time that this takes is determined by the size of the project and the numberof layers being fused. The larger the project and the greater the number of layers the longer this willtake.Don’t rush this step it is critical to the success of your work! While the glass is cooling, it is goingthrough an annealing phase, which occurs at approximately <strong>96</strong>0°F F . I like to call it the “healing” phase.Keep in mind that you have just taken several layers of glass and forced them to become one. Theyneed some time to adjust. Be nice to your glass!MATERIALS / COMPATIBILITYGlass expands when it is heated and contracts when it cools. When we fuse, we work within a family ofproducts that have been “tested compatible” to have the same C.O.E (Coefficient of Expansion). Thesematerials are specially formulated and pretested by the manufacturer for consistency.Don’t botherwasting your time working with the stuff you have laying around the garage. If it isn’t marked testedcompatibleit isn’t!Invest in fusible glass right up front; the success of your project depends on it. This isthe best advice you will get today!G L A S S 1 0 1Tips for better projects:• Cutting the glass: Take the time to cut the glass accurately. Grind the project pieces wherenecessary to improve the fit.• Clean:Wash the glass before assembling the project with a mild detergent and water. Dry theglass thoroughly.• Pattern Design: Construct your projects with 2 – 2 ½ layers of glass for greater consistency insize, shape and thickness. Layer 1 is the base. Layer 2 is the design layer and the third “half”layer is the accent.• Glue:Lightly tack the design layer to the base layer so you can transport the project to the kilnwithout its shifting. Use a tooth pick or similar tool to apply apin head or smallersize dab ofElmer’swhite glue to the back side of the glass.• Firing Speed: : Slower is usually better. If you are not sure which firing program to use, err onthe side of conservative and choose the slower program.
GLASS 10127Frequently Asked QuestionsQ. Do you have to re-coat the kiln shelf with primer every time you use it?A.If the shelf primer is in good condition it can be used more than one time. The shelf should bescraped, sanded or washed clean with clear water and re-coated when the primer shows signs of wear.It’s time to re prime when the coating becomes thin (usually where a project rested) has cracks, orbegins to flake off.Q. Why does kiln wash stick to the back of a project?A.This is usually the result of exhausted kiln wash; the shelf should have been re-primed prior to use.It may also occur when the glass has been fired to too high a temperature or kept at full fuse too long.The kiln wash can be removed with fine steel wool or a scraping tool. Stubborn patches can be soakedoff with bathroom cleaning products used to remove hard chemical residue.Q. After the project is fused, how close to room temperature do you have to be before openingthe kiln lid?A. How badly do you want the project inside?Room temperature is usually well below 100 °F. . If youopen the lid prematurely thermal shock can occur; breakage caused by changing temperature too fast.Just a quickpeekin to the kiln, done too early can ruin your day. Wait, it will be worth it!Q. What causes tiny bubbles and how do I get rid of them?A.Air becomestrapped between the layers of glass when it is heated. The number and size of the air bubbles can be reduced by heating the glass more slowly between the temperatures of 1000 – 1465°F F.This gives the air more time to escape before the glass edges become sealed.Q. How do I avoid big bubbles?A.Large dome shaped bubbles will sometimes rise up in the middle of a medium - large (4” x 4” orbigger) projects. This is usually the result of firing too fast on a ceramic kiln shelf. The outer edgesof the project become soft first and form a “seal” on the shelf. Air becomes trapped under the glass.When it expands it lifts the glass. This is less likely to happen when using shelf paper or a fiber boardkiln shelf, as the air can escape through the porous materials. Best advice is to slow down the firingprocess.Q. Can I stack kiln shelves?A. Not recommended. Unlike ceramics, glass is thin and reacts to heat quickly. Stacking shelvescauses uneven heating. The outer edges of the project become molten before the center has a chanceto react; your firing results will be inconsistent.Q. How does the thickness of the glass relate to my target temperature?A. A project made with two layers of thin fusible glass will usually reach the desired “look” before a proj-ect made with two layers of 1/8” glass. When you change project sizes or materials (thin vs. 1/8”) youwill want to monitor the first few firings and make any necessary adjustments to your firing schedule.Q. Can more that one project be fired in the kiln at one time?A.Yes, as long as the projects are similar. They should be made from the same thickness glass,have the same number of layers and be close is size. Use a firing speed for the largest project.Smallprojects will not be harmed by firing slowly but a large project will suffer if rushed.G L A S S 1 0 1
28GLASS FUSING 101Frequently Asked QuestionsQ. What causes sharp edges on the project?A.Dragging is usually caused by over firing a project that is resting on fiber paper. As the glasscontracts and draws in on itself the paper resists, sharp edges are the result. This edge can be madesafe with file a or grinder. After grinding the project can be put back in the kiln and heat until the groundedge is polished.Q. Why is there debris between the glass layers?A.Too much glue. Small amounts of glue will burn off leaving no trace. (See:Glue above for moreinfo.) If you use an excessive amount of glue it will burn becoming sealed between the layers, leavingdark blotches. Excess glue can also cause small eruptions that will blow a hole through the glass orcause pieces to jump and move in the kiln.G L A S S 1 0 1Q. What are the differences between using a ceramic kiln shelf or fiber paper?A. Ceramic Shelf:• Fused glass will take on the texture/ pattern of whatever it is fired on. If you fire on a ceramickiln shelf your project will have a smooth back surface. (Great for bowls, plates, fine art pieces;projects where a sleek underside is desired.)• Ceramic shelf is used over and over again.• A ceramic shelf is dense; it retains heat which allows the glass to pass through the critical stagesslowly.• Ceramic shelves have to be primed frequently, this can be time consuming.Fiber Paper:• Shelf paper comes in a variety of thickness and finishes. Generally the thinner the material thesmoother the fusing surface. (Great for coasters, pins, wall art; projects where a textured backside will make it easy to glue accessories on like rubber feet, pin backs etc.)• The thin material can be used only once. The medium material can sometimes be reused; itleaves a matt finish on the back of the project. The thick material can be used multiple times butthe texture on the back of the project will be course.• The fiber paper is porous. Air can circulate, therefore large air bubbles are less likely to formbetween the glass and the shelf.• Shelf paper has to be cut to size and can be costly if you are using it every time you fire.Q. What are the differences between ceramic molds and stainless steel forms?A. Ceramic Molds:• Ceramic molds come in a wide variety of sizes and shapes. They have to be primed like theceramic kiln shelf. The primer tends to last longer on a form than on a shelf because slumpingtemperatures are lower than fusing temperatures. Slumping occurs at approximately 1200-1300degrees.• Ceramic molds are inexpensive and durable but they will break if dropped or used unprimed.• Ceramic molds should be sanded and be re-primed if there are pits or cracks in the coating.• Ceramic molds coolmore slowlythan the glass. Therefore most molds are shaped so the glassslumps down into the mold, allowing the glass to contract first.
G L A S S 1 0 1GLASS FUSING 10129Stainless Steel Forms:• Stainless steel forms come in a variety of shapes and sizes as well. They have to be primedalso. The slick surface makes priming difficult. The form can be sanded, sandblasted or heatedto make the priming process easier.• Stainless steel forms are extremely durable “forever” molds. But they tend to be several timesmore expensive than ceramic molds.• Steel forms should also be sanded and re-primed if there are pits or cracks in the coating.• Steel coolsmore quicklythan the glass. The metal contracts underneath the glass which givesthe room needed to slide the draped piece off the form.A bit of advice:Take your time in the beginning. Start with a bunch of small, 2” x 2” or 4” x 4” square, super fast (notime consuming pattern) projects. Use them to establish a relationship with your kiln and with fusingmaterials. Take accurate notes so you can repeat the successful projects and learn how to avoid thefailures. Don’t think you won’t be having any fun. Some of the best work comes from loose designexercises like this. As your confidence builds so will the size and complexity of your projects.Good Luck! Lisa VogtLisa Vogt is a successful glass artist, writer, instructor, and business owner. Herartwork and glass articles have been featured in numerous national magazines. Lisahas authored several books including a beginning glass fusing book called Get FiredUp!
30GENERAL INFORMATIONTroubleshootingIf you find yourself in this section of the manual please remember that Skutt and your Hot Start Kiln Dealer are here tohelp you as long as you own your kiln. If you are unable to determine the problem, or just need to order parts, please let usknow.KILN WILL NOT STARTIf there is no display, check to see if the kiln is plugged in and the breaker has not tripped. If there is a display, doublecheck your programming instructions. The kiln must be in Idle Mode to start.KILN WILL NOT REACH TEMPERATUREMake sure the kiln is connected to the proper voltage. After extended use, the elements in the kiln wear out and eventuallyneed to be replaced. Look for possible breaks in an element. Elements can break if they are contaminated by bits ofglass. If an element is out it will not glow. Fire the kiln to at least 500 °F and look in the kiln to see if an element is out.KILN OVERFIRES OR UNDERFIRESThe thermocouple, which looks like a metal wire protruding into the kiln chamber, measures the temperature in the kilnchamber. As thermocouples began to wear out they slowly drift in the direction of an overfire. If you have noticed that yourprojects have become increasingly overfired it may be time to change your thermocouple. If you are comparing your resultsto how they fire in other kilns it is important to remember that every kiln fires slightly different and it may be necessary toadjust your firing programs.Another possible cause would be that the factory programs have been changed. Look at the programs on page 25 andmake sure they match the process temperature and process hold time that is entered in the program you are running. The lastprogram run can easily be checked by pressing the Review key. To check other programs enter them while Modify GlassFireMode is on. Remember, <strong>Pro</strong>cess Hold times need to entered with Hours to the left of the decimal and Minutes to the right ofthe decimal.ERROR MESSAGESErr 1The following errors messages may appear in the display of your controller.Error 1 occurs during a firing segment programmed to increase the temperature. When the kiln is maintaining theprogrammed set point this error is not checked. If the kiln is unable to maintain the programmed set point the controller thenrequires that the kiln maintain a minimum rise of 12°F (4.8°C) per hour.Err FThis usually indicates that the elements or the relay have failed. The kiln will shut off.Error F occurs during a firing segment programmed to decrease the temperature. When the kiln is maintaining theprogrammed set point this error is not checked. If the kiln is unable to maintain the programmed set point the controller thenrequires that the kiln maintain a minimum fall of 12°F (4.8°C) per hour.Err DThis usually indicates that a relay has failed and needs to be replaced. The kiln will shut off.Error D occurs during a firing segment programmed to increase the temperature. If the kiln temperature is 100°F(38°C) or greater above the set point for 15 seconds then the controller registers an error d situation.G E N E R A LFAILtc--This usually indicates that a relay has failed and needs to be replaced. The kiln will shut off.This indicates that the thermocouple has failed and needs to be replaced. The kiln will shut off.This indicates that the thermocouple has been installed backwards. The thermocouple needs to be removed and reinstalledinto the thermocouple block with the red wire inserted in the hole stamped “-”.
G E N E R A LGENERAL INFORMATION31HOW DO I...?How Do I Go Back A Step When I Make A Mistake In <strong>Pro</strong>gramming?You can’t go back a step but you can start over at any point by holding down the ENTER key until it beeps. Thiswill take you back to IDLE MODE. If you have unlocked the Advanced level Press ENTER again and use the arrowsto select your desired programming mode.How Do I Make The Kiln Fire Hotter or Cooler In Glass Fire Mode (AUTO)?Follow the instructions in this manual for turning on Modify GlassFire Mode. You will find these instructionsunder the Options Mode portion of the manual. When MGF is turned on it will give the option of changing theprocess temperature and hold time as part of the programming process (pg.21).How Do I Make The Kiln Heat Faster In Glass Fire Mode?If the preset programs in GlassFire Mode are too slow for your liking the most obvious option is to switch toRamp and Hold Mode in the Advanced Level and design your own faster program. You can use the programs forGlassFire Mode, which are listed in this manual, as a guide and just tweak them to your needs.Another option is to use the Skip Step Feature (see EDIT MODE instructions pg.20) to skip the first segment of theGlassFire Mode program and move directly to the second segment which has a faster heating rate.How Do I Make The Kiln Cool Faster?In GlassFire Mode one option is to press STOP to skip the Annealing segments after the kiln has finished the processsegment. Another option is to switch to Ramp and Hold Mode in the Advanced Level and design your ownfaster annealing portion of the program. You can use the programs for GlassFire Mode (pg.21), which are listed inthis manual, as a guide and just tweak them to your needs.Still another option is to use a box fan to cool the outer shell of the kiln. This can knock up to 4 hours off the coolingtime depending on the model. Always be careful that you are not cooling too fast and thermal shocking orimproperly annealing the glass.How Do I Start Over And Reset Factory Settings?Follow the instruction under the OPTIONS MODE portion of this manual for Resetting Factory Settings. This willbring it back to the same configuration as it left the factory. Be careful because it will also overwrite any Rampand Hold <strong>Pro</strong>grams you have created.How Do I Get The Controller To Read Temperature In Celsius?Follow the instructions under the OPTIONS MODE of the manual for changing the temperature scale. When thekiln is reading in Celsius there will be a red led light illuminated in the lower right hand corner of the display.
32GENERAL INFORMATIONGlassFire <strong>Pro</strong>gramsSlow Rate Soak Temp Hold Length250°F/Hour 300°F 10 minutes400°F/Hour By <strong>Pro</strong>cess By <strong>Pro</strong>cess9999°F/Hour 950°F 60 minutes100°F/Hour 800°F 15 minutesMedium Rate Soak Temp Hold Length350°F/Hour 300°F 10 minutes600°F/Hour By <strong>Pro</strong>cess By <strong>Pro</strong>cess9999°F/Hour 950°F 30 minutes150°F/Hour 800°F 10 minutesFast Rate Soak Temp Hold Length500°F/Hour 300°F 5 minutes800°F/Hour By <strong>Pro</strong>cess By <strong>Pro</strong>cess9999°F/Hour 950°F 30 minutes175°F/Hour 800°F 10 minutesSoak Temp Hold Lengthfull 1465°F 10 minutestac 1325°F 10 minutesslump 1225°F 15 minutesG E N E R A L32
My <strong>Pro</strong>gramsGENERAL INFORMATION33PROGRAM 1 SEG 1 SEG 2 SEG 3 SEG 4 SEG 5 SEG 6 SEG 7 SEG 8RATETEMPHOLDPROGRAM 2 SEG 1 SEG 2 SEG 3 SEG 4 SEG 5 SEG 6 SEG 7 SEG 8RATETEMPHOLDPROGRAM 3 SEG 1 SEG 2 SEG 3 SEG 4 SEG 5 SEG 6 SEG 7 SEG 8RATETEMPHOLDPROGRAM 4 SEG 1 SEG 2 SEG 3 SEG 4 SEG 5 SEG 6 SEG 7 SEG 8RATETEMPHOLDFactory Set Casting <strong>Pro</strong>gramPROGRAM 5 SEG 1 SEG 2 SEG 3 SEG 4 SEG 5 SEG 6 SEG 7 SEG 8RATETEMPHOLD150F/hr 250F/hr 1000F/hr 30F/hr250F 1500F 950F 750F00:15 00:05 02:30 00:20SPARE 1 SEG 1 SEG 2 SEG 3 SEG 4 SEG 5 SEG 6 SEG 7 SEG 8RATETEMPHOLDSPARE 2 SEG 1 SEG 2 SEG 3 SEG 4 SEG 5 SEG 6 SEG 7 SEG 8RATETEMPHOLDG E N E R A L
34GENERAL INFORMATIONWarranty & RepairsAll Skutt Kilns come with a 2 year warranty. This warranty is included in the bag that contained this manual. Fordetails regarding what is covered in the warranty and how to obtain warranty service, please consult the warranty.There are certain repairs that can be done fairly easily. All parts come with a complete set of instructions. The followingare repairs that can be done by most kiln owners. For more complicated repairs please contact your distributor.ALWAYS UNPLUG THE KILN PRIOR TO DOING ANY REPAIRS.BRICK REPAIRSGenerally brick does not need to be replaced or repaired unless a large portion of the brick has been broken out. Smallchips and cracks do not effect the performance of the kiln.SLAB REPAIRSMelted glass on a properly kiln washed floor can easily be removed without damage to the surface below by scrapingthe slab with a putty knife.Holes in the slab up to 1.5 centimeters deep can be patched. Using a sharp knife or X-Acto tool, undercut the edgesof the damaged area. To fill the void use “Kiln Patch”. This can be ordered through Skutt or may be available at your localdistributor. Compress the kiln patch into place, and scrape flush with the rest of the floor. Allow to dry well before firing.LID REPAIRSA coating of refractory cement will prevent the brick from crumbling and falling on your ware. Some lids withoutelements have a flip side if ever needed. Just remove the screws holding the hinge leaves, turn the lid over, and reattach theleaves to new holes drilled in the lid’s band.Major cracks and chips are often times impossible to repair and it will be necessary to replace the lid.REPINING ELEMENTSSagging elements can be re-pinned into the element groove. Reposition the sagging element into the groove and useneedle-nose pliers to push the pin at a 45 degree angle across the element and into the brick. Do not place the pin in the samehole to insure a fresh snug fit. Be sure to only use factory pins. Pins made of metal which is different then the material usedto make the element will cause the element to burn out.REPLACING ELEMENTSAs elements grow old they oxidize and produce less power. Eventually the kiln will no longer reach temperature andthe elements will need replacing. Please consult your distributor when it becomes necessary to replace the elements in yourkiln. They will provide you with the correct replacement parts and comprehensive instructions for replacing them correctly.REPLACING THERMOCOUPLESThe thermocouple is the twisted wire object that protrude into the kiln chamber. It measure the temperature inside thekiln and relays the information to the controller. Over a period of time thermocouples can degrade and need to be replaced.If not bent or broken, thermocouples will generally slowly drift towards an overfire. If you notice an increasing amount ofheatwork to your projects it may be necessary to replace the thermocouple.REPLACING RELAYSG E N E R A LRelays cycle the power on and off in the kiln. The <strong>HotStart</strong> <strong>Pro</strong> utilizes a solid state relay for cycling the power on andoff as well as a mechanical relay as a safety. If the relay fails during a cooling segment of the program you will see an errorcode of Err F. If the relay fails during heating segment of the program you will see an Err D. If the safety relay fails you willsee an Err1.
G E N E R A LGENERAL INFORMATION35Electrical Requirements & Wiring DiagramThe chart below shows the recommended electrical specification for the Hot Start Kiln. If you are uncertain aboutyour existing power, have it checked by an electrician. If you are installing a new kiln, have the electrician follow thisguide.Electrical RequirementsWire Breaker Max NEMAVoltage Amp Watts Size* Size Temp Receptacle115 15 1690 12 20 1650 5-15*For each additional 50 feet use heavier wire.Specifications for kilns designed to run on power supplies outside the USA may vary. These kilns shouldinclude a manual addendum. If for some reason you can not find your addendum or one was not included pleasecontact Skutt for details.
6441 SE JOHNSON CREEK BLVD. PORTLAND, OR 97206 (503) 774--6000 SKUTT@SKUTT.COM