RWB7 Timeswitch
(i.e. every day different) (PDF)
(i.e. every day different) (PDF)
- No tags were found...

You also want an ePaper? Increase the reach of your titles
YUMPU automatically turns print PDFs into web optimized ePapers that Google loves.
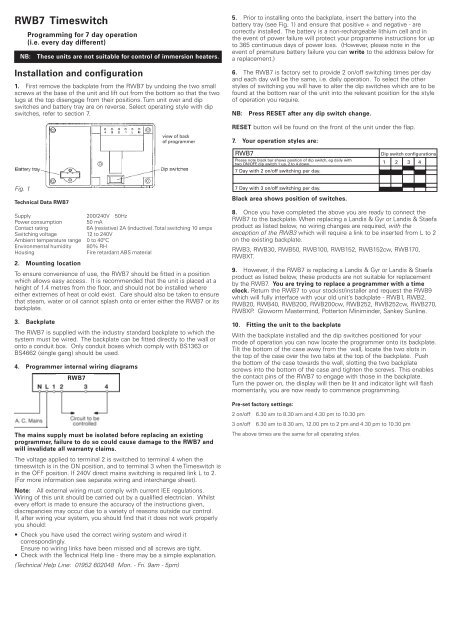
<strong>RWB7</strong> <strong>Timeswitch</strong>NB:Programming for 7 day operation(i.e. every day different)These units are not suitable for control of immersion heaters.Installation and configuration1. First remove the backplate from the <strong>RWB7</strong> by undoing the two smallscrews at the base of the unit and lift out from the bottom so that the twolugs at the top disengage from their positions. Turn unit over and dipswitches and battery tray are on reverse. Select operating style with dipswitches, refer to section 7.view of backof programmer5. Prior to installing onto the backplate, insert the battery into thebattery tray (see Fig. 1) and ensure that positive + and negative - arecorrectly installed. The battery is a non-rechargeable lithium cell and inthe event of power failure will protect your programme instructions for upto 365 continuous days of power loss. (However, please note in theevent of premature battery failure you can write to the address below fora replacement.)6. The <strong>RWB7</strong> is factory set to provide 2 on/off switching times per dayand each day will be the same, i.e. daily operation. To select the otherstyles of switching you will have to alter the dip switches which are to befound at the bottom rear of the unit into the relevant position for the styleof operation you require.NB:Press RESET after any dip switch change.RESET button will be found on the front of the unit under the flap.7. Your operation styles are:<strong>RWB7</strong>Please note black bar shows position of dip switch, eg daily withtwo ON/OFF, dip switch 1 up, 2 to 4 down. 1 2 3 47 Day with 2 on/off switching per day.Dip switch configurationsFig. 1Technical Data <strong>RWB7</strong>Supply 200/240V 50HzPower consumption 50 mAContact rating6A (resistive) 2A (inductive). Total switching 10 ampsSwitching voltage12 to 240VAmbient temperature range 0 to 40ºCEnvironmental humidity 80% RHHousingFire retardant ABS material2. Mounting locationTo ensure convenience of use, the <strong>RWB7</strong> should be fitted in a positionwhich allows easy access. It is recommended that the unit is placed at aheight of 1.4 metres from the floor, and should not be installed whereeither extremes of heat or cold exist. Care should also be taken to ensurethat steam, water or oil cannot splash onto or enter either the <strong>RWB7</strong> or itsbackplate.3. BackplateThe <strong>RWB7</strong> is supplied with the industry standard backplate to which thesystem must be wired. The backplate can be fitted directly to the wall oronto a conduit box. Only conduit boxes which comply with BS1363 orBS4662 (single gang) should be used.4. Programmer internal wiring diagrams<strong>RWB7</strong>The mains supply must be isolated before replacing an existingprogrammer, failure to do so could cause damage to the <strong>RWB7</strong> andwill invalidate all warranty claims.The voltage applied to terminal 2 is switched to terminal 4 when thetimeswitch is in the ON position, and to terminal 3 when the <strong>Timeswitch</strong> isin the OFF position. If 240V direct mains switching is required link L to 2.(For more information see separate wiring and interchange sheet).Note: All external wiring must comply with current IEE regulations.Wiring of this unit should be carried out by a qualified electrician. Whilstevery effort is made to ensure the accuracy of the instructions given,discrepancies may occur due to a variety of reasons outside our control.If, after wiring your system, you should find that it does not work properlyyou should:• Check you have used the correct wiring system and wired itcorrespondingly.Ensure no wiring links have been missed and all screws are tight.• Check with the Technical Help line - there may be a simple explanation.(Technical Help Line: 01952 602048 Mon. - Fri. 9am - 5pm)7 Day with 3 on/off switching per day.Black area shows position of switches.8. Once you have completed the above you are ready to connect the<strong>RWB7</strong> to the backplate. When replacing a Landis & Gyr or Landis & Staefaproduct as listed below, no wiring changes are required, with theexception of the RWB3 which will require a link to be inserted from L to 2on the existing backplate.RWB3, RWB30, RWB50, RWB100, RWB152, RWB152cw, RWB170,RWBXT.9. However, if the <strong>RWB7</strong> is replacing a Landis & Gyr or Landis & Staefaproduct as listed below, these products are not suitable for replacementby the <strong>RWB7</strong>. You are trying to replace a programmer with a timeclock. Return the <strong>RWB7</strong> to your stockist/installer and request the RWB9which will fully interface with your old unit’s backplate - RWB1, RWB2,RWB20, RWB40, RWB200, RWB200cw, RWB252, RWB252cw, RWB270,RWBXP. Gloworm Mastermind, Potterton Miniminder, Sankey Sunline.10. Fitting the unit to the backplateWith the backplate installed and the dip switches positioned for yourmode of operation you can now locate the programmer onto its backplate.Tilt the bottom of the case away from the wall, locate the two slots inthe top of the case over the two tabs at the top of the backplate. Pushthe bottom of the case towards the wall, slotting the two backplatescrews into the bottom of the case and tighten the screws. This enablesthe contact pins of the <strong>RWB7</strong> to engage with those in the backplate.Turn the power on, the display will then be lit and indicator light will flashmomentarily, you are now ready to commence programming.Pre-set factory settings:2 on/off 6.30 am to 8.30 am and 4.30 pm to 10.30 pm3 on/off 6.30 am to 8.30 am, 12.00 pm to 2 pm and 4.30 pm to 10.30 pmThe above times are the same for all operating styles.
Programming for 7 day operation(i.e. every day different)NB: If you have selected this style of operation for the first time youmust press the Reset button first before making any entries.Drop the bottom door flap and with a ball-point pen or similar object, press the smallReset button to the right of the time adjustment button. The display will show thecurrent states of the dip switch setting:2P 10: 2 programs per day3P 10: 3 programs per dayMo Tu We Th Fr Sa Su: successively:individual day programmingIf while entering a switching time the word LIMIT should appear in thedisplay you have tried to enter a switching programme that is not possible.ie 1 ON 8.40AM1 OFF 8.30AMWhen first time programming or after pressing the Reset button, youmust first set the clock time before you can enter any programmetimes.3.0 Altering the clockMove the vertical slider switch on the left up to SET TIME and Mowill flash. If today is Monday press YES, if not then press NOrepeatedly until the correct day is displayed. Then press YES.Movethe vertical slider switch back to RUN, thus completing the clocksetting.For Winter/Summer time changes DO NOT PRESS RESET follownormal operation above.Selecting switching patternsThese are the various styles of switching available to you by use of thefollowing buttons:AUTO - Programmer will operate across ALL programmed switchingtimes.OFF - Always off - only + 1hr. operative.ON - Constant On. Never Off.ONCE - From first On to last Off.ADV (Advance) - Only operates in AUTO or ONCE. Pressing ADV bringsforward the next automatic switching time, e.g. from an ON time to thenext OFF time and will automatically cancel at next switching time. If youwish to cancel Advance push ADV again. When Advance is in operationa black bar shows against ADV in the display.+ 1hr. (also known as ‘boost’) - This button will either bring the unit onone hour in OFF, or extend by one hour in ON. To cancel just press + 1hr.again. When + 1hr. is in operation a black bar shows against + 1hr. in thedisplay. Please note + 1hr. will also work when the unit is in any OFFposition.AUTO, OFF, ON, ONCETo select the four positions listed above, push the button marked Selectlocated under the flap until the black bar is adjacent to your switchingdemand.The <strong>RWB7</strong> is fitted with a red LED which will light only when the relay ison.3.1 Changing the switching timesTo alter the switching times move the vertical slider switch to SETPRG. The display now shows Mo and YES/NO flashing.Indicator bar shows mode of operationPress YES the display will show “1 ON” indicating first on period.Using TIME+, TIME- buttons, adjust to required time setting (10minute increments). Press YES to store and move onto nextswitching time. Repeat through each switching operation.Display shows Mo COPY? static and Tu YES/NO flashing. To copyMonday’s switching times to Tuesday press YES and repeat foreach day that you require these same times, or press NO, then YESand enter new times. Please note that the copy facility will workthrough all days except Sunday to Monday. Continue until all theweek’s programmes are entered.Having completed the above the display will show either Mo,YES/NO alone flashing or with COPY? Su static, you havecompleted your programming. Now move the vertical switch toRUN. The correct time and day will now display along with onesmall bar on the left of your screen which points to your programmeselection (switching patterns).Initially this bar will show against OFF and you must now makeyour selection of switching patterns - see Selecting SwitchingPatterns.Works through allprogrammed timesAlways OffAlways OnSwitches on at thefirst on & off at thelast offBrings forward thenext switchingtime either on oroff.Switches on forone hour onlyAutoOffOnOnceADV+1hrADVANCESetprgsettimeRunonon12.00PM+ 1hrSelectYes No Time Time -Indicator lightResetSelect buttons move the indicator bar todesired position i.e. on, off, auto etc.

![tdlzl k[F7`m :c7Âuy jw]dL jw] olin# d[4jj#](https://img.yumpu.com/52870858/1/184x260/tdlzl-kf7m-c7auy-jwdl-jw-olin-d4jj.jpg?quality=85)