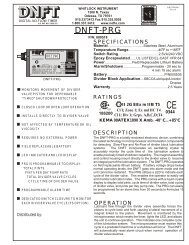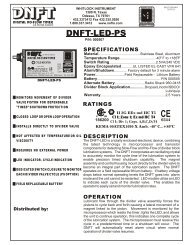
Combustion Technologies By-Pass Filtration Instructions
Combustion Technologies By-Pass Filtration Instructions
Combustion Technologies By-Pass Filtration Instructions

Create successful ePaper yourself
Turn your PDF publications into a flip-book with our unique Google optimized e-Paper software.
Road Test:After the installation is complete you will want to go on a road test. It is important that you periodicallycheck the <strong>Combustion</strong> <strong>Technologies</strong> <strong>By</strong>-<strong>Pass</strong> <strong>Filtration</strong> System for leaks, rubbing on hoses, and bolts thatmay have vibrated loose. Always check fluid levels and monitor gauges for safe operation.Note: Never run an engine that is low on oil!Servicing:Replacing the Spin-On Filter Element(The pressure gauge that comes with the kit (illustration # 6) will help determine when your spinonCombust Filter may need to be replaced. Please note the pressure at start up after the enginehas come to the operating temperature. (Example 60-psi) Once your Combust Spin-On Filter hasbecome full of contamination and water, the pressure gauge should show a drop in reading whichindicates it is time to replace the filter. (Example 15-psi)Replace the <strong>Combustion</strong> <strong>Technologies</strong> spin-on filter at the oil service interval recommended by themanufacturer. (See your owner’s manual) The manufactures recommended oil change interval is a safestarting point to do an oil analysis and safely extend oil change intervals. Make sure your engine is at a safe temperature to work on to avoid burn injuries Place an oil drain pan below the filter in case of a spill Remove the used filter by hand or with a filter wrenchBefore installing the new filter, lubricate the new rubber seal with clean oil (DO NOT pre-fill filter)Tighten the replacement <strong>Combustion</strong> <strong>Technologies</strong> filter by hand until the gasket contacts thebase and ensure proper seating of the filter and new gasket.Note: (DO NOT USE A FILTER WRENCH AND DO NOT OVER TIGHTEN)Start Engine and run until oil pressure is indicated on the oil pressure gauge on the top of thealuminum head unit. This insures that the filter is full.Check for leaksStop engine. Check oil level and fill as requiredWe recommend that you change the <strong>Combustion</strong> <strong>Technologies</strong> Filter every normal service interval asrecommend by the engine manufacturer. The OEM Full Flow Filters should be changed at a maximum of 1 year or 80,000 miles. Take Oil Samples at the normal service interval (as recommend by the manufacturer). Shorten this interval if the results of the previous oil test indicated a potential problem.Oil Sample Procedure:Start the engine and bring the engine to normal operating temperature.With the engine running, remove the safety cap on Oil Sample Valve (part #7). To ensure anaccurate sample reading, purge the sampling valve to flush out impurities that may have settled inthe valve opening.Hold the clean sample bottle under the sample valve and push on the button until bottle is filled tocorrect level.Screw cap tightly onto the sample bottleScrew the Safety Cap back onto the Sample ValveFill out documentation forms will all the necessary information required by your lab and returnwith oil sample to your test facility.Oil Sample Testing is the only way to safely extend oil drain intervals. Working with a qualified testingfacility can help you determine when an oil change is needed. Your new <strong>Combustion</strong> <strong>Technologies</strong> <strong>By</strong>-<strong>Pass</strong> <strong>Filtration</strong> System can safely extend oil change intervals, reduce engine wear, reduce waste oildisposal costs, and increase fuel efficiency by simply keeping the oil clean!www.combustfilters.com Page 8