Installation Guidelines
Installation Instructions - Royal Building Products
Installation Instructions - Royal Building Products
- No tags were found...

You also want an ePaper? Increase the reach of your titles
YUMPU automatically turns print PDFs into web optimized ePapers that Google loves.
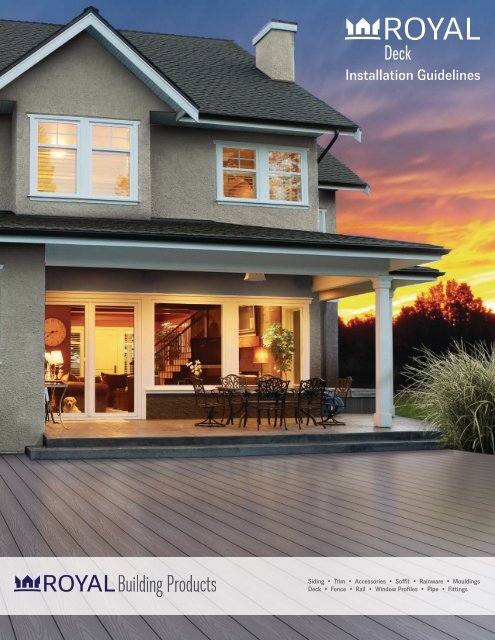
<strong>Installation</strong> <strong>Guidelines</strong><br />
Siding • Trim • Accessories • Soffit • Rainware • Mouldings<br />
Deck • Fence • Rail • Window Profiles • Pipe • Fittings
Material Storage, Safety & Tools<br />
Material Storage<br />
Royal Deck has been properly packaged from the manufacturer and should be stored and transported in this<br />
packaging until installation.<br />
• Leave pallet shroud on the Royal Deck throughout the installation to avoid damage, protect from<br />
construction debris, and maintain a consistent board temperature.<br />
• Store decking material on a flat surface to avoid bowing or warping (adjusting support blocks may be<br />
required on uneven ground).<br />
• Use protective corner clips when banding to prevent stress damage to the decking material.<br />
• Do not store in heat exceeding 120°F.<br />
Safety<br />
As with all construction projects the proper safety equipment should be utilized at all times (i.e. safety glasses,<br />
hearing protection, gloves, etc.). Dust mask and long sleeves may be used if you are cutting in confined areas.<br />
Safe lifting practices should also be used when handling product as the weight and flex of the product can be<br />
awkward.<br />
ROYAL DECK INSTALLATION GUIDELINES<br />
Tools<br />
Saws & Blades:<br />
• 10” or 12” Miter Saw – Used for finished end-cuts and trim miters<br />
Minimum blade requirements – Carbide 60 to 80 tooth<br />
Blade recommendation – CMT 96 tooth fine finish (12”<br />
• Jig Saw – used for cutting notches around obstacles, protrusions (i.e. posts, columns)<br />
Minimum blade requirements – 10 TPI<br />
Blade recommendation – 10 TPI with board positioned<br />
face down<br />
• Circular Saw or Portable Table Saw – Used for ripping<br />
deck boards<br />
Minimum blade requirements – Carbide Tooth – 24 T<br />
(7-1/4”Blade) & 60T (10” blade)<br />
Blade recommendation – (7-1/4”) 60 T Skilsaw Carbide<br />
finishing (10”) CMT 80 T Fine finish<br />
Work Station:<br />
• It is recommended to use a miter-saw stand, roller<br />
stands, or out feed tables when cutting Royal Deck. The<br />
objective is to support the material during the cutting<br />
process.<br />
Drill & Drivers:<br />
• Drills and drill bits as well as impact drivers and appropriate driver tips are required.<br />
Layout Tools:<br />
• Typical tools required such as tape, chalk line, straight edge, etc<br />
• Plate Joiner – used for the EB-TY Fastener application<br />
• CAMO Marksmen Pro NB – tool provided with the Camo hidden fastening system<br />
2800.368.3117
Design and Layout<br />
Design Principles<br />
Due to the diversity of installation scenarios it is the installer’s responsibility to determine the specific<br />
requirements for each application. Royal recommends that an architect, engineer or local building official<br />
review Royal Deck applications prior to install. The intent of the instructions is to set forth principles, work<br />
parameters, and provide a working knowledge of Royal Deck characteristics.<br />
Expansion/Contraction<br />
Expansion and contraction are most significant where extreme temperature change exists. All PVC moves<br />
with temperature change and it moves differently from wood decking products. Wood will typically expand<br />
and contract in the width direction and Royal Deck will move in its length. Moisture has the biggest impact<br />
on wood and no effect on Royal Deck’s PVC substrate. The key to a successful build is planning for this<br />
lengthwise movement. A few ways to control movement are:<br />
• Fasten boards within 1/2” of the ends.<br />
• Butt joints must be tight (below 32°F leave 1/16” gap)<br />
• Minimum of 1/4” space between Royal Deck boards and any structure, post or obstruction.<br />
• Upon cutting board to finished length, install as soon as possible<br />
• On long decks (20’ and greater), orient the boards to run boards in the narrow direction. For example – on<br />
a 40’ X 10’ build – install 10’ boards perpendicular instead of 20’ boards parallel to the structure.<br />
Layouts<br />
The layout or board orientation can have a big impact on the finished products appearance and perceived<br />
performance. Points of consideration:<br />
Staggered butt-joints – On runs exceeding 20’ or unique builds that have need of butt-joints, additional<br />
framing is required to help control movement. Blocking or “sistering” on each side of all butt joints is<br />
mandatory. The blocking must be screwed to mating frame tightly.<br />
Feature board/Breaker board – This concept will disguise movement the best. By strategically placing a board<br />
perpendicular to the main build direction, this will simulate shorter runs and the perpendicular board moves<br />
very little in the width axis resulting in half the gap size of conventional joint.<br />
ROYAL DECK INSTALLATION GUIDELINES<br />
www.royalbuildingproducts.com3
Framing & Fasteners<br />
Building codes and/or officials should be consulted prior to Royal Deck installation to confirm structure<br />
conforms to local requirements. Royal Deck is load bearing, but should never be used for structural framing.<br />
The quality of the framing will directly impact the overall appearance of the Royal Deck as product will<br />
conform to the shape of any uneven framing.<br />
We suggest framing with Premium framing lumber. This wood is usually lighter, straighter and will not expand<br />
or contract as much during construction.<br />
• Joist system must be level and flush.<br />
• Install all railing posts of post supports prior to Royal Deck install. Railing supports must NOT be attached<br />
to Royal Deck.<br />
Joist Spacing:<br />
Cellular PVC is not as rigid or stiff as traditional hardwoods; Royal Deck boards are code approved for a 16”<br />
on-center installation. If a springy or cushioned feel is a concern, 12” on-center construction is recommended.<br />
24” on-center is unacceptable for Royal Deck.<br />
• 16” on-center – is permissible for standard residential applications. This only applies if<br />
boards are installed perpendicular to joists.<br />
• 12” on-center – is required for high traffic areas, commercial builds and installs using a 45°<br />
or herringbone layout.<br />
• 12” on-center – is required for all step stringers.<br />
Face Screw<br />
Most conventional decking screws will work with Royal Deck for face-screw applications. For a color matched<br />
trim head screw we recommend the following:<br />
Headcote Cap-Tor - #10 x 2-1/2” Screws<br />
Approved for use with ACQ treated lumber. Available in color matched coating.<br />
• Graystone Warm Gray #54<br />
• Kanyon Sand #64<br />
• Sage Grey #37<br />
• Pebblestone Clay Sand #64<br />
• Porter Chocolate #71<br />
• Sandbar Rosy Brown #65<br />
NOTE: 305 stainless for inland builds and 316 Stainless for seaside or brackish water applications.<br />
ROYAL DECK INSTALLATION GUIDELINES<br />
Hidden Fastening Systems<br />
Some hidden fasteners do not rigidly affix the board to the structure. For those fasteners that do not penetrate<br />
the board, additional measures, such as face or toe screwing at the joints and board ends is required to<br />
maintain uniform spacing at joints.<br />
For all other fasteners including the Mantis and Tigerclaw TCG you must face or toe screw butt joints and<br />
board ends (figure 2).<br />
Royal Deck approves the use of the following hidden fasteners. (Please refer to the fastener manufacturer<br />
instructions.)<br />
• Camo Fasteners<br />
• Eb-Ty<br />
• Ipe clip<br />
• When the Eb-Ty and Ipe clip are used the screw must be angled through the deck board to<br />
restrict movement.<br />
4800.368.3117
Fascia/Skirt Board<br />
All fascias should be installed prior to decking. We suggest using Royal Deck<br />
fascia for a color matched look and Royal’s S4S trim products for a contrast.<br />
Full installation instructions for this application are available at<br />
www.royalbuildingproducts.com. A few application specific guidelines are:<br />
• All miter joints are to be glued – PVC Cement<br />
• Expansion joints are required on runs exceeding 20’ – shiplap joint is<br />
recommended<br />
• Required fastening schedule for fascia with a bead of construction adhesive<br />
16” OC between fasteners<br />
• Boards 6” wide or less – 2 fasteners, 12” on center<br />
• Boards 8”to 10” wide – 3 fasteners, 12” on center<br />
• Boards 12” wide or more – 4 to 5 fasteners, 12” on center<br />
• As an option to eliminate “oil canning” use construction adhesive between<br />
mechanical fasteners.<br />
Shiplap Joint<br />
Screw position – no less than<br />
1/2” and no greater than 2”<br />
from edge of board<br />
8<br />
No glue on<br />
this joint<br />
Glue all<br />
miter joints<br />
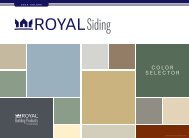
Available Colors<br />
Graystone Kanyon Sage Pebblestone<br />
Clay<br />
Sandbar<br />
Porter<br />
ROYAL DECK INSTALLATION GUIDELINES<br />
www.royalbuildingproducts.com5
Main Body Decking & Steps<br />
Main Body Decking<br />
Install Royal Deck boards with one of the approved<br />
fastening methods. Work from the out side or highest<br />
traffic area toward the structure or least traffic area.<br />
Feature boards, transition board and/or inlay work<br />
should be installed first, and then the main body, this<br />
allows for more precise cutting.<br />
Follow the selected fastening systems instructions.<br />
• Face Screw spacing can vary<br />
• Camo provides 3/16” gap spacing<br />
• Eb-Ty provides 3/32” & 1/8” gap spacing<br />
Face Screw Option<br />
1/8 to 1/4<br />
Eb-Ty Option<br />
3/32<br />
Camo Option<br />
3/16<br />
Steps<br />
AC-174 code requires the following framing scenarios for compliance when installing Royal Deck. Do not<br />
cantilever more than Royal deck 1/2” on step application.<br />
12” on center stringers 16” on center stringers will require bridging<br />
ROYAL DECK INSTALLATION GUIDELINES<br />
6800.368.3117
Care and Cleaning<br />
Royal Deck is a low maintenance product, but with all outdoor products care and cleaning will help keep the<br />
product looking its best. Our recommendations are as follows:<br />
Clean two times a year or after major pollen events<br />
• Organic material, pollen and dirt are a food source for mold and mildew and although Royal Deck is<br />
formulated to inhibit mold growth the mold/mildew will grow on materials imbedded in or on the deck<br />
board’s embossed surface.<br />
• Dirt, Debris, Mold and Mildew removal (best practice)<br />
• Remove large organic debris (leaves, twigs, etc) with a broom or blower. Mild Soap (Simple Green) and a<br />
garden hose with a soft bristled brush (automotive type) works best in most cases.<br />
• Pressure washer may be used using a fan nozzle and a PSI setting of 1200 or lower as well as<br />
maintaining a 12” or greater distance from the board when spraying. Spray in the direction of the grain<br />
pattern for best results.<br />
Barbecue Grills, Portable Chimenaeas and Fire Pits.<br />
• All sources of high heat or flame should be placed on a non-rubber or non-vinyl mat to protect decking.<br />
Pools and Hot Tubs<br />
• Chlorinated water will not harm Royal Deck.<br />
Snow Removal<br />
• Use a non-metallic snow shovel and/or stiff bristled broom.<br />
• Salt may be used to break ice and should have no affect on the board other than a residue that can be<br />
remove with water and mild detergent.<br />
Slip resistance<br />
• Royal Deck meets or exceeds the ADA requirements.<br />
DeckMAX Enhanced<br />
• After years of outdoor exposure Royal deck will loose surface gloss and may appear lighter in color. This<br />
is a normal process and occurs with many exterior products. The process takes years to occur and is so<br />
subtle it is undetectable with out comparing it to an unexposed board.<br />
• If the new look is desired we recommend DeckMAX Enhanced as a rejuvenator for the gloss.<br />
• Follow DeckMAX instructions for best results.<br />
Rubber/Vinyl Mats<br />
• Prolonged exposure to Rubber and Vinyl products can discolor the Royal Deck products therefore the<br />
use of these products is discouraged.<br />
ROYAL DECK INSTALLATION GUIDELINES<br />
www.royalbuildingproducts.com7
800.368.3117 www.royalbuildingproducts.com<br />
Siding • Trim • Accessories • Soffit • Rainware • Mouldings<br />
Deck • Fence • Rail • Window Profiles • Pipe • Fittings