Nikon D5100 Experience 0
Nikon D5100 Experience - Dojoklo.com
Nikon D5100 Experience - Dojoklo.com

Create successful ePaper yourself
Turn your PDF publications into a flip-book with our unique Google optimized e-Paper software.
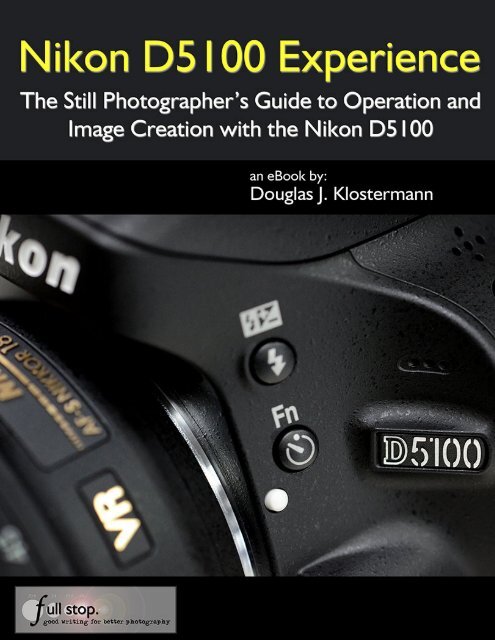
<strong>Nikon</strong> <strong>D5100</strong> <strong>Experience</strong><br />
0
<strong>Nikon</strong> <strong>D5100</strong> <strong>Experience</strong><br />
<strong>Nikon</strong> <strong>D5100</strong> <strong>Experience</strong><br />
The Still Photographer’s Guide to Operation<br />
and Image Creation with the <strong>Nikon</strong> <strong>D5100</strong><br />
by<br />
Douglas J. Klostermann<br />
Full Stop. good writing for better photography<br />
1
<strong>Nikon</strong> <strong>D5100</strong> <strong>Experience</strong><br />
All rights reserved. No part of this book may be reproduced or transmitted in any form<br />
or by any means, electronically or in print, without expressed permission from the<br />
author. The author takes no responsibility for the use of any of the materials or<br />
methods described in this book, or for the products, Internet web sites, or links<br />
mentioned. Douglas Klostermann is a participant in the Amazon Services LLC<br />
Associates Program, an affiliate advertising program designed to provide a means for<br />
sites to earn advertising fees by advertising and linking to amazon.com.<br />
All contents including cover design, text, and photographs<br />
Copyright 2011 Douglas J. Klostermann<br />
<strong>Nikon</strong> <strong>D5100</strong> <strong>Experience</strong><br />
The Still Photographer’s Guide to Operation and Image Creation with the <strong>Nikon</strong> <strong>D5100</strong><br />
by: Douglas J. Klostermann<br />
Version 1.0<br />
April 2011<br />
www.dojoklo.com<br />
Author’s blog: http://blog.dojoklo.com/<br />
Published by Full Stop. good writing for better photography<br />
A division of Douglas J. Klostermann Photography<br />
Cambridge, MA 02138 USA<br />
http://www.dojoklo.com/Full_Stop/<br />
2
<strong>Nikon</strong> <strong>D5100</strong> <strong>Experience</strong><br />
CONTENTS<br />
CONTENTS .................................................................................................................... 3<br />
INTRODUCTION............................................................................................................. 4<br />
MENUS and CUSTOM SETTINGS................................................................................. 8<br />
Menu Settings .................................................................................................... 9<br />
Custom Settings............................................................................................... 15<br />
My Menu .......................................................................................................... 23<br />
CAMERA OPERATION................................................................................................. 23<br />
JPEG vs. NEF (RAW) ...................................................................................... 24<br />
Focusing........................................................................................................... 26<br />
Using Autofocus............................................................................................ 26<br />
Focus Modes ................................................................................................ 30<br />
Autofocus Area Modes ................................................................................. 31<br />
Locking Focus............................................................................................... 32<br />
Live View and Movie Focusing ..................................................................... 34<br />
Release Modes ................................................................................................ 34<br />
Exposure.......................................................................................................... 36<br />
Aperture, Shutter Speed and ISO................................................................. 36<br />
Aperture-Priority Auto Mode (A) and Shutter-Priority Auto Mode (S)........... 39<br />
Full Stops...................................................................................................... 41<br />
Manual Exposure Mode (M) ......................................................................... 42<br />
Metering Modes ............................................................................................... 43<br />
Matrix Metering............................................................................................. 44<br />
Center-Weighted Metering............................................................................ 44<br />
Spot Metering ............................................................................................... 45<br />
Manual Metering........................................................................................... 46<br />
Exposure Lock.............................................................................................. 46<br />
Histograms....................................................................................................... 48<br />
Exposure Compensation.................................................................................. 50<br />
Auto Bracketing for Exposure .......................................................................... 51<br />
Active D-Lighting (ADL) ................................................................................... 51<br />
High Dynamic Range (HDR)............................................................................ 52<br />
White Balance.................................................................................................. 53<br />
Picture Controls ............................................................................................... 55<br />
Flash ................................................................................................................ 57<br />
Sensor Cleaning .............................................................................................. 58<br />
COMPOSITION............................................................................................................. 59<br />
THE IMAGE TAKING PROCESS.................................................................................. 65<br />
VIDEO – AN INTRODUCTION...................................................................................... 66<br />
PHOTOGRAPHY ACCESSORIES................................................................................ 67<br />
CONCLUSION .............................................................................................................. 70<br />
3
<strong>Nikon</strong> <strong>D5100</strong> <strong>Experience</strong><br />
INTRODUCTION<br />
The introduction of the <strong>Nikon</strong> <strong>D5100</strong> brings forth a worthy successor to its popular predecessor,<br />
the D5000. By incorporating the high quality 16.2 megapixel sensor, great low-light<br />
performance, and full HD video of the pro-sumer D7000, the <strong>D5100</strong> puts these advanced<br />
features in the hands of the dedicated enthusiast, plus includes a fully adjustable high resolution<br />
rotating LCD screen. With its 420 pixel RGB exposure metering sensor, accurate 11 point<br />
autofocus system, 4 frames per second continuous shooting speed, and easy to navigate<br />
information display, the <strong>D5100</strong> offers the capability and features required for dedicated<br />
photographers who wish to continue to grow.<br />
The <strong>Nikon</strong> <strong>D5100</strong> is clearly an advanced tool for digital photography, and offers the potential to<br />
capture professional quality images in most any situation you wish to use it. But it is merely a<br />
tool.<br />
Figure 1 –Detail of the <strong>Nikon</strong> <strong>D5100</strong> digital SLR<br />
It is up to you to make use of its features and capabilities to create the images you envision.<br />
While the camera’s manuals can tell you about the settings and controls and how they function,<br />
this guide will build upon that and tell you when and why you want to use them. Every button,<br />
menu item, and Custom Setting of the <strong>D5100</strong> is there for a reason: to help you capture the<br />
images you want. Some of them are more useful to different types of photographers and<br />
shooting situations and you don’t need to learn and use them all immediately, but this guide<br />
should help to give you the knowledge to confidently use the ones that turn your <strong>Nikon</strong> <strong>D5100</strong><br />
into an image capturing tool that works best for you.<br />
There are many different ways to use a digital SLR (dSLR) camera and its controls to capture<br />
images, and I’m not going to attempt to explain them all. I am going to concentrate on the ways<br />
4
<strong>Nikon</strong> <strong>D5100</strong> <strong>Experience</strong><br />
that I believe are the most practical, useful, and effective. The settings and techniques I discuss<br />
apply to general photography, which includes most travel photography. I will point out other<br />
options for users who might wish to work differently and I encourage you to experiment and find<br />
the techniques that work best and are most comfortable or intuitive for you. If you typically<br />
shoot very specifically, say macro photography or studio photography with complex lighting,<br />
some of what I discuss may not apply. But if you are that specialized, I’m sure you are skilled<br />
enough to know when and how to adapt what I say!<br />
Since this guide is intended to help you get the most out of your <strong>D5100</strong>, I will not necessarily<br />
discuss or go into detail about many of the automatic features or Auto and Scene Modes. The<br />
<strong>D5100</strong> is a sophisticated tool that deserves to be used to its full potential, and that means taking<br />
control of the camera and its functions. And since this guide is about image creation – the<br />
capturing of a photograph – it will not discuss features that deal with image processing, such as<br />
the Retouch Menu. And finally, while it will discuss basic video settings and options to get you<br />
started, the guide will focus on still photography and image creation. However there is a great<br />
deal to be learned about everything else including the autofocus system, the elements of<br />
exposure, exposure metering, white balance, and even basic composition.<br />
As you have probably discovered by now, the camera’s User’s Manual is brief and basic. There<br />
is a more detailed Reference Manual on the Reference CD included with your camera. This<br />
ebook guide will expand on the manuals and explain not only the features, controls, and menus<br />
of the <strong>D5100</strong>, but more importantly when and why you might want to use them in your<br />
photography. However, this guide is not intended to completely replace the manuals, but to be<br />
used in conjunction with them, so every bit of information in those manuals will not be repeated<br />
here. For example, I may explain the use of Single-servo AF (AF-S auto-focus mode), but not<br />
always explain how to change to this setting on your camera. If you don’t know how to change<br />
it please read the User’s Manual where it will tell you to press the i Button twice, highlight the<br />
focus-mode options, press OK, and then choose the AF-S focus mode.<br />
As you can see, there is a lot to make sense of regarding terminology and controls, so I<br />
recommend that you familiarize yourself with the controls and displays of the camera body, as<br />
shown on pages 2-7 of the <strong>D5100</strong> User’s Manual and pages 1-10 of the <strong>D5100</strong> Reference<br />
Manual (see Figure 2), as well as read through the manuals and attempt to understand as much<br />
as possible. Yes, much of it may be complicated and confusing at first, but this ebook guide will<br />
explain the uses of the numerous buttons, controls, menus, and settings and concentrate on the<br />
essential ones to get you started taking great images.<br />
5
<strong>Nikon</strong> <strong>D5100</strong> <strong>Experience</strong><br />
contrast situations with a wide range of lighting. Some differences, however, are that you need<br />
to hold your camera still for both shots so that the two frames line up and are not cropped when<br />
combined, and that it is not recommended for moving subjects. Use Active D-Lighting for<br />
action situations. See the High Dynamic Range (HDR) section below for further information.<br />
Long Exposure Noise Reduction<br />
This is used, obviously, to automatically correct noise in long exposures (over 8 seconds). Leave<br />
this Off until you are intentionally taking long exposure images, then determine if you wish the<br />
camera to do this correction or if you wish to do it yourself with Photoshop or other software.<br />
Note that the noise reduction processing occurs immediately after you take your image, and will<br />
take perhaps as long as the initial long-exposure took, during which time you cannot take another<br />
image and should not turn off your camera. For example, a 30 second exposure may require an<br />
additional 30 seconds for noise reduction processing.<br />
High ISO Noise Reduction<br />
The camera will automatically process images to reduce noise at 1600 ISO and above even<br />
without this setting, so turn this Off and evaluate any noise issues in your images before deciding<br />
if you might want to set this to Low or Normal later. Again, this can also be done later in<br />
processing and often with more control in Photoshop or other software.<br />
Figure 7 – ISO Sensitivity Settings Menu<br />
ISO Sensitivity Settings<br />
This is used to change the ISO setting, which is more easily done using the i Button and<br />
Information Display. However, this also sets the optional Auto ISO Sensitivity Control, which<br />
functions in P, S, A, and M modes. If you enable this (On) then the camera will automatically<br />
change your selected ISO, without your expressed permission, in certain situations in order to<br />
obtain a proper exposure. For example, if you are working in Aperture-Priority Auto Mode<br />
(A) and set the ISO at 1600, but based on your selected aperture and the lighting the camera does<br />
not believe there is enough light for the exposure and a realistic shutter speed (that you set – see<br />
below), it will automatically raise the ISO so that the shutter speed does not become impossibly<br />
slow for hand-holding. This may be good if you are still getting used to the cameras controls and<br />
settings and wish for the camera to help you out a bit in certain situations where you may not be<br />
paying close enough attention to your settings. Or perhaps in situations such as at a concert<br />
13
<strong>Nikon</strong> <strong>D5100</strong> <strong>Experience</strong><br />
Custom Settings<br />
Figure 8 – Custom Settings Menu<br />
Autofocus<br />
a1: AF-C priority selection – This setting determines if attaining focus is top priority when you<br />
are in Continuous-servo AF mode (AF-C autofocus mode), or if you just want the shots to be<br />
taken even if exact focus is not attained for each shot. For example, if you are tracking a moving<br />
subject such as a runner or a bird, you may wish to just take a rapid series of shots at all costs in<br />
order to capture specific moments, and exact focus of each shot may not be the priority. Or you<br />
may wish to make sure the camera has properly focused each shot before the shutter is released.<br />
This however may cause a slight (perhaps millisecond) delay for each shot and the exact<br />
moments may be missed. If exact focus is your priority, set on Focus. If getting the shots at all<br />
costs is the priority, set for Release.<br />
a2: Built-in AF-assist illuminator – This is used to enable or disable the autofocus assist light.<br />
Turn this On to assist you in autofocusing in low light, but be sure to turn it Off if you are<br />
working in situations where it will be distracting, unwanted, or unnecessary.<br />
a3: Rangefinder – This setting is used to help obtain focus when you have turned off autofocus<br />
and are using Manual Focus mode (MF) and manually focusing. (Be sure to also set the<br />
autofocus switch on your lens to M) The exposure indicator in the viewfinder is used to indicate<br />
if the subject is correctly in focus. If the dots and arrow are to the left of 0, the camera is focused<br />
in front of the subject; to the right means the camera is focused behind the subject. Note that this<br />
indicator does not work for determining focus in Manual (M) shooting mode (when your Mode<br />
Dial is set to M) because it is used instead to indicate exposure. Turn this setting On if you need<br />
its assistance when manually focusing. It is generally advisable to use the camera’s autofocus<br />
system and not manually focus, though some users may wish to manually focus in certain<br />
situations such as close-up and macro photography.<br />
15
<strong>Nikon</strong> <strong>D5100</strong> <strong>Experience</strong><br />
worth it to use Center-Weighted Metering mode. Another time to use this is when there is a<br />
wide range of light in your scene, such as bright sunlight to deep shadows. Determine the proper<br />
exposure by metering on the subject using the center of the viewfinder, and lock in that exposure<br />
(see Exposure Lock below). (See Figure 30.)<br />
Remember, this mode is not linked to your focus point. The area that is metered is always in the<br />
center so if your subject is off center – which it typically should be for a more dynamic image –<br />
you need to meter on your subject or on a middle tone in the part of the scene that is most critical<br />
and that you want properly exposed, using the central area of the viewfinder. Lock in that<br />
exposure, then recompose and take the shot. If you are finding that Matrix Metering is not<br />
giving you the exposures you desire in certain unusual, dramatic, or difficult lighting situations<br />
and your exposures are too dark or too light, try using Center-Weighted Average Metering (or<br />
Exposure Compensation, discussed below).<br />
Figure 30 – Lion Sculpture – Center-Weighted Metering used to properly expose for the subject,<br />
exposure locked, then framing recomposed to place subject off center. (Very carefully hand-held<br />
at very slow shutter speed.) Shutter speed 1/13, aperture f/4.0, ISO 800<br />
Spot Metering<br />
This mode meters exclusively on a 3.5mm circular area, approximately 2.5% of the frame area,<br />
centered on the selected focus point. Note that the spot is not necessarily in the center of the<br />
frame as with Center-Weighted Metering, unless you or the camera has selected the center AF<br />
point. So when do you want to use Spot Metering? This, again, is useful for scenes with great<br />
variation in light and shadow, or in very critical situations. One of the most common ways to use<br />
it is when metering for proper exposure on a dramatically lit face or subject, where the proper<br />
exposure of that part of the image is critical. Be aware that the area the camera is metering does<br />
not take into account any other parts of the scene and is very small – not much larger than the<br />
brackets you see in the viewfinder surrounding the center focus point. For advanced users, Spot<br />
45
<strong>Nikon</strong> <strong>D5100</strong> <strong>Experience</strong><br />
What readers are saying about Doug's previous guide, <strong>Nikon</strong> D7000 <strong>Experience</strong>:<br />
“This book, together with the manual that came with your camera, is all you need to start<br />
discovering all the potential of the D7000.”<br />
-Max M.<br />
“It’s the first guide I've read which has taken me through all the settings in an<br />
understandable way. I now feel that I have control over the camera.”<br />
-Peter S.<br />
“I would recommend this to anyone who wants to get a quick start to using the D7000.<br />
Manuals are nice, but this eBook highlights the important information and gives a quick<br />
easy to understand explanation of most all of the functions and controls.”<br />
-Ray M.<br />
“This manual is a clearly written, concise and useful explanation of the rationale for the<br />
seemingly infinite and often confusing settings options for the D7000. Used in<br />
conjunction with the <strong>Nikon</strong> manual I feel a bit more confident in understanding how to at<br />
last proceed in getting better photographs.”<br />
-WLS<br />
“I found the <strong>Nikon</strong> manual good for understanding how to set things up but not much on<br />
the why - this book really focuses on the "why." I would like to thank you for saving me<br />
time - now I'm confident that my camera is well tuned!”<br />
-Benoit A.<br />
“It's clear, concise and gets to the heart of the camera's multiple and often confusing<br />
options. Very highly recommended - for experienced user and beginner alike. As<br />
previous reviewers have remarked, the official manual is very good on what to do, but<br />
not so clear on why.”<br />
-GSA<br />
Purchase <strong>Nikon</strong> <strong>D5100</strong> <strong>Experience</strong> at:<br />
http://www.dojoklo.com/Full_Stop/<strong>Nikon</strong>_<strong>D5100</strong>_<strong>Experience</strong>.htm<br />
71