Brand Portfolio
Technical Troubleshooting Guide - Environmental Test Chambers ...
Technical Troubleshooting Guide - Environmental Test Chambers ...
- No tags were found...

Create successful ePaper yourself
Turn your PDF publications into a flip-book with our unique Google optimized e-Paper software.
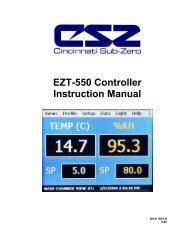
EZT-560i Technical manual<br />
TABLE OF CONTENTS (cont'd)<br />
7. Deciphering EZT Input/Output (I/O) Operation............................................. 46<br />
7.1 Standard Input Configuration..............................................................................................47<br />
7.1.1 Input Description of Use ........................................................................................48<br />
7.1.1.1 Custom Input Description of Use (DTS, VTS, TSB) ...............................53<br />
7.2 Standard Output Configuration...........................................................................................54<br />
7.2.1 Output Description of Use .....................................................................................55<br />
7.2.1.1 Custom Output Configuration (Altitude)..................................................59<br />
7.2.1.2 Custom Output Configuration (DTS, VTS, TSB).....................................60<br />
7.3 PLC Status Indicators.........................................................................................................61<br />
7.3.1 I/O Ribbon Cable Connections ..............................................................................62<br />
8. Adjusting EZT Configuration options ........................................................... 63<br />
8.1 Accessing the EZT Configurator.........................................................................................64<br />
8.2 Number of Loops/Monitors .................................................................................................66<br />
8.3 Loops/Monitor Tagnames...................................................................................................67<br />
8.4 Chamber Options................................................................................................................69<br />
8.5 Refrigeration Options..........................................................................................................71<br />
8.6 Humidity Options ………………………………………………………………………………….73<br />
8.7 Purge/Lo RH Options..........................................................................................................75<br />
8.8 Auxiliary Cooling Options ...................................................................................................76<br />
8.9 Configuration Options.........................................................................................................77<br />
8.10 CSZ Events…….. ...............................................................................................................78<br />
8.11 Critical Chamber Alarms.....................................................................................................79<br />
8.12 Critical Refrigeration Alarms...............................................................................................80<br />
8.13 Non-Critical Alarms.............................................................................................................81<br />
8.14 Maintenance Alarms...........................................................................................................82<br />
8.15 Special Settings Tagnames................................................................................................83<br />
8.16 Completing EZT560i Configuration ....................................................................................84<br />
Appendix<br />
List of Figures<br />
List of Tables<br />
3
EZT-560i Technical Manual<br />
1. Overview<br />
This technical manual has been written to aid in the troubleshooting of chamber operational issues<br />
and/or malfunctions. Note that not all options and/or features discussed in this guide may be<br />
available or applicable to the particular chamber that is being serviced. It is highly recommended that<br />
you read this material thoroughly prior to performing any diagnostic service in order to better assist<br />
you in locating the section(s) that apply to your situation.<br />
1.1 Safety Information<br />
Note, caution and warning symbols that appear throughout this manual are to draw your attention to<br />
important operational and safety information.<br />
A “NOTE” marks a short message to alert you to an important detail.<br />
A “CAUTION” safety alert appears with information that is important for protecting your<br />
equipment and performance.<br />
A “WARNING” safety alert appears with information that is important for protecting you,<br />
others and equipment from damage. Pay very close attention to all warnings that apply to<br />
your chamber.<br />
1.2 How to Use this Manual<br />
To start using this manual, see Section 2, Where Do I Begin? This will assist you in finding the<br />
correct section for further information on how to diagnose and correct the problem.<br />
Remember to keep it simple. Don’t try and solve everything at once. Take each issue oneat-a-time.<br />
It may take several “trips” through this guide to correct each problem or locate the<br />
root cause of a single fault, but by breaking it down into pieces, you can simplify the process<br />
and solve it in less time.<br />
In many instances, one component failure or incorrect control setting can cause various<br />
chamber malfunctions that would point you in several different directions, none of which may<br />
be correct. Always try and work backwards from what is not working correctly and determine<br />
why. Why is this not working, what makes it work and/or how should it work?<br />
4
EZT-560i Technical manual<br />
2. Where Do I Begin?<br />
The EZT-560i is a Distributed Control System (DCS) that uses different hardware layers to perform<br />
the various functions needed to operate the chamber. These include the user interface (HMI), system<br />
monitoring and protection (CPU), as well as process control (9300 controllers). This type of platform<br />
distributes the work load of controlling the chamber into different devices and allows us to break the<br />
system down into these layers for troubleshooting which makes diagnosing problems quicker.<br />
Instead of looking at the system as a whole, look at each component and focus on what task it is<br />
performing and whether or not it is doing it right. Start from the component level when tracing a<br />
problem and work backwards from what is not working. Some problems are obvious. If I am trying to<br />
enter a set point and the touch screen is not responding to my touch, then it is a problem with the<br />
HMI. However, when the chamber is not doing something it is supposed to, is it the controller or<br />
something else? Over 90% of the time it can be attributed to a wiring fault or single component<br />
failure that prevents the system from operating. It isn’t the controller.<br />
Example:<br />
The chamber is at 75°F and the set point is 185°F. The fans are running, but it is not<br />
heating up. What is wrong?<br />
Instead of approaching the problem by assuming the controller is not calling for heat, ask<br />
why is the chamber not heating up? Are the heaters on? Using the electrical schematic<br />
for the chamber, locate the power wiring for the heater. Is there voltage to the heaters?<br />
Is the heat output of the controller on, i.e., is the solid state relay on to supply power to<br />
the heater. Is the heater contactor on? Is there a blown fuse?<br />
Start from the heaters and work back. This will allow you to find what is not allowing<br />
power to pass to the heaters. It may even be several components, like the contactor and<br />
solid state relay, both of which get power from a common wire that may be shorted or<br />
open due to a limit device which needs to be manually reset.<br />
The EZT performs the same function on the chamber as any other controller. It has heat and cool<br />
outputs for controlling temperature based on a set point. It has humidify and dehumidify outputs to<br />
control humidity based on a set point. These outputs control the same heaters, compressors and<br />
solenoids that any other controller would.<br />
Since the EZT has a host of additional features and more functionality than other controllers, it is not<br />
uncommon to look inward on the controller and blame it for any problems that arise. However,<br />
software does not change. If it worked yesterday, then it is working today. What may not be working<br />
is a valve that reached then end of its cycle life or a wire that has come loose or corroded to a point<br />
where it will no longer pass power. Those types of failures are far more common.<br />
An alarm condition may be present and not indicated on the EZT if a hardware failure or<br />
wiring problem exists. Keep this in mind when there are no obvious fault conditions present<br />
that would indicate why the chamber is not working properly.<br />
In order to begin troubleshooting an issue, narrow down the search by determining which section of<br />
this guide the problem most likely falls into based on the following information.<br />
5
EZT-560i Technical Manual<br />
Section 3. Resolving “Loop Comms Failure” Alarms<br />
This section provides detailed assistance on locating and correcting communication problems with<br />
the Gateway communication link between the CPU and 9300 loop controllers.<br />
Section 4. Chamber Operating Problems<br />
Use this section to diagnosis problems when no alarm messages are present. Why are the<br />
compressors not turning on? Why is humidity not turning on when the event is on? This helps you<br />
determine if there is a real problem or if the chamber is doing what it is supposed to.<br />
Section 5. Remote Communication Problems<br />
Use this section to diagnose connection problems relating to the use of the serial, Ethernet and<br />
optional IEEE interfaces.<br />
Section 6. User Interface (HMI) Troubleshooting<br />
This section covers issues that may arise with the EZT display such as a non-responsive touch<br />
screen or the EZT failing to start due to a communications failure or other hardware problems.<br />
Section 7. Deciphering EZT Input/Output (I/O) Operation<br />
This section reviews the functionality of the inputs and outputs of the EZT and how they are used and<br />
controlled. This section can assist you in determining if there is a wiring or hardware problem that<br />
may be causing the chamber to not operate properly.<br />
Section 8. Adjusting EZT Configuration Options<br />
This section reviews the use of the EZT’s configurator and how the settings affect the operation of the<br />
chamber. This section is for experienced service personnel only. Changing certain settings from the<br />
original factory settings can cause damage to equipment and/or injury to personnel. CSZ is not<br />
responsible for damages or losses attributed to unauthorized changes of these settings.<br />
This section is provided to assist with the installation of chamber options not provided originally on the<br />
unit at the factory. Certain options, when added in the field, may require modification to specific<br />
configurator settings in order for them to operate properly.<br />
6
EZT-560i Technical manual<br />
3. Resolving “Loop Comms Failure” Alarms<br />
The “Loop Comms Failure” alarm indicates that there is a problem with communications between the<br />
CPU and the 9300 loop controllers. The communications between the CPU and the 9300 controllers<br />
is performed by the Gateway module. When this alarm occurs, the chamber will shut down and not<br />
be able to be restarted until the alarm condition is cleared. The cause of this alarm may lie in one of<br />
several areas. To determine the root cause, it is important to understand how the Gateway operates.<br />
3.1 Gateway Sequence of Operation<br />
When power is applied to the EZT-560i it will begin its boot-up sequence. At the same time, the<br />
Gateway starts its communications program and attempts to communicate with the CPU and 9300<br />
controllers. The Gateway is equipped with three indictor lights that show what operations are being<br />
performed, and they can be used to diagnose problems and determine if it is working correctly.<br />
Gateway to CPU Communications<br />
The middle indicator light, labeled “OK”, will turn on at power up and stay on at all times when<br />
communications with the CPU are good. The top indicator light, labeled “PLC1”, will also begin<br />
flashing on power up and continue flashing at all times when communications with the CPU are taking<br />
place. If the “OK” light is flashing, check the connection between the Gateway and the CPU to make<br />
sure the cable is connected to the port on the CPU and that it is fully inserted and seated properly. If<br />
the cable is connected, and the “OK” indicator is flashing, the cable may be damaged or the Gateway<br />
is not functioning correctly and needs to be replaced.<br />
If the communication connection to the CPU is lost, the Gateway will try to re-establish the<br />
connection on 10 second intervals. When attempting corrections, be sure to allow at least 10<br />
seconds between corrections in order to give the Gateway sufficient time to attempt to<br />
reconnect to the CPU.<br />
The “OK” indicator will flash during the idle period and both the “PLC1” and “PLC2” indicators<br />
will remain off. When the reconnection attempt is made, the “PLC1” indicator will flash. If<br />
successful, the “OK” indicator will go from flashing to steady on, and the “PLC1” and “PLC2”<br />
indicators will begin flashing to indicate that communications are again taking place.<br />
7
EZT-560i Technical Manual<br />
Gateway to 9300 Controller Communications<br />
The bottom indicator light, labeled “PLC2”, will begin flashing once the EZT-560i application starts<br />
running on the HMI. It indicates communications between the Gateway and the 9300 controller(s).<br />
The light will continue flashing during normal chamber operations. If this light is flashing slowly or<br />
irregularly, this may indicate a loss of communications to one or more of the 9300 controllers.<br />
When the EZT-560i is in system maintenance mode, communications to the 9300 controllers<br />
will be halted. Communications will resume once the user returns to the normal operating<br />
screens. During this time, the “PLC2” indicator will not be flashing unless the EZT is<br />
equipped with the monitor input option. Communications to the input module will always take<br />
place. The “PLC2” indicator will continue to flash even when the EZT application is not<br />
running or the EZT is in “System Maintenance” when the input option is installed.<br />
If this is a new installation or an option has been added, make sure that the EZT is properly<br />
configured. If the EZT is configured to use a loop that is not installed, the communication<br />
failure will not be able to be cleared. See Section 9, Adjusting EZT Configuration options for<br />
more information on checking loop configurations. Note that the number of loops installed<br />
should be set to 5, in order to display all control loops. It can then be set back to the proper<br />
number of installed loops once each loop setting has been verified.<br />
Steady Slow Flash<br />
If the light flashes approximately once per second at a steady pace, it<br />
indicates a loss of communications to all 9300 controller(s). Check the wiring<br />
between the Gateway and 9300 controller(s) to make sure that there are no<br />
nicks in wiring, shorts or wire crossings. Check to make sure that the 9300<br />
controllers have the proper setup and communication settings corresponding<br />
to the 9300 setup sheet provided with the chamber. If two or more<br />
controllers have the same address, this will also cause a communication<br />
failure.<br />
Also verify that the rear connector on each 9300 controller is inserted<br />
properly. If the rear connector is not fully inserted, or is inserted improperly,<br />
the communications connections may not be making proper contact internally<br />
to the rear connector body which will cause loss of communications. Make<br />
sure that the polarity of the communication wiring from the Gateway to the<br />
9300 is correct. If the leads are reversed at the terminal block, or inserted<br />
too far into the terminal block so that the insulation is interfering with the<br />
connection, this will also cause a failure.<br />
Irregular Flash Rate If the light flashes a few times at high speed, and then a couple flashes on 1<br />
second intervals, and then back to a couple of high speed flashes, and so on,<br />
it indicates that communications has not been lost to all 9300 controllers. To<br />
locate the problem connection, change the set points for each loop and<br />
watch the display of the 9300 controllers. If the set point does not change on<br />
the corresponding 9300 controller, that is the connection giving the problem.<br />
Check the wiring between the Gateway and 9300 controller to make sure that<br />
there are no nicks in wiring, shorts or wire crossings. Check to make sure<br />
that the 9300 controller has the proper communication settings<br />
corresponding to the 9300 setup sheet provided with the chamber. Also<br />
verify that the rear connector on the 9300 controller is inserted properly. If<br />
the rear connector is not fully inserted, or is inserted improperly, the<br />
communications connections may not be making proper contact internally to<br />
the rear connector body which will cause loss of communications.<br />
8
EZT-560i Technical manual<br />
3.2 Gateway Status Indicator Quick Guide<br />
STATUS INDICATOR<br />
STATUS DESCRIPTION<br />
“OK” indicator is quick flash.<br />
“PLC1” indicator is off.<br />
“PLC2” indicator is off.<br />
The Gateway has not established or lost connection to the CPU or is not<br />
functioning correctly. Check cable connection to CPU or replace<br />
Gateway. “Loop Comms Failure” is indicated on EZT.<br />
“OK” indicator is on.<br />
“PLC1” indicator is quick flash.<br />
“PLC2” indicator is off.<br />
Gateway is properly communication with CPU. Communications with<br />
9300 controllers is not in process. EZT application on HMI has not yet<br />
running or<br />
EZT is in “System Maintenance” mode.<br />
If the EZT is equipped with the monitor input option,<br />
communications to the input module will always take place. The<br />
“PLC2” indicator will flash to indicate this communication even<br />
when the EZT application is not running or the EZT is in<br />
“System Maintenance”.<br />
“OK” indicator is on.<br />
“PLC1” indicator is off.<br />
“PLC2” indicator is slow flash.<br />
Gateway located and is properly communication with CPU; however,<br />
communications have not been established with 9300 controllers. “Loop<br />
Comms Failure” is indicated on EZT. Check wiring to 9300 controllers<br />
and verify that they have proper communications setup.<br />
“OK” indicator is on.<br />
“PLC1” indicator is quick flash.<br />
“PLC2” indicator is quick flash.<br />
Gateway is properly communication with CPU and 9300 controllers. No<br />
alarm indication on EZT.<br />
If the EZT is equipped with the monitor input option, the “PLC1”<br />
and “PLC2” indicators may have a pause in flashing at regular<br />
intervals. This is due to the response time of the monitor input<br />
module and does not indicate a communications problem.<br />
“OK” indicator is on.<br />
“PLC1” indicator is irregular flash.<br />
“PLC2” indicator is irregular flash.<br />
Gateway is not properly communication with one or more 9300<br />
controllers. “Loop Comms Failure” is indicated on EZT. Check wiring<br />
and verify that rear connector plugs on 9300 controllers are inserted<br />
properly. Change set points and monitor 9300 loop controllers. If set<br />
point does not change on 9300, then that is the problem connection.<br />
If this is a new installation or an option has been added, make<br />
sure that the EZT is properly configured. If the EZT is<br />
configured to use a loop that is not installed, the communication<br />
failure will not be able to be cleared.<br />
See Section 9, Adjusting EZT Configuration options for more<br />
information on checking loop configurations. Note that the<br />
number of loops installed should be set to 5, in order to display<br />
all control loops. It can then be set back to the proper number<br />
of installed loops once each loop setting has been verified.<br />
9
EZT-560i Technical Manual<br />
4. Chamber Operating Problems<br />
This section provides direction on troubleshooting chamber operation when no alarm condition is<br />
present. It is broken into sub-sections for temperature, humidity, altitude control, etc. Locate the<br />
section that most closely relates to the problem at hand in order to help diagnose and solve it.<br />
Section 4.1 Conditioning System<br />
This section covers typical problems that may arise with the chamber’s heating and refrigeration<br />
systems. It includes information regarding the operation of temperature limited sheath heaters for<br />
special use as well as information on rate-master and defrost operating conditions in order to help<br />
diagnose any problems that may occur with their operation.<br />
Section 4.2 Humidity System<br />
This section covers typical problems that may arise with the chamber’s humidity system. It also<br />
includes information regarding the operation of the low RH mode (frozen coil) in order to help<br />
diagnose any problems that may occur during operation.<br />
Section 4.3 Auxiliary Cooling System<br />
This section covers typical problems that may arise with the chamber’s auxiliary cooling system. It<br />
includes information regarding the operation of both the boost cooling and cooling control modes in<br />
order to help diagnose any problems that may occur during operation.<br />
Section 4.4 Dry Air Purge System<br />
This section covers typical problems that may arise with the chamber’s dry air purge system. It<br />
includes information regarding the operation of the low RH mode (frozen coil) in order to help<br />
diagnose any problems that may occur during operation.<br />
Section 4.5 Altitude System<br />
This section covers typical problems that may arise with the chamber’s altitude system.<br />
Section 4.6 Fluid Systems (LC/TSB)<br />
This section covers typical problems that may arise with the chamber’s fluid system. It also includes<br />
information regarding hot oil heating systems for special use on explosion proof (EXP) chambers.<br />
Section 4.7 Transfer Mechanism (DTS/VTS/TSB)<br />
This section covers typical problems that may arise with the basket transfer mechanism. It includes<br />
information regarding the operation for both air and motor operated systems.<br />
10
EZT-560i Technical manual<br />
4.1 Conditioning System<br />
When the main chamber event is turned on, whether it be a standard ZP, TSB or VTS for example,<br />
temperature control is the primary function. The air circulator/bath output will turn on and enable the<br />
heating/cooling logic. Even though the air circulator/bath output (typically Q0 and/or Q1) may vary<br />
based on the type of chamber, it performs the same function.<br />
The minimum cool output (Q14) and minimum heat output (Q16) turn on with the chamber event to<br />
enable the control circuits for heating and cooling. They are typically only used and wired into the<br />
control circuit when the chamber is equipped with defrost. In defrost, the outputs would turn off in<br />
order to disable the heating and cooling control circuits while defrost is running.<br />
The maximum cool output (Q15) and maximum heat output (Q17) are controlled by the configurator<br />
settings. When the cooling or heating output percent exceeds the configurator set point for the on<br />
delay period, the maximum output will turn on. They operate as boost outputs, i.e., they are on/off<br />
outputs, not proportioning outputs. They connect additional heating and cooling circuits to the control<br />
outputs in order to boost chamber performance.<br />
Heating operation is relatively basic; however, the refrigeration system operation is more complicated<br />
with staging of compressors, etc. Depending upon options present on the chamber, it may include<br />
the rate master refrigeration system operation and/or defrost. The sequence of operation then varies<br />
from that of a typical chamber.<br />
Temperature Limited Sheath Heaters<br />
Temperature limited sheath heaters are used in applications where there is, or may be, the presence<br />
of a flammable substance within the chamber. These heaters operate at lower surface temperatures<br />
than standard open element, nichrome wire heaters and their surface is not electrically “live”. This<br />
allows a temperature sensor, typically a thermocouple, to be placed on their surface.<br />
The sensor is then connected to a limit device. This limit device monitors the temperature and turns<br />
off the power to the heater when the surface temperature exceeds the maximum operating limit. The<br />
limit device overrides any call from heating by the chamber controller. Once the temperature drops<br />
below the operating limit, power is restored to the heaters if heating is still required. The operating<br />
temperature limit is dictated by the flammable material. The maximum operating temperature of the<br />
heater surface can be no higher than 80% of the auto-ignition temperature of the flammable material<br />
in degrees centigrade.<br />
Rate Master Operation<br />
With rate master, the operation of the refrigeration system varies with temperature. When the air<br />
temperature is above -20°C (-4°F) and air temperatur e set point is -10°C (14°F) or above, the system<br />
operates in single stage mode. The system 1 compressor output (Q2), solenoids output (Q11) and<br />
the rate master control output (Q10) will be on when cooling is required. The rate master control<br />
output is used to switch the cooling output of the 9300 loop controller from the system 2 cooling<br />
solenoids over to the system 1 cooling solenoids. The maximum cool output will turn on and off<br />
based on the demand for cooling and the control settings in the EZT configurator.<br />
The refrigeration system will switch over to cascade mode when the air temperature drops below 0°C<br />
(32°F) and the air temperature set point is below -10°C (14°F). During the switch from single stage to<br />
cascade mode, the cascade cooling control output (Q13) will turn on and the maximum cooling output<br />
(Q15) will be disabled. This allows some of system 1’s capacity to be diverted to the cascade<br />
condenser to pre-cool it prior to system 2 starting. After the stager start delay, system 2’s output (Q3)<br />
will turn on and the rate master control output (Q10) will turn off.<br />
11
EZT-560i Technical Manual<br />
The cooling output for the 9300 will now be used to control system 2 cooling solenoids. The<br />
maximum cool output (Q15) is then re-enabled so that it can turn on system 2 maximum cool<br />
solenoids if needed. For safety, when the air temperature is below -20°C (-4°F), the system will only<br />
start and run in cascade mode. This prevents system 1 evaporator from becoming a condenser (due<br />
to the lower chamber temperature) and causing liquid slugging of the system 1 compressor.<br />
Defrost Operation<br />
There are two selections for defrost in the EZT’s configurator. Defrost can be configured for regular<br />
or large horsepower. The large horsepower selection is typically used on systems 7.5HP and larger.<br />
The difference between the selections defines how system 1 is controlled in order to cool system 2.<br />
With standard defrost, the system 1 compressor is cycled on and off based on system 2 head<br />
pressure. With large horsepower defrost, system 1 compressor remains in operation while output<br />
Q13 cycles system 1 cascade cooling solenoids on and off to maintain system 2 head pressure.<br />
Defrost can be manually initiated by turning on the defrost event, or it can be automatically started by<br />
the EZT based on the defrost settings. When in automatic mode, the defrost timer will begin counting<br />
down whenever the air temperature set point is below the defrost set point. Once the timer counts<br />
zero, defrost is initiated for one cycle. Upon completion of the cycle, the timer will begin the next<br />
timed countdown.<br />
Figure 4-1 Defrost Settings<br />
When defrost is started, the air circulator output is turned off. The minimum heat and cool outputs are<br />
also turned off. This prevents any heating or cooling from taking place. The defrost solenoid output<br />
(Q12) will turn on and system 2 will continue operating. This supplies hot gas to the cooling coil. If<br />
defrost is set up for regular operation, system 1 compressor will be cycled on and off to provide<br />
cooling to system 2 based on the defrost pressure control input (I17). If large horsepower defrost is<br />
selected, the system1 compressor output (Q2) will remain on, and the cascade cooling output (Q13)<br />
will be cycled on and off to provide cooling to the cascade for system 2.<br />
This process will continue until the defrost temperature switch input (I20) is made indicating that the<br />
suction temperature of the coil has warmed up to the defrost temperature setting. This will initiate a<br />
15 minute timer in the EZT. Defrost will continue for another 15 minutes to insure that the coil is<br />
completely defrosted. Once the 15 minute defrost time has elapsed, prechill is started.<br />
In prechill, the defrost solenoid will be turned off and the minimum cooling output (Q14) will be turned<br />
on. This will allow the refrigeration system to pre cool the coil prior to starting the air circulators.<br />
Once the defrost temperature switch turns off, indicating that the suction line has dropped below the<br />
defrost temperature, a one minute timer begins. Once this timer is complete, prechill will terminate,<br />
the air circulators will turn back on, and the system will resume normal operation.<br />
12
EZT-560i Technical manual<br />
4.1.1 Conditioning System Failures and Corrective Actions<br />
SYMPTOM PROBABLE CAUSES CORRECTIVE ACTIONS<br />
Chamber air circulator(s) not turning<br />
on.<br />
Chamber event not turned on.<br />
Conditioning system disabled (altitude<br />
chambers).<br />
Blown fuse.<br />
Chamber in defrost (if equipped).<br />
Basket not in correct position<br />
(DTS/VTS).<br />
Chamber door open (if door switch<br />
enabled in configurator).<br />
Turn on chamber event.<br />
Altitude above controllable limit for<br />
temperature. Decrease altitude or turn<br />
off altitude system.<br />
Replace Fuse.<br />
Check defrost status. Allow defrost to<br />
complete or terminate defrost.<br />
Check basket position and adjust if<br />
necessary. Check basket position<br />
sensors, adjust/replace.<br />
Close chamber door.<br />
Chamber not heating.<br />
Chamber event not on.<br />
Conditioning system disabled (altitude<br />
chambers).<br />
Blown heater fuse.<br />
Sheath heater limit tripped.<br />
9300 controller output off.<br />
Chamber in defrost (if equipped).<br />
Turn on chamber event.<br />
Altitude above controllable limit for<br />
temperature. Decrease altitude or turn<br />
off altitude system.<br />
Replace fuse.<br />
Check heater limit. Maximum<br />
temperature reached.<br />
Verify proper 9300 controller<br />
configuration. Check set point.<br />
Replace 9300 controller.<br />
Check defrost status. Allow defrost to<br />
complete or terminate defrost.<br />
System 1 compressor not turning on.<br />
Chamber event not on.<br />
Conditioning system disabled (altitude<br />
chambers).<br />
Blown fuse.<br />
Compressor internal thermal overload<br />
tripped.<br />
Chamber in defrost (if equipped).<br />
Refrigeration system not enabled or<br />
compressor percent on set point not<br />
exceeded for delay time.<br />
Turn on chamber event.<br />
Altitude above controllable limit for<br />
temperature. Decrease altitude or turn<br />
off altitude system.<br />
Replace fuse.<br />
Allow compressor to cool. Check<br />
refrigeration system/injection valve<br />
operation.<br />
Check defrost status. Allow defrost to<br />
complete. Compressor will cycle as<br />
needed.<br />
Check configurator settings. Refrig<br />
system type should match installed<br />
system type.<br />
13
EZT-560i Technical Manual<br />
SYMPTOM PROBABLE CAUSES CORRECTIVE ACTIONS<br />
System 2 compressor not turning on.<br />
Blown fuse.<br />
Compressor internal thermal overload<br />
tripped.<br />
Chamber in humidity mode.<br />
Refrigeration system not enabled or<br />
stager start delay time not met.<br />
Replace fuse.<br />
Allow compressor to cool. Check<br />
refrigeration system/injection valve<br />
operation.<br />
Check humidity system type. System<br />
2 disabled for single stage humidity<br />
operation.<br />
Check configurator settings.<br />
Refrigeration system type should<br />
match installed system type. Wait for<br />
stager start delay period.<br />
Chamber not cooling.<br />
(further diagnosis and/or repair<br />
requires certified refrigeration service<br />
personnel)<br />
Chamber event not on.<br />
Conditioning system disabled (altitude<br />
chambers).<br />
Cooling coil fouled with ice build-up.<br />
9300 controller output off.<br />
Chamber in defrost (if equipped).<br />
Refrigeration system capacity<br />
exceeded.<br />
Turn on chamber event.<br />
Altitude above controllable limit for<br />
temperature. Decrease altitude or turn<br />
off altitude system.<br />
Initiate defrost or warm up chamber to<br />
melt ice from coil. Seal ports or leaks<br />
in chamber to minimize moisture<br />
migration into chamber and<br />
accumulating on coil.<br />
Verify proper 9300 controller<br />
configuration. Check set point.<br />
Replace 9300 controller.<br />
Check defrost status. Allow defrost to<br />
complete or terminate defrost.<br />
Reduce live load in chamber.<br />
Defrost not starting.<br />
Suction line not below defrost<br />
thermostat setting.<br />
Defrost thermostat not working.<br />
Check thermostat setting. Defrost not<br />
required.<br />
Check thermostat set point and<br />
operation. Adjust/replace.<br />
Defrost not terminating.<br />
Defrost delay off period (15 minutes) not<br />
completed.<br />
Defrost thermostat not working.<br />
Allow enough time for defrost<br />
sequence to complete.<br />
Check thermostat set point and<br />
operation. Adjust/replace.<br />
14
EZT-560i Technical manual<br />
4.1.2 Conditioning System Logic Flow<br />
15
16<br />
EZT-560i Technical Manual
EZT-560i Technical manual<br />
17
EZT-560i Technical Manual<br />
4.2 Humidity System<br />
When the humidity system is enabled, the humidity system output (Q32) will turn on. This turns on<br />
water supply solenoids and atomizer air compressor if applicable. If the refrigeration system is set to<br />
run in single stage mode when humidity is on, the RH cool output (Q31) will turn on in order to<br />
connect the 9300 cool output to the RH cool solenoid. System 2 compressor (Q3) will then be turned<br />
off as long as humidity is on.<br />
When running in standard humidity mode, not low RH mode (frozen coil), the dehumidify enable<br />
output (Q30) will turn on. This allows the 9300 dehumidification output to control the wet coil<br />
solenoid. The maximum humidify output (Q33) will turn on whenever the humidification output<br />
percentage exceeds the set point in the configurator for the on delay time period.<br />
An alarm delay is added to the boiler low water input (I15) in order to allow enough time for it to fill<br />
with water when the humidity system is first turned on. The delay will prevent the alarm from going<br />
off for a period of 30 minutes. Should the level not be made in that time, the alarm will sound and<br />
shut down the chamber. Once the proper water level is reached, the alarm will sound and shut down<br />
the chamber immediately upon loosing the input. Should the alarm occur, silence the alarm from the<br />
alarm monitor screen and the chamber will begin operating again and restart the 30 minute alarm<br />
delay timer.<br />
Temperature Limits<br />
The EZT limits the humidity system’s operational range to a minimum and maximum temperature as<br />
set in the configurator. These limits are typically set around freezing and boiling temperatures. Once<br />
the air temperature exceeds either limit, the EZT shuts down the humidity system automatically. If<br />
the humidity system is shut down due to temperature limitations, the system status monitor will<br />
indicate that this has occurred by illuminating the “RH TMP DISABLE” indicator. The humidity system<br />
will restart automatically once the air temperature returns to within the set temperature range.<br />
Dewpoint Limits<br />
In order to protect the refrigeration system and chamber from damage, there are minimum and<br />
maximum dewpoint levels that are set in the configurator. These limits in turn define the minimum<br />
and maximum relative humidity levels that the chamber will operate to at any given temperature. The<br />
EZT uses these limits and internally calculates the minimum and maximum humidity level that the<br />
chamber will control to at the current chamber temperature.<br />
Should the user enter a set point outside of those limits, the EZT will coerce the 9300 set point to the<br />
minimum or maximum value allowed. The system status monitor will then indicate that limiting is<br />
taking place and in which direction by illuminating the appropriate LED on the system status monitor<br />
screen.<br />
Low RH (Frozen Coil)<br />
For chambers equipped with the low RH (frozen coil) option, the EZT monitors the temperature and<br />
relative humidity set points and calculates the resulting dewpoint. When this value is below the<br />
standard wet coil range of 1.7°C (35°F), the EZT auto matically switches to frozen coil mode. This<br />
allows the chamber to reach lower humidity levels than what is capable with standard humidity. The<br />
EZT does not initiate frozen coil mode until the measured dewpoint in the chamber is below 10°C<br />
(50°F). This prevents the coil from loading up with moist ure prematurely and reducing the duration of<br />
time at which the coil can affectively control low humidity levels in the chamber.<br />
When frozen coil mode is initiated, the frozen coil control solenoid output (Q36) and frozen coil<br />
bypass solenoid output (Q37) turn on. The frozen coil control solenoid output transfers control of the<br />
frozen coil solenoid to the dehumidification output of the 9300 controller. At this point, the dehumidify<br />
enable output (Q30) will turn off so that the normal wet coil solenoid will be disabled.<br />
18
EZT-560i Technical manual<br />
4.2.1 Humidity System Failures and Corrective Actions<br />
SYMPTOM PROBABLE CAUSES CORRECTIVE ACTIONS<br />
Humidity system not turning on.<br />
Humidity event not turned on.<br />
Air temperature outside of humidity<br />
control range.<br />
Turn on humidity event.<br />
Change temperature set point to within<br />
allowable humidity control range.<br />
Altitude system on (altitude chambers).<br />
Humidity not enabled in configurator.<br />
Turn off altitude system.<br />
Check configurator settings.<br />
Chamber not humidifying.<br />
Maximum dewpoint limit reached.<br />
Boiler filling with water/heating up.<br />
Blown boiler heater fuse.<br />
9300 controller output off.<br />
Atomizer nozzle clogged.<br />
Atomizer water supply low.<br />
Atomizer air supply low.<br />
Check system status monitor.<br />
Chamber operating at maximum<br />
humidity level.<br />
Check water supply. Allow time for<br />
boiler to heat up.<br />
Replace fuse.<br />
Verify proper 9300 controller<br />
configuration. Check set point.<br />
Replace 9300 controller.<br />
Check/clean atomizer nozzle.<br />
Check water supply. Increase flow<br />
rate.<br />
Verify air compressor operation.<br />
Check for leaks/cracks in tubing.<br />
Chamber not dehumidifying.<br />
(further diagnosis and/or repair<br />
requires certified refrigeration service<br />
personnel)<br />
Minimum dewpoint limit reached.<br />
Dehumidification coil logged with<br />
moisture.<br />
9300 controller output off.<br />
Check system status monitor.<br />
Chamber operating at minimum<br />
humidity level.<br />
Check coil. Warm up chamber to<br />
remove moisture build-up.<br />
Verify proper 9300 controller<br />
configuration. Check set point.<br />
Replace 9300 controller.<br />
19
EZT-560i Technical Manual<br />
4.2.2 Humidity System Logic Flow<br />
20
EZT-560i Technical manual<br />
4.3 Auxiliary Cooling System<br />
The auxiliary cooling system can be installed as a boost system or a low range control system. When<br />
set as a boost, it will assist the refrigeration system in lowering chamber temperatures quickly. As a<br />
control, it will take over once the low temperature limit of the refrigeration system is reached and<br />
continue cooling the chamber down to an ultimate low of the auxiliary cooling medium (LN2 or CO2).<br />
Auxiliary Cool Boost Operation<br />
When the auxiliary cooling option is set for boost in the configurator, the auxiliary cooling supply valve<br />
output (Q40) will turn on when the chamber and auxiliary cooling events are enabled. The EZT will<br />
then monitor the cooling percentage of output. When it exceeds the auxiliary cooling on percentage<br />
set point for the on delay time period, the boost cool output (Q42) will turn on. When the percentage<br />
of output drops below the on percentage set point, the output will turn off. The supply valve output<br />
will remain on as long as the event is on. Only the boost output will cycle on and off for control.<br />
Once the air temperature reaches the low limit set point in the configurator (boost cool disable), the<br />
boost cooling output will be disabled to prevent the chamber from going colder than what the<br />
refrigeration system is capable of in order to protect the compressors.<br />
Auxiliary Cool Control Operation<br />
When auxiliary cooling is set for control in the configurator, the auxiliary cooling system will operate<br />
according to the boost control logic until the low limit set point is reached. The low limit set point in<br />
the configurator (boost cool disable) is the lowest safe operating range for the refrigeration system.<br />
Once the low limit set point temperature is reached, the refrigeration system is shut down and the<br />
control solenoid output (Q41) will turn on. This transfers the cooling output from the 9300 controller to<br />
the auxiliary cooling control solenoid. This allows the chamber to be controlled to temperatures below<br />
what the refrigeration system can produce.<br />
4.3.1 Auxiliary Cooling System Failures and Corrective Actions<br />
SYMPTOM PROBABLE CAUSES CORRECTIVE ACTIONS<br />
Boost cooling not turning on.<br />
Auxiliary cooling event not turned on.<br />
Loop percentage of output not<br />
exceeding on percentage for delay<br />
period.<br />
Air temperature at minimum allowable<br />
range.<br />
Altitude system on (altitude chambers).<br />
Turn on auxiliary cooling event.<br />
Check loop output percentage, adjust<br />
configurator settings if necessary for<br />
performance.<br />
Chamber at low limit. Can not go any<br />
colder.<br />
Turn off altitude system.<br />
Poor cooling performance with<br />
auxiliary cooling on.<br />
Cooling medium (LN2/CO2) not<br />
reaching chamber as liquid.<br />
Supply/control valve clogged/failed.<br />
Allow boost cooling to run longer in<br />
order for liquid to reach chamber.<br />
Insulate supply lines.<br />
Install automatic purge system to<br />
bleed off gas in order to maintain liquid<br />
in supply line.<br />
Inspect valve. Clean/Replace if<br />
necessary.<br />
21
EZT-560i Technical Manual<br />
4.3.2 Auxiliary Cooling System Logic Flow<br />
22
EZT-560i Technical manual<br />
4.4 Dry Air Purge System<br />
The dry air purge system can work independently or as part of the humidity system. If the chamber is<br />
a standard dry unit (non humidity) or the humidity system is off, the dry air purge output (Q34) will turn<br />
on when the chamber and purge events are turned on. The purge system will run continuously<br />
supplying dry air to the chamber until the event is turned off.<br />
If the chamber is equipped with humidity, the dry air purge system output (Q34) will be automatically<br />
turned off when the humidity system is turned on. This is done in order to allow the humidity system<br />
to control the humidity level. If the purge system was allowed to continue operation, it would be<br />
constantly trying to dry the chamber regardless of the humidity set point. The humidity system control<br />
logic will allow the dry air purge system to operate during periods of 100% dehumidification to help<br />
speed the “drying out” process.<br />
For chambers equipped with the low RH (frozen coil) option; the purge system will automatically run<br />
during low RH humidity operation. The EZT monitors the temperature and relative humidity set points<br />
and calculates the resulting dewpoint. When this value is below the standard wet coil range, the EZT<br />
will automatically switch to frozen coil mode. The EZT does not initiate frozen coil mode until the<br />
measured dewpoint in the chamber is below 10°C (50°F). This prevents the coil from loading up with<br />
moisture prematurely and reducing the duration of time at which the coil can affectively control low<br />
humidity levels in the chamber.<br />
When frozen coil mode is initiated, the dry air purge system output (Q34) and air control solenoid<br />
output (Q35) turn on. The air control solenoid output transfers control of the purge air supply to the<br />
chamber over to the dehumidification output of the 9300 loop controller. This allows the dry air purge<br />
to be controlled along with the dehumidification solenoid for proper humidity control.<br />
4.4.1 Dry Air Purge System Failures and Corrective Actions<br />
SYMPTOM PROBABLE CAUSES CORRECTIVE ACTIONS<br />
Purge system not supplying dry air to<br />
chamber.<br />
Purge system off.<br />
No compressed air supply.<br />
Purge flow meter adjusted too low.<br />
Supply/control valve clogged/failed.<br />
Turn on purge event.<br />
Supply compressed air to purge<br />
system.<br />
Verify/adjust flow meter for proper flow<br />
rate.<br />
Inspect valve. Clean/Replace if<br />
necessary.<br />
Dry air purge not turning on.<br />
Purge event not turned on.<br />
Chamber operating in humidity mode.<br />
Altitude system on (altitude chambers).<br />
Turn on purge event.<br />
Purge automatically controlled. Dry air<br />
purge will turn on automatically when<br />
required. Turn off humidity.<br />
Turn off altitude.<br />
23
EZT-560i Technical Manual<br />
4.4.2 Dry Air Purge System Logic Flow<br />
24
EZT-560i Technical manual<br />
4.5 Altitude System<br />
When the altitude system is enabled, the altitude system output (Q43) will turn on. This turns on the<br />
vacuum pump and any isolation valves to seal the chamber. The minimum dive output (Q44) and<br />
minimum vacuum output (Q46) turn on with the altitude event to enable the control circuits for<br />
increasing and decreasing the pressure inside the chamber. They are typically not used and are<br />
provided for special applications.<br />
The maximum dive output (Q45) and maximum vacuum output (Q47) are controlled by the<br />
configurator settings. When the loop output percent exceeds the configurator set point for the on<br />
delay period, the maximum output will turn on. They operate as boost outputs, i.e., they are on/off<br />
outputs, not proportioning outputs. They connect additional air and vacuum supply circuits to the<br />
control outputs in order to boost chamber performance.<br />
The altitude system automatically disables humidity, auxiliary cooling and dry air purge when it is<br />
turned on. These systems can not run when the altitude system is on. The conditioning system is<br />
allowed to run until the altitude reaches the conditioning system disable set point in the configurator.<br />
Once this altitude is reached, both heating and cooling is shut down. During the allowed operating<br />
range, the air circulator motors will switch from low speed (output Q0) to high speed (output Q1) once<br />
the high speed fan enable set point is reached. This improves the heating and cooling performance<br />
at higher altitudes due to the low air density in the chamber.<br />
4.5.1 Altitude System Failures and Corrective Actions<br />
SYMPTOM PROBABLE CAUSES CORRECTIVE ACTIONS<br />
Chamber not increasing in altitude.<br />
Altitude turned off.<br />
Manual dive valve open.<br />
Vacuum pump not running.<br />
Leak in chamber.<br />
9300 controller output off.<br />
Vacuum control valve clogged/failed.<br />
Turn on altitude event.<br />
Close dive valve.<br />
Check/replace fuse. Reset overload.<br />
Check for leaks. Check door gaskets<br />
and latches for tight seal.<br />
Verify proper 9300 controller<br />
configuration. Check set point.<br />
Replace 9300 controller.<br />
Inspect valve. Clean/Replace if<br />
necessary.<br />
Chamber not decreasing in altitude.<br />
No compressed air supply.<br />
9300 controller output off.<br />
Air supply control valve clogged/failed.<br />
Check/supply chamber with<br />
compressed air. Check pressure<br />
regulator setting.<br />
Verify proper 9300 controller<br />
configuration. Check set point.<br />
Replace 9300 controller.<br />
Inspect valve. Clean/Replace if<br />
necessary.<br />
25
EZT-560i Technical Manual<br />
4.5.2 Altitude System Logic Flow<br />
26
EZT-560i Technical manual<br />
4.6 Fluid Systems<br />
Fluid systems can vary considerably between different types of chambers. LC’s, TSB’s and explosion<br />
proof chambers are typical candidates for fluid systems. For LC’s and TSB’s, it is the only means of<br />
heating and cooling the product under test.<br />
Troubleshooting fluid system problems generally ends up with a heating or cooling system diagnosis.<br />
As long as fluid is flowing at the proper rate, temperature control falls back to the heating and cooling<br />
systems. As long as the pump is operating properly and all isolation valves are open, there isn’t<br />
much to consider.<br />
LC Chambers<br />
When the chamber event is turned on, the fluid system pump is started in order to keep fluid flowing<br />
through the system to condition the test product. The fluid is heated and cooled as it flows through<br />
the heater barrel and heat exchanger much like the air across the heater and evaporator in a typical<br />
chamber.<br />
The fluid system is equipped with safeties that insure that fluid is flowing through the system prior to<br />
allowing heating or cooling of the fluid to commence. This protects the system and components from<br />
damage that may occur by operating with no fluid flow. The heating and cooling outputs function in<br />
the same manner as a standard chamber, except they are controlling fluid temperature instead of air.<br />
TSB Chambers<br />
When the chamber event is turned on, the fluid system pumps are started in order to keep fluid<br />
flowing through the system to condition the test product. Some smaller TSB’s merely have mixers in<br />
the bath to promote flow over the heaters and evaporator mounted in the baths. The fluid is heated<br />
and cooled as it flows across the heater and heat exchanger much like the air across the heater and<br />
evaporator in a typical chamber.<br />
For TSB’s with fluid pumps, the fluid system is equipped with safeties that insure that fluid is flowing<br />
through the system prior to allowing heating or cooling of the fluid to commence. This protects the<br />
system and components from damage that may occur by operating with no fluid flow. The heating<br />
and cooling outputs function in the same manner as a standard chamber, except they are controlling<br />
fluid temperature instead of air.<br />
Hot baths are typically for heating only. They do not have any means of cooling the fluid. Cold baths<br />
may or may not have heaters in order to warm up and operate at elevated temperatures. Typically,<br />
cold baths are for cooling only.<br />
Explosion Proof Chambers<br />
Division I, explosion proof chambers typically use “hot oil” systems as the means for heating the<br />
chamber. Division I explosion proof classifications require that no component, even upon failure, can<br />
ignite the flammable substance present. Electric heaters can short or rupture in a failure condition<br />
thus causing an explosion. Also, the surface temperature of the heaters is critical to safety. No<br />
portion of the heater surface can operate over 80% of the auto-ignition temperature of the flammable<br />
material as defined by Article 500 of the NEC.<br />
Hot oil systems are equipped with independent temperature controls. These control devices will<br />
maintain the fluid at a preset temperature and/or prevent it from exceeding the maximum allowed<br />
operating temperature. The chamber temperature control will then cycle solenoids to control the flow<br />
of the fluid into a heating coil in the chamber, thus heating the air. Since the fluid is maintained at a<br />
safe temperature, even if the coil were to rupture, there is no source of ignition present.<br />
27
EZT-560i Technical Manual<br />
4.6.1 Fluid System Failures and Corrective Actions<br />
SYMPTOM PROBABLE CAUSES CORRECTIVE ACTIONS<br />
Low or no fluid flow.<br />
Blockage in piping/closed valves.<br />
Pressure relief valve bypassing fluid.<br />
Pump failure.<br />
Blown fuse.<br />
Locate blockage and remove/open<br />
valves.<br />
Check pump pressure. Adjust/replace<br />
relief valve.<br />
Check pump shaft coupling.<br />
Check motor overload/reset.<br />
Worn pump. Replace/repair.<br />
Replace fuse.<br />
4.6.2 LC Fluid System Logic Flow<br />
28
EZT-560i Technical manual<br />
4.7 Transfer Mechanism<br />
Transfer mechanisms are used on thermal shock chambers (DTS/VTS/TSB) to move a basket loaded<br />
with test product from one extreme temperature to another. These systems may utilize a single motor<br />
drive or one or more air cylinders to move the basket between the different temperature zones.<br />
Motor Operated Transfer Mechanism<br />
Motor operated transfer mechanisms are typically used on TSB’s. They consist of a gear-motor drive<br />
with a lever arm attached to the output shaft. The motor direction is switched between clockwise and<br />
counterclockwise rotation in order to move the basket back and forth between the baths.<br />
Limit switches are used to indicate each of the three positions, hot, cold and unload. The motor<br />
direction is determined by the current position of the basket, as indicated by which position switch is<br />
on, and the desired bath position set by the events. The motor runs until the limit switch for the<br />
desired position is met.<br />
Air Cylinder Operated Mechanism<br />
Air operated transfer mechanisms for DTS and VTS chambers are relatively simple. A single air<br />
cylinder is used to move the basket between the two available positions. Because of the design, the<br />
basket provides the mechanical stop for the cylinder. The cylinder continues to push on the basket,<br />
thus sealing the gasket surface to keep the hot and cold chambers separate. Limit switches are<br />
positioned on each end of the cylinder in order to identify the basket position.<br />
TSB transfer mechanisms employing air cylinders are more sophisticated. They use two cylinders,<br />
one for up-and-down motion and the other for side-to-side motion. Limit switches are placed on each<br />
end of both cylinders to provide position information to the EZT. In order to transfer from one bath to<br />
the other, the basket is first raised into position. Once the basket is in the up position, the EZT then<br />
controls the other cylinder to move the basket left or right over the opposing baths. Once the basket<br />
is repositioned over either of the baths, it is then lowered into the bath.<br />
4.7.1 Transfer Mechanism Failures and Corrective Actions<br />
SYMPTOM PROBABLE CAUSES CORRECTIVE ACTIONS<br />
Basket not transferring.<br />
Limit switch failure.<br />
Basket already in position.<br />
Motor clutch slipping.<br />
Blown fuse (motor operated).<br />
Binding in transfer basket/mechanism.<br />
Loss of/low air pressure.<br />
Check limit switches. Adjust/replace.<br />
Transfer to other position.<br />
Check/adjust clutch tension.<br />
Replace fuse.<br />
Check cable tension, pulleys, cylinder<br />
guides, etc. for wear. Adjust/repair.<br />
Supply proper air pressure. Check<br />
pressure regulator/adjust.<br />
Basket not transferring to proper<br />
position.<br />
Limit switch failure.<br />
Motor leads reversed.<br />
Air lines to cylinder reversed.<br />
Verify limit switch operation.<br />
Swap motor leads.<br />
Swap air lines.<br />
29
EZT-560i Technical Manual<br />
4.7.2 Transfer System Logic Flow<br />
30
EZT-560i Technical manual<br />
31
EZT-560i Technical Manual<br />
5. Remote PC Communication Problems<br />
This section covers troubleshooting basics for user communications to the EZT. This is for PC to<br />
EZT communications, not internal communication between EZT components. The user<br />
communication capabilities are enabled from the “Web Server/Modbus/VNC” settings screen under<br />
the chamber setup menu.<br />
Figure 5-1 Web Server/Modbus/VNC Communication Settings<br />
For more detailed information on communication format, commands and functionality of the<br />
232/485 serial interfaces, see the EZT-560i User Communication Reference Manual.<br />
When connecting remote devices to the EZT’s communication ports, make sure that<br />
the equipment is properly grounded as required by the manufacturer’s instructions<br />
with a good earth ground. Poor site earths can introduce electrical noise and transient<br />
voltages into the communication wiring resulting in poor performance or damage to<br />
equipment.<br />
32
EZT-560i Technical manual<br />
5.1 Serial Communications Troubleshooting<br />
The EZT-560i allows a user to remote monitor and control chamber operations over an RS232 or<br />
RS485 communications connection. Only one may be used at a time. The connection type is<br />
enabled from the “System Settings” screen.<br />
Figure 5-2 Serial Port Mode Settings<br />
The system settings is accessed through the “Calibrate Touch Screen” menu item under system<br />
maintenance and selecting “Calibrate Touch”. You can then select the serial port mode tab to access<br />
the port settings. COM3 is utilized for user communications. Using the drop down menu, it is<br />
possible to select the port mode, RS232 or RS485.<br />
The Modbus settings in the EZT allow the controller address and parity of the communications<br />
protocol to be changed. When communicating with a PC, the PC and the EZT settings must match in<br />
order for the communications connection to operate. The EZT is set with a default address of 1 and<br />
Even parity. Even parity is required when using CSZ EZ-View software to communicate with the<br />
EZT. The baud rate, data bits and stop bits of the serial interface are fixed at 9600 baud, 8 data bits<br />
and 1 stop bit. These settings are fixed and can not be changed.<br />
Table 5-1 Common Serial Communication Problems and Corrective Actions<br />
SYMPTOM PROBABLE CAUSES CORRECTIVE ACTIONS<br />
EZT not responding to commands from<br />
PC.<br />
Wrong slave address.<br />
Wrong parity setting.<br />
Wrong serial port mode setting.<br />
Wrong communication port settings in<br />
PC or wrong command format.<br />
EZT timeout setting too low.<br />
Improper or loose connection.<br />
Use slave address set in EZT or<br />
change EZT slave address to match.<br />
Use parity setting in EZT or change<br />
EZT parity to match.<br />
Verify serial connection used and set<br />
mode setting to match<br />
(RS232/RS485).<br />
Verify proper protocol used (Modbus)<br />
Verify proper serial port settings used<br />
in PC.<br />
Increase EZT timeout setting and/or<br />
slow down PC communication rate.<br />
Check cables and wiring for loose or<br />
damaged connections. Verify proper<br />
connection polarity (null-modem cable<br />
connection for RS232).<br />
33
EZT-560i Technical Manual<br />
5.1.1 CSZ EZ-View Software<br />
EZ-View is a SCADA and configuration package for Cincinnati Sub-Zero EZT-560 controllers.<br />
Connection to controllers is accomplished via an RS232 (single) or RS485 (one to many) connection.<br />
This allows for up to 20 EZT-560i controlled chambers to be connected to a single PC using RS485.<br />
EZ-View requires the use of serial port #1 (COM1) on the computer it is installed on. EZ-View does<br />
not allow modifications to the port number. Thus, this port must be available for EZ-View to operate.<br />
EZ-View must be configured for the chambers attached to the system prior to use. The "Controller<br />
Labels/Activation" menu under the "Setup” menu allows the user to add EZT controllers attached to<br />
the PC. EZT-560 series controllers are enabled (turned on) sequentially starting with address 1<br />
through 20 which must match the address entered in each EZT-560. Each EZT must also have its<br />
parity set to “Even” in order for EZ-View to communicate with it.<br />
Controllers must be enabled in order. If a controller is skipped, it will not cause a direct<br />
communication error; however, the communications may not take place properly. With a<br />
controller skipped in the list, it can cause control data to be sent to the wrong controller<br />
Table 5-2 Common EZ-View Start-up Problems and Corrective Actions<br />
SYMPTOM PROBABLE CAUSES CORRECTIVE ACTIONS<br />
EZ-View communication error:<br />
“Control Address #, Device did not<br />
respond in 1 sec.<br />
Wrong slave address at EZT.<br />
Wrong parity setting at EZT.<br />
EZT not connected to serial port #1 of<br />
the PC.<br />
Wrong communication port mode on<br />
EZT.<br />
EZT timeout setting too low.<br />
Improper or loose connection.<br />
Set EZT address to match controller<br />
number in EZ-View.<br />
Set EZT parity to “Even”.<br />
Verify PC serial port used/connect to<br />
COM1.<br />
Verify proper serial port mode for<br />
connection used (RS232/485).<br />
Increase EZT timeout setting and/or<br />
slow down EZ-View scan rate.<br />
Check cables and wiring for loose or<br />
damaged connections. Verify proper<br />
connection polarity (null-modem cable<br />
connection for RS232).<br />
34
EZT-560i Technical manual<br />
5.2 GPIB Communications Troubleshooting<br />
The GPIB communication option is provided through the use of ICS's Model 4899 GPIB-to-Modbus<br />
Controller. The 4899 is an IEEE 488.2 compatible GPIB device that can control Modbus slave<br />
devices. It accepts simple GPIB bus commands that are used to create Modbus RTU packets that<br />
are transmitted serially to the Modbus slave devices, in this case, the EZT.<br />
When this option is provided, it is connected to the EZT’s RS485 serial connection. For the GPIB<br />
interface to be used, the EZT must have its serial port mode setting for COM3 set to RS485. If the<br />
serial port is not set for RS485, the GPIB interface will be unable to communicate with the EZT and<br />
communications will not be able to take place.<br />
Table 5-3 Common GPIB Communication Problems and Corrective Actions<br />
SYMPTOM PROBABLE CAUSES CORRECTIVE ACTIONS<br />
GPIB interface not responding to<br />
read/write commands.<br />
4899 power turned off.<br />
Wrong bus address.<br />
Missing termination character.<br />
Turn 4899 power switch on.<br />
Verify 4899 GPIB bus address.<br />
Use proper termination character<br />
(default is LF).<br />
Not reading data from EZT.<br />
Read command sent to quickly after<br />
write command.<br />
4899 serial timeout set to short.<br />
Wrong communication port mode on<br />
EZT.<br />
EZT timeout setting too low.<br />
Improper or loose connection.<br />
Slow down communication rate<br />
between write/read commands to<br />
allow EZT time to respond.<br />
Set 4899 serial timeout to higher<br />
value. Use “D ####” command where<br />
#### = timeout in milliseconds.<br />
Verify proper serial port mode for<br />
connection used (RS232/485).<br />
Increase EZT timeout setting and/or<br />
slow down PC communication rate.<br />
Check cables and wiring for loose or<br />
damaged connections. Verify proper<br />
polarity.<br />
35
EZT-560i Technical Manual<br />
5.3 Ethernet Communications Troubleshooting<br />
The EZT-560i provides the ability to remotely control and monitor chamber operations over a<br />
network. To connect the EZT-560i to a network, connect the EZT’s Ethernet port to an available<br />
network port using a standard CAT5 cable connection. The EZT will be automatically assigned an IP<br />
address via the network’s DHCP server.<br />
In order for the IP address to be assigned; however, power to the EZT must be cycled while the EZT<br />
is connected to the network. The IP address is assigned to the EZT during its boot sequence. The<br />
EZT indicates network communication activity via the red “COM” indicator LED on the front of the<br />
HMI. When the EZT is connected to a network, this indicator will flash to show network activity.<br />
Remember that even though the light may be flashing to indicate network activity, it does not mean<br />
that the EZT is part of the network. To be part of the network, it must have a valid IP address which<br />
is only assigned during boot.<br />
The EZT provides control and monitoring interface using VNC. VNC viewers are available for free for<br />
most operating systems including Windows, MAC, Unix, etc. The monitor only interface is provided<br />
on a web page that contains the EZT operating information via the EZT’s web server.<br />
To use either interface, you must use the assigned IP address to access the EZT-560i. To obtain the<br />
correct IP address, go to the “Web Server/Modbus/VNC” screen under the chamber setup menu.<br />
Enter the IP address in your VNC client server or as the web page address in your web browser.<br />
When using the web browser connection, be sure to complete the address as shown in order to<br />
display the web page: http://”IPaddress”/ezt.html (from example address in Figure 5.1,<br />
http://10.1.1.231/ezt.html).<br />
Table 5-4 Common Ethernet Communication Problems and Corrective Actions<br />
SYMPTOM PROBABLE CAUSES CORRECTIVE ACTIONS<br />
Web page not updating.<br />
Connection to EZT lost.<br />
Page update period not elapsed.<br />
Check EZT connection to intranet.<br />
Wait 30 seconds or press refresh<br />
button on web browser.<br />
Can not open web page in web<br />
browser.<br />
Web server disabled.<br />
IP address entered incorrectly.<br />
Invalid IP address.<br />
Enable web server on “/Web<br />
Server/Modbus/VNC” screen.<br />
Verify web address format.<br />
Cycle power to EZT. EZT must be<br />
connected to intranet upon application<br />
of power to receive a valid IP address.<br />
VNC client not connecting to EZT.<br />
VNC server disabled.<br />
IP address entered incorrectly.<br />
Invalid IP address.<br />
Enable VNC server on “/Web<br />
Server/Modbus/VNC” screen.<br />
Verify IP address format.<br />
Cycle power to EZT. EZT must be<br />
connected to intranet upon application<br />
of power to receive a valid IP address.<br />
EZT not assigned valid IP address.<br />
DHCP not set to automatically assign IP<br />
address on host.<br />
Contact IT department for assistance.<br />
36
EZT-560i Technical manual<br />
6. User Interface (HMI) Troubleshooting<br />
The EZT-560i’s user interface is an embedded Windows CE device. Once powered up, it will follow a<br />
typical boot up sequence (similar to any PC running a Microsoft Windows product) and automatically<br />
start the EZT560i application. The EZT560i application is what provides the operating screens, loop<br />
views, trends, logging, etc., that the user can navigate through to change set points, create and run<br />
profiles, and so on.<br />
The HMI and EZT560i application do not operate or perform any control tasks for the chamber. They<br />
are used for user input, information gathering and monitoring of chamber operations only. The<br />
information is exchanged over an RS485 serial communication link between the HMI and the EZT-<br />
560i’s CPU mounted on the electrical sub-panel. A failure of the HMI or EZT560i application will not<br />
cause the chamber to shut down. The CPU will continue to operate the chamber under its last given<br />
instructions. In order to stop the chamber, power must be removed from the chamber.<br />
If the HMI fails to boot up properly when power is restored to the chamber, the chamber will<br />
not begin operation. The HMI must boot up into the EZT560i application in order for the<br />
chamber to start. The CPU will not start the chamber until it receives a signal from the HMI<br />
that it has booted up and the EZT560i application is running properly.<br />
37
EZT-560i Technical Manual<br />
6.1 HMI Troubleshooting and Corrective Actions<br />
SYMPTOM PROBABLE CAUSES CORRECTIVE ACTIONS<br />
1) Black Screen<br />
“PWR” indicator is off.<br />
“CPU” indicator is off.<br />
Power is off.<br />
Wrong polarity of power source.<br />
Blown Fuse on HMI.<br />
Turn on power.<br />
Check/correct polarity of power<br />
source.<br />
Replace fuse.<br />
“PWR” indicator is on.<br />
“CPU” indicator is off.<br />
Screen saver is on.<br />
Bad backlight.<br />
Touch screen to disable screen saver.<br />
Replace HMI.<br />
“PWR” indicator is on.<br />
“CPU” indicator is on.<br />
Power “glitch”.<br />
Bad USB cable/damaged USB memory<br />
stick.<br />
Improperly inserted/damaged CF card.<br />
HMI hardware failure.<br />
Cycle power to EZT. Check supply<br />
voltage. (must be 24 + 1Vdc)<br />
Remove memory stick, replace USB<br />
cable.<br />
Verify CF card inserted properly.<br />
Replace CF card.<br />
Replace HMI.<br />
2) Blue Screen<br />
EZT560i application not starting.<br />
CF card missing, improperly inserted or<br />
erased.<br />
Windows CE startup directory not<br />
properly configured.<br />
Card socket damaged.<br />
Verify CF card is inserted properly.<br />
Check CF card for EZT560i operating<br />
files.<br />
Check/configure proper startup<br />
directory. (see Section 6.1.1)<br />
Check socket for bent/missing pins.<br />
Repair/replace HMI.<br />
3) Communications Error<br />
“Error during write to controller. Check<br />
cable or setup/wiring.” message<br />
displayed at startup.<br />
CPU not loaded with chamber control<br />
program.<br />
Communication wiring between HMI<br />
and CPU not properly connected.<br />
Serial port not set up properly on HMI.<br />
CPU communication adapter (port 2)<br />
not seated properly on CPU/damaged.<br />
Verify/load proper program to CPU.<br />
Both “PWR” and “RUN” LED’s lit on<br />
CPU.<br />
Check wiring/connections.<br />
Correct/repair.<br />
Verify/correct serial port 1 mode on<br />
HMI. (see Section 6.1.2)<br />
Check connection between adapter<br />
and CPU. Replace adapter (port 2).<br />
38
EZT-560i Technical manual<br />
SYMPTOM PROBABLE CAUSES CORRECTIVE ACTIONS<br />
“Comm alm at PLC. Check Cable.”<br />
alarm message.<br />
Communication wiring between HMI<br />
and CPU not properly connected.<br />
Electrical noise in system or remote PC<br />
communicating too fast with EZT.<br />
Check wiring/connections.<br />
Correct/repair.<br />
Check for proper shielding of<br />
communication wiring.<br />
Turn off electrically noisy devices.<br />
Disconnect remote PC or slow down<br />
communication rate from remote PC.<br />
(minimum 500ms scan rate)<br />
4) Screen Locked Up<br />
Screen does not respond to touch.<br />
CE operating system locked up.<br />
Touch screen out of calibration.<br />
HMI operating temperature exceeded.<br />
Touch screen failure.<br />
Cycle power.<br />
Calibrate touch screen.<br />
(see Section 6.1.3)<br />
Ambient temperature around HMI<br />
must be between 0°C (32°F) and 45°C<br />
(113°F). Turn off EZT. Bring ambient<br />
temperature to within allowable range.<br />
Replace HMI.<br />
39
EZT-560i Technical Manual<br />
6.1.1 Configure Windows CE Startup Directory<br />
The startup directory must be stored in the “NORFlash” directory in the HMI. This area is backed up<br />
to flash memory so it is retained when power is removed, and is automatically started once the boot<br />
sequence has been completed on power up. To check the startup directory, touch the thin gray bar<br />
at the bottom of the screen to display the start menu. Touch the “Start” button and select “Programs”<br />
and then “Windows Explorer”.<br />
Figure 6-1 Windows Start Menu<br />
From “My Computer” open the “NORFlash” directory. The NORFlash directory may contain several<br />
folders and/or files; however, we are only concerned with the “Startup” folder. If the startup folder<br />
does not exist, then it must be created. If the startup folder does exist, open the folder and make sure<br />
the file “Shortcut to EZT560” is in the folder. If it is not, then it must be added.<br />
The CF card holds a copy of the startup folder needed for proper operation. To replace either the<br />
missing folder or shortcut, copy the startup folder from the compact flash card to the NORFlash<br />
directory. To do so, open the storage card folder from “My Computer”. Touch the “Startup” folder to<br />
select it and then select “Copy” from the “Edit” menu. Return to the NORFlash directory and then<br />
select “Paste” from the “Edit” menu to paste the startup folder into the NORFlash directory. Cycle<br />
power to the EZT so that it can perform its normal boot sequence.<br />
Figure 6-2 “My Computer” File Access<br />
40
EZT-560i Technical manual<br />
6.1.2 Configure Serial Port 1 Mode<br />
Serial port 1, of the HMI, is used to communicate with the CPU. This is a two wire, RS485 serial link.<br />
In order for the link to operate properly, the serial port on the HMI must be set for RS485.<br />
Figure 6-3 Write Error on Boot<br />
To check the serial port settings, power down the EZT. Remove the CF card from the back of the<br />
HMI and turn the power back on. Allow the HMI to boot up to the Windows desktop. Insert the CF<br />
card in the back of the HMI making sure that it is properly oriented. Touch the small gray bar at the<br />
bottom of the screen to open up the start menu. Press the “Start” button and select “Windows<br />
Explorer” from the “programs” menu.<br />
Figure 6-4 Windows Start Menu<br />
41
EZT-560i Technical Manual<br />
Open the “StorageCard” folder in order to gain access to the “CECP” utility. The utility has an icon<br />
that looks like a hammer.<br />
Figure 6-5 “StorageCard” File Access<br />
Open the CECP utility and select the “Set serial port mode” tab. COM1 should be set for RS485.<br />
COM3 is used for remote PC communications and its mode does not affect the communications<br />
between the HMI and PLC.<br />
Figure 6-6 Serial Port Settings<br />
Set the serial port mode for COM1 to RS485 using the drop down selection box. Select the “Save”<br />
tab and press the “Save registry” button to save the settings. This must be done in order to save the<br />
serial port settings to flash memory so that it is retained when power is turned off. Cycle power to the<br />
EZT and allow it to boot up normally.<br />
42
EZT-560i Technical manual<br />
6.1.3 Touch Screen Calibration<br />
If the touch screen is severely out of calibration it can appear as if the HMI is “locked-up”. It may not<br />
respond to touch or will make it impossible to accurately select items in order to navigate to the<br />
normal screen calibration menu. If this occurs, there are two methods for correcting the screen’s<br />
calibration. The first one requires access to the dip switches on the back of the HMI, the other<br />
requires the use of a USB compatible mouse.<br />
6.1.3.1 Dip Switch Calibration Procedure<br />
To begin, switch power off to the EZT. Gain access to the rear of the HMI and locate the dip switches<br />
to the upper right of the power plug connection. Set dip switch 1 to the “on” (up) position. Restore<br />
power to the EZT. Allow the HMI to follow its normal boot sequence. Once the Windows CE image is<br />
loaded, the display will automatically start the touch screen calibration routine. Using a stylus, or the<br />
tip of a plastic pen cap, touch and hold on the center of each point marked by the crosshairs on the<br />
screen.<br />
Do not use any metal or sharp edged instruments on the screen or permanent damage<br />
to the screen may result.<br />
Figure 6-7 Touch Calibration Screen<br />
Once all points have been measured, touch anywhere on the screen to accept the settings and<br />
complete the calibration routine. The display will continue its boot up sequence and start the<br />
EZT560i application. Set dip switch 1 off.<br />
Dip switch one must be set to off or the calibration routine will start each time power is<br />
applied. This will prevent the chamber from resuming operation on a power failure without<br />
user intervention.<br />
43
EZT-560i Technical Manual<br />
6.1.3.2 USB Mouse Calibration Procedure<br />
Begin by connecting a mouse to the EZT’s USB port. Using the mouse, you can navigate the screen<br />
just like using a desktop PC. Begin by selecting “Chamber Setup” from the main setup menu.<br />
Figure 6-8 Setup Menu Access<br />
Select “System Maintenance” from the setup menu.<br />
Figure 6-9 Chamber Setup Menu Access<br />
You will be prompted with a message stated that “Maintenance mode will put system in offline<br />
condition! Continue?” Select “Yes”. From the setup menu, select “Calibrate Touch Screen”.<br />
Figure 610 System Maintenance Setup menu Access<br />
44
EZT-560i Technical manual<br />
Press the “Calibrate Touch” button.<br />
Figure 6-11 Calibrate Touch<br />
Press the “Calibrate” button on the system settings screen to start the calibration process.<br />
Figure 6-12 Touch Screen Settings<br />
Using a stylus, or the tip of a plastic pen cap, touch and hold on the center of each point marked by<br />
the crosshairs on the screen. Once all points have been measured, touch anywhere on the screen to<br />
accept the settings and complete the calibration routine.<br />
Do not use any metal or sharp edged instruments on the screen or permanent damage<br />
to the screen may result.<br />
Figure 6-13 Touch Calibration Screen<br />
Close the system settings window by pressing the “OK” button at the top right of the window. You<br />
can then return to the normal operating screens and resume operation of the chamber.<br />
45
EZT-560i Technical Manual<br />
7. Deciphering EZT Input/Output (I/O) Operation<br />
The inputs and outputs of the EZT-560i are predefined for specific functions on all standard chamber<br />
designs. This requires that certain inputs and outputs perform different functions based on the<br />
chamber type. This section covers all of the standard inputs and outputs of the system and their use<br />
based on the chamber type. For each input and output, an individual functional description is<br />
provided on how the input or output is used.<br />
The control of the EZT outputs are also defined by which chamber events are enabled. The chamber<br />
events are predefined and their use varies according to the type of chamber and options present.<br />
The following table defines the standard use of the events.<br />
Table 7-1 Chamber Events<br />
EVENT STANDARD VTS (TSB) DTS<br />
1 CHAMBER HOT CHAMBER (BATH ON) LEFT CHAMBER<br />
2 HUMIDITY COLD CHAMBER CENTER CHAMBER<br />
3 AUX COOL AUX COOL AUX COOL<br />
4 PURGE PURGE PURGE<br />
5 ALTITUDE XFR HOT XFR LEFT<br />
6 - XFR COLD XFR RIGHT<br />
7 - (XFR UNLOAD) RIGHT CHAMBER<br />
8 RC BLOWER - -<br />
9 INITIATE DEFROST INITIATE DEFROST INITIATE DEFROST<br />
10 PRODUCT CONTROL PRODUCT CONTROL PRODUCT CONTROL<br />
11 REMOTE SETPOINT 1 REMOTE SETPOINT 1 REMOTE SETPOINT 1<br />
12 REMOTE SETPOINT 2 REMOTE SETPOINT 2 REMOTE SETPOINT 2<br />
13 REMOTE SETPOINT 3 REMOTE SETPOINT 3 REMOTE SETPOINT 3<br />
14 REMOTE SETPOINT 4 REMOTE SETPOINT 4 REMOTE SETPOINT 4<br />
15 REMOTE SETPOINT 5 REMOTE SETPOINT 5 REMOTE SETPOINT 5<br />
The chamber loops are also predefined and their use varies according to the type of chamber and<br />
options present. The following table defines the standard use of the control loops.<br />
Table 7-2 Control Loops<br />
LOOP STANDARD VTS (TSB) DTS<br />
1 TEMPERATURE HOT CHAMBER (BATH) LEFT CHAMBER<br />
2 DUT/HUMIDITY/ALTITUDE COLD CHAMBER (BATH) CENTER CHAMBER<br />
3 DUT/ALTITIUDE DUT RIGHT CHAMBER<br />
4 DUT - DUT LEFT BASKET<br />
5 - - DUT RIGHT BASKET<br />
46
EZT-560i Technical manual<br />
7.1 Standard Input Configuration<br />
CONNECTION INPUT STANDARD CHAMBER CONFIGURATION DTS, VTS, TSB<br />
BO1-26 I0 CHAMBER LIMIT<br />
BO1-24 I1 PRODUCT SAFETY<br />
BO1-22 I2 MOTOR OVERLOAD<br />
BO1-20 I3 SYSTEM 1 PUMPDOWN SWITCH<br />
BO1-18 I4 SYSTEM 1 HI/LO PRESSURE SAFETY<br />
BO1-16 I5 SYSTEM 1 OIL PRESSURE SAFETY<br />
BO1-14 I6 SYSTEM 1 DISCHARGE THERMOSTAT<br />
BO1-12 I7 SYSTEM 1 COMPRESSOR SAFETY MODULE<br />
BO1-10 I10 SYSTEM 2 HI/LO PRESSURE SAFETY<br />
BO1-8 I11 SYSTEM 2 OIL PRESSURE SAFETY<br />
BO1-6 I12 SYSTEM 2 DISCHARGE THERMOSTAT<br />
BO1-4 I13 SYSTEM 2 COMPRESSOR SAFETY MODULE<br />
BO2-26 I14 BOILER HI TEMPERATURE THERMOSTAT BASKET LEFT<br />
BO2-24 I15 BOILER LOW WATER LEVEL FLOAT BASKET RIGHT<br />
BO2-22 I16 WATER RESERVOIR LOW LEVEL FLOAT BASKET UP<br />
BO2-20 I17 SYSTEM 1 DEFROST PRESSURE CONTROL<br />
BO2-18 I20 DEFROST TEMPERATURE SWITCH<br />
BO2-16 I21 DOOR SWITCH<br />
BO2-14 I22 EMERGENCY STOP<br />
BO2-12 I23 FLUID SYSTEM TEMPERATURE SAFETY HOT BATH FLUID SAFETY<br />
BO2-10 I24 FLUID SYSTEM PRESSURE SAFETY COLD BATH FLUID SAFETY<br />
BO2-8 I25 FLUID SYSTEM FLOW SAFETY BATH LEVEL SAFETY<br />
BO2-6 I26 CARGOCAIRE FAULT BASKET DOWN<br />
BO2-4 I27 POWER FAILURE<br />
Connection -<br />
Input -<br />
This column designates the physical wire connection point to the PLC for the input.<br />
This column designates the input address to the PLC as well as the marking used to<br />
identify wiring and hardware associated with the input.<br />
47
EZT-560i Technical Manual<br />
7.1.1 Input Description of Use<br />
Chamber Limit (I0):<br />
Product Safety (I1):<br />
Motor Overload (I2):<br />
The chamber limit input is used to indicate that the chamber<br />
temperature safety has tripped. This input is active high, i.e., the<br />
input must be on in order for the alarm to be indicated. When<br />
active, the EZT shuts down the chamber until the alarm is<br />
acknowledged (silence button pressed on alarm monitor screen)<br />
and the input is no longer active (requires manual reset of<br />
chamber limit device).<br />
The product safety input is used to indicate that the redundant<br />
product safety has tripped (if equipped). This input is active<br />
high, i.e., the input must be on in order for the alarm to be<br />
indicated. When active, the EZT shuts down the chamber until<br />
the alarm is acknowledged (silence button pressed on alarm<br />
monitor screen) and the input is no longer active (requires<br />
manual reset of product safety).<br />
The motor overload input is used to indicate that a motor<br />
overload relay has tripped off due to a motor overload condition<br />
(if equipped). This input is active high, i.e., the input must be on<br />
in order for the alarm to be indicated. When active, the EZT<br />
shuts down the chamber until the alarm is acknowledged<br />
(silence button pressed on alarm monitor screen) and the input is<br />
no longer active (requires manual reset of motor overload).<br />
It may also be used to indicate a failure of a VFD if one is used<br />
to control motor speed. If the VFD is at fault, check the<br />
manufacturer’s manual for troubleshooting and diagnostic<br />
information. Typically, pressing the stop/reset button on the<br />
drive should clear the fault condition.<br />
Sys1 Pumpdown Switch (I3):<br />
This input is a control input for pumpdown (if equipped). There is<br />
no user indication for this input. When the refrigeration system<br />
requires pumpdown, this input is wired to a low pressure switch<br />
on the suction line of system 1 compressor. When the pressure<br />
rises, the switch closes and turns on the input.<br />
The EZT then turns on the system 1 compressor output (Q2)<br />
until the input turns off. When the input turns off, indicating that<br />
the compressor has pumped down, the EZT turns off the system<br />
1 compressor output. During pumpdown, the system 1 solenoids<br />
output (Q11) remains off in order to isolate the low side of the<br />
refrigeration system so it can be pumped down.<br />
Sys1 Hi/Lo Pressure Safety (I4):<br />
The system 1 hi/lo pressure safety input is used to indicate that<br />
the system 1 compressor has exceeded its high or low pressure<br />
operating range. This input is active low, i.e., the input must be<br />
off in order for the alarm to be indicated. When active (input off),<br />
the EZT shuts down the chamber until the alarm is<br />
acknowledged (silence button pressed on alarm monitor screen)<br />
and the input is on (requires manual reset of high pressure<br />
safety).<br />
48
EZT-560i Technical manual<br />
Sys1 Oil Pressure Safety (I5):<br />
Sys1 Discharge Thermostat (I6):<br />
Sys1 Protection Module (I7):<br />
Sys2 Hi/Lo Pressure Safety (I10):<br />
Sys2 Oil Pressure Safety (I11):<br />
Sys2 Discharge Thermostat (I12):<br />
The system 1 oil pressure safety input is used to indicate that the<br />
system 1 compressor oil pressure is below the proper operating<br />
range (if equipped). This input is active low, i.e., the input must<br />
be off in order for the alarm to be indicated. When active (input<br />
off), the EZT shuts down the chamber until the alarm is<br />
acknowledged (silence button pressed on alarm monitor screen)<br />
and the input is on (requires manual reset of oil pressure safety).<br />
The system 1 discharge thermostat input is used to indicate that<br />
the system 1 compressor discharge temperature has exceeded<br />
the maximum operating range (if equipped). This input is active<br />
low, i.e., the input must be off in order for the alarm to be<br />
indicated. When active (input off), the EZT shuts down the<br />
chamber until the alarm is acknowledged (silence button pressed<br />
on alarm monitor screen) and the input is on (automatically<br />
resets after allowed to cool down).<br />
The system 1 compressor protection module input is used to<br />
indicate that the system 1 compressor protection module has<br />
detected an improper phase condition/loss or the compressor<br />
motor windings have overheated (if equipped). This input is<br />
active low, i.e., the input must be off in order for the alarm to be<br />
indicated. When active (input off), the EZT shuts down the<br />
chamber until the alarm is acknowledged (silence button pressed<br />
on alarm monitor screen) and the input is on (automatically<br />
resets after built-in timeout period).<br />
The system 2 hi/lo pressure safety input is used to indicate that<br />
the system 2 compressor has exceeded its high or low pressure<br />
operating range. This input is active low, i.e., the input must be<br />
off in order for the alarm to be indicated. When active (input off),<br />
the EZT shuts down the chamber until the alarm is<br />
acknowledged (silence button pressed on alarm monitor screen)<br />
and the input is on (requires manual reset of high pressure<br />
safety).<br />
The system 2 oil pressure safety input is used to indicate that the<br />
system 2 compressor oil pressure is below the proper operating<br />
range (if equipped). This input is active low, i.e., the input must<br />
be off in order for the alarm to be indicated. When active (input<br />
off), the EZT shuts down the chamber until the alarm is<br />
acknowledged (silence button pressed on alarm monitor screen)<br />
and the input is on (requires manual reset of oil pressure safety).<br />
The system 2 discharge thermostat input is used to indicate that<br />
the system 2 compressor discharge temperature has exceeded<br />
the maximum operating range (if equipped). This input is active<br />
low, i.e., the input must be off in order for the alarm to be<br />
indicated. When active (input off), the EZT shuts down the<br />
chamber until the alarm is acknowledged (silence button pressed<br />
on alarm monitor screen) and the input is on (automatically<br />
resets after allowed to cool down).<br />
49
EZT-560i Technical Manual<br />
Sys2 Protection Module (I13):<br />
Boiler Thermostat (I14):<br />
Boiler Low Water (I15):<br />
The system 2 compressor protection module input is used to<br />
indicate that the system 2 compressor protection module has<br />
detected an improper phase condition/loss or the compressor<br />
motor windings have overheated (if equipped). This input is<br />
active low, i.e., the input must be off in order for the alarm to be<br />
indicated. When active (input off), the EZT shuts down the<br />
chamber until the alarm is acknowledged (silence button pressed<br />
on alarm monitor screen) and the input is on (automatically<br />
resets after built-in timeout period).<br />
The boiler high temperature thermostat input is used to indicate<br />
that the boiler has overheated. This input is active low, i.e., the<br />
input must be off in order for the alarm to be indicated. When<br />
active (input off), the EZT shuts down the chamber until the<br />
alarm is acknowledged (silence button pressed on alarm monitor<br />
screen) and the input is on (requires manual reset of thermostat).<br />
The boiler low water input is used to indicate that the boiler is low<br />
on water. This input is active low, i.e., the input must be off in<br />
order for the alarm to be indicated. When active (input off), the<br />
EZT shuts down the chamber until the alarm is acknowledged<br />
(silence button pressed on alarm monitor screen).<br />
The low water safety has a built in delay to prevent the activating<br />
of the alarm until the boiler has been given sufficient time to fill<br />
(30 minute delay upon turning on the humidity event). If the<br />
boiler has not filled up in the allotted time, the alarm will sound.<br />
Once the boiler has reached the proper operating level, the<br />
alarm will sound immediately upon loss of level.<br />
Water Reservoir Low (I16):<br />
The water reservoir low input is used to indicate that the humidity<br />
system water reservoir is low on water (if equipped). This input<br />
is active low, i.e., the input must be off in order for the alarm to<br />
be indicated. When active (input off), the EZT will sound the<br />
alarm to bring operator attention to the chamber. The alarm will<br />
sound until acknowledged (silence button pressed on system<br />
status screen). This is a notification alarm only and does not<br />
shut down the chamber.<br />
If the chamber has the humidity option, but not the low water<br />
reservoir, this input must be wired to VCC. If not, the low water<br />
alarm will always be present. Jumping this input out prevents<br />
the alarm.<br />
Sys1 Defrost Pressure Switch (I17): This input is a control input for defrost (if equipped). There is no<br />
user indication for this input. When equipped with defrost, this<br />
input is wired to a pressure switch on the discharge of system 2<br />
compressor. This input is used to control system 1 cooling of<br />
system 2. When the input is on, system 1 will cool the cascade<br />
condenser for system 2. When the input is off, the EZT turns off<br />
cooling to the cascade by either turning of the cascade cooling<br />
solenoids (Q13) for large HP defrost or by turning off system 1<br />
compressor for standard defrost.<br />
50
EZT-560i Technical manual<br />
Sys1 Defrost Thermostat (I20):<br />
This input is a control input for defrost (if equipped). There is no<br />
user indication for this input. When equipped with defrost, this<br />
input is wired to a thermostat on the suction line of the cooling<br />
coil. When the refrigeration system is in defrost, this input is<br />
used to begin the termination sequence for defrost by signaling<br />
that the coil defrost temperature has been met.<br />
When the input first turns on, the EZT will begin the 15 minute<br />
countdown to terminate defrost. The thermostat is typically set<br />
for about 10°C (50°F). After defrost times out, the prechill step<br />
begins. The refrigeration system will begin to cool the coil.<br />
Once the thermostat sees the coil drop below the set point, a 60<br />
second prechill timer will begin. At the end of 60 seconds, the<br />
chamber will return to normal operation.<br />
If the control loop is not calling for 100% cooling, the prechill<br />
timer will begin its 60 second countdown regardless of the<br />
suction line temperature.<br />
Door Switch (I21):<br />
Emergency Stop (I22):<br />
Fluid Temperature Safety (I23):<br />
Fluid Pressure Safety (I24):<br />
The door switch input is used to indicate if the chamber door is<br />
open or closed (if equipped). The "door ajar" status will be<br />
displayed on the system status monitor screen. If the door<br />
control option is enabled, the EZT will shut down the chamber<br />
when the door is opened. This input is active high, i.e., the input<br />
is on to indicate an “open door” status.<br />
The emergency stop input is used to indicate that the emergency<br />
stop has been activated (if equipped). This input is active high,<br />
i.e., the input must be on in order for the alarm to be indicated.<br />
When active (input on), the EZT shuts down the chamber until<br />
the alarm is acknowledged (silence button pressed on alarm<br />
monitor screen) and the input is off (requires manual reset of E-<br />
Stop button).<br />
The fluid system temperature safety input is used to indicate that<br />
the fluid temperature limit has been exceeded (LC chambers).<br />
This input is active high, i.e., the input must be on in order for the<br />
alarm to be indicated. When active (input on), the EZT shuts<br />
down the chamber until the alarm is acknowledged (silence<br />
button pressed on alarm monitor screen) and the input is off<br />
(requires manual reset of limit device).<br />
The fluid system pressure safety input is used to indicate that the<br />
fluid system has exceeded maximum operating pressures (LC<br />
chambers). This input is active low, i.e., the input must be off in<br />
order for the alarm to be indicated. When active (input off), the<br />
EZT shuts down the chamber until the alarm is acknowledged<br />
(silence button pressed on alarm monitor screen) and the input is<br />
off.<br />
51
EZT-560i Technical Manual<br />
Fluid Flow Safety (I25):<br />
The fluid system flow safety input is used to indicate that the fluid<br />
system has proper flow (LC chambers). This input is active low,<br />
i.e., the input must be off in order for the alarm to be indicated.<br />
When active (input off), the EZT shuts down the chamber until<br />
the alarm is acknowledged (silence button pressed on alarm<br />
monitor screen) and the input is off.<br />
The EZT has a built in time delay to disable the low flow alarm<br />
until the pump has had a chance to start and begin moving fluid<br />
(5 seconds). If the input does not turn on within the start delay<br />
period, the alarm will be activated.<br />
Cargocaire Fault (I26):<br />
Power Failure(I27):<br />
The dehumidifier system fault input is used to indicate that there<br />
is a problem with the Cargocaire (if equipped). This input is<br />
active high, i.e., the input must be on in order for the alarm to be<br />
indicated. When active (input on), the EZT shuts down the<br />
chamber until the alarm is acknowledged (silence button pressed<br />
on alarm monitor screen) and the input is off (requires manual<br />
reset/service of dehumidifier unit).<br />
The power failure input is used to indicate that there is a primary<br />
power failure to the chamber. When the chamber is equipped<br />
with a battery backup option for the control circuit, it allows the<br />
EZT to send out an alarm message over its network interface to<br />
alert operators of the power outage.<br />
52
EZT-560i Technical manual<br />
7.1.1.1 Custom Input Description of Use (DTS, VTS, TSB)<br />
Basket Left (I14):<br />
Basket Right (I15):<br />
Basket Up (I16):<br />
Hot Bath Fluid Safety (I23):<br />
Cold Bath Fluid Safety (I24):<br />
Bath Level Safety (I25):<br />
Basket Down (I26):<br />
This control input is used to tell the EZT that the basket<br />
(DTS/TSB) is in the left position/hot bath. There is no user<br />
indication for this input.<br />
This control input is used to tell the EZT that the basket<br />
(DTS/TSB) is in the right position/cold bath. There is no user<br />
indication for this input.<br />
This control input is used to tell the EZT that the basket<br />
(VTS/TSB) is in the hot chamber/unload position. There is no<br />
user indication for this input.<br />
The hot bath fluid safety input is used on TSB’s to indicate a<br />
problem with the hot bath fluid system (pressure/temperature).<br />
This input is active high, i.e., the input must be on in order for the<br />
alarm to be indicated. When active (input on), the EZT shuts<br />
down the chamber until the alarm is acknowledged (silence<br />
button pressed on alarm monitor screen) and the input is off<br />
(requires manual reset of limit device).<br />
The cold bath fluid safety input is used on TSB’s to indicate that<br />
the cold bath fluid system has exceeded maximum operating<br />
pressures. This input is active low, i.e., the input must be off in<br />
order for the alarm to be indicated. When active (input off), the<br />
EZT shuts down the chamber until the alarm is acknowledged<br />
(silence button pressed on alarm monitor screen) and the input is<br />
off.<br />
The bath level safety input is used on TSB’s to indicate that a<br />
bath is low on fluid (if equipped with level sensors). This input is<br />
active high, i.e., the input must be on in order for the alarm to be<br />
indicated. When active (input on), the EZT will sound the alarm<br />
to obtain operator attention but will not shut down the chamber.<br />
The alarm will be shown on the system status monitor screen.<br />
This control input is used to tell the EZT that the basket<br />
(VTS/TSB) is in the cold chamber/down position. There is no<br />
user indication for this input.<br />
53
EZT-560i Technical Manual<br />
7.2 Standard Output Configuration<br />
CONNECTION INPUT STANDARD ALTITUDE DTS, VTS, TSB<br />
BO1-25 Q0 AIR CIRCULATORS LOW SPEED FANS COLD CHAMBER (DTS CENTER)<br />
BO1-23 Q1 RC BLOWER HIGH SPEED FANS HOT CHAMBER (DTS LEFT)<br />
BO1-21 Q2 SYSTEM 1 COMPRESSOR<br />
BO1-19 Q3 SYSTEM 2 COMPRESSOR<br />
BO1-17 Q4 CHAMBER LIGHT(S)<br />
BO1-15 Q5 WINDOW/DOOR FRAME HEATER(S)<br />
BO1-13 Q6 PRODUCT LIMIT<br />
BO1-11 Q7 AUDIBLE ALARM<br />
BO2-25 Q10 RATE MASTER CONTROL HOT CHAMBER (DTS RIGHT)<br />
BO2-23 Q11 SYSTEM 1 SOLENOIDS<br />
BO2-21 Q12 DEFROST SOLENOID<br />
BO2-19 Q13 SYSTEM 1 CASCADE SOLENOID CONTROL (RATE MASTER/DEFROST)<br />
BO2-17 Q14 MINIMUM COOL ENABLE<br />
BO2-15 Q15 MAXIMUM COOL ENABLE<br />
BO2-13 Q16 MINIMUM HEAT ENABLE MAX HEAT (DTS RIGHT)<br />
BO2-11 Q17 MAXIMUM HEAT ENABLE (DTS LEFT)<br />
BO3-20 Q30 DEHUMIDIFY ENABLE<br />
BO3-18 Q31 RH COOL ENABLE<br />
BO3-16 Q32 HUMIDITY SYSTEM<br />
BO3-14 Q33 MAXIMUM HUMIDIFY ENABLE<br />
BO3-12 Q34 DRY AIR PURGE SYSTEM<br />
BO3-10 Q35 AIR CONTROL SOLENOID<br />
BO3-8 Q36 FROZEN COIL CONTROL SOLENOID<br />
BO3-6 Q37 FROZZEN COIL BYPASS SOLENOID<br />
BO3-19 Q40 LN2 SUPPLY SOLENOID<br />
BO3-17 Q41 LN2 CONTROL SOLENOID<br />
BO3-15 Q42 LN2 BOOST SOLENOID<br />
BO3-13 Q43 NOT USED ALTITUDE SYSTEM IN TRANSFER DOOR LOCK<br />
BO3-11 Q44 NOT USED MIN DIVE TRANSFER LEFT<br />
BO3-9 Q45 NOT USED MAX DIVE TRANSFER RIGHT<br />
BO3-7 Q46 NOT USED MIN VACUUM TRANSFER UP<br />
BO3-5 Q47 NOT USED MAX VACUUM TRANSFER DOWN<br />
Connection -<br />
Output -<br />
This column designates the physical wire connection point to the PLC for the output.<br />
This column designates the output address in the PLC as well as the marking used to<br />
identify wiring and hardware associated with the output.<br />
54
EZT-560i Technical manual<br />
7.2.1 Output Description of Use<br />
Air Circulator(s) (Q0):<br />
This output is used to turn the chamber air circulator(s) on and<br />
off when the chamber event 1 is turned on and off.<br />
If defrost is enabled, this output will turn off the air circulator(s)<br />
during defrost and will turn back on once defrost is complete.<br />
RC Blower (Q1):<br />
This output is active on RC units and is used to turn the RC<br />
blower on and off when the chamber is on and event 8 is turned<br />
on and off.<br />
If defrost is enabled, this output will turn off the blower during<br />
defrost and will turn it back on once defrost is complete.<br />
System 1 Compressor (Q2):<br />
This output is used to turn system 1 compressor on and off<br />
based on the demand for cooling or dehumidification. The<br />
output turns on when the loop percentage of output exceeds the<br />
on percentage for the delay period set in the configurator. The<br />
output will turn off the compressor when the loop percentage of<br />
output exceeds the off percentage for the delay period set in the<br />
configurator.<br />
The output also turns on and off with the pressure switch input<br />
(I3) if pumpdown is enabled. If main power is off for more than<br />
30 minutes, the input will be ignored, and the output will remain<br />
off, until pumpdown is reset automatically after 4 hours or<br />
manually by the operator.<br />
The output is also controlled by the defrost pressure switch (I17).<br />
When defrost is enabled, the output will turn system 1<br />
compressor on and off with the input in order to maintain the<br />
discharge pressure of system 2 at the proper range during<br />
defrost. Note that when large horsepower defrost is enabled, the<br />
output will remain on at all times and is not cycled on and off.<br />
System 2 Compressor (Q3):<br />
This output is used to turn system 2 compressor on and off<br />
based on the demand for cooling. It turns on after the stager<br />
start delay time set in the configurator. The timer begins once<br />
system 1 output turns on. The output turns off when system 1<br />
output turns off.<br />
During single stage humidity operation, the output is also turned<br />
off. The output will remain off until humidity is turned off. The<br />
stager start timer will begin again and turn on the output.<br />
During defrost, the output is forced on to maintain system 2<br />
operation in order to provide hot gas for defrosting of the cooling<br />
coils. Once defrost is complete, the output will be controlled by<br />
normal cooling requirements.<br />
Chamber Light(s) (Q4):<br />
This output toggles on and off to turn the chamber light(s) on and<br />
off when the light icon on the HMI is pressed.<br />
55
EZT-560i Technical Manual<br />
Window/Door Frame Heater (Q5):<br />
This output is used to turn the window heater(s) on and off based<br />
on the air temperature set point set in the configurator. When<br />
the air temperature drops below the set point, the output will turn<br />
on after a 1 minute delay. Once the air temperature rises above<br />
the set point, the output will then turn off after a 1 minute delay.<br />
The output will also turn on whenever the humidity system is<br />
enabled. This keeps the window clear during high dewpoint<br />
conditions in the chamber.<br />
Product Safety (Q6):<br />
Audible Alarm (Q7):<br />
Rate Master Control (Q10):<br />
System 1 Solenoids (Q11):<br />
This output acts as a “chamber run” verification for the customer<br />
to use as a product under test enable. As long as the chamber<br />
is running, i.e., controlling temperature, this output will be on.<br />
When the chamber is turned off or in a critical alarm condition,<br />
this output is off.<br />
This output is used to turn the audible alarm on and off under<br />
fault conditions.<br />
This output is used for rate master refrigeration systems. It is<br />
used to switch cooling control between the system 1 and system<br />
2 valves. When the output is turned on, system 1 is being used<br />
to provide the cooling to the chamber. When the output is off,<br />
system is being used to provide cooling the chamber like a<br />
typical cascade system.<br />
This output is used to turn on the liquid line and hot gas<br />
solenoids on system 1 when the unit is equipped with<br />
pumpdown. This allows the solenoids to open and close<br />
independently of system 1 compressor operation so that the<br />
system can be pumped down.<br />
During normal cooling operation, this output will turn on with the<br />
system 1 compressor output (Q2). When the refrigeration<br />
system is no longer required to run, this output will turn off to<br />
isolate the high side of the system while the compressor<br />
continues to run in order to pump down the system.<br />
Defrost Solenoid (Q12):<br />
Cascade Solenoid Control (Q13):<br />
This output is used to turn on the hot gas defrost solenoid on<br />
chambers equipped with defrost. This output will turn on during<br />
the defrost period supplying hot gas to the cooling coil.<br />
The system 1 cascade solenoid control output is used on<br />
chambers with rate master refrigeration systems. It is used to<br />
disable refrigerant flow to the cascade when running in single<br />
stage mode.<br />
This output is also used to control cooling of system 2 when in<br />
defrost on large horsepower systems. This output will cycle on<br />
and off with the defrost pressure switch input (I17) in order to<br />
maintain system 2’s head pressure in the proper range. This<br />
allows system 1 compressor to run continuously so as not to<br />
cycle the compressor on and off.<br />
56
EZT-560i Technical manual<br />
Minimum Cool Enable (Q14):<br />
Maximum Cool Enable (Q15):<br />
Minimum Heat Enable (Q16):<br />
Maximum Heat Enable (Q17):<br />
Dehumidify Enable (Q30):<br />
RH Cool Enable (Q31):<br />
Humidity System (Q32):<br />
Maximum Humidify Enable (Q33):<br />
Dry Air Purge System (Q34):<br />
Air Control Solenoid (Q35):<br />
This output is used to enable and disable the cooling output from<br />
the 9300 controller, typically on chambers with defrost. When<br />
defrost is on, this output will be off to prevent any cooling from<br />
taking place in order to defrost the cooling coil.<br />
This output is used to enable and disable the maximum cooling<br />
solenoids based on the percentage of output set up in the<br />
configurator. When the loop output exceeds the maximum<br />
output on percentage for the on delay period set in the<br />
configurator, this output will turn on.<br />
This output is used to enable and disable the heating output from<br />
the 9300 controller, typically on chambers with defrost. When<br />
defrost in on, this output will be off to prevent any heating from<br />
taking place in order to minimize chamber temperature rise.<br />
This output is used to enable and disable the maximum heating<br />
SSR based on the percentage of output set up in the<br />
configurator. When the loop output exceeds the maximum<br />
output on percentage for the on delay period set in the<br />
configurator, this output will turn on.<br />
This output is used to enable and disable the control of the wet<br />
coil solenoid from dehumidification output of the 9300 controller.<br />
In normal humidity mode, this output will be on so that the wet<br />
coil solenoid can be cycled on and off. When operating in frozen<br />
coil mode (if equipped) this output will turn off in order to allow<br />
the dehumidification output of the 9300 controller to control the<br />
frozen coil solenoid (Q36).<br />
This output is active on cascade refrigeration systems that<br />
operate in single stage mode for humidity. This output will turn<br />
on in order to allow the cooling output of the 9300 to control the<br />
system 1 cooling solenoid.<br />
This output is used to turn the humidity system on and off with<br />
chamber event 2.<br />
This output is used to enable and disable the maximum boiler<br />
SSR based on the percentage of output set up in the<br />
configurator. When the loop output exceeds the maximum<br />
output on percentage for the on delay period set in the<br />
configurator, this output will turn on.<br />
This output is used to turn the dry air purge system on and off<br />
with chamber event 4. It will also turn on automatically when the<br />
chamber is equipped with the frozen coil (low RH) option, when<br />
needed to reach a low humidity condition.<br />
This output is used when the chamber is equipped with the<br />
frozen coil (low RH) option. It is used to switch the purge air<br />
supply solenoid control between the dehumidification output of<br />
the 9300 controller when the humidity system is on, or the dry<br />
purge system output when only dry air purge is on.<br />
57
EZT-560i Technical Manual<br />
Frozen Coil Control Solenoid (Q36): This output is used to enable and disable the control of the<br />
frozen coil solenoid from dehumidification output of the 9300<br />
controller. In normal humidity mode, this output will be of so that<br />
the wet coil solenoid can be cycled on and off (Q30). When<br />
operating in frozen coil mode this output will turn on in order to<br />
allow the dehumidification output of the 9300 controller to control<br />
the frozen coil solenoid.<br />
Frozen Coil Bypass Solenoid (Q37): This output is used to turn on the bypass solenoid in order to<br />
bypass the EPR valve on the dehumidification coil when running<br />
in frozen coil mode.<br />
LN2 Supply Solenoid (Q40):<br />
LN2 Control Solenoid (Q41):<br />
This output is used to turn the LN2 supply solenoid on and off<br />
based on chamber event 3. If the boost cool system is set for<br />
control mode, it will automatically turn on when required in order<br />
for the chamber to obtain temperatures below the capabilities of<br />
the refrigeration system.<br />
This output is used on chambers that go to ultra low<br />
temperatures, i.e., temperatures that exceed the minimum<br />
operating temperatures of the refrigeration system.<br />
When “aux cool control” is selected in the configurator, the<br />
output will turn on to switch the cooling output of the 9300 to<br />
control the LN2 control solenoid. The output is enabled when<br />
the air temperature set point and air temperature are below the<br />
“boost cool SP disable” set in the configurator.<br />
LN2 Boost Solenoid (Q42):<br />
This output is used to turn the boost cooling solenoid on and off<br />
based on the demand for cooling and settings made in the<br />
configurator. It will turn on when the loop output exceeds the<br />
“aux cool on percentage” for the on delay time set in the<br />
configurator.<br />
58
EZT-560i Technical manual<br />
7.2.1.1 Custom Output Configuration (Altitude)<br />
Low Speed Fans (Q0):<br />
High Speed Fans (Q1):<br />
Altitude System (Q43):<br />
Min Dive (Q44):<br />
Max Dive (Q45):<br />
Min Vacuum (Q46):<br />
Max Vacuum (Q47):<br />
This output is used to turn on the chamber air circulator(s) in low<br />
speed mode. When the altitude exceeds the “Alt Hi Speed Fan<br />
Enable SP” in the configurator, this output turns off so the high<br />
speed fan output (Q1) can turn on and control the air circulators.<br />
This output is used to turn on the chamber air circulator(s) in<br />
high speed mode. When the altitude exceeds the “Alt Hi Speed<br />
Fan Enable SP” in the configurator, this output turns on. When<br />
the altitude drops below the set point, this output turns back off<br />
so the low speed fan output (Q0) can turn on and control the air<br />
circulators.<br />
This output is used to enable and disable the altitude system and<br />
associated components with chamber event 5.<br />
This output is used to enable and disable the 9300 controller<br />
output control of the minimum dive solenoid.<br />
This output is used to enable and disable the 9300 controller<br />
output control of the maximum dive solenoid. When the loop<br />
output exceeds the maximum output on percentage for the on<br />
delay period set in the configurator, this output will turn on.<br />
This output is used to enable and disable the 9300 controller<br />
output control of the minimum vacuum solenoid.<br />
This output is used to enable and disable the 9300 controller<br />
output control of the maximum vacuum solenoid. When the loop<br />
output exceeds the maximum output on percentage for the on<br />
delay period set in the configurator, this output will turn on.<br />
59
EZT-560i Technical Manual<br />
7.2.1.2 Custom Output Configuration (DTS, VTS, TSB)<br />
Hot (left) Chamber (Q0):<br />
Cold (center) Chamber (Q1):<br />
Hot (right) Chamber (Q10):<br />
This output is used to turn on the left chamber of a DTS or the<br />
hot chamber of a VTS using chamber event 1. It is also used to<br />
enable both baths for a TSB. When used for a DTS or VTS, the<br />
output will turn off during a transfer to stop the fans and then turn<br />
back on once the transfer is complete.<br />
This output is used to turn on the center chamber of a DTS or<br />
the cold chamber of a VTS using chamber event 2. It is not used<br />
for a TSB. The output will turn off during a transfer to stop the<br />
fans and then turn back on once the transfer is complete.<br />
This output is used to turn on the right chamber of a DTS using<br />
chamber event 7. The output will turn off during a transfer to<br />
stop the fans and then turn back on once the transfer is<br />
complete.<br />
Maximum Heat (right) Enable (Q16): This output is used to enable and disable the maximum heating<br />
SSR for the right chamber of a DTS. When the loop output<br />
exceeds the maximum output on percentage for the on delay<br />
period set in the configurator, this output will turn on.<br />
In Transfer Door Lock (Q43):<br />
Transfer Left (Q44):<br />
Transfer Right (Q45):<br />
Transfer Up (Q46):<br />
Transfer Down (Q47):<br />
This output is used to enable a locking mechanism on the<br />
chamber door (if equipped) to prevent the door from being<br />
opened during a transfer. When the transfer is complete, the<br />
output turns off.<br />
This output is used to turn on the transfer mechanism to move<br />
the basket to the left on a DTS or TSB. For a DTS it transfers<br />
the left basket into the left (hot) chamber and the right basket<br />
into the center (cold) chamber. On a TSB, it transfers the basket<br />
from the cold or unload position to the unload or hot position.<br />
This output is used to turn on the transfer mechanism to move<br />
the basket to the right on a DTS or TSB. For a DTS it transfers<br />
the right basket into the right (hot) chamber and the left basket<br />
into the center (cold) chamber. On a TSB, it transfers the basket<br />
from the hot or unload position to the unload or cold position.<br />
This output is used to turn on the transfer mechanism to move<br />
the basket up on a VTS or TSB equipped with a pneumatic<br />
transfer mechanism. For a VTS, the basket is transferred into<br />
the hot chamber. On pneumatic TSB systems, this lifts the<br />
basket out of the baths so that it can move from side to side. It<br />
also holds the basket up when the unload position is selected.<br />
This output is used to turn on the transfer mechanism to move<br />
the basket down on a VTS or TSB equipped with a pneumatic<br />
transfer mechanism. For a VTS, the basket is moved into the<br />
cold chamber. On pneumatic TSB systems, this lowers the<br />
basket into the baths once it is positioned over the hot or cold<br />
bath.<br />
60
EZT-560i Technical manual<br />
7.3 PLC Status Indicators<br />
All of the digital input and output points on the PLC have indicator lights that tell whether the input or<br />
output is on or off. The lights are numbered for quick identification. By using the status lights, it can<br />
help you diagnose a wiring or component problem in the system. For example, if the output light on<br />
the PLC is on indicating that the output relay should be on, and the relay is off, it could indicate a bad<br />
relay or a problem with the wiring to the relay.<br />
The CPU has connections for all inputs used on a standard system. This includes inputs I0-I17 and<br />
I20-I27. It also has the output connections for the first 16 outputs used on standard chambers, Q0-<br />
Q7 and Q10-Q17.<br />
The remaining outputs are used depending upon the options present on the chamber. The outputs<br />
are added through the use of add on output modules that connect to the right side of the CPU. When<br />
options are added, a 16-point digital output card is attached in order to obtain outputs Q30-Q37 and<br />
Q40-Q47.<br />
The output numbering is octal based. That means that the outputs increment in groups of 8.<br />
The first group is outputs Q0-Q7. The second group is outputs Q10-Q17. The next<br />
incremental group starts with the addition of a digital output card. It begins at output Q30.<br />
The range of Q20-Q27 is skipped.<br />
CPU Connector 1<br />
0-13 = I0-I13<br />
0-7 = Q0-Q7<br />
CPU Connector 2<br />
14-27 = I14-I27<br />
10-17 = Q10-Q17<br />
16 Point Output Card<br />
0-17 = Q30-Q47<br />
Figure 7-1 PLC Input/Output Indicators<br />
61
EZT-560i Technical Manual<br />
7.3.1 I/O Ribbon Cable Connections<br />
The PLC input and output connections are made through ribbon cables to break out wiring boards for<br />
individual conductors. The ribbon cables may or may not be keyed. If the cable is not keyed, it can<br />
be inserted “upside down”. This will cause the chamber to not function correctly and can cause<br />
numerous alarms to appear on the EZT, none of which are real.<br />
The ribbon cables are marked with a red stripe down one side indicating pin 1. When inserting the<br />
ribbon cables, make sure that the red stripe is oriented the same direction on both the PLC and the<br />
break out board. That is, pin 1 to pin 1 or pin 20 to pin 20 for example.<br />
Red Stripe Designating<br />
“Pin 1” Side of Cable<br />
Pin 1 on Connector<br />
Terminal 1 on Break-Out Board<br />
Figure 7-2 Ribbon Cable Connection<br />
62
EZT-560i Technical manual<br />
8. Adjusting EZT Configuration options<br />
The EZT configurator is used to set the functionality of the EZT to match the chamber type and<br />
available options on the chamber. The settings contained in the configurator affect the control of<br />
chamber components and systems. Changes to these parameters should only be performed by or<br />
under the supervision of CSZ authorized service personnel.<br />
Changing certain configurator settings to values other than those listed on the EZT<br />
Configuration sheet provided with the chamber can cause damage to the chamber<br />
and present hazards to personnel. Changes to any configurator settings not<br />
specifically called out in this manual may only be done with the consent of an<br />
authorized CSZ representative.<br />
Failure to comply with this WARNING will void the chamber’s warranty.<br />
63
EZT-560i Technical Manual<br />
8.1 Accessing the EZT Configurator<br />
To access the EZT configurator, you must quit the EZT560i application and start the configurator<br />
program. To do this, you must have the proper security access to exit the EZT application. All<br />
chambers leave the factory with a default user name and password. Select “Logon” under the<br />
security menu and enter the default password information:<br />
User: FACTORY<br />
Password: CONTROL<br />
Once you are logged in as “Factory”, you have the ability to exit the EZT560i application. To exit the<br />
application, select “System Maintenance” from the chamber setup menu. Select “Exit Application”<br />
from the system maintenance setup menu. Press the “Exit Application” button to quit the EZT-560i<br />
application.<br />
Figure 8-1 Exit Application<br />
If security is not enabled, you will not have to log on to gain access to quit the application. However,<br />
if security is enabled, and the default password is no longer valid, then you must either obtain the<br />
necessary user name and password from the end user of the chamber, or you can bypass the<br />
security by turning off power to the chamber.<br />
With the power turned off, remove the compact flash card from the back of the HMI. Turn the power<br />
back on and allow the HMI to boot up to the Windows CE desktop (blue screen). Insert the CF card<br />
back into the slot in the HMI making sure to insert it in the proper orientation. Touch the thin gray bar<br />
at the bottom of the screen to show the Windows task bar and select “Windows Explorer” from the<br />
start menu.<br />
Figure 8-2 Windows Start Menu<br />
64
EZT-560i Technical manual<br />
Open the “StorageCard” folder.<br />
Figure 8-3 Storage Card<br />
Open the “EZT560” folder.<br />
Figure 8-4 EZT560 Folder<br />
Select “EZT560 Config” from the EZT560 folder to start the configurator program.<br />
Figure 8-5 EZT560 Config<br />
When the configurator application starts, it will default to the “Number of Loops/Monitors” screen.<br />
65
EZT-560i Technical Manual<br />
8.2 Number of Loops/Monitors<br />
The number of loops/monitors screen is accessed from the “Loops” menu. It is used to configure the<br />
EZT for the number of control loops that are present (9300 controllers), how many monitor inputs are<br />
used (Eagle input module) and how many analog inputs and outputs are installed on the EZT.<br />
Figure 8-6 Number of Loops/Monitors<br />
Set the number of each item by touching the respective number field. Enter the correct value using<br />
the keypad and press done. The EZT can have up to 5 control loops, 8 monitor loops, 5 analog<br />
inputs and 4 analog outputs maximum.<br />
Parameter Descriptions<br />
Total # of Control Loops:<br />
Sets the number of 9300 control loop displays that are shown on the<br />
loop view screens, trend, etc. of the EZT (one for each controlled<br />
process, i.e., temperature, humidity, etc.).<br />
The “Loops/Monitor Tagnames” screen is where the mode of<br />
the control loop is selected and enabled/disabled. If a loop<br />
is being removed, you must first change the loop to disabled<br />
and then change the total number of control loops. Only<br />
changing the number of control loops will remove the display<br />
from the loop view screens but will not disable the loop. If<br />
the 9300 controller is then removed, the chamber will shut<br />
down on a “loop comms failure” alarm.<br />
Total # of Monitor Loops:<br />
Total # of Analog Inputs:<br />
Total # of Analog Outputs:<br />
Sets number of monitor inputs connected to the Eagle module. For<br />
each enabled input, another loop is added to the loop view screens,<br />
trend, etc. for viewing.<br />
Sets the number of analog inputs connected to the EZT. When one<br />
or more are enabled, the “Analog Input” menu item under the I/O<br />
menu in system maintenance will be enabled. This allows the<br />
input(s) to be configured from the EZT application.<br />
Sets the number of analog outputs connected to the EZT. When one<br />
or more are enabled, the “Analog Output” menu item under the I/O<br />
menu in system maintenance will be enabled. This allows the<br />
input(s) to be configured from the EZT application.<br />
66
EZT-560i Technical manual<br />
8.3 Loops/Monitor Tagnames<br />
The “Loops/Monitor Tagnames” screen is accessed from the “Loops” menu. This screen allows you<br />
to define what type of control loop it is, what its name is and specific control output settings for the<br />
loop.<br />
Figure 8-7 Loop/Monitor Tagnames<br />
The arrow keys provided on the upper right of the screen allow you to scroll through all available<br />
control loops and monitor loops that have been set on the ”Number of Loops/Monitors” screen.<br />
You must press the “Set” button to save changes to the input type. Be sure to press the “Set”<br />
button prior to switching to another loop or another configuration screen or any change to the<br />
input type will not be saved.<br />
Parameter Descriptions<br />
Input Type:<br />
Sets the type of control loop (temperature, humidity, altitude, etc.).<br />
Do not alter the loop type to any selection other than what is<br />
called out on the EZT Configuration form supplied with the<br />
chamber or the chamber may not operate properly and damage to<br />
equipment can occur.<br />
Tagname:<br />
Alm1 Message:<br />
Eng Units:<br />
Sets the name of the loop (what its controlling). This description is used<br />
throughout the loop and trend screens as well as input selection for data logging.<br />
Sets the alarm message that will be used for input alarms. This will be the name<br />
displayed on the alarm monitor screen when the user configurable alarm is<br />
active.<br />
Sets the units for the input (degrees C/F, RH, KFT, etc.). The units are displayed<br />
on the single and dual loop display screen.<br />
Dec Pos: Sets how many decimal positions to use when displaying an input (always 1).<br />
67
EZT-560i Technical Manual<br />
Max Heat%:<br />
Heat Dly:<br />
Max Cool%:<br />
Cool Dly:<br />
Sets the loop percentage of output at which the maximum heat output is enabled.<br />
Sets the delay in seconds for which the loop percentage of output must exceed<br />
the max heat% before the max heat output will turn on.<br />
Sets the loop percentage of output at which the maximum cool output is enabled.<br />
Sets the delay in seconds for which the loop percentage of output must exceed<br />
the max cool% before the max heat output will turn on.<br />
68
EZT-560i Technical manual<br />
8.4 Chamber Options<br />
The “Chamber Options” screen is accessed from the “Chamber” menu. This screen is used to define<br />
what type of chamber the EZT-560i is being used on and enables special logic for certain types of<br />
chambers.<br />
Figure 8-8 Chamber Options<br />
Only one selection can be made at a time. If a new selection is made, the other selection will turn off<br />
automatically. For standard temperature and humidity or altitude chambers, all options will typically<br />
be off.<br />
Parameter Descriptions<br />
All Options Off:<br />
RC Logic Enabled:<br />
LC Logic Enabled:<br />
VTS Logic Enabled:<br />
Used for all standard temperature/humidity/altitude chambers.<br />
Enables the logic for the RC blower motor. The logic ties event 8 to output<br />
Q1 to turn the RC blower motor on and off with the event. Note that this<br />
option is typically only used for retrofitting RC chambers that require event<br />
control for the blower.<br />
Enables the logic for pump control and fluid system monitoring. The logic<br />
turns on output Q1 for the pump with event 1 and enables the input alarm<br />
logic for high temperature (I23), pressure (I24) and flow (I25) monitoring.<br />
Enables the logic for basket position and dual zone control. Loop 1 is set for<br />
hot chamber control and loop 2 for cold chamber control. The logic turns on<br />
output Q1 for the hot chamber using event 1 while event 2 becomes the cold<br />
chamber. Outputs Q46 and Q47 for basket up and down are enabled<br />
through events 5 and 6.<br />
Inputs I16 and I26 are used for basket position monitoring for hot and cold<br />
chamber positions respectively. The door switch input (I21) is monitored to<br />
disable the transfer if either door is opened.<br />
69
EZT-560i Technical Manual<br />
DTS Logic Enabled:<br />
Enables the logic for basket position and three zone control. Loop 1 is set for<br />
the left (hot) chamber control, loop 2 for the center (cold) chamber control<br />
and loop 3 is for the right (hot) chamber control. Loops 4 and 5 are set for<br />
product control for the left and right basket respectively.<br />
The logic turns on output Q1 for the left chamber using event 1 while event 2<br />
becomes the center chamber. Output Q10 becomes the right chamber<br />
control using event 7 with output Q16 being enabled for the max heat output<br />
control. Outputs Q44 and Q45 for basket left and right are enabled through<br />
events 5 and 6.<br />
Inputs I14 and I15 are used for basket position monitoring for left and right<br />
chamber positions respectively. The door switch input (I21) is monitored to<br />
disable the transfer if any door is opened.<br />
TSB Logic Enabled:<br />
Enables the logic for basket position and dual zone control. Loop 1 is set for<br />
the left (hot) bath control and loop 2 for the right (cold) bath control. The<br />
door switch input (I21) is monitored to disable the transfer if the lid/door is<br />
opened. Inputs I23 and I24 are enabled for the hot and cold bath fluid<br />
safeties respectively. If the baths are equipped with low level floats, I25 is<br />
used as a low level warning input.<br />
Depending on the transfer mechanism used, different inputs and outputs are<br />
used to transfer the basket to each position. For motor operated transfer<br />
mechanisms, outputs Q44 and Q45 for basket left and right are used to<br />
position the basket. For air cylinder operated transfer mechanisms, outputs<br />
Q44 and Q45 are used for the left and right movement with outputs Q46 and<br />
Q47 used to control the up and down movement.<br />
Events 5 and 6 with event 7 for the unload position are used to select the<br />
three positions. Inputs I14 and I15 are used to monitor the left (hot) and right<br />
(cold) positions. Inputs I16 and I26 are used for up and down position<br />
monitoring for air cylinder control. On units with a motor operated<br />
mechanism, I26 is used for the unload position indication.<br />
Door Switch On/Off:<br />
Air/Motor Transfer:<br />
Sets whether or not the opening and closing of the chamber door (when<br />
equipped with a door switch on input I21) turns the chamber off and on. If<br />
enabled, when the door is opened, the chamber will shut down. When the<br />
door is closed, the chamber will turn back on.<br />
For DTS/VTS/TSB chambers, this sets the type of transfer mechanism used<br />
to move the basket between zones. This setting must match the transfer<br />
mechanism type or the transfer mechanism may be damged.<br />
70
EZT-560i Technical manual<br />
8.5 Refrigeration Options<br />
“Refrigeration Options” screen is accessed from the “Chamber” menu. This screen is used to define<br />
what type of refrigeration system the chamber has and how the EZT-560i is to control it.<br />
Figure 8-9 Refrigeration Options<br />
You must press the “Set” button to save changes to the refrigeration and/or defrost type<br />
selections. Be sure to press the “Set” button prior to switching to another configuration<br />
screen or any change to the refrigeration and/or defrost type will not be saved.<br />
Parameter Descriptions<br />
Refrig Type:<br />
Sets the type of refrigeration system installed on the chamber (can be none).<br />
Do not change the refrigeration type to any selection other than<br />
what is installed on the chamber and called out on the EZT<br />
Configuration form supplied with the chamber or the refrigeration<br />
system may not operate properly and damage can occur.<br />
Cmp On %:<br />
Sets the loop percentage of output required to turn enable the refrigeration<br />
system because cooling is required.<br />
Cmp On Dly: Sets the delay in seconds for which the loop output must exceed the cmp on %<br />
before the refrigeration system is turned on.<br />
Cmp Off %:<br />
Sets the loop percentage of output required to disable the refrigeration system<br />
because cooling is no longer required.<br />
Cmp Off Dly: Sets the delay in seconds for which the loop output must exceed the cmp off %<br />
before the refrigeration system is turned off.<br />
Stager Dly:<br />
Sets the stager start delay time in seconds for system 2 on cascade systems.<br />
71
EZT-560i Technical Manual<br />
Defrost:<br />
Sets the defrost mode based on installed defrost components.<br />
- “Defrost On” is used for smaller compressors (typically smaller than 7.5hp)<br />
- “Large HP Defrost” is used for larger systems (typically larger than 7.5hp)<br />
The large horsepower defrost is used to control the cascade condenser liquid line<br />
cooling solenoids on cascade systems. It cycles the solenoids on and off to<br />
maintain system 2 head pressures rather than cycling the system 1 compressor<br />
on and off. Cycling large horsepower compressors is detrimental to the life of the<br />
compressor and is not recommended by the manufacturer.<br />
Pumpdown On/Off:<br />
Pumpdown Reset Time Out:<br />
Enables or disables pumpdown mode.<br />
Sets the time in seconds for which the chamber can be without<br />
power before pumpdown will be disabled and require manual reset<br />
or the four hour automatic reset delay.<br />
72
EZT-560i Technical manual<br />
8.6 Humidity Options<br />
The “Humidity Options” screen is accessed from the “Chamber” menu. This screen is used to define<br />
what type of humidity system the chamber has and how the EZT-560i is to control it.<br />
Figure 8-10 Humidity Options<br />
You must press the “Set” button to save changes to the humidity system type selection. Be<br />
sure to press the “Set” button prior to switching to another configuration screen or any<br />
change to the humidity system type will not be saved.<br />
Parameter Descriptions<br />
Humid Type:<br />
Cmp On %:<br />
Cmp On Dly:<br />
Cmp Off %:<br />
Cmp Off Dly:<br />
Hum Min SP:<br />
Hum Max SP:<br />
Sets the type of humidity system installed on the chamber.<br />
- “Humidity Installed” is for single stage/tundra systems or cascade systems<br />
without a separate RH cooling circuit on system 1.<br />
- “Single stage humid installed” is for cascade systems that run in single<br />
stage mode during humidity (have separate RH cooling circuit on system 1).<br />
Sets the loop percentage of output required to enable the refrigeration system in<br />
order to provide dehumidification.<br />
Sets the delay in seconds for which the loop percentage of output must exceed<br />
the cmp on % before the refrigeration system is turned on.<br />
Sets the loop percentage of output required to disable the refrigeration system<br />
because dehumidification is no longer required.<br />
Sets the delay in seconds for which the loop percentage of output must exceed<br />
the cmp off % before the refrigeration system is turned off<br />
Sets the minimum air temperature set point at which the humidity system will<br />
operate. When the air temperature set point and/or air temperature is below this<br />
value, the humidity system will be automatically turned off and the system status<br />
indicator “RH TMP DISABLE” will be lit.<br />
Sets the maximum air temperature set point at which the humidity system will<br />
operate. When the air temperature set point and/or air temperature is above this<br />
value, the humidity system will be automatically turned off and the system status<br />
indicator “RH TMP DISABLE” will be lit.<br />
73
EZT-560i Technical Manual<br />
Temp Comp On/Off:<br />
Enables or disables the humidity sensor temperature compensation<br />
algorithm in the EZT depending on whether or not a compensated<br />
sensor is used.<br />
The compensation is for a Vaisala HMM30C sensor only. Do not<br />
use it for other brands of sensors. This should be disabled when<br />
using compensated humidity sensors. If set incorrectly, the EZT<br />
will not read the correct humidity in the chamber.<br />
Condensation On/Off:<br />
Enables or disables the condensation control option. This feature can<br />
reduce the formation of condensation during testing on product within the<br />
chamber. However, it can greatly reduce the performance of the<br />
chamber. This option is used for special circumstances only.<br />
74
EZT-560i Technical manual<br />
8.7 Purge/Lo RH Options<br />
The “Purge/Lo RH Options” screen is accessed from the “Chamber” menu. This screen is used to<br />
define what type of purge system is installed on the chamber and what dewpoint limits the humidity<br />
system is allowed to control to, if equipped.<br />
Figure 8-11 Purge/Lo RH Options<br />
You must press the “Set” button to save changes to the purge system type selection. Be<br />
sure to press the “Set” button prior to switching to another configuration screen or any<br />
change to the purge system type will not be saved.<br />
Parameter Descriptions<br />
Purge/Low RH Type: Sets the type of purge system installed.<br />
- “Dry Air Purge” is used when just the air dryer is installed.<br />
- “Low RH Option Installed” is used when the frozen coil option is installed.<br />
Min Dewpoint Limit:<br />
Sets the minimum dewpoint that the chamber will control to. In essence, this<br />
limits the minimum humidity level that the chamber can achieve at a given<br />
temperature.<br />
This value is used to protect the refrigeration system from liquid refrigerant<br />
flood back that can happen when trying to achieve to low of a humidity level<br />
at lower air temperatures.<br />
Standard humidity is limited to a 1.6C (35F) dewpoint.<br />
The low RH option is limited to a -30.0C (-22F) dewpoint.<br />
Max Dewpoint Limit:<br />
Sets the maximum dewpoint that the chamber will control to. In essence, this<br />
limits the maximum humidity that the chamber can achieve at a given<br />
temperature.<br />
This value is primarily used to protect modular walk-ins. The modular walk-in<br />
panels can not withstand high temperature and humidity levels.<br />
Standard chambers typically have a setting of 100C (212F).<br />
Modular walk-ins are typically limited to 70C (158F).<br />
75
EZT-560i Technical Manual<br />
8.8 Auxiliary Cooling Options<br />
The “Aux Cooling Options” screen is accessed from the “Chamber” menu. This screen is used to<br />
define what type of boost cooling the chamber has, if equipped.<br />
Figure 8-12 Aux Cooling Options<br />
You must press the “Set” button to save changes to the auxiliary cooling type selection. Be<br />
sure to press the “Set” button prior to switching to another configuration screen or any<br />
change to the auxiliary cooling type will not be saved.<br />
Parameter Descriptions<br />
Aux Cooling Type:<br />
Sets the type of boost cooling system installed on the chamber.<br />
- “Aux cool boost” is for the standard boost option that is used to assist the<br />
refrigeration system.<br />
- “Aux cool control” is for chambers that have extended low temperature<br />
operation which go colder than the range of the refrigeration system.<br />
Boost Cool Temp SP Disable: Sets the temperature below which the refrigeration system is<br />
automatically disabled if “aux cool control” is selected. The boost<br />
cooling system will then switch to control mode and start controlling<br />
temperature below this set point.<br />
If “aux cool boost” is selected, the boost outputs will be disabled<br />
below this set point to prevent the chamber from exceeding the limits<br />
of the refrigeration system.<br />
For boost only mode, this set point must be set no<br />
lower than the minimum achievable temperature of the<br />
refrigeration system or the compressors can be<br />
damaged.<br />
Aux Cool On Percentage:<br />
Aux Cool On Delay:<br />
Sets the loop percentage of output required to enable the boost<br />
cooling output.<br />
Sets the delay in seconds for which the loop percentage of output<br />
must exceed the aux cool on percentage before the refrigeration<br />
boost cool output is turned on.<br />
76
EZT-560i Technical manual<br />
8.9 Configuration Options<br />
The “Configuration Options” screen is accessed from the “Chamber” menu. This screen is used to<br />
set general values relating to altitude system operation and other options.<br />
Figure 8-13 Altitude Options<br />
Set the value of each item by touching the respective number field. Enter the correct value using the<br />
keypad and press done. Enable the digital inputs or special settings by pressing the respective<br />
enable buttons.<br />
Parameter Descriptions<br />
Window Heater Enable SP:<br />
Sets the temperature below which the window heater turns on.<br />
Alt Hi Speed Fan Enable SP: Sets the altitude (in Kft) above which the high speed fans will be<br />
turned on.<br />
Alt Cond System Disable:<br />
Digital Inputs Off/On:<br />
Special Settings Off/On:<br />
Sets the altitude above which the conditioning system will be<br />
automatically disabled.<br />
Enables/disables the digital input option on the EZT. The digital<br />
input card must be installed on the EZT for the option to work.<br />
Enables/disables the special settings screen in the EZT application<br />
for custom settings use. If used on a chamber, it will be application<br />
specific.<br />
77
EZT-560i Technical Manual<br />
8.10 CSZ Events<br />
The “CSZ Events” screen is accessed from the “Event/Alarm Tags” menu. This screen is used to set<br />
the names for the events of chamber options present.<br />
Figure 8-14 CSZ Event Names<br />
To change or edit a tag name, touch the position for the event and change the name using the pop-up<br />
keypad. Note that event names are limited to 20 characters in length.<br />
Altering the event names from those listed on the EZT Configuration sheet provided with the<br />
chamber may make their use unclear and cause operator confusion. Use discretion when<br />
altering tag names.<br />
78
EZT-560i Technical manual<br />
8.11 Critical Chamber Alarms<br />
The “Critical Chamber Alarms” screen is accessed from the “Event/Alarm Tags” menu. This screen is<br />
used to set the names for the different system alarms in the chamber.<br />
Figure 8-15 Critical Chamber Alarm Names<br />
To change or edit a tag name, touch the position for the alarm and change the name using the popup<br />
keypad. Note that alarm names are limited to 20 characters in length.<br />
Altering the alarm names from those listed on the EZT Configuration sheet provided with the<br />
chamber may cause operator confusion when diagnosing alarms. Use discretion when<br />
altering tag names.<br />
79
EZT-560i Technical Manual<br />
8.12 Critical Refrigeration Alarms<br />
Access the “Critical Refrigeration Alarms” screen from the “Event/Alarm Tags” menu. This screen is<br />
used to set the names for the different refrigeration system alarms.<br />
Figure 8-16 Critical Refrigeration Alarm Names<br />
To change or edit a tag name, touch the position for the alarm and change the name using the popup<br />
keypad. Note that alarm names are limited to 20 characters in length.<br />
Altering the alarm names from those listed on the EZT Configuration sheet provided with the<br />
chamber may cause operator confusion when diagnosing alarms. Use discretion when<br />
altering tag names.<br />
80
EZT-560i Technical manual<br />
8.13 Non-Critical Alarms<br />
Access the “Non-Critical Alarms” screen from the “Event/Alarm Tags” menu. This screen is used to<br />
set the names for the different system status alarms such as service monitors.<br />
Figure 8-17 Non-Critical Alarm Names<br />
To change or edit a tag name, touch the position for the alarm and change the name using the popup<br />
keypad. Note that alarm names are limited to 20 characters in length.<br />
Altering the alarm names from those listed on the EZT Configuration sheet provided with the<br />
chamber may cause operator confusion when diagnosing alarms. Use discretion when<br />
altering tag names.<br />
81
EZT-560i Technical Manual<br />
8.14 Maintenance Alarms<br />
Access the “Maintenance Alarms” screen from the “Event/Alarm Tags” menu. This screen is used to<br />
set the names for the different service monitors of each system component.<br />
Figure 8-18 Maintenance Alarm Names<br />
To change or edit a tag name, touch the position for the alarm and change the name using the popup<br />
keypad. Note that alarm names are limited to 20 characters in length.<br />
Altering the alarm names from those listed on the EZT Configuration sheet provided with the<br />
chamber may cause operator confusion when diagnosing alarms. Use discretion when<br />
altering tag names.<br />
82
EZT-560i Technical manual<br />
8.15 Special Settings Tagnames<br />
Access the “Special Settings” screen from the “Event/Alarm Tags” menu. This screen is used to set<br />
the names for the different “special settings” values in the EZT application.<br />
Figure 8-18 Maintenance Alarm Names<br />
To change or edit a tag name, touch the position for the alarm and change the name using the popup<br />
keypad. Note that alarm names are limited to 10 characters in length.<br />
Altering the tag names from those listed on the EZT Configuration sheet provided with the<br />
chamber may cause operator confusion when viewing the special setting fields. Use<br />
discretion when altering tag names.<br />
83
EZT-560i Technical Manual<br />
8.16 Completing EZT560i Configuration<br />
Any changes made in the configurator program must be backed up prior to cycling power to the EZT.<br />
First, exit the configurator by selecting “Exit” from the “File” menu. DO NOT cycle power to the<br />
controller yet. First, manually back up the settings to EEPROM. To do this, you must rotate the small<br />
pot on the CPU module.<br />
Memory Back-up Pot<br />
STAT LED<br />
Figure 8-19 EEPROM Configuration Back-up<br />
Gently turn the pot full counterclockwise, then fully clockwise and back counterclockwise again. The<br />
small “STAT” LED on the CPU will blink indicating that the configuration has been saved. You can<br />
now cycle power to the EZT and allow it to boot up normally.<br />
If the settings are not backed up to EEPROM prior to cycling power, all changes will be lost<br />
and the values will revert back to their original settings.<br />
84
EZT-560i Technical manual<br />
Appendix<br />
1
EZT-560i Technical Manual<br />
List of Figures<br />
Figure 4-1 Defrost Settings..................................................................................................................12<br />
Figure 5-1 Web Server/Modbus/VNC Communication Settings .........................................................32<br />
Figure 5-2 Serial Port Mode Settings ..................................................................................................33<br />
Figure 6-1 Windows Start Menu..........................................................................................................40<br />
Figure 6-2 “My Computer” File Access................................................................................................40<br />
Figure 6-3 Write Error on Boot ............................................................................................................41<br />
Figure 6-4 Windows Start Menu..........................................................................................................41<br />
Figure 6-5 “StorageCard” File Access.................................................................................................42<br />
Figure 6-6 Serial Port Settings ............................................................................................................42<br />
Figure 6-7 Touch Calibration Screen ..................................................................................................43<br />
Figure 6-8 Setup Menu Access ...........................................................................................................44<br />
Figure 6-9 Chamber Setup Menu Access ...........................................................................................44<br />
Figure 610 System Maintenance Setup menu Access........................................................................44<br />
Figure 6-11 Calibrate Touch................................................................................................................45<br />
Figure 6-12 Touch Screen Settings.....................................................................................................45<br />
Figure 6-13 Touch Calibration Screen ................................................................................................45<br />
Figure 7-1 PLC Input/Output Indicators...............................................................................................61<br />
Figure 7-2 Ribbon Cable Connection ..................................................................................................62<br />
Figure 8-1 Exit Application...................................................................................................................64<br />
Figure 8-2 Windows Start Menu..........................................................................................................64<br />
Figure 8-3 Storage Card......................................................................................................................65<br />
Figure 8-4 EZT560 Folder ...................................................................................................................65<br />
Figure 8-5 EZT560 Config ...................................................................................................................65<br />
Figure 8-6 Number of Loops/Monitors.................................................................................................66<br />
Figure 8-7 Loop/Monitor Tagnames ....................................................................................................67<br />
Figure 8-8 Chamber Options...............................................................................................................69<br />
Figure 8-9 Refrigeration Options .........................................................................................................71<br />
Figure 8-10 Humidity Options..............................................................................................................73<br />
Figure 8-11 Purge/Lo RH Options.......................................................................................................75<br />
Figure 8-12 Aux Cooling Options ........................................................................................................76<br />
Figure 8-13 Altitude Options................................................................................................................77<br />
Figure 8-14 CSZ Event Names ...........................................................................................................78<br />
Figure 8-15 Critical Chamber Alarm Names .......................................................................................79<br />
Figure 8-16 Critical Refrigeration Alarm Names..................................................................................80<br />
Figure 8-17 Non-Critical Alarm Names ...............................................................................................81<br />
Figure 8-18 Maintenance Alarm Names..............................................................................................82<br />
Figure 8-18 Maintenance Alarm Names..............................................................................................83<br />
Figure 8-19 EEPROM Configuration Back-up.....................................................................................84<br />
2
EZT-560i Technical manual<br />
List of Tables<br />
Table 5-1 Common Serial Communication Problems and Corrective Actions....................................33<br />
Table 5-2 Common EZ-View Start-up Problems and Corrective Actions............................................34<br />
Table 5-3 Common GPIB Communication Problems and Corrective Actions ....................................35<br />
Table 5-4 Common Ethernet Communication Problems and Corrective Actions ...............................36<br />
Table 7-1 Chamber Events..................................................................................................................46<br />
Table 7-2 Control Loops ......................................................................................................................46<br />
3