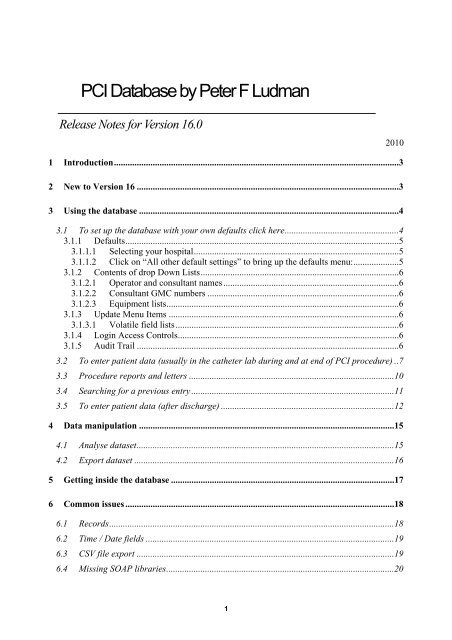
PCI Database by Peter F Ludman
Release notes for version 16.0 - British Cardiovascular Intervention ...
Release notes for version 16.0 - British Cardiovascular Intervention ...
- No tags were found...
Create successful ePaper yourself
Turn your PDF publications into a flip-book with our unique Google optimized e-Paper software.
<strong>PCI</strong> <strong>Database</strong> <strong>by</strong> <strong>Peter</strong> F <strong>Ludman</strong><br />
Release Notes for Version 16.0<br />
2010<br />
1 Introduction.............................................................................................................................3<br />
2 New to Version 16 ...................................................................................................................3<br />
3 Using the database ..................................................................................................................4<br />
3.1 To set up the database with your own defaults click here..................................................4<br />
3.1.1 Defaults........................................................................................................................5<br />
3.1.1.1 Selecting your hospital..........................................................................................5<br />
3.1.1.2 Click on “All other default settings” to bring up the defaults menu:....................5<br />
3.1.2 Contents of drop Down Lists.......................................................................................6<br />
3.1.2.1 Operator and consultant names .............................................................................6<br />
3.1.2.2 Consultant GMC numbers ....................................................................................6<br />
3.1.2.3 Equipment lists......................................................................................................6<br />
3.1.3 Update Menu Items .....................................................................................................6<br />
3.1.3.1 Volatile field lists..................................................................................................6<br />
3.1.4 Login Access Controls.................................................................................................6<br />
3.1.5 Audit Trail ...................................................................................................................6<br />
3.2 To enter patient data (usually in the catheter lab during and at end of <strong>PCI</strong> procedure) ..7<br />
3.3 Procedure reports and letters ..........................................................................................10<br />
3.4 Searching for a previous entry .........................................................................................11<br />
3.5 To enter patient data (after discharge) ............................................................................12<br />
4 Data manipulation ................................................................................................................15<br />
4.1 Analyse dataset.................................................................................................................15<br />
4.2 Export dataset ..................................................................................................................16<br />
5 Getting inside the database ..................................................................................................17<br />
6 Common issues ......................................................................................................................18<br />
6.1 Records.............................................................................................................................18<br />
6.2 Time / Date fields .............................................................................................................19<br />
6.3 CSV file export .................................................................................................................19<br />
6.4 Missing SOAP libraries....................................................................................................20<br />
1
6.5 Issues after filling in a number of missing values in different patients............................20<br />
7 Notes on the structure of the database................................................................................20<br />
8 Format of CSV export file....................................................................................................20<br />
9 Evolution of the BCIS-CCAD dataset.................................................................................23<br />
10 Key Web Links...................................................................................................................23<br />
11 The End ..............................................................................................................................24<br />
2
1 Introduction<br />
This <strong>PCI</strong> <strong>Database</strong> is designed to capture details about percutaneous coronary<br />
interventional procedures. Procedure reports and GP letters can be created, the data<br />
can be analysed within the database, or exported for analysis. This database has been<br />
specifically programmed so that all fields of the BCIS-CCAD dataset are included. It<br />
can create the comma separated values (CSV) file required to upload data to the<br />
Lotus Notes application for CCAD. Thus the data can be sent encrypted to CCAD in<br />
exactly the same way (and using the same gateway) as is done with the Myocardial<br />
Infarction National Audit Project (MINAP). It also has a number of in built analysis<br />
tools to provide a variety of cuts of the data, and options to look at risk stratified<br />
outcomes. I have written the database in Access 2000.<br />
This database is not locked so the code can be explored and modified if necessary<br />
(see Release Notes ‘getting inside the database’). You can ask your IT department to<br />
set up a link between this database and your local hospital Patient Administration<br />
System, so that patient demographics, NHS numbers etc. do not have to be entered<br />
manually. A link to the lab results server is also very helpful. In my centre the<br />
database is stored on the hospital server and so is accessible from any network<br />
computer in the trust and is automatically backed up each night. Microsoft Access is<br />
designed so that it copes with a number of users simultaneously interacting with the<br />
database, so for example it can be running in several <strong>PCI</strong> labs and offices at the same<br />
time.<br />
The database is designed so that most of the data is entered during and at the end of a<br />
<strong>PCI</strong> procedure, and a procedure report can be printed for the patient notes at that<br />
stage. A final set of data is entered after patient discharge.<br />
The data can be analysed using the queries I have written, and in addition the full<br />
dataset (excluding sub-tables) can be exported to Microsoft Excel to be analysed<br />
elsewhere. In addition once the data are uploaded to the Lotus Notes CCAD<br />
application, all the Lotus analysis tools are also available.<br />
The current database version is 16.0, and the latest dataset is version 5.5.5. These are<br />
available on the BCIS web site (http://www.bcis.org.uk/).<br />
Users of earlier versions of this database can find instructions for upgrading to the<br />
current version on the BCIS web site<br />
2 New to Version 16<br />
This version is compatible with dataset 5.5.5 which includes GMC numbers for<br />
consultants and additional P<strong>PCI</strong> fields (mandatory from 1stNov 2010).<br />
New analysis options for primary <strong>PCI</strong>, including split of activity <strong>by</strong> admission routes,<br />
indications and in hours / off hours.<br />
Automatic creation of VLAD and cumulative funnel plots for unit and operator<br />
specific data<br />
3
New data completeness analysis options (focusing on essential CCAD fields)<br />
Security features: login access controls (from v15) and audit trail for changes to fields<br />
3 Using the database<br />
You need to put two files in the same location on the computer or server on which the<br />
database is to reside:<br />
1. The database itself (called <strong>PCI</strong> version 16-0)<br />
2. The file called mousehook.dll (this will simply prevent the mouse wheel scrolling<br />
inadvertently through records <strong>by</strong> accident).<br />
No password has been set. Double click “<strong>PCI</strong> version 16-0” to open.<br />
3.1 To set up the database with your own defaults click here<br />
Figure 1<br />
4
You then will be presented with the following screen:<br />
Figure 2<br />
3.1.1 Defaults<br />
3.1.1.1 Selecting your hospital<br />
Once selected, you need to close down the database and re-open it. Your hospital<br />
should now appear on the main (and all other) switchboards, report forms etc.<br />
If your hospital is not in the list, it will need to be added to the table called “centers”<br />
inside the database – see ‘getting inside the database’ below<br />
3.1.1.2 Click on “All other default settings” to bring up the defaults menu:<br />
If you want all drop down lists in the data entry form to automatically open on focus<br />
– pick this option. The alternatives are<br />
1. use F4 to show all options, and arrows to move through them<br />
2. enter the first letter of the selection you want and auto-complete will<br />
put the appropriate selection in the field, or<br />
3. use the mouse<br />
5
You can also modify the default Surgical cover and Brachytherapy options<br />
3.1.2 Contents of drop Down Lists<br />
3.1.2.1 Operator and consultant names<br />
Enter the names of local consultants and operators (need to enter consultants into both<br />
lists). Format is First initial, full stop, space, Surname<br />
3.1.2.2 Consultant GMC numbers<br />
This opens up a table that will allow you to store all consultants GMC numbers.<br />
Initially there is the option for this table to automatically populate from the existing<br />
consultant table, and then GMC numbers can be added. This will allow GMC<br />
numbers to be automatically entered into the db whenever a consultant name is<br />
picked from a drop down list.<br />
3.1.2.3 Equipment lists<br />
Modify the list of stent names and balloon names that will appear in the drop down<br />
menus when you use the database.<br />
3.1.3 Update Menu Items<br />
3.1.3.1 Volatile field lists<br />
The eight volatile fields in the BCIS / CCAD dataset version 5 can also be altered<br />
from this menu, under the heading “Update Menu Items”<br />
3.1.4 Login Access Controls<br />
This button gives you the ability to restrict access to some aspects of the database’s<br />
inbuilt analysis options. The ability to either get to the export switchboard, or to get<br />
to the consultant or operator based analysis options can be set up to be blocked except<br />
for specific users. This block is not intended to do more than discourage<br />
inappropriate use <strong>by</strong> casual users. It is actually very easy to <strong>by</strong>pass the restriction if<br />
you have any programming ability. I will give you the administrator password to get<br />
into this on request. Once the access restriction is switched on, the database looks to<br />
see the windows username (i.e. the windows user name of the person logged into that<br />
computer). If this matches the user names in the admin list, then access is granted,<br />
and if not, access is denied<br />
3.1.5 Audit Trail<br />
If you turn on this feature, changes made to many of the fields in the database are<br />
recorded. The logged in user (windows log in username), the initial value of the<br />
field, and the value it has been changed to are stored in a table. This does tend to<br />
generate a very large table over time, and if you use this feature, then you may wish<br />
to delete its contents periodically. This is work in progress as the table currently also<br />
record some of the automatic changes that occur to the data, calculated <strong>by</strong> the<br />
database behind the scenes. However it does work well in capturing changes to<br />
timing fields for emergency <strong>PCI</strong><br />
6
3.2 To enter patient data (usually in the catheter lab during and at end of <strong>PCI</strong> procedure)<br />
From the main menu (figure 1), click the top green button ‘New Procedure’, and the<br />
following form will open:<br />
Figure 3<br />
The cursor will start in Hospital Number field in the dark grey section at the top.<br />
After entering number hit enter or return or tab to move to next field. The procedure<br />
date / time field (top right) defaults to the current time and so does not need altering if<br />
the data are being entered at the time of the procedure (otherwise these need to be<br />
entered manually). Once the top 4 fields are filled, you will move down to the first<br />
field under the tab heading “Patient”. When you get to a field with a drop down<br />
arrow, the list will appear if you click the mouse, or if you hit F4. The list will<br />
appear automatically if you have selected this to occur in the defaults section (above<br />
section 2.1).<br />
I have set up the Queen Elizabeth Hospital database so that after entering the hospital<br />
number, the rest of the patient demographics, NHS number (and the GP details) are<br />
automatically pulled into the database from the PAS server. I strongly recommend<br />
that you get your IT team to do this. I have also created links to our acute coronary<br />
syndrome ward and the Results server (these buttons are disabled on your version, but<br />
the code behind them is still in place in case your IT want to modify it for your own<br />
systems.<br />
The hospital name will be the one you have chosen as your default. If the patient is<br />
not being treated at your default hospital, you can change this for this particular<br />
patient using this field (which won’t alter your default).<br />
7
Height converter: If you only know height in feet and inches, then the cm height will<br />
be calculated after you have entered the inches and hit enter or return (so if a patient<br />
is 6 foot, you need to enter 6 foot 0 inches).<br />
The multi-selection tables work <strong>by</strong> holding down the control key and clicking on any<br />
selection(s) you want to make. You can check you’ve got the correct ones <strong>by</strong> looking<br />
at the ‘selected items’ list which reflects what is actually stored in the database.<br />
Whether a selection remains highlighted or not as you move about is irrelevant.<br />
Once this sheet is complete, click on the next tab “clinical / indications” and complete<br />
this. You will note that if a patient with stable clinical syndrome is being treated, a<br />
number of the fields that are not required are covered up, and the CCS and NYHA<br />
fields are exposed. In addition, if you select an ST elevation MI in this section, the<br />
TIMI flow rates and times under tab section “epicardial data” are uncovered.<br />
“Operator data” tab – self-explanatory. The form will look to see if your name also<br />
appears in the consultant field list, and if so automatically enter appropriate status, but<br />
non-consultant grades will have to pick their status from the drop down list.<br />
“Angio segments” tab<br />
This gives you the opportunity to enter details about the entire coronary anatomy. I<br />
have used the coronary tree segment classification that has been adopted <strong>by</strong> the<br />
European working party (CARDS project 2004) for the unification of European <strong>PCI</strong><br />
datasets. This section is not required for the current BCIS dataset, but it will be for<br />
the European dataset.<br />
“Epicardial data” tab. For the BCIS / CCAD dataset, this is the mandatory way in<br />
which coronary anatomy is described. If you have filled out the “angio segments”<br />
tab, then clicking ‘update epicardial data from angiosegment chart’ will pull the data<br />
across. Otherwise the most efficient way of entering data into this sheet is to use the<br />
keyboard instead of the mouse. Hit enter or return to move to subsequent fields, and<br />
use F4 for drop downs, or hit the first letter of the item you wish to select and autocomplete<br />
will put the appropriate selection in the field. You will note that if you have<br />
not treated a lesion, the post procedure stenosis is automatically entered the same as<br />
the pre-procedure one. Note you are describing epicardial territories, not vessels. If<br />
the Duke score does not auto calculate, then you can click the button to force the<br />
calculation or to update it if you’ve modified the epicardial data.<br />
“All guide/wires” tab<br />
If you wish to modify the contents of the drop down menus, you can do it from the<br />
buttons on this page<br />
“Lesions” tab<br />
I have provided up to 4 lesion details that can be entered. If you have treated more,<br />
and wish to record this, then that can be done under the next tab.<br />
8
“Procedure overview” tab<br />
You can check that the program has correctly calculated the summary data <strong>by</strong><br />
clicking the button ‘view edit lesion summary data’. The number of lesions treated is<br />
the total number, of which the number of CTOs, restenoses etc. are all subsets.<br />
“Devices used”. A quick way to enter the GP IIb/IIIa antagonists is to check the box<br />
entering “No” in all options, and then change the field of the appropriate agent to yes,<br />
this will automatically update the ‘why no agent used’ field.<br />
This is the last tab to be completed at the time of the procedure. After discharge, the<br />
next tab can be completed to capture, post procedure data, and there are two further<br />
tabs for later follow up if required.<br />
9
3.3 Procedure reports and letters<br />
Once the procedure information is entered (i.e. after the patient is about to leave the<br />
catheter lab but before data has been entered under the “outcome” tab), you can create<br />
a procedure report, letter, or Save and Exit. (Clicking either of these buttons saves<br />
the record).<br />
Figure 6<br />
Once you click on either of these buttons if there are any fields that have not been<br />
filled in (excluding the “outcome” tab data) you will be presented with a list of them<br />
(figure 7), and the actual fields will be highlighted in red. You are given 2 chances to<br />
complete data entry. If after the second warning you haven’t done it, you will be<br />
allowed to progress as you had originally intended to the reports or exit.<br />
Figure 7<br />
The procedure report will automatically have your hospital name at the top, and is<br />
intended to go in the notes as the patient leaves the catheter lab.<br />
The GP letter is still under development, and I would suggest you use it as a first<br />
draft. You will want to alter it <strong>by</strong> placing your hospital’s official logo / header in<br />
place etc. I have set up the database at the Queen Elizabeth Hospital so that after<br />
entering the patient’s hospital number, not only are the patient demographics<br />
automatically pulled into the database, but also the patient address and GP data are<br />
pulled from the PAS system into these fields. The form allows you to do this<br />
manually of you wish.<br />
10
3.4 Searching for a previous entry<br />
You can search for a previous entry in four ways<br />
1. Use the ‘Surname’, ‘<strong>Database</strong> ID’ or ‘Date of Procedure’ drop down boxes. Click<br />
on the arrow and scroll to the appropriate record, or highlight the whole box and then<br />
enter the first few letters of the surname, the list will scroll straight to all appropriate<br />
entries. Once you click correct entry, all the data for that procedure are brought into<br />
the data entry form.<br />
2. Use a full access database search dialogue<br />
3. Use the navigation buttons as shown below<br />
Figure 8<br />
To first record<br />
Back one record<br />
Forward one record<br />
To last record<br />
4. In addition, from the first switchboard (figure 1), if you click the second green<br />
button ‘view or edit existing record’, the first record will open as in figure 3, but the<br />
Patient name and ID fields will be locked, preventing inadvertent modification. The<br />
navigation buttons can then be used to move through the dataset as before. The<br />
locked fields can be unlocked <strong>by</strong> clicking on the greyed out button at the bottom of<br />
the screen ‘unlock patient ID fields for edit’ if required.<br />
11
3.5 To enter patient data (after discharge)<br />
All tab sections up to and including “Devices used” need to be filled in up to the time<br />
the patient leaves the catheter lab.<br />
To find patients who have had procedures, but whose data up to hospital discharge is<br />
still not entered (i.e. “Outcome” tab data not yet entered), go to ‘missing follow up<br />
data’:<br />
Figure 9<br />
This will bring up the next dialogue box:<br />
12
Figure 10<br />
Click on this to get list<br />
Figure 11<br />
13
If you now double click on any of the names of these patients, the data entry form<br />
will automatically open to that particular procedure, and allow you to fill in the final<br />
set of data.<br />
If the patient’s procedure was uncomplicated, then you need only answer 4 questions<br />
(stable cases) or 3 questions (acute cases).<br />
Thus:<br />
1. Click complication free ‘Yes’ - and all other options are auto filled<br />
2. Enter discharge date – as many patients go home the next day, if you click the<br />
check box, the day after procedure date is auto-entered<br />
3. Fill in the discharged to where question(s)<br />
4. In stable patients, you also need to enter the post procedure cardiac markers (this<br />
data field is hidden in patients treated for acute coronary syndromes).<br />
There is the option to put any cardiac marker result in the database whether or not the<br />
patient is stable, but this is not required for the BCIS/CCAD minimum dataset.<br />
Figure 12<br />
14
4 Data manipulation<br />
4.1 Analyse dataset<br />
Once you have closed down the patient entry form, and patient report etc. the<br />
database can perform a number of analyses on the entire dataset.<br />
From the first switchboard (figure 1) click on Analyse dataset, to get to this menu:<br />
Figure 13<br />
Explore these analysis options which should be self explanatory. The ‘operator’ and<br />
‘consultant’ based data analysis provides quite a detailed breakdown of individual<br />
activity. It is also now possible to create operator specific cumulative funnel plots<br />
and VLAD plots. There is a fairly detailed breakdown of P<strong>PCI</strong> also available. You<br />
can also get to all the previously programmed data cuts via the ‘open Old Analysis<br />
options’ button, bottom left.<br />
The monthly activity button will prompt for dates. Note that all Januaries and<br />
Februaries in the time period you select will be added, so if you specify 2 years, this<br />
will be sum of 2 Januaries, 2 Februaries, etc. activity.<br />
15
4.2 Export dataset<br />
From the first switchboard (figure 1) click on Export dataset to be presented with the<br />
following options:<br />
Figure 14<br />
The top button will extract data from the database (between dates of your choosing)<br />
into a comma separated values (CSV) file called BCIS.CSV, and will put it in the<br />
‘temp’ folder on the C drive.<br />
It looks for c:\temp. If you don’t have a folder labelled ‘temp’ on the C drive, you<br />
will get an error message (computers with windows XP often don’t have this folder) –<br />
so put a folder of that name on your C drive and it will then work. (For the format of<br />
the CSV file see below).<br />
The dataset is version 5.5.5, and can be uploaded into the Lotus notes CCAD<br />
database front end (which is programmed to look for a file named BCIS.CSV in a<br />
folder named ‘temp’ on drive C). It will then populate the CCAD database fields, and<br />
the data can then be analysed using all the analysis software programmed into the<br />
Lotus Notes front end, and of course the data can also be encrypted and sent to the<br />
CCAD servers via the gateway.<br />
The second button allows you to download your raw dataset between selected dates<br />
into an excel spread sheet for further custom analysis. The only data not extracted are<br />
the data contained on the sub forms (i.e. the list of guides, wires, balloons, stents and<br />
associated pressures). To clarify the codes for each of the options, you can click the<br />
button ‘click to see Dataset Definitions’ on this switchboard or the main switchboard.<br />
16
The third button generates a CSV file just like to top button, but with patient and<br />
operator identifiers anonymised<br />
The fourth is an initial attempt to create an export compatible with the CARDS<br />
European dataset. There are important structural differences between CARDS and<br />
BCIS-CCAD, so this section is work in progress<br />
5 Getting inside the database<br />
In order to get inside the database, to alter programming, table entries etc. you need<br />
to open the database with the shift key held down. You will then be presented with<br />
all the tables, forms, queries, macros etc. grouped under tab headings. Be cautious, it<br />
is very easy to break the database.<br />
17
6 Common issues<br />
6.1 Records<br />
If you start a new record, you must enter data at least into the hospital number and<br />
patient surname fields. These are required fields, and no data can be stored in the<br />
record without something in these fields. If you inadvertently start a new record, but<br />
don’t wish to continue to enter data you can:<br />
either: Press Esc key and then go back to the previous record (with the navigation<br />
buttons see figure 8)<br />
or: Quit Access (very top right of screen)<br />
Figure 10<br />
You will get a warning that the record can’t be saved – answer OK.<br />
18
If you inadvertently enter data, but wish to delete the entire record, use the Edit /<br />
Delete Record menu from the top<br />
6.2 Time / Date fields<br />
Sometimes the time date fields in Access are awkward. There is an input mask on<br />
these fields, so provided you have landed on the field using the tab or entry key, you<br />
can simply type in the numbers without the place holders (i.e. the “/” or “:”):<br />
So to enter 10/12/2002 18:00, you just type 121220021800<br />
It should all look fine once you’ve done it.<br />
If you got to the field with the mouse, make sure the cursor is at the left end of the<br />
empty field.<br />
If you then wish to change the date, it is sometimes not happy with you simply<br />
altering a part of it. You may need to select the whole field <strong>by</strong> dragging the mouse<br />
across it and enter the entire date / time again, (even though they do not show, you<br />
still do not need to put in the place holders). You can always use the Esc key to get<br />
back out of the field.<br />
All years must be entered as full four digit years.<br />
6.3 CSV file export<br />
Remember that you need to have a folder labelled ‘temp’ in the C drive, because that<br />
is where the CSV exported file will be sent to, and it is also where the Lotus Notes<br />
application from CCAD will look for it. If you have not made a temp folder on the C<br />
drive, you will get an error message when you try to create the CSV export file.<br />
19
6.4 Missing SOAP libraries<br />
Some users have noticed that when upgrading from earlier versions of the database to<br />
version 16.0, the program jumps out to a page of visual basic code where it is trying<br />
to calculate age and with the message: ‘Compile error: can’t find project or library’.<br />
This seems to be due to a missing SOAP library, which I think is present on newer,<br />
but not earlier version of Microsoft Access. Once this dll is placed in the appropriate<br />
program folder on the computer, the program will run correctly. Your IT department<br />
should be able to provide you with the missing component.<br />
6.5 Issues after filling in a number of missing values in different patients<br />
When filling in gaps in the database, you will find yourself jumping from record to<br />
record filling in different empty or unknown fields. Two potential issues occur.<br />
1. You may see an error message ‘unable to update…’. If you press escape once or<br />
twice, this often frees the database up so you can continue to enter values.<br />
2. Some database fields are designed to be calculated and entered automatically once<br />
the database is moved forward to the next record, and so may not be calculated as you<br />
jump from record to record. To fix this, it is worth running the update script once<br />
after you have made a number of changes. This can be found as a button on<br />
a) Either:start with main switchboard: ‘Export dataset’ / ‘Create the BCIS dataset 5.5<br />
…..’ / on the export to BCIScsv file form, button labelled ‘run once if updating db<br />
version 11’<br />
b) Or ;’Missing Follow up data’ / ‘Create lists of patients with missing data for<br />
CCAD export’ / ‘Go to list selection form’ / ‘Run to update after making changes<br />
from lists above’.<br />
7 Notes on the structure of the database<br />
The database is structured so that each procedure is stored as a separate record in the<br />
table ‘Patients and procedures’. If a patient has more than one procedure, each will<br />
appear as a separate line in this table. Virtually all the data for the procedures is<br />
stored here. The only additional place data are stored is in the subtables that contain<br />
information about balloon and stent sizes and deployment pressures, and guides and<br />
wires. It is possible to enter detailed lesion specific data, with balloons and stents<br />
used etc. on up to 4 lesions (data entry form tab “Lesions”). If in fact you have<br />
treated 6 lesions, then enter the correct totals in the section under tab “Procedure<br />
overview”. The correct totals will be counted in all the analysis sections, and<br />
exported to CCAD in the CSV file, which does not look at the data entered under tab<br />
“Lesions”.<br />
8 Format of CSV export file<br />
The evolution of the datasets and the resultant csv file formats are documented on the<br />
BCIS web site. Version 5.5.5 is given below<br />
20
This file describes the format for the BCIS export file 5.5.x - bcis.csv,<br />
introduced in November 2010<br />
The file is a CSV (comma separated variable) file. All values (even empty<br />
ones) must be enclosed in quotes("").<br />
Each line (record) of the file must be properly terminated with a CRLF<br />
(carriage return and line feed, ASCII<br />
characters 13 and 10 in decimal, 0D and 0A in hex).<br />
Each line (record) is made up of 113 variables (fields) in the prescribed<br />
order.<br />
A complete list of variables is shown below. The first number is the<br />
position of the variable in the csv, followed <strong>by</strong> a<br />
comma then a tab, the next number is the dataset number, then a hyphen,<br />
followed <strong>by</strong> the field description,<br />
followed <strong>by</strong> a hyphen then the datatype.<br />
Details about the legal values for the fields can be found in the dataset,<br />
http://www.ic.nhs.uk/our-services/improving-patient-care/the-nationalclinical-audit-support-programme-ncasp/heart-disease/gettingstarted/information-on-datasets<br />
1, 1.01 - Hospital identifier - Text (single value)<br />
2, 1.02 - Patient Case Record Number - Text (single value)<br />
3, 1.03 - NHS Number - Text (single value)<br />
4, 1.04 - Patient Surname - Text (single value)<br />
5, 1.05 - Patient Forename - Text (single value)<br />
6, 1.06 - Patient Date of Birth - Date (dd/mm/yyyy)<br />
7, 1.07 - Patient Gender - Text (single value)<br />
8, 1.08 - Patient Ethnic Group - Text (single value)<br />
9, 1.09 - Patient Admin status - Text (single value)<br />
10, 1.10 - Patient Post Code - Text (single value)<br />
11, 2.01 - Clinical Syndrome - Text (single value)<br />
12, 2.02 - Indication for Intervention - Text (single value)<br />
13, 2.03 - Procedure Urgency - Text (single value)<br />
14, 2.04 - Cardiogenic shock pre-anaesthesia (pre-procedure for <strong>PCI</strong>) -<br />
Text (single value)<br />
15, 2.05 - CCS classification for stable angina - Text (single value)<br />
16, 2.06 - NYHA classification for cardiac disease - Text (single value)<br />
17, 2.07 - Symptom onset (ACS) - DateTime (dd/mm/yyyy hh:mm)<br />
18, 2.08 - Arrival in First Hospital of chain (ACS) - DateTime (dd/mm/yyyy<br />
hh:mm)<br />
19, 2.09 - Admission route (ACS) - Text (single value)<br />
20, 2.10 - Presenting ECG (ACS) - Text (single value)<br />
21, 2.11 - Recent Lysis (ACS) - Text (single value)<br />
22, 2.12 - Cardiac Enzymes/Markers Raised - Text (single value)<br />
23, 2.13 - Previous MI - Text (single value)<br />
24, 2.14 - Previous CABG - Text (single value)<br />
25, 2.15 - Previous <strong>PCI</strong> - Text (single value)<br />
26, 2.16 - Diabetes - Text (single value)<br />
27, 2.17 - Height - Numeric (integer)<br />
28, 2.18 - Weight - Numeric (real)<br />
29, 2.19 - LV Function assessment - Text (single value)<br />
30, 2.20 - LV Ejection Fraction - Numeric (integer)<br />
31, 2.21 - N grafts present - Numeric (integer)<br />
32, 2.22 - N grafts patent PreOp - Numeric (integer)<br />
33, 2.23 - LMain PreOp - Text (single value)<br />
34, 2.24 - LADprox PreOp - Text (single value)<br />
35, 2.25 - LADother PreOp - Text (single value)<br />
36, 2.26 - RCA PreOp - Text (single value)<br />
21
37, 2.27 - LCX PreOp - Text (single value)<br />
38, 2.28 - Flow in IRA PreOp (ACS) - Text (single value)<br />
39, 3.01 - Date/Time arrival at hospital (for MINAP) or Procedure Date<br />
(for all other datasets) - DateTime (dd/mm/yyyy hh:mm)<br />
40, 3.02 - Consultant Responsible for Procedure - Text (single value)<br />
41, 3.03 - Primary Operator - Text (single value)<br />
42, 3.04 - Primary Operator status - Text (single value)<br />
43, 3.05 - Second Operator - Text (single value)<br />
44, 3.06 - Second Operator status - Text (single value)<br />
45, 3.07 - Third Operator - Text (single value)<br />
46, 3.08 - Third Operator status - Text (single value)<br />
47, 3.09 - Vessels attempted - Text (multivalue ; separated)<br />
48, 3.10 - N Vessels attempted - Numeric (integer)<br />
49, 3.11 - N Lesions attempted - Numeric (integer)<br />
50, 3.12 - N Chronic Occlusions attempted - Numeric (integer)<br />
51, 3.13 - N Restenoses attempted - Numeric (integer)<br />
52, 3.14 - N InStent stenoses attempted - Numeric (integer)<br />
53, 3.15 - N Stents used - Numeric (integer)<br />
54, 3.16 - N Drug Eluting Stents used - Numeric (integer)<br />
55, 3.17 - Drug(s) eluted <strong>by</strong> stent(s) - Text (multivalue ; separated)<br />
56, 3.18 - GP IIb/IIIa drug(s) used during procedure - Text (multivalue ;<br />
separated)<br />
57, 3.19 - Diagnostic device(s) used during procedure - Text (multivalue ;<br />
separated)<br />
58, 3.20 - Procedural device(s) used - Text (multivalue ; separated)<br />
59, 3.21 - Athero-thrombus removal device(s) used - Text (multivalue ;<br />
separated)<br />
60, 3.22 - Brachytherapy device(s) used - Text (multivalue ; separated)<br />
61, 3.23 - Emboli protection device(s) used - Text (multivalue ;<br />
separated)<br />
62, 3.24 - Circulatory support - Text (multivalue ; separated)<br />
63, 3.25 - Arterial management - Text (multivalue ; separated)<br />
64, 3.26 - Time of IRA reperfusion (ACS) - DateTime (dd/mm/yyyy hh:mm)<br />
65, 3.27 - LMain PostOp - Text (single value)<br />
66, 3.28 - LADprox PostOp - Text (single value)<br />
67, 3.29 - LADother PostOp - Text (single value)<br />
68, 3.30 - RCA PostOp - Text (single value)<br />
69, 3.31 - LCX PostOp - Text (single value)<br />
70, 3.32 - N Lesions success - Numeric (integer)<br />
71, 3.33 - N grafts patent PostOp - Numeric (integer)<br />
72, 3.34 - Flow in IRA PostOp (ACS) - Text (single value)<br />
73, 3.35 - Procedure report/comment - Text (single value)<br />
74, 3.36 - Device failure - Text (single value)<br />
75, 4.01 - <strong>PCI</strong> Hospital Outcome - Text (multivalue ; separated)<br />
76, 4.02 - Enzymes PostOp - Text (single value)<br />
77, 4.03 - Status at discharge - Text (single value)<br />
78, 4.04 - Discharge Date - Date (dd/mm/yyyy)<br />
79, 5.01 - Local Procedure Identifier - Text (single value)<br />
80, 5.02 - Cholesterol - Numeric (real)<br />
81, 5.03 - Smoking status - Text (single value)<br />
82, 5.04 - Family history of CAD - Text (single value)<br />
83, 5.05 - Medical history - Text (multivalue ; separated)<br />
84, 5.06 - History of renal disease - Text (single value)<br />
85, 5.07 - Ventilated PreOp - Text (single value)<br />
86, 5.08 - Q Wave on ECG - Text (single value)<br />
87, 5.09 - ECG ischaemia - Text (single value)<br />
88, 5.10 - Drug therapy PreOp - Text (multivalue ; separated)<br />
89, 5.11 - Follow on (Adhoc) procedure - Text (single value)<br />
90, 5.12 - Training procedure - Text (single value)<br />
91, 5.13 - Research procedure - Text (single value)<br />
92, 5.14 - Research title - Text (single value)<br />
22
93, 5.15 - Arterial access - Text (multivalue ; separated)<br />
94, 5.16 - Largest balloon/stent used - Numeric (real)<br />
95, 5.17 - Longest balloon/stent used - Numeric (integer)<br />
96, 5.18 - Procedural Complication - Text (multivalue ; separated)<br />
97, 5.19 - Arterial Complications - Text (multivalue ; separated)<br />
98, 5.20 - Time to <strong>by</strong>pass - Numeric (integer)<br />
99, 5.21 - Transfer to theatre - Text (single value)<br />
100, 5.22 - Why no IIb/IIIA during procedure - Text (single value)<br />
101, 5.23 - Indication for stent - Text (single value)<br />
102, 5.24 - Surgical cover - Text (single value)<br />
103, 5.25 - LMS Protected - Text (single value)<br />
104, 5.26 - Arrival in <strong>PCI</strong> Hospital (ACS) - DateTime (dd/mm/yyyy hh:mm)<br />
105, 5.27 – Call for Help (STEMI only) - DateTime (dd/mm/yyyy hh:mm)<br />
106, 5.28 – Referring hospital – Text (single value)<br />
107, 5.29 - Date/time of ECG triggering P<strong>PCI</strong> pathway – DateTime (dd/mm/yyyy<br />
hh:mm)<br />
108, 5.30 - Patient location at time of STEMI onset (for patients treated<br />
for acute STEMI only) – numeric (integer)<br />
109, 5.31 - Consultant responsible for procedure GMC Number - Text (single<br />
value)<br />
110, 5.32 - Primary Operator GMC number - Text (single value)<br />
111, 5.33 – Secondary Operator GMC number - Text (single value)<br />
112, 5.34 - Third Operator GMC number - Text (single value)<br />
113, 5.35 - Creatinine - numeric (integer)<br />
Format of an export file:<br />
"value 1","value 2","","",......"value 112","Value 113"<br />
"value 1","value 2","","",......"value 112","Value 113"<br />
"value 1","value 2","","",......"value 112","Value 113"<br />
Note:<br />
Empty quotes ("") to highlight how to handle empty values.<br />
..... signifies the continuation of the values<br />
9 Evolution of the BCIS-CCAD dataset<br />
Datasets continuously evolve and are never perfect. Below i have tried to capture the key<br />
changes from 2003 to 2010 for this dataset<br />
The details can be found on the BCIS web site http://www.BCIS.org.uk<br />
10 Key Web Links<br />
British Cardiovascular Intervention Society (BCIS):<br />
http://www.BCIS.org.uk<br />
Information Centre, which currently hosts the National Clinical Audit Support<br />
Program (NCASP), which in turn supports the Central Cardiac Audit <strong>Database</strong><br />
(CCAD):<br />
23
http://www.ic.nhs.uk/our-services/improving-patient-care/the-national-clinical-auditsupport-programme-ncasp/heart-disease/getting-started/information-on-datasets<br />
11 The End<br />
<strong>Database</strong> <strong>by</strong>:<br />
<strong>Peter</strong> F <strong>Ludman</strong><br />
Queen Elizabeth Hospital<br />
Edgbaston<br />
Birmingham B15 2NQ<br />
United Kingdom<br />
peter.ludman@uhb.nhs.uk<br />
24


