PAVERS
PAVERS - Wausau Tile
PAVERS - Wausau Tile
- No tags were found...

You also want an ePaper? Increase the reach of your titles
YUMPU automatically turns print PDFs into web optimized ePapers that Google loves.
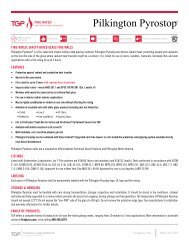
Wausau<br />
<strong>PAVERS</strong>
Wausau Plank<br />
Style Pavers are<br />
available in all of our<br />
colors and finishes.<br />
Various lengths and<br />
widths can be made<br />
to order.<br />
Typical Sizes:<br />
3” x 12”<br />
3” x 24”<br />
6” x 12”<br />
6” x 24”<br />
6” x 36”<br />
12” x 24”<br />
Thickness: 2”-2.75”<br />
Barn Board Pavers
wausaupaving.com • 800-388-8728<br />
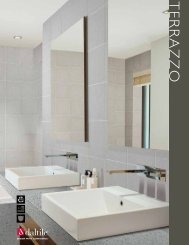
Wausau<br />
EcoPremier<br />
<strong>PAVERS</strong><br />
Wausau EcoPremier Pavers<br />
feature recycled porcelain<br />
aggregate. The surface is<br />
sandblasted. Offered in seven<br />
standard colors (pages 2-5),<br />
with custom colors available.<br />
Wausau EcoPremier pavers are available in these sizes, in modular<br />
patterns and plank style pavers. Custom sizes available.<br />
Standard Thickness = 2” - 2.75”<br />
EP-10<br />
EP-20<br />
EP-30<br />
2
Celebrezze Federal Building, Cleveland, OH<br />
3
wausaupaving.com • 800-388-8728<br />
Wausau<br />
EcoPremier<br />
<strong>PAVERS</strong><br />
Wausau EcoPremier pavers are available in these sizes, in modular<br />
patterns and plank style pavers. Custom sizes available.<br />
Standard Thickness = 2” - 2.75”<br />
Wausau Tile’s concrete based<br />
pavers with recycled glass or<br />
recycled porcelain may qualify<br />
for LEED credits that may<br />
contribute toward your project<br />
certification.<br />
EP-40 EP-50 EP-60<br />
4
Figueroa Plaza, Los Angeles, CA<br />
EP-70<br />
In 2012, Wausau Tile recycled<br />
over 1,300,000 pounds of<br />
porcelain that otherwise would be<br />
destined for the landfill.<br />
5
wausaupaving.com • 800-388-8728<br />
Wausau<br />
UltraFace<br />
<strong>PAVERS</strong><br />
Wausau UltraFace Pavers<br />
are shown in six colors.<br />
For a complete offering, visit<br />
www.wausaupaving.com.<br />
Custom colors are also available.<br />
Wausau UltraFace pavers are available in these sizes, in modular patterns<br />
and plank style pavers, all with Shot blasted finish. Custom sizes available.<br />
“Quik Ship” items are stocked in 24” squares (2” thick) and ship within 15<br />
business days based on availability. Standard Thickness = 2” - 2.75”<br />
UF-10 UF-20 UF-30<br />
6
Northpark Office Towers, Atlanta, GA<br />
UF-40 UF-50 UF-60<br />
7
wausaupaving.com • 800-388-8728<br />
Wausau<br />
Textured<br />
Granite<br />
<strong>PAVERS</strong><br />
Wausau Textured Granite<br />
Pavers are available in six<br />
colors. Custom colors available.<br />
Wausau Textured Granite pavers are available in these sizes, in modular<br />
patterns and plank style pavers, all with shot blasted finish. Custom sizes<br />
available. “Quik Ship” items are stocked in 24” squares (2” thick) and ship<br />
within 15 business days based on availability. Standard Thickness = 2” - 2.75”<br />
UG-10 UG-20 UG-30<br />
8
EnV Apartments, Chicago, IL<br />
UG-40 UG-50 UG-60<br />
9
Amway Center, Orlando, FL<br />
TS-50<br />
TS-60<br />
TS-70<br />
11
wausaupaving.com • 800-388-8728<br />
Wausau<br />
Stoney<br />
Creek<br />
<strong>PAVERS</strong><br />
Wausau Stoney Creek Pavers<br />
are shown in six colors<br />
(pages 12-15). Custom colors<br />
available.<br />
Wausau Stoney Creek pavers are available in these sizes, in modular<br />
patterns and plank style pavers. “Quik Ship” items are stocked in 24”<br />
squares (2” thick) and ship within 15 business days based on availability.<br />
Standard Thickness = 2” - 2.75”<br />
SC-10 SC-20 SC-30<br />
12
Nationwide Plaza, Columbus, OH<br />
13
wausaupaving.com • 800-388-8728<br />
Wausau<br />
Stoney<br />
Creek<br />
<strong>PAVERS</strong><br />
Wausau Stoney Creek Pavers<br />
are shown in six colors<br />
(pages 12-15). Custom colors<br />
available.<br />
Wausau Stoney Creek pavers are available in these sizes, in modular<br />
patterns and plank style pavers. “Quik Ship” items are stocked in<br />
24” squares (2” thick) and ship within 15 business days based on<br />
availability. Standard Thickness = 2” - 2.75”<br />
SC-40 SC-50 (Shown in slate finish) SC-60<br />
14
Hollywood Casino, Toledo, OH<br />
15
wausaupaving.com • 800-388-8728<br />
Wausau<br />
Granitex<br />
<strong>PAVERS</strong><br />
Wausau Granitex Pavers<br />
are shown in twelve colors<br />
and two series. (pages 16-19).<br />
Custom colors available.<br />
Wausau Granitex Pavers are available in these sizes, in modular<br />
patterns and plank style pavers. Standard Thickness = 2” - 2.75”<br />
GTX-10 GTX-20 GTX-30<br />
16
Ameristar Casino, St. Charles, MO<br />
GTX2-40 GTX2-50 GTX-60<br />
17
wausaupaving.com • 800-388-8728<br />
Wausau<br />
Granitex<br />
<strong>PAVERS</strong><br />
Wausau Granitex Pavers<br />
are shown in twelve colors<br />
and two series. Custom colors<br />
available.<br />
Wausau Granitex pavers are available in these sizes, in modular<br />
patterns and plank style pavers.<br />
Standard Thickness = 2” - 2.75”<br />
GTX-70 GTX-80 GTX-90<br />
18
Main Street Plaza, Dallas, TX<br />
GTX2-100<br />
GTX2-110<br />
GTX-120<br />
19
wausaupaving.com • 800-388-8728<br />
Wausau<br />
ExpoStone<br />
<strong>PAVERS</strong><br />
Wausau ExpoStone Pavers<br />
are shown in six colors. Custom<br />
colors available.<br />
Wausau ExpoStone pavers are available in these sizes, in modular<br />
patterns and plank style pavers. Custom sizes available. Standard<br />
Thickness = 2” - 2.75”<br />
ES-10 ES-20 ES-30<br />
20
Celebrezze Plaza, Cleveland, OH<br />
ES-40 ES-50 ES-60<br />
21
wausaupaving.com • 800-388-8728<br />
Wausau<br />
Expo<br />
Granite<br />
<strong>PAVERS</strong><br />
Wausau ExpoGranite Pavers<br />
are shown in three colors.<br />
Custom colors available.<br />
Wausau ExpoGranite pavers are available in these sizes, in<br />
modular patterns and plank style pavers. Custom sizes available.<br />
Standard Thickness = 2” - 2.75”<br />
EG-10 EG-20 EG-30<br />
22
Omni Hotel, Fort Worth, TX<br />
23
wausaupaving.com • 800-388-8728<br />
Wausau<br />
Exterior<br />
Terrazzo<br />
<strong>PAVERS</strong><br />
Wausau Exterior Terrazzo Pavers<br />
are shown in five<br />
colors and standard finishes:<br />
ground, shotblast and sealed.<br />
Custom colors available.<br />
Wausau Exterior Terrazzo pavers are available in these<br />
sizes and plank style pavers. Custom sizes available.<br />
Standard Thickness = 2” - 2.75”<br />
ET-10 ET-20 ET-30<br />
24
Xcel Plaza, Minneapolis, MN<br />
ET-40<br />
ET-50<br />
25
wausaupaving.com • 800-388-8728<br />
Wausau<br />
SeaShell<br />
<strong>PAVERS</strong><br />
Wausau SeaShell Pavers<br />
are shown in five colors. Custom<br />
colors available.<br />
Wausau SeaShell pavers are available in these sizes<br />
and plank style pavers. Custom sizes available.<br />
Standard Thickness = 2” - 2.75”<br />
SEA-10 SEA-20 SEA-30<br />
26
Omni Hotel, Dallas, TX<br />
SEA-40<br />
SEA-50<br />
27
wausaupaving.com • 800-388-8728<br />
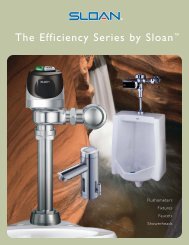
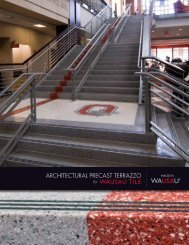
Wausau<br />
Cool Series<br />
<strong>PAVERS</strong><br />
Wausau CoolSeries pavers are available in these sizes, in<br />
modular patterns and plank style pavers. Custom sizes available.<br />
Standard Thickness = 2” - 2.75”<br />
Wausau CoolSeries Pavers<br />
are shown in six colors. Custom<br />
colors available. Cool pavers<br />
have a minimum 78% solar<br />
reflectance index (SRI). Available<br />
with different surface textures as<br />
shown on page 56.<br />
C-10 (SRI 94.8) CB-15 (SRI 81.1) CB-20 (SRI 79.9)<br />
28
Target, Atlanta, GA<br />
C-30 (SRI 93.2)<br />
C-40 (SRI 92.2) C-50 (SRI 87.1)<br />
29
wausaupaving.com • 800-388-8728<br />
Wausau<br />
Washed<br />
Glass<br />
<strong>PAVERS</strong><br />
Wausau Washed Glass Pavers<br />
are shown in five colors. Custom<br />
colors available.<br />
Wausau Washed Glass pavers are available in these sizes, in<br />
modular patterns and plank style pavers. Custom sizes available.<br />
Standard Thickness = 2” - 2.75”<br />
WG-10 WG-20 WG-30<br />
30
Syracuse University, Syracuse, NY<br />
WG-40<br />
WG-50<br />
31
wausaupaving.com • 800-388-8728<br />
Wausau<br />
Blasted<br />
Glass<br />
<strong>PAVERS</strong><br />
Wausau Blasted Glass Pavers<br />
are shown in five colors. Custom<br />
colors available.<br />
Wausau Blasted Glass pavers are available in these sizes, in<br />
modular patterns and plank style pavers. Custom sizes available.<br />
Standard Thickness = 2” - 2.75”<br />
BG-10 BG-20 BG-30<br />
32
South Los Angeles City Hall, Los Angeles, CA<br />
BG-40<br />
BG-50<br />
33
wausaupaving.com • 800-388-8728<br />
Wausau<br />
Ballast<br />
<strong>PAVERS</strong><br />
Wausau Ballast Pavers are<br />
shown in four colors. Custom<br />
colors available.<br />
B-10<br />
Wausau Ballast pavers are available in these sizes, and<br />
in modular patterns. “Quik Ship” items are stocked in 24”<br />
squares (2” thick) and ship within 15 business days, based on<br />
availability. Standard Thickness = 2” - 2.75”<br />
34
Coloplast, Minneapolis, MN<br />
B-20 B-30 B-40<br />
35
wausaupaving.com • 800-388-8728<br />
Wausau<br />
Detectable<br />
Warning<br />
<strong>PAVERS</strong><br />
Wausau Detectable Warning pavers are available in 12” and<br />
24” squares. Custom sizes available.“Quik Ship” items are<br />
stocked in 12” squares (2” thick) and ship within 15 business<br />
days based on availability. Standard Thickness = 2” - 2.75”<br />
Wausau Detectable<br />
Warning Pavers are shown in<br />
twelve colors and five patterns<br />
(pages 36-39). Custom colors<br />
available. Wausau Detectable<br />
Warning Pavers are also<br />
available with a flat finish.<br />
ADA-2 Pavers are State of<br />
California Title 24 compliant.<br />
A-10 A-20 A-30<br />
36
Tactile Warning<br />
Directional Bar<br />
Available Patterns:<br />
ADA-1<br />
ADA-2<br />
A-40 (33538 Federal Yellow)<br />
ADA-3<br />
37
wausaupaving.com • 800-388-8728<br />
Wausau<br />
Detectable<br />
Warning<br />
<strong>PAVERS</strong><br />
Wausau Detectable Warning pavers are available in 12” and<br />
24” squares. Custom sizes available.“Quik Ship” items are<br />
stocked in 12” squares (2” thick) and ship within 15 business<br />
days based on availability. Standard Thickness = 2” - 2.75”<br />
Wausau Detectable<br />
Warning Pavers are shown in<br />
twelve colors and five patterns<br />
(pages 36-39). Custom colors<br />
available. Wausau Detectable<br />
Warning Pavers are also<br />
available with a flat finish.<br />
ADA-2 Pavers are State of<br />
California Title 24 compliant.<br />
A-50 A-60 A-70<br />
38
A-120<br />
A-110<br />
A-100<br />
A-80<br />
A-90<br />
39
www.wausaupavers.com<br />
Detectable Warning Paver Designs and Patterns<br />
ADA-1 Staggered Pattern<br />
nominal<br />
nominal<br />
TITLE 24<br />
ADA-2 Straight Row 2.375” Spacing Pattern<br />
COMPLIANT<br />
nominal<br />
• ADA <strong>PAVERS</strong><br />
S TAT E<br />
O F<br />
nominal<br />
•<br />
C A L IF O R N I A<br />
• ADA <strong>PAVERS</strong><br />
TITLE 24<br />
COMPLIANT<br />
S TAT E<br />
O F<br />
•<br />
C A L IF O R N I A<br />
nominal<br />
nominal<br />
40
800.388.8728<br />
Detectable Warning Straight Row 1.67” Spacing Pattern<br />
Directional Bar Pattern<br />
Tactile Warning Pattern<br />
* Details available for download at www.wausaupaving.com<br />
41
Detectable Warning Paver Installation Guide with<br />
Wausau Tile’s Reusable Block-Out Frame<br />
www.wausaupavers.com<br />
1) Prepare area to receive concrete and detectable warning pavers. 2) Drive in rebar to the approximate height to receive Wausau Tile’s block<br />
out frame. The frame work has small feet to help locate where rebar<br />
should be located.<br />
3) Set block-out frame so rebar sits inside the frame legs. 4) Set block-out frame to final grade by tapping on frame work.<br />
5) Pour concrete into and around frame work. Level concrete and bull<br />
float area.<br />
6) Level concrete with a straight edge inside of the frame work- adding<br />
concrete as needed. Note: Standard frame designed for 2” thick paver.<br />
42<br />
7) Pull out frame. Bull float area to receive detectable warning pavers. 8) Allow concrete to cure. Use the following guidelines based on installation<br />
method. Note: If using wet set, do not allow concrete to cure.
800.388.8728<br />
Detectable Warning Guide for Sand Set Installation<br />
with Wausau Tile’s Reusable Block-Out Frame<br />
Step #1 - Sand Set Installation - Create weep holes for drainage. Core drill<br />
hole once concrete has set or, while concrete is still wet, make a hole with<br />
pipe.<br />
Step #2 - Sand Set Installation - Add masonry sand to recessed<br />
area.<br />
Step #3 - Sand Set Installation - Screed 1/4” masonry sand. Step #4 - Sand Set Installation - Set pavers in sand. Leave 1/16” to 1/8”<br />
between units to allow for sand.<br />
Step #5 - Sand Set Installation - Sweep sand into joints after installation.<br />
Extension Block Out-Frame<br />
12” x 24”<br />
Complete.<br />
12” Standard Blok-handle<br />
24” Also Available<br />
Main Block Out-Frame<br />
24” x 36”<br />
43
www.wausaupavers.com<br />
Detectable Warning Paver Guide for Thin Set Installation<br />
with Wausau Tile’s Reusable Block-Out Frame<br />
Step #1 - Thin Set Installation - Apply thin set with 1/4” x 3/8” notched<br />
trowel. Exterior grade.<br />
Step #2 - Thin Set Installation - Spread fully and evenly.<br />
Step #3 - Thin Set Installation - Set pavers. Be sure pavers are fully set<br />
into thinset. (Back buttering may be necessary).<br />
Step #4 - Thin Set Installation - Grout all joints with an exterior based<br />
grout or caulk. Complete.<br />
Detectable Warning Paver Guide for Wet Set Installation<br />
with Wausau Tile’s Reusable Block-Out Frame<br />
Step #1 - Wet Set Installation - While concrete is still wet, embed pavers<br />
into cavity.<br />
Step #2 - Wet Set Installation - Level pavers by tapping with rubber<br />
hammer. Note: Joints may or may not be grouted; contractor option.<br />
44<br />
Complete.
Wausau Pavers Physical Properties<br />
Property Value Test Method Property Value Test Method<br />
Compressive Strength =>8,000 psi avg. ASTM C140 Freeze-Thaw =< 0.5% loss of dry ASTM C67<br />
weight (50 cycles)* C-1260<br />
Flexural Strength =>700 psi ASTM C293<br />
Water Absorption < 5% ASTM C140 Center Load 1,850 lbs. WTCL 99<br />
Weight: 24-33 lbs/sf • Dimensional Tolerance: +/ - 1/16” (Length, width, height, convex, concave)<br />
*28 day test results based on nominal 24” Sq. x 2” thick material and our standard mix designs<br />
Above Left:<br />
Testing Flexural Strength<br />
Above Right:<br />
Testing Compressive Strength<br />
Left:<br />
Testing Center Load Capacity<br />
In-House<br />
Testing Facility<br />
Every job is<br />
tested before<br />
it leaves.<br />
45
wausaupaving.com • 800-388-8728<br />
Available in all of<br />
the colors shown on<br />
pages 46-47.<br />
Wausau<br />
Black<br />
Terra-Lok®<br />
<strong>PAVERS</strong><br />
Red<br />
Terra-Lok® pavers are available in 26 colors. They<br />
may also be ordered with 100% recycled porcelain<br />
aggregate (shown in the saw-cut paver to the<br />
right). Terra-Lok® pavers shown are manufactured<br />
in nominal 4” x 8” x 2 3⁄8” thick size and in other<br />
shapes. Inquire at 800-388-8728 or visit our website.<br />
Custom colors available.<br />
46<br />
18” x 18” x 2”<br />
12” x 12” x 2 3/8”<br />
The two-part design<br />
provides tighter control<br />
of surface aggregate,<br />
improving the overall look<br />
of the surface, compared<br />
to single mixes.<br />
The two-part mix allows<br />
more pigment to be added<br />
to the top layer for a richer<br />
color that won’t fade.
Tan<br />
Red Range<br />
Brown<br />
Gray<br />
Tan-Red<br />
Brown-Tan<br />
Gray-Black<br />
Brown-Black<br />
Red Black<br />
Red-Brown<br />
Red-Gray<br />
Peoria Flash<br />
Morning Moss<br />
River Run<br />
Firey Sunset<br />
Amber Spark<br />
Rising Dawn<br />
Shimmering<br />
Citrine<br />
Spring Gust<br />
Summer Sun<br />
Willow Creek<br />
Zephyr<br />
Autumn Blaze<br />
Winter Fury<br />
47
wausaupaving.com • 800-388-8728<br />
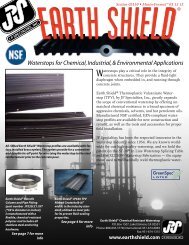
Wausau<br />
Lok-Down<br />
SYSTEM<br />
Wausau Lok-Down pavers are available in standard<br />
24”squares. Thickness = 2”<br />
Wausau Tile’s exclusive wind uplift data is based on 24”<br />
Sq. x 2” thick pavers only.<br />
Wausau Lok-Down pavers<br />
are designed for high-wind<br />
conditions. The system is<br />
adaptable to any Wausau<br />
paver in 24” squares, custom<br />
sizes are available. Lok-Down<br />
assembly is available in any of<br />
the colors below or in special<br />
order white.<br />
LD-10 (Cream) LD-20 (Tan) LD-30 (Gray)<br />
48
LD-40 (Brown) LD-50 (Red) LD-60 (Black)<br />
49
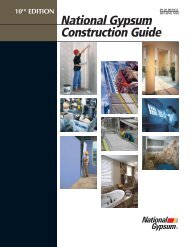
LOK-DOWN INSTRUCTIONS<br />
1. 1B.<br />
Base Plate of Lok-Down<br />
w/ 1/16” Rubber Shim Plate<br />
Terra-Stand® Assembly<br />
Set Grid Marks. Set Lok-Downs every 8-16 ft<br />
(Note: If using a Terra-Stand® set pedestal first.<br />
Follow Terra-Stand® Installation Instructions.)<br />
Assembly of the Terra-Stand® with the base of<br />
Lok-Down on the top of the pedestal with rubber<br />
shim plate. **See Terra-Stand® guide for<br />
pedestal assembly.**<br />
2.<br />
Set Balance of Lok-Down Base Plates.<br />
(Note: If using Terra-Stands® set Lok-Down base units on shims and pedestal tops.)<br />
3.<br />
Lok-Down Paver Recess<br />
Lok-Down Paver<br />
Lok-Down Base Plate Dome<br />
Lok-Down Base Plate<br />
Set Lok-Down Pavers on the base plates. Be sure to align recess on back side of paver with the<br />
domes on the Lok-Down base plate.<br />
50
0<br />
LOK-DOWN INSTRUCTIONS<br />
Lok-Down Paver<br />
Screw<br />
Lok-Down<br />
Top Plate<br />
Lok-Down<br />
Paver Recess<br />
Lok-Down<br />
Base Plate<br />
Complete Lok-Down System Model<br />
Model of the Lok-Down base plate and top<br />
plate in place ready to be screwed down.<br />
4. 4B.<br />
100<br />
200<br />
100<br />
Install Screw into Lok-Down with a Hex bit.<br />
Tighten down to 70 psi maximum. Do not over tighten.<br />
5.<br />
Sealant<br />
(By Others)<br />
Pre-Slotted<br />
Holes 6”OC<br />
WT Terra-Tab<br />
Cover 12’ Lengths<br />
*Extruded<br />
Termination Bar<br />
12’ Lengths<br />
Lok-Down<br />
Paver (Cut Paver)<br />
Check after tightening screw that it has a<br />
maximum 70 psi rating with a torque wrench.<br />
Top cap of Lok-Downto be flush with<br />
paver surface.<br />
*Install Paver Termination Bar along wall.<br />
Termination Bar (supplied by others))<br />
6.<br />
Lok-Down<br />
Paver<br />
Recess on Paver<br />
for Lok-Down<br />
Top Plate<br />
Top View of Lok-Down<br />
Lok-Down<br />
Assembly<br />
51
wausaupaving.com • 800-388-8728<br />
Wausau<br />
Modular<br />
PAtternS<br />
Wausau Modular Patterns<br />
pavers are available in all<br />
colors and finishes. Details<br />
shown are sectional only.<br />
West Point Academy, West Point, NY<br />
MOD-1<br />
12, 18, 24 sq, 6 x 18, 6 x 24 and 12 x 24 inches<br />
MOD-2<br />
6, 12, 18, 24 sq and 6 x 12 inches<br />
52
MOD-3<br />
6, 9, 12, 18 sq, 6 x 12, 9 x 18 and 12 x 18 inches<br />
MOD-4<br />
6, 12, 18, 24 sq, 6 x 12 and 12 x 24 inches<br />
MOD-5<br />
6, 12, 18, 24, 30, 36 sq and 6 x 12 inches<br />
53
wausaupaving.com • 800-388-8728<br />
Wausau<br />
Permeable<br />
<strong>PAVERS</strong><br />
Wausau Permeable Pavers<br />
are 12” square, and are<br />
available in all colors and<br />
finishes, except ADA patterns.<br />
Thickness = 2.375” - 2.75”<br />
Stacked Installation<br />
Running Bond Installation<br />
Wausau Turfstone Pavers are<br />
nominal 24” x 16” x 3.25” stocked in<br />
gray; custom colors available.<br />
54
City Walk, Green Bay, Wisconsin<br />
A<br />
B<br />
Wausau Permeable Pavers-2 are designed<br />
using both A and B, both approximately 14”<br />
in length, and are available in many colors and<br />
finishes, except ADA patterns.<br />
Thickness = 2.375” - 2.75”<br />
Permeable Terra-Lok are available in 26 colors.<br />
They may also be ordered with 100% recycled<br />
porcelain aggregate. Permeable Terra-Lok<br />
pavers are manufactured in nominal 4” x 8” size<br />
(3 7/8” x 7 7/8” x 3 1/4” thick).<br />
55
wausaupaving.com • 800-388-8728<br />
Wausau<br />
Accent<br />
<strong>PAVERS</strong><br />
Wausau Accent Pavers can<br />
be custom designed in any<br />
standard size. All surfaces<br />
can be produced in all colors.<br />
Custom colors available.<br />
Customers may also choose<br />
from special patterns already<br />
created by Wausau Tile.<br />
P-10 P-20<br />
P-30<br />
P-40 (broom) P-50 (wood grain)<br />
P-60 (slate)<br />
56
Old Town Streetscape, Chicago, Illinois<br />
57
wausaupaving.com • 800-388-8728<br />
Wausau<br />
Engraved<br />
<strong>PAVERS</strong><br />
Wausau Engraved Pavers<br />
carry your custom lettering<br />
and artwork. Engraving is<br />
epoxy filled. Available in select<br />
architectural precast pavers or<br />
on Terra-Lok pavers (see pages<br />
46-47). Perfect for your donor<br />
recognition project.<br />
Wausau Engraved pavers are available in these sizes and plank style<br />
pavers. Custom sizes available. Standard Thickness = 2” - 2.75”<br />
Terra-Lok paver shown with custom engraving.<br />
58
Custom Engraving<br />
Custom Engraving<br />
Custom Engraving<br />
59
wausaupaving.com • 800-388-8728<br />
Installation<br />
The most economical method<br />
for installing architectural pavers<br />
is sand setting. It also allows for<br />
easy replacement, repair and<br />
adjustment. Sand-set installation<br />
can be used where soils are<br />
well drained and settling is not<br />
expected. Proper compaction of<br />
the setting bed and the gravel<br />
sub-bed is mandatory. For<br />
stability, the sand bed should be<br />
no thicker than one inch. Joints<br />
should be 1/16” to 1/8”, and<br />
filled with swept sand. Perimeter<br />
restraint is recommended.<br />
Bituminous installation is<br />
indicated where greater stability<br />
is required.<br />
60
Wausau Sand-Set Installation<br />
Typical joint is 1/16” to 1/8”<br />
Wausau Bituminous Installation<br />
Typical joint is 1/16” to 1/8”<br />
61
wausaupaving.com • 800-388-8728<br />
Wausau Tab Installation<br />
Typical joint is 1/16” to 1/8”<br />
Wausau Pedestal Installation<br />
Typical joint is 1/16” to 1/8”<br />
62<br />
Terra-Stand is a registered trademark of<br />
Wausau Tile, Inc.
Wausau Mortar Thin-Set Installation<br />
*Follow current TCNA guidelines<br />
Wausau Mortar Thick-Set Installation<br />
*Follow current TCNA guidelines<br />
63
wausaupaving.com • 800-388-8728<br />
Installation<br />
Wausau Terra-Stand® Pedestal<br />
Full Assembly<br />
Accommodates slope<br />
The Wausau pedestal system<br />
provides height adjustment<br />
from 3/8” to 21”. Slopes up<br />
to 5/8” per foot are allowed.<br />
Maximum load per pedestal is<br />
3,000 pounds.<br />
64<br />
20” 15” 10” 5”
Monona Terrace, Madison, Wisconsin<br />
Spacers<br />
Waffle-Reducer<br />
3/8”<br />
3/8”<br />
Available in 1/8”, 3/16”<br />
and 1/4” sizes<br />
3/4”<br />
3/8”<br />
Tabs<br />
Available in<br />
5”, 6” and 7”<br />
squares with<br />
3/16” or 1/8”<br />
joint spacing.<br />
#5A<br />
#6<br />
#6A<br />
#7<br />
#5-1/8”<br />
Shims<br />
#6-1/8”<br />
Thicknesses from 3/8” - 2”<br />
#7-1/8”<br />
#5<br />
#5-1/4”<br />
#5-1/16”<br />
Available in 1/16”, 1/8”, 1/4” thickness<br />
65
Level Installation Using Terra-Stand®<br />
www.wausaupavers.com<br />
1- After establishing your paver grid marks, set Quadrant Pedestals<br />
every 8’ to 16’. Use a transit or laser level to set height.<br />
For cutting and leveling these pedestals, see details 2, 3 and 4.<br />
2- Cut Terra-Stand core with a chop saw; cut should be made on<br />
the perforated cut lines. The open end (top) of the core unit<br />
should be cut and discarded.<br />
3- Assemble Terra-Stand unit; hand tighten 3/4” nut.<br />
Do not over tighten nut. Unit is threaded correctly when core<br />
can be seen through the hole in the neck of the top piece.<br />
Use pencil to determine if the core is threaded adequately.<br />
4- Slide pedestal under laser line or straight-edge placing base<br />
grooves on chalk lines. Level top of Terra-Stand, in both<br />
directions, with level. Once level, tighten 3/4” nut with<br />
socket wrench or core wrench (shown).<br />
See# 8<br />
5- Once quadrant pedestals are set, take a straight-edge that can<br />
span the distance between the quadrant pedestals and mark<br />
the locations where the center of the intermediate pedestals should<br />
be placed.<br />
6- After the core is cut and the Terra-Stand is assembled (details<br />
2 and 3), slide line course pedestal under the straight-edge<br />
and adjust up by turning the top, making full contact with the<br />
straight-edge. Once the pedestal is set to height, tighten nut<br />
as shown in detail 4.<br />
66
Level Installation Using Terra-Stand®<br />
800.388.8728<br />
See# 8<br />
7- After the Line Course Pedestals are set, you can then install<br />
the Stretcher Course Pedestal in the same way as described<br />
in details 6 and 7.<br />
8- Fully installed pedestals:<br />
Quadrant Pedestals<br />
Line Course Pedestals<br />
Stretcher Course Pedestals<br />
(Orange)<br />
(Blue)<br />
(Yellow)<br />
9- Set #5 or #6 Terra-Tabs on Terra-Stand where you expect<br />
to set pavers for that working day.<br />
10- Run two or three rows of pavers down the middle of the deck<br />
in both directions. Keep pavers straight with laser.<br />
11- Fill in the Quadrants of the deck as shown above<br />
with red pavers.<br />
67
10” *15<br />
5” 10”<br />
Level Installation Using Terra-Stand®<br />
5”<br />
www.wausaupavers.com<br />
Cut<br />
core<br />
here<br />
Cut<br />
core<br />
here<br />
*20<br />
Final project grade<br />
1. After chalking grid lines, select required<br />
core size.<br />
* (15” & 20” cores are special order)<br />
1. After chalking grid lines, select required<br />
core size.<br />
* (15” & 20” cores are special order)<br />
1. Using a las<br />
pedestal. D<br />
assembly. C<br />
1. Using perforated a las<br />
pedestal. measureme D<br />
assembly. C<br />
perforated<br />
measureme<br />
*20<br />
*20<br />
equired<br />
rder)<br />
required<br />
required<br />
rder)<br />
order)<br />
hten)<br />
dhten)<br />
ghten)<br />
Laser line<br />
Final project grade<br />
Cut Final project grade<br />
core<br />
here<br />
Laser line<br />
Laser line<br />
Cut<br />
core Cut<br />
here core<br />
Chalk line<br />
here<br />
(Open end up)<br />
Chalk line<br />
1. Using a laser, determine final Chalk height lineof<br />
pedestal. Deduct (Open for end tab up) and base/top<br />
assembly. Cut<br />
(Open<br />
core on<br />
end<br />
the<br />
up)<br />
closest<br />
1. perforated Using a laser, cut line determine under this final height of<br />
1. measurement.<br />
pedestal. Using a laser, Deduct determine for tab and final base/top height of<br />
assembly. pedestal. Deduct Cut core for on tab the and closest base/top<br />
perforated assembly. cut Cut line core under on the this closest<br />
measurement.<br />
perforated cut line under Laser this line<br />
measurement.<br />
Laser line<br />
Laser Inspection line<br />
Hole<br />
Inspection<br />
Hole Inspection<br />
Chalk Hole line<br />
Grooves<br />
Chalk line<br />
4. Slide pedestal under laser line Chalk or line<br />
straight Grooves edge placing base grooves on<br />
chalk lines. Grooves Check inspection hole for<br />
4. threaded Slide pedestal core. under laser line or<br />
4. straight Slide pedestal edge placing under base laser grooves line or on<br />
chalk straight lines. edge Check placing inspection base grooves hole for on<br />
threaded chalk lines. core. Check inspection hole for<br />
threaded Final core. project grade<br />
Laser line<br />
Final project grade<br />
Final project grade<br />
Laser line<br />
Inspection<br />
Laser line<br />
Hole<br />
Final project grade<br />
Level<br />
Final project grade<br />
Final project grade<br />
Laser line<br />
Level<br />
Level Inspection<br />
Laser line<br />
Hole<br />
Laser line<br />
Inspection<br />
Hole Inspection<br />
Hole<br />
5. Level Terra-Stand in both directions<br />
with a carpenter or torpedo level. Be<br />
sure threads show in the inspection<br />
5. hole. Level (see Terra-Stand figure 9) in both directions<br />
5. with Level a Terra-Stand carpenter or in torpedo both directions level. Be<br />
sure with threads a carpenter show or in torpedo the inspection level. Be<br />
hole. sure threads (see figure show 9) in the inspection<br />
Top hole. (see figure Top 9) Top<br />
Deck<br />
Open end<br />
2. Cut Terra-Stand core with a Open chop saw; end<br />
Cut off and discard open end. Open end<br />
2. Cut Terra-Stand core with a chop saw;<br />
2. Cut off Terra-Stand and discard core open with end. a chop saw;<br />
Cut off and discard open end.<br />
Deck<br />
Deck<br />
Top Top Top<br />
Top Top Top<br />
3. Assemble Terra-Stand unit; hand<br />
tighten 3/4” nut. (Do not over tighten)<br />
3. Assemble Terra-Stand unit; hand<br />
tighten 3/4” nut. (Do not over tighten)<br />
core<br />
wrench<br />
core<br />
wrench<br />
6. Once top is level tighten nut with core<br />
wrench or 3/4” socket.<br />
6. Once top is level tighten nut with core<br />
wrench or 3/4” socket.<br />
TERRA<br />
Terra-Tab<br />
SYSTEM<br />
ONE<br />
R R<br />
Gro<br />
4. Slide pedes<br />
straight Gro edg<br />
chalk lines<br />
4. Slide threaded pedes co<br />
straight edg<br />
chalk lines<br />
threaded co<br />
Fin<br />
Fin<br />
Groove<br />
7. Make final<br />
as Groove needed.<br />
pencil/pen<br />
7. Make engaged final w<br />
as needed.<br />
pencil/pen<br />
engaged w<br />
Ter<br />
core<br />
h core<br />
th core<br />
Inspection<br />
Hole Inspection Chalk line<br />
Hole<br />
Grooves<br />
Chalk line<br />
7. Make final adjustments to Terra-Stand Chalk line<br />
as needed. GroovesCheck inspection hole with<br />
pencil/pen Grooves to ensure threads are<br />
7. engaged Make final with adjustments top. (see figure to Terra-Stand 9)<br />
7. as Make needed. final adjustments Check inspection to Terra-Stand hole with<br />
pencil/pen as needed. to Check ensure inspection threads are hole with<br />
engaged pencil/pen with to top. ensure (see threads figure are 9)<br />
engaged with top. (see figure 9)<br />
Core Core<br />
OK MIN. FAILURE<br />
Core Core<br />
OK<br />
Core Core<br />
MIN. FAILURE<br />
8. OK Installingcontractor MIN. to check<br />
FAILURE<br />
each Terra-<br />
Stand unit to ensure each core and top<br />
have enough threads engaged for<br />
8. support. Installingcontractor to check each Terra-<br />
8. Stand Installingcontractor unit to ensure to each check core each and Terra- top<br />
have Standenough unit to threads ensure each engaged core for and top<br />
support. have threads engaged for<br />
support.<br />
9. Set #5 or #6 Terra Tab on top of the<br />
Terra-Stand unit.<br />
11. Set Ter<br />
with Te<br />
68<br />
For a full Terra System One
800.388.8728<br />
Waffle Reducer Instructions<br />
R<br />
R<br />
3/8”<br />
3/8”<br />
3/8”<br />
3/8”<br />
3/8”<br />
3/8”<br />
3/4”<br />
3/4”<br />
1. The reducer assembly consists of a<br />
1. The base reducer unit with assembly 4 rings consists for height of a<br />
base adjustments unit with between 4 rings for 5/8” height and 2 1/2”.<br />
adjustments Additional base between units 5/8” are available and 2 1/2”. in<br />
Additional full box quantities. base units are available in<br />
full box quantities.<br />
Final project grade<br />
Final project grade<br />
Deck<br />
Deck<br />
4. Use laser line or equivalent to establish<br />
4. Use final laser project line grade. or equivalent Subtract to thickness establish of<br />
final paver project and support grade. unit Subtract (Terra-Tab) thickness to of<br />
paver determine and support final reducer unit (Terra-Tab) height required. to<br />
determine final reducer height required.<br />
2. Setting base plate on surface, stack<br />
2. Setting reducer base rings plate over on each surface, other stack until<br />
reducer required rings height over is each approximately other until<br />
required reached. height is approximately<br />
reached.<br />
Final project grade<br />
Final project grade<br />
Deck<br />
1/2 Shim Unit<br />
Deck<br />
FULL SHIM 1/2 SHIMS1/2 Shim 3/4 SHIM Unit<br />
FULL SHIM 1/2 SHIMS 3/4 SHIM<br />
1/4 SHIM<br />
1/4 SHIM<br />
5. Use 1/8” shim plate under reducer,<br />
5. Use when 1/8” required, shim plate to level under with reducer, laser line.<br />
when (Shims required, are scored to level to allow with field laser cutting) line.<br />
(Shims are scored to allow field cutting)<br />
3. Center reducer unit on chalk line(s)<br />
3. Center previously reducer established unit on chalk for paver line(s) layout.<br />
previously established for paver layout.<br />
6. Check level of reducer in both directions.<br />
6. Check Make level any necessary of reducer adjustments in both directions. required<br />
Make using any 1/8” necessary shim plate adjustments (see #4). required<br />
using 1/8” shim plate (see #4).<br />
7. Place Terra-Tab paver support unit on<br />
7. Place top of Terra-Tab reducer and paver install support pavers. unit on See<br />
top back of reducer of instructions and install for details. pavers. See<br />
back of instructions for details.<br />
8. Occasionally height limitation is less<br />
8. Occasionally than what the height reducer limitation or Terra-Tab is lesscan<br />
than accommodate. what the reducer (See or step Terra-Tab 9) can<br />
accommodate. (See step 9)<br />
TERRA PAVER<br />
9. When height clearance is limited, the<br />
9. When use of height 1/8” shim clearance plates is with limited, 3/16” the or<br />
use 1/8” of spacers 1/8” shim may plates be required. with 3/16” or<br />
1/8” spacers may be required.<br />
TERRA-STAND WITH<br />
TERRA TAB<br />
TERRA-SHIM PLATE<br />
WITH SPACER<br />
WAFFLE REDUCER<br />
(BASE & TWO RINGS)<br />
WITH TERRA-TAB<br />
69
WausauPaving.com • 800-388-8728<br />
WausauPaving.com • 800-388-8728<br />
Wausau Tab at Joint<br />
Wausau Tab at Joint<br />
Installation<br />
DETAILS<br />
Details<br />
Wausau Pedestal with Tab at Wall<br />
Wausau Pedestal with Tab at Wall<br />
inspection<br />
hole<br />
Wausau Pedestal at Joint<br />
Wausau Pedestal at Joint<br />
inspection<br />
hole<br />
2 1 ⁄2” to 21”<br />
adjustment<br />
Wausau Tab at Wall<br />
Wausau Tab at Wall<br />
70<br />
58
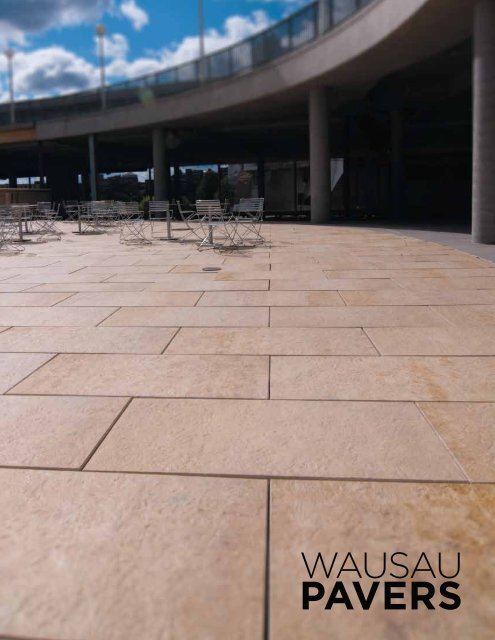
Waterjet<br />
Designs<br />
Water-jet Technology is the<br />
quickest, most efficient method<br />
of cutting pavers to achieve the<br />
ultimate in design accuracy and<br />
eye appeal.<br />
The water is filtered, compressed<br />
and emitted at ultrasonic speed.<br />
The result is a jet stream that cuts<br />
cleanly with no rough edges.<br />
Arcs, circles and other intricate<br />
designs can be cut using<br />
the precise water-jet cutting<br />
techniques to create a work of art<br />
with pavers.<br />
71
wausaupaving.com • 800-388-8728<br />
Custom<br />
Precast<br />
Wausau Tile Inc. also<br />
manufactures custom precast<br />
concrete to the highest<br />
standards of quality and service.<br />
Lakeshore East, Chicago, IL<br />
72<br />
Amplatz Children’s Hospital, Minneapolis, MN
Marie Gabrielle Gardens, Dallas, TX<br />
on back cover: Hollywood Casino, Toledo, OH<br />
73
Wausau<br />
<strong>PAVERS</strong><br />
WausauPaving.COm<br />
8 0 0 - 3 8 8 - 8 7 2 8<br />
TM<br />
5-13<br />
PO Box 1520 • Wausau, WI 54402-1520 • wausautile.com