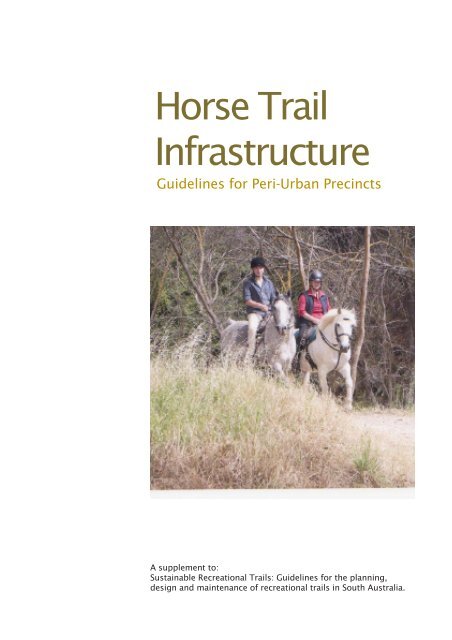
Horse Trail Infrastructure
Horse Trail Infrastructure - Horse SA
Horse Trail Infrastructure - Horse SA
- No tags were found...

You also want an ePaper? Increase the reach of your titles
YUMPU automatically turns print PDFs into web optimized ePapers that Google loves.
<strong>Horse</strong> <strong>Trail</strong><br />
<strong>Infrastructure</strong><br />
Guidelines for Peri-Urban Precincts<br />
A supplement to:<br />
Sustainable Recreational <strong>Trail</strong>s: Guidelines for the planning,<br />
design and maintenance of recreational trails in South Australia.
Contents<br />
03 Introduction<br />
05 Barriers<br />
06 Bridges and Boardwalks<br />
09 Underpasses<br />
12 Hitching Posts, Rails and Rings<br />
14 Cavaletti (Step-overs)<br />
16 Mounting Blocks<br />
18 Watering Points<br />
20 Riding Alongside Roadsides<br />
22 Road Crossings<br />
25 Signage<br />
30 <strong>Horse</strong> Yards<br />
31 <strong>Trail</strong> Heads<br />
32 <strong>Trail</strong> Design Notes<br />
34 References and Useful Links<br />
Cover photo courtesy The Advertiser.<br />
Photographer: Sarah Reed<br />
Acknowledgements<br />
<strong>Horse</strong> Owners of the Southern Mount Lofty Ranges Inc<br />
Elizabeth Stone, ACT Equestrian Association Inc<br />
Andrew Inglis, Australian <strong>Trail</strong> <strong>Horse</strong> Riders Assoc.Inc<br />
City of Onkaparinga, South Australia<br />
Prepared by <strong>Horse</strong> SA with funding support from the Office for<br />
Recreation, Sport Statewide Enhancement Program<br />
All or part of this document may be copied and distributed with<br />
permission from, and with acknowledgement of, <strong>Horse</strong> SA<br />
Disclaimer<br />
Although all reasonable care has been taken in preparing this<br />
information, <strong>Horse</strong> SA, the Office for Recreation and Sport or<br />
its officers accept no liability resulting from the interpretation<br />
or use of this information. The information is subject to change<br />
without notice<br />
© <strong>Horse</strong> SA 2010<br />
2
Introduction: <strong>Horse</strong> <strong>Trail</strong>s in<br />
Peri-urban Areas<br />
Peri-urban is the term used to describe the inter-face between city<br />
and country. New housing estates are being placed on land used<br />
previoulsy for agricultural purposes, often in a patchwork sort of<br />
way, with remnant traditional farming properties in-between.<br />
Housing estates often have the unintended effect of being built<br />
over traditional pathways or land used by people for recreation or<br />
informal transport corridors used to move from home to business<br />
or recreational pursuits.<br />
This alienation includes horse riders being limited or restricted<br />
from being able to travel between horse keeping and horse riding<br />
areas.<br />
Local Governments are increasingly recognising the need to provide<br />
for horse riders as part of a planned recreational trail system.<br />
Ideally, a local or regional recreational trail plan identifies not only<br />
current trail networks (signed or unsigned) but new opportunities.<br />
Recreational trail plans may or may not include commuter routes,<br />
but must interface with a range of land managers and adjacent<br />
councils.<br />
A safe, accessible trail network can be provided through urbanised<br />
areas, utilising road verges, open public space and unmade road<br />
reserves or service corridors. By far, it is easier to include trails<br />
in the planning stage of new developments rather than trying to<br />
install as an after-thought.<br />
Recreational trails are a low cost facility, often open 24 hrs a day,<br />
7 days a week with no entry fees. A low-cost investment for maximum<br />
return in use by residents and user groups.<br />
<strong>Trail</strong> users are typically not members of any clubs, but use trails<br />
to fit in with their own personal busy timetables and seek to use<br />
trails in their local area.<br />
People use trails for a range of reasons from bird watching, exercise<br />
or fitness to enjoying nature, socialising or even competitive<br />
activities. How people participate is far ranging, from a solo adventure<br />
to an organised group activity.<br />
Recreational trails are a community facility and need to be asset<br />
registered with management and maintenance plans. The trail<br />
facility is then included in all strategic, operation plans and<br />
schedules (financial, maintenance, asset) as Local Government or<br />
other land management agency would for any other valued community<br />
facility.<br />
Perceived low horse numbers due to predicted housing booms is<br />
not a reason not to plan for horse use on multi-use trails. A well<br />
designed multi-use trail will almost certainly be suitable for horse<br />
use., as well as cyclists and walkers.<br />
© <strong>Horse</strong> SA 2010<br />
3
Other trail users are quite happy to share a trail with a horse, as<br />
long as it is sign posted that horses should be expected to be seen<br />
on the trail. This is the same as walking on a route that is signed<br />
to raise awareness that cyclists are expected to be seen.<br />
Land Managers are encouraged to sign routes used by horse<br />
riders, this not only preserves trail routes but increases user<br />
awareness and therefore safety.<br />
<strong>Horse</strong> riding in particular, is captured as a valued part of our Australian<br />
Cultural Heritage and opportunities need to be provided to<br />
celebrate and practice this tradition.<br />
It is also quite achievable to provide for horse trails in an environmentally<br />
sustainable manner with a combination of good planning,<br />
trail design and installation of appropriate infrastructure to manage<br />
potential impacts.<br />
All trails require user group education through signage, maps,<br />
website information and engagement of local clubs.<br />
Land managers, trail designers & planners are encouraged to consult<br />
with a range of horse riders as different sectors (e.g. dressage,<br />
western) may have different requests to inform the brief.<br />
Understanding of Local Government & local land manager processes<br />
is critical for effective input into planning for the trail horse<br />
sector.<br />
This resource seeks to provide a guide for Land Managers in relation<br />
to (ridden) horse trail infrastructure, as part of a multi-use<br />
recreational trail network. This Guideline is supplementary to “Sustainable<br />
Recreational <strong>Trail</strong>s: Guidelines for the planning, design<br />
and maintenance of recreational trails in South Australia”<br />
References in the appedices will provide guidance for horse trail<br />
surfaces and other related resoruces.<br />
Signage<br />
Mt. Crawford Forest<br />
South Australia<br />
Photo: Julie Fiedler<br />
© <strong>Horse</strong> SA 2010<br />
4
Barriers<br />
Introduction<br />
Land Managers often seek to permit horse access while providing<br />
a barrier for vehicles. A barrier layout is a “control point” on a trail,<br />
used to modify speed or direction.<br />
Poor design will mean that a “crush point” is created with associated<br />
safety hazards.<br />
Construction Materials<br />
A wide variety of solid materials can be used including metal or<br />
recycled plastic bollards, posts or rocks. Land Managers may have<br />
further requirements, in order to deter vehicles.<br />
Construction Guidelines<br />
Barriers requiring a horse to step over an obstacle should not exceed<br />
35 cm height<br />
The barrier to have no protruding sharp edges<br />
A hardened surface friendly for horses at the “control point” where<br />
trail users pass through the barriers. Smooth cement is not suitable.<br />
Bottom left Coast to Vines Rail<br />
<strong>Trail</strong><br />
City of Onkaparinga<br />
South Australia<br />
Bottom Right<br />
Tom Roberts <strong>Horse</strong> <strong>Trail</strong><br />
City of Mitcham<br />
South Australia<br />
Siting Checklist<br />
Bollards, posts or rocks are ideally placed > 1.5 m apart<br />
Vegetation height clearances above the barrier > 3.7 m<br />
A safety zone of 2 m to allow for clear access and egress<br />
A clear trail corridor through the barrier is to be evident<br />
Approach & departure sightlines for best distance<br />
© <strong>Horse</strong> SA 2010<br />
5
Bridges and Boardwalks<br />
Introduction<br />
Bridges are the single most expensive item to include in a trail build<br />
budget. Bridges suitable for recreational trail use may also need<br />
to service a number of other users, including emergency service<br />
vehicles.<br />
Boardwalks are really just a series of inter-connected bridges postioned<br />
just above ground height. Traditionally made of wood,<br />
boardwalks are placed on sand, marshes or over wetlands. <strong>Horse</strong><br />
trails rarely have boardwalks, with modern trail builders choosing to<br />
utlise geotextile options or relocate around this type of environment.<br />
Bridge planning, design and installation is the domain of trained<br />
engineers, who can also cost out the best option and meet building,<br />
safety & environmental codes.<br />
This document seeks only to provide a guide to the needs of horse<br />
riders, in order that preferred specifications can be inserted into a<br />
brief for a new or refurbished bridge.<br />
Construction Materials<br />
Noise will frighten horses. If the bridge is made of metal or other<br />
noisy material, then treatments to deaden the noise will need to be<br />
applied.<br />
Anti-slip surfacing is paramount, as is a surface without lots of<br />
loose debris. Consider spraying a grit based surface over timber<br />
decking to provide grip and dull the noise or to lay rubber matting<br />
designed for equestrian use.<br />
Bridges supplied to “meet Australian Standards” can arrive with<br />
a surface of modern plastics which have proven quite slippery.<br />
Normally quiet horses lose confidence and refuse to cross. There<br />
are no Australian Standards for bridge design or aspects of design<br />
(e.g. surfacing) for horses, so working closely with the manufacturer<br />
is essential.<br />
The colour & consistency of the surface of the trail should<br />
continue from the trail tread approaching the bridge, over the<br />
bridge decking itself.<br />
A parapet is a low protective wall or railing along the edge of a<br />
raised structure e.g. a bridge. The narrower the bridge, the higher<br />
the parapet. On a wide bridge with low user traffic, horse riders<br />
can travel towards the centre, reducing the reliance on parapets.<br />
© <strong>Horse</strong> SA 2010<br />
6
Opening of the Amy Gillet<br />
Bikeway<br />
(Adelaide Hills Rail <strong>Trail</strong>)<br />
Adelaide Hills Council,South<br />
Australia<br />
Photo: Julie Fiedler<br />
On bridges or boardwalks less than 600 mm from the ground,<br />
(wide, with good sight lines) no parapets may be required. If a<br />
parapet is to be constructed to block out high volume traffic, research<br />
of existing structures world wide is recommended first as<br />
no design standards exist.<br />
No gaps to appear between planks if used for decking.<br />
Dimension Guide<br />
(note: These are a guide only, to be considered along with Australian<br />
Standards for bridge design)<br />
Preferred decking width: > 3.5 m (note this is wider than a trail<br />
surface, as there is no room to move off to the side) Individual<br />
sites may have narrower bridges, in consultation with horse<br />
owners.<br />
Minimum cross-fall the design selected will permit<br />
Decking kickboard positioned 25 mm above the decking (to allow<br />
for water drainage) to a suggested height of 250 mm, which<br />
will assist to arrest a hoof should a horse startle and his leg slide<br />
sideways.<br />
Solid parapets of 1.8 m or greater may need to be applied to<br />
bridges over or near major highways or where a specific type of<br />
horse is being catered for (e.g. young racehorses)<br />
On wide bridges with good sight lines lower parapets may suffice,<br />
on consultation with riders.<br />
Siting Checklist<br />
“Flared” approaches to bridges will assist nervous horses. To be<br />
constructed outside the limits of the bridge. A continous rail from<br />
the flair to the paraphet is required to minimise hooking of stirrup<br />
© <strong>Horse</strong> SA 2010<br />
7
irons or other preventable accident.<br />
Where the bridge is not part of a designated horse trail or for other<br />
reasons requires a rider to dismount and mount, mounting blocks<br />
may need to be provided at each end of the bridge.<br />
<strong>Horse</strong> waiting areas to be considered for each end of the bridge,<br />
to allow for riders to wait until a clear passage is available to go<br />
accross.<br />
Signage to be erected at each end of the bridge, reminding users<br />
to give way to horses. Narrow bridges may also require signage<br />
A culvert which does<br />
not require parapets<br />
Coast to Vines<br />
Rail <strong>Trail</strong><br />
City of Onkaparinga<br />
South Australia<br />
© <strong>Horse</strong> SA 2010<br />
8
Underpasses<br />
Example of an underpass<br />
suitable for horses.<br />
Australian Capital Territory<br />
Photo: Elizabeth Stone<br />
AFT<br />
Introduction<br />
Underpasses are a way of gaining safe passage for trail users from<br />
one side of a busy road or railway to another. On most occasions,<br />
existing infrastructure instalments are utilised. If horse riders in a<br />
local area are participating in consultation for a new roadway, the<br />
inclusion of an underpass during the construction phase will reap<br />
rewards for many years.<br />
Should riders be required to dismount to negotiate the underpass,<br />
a mounting block needs to be provided at each end as part of the<br />
construction brief.<br />
Construction Materials<br />
An underpass is a major project which will have environmental,<br />
building, safety and weight bearing requirements. Preferred materials<br />
will be selected by Engineers.<br />
Noise levels will need to be considered and construction materials<br />
selected to minimize.<br />
Ample natural lighting is to be available or artificial lighting<br />
provided.<br />
© <strong>Horse</strong> SA 2010<br />
9
Dimension Guide<br />
Preferred height > 3.7 m<br />
Preferred width > 4.0 m<br />
A lower height may be agreed to by local horse riders in<br />
collaboration with the land manager. The shape of the roof will<br />
have an influence on perceived or real available space.<br />
Narrow underpasses will need to allow for adequate space at each<br />
end to enable horse riders to halt horses and wait for a clear passage<br />
through.<br />
Siting Checklist<br />
The underpass should be kept clear of overhanging vegetation to<br />
maintain sight lines and ease of access.<br />
Manholes or other fittings and fixtures need to sit flush to avoid<br />
injury<br />
Similar to bridges, the trail surface ideally continues through the<br />
underpass.<br />
It is recommended to provide right of way signage at each end<br />
Signage relating to any other hazards, including seasonal or heavy<br />
rain event water flow need to be arranged<br />
Underpass segregating horse and<br />
walk/cycle<br />
Ideally a greater sight line would be<br />
available<br />
Australian Capital Territory<br />
Photo: Elizabeth Stone<br />
© <strong>Horse</strong> SA 2010<br />
10
Underpass is a bridge over a shallow creek.<br />
Coast to Vines Rail <strong>Trail</strong><br />
City of Onkaparinga, South Australia<br />
Photo: Julie Fiedler<br />
Underpass segregating horses from walk/cycle<br />
Australian Capital Territory<br />
Photo: Elizabeth Stone<br />
Underpass segregating horses and walk/cycle.<br />
Broom brushed concrete and dirt trail surface for<br />
horse riders.<br />
Australian Capital Territory<br />
Photo: Elizabeth Stone<br />
Underpass utilizing prefabricated pipe segment<br />
Tom Roberts <strong>Horse</strong> <strong>Trail</strong><br />
City of Onkaparinga, South Australia<br />
Photo: Julie Fiedler<br />
© <strong>Horse</strong> SA 2010<br />
11
Hitching Posts, Rails and Rings<br />
Introduction<br />
D<br />
There will be times that horse riders will need to tie up a horse.<br />
This is most likely to occur at trail heads, watering points and at<br />
locations that rider rest facilities are found.<br />
Local riders will be able to advise the land manager where horse<br />
tie up infrastructure is required along a trail route, other than at<br />
trail heads.<br />
The provision of a horse tie-up facility will remove the need to tie<br />
up a horse to another potentially unsafe object and reduce the<br />
need to tie horses up to trees. <strong>Horse</strong>s may cause damage to trees<br />
if tied up for long periods of time, such as an overnight campsite.<br />
There are many peri-urban horse trails that would not require a<br />
horse tie-up facility, as they are short distance trails or the primary<br />
user group lives locally and will complete a full ride without resting<br />
or tying up a horse. As an estimate, distances of less than 12 Km<br />
will not require a tie up facility other than at the trail head.<br />
A horse float parking site should include horse tie up facilities.<br />
The most common infrastructure installments required to tie up a<br />
recreational trail horse are:-<br />
Hitching Ring: A heavy duty metal ring anchored firmly into<br />
another solid fixture, such as a wall. Accommodates only one<br />
horse.<br />
Historial hitching post<br />
Stirling township main street<br />
Adelaide Hills Council<br />
South Australia<br />
Photo: Julie Fiedler<br />
Hitching Post: A single upright post. Strong enough to withstand<br />
at least a 750Kg horse pulling back with all their<br />
strength. Accommodates only one horse. Many towns will have<br />
both hitching rings and posts on their local heritage register.<br />
Hitching Rail<br />
Canberra Agistment Grounds<br />
Australian Capital Territory<br />
Photo: Elizabeth Stone<br />
© <strong>Horse</strong> SA 2010<br />
12
Hitching rail: Accommodates 2 – 4 horses on one side<br />
High-line: A suspended rope between two high points.<br />
<strong>Horse</strong>s are tied to the rope. Primarily used for overnight camping.<br />
High points are two taller established trees or two solid<br />
posts provided by the campsite manager.<br />
As this guideline has a focus on peri-urban horse trails, hitching<br />
rails will be considered as the mostly likely requiremen<br />
Construction Materials<br />
A hitching rail needs to withstand the rail snapping, bending or<br />
the uprights coming loose from their anchor point. The infrastructure<br />
will be tested when a full size horse pulls back with all of its<br />
weight on a rope or rein. <strong>Horse</strong> lead ropes or bridle reins often do<br />
not break under the strain.<br />
The hitching rail should meet the horse at chest height and will<br />
have to also take strain from a horse pushing and rubbing against<br />
it.Timber is higher maintenance than piping.<br />
Top: High-line demonstration<br />
Belair National Park<br />
South Australia<br />
Bottom: Hitching ring<br />
embedded in a wall<br />
Old Council Pound building<br />
Mid Murray Council<br />
South Australia<br />
Photographs: Julie Fiedler<br />
Design Guide (for hitching rails)<br />
Timber rail >200mm in diameter<br />
Piping approx: 75-100 mm diameter<br />
Rail height range: 990mm – 1220mm<br />
Length of rail: 3000-5000mm. Longer rails will require additional<br />
bracing or uprights.<br />
Siting Checklist<br />
A hitching rail installment should be placed at least 6 m from any<br />
other trail infrastructure, including the trail itself, picnic facilities<br />
or a watering point. Height clearance above the rail to be > 3.7 m.<br />
Additional hitching rails can be sited within their measured out<br />
“safety zones”.<br />
Only one single rail infrastructure installment per safety zone.<br />
The safety zone is free of hazards such as wire, exposed tree<br />
roots, designated car parks or picnic infrastructure.<br />
<strong>Infrastructure</strong> to be installed on a hardened surface with natural<br />
drainage. Surface can be compacted earth or aggregate, dolomite<br />
or sand on a firm base. Artificial surfaces such as purpose made<br />
equestrian matting placed on a prepared base is ideal.<br />
© <strong>Horse</strong> SA 2010<br />
13
Cavaletti (Step Overs)<br />
Introduction<br />
The primary purpose of a cavaletti (also known in some states<br />
as a step-overs or horse stile) is to prevent entry by motorbikes<br />
or vehicles onto a trail but allow for safe access for horse and<br />
rider.<br />
Walkers and cyclists can still negotiate a cavaletti, although<br />
some trail managers are also providing specialist gates for<br />
these trail users too. Cyclists with panniers will find cavaletti<br />
difficult to negotiate.<br />
<strong>Horse</strong> riders will need to be advised of the type of step-over<br />
installed as part of the trail infrastructure and where they may<br />
expect to find them.<br />
Construction Materials<br />
Timber, including railway sleepers, are most suitable for the<br />
rails which the horse steps over. Metal is not recommended, as<br />
horses will hit this with their hooves, make a noise and frighten<br />
themselves.<br />
Metal may be used for side bracings or components not<br />
expected to be hit by a hoof or the riders stirrup.<br />
Design Features<br />
Preferred rail height for horses to step over: 30 – 35cm<br />
Preferred width: 3.0 m<br />
Minmum width: 1.5 m<br />
Example of single rail cavaletti<br />
Kuitpo Forest, South Australia<br />
© <strong>Horse</strong> SA 2010<br />
14
Two rails is often enough to deter motor cycles, however in South<br />
Australia, Land managers often build a box frame base so that<br />
additonal rails can be added at any time in the future.<br />
Distance between rails: 1.2 m give or take 100 mm<br />
Siting Checklist<br />
The cavaletti needs to be sited on a near-level base, with all natural<br />
surface water draining well away from the installation.<br />
The horse rider attempting to access and egress the cavaletti will<br />
need a defined trail tread surface to safety negotiate the obstacle.<br />
One of the most common problems observed with placement of<br />
this type of infrastructure, is related to water. Often, as step-overs<br />
are placed to the side of the main carriageway, then the surface<br />
water running off the roadway or trail surface travels under the<br />
cavaletti.<br />
Armarta Road,<br />
City of Onkaparinga,<br />
South Australia<br />
(water erosion)<br />
Photo: J Fiedler<br />
Ideally, site selection includes a firm surface with natural drainage.<br />
However, as this type of infrastructure is often installed at “pinch<br />
points” or narrow points of concentrated trail activity, this is not<br />
always possible.<br />
The addition of 150 mm of dolomite on a compacted base<br />
(with no gravel component greater than 10 mm in diameter) is<br />
recommended for all installations to avoid the possibility of water<br />
pooling at the point either side of the cavaletti.<br />
The placement of the hardened surface will need to extend out<br />
past the cavaletti for at least 1.5m either side to capture the stride<br />
before and the stride after the horse negotiates the obstacle.<br />
© <strong>Horse</strong> SA 2010<br />
15
Mounting Blocks<br />
Introduction<br />
The installation of mounting blocks along a trail will increase usage<br />
by horse riders. Mounting blocks can be installed at trail heads and<br />
at gates which require horse riders to dismount to open or close.<br />
Other names include mounting steps, which implies portability or<br />
mounting ramps (steps and ramp onto a platform for wheelchairs)<br />
<strong>Trail</strong>s located in peri-urban areas around our major cities and towns<br />
are the most likely to benefit from mounting block installation.<br />
<strong>Trail</strong>s in these locations are more likely to have the requirement for<br />
a lot of gates.<br />
Often riders will seek out a rock, mound of dirt or old tree stump<br />
which serves the same purpose, however these natural features are<br />
not always available, be poorly positioned or unsafe to use in all<br />
weather.<br />
Mounting blocks consisting of one, two or three steps are suitable<br />
for peri-urban trails.<br />
Riders normally mount the horse on the left side (when the head<br />
is facing forward) The rider is in a vulnerable position during the<br />
mount, in the phase between having one foot is in the stirrup and<br />
one on the ground until the time that both feet are placed in the<br />
stirrups. If the horse moves during this time the rider can lose balance,<br />
or at the least, is less able to control the horse from moving<br />
its body around. Therefore a clear area around mounting blocks is<br />
of importance.<br />
The guidelines described for mounting blocks in this document are<br />
for a very basic design only. <strong>Trail</strong>s regularly utilised by riders with<br />
a wheelchair would potentially benefit from a wheelchair accessible<br />
mounting ramp placed at trailheads.<br />
Links to further mounting block and ramp information can be found<br />
in the appendicies<br />
Construction Materials<br />
Material or material combinations of stone, earth, timber or trail<br />
specific plastics (with anti-slip tread surface) Materials to be avoided<br />
are those which are lightweight, slippery when wet or make a noise<br />
when used.<br />
© <strong>Horse</strong> SA 2010<br />
16
Design Guidelines<br />
Land Managers will have a requirement to consider their agency<br />
design specifications for human steps and placement of steps in<br />
public places.<br />
The design selected (one, two or three steps) will depend on budget,<br />
siting on the trail and building materials. A design featuring<br />
steps on both sides of a platform may be considered in some sites.<br />
All edges to be rounded. Any fittings to be set flush. As a guide;<br />
Individual step height approx. 250 mm<br />
Width of each step > 500 mm<br />
Depth of each step > 250 mm<br />
The platform area on the top step to be at least 750 mm (as<br />
some rider foot placement adjustment is often required if the<br />
horse does not stand quite still).<br />
Historical Ladies Mounting Block<br />
circa 1864<br />
Auburn, South Australia<br />
© <strong>Horse</strong> SA 2010<br />
17
Watering Points<br />
Introduction<br />
<strong>Horse</strong> trails in peri-urban areas, utilised by local riders who keep<br />
their horses nearby are unlikely to require watering points. Longer<br />
distance trails that attract horse riders who travel in a horse float<br />
to use the route, will require access to water. <strong>Trail</strong> heads need to<br />
have an identified source for stock water.<br />
How water is provided can vary.<br />
Troughs are traditional, but require regular inspection (preferably<br />
daily) cleaning and maintenance.<br />
Taps fitted with self-turning off handles are a good option. People<br />
travelling with horses, who expect to require water, should be carrying<br />
a bucket in their float or a collapsible bucket on the saddle.<br />
The water can be supplied by mains or a tank which is regularly<br />
filled through access to a roof catchment.<br />
Open bodies of water (rivers, lakes) if available, will need to be<br />
signed to identify the best access point and the fact that horses<br />
are permitted to drink from the supply.<br />
If the water point is located off the trail, or in a spot where humans<br />
on foot can only access, signage and a horse tie up area need to<br />
be provided.<br />
A thirsty horse, in hot weather, may drink up to 70 litres per day.<br />
Watering points should be indicated on trail maps and supporting<br />
information.<br />
Construction Material<br />
There are many commercial companies who can provide safe,<br />
sturdy horse watering options in a range of colours and materials.<br />
Design Considerations<br />
The type of watering infrastructure selected will be determined by<br />
how the water will be supplied to the point, how much on site storage<br />
is required, expected usage levels and additional demands on<br />
the supply e.g. firewater.<br />
A commercial company can provide a range of options in collaboration<br />
with the Land Manager, who may also have budget<br />
constraints.<br />
© <strong>Horse</strong> SA 2010<br />
18
Siting Guidelines<br />
<strong>Horse</strong> yards provided on trails do not need to have watering points<br />
located within, as riders are present and the stay is only short.<br />
Buckets can be used or the horse led to water at regular intervals.<br />
Tap handles can get caught in bridles and headcollars, so they<br />
need to be located well away from horse yards or tie ups (outside<br />
of the reach of an unsupervised horse).<br />
Truck access may be required to fill tanks during extended dry<br />
periods.<br />
<strong>Horse</strong>, dog and human<br />
watering point<br />
Coast to Vines Rail <strong>Trail</strong><br />
City of Onkaparinga<br />
South Australia<br />
Photo: Julie Fiedler<br />
© <strong>Horse</strong> SA 2010<br />
19
Riding Along Roadsides<br />
Introduction<br />
In peri-urban areas, it is highly likely that all or a part of a trail will<br />
be placed within a road reserve boundary.<br />
Given a choice, it is better for a horse and rider to cross a road to<br />
get from one section of a route to another if the option provides<br />
lower interaction with motorised vehicles.<br />
Travelling along a roadway is not a preferred choice, as this greatly<br />
increases the likelihood of issues relating to traffic - but trail planners<br />
are frequently left with little option. Methods of traffic seperation<br />
are desirable.<br />
Traffic Seperation<br />
Providing a natural or artificial barrier between the horse rider and<br />
vehicles on the carriageway will minimise disturbance to the trail<br />
users. The natural barrier also includes that of space or distance<br />
between the carriageway and the roadside trail.<br />
Consideration should be given to “Crush points” or difficult areas<br />
frequently occur on the crests of hills and bends. In both circumstances<br />
the available verge is dramatically reduced or not available.<br />
Bridges or loss of verges for other reasons need to be closely<br />
looked at for solutions to improve safety for trail users.<br />
Solutions utilised to retrieve lost land may include trail access<br />
agreements for neighbouring land, purchase of land or cutting a<br />
trail below or above the carriageway levels and fencing to make<br />
use of whatever land is available.<br />
Construction Materials<br />
Natural barriers consist of trees, vegetation or dirt mound buffer.<br />
Space itself acts as a natural “barrier” in that space can be used as<br />
a clear separation tool.<br />
Artificial barriers can be made from a range of materials common<br />
to road design construction from guard rails to a parapet style<br />
installation.<br />
Design guidelines<br />
Each situation will be quite different and often an engineer and a<br />
road safety advisor may need to provide input in addition to horse<br />
riders input. Separation is the key. A visual barrier will benefit<br />
where trucks or frequent trade vehicles are passing close by and<br />
there is little or no room for a horse to move sideways as part of a<br />
natural response.<br />
© <strong>Horse</strong> SA 2010<br />
20
Siting guidelines<br />
Roadside horse riding occurs frequently, due to the lack of options<br />
for siting a trail route. Engage a range of expertise to assist in<br />
determining the best options for the trail. Take into consideration<br />
aspects outlined in other sections of this document, including hazards,<br />
low branches or unsuitable trail surface.<br />
Artificial Seperation Barrier<br />
(<strong>Horse</strong> trail marked in red)<br />
Canberra, Australian Capitol<br />
Territory.<br />
Photo: Elizabeth Stone<br />
Natural Seperation Barrier<br />
(<strong>Horse</strong> trail marked in red)<br />
Tom Roberts <strong>Horse</strong> <strong>Trail</strong><br />
City of Onkaparinga<br />
South Australia<br />
Photo: Julie Fiedler<br />
© <strong>Horse</strong> SA 2010<br />
21
Road Crossings<br />
Introduction<br />
<strong>Trail</strong>s in peri-urban areas may have road crossings and on<br />
some trails, there may be frequent crossings from one side<br />
of the road to the other in order to make best use of the<br />
limited available verge. Roads may be made or unmade.<br />
Under the Australian Road Rules horses are a vehicle. <strong>Horse</strong>s<br />
under the control of a rider are also permitted to travel<br />
either way on the verge or footpath with due care.<br />
Local governments or other land managers can also recognise<br />
horses as a legitimate trail user of roadways, including<br />
public parks & forests, rail trails and unmade road reserves<br />
(undeveloped roads)<br />
Safety for all trail users can be improved by selection of<br />
crossing points.<br />
Of great benefit, if room permits, is the installation of a<br />
“horse holding bay” which is in effect, a pull-over bay for<br />
horse riders whereby horses can be held at halt until a<br />
gap in the traffic allows for a safer crossing. At it’s most<br />
basic, a fencing panel will allow for an impatient horse to<br />
be “bumped up” against the rail or panel to encourage the<br />
horse to stand while waiting to cross.<br />
Where regular road crossings take place, on busy roads,<br />
a “Pegasus” crossing can be installed. This is a signalised<br />
crossing with the button to control lights placed both at<br />
pedestrian (or horse handler) height and one at rider height<br />
2 m above the ground. More information about Pegasus<br />
Crossings can be found in the reference section of this<br />
Guide.<br />
Instead of having a pictogram of a person walking or standing,<br />
this is replaced by a horse pictogram. The lights are<br />
coupled with a fence panel or barrier to keep horses away<br />
from the road edge while waiting for the lights to change.<br />
The light interval timings need to be discussed with road<br />
authorities, to allow for horses to cross.<br />
The crossing points are supported with signage.<br />
© <strong>Horse</strong> SA 2010<br />
22
Construction material<br />
Crossing points needs to be well signed.<br />
A “bump rail” can be placed at appoximate1.4 m height on a firm<br />
natural surface or with equestrian matting.<br />
Road related infrastructure for other user groups is often suitable<br />
to raise awareness of horses being in the vicinity.<br />
Siting Guidelines<br />
Crossing points need to have maximum sight lines for oncoming<br />
traffic.<br />
The crossing point needs to be free of hazards such as street furniture,<br />
poorly placed signage, excessive painted white road markings<br />
(which horses find scary) or obstructive landscaping.<br />
The waiting area needs to be located on a firm surface. Collapsing<br />
road edges, ditches, drains or metal grates over road guttering<br />
provide a dangerous surface.<br />
Segregated areas for pedestrians and cyclists if possible, especially<br />
if there are expected to be frequent or higher number of users.<br />
Coast to Vines Rail <strong>Trail</strong><br />
School crossing intersecting<br />
with Rail <strong>Trail</strong><br />
Main Road, Willunga<br />
City of Onkaparinga,<br />
South Australia<br />
Photo: Julie Fiedler<br />
© <strong>Horse</strong> SA 2010<br />
23
Rails sited to “bump” up horses<br />
while waiting for a gap in traffic.<br />
Upper Sturt Road,<br />
City of Mitcham, South Australia<br />
Photo: Julie Fiedler<br />
AFT<br />
© <strong>Horse</strong> SA 2010<br />
24
Signage<br />
Introduction<br />
Each trail will need a signage plan. This plan outlays<br />
• Primary information – of the type to be displayed at trail<br />
heads<br />
• Secondary information- directional & reassurance markers<br />
to keep trail users on route<br />
• Tertiary signage (site specific information) – e.g. close the<br />
gate<br />
• Regulartory signage e.g. road signs<br />
Many land managers will have other siganage plans, policies<br />
and other requirements to consider. Signage plans will require<br />
approval from the land manager.<br />
This section will address information to consider specifically for<br />
horse riders on multi-use trails.<br />
Primary Information: <strong>Trail</strong> head sign example<br />
<strong>Trail</strong> head signs are placed at major points of entry to/exit from<br />
of a trail network, which includes float parking areas and at trail<br />
heads used for camping. Seek a professional designer and sign<br />
manufacturer to assist. Professional companies can recommend<br />
signage construction materials, paint finishes and special coatings.<br />
The Kidman <strong>Trail</strong> signs, for example, have a special coating which<br />
© <strong>Horse</strong> SA 2010<br />
25
educes sun fade and damage from graffiti removal.<br />
Each land manager will have application requirements and approval<br />
processes for signage instalment including sign size, positioning,<br />
wind strength and public safety specifications.<br />
If a land manager is a trail project partner, their agency may very<br />
well facilitate the development application and installation of the<br />
sign for the trail.<br />
Tips for horse riders helping signage consultants<br />
1. Collect all the specifications, signage applications and any<br />
other requirements land managers may have<br />
Example of <strong>Trail</strong> Marker<br />
2. Refer to the signage plan and/or policies to determine what<br />
information will go onto the trail head sign including sign<br />
dimensions, colours, font styles and sizes, which logos.<br />
Existing signage may provide a guide.<br />
3. Prepare all of the information to go onto the map and source<br />
a contractor to complete this component first, as it will take<br />
the longest<br />
4. Prepare drafts of all of the text envisaged to appear on the<br />
sign<br />
5. Ensure each land manager, agency, community group and<br />
any other stakeholder check the information<br />
6. Run your own checks and test any phone numbers and<br />
websites<br />
7. Ask all stakeholders (land managers and funding agencies to<br />
“sign off” on the draft trail map and signage.<br />
8. Engage a graphic designer with experience in signage<br />
development.<br />
9. Circulate the final graphic design version for any comments<br />
by all stakeholder groups. It may also pay to have a full size<br />
print out done so it can be mounted on cardboard and placed<br />
in the intended location. Consideration then be given to such<br />
facts as font colour scheme and noting from how far away<br />
words can be easily read. Font colors may be difficult to read<br />
if the sign is in full sun or full shade.<br />
10. It is always useful to ask somone not familiar with the trail<br />
or trail project to give their interpretation on the information<br />
provided to make sure key messages are understood.<br />
© <strong>Horse</strong> SA 2010<br />
26
Information on the trai head can be clustered into categories:<br />
About the <strong>Trail</strong><br />
<strong>Trail</strong> logo<br />
Cultural heritage reference<br />
Map<br />
Travel Information<br />
Code of Practice<br />
Emergency contacts<br />
Contact for further information<br />
Logos of funding bodies & support organisations<br />
Watering points<br />
Disclaimer<br />
The information on the trail head includes:<br />
trail route, tourism information points, water, hospital, public telephone,<br />
public toilet, North marker, distance ruler, sealed roads,<br />
unsealed roads, other trails in the area to help plan loop experiences<br />
(e.g. The Mawson, Heysen <strong>Trail</strong>s are included in The Kidman<br />
Map series)<br />
Example of <strong>Trail</strong> Marker<br />
Geographical points: Watercourses, built up areas, airstrips, pines,<br />
orchards, trig markers, relief impressions to indicate hills & valleys.<br />
These are points that will not change significantly over time.<br />
Traveller information may include:<br />
Are permits required?<br />
Will private landholdings be traversed? If yes, include Code of<br />
Practice<br />
Will livestock be expect to be passed? If yes, include Code of<br />
Practice<br />
Will horses need to tolerate traffic?<br />
Will accommodation need to be booked ahead?<br />
Who do you report trail hazards to?<br />
Will the trail be closed on any days?<br />
Are there any water crossings on the trail? If so, warn of depth<br />
changes<br />
If other trail users are expected, include duty of care statement<br />
Include a general statement about risk<br />
Is any Personal Protective Clothing recommended?<br />
Is this trail overlayed on a public road governed by Australian<br />
Road Rules?<br />
Does this trail have neighbouring landholders?<br />
Does this trail traverse private land?<br />
© <strong>Horse</strong> SA 2010<br />
27
Sample signage<br />
Further information can be included on a trail notes brochure<br />
and/or website.<br />
AFT<br />
Sample signage used<br />
extensively in United<br />
States<br />
© <strong>Horse</strong> SA 2010<br />
28
Shared Use <strong>Trail</strong> Marker<br />
Belair National Park<br />
Photo: Julie Fiedler<br />
T<br />
Far Right:<br />
Sign on narrow verge,<br />
Tom Roberts <strong>Horse</strong> <strong>Trail</strong><br />
City of Onkaparinga<br />
Photo: Julie Fiedler<br />
Right:<br />
Awareness signage<br />
Kidman <strong>Trail</strong><br />
City of Onkaparinga,<br />
South Australia<br />
Photo: Julie Fiedler<br />
29
<strong>Horse</strong> Yards<br />
Introduction<br />
Peri-urban horse trails are unlikely to need horse yards, unless a<br />
number of loop rides can be joined to make up two or more days<br />
of a good riding experience.<br />
Yards hold horses for overnight stays and can be located on community<br />
land, or private land if an agreement is arranged. Water will<br />
need to be available.<br />
Construction Materials<br />
Timber or piping are the most common. A firm base with sand or<br />
dolomite mix on top. Rural suppliers have prefabricated panels<br />
which can be interlocked to form suitable yarding.<br />
Design Guide<br />
Yards need to be strong and solid as horses will rub, push, try to<br />
lift or kick railings. Minimise or reduce protruding fittings. Keep<br />
gaps between posts or gates and posts quite narrow, in order to<br />
avoid a hoof getting caught between. To construct or refurbish<br />
yards, engage a rural building contractor who understands livestock<br />
behaviour.<br />
Siting Guidelines<br />
Level, well draining ground. Placement near natural or artificial<br />
shelter to act as a wind break is desirable.<br />
<strong>Horse</strong> Yards<br />
Rockleigh <strong>Trail</strong> Head<br />
Kidman <strong>Trail</strong><br />
Mid Murray Council<br />
South Australia<br />
Photo: Julie Fiedler<br />
© <strong>Horse</strong> SA 2010<br />
30
<strong>Trail</strong> Heads<br />
A trail head can be any entry point onto a trail network.<br />
It provides<br />
<strong>Trail</strong> head signage with key trail related information<br />
<strong>Horse</strong> float parking on a firm surface<br />
Tie up rails and maybe yarding<br />
Stock water<br />
Rider facilities, including toilet and picnic table<br />
Facilities for other trail users, e.g. cycle racks<br />
A trail head which can have perimeter fencing installed with gates<br />
will add an extra level of security should horses get loose.<br />
Land Managers will need to meet with local horse riders to<br />
determine how available land can best be utilised. Discussion<br />
points may include:<br />
Entry and exit points to allow for best vision for towing vehicles<br />
Gate positioning so that horse floats are not protruding onto b<br />
Busy roadways while entry gates are opened<br />
Traffic flow, including vehicle turning circles<br />
Parking space for expected numbers<br />
Select suitable tent sites or how existing public buildings can<br />
Be accessed for overnight camping<br />
Is power available?<br />
Water for humans<br />
Manure management<br />
Fire pits, bbq areas or cooking areas<br />
Rules for the site e.g. dogs, noise, booking system<br />
Conservation or heritage areas to be protected<br />
Relationships with neighbours<br />
Yarding, toilet, water and ample parking<br />
Rams Head Corner<br />
Kidman <strong>Trail</strong> Head<br />
Mid Murray Council<br />
South Australia<br />
Photo: Julie Fiedler<br />
© <strong>Horse</strong> SA 2010<br />
31
<strong>Trail</strong> Design Notes<br />
<strong>Horse</strong> trail design for peri-urban areas is really the subject of a<br />
separate guide. However, some notes have been included to provide<br />
guidance for Land Managers.<br />
General Information<br />
There are significant bodies of work which have been completed<br />
by the International Mountain Bike Association (IMBA) and the following<br />
publications<br />
• Recreational <strong>Horse</strong> <strong>Trail</strong>s in Rural and Wildland Areas by Dr.<br />
Gene Wood (United States)<br />
• Equestrian Design Guidebook for <strong>Trail</strong>s, <strong>Trail</strong>heads and<br />
Campgrounds by Federal Highway Administration (United<br />
States)<br />
These notes supplement the <strong>Horse</strong> <strong>Trail</strong> Classifications found in<br />
the Sustainable Recreational <strong>Trail</strong>s: Guidelines for the planning,<br />
design and maintenance of recreational trails in South Australia.<br />
http://www.recsport.sa.gov.au<br />
Type of <strong>Trail</strong><br />
<strong>Horse</strong> riders, like walkers and mountain bikers, prefer single track<br />
with interesting scenery and a range of challenges. Riding along<br />
roadsides or the crossing of roads needs to be kept to a minimum.<br />
<strong>Trail</strong>s that are expected to service vehicles, or have other user<br />
groups frequently access the area will need to be wider and have<br />
the surface managed to resist erosion.<br />
Network Design<br />
Stacked loop system radiating out from a trail head where horse<br />
transport can be parked is ideal. In peri-urban areas, the linking<br />
of horse keeping and horse riding areas with short local routes is<br />
very important for safety.<br />
<strong>Trail</strong> Length<br />
Peri-urban trails will need to cater for the needs of local horse riders.<br />
Often it is more about defining the route, signage and infrastructure<br />
rather than long distance. Typically horse owners work<br />
during the day and can only fit in short rides of 5 – 10 km after<br />
hours. Links to longer routes for day rides are valued.<br />
© <strong>Horse</strong> SA 2010<br />
32
<strong>Trail</strong> Surface<br />
Natural trail surfaces are preferred.<br />
Avoid using long sections of asphalt or concrete as slippery<br />
and does not absorb concussion well. Longer term use by<br />
horses travelling faster than walking speed may cause concussive<br />
injury to the horse.<br />
Stones larger than a 10 mm across, loose debris which may<br />
be slippery or hide holes, or an unstable travel surface are not<br />
suitable.<br />
Turning Radius<br />
Turning radius is not critical on horse trails. Reference to a<br />
“safety zone” (clear space) around gateways, cavaletti and other<br />
infrastructure as described in this document is required.<br />
Percent Grade<br />
<strong>Horse</strong>s are quite capable of going up and down steep slopes.<br />
It is the trail design to manage water and prevent erosion that<br />
needs to be considered as a priority.<br />
Sight Distances<br />
Sight distances are not critical on horse trails unless it is a busy<br />
multi-use trail.<br />
Sight distances are most important at road crossing points. A<br />
sight line of 200 metres or more is desirable. Land Managers<br />
have access to traffic management specialists who can inspect<br />
sites and suggest modifications, signage or other modifications.<br />
Water Crossings<br />
Natural ford and creek crossings with a stable stream bank and<br />
bed are best, if water average is less than 600 mm in depth.<br />
<strong>Horse</strong>s can use bridges successfully; refer to the guidelines<br />
within this document.<br />
Fencing<br />
Fencing in of horses on trails is rarely required.<br />
Land Managers who are planning to mark existing routes or<br />
install horse trails should seek advice from experienced local<br />
trail riders and utilise the recommended reading list.<br />
© <strong>Horse</strong> SA 2010<br />
33
References and Useful Links<br />
References<br />
ACT Department of Territory and Municipal Services<br />
Equestrian Cavaletti Design and Self-closing Gate<br />
http://www.tams.act.gov.au/__data/assets/pdf_<br />
file/0015/12552/ds20_urbanedge.pdf<br />
Design Standards for Urban <strong>Infrastructure</strong> 7. Bridges &<br />
Underpasses<br />
http://www.tams.act.gov.au/__data/assets/pdf_<br />
file/0003/12576/ds07_bridges.pdf<br />
Equestrian Design Guidelines for <strong>Trail</strong>s, <strong>Trail</strong>heads and<br />
Campgrounds<br />
http://www.hancockresources.com/book.html<br />
<strong>Horse</strong> <strong>Trail</strong>s in Rural and Wildland Areas: Design, Construction<br />
and Maintenance by Dr Gene Wood<br />
http://www.americantrails.org/views/woodhorsetrails.html<br />
Ride UK The National Bridleroute Network Design Information<br />
http://www.ride-uk.org.uk/info.htm<br />
Ontario <strong>Trail</strong> Riders - Criteria for Hitching Rails<br />
http://www.otra.ca/Criteria%20for%20Hitching%20Rails.pdf<br />
Bridge Parapets Ltd.<br />
http://www.bridge-parapets.com/pedestrian_bridleways.shtml<br />
Design Criteria for Footbridges (Scotland/Wales/Ireland)<br />
http://www.standardsforhighways.co.uk/dmrb/vol2/sect2/<br />
bd2904.pdf<br />
Useful Links<br />
Town of Apple Valley Calafornia - Multi Use and Equestrian<br />
<strong>Trail</strong> Standards<br />
http://www.applevalley.org/Index.aspx?page=369<br />
Standards Australia<br />
http://www.standards.org.au<br />
Note: There are no standards for horse trail surface or infrastructure<br />
design in Australia. This document is a guideline only and information<br />
has been sourced from reference documents and experienced<br />
horse riders.<br />
It is anticipated that this document is widley circulated for 3 - 5<br />
years. <strong>Horse</strong> SA invites further contributions, comments and examples<br />
with the viewpoint that selected infrastructure items will<br />
progress to becoming Australian Standards.<br />
<strong>Horse</strong> SA http://www.horsesa.asn.au<br />
E: horsesa.asn.au<br />
© <strong>Horse</strong> SA 2010<br />
34