Fish Hawk X4 Manual - Fish Hawk Electronics, Inc.
Fish Hawk X4 Manual - Fish Hawk Electronics, Inc.
Fish Hawk X4 Manual - Fish Hawk Electronics, Inc.

You also want an ePaper? Increase the reach of your titles
YUMPU automatically turns print PDFs into web optimized ePapers that Google loves.
For over 30 years anglers have relied on <strong>Fish</strong> <strong>Hawk</strong> <strong>Electronics</strong> to give them accurate<br />
boat speed and water temperature information to help them catch more fish.<br />
Thank you for your purchase. We are a small, family owned and operated business<br />
that enjoys working personally with each of our customers<br />
If you like our products and customer service, please take a moment to write<br />
a review, ‘Like’ us and post at facebook.com/<strong>Fish</strong><strong>Hawk</strong><strong>Electronics</strong>, and tell your<br />
fishing friends about us.<br />
We want to make your fishing time more productive and more fun! If you have<br />
any questions about your <strong>Fish</strong> <strong>Hawk</strong>, please feel free to contact me. Thank you<br />
again, and have a safe and enjoyable season.<br />
Sincerely,<br />
Trevor Sumption<br />
Owner/Operator<br />
FISH HAWK ELECTRONICS ARE<br />
PROUDLY DESIGNED AND<br />
BUILT IN THE USA
Table of Contents<br />
The Search for the Right Water Temperature .............................................5<br />
<strong>Fish</strong> <strong>Hawk</strong> <strong>X4</strong> Components ..................................................................6<br />
<strong>Fish</strong> <strong>Hawk</strong> <strong>X4</strong> System ......................................................................6<br />
<strong>Fish</strong> <strong>Hawk</strong> Upgrade Kit ..................................................................6<br />
<strong>Fish</strong> <strong>Hawk</strong> <strong>X4</strong> Probe .......................................................................6<br />
How the <strong>Fish</strong> <strong>Hawk</strong> <strong>X4</strong> Operates ...........................................................6<br />
The <strong>Fish</strong> <strong>Hawk</strong> <strong>X4</strong> Probe .....................................................................7<br />
Installing the Batteries .....................................................................7<br />
Turning the Probe On and Off ..........................................................7<br />
Low Battery Warning ......................................................................7<br />
Attaching the Probe to the Downrigger Cable ...........................................7<br />
Attaching the Downrigger Ball ..........................................................8<br />
Selecting the Proper Weight Downrigger Ball ........................................8<br />
Installing the Triducer ........................................................................8<br />
Selecting a Location for the Triducer ...................................................8<br />
Mounting the Triducer ....................................................................9<br />
More Triducer Mounting Tips: ...........................................................9<br />
Sonar Interference ..........................................................................9<br />
The <strong>Fish</strong> <strong>Hawk</strong> <strong>X4</strong> LCD Display ............................................................9<br />
Installing the Display ......................................................................9<br />
Adjusting the Angle of the Display .................................................. 10<br />
Using the <strong>Fish</strong> <strong>Hawk</strong> <strong>X4</strong> Display ........................................................ 10<br />
Setting the Gain – Screen #1 ........................................................... 11<br />
Setting the Temperature Unit of Measure – Screen #2 ........................... 11<br />
Setting the Speed Unit of Measure – Screen #3 ..................................... 11<br />
Calibrating the Sensors – Screen #4 ...................................................12<br />
Electrical Interference .......................................................................12<br />
Routine Maintenance ........................................................................13<br />
Trouble Shooting .............................................................................13<br />
Warranty .......................................................................................14<br />
Service ..........................................................................................14<br />
Warranty Repairs .........................................................................14<br />
Out of Warranty Repairs ...............................................................14<br />
Flat Rate Repair Charge Chart .............................................................14<br />
Other Repair Information ...............................................................15<br />
www.fishhawkelectronics.com 3
The Search for the Right Water Temperature<br />
Almost every body of water has temperature changes from the top to the bottom.<br />
There are layers, or “pockets” of water where the temperature will be significantly<br />
different from the surrounding water. Sometimes these are differences are<br />
referred to as “temperature breaks” or the “thermocline.” Often fish will travel<br />
along the thermocline or break and finding theses area is a key to finding fish in<br />
several bodies of water.<br />
Each species of fish lives in a preferred water temperature range, which is often<br />
quite limited. Preferred temperature ranges include an optimum temperature, an upper<br />
limit, and lower limit. The chart below shows the preferred water temperature<br />
range for the most popular freshwater game fish and baitfish species in Fahrenheit.<br />
Species Lower Limit Optimum Upper Limit<br />
Atlantic Salmon 62<br />
Brook Trout 44 58 70<br />
Brown Trout 44 56-65 75<br />
Chinook Salmon 44 54 60<br />
Coho Salmon 44 54 60<br />
Kamloops Trout 46 47-54<br />
Kokanee 52-55<br />
Lake Trout 42 46-52<br />
Lake Whitefish 43 51<br />
Landlocked Atlantic Salmon 45-55<br />
Pink Salmon 49<br />
Rainbow Trout 44 54 75<br />
Sauger 55 67 75<br />
Sockeye Salmon 55<br />
Steelhead Trout 38 48-52<br />
Walleye 50 67 76<br />
Alewife 48 54 72<br />
Cisco 52-55<br />
Emerald Shiner 61<br />
Gizzard Shad 69<br />
Rainbow Smelt 43 50 57<br />
Spot tail Shiner 54<br />
When fish suspend in the water column it is by water temperature, and using the<br />
<strong>Fish</strong> <strong>Hawk</strong> <strong>X4</strong> will allow you to find them. With the <strong>Fish</strong> <strong>Hawk</strong> <strong>X4</strong> you can create a<br />
temperature profile of the water column by lowering the probe close to the bottom and<br />
observing the water temperature as you slowly raise the probe to the surface. This will<br />
allow you to find the correct water temperature for the species you are targeting.<br />
www.fishhawkelectronics.com 5
<strong>Fish</strong> <strong>Hawk</strong> <strong>X4</strong> Components<br />
The <strong>Fish</strong> <strong>Hawk</strong> <strong>X4</strong> can be purchased any one of three ways; as a complete system,<br />
or as an upgrade for the <strong>Fish</strong> <strong>Hawk</strong> Model 840, or the <strong>X4</strong> probe by itself. Depending on<br />
which configuration you have purchased, your package will include the following:<br />
<strong>Fish</strong> <strong>Hawk</strong> <strong>X4</strong> System<br />
Triducer with 30’ cable<br />
Triducer mounting kit<br />
Power cord for LCD display<br />
LCD display<br />
Stand for LCD display<br />
<strong>X4</strong> trolling probe<br />
Breakaway wire cannon ball safety lead<br />
This owners manual<br />
<strong>Fish</strong> <strong>Hawk</strong> Upgrade Kit (Upgrades the Model 840 to an <strong>X4</strong>)<br />
LCD display<br />
Stand for LCD display<br />
<strong>X4</strong> trolling probe<br />
Breakaway wire cannon ball safety lead<br />
This owners manual<br />
<strong>Fish</strong> <strong>Hawk</strong> <strong>X4</strong> Probe<br />
<strong>X4</strong> trolling probe<br />
Breakaway wire cannon ball safety lead<br />
This owners manual<br />
How the <strong>Fish</strong> <strong>Hawk</strong> <strong>X4</strong> Operates<br />
The <strong>X4</strong> trolling probe is fastened to the downrigger<br />
cable just above the downrigger ball and<br />
has sensors that constantly monitor water temperature<br />
and speed as it travels through the water.<br />
The probe sends a sonar signal with that information<br />
to the Triducer mounted on the back<br />
of the boat, much in the same way that a typical<br />
electronic fish finder works. The Triducer, which<br />
is hooked up to the LCD display, sends the data<br />
from the probe and the waters surface to the liquid<br />
crystal display (LCD) mounted in the boat.<br />
As the water temperature or speed changes the<br />
LCD readout changes to reflect the new information.<br />
The probe operates at depths from 1 to 300<br />
feet - guaranteed.<br />
6 <strong>Fish</strong> <strong>Hawk</strong> <strong>X4</strong> Owners <strong>Manual</strong><br />
Downrigger<br />
Line<br />
Probe<br />
Temperature<br />
Sensors<br />
Break-Away<br />
Lead<br />
Downrigger Ball<br />
<strong>X4</strong> Digital Display<br />
Transducer<br />
Transmitter<br />
Speed<br />
Sensor
The <strong>Fish</strong> <strong>Hawk</strong> <strong>X4</strong> Probe<br />
Installing the Batteries<br />
The probe is powered by four AA Alkaline batteries (not included.) Do not use<br />
Heavy Duty or rechargeable batteries. Fresh Alkaline bat-<br />
Twist off Battery Cap<br />
teries will provide 100+ hours of in-the-water life<br />
depending on water temperature. Install the<br />
batteries by:<br />
Unscrew the probe’s battery cap.<br />
Carefully pull the battery holder out of the probe.<br />
Place the four batteries into the battery holder<br />
Pull out battery holder<br />
matching the appropriate +/- terminals. Please note:<br />
pay special attention to the polarity of the batteries because the probe will function if only<br />
three of four batteries are correctly installed, but the readings provided may be inaccurate.<br />
Place the battery holder back into the probe with the battery wires facing the rear<br />
of the probe. The wires are designed to be longer to make replacing batteries easier.<br />
Please note: if the battery holder is replaced with the wires facing the front of the probe the<br />
slack wire can get caught in the threads of the cap, damaging the battery wires. While this<br />
easily repaired it may cause you to lose fishing time with the probe.<br />
Turn the battery cap back onto the probe and hand-tighten snug. Do not over<br />
-tighten. The battery cap has a double O-ring design that does not need to be<br />
overly tight to keep water out of the battery compartment. Keep the O-rings clean<br />
and lightly lubricated.<br />
Turning the Probe On and Off<br />
The <strong>X4</strong> Probe features a water sensitive Auto On/Off switch that turns the<br />
probe on when it is lowered into the water and shuts the probe off when it is removed<br />
from the water, conserving battery life. To test the probe, simply wet your<br />
fingers and place them across the two activated metal temperature sensors coming<br />
out of the front of the probe. A red LED<br />
inside the body of the probe will flash<br />
approximately every five seconds<br />
when the probe is on.<br />
Water sensitive<br />
Auto On/Off switch<br />
Low Battery Warning<br />
When the probe’s batteries are low a<br />
Flashing Red LED<br />
LOW BAT sign will appear in the center of the LCD display.<br />
When the LOW BAT sign is present and the probe readings appear as dashes<br />
it is time to change the batteries in the probe.<br />
Attaching the Probe to the Downrigger Cable<br />
Terminate your downrigger cable following your downrigger manufacturer’s<br />
instructions. Prior to attaching the probe it is a good idea to inspect the downrigger<br />
cable for and kinks or frays that might weaken the downrigger cable which<br />
could cause you to lose your valuable <strong>X4</strong> probe. Attach the probe using a high<br />
quality snap run through the stamped stainless steel loop on top of the <strong>X4</strong> probe.<br />
www.fishhawkelectronics.com 7
Attaching the Downrigger Ball<br />
<strong>Inc</strong>luded in the box is a break-away wire lead<br />
that goes between the probe and the downrigger<br />
ball. Attach one end of this lead to the stamped<br />
stainless steel loop on the bottom of the <strong>X4</strong> probe<br />
and the other end to the downrigger ball. The<br />
break-away lead is approximately 60lb test and<br />
is designed to break in the event you snag your<br />
downrigger weight on the bottom.<br />
Selecting the Proper Weight Downrigger Ball<br />
Although it is minimized, water resistance<br />
from the <strong>X4</strong> probe will cause some additional drag<br />
on the downrigger line. If you consider the sway<br />
in the downrigger line to be too much, a heavier<br />
downrigger ball can be used (i.e. switching from a<br />
10 pound ball to a 12 pound ball.)<br />
Installing the Triducer<br />
Properly installing the Triducer on the back of<br />
your boat is key to getting the best performance<br />
from your new <strong>Fish</strong> <strong>Hawk</strong> <strong>X4</strong>. Properly located,<br />
the Triducer will be completely immersed in the water at trolling speeds and will<br />
ride nearly flush with the bottom of the hull at planning speeds.<br />
Selecting a Location for the Triducer<br />
The Triducer should be located away from<br />
other transducers in an area not affected by bubbles<br />
from the hull or drive system. To locate the<br />
best place on the transom to mount the Triducer,<br />
observe the water flow out from under the<br />
hull at trolling speeds and while on plane. At<br />
trolling speeds look for the area that has the<br />
least amount of prop or back wash. At planning<br />
speed look for the area with the least amount of turbulence or<br />
bubbles. This will be the best place to mount the Triducer.<br />
Mount the <strong>Fish</strong> <strong>Hawk</strong> Triducer as far away as possible<br />
from other transducers (i.e. your fish finder’s) on the back of the boat. When possible,<br />
mount your <strong>Fish</strong> <strong>Hawk</strong> Triducer on the opposite side of the boat from other<br />
transducers. Experimentation almost always provides the best location for the Triducer<br />
on any boat.<br />
The Triducer has an extremely wide angle of 77-degrees that permits the signal to<br />
be received near the surface while increasing reception the deeper the probe goes.<br />
8 <strong>Fish</strong> <strong>Hawk</strong> <strong>X4</strong> Owners <strong>Manual</strong><br />
Connect probe to<br />
downrigger line here.<br />
Connect probe to<br />
Break-away Lead here.<br />
Break-away Lead<br />
Downrigger Ball
Mounting the Triducer<br />
Follow the installation instructions found in the included Triducer mounting kit.<br />
More Triducer Mounting Tips:<br />
• Most often the <strong>Fish</strong> <strong>Hawk</strong> Triducer should be mounted using the same criteria<br />
as most fish finders.<br />
• Locate the <strong>Fish</strong> <strong>Hawk</strong> Triducer as far away from other transducers as possible,<br />
preferably on the other side of the transom.<br />
• DO NOT cut the Triducer cable. If the cable is too long simply coil the excess<br />
out of the way. Ten foot cable extensions are available on-line from <strong>Fish</strong> <strong>Hawk</strong><br />
<strong>Electronics</strong> if a longer cable is needed.<br />
• When possible run the Triducer through its own hole through the transom<br />
above the waterline. We have seen instances where this eliminated interference<br />
with certain brands of fish finders.<br />
We install pieces of marine grade plastic on the back of our boats because they<br />
allow us change the position of transducers without drilling new holes in the transom.<br />
When trailering the boat, we recommend placing a rubber band around the<br />
Triducer speed wheel so it does not spin in the air. Remember to remove the rubber<br />
band before launching the boat.<br />
Sonar Interference<br />
Sonar interference is usually caused when similar sonar frequencies are used in<br />
close proximity to one another. The <strong>Fish</strong> <strong>Hawk</strong> <strong>X4</strong> uses a 70 KHz frequency while<br />
most fish finders operate around 200 KHz, meaning that the <strong>Fish</strong> <strong>Hawk</strong> <strong>X4</strong> will not<br />
interfere with most fish finders. Some dual frequency finders use a 50 or 83 KHz<br />
frequency that can interfere at high gain settings if the transducers are mounted too<br />
close together on the transom. You can also opt not to use the 50 or 83 KHz frequency<br />
if it causes a problem. <strong>Fish</strong> finders that have a user adjustable pulse width setting<br />
can be set to less than 800 microseconds if they cause interference.<br />
To identify the source of sonar interference, motor out to a spot where you can<br />
lower the probe 50-feet into water and then turn everything off, except your <strong>Fish</strong><br />
<strong>Hawk</strong> <strong>X4</strong>. Then start turning things on one at a time until you can repeat the interference.<br />
Lowering the gain will help the <strong>X4</strong> minimize interference but<br />
may reduce the usable depth range.<br />
The <strong>Fish</strong> <strong>Hawk</strong> <strong>X4</strong> LCD Display<br />
Installing the Display<br />
Place the display in a visible location. In some<br />
cases it is desirable to position it at the helm while<br />
in other situations you may want to locate it in<br />
the fishing area by the downriggers. An optional<br />
foul weather cover is available for purchase online<br />
if you plan on leaving the display in an exposed<br />
location.<br />
You can flush mount the display into your<br />
Use the four<br />
holes at the<br />
bottom of<br />
the base to<br />
secure it in<br />
place. There<br />
are two holes on<br />
each side of base.<br />
www.fishhawkelectronics.com 9
oat’s console by cutting a 3 1 ⁄2" wide x 6 1 ⁄8" tall hole in the dash and using a silicone<br />
sealant to secure the display in place.<br />
The display requires that two connections be made; the power cord and the Triducer.<br />
Additional cable can added to the power<br />
cable if you follow the proper polarity (+/-.) The<br />
display is protected by an in-line 1 amp fuse. As<br />
with most radio or sonar devices, we strongly<br />
recommend wiring the display directly to a 12-<br />
volt battery. Connecting to a fuse block can result<br />
in unwanted electrical noise that can interfere<br />
with the <strong>Fish</strong> <strong>Hawk</strong> <strong>X4</strong>.<br />
Adjusting the Angle of the Display<br />
You can remove, or adjust the angle of the LCD display by pressing the tabs at<br />
the top of the mounting base.<br />
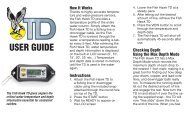
Using the <strong>Fish</strong> <strong>Hawk</strong> <strong>X4</strong> Display<br />
The <strong>Fish</strong> <strong>Hawk</strong> <strong>X4</strong> Display is divided into a top and bottom section. The top<br />
half of the display shows water temperature and boat speed at the surface, and the<br />
bottom half of the display shows water temperature and speed at the probe. If the<br />
probe signal is not detected, dashes will appear for both the probe temperature<br />
and speed. To indicate that the probe is functioning correctly, every time a new<br />
signal is received the decimal points in the probe readings will flash.<br />
The POWER button turns the display on and off. The display draws 35 mA<br />
when on and .3 mA when off. The display is equipped with a backlight for lowlight<br />
conditions. Enable the backlight by pressing the UP arrow or turn the back-<br />
Surface Temperature<br />
Surface Speed<br />
Current Settings<br />
Probe Temperature<br />
Probe Speed<br />
10 <strong>Fish</strong> <strong>Hawk</strong> <strong>X4</strong> Owners <strong>Manual</strong><br />
Pull rubber fuse<br />
housing apart to access fuse.<br />
POWER Button<br />
SET Button<br />
UP Arrow<br />
DOWN Arrow
light off by pressing the DOWN arrow.<br />
The display has four screen settings. To access each setting press the SET button,<br />
each time the SET button is pressed, the display will move to the next setting.<br />
Screen #1 allows you to set the gain (sensitivity) with a range of 0-25, the default<br />
is 15. Use the UP and DOWN arrows to adjust.<br />
Screen #2 allows you to set the temperature unit of measure to Fahrenheit or Celsius,<br />
the default is Fahrenheit. Use the UP and DOWN arrows to adjust.<br />
Screen #3 allows you to set the speed unit of measure to MPH, KNOTS, or KPH,<br />
the default is MPH. Use the UP and DOWN arrows to adjust.<br />
Screen #4 allows you to calibrate the sensor readings, + or – 5 degrees F on the<br />
temperature, and up to two-times adjustment for the speed. Use the<br />
UP and DOWN arrows to adjust.<br />
You can exit these screens by pressing the POWER button at anytime. All<br />
changes are saved at that point.<br />
Current gain setting<br />
being displayed.<br />
Current temperature<br />
configuration.<br />
Current speed<br />
configuration.<br />
Press UP<br />
arrow to<br />
increase<br />
gain<br />
setting.<br />
Press<br />
DOWN<br />
arrow to<br />
decrease<br />
gain<br />
setting.<br />
Setting the Gain–Screen #1<br />
The gain is also referred to as sensitivity, and ranges<br />
from 0 to 25. The factory default setting of 15 usually<br />
provides excellent results. The gain control only has<br />
an effect on the probe function. Most of the time no<br />
or only small adjustments are necessary. <strong>Inc</strong>reasing<br />
the gain allows probe readings to be received from<br />
greater depths. Lower gain settings reduce the possibility<br />
of other sonar or electrical interference, and<br />
also may be necessary in shallow water.<br />
Setting the Temperature Unit of Measure–Screen #2<br />
This screen allows you to select which temperature unit is displayed<br />
on the screen. The <strong>Fish</strong> <strong>Hawk</strong> <strong>X4</strong> will display temperatures<br />
ranging from 32 degrees to 104 degrees Fahrenheit.<br />
Press UP or DOWN arrow to<br />
toggle between °F and °C.<br />
Setting the Speed Unit of Measure–Screen #3<br />
This screen allows you to select the unit of measure for speed.<br />
The surface and probe speeds will automatically be in the same<br />
unit of measure. The <strong>Fish</strong> <strong>Hawk</strong> <strong>X4</strong> system will display speeds<br />
from .4 MPH to 11 MPH at the probe and from .4MPH to<br />
planning speeds at the surface.<br />
Press UP or DOWN arrows to toggle between<br />
the MPH – KNOTS – KPH settings.<br />
www.fishhawkelectronics.com 11
The reading will<br />
flash when selected.<br />
Electrical Interference<br />
Electrical interference can be caused by any other electrical equipment on the<br />
boat such as the radio, fish finder, chart plotter, radar, etc. The engine(s) can also<br />
create electrical interference. Electrical interference is generally a result of common<br />
wiring, but can be transmitted through the air. This is why we recommend that<br />
your <strong>Fish</strong> <strong>Hawk</strong> <strong>X4</strong> is wired directly to the battery and not to a fuse block.<br />
To identify the source of electrical interference, motor out to a spot where you<br />
can lower the probe 50-feet into water and then turn everything off, except your<br />
<strong>Fish</strong> <strong>Hawk</strong> <strong>X4</strong>. Then start turning things on one at a time until you can repeat the<br />
interference.<br />
12 <strong>Fish</strong> <strong>Hawk</strong> <strong>X4</strong> Owners <strong>Manual</strong><br />
Calibrating the Sensors–Screen #4<br />
If you feel the system is not reading correctly<br />
the calibration screen allows you to<br />
adjust the values of all temperature and<br />
speed readings. Due to differences in transducer<br />
mounting, you may have to make<br />
adjustments to the surface speed readings.<br />
Do this by:<br />
Pressing the SET button until the sensor reading flashes<br />
for the sensor you want to adjust.<br />
Once that sensor reading flashes press the UP or<br />
DOWN arrow to adjust.<br />
Please note that the factory calibrated values are de-<br />
Press the SET<br />
button to select<br />
the next item to<br />
calibrate.<br />
Calibration<br />
Indicator.<br />
Press UP or DOWN arrows<br />
to define the setting that is<br />
flashing.<br />
noted for each sensor by a missing decimal point. If you wish to go back to the<br />
factory settings press the UP or DOWN arrow until the reading flashes without a<br />
decimal point. The factory default value is always in the middle of the adjustment<br />
range. Once the reading flashes without a decimal point, press the SET button and<br />
the factory default will be restored.
Routine Maintenance<br />
Your <strong>Fish</strong> <strong>Hawk</strong> <strong>X4</strong> requires simple maintenance to keep it working properly.<br />
Use the following schedule to keep your <strong>Fish</strong> <strong>Hawk</strong> in top working order:<br />
Item Check Action Interval<br />
Liquid Crystal<br />
Display<br />
Check for dirt and<br />
water spots on the<br />
screen.<br />
Triducer Check for marine<br />
growth or deposits<br />
on the face.<br />
Downrigger<br />
Cable<br />
Check for kinks for<br />
fraying.<br />
Clean with soft cloth. Daily<br />
Clean with a soft bristle<br />
brush.<br />
Weekly<br />
Replace cable. Daily<br />
Probe Batteries Check for power. Replace if LED is not flashing<br />
inside the probe or if LO<br />
BAT appears on the display.<br />
Probe O-Rings Check for dirt and<br />
lubrication.<br />
Break-away<br />
Cable<br />
Check for kinks or<br />
fraying.<br />
Clean and apply a light<br />
coating of silicone lubricant<br />
if dry. Do not over-lubricate.<br />
Order replacement cable if<br />
bad.<br />
Daily<br />
Weekly<br />
Daily<br />
Trouble Shooting<br />
Refer to this trouble shooting chart prior to contacting the factory for service help.<br />
Problem Cause Solution<br />
The display<br />
does not<br />
power up.<br />
The display<br />
turns on but<br />
no probe data<br />
appears.<br />
Interference<br />
on the <strong>Fish</strong><br />
<strong>Hawk</strong> display<br />
or on your fish<br />
finder.<br />
The power cable is not<br />
connected.<br />
The battery is dead.<br />
The 1-amp in-line fuse is<br />
broken.<br />
The probe is not in the<br />
water.<br />
No power in the probe.<br />
The Triducer is not<br />
placed correctly.<br />
Bubbles are blocking the<br />
signal.<br />
Transducers are not<br />
separated enough on the<br />
transom.<br />
The 12-volt power cable<br />
is not connected directly<br />
to the battery.<br />
Connect the power cable to the<br />
display.<br />
Charge or replace the battery.<br />
Replace the 1-amp in-line fuse.<br />
Lower the probe into the water.<br />
Replace the probe batteries.<br />
Relocate the Triducer on the transom.<br />
Relocate the Triducer on the transom<br />
Try lowering the gain setting or<br />
relocate the triducer if necessary.<br />
Eliminate any connections between<br />
the 12-volt battery and the display.<br />
www.fishhawkelectronics.com 13
Warranty<br />
The <strong>Fish</strong> <strong>Hawk</strong> <strong>X4</strong> has one-year warranty from the date of purchase that covers<br />
all defects in materials and workmanship for the original owner. Grayden Outdoor<br />
LLC will at its sole discretion repair or replace components that fail during normal<br />
use. Failures due to abuse, neglect, or loss are not covered under this warranty.<br />
Service<br />
“HELP, I can’t fish without my <strong>Fish</strong> <strong>Hawk</strong>!” Many customers tell us that their<br />
<strong>Fish</strong> <strong>Hawk</strong> is so important to their fish catching success that they won’t fish without<br />
it. <strong>Fish</strong>ing season is too short and we want you to maximize every trip out –<br />
which means keeping your <strong>Fish</strong> <strong>Hawk</strong> in the water. That’s why we make getting<br />
service as easy as we can, to get you back on the water as quickly possible. If you<br />
have a question we’ll return your call or e-mail the same day (Monday through<br />
Friday 8a.m. -5p.m. CST.)<br />
Warranty Repairs<br />
If your <strong>Fish</strong> <strong>Hawk</strong> product was purchased within one-year, please call or email<br />
us and we’ll arrange to have a replacement product shipped right away at no cost<br />
to you. Please have a copy of your sales receipt, or credit card statement, or cancelled<br />
check available.<br />
Out of Warranty Repairs<br />
If your product is outside of the one-year warranty, you can send it to us right<br />
away without contacting us and we’ll fix it for a flat rate (see chart below.) Please<br />
ship the product back to us along with a note describing the problem, your return<br />
shipping address, phone number, and payment for the repair, plus $10 for shipping.<br />
We recommend sticking your address label on each part you ship back to us.<br />
Payment may be made by check or credit card. If you choose to include your credit<br />
card information, please provide the expiration date and security code (the last<br />
three numbers on the back of the card.)<br />
Flat Rate Repair Charge Chart<br />
Model Flat Rate Charge Repair Time*<br />
<strong>X4</strong> Probe $175 up to 3 working days<br />
<strong>X4</strong> Display $190 up to 3 working days<br />
*Repair time does not include inbound or outbound shipping times<br />
14 <strong>Fish</strong> <strong>Hawk</strong> <strong>X4</strong> Owners <strong>Manual</strong>
Other Repair Information<br />
Here are some other tips that make the repair process more hassle free:<br />
• Ship your product back in a way that you to get a tracking number for it<br />
• Very seldom is the Triducer the problem. We mention this because they can be<br />
a hassle to get off the boat. Contact us prior to removing the Triducer from the boat.<br />
Attach your address labels to each piece you send us.<br />
Service Contact Information:<br />
Return Address:<br />
<strong>Fish</strong> <strong>Hawk</strong> <strong>Electronics</strong><br />
C/o Grayden Outdoor LLC<br />
211 NW 4th St.<br />
Brainerd, MN 56401<br />
Phone: (218) 232-8793<br />
Email: service@fishhawkelectronics.com<br />
www.fishhawkelectronics.com 15
<strong>Fish</strong> <strong>Hawk</strong> <strong>Electronics</strong> Replacement Parts List<br />
Mail/Fax Order Form<br />
Grayden Outdoor LLC c/o <strong>Fish</strong> <strong>Hawk</strong> Parts<br />
P.O. Box 128<br />
Brainerd, MN 56401<br />
Fax (218) 824-1422<br />
or<br />
Order Securely On-line at www.fishhawkelectronics.com<br />
PART # DESCRIPTION PRICE ORDER<br />
QTy<br />
FH-<strong>X4</strong> DISPLAY <strong>Fish</strong> <strong>Hawk</strong> <strong>X4</strong> LCD display $299.99<br />
FH-<strong>X4</strong>-P <strong>Fish</strong> <strong>Hawk</strong> <strong>X4</strong> probe $269.99<br />
TRIDUCER PARTS<br />
FH-TRI-D Triducer for 840 or <strong>X4</strong> systems $199.99<br />
FH-BRKT Triducer bracket $24.99<br />
FH-EXT Triducer extension cable $49.99<br />
FH-SWK Triducer speed wheel kit $24.99<br />
PRObE PARTS<br />
FH-<strong>X4</strong> PADDLE WHL Probe paddle wheel with axel and nuts $14.99<br />
FH-840 SLOTTED CAP 840 Probe cap - slotted cap $14.99<br />
FH-840 STAR CAP 840 Probe cap - star cap $14.99<br />
FH-840 O-RING SLOT O-ring for 840 probe with slotted cap $1.99<br />
FH-O-RING STAR O-ring for 840 probe with star cap $1.99<br />
FH-<strong>X4</strong> PROBE CAP X-4 Probe cap $14.99<br />
FH-WIRE LEAD<br />
DISPLAy PARTS<br />
Breakaway cannon ball lead $9.99<br />
FH-PC Power Cord for <strong>X4</strong> and 840 $49.99<br />
FH-840 LABEL Label for 840 display $14.99<br />
FH-840 GIMBAL Gimbal bracket for 840 display $14.99<br />
FH-<strong>X4</strong> GIMBAL Stand for <strong>X4</strong> LCD Display $14.99<br />
FH-<strong>X4</strong>-FWC <strong>X4</strong> LCD foul weather cover<br />
Order Total<br />
MN Residents add 6.875% Sales Tax<br />
$14.99<br />
Shipping within continental US*<br />
Total in US Dollars<br />
$5.00<br />
Name —————————————————————————————————<br />
Address ————————————————————————————————<br />
City —————————————————— State ———— Zip ——————<br />
Phone<br />
—————————————————<br />
Personal Check, Money Order, or Credit Cards Accepted<br />
Card No. ____________ - __________ - ___________ - ____________<br />
i f t<br />
Exp. Date ____ -____ Security Code ________ Signature ______________________<br />
*International customers will be charged the actual cost of freight and are responsible for all<br />
brokerage fees, taxes, and duties applicable