Geology of Kingsand/Cawsand
Geology of Kingsand/Cawsand - Plymouth Business School
Geology of Kingsand/Cawsand - Plymouth Business School

You also want an ePaper? Increase the reach of your titles
YUMPU automatically turns print PDFs into web optimized ePapers that Google loves.
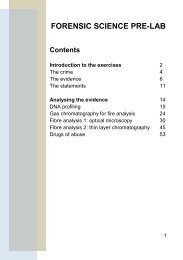
<strong>Geology</strong> <strong>of</strong> <strong>Kingsand</strong>/<strong>Cawsand</strong><br />
View from <strong>Cawsand</strong> looking north towards Sandway Cellar<br />
A PDF copy <strong>of</strong> this booklet, as well as PDFs <strong>of</strong><br />
risk assessments, maps and other documents in<br />
the box can be found in the virtual box,<br />
accessible from the LABplus website (see signs<br />
up around the lab to find out how to access the<br />
website).<br />
Further information can also be found at the<br />
fieldtrip website (laptops are available from the<br />
technician’s <strong>of</strong>fice)…<br />
http://www2.plymouth.ac.uk/science/anderson/de<br />
fault.htm
Introduction<br />
Looking northeast from <strong>Kingsand</strong> (Grid<br />
reference: 4347 5051) along the wavecut<br />
platform there is almost continuous exposure all<br />
the way to Fort Picklecombe (see photo above).<br />
This provides an excellent opportunity to study<br />
these rocks in the field and learn/practice some<br />
<strong>of</strong> the basic field techniques needed as a<br />
Geoscientist during your degree and afterwards.<br />
In particular the rocks at Sandway Cellar (Grid<br />
reference: 4407 5102) are <strong>of</strong> great interest and<br />
on the beach there is more to observe to build up<br />
a picture <strong>of</strong> the relationships between different<br />
rock types.<br />
How to get there?<br />
The twin villages <strong>of</strong> <strong>Kingsand</strong> and <strong>Cawsand</strong> are<br />
situated across the River Tamar on the western<br />
side <strong>of</strong> Plymouth Sound on what is known as the<br />
Rame Peninsula. It takes about 810 miles by<br />
road from Plymouth but only about 3.5 miles as<br />
the crow flies.<br />
Use the Ordnance survey map in the box to find<br />
out where <strong>Kingsand</strong>/<strong>Cawsand</strong> are and think<br />
about how you will get there. There are several<br />
ways <strong>of</strong> getting to <strong>Kingsand</strong>/<strong>Cawsand</strong>:
1. by bus (81C) from Plymouth (takes about 1<br />
hour). See bus timetable.<br />
2. by the Cremyll Ferry, from Admiral’s Hard,<br />
Stonehouse (8 minutes) and then either walking<br />
along the coastal path (45 minutes) or catching a<br />
bus (81C) to <strong>Kingsand</strong> (20 minutes). See<br />
timetables for ferry and bus times.<br />
3. by driving via the Torpoint Ferry and parking in<br />
the village (about 1 hour). See the OS Explorer<br />
map for the route. Come <strong>of</strong>f the ferry in Torpoint<br />
and drive straight on via the A374, turn left to<br />
Antony and left again at Tregantle onto the<br />
B3247 to Millbrook. Carry on up the hill past<br />
Millbrook to Fourlanesend (school on the left)<br />
and then turn right down the hill into <strong>Kingsand</strong>.<br />
Parking is available at the side <strong>of</strong> the road by the<br />
play park (free) or in one <strong>of</strong> the 2 carparks in the<br />
villages (pay & display).<br />
Tides<br />
Check the tide times as the exposures are tide<br />
dependent. Look at the Tide tables in the box or<br />
check online for the day you are planning to go<br />
into the field. You should always be aware <strong>of</strong><br />
whether the tide is rising or falling while you are<br />
working on a coastal section.
Website<br />
You can also check the following website for all<br />
this information:<br />
http://www2.plymouth.ac.uk/science/anderson/de<br />
fault.htm<br />
What to bring?<br />
You will need:<br />
Suitable footwear which supports your ankles<br />
Waterpro<strong>of</strong> jacket and trousers<br />
Compass clinometer & hand lens<br />
Field notebook & pencil<br />
Clipboard<br />
Maps <strong>of</strong> the area at varying scales – available<br />
online to print<br />
Lunch/snacks & drinks<br />
Handout with tasks to be completed/PDA<br />
Ordnance survey maps can be borrowed from<br />
the Cartographic Resources Unit, located in<br />
LABplus. Copies <strong>of</strong> the detailed<br />
<strong>Kingsand</strong>/<strong>Cawsand</strong> maps can be obtained as<br />
PDFs from the virtual box.<br />
Risk Assessment<br />
You MUST read and sign the risk assessment,<br />
leaving a copy with Meriel Fitzpatrick and taking<br />
a copy with you into the field. Copies <strong>of</strong> the risk<br />
assessment can be found in the virtual box.
What to expect<br />
The information in this next section is intended<br />
as an introduction to what you might see. The<br />
PDAs will provide similar information when you<br />
are in the field.<br />
Once you arrive in the village use the maps or<br />
PDA available to orientate yourself. Using the<br />
larger scale map find your way to the Minnadhu,<br />
also spelt Minnadew (a large grassy area to the<br />
northeast <strong>of</strong> the village) Grid reference: 4350<br />
5063.<br />
The coastal path leading towards Minnadhu
Walk along from the gate which marks the<br />
beginning <strong>of</strong> Mount Edgcumbe Country Park.<br />
Walk along the path and then diagonally down<br />
and along the grassy slope to the right, to the<br />
very end where there is a gap/gateway in the<br />
hedge straight ahead. Go down the narrow path<br />
and metal steps onto the beach.<br />
The gap in the hedge leading to the beach
View towards Sandway Cellar – pointed out by the red<br />
arrow<br />
Tasks to be completed:<br />
Once you have reached Sandway Cellar<br />
(marked with the red arrow) you should locate<br />
yourself and visit the following sites, using the<br />
PDA for assistance.
Site 1 – general view<br />
Site 1<br />
At this location you should be able to see the<br />
subvertical layers (beds) <strong>of</strong> sedimentary rocks<br />
which differ in their grainsize.
Site 1 – detailed view <strong>of</strong> sedimentary rocks<br />
Tasks:<br />
1. Examine the first rock type (Sample KC1) –<br />
look at the rock with a handlens and note that it<br />
is made up <strong>of</strong> grains (rather like the sand on a<br />
beach). Use the grainsize chart to determine<br />
the grainsize more accurately. Is it fine, medium<br />
or coarse?
2. Examine the second rock type (Sample KC2)<br />
– look at the rock with a handlens and note that<br />
you cannot see individual grains. To determine<br />
whether the rock is a siltstone or a claystone,<br />
you can carry out the “chew” test. Take a small<br />
piece and gently rub it against your teeth, or you<br />
can rub it against your fingernail if you prefer. If<br />
the material forms a paste it is dominated by clay<br />
and it is a claystone. If it feels gritty it is a mix <strong>of</strong><br />
clay and silt and it is a siltstone.<br />
3. Use your compass clinometer to measure the<br />
dip and dip direction <strong>of</strong> the bedding at this<br />
location (check on University S<strong>of</strong>tware – Earth<br />
Science Courseware – Compass Clinometer if<br />
you are not sure how to do this.<br />
Don’t worry about the white material in these<br />
rocks. These are veins and are a result <strong>of</strong><br />
fracturing. Note that they are only found in the<br />
Sandstones and not the Mudstones, which are<br />
s<strong>of</strong>ter.<br />
Directions: From here walk northeast to site 2.
Site 2<br />
Site 2 – general view <strong>of</strong> the orangeyred rock with the<br />
sedimentary rocks in the foreground<br />
You should see 3 rock types: two sedimentary<br />
rocks like those you saw at Site 1 – Sandstones<br />
(Sample KC1) & Mudstones (Sample KC2) and<br />
an orangeyred rock (Sample KC3).
Tasks:<br />
Find a good bedding surface and take a<br />
measurement <strong>of</strong> the Dip/Dip Direction <strong>of</strong> the<br />
sedimentary rocks – sandstones and mudstones.<br />
Examine the very orangey/red rock (Sample<br />
KC3) and describe it.<br />
Can you see any bedding?<br />
It is massive (i.e. has no bedding) and has<br />
coarse crystals (up to 5 mm)<br />
Closeup <strong>of</strong> crystals in the orangeyred rock
1. Look at the boundary between this rock and<br />
the sedimentary rocks (Samples KC1 & 2).<br />
2. What is the nature <strong>of</strong> this boundary?<br />
3. What does this tell you about their relative<br />
ages?<br />
4. What is the orientation <strong>of</strong> this boundary? Use<br />
your compass to take a measurement.<br />
Directions: From here was south to Site 3.<br />
Site 3<br />
You are along strike from the sandstones and<br />
mudstones that you measured at Site 1. You<br />
should see one main rock type here (Sample KC<br />
4). It is different to the others you have already<br />
described.
Site 3 – general view <strong>of</strong> the site<br />
This is very coarse sedimentary rock. It is a<br />
conglomerate.<br />
Tasks:<br />
Examine the rocks exposed and describe the<br />
range <strong>of</strong> blocks (clasts) found within them.<br />
1. What is the largest sized clast in the<br />
conglomerates (use your grainsize chart to<br />
classify clasts <strong>of</strong> this size)?<br />
2. What is the smallest sized clast (again use<br />
your grainsize chart)?
3. How many different types <strong>of</strong> clast can you<br />
identify?<br />
4. Identify and describe any <strong>of</strong> the rock types<br />
that form clasts in these conglomerates<br />
(especially any that you may have seen earlier<br />
today)?<br />
5. Do the large clasts touch each other or do<br />
they “float” in a matrix <strong>of</strong> finer material?<br />
6. What is the Dip and Dip Direction <strong>of</strong> the<br />
conglomerates?<br />
7. Which are the younger rocks and why?<br />
8. What is the nature <strong>of</strong> the boundary between<br />
these two sets <strong>of</strong> rocks?<br />
Directions: From here continue walking<br />
southwest to Site 4.<br />
Site 4<br />
You can sometimes see two <strong>of</strong> the rock types<br />
exposed here. But it depends how much sand is<br />
covering the exposure. You may see the<br />
sandstones like at Site 1 and the conglomerates<br />
like at Site 3 lying directly above.
Site 4 – general view<br />
Tasks:<br />
Examine the first rock type (Sample KC1).<br />
1. Can you see the grain size? Use your hand<br />
lens and grain size chart to help you.<br />
2. This is a sandstone, but is it Fine, Medium or<br />
Coarse?<br />
3. Can you see the bedding?<br />
4. Take a measurement <strong>of</strong> the Dip/Dip Direction.<br />
5. These rocks can also be seen at Sites 1 and<br />
2.
Site 4 – showing the dip <strong>of</strong> the bedding in the first rock<br />
type
Site 4 – showing the conglomerate filling in above the<br />
sandstone<br />
Examine the coarser rock type (Sample KC4).<br />
1. This is a conglomerate similar to the one you<br />
saw at Site 3.<br />
2. Estimate the Dip/Dip Direction <strong>of</strong> the bedding.<br />
Compare this with the measurement you took at<br />
Site 3.<br />
3. These rocks can be seen in much more detail<br />
at Site 3.
4. What do you think the nature <strong>of</strong> the boundary<br />
between Rock Types 1 & 2 is?<br />
5. Are these conglomerates younger or older<br />
than those Locality 3? Explain your reasoning.<br />
Directions: From here walk south just beyond<br />
the corner <strong>of</strong> the wall to Site 5.
Site 5<br />
These rocks are the youngest you will see in the<br />
succession here. They are completely different<br />
to the other rock types you have already seen at<br />
Sandways and originate from volcanic<br />
extrusions.<br />
Look for the obvious rocky platform which<br />
extends from the corner <strong>of</strong> Sandway Cellar and<br />
forms the southern edge to the beach.<br />
This is a volcanic igneous rock.<br />
Tasks:<br />
1. Examine the rock (Sample KC5) and<br />
describe the grain size. It is very fine but you<br />
may be able to see individual crystals.<br />
2. You should be able to observe some fine<br />
wavy lineations in these rocks, which are flow<br />
banding where the lava flowed (see photo<br />
below).<br />
3. You may also observe some very small holes<br />
or vesicles. What do these tell you?<br />
4. There is some very distinct jointing in these<br />
rocks – take a measurement <strong>of</strong> the orientation <strong>of</strong><br />
these joints with your compass.
Flow banding<br />
5. What is the relationship between these rocks<br />
and the others you have been observing?<br />
6. What geographical feature do these rocks<br />
form?<br />
Make some notes in your field notebook at each<br />
site. Try to be methodical in the way in which<br />
you make your notes.
Finally…<br />
1. Think about the relationships between all the<br />
rocks you have observed on this beach.<br />
2. Try to put them in stratigraphic order with<br />
reasons for your decisions.<br />
You can also check the geological map online for<br />
further information which may help you. This will<br />
tell you the ages <strong>of</strong> the rocks which is something<br />
you cannot ascertain in the field unless you find<br />
evidence in the form <strong>of</strong> fossils.<br />
Description <strong>of</strong> rock types in the<br />
laboratory<br />
Look in the box for samples <strong>of</strong> the rocks which<br />
you will see in the field (labelled KC15). This is<br />
an opportunity to look at the rock types in the<br />
comfort <strong>of</strong> the laboratory. Make some notes and<br />
compare these to the real outcrops when you<br />
visit the location.