Mulberry
Mulberry Cultivation in South India - Central Sericultural Research ...
Mulberry Cultivation in South India - Central Sericultural Research ...

Create successful ePaper yourself
Turn your PDF publications into a flip-book with our unique Google optimized e-Paper software.
<strong>Mulberry</strong><br />
Cultivation<br />
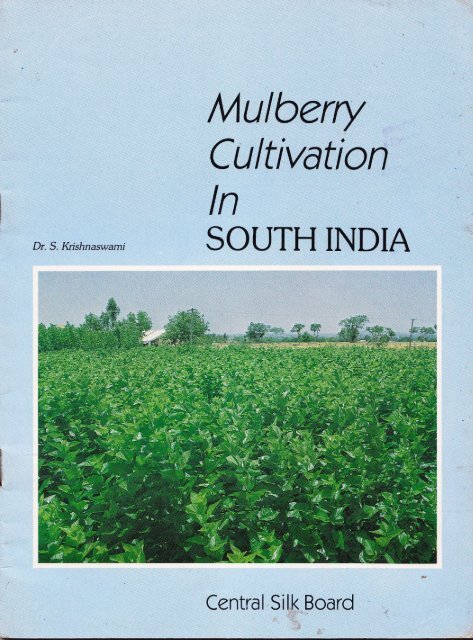
Dr. S. Krishnaswami<br />
ln<br />
SOUTH'INDIA<br />
rr i i -r'1..-,.1 ; i i:: :. ri. .:: i<br />
r,t.,ll'i, r,':<br />
"t.iil..t'.;,<br />
r,.,11'. '.|l , ,.1,.::.ll r:<br />
Central Silk Board
\*<br />
MULBERRY CULTIVATION<br />
IN<br />
SOUTH INDIA<br />
@<br />
ffi,<br />
t. Y- ,!/,g,i-il '<br />
ils€i{\r<br />
t<br />
DN. S. KRISHNASWAMI<br />
DIRECTOR (neto )<br />
Central Sericultural Research & Training lnstitute, Mysore.<br />
(Reprinted from the Bulletin No. 1 of the C. S. B. & T. 1., Mysore)<br />
CENTRAL SILK BOARD<br />
(Govt, of lndia - Ministry of Textiles)<br />
E}AI\GALOFTE
Reprint: November, 1986-5,000 copies<br />
Published by:<br />
Shri V. Balasubramanian, lAS,<br />
Member-SecretarY<br />
Central Silk Board<br />
United Mansions<br />
No. 39, Mahatma Gandhi Road<br />
BANGALORE.56O OO1.<br />
Printed at:<br />
Omkar, Offset Printers,<br />
Bangalore-560 002.<br />
Phone: 603601.<br />
Price: Rs. 3/-
CONTENTS<br />
'<br />
Page<br />
I. INTRODUCTION<br />
1<br />
II. MULBERRY PLANT<br />
1<br />
III. SOIL & CLIMATIC CONDITIONS<br />
2<br />
IV.ESTABLISHMENToFTHEMULBERRYGARDENSDURIT{G<br />
THE FIRST YEAR<br />
2<br />
i) Land PreParation<br />
ii) Planting Material & Planting<br />
iii) Spacing<br />
iv) VarietY of MulberrY<br />
v) Manuring<br />
vi) Weeding & lnter-cultivation<br />
V. MAINTENANCE OF THE MULBERRY GARDENS AFTER<br />
THE INITIAL ESTABLISHMENT 7<br />
A. RAINFED MULBERRY<br />
7<br />
i) Pruning<br />
ii) Weeding & lnter-cultivation<br />
iii) Manuring<br />
iv) Harvesting of Leaves<br />
v) Leaf Yield<br />
vi) Summary Schedule of Operations for Rainfed <strong>Mulberry</strong><br />
B. IRRIGATED MULBERRY<br />
12<br />
i) Pruning<br />
ii) Weeding & lnter-cultivation<br />
iii) Manuring-Dosage of chemical Fertrlisers for Row/Pit systems<br />
iv) lrrigation<br />
v) Leaf Harvest<br />
vi) Yield<br />
vii) summary schedule of operations for lrrigaied <strong>Mulberry</strong> under<br />
Row/Pit Systems<br />
VI. QUALITY OF LEAF HARVEST<br />
19
I. INTRODUCTION<br />
A major factor determining productivity and hence the profitability in Sericulture<br />
is the yield of mulberry crop. Maximisation of mulberry leaf yield per unit area wiil lead<br />
to the realisation of two most important objectives namely increased cocoon production<br />
per hectare and reduced cost of production. Therefore, it should be the primary aim<br />
of every sericulturist to ensure that he gets maximum leaf yield from his mulberry crop.<br />
It should also be realised that all measures taken to maximise leaf yield, simultaneously<br />
help to improve the quality of leaves which automatically secures an insurance against<br />
cocoon crop losses at lhe later stage of silkworm rearing'<br />
Towards the above end, intensive agronomic research was carried out both at<br />
Central Sericuliural Research Station, Berhampore and Central Sericultural Research<br />
and Training lnstitute, Mysore and based on the results achieved, the first paper on<br />
'Package of Practices for mulberry cultivation' was presented at a seminar organised by<br />
the Central Sericultural Research and Training lnstitute, Mysore in November, 1972.<br />
These recommendations have been since popularised by the lnstitute at Mysore and<br />
the Departments of Sericulture in Karnataka, Tamil Nadu and Andhra Pradesh on a<br />
large scale. With the result a large number of sericulturists, particularly those raising<br />
mulberry under irrigation have been enabled to raise their mulberry yield from an<br />
average of 15,000 kgs. in the past to 30,000 kgs. and over per hectare currently.<br />
While the recommendations of the lnstitute on mulberry cultivation have been no<br />
doubt helpful, ii is being observed, however, that the significance of some of these<br />
practices have not been fully realised by the cultivators and hence, a revised paper is<br />
being published now, incorporating some new ideas and research findings and<br />
stressing the importance of these recommendations with due reasoning and<br />
explanations, so that their full significance could be appreciated and followed in full<br />
(without inadvertant lapses) by the sericulturists;<br />
II. MULBERRY PLANT<br />
<strong>Mulberry</strong> is a hardy plant capable of thriving under a variety of agro-climatic<br />
conditions. At the same time, it is also sensitive responding extremely well to optimum<br />
agricultural inputs but showing practically no growth when plant nutrients and mositure<br />
begjn to operate as limiting factors. This is evident from the fact that under the poor
ainfall conditions ol 25-go" (625-750 mm) prevailing in South lndia, the current leaf<br />
yield is of the order of only 3,000-3,500 kgs. per hectare whereas under assured<br />
irrigation and appfopriate fertiliser application, it can be stepped upto 30,000 kgs. or<br />
so, or nearly ten times. Further, mulberry under South lndian conditions, unlit
tiith. Afterwards, a basal dose of organic manure like compost or cattle manure should<br />
be applied at the rate of atleast 10 tonnes per hectare for rainfed mulberry and 20<br />
tonnes per hectare for irrigated mulberry. Finally, the manure should be properly<br />
incorporated into the soil by ploughing and the land levelled and made ready for<br />
planting during the monsoon rains of June-July. lt must be stressed here that<br />
application of basal dose of organic manure like compost or cattle manure is essential<br />
{or successful initial establishment of the plantation. Under very exceptional<br />
circumstances, where these are not at all available, an alternative may be resorted to,<br />
by growing nursery raised plants and transplanting them into the main {ield.<br />
Generally, pit system of planting with wider spacing should be adopted for<br />
rainfed mulberry while row system with closer spacing can be adopted for irrigated<br />
mulberry. Therefore,for planting mulberry under rainfed conditions, pits should be dug<br />
at a spacing of 3'x3'(0.9 mx0.9m). The pits should be of the size ltlo'x 1'lo' (95<br />
cm. x 35 cm.) and atleast 1114' (gS cm.) deep. These pits are filled with soil, preferably<br />
mixed with some cattle manure and in the pits, the cuttings or rooted saplings are<br />
planted.<br />
. ln the case of irrigated gardens, the prepared land is thrown into ridges and<br />
furrows (by using a ridge former or working with manual labour) as indicated in the<br />
diagram. The cuttings are later planted along the edge on the ridges as shown in<br />
Figure 1.<br />
Figure 1<br />
-<br />
Formation oi Ridges and Furrows and Correct Way of Planting<br />
A- Ridge B-Furrow C-Cutting<br />
It may be noted here that there is only one irrigation channel for every two rows<br />
of mulberry plants. This helps in both saving and more effective use of the irrigation<br />
water.<br />
li) Planting Material and Planting:<br />
ln tropical conditions as in South lndia, mulberry can root easily and therefore,<br />
can be easily propagated through cuttings with minimum of time and expenditure. The<br />
cuttings should be prepared from 4-8 month's old hard wood branches which are brown
in colour and afleast'rr" 110-12 mm.) in diameter. The cuttings shourd be afleast 7,,_g,,<br />
(18-20 cm') long with a minimum of three bude (as shownln Figure 2).The ends of<br />
the cuttings should be clean cut with a sharp knife, without splits or.bark pealing off.<br />
Figure 2_ Selection of Cuttingsand Their Response<br />
A. Short and thin cuttings are unsuitable for planting.<br />
B. Planting of unsuitabre cuttings means no rooting (though sprouting) or very srow<br />
formation<br />
root<br />
and growth.<br />
9 Right type of cutting Diameter<br />
-./.r,,<br />
and 7:B,, in length.<br />
D' Root formation and growth vigorous when right type of cutting is pranted.<br />
4<br />
It is in the serection of pranting materiar that mistakes are often made<br />
which result in poor establishment of the plants with lots of failures and<br />
resultant gaps. Cuttings eilher thin in diameter or green in colour should be<br />
avoided as the chances of their success are poor. Therefore, to,. *.."r.ir]<br />
rooting of the cuttings every care should be taken to see that the cuttings<br />
of the desired maturity, thickness and rength arone, as indicated above, are<br />
selected for planting. Because, only such cuttings provide necessary nutrients<br />
for the buds to sprout and grow till such time that adequate root formation<br />
takes place.
It is also to be remembered that the soil should be very fertile containing<br />
adequate quantities of organic matter. lt is, therefore, absolutely necessary that<br />
whenever straight planting of cuttings is resorted to, the soil should receive a basal<br />
dose of manure like compost or organic manure at the rate indicated already. The<br />
manure should be thoroughly mixed with the soil before planting is undertaken.<br />
At the time of planting, it is important to see that the cuttings are placed deep<br />
and the soil around well compacted, leaving just one inch alone of the cutting exposed.<br />
This ensures the cuttings being planted sufficiently deep in the soil resulting in the<br />
formation of roots below the ground level. Further, this will prevent the cuttings from<br />
drying up. While planting, the cuttings should be planted either upright or with only a<br />
very slight tilt.<br />
ln places where compost or cattle manure is not available, it is highly risky to<br />
resort to direct planting of cuttings. Under such conditions, it will be found necessary<br />
to raise rooted plants in nurseries and transplanl 2112 - 3 months old rooted plants with<br />
about 3' growth and a stem thickness of about 10 mm., in the main field. While<br />
transplanting nursery raised plants, it is important to see that the original cutting from'<br />
which the plants have grown are burried deep in the soil atleast one to two inch below<br />
ground level and the soil around pressed hard as in the case of planiing cuttings. This<br />
ensures better anchoring of the plant .<br />
ln all the new plantings with either cuttings or nursery raised plants, it should be<br />
sotimedthatthere is 1-2 months of rainfall following the planting operation, particularly<br />
in the case of rainfed mulberry.<br />
iii) Spacing:<br />
ln the case of rainfed mulberry gardens, the aim should be to raise mulberry<br />
plant with a sturdier frame so that it is able to withstand prevailing drought conditions<br />
better. Therefore, the spacing should be atleast 3'x3' (0'9 m. x 0'9 m.) as is being<br />
currently practised. When cuttings are planted in the pits prepared for the purpose, they<br />
should be planted in "threes" at a spacing of 6" (15.cm.) from each other, forming an<br />
equilateral triangle. When nursery raised rooted plants are transplanted, they may be<br />
planted as single plants.<br />
ln the case of irrigated mulberry, the overall advantage in raising mulberry for<br />
both quantitative and qualitative harvest is in favour of planting mulberry with a spacing<br />
of 2' (0.6 m.) between the rows and 9r10" (23-25 cm.) within the row. This slightly<br />
wider spacing as compared to the existing Kolar system of row cultivation helps to<br />
produce better quality leaves from the point of view of silkworm rearing. In the case<br />
of irrigated gardens, where the practice of leaf picking instead of whole shoot harvest<br />
is followed, it would be found necessary to adopt a wide spacing namely 2'x2' (0'6<br />
m. x 0.6 m.). Upto 3'x 3'(0.9 m. x 0.9 m.) is also practised sometimes, but in this<br />
case the plants tend to become almost small trees and present problems of harvest.
iv) Variety of <strong>Mulberry</strong>:<br />
An improved selection namely Kanva-2, also referred to as M5, is a superior<br />
variety evolved by the lnstitute, which is a vigorous strain responding well to manuring<br />
and capable of giving aboul 25To more leaf yield. This variety thrives weil both under<br />
dry as well as irrigated conditionS. Qualitywise also, it is superior to the local variety<br />
of mulberry and therefore, could be used with great advantage.<br />
v) Manuring:<br />
As pointed out earlier, application of a ba.sal dose of organic manure like<br />
compost or cattle manure, is necessary for successful estabiishment of the garden.<br />
Thereafter, the young growing plants should be assisted to put forth vigorous and<br />
maximum growth through periodical fertiliser applications.<br />
ln the case of the rainfed garden, which is planted in June-July during the<br />
South-West monsoon season, the mulberry will receive sufficient rains from both the<br />
monsoons and this fact should be taken full advantage of to achieve maximum growth<br />
and build up a huge sturdy frame, so that the plant may stand the following drought<br />
months, from January to April very well. This is achieved by applying two doses of<br />
nitrogenous fertilisers such as Ammonium Sulphate or Urea at the rate of 25 kg. of<br />
N/ha for the first application aller 2112 to 3 months of growth and again, another 40 kg.<br />
of N/ha as the second dose after an interval of another three months. This would<br />
enable the plants to reach a growth of about 6' (2 m.) in about 6 to g months'time.<br />
ln the case of irrigated mulberry, where the plant will grow vigorously due to<br />
assured irrigation, the first dose of nitrogenous fertiliser should be given after 21l,<br />
months of planting at the rate of about 40 kg. N/ha. ln the next 2 to 21lz months, the<br />
plants would be ready for first harvest of leaves. Thereafter, the normal fertiliser<br />
application programme (described later) could be resorted to.<br />
vi) Weeding and lnter-cultivation:<br />
During the initial stages of plant establishment in the field, weed growth should<br />
be kept to the minimum, so that lhe growing young plants are not smothered by the<br />
weeds. Atleast two weedings should be carried out during the first six months after<br />
planting of cuttings. once after two months of planting and again a{ter an interval of<br />
2 to 3 months. The weeding operation should be thorough and the soil should be dug<br />
deep to remove the weeds with roots. This deep digging is carried out as a part of the<br />
weeding operation and results in necessary loosening of the soil and stimulation to the<br />
plants to grow vigorously. Thus,special care should be taken to reduce the weed<br />
growth as much as possible in the first year of planting. Thereafter, the shade effect<br />
of the fully grown mulberrv will tend to keep the weeds down. Similarly, periodicai<br />
6
inter-cultivation should be resorted to, particularly in the case.of dry mulberry gardens,<br />
during the first year so that soil loosening results in better aeration and stimulation of<br />
plant growth. This also helps in catching the rain water and its deep penetration for<br />
better retension of soil mositure.<br />
V. MAINTENANCE OF THE MULBERRY GARDENS AFTER<br />
THE INITIAL ESTABLISHMENT<br />
During the first year, all attention should be concentrated on establishing the<br />
mulberry field properly as indicated above. One should not be in a haste to take early<br />
leaf harvests before the plants attain full growth. ln the case of mulber?y under rainfed<br />
conditions, it will take ten to twelve months before first pruning is resorted to and<br />
systematic cultivation is taken up. On the other hand, in about six months time, the<br />
plants will reach {ull growth under the irrigated conditions and thereafter, systematic<br />
cultivation can be taken up. These are described below.<br />
A. Rainfed MulberrY:<br />
As mentioned earlier, mulberry planted in June-July will be ready for first pruning<br />
in June of the following year. Prior to that, two small harvests may be taken, once,some<br />
time in November-December and again in April-May. The harvests should be light and<br />
made by picking only mature leaves, leaving major part of the growing branch intact<br />
covered with leaves.<br />
i) Pruning:<br />
For maintaining mulberry in a state of. vigorous growth and also for obtaining<br />
good quality leaves, periodic pruning is necessary. Pruning should also take into<br />
consideration the growth attained by the plants; normally the growth should be more<br />
than 6' (2 m.) in height and stem or branch girth not less than tlo" 123 mm) at the<br />
bottom.<br />
Rainfed mulberry should receive one annual bottom pruning in June coinciding<br />
with the receipt of the South-West monsoon rains. lt is carried out by cutting the plants<br />
at a height of 3" to 4" (8-10 cm.) above the ground ievel with a sharp pruning knife<br />
or saw, in such a way that clean cuts are made without splitting the stem or branches,<br />
as shown in Figure 3. The system of "guddali" pruning currently practised is too<br />
drastic and cuts into the root zone which leads to reduced branching and gradually to<br />
even ultimate rnortality of plants. Therefore, such a practice should be given up and<br />
pruning carried out as indir:ated above.
Figure 3 - Correct Way of pruning 3,,-4,, Above Ground<br />
with Clean Cuts at Cut Ends<br />
ii) Weeding and lnter-cultivation:<br />
Normally within a week of pruning, weeding and inter-cultivation should be<br />
carried out by ploughing or using a harrow. The weeds around the plants which are<br />
not generally removed by ploughing or harrowing are removed manually. This operation<br />
stimulates growth of plants and also assists in providing necessary tilth and deep<br />
penetration of rain water into the soil, resulting in better conservation and utilisationof<br />
the soil moisture. ln all, upto four weeding and inter-cultivation operation should be<br />
carried out in June, October. January and April.<br />
Fii) Manuring:<br />
The present low yields of leaf under rainfed mulberry is mainly due to poor<br />
rainfall and lack of or inadequate application of manures or fertilisers. Even under the<br />
limitations of scanty rainfall prevalent in South lndia, scope exists to improve leaf yields<br />
through optimum manuring of the fields. Therefore; manure should be applied in the<br />
form of both built organic manure like compost or cattle manure and chemical fertilisers.<br />
8
Organic manure should be applied at the rate of ten tonnes per hectare,<br />
immediately after pruning and inter-cultivation and thoroughly incorporated in the soil.<br />
This should be carried out systematically once in a year so that the organic content<br />
in the soil is improved and as a result, the fertiliser application is more effectively<br />
utilised. Alternatively, where organic manure is not available, a green manure crop like<br />
Sunhemp can be raised annually during the rainy season and incorporated into the soil<br />
to serve the same purpose.<br />
ln addition to bulk organic manure, chemical fertilisers should also be applied at<br />
the rate 100 kg. N,50 kg. P and 50 kg. K per hectare per annum, which may be<br />
applied in two equal split doses. The first dose should be applied sometime in late<br />
August, l.e. 6-8 weeks after the application of the organic manure and the second dose<br />
sometime in late November during the North-East monsoon rains. The first dose may<br />
be in the form of a complex manure like 15:15:15 or 17:17:17. About 300 kg. or 6 bags<br />
of 17:17:17 will be required to meet the requirements of the first dose of 50 kg. N,<br />
50 kg. P and 50 kg. K. The second dose may be given as 50 kg. N only which is<br />
available in 250 kg. or 5 bags of Ammonium sulphate or about 100 kg. or 2 bags of<br />
Urea.<br />
While applying the fertiliser, it should be spread close to the plant on either sides<br />
along the row, as shown in Figure 4. After application, the fertiliser should be<br />
incorporated wqll into the soil by digging with spade or forkinE in with a digging fork<br />
for good results as shown in Figure' 5. This is very important operation, as otherwise,<br />
the fertiliser would be wasted and would not be effectively utilised by the plant.<br />
'ii<br />
,;,'J ,<br />
,<br />
',<br />
1'<br />
!i,,1.,i<br />
r'<br />
rS<br />
Figure 4<br />
-<br />
Fertiliser Application<br />
on either side<br />
of the Row
Figure-'5 lncorporation of ihe Fertiliser into the soil and working with the spade<br />
iv) Harvesting of Leaves:<br />
Leaf harvest commences after about ten weeks from the time of pruning in June<br />
and upto six harvests can be taken during the year at an interval of roughly Z-B weeks<br />
in between harvests. The quantum of harvest will depend on the precipitation received<br />
in the different seasons, being more during rainy season (more than 2/, of the iotal<br />
harvest) from August to December during the first three harvests and comparatively<br />
poorer during the drought months from January to May, except the "Mungaru" season<br />
when pre-monsoon showers are received resulting in a slightly improved harvest.<br />
Picking of leaves should be carried out in time, that is to say, when the leaves<br />
are at the correct stage of maturity for harvest. Other.wise, part of the leaves will<br />
become overmature or coarse and suffer in quality from the point of view of nutritive<br />
value for the silkworms. Also part of the leaves may turn yellow, shed and be lost.<br />
Therefore, timely harvest as the leaves reach the required stage of maturity will iead<br />
to fuller harvest of the available leaves without wastage and realisation of maximurn<br />
yield.<br />
10
It is also important to stress here that while harvesting, the terminal buds of<br />
branches should not be picked but allowed to grow till the plant reaches its full frame<br />
o{ growth upto about 6' or so. Thereafter, the tips of the branches may be picked so<br />
as to encourage the formation of secondary branches. Unfortunately, the current<br />
practice is to strip the entire branch from top to bottom at every harvest which results<br />
in serious set back to the growing plant. This is also one of the main factors<br />
responsible for reduced harvests in the case of rainfed mulberry at present.<br />
v) Leaf Yield:<br />
By adopting the package of practices for the rainfed mulberry described abpve,<br />
it should be possible to harvest upto 7,000 to 8,000 kgs. of leaf per, year per hectare<br />
which will mean more than'100 per cent improvement in yield over the present level<br />
of harvest which stands at about 3,000 to 3,500 kgs. per hectare per year.<br />
The above schedules rnay be summarised as follows:-<br />
Summary of Schedule of Operations for Rainfed Mulb,erry<br />
Operations<br />
1. Annual bottom pruning<br />
2. 1st weeding and inter-cultivation<br />
3. Application of bulk organic manure<br />
at 10 tonnes/hectare and incorporation<br />
of the same<br />
Timings<br />
With the commencement of South-West<br />
monsoon rains (Early June)<br />
Within a week after pruning (Mid June)<br />
Within a month of pruning (Early July)<br />
4. 1st picking of leaves Aboul 21lz months after pruning (Mid August)<br />
5. Application of first dose of lertiliser 6-8 weeks after application of organic manure<br />
at 50 kg. N, 50 kg. P, and 50 kg. K<br />
per hectare Le. 300 kg. or 6 bags<br />
of 17:17:17<br />
and following first harvest of leaves<br />
(Late August)<br />
6. 2nd weeding and inter-cultivation 5-6 weeks after the I picking of leaves<br />
(Early October)<br />
7. 2nd plcking of leaves Two months after the I picking of leaves<br />
(Mid October)<br />
B. Application of 2nd dose of fertiliser<br />
at 50 kg" N per hectare l.e. 5 bags<br />
of Ammonium sulphate or 2 bags of Urea<br />
6 weeks after the ll picking of leituo-<br />
(Late November)<br />
9. 3rd picking of leaves<br />
Two months after the ll picking of leaves<br />
{Mid December)<br />
:t
Operations<br />
Tirnings<br />
10. 3rd weeding and inter-cultivaiion<br />
1 1. 4th picking of leaves<br />
12. 4lh weeding and inter-cuitivation<br />
13. sth picking of leaves<br />
14. 6th and final picking of leaves<br />
2-3 weeks after the lll picking of leaves<br />
(Early January)<br />
2 months after the tll picking of leaves<br />
(Mid February)<br />
With receipt of pre-monsoon rains. 6-7 weeks<br />
after lV picking of leaves (Earty April)<br />
7-8 weeks after the lV picking of leaves<br />
(Early April)<br />
7-B weeks after the V picking of leaves<br />
(Late May-Early Junq)<br />
B. lrrigated <strong>Mulberry</strong>:<br />
t'.lnder irrigated conditions, mulberry register.s faster growth than under rainfed<br />
conditions and therefore, the plant will attain sufficient growth up 6, (2 m.) in about 5-6<br />
months' time and become due for first pruning or harvest. Thereafter, systematic<br />
cultivation can be commenced and leaf harvests taken at roughly about ten weeks<br />
interval, by resorting to bottom pruning in the case of row system of plantation and at<br />
about eight weeks interval where leaf picking method of leaf harvest is practised.<br />
i) Pruning:<br />
ln the case of mulberry under row system with closer spacing, pruning is carried<br />
out at a height 1"-3" (2.s-7.5 cm.) above ground level by cutting the stem neatly with<br />
sharp pruning knives as described earlier. ln all, five prunings combining five harvest<br />
of leaves with twigs are carried out during a year,<br />
ln the case of mulberry under pit system with wider spacing, pruning can be<br />
carried out twice during the year, once early in June and again in late November at<br />
a height ol 3"-4" (8-10 cm.) above ground level, as in the case of rainfed mulberry,<br />
taking due care to see that clean cuts are made without splitting the branches.<br />
ii) Weeding and lnter-cultivation:<br />
This should be carried out invariably, imrnediately after the pruning operation so<br />
that weeds are eliminated completely from the mulberry plots and the soil is worked<br />
and loosened for necessary aeration and stimulation to the growth of the plants.<br />
12
ln the case of row system of planting, the inter- cultivation is carried out by deep<br />
digging of the soil upto g" (22 cm.) depth including thb space between the plants in<br />
the row. Simultaneously, the ridges and furrows also should be re-formed so that the<br />
furrows are sufficiently deepened to hold enough water during irrigation for necessary<br />
deep percolation to the root zone. Where feasible, power tiller or bullock power with<br />
mould board plough could be used for the purpose ol weeding and inter-cultivation in<br />
order to save labour costs, but care should be taken to see that the implements do<br />
not cut or damage the roots of plants. Still, for working around the plants, resort to<br />
human labour will be found inevitable.<br />
ln the case of pit system of cultivation, the power tiller and bullock drawn ploughs<br />
may be used for weeding and inter-cultivation in the initial stage following the pruning<br />
but as the plants grow, this may not be feasible. Only manual working will meet the<br />
needs.<br />
iii) Manuring:<br />
Once in a year, bulk organic manure in the form of cattle manure or compost<br />
should be applied at the rate of 20 tonnes per hectare sometime during May-June prior<br />
to the onset of the monsoon rains and well incorporated into the soil. This may be<br />
carried out within one to two weeks following the pruning operation. Organic matter in<br />
the soil helps to utilise heavy applications of chemical fertilisers better and hence, the<br />
need for the organic manures. Thereafter, systematic application of chemical fertilisers<br />
should follow at periodical intervals coinciding with each leaf harvest.<br />
The total annual requirement of plant nutrients is roughly about 300 kg. N, 120<br />
kg. P and 120 kg. K per hectare. This should be applied in five split doses in the case<br />
of row system and six split doses in the case of pit system of cultivation coinciding<br />
with similar number of leaf harvests made, as indicated below:<br />
Fertiliser Schedule for lrrigated <strong>Mulberry</strong><br />
Row System<br />
Pit System<br />
1st Application<br />
60 kg. N + 60 kg. P+ 60 kg. K as complex<br />
lertilrser l.e. 7 bags of 17:17:17.<br />
60 kg. N + 60 kg. P +60 kg. K as complex<br />
lertiliser i.e. 7 bags ol 17:17:17.<br />
2nd Application<br />
60 kg. N as straight fertiliser l.e. 6 bags of<br />
Ammonium sulphate or 23lo bags of Urea.<br />
40 kg. N as straight fertiliser Le. 4 bags oi<br />
Ammonium sulphate or '13lo bags of Urea.<br />
3rd Application<br />
60 kg. N + 60 kg. P + 60 kg. K as complex<br />
fertiliser i.e.7 bags oI 17:17:17.<br />
40 kg. N as straight fertiliser i.e. 4 bags of<br />
Ammonium sulphate or 13/o bags ol Urea.<br />
4th Application<br />
60 kg. N as straight lertiliser l.e. 6 bags of<br />
Ammonium sulphate or 2r . bags of Urea.<br />
60 kg. N + 60 kg. P + 60 kg. K as complex<br />
fertiliser i.e.7 bags oI 17:17.17.<br />
13
Row.System<br />
Pit System<br />
5th Application<br />
6th Application<br />
60 kg. N as straight fertiliser r.e.6 bags of<br />
Ammonium sulphate or 23la bags of Urea.<br />
40 kg. N as straight fertiliser i.e. 4 bags of<br />
Ammonium sulphate or 13/o bags of Urea.<br />
40 kg. N as straight fertiliser l.e. 4 bags of<br />
Ammonium sulphate or i3/o bags of Urea.<br />
Total 300 kg. N +120 kg. P + 120 kg. K 280 kg. N + 120 kg. p + 120 kg. K<br />
Application of fertilisers should be carried out within three to four weeks {ollowing<br />
pruning operation in the case of row system. ln the case of pit system, however, the<br />
first application following the pruning is given within three to four weeks of pruning and<br />
thereafter, subsequent applications are given within two to thrqe weeks of every leaf<br />
harvest.<br />
The fertilisers should be applied with due care by spreading evenly on either sides<br />
of the plants along the row and completely incorporated into the soil 6y digging in or<br />
forking in for effective utilisation by the plants. Otherwise, they will run the risk of<br />
getting decomposed in hot sun or leached out in heavy rains.<br />
iv) lrrigation:<br />
Among various agronomic inputs to which mulberry plant responds very well,<br />
irrigation ranks high as it enables full utilisation of very heavy applications of fertiliser<br />
for crop production. Since this item of input is fairly expensive, judicious use of water<br />
for maximising production is very important.<br />
Under South lndian conditions, particularly in Karnataka, the sericultural tracts<br />
receive fairly distributed rains from May to November amounting to 25t30,, and all that<br />
needs to be done for helping the plant growth is to supplement the rains with the<br />
required irrigations which may be 5 to 6 in number. During the dry period from<br />
December to April, however, systematic irrigation should be given regularly at roughly<br />
about a week to ten days' interval, depending upon the soil condition and its water<br />
holding capacity. ln light sandy loam soils more frequent irrigation at a week's interval<br />
may be found necessary while in heavy clayey loam soils, irrigation at l0 to 14 days<br />
inierval may be found adequate.<br />
It is also important to remember that at the above intervals of irrigation, adequate<br />
quantities of water should be supplied as irrigation at a time. lt has been estimated that<br />
111, ta 2 acre inches of water is required per irrigation and therefore, this quantity<br />
should be supplied without fail. lt is being observed that sericulturists have a tendency<br />
to water their gai'dens lightly but too frequently, quite often at every three or four days<br />
14
interval. For getting best results from irrigation, copious irrigation upto 1'l2lo 2 acre<br />
inches should be given at a time, so that water fills the channels completely and<br />
percolates deep, and does not get depleted from the root zone easily, due to<br />
evaporation. lf necessary, whenever the irrigation channels get silted up, they should<br />
be scooped and deepened at periodical intervals for ensuring optimum level of irrigation<br />
(as shown in Figure 6).<br />
Figure 6- Correct Way of lrrigation<br />
A. Shallow channel and B. Proper size channel and<br />
superficial lrrigation<br />
deep lrrigation<br />
Thus, when irrigation is regulated as indicated above, best growth of mulberry<br />
is obtained and water is also effectively utilised without any wastage.<br />
v) teaf Harvest:<br />
ln the case ol row system of cultivation, leaf harvests are taken by the shoot<br />
cutting method, where in the twigs aiongwith the leaves are cut at the bottom; as in<br />
pruning. ln fact, in this systemboththepruning and harvesting operations are combined<br />
which leads to considerable saving of labour. ln all, five harvests are possible, at an<br />
interval of rougly 2112 months or 10 weeks during the year. Growth, however, may be<br />
delayed or hastened depending on the seasonal temperature conditions-being slower<br />
in cold winter months and laster during hot summer months. Accordingly, harvesting<br />
also should be adjusted by advancinE or delaying by a week or so. What is particularly<br />
important to observe is that plant growth is adequate before it is harvested. As per the<br />
15
ecommendations made in this paper, particularly of manuring and irrigation, the growth<br />
ol 411, to 5 ft. height will be easily achieved in about ten weeks time and the ptants<br />
will be ready for harvest.<br />
Harvesting in the case of pit system is carried out by picking leaves individually.<br />
The first harvest after pruning will become due after aboul 21/2 months time and<br />
thereafter, subsequent harvests may be made at six to eight weeks interval depending<br />
on growth. Care should be taken to see that the growing bud is not clipped before the<br />
plant reaches full growth and attains frame of over 6' in height. ln all, six harvests may<br />
be taken in this system of cultivation.<br />
vi) Yield:<br />
An average of about 25,000 to 30,000 kgs. of leaf (without twigs) can be<br />
harvested per annum per hectare under the row system of cultivation. ln the case of<br />
pit system, however, since only two prunings are made during the year, the plant is<br />
enabled to develop a higher frame which permits of six harvests and also of heavier<br />
and thicker leaves, which are comparatively superior in quality, although the total yield<br />
may be of the same order as under the row systsem of cultivation. However, the<br />
advantage of improved quality of leaves is more than offset by the heavy cost of labour<br />
involved in leaf picking (Figure 7).<br />
s<br />
Figurg 7<br />
-<br />
Prgper lrrigation and Manuring Ensure lmproved yield
Tiie above schedule may be summarised as follows:-<br />
Summary of Schedule of Operations for lrrigated <strong>Mulberry</strong><br />
A. ROW SYSTEM<br />
Operations<br />
Timings<br />
1. 1st pruning combining harvest With the commencement of South-West monsoon<br />
rains (Early June)<br />
2. 1st weeding and inter-cultivation Within a week after pruning (2nd week ot June)<br />
3. Application of bulk organic manure at the rate of Within a {ortnight after pruning (Mid June)<br />
20 tonnes per hectare and incorporation of<br />
the same<br />
4. 1st dose of lertiliser application Within a month after pruning (Early July)<br />
5. 1st harvest of leaves By pruning (Mid August)<br />
6. 2nd weeding and inter-cultivation Within a week of last harvest (2nd week of<br />
August)<br />
7. znd dose of fertiliser application<br />
B. 2nd harvest of leaves<br />
9. 3rd weeding and inter-cultivation<br />
Within a month of last harvest (Mid September)<br />
By pruning (Early November)<br />
Within a week of last harvest (2nd week ol<br />
November)<br />
10. 3rd dose of fertiliser application Within a month of last harvest (Early December)<br />
1 1. 3rd harvesl of leaves By pruning {Mid January)<br />
12. 4lh weeding and inter-cultivation Within a week of last harvest (3rd week ol<br />
January)<br />
13. 4th dose of fertiliser application<br />
14. 4th harvesi of leaves<br />
15. 5th weeding and inter=cultivation<br />
16. 5ih dose of fertiliser application<br />
'17. sth harvest of leaves<br />
Within a month of last harvest (Mid February)<br />
By pruning (Late March)<br />
Within a week of last harvest (1st week ol April)<br />
Within a month of last harvest (Late April)<br />
By pruning (Early June)<br />
17
B. PIT SYSTEM<br />
Operations<br />
Timings<br />
1. 1st Bottoni Pruning With the commencement of the South-West nron.<br />
soon rains (Early June)<br />
2. 1 st weeding and inter-cultivation Within a week after pruning (2nd week ot June)<br />
3. Application of bulk organic manure at the rate of Within a fortnight after pruning (3rd week of June)<br />
20 tonnes per hectare and incorporation of<br />
the same<br />
4. 1st dose of fertiliser application within a month after pruning (Early July)<br />
5. 1st harvest of leaves By leaf picking (Mid August)<br />
6. 2nd weeding and inter-cultivation Within a week of last harvest (3rd week of<br />
August)<br />
7. 2nd dose of fertiltser application Within three weeks of last harvest (2nd week ol<br />
September)<br />
8. 2nd harvest of leaves<br />
9. 3rd dose of fertiliser application<br />
By leaf picking (Early October)<br />
Within three weeks of last harvest (4th week of<br />
October)<br />
10. 3rd harvest of leaves By leaf picking (Late November)<br />
1 1. 2nd Botlorn Pruning lmmediately after 3rd leaf harvest {Late<br />
November)<br />
12. 3rd weeding and inter-cultivation Within a week afier 2nd pruning (1st week ol<br />
December)<br />
'13. 4th dose of fertiliser application<br />
Within a month after 2nd pruning (3rd week of<br />
December)<br />
14. 4h harvest of leaves By leaf picking (Early February)<br />
15. 5th dose of fertiliser application Within 3 weeks after 'last harvest (4th week ol<br />
February)<br />
16. sth harvest of leaves By leaf picking (lst week of April)<br />
17. 4lh weeding and inter-cultivation Within a week after last harvest (2nd week of<br />
April)<br />
18. 6th dose of fertiliser application Within 3 weeks afier last harvest (Late April)<br />
19. 6th harvest of leaves By leaf picking (Late May)<br />
18
VI. QUALITY OF LEAF HARVEST<br />
Flnally, a word about the qualiiy. The aim of mulberry cultivation for silkworm<br />
rearing should be not only increased leaf yields, but also of .quality leaves. Therefore,<br />
the leaves in the field at the time of harvest should be full grown, lush looking and dark<br />
green in colour. Such quality harvests are readily achieved by following the package<br />
of recommendations made in this paper. Paling or yellowing of leaves are symptoms<br />
of deficiencies in plant nutrients or moisture availability, which should be promptly<br />
corrected.<br />
Generally harvest under the row system of cultivation comprises of leaves<br />
growing 0n the primary shoots which are vigorous in growth and thin because of the<br />
close spacing. As a result, the leaves are also comparatively thinner and tend to dry<br />
faster when severed from the plant. This disadvantage is overcome by the method of<br />
twig harvest and twig feeding, or cutting the twings alongwiih leaves into larger bits and<br />
then feeding. Again, since the leaves grow faster on thinnqr branches, they have a<br />
tendency to get over-matured and turn yellow in comparatively shorter period. Further,<br />
during the rainy seasons, they contain comparalively more moisture and therefore, build<br />
up too much humidity in rearing beds, leading to outbreak of diseases, particularly,<br />
Grasserie and Muscardine. Therefore, greater care should be paid to ensure better<br />
ventilation of rearing rooms; harvesting leaves only when they are fully mature; avoiding<br />
overfeeding in rearing beds; satisfactory drying of beds in between feeds and if<br />
necessary to feed the worms with more mature leaves, i.e. with the normal second-age<br />
leaves to first-age larvae, third-age leaves to second-age larvae and so on.<br />
As pointed out earlier, in the case of irrigated mulberry under the pit system, the<br />
leaves are comparatively thicker and heavier, and contain cornparatively less moisture<br />
during rainy seasons. Hence, their feed value in the rearing bed is better and lasts longer.<br />
From the pointof viewof preservingthe quality of leaves, harvest should be made<br />
invariably in the rnorning or evening during the cooler hours of the day. Further, they<br />
should be carried during transit properly covered with wet cloth or gunny, in bags or<br />
baskets. Otherwise, the harvested leaf will suffer in quality due to drying and loss of<br />
moisture, particularly during sum,-ner.<br />
Another important point to be kept in view is that in the case of irrigated gardens,<br />
one proper irrigation should be given invariably, when the worms under rearing pass<br />
the fourth and final moult, so that succulent leaves are available for the last instar<br />
worms.


![E}A]\GALORE](https://img.yumpu.com/54052619/1/190x260/eagalore.jpg?quality=85)