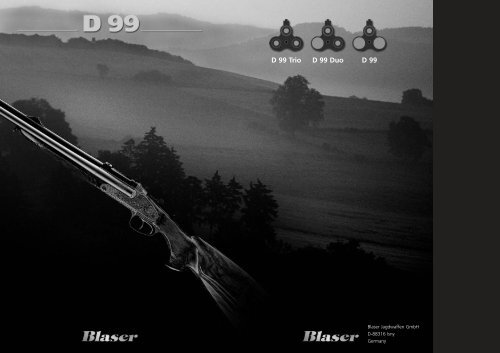
D 99 Trio D 99 Duo D 99
Blaser D99 - Stevespages.com
Blaser D99 - Stevespages.com
- No tags were found...

Create successful ePaper yourself
Turn your PDF publications into a flip-book with our unique Google optimized e-Paper software.
D <strong>99</strong> <strong>Trio</strong> D <strong>99</strong> <strong>Duo</strong> D <strong>99</strong><br />
Blaser Jagdwaffen GmbH<br />
D-88316 Isny<br />
Germany
1.1.<br />
2.1.<br />
2.4.<br />
4.1.<br />
1.1.<br />
2.2.<br />
3.1.<br />
4.1.<br />
1.2.<br />
2.2.<br />
3.1.<br />
4.2.<br />
1.2.<br />
11<br />
2.3.<br />
3.2.<br />
4.2.<br />
17<br />
2.1.<br />
11<br />
2.4.<br />
3.2.<br />
1<br />
6.1.
1<br />
2<br />
6.1.<br />
8.2.<br />
16<br />
2<br />
3<br />
6.1.<br />
9.1.<br />
15<br />
3<br />
4<br />
6.1.<br />
9.1.<br />
14<br />
13<br />
4<br />
5<br />
17<br />
6<br />
12<br />
11<br />
7<br />
8<br />
10<br />
7.1.<br />
9.2.<br />
9<br />
8.1.<br />
9.2.
12. Warranty Conditions<br />
Description of Parts<br />
1. Manufacturer’s warranty<br />
Warranty of Blaser Jagdwaffen GmbH is provided<br />
in addition to statutory warranty claims by dealers,<br />
provided, that the enclosed firearms certificate is<br />
filled in completely and received by Blaser Jagdwaffen<br />
GmbH within ten days after the date of<br />
sale. Warranty is provided exclusively for the first<br />
purchaser having his residence in the country of<br />
purchase.<br />
The warranty applies to the metal and plastic<br />
parts of the rifle only, including original Blaser rifle<br />
scope mounts, but not the rifle scope. Wooden<br />
parts of the rifle require special care and, being<br />
natural products, are subject to natural changes.<br />
Warranty for wooden parts is excluded.<br />
The warranty period amounts to ten years, starting<br />
with the date of sale. It includes any defects<br />
of and damages to the rifle (metal and plastic<br />
parts), which are proven to be due to faulty material<br />
or manufacturing. Within this framework, the<br />
manufacturer shall bear the costs for material and<br />
working time. For performance of work under<br />
this warranty, the rifle has to be returned to the<br />
specialised dealer or the production company in<br />
Isny.<br />
Risk and costs of transportation of the rifle (outward<br />
and return) shall be borne by the customer.<br />
Warranty is performed in the discretion of manufacturer<br />
by repair or replacement of defective<br />
parts; replaced parts pass into manufacturer’s<br />
property.<br />
2. Warranty for gun efficiency<br />
The firing precision of a gun depends on a multitude<br />
of factors. The most important factor is the<br />
ammunition. Not every barrel fires equally well<br />
with every type of ammunition, there may be considerably<br />
differences in efficiency. The scope and<br />
its mount are of the same importance. Parallax,<br />
loose reticles, defects in reticle adjustment and<br />
faulty mounting are the most common causes for<br />
unsatisfactory gun efficiency. For these reasons,<br />
you should use branded scopes, mounted by a<br />
specialist, and you should tune in the ammunition<br />
to your rifle by testing several types of ammunition.<br />
Ammunition of the same make and charge may<br />
exhibit different efficiency and impact point<br />
characteristics from one manufacturing run to the<br />
other and from one rifle to the other.<br />
When the optimum of ammunition, rifle scope<br />
and mount were selected, we provide a warranty<br />
for the excellent efficiency of our rifles.<br />
Complaints regarding gun efficiency have to be<br />
brought forward in writing within 20 days after<br />
the date of sale. We reserve the right to submit the<br />
rifle to an independent institution for verification<br />
(DEVA or Staatliches Beschussamt) [government<br />
proofhouse]. If excellent gun efficiency is confirmed<br />
there, we are entitled to claim the costs<br />
incurred for the tests from customer.<br />
3. Scope of warranty<br />
Work performed under warranty does not cause<br />
any prolongation or renewal of the warranty period<br />
for the rifle or built in spare parts. The warranty<br />
period for installed spare parts ends at the same<br />
time as the warranty period for the entire rifle.<br />
4. Guarantee exclusion<br />
The guarantee shall be excluded with:<br />
• Damage that is caused as the result of normal<br />
wear and tear, with non-observance of the operating<br />
instructions or improper use or handling<br />
and if the gun shows mechanical damages of<br />
any kind.<br />
• Damages that are the result of force majeure<br />
or environmental influences<br />
• Repairs, treatment or changes to the gun<br />
performed by third parties<br />
• Use of reloaded or non-CIP-permitted<br />
ammunition<br />
• Blueing carried out by a third party<br />
The guarantee does not apply for optical sight<br />
equipment and telescopic sight mounts of manufacturers<br />
other than Blaser Jagdwaffen GmbH.<br />
More extensive or other claims, especially those<br />
that refer to compensation for damages that go<br />
beyond the gun itself (consequential damages)<br />
shall be excluded (provided liability is not legally<br />
ordered as compulsory).<br />
1 Foresight<br />
9 Buttstock<br />
2 Rear sight<br />
10 Triggers<br />
3 Seats for Original Blaser<br />
11 Block lock<br />
saddle mount (DBP)<br />
12 Receiver<br />
4 Barrel hook<br />
13 Hinge bolt<br />
5 Indication of model and calibre 14 Forearm flap<br />
6 Breech block<br />
15 Forearm<br />
7 Locking lever<br />
16 Barrel set<br />
8 Safety slide (cocking slide)<br />
17 Shaft bearing<br />
Table of Contents<br />
Page<br />
Description of Parts 1<br />
General Safety Rules 2/3<br />
1. Assembly of the Rifle 4<br />
2. Disassembly of the rifle 5<br />
3. Opening and Closing the Rifle 6<br />
4. Safety 7<br />
5. Loading the rifle 8<br />
6. Firing 8<br />
7. Unloading the rifle 9<br />
8. Open sights 9<br />
9. Mounting of Scope 10<br />
10. Case 11<br />
11. Care and Maintenance 11<br />
12. Warranty Conditions 12<br />
Instruction manual<br />
12<br />
12-2004 Subject to technical modifications<br />
1
General Safety Rules<br />
General Safety Rules<br />
Your new Blaser Drilling D <strong>99</strong> is characterised<br />
by special design features, making it very<br />
different from other three-barrelled guns.<br />
The enhanced safety features of your Blaser<br />
rifle should never induce you to ignore the<br />
necessary care and legal provisions with<br />
respect to handling arms.<br />
Please check first, whether you have the<br />
correct operating instructions: The model<br />
name D <strong>99</strong>/D <strong>99</strong> <strong>Duo</strong> or D <strong>99</strong> <strong>Trio</strong> is marked<br />
on the left side of the barrel, at the back.<br />
CAUTION:<br />
Please read these operating instructions<br />
completely, before using the rifle. Only<br />
hand on the rifle together with the operating<br />
instructions.<br />
Please ask your specialised dealer for an<br />
in-depth explanation of your rifle and<br />
instruction in its use, as a supporting<br />
measure to these operating instructions.<br />
General safety rules<br />
for handling firearms<br />
– Ensure that firearm and ammunition never<br />
pass into the hands of unauthorised<br />
persons.<br />
– Always keep firearm and ammunition separate,<br />
in a secured unit and inaccessible<br />
to unauthorised persons.<br />
– Observe applicable legal provisions<br />
for carrying and storing arms and<br />
ammunition.<br />
– Familiarise yourself thoroughly with the<br />
handling of your firearm and practise all<br />
functions and actions with the firearm<br />
unloaded, before starting to carry and<br />
use it.<br />
– Consider every firearm as loaded and<br />
ready to fire, unless you have convinced<br />
yourself of the contrary by opening<br />
the action and checking the chamber<br />
(barrel). Even when unloaded, a firearm<br />
has to be handled like a loaded firearm.<br />
– During any handling, always hold the<br />
muzzle in a direction where you can<br />
neither jeopardise nor damage persons<br />
or property.<br />
– Before loading the firearm, always check,<br />
whether there are oil residues or other<br />
foreign matter in the chamber or barrel.<br />
Oil residues in chamber or barrel may<br />
cause distinct shifts in the point of impact!<br />
Foreign matter in the barrel (e.g. water,<br />
snow, soil) may cause a detonation of<br />
the barrel, leading to severe injuries of<br />
the shooter or persons in the vicinity!<br />
Ensure that no foreign matter can enter<br />
the barrel, also during use!<br />
– Only use ammunition which meets the CIP<br />
requirements, in particular with regards to<br />
the maximum gas pressures Pmax according<br />
to CIP regulations. Every Blaser rifle is<br />
controlled and tested by the state proofhouse<br />
according to the requirements of<br />
the proofing-law and -regulations, using<br />
proof cartridges exceeding the maximal<br />
allowed gas pressure Pmax by a minimum<br />
of 30%. If gas pressures exceed proof-level,<br />
the safety of the user and/or third parties<br />
can no longer be guaranteed. The same<br />
applies to cartridge cases, where the seal<br />
function is no longer correct through<br />
obturation.<br />
– Load your firearm only immediately<br />
before use.<br />
– Disengage from safe position (cock) your<br />
firearm only immediately before shooting.<br />
Hold barrel into a direction out of danger<br />
during disengaging (cocking).<br />
– Check the surrounding area, before<br />
every shot.<br />
– Point your firearm only at a target,<br />
which you have clearly identified.<br />
– Only put your finger on the trigger,<br />
when you want to shoot.<br />
– Only fire a shot, when a secure back<br />
stop exists.<br />
– When a cartridge fails, wait approx.<br />
60 seconds before opening the action,<br />
to avoid danger through hang-fire.<br />
– Wear hearing protection during shooting.<br />
Unload your firearm:<br />
– before crossing obstacles,<br />
– before climbing and leaving raised hides,<br />
– before entering a building,<br />
– before climbing into a vehicle,<br />
– before entering a built area,<br />
– and also, when you lay down or<br />
hand on the firearm temporarily.<br />
2<br />
3
1. Assembly of the Rifle<br />
2. Disassembly of the rifle<br />
1.1. Securing barrel set<br />
1.2. Installing forearm<br />
CAUTION:<br />
(Only possible with forearm removed)<br />
• Seat the front barrel hook onto the hinge<br />
bolt. Due to the tight fit, this requires care.<br />
• Grip around barrel hook part and action<br />
with one hand, press barrel hook into its<br />
seat, closing the rifle.<br />
• Do not operate locking lever during this<br />
process.<br />
CAUTION:<br />
The breech block must be in its correct position<br />
(slightly inclined forwards). Should the<br />
block be in a vertical position, the barrel<br />
cannot be closed. In this case, press the<br />
locking lever all the way to the right and,<br />
with your other hand, return the breech<br />
block into its forward inclined position.<br />
NOTE:<br />
Securing the barrel requires a certain amount<br />
of skill. Do not use force! We suggest having<br />
this procedure demonstrated by an expert<br />
and practise several times in his presence.<br />
• Engage forearm on hinge bolt, flush with<br />
the receiver, and tilt it onto the barrel,<br />
until it reaches the stop.<br />
• The best manner to do this is to lift the<br />
forearm flap with your index finger and<br />
hold it in this position.<br />
• Press in forearm.<br />
• The forearm flap engages.<br />
• Close the forearm flap completely.<br />
The forearm is now locked.<br />
Unload your rifle before disassembly<br />
(refer to page 9).<br />
2.1.<br />
Removing forearm<br />
• Support the rifle at the buttstock<br />
on your thigh.<br />
• Pull forearm flap out with a finger of one<br />
hand, and disengage forearm from the<br />
barrel by pressing with the fingers of your<br />
other hand.<br />
• Tilt forearm away from barrel at a slight<br />
angle and pull it up, out of the hinge.<br />
2.2. Unhinging barrel set<br />
(Only possible with forearm removed)<br />
• Press locking lever all the way to<br />
the right and hold it in this position.<br />
• Tilt barrel all the way down. Doing so,<br />
the barrel hook is disengaged.<br />
2.3. Removing breech block<br />
(with barrel unhinged)<br />
This is only necessary, when you want to<br />
thoroughly clean the rifle or safeguard it<br />
against unauthorised use by removing the<br />
breech block.<br />
• Press block lock 11 beside the trigger and<br />
keep it pressed down.<br />
• Now press the locking lever simultaneously<br />
to the right, until breech block disengages.<br />
• When disengaging, the block snaps forward<br />
a little and can now be removed,<br />
accessing it from the front.<br />
2.4.<br />
Reinstalling breech block<br />
• Put breech block with the semicircular<br />
shaft bearing 17 onto the shaft in the<br />
bottom of the receiver and tilt it backwards<br />
into its tilted position.<br />
• Press block lock 11 , located beside the<br />
trigger, and keep it pressed down. Now,<br />
the locking lever can be pushed all the<br />
way to the right (a bit further than for<br />
opening the rifle).<br />
• Hold locking lever in this position, you<br />
may reengage the breech block 11 now.<br />
• Now press the breech block at its rear end<br />
down into the receiver and release the<br />
locking lever.<br />
NOTE:<br />
If you tilted the breech block all the way<br />
to the back into its locked vertical position<br />
during installation, push the locking lever<br />
(without pressing block lock 11 ) to the<br />
right again and allow the block to snap<br />
back into its position of a slight forward<br />
inclination, by pushing it lightly forward.<br />
In this position, the rifle can be fired.<br />
4<br />
5
3. Opening and Closing the Rifle<br />
4. Safety<br />
3.1. Opening the rifle<br />
3.2. Closing the rifle<br />
The safety system of the Blaser Drilling D <strong>99</strong> 4.2. Returning to the safe position<br />
(locking/uncocking)<br />
• Press locking lever all the way to the right • Do not touch locking lever.<br />
and hold it in this position.<br />
• The barrel hook is disengaged.<br />
• The barrel set can now be tilted downwards<br />
(“opened”).<br />
• Hold barrel set pointing in a safe position<br />
and tilt the buttstock upward. The breech<br />
block engages in the barrel and is locked<br />
by the breech wedge.<br />
• To check whether the locking lever is<br />
closed, apply light pressure to the left.<br />
Otherwise, disengaging from safe position<br />
(cocking) of the rifle will not be possible,<br />
for safety reasons.<br />
• Mainly in new rifles, some force has to<br />
be exerted in order to close the locking<br />
lever. This is due to the tight, precise fits.<br />
The wedge "pulls”.<br />
CAUTION:<br />
The breech block must be in its slightly<br />
inclined forward position. If in a vertical<br />
position, the rifle cannot be closed any more.<br />
In this case, press the locking lever all the<br />
way to the right and, with your other hand,<br />
return the breech block into its position of<br />
an inclination to the front.<br />
is based on uncocked firing pin springs. The<br />
firing pin springs are cocked with the safety<br />
slide (cocking slide) immediately before the<br />
shot.<br />
CAUTION:<br />
Your Blaser Drilling is equipped with two<br />
hammers: when the cocking slide is pushed<br />
forward, both hammers are cocked.<br />
4.1.<br />
Disengaging from safe position<br />
(cocking)<br />
Push the safety slide (cocking slide)<br />
all the way to the front, until it locks.<br />
Safety slide (cocking slide)<br />
in front position:<br />
The rifle is disengaged from safe position,<br />
the hammers are cocked.<br />
Press rear end of safety slide (cocking slide)<br />
down with your thumb and let it slide backwards.<br />
With some practise, this can be done<br />
without making a sound.<br />
When the safety slide (cocking slide)<br />
is in its rear position:<br />
The rifle is locked, the hammers are<br />
uncocked.<br />
CAUTION:<br />
Under no circumstances should you put<br />
your fingers into the triggers when disengaging<br />
(cocking) or locking (uncocking) your<br />
rifle (you may be used to do this from rifles<br />
with exposed hammers). This would trigger<br />
the shots, when the rifle is loaded!<br />
NOTE:<br />
When opening the rifle - pressing the locking<br />
lever to the right - the safety slide (cocking<br />
slide) jumps back into the "safe” (uncocked)<br />
position automatically.<br />
6<br />
7
5. Loading the rifle 6. Firing 7. Unloading the rifle<br />
8. Open sights<br />
8<br />
5.1. Loading the rifle<br />
6.1. Firing<br />
7.1. Unloading the rifle<br />
• Remove oil from barrels and chambers<br />
and check them for foreign matter.<br />
• Convince yourself under all circumstances<br />
that the ammunition corresponds with the<br />
calibres of your rifle.<br />
• Insert the appropriate cartridges into the<br />
chambers.<br />
• Close the rifle.<br />
CAUTION:<br />
Please check the trigger regularly for smooth<br />
movement, with the rifle unloaded and<br />
locked (uncocked). Gummy oil and/or contaminations<br />
may affect proper functioning<br />
of the trigger and cause malfunctions.<br />
• Cock the rifle by pushing the safety<br />
slide (cocking slide) forward.<br />
• Sight at target and fire.<br />
Firing lower barrels: Push change-over lever<br />
down 1 + 2 ). The trigger in front releases<br />
the shot in the right barrel, the one in the<br />
back releases the shot in the left barrel.<br />
Firing the upper barrel and the lower<br />
left barrel: Push change-over lever upward<br />
(Fig. 3 + 4 – red dot in change-over lever<br />
becomes visible!). The trigger in front<br />
releases the shot in the upper barrel.<br />
The trigger in the back releases the shot<br />
in the lower left barrel.<br />
CAUTION:<br />
When only one shot is fired, one hammer<br />
remains cocked! MORTAL DANGER!<br />
When you do not intend to fire the second<br />
shot immediately, lock (uncock) the rifle<br />
before putting it down!<br />
Please remember that, after firing the first<br />
shot, there are still live cartridges in the<br />
barrels which were not fired!<br />
NOTE:<br />
After firing one or two shots, the safety<br />
slide (cocking slide) remains in its forward<br />
position. When the locking lever is pushed<br />
to the right before breaking the rifle, the<br />
safety slide (cocking slide) jumps back into<br />
the position "safe (uncocked)” automatically.<br />
CAUTION:<br />
Blaser Drillings are equipped with direct pull<br />
triggers. The setting of the trigger pulls can<br />
and may only be changed at the factory.<br />
• Open the rifle.<br />
• When breaking the barrels, the cartridges<br />
are pulled out by the extractor far enough<br />
to be taken out fully by hand.<br />
Considering differing sighting habits and<br />
requirements, the rifle is zeroed-in over<br />
open sights at the factory with approximate<br />
precision only. Precise zeroing-in by adjusting<br />
foresight and rear sight should be performed<br />
by yourself, together with your specialised<br />
dealer, in order to adjust the sights precisely<br />
to your personal requirements.<br />
8.1.<br />
Foresight with elevation<br />
adjustment<br />
Insert Allen key SW 0.9 into the bore in the<br />
foresight from above, and turn Allen screw<br />
as needed. The foresight works with spring<br />
support.<br />
When shooting deep:<br />
Turn Allen screw to the right.<br />
When shooting high:<br />
Turn Allen screw to the left.<br />
8.2.<br />
Rear sight (sight)<br />
with lateral adjustment<br />
The rear sight is designed as a folding sight,<br />
offering two notches of different sizes.<br />
• Rear sight folded to the front:<br />
Fine rear sight notch for precise shooting.<br />
• Rear sight folded back:<br />
Coarse rear sight notch for driven<br />
hunt situations.<br />
At the side of the base of the sight,<br />
two locking screws are provided.<br />
When shooting to the left:<br />
Loosen left screw, tighten right screw.<br />
When shooting to the right:<br />
Loosen right screw, tighten left screw.<br />
9
10<br />
9. Mounting of Scope<br />
The Blaser D <strong>99</strong> has been prepared for<br />
installation of the Original Blaser saddle<br />
mount (DBP).<br />
We assume that your scope has been<br />
mounted correctly on the appropriate<br />
barrel by your specialized dealer.<br />
9.1.<br />
Installing scope<br />
• Open lid of rear and front mount lever<br />
and ensure that both are swivelled all<br />
the way to the front /up.<br />
• Hold rifle at the forearm with your left<br />
hand, support buttstock on your thigh.<br />
• Hold scope with your right hand at the<br />
centre tube, above the mount, so that<br />
you can reach the front lever with your<br />
thumb.<br />
• Insert the two round studs at the scope<br />
mount carefully into the two oval holes<br />
sunk into the upper right side of the barrel,<br />
tilt scope to the left onto the barrel<br />
and hold it in this position.<br />
• Press the (opened) mount levers, first the<br />
one in front and then the one in the<br />
back, backwards/downwards with your<br />
thumb, until they reach their stop position<br />
(tension!). If this is too easy or requires<br />
a lot of force, the mount is maladjusted.<br />
Have your dealer correct this<br />
according to works instructions.<br />
• Now close the two lids of the mount<br />
levers.<br />
Please ensure that the engaging surfaces<br />
are clean and free from grease.<br />
9.2. Removing scope<br />
• Hold the rifle with your left hand at the<br />
forearm and support it on your thigh.<br />
• Open both lids of the mount levers.<br />
• First swivel the rear lever with your<br />
thumb all the way to the front/up - until<br />
it reaches the stop.<br />
• Grip scope with your right hand at the<br />
centre tube and hold it.<br />
• Now swivel the mount lever at the front<br />
with your thumb all the way to the<br />
front/up - until it reaches the stop.<br />
• Tilt scope to the right and remove it.<br />
CAUTION:<br />
If the distance between eye and scope is too<br />
short and if the rifle is not seated correctly<br />
at your shoulder, injuries are not to be excluded<br />
when shooting with large calibres.<br />
10. Case 11. Care and<br />
Maintenance<br />
The double-shell special ABS transportation<br />
case with three locks offers appropriate<br />
storage for the Blaser Drilling, plus scope<br />
and accessories, when travelling.<br />
Rifle case A<br />
For all Blaser single shot rifles and Blaser<br />
bolt action rifle R 93, forearm disassembled,<br />
with scope.<br />
External dimensions LxWxH: 70x26x9 cm<br />
Rifle case C<br />
For all Blaser single shot rifles and Blaser<br />
bolt action rifle R 93, forearm assembled.<br />
Featuring additional compartments for<br />
second interchangeable barrel and scope.<br />
External dimensions LxWxH: 78x35x9 cm<br />
Only use products for the care of your rifle,<br />
which are destined for this purpose.<br />
Barrel: Polish exterior and interior of chamber<br />
and barrel with a suitable gun oil after shooting,<br />
before storing the rifle for prolonged<br />
periods of time, and after carrying the rifle,<br />
especially in humid or wet conditions. Prior<br />
to shooting, barrel and chamber have to be<br />
thoroughly de-oiled again. In case of thick<br />
deposits of bullet residues, we recommend<br />
to use chemical barrel cleaners.<br />
CAUTION:<br />
Under all circumstances, oberserve<br />
instructions and warnings given by the<br />
product manufacturer for use of product.<br />
Metal parts: Keep all metal parts of the<br />
rifle clean and slightly oiled at all times.<br />
Stock preservative is not suitable<br />
for polishing metal parts!<br />
Stocks: All wooden stocks of Blaser hunting<br />
rifles are oil-rubbed. We recommend to<br />
polish them regularly with standard stock<br />
care products.<br />
Gun oil is not suitable for stock care!<br />
Optics: Please refer to care instructions<br />
of the optics manufacturer.<br />
CAUTION:<br />
When oiling hunting rifles, care has to be<br />
taken that no oil or grease gets into the trigger<br />
and action system. Under certain conditions,<br />
oil and grease can resinify (harden), causing<br />
dangerous disruptions of functioning. Please<br />
have your rifle checked by your specialised<br />
dealer prior to each hunting season or hunting<br />
trip. Every rifle is a piece of technical<br />
equipment requiring regular checks.<br />
11