Programmable Piezo Button Programming Instructions
Programming Piezo Button - Whitehall Manufacturing
Programming Piezo Button - Whitehall Manufacturing

You also want an ePaper? Increase the reach of your titles
YUMPU automatically turns print PDFs into web optimized ePapers that Google loves.
®<br />
BestCare ®<br />
INSTALLATION, OPERATIONS & MAINTENANCE MANUAL<br />
Patients, Not Prisoners ®<br />
Healthcare and Ligature<br />
Resistant Products<br />
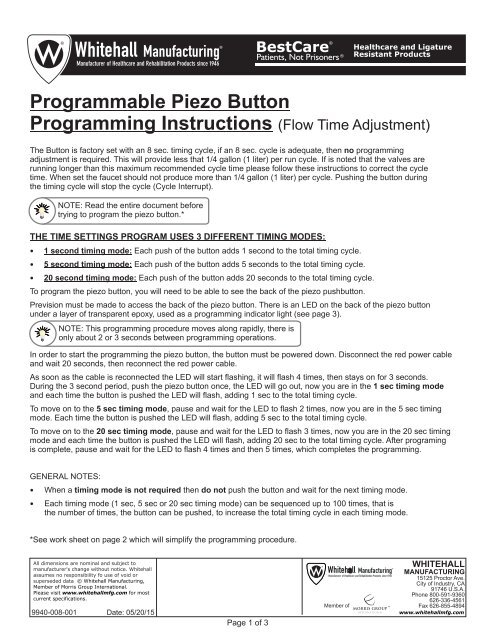
<strong>Programmable</strong> <strong>Piezo</strong> <strong>Button</strong><br />
<strong>Programming</strong> <strong>Instructions</strong> (Flow Time Adjustment)<br />
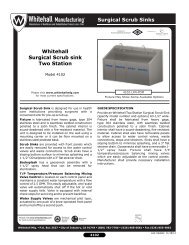
The <strong>Button</strong> is factory set with an 8 sec. timing cycle, if an 8 sec. cycle is adequate, then no programming<br />
adjustment is required. This will provide less that 1/4 gallon (1 liter) per run cycle. If is noted that the valves are<br />
running longer than this maximum recommended cycle time please follow these instructions to correct the cycle<br />
time. When set the faucet should not produce more than 1/4 gallon (1 liter) per cycle. Pushing the button during<br />
the timing cycle will stop the cycle (Cycle Interrupt).<br />
NOTE: Read the entire document before<br />
trying to program the piezo button.*<br />
THE TIME SETTINGS PROGRAM USES 3 DIFFERENT TIMING MODES:<br />
— 1 second timing mode: Each push of the button adds 1 second to the total timing cycle.<br />
— 5 second timing mode: Each push of the button adds 5 seconds to the total timing cycle.<br />
— 20 second timing mode: Each push of the button adds 20 seconds to the total timing cycle.<br />
To program the piezo button, you will need to be able to see the back of the piezo pushbutton.<br />
Prevision must be made to access the back of the piezo button. There is an LED on the back of the piezo button<br />
under a layer of transparent epoxy, used as a programming indicator light (see page 3).<br />
NOTE: This programming procedure moves along rapidly, there is<br />
only about 2 or 3 seconds between programming operations.<br />
In order to start the programming the piezo button, the button must be powered down. Disconnect the red power cable<br />
and wait 20 seconds, then reconnect the red power cable.<br />
As soon as the cable is reconnected the LED will start flashing, it will flash 4 times, then stays on for 3 seconds.<br />
During the 3 second period, push the piezo button once, the LED will go out, now you are in the 1 sec timing mode<br />
and each time the button is pushed the LED will flash, adding 1 sec to the total timing cycle.<br />
To move on to the 5 sec timing mode, pause and wait for the LED to flash 2 times, now you are in the 5 sec timing<br />
mode. Each time the button is pushed the LED will flash, adding 5 sec to the total timing cycle.<br />
To move on to the 20 sec timing mode, pause and wait for the LED to flash 3 times, now you are in the 20 sec timing<br />
mode and each time the button is pushed the LED will flash, adding 20 sec to the total timing cycle. After programing<br />
is complete, pause and wait for the LED to flash 4 times and then 5 times, which completes the programming.<br />
GENERAL NOTES:<br />
— When a timing mode is not required then do not push the button and wait for the next timing mode.<br />
— Each timing mode (1 sec, 5 sec or 20 sec timing mode) can be sequenced up to 100 times, that is<br />
the number of times, the button can be pushed, to increase the total timing cycle in each timing mode.<br />
*See work sheet on page 2 which will simplify the programming procedure.<br />
All dimensions are nominal and subject to<br />
manufacturer's change without notice. Whitehall<br />
assumes no responsibility fo use of void or<br />
superseded data © Whitehall Manufacturing,<br />
Member of Morris Group International.<br />
Please visit www.whitehallmfg.com for most<br />
current specifications.<br />
9940-008-001<br />
Date: 05/20/15<br />
Page 1 of 3<br />
Member of<br />
<br />
WHITEHALL<br />
MANUFACTURING<br />
15125 Proctor Ave.<br />
City of Industry, CA<br />
91746 U.S.A.<br />
Phone 800-591-9360<br />
626-336-4561<br />
Fax 626-855-4894<br />
www.whitehallmfg.com
®<br />
BestCare ®<br />
INSTALLATION, OPERATIONS & MAINTENANCE MANUAL<br />
Patients, Not Prisoners ®<br />
Healthcare and Ligature<br />
Resistant Products<br />
Programable <strong>Piezo</strong> <strong>Button</strong><br />
<strong>Programming</strong> <strong>Instructions</strong> (Flow Time Adjustment)<br />
WORKSHEET<br />
(FILL IN ALL BOXES, WHICH WILL SIMPLIFY THE PROGRAMMING PROCEDURE)<br />
Fill in all the<br />
Boxes below<br />
PROGRAMING STEPS:<br />
— Power down piezo button for 20 seconds.<br />
Determine the<br />
number of seconds<br />
per timing cycle<br />
Ÿ<br />
Ÿ<br />
Ÿ<br />
Ÿ<br />
Reconnect power.<br />
LED flashes, then stays on.<br />
While the LED is steady on, push button.<br />
LED turns off.<br />
1 Push = 1 Second<br />
x 1 =<br />
sec<br />
ADD<br />
1 Push = 5 Seconds<br />
x 5 =<br />
sec<br />
ADD<br />
Ÿ<br />
Ÿ<br />
Ÿ<br />
Ÿ<br />
You are in the 1 sec timing mode, immediately push the button, 1 push<br />
equals 1 sec added to the total timing cycle.<br />
Pause and wait for the LED to flash 2 times.<br />
You are in the 5 sec timing mode, immediately push the button, 1 push<br />
equals 5 sec added to the total timing cycle.<br />
Pause and wait for the LED to flash 3 times.<br />
1 Push = 20 Seconds<br />
x 20 =<br />
sec<br />
Ÿ You are in the 20 sec timing mode, immediately push the button, 1<br />
push equals 20 sec added to the total timing cycle.<br />
EQUALS<br />
Total timing cycle equals<br />
seconds<br />
NOTE: if you miss a step in the programming procedure, just power down<br />
the button and start again from the first step.<br />
All dimensions are nominal and subject to<br />
manufacturer's change without notice. Whitehall<br />
assumes no responsibility fo use of void or<br />
superseded data © Whitehall Manufacturing,<br />
Member of Morris Group International.<br />
Please visit www.whitehallmfg.com for most<br />
current specifications.<br />
9940-008-001 Date: 05/20/15<br />
Page 2 of 3<br />
Member of<br />
<br />
WHITEHALL<br />
MANUFACTURING<br />
15125 Proctor Ave.<br />
City of Industry, CA<br />
91746 U.S.A.<br />
Phone 800-591-9360<br />
626-336-4561<br />
Fax 626-855-4894<br />
www.whitehallmfg.com
®<br />
BestCare ®<br />
INSTALLATION, OPERATIONS & MAINTENANCE MANUAL<br />
Patients, Not Prisoners ®<br />
Healthcare and Ligature<br />
Resistant Products<br />
Lavy (Shown for reference)<br />
WH3374-PPZ<br />
(Shown For Reference)<br />
Black Solenoid<br />
Cable<br />
<strong>Piezo</strong><br />
Pushbutton<br />
Red Power<br />
Cable<br />
Programing Indicator<br />
LED Light<br />
Black<br />
Red<br />
Transparent<br />
Epoxy Filling<br />
LIGHT DETAIL<br />
All dimensions are nominal and subject to<br />
manufacturer's change without notice. Whitehall<br />
assumes no responsibility fo use of void or<br />
superseded data © Whitehall Manufacturing,<br />
Member of Morris Group International.<br />
Please visit www.whitehallmfg.com for most<br />
current specifications.<br />
9940-008-001 Date: 05/20/15<br />
Page 3 of 3<br />
Member of<br />
<br />
WHITEHALL<br />
MANUFACTURING<br />
15125 Proctor Ave.<br />
City of Industry, CA<br />
91746 U.S.A.<br />
Phone 800-591-9360<br />
626-336-4561<br />
Fax 626-855-4894<br />
www.whitehallmfg.com