Spear The Art of Temporization Part II - Great Lakes Orthodontics
Spear The Art of Temporization Part II - Great Lakes Orthodontics
Spear The Art of Temporization Part II - Great Lakes Orthodontics

You also want an ePaper? Increase the reach of your titles
YUMPU automatically turns print PDFs into web optimized ePapers that Google loves.
Vol. 1 No. 2<br />
Perspective<br />
<strong>Spear</strong><br />
<strong>The</strong> <strong>Art</strong> <strong>of</strong> <strong>Temporization</strong> <strong>Part</strong> <strong>II</strong><br />
by Frank <strong>Spear</strong>, DDS, MSD<br />
In the last installment, I discussed<br />
the rationale for making excellent<br />
temporaries, the materials available<br />
and the concerns about having an<br />
adequate amount <strong>of</strong> time to do it<br />
right. In this installment, I will<br />
discuss the techniques I use in<br />
practice to fabricate<br />
different types<br />
<strong>of</strong> temporaries.<br />
<strong>The</strong> techniques I use<br />
are largely dependent<br />
upon where in the<br />
mouth I am working<br />
(anterior vs. posterior),<br />
the type <strong>of</strong><br />
restoration (full<br />
vs. partial<br />
coverage),<br />
how many teeth are<br />
being restored, whether<br />
significant occlusal changes are<br />
being planned, and the esthetic<br />
requirements <strong>of</strong> the temporary.<br />
<strong>The</strong> most common restorations<br />
done today are simple posterior<br />
restorations on one to four teeth in a<br />
quadrant. I virtually always make<br />
these temporaries directly in the<br />
mouth inside some type <strong>of</strong> matrix.<br />
If the current tooth form and occlusion<br />
are acceptable, I create the<br />
matrix one <strong>of</strong> two ways. <strong>The</strong> easiest<br />
method is to simply make the<br />
matrix out <strong>of</strong> bite registration paste<br />
inside a check bite tray. Load the<br />
tray with the bite registration paste<br />
and then quickly syringe the<br />
material around the unprepared<br />
teeth. Place the tray and let the<br />
patient close into occlusion. When<br />
the material is hard, remove the tray<br />
and set it aside until after the tooth<br />
preparation is completed. Be sure<br />
to include enough teeth anteriorly<br />
▼<br />
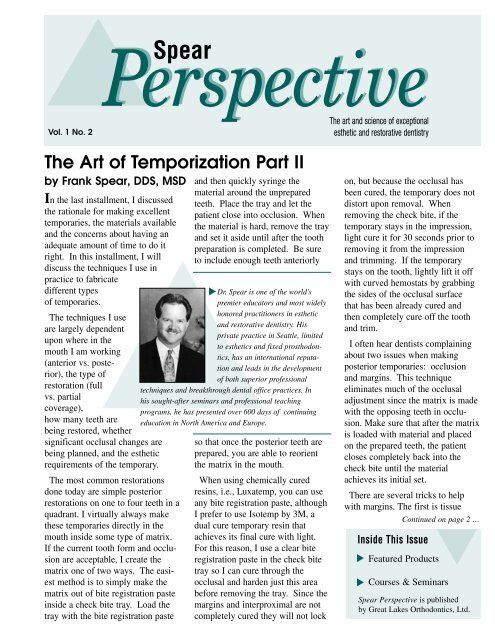
Dr. <strong>Spear</strong> is one <strong>of</strong> the world’s<br />
premier educators and most widely<br />
honored practitioners in esthetic<br />
and restorative dentistry. His<br />
private practice in Seattle, limited<br />
to esthetics and fixed prosthodontics,<br />
has an international reputation<br />
and leads in the development<br />
<strong>of</strong> both superior pr<strong>of</strong>essional<br />
techniques and breakthrough dental <strong>of</strong>fice practices. In<br />
his sought-after seminars and pr<strong>of</strong>essional teaching<br />
programs, he has presented over 600 days <strong>of</strong> continuing<br />
education in North America and Europe.<br />
so that once the posterior teeth are<br />
prepared, you are able to reorient<br />
the matrix in the mouth.<br />
When using chemically cured<br />
resins, i.e., Luxatemp, you can use<br />
any bite registration paste, although<br />
I prefer to use Isotemp by 3M, a<br />
dual cure temporary resin that<br />
achieves its final cure with light.<br />
For this reason, I use a clear bite<br />
registration paste in the check bite<br />
tray so I can cure through the<br />
occlusal and harden just this area<br />
before removing the tray. Since the<br />
margins and interproximal are not<br />
completely cured they will not lock<br />
<strong>The</strong> art and science <strong>of</strong> exceptional<br />
esthetic and restorative dentistry<br />
on, but because the occlusal has<br />
been cured, the temporary does not<br />
distort upon removal. When<br />
removing the check bite, if the<br />
temporary stays in the impression,<br />
light cure it for 30 seconds prior to<br />
removing it from the impression<br />
and trimming. If the temporary<br />
stays on the tooth, lightly lift it <strong>of</strong>f<br />
with curved hemostats by grabbing<br />
the sides <strong>of</strong> the occlusal surface<br />
that has been already cured and<br />
then completely cure <strong>of</strong>f the tooth<br />
and trim.<br />
I <strong>of</strong>ten hear dentists complaining<br />
about two issues when making<br />
posterior temporaries: occlusion<br />
and margins. This technique<br />
eliminates much <strong>of</strong> the occlusal<br />
adjustment since the matrix is made<br />
with the opposing teeth in occlusion.<br />
Make sure that after the matrix<br />
is loaded with material and placed<br />
on the prepared teeth, the patient<br />
closes completely back into the<br />
check bite until the material<br />
achieves its initial set.<br />
<strong>The</strong>re are several tricks to help<br />
with margins. <strong>The</strong> first is tissue<br />
Continued on page 2 …<br />
Inside This Issue<br />
▼<br />
▼<br />
Featured Products<br />
Courses & Seminars<br />
<strong>Spear</strong> Perspective is published<br />
by <strong>Great</strong> <strong>Lakes</strong> <strong>Orthodontics</strong>, Ltd.
<strong>The</strong> <strong>Art</strong> <strong>of</strong> <strong>Temporization</strong> <strong>Part</strong> <strong>II</strong><br />
Continued from front …<br />
management at the time <strong>of</strong> temporary<br />
fabrication. I personally use a<br />
double cord technique where the<br />
bottom cord stays in during the<br />
final impression. I leave this cord<br />
in until after the temporary is<br />
fabricated. It is critical that the<br />
tissue be retracted prior to temporary<br />
fabrication to obtain excellent<br />
margins. If you do not use cord,<br />
laser or electrosurgery may be used<br />
to achieve tissue retraction. <strong>The</strong><br />
final impression can then be taken<br />
and the temporary made after the<br />
tissue retraction.<br />
<strong>The</strong> second critical factor<br />
concerning margins is moisture.<br />
All <strong>of</strong> today’s Bis-GMA based<br />
temporary materials are very<br />
hydrophobic, so it is imperative<br />
that there is minimal moisture on<br />
the margins at the time <strong>of</strong> fabrication<br />
to achieve an excellent<br />
fit. If after the initial fabrication<br />
the margins are less<br />
than ideal, I completely<br />
trim the temporary prior<br />
to attempting to reline<br />
the margin, air abrade<br />
the temporary internally and at<br />
the margin, and paint in a layer<br />
<strong>of</strong> any one-step dentin adhesive,<br />
but do not cure it yet.<br />
Dry the tooth and syringe a<br />
very thin layer <strong>of</strong> Isotemp just on<br />
the margin <strong>of</strong> the preparation and<br />
then immediately reseat the temporary<br />
over it. Light cure the facial<br />
and lingual each for 10 seconds, lift<br />
<strong>of</strong>f the temporary, cure additional<br />
seconds and then re-trim and polish.<br />
This technique <strong>of</strong> using Isotemp in<br />
the bite registration paste yields<br />
minimal occlusal adjustment and<br />
excellent margins if adequate<br />
retraction and moisture control are<br />
maintained throughout the temporary<br />
fabrication.<br />
<strong>The</strong> technique described above is<br />
excellent whenever tooth form is<br />
acceptable. However, I <strong>of</strong>ten desire<br />
a change in tooth morphology for<br />
esthetic or occlusal reasons. In<br />
these instances, I take an alginate<br />
impression prior to administering<br />
anesthesia and pour it in Whip Mix<br />
mounting stone, which sets in about<br />
five minutes. On this model I use<br />
Ultradent blockout material (a<br />
light cured resin) to make the<br />
change in tooth morphology by<br />
adding, curing, and trimming with<br />
burs or discs. To make the material<br />
stick, paint a layer <strong>of</strong> unfilled resin<br />
on the model prior to applying<br />
the blockout material.<br />
I prefer using blockout<br />
“<strong>The</strong> techniques I use are<br />
largely dependent upon<br />
where in the mouth I am<br />
working, the type <strong>of</strong><br />
restoration, how many<br />
teeth are being restored,<br />
whether significant<br />
occlusal changes are<br />
being planned, and the<br />
esthetic requirements <strong>of</strong><br />
the temporary.”<br />
resin instead <strong>of</strong> wax because I can<br />
do a 1 mm copyplast pressing using<br />
the MiniSTAR ® directly over this<br />
model without having to first duplicate<br />
a waxed up model. I also prefer<br />
not to use my original mounted<br />
diagnostic casts to do this mock-up<br />
in simple cases so that the original<br />
models are not altered.<br />
If the complexity <strong>of</strong> the case<br />
requires the mounted models to do<br />
the mock-up, then I recommend<br />
doing a duplicate mounting rather<br />
than altering the originals. Once<br />
the copyplast pressing is complete<br />
and trimmed, it is used as a matrix<br />
just as the bite registration paste<br />
was previously used. In my own<br />
practice, 90% <strong>of</strong> my temporaries are<br />
done this way because I am usually<br />
altering tooth form. For simple<br />
posteriors and many anteriors, I use<br />
Isotemp inside the copyplast, cure<br />
the occlusal through the matrix and<br />
complete the Isotemp temporaries<br />
as previously described.<br />
For both long term and light shade<br />
anterior temporaries, I prefer Triad<br />
Ivory Light from Dentsply. Triad<br />
does require some modification in<br />
fabrication technique. Because the<br />
Triad is light cure only, a clear<br />
matrix must be used. Copyplast<br />
works fine. However, because<br />
Triad is quite viscous, it <strong>of</strong>ten<br />
distorts the copyplast when the<br />
matrix is loaded directly on the<br />
teeth in the mouth. <strong>The</strong>re are two<br />
things I do to prevent this. First,<br />
after the copyplast pressing is done,<br />
I press a layer <strong>of</strong> 1 mm stent<br />
material over it to create a more<br />
rigid matrix. Second, after the<br />
matrix is loaded, I place it in a bowl<br />
<strong>of</strong> very hot water for 10-15 seconds<br />
to make the Triad less viscous. I<br />
immediately take it to the mouth<br />
and seat the matrix to place. Cure<br />
each tooth facially and lingually for<br />
five seconds, lift the matrix up<br />
slightly, reseat it and repeat the<br />
curing cycle <strong>of</strong> five seconds each.<br />
After three to four curing cycles,<br />
remove the temporary, final cure<br />
for one minute and trim. Triad<br />
almost always needs the margins<br />
relined and I do it by using Isotemp<br />
exactly as earlier described. <strong>The</strong><br />
advantages <strong>of</strong> using Triad are its<br />
durability and excellent esthetics,<br />
although they are achieved with<br />
some loss <strong>of</strong> convenience. In my<br />
practice, I use Triad on posterior<br />
teeth only if the temporaries will be<br />
in several months or more, other-
wise I have found that Isotemp<br />
holds up fine and is more convenient.<br />
On anterior teeth, however,<br />
I use Triad 90% <strong>of</strong> the time, using<br />
Isotemp only when the patient will<br />
tolerate a darker, more translucent<br />
temporary.<br />
If the anterior temporaries are for<br />
full crowns, I usually make them<br />
directly on the tooth in the mouth<br />
using the copyplast and Triad.<br />
However, for anterior veneer temporaries,<br />
I prefer to make them<br />
indirectly on a model. I have found<br />
that I have far more control over<br />
these thinner temporaries that way.<br />
Again, the two most common<br />
materials I use are Isotemp and<br />
Triad, with shade and translucence<br />
being the critical factors in<br />
choosing between the two.<br />
Triad is typically much lighter and<br />
less translucent and, therefore, I<br />
use it more <strong>of</strong>ten. For a matrix, I<br />
use the techniques described earlier<br />
to modify the model and create<br />
the copyplast matrix. What varies<br />
is the type <strong>of</strong> model I use for<br />
these materials.<br />
When using Triad, I make two<br />
final impressions <strong>of</strong> the veneers out<br />
<strong>of</strong> silicone. I send the best one to<br />
the lab and pour the other one in<br />
Whip Mix mounting stone. After<br />
the stone has set and the model<br />
separated, I lubricate the model<br />
with Vaseline and make the Triad<br />
temporary on the model using the<br />
exact steps described for fabricating<br />
it in the mouth for full crowns. I<br />
even reline the margins in the<br />
mouth after trimming with Isotemp<br />
just as for full crowns.<br />
When using Isotemp for veneer<br />
temporaries, a stone model such as<br />
the Whip Mix mounting stone can<br />
be used. However, it is very nice to<br />
work <strong>of</strong>f a flexible model whenever<br />
possible. To do this, rather than<br />
making two silicone impressions, I<br />
make one Duoloid alginate impression<br />
<strong>of</strong> the tooth preparations for<br />
the temporary model and one silicone<br />
impression to send to the lab<br />
for veneer fabrication. I use alginate<br />
rather than silicone because the<br />
flexible model I make is out <strong>of</strong> a<br />
silicone material that would stick to<br />
the silicone final impression material.<br />
Take the Duoloid impression and<br />
inject Mach <strong>II</strong> die silicone from<br />
Parkell into it. Next, inject a base<br />
<strong>of</strong> heavier bite registration paste,<br />
and in two minutes, you have a<br />
model on which to fabricate the<br />
temporary. Load the copyplast with<br />
Isotemp, inject a thin layer around<br />
the margins and seat the loaded<br />
matrix onto the silicone model. It<br />
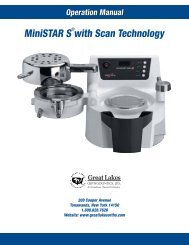
Featured Products<br />
MiniSTAR ®<br />
<strong>The</strong>rmal-forming machine<br />
can then be cured, removed and<br />
trimmed. <strong>The</strong> big advantage <strong>of</strong> this<br />
technique is the ability to completely<br />
cure the temporary knowing that<br />
it can be removed because <strong>of</strong> the<br />
model’s flexibility. It is then finished<br />
and relined if necessary as<br />
previously described. <strong>The</strong> reason I<br />
do not use this technique with Triad<br />
is because the viscosity <strong>of</strong> Triad<br />
distorts the silicone model.<br />
In the last segment on temporization,<br />
I will cover the use <strong>of</strong><br />
methylmethacrylate shells in<br />
complex reconstruction, as well<br />
as trimming, polishing and<br />
cementing temporaries.<br />
▼<br />
This positive pressure, thermal-forming<br />
machine provides adaptation so exceptional,<br />
you have to feel it to believe it.<br />
Quickly and accurately fabricate splints,<br />
bleaching trays, matrices for temporaries<br />
and mouthguards. <strong>The</strong> combination<br />
<strong>of</strong> 45psi and the heated side <strong>of</strong> the material being formed over the<br />
model delivers flawless adaptation. Compact, sturdy and easy to operate.<br />
Triad VLC Provisional Rope Material<br />
(Ivory Light)<br />
Easily fabricate durable, highly esthetic temporary<br />
crowns, bridges and veneers with this light-cured<br />
urethane dimethacrylate resin. <strong>The</strong> material, which<br />
comes in ropes, features “high flow” handling for<br />
rapid and accurate fabrication with minimal<br />
shrinkage.<br />
Triad <strong>II</strong><br />
VLC Light Curing Unit<br />
Cures light activated<br />
materials using tungsten<br />
halogen lighting. Adjustable<br />
table allows you to process<br />
all types <strong>of</strong> visible light<br />
cure materials in various appliance shapes, with or<br />
without the use <strong>of</strong> a model.<br />
▼<br />
▼<br />
Putty Silicone<br />
Ideal for incisal<br />
edge indexes,<br />
provisional matrices,<br />
checking<br />
occlusal registrations<br />
<strong>of</strong> mounted<br />
casts and other<br />
laboratory applications<br />
that require<br />
utmost accuracy.