KEK Amsterdam Spring Additions 2016

You also want an ePaper? Increase the reach of your titles
YUMPU automatically turns print PDFs into web optimized ePapers that Google loves.
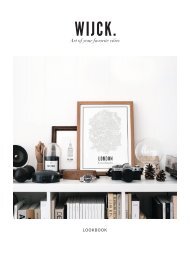
WONDER<br />
WALLS<br />
SPRING <strong>2016</strong>
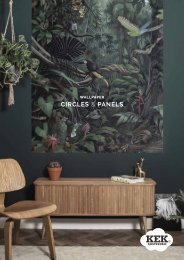
WALL<br />
PAPER<br />
The drawings of Fiep Westendorp are so beautiful that they deserve a place in<br />
every kid’s room. Therefore we created a new collection of wall stickers, wallpaper,<br />
wallpaper borders and posters with some of Fiep’s best creations.<br />
They just make you smile, don’t they?<br />
© Illustrations: Fiep <strong>Amsterdam</strong> bv; Fiep Westendorp Illustrations<br />
WP-101<br />
FOREST<br />
ANIMALS<br />
WALLPAPER<br />
Contains 3 Sheets<br />
Sheet size 48,7 x 280 cm<br />
Total size 146,1 x 280 cm<br />
99.95<br />
WP-100<br />
Forest Animals, Pink | € 99.95<br />
WP-107<br />
Busy Bears, Yellow | € 99.95
© Fiep <strong>Amsterdam</strong> bv; Fiep Westendorp Illustrations<br />
1<br />
2<br />
3<br />
4<br />
5<br />
Instructions<br />
Non-woven wallpaper<br />
Step 1<br />
Make sure the surface is suitable for this<br />
type of wallpaper. Prepare the surface by<br />
making sure it is dry, clean, smooth, stable,<br />
evenly absorbent, and of uniform colour with<br />
no old paint or rust showing through. Also<br />
make sure all old nails and screws are<br />
removed beforehand.<br />
WP-103<br />
HOLLAND<br />
AMERICA LINE<br />
48.7 cm x 280 cm<br />
Non-woven Wallpaper 3 Sheets<br />
Total size<br />
Illustrated by<br />
146.1 x 280 cm<br />
© <strong>KEK</strong> <strong>Amsterdam</strong> | All rights reserved<br />
WP-101<br />
WP-100<br />
WP-102<br />
WP-103<br />
Step 2<br />
Mix the paste according to the manufacturer’s<br />
instructions and apply to the wall, slightly<br />
wider than the wallpaper lengths.<br />
Step 3<br />
The dry wallpaper lengths are then hung<br />
directly onto the pasted wall using a rubber<br />
roller to make sure there are no air bubbles.<br />
Ensure the first length is hung vertically plumb<br />
(use a plumb line).<br />
Step 4<br />
The length can now be trimmed at the top<br />
and bottom.<br />
Subsequent lengths can now be hung, using<br />
a seam rubber roller to ensure that joins are<br />
tightly butted and there is no overlap. Make<br />
sure that the pattern carries through.<br />
Step 5<br />
Remove spots of paste immediately with a<br />
damp cloth and then dab them dry.<br />
It is important to avoid excessive heat or<br />
draughts when hanging and drying wallpaper,<br />
otherwise the wallpaper dries too quickly and<br />
this can lead to gapping at seams.<br />
Green<br />
FOREST ANIMALS<br />
Pink<br />
FOREST ANIMALS<br />
Yellow<br />
FOREST ANIMALS<br />
White<br />
HOLLAND AMERICA LINE<br />
WP-104<br />
WP-106<br />
WP-107<br />
WP-105<br />
Pink<br />
BUSY BEARS<br />
Blue<br />
BUSY BEARS<br />
Yellow<br />
BUSY BEARS<br />
Green<br />
BUSY BEARS<br />
WP-103<br />
HOLLAND<br />
AMERICA LINE<br />
WALLPAPER<br />
Contains 3 Sheets<br />
Sheet size 48,7 x 280 cm<br />
Total size 146,1 x 280 cm<br />
99.95<br />
© Illustrations: Fiep <strong>Amsterdam</strong> bv; Fiep Westendorp Illustrations
Step 1<br />
Make sure the surface is suitable for this type of<br />
non-woven wallpaper. Prepare the surface by<br />
making sure it is dry, clean, smooth, stable, evenly<br />
absorbent, and that the colour is uniform throughout<br />
with no old paint or rust showing through. Also make<br />
sure all old nails and screws are removed<br />
beforehand.<br />
Step 2<br />
Mix the paste according to the manufacturer’s<br />
instructions and apply to the wall, slightly wider than<br />
the wallpaper border.<br />
Step 3<br />
The dry wallpaper borders are then placed directly<br />
on the pasted wall using a rubber roller to make sure<br />
there are no air bubbles. Ensure the first part of the<br />
border is placed correctly horizontally by using a<br />
spirit level.<br />
Step 4<br />
After placing the first part of the border, you can now<br />
place the other parts (depending how long the border<br />
will be) by using a seam rubber roller. This ensures<br />
that the joins are butted tightly and there is no overlap.<br />
Make sure each section of the pattern matches up so<br />
as to run continuously throughout the border length.<br />
Subsequent lengths can now be hung, using a seam<br />
rubber roller to ensure that joins are tightly butted and<br />
there is no overlap. Make sure that the pattern carries<br />
through.<br />
Step 5<br />
Using a damp cloth, immediately remove any spots of<br />
paste showing outside the border area and then dab<br />
dry.<br />
It is important to avoid excessive heat or draughts<br />
when placing and drying the wallpaper borders,<br />
otherwise the wallpaper dries too quickly. This can<br />
lead to gapping at seams.<br />
WP-114<br />
Non-woven Wallpaper Border<br />
Total size<br />
Illustrated by<br />
© <strong>KEK</strong> <strong>Amsterdam</strong> | All rights reserved<br />
WP-113<br />
Non-woven Wallpaper Border<br />
Total size<br />
Illustrated by<br />
© <strong>KEK</strong> <strong>Amsterdam</strong> | All rights reserved<br />
WP-115<br />
Non-woven Wallpaper Border<br />
Total size<br />
Illustrated by<br />
© <strong>KEK</strong> <strong>Amsterdam</strong> | All rights reserved<br />
WP-117<br />
Non-woven Wallpaper Border<br />
Total size<br />
Illustrated by<br />
© <strong>KEK</strong> <strong>Amsterdam</strong> | All rights reserved<br />
WP-116<br />
Non-woven Wallpaper Border<br />
Total size<br />
Illustrated by<br />
© <strong>KEK</strong> <strong>Amsterdam</strong> | All rights reserved<br />
WP-118<br />
Non-woven Wallpaper Border<br />
Total size<br />
Illustrated by<br />
© <strong>KEK</strong> <strong>Amsterdam</strong> | All rights reserved<br />
WP-119<br />
Non-woven Wallpaper Border<br />
Total size<br />
Illustrated by<br />
© <strong>KEK</strong> <strong>Amsterdam</strong> | All rights reserved<br />
WP-113<br />
FOREST<br />
ANIMALS<br />
WALLPAPER<br />
BORDER<br />
Pink, 16 x 500 cm<br />
39.95<br />
WALLPAPER BORDERS<br />
16 x 500 CM | NON-WOVEN WALLPAPER<br />
The illustrations of Fiep Westendorp are so amazing, we decided to use them for our<br />
brand new collection of wallpaper borders. These borders can be used to make a nice<br />
panelling, to give just that extra boost to the kid’s bedroom walls.<br />
© Illustrations: Fiep <strong>Amsterdam</strong> bv; Fiep Westendorp Illustrations<br />
INSTRUCTIONS<br />
This pattern repeats itself 5 times (5 x 100 cm = 500 cm) © Fiep <strong>Amsterdam</strong> bv; Fiep Westendorp Illustrations<br />
FOREST<br />
ANIMALS<br />
16 x 500 CM<br />
WP-114 Forest Animals, Green, 16 x 500 cm | € 39.95<br />
WP-109 Road Trip, Green, 16 x 500 cm | € 39.95<br />
INSTRUCTIONS<br />
This pattern repeats itself 5 times (5 x 100 cm = 500 cm) © Fiep <strong>Amsterdam</strong> bv; Fiep Westendorp Illustrations<br />
FOREST<br />
ANIMALS<br />
16 x 500 CM<br />
WP-113 Forest Animals, Pink, 16 x 500 cm | € 39.95<br />
WP-110 Road Trip, Yellow, 16 x 500 cm | € 39.95<br />
INSTRUCTIONS<br />
This pattern repeats itself 5 times (5 x 100 cm = 500 cm) © Fiep <strong>Amsterdam</strong> bv; Fiep Westendorp Illustrations<br />
FOREST<br />
ANIMALS<br />
16 x 500 CM<br />
WP-115 Forest Animals, Yellow, 16 x 500 cm | € 39.95<br />
INSTRUCTIONS<br />
This pattern repeats itself 5 times (5 x 100 cm = 500 cm) © Fiep <strong>Amsterdam</strong> bv; Fiep Westendorp Illustrations<br />
BUSY<br />
BEARS<br />
16 x 500 CM<br />
WP-117 Busy Bears, Green, 16 x 500 cm | € 39.95<br />
WP-112 Red Tow Truck, 16 x 500 cm | € 39.95<br />
INSTRUCTIONS<br />
This pattern repeats itself 5 times (5 x 100 cm = 500 cm) © Fiep <strong>Amsterdam</strong> bv; Fiep Westendorp Illustrations<br />
BUSY<br />
BEARS<br />
16 x 500 CM<br />
WP-116 Busy Bears, Pink, 16 x 500 cm | € 39.95<br />
WP-108 Holland America Line, 16 x 500 cm | € 39.95<br />
INSTRUCTIONS<br />
This pattern repeats itself 5 times (5 x 100 cm = 500 cm)<br />
BUSY<br />
BEARS<br />
© Fiep <strong>Amsterdam</strong> bv; Fiep Westendorp Illustrations<br />
16 x 500 CM<br />
WP-118 Busy Bears, Blue, 16 x 500 cm | € 39.95<br />
WP-120 Fanfare, 16 x 500 cm | € 39.95<br />
INSTRUCTIONS<br />
This pattern repeats itself 5 times (5 x 100 cm = 500 cm)<br />
BUSY<br />
BEARS<br />
© Fiep <strong>Amsterdam</strong> bv; Fiep Westendorp Illustrations<br />
16 x 500 CM<br />
WP-119 Busy Bears, Yellow, 16 x 500 cm | € 39.95<br />
WP-121 Animal Parade, 16 x 500 cm | € 39.95
WALL<br />
STICKERS<br />
MS-614<br />
Little Prince XL, 57 x 97 cm | € 59.95<br />
MS-600<br />
Riding my Bike, 11 stickers<br />
sheet size 21 x 33 cm | € 0.00<br />
MS-603<br />
Little Prince, 19 x 32 cm | € 12.95<br />
MS-606<br />
Red Tow Truck, 26 x 32 cm | € 12.95<br />
From the book Pluk van de Petteflet by<br />
Annie M.G. Schmidt and Fiep Westendorp<br />
MS-602<br />
Boy with Hat, 20 x 32 cm | € 12.95<br />
From the book Pluk van de Petteflet by<br />
Annie M.G. Schmidt and Fiep Westendorp<br />
MS-613<br />
Hang On, 37 x 140 cm | € 59.95<br />
From the book Pluk van de Petteflet<br />
by Annie M.G. Schmidt and Fiep Westendorp<br />
MS-611<br />
RED TOW<br />
TRUCK XL<br />
70 x 87 cm<br />
59.95<br />
From the book Pluk van de Petteflet<br />
by Annie M.G. Schmidt and Fiep Westendorp<br />
© Illustrations: Fiep <strong>Amsterdam</strong> bv; Fiep Westendorp Illustrations<br />
MS-605<br />
Animals, 16 stickers<br />
sheet size 21 x 33 cm | € 12.95<br />
MS-609<br />
Animals, 20 stickers, sheet size 42 x 59 cm | € 29.95<br />
MS-607<br />
Boy with Animals, 16 stickers, sheet size 42 x 59 cm | € 29.95<br />
From the book Pluk van de Petteflet by Annie M.G. Schmidt<br />
and Fiep Westendorp
WALL<br />
STICKERS<br />
MS-608<br />
Pim & Pom, 18 stickers, sheet size 42 x 59 cm | € 29.95<br />
MS-610<br />
Pim & Pom, 19 stickers, sheet size 42 x 59 cm | € 29.95<br />
PIM & POM<br />
From the book Pim & Pom by Mies Bouhuys and Fiep Westendorp<br />
MS-612<br />
Pim & Pom, 97 x 70 cm | € 69,95<br />
MS-604<br />
Pim & Pom, 8 stickers<br />
sheet size 21 x 33 cm | € 12.95<br />
MS-601<br />
Pim & Pom, 12 stickers<br />
sheet size 21 x 33 cm | € 12.95<br />
MS-615<br />
PIM & POM<br />
Set of 2 XL stickers<br />
Pim 89 x 110 cm<br />
Pom 95 x 110 cm<br />
149.95<br />
© Illustrations: Fiep <strong>Amsterdam</strong> bv; Fiep Westendorp Illustrations
POSTERS<br />
42 x 59.4 CM<br />
This brand new collection of retro posters is based on some of the<br />
beautiful illustrations from Fiep Westendorp, Marije Tolman and Noëlle Smit.<br />
The posters are available in size A2, which is very suitable for all kinds of<br />
children’s rooms. Have a look at all 24 of them.<br />
PS-005 Picking Flowers | € 14.95 PS-018 Riding the Whale | € 14.95<br />
PS-004 Bear with Blue House | € 14.95 PS-003 Apple Tree | € 14.95 PS-020 The Booted Cat | € 14.95 PS-023 Little Princess | € 14.95
PS-017 Smiling Tiger | € 14.95 PS-001 Giant Giraffe | € 14.95 PS-016 Jumping Pinguïns | € 14.95<br />
BOOK<br />
CREDITS<br />
005, 010 From the book Floddertje by Annie M.G. Schmidt and Fiep<br />
Westendorp 011, 012 From the book Pim & Pom by Mies Bouhuys<br />
and Fiep Westendorp 016, 017 From the book <strong>Spring</strong>ende pinguïns<br />
en lachende hyena’s by Jesse Goossens and Marije Tolman<br />
018 From the book De Boomhut by Ronald Tolman and Marije Tolman<br />
019 From the book Het Eiland by Ronald Tolman and Marije Tolman<br />
020, 023 From the book Er was eens een prins en die wou een prinses<br />
by Martine Bijl and Noëlle Smit 021 From the book Welkom op de<br />
Dierderij by Lida Dijkstra and Noëlle Smit 022, 024 From the book<br />
Willemijn wil niet zwemmen by Lida Dijkstra and Noëlle Smit<br />
PS-002 Little Prince | € 14.95<br />
© Illustrations: Marije Tolman, Noëlle Smit, Fiep <strong>Amsterdam</strong> bv<br />
PS-019 Climbing the Clouds | € 14.95<br />
PS-007 Riding my Bike, Pink | € 14.95<br />
PS-006 Riding my Bike, Green | € 14.95<br />
PS-013 Donkey Ride | € 14.95 PS-010 Little Girl | € 14.95 PS-014 Castle | € 14.95<br />
PS-021 Bon Appetit | € 14.95<br />
PS-011 Pim & Pom, Blue | € 14.95<br />
PS-012 Pim & Pom, Yellow | € 14.95<br />
PS-015 Fire Brigade | € 14.95 PS-009 Holland America Line | € 14.95 PS-022 Swimming Lesson | € 14.95 PS-024 Swimming Lesson II | € 14.95<br />
PS-008 Little Lord | € 14.95
AGENCIES<br />
GERMANY<br />
Dutch Deutsch Living<br />
info@dutchdeutsch.de<br />
www.dutchdeutsch.de<br />
JAPAN<br />
Hiroboshi Co. Ltd / Dutch Design<br />
info@dutchdesign.jp<br />
www.dutchdesign.jp<br />
BELGIUM / LUXEMBOURG<br />
D2<br />
info@d-2.be<br />
www.d-2.be<br />
SPAIN<br />
aPunt Barcelona<br />
apunt.info@gmail.com<br />
www.apuntbarcelona.com<br />
<strong>KEK</strong> <strong>Amsterdam</strong><br />
Rooseveltlaan 179<br />
1079 AN <strong>Amsterdam</strong><br />
The Netherlands<br />
+31 (0)6 37 29 34 18<br />
info@kekamsterdam.nl<br />
www.kekamsterdam.nl<br />
Dealer login<br />
Please send an email to<br />
info@kekamsterdam.nl to request<br />
your personal login code for<br />
ordering our products online.<br />
kekretail.com