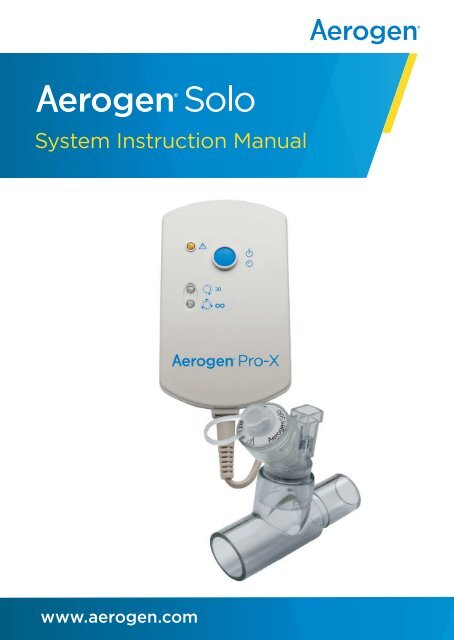
Aerogen Solo Instruction Manual
- No tags were found...

You also want an ePaper? Increase the reach of your titles
YUMPU automatically turns print PDFs into web optimized ePapers that Google loves.
System <strong>Instruction</strong> <strong>Manual</strong><br />
www.aerogen.com
Contents<br />
Introduction 2<br />
Indications for Use 2<br />
System Warnings 4<br />
Assembly & Installation 6<br />
Installation For Use With A Ventilator 11<br />
Optimum Use 13<br />
Installation For Use Off-Ventilator 14<br />
Nebulisation Modes 17<br />
Functional Test 21<br />
<strong>Aerogen</strong> <strong>Solo</strong> Aerosol Flow Rate Calculation 22<br />
Troubleshooting 23<br />
Warranty 25<br />
Life Of Product 25<br />
Specifications 26<br />
Performance 27<br />
Symbols 28<br />
Appendix 1 29<br />
Appendix 1: EMC Tables 31<br />
<strong>Aerogen</strong> ® <strong>Solo</strong> System <strong>Instruction</strong> <strong>Manual</strong> 1
Introduction<br />
The <strong>Aerogen</strong> ® <strong>Solo</strong> System is an iteration of the <strong>Aerogen</strong> ® Pro System.<br />
The indications for use of the <strong>Aerogen</strong> ® Pro System are given below. The<br />
<strong>Aerogen</strong> ® <strong>Solo</strong> System consists of the <strong>Aerogen</strong> ® <strong>Solo</strong> nebuliser and the<br />
<strong>Aerogen</strong> ® Pro-X Controller. It is intended for hospital use only to nebulise<br />
physician-prescribed medications for inhalation which are approved for<br />
use with a general purpose nebuliser. The <strong>Aerogen</strong> ® <strong>Solo</strong> nebuliser is for<br />
single patient use only and the <strong>Aerogen</strong> ® Pro-X Controller is for re-use.<br />
The <strong>Aerogen</strong> <strong>Solo</strong> System is suitable for intermittent and continuous<br />
nebulisation of neonate, paediatric and adult patients as described in this<br />
manual.<br />
Indications for Use<br />
The <strong>Aerogen</strong> Pro System is a portable medical device for multiple patient<br />
use that is intended to aerosolise physician-prescribed solutions for<br />
inhalation to patients on and off ventilation or other positive pressure<br />
breathing assistance. The <strong>Aerogen</strong> Pro System is suitable for use in adult,<br />
paediatric and neonate patients as described in the <strong>Instruction</strong> <strong>Manual</strong>.<br />
2 <strong>Aerogen</strong> ®
<strong>Aerogen</strong> <strong>Solo</strong> System<br />
The <strong>Aerogen</strong> <strong>Solo</strong> System includes the following components:<br />
1 2 3 4<br />
5 6 7 8<br />
Figure 1. <strong>Aerogen</strong> <strong>Solo</strong> System<br />
1. <strong>Aerogen</strong> <strong>Solo</strong> With Plug<br />
2. T-Piece (Adult)*<br />
3. <strong>Aerogen</strong> Pro-X Controller<br />
4. Controller Cable<br />
5. AC/DC Adapter<br />
6. Universal Mounting Bracket & Equipment Mount Adapter<br />
7. Continuous Nebulization Tube Set*<br />
8. <strong>Aerogen</strong> ® Ultra*<br />
* Neonate and paediatric adapters, Continuous Nebulization Tube Set and<br />
<strong>Aerogen</strong> Ultra are sold separately. Visit www.aerogen.com for full parts list.<br />
Note: Device names previously referencing ‘Aeroneb’ are now referencing<br />
‘<strong>Aerogen</strong>’. The <strong>Aerogen</strong> Ultra was also previously known as Aeroneb <strong>Solo</strong> Adapter.<br />
<strong>Aerogen</strong> ® <strong>Solo</strong> System <strong>Instruction</strong> <strong>Manual</strong> 3
System Warnings<br />
Read and study all instructions before using the <strong>Aerogen</strong> <strong>Solo</strong> System<br />
and accessories. Only trained medical personnel should operate the<br />
device.<br />
This is a single patient use device not to be used on more than one patient<br />
to prevent cross infection.<br />
The components and accessories of the <strong>Aerogen</strong> <strong>Solo</strong> System, as packaged,<br />
are not sterile.<br />
The components and accessories of the <strong>Aerogen</strong> <strong>Solo</strong> System are not made<br />
with natural rubber latex.<br />
Inspect all parts before use, and do not use if any parts are missing,<br />
cracked or damaged. In case of missing parts, malfunction or damage,<br />
contact your sales representative.<br />
Only use physician-prescribed solutions that are approved for use with<br />
a general purpose nebuliser. Consult drug manufacturer’s instructions<br />
regarding suitability for nebulisation.<br />
Use only with <strong>Aerogen</strong> <strong>Solo</strong> components, connectors and accessories<br />
specified by <strong>Aerogen</strong> in this instruction manual.<br />
Do not use beyond defined life (see page 25).<br />
Do not use in the presence of flammable substances or flammable<br />
anaesthetic mixtures combined with air, oxygen or nitrous oxide.<br />
To avoid the risk of fire, do not use to aerosolise alcohol-based medications,<br />
which can ignite in oxygen-enriched air under high pressure.<br />
Do not autoclave any component or accessory of the <strong>Aerogen</strong> <strong>Solo</strong><br />
System.<br />
4 <strong>Aerogen</strong> ®
Do not modify this equipment without the authorisation of the manufacturer.<br />
Do not use or store outside of specified environmental conditions.<br />
To avoid damage to the nebuliser:<br />
••<br />
Do not apply undue pressure to the domed aperture plate in the centre<br />
of the nebuliser.<br />
••<br />
Do not push out the <strong>Aerogen</strong> Vibronic ® aerosol generator.<br />
••<br />
Do not use a syringe with a needle to add medication.<br />
••<br />
Do not attempt to clean the nebuliser.<br />
Use of the <strong>Aerogen</strong> <strong>Solo</strong> and T-piece during the administration of volatile<br />
anaesthetics may result in adverse effects on the constituent plastics. Do<br />
not use with volatile anaesthetics unless known to be compatible. <strong>Aerogen</strong><br />
have determined that, using anaesthetic ventilators, the following volatile<br />
anaesthetic agents are compatible under the stated conditions below:<br />
Anaesthetic<br />
Agent<br />
Proprietary Name<br />
Maximum<br />
Percentage of<br />
Anaesthetic<br />
Maximum Duration<br />
of Exposure<br />
Isoflurane FORANE ® 3.5 % 12 hours<br />
Sevoflurane SEVOFLURANE ® 8 % 12 hours<br />
Desflurane SUPRANE ® 10 % 12 hours<br />
The <strong>Aerogen</strong> <strong>Solo</strong> should not be used after exposure to volatile anaesthetic.<br />
<strong>Aerogen</strong> ® <strong>Solo</strong> System <strong>Instruction</strong> <strong>Manual</strong> 5
Assembly & Installation<br />
<strong>Aerogen</strong> <strong>Solo</strong> System Set-Up<br />
Perform a functional test of the <strong>Aerogen</strong> <strong>Solo</strong> before use as described in<br />
the Functional Test section of this manual (See page 21).<br />
Figure 2. Assembly of <strong>Aerogen</strong> <strong>Solo</strong> System<br />
1. Connect the <strong>Aerogen</strong> <strong>Solo</strong> to the T-piece by pushing the nebuliser<br />
firmly onto the T-piece.<br />
2. Insert the <strong>Aerogen</strong> <strong>Solo</strong> and the T-piece into the breathing circuit.<br />
Note: For use with other accessories, refer to Figure 9, Figure 10<br />
and Figure 11.<br />
3. Connect the <strong>Aerogen</strong> Pro-X Controller to the <strong>Aerogen</strong> <strong>Solo</strong> using the<br />
nebuliser cable.<br />
4. To operate on AC power (the primary mode of operation), connect the<br />
<strong>Aerogen</strong> Pro-X AC/DC adapter to the <strong>Aerogen</strong> Pro-X Controller.<br />
5. Plug the adapter into an AC power source.<br />
6 <strong>Aerogen</strong> ®
6. The <strong>Aerogen</strong> Pro-X Controller can be battery-operated for portable<br />
applications. The rechargeable battery can power the System for up<br />
to 45 minutes when fully charged. In the case of AC power failure the<br />
controller will automatically switch to battery operation.<br />
7. Use the universal mounting bracket to attach the controller to an IV<br />
pole or bed rail in either a vertical or horizontal orientation (Figure 3).<br />
8. Where a standard equipment mount is available, use the equipment<br />
mount adapter to support the controller (Figure 3).<br />
Standard<br />
Equipment Mount<br />
Vertical<br />
Universal Mounting Bracket<br />
Horizontal<br />
Universal Mounting Bracket<br />
Equipment<br />
Mount Adapter<br />
Figure 3. <strong>Aerogen</strong> Pro-X Controller and universal mounting bracket<br />
configurations<br />
Warnings<br />
••<br />
To ensure uninterrupted operation of the <strong>Aerogen</strong> <strong>Solo</strong>, secure both the<br />
AC/DC adapter cable and the controller cable so they cannot become<br />
disconnected during treatment. If clips are available on patient circuits,<br />
run the cables through the eyes of the clips. If clips are not available,<br />
ensure that all cables are routed safely.<br />
••<br />
The AC/DC adapter is the means of isolating the <strong>Aerogen</strong> <strong>Solo</strong> System<br />
from the mains power supply.<br />
••<br />
The Continuous mode can only be operated from AC power supply.<br />
••<br />
Do not over-tighten knob on the universal mounting bracket.<br />
<strong>Aerogen</strong> ® <strong>Solo</strong> System <strong>Instruction</strong> <strong>Manual</strong> 7
<strong>Aerogen</strong> Pro-X Controller<br />
On/Off Power<br />
• 30 Min. - Press & Release<br />
• Continuous Mode - 3 Sec. hold from off<br />
Error Indicator<br />
30 Minute Mode<br />
Indicator light<br />
Continuous Mode<br />
Indicator light<br />
Battery Status<br />
Indicator<br />
9V DC Input<br />
Controller<br />
Cable Input<br />
Figure 4. <strong>Aerogen</strong> Pro-X Controls & Indicators<br />
8 <strong>Aerogen</strong> ®
Table 1. <strong>Aerogen</strong> Pro-X Controls & Indicators<br />
Control / Indicator<br />
30 Min. Indicator<br />
Continuous Indicator<br />
Error Indicator<br />
On/Off Power Button<br />
Battery Status Indicator<br />
Function<br />
• Green (steadily lit) = 30 Minute nebulisation<br />
cycle on<br />
• Green (flashing) = Low battery power<br />
• Nebuliser automatically powers off after 30<br />
minutes have elapsed<br />
• Green (steadily lit) = Continuous nebulisation<br />
cycle on<br />
• Nebuliser does not power off<br />
automatically<br />
• Amber (steadily lit) = <strong>Aerogen</strong> <strong>Solo</strong><br />
nebuliser disconnected from <strong>Aerogen</strong> Pro-X<br />
Controller<br />
• Amber (flashing) = <strong>Aerogen</strong> Pro-X drive<br />
voltage error<br />
• To operate in 30 Minute Mode, press the On/Off<br />
button once<br />
• To operate in Continuous Mode, press and<br />
hold the On/Off button for greater than 3<br />
seconds from off<br />
• Pressing during nebulisation turns off power<br />
to the nebuliser<br />
• Green = Battery fully charged<br />
• Amber = Battery charging<br />
• No light = Battery in operation<br />
Recharging the Battery<br />
To recharge the battery, connect the AC/DC adapter to the controller and<br />
connect to AC power source. The battery status indicator is amber while<br />
charging and green when fully charged.<br />
If the controller is placed in long-term storage, it is recommended that the<br />
battery be recharged every 3 months.<br />
Allow a minimum of four hours for the internal battery to fully recharge.<br />
<strong>Aerogen</strong> ® <strong>Solo</strong> System <strong>Instruction</strong> <strong>Manual</strong> 9
Cleaning the <strong>Aerogen</strong> Pro-X Controller<br />
Cleaning of controller and controller cable, AC/DC adapter and mounting<br />
brackets:<br />
1. Wipe clean with an alcohol based disinfectant wipe or a quaternary<br />
ammonium compound based disinfectant wipe.<br />
2. Check for exposed wiring, damaged connectors, or other defects and<br />
replace controller if any are visible.<br />
3. Visually inspect for damage and replace the controller if any damage<br />
is observed.<br />
Warnings<br />
••<br />
Do not immerse or autoclave the <strong>Aerogen</strong> Pro-X Controller, cable or<br />
AC/DC adapter.<br />
••<br />
Do not place the <strong>Aerogen</strong> Pro-X Controller in an incubator during use.<br />
••<br />
Do not use abrasive or sharp tools.<br />
••<br />
Do not spray liquid directly onto the controller.<br />
••<br />
Do not wrap the nebuliser cable tightly around any of the system<br />
components.<br />
••<br />
Do not use in the presence of devices generating high electromagnetic<br />
fields such as magnetic resonance imaging (MRI) equipment.<br />
••<br />
The <strong>Aerogen</strong> Pro-X Controller contains a nickel metal hydride (NiMH)<br />
rechargeable battery, which should be disposed of in accordance with<br />
local governing regulations at the end of its useful life.<br />
••<br />
Follow local laws and recycling plans regarding disposal or recycling of<br />
components, batteries and packaging.<br />
10 <strong>Aerogen</strong> ®
Installation for use with a Ventilator<br />
T-Pieces - Connection to a Breathing Circuit<br />
1. For 22mm adult breathing circuits connect the nebuliser with adult<br />
T-piece into the inspiratory limb of the breathing circuit before the<br />
patient Y (Figure 5).<br />
Figure 5. Connecting the <strong>Aerogen</strong> <strong>Solo</strong> to a breathing circuit<br />
Note: Figure 5 shows adult configuration only<br />
For 15mm paediatric breathing circuits connect the nebuliser with<br />
the paediatric T-piece into the inspiratory limb of the breathing circuit<br />
before the patient Y.<br />
The <strong>Aerogen</strong> <strong>Solo</strong> can connect to 10mm neonate breathing circuits<br />
with the 15mm paediatric T-piece and the neonate adapters. This can<br />
be positioned approximately 30 cm (12 in.) back from the patient Y<br />
(Figure 6).<br />
Figure 6. Connecting to a neonate breathing circuit<br />
<strong>Aerogen</strong> ® <strong>Solo</strong> System <strong>Instruction</strong> <strong>Manual</strong> 11
2. The <strong>Aerogen</strong> <strong>Solo</strong> can be placed on the dry side of the humidifier as<br />
shown in Figure 7. The <strong>Aerogen</strong> <strong>Solo</strong> can be used with a nasal interface<br />
in this configuration.<br />
Figure 7. <strong>Aerogen</strong> <strong>Solo</strong> on dry side of humidifier<br />
3. Follow ventilator manufacturer instructions for performing a leak test<br />
after inserting or removing the nebuliser.<br />
Warnings<br />
• Condensate can collect and occlude ventilator circuits. Always position<br />
ventilator circuits so that fluid condensate drains away from the patient.<br />
• Always connect a bacteria filter to the expiratory inlet of the ventilator.<br />
Otherwise the function of the expiratory channel may be degraded.<br />
• Do not use a filter or heat-moisture exchanger (HME) between the<br />
nebuliser and patient airway.<br />
12 <strong>Aerogen</strong> ®
Optimum Use<br />
For optimum use of the <strong>Aerogen</strong> <strong>Solo</strong>, ensure it is correctly orientated as<br />
shown in Figure 8. This applies to both 30 Minute and Continuous modes.<br />
Figure 8. Optimum Use of the <strong>Aerogen</strong> <strong>Solo</strong><br />
<strong>Aerogen</strong> ® <strong>Solo</strong> System <strong>Instruction</strong> <strong>Manual</strong> 13
Installation for use Off-Ventilator<br />
Use with a Face Mask<br />
Mask kits, which include a vented elbow and mask elbow, are available<br />
separately (visit www.aerogen.com for full parts list).<br />
1. When using a mask, connect the vented elbow, mask elbow and mask<br />
to the nebuliser by firmly pushing the parts together.<br />
2. Rotate the vented elbow to suit the position of the patient (Figure 9).<br />
Vented Vented<br />
Elbow Elbow<br />
Face Face Mask Mask<br />
Elbow Elbow<br />
Patient Patient Upright Upright<br />
Patient Patient Reclined Reclined<br />
Figure 9. Connecting to a mask<br />
Use with a Mouthpiece<br />
The <strong>Aerogen</strong> <strong>Solo</strong> is compatible with any standard ISO 22 mm nebuliser<br />
mouthpiece inserted into the adult T-piece.<br />
When using a mouthpiece, connect the nebuliser to the T-piece and then<br />
connect the T-piece to the mouthpiece by pushing the parts firmly together<br />
as shown in Figure 10.<br />
Figure 10. Connecting to a mouthpiece<br />
14 <strong>Aerogen</strong> ®
Warning: To ensure correct nebulisation, maintain the nebuliser in a<br />
vertical orientation (Figure 9 & Figure 10)<br />
Use with a Nasal Interface<br />
The <strong>Aerogen</strong> <strong>Solo</strong> can be used on/off ventilator with a nasal interface<br />
when configured with a humidifier (Figure 7).<br />
<strong>Aerogen</strong> Ultra<br />
The <strong>Aerogen</strong> Ultra is an accessory specific to the <strong>Aerogen</strong> <strong>Solo</strong> nebuliser. It<br />
facilitates intermittent and continuous nebulisation, with optional supply of<br />
supplemental oxygen to paediatric and adult patients via mouthpiece. The<br />
device can alternatively be used with a face mask, which is not provided.<br />
It is a single patient use device which is qualified for 20 intermittent use<br />
treatments (at a rate of four 3 mL doses per day over 5 days) or 3 hours of<br />
continuous use.<br />
Optimal aerosol delivery is achieved with a valved mouthpiece or valved<br />
aerosol face mask with low/no oxygen flow.<br />
Mouthpiece<br />
Face Mask<br />
<strong>Aerogen</strong> Ultra<br />
<strong>Aerogen</strong> <strong>Solo</strong><br />
Oxygen Tubing<br />
Figure 11. Assembly of <strong>Aerogen</strong> Ultra<br />
<strong>Aerogen</strong> ® <strong>Solo</strong> System <strong>Instruction</strong> <strong>Manual</strong> 15
Inspect for device integrity and correct valve placement prior to use.<br />
1. Insert <strong>Aerogen</strong> <strong>Solo</strong> nebuliser firmly into <strong>Aerogen</strong> Ultra in orientation<br />
shown in Figure 11.<br />
2. If supplemental oxygen is required, firmly attach oxygen tubing to<br />
<strong>Aerogen</strong> Ultra.<br />
Note: Oxygen flow rate should be set between 1-6 LPM.<br />
3. If a face mask is required, remove mouthpiece and attach face mask<br />
to <strong>Aerogen</strong> Ultra.<br />
Note: When using an open face mask, a minimum oxygen flow of 1 LPM<br />
is required.<br />
4. Add medication to nebuliser.<br />
5. Connect cable to <strong>Aerogen</strong> <strong>Solo</strong> and power on controller.<br />
6. Introduce <strong>Aerogen</strong> Ultra to patient and observe aerosol flow to ensure<br />
correct operation.<br />
7. Remove excess rainout from the <strong>Aerogen</strong> Ultra periodically (hourly with<br />
continuous nebulisation).<br />
8. To ensure optimum performance of the <strong>Aerogen</strong> Ultra, remove any<br />
residue by rinsing through with sterile water, shake off excess and allow<br />
to air dry.<br />
Warnings<br />
• Do not use with a closed face mask.<br />
• When using with an open face mask, always use supplemental oxygen<br />
flow of 1-6 LPM.<br />
• Performance of the <strong>Aerogen</strong> Ultra may vary depending upon the type<br />
of drug and <strong>Aerogen</strong> Ultra configuration used.<br />
• Do not exceed recommended oxygen flow for system.<br />
• Ensure oxygen connection port or tubing is not occluded.<br />
• Do not use <strong>Aerogen</strong> Ultra without a mouthpiece or face mask.<br />
• Visually check <strong>Aerogen</strong> Ultra post-rinsing to ensure that valves have<br />
not become dislodged.<br />
• Do not cover <strong>Aerogen</strong> Ultra valves during use.<br />
• Do not use <strong>Aerogen</strong> Ultra in conjunction with the <strong>Aerogen</strong> Pro.<br />
• Do not autoclave any component of the kit.<br />
• Ensure tubing is safely orientated to prevent strangulation hazard.<br />
16 <strong>Aerogen</strong> ®
Nebulisation Modes<br />
30 Minute Mode (Intermittent)<br />
Warnings<br />
• To avoid damage to the <strong>Aerogen</strong> <strong>Solo</strong>, do not use a syringe with a<br />
needle.<br />
• During use observe for correct functioning of the nebuliser.<br />
• The maximum capacity of the nebuliser is 6 mL.<br />
For intermittent doses less than or equal to 6 mL:<br />
1. Open the plug on the nebuliser.<br />
2. Use a pre-filled ampoule or syringe to add medication into the filler port<br />
of the nebuliser (Figure 12).<br />
3. Close the plug.<br />
Figure 12. Filling the nebuliser with a pre-filled ampoule<br />
4. To start a 30 Minute nebulisation cycle, press and release the blue<br />
On/Off power button (Figure 4). The green 30 Minute indicator light<br />
illuminates to indicate that the 30 Minute nebulisation cycle is in<br />
progress.<br />
5. To stop the nebuliser at any time, press the On/Off power button. The<br />
indicator turns off to indicate that nebulisation has stopped.<br />
Note: Medication can be added to the <strong>Aerogen</strong> <strong>Solo</strong> during nebulisation.<br />
This does not interrupt nebulisation or ventilation.<br />
<strong>Aerogen</strong> ® <strong>Solo</strong> System <strong>Instruction</strong> <strong>Manual</strong> 17
Continuous Mode<br />
Continuous Nebulization Tube Set<br />
The <strong>Aerogen</strong> Continuous Nebulization Tube Set is an accessory specific<br />
to the <strong>Aerogen</strong> <strong>Solo</strong> nebuliser which enables safe continuous infusion of<br />
liquid medication for aerosolisation.<br />
Note: Place the syringe cap on the syringe after it is filled with medication.<br />
Tethered Silicone Plug<br />
Tubing<br />
(Nebuliser End)<br />
A<br />
Syringe Cap<br />
Tubing<br />
Syringe<br />
Tubing<br />
(Syringe End)<br />
Figure 13. Continuous Nebulization Tube Set<br />
1. Ensure the <strong>Aerogen</strong> <strong>Solo</strong> nebuliser is firmly fitted into the <strong>Aerogen</strong> <strong>Solo</strong><br />
T-piece in the breathing circuit.<br />
2. Remove the syringe cap from the medication-filled syringe.<br />
3. Attach the syringe end of the tubing onto the syringe.<br />
4. Prime the tubing until the medication reaches end of tubing (Point A).<br />
Note: The tubing priming volume is maximum 3.65 mL.<br />
5. Unplug the tethered silicone plug from the <strong>Aerogen</strong> <strong>Solo</strong> nebuliser, but<br />
do not remove it from the nebuliser.<br />
6. Screw the nebuliser end of the tubing onto the top of the nebuliser.<br />
18 <strong>Aerogen</strong> ®
7. Insert the syringe filled with medication into the syringe infusion pump<br />
(pump not shown in Figure 13) and set the appropriate flow rate (refer<br />
to pump manual or manufacturer for guidance).<br />
8. To start a continuous nebulisation cycle, press and hold the blue On/Off<br />
power button from the off state for at least three seconds. Verify the<br />
green, ‘Continuous Nebulization’ indicator light is on (Figure 4).<br />
9. Observe nebuliser for correct operation. During continuous<br />
nebulisation, the nebuliser is on continuously and the medication is<br />
nebulised on a drop by drop basis. Nebulisation should be visible with<br />
regular intermittent pauses. Medication level in the nebuliser reservoir<br />
should not rise during use.<br />
10. To stop the nebuliser at any time, press the On/Off power button. The<br />
indicator turns off to indicate that nebulisation has stopped.<br />
<strong>Aerogen</strong>’s recommended input rate of medication into the <strong>Aerogen</strong> <strong>Solo</strong><br />
nebuliser during continuous nebulisation is up to a maximum of 12 mL per<br />
hour. The upper limit of 12 mL per hour is based on <strong>Aerogen</strong>’s specification<br />
for the minimum nebuliser flow rate. For directions on determining flow<br />
rates, refer to the Optional Flow Rate Calculation method in the Functional<br />
Test section, page 22.<br />
Warnings Specific to the Continuous Nebulization Tube Set<br />
• It is important to ensure that the maximum flow rate through the tube<br />
set into the nebuliser must not exceed the output rate of the nebuliser.<br />
• Check for leaks from the system prior to and during use.<br />
• The graduations on the syringe are for indication use only.<br />
• Store at room temperature and use product within labelled shelf life.<br />
• To ensure correct and safe connection between the nebuliser and the<br />
medication reservoir, trace the medication tube from the nebuliser<br />
back to the medication reservoir to make sure the medication tube is<br />
connected to the correct source.<br />
• The recommended syringe pump software setting with the <strong>Aerogen</strong><br />
syringe is typically the “BD Plastipak” setting. This must be validated<br />
locally before use. Refer to pump manual or manufacturer for guidance.<br />
These pumps may also be used in accordance with local hospital or<br />
ward policies.<br />
<strong>Aerogen</strong> ® <strong>Solo</strong> System <strong>Instruction</strong> <strong>Manual</strong> 19
• Ensure that the tethered silicone plug is attached to the <strong>Aerogen</strong> <strong>Solo</strong><br />
when connecting tube set.<br />
• Ensure that the tubing is safely orientated to prevent a trip hazard.<br />
• Rising level of medication in the reservoir may occur if the <strong>Aerogen</strong><br />
<strong>Solo</strong> nebuliser is turned off while the feed system is still on or the<br />
nebuliser is not in its recommended orientation.<br />
• The level of the medication in the reservoir of the <strong>Aerogen</strong> <strong>Solo</strong><br />
nebuliser should be periodically monitored to ensure that the fill rate<br />
of medication does not exceed the output rate of the nebuliser. A<br />
rising level of medication in the reservoir indicates that the fill rate is<br />
exceeding the output rate of the nebuliser.<br />
• Replace the tube set and syringe when changing the type of medication.<br />
• Do not connect the tube set and syringe to non-respiratory equipment.<br />
• Do not clean or sterilize.<br />
• Do not connect to any nebuliser other than the <strong>Aerogen</strong> <strong>Solo</strong>.<br />
Note: If the mains power is disconnected during a continuous nebulisation<br />
cycle and reconnected within 10 seconds, the controller shall return to<br />
Continuous Nebulization mode automatically.<br />
20 <strong>Aerogen</strong> ®
Functional Test<br />
Perform a functional test of the <strong>Aerogen</strong> <strong>Solo</strong> System prior to first use or<br />
at any time to verify proper operation. This test is to be carried out prior to<br />
inserting the nebuliser into a circuit or accessory.<br />
1. Visually inspect each part of the system for cracks or damage and<br />
replace if any defects are visible.<br />
2. Pour 1-6 mL of normal saline (0.9%) into the nebuliser.<br />
3. Connect the nebuliser to the controller using the controller cable.<br />
Connect the AC/DC adapter to the controller and plug the AC/DC<br />
adapter into an AC power source.<br />
4. Press and release the blue On/Off power button and verify that the<br />
green 30 Min. indicator light illuminates and that aerosol is visible.<br />
5. Disconnect the nebuliser from the controller. Verify that the amber<br />
Error Indicator lights. Reconnect the nebuliser to the controller.<br />
6. Disconnect the AC/DC adapter from the controller and verify that<br />
nebulisation continues and that the battery status indicator turns off.<br />
7. Power off the controller. Reconnect the AC/DC adapter to the controller.<br />
Press and hold the button for at least 3 seconds. Verify that the green<br />
Continuous indicator light illuminates and that aerosol is visible.<br />
8. Turn the system off and verify that the 30 Min. and Continuous<br />
indicators are off.<br />
<strong>Aerogen</strong> ® <strong>Solo</strong> System <strong>Instruction</strong> <strong>Manual</strong> 21
)<br />
)<br />
<strong>Aerogen</strong> <strong>Solo</strong> Aerosol Flow Rate<br />
Calculation (Optional)<br />
Flow rates may vary between individual <strong>Aerogen</strong> <strong>Solo</strong> nebulisers. The<br />
minimum flow rate for all <strong>Aerogen</strong> <strong>Solo</strong> nebulisers is 0.2 mL per minute.<br />
In order to calculate the flow rate of an individual <strong>Aerogen</strong> <strong>Solo</strong> nebuliser,<br />
follow these steps:<br />
1. Transfer 0.5 mL of normal saline (0.9%) or intended drug into the<br />
<strong>Aerogen</strong> <strong>Solo</strong> medication cup.<br />
2. Turn on the nebuliser.<br />
3. Using a stop-watch, measure the length of time it takes from the start<br />
of nebulisation until all the saline/drug has been nebulised.<br />
4. Calculate the flow rate using the following equations:<br />
Flow rate in mL/min =<br />
Flow rate in mL/hr =<br />
)<br />
Volume of normal saline or drug<br />
Nebulisation time in seconds<br />
Volume of normal saline or drug<br />
Nebulisation time in seconds<br />
)<br />
)<br />
x 60<br />
x 60) x 60<br />
22 <strong>Aerogen</strong> ®
Troubleshooting<br />
If these suggestions do not correct the problem, discontinue use of any<br />
device and contact your local <strong>Aerogen</strong> sales representative.<br />
Table 2. <strong>Aerogen</strong> Pro-X Controller Troubleshooting<br />
If this happens: It could mean: Try this:<br />
The 30 Min. indicator<br />
flashes during<br />
nebulisation.<br />
Battery will not<br />
recharge.<br />
Controller is connected<br />
to the AC/DC adapter<br />
and the battery charging<br />
light is illuminated green<br />
and the 30 Min. indicator<br />
light is flashing.<br />
Battery power is low.<br />
It may be time to replace<br />
the battery.<br />
Recharge battery<br />
(see Recharging the Battery).<br />
Contact your local <strong>Aerogen</strong><br />
sales representative.<br />
Battery will not retain<br />
initial charge.<br />
Rechargeable battery may<br />
need to be replaced.<br />
Contact your local <strong>Aerogen</strong><br />
sales representative.<br />
The 30 Min. or<br />
Continuous light<br />
illuminates, but aerosol<br />
is not visible.<br />
30 Min. or Continuous<br />
indicator does not light<br />
when On/Off power<br />
button is pressed.<br />
The fault indicator light<br />
illuminates.<br />
No medication in nebuliser.<br />
It may be time to replace<br />
the nebuliser.<br />
There is no power to the<br />
system.<br />
Rechargeable battery is<br />
depleted.<br />
The controller cable is<br />
incorrectly connected to<br />
the nebuliser, or electronics<br />
are malfunctioning.<br />
Refill medication through filler<br />
cap in the nebuliser (see page<br />
17).<br />
See Warranty and Life of<br />
Product. Refer to <strong>Aerogen</strong><br />
<strong>Solo</strong> parts list by visiting<br />
www.aerogen.com.<br />
Verify that AC/DC adapter<br />
is securely attached to<br />
controller.<br />
Recharge battery (see<br />
Recharging the Battery).<br />
Verify that controller cable<br />
is correctly connected to<br />
both the nebuliser and the<br />
controller.<br />
<strong>Aerogen</strong> ® <strong>Solo</strong> System <strong>Instruction</strong> <strong>Manual</strong> 23
Table 2. <strong>Aerogen</strong> Pro-X Controller Troubleshooting (Continued)<br />
If this happens: It could mean Try this:<br />
Medication is left in<br />
the nebuliser after<br />
nebulisation cycle.<br />
Flashing amber light.<br />
Nebuliser was not turned<br />
on or connected to power.<br />
Rechargeable battery is<br />
depleted.<br />
A 30 Minute cycle was<br />
selected when connected<br />
to the continuous feed<br />
system.<br />
It may be time to replace<br />
the nebuliser.<br />
It may mean that it is time<br />
to replace controller.<br />
Ensure that nebuliser is<br />
connected to power and<br />
turned on.<br />
Recharge battery (see<br />
Recharging the Battery).<br />
Run a continuous cycle.<br />
See Warranty and Life of<br />
Product. Refer to <strong>Aerogen</strong><br />
<strong>Solo</strong> parts list by visiting<br />
www.aerogen.com.<br />
Contact your local <strong>Aerogen</strong><br />
sales representative.<br />
Note: The rechargeable battery in the <strong>Aerogen</strong> Pro-X Controller should<br />
only be replaced by <strong>Aerogen</strong> authorised personnel: contact your <strong>Aerogen</strong><br />
sales representative.<br />
24 <strong>Aerogen</strong> ®
Warranty<br />
<strong>Aerogen</strong> warrants that the <strong>Aerogen</strong> <strong>Solo</strong> nebuliser shall be free from<br />
defects of workmanship and materials for a period of the defined life of the<br />
nebuliser when used in accordance with this instruction manual.<br />
The <strong>Aerogen</strong> Pro-X Controller and AC/DC adapter are warranted against<br />
defects in manufacturing for a period of two years from the date of<br />
purchase. All warranties are based on typical usage, detailed below.<br />
Life of Product<br />
As with all active electronic components, the <strong>Aerogen</strong> <strong>Solo</strong> nebuliser has<br />
a defined life. In the case of <strong>Aerogen</strong> <strong>Solo</strong>, the life of the nebuliser has<br />
been validated for intermittent use for a maximum of 28 days based upon<br />
a typical usage profile of 4 treatments per day.<br />
For continuous use, the life of the <strong>Aerogen</strong> <strong>Solo</strong> nebuliser and the<br />
Continuous Nebulization Tube Set have been qualified for use for a<br />
maximum of 7 days.<br />
The user should note that use in excess of these periods is not qualified<br />
by <strong>Aerogen</strong>.<br />
<strong>Aerogen</strong> ® <strong>Solo</strong> System <strong>Instruction</strong> <strong>Manual</strong> 25
Specifications<br />
Table 3. Physical Specifications of the <strong>Aerogen</strong> <strong>Solo</strong> System<br />
Nebuliser Dimensions<br />
<strong>Aerogen</strong> Pro-X Controller<br />
Dimensions<br />
Controller Cable Length<br />
AC/DC Adapter Cable Length<br />
Nebuliser Weight<br />
<strong>Aerogen</strong> Pro-X Controller Weight<br />
Nebuliser Capacity<br />
67 mm H x 48 mm W x 25 mm D<br />
2.6” H x 1.88” W x 1.1” D<br />
33mm H x 75mm W x 131mm D<br />
1.3” H x 2.9” W x 5.2”D<br />
1.8 m (5.9 ft.)<br />
2.1 m (6.7 ft.)<br />
13.5 g (0.5 oz) nebuliser and plug<br />
230 g (8.1 oz.), including battery and cable<br />
Maximum 6 mL<br />
Table 4. Environmental Specifications of the <strong>Aerogen</strong> <strong>Solo</strong> System<br />
Operating<br />
Storage & Transport<br />
Maintains specified performance at circuit pressures up to 90cm<br />
H 2<br />
O and temperatures from 5 ºC (41ºF) up to 45 ºC (113ºF).<br />
Atmospheric Pressure<br />
Humidity<br />
Noise Level<br />
Transient Temperature<br />
Range<br />
Atmospheric Pressure<br />
Humidity<br />
450 to 1100 mbars<br />
15% to 95% relative humidity<br />
< 35 dB measured at 0.3 m distance<br />
-20 to +60°C (-4 to +140°F)<br />
450 to 1100 mbars<br />
15 to 95% relative humidity<br />
Table 5. Power Specifications of the <strong>Aerogen</strong> <strong>Solo</strong> System<br />
Power Source<br />
Power Consumption<br />
Patient Isolation<br />
FRIWO (AG-AP1040-XX*) AC/DC adapter (input 100 to 240 VAC<br />
50 – 60 Hz, output 9 V) or internal rechargeable battery (4.8 V<br />
nominal output).<br />
Note: The <strong>Aerogen</strong> Pro-X Controller is approved for use<br />
with <strong>Aerogen</strong> AC/DC adapter AG-AP1040-XX* (Manufacturer<br />
Reference: FRIWO FW7660/09)<br />
< 8 Watts (charging), 2.0 Watts (nebulising).<br />
Controller circuitry provides 4 kilovolt (kV) patient isolation and<br />
complies with IEC/EN 60601-1.<br />
* Consult your local representative for the order number extension specific<br />
to your country and for pricing information.<br />
26 <strong>Aerogen</strong> ®
Performance<br />
Table 6. Performance Specifications of the <strong>Aerogen</strong> <strong>Solo</strong><br />
Flow Rate<br />
Particle Size<br />
> 0.2 mL/min (Average ~ 0.38 mL/min)<br />
As measured with the Andersen Cascade Impactor:<br />
Specification Range: 1-5 μm<br />
Average Tested: 3.1 μm<br />
As measured with the Marple 298 Cascade Impactor:<br />
Specification Range: 1.5-6.2 μm<br />
Average Tested: 3.9 μm<br />
As per EN 13544-1:<br />
Aerosol Output rate: 0.30 mL/min<br />
Aerosol Output: 1.02 mL emitted of 2.0 mL dose<br />
Residual Volume:
Symbols<br />
Table 7. <strong>Aerogen</strong> <strong>Solo</strong> System Symbols<br />
Symbol Meaning Symbol Meaning<br />
YYXXXXX<br />
IPX1<br />
Serial number<br />
designation, where<br />
YY is the year of<br />
manufacture and<br />
XXXXX is the serial<br />
number<br />
Caution<br />
Attention: Consult<br />
accompanying<br />
documents<br />
Degree of protection<br />
against<br />
dripping water<br />
Transient storage<br />
temperature limitations<br />
-20 ºC to +60 ºC<br />
Quantity<br />
(Number of units<br />
contained in package)<br />
Certified by TUV with<br />
respect to electric<br />
shock, fire and<br />
mechanical hazards<br />
Class II equipment per<br />
IEC/EN 60601-1<br />
Controller Input - DC<br />
voltage<br />
Type BF equipment per<br />
IEC/EN 60601-1<br />
Controller Output – AC<br />
voltage<br />
On/Off power button<br />
(standby)<br />
Output<br />
30<br />
∞<br />
Rx Only<br />
30 Minute<br />
operating mode<br />
Continuous operating<br />
mode (International)<br />
Federal (US) Law<br />
restricts this device to<br />
sale by or on the order<br />
of a physician<br />
Battery status indicator<br />
Refer to instruction<br />
manual/booklet<br />
28 <strong>Aerogen</strong> ®
Appendix 1<br />
Electromagnetic Susceptibility<br />
This device meets the requirements of the Electromagnetic Compatibility<br />
(EMC), pursuant to the Collateral Standard, IEC/EN 60601-1-2, which<br />
addresses EMC in North America, Europe and other global communities.<br />
This includes immunity to radio frequency electric fields and electrostatic<br />
discharge, in addition to the other applicable requirements of the<br />
standard. Compliance with EMC standards does not mean a device has<br />
total immunity; certain devices (cellular phones, pagers, etc.) can interrupt<br />
operation if they are used near medical equipment. Follow institutional<br />
protocol regarding the use and location of devices that could interfere with<br />
medical equipment operation.<br />
Note: This device is classified as Class II Type BF medical electrical<br />
equipment and the device complies with specified safety levels for<br />
electrical isolation and leakage current. The <strong>Aerogen</strong> <strong>Solo</strong> AC/DC<br />
adapter (AG-AP1040-XX*) has no connection to earth ground because<br />
the necessary level of protection is achieved through the use of double<br />
insulation.<br />
Warnings<br />
• Only use the <strong>Aerogen</strong> <strong>Solo</strong> nebuliser with components specified<br />
in the <strong>Instruction</strong> <strong>Manual</strong>. Use of the <strong>Aerogen</strong> <strong>Solo</strong> nebuliser with<br />
components other than those specified in the <strong>Instruction</strong> <strong>Manual</strong> may<br />
result in increased emissions or decreased immunity of the <strong>Aerogen</strong><br />
<strong>Solo</strong> nebuliser system.<br />
• Do not use the <strong>Aerogen</strong> <strong>Solo</strong> adjacent to or stacked with other<br />
equipment. If adjacent or stacked use is necessary, the device should<br />
be observed to verify normal operation in this configuration.<br />
• The <strong>Aerogen</strong> <strong>Solo</strong> needs special precautions regarding<br />
electromagnetic compatibility (“EMC”) and must be installed and<br />
put into service according to the EMC information provided in the<br />
<strong>Instruction</strong> <strong>Manual</strong>.<br />
<strong>Aerogen</strong> ® <strong>Solo</strong> System <strong>Instruction</strong> <strong>Manual</strong> 29
• Portable and mobile radio frequency (“RF”) communication devices<br />
can disrupt medical electrical equipment.<br />
* Consult your local representative for the order number extension specific<br />
to your country and for pricing information.<br />
30 <strong>Aerogen</strong> ®
Appendix 1: EMC Tables<br />
The following tables are provided in accordance with IEC/ EN 60601-1-2<br />
Guidance and manufacturer’s declaration – electromagnetic emissions<br />
The <strong>Aerogen</strong> <strong>Solo</strong> nebuliser system is intended for use in the electromagnetic environment<br />
specified below. The customer or the user of the <strong>Aerogen</strong> <strong>Solo</strong> nebuliser system should<br />
assure that it is used in such an environment.<br />
Emissions test Compliance Electromagnetic Environment -<br />
Guidance<br />
RF Emissions<br />
CISPR 11<br />
RF Emissions<br />
CISPR 11<br />
Harmonic emissions<br />
IEC/EN 61000-3-2<br />
Voltage fluctuations / flicker<br />
emissions<br />
IEC/EN 61000-3-3<br />
Group 1<br />
Class B<br />
Compliant<br />
Compliant<br />
The <strong>Aerogen</strong> <strong>Solo</strong> nebuliser system uses<br />
RF energy only for its internal function.<br />
Therefore, its RF emissions are very low and<br />
are not likely to cause any interference in<br />
nearby electronic equipment.<br />
The <strong>Aerogen</strong> <strong>Solo</strong> nebuliser system is<br />
suitable for use in all establishments,<br />
including domestic establishments and<br />
those directly connected to the public low<br />
voltage power supply network that supplies<br />
buildings used for domestic purposes.<br />
<strong>Aerogen</strong> ® <strong>Solo</strong> System <strong>Instruction</strong> <strong>Manual</strong> 31
Recommended separation distances between portable and mobile RF<br />
communication equipment and the <strong>Aerogen</strong> <strong>Solo</strong> nebuliser system that is not life<br />
supporting<br />
This <strong>Aerogen</strong> <strong>Solo</strong> nebuliser system is intended for use in the electromagnetic environment<br />
in which radiated RF disturbances are controlled. The customer or the user of the <strong>Aerogen</strong><br />
<strong>Solo</strong> nebuliser system can help prevent electromagnetic interference by maintaining<br />
a minimum distance between portable and mobile RF communications equipment<br />
(transmitters) and the <strong>Aerogen</strong> <strong>Solo</strong> nebuliser system as recommended below, according to<br />
the maximum output power of the communications equipment.<br />
Rated maximum<br />
output power of<br />
transmitter W<br />
Separation distance according to frequency of transmitter m<br />
150 kHz to 80 MHz<br />
d = [1.17] √P<br />
80 MHz to 800 MHz<br />
d = [1.17] √P<br />
800 MHz to 2.5 GHz<br />
d = [2.33] √P<br />
0.01 0.12 0.12 0.23<br />
0.1 0.37 0.37 0.75<br />
1 1.17 1.17 2.33<br />
10 3.70 3.70 7.36<br />
100 11.70 11.70 23.30<br />
For transmitters rated at a maximum output power not listed above, the recommended<br />
separation distance d in metres (m) can be estimated using the equation applicable to the<br />
frequency of the transmitter, where P is the maximum output power rating of the transmitter<br />
in watts (w) according to the transmitter manufacturer.<br />
Note 1: At 80 MHz and 800 MHz, the separation distance for the higher frequency range<br />
applies.<br />
Note 2: These guidelines may not apply in all situations. Electromagnetic propagation is<br />
affected by absorption and reflection from structures, objects and people.<br />
32 <strong>Aerogen</strong> ®
Guidance and manufacturer’s declaration – electromagnetic immunity for the<br />
<strong>Aerogen</strong> <strong>Solo</strong> nebuliser system that is not life supporting<br />
This <strong>Aerogen</strong> <strong>Solo</strong> nebuliser system is intended for use in the electromagnetic environment<br />
specified below. The customer or the user of the <strong>Aerogen</strong> <strong>Solo</strong> nebuliser system should<br />
assure that it is used in such an environment.<br />
Immunity Test<br />
Electrostatic<br />
discharge (ESD)<br />
IEC/EN<br />
61000-4-2<br />
Electrical fast<br />
Transient/burst<br />
IEC/EN<br />
61000-4-4<br />
Surge<br />
IEC/EN<br />
61000-4-5<br />
Voltage<br />
dips, short<br />
interruptions<br />
and voltage<br />
variations on<br />
power supply<br />
input lines<br />
IEC/EN<br />
61000-4-11<br />
Power frequency<br />
(50/60 Hz)<br />
Magnetic field<br />
IEC/EN<br />
61000-4-8<br />
IEC/EN 60601<br />
Test Level<br />
±6 kV contact<br />
±8 kV air<br />
±2 kV for power<br />
supply lines<br />
±1 kV for input/<br />
output lines<br />
±1 kV line(s) to<br />
line(s)<br />
±2 kV line(s) to<br />
earth<br />
95 % dip in Ut)<br />
for 0.5 cycle<br />
40 % Ut<br />
(60 % dip in Ut)<br />
for 5 cycles<br />
70 % Ut<br />
(30 % dip in Ut)<br />
for 25 cycles<br />
95 % dip in Ut)<br />
for 5 sec<br />
Compliance<br />
Level<br />
±6 kV contact<br />
±8 kV air<br />
±2 kV for power<br />
supply lines<br />
±1 kV for input/<br />
output lines<br />
±1 kV line(s) to<br />
line(s)<br />
±2 kV line(s) to<br />
earth<br />
95 % dip in Ut)<br />
for 0.5 cycle<br />
40 % Ut<br />
(60 % dip in Ut)<br />
for 5 cycles<br />
70 % Ut<br />
(30 % dip in Ut)<br />
for 25 cycles<br />
95 % dip in Ut)<br />
for 5 sec<br />
Electromagnetic<br />
Environment - Guidance<br />
Floors should be wood,<br />
concrete or ceramic tile.<br />
If floors are covered with<br />
synthetic material, the relative<br />
humidity should be at least<br />
30%.<br />
Mains power quality should be<br />
that of a typical commercial or<br />
hospital environment.<br />
Mains power quality should be<br />
that of a typical commercial or<br />
hospital environment.<br />
Mains power quality should be<br />
that of a typical commercial<br />
or hospital environment. If<br />
the user of the <strong>Aerogen</strong> <strong>Solo</strong><br />
nebuliser system requires<br />
continued operation during<br />
power mains interruption,<br />
it is recommended that the<br />
<strong>Aerogen</strong> <strong>Solo</strong> nebuliser<br />
system be powered from an<br />
uninterruptible power supply<br />
or battery.<br />
3 A/m 3 A/m Power frequency magnetic<br />
fields should be at levels<br />
characteristic of a typical<br />
location in a typical<br />
commercial or hospital<br />
environment.<br />
Note: Ut is the A.C. mains voltage prior to application of the test level.<br />
<strong>Aerogen</strong> ® <strong>Solo</strong> System <strong>Instruction</strong> <strong>Manual</strong> 33
Guidance and manufacturer’s declaration - electromagnetic immunity<br />
This <strong>Aerogen</strong> <strong>Solo</strong> nebuliser system is intended for use in the electromagnetic environment<br />
specified below. The customer or the user of the <strong>Aerogen</strong> <strong>Solo</strong> nebuliser system should<br />
assure that it is used in such an environment.<br />
Immunity Test<br />
IEC/EN 60601<br />
Test Level<br />
Compliance<br />
Level<br />
Electromagnetic<br />
Environment - Guidance<br />
Portable and mobile RF communications<br />
equipment should be used no closer to<br />
any part of the <strong>Aerogen</strong> <strong>Solo</strong> nebuliser<br />
system, including cables, than the<br />
recommended separation distance<br />
calculated from the equation applicable<br />
to the frequency of the transmitter.<br />
Conducted RF<br />
IEC/EN 61000-4-6<br />
Radiated RF<br />
IEC/EN 61000-4-3<br />
3 Vrms<br />
150 kHz to 80 MHz<br />
3 V/m<br />
80 MHz to 2.5 GHz<br />
3 Vrms<br />
3 V/m<br />
Recommended Separation Distance<br />
d = [1.17] √P<br />
d = [1.17] √P... 80MHz to 800MHz<br />
d = [2.33] √P... 800MHz to 2.5GHz<br />
where P is the maximum output<br />
power rating of the transmitter in<br />
Watts (W) according to the transmitter<br />
manufacturer and d is the recommended<br />
separation distance in metres (m).<br />
Field strengths from fixed RF<br />
transmitters, as determined by an<br />
electromagnetic site survey,ª should be<br />
less than the compliance level in each<br />
frequency range. b<br />
Interference may occur in the vicinity of<br />
equipment marked with the following<br />
symbol:<br />
Note 1: At 80 MHz and 800 MHz, the separation distance for the higher frequency range applies.<br />
Note 2: These guidelines may not apply in all situations. Electromagnetic propagation is affected by<br />
absorption and reflection from structures, objects and people.<br />
a) Field strengths from fixed transmitters, such as base stations for radio (cellular/cordless) telephones<br />
and land mobile radios, amateur radio, AM and FM radio broadcast and TV broadcast cannot be<br />
predicted theoretically with accuracy. To assess the electromagnetic environment due to fixed RF<br />
transmitters, an electromagnetic site survey should be considered. If the measured field strength in the<br />
location in which the <strong>Aerogen</strong> <strong>Solo</strong> nebuliser system is used exceeds the applicable RF compliance<br />
level above, the <strong>Aerogen</strong> <strong>Solo</strong> nebuliser system should be observed to verify normal operation. If<br />
abnormal performance is observed, additional measures may be necessary, such as re-orientating or<br />
relocating the <strong>Aerogen</strong> <strong>Solo</strong> nebuliser system.<br />
b) Over the frequency range 150 kHz to 80 MHz, field strengths should be less than 3V/m<br />
34 <strong>Aerogen</strong> ®
INTL. +353 91 540 400<br />
e.<br />
w.<br />
info@aerogen.com<br />
www.aerogen.com<br />
twitter.com/aerogen<br />
© 2015 <strong>Aerogen</strong> Ltd.<br />
Part No. AG-AS3050-EN<br />
P/N 30-354 Rev N<br />
Manufacturer<br />
<strong>Aerogen</strong> Ltd.<br />
Galway Business Park,<br />
Dangan, Galway,<br />
Ireland.