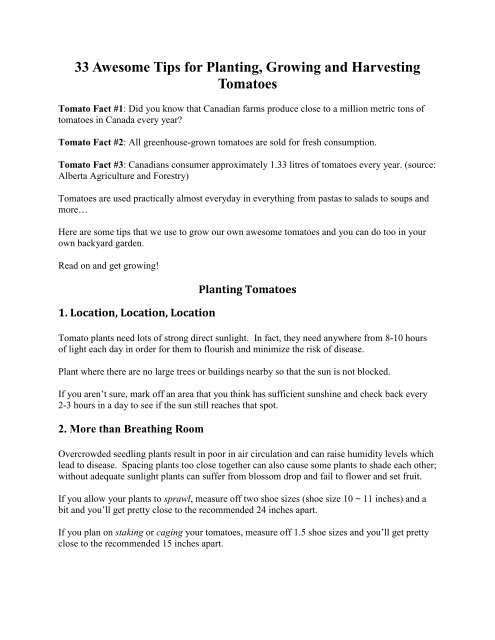
33 Awesome Tips for Planting, Growing and Harvesting Tomatoes
Tomatoes are used almost in everything like salads, soups and making vegetables and more. Here are some tips to grow tomatoes in your own backyard garden. http://www.toemar.ca/33-awesome-tips-for-planting-growing-and-harvesting-tomatoes/
Tomatoes are used almost in everything like salads, soups and making vegetables and more. Here are some tips to grow tomatoes in your own backyard garden. http://www.toemar.ca/33-awesome-tips-for-planting-growing-and-harvesting-tomatoes/

Create successful ePaper yourself
Turn your PDF publications into a flip-book with our unique Google optimized e-Paper software.
<strong>33</strong> <strong>Awesome</strong> <strong>Tips</strong> <strong>for</strong> <strong>Planting</strong>, <strong>Growing</strong> <strong>and</strong> <strong>Harvesting</strong><br />
<strong>Tomatoes</strong><br />
Tomato Fact #1: Did you know that Canadian farms produce close to a million metric tons of<br />
tomatoes in Canada every year?<br />
Tomato Fact #2: All greenhouse-grown tomatoes are sold <strong>for</strong> fresh consumption.<br />
Tomato Fact #3: Canadians consumer approximately 1.<strong>33</strong> litres of tomatoes every year. (source:<br />
Alberta Agriculture <strong>and</strong> Forestry)<br />
<strong>Tomatoes</strong> are used practically almost everyday in everything from pastas to salads to soups <strong>and</strong><br />
more…<br />
Here are some tips that we use to grow our own awesome tomatoes <strong>and</strong> you can do too in your<br />
own backyard garden.<br />
Read on <strong>and</strong> get growing!<br />
1. Location, Location, Location<br />
<strong>Planting</strong> <strong>Tomatoes</strong><br />
Tomato plants need lots of strong direct sunlight. In fact, they need anywhere from 8-10 hours<br />
of light each day in order <strong>for</strong> them to flourish <strong>and</strong> minimize the risk of disease.<br />
Plant where there are no large trees or buildings nearby so that the sun is not blocked.<br />
If you aren’t sure, mark off an area that you think has sufficient sunshine <strong>and</strong> check back every<br />
2-3 hours in a day to see if the sun still reaches that spot.<br />
2. More than Breathing Room<br />
Overcrowded seedling plants result in poor in air circulation <strong>and</strong> can raise humidity levels which<br />
lead to disease. Spacing plants too close together can also cause some plants to shade each other;<br />
without adequate sunlight plants can suffer from blossom drop <strong>and</strong> fail to flower <strong>and</strong> set fruit.<br />
If you allow your plants to sprawl, measure off two shoe sizes (shoe size 10 ~ 11 inches) <strong>and</strong> a<br />
bit <strong>and</strong> you’ll get pretty close to the recommended 24 inches apart.<br />
If you plan on staking or caging your tomatoes, measure off 1.5 shoe sizes <strong>and</strong> you’ll get pretty<br />
close to the recommended 15 inches apart.
3. Turning Up the HEAT On Soil<br />
It’s a fact, <strong>Tomatoes</strong> LOVE heat.<br />
Extra degrees of soil warmth will translate into earlier tomatoes. Who doesn’t want early<br />
tomatoes?<br />
Use plastic (black or clear) to cover the planting area be<strong>for</strong>e you intent to plant. Some say that<br />
clear plastic works better because it allow the sun’s energy through while trapping the heat<br />
energy.<br />
When you add the plastic covering, it will cause the weed seeds to germinate faster <strong>and</strong> then kill<br />
them so they won’t come back.<br />
4. Soil Power Up<br />
Like anything you create, grow or build, starting out with the right foundation is critical to future<br />
success.<br />
Get a high quality soil base to make sure that you have enough nutrients <strong>for</strong> the plant to draw<br />
from. Later on, you can continue to add to this soil with other nutrients as they become depleted.<br />
5. To Determinate or Indeterminate<br />
Selecting the right type of tomato plant is dependent on what you plan to do with them. If you<br />
want a large quantity of tomatoes quickly, then select a determinate variety. If you want to eat<br />
fresh tomatoes on an ongoing basis (at least <strong>for</strong> a while) go <strong>for</strong> the indeterminate variety.<br />
Determinate – Grow to a certain height (approximately 3 feet tall), stop growing, <strong>and</strong> then set<br />
<strong>and</strong> ripen their fruit all at one time.<br />
Indeterminate – The plants like to grow tall be<strong>for</strong>e it starts to set fruits <strong>and</strong> the fruit will ripen at<br />
different times.<br />
If you are looking to make your own tomato sauce, go <strong>for</strong> the determinate variety so that you can<br />
harvest a large quantity to use.<br />
6. Meet Hairy Vetch – An Organic Friend<br />
To keep your tomatoes healthy <strong>and</strong> strong, many organic gardeners often plant hairy vetch in the<br />
garden bed as opposed to rotating crops in small growing spaces. Hairy vetch is known to fix<br />
nitrogen in the soil <strong>and</strong> provide almost all the needs of the subsequent crop. In addition, it also<br />
supports several beneficial insects <strong>and</strong> can host several species of nematodes.
Plant hairy vetch (Vicia villosa) in the fall <strong>and</strong> let it grow. When it is time to plant tomatoes in<br />
the spring, cut the hairy vetch right down to the ground <strong>and</strong> plant the seedlings through matted<br />
residue. Doing it this way not only provides nitrogen, but the hairy vetch also acts like a mulch<br />
that preserves the moisture <strong>and</strong> prevents weeds from sprouting.<br />
7. Young <strong>and</strong> Green – Buying Seedlings<br />
The simplest way to identify which seedlings to purchase is when it looks healthy. This means<br />
that the foliage is clean, has a dark green color <strong>and</strong> is sturdy.<br />
If there are flowers showing or the leaves at the bottom are turning yellow or brown, then you<br />
have a plant that has been stressed.<br />
Take a closer look at the leaves, top <strong>and</strong> underneath, to make sure that there are no chew marks<br />
or insects like aphids. If there are, don’t buy it.<br />
Getting the most productive plant means choosing the healthiest, pest-free plants that you can<br />
find.<br />
8. More Roots = More Fruits<br />
It’s all what we want when we plant a tomato plant, lots of tomatoes to use in our salad, to make<br />
sauce <strong>and</strong> to just eat them with a dash of salt. There are a couple of ways you can encourage<br />
more roots from your plant.<br />
Dig a deeper hole – plant your tomato plants deeper than the pot they come right up to top few<br />
leaves.<br />
Dig a shallow trench – lay your tomato plant sideways <strong>and</strong> within a few days, the plant will<br />
straighten itself out <strong>and</strong> grow toward the sun.<br />
The stems will be able to develop roots all along it which makes <strong>for</strong> a stronger plant, better<br />
foundation, <strong>and</strong> greater ability to absorb nutrients <strong>and</strong> water. As an added bonus, a larger root<br />
system near the soil surface will mean more heat is available to the plant, producing earlier<br />
tomatoes.<br />
9. <strong>Tomatoes</strong> like Eggs too!<br />
When you plant your seedling in the deep hole, use a h<strong>and</strong>ful of crushed egg shells because it<br />
provides the tomato plants thrive on calcium.<br />
The calcium from the from egg shells is absorbed into the roots <strong>and</strong> into the stems of the plant.<br />
If you have yellowing tomato plants, it is a sign that you have a calcium deficiency.
As an added bonus, when you boil your eggs, don’t throw away the water as it is full of calcium<br />
from the egg shells. Let the water cool off <strong>and</strong> water your tomato plants with it.<br />
10. Break the Disease Cycle<br />
To get rid of disease-causing organisms <strong>and</strong> stop the cycle, place your tomatoes on a 3-year<br />
rotation schedule with unrelated crops. Unrelated crops such as corn, beans, or lettuce will break<br />
the disease cycle.<br />
Make sure you don’t plant members of the tomato family which includes peppers, eggplants <strong>and</strong><br />
potatoes.<br />
In addition, get rid of diseased plants instead of composting them. Either throw them away or<br />
burn the diseased plants <strong>and</strong> any other garden debris like mulch or weeds that were in contact<br />
with the diseased plants.<br />
<strong>Growing</strong> <strong>Tomatoes</strong><br />
11. “A Little Vinegar With My Soil Please”<br />
Tomato plants like soil that has a pH between 5.5 – 6.8 so they are considered to be acid loving<br />
plants.<br />
Acidic soils have iron in a soluble <strong>for</strong>m which allow plants to take in the iron contained in the<br />
soil. <strong>Tomatoes</strong> have a high iron requirement to help it flourish <strong>and</strong> grow. Alkaline soils also have<br />
iron, but not in soluble <strong>for</strong>m <strong>and</strong> can’t be absorbed by the tomato plant.<br />
You can gauge whether your soil is acidic or alkaline by using two simple household items:<br />
vinegar <strong>and</strong> baking soda.<br />
Put a couple spoonfuls of soil into two separate containers. In one container, add some vinegar.<br />
If it fizzles, it means that your soil is alkaline <strong>and</strong> you are done. If it doesn’t fizzle, add water to<br />
other container with soil so it becomes wet <strong>and</strong> muddy. Add some backing soda to it <strong>and</strong> if it<br />
fizzles, it means your soil is acidic. If neither sample fizzles, then your soil probably has a<br />
neutral pH of 7.<br />
For other ways to determine soil pH, check out these tests.<br />
12. Stake Them High<br />
keeping disease away from tomato plants is always an ongoing issue, but manageable. One way<br />
is to use 6-foot stakes (what is showing above ground) or a trellis system <strong>for</strong> indeterminate<br />
tomatoes.<br />
By keeping the ripe fruit off the ground, it is less susceptible to disease <strong>and</strong> it is easier to harvest.
A basic trellis structure is 8-foot steel stakes pounded approximately 18 inches into the ground at<br />
4-foot intervals. Attach horizontal wires to the stakes with 1-foot vertical intervals to provide the<br />
tomato vines support as they grow.<br />
13. A Balanced Approach: 5-5-5<br />
Maybe Hairy Vetch isn’t your thing, consider adding a small amount of balanced organic<br />
fertilizer like 5-5-5 <strong>and</strong> work it into the soil just be<strong>for</strong>e you decide to plant the tomato seedlings.<br />
Fertilizing too much be<strong>for</strong>e the plant is well established <strong>and</strong> in full flower means you get lots of<br />
foliage <strong>and</strong> very little fruit.<br />
Putting down a small amount of 5-5-5 balanced fertilizer gets the plants off to a good <strong>and</strong> healthy<br />
start.<br />
14. Tie them up – White Glove H<strong>and</strong>ling<br />
When you want to support your plants, avoid the use of wire or string. Try using strips of soft<br />
cloth or green growing tape so that it will not girdle the stem.<br />
15. Watering the “Right” Way<br />
Knowing how much to water <strong>and</strong> when is important to helping to developing healthy tomato<br />
plants <strong>and</strong> fruits. Always try to water directly on the soil <strong>and</strong> not on the leaves to minimize the<br />
chance of disease.<br />
When the plants are developing: water the plants deeply <strong>and</strong> regularly. Get at least 1 inch of<br />
water per week.<br />
When at the height of summer: soak your tomato bed once a week or every five days.<br />
When the fruit begins to ripen: ease up on the watering to help coax the plant into concentrating<br />
its sugars <strong>for</strong> better flavor. If you hold back too much water, the plants will wilt <strong>and</strong> become<br />
stressed.<br />
16. Getting Water to Where It’s Really Needed<br />
<strong>Tomatoes</strong> have two sets of roots, some are at the surface <strong>and</strong> the lower ones drink in the water.<br />
Sink a pipe vertically, be careful not to hurt the stem, into the ground when you plant out. The<br />
pipe allows you to get water down to where it counts quickly <strong>and</strong> efficiently.
17. A Rock <strong>and</strong> Some Water<br />
If you are in a period of drought, considering using some flat rocks <strong>and</strong> place one next to each<br />
plant. The flat rocks will pull up water from under the ground <strong>and</strong> keep it from evaporating into<br />
the atmosphere.<br />
18. Prune or not to Prune<br />
Indeterminate tomato varieties require (or benefit from) pruning because they continue to grow<br />
unlike determinate varieties, which stop growing.<br />
Pruned plants will yield fewer <strong>and</strong> larger fruit (great <strong>for</strong> sauces), while unpruned plants will yield<br />
greater numbers of smaller fruit.<br />
19. Prune it Right<br />
Prune off non-fruiting branches. These are shoots that develop between the stem <strong>and</strong> the main<br />
branches. By doing so, you will direct the tomato plant’s energy into growing bigger <strong>and</strong> better<br />
fruit.<br />
However, you will need to go easy on pruning the rest of the plant because it is the leaves that<br />
are photosynthesizing <strong>and</strong> creating sugars that give flavor to your tomatoes.<br />
When your tomato plant grows to a height of 65 to 90 centimeters, remove the lower leaves from<br />
the bottom 25 centimeters to prevent the development of fungus.<br />
You may also want to prune off the leaves (that have yet to change color) around the full size<br />
tomatoes to get more sunlight <strong>for</strong> the fruit, increase air flow <strong>and</strong> minimize disease.<br />
20. Remove those Suckers (fruit bearing branches)<br />
Why would you want to remove fruit bearing branches? It depends on what you want the plant<br />
to do.<br />
Sometimes you prune out the suckers so that the plant doesn’t get top heavy. Another reason is<br />
that the plant can produce more fruit than it can mature in time <strong>for</strong> the fall season.<br />
If you aren’t sure, prune one plant <strong>and</strong> not another <strong>and</strong> see what happens. You’ll know better<br />
next time around.<br />
21. Adding Just Enough Compost/Mulch<br />
When the first fruit is ripening, add some compost around the stem <strong>and</strong> trim some of the upper<br />
leaves to encourage new growth <strong>and</strong> continued fruit.
Make sure that it is also warm enough outside <strong>and</strong> the ground has had a chance to warm up<br />
be<strong>for</strong>e adding mulch. While mulching does conserve water <strong>and</strong> prevents the soil <strong>and</strong> soil-borne<br />
diseases from splashing up on the plants, putting it down too early it will also shade <strong>and</strong><br />
there<strong>for</strong>e cool the soil.<br />
22. Dry Leaves = No Infection<br />
<strong>Tomatoes</strong> can become infected when airborne spores l<strong>and</strong> on wet plants, as a result never use an<br />
overhead sprinkler or water from above. If it rains you can’t do anything about it, but try not to<br />
unnecessarily get the plants wet.<br />
When watering, always keep the water towards the base of the plant, <strong>and</strong> try <strong>and</strong> keep the leaves<br />
dry.<br />
Using drip or soaker hose irrigation is the best way to do this.<br />
23. Mid-summers Refill is Nitrogen<br />
It’s mid-summer <strong>and</strong> you’ve watched your tomatoes grow <strong>and</strong> grow. If you have low organic<br />
matter in your soil, you might run out of nitrogen <strong>for</strong> your tomatoes by mid to late summer.<br />
You’ll know by the yellowing of the lower leaves. With low nitrogen levels in the plant, the<br />
plant can get early blight disease which spreads like wildfire.<br />
Control early blight by keeping up nitrogen levels up from mid to late summer <strong>and</strong> significantly<br />
improve the number of fruit.<br />
Also consider using water soluble fertilizers <strong>and</strong> use according to label directions. These are<br />
good summer fertilizer supplements.<br />
24. Cutting out the Cutworm<br />
Cutworms are one of the many pests that can affect your tomatoes. Cutworms chew through the<br />
stem of the plant, effectively killing it. You can stop this from happening by placing a “collar”<br />
around the stem of the plant where it goes into the soil.<br />
Take an old cardboard toilet paper roll holder or a strip of newspaper <strong>and</strong> create collar around the<br />
stem. Make sure the collar is at least 1 inch below <strong>and</strong> 1 inch above the soil surface.<br />
Once the stems toughen up in 3-4 weeks, cutworm damage is no longer an issue <strong>and</strong> the paper<br />
collar will have rotted away.<br />
25. Some side dressing with the tomatoes please<br />
Side dressing is the application of fertilizers in a shallow furrow or b<strong>and</strong> along the side of<br />
vegetable row crops or in a circle around individual plants along the drip line.
Side dressing gives extra nutrients to the plants so that they can produce to their full potential.<br />
Apply the side dressing 2-3 weeks after transplanting, at blossom time, be<strong>for</strong>e first picking <strong>and</strong> 2<br />
weeks after the first picking.<br />
26. Solarize your soil<br />
Harness the sun’s energy to help you control nematodes <strong>and</strong> weeds. During the hottest part of<br />
the summer, moisten the area <strong>and</strong> cover it with a sturdy plastic tarp. Leave the tarp in place <strong>for</strong><br />
at least 3-4 weeks <strong>and</strong> it will kill the weeds <strong>and</strong> nematodes. It is also an effective treatment <strong>for</strong><br />
other pests <strong>and</strong> disease pathogens.<br />
27. <strong>Harvesting</strong> the Fruit<br />
<strong>Harvesting</strong> <strong>Tomatoes</strong><br />
You can see when the fruit is ready to be harvested when it is a solid color (red, yellow, etc.)<br />
from top to bottom, but still firm.<br />
By keeping an eye on how the fruit is developing, you may need to harvest daily or every other<br />
day.<br />
The best-tasting tomatoes have a balanced ratio of sugar to acid. As the sugars increase so does<br />
the color of the fruit. So during the longer days of summer, tomatoes that ripen in this time have<br />
more sugar than those who mature during shorter days of summer.<br />
Once you pick them, store tomatoes on your kitchen counter, where the temperatures are above<br />
50° F (10° C), instead of in your refrigerator’s crisper. The cold temperature can spoil the tomato<br />
flavor <strong>and</strong> texture.<br />
28. Pick it Right<br />
Grasp a ripened tomato gently <strong>and</strong> firmly. Twist it until it snaps off the vine. You may also want<br />
to use clipper or knife to harvest tomatoes. Cut the stem close to the fruit.<br />
29. Looks Count!<br />
<strong>Tomatoes</strong> will always ripen from the inside out. If a tomato looks ripe on the outside, it will be<br />
ripe on the inside.
30. Watch the Temperature<br />
<strong>Tomatoes</strong> stop ripening are above 30C / 86F. If you have a long string of hot days, or if you live<br />
in an area that has consistently hot summer temperatures, then tomatoes may ripen to a<br />
yellow/orange color <strong>and</strong> stop. Harvest them be<strong>for</strong>e they turn completely red.<br />
Even if the days are overcast or cloudy <strong>and</strong> warm, the fruit will continue to ripe because<br />
tomatoes need warmth <strong>and</strong> not light to continue the process.<br />
31. Save Your Own Seeds<br />
Instead of buying seedlings, consider saving your own seeds from your own crop.<br />
Select the best looking fully ripe tomato, squeeze the seed mass into a jar, fill it with water <strong>and</strong><br />
shake well. In a day or so, rinse the seeds through a strainer <strong>and</strong> dry them on a plate <strong>for</strong> a couple<br />
of weeks or until fully dry. Store in a cool dry spot <strong>and</strong> you are ready <strong>for</strong> next year’s growing<br />
season.<br />
32. Ripening <strong>Tomatoes</strong> – Go the distance<br />
When the fall months arrive <strong>and</strong> you still have several green or partially ripe tomatoes on your<br />
vines, don’t let those tomatoes go. Here are two ways to ripen them properly even when you<br />
don’t have the warmth or sun to mature the fruits.<br />
Ripening Indoors – Pick the tomatoes <strong>and</strong> cover them with a single sheet of newspaper in a<br />
warm <strong>and</strong> dark spot. The tomatoes will continue their ripening process. Check on them once a<br />
while to make sure they don’t over ripen. Remember to never ever put them on a windowsill. It<br />
may turn red, but it won’t be ripe.<br />
Ripening Outdoors – Cut a semicircle around the plant that is 2 inches from the stem <strong>and</strong> 9<br />
inches deep. By cutting some of the roots, you’ll shock the plant into <strong>for</strong>cing all its strength into<br />
ripening its fruit. Make sure you only do this near the end of season.<br />
<strong>33</strong>. Long term storage of tomatoes<br />
If you are looking to store your tomatoes <strong>for</strong> a longer period, you can freeze them. Remove the<br />
core of fresh unblemished tomatoes, place them entirely into freezer bags or containers <strong>and</strong> seal.<br />
Label them along with the date you froze them. When you defrost the tomatoes, the skin will<br />
slip right off making it perfect <strong>for</strong> creating sauces.<br />
http://www.toemar.ca/
![What’s Hot In Backyard Design in 2018 [6 Tips to an Amazing Yard]](https://img.yumpu.com/60436469/1/190x245/whats-hot-in-backyard-design-in-2018-6-tips-to-an-amazing-yard.jpg?quality=85)