


Create successful ePaper yourself
Turn your PDF publications into a flip-book with our unique Google optimized e-Paper software.
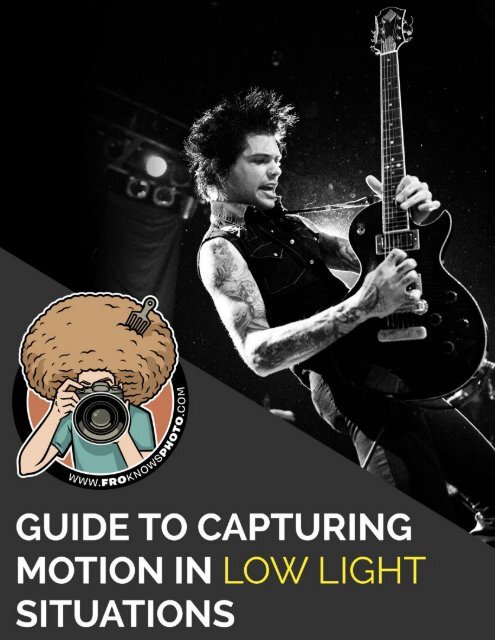
<strong>Guide</strong> <strong>to</strong> <strong>Captur<strong>in</strong>g</strong> <strong>Motion</strong> <strong>in</strong> <strong>Low</strong> <strong>Light</strong> <strong>Situations</strong> <strong>Page</strong> 1
One of the hardest aspects of<br />
pho<strong>to</strong>graphy is figur<strong>in</strong>g out how <strong>to</strong><br />
capture pho<strong>to</strong>s <strong>in</strong> low light situations.<br />
The truth of the matter is that if you can<br />
master low light shoot<strong>in</strong>g, other light<br />
sett<strong>in</strong>gs become less daunt<strong>in</strong>g. Th<strong>in</strong>k<br />
about that for a second: you will not<br />
only be able <strong>to</strong> capture solid images <strong>in</strong><br />
low light situations, but also <strong>in</strong> pretty<br />
much any other situation you can th<strong>in</strong>k<br />
of.<br />
ABOVE:<br />
Gav<strong>in</strong> Degraw at Madison Square Garden 8/7/2014<br />
Manual Sett<strong>in</strong>gs: 1/320th of a second at F3.2 ISO 2500 with the Nikon 14-24mm<br />
2.8; shot RAW; not Cropped edited <strong>in</strong> Adobe <strong>Light</strong>room.<br />
As you can see, the stage light<strong>in</strong>g is all over the place. You have two bright spotlights<br />
right on Gav<strong>in</strong>, as well as other stage lights that could mess with the exposure.<br />
Because I manually set the exposure triangle, I was able <strong>to</strong> get a proper exposure.<br />
If I were <strong>to</strong> allow the camera <strong>to</strong> do the work, it’s likely that the spot lights would<br />
have caused the exposure <strong>to</strong> be completely wrong, leav<strong>in</strong>g me with a dark image.<br />
I am go<strong>in</strong>g <strong>to</strong> expla<strong>in</strong> the fundamentals<br />
of captur<strong>in</strong>g images <strong>in</strong> low light<br />
situations no matter if you have a<br />
DSLR (digital s<strong>in</strong>gle lens reflect) or a<br />
mirrorless camera. Keep <strong>in</strong> m<strong>in</strong>d, it’s<br />
not the camera that makes the images,<br />
it’s you. You are smarter than your<br />
camera.<br />
Are you ready?<br />
<strong>Guide</strong> <strong>to</strong> <strong>Captur<strong>in</strong>g</strong> <strong>Motion</strong> <strong>in</strong> <strong>Low</strong> <strong>Light</strong> <strong>Situations</strong> <strong>Page</strong> 1
SITUATIONS:<br />
POSSIBLE SITUATIONS<br />
As far as difficult low light situations<br />
go, concerts pose some of the<br />
biggest challenges. Often, light<strong>in</strong>g is<br />
unpredictable. Concerts tend <strong>to</strong> either<br />
have really poor light<strong>in</strong>g, lights that<br />
are constantly chang<strong>in</strong>g, subjects that<br />
are mov<strong>in</strong>g around quickly, or all of<br />
the above.<br />
If you don’t shoot concerts, don’t<br />
worry--I am go<strong>in</strong>g <strong>to</strong> walk you through<br />
some other scenarios like shoot<strong>in</strong>g ice<br />
hockey <strong>in</strong>doors or low light candids<br />
that you may f<strong>in</strong>d at a wedd<strong>in</strong>g or<br />
other <strong>in</strong>door events. These situations<br />
will help you figure out not only how<br />
<strong>to</strong> capture motion <strong>in</strong> low light but how<br />
<strong>to</strong> quickly tweak your sett<strong>in</strong>gs for when<br />
the subjects are stand<strong>in</strong>g still.<br />
CAMERA SETTINGS<br />
I am a big proponent of shoot<strong>in</strong>g <strong>in</strong><br />
manual. I know manual sounds scary<br />
but it’s what will allow you <strong>to</strong> take<br />
full control of your camera and the<br />
images you are captur<strong>in</strong>g. In fact, I<br />
even created a three-hour video guide<br />
<strong>to</strong> “Gett<strong>in</strong>g Out Of Au<strong>to</strong>” for those<br />
who are look<strong>in</strong>g <strong>to</strong> take full control of<br />
their image mak<strong>in</strong>g (check out a free<br />
preview right here).<br />
For those of you who are more<br />
comfortable shoot<strong>in</strong>g <strong>in</strong> au<strong>to</strong> modes, I<br />
will also expla<strong>in</strong> how <strong>to</strong> capture great<br />
pho<strong>to</strong>s <strong>in</strong> low light situations us<strong>in</strong>g<br />
priority modes (Aperture / Shutter<br />
Priority).<br />
One major component of my teach<strong>in</strong>g<br />
revolves around understand<strong>in</strong>g the<br />
“Cause and Effect” of the exposure<br />
triangle. You need <strong>to</strong> always ask<br />
yourself, if I change this, how will<br />
it affect my pho<strong>to</strong>? Keep that <strong>in</strong> the<br />
back of your m<strong>in</strong>d from now until, well,<br />
forever.<br />
FILE FORMAT<br />
Before we get down <strong>to</strong> the nitty-gritty,<br />
we need <strong>to</strong> talk about shoot<strong>in</strong>g RAW. A<br />
RAW file is your best friend. “I SHOOT<br />
RAW” is not only a say<strong>in</strong>g; it’s a way<br />
of life.<br />
The RAW file format takes all of the<br />
“raw” data that the image sensor<br />
captures and sends it right <strong>to</strong> your<br />
memory card without mak<strong>in</strong>g edits or<br />
compress<strong>in</strong>g your file. This is important<br />
as the RAW file gives you more ability<br />
<strong>to</strong> tweak your f<strong>in</strong>al images exposure,<br />
contrast, vibrancy, clarity and more<br />
help create a better all around image.<br />
ABOVE:<br />
Kickbox<strong>in</strong>g<br />
1/500th of a second at F4 ISO 12,800<br />
Nikon D4s Nikon 24-70 2.8 at 32mm<br />
As you can tell, I was <strong>in</strong> a dimly lit gym. There are only a few lights above and my goal<br />
was <strong>to</strong> freeze Maria <strong>in</strong> air. I knew I needed a fast shutter speed so I bumped my ISO<br />
pretty high. I decided <strong>to</strong> use S<strong>in</strong>gle Focus mode because she would pretty much be <strong>in</strong><br />
one place which would allow me <strong>to</strong> lock my focus for her movement.<br />
The comb<strong>in</strong>ation of the exposure triangle and the focus mode allowed me <strong>to</strong> capture<br />
this image where Maria is at the <strong>to</strong>p of her jump. As a rule of thumb, you want <strong>to</strong> look<br />
for that peak action, a.k.a. when the subject hits the highest po<strong>in</strong>t right before they<br />
come down.<br />
For example: if your captured image<br />
is underexposed (looks dark) but the<br />
subject and motion appear the way<br />
you hoped, you can tweak the RAW file<br />
<strong>to</strong> change your exposure sett<strong>in</strong>gs after<br />
the fact, offer<strong>in</strong>g you a better chance<br />
at a usable image. I call this “cheat<strong>in</strong>g<br />
the system” where you deliberately<br />
underexpose the image know<strong>in</strong>g that<br />
you will be able <strong>to</strong> “br<strong>in</strong>g it back” with<br />
the flexibility that the RAW file offers.<br />
If you’re not quite sure why you would<br />
use RAW files, I suggest you shoot<br />
RAW+JPEG so you have both options.<br />
If you just shoot JPEG, you will never<br />
be able <strong>to</strong> go back <strong>to</strong> the orig<strong>in</strong>al RAW<br />
file for tweak<strong>in</strong>g <strong>in</strong> post-process<strong>in</strong>g.<br />
You will thank me <strong>in</strong> the future when<br />
you realize how much better your f<strong>in</strong>al<br />
images will look because you have the<br />
RAW files.<br />
<strong>Guide</strong> <strong>to</strong> <strong>Captur<strong>in</strong>g</strong> <strong>Motion</strong> <strong>in</strong> <strong>Low</strong> <strong>Light</strong> <strong>Situations</strong> <strong>Page</strong> 2
THE BUILDING BLOCKS OF YOUR WINNING IMAGE:<br />
THE BUILDING BLOCKS OF YOUR<br />
WINNING IMAGE:<br />
THE EXPOSURE TRIANGLE<br />
THE EXPOSURE TRIANGLE<br />
Your exposure is comprised of three<br />
th<strong>in</strong>gs: Shutter Speed, Aperture and<br />
ISO. These three sett<strong>in</strong>gs determ<strong>in</strong>e<br />
if your exposure is go<strong>in</strong>g <strong>to</strong> be proper<br />
for the situation you’re <strong>in</strong>. Every time<br />
you change one of these sett<strong>in</strong>gs it<br />
directly affects your overall exposure.<br />
Remember: cause and effect.<br />
I know it may sound daunt<strong>in</strong>g <strong>to</strong><br />
understand how each one directly<br />
affects the image, but I’m go<strong>in</strong>g <strong>to</strong> take<br />
the fear out of it as we go. Prepare <strong>to</strong><br />
be fearless.<br />
ABOVE:<br />
Perry Farrell 9/9/2007<br />
Manual exposure sett<strong>in</strong>gs: 1/40th of a second at F2.8 ISO 1250; Nikon 10.5mm DX<br />
Fisheye; shot RAW; not cropped; edited <strong>in</strong> Adobe <strong>Light</strong>room.<br />
This image is a perfect explanation of what “cheat<strong>in</strong>g the system” really does. The idea<br />
is you underexpose your pho<strong>to</strong> <strong>in</strong> order <strong>to</strong> keep a shutter speed that is hopefully fast<br />
enough <strong>to</strong> allow for a frozen image. In <strong>Light</strong>room, you then open the exposure up <strong>to</strong><br />
br<strong>in</strong>g the image back from the dark side.<br />
The image on the right is what the pho<strong>to</strong> would have looked like if I hadn’t cheated the<br />
system. The reason I needed <strong>to</strong> cheat the system was I couldn’t bump the ISO higher<br />
than 1250 and get a usable image (Nikon D2Xs). I was at F2.8, the widest aperture<br />
of the lens, and f<strong>in</strong>ally, if I dropped my shutter speed two s<strong>to</strong>ps, I would have been at<br />
1/10th of a second which would have risked blur. The only way I could get two s<strong>to</strong>ps<br />
was <strong>to</strong> “cheat the system” and br<strong>in</strong>g it back <strong>in</strong> post.<br />
<strong>Guide</strong> <strong>to</strong> <strong>Captur<strong>in</strong>g</strong> <strong>Motion</strong> <strong>in</strong> <strong>Low</strong> <strong>Light</strong> <strong>Situations</strong> <strong>Page</strong> 3
ISO<br />
The ISO is your film speed. You can<br />
determ<strong>in</strong>e the proper ISO based on<br />
how much light is available <strong>in</strong> your<br />
shoot<strong>in</strong>g environment. ISO sett<strong>in</strong>gs will<br />
directly affect your shutter speed and<br />
aperture sett<strong>in</strong>gs. The rule of thumb<br />
is that as your ISO goes higher, your<br />
shutter speed will follow. For example,<br />
if you have a proper exposure at ISO<br />
1600 and a shutter speed set at 250th<br />
and <strong>in</strong>creased your ISO <strong>to</strong> 3200,<br />
your shutter speed would be 1/500th,<br />
which is a 1 s<strong>to</strong>p change <strong>to</strong> give you<br />
the same exact exposure. Mak<strong>in</strong>g the<br />
one change caused the other change<br />
<strong>to</strong> need <strong>to</strong> be made.<br />
In most concert situations, you are<br />
faced with dimly lit stages and rooms;<br />
therefore a good start<strong>in</strong>g po<strong>in</strong>t would<br />
be an ISO between 3200-6400<br />
depend<strong>in</strong>g on your camera (the same<br />
applies for <strong>in</strong>door sports, wedd<strong>in</strong>gs<br />
and other low light situations). S<strong>in</strong>ce<br />
you are <strong>in</strong> a darker environment, you<br />
know right off the bat <strong>to</strong> select a higher<br />
ISO. You also know that a higher ISO<br />
will allow you <strong>to</strong> have a faster shutter<br />
speed thus allow<strong>in</strong>g you a better<br />
chance of captur<strong>in</strong>g motion (Higher<br />
ISO could also lead <strong>to</strong> a more gra<strong>in</strong>y<br />
image which I will discuss <strong>in</strong> future<br />
articles).<br />
Keep <strong>in</strong> m<strong>in</strong>d, your ISO’s reach is<br />
dependent upon your camera. Today,<br />
most consumer cameras can push<br />
their ISO <strong>to</strong> 6400 and higher, but<br />
pro cameras have the ability <strong>to</strong> shoot<br />
at ISO’s of 12,800 <strong>to</strong> 52,400 and<br />
beyond.<br />
It’s pretty <strong>in</strong>sane how far some of<br />
<strong>to</strong>day’s cameras can go <strong>in</strong> terms of<br />
ISO. But remember, if you don’t<br />
understand the fundamentals of the<br />
exposure triangle, the best pro camera<br />
<strong>in</strong> the world may not help you get any<br />
better pictures than an <strong>in</strong>expensive<br />
consumer camera.<br />
The same ISOs tend <strong>to</strong> apply <strong>in</strong> most<br />
low light situations; the less light you<br />
ABOVE:<br />
Ed Sheeran 2/5/2015<br />
Manual Sett<strong>in</strong>gs: 1/1250th of a<br />
second at F4.5 ISO 4000<br />
have, the higher you may want your<br />
ISO. Keep <strong>in</strong> m<strong>in</strong>d, though, that no<br />
ISO, regardless of how high you push<br />
it, will compensate for a lack of actual<br />
light.<br />
For those who are lett<strong>in</strong>g their camera<br />
set the ISO au<strong>to</strong>matically, you may run<br />
<strong>in</strong><strong>to</strong> some issues. Sure, the camera<br />
can do a great job of select<strong>in</strong>g what<br />
it th<strong>in</strong>ks is the proper ISO, but why<br />
rely on it when you can make that<br />
call yourself? Also, the camera may<br />
change the ISO from picture <strong>to</strong> picture<br />
even if you’re <strong>in</strong> a situation where the<br />
light is not chang<strong>in</strong>g.<br />
If you’re <strong>in</strong> a situation where the light<br />
is constant, simply select your ISO<br />
manually and lock it <strong>in</strong>. You can<br />
always push it higher if you need the<br />
effect of more light or lower if you need<br />
less. Say it with me, “I am smarter than<br />
my camera.”<br />
<strong>Guide</strong> <strong>to</strong> <strong>Captur<strong>in</strong>g</strong> <strong>Motion</strong> <strong>in</strong> <strong>Low</strong> <strong>Light</strong> <strong>Situations</strong> <strong>Page</strong> 4
ABOVE:<br />
Local Hockey R<strong>in</strong>k<br />
Manual Sett<strong>in</strong>gs: 1/800th of a second<br />
at F3.5 ISO 5000<br />
SHUTTER SPEED<br />
Understand<strong>in</strong>g the role shutter speed<br />
plays <strong>in</strong> captur<strong>in</strong>g motion directly<br />
translates <strong>to</strong> captur<strong>in</strong>g low light images<br />
<strong>in</strong> which subjects don’t move.<br />
For example, if you are shoot<strong>in</strong>g<br />
<strong>in</strong>door ice hockey where the subjects<br />
are mov<strong>in</strong>g quickly, you will most likely<br />
want <strong>to</strong> have your shutter speed higher<br />
than 1/250th of a second. If I were<br />
you, I would prefer my shutter speed<br />
<strong>to</strong> be 1/500th of a second or higher<br />
<strong>to</strong> make sure I am actually freez<strong>in</strong>g the<br />
motion.<br />
This is where understand<strong>in</strong>g your<br />
exposure triangle comes <strong>in</strong><strong>to</strong> play. It’s<br />
all about “cause and effect”—if I do<br />
this, this will happen; if I do that, that<br />
will happen.<br />
If you’re shoot<strong>in</strong>g a bride walk<strong>in</strong>g<br />
down the aisle <strong>to</strong>wards you <strong>in</strong> a lower<br />
light situation you will not want <strong>to</strong> set<br />
your shutter speed below 1/125th of a<br />
second. Even at that shutter speed, it<br />
is still possible that you may get some<br />
movement <strong>in</strong> your image you may not<br />
be look<strong>in</strong>g for. On the flip side, if the<br />
bride is stand<strong>in</strong>g still at the altar, you<br />
can drop your shutter speed lower than<br />
1/125th and possibly get a still image.<br />
NOTE - see focus modes later <strong>in</strong> this<br />
article for tips on which ones <strong>to</strong> use<br />
when and where.<br />
I would rather bump my ISO higher<br />
and have more gra<strong>in</strong> <strong>in</strong> my image than<br />
leave it lower and possibly end up with<br />
a blurry subject. Th<strong>in</strong>k about it: freeze<br />
the subject, but have a little gra<strong>in</strong> or<br />
have the subject blur but have less<br />
noise?<br />
Another way <strong>to</strong> “cheat” the system is <strong>to</strong><br />
underexpose your image. I do this <strong>in</strong><br />
situations where I don’t want <strong>to</strong> push<br />
my ISO any higher but need faster<br />
shutter speed <strong>to</strong> freeze the movement.<br />
Underexpos<strong>in</strong>g with the shutter speed<br />
means you are deliberately us<strong>in</strong>g a<br />
faster shutter speed, which <strong>in</strong> turn<br />
means your image may come out<br />
darker (due <strong>to</strong> not lett<strong>in</strong>g <strong>in</strong> the proper<br />
amount of light). The cheat<strong>in</strong>g comes<br />
<strong>in</strong><strong>to</strong> play is <strong>in</strong> post-production. Br<strong>in</strong>g<br />
the image back by bump<strong>in</strong>g up the<br />
exposure slider. It’s a good idea <strong>to</strong><br />
make sure you are shoot<strong>in</strong>g RAW when<br />
you try <strong>to</strong> cheat the system.<br />
For those who are not <strong>in</strong> manual and<br />
want the camera <strong>to</strong> set your shutter<br />
speed au<strong>to</strong>matically, use aperture<br />
priority mode. In this mode, the<br />
<strong>Guide</strong> <strong>to</strong> <strong>Captur<strong>in</strong>g</strong> <strong>Motion</strong> <strong>in</strong> <strong>Low</strong> <strong>Light</strong> <strong>Situations</strong> <strong>Page</strong> 5
camera will au<strong>to</strong>matically set the<br />
shutter speed for you based on your<br />
ISO and Aperture sett<strong>in</strong>gs. However,<br />
you’ll still have <strong>to</strong> pay attention <strong>to</strong><br />
where it’s set. If you aren’t gett<strong>in</strong>g<br />
a fast enough shutter speed, you’re<br />
go<strong>in</strong>g <strong>to</strong> have <strong>to</strong> do one of two th<strong>in</strong>gs<br />
<strong>to</strong> make it higher: 1) raise your ISO or<br />
2) open your aperture <strong>to</strong> let more light<br />
<strong>in</strong>. Remember: change one sett<strong>in</strong>g<br />
at a time, check the image, and then<br />
make further adjustments.<br />
There are a few rules tied <strong>to</strong> sett<strong>in</strong>g your<br />
shutter speed. One is that your shutter<br />
speed should be higher than the focal<br />
length of your lens. For example, if<br />
your lens is zoomed <strong>to</strong> 300mm, your<br />
shutter speed should not drop below<br />
1/320th of a second. If you are us<strong>in</strong>g<br />
a 50mm your shutter speed should not<br />
drop below 1/50th of a second. The<br />
reason you have <strong>to</strong> set your shutter<br />
speeds higher than your focal length is<br />
because small movements can cause<br />
your images <strong>to</strong> blur as light travels<br />
<strong>to</strong> the image sensor. Aga<strong>in</strong>, this is a<br />
general rule of thumb but it can be<br />
broken <strong>in</strong> certa<strong>in</strong> situations.<br />
ABOVE:<br />
Walk<strong>in</strong>g down the aisle 8/9/2009 Manual Exposure Mode 1/250th of a second at F3.2 ISO 3200; Cont<strong>in</strong>uous Focus Mode.<br />
<strong>Guide</strong> <strong>to</strong> <strong>Captur<strong>in</strong>g</strong> <strong>Motion</strong> <strong>in</strong> <strong>Low</strong> <strong>Light</strong> <strong>Situations</strong> <strong>Page</strong> 6
ABOVE:<br />
Nick Perri 3/9/2013<br />
1/1000th of a second at F3.5 ISO<br />
8000 shot RAW; not cropped Nikon<br />
14-24mm 2.8<br />
As you can see from the image on the<br />
right, I cheated the system. I knew <strong>in</strong><br />
order <strong>to</strong> capture Nick’s jump I would<br />
have <strong>to</strong> have a fast enough shutter<br />
speed. But I didn’t want <strong>to</strong> push<br />
my ISO any further so I decided <strong>to</strong><br />
“cheat the system” and br<strong>in</strong>g it back<br />
<strong>in</strong> <strong>Light</strong>room.<br />
APERTURE<br />
What is your aperture and how does<br />
it affect your shoot<strong>in</strong>g <strong>in</strong> low light<br />
situations? Like shutter speed, your<br />
aperture controls the amount of light<br />
you’re lett<strong>in</strong>g on<strong>to</strong> the image sensor as<br />
well as depth of field. For this guide,<br />
my ma<strong>in</strong> focus is <strong>to</strong> expla<strong>in</strong> aperture as<br />
it perta<strong>in</strong>s <strong>to</strong> light gather<strong>in</strong>g.<br />
If you want <strong>to</strong> gather more light for<br />
your image, you will want <strong>to</strong> do what<br />
we call “open<strong>in</strong>g up.” Open up the<br />
aperture or, <strong>in</strong> other words, use a<br />
lower F sett<strong>in</strong>g. For example, go<strong>in</strong>g<br />
from F5.6 <strong>to</strong> F4 lets <strong>in</strong> one extra s<strong>to</strong>p<br />
of light. Go<strong>in</strong>g from F4 <strong>to</strong> F2.8 also<br />
lets <strong>in</strong> one s<strong>to</strong>p of light. The lower the<br />
F-number, the more light you’re lett<strong>in</strong>g<br />
<strong>in</strong>. The higher the F number (16; 22;<br />
32), the less light you’re gather<strong>in</strong>g.<br />
On a side note, your aperture directly<br />
affects your depth of field, which is<br />
the portion of your image that will be<br />
<strong>in</strong> focus. I dive much deeper <strong>in</strong><strong>to</strong> this<br />
subject <strong>in</strong> the FroKnowsPho<strong>to</strong> <strong>Guide</strong> To<br />
Gett<strong>in</strong>g Out Of Au<strong>to</strong>.<br />
You may be say<strong>in</strong>g, “But FRO, where<br />
should I set my Aperture if I am shoot<strong>in</strong>g<br />
X?” Before I can tell you that, you have<br />
<strong>to</strong> know that not every lens will let you<br />
shoot at the widest aperture. Most<br />
consumer lenses tend <strong>to</strong> have a widest<br />
aperture sett<strong>in</strong>g up F3.5 or F4. But, if<br />
you have a consumer zoom lens, the<br />
more you zoom the more your aperture<br />
will close down thus cutt<strong>in</strong>g back on<br />
the amount of light you’re lett<strong>in</strong>g <strong>in</strong>.<br />
On the flip side, more expensive pro<br />
glass can open up <strong>to</strong> as wide as F1.2,<br />
F1.4, F1.8 and F2.8.<br />
For those who are not shoot<strong>in</strong>g <strong>in</strong><br />
manual, you can set their camera <strong>to</strong><br />
aperture priority and select the widest<br />
aperture possible. The camera will do<br />
the rest of the work for you by sett<strong>in</strong>g<br />
your shutter speed and possibly your<br />
ISO. Keep <strong>in</strong> m<strong>in</strong>d that just because<br />
the camera can make a decision for<br />
you, that doesn’t mean it will make<br />
the proper exposure choice for the<br />
situation you’re <strong>in</strong>.<br />
<strong>Guide</strong> <strong>to</strong> <strong>Captur<strong>in</strong>g</strong> <strong>Motion</strong> <strong>in</strong> <strong>Low</strong> <strong>Light</strong> <strong>Situations</strong> <strong>Page</strong> 7
METERING MODES<br />
ABOVE:<br />
Goalie 2/2/2012<br />
Manual Sett<strong>in</strong>gs: 1/250th of a second<br />
METERING at F3.5 ISO MODES 4000<br />
Many of <strong>to</strong>day’s cameras allow you<br />
<strong>to</strong> choose from three-dimensional<br />
meter<strong>in</strong>g <strong>to</strong> spot meter<strong>in</strong>g. 3D<br />
meter<strong>in</strong>g will survey the entire frame <strong>to</strong><br />
get an average light read<strong>in</strong>g, help<strong>in</strong>g<br />
you determ<strong>in</strong>e the proper aperture<br />
and shutter speed.<br />
For everyday, general shoot<strong>in</strong>g, 3D is<br />
great for atta<strong>in</strong><strong>in</strong>g your <strong>in</strong>itial exposure.<br />
Spot meter<strong>in</strong>g exclusively uses the<br />
center portion of the frame. This means<br />
that a smaller portion of the frame will<br />
be used for meter<strong>in</strong>g. Usually this will<br />
be done <strong>in</strong>side a very small circle <strong>in</strong>side<br />
the viewf<strong>in</strong>der. This is a great sett<strong>in</strong>g<br />
<strong>to</strong> use when try<strong>in</strong>g <strong>to</strong> shoot a subject<br />
who may be backlit or surrounded by<br />
lights that may throw off your meter.<br />
This sett<strong>in</strong>g will give you a read<strong>in</strong>g of<br />
exactly what you are try<strong>in</strong>g <strong>to</strong> meter<br />
with less chance of the meter be<strong>in</strong>g<br />
tricked.<br />
As you start <strong>to</strong> understand light better,<br />
you will see that all of these meter<br />
sett<strong>in</strong>gs will give you a close read<strong>in</strong>g.<br />
Your personal tweaks, however, will<br />
get an even better one.<br />
If you are us<strong>in</strong>g a wide-angle lens and<br />
3D meter<strong>in</strong>g, it is possible that random<br />
stage lights, ceil<strong>in</strong>g lights, or spot lights<br />
will give you a false meter read<strong>in</strong>g as<br />
the meter is most likely read<strong>in</strong>g the<br />
brightest light source. If this is the case,<br />
your ma<strong>in</strong> subject might come out <strong>to</strong>o<br />
dark. Switch<strong>in</strong>g <strong>to</strong> spot meter<strong>in</strong>g will<br />
allow you <strong>to</strong> meter for just your subject,<br />
<strong>Guide</strong> <strong>to</strong> <strong>Captur<strong>in</strong>g</strong> <strong>Motion</strong> <strong>in</strong> <strong>Low</strong> <strong>Light</strong> <strong>Situations</strong> <strong>Page</strong> 8
giv<strong>in</strong>g you a better chance of gett<strong>in</strong>g<br />
a correct read<strong>in</strong>g. Conversely, when<br />
you use a telepho<strong>to</strong> lens, you are<br />
gather<strong>in</strong>g light from a smaller area,<br />
so either spot meter<strong>in</strong>g or 3D meter<strong>in</strong>g<br />
should work.<br />
For those who are shoot<strong>in</strong>g <strong>in</strong> manual,<br />
the meter will not affect your f<strong>in</strong>al<br />
image because you have “manually”<br />
locked <strong>in</strong> the exposure yourself.<br />
To determ<strong>in</strong>e whether or not your<br />
exposure is <strong>in</strong> good shape, simply look<br />
at one of your images on the back of<br />
your screen. The screen is a good way<br />
<strong>to</strong> make sure you are on the right path.<br />
It’s not perfect but it’s a nice <strong>to</strong>ol <strong>to</strong> use<br />
s<strong>in</strong>ce you have it at your disposal.<br />
PHOTOS:<br />
Misterwives 1/4/2015<br />
Manual Sett<strong>in</strong>gs Image on the<br />
right: 1/200th of a second F3.2<br />
ISO 4000; Shot RAW; not cropped.<br />
The image on the bot<strong>to</strong>m was shot<br />
<strong>in</strong> manual exposure. The image on<br />
the <strong>to</strong>p shows you what would have<br />
happened if I allowed the camera<br />
<strong>to</strong> select all the sett<strong>in</strong>gs. What<br />
would have happened is the strong<br />
backlight would have <strong>to</strong>ld the<br />
meter that it was actually brighter<br />
than it really was thus tell<strong>in</strong>g your<br />
camera <strong>to</strong> raise it’s shutter speed<br />
and leav<strong>in</strong>g you with a darker<br />
image. This is why you are smarter<br />
than your camera.<br />
<strong>Guide</strong> <strong>to</strong> <strong>Captur<strong>in</strong>g</strong> <strong>Motion</strong> <strong>in</strong> <strong>Low</strong> <strong>Light</strong> <strong>Situations</strong> <strong>Page</strong> 9
FOCUS MODES<br />
FOCUS MODES<br />
What good is captur<strong>in</strong>g a WINNING<br />
image <strong>in</strong> low light if it’s not <strong>in</strong> focus<br />
<strong>in</strong> the first place? You’re go<strong>in</strong>g <strong>to</strong><br />
encounter four ma<strong>in</strong> types of focus<strong>in</strong>g<br />
options (some cameras allow you <strong>to</strong><br />
tweak multiple focus<strong>in</strong>g modes beyond<br />
three):<br />
1. Full AUTO: The camera selects<br />
between counties or s<strong>in</strong>gle focus<br />
modes. This mode is select<strong>in</strong>g<br />
what the camera th<strong>in</strong>ks you should<br />
be us<strong>in</strong>g. This is not a mode I ever<br />
venture <strong>in</strong><strong>to</strong>. We just spend all this<br />
time gett<strong>in</strong>g our sett<strong>in</strong>gs situated<br />
only <strong>to</strong> allow the camera <strong>to</strong><br />
select the wrong focus mode that<br />
may lead <strong>to</strong> miss<strong>in</strong>g your focus.<br />
I personally would not be able <strong>to</strong><br />
keep up with fast mov<strong>in</strong>g subjects<br />
and simultaneously manually focus<br />
the lens. The few times you will<br />
f<strong>in</strong>d yourself manually focus<strong>in</strong>g<br />
may be if you are shoot<strong>in</strong>g macro<br />
images and you need <strong>to</strong> get a more<br />
precise focus than the camera is<br />
giv<strong>in</strong>g you. Or when your camera<br />
is “hunt<strong>in</strong>g” for focus. Hunt<strong>in</strong>g<br />
means the au<strong>to</strong>-focus keeps<br />
rack<strong>in</strong>g back and forth and not<br />
lock<strong>in</strong>g <strong>in</strong>. At that po<strong>in</strong>t, you may<br />
need <strong>to</strong> switch <strong>in</strong><strong>to</strong> manual <strong>to</strong> try<br />
and get the proper focus.<br />
2. Cont<strong>in</strong>uous Focus: You will f<strong>in</strong>d<br />
yourself <strong>in</strong> this mode when you’re<br />
shoot<strong>in</strong>g mov<strong>in</strong>g subjects. This<br />
mode lets you better track your<br />
subjects. As they move, your<br />
focus should cont<strong>in</strong>ue <strong>to</strong> focus<br />
and refocus. This is great when<br />
you’re shoot<strong>in</strong>g sports, concerts,<br />
and even wedd<strong>in</strong>gs where you’re<br />
try<strong>in</strong>g <strong>to</strong> capture the bride walk<strong>in</strong>g<br />
down the aisle. This primarily<br />
is the mode you want <strong>to</strong> be <strong>in</strong><br />
when it comes <strong>to</strong> shoot<strong>in</strong>g<br />
unpredictable subjects. Generally<br />
speak<strong>in</strong>g, this means that when<br />
you’re hold<strong>in</strong>g the shutter<br />
but<strong>to</strong>n halfway down, the<br />
camera will focus cont<strong>in</strong>uously<br />
as you track the subject.<br />
3. S<strong>in</strong>gle Focus: Switch <strong>to</strong> focus<br />
mode when you know your subject<br />
won’t be mov<strong>in</strong>g or for when you<br />
have more time <strong>to</strong> atta<strong>in</strong> focus:<br />
the bride stand<strong>in</strong>g at the altar,<br />
the hockey player sitt<strong>in</strong>g on the<br />
bench watch<strong>in</strong>g, the musician<br />
that is static, or <strong>in</strong>animate objects<br />
that aren’t go<strong>in</strong>g anywhere.<br />
4. Manual Focus: This is not a<br />
mode I f<strong>in</strong>d myself <strong>in</strong> very often.<br />
PHOTOS:<br />
Quarterback<br />
1/800th at F3.2 ISO 8000<br />
Nikon D750 Nikon 70-200 VR II at 200mm<br />
A low light situation you may f<strong>in</strong>d yourself <strong>in</strong> is at a high school football stadium. The<br />
lights tend not <strong>to</strong> be very bright, which means you have <strong>to</strong> push your ISO a little further<br />
than normal. In turn, you have <strong>to</strong> remember how rais<strong>in</strong>g your ISO affects your shutter<br />
speed as well as what focus mode you will use.<br />
In this case, I was us<strong>in</strong>g the cont<strong>in</strong>uous focus mode and mak<strong>in</strong>g sure my focus po<strong>in</strong>t<br />
was on the quarterback. I had <strong>to</strong> bump my ISO <strong>to</strong> allow me <strong>to</strong> have a 1/800th of a<br />
second shutter speed <strong>to</strong> help freeze the motion. Yes, I could have dropped my shutter<br />
speed one s<strong>to</strong>p <strong>to</strong> 1/400th of a second, which would have allowed me <strong>to</strong> drop my<br />
ISO one s<strong>to</strong>p <strong>to</strong> 4,000. However, I did not want <strong>to</strong> risk show<strong>in</strong>g motion <strong>in</strong> the image<br />
so I left my shutter speed at 8000.<br />
<strong>Guide</strong> <strong>to</strong> <strong>Captur<strong>in</strong>g</strong> <strong>Motion</strong> <strong>in</strong> <strong>Low</strong> <strong>Light</strong> <strong>Situations</strong> <strong>Page</strong> 10
REAL WORLD SHOOTING<br />
ABOVE:<br />
The Hooters 11/27/2009<br />
Manual Sett<strong>in</strong>gs: 1/400th of a second at F3.2 ISO 3200; shot RAW; not cropped.<br />
The image on the left is the manually exposed image whereas the image on the right is what would have happened if I left the camera<br />
meter the scene. The camera’s meter would have <strong>to</strong>ld you that the scene was really bright and caused your shutter speed <strong>to</strong> be<br />
around 1/2000th of a second which would have left you with a <strong>to</strong>tally underexposured dark image.<br />
REAL WORLD SHOOTING<br />
What I want <strong>to</strong> do right now is break<br />
down three different, potential low<br />
light scenarios. Keep <strong>in</strong> m<strong>in</strong>d the<br />
<strong>in</strong>formation, I am giv<strong>in</strong>g you is meant<br />
<strong>to</strong> help you get as close as possible <strong>to</strong><br />
the proper sett<strong>in</strong>gs. The reason I can’t<br />
give you exact sett<strong>in</strong>g is every situation<br />
is go<strong>in</strong>g <strong>to</strong> be different.<br />
Yes, these are three specific scenarios<br />
but the same rules apply <strong>to</strong> captur<strong>in</strong>g<br />
motion <strong>in</strong> low situations no matter what<br />
you’re shoot<strong>in</strong>g. You also need <strong>to</strong> ask<br />
yourself the basic questions; they never<br />
change and can be used <strong>in</strong> any situation:<br />
1. Is my subject mov<strong>in</strong>g fast or slow?<br />
2. How high can I put my ISO before<br />
I run <strong>in</strong><strong>to</strong> noise?<br />
3. What focus mode should I be<br />
us<strong>in</strong>g?<br />
4. If the light changes which part of<br />
my triangle should I move first?<br />
<strong>Guide</strong> <strong>to</strong> <strong>Captur<strong>in</strong>g</strong> <strong>Motion</strong> <strong>in</strong> <strong>Low</strong> <strong>Light</strong> <strong>Situations</strong> <strong>Page</strong> 11
ABOVE:<br />
Grouplove 6/11/2012<br />
Manual Sett<strong>in</strong>gs: 1/640th of a second<br />
at F3.5 ISO 10,000; shot RAW; not<br />
cropped.<br />
For an image like this one where the<br />
subjects are mov<strong>in</strong>g a <strong>to</strong>n I would be<br />
<strong>in</strong> cont<strong>in</strong>uous focus so I can track the<br />
subject. A comb<strong>in</strong>ation of proper<br />
exposure and focus<strong>in</strong>g mode allowed<br />
me <strong>to</strong> capture this image.<br />
SCENARIO #1:<br />
LOW LIGHT CONCERT<br />
Introduction:<br />
Before a concert, I ask myself a bunch<br />
of different questions. Will the subject<br />
be mov<strong>in</strong>g quickly or more static?<br />
And, at all times, what are the most<br />
important parts of the triangle for what<br />
I am about <strong>to</strong> shoot? If I know the<br />
subject is go<strong>in</strong>g <strong>to</strong> be mov<strong>in</strong>g, I know<br />
that my shutter speed will need <strong>to</strong> be<br />
fast. In order <strong>to</strong> make it faster, I could<br />
raise my ISO, mak<strong>in</strong>g the sensor more<br />
sensitive <strong>to</strong> light, or I could open my<br />
aperture <strong>to</strong> let more light <strong>in</strong>. Everyth<strong>in</strong>g<br />
is cause and effect; what is most<br />
important and why?<br />
Dur<strong>in</strong>g the show, the lights are go<strong>in</strong>g <strong>to</strong><br />
change. But what sett<strong>in</strong>gs should you<br />
tweak first? I’m a big fan of rid<strong>in</strong>g my<br />
back right thumb on the dial. Just about<br />
all DSLR’s and mirrorless cameras will<br />
have some k<strong>in</strong>d of control dial on the<br />
back right hand side. I have m<strong>in</strong>e set<br />
<strong>to</strong> control shutter speed.<br />
Shutter Speed:<br />
For a mov<strong>in</strong>g subject: no less than<br />
1/250th of a second. I try <strong>to</strong> live <strong>in</strong><br />
the 1/500th <strong>to</strong> 1/1000th of a second<br />
range but a lot depends on the lenses<br />
you use, the ISO capability of your<br />
camera and last, but not least, the<br />
amount of light at the concert.<br />
For a still subject: shutter speeds of<br />
1/250th and slower, depend<strong>in</strong>g on<br />
the focal length you’re us<strong>in</strong>g. See rule<br />
of thumb for the focal length vs. shutter<br />
speed sett<strong>in</strong>gs <strong>in</strong> “Shutter Speed”<br />
section.<br />
Aperture and ISO:<br />
If I see that my shutter speed is gett<strong>in</strong>g<br />
<strong>to</strong> a po<strong>in</strong>t where I may not be able <strong>to</strong><br />
freeze the motion, I have <strong>to</strong> decide<br />
what should I do next. This is when<br />
you look at your aperture and ask if<br />
you can open it up <strong>to</strong> let more light<br />
<strong>in</strong>, thus keep<strong>in</strong>g my shutter speed<br />
higher. Or whether or not you have<br />
room <strong>to</strong> bump the ISO <strong>to</strong> keep that<br />
faster shutter speed. These are the<br />
k<strong>in</strong>ds of cause and effect scenarios<br />
that are constantly runn<strong>in</strong>g through my<br />
head.<br />
<strong>Guide</strong> <strong>to</strong> <strong>Captur<strong>in</strong>g</strong> <strong>Motion</strong> <strong>in</strong> <strong>Low</strong> <strong>Light</strong> <strong>Situations</strong> <strong>Page</strong> 12
Don’t get overwhelmed by all of this;<br />
the more you do it, the easier it gets.<br />
Focus Modes for Concerts:<br />
For a mov<strong>in</strong>g subject: use cont<strong>in</strong>uous<br />
focus as it allows for the camera <strong>to</strong><br />
track the subject as they move from<br />
focus po<strong>in</strong>t <strong>to</strong> focus po<strong>in</strong>t. All of <strong>to</strong>day’s<br />
DSLR’s and mirrorless cameras do a<br />
fantastic job of track<strong>in</strong>g your subjects<br />
or allow you <strong>to</strong> tell the camera where<br />
<strong>to</strong> focus.<br />
For a still subject: you can switch <strong>to</strong><br />
s<strong>in</strong>gle focus mode which means when<br />
you press the shutter but<strong>to</strong>n halfway<br />
down and the focus locks <strong>in</strong> it will not<br />
shift unless you lift your f<strong>in</strong>ger. So if<br />
you lock <strong>in</strong> a subject then they move,<br />
you will have <strong>to</strong> lift your f<strong>in</strong>ger and<br />
refocus.<br />
Meter<strong>in</strong>g Mode for Concerts:<br />
9 out of 10 times I am leav<strong>in</strong>g my<br />
cameras meter<strong>in</strong>g mode on matrix<br />
meter<strong>in</strong>g, as it takes the brightest<br />
and darkest parts of the pho<strong>to</strong> and<br />
giv<strong>in</strong>g me the average read<strong>in</strong>g.<br />
Post-script:<br />
Keep <strong>in</strong> m<strong>in</strong>d when you have a lot<br />
of lights mov<strong>in</strong>g around at a concert<br />
you’re go<strong>in</strong>g <strong>to</strong> see your meter<br />
danc<strong>in</strong>g around quite a bit. That’s why<br />
I suggested be<strong>in</strong>g <strong>in</strong> manual exposure<br />
above. You are smarter than your<br />
camera; you understand that all the<br />
flash<strong>in</strong>g light will affect the better but<br />
not cause you <strong>to</strong> need <strong>to</strong> change your<br />
sett<strong>in</strong>gs.<br />
I love concerts, I love the challenge<br />
of shoot<strong>in</strong>g <strong>in</strong> them but please don’t<br />
over-complicate th<strong>in</strong>gs. Don’t try and<br />
change three sett<strong>in</strong>gs if you’re hav<strong>in</strong>g<br />
trouble gett<strong>in</strong>g the proper exposure.<br />
Just ask yourself the questions I laid<br />
out one at a time and build/tweak your<br />
exposure from there.<br />
ABOVE:<br />
Frozen on Stage<br />
1/640th of a sec at F3.5 ISO 3200<br />
Nikon D4s Nikon 70-200 2.8 VR II at 95mm<br />
The difference between captur<strong>in</strong>g the motion and miss<strong>in</strong>g the shot is very slim<br />
especially when you have a subject who’s constantly mov<strong>in</strong>g. In a situation like this<br />
one, I want <strong>to</strong> determ<strong>in</strong>e a few th<strong>in</strong>gs: 1) that my shutter speed is high enough <strong>to</strong><br />
freeze any action and 2) that my focus mode is on cont<strong>in</strong>uous <strong>to</strong> track the subject.<br />
With these two th<strong>in</strong>gs comb<strong>in</strong>ed, I was able <strong>to</strong> capture this moment <strong>in</strong> time.<br />
The fast shutter speed and the cont<strong>in</strong>uous focus made this a w<strong>in</strong>n<strong>in</strong>g image. You will<br />
notice my ISO was only 3200 and my f s<strong>to</strong>p was at 3.5. Most consumer lenses and<br />
bodies will be able <strong>to</strong> use these same sett<strong>in</strong>gs and hopefully get similar results. Even if<br />
your lens is a 5.6, you can simply do the math <strong>to</strong> figure out what your sett<strong>in</strong>gs should<br />
be. In this case, that’s roughly a s<strong>to</strong>p different from 3.5, which we can call F4. From<br />
F4 <strong>to</strong> 5.6 is one s<strong>to</strong>p, from 3200 <strong>to</strong> 6400 is one s<strong>to</strong>p. Remember: cause and effect-- if<br />
I change one th<strong>in</strong>g, this happens; if I change another, that happens.<br />
<strong>Guide</strong> <strong>to</strong> <strong>Captur<strong>in</strong>g</strong> <strong>Motion</strong> <strong>in</strong> <strong>Low</strong> <strong>Light</strong> <strong>Situations</strong> <strong>Page</strong> 13
SCENARIO #2: INDOOR SPORTS<br />
(ICE HOCKEY AND SCHOOL GYM)<br />
Generally speak<strong>in</strong>g, when you’re at<br />
a hockey r<strong>in</strong>k the light<strong>in</strong>g should be<br />
even across the ice. Of course there’s<br />
always those older r<strong>in</strong>ks that have the<br />
terrible sodium vapor lights that buzz<br />
and give off a p<strong>in</strong>kish color, which<br />
really messes with your white balance.<br />
But for this scenario, let’s say the light<br />
is evenly spread across the r<strong>in</strong>k. In<br />
my op<strong>in</strong>ion hockey may be one of the<br />
hardest th<strong>in</strong>gs <strong>to</strong> pho<strong>to</strong>graph because<br />
you never know where the action<br />
is go<strong>in</strong>g <strong>to</strong> happen. But once you<br />
practice f<strong>in</strong>d<strong>in</strong>g the proper action, the<br />
sett<strong>in</strong>gs pretty much become set it and<br />
forget it.<br />
Shutter Speed:<br />
For a mov<strong>in</strong>g subject: set shutter speed<br />
of 1/400th of a second or higher <strong>to</strong><br />
freeze the motion.<br />
For a still subject: perhaps you want <strong>to</strong><br />
pho<strong>to</strong>graph a player on the bench. The<br />
bench tends <strong>to</strong> have less light available.<br />
Simply lower your shutter speed <strong>to</strong><br />
let more light <strong>in</strong> and compensate for<br />
the darker area. Always remember<br />
<strong>to</strong> bump it back up when you start <strong>to</strong><br />
focus on the r<strong>in</strong>k aga<strong>in</strong>.<br />
Aperture and Focal Length:<br />
As a rule of thumb, you will want <strong>to</strong><br />
shoot your lens on the wider side. For<br />
example, if you have a 2.8 lens you will<br />
want <strong>to</strong> shoot at F-2.8. If you have a<br />
kit lens, then simply shoot at its widest<br />
aperture. For those with faster lenses<br />
like 1.2 or 1.4, I suggest sett<strong>in</strong>g it <strong>to</strong><br />
around F-2.8.<br />
ISO:<br />
In terms of your ISO, you will probably<br />
f<strong>in</strong>d yourself somewhere between<br />
3200 and 6400 <strong>in</strong> order <strong>to</strong> get similar<br />
sett<strong>in</strong>gs <strong>to</strong> above.<br />
Post-script:<br />
Before we shoot, we know the<br />
follow<strong>in</strong>g th<strong>in</strong>gs: the subjects will be<br />
mov<strong>in</strong>g quickly; the light is even across<br />
the ice; it isn’t go<strong>in</strong>g <strong>to</strong> get brighter or<br />
darker, it’s fixed. This means once you<br />
lock <strong>in</strong> your exposure you can focus<br />
on captur<strong>in</strong>g the moment and not<br />
worry<strong>in</strong>g about your sett<strong>in</strong>gs.<br />
Remember when I recommended<br />
shoot<strong>in</strong>g <strong>in</strong> manual exposure, and<br />
not one of the au<strong>to</strong> modes? If you<br />
attempt <strong>to</strong> shoot <strong>in</strong> shutter or aperture<br />
priority mode, your meter will be <strong>to</strong>tally<br />
thrown off by the ice and cause you <strong>to</strong><br />
overexposure your images. This is why<br />
tak<strong>in</strong>g control of your sett<strong>in</strong>gs is vital <strong>to</strong><br />
becom<strong>in</strong>g a competent pho<strong>to</strong>grapher.<br />
BONUS SCENARIO:<br />
PHOTOGRAPHING<br />
A SCHOOL GYM<br />
Unlike the hockey r<strong>in</strong>k where you have<br />
a bright white surface reflect<strong>in</strong>g light<br />
back <strong>in</strong><strong>to</strong> the players face, the gym is<br />
go<strong>in</strong>g <strong>to</strong> look darker because of the<br />
wood floors. Your sett<strong>in</strong>gs will not<br />
be that far off from the r<strong>in</strong>k but you<br />
may need <strong>to</strong> bump your ISO higher<br />
<strong>to</strong> compensate for the lack of light<br />
reflection com<strong>in</strong>g off the white ice.<br />
Aga<strong>in</strong>, once you get your exposure<br />
locked <strong>in</strong>, you are free <strong>to</strong> focus on the<br />
action <strong>in</strong> front of you.<br />
In both scenarios you will want <strong>to</strong> be <strong>in</strong><br />
cont<strong>in</strong>uous focus <strong>to</strong> allow for the best<br />
chance at gett<strong>in</strong>g a tack-sharp <strong>in</strong> focus<br />
image.<br />
<strong>Guide</strong> <strong>to</strong> <strong>Captur<strong>in</strong>g</strong> <strong>Motion</strong> <strong>in</strong> <strong>Low</strong> <strong>Light</strong> <strong>Situations</strong> <strong>Page</strong> 14
SCENARIO #3:<br />
WALKING DOWN THE AISLE<br />
One of the most important shots <strong>to</strong> get<br />
at a wedd<strong>in</strong>g is the bride or groom<br />
walk<strong>in</strong>g down the aisle. Unlike hockey,<br />
they will not be mov<strong>in</strong>g super fast, but<br />
they will be mov<strong>in</strong>g and you will need<br />
the right sett<strong>in</strong>gs.<br />
Shutter Speed:<br />
For this scenario, you are us<strong>in</strong>g<br />
whatever natural light you have--no<br />
flash. As a general rule of thumb<br />
you won’t want your shutter speed <strong>to</strong><br />
drop much lower than 1/250th of a<br />
second. In some situations you may<br />
be able <strong>to</strong> get away with 1/125th<br />
s<strong>in</strong>ce the bride or groom shouldn’t be<br />
mov<strong>in</strong>g super fast down the aisle.<br />
ISO and Aperture:<br />
Like the other scenarios above, you<br />
simply have <strong>to</strong> build your exposure<br />
know<strong>in</strong>g that you’re try<strong>in</strong>g <strong>to</strong> freeze the<br />
action. Where does your ISO need <strong>to</strong><br />
be <strong>to</strong> help you get the proper shutter<br />
speed? Where does your aperture<br />
need <strong>to</strong> be <strong>to</strong> allow you <strong>to</strong> get the depth<br />
of field you’re look<strong>in</strong>g for?<br />
Post-script:<br />
This scenario is one where the light<strong>in</strong>g<br />
will be different from location <strong>to</strong><br />
location. I suggest that you use the<br />
time before the wedd<strong>in</strong>g <strong>to</strong> do test<br />
shots. Pho<strong>to</strong>graphy guests arriv<strong>in</strong>g<br />
and walk<strong>in</strong>g down the aisle <strong>to</strong> their<br />
seats. Shoot a pho<strong>to</strong> of an assistant<br />
walk<strong>in</strong>g down the aisle <strong>to</strong> you can test<br />
the light<strong>in</strong>g. Do what you need <strong>to</strong> do<br />
<strong>to</strong> help you get the shot you’re be<strong>in</strong>g<br />
paid <strong>to</strong> capture.<br />
Clos<strong>in</strong>g:<br />
Remember these are three scenarios<br />
plus one as a bonus. This doesn’t<br />
mean these concepts only work with<br />
the situations above. These concepts<br />
and tips transcend from scenario<br />
<strong>to</strong> scenario. Ask yourself the right<br />
questions, build the exposure, th<strong>in</strong>k<br />
about what your try<strong>in</strong>g <strong>to</strong> capture and<br />
you will have a better chance and<br />
gett<strong>in</strong>g it right.<br />
ABOVE:<br />
Wedd<strong>in</strong>g Kiss 8/22/2008<br />
Manual Sett<strong>in</strong>gs: 1/250th of a second at F2.8 ISO 3200; shot RAW; not cropped.<br />
The Focus mode was set <strong>to</strong> s<strong>in</strong>gle focus for this shot. The reason be<strong>in</strong>g is the subjects are not go<strong>in</strong>g <strong>to</strong> move from where they are at<br />
that moment. The focus was locked on for the kiss. Right after the kiss, I would switch <strong>to</strong> cont<strong>in</strong>uous focus <strong>to</strong> get them walk<strong>in</strong>g back<br />
down the aisle.<br />
<strong>Guide</strong> <strong>to</strong> <strong>Captur<strong>in</strong>g</strong> <strong>Motion</strong> <strong>in</strong> <strong>Low</strong> <strong>Light</strong> <strong>Situations</strong> <strong>Page</strong> 15
“ ”<br />
ARE YOU INTERESTED IN LEARNING THE STEP-BY-STEP<br />
PROCESS I USED TO CAPTURE THE IMAGES IN THIS BOOK?<br />
If so please CLICK HERE <strong>to</strong> check out the FroKnowsPho<strong>to</strong> <strong>Guide</strong> To Gett<strong>in</strong>g Out Of Au<strong>to</strong>.<br />
Back Cover<br />
[Noah <strong>to</strong> send updated copy]<br />
<strong>Guide</strong> <strong>to</strong> <strong>Captur<strong>in</strong>g</strong> <strong>Motion</strong> <strong>in</strong> <strong>Low</strong> <strong>Light</strong> <strong>Situations</strong> <strong>Page</strong> 16