Connect

You also want an ePaper? Increase the reach of your titles
YUMPU automatically turns print PDFs into web optimized ePapers that Google loves.
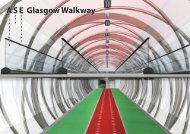
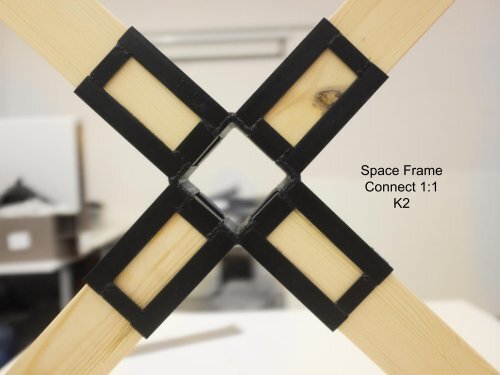
Space Frame<br />
<strong>Connect</strong> 1:1<br />
K2
Initial Research<br />
Square gridded Space Frame, timber<br />
members with a metal connection<br />
Research Initial Ideas Development Building Evaluation
Initial Model Building<br />
Overall Space frame 1:50 and<br />
Module size 1:20<br />
Research Initial Ideas Development Building Evaluation
Initial FEA Analysis<br />
Research Initial Ideas Development Building Evaluation
Renzo Piano - IBM Pavilion<br />
Research Initial Ideas Development Building Evaluation
Mero System<br />
Research Initial Ideas Development Building Evaluation
Concept - Finger joint<br />
Research Initial Ideas Development Building Evaluation
Research Initial Ideas Development Building Evaluation
Research Initial Ideas Development Building Evaluation
Research Initial Ideas Development Building Evaluation
Research Initial Ideas Development Building Evaluation
Failed 3D Model<br />
Prototype<br />
3d Model Prototype<br />
Research Initial Ideas Development Building Evaluation
Manufacturing and Assembly Development<br />
Research Initial Ideas Development Building Evaluation
3 Part Assembly<br />
Proposal<br />
for 1:1 Build<br />
Research Initial Ideas Development Building Evaluation
Research Initial Ideas Development Building Evaluation
Building Process<br />
Wood Work<br />
Cutting the Metal L<br />
Sections and bars<br />
Making a Jig for<br />
the Welding<br />
Prepping the Metal<br />
for Welding<br />
Welding<br />
Assembling<br />
Research Initial Ideas Development Building Evaluation
Cutting the Metal L<br />
Sections and Bars<br />
Workshop Notes<br />
16/01/15<br />
.Cut all L-sections needed for bottom part<br />
.Made sure that bar and more L-sections were ordered<br />
.Got advice on how to prepare for welding:<br />
- Cut 45deg off one bit for each weld<br />
- Get rid of oxide layer on both pieces<br />
- Weld top and bottom seperately, then combine<br />
- Make sure all angles are correct by creating a rig where the beams are nailed to a surface.<br />
(Height is not important here, only width). Use this for top and bottom and four bits of 70x70 for combining<br />
the two parts.<br />
Research Initial Ideas Development Building Evaluation
Prepping the Metal<br />
for Welding<br />
Filing away the coating of the metal<br />
19/01/15<br />
Chamfering the edges of some pieces<br />
19/01/15<br />
.Filed long L sections in prep for welding<br />
.Chamfered middle L-sections for welding (just a tiny bit of finishing left)<br />
.Ordered some wood for welding jig.<br />
Research Initial Ideas Development Building Evaluation
Making a Jig for<br />
the Welding<br />
Using leftover metal to create right angles<br />
20/01/15<br />
.Aquired, cut and<br />
chamfered bar-sections<br />
.Created welding jig for<br />
top and bottom<br />
.Varnish tested and<br />
aquired<br />
Research Initial Ideas Development Building Evaluation
Welding<br />
21/01/15<br />
.Minor adjustment to metal pieces pre-welding (lengths)<br />
.Welding started, top and bottom done<br />
.Jig: 4 70x70 pieces made<br />
22/01/15<br />
. Welding finished<br />
Research Initial Ideas Development Building Evaluation
Assembling<br />
Research Initial Ideas Development Building Evaluation
Next Steps<br />
Research Initial Ideas Development Building Evaluation