
Create successful ePaper yourself
Turn your PDF publications into a flip-book with our unique Google optimized e-Paper software.
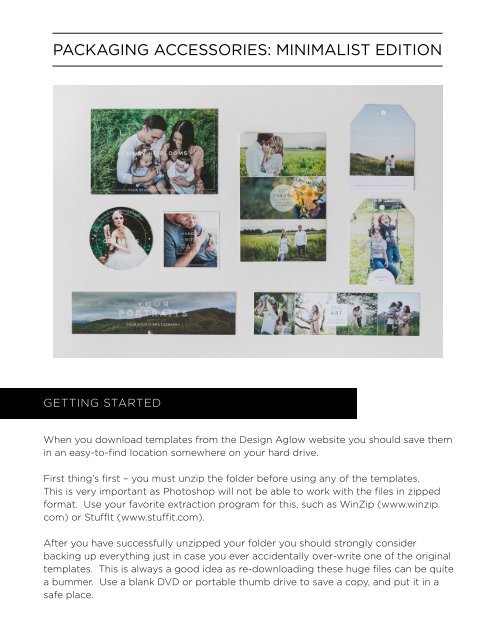
PACKAGING accessories: MINIMALIST edition<br />
GETTING STARTED<br />
When you download templates from the Design Aglow website you should save them<br />
in an easy-to-find location somewhere on your hard drive.<br />
First thing’s first – you must unzip the folder before using any of the templates.<br />
This is very important as Photoshop will not be able to work with the files in zipped<br />
format. Use your favorite extraction program for this, such as WinZip (www.winzip.<br />
com) or StuffIt (www.stuffit.com).<br />
After you have successfully unzipped your folder you should strongly consider<br />
backing up everything just in case you ever accidentally over-write one of the original<br />
templates. This is always a good idea as re-downloading these huge files can be quite<br />
a bummer. Use a blank DVD or portable thumb drive to save a copy, and put it in a<br />
safe place.
WHAT’S IN YOUR DOWNLOAD FOLDER<br />
• PHOTOSHOP FILES - This folder contains the PSD files you will be using in<br />
Photoshop.<br />
• JPEG PREVIEWS - This folder contains a small preview of each template for easy<br />
reference.<br />
• read_me_pretty_please_template_copyright.pdf – This text file contains a quick<br />
word on copyright.<br />
• <strong>TUTORIAL</strong>.pdf – This file is the tutorial you’re reading now.<br />
FONTS<br />
The text in the templates is fully editable. If you would like to edit it or add text to<br />
the template using the same font, we used Raleway. The fonts we use in our designs<br />
are usually freeware or shareware fonts available for free on the internet. We cannot<br />
include the fonts in your download because they are protected under copyright.<br />
However you can download them directly from their creators. We find that if you<br />
type in the name of the font into your favorite search engine you will come up with<br />
several download sources.<br />
SOFTWARE YOU WILL NEED<br />
These templates are designed for Adobe Photoshop CS or newer. This is not to say<br />
that they don’t work with previous versions – they very well may. The files are unflattened,<br />
fully editable Photoshop PSDs that offer literally limitless opportunity for<br />
customization and creativity.<br />
In order to take full advantage of these templates, you should be relatively proficient<br />
in Photoshop. Not an expert, mind you. But you should have a general knowledge<br />
of layers, shapes, text and image manipulation such as using the transform tool, layer<br />
masks, etc.<br />
If you are less familiar with Photoshop, don’t fear. We will try to be as thorough as<br />
possible with the tutorial – and hey, you might just learn something new!
INSERTING YOUR IMAGES<br />
It’s very easy to place your images into the templates using the following steps:<br />
1<br />
2<br />
3<br />
4<br />
5<br />
Locate the layer of the position you would like to populate in your layers<br />
palette, called “IMAGE LAYER 1”, “IMAGE LAYER 2”, etc.<br />
Click once on the layer to highlight it.<br />
Open the image you would like to insert into this position and drag it onto the<br />
template by using the “Move Tool” ( Keyboard shortcut “V”).<br />
Now, to get your image to fit within the square, we need to apply a “clipping<br />
mask”. To do this, go to LAYER -> CREATE CLIPPING MASK in our top menu in<br />
Photoshop. The image will now take on the shape of the opening.<br />
The image will probably not fit correctly within the frame at first, so at this<br />
time you can resize the image by using the “Free Transform Tool” (Keyboard<br />
Shortcut Control+T, or Apple T on a Mac). Resize the image by dragging in the<br />
corners of the transform frame and don’t forget to hold down the Shift Key to<br />
maintain perspective. When you are happy with the size and position of your<br />
image, simply press “Enter” to apply the transformation. Repeat this step for<br />
subsequent images.<br />
CUSTOMIZING YOUR TEXT<br />
As we said before, your templates can be customized in any way imaginable. You can<br />
change nearly everything about them including the fonts, colors, image placement,<br />
borders, and so on. Here’s a little info on how to customize text:<br />
To change the wording on your templates do the following:<br />
1<br />
2<br />
3<br />
4<br />
Select the Text Tool from your tools palette (keyboard shortcut “T”)<br />
Click on the line of text that you would like to change.<br />
Highlight the text by dragging the tool across it.<br />
Type to your heart’s content.
CUSTOMIZING THE COLORS<br />
Changing the colors of your templates could not be easier. Here are a few tips on<br />
how to change the text and graphic elements:<br />
TEXT – Perform the same steps as if you were to change the verbiage – text tool,<br />
click and highlight.<br />
1<br />
2<br />
3<br />
Double click on the top color box in your tools menu.<br />
Choose the color for your text.<br />
Click “OK”<br />
GRAPHICS – You will see that all of the graphics are in the form of shapes. This<br />
makes it very easy to change the color on the fly. Here’s how:<br />
1<br />
2<br />
3<br />
4<br />
Choose the color block that you would like to change in the Layers palette. If<br />
you cannot see the layers palette, click the “Window” dropdown menu at the<br />
top of your screen and choose “Layers”.<br />
Now, double-click the small box of color next to the name of the layer.<br />
Choose the new color when the dialog box appears.<br />
Click “OK”<br />
PRINTING YOUR TEMPLATES<br />
We have designed these templates to be used with ProDPI’s (www.prodpi.com)<br />
products. If you currently use ProDPI the templates are 100% ready to go.<br />
Don’t worry, however, if you use another lab as the templates can be printed<br />
easily with your favorite printer. Remember that each lab is different, so be<br />
absolutely sure that you contact them for their specs and color profiles prior<br />
to submitting your files. When you have your lab’s sizing and submission<br />
guidelines, you will need to transfer the designs to their templates before<br />
printing them.
PRINTING YOUR TEMPLATES (CONTINUED)<br />
These templates are fully customizable and can be printed in a many different<br />
ways. Take a look at the following examples and be inspired!<br />
jumbo bookmarks<br />
gift tags<br />
4x6 stickers<br />
circle sticker<br />
square sticker<br />
If you have any questions that we did not cover in this tutorial, please get in<br />
touch with us through our website.<br />
All the best,<br />
Design Aglow