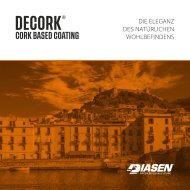
Kork Wandbeläge Wall-Coverings-Catalog_EN_P2P3
Wandbeläge aus Kork, Plattenware und Rollenware in verschiedenen Designs.
Wandbeläge aus Kork, Plattenware und Rollenware in verschiedenen Designs.

You also want an ePaper? Increase the reach of your titles
YUMPU automatically turns print PDFs into web optimized ePapers that Google loves.
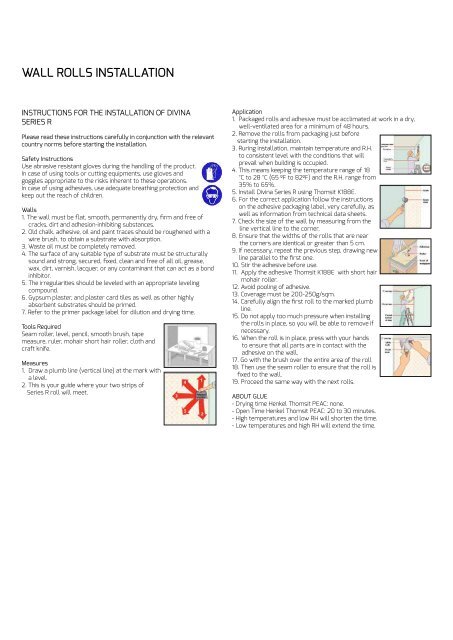
WALL ROLLS INSTALLATION<br />
INSTRUCTIONS FOR THE INSTALLATION OF DIVINA<br />
SERIES R<br />
Please read these instructions carefully in conjunction with the relevant<br />
country norms before starting the installation.<br />
Safety Instructions<br />
Use abrasive resistant gloves during the handling of the product.<br />
In case of using tools or cutting equipments, use gloves and<br />
goggles appropriate to the risks inherent to these operations.<br />
In case of using adhesives, use adequate breathing protection and<br />
keep out the reach of children.<br />
<strong>Wall</strong>s<br />
1. The wall must be flat, smooth, permanently dry, firm and free of<br />
cracks, dirt and adhesion-inhibiting substances.<br />
2. Old chalk, adhesive, oil and paint traces should be roughened with a<br />
wire brush, to obtain a substrate with absorption.<br />
3. Waste oil must be completely removed.<br />
4. The surface of any suitable type of substrate must be structurally<br />
sound and strong, secured, fixed, clean and free of all oil, grease,<br />
wax, dirt, varnish, lacquer, or any contaminant that can act as a bond<br />
inhibitor.<br />
5. The irregularities should be leveled with an appropriate leveling<br />
compound.<br />
6. Gypsum plaster, and plaster card tiles as well as other highly<br />
absorbent substrates should be primed.<br />
7. Refer to the primer package label for dilution and drying time.<br />
Tools Required<br />
Seam roller, level, pencil, smooth brush, tape<br />
measure, ruler, mohair short hair roller, cloth and<br />
craft knife.<br />
Measures<br />
1. Draw a plumb line (vertical line) at the mark with<br />
a level.<br />
2. This is your guide where your two strips of<br />
Series R roll will meet.<br />
Application<br />
1. Packaged rolls and adhesive must be acclimated at work in a dry,<br />
well-ventilated area for a minimum of 48 hours.<br />
2. Remove the rolls from packaging just before<br />
starting the installation.<br />
3. Ruring installation, maintain temperature and R.H.<br />
to consistent level with the conditions that will<br />
prevail when building is occupied.<br />
4. This means keeping the temperature range of 18<br />
°C to 28 °C (65 ºF to 82ºF) and the R.H. range from<br />
35% to 65%.<br />
5. Install Divina Series R using Thomsit K188E.<br />
6. For the correct application follow the instructions<br />
on the adhesive packaging label, very carefully, as<br />
well as information from technical data sheets.<br />
7. Check the size of the wall by measuring from the<br />
line vertical line to the corner.<br />
8. Ensure that the widths of the rolls that are near<br />
the corners are identical or greater than 5 cm.<br />
9. If necessary, repeat the previous step, drawing new<br />
line parallel to the first one.<br />
10. Stir the adhesive before use.<br />
11. Apply the adhesive Thomsit K188E with short hair<br />
mohair roller.<br />
12. Avoid pooling of adhesive.<br />
13. Coverage must be 200-250g/sqm.<br />
14. Carefully align the first roll to the marked plumb<br />
line.<br />
15. Do not apply too much pressure when installing<br />
the rolls in place, so you will be able to remove if<br />
necessary.<br />
16. When the roll is in place, press with your hands<br />
to ensure that all parts are in contact with the<br />
adhesive on the wall.<br />
17. Go with the brush over the entire area of the roll<br />
18. Then use the seam roller to ensure that the roll is<br />
fixed to the wall.<br />
19. Proceed the same way with the next rolls.<br />
ABOUT GLUE<br />
- Drying time Henkel Thomsit PEAC: none.<br />
- Open Time Henkel Thomsit PEAC: 20 to 30 minutes.<br />
- High temperatures and low RH will shorten the time.<br />
- Low temperatures and high RH will extend the time.