The Physics of LASERs - American Physical Society
The Physics of LASERs - American Physical Society
The Physics of LASERs - American Physical Society

You also want an ePaper? Increase the reach of your titles
YUMPU automatically turns print PDFs into web optimized ePapers that Google loves.
Teacher Edition<br />
<strong>The</strong> <strong>Physics</strong> <strong>of</strong> <strong>LASERs</strong><br />
APS Inquiry Lessons for High School <strong>Physics</strong> Students<br />
Heide Doss, Ed Lee, and Monica Plisch
Acknowledgments<br />
<strong>The</strong> <strong>Physics</strong> <strong>of</strong> <strong>LASERs</strong> was produced at the <strong>American</strong> <strong>Physical</strong> <strong>Society</strong> as a part <strong>of</strong> LaserFest, the celebration <strong>of</strong> the 50th<br />
anniversary <strong>of</strong> the creation <strong>of</strong> the laser. LaserFest was a joint project <strong>of</strong> the <strong>American</strong> <strong>Physical</strong> <strong>Society</strong>, IEEE Photonics<br />
<strong>Society</strong>, OSA, and SPIE.<br />
We are pleased to acknowledge the support <strong>of</strong> our funders:<br />
• National Science Foundation, Grant # PHY-0900403<br />
• U.S. Department <strong>of</strong> Energy, Grant # SC0001436<br />
Authors<br />
Heide Doss<br />
Ed Lee<br />
Monica Plisch<br />
Graphic Designer<br />
Nancy Bennett-Karasik<br />
Field Test Teachers<br />
Joe Boettcher<br />
Blair Magnet Program<br />
Silver Spring, MD<br />
Deward Houck, Esq.<br />
Steele Canyon Charter High School<br />
Spring Valley, CA<br />
Jeff Major<br />
High Tech High International<br />
Point Loma, CA<br />
James Schafer<br />
Blair Magnet Program<br />
Silver Spring, MD<br />
Other Contributors<br />
Chris Discenza, <strong>American</strong> <strong>Physical</strong> <strong>Society</strong><br />
Steve Rolston, University <strong>of</strong> Maryland<br />
Becky Thompson, <strong>American</strong> <strong>Physical</strong> <strong>Society</strong><br />
Educational Innovations<br />
Lesson 2 <strong>of</strong> <strong>The</strong> <strong>Physics</strong> <strong>of</strong> <strong>LASERs</strong> is based on the PhET Lasers simulation, which was produced in the physics department<br />
<strong>of</strong> the University <strong>of</strong> Colorado at Boulder. We highly recommend the PhET simulations to physics students and<br />
teachers.<br />
Copyright 2010 <strong>American</strong> <strong>Physical</strong> <strong>Society</strong><br />
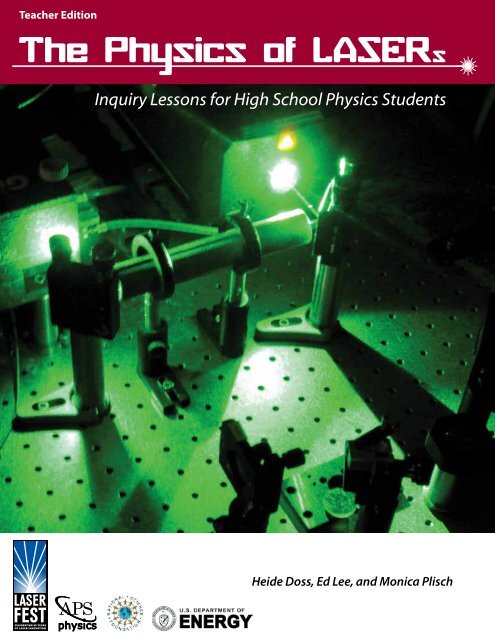
Cover Image: Green diode-pumped solid state laser pumping a Titanium Sapphire laser. Image courtesy <strong>of</strong>: Sara DeSavage and Kyle Gordon,<br />
Laboratory <strong>of</strong> F.A. Narducci, Naval Air Systems Command, Patuxent River, Md<br />
1
2<br />
Table <strong>of</strong> Contents<br />
Teacher Introduction<br />
Acknowledgements ..................................................................................... 1<br />
Intro to Teacher Edition ...............................................................................3<br />
Lesson 1. What’s Special about LASER Light? ................................. 8<br />
Lesson 2. How Does a LASER Work? ..................................................18<br />
Lesson 3. What are Some Applications <strong>of</strong> <strong>LASERs</strong>? .......................30<br />
Appendix ..........................................................................................................40
Teacher Introduction<br />
Introduction to Teacher Edition<br />
Summary for all Lessons<br />
<strong>The</strong>se lessons were written to celebrate the 50 th birthday <strong>of</strong> the LASER. <strong>The</strong> first working LASER was created on May 17,<br />
1960.<br />
This set <strong>of</strong> three laser lessons introduces students to the properties <strong>of</strong> lasers, the fundamental components <strong>of</strong> a laser, and<br />
some applications <strong>of</strong> lasers. <strong>The</strong> first lesson provides students with hands-on experiences to gain understanding <strong>of</strong> the special<br />
properties <strong>of</strong> laser light: monochromatic, collimated, and coherent. <strong>The</strong> second lesson focuses on the parts <strong>of</strong> a laser (an<br />
energy source, an active medium, and a resonant cavity), and has students explore how to build a laser using a computer<br />
simulation (PhET simulator from the University <strong>of</strong> Colorado at Boulder). In the third lesson students investigate applications<br />
<strong>of</strong> the laser. Students explore how information is transmitted using light, use lasers to measure the width <strong>of</strong> a hair,<br />
model X-ray diffraction <strong>of</strong> DNA, and produce a speckle pattern like that used to measure blood flow. By the end <strong>of</strong> these<br />
lessons students should have a good idea <strong>of</strong> what makes laser light special, how it is produced, and how it can be used.<br />
You can find more information about lasers at the LaserFest and <strong>Physics</strong>Central websites.<br />
Using this Teacher Edition<br />
Written instructions within the teacher’s edition are meant for the teacher to use to assist students. In general the student’s<br />
edition is not to be used as a set <strong>of</strong> instructions that students independently follow. <strong>The</strong> only parts <strong>of</strong> the lesson that students<br />
could do independently are in Lesson II, Parts A and B that have students explore how to build a laser using a computer<br />
simulation.<br />
To reduce photocopying, a single class set <strong>of</strong> student lesson sheets could be produced and used for all classes. Students<br />
could record their responses on their own paper.<br />
<strong>The</strong> following symbols appear within these lessons:<br />
(record results) (discuss) (safety)<br />
Prerequisites<br />
<strong>The</strong>se lessons assume that students understand the following concepts:<br />
• Light travels in straight lines.<br />
• Light is an electromagnetic wave.<br />
• Light can be represented as a particle (photon - a packet <strong>of</strong> light energy).<br />
• Waves can interfere.<br />
• Different colors <strong>of</strong> light have different wavelengths.<br />
!<br />
Safety<br />
Lasers are powerful light sources that can harm the eye, and even though some are inexpensive, they are not toys. If a<br />
student stares deliberately into a laser beam, permanent and irreparable eye damage can occur. Because <strong>of</strong> this, it is suggested<br />
that students use a Class II laser. Class II lasers are no more powerful than 1 mW and the blink reflex will prevent<br />
eye damage, unless deliberate staring into the beam occurs. Most laser pointers are Class III A lasers, which are rated up<br />
to 5 mW. Class III A lasers can cause permanent and irreparable eye damage if they are used with lenses and mirrors or if<br />
direct viewing <strong>of</strong> the beam occurs. Viewing <strong>of</strong> the beam reflected from surfaces such as mirrors will also cause permanent<br />
and irreparable damage. To reduce the chance <strong>of</strong> eye damage, do not completely darken the room.<br />
This unit specifies several simple precautions that prevent direct viewing <strong>of</strong> the beam:<br />
• Students perform the activities in a normal sitting position, so their eyes are well above the level <strong>of</strong> the tabletop.<br />
• <strong>The</strong> laser is placed at or very near tabletop level, and is aimed either horizontally or down at the table.<br />
<strong>The</strong> National Science Teachers Association recommends that students below high school level should not handle laser<br />
pointers, rather the teacher should perform demonstrations with the laser pointer. 1 Additionally, it is suggested that safety<br />
posters be displayed in the classroom when using lasers. If conducting the optional Part A <strong>of</strong> Lesson 3, review the safety issues<br />
involved with the different classes <strong>of</strong> lasers. <strong>The</strong> Spectra Sound kit includes in it a Class III A laser. Safety information<br />
for lasers can be found online by conducting an Internet search on “laser safety”.<br />
1 Roy, K. (2007). Shedding Light on Laser Pointer Safety, Science Scope, Summer 2007<br />
!<br />
<strong>The</strong> <strong>Physics</strong> <strong>of</strong> <strong>LASERs</strong>, Teacher Edition<br />
3
Materials<br />
Complete Kit List<br />
4<br />
Teacher Introduction<br />
Item Used in Lesson<br />
1 red LED per group 1<br />
1 white LED per group 1, 3<br />
1 laser pointer (class II) per group 1, 3<br />
1 diffraction grating per group 1<br />
1 spring per group 3<br />
1 slide holder per group 3<br />
Optional – Spectra Sound kit 1 (http://www.laserfest.org/about/store/) 3<br />
Additional Materials Needed<br />
Item Used in Lesson<br />
projection system 1, 2, 3<br />
meter stick 1, 3<br />
1 flashlight – teacher demonstration 1<br />
masking tape 1, 2, 3<br />
colored markers 1, 2<br />
colored paper such as sticky notes (red, orange, yellow, blue, green, and purple) 1<br />
construction paper (red) 2<br />
optional box or box lid to block ambient light 1, 3<br />
optional: 1 bulb in bulb holder, 2 batteries, 3 connecting wires, and aperture per group 1<br />
computer(s) per group or class with PhET simulator downloaded or internet connection, found 2<br />
at URL listed below or by conducting an Internet search on the words, “PhET laser simulator”<br />
http://phet.colorado.edu/simulations/sims.php?sim=Lasers<br />
1 Adapted from the <strong>American</strong> <strong>Physical</strong> <strong>Society</strong>’s Spectra Sound kit<br />
Timeline for Lessons<br />
<strong>The</strong> full set <strong>of</strong> Laser Lessons takes approximately 200 minutes or five 40 minute class periods. Lesson 1 takes approximately<br />
80 minutes (two 40 minute class periods). Lesson 2 takes approximately 80 minutes or 40 minutes if Parts A and B are assigned<br />
as out-<strong>of</strong>-class work. Lesson 3 takes one 40 minute class.<br />
If you have limited time; after completing Lesson 1, consider doing only the explanation part <strong>of</strong> Lesson 2 during class time.<br />
Lesson 2, Parts A and B can be assigned as homework or skipped if needed. We recommend completing Lesson 3.<br />
National Education Standards Addressed by Laser Lessons<br />
<strong>The</strong>se lessons may address some <strong>of</strong> your state science standards. Some common national standards for 9 th -12 th grade that<br />
this lesson addresses or meets are listed on the following pages.
Teacher Introduction<br />
<strong>American</strong> Association for the Advancement <strong>of</strong> Science (AAAS)<br />
Lessons<br />
Benchmark<br />
Nature <strong>of</strong> Science<br />
Investigations are conducted for different reasons, including: to explore new phenomena, to 1, 2, 3<br />
check on previous results, to test how well a theory predicts, and to compare theories. 1B/H1<br />
<strong>The</strong>re are different traditions in science about what is investigated and how, but they all share a 1, 2, 3<br />
commitment to the use <strong>of</strong> logical arguments based on empirical evidence. 1B/H4*<br />
To be useful, a hypothesis should suggest what evidence would support it and what evidence 1<br />
would refute it. A hypothesis that cannot, in principle, be put to the test <strong>of</strong> evidence may be<br />
interesting, but it may not be scientifically useful. 1B/H9** (SFAA)<br />
Bias attributable to the investigator, the sample, the method, or the instrument may not be com- 1, 3<br />
pletely avoidable in every instance, but scientists want to know the possible sources <strong>of</strong> bias and<br />
how bias is likely to influence evidence. 1B/H10** (SFAA)<br />
Because science is a human activity, what is valued in society influences what is valued in sci- 3<br />
ence. 1C/H10** (SFAA)<br />
<strong>The</strong> Nature <strong>of</strong> Technology<br />
One way science affects society is by stimulating and satisfying people’s curiosity and enlarg- 1, 3<br />
ing or challenging their views <strong>of</strong> what the world is like. 3A/H3b*<br />
<strong>The</strong> <strong>Physical</strong> Setting<br />
Waves can superpose on one another, bend around corners, reflect <strong>of</strong>f surfaces, ... these effects 1, 2, 3<br />
vary with wavelength. 4F/H6ab<br />
<strong>The</strong> energy <strong>of</strong> waves (like any form <strong>of</strong> energy) can be changed into other forms <strong>of</strong> energy. 4F/ 2<br />
H6c<br />
Although the various forms <strong>of</strong> energy appear very different, each can be measured in a way 2<br />
that makes it possible to keep track <strong>of</strong> how much <strong>of</strong> one form is converted into another. Whenever<br />
the amount <strong>of</strong> energy in one place diminishes, the amount in other places or forms increases<br />
by the same amount. 4E/H1*<br />
When energy <strong>of</strong> an isolated atom or molecule changes, it does so in a definite jump from one 2<br />
value to another, with no possible values in between. <strong>The</strong> change in energy occurs when light is<br />
absorbed or emitted, so the light also has distinct energy values. <strong>The</strong> light emitted or absorbed<br />
by separate atoms or molecules (as in a gas) can be used to identify what the substance is. 4E/<br />
H5*<br />
If no energy is transferred into or out <strong>of</strong> a system, the total energy <strong>of</strong> all the different forms in 2<br />
the system will not change, no matter what gradual or violent changes actually occur within<br />
the system. 4E/H10** (SFAA)<br />
In empty space, all electromagnetic waves move at the same speed—the “speed <strong>of</strong> light.” 4F/H3c* 1 (could be discussed)<br />
<strong>The</strong> Designed World<br />
Lasers are a new tool for focusing radiation energy with great intensity and control. 8C/H1c 1, 2, 3<br />
… <strong>The</strong> instructions and data input <strong>of</strong> a computer model try to represent the real world so the 2<br />
computer can show what would actually happen. In this way, computers assist people in making<br />
decisions by simulating the consequences <strong>of</strong> different possible decisions. 8E/H1<br />
Common <strong>The</strong>mes<br />
Understanding how things work and designing solutions to problems <strong>of</strong> almost any kind can 2<br />
be facilitated by systems analysis. In defining a system, it is important to specify its boundaries<br />
and subsystems, indicate its relation to other systems, and identify what its input and output<br />
are expected to be. 11A/H2<br />
<strong>The</strong> <strong>Physics</strong> <strong>of</strong> <strong>LASERs</strong>, Teacher Edition<br />
5
6<br />
Teacher Introduction<br />
Models are <strong>of</strong>ten used to think about processes that happen too slowly, too quickly, or on too 1, 2, 3<br />
small a scale to observe directly. <strong>The</strong>y are also used for processes that are too vast, too complex,<br />
or too dangerous to study. 11B/M1*<br />
Computers have greatly improved the power and use <strong>of</strong> mathematical models by performing 2, 3<br />
computations that are very long, very complicated, or repetitive. <strong>The</strong>refore, computers can<br />
reveal the consequences <strong>of</strong> applying complex rules or <strong>of</strong> changing the rules. <strong>The</strong> graphic capabilities<br />
<strong>of</strong> computers make them useful in the design and simulated testing <strong>of</strong> devices and<br />
structures and in the simulation <strong>of</strong> complicated processes. 11B/H2*<br />
Whatever happens within a system, such as parts exploding, decaying, or reorganizing, some 2<br />
features, such as the total amount <strong>of</strong> matter and energy, remain precisely the same. 11C/H10**<br />
(SFAA)<br />
Graphs and equations are useful (and <strong>of</strong>ten equivalent) ways for depicting and analyzing pat- 3<br />
terns <strong>of</strong> change. 11C/H4<br />
Representing very large or very small numbers in terms <strong>of</strong> powers <strong>of</strong> ten makes it easier to 3<br />
perform calculations using those numbers. 11D/H1*<br />
Habits <strong>of</strong> Mind<br />
Exhibit traits such as curiosity, honesty, openness, and skepticism when making investigations, 1, 2, 3<br />
and value those traits in others. 12A/H1*<br />
View science and technology thoughtfully, being neither categorically antagonistic nor uncriti- 1, 2, 3<br />
cally positive. 12A/H2<br />
Scientists value evidence that can be verified, hypotheses that can be tested, and theories that 1, 2, 3<br />
can be used to make predictions. 12A/H4** (SFAA)<br />
Curiosity motivates scientists to ask questions about the world around them and seek answers 1, 2, 3<br />
to those questions. Being open to new ideas motivates scientists to consider ideas that they had<br />
not previously considered. Skepticism motivates scientists to question and test their own ideas<br />
and those that others propose. 12A/H5*<br />
Find answers to real-world problems by substituting numerical values in simple algebraic for- 3<br />
mulas and check the answer by reviewing the steps <strong>of</strong> the calculation and by judging whether<br />
the answer is reasonable. 12B/H2*<br />
When describing and comparing very small and very large quantities, express them using 3<br />
powers-<strong>of</strong>-ten notation. 12B/H6*<br />
Consider the possible effects <strong>of</strong> measurement errors on calculations. 12B/H9 1, 3<br />
Follow instructions in manuals or seek help from an experienced user to learn how to operate 3 (optional part)<br />
new mechanical or electrical devices. 12C/H1*<br />
Make and interpret scale drawings. 12D/H1 1, 2, 3<br />
Use and correctly interpret relational terms such as if… then…, and, or, sufficient, necessary, some, 1, 2, 3<br />
every, not, correlates with, and causes. 12D/H5<br />
Participate in group discussions on scientific topics by restating or summarizing accurately 1, 2, 3<br />
what others have said, asking for clarification or elaboration, and expressing alternative positions.<br />
12D/H6<br />
Use tables, charts, and graphs in making arguments and claims in oral, written, and visual 1, 2. 3<br />
presentations. 12D/H7*<br />
Use symbolic equations to represent relationships between objects and events. 12D/H8** 3
Teacher Introduction<br />
Notice and criticize claims based on the faulty, incomplete, or misleading use <strong>of</strong> numbers, such 1, 2, 3<br />
as in instances when (1) average results are reported but not the amount <strong>of</strong> variation around the<br />
average, (2) a percentage or fraction is given but not the total sample size, (3) absolute and proportional<br />
quantities are mixed, or (4) results are reported with overstated precision. 12E/H1*<br />
Consider whether some event <strong>of</strong> interest might have occurred just by chance. 12E/H3* 1, 3<br />
Insist that the key assumptions and reasoning in any argument—whether one’s own or that <strong>of</strong> 1, 2, 3<br />
others—be made explicit; analyze the arguments for flawed assumptions, flawed reasoning, or<br />
both; and be critical <strong>of</strong> the claims if any flaws in the argument are found. 12E/H4*<br />
Notice and criticize claims that people make when they select only the data that support the 1, 2, 3<br />
claim and ignore any that would contradict it. 12E/H5*<br />
Notice and criticize arguments in which data, reasoning, or claims are represented as the only 1, 2, 3<br />
ones worth considering, with no mention <strong>of</strong> other possibilities. 12E/H6a*<br />
Suggest alternative trade-<strong>of</strong>fs in decisions and designs and criticize those in which major trade<strong>of</strong>fs<br />
are not acknowledged. 12E/H6b<br />
National Science Education Standards (NSES) Lessons<br />
1 (Optional activity<br />
only), 2<br />
Unifying Concepts and Processes<br />
Systems, order, and organization 1, 2, 3<br />
Evidence, models, and explanation 1, 2, 3<br />
Change, constancy, and measurement<br />
Science as Inquiry<br />
1, 2, 3<br />
Abilities necessary to do scientific inquiry 1, 2, 3<br />
Understandings about scientific inquiry<br />
<strong>Physical</strong> Science<br />
1, 2, 3<br />
Motions and forces 1, 2, 3<br />
Interactions <strong>of</strong> energy and matter 1, 2, 3<br />
Structure <strong>of</strong> atoms 2<br />
Structure and properties <strong>of</strong> matter 2<br />
Conservation <strong>of</strong> energy and increase in disorder<br />
Science and Technology<br />
2<br />
Understandings about science and technology 1, 2, 3<br />
Abilities <strong>of</strong> technological design<br />
Science in Personal and Social Perspectives<br />
2<br />
Natural and human-induced hazards 1, 2, 3<br />
Science and technology in local, national, and global challenges<br />
History and Nature <strong>of</strong> Science<br />
1, 3<br />
Science as a human endeavor 1, 2, 3<br />
Nature <strong>of</strong> scientific knowledge 1, 2, 3<br />
Historical perspectives 1 (optional video at<br />
end), 3<br />
<strong>The</strong> <strong>Physics</strong> <strong>of</strong> <strong>LASERs</strong>, Teacher Edition<br />
7
8<br />
Lesson 1.<br />
What’s Special about LASER Light?<br />
Goal<br />
Through an investigation students describe properties that distinguish laser<br />
light from other common light sources, namely that it is monochromatic, collimated,<br />
and coherent.<br />
Time: 80 minutes<br />
Summary <strong>of</strong> Lesson 1<br />
In the first part <strong>of</strong> this lesson students obtain evidence to support the idea<br />
that laser light is monochromatic (<strong>of</strong> a single color, or equivalently, a single<br />
wavelength). <strong>The</strong>y observe how light from a red laser pointer, a red LED, and<br />
a white LED interact with a diffraction grating. <strong>The</strong>ir observations provide<br />
evidence that the light from the red and white LEDs is composed <strong>of</strong> more<br />
than one color (more than one wavelength), whereas the laser light contains<br />
only one color (only one wavelength).<br />
During the second part <strong>of</strong> this activity, students are provided with evidence<br />
that laser light is collimated (the light produced is composed <strong>of</strong> parallel light<br />
waves). By comparing how laser light and red LED light spread as they travel,<br />
students obtain qualitative evidence. Students then collect quantitative<br />
evidence by measuring how the beam width varies with distance. As an enrichment<br />
activity students could quantitatively compare the collimation <strong>of</strong><br />
laser light and another light source (e.g. a bulb).<br />
<strong>The</strong> third part <strong>of</strong> this activity presents students with the concept <strong>of</strong> coherence.<br />
Coherent light is composed <strong>of</strong> light waves that have a constant relative<br />
phase. Students shine LED and laser light on paper and compare the reflections.<br />
With a discussion about the interference <strong>of</strong> light waves reflected <strong>of</strong>f the<br />
paper and entering the eye, students explain their observations. After these<br />
experiences, students are introduced to the concept <strong>of</strong> coherence.<br />
Students participate in a kinesthetic model in which the students model the<br />
light from a white LED, a red LED, and a laser. <strong>The</strong> class concludes this lesson<br />
by summarizing the special properties <strong>of</strong> laser light.<br />
!<br />
Safety<br />
Lasers are powerful light sources that can cause permanent eye damage. If a<br />
student stares deliberately into a laser beam, permanent and irreparable eye<br />
damage can occur. Because <strong>of</strong> this, it is suggested that students use a Class II<br />
laser. Class II lasers are no greater than 1 mW, and the blink reflex will prevent<br />
eye damage, unless deliberate staring into the beam occurs. Most laser<br />
pointers are Class III A lasers, which are up to 5 mW. Class III A lasers can<br />
cause permanent and irreparable eye damage if they are used with lenses or<br />
mirrors or if direct viewing <strong>of</strong> the beam occurs. Direct viewing <strong>of</strong> the beam<br />
<strong>of</strong>f <strong>of</strong> highly reflective surfaces such as mirrors can also cause permanent and<br />
irreparable damage. <strong>The</strong> National Science Teachers Association recommends that students below high school level should<br />
not handle laser pointers, rather the teacher should perform demonstrations with the laser pointer. 1 Additionally, it is suggested<br />
that safety posters be displayed in the classroom when using lasers.<br />
To reduce the chance <strong>of</strong> eye damage, do not completely darken the room.<br />
1 Roy, K. (2007). Shedding Light on Laser Pointer Safety, Science Scope, Summer 2007<br />
Prerequisites<br />
<strong>The</strong>se lessons assume that students understand<br />
the following concepts:<br />
• Light travels in straight lines.<br />
• Light is an electromagnetic wave.<br />
• Light can be represented as a particle<br />
(photon - a packet <strong>of</strong> light energy).<br />
• Waves can interfere.<br />
• Different colors <strong>of</strong> light have different<br />
wavelengths.<br />
Materials<br />
• 1 red LED per group<br />
• 1 white LED per group<br />
• 1 laser pointer per group<br />
• 1 meter stick per group<br />
• 1 sheet <strong>of</strong> white paper per group<br />
• 1 diffraction grating per group<br />
• optional: 1 box or box lid per group, to<br />
help block ambient light<br />
• masking tape<br />
• colored paper or cards in red, orange,<br />
yellow, green, blue, and violet<br />
• optional: Colored markers (red, orange,<br />
yellow, green, blue, violet)<br />
• optional: Masking tape marked with<br />
the six colors listed above or colored<br />
tape<br />
• optional: 1 bulb in bulb holder, 2<br />
batteries, 3 connecting wires, and<br />
aperture per group<br />
• optional: rigid object, like a meter stick,<br />
to help students understand that light<br />
<strong>of</strong> different colors travels at the same<br />
speed
Lesson 1 - Teacher Edition<br />
Preparation before class<br />
Cut the plastic grating sheet to fit the slide mount. It<br />
should be slightly larger than the slide opening and<br />
should not overlap any <strong>of</strong> the pins. Tape the slide together<br />
on all four sides so the grating cannot drop out. You<br />
will need one mounted diffraction grating per group.<br />
In the last part <strong>of</strong> Lesson 1, students will take part in kinesthetic<br />
models to help them understand the properties <strong>of</strong><br />
laser light. Students will model the different light sources<br />
they observed by representing photons (packets <strong>of</strong> light<br />
energy) that the light sources produce. <strong>The</strong>ir stride length<br />
will represent the wavelength (color). Red light will have<br />
the longest wavelength and hence the red stride length<br />
should be the longest (about 1 m). Violet light will have<br />
the shortest wavelength, and has just over half the wavelength<br />
<strong>of</strong> red light, so it should be represented by just<br />
over half the stride length selected for red light. In order<br />
to simulate the mirrors <strong>of</strong> a laser cavity, you will need a<br />
space about five students wide, and long enough to allow<br />
at least five stride lengths representing red light. Use<br />
objects such as walls or desks to represent the two mirrors<br />
<strong>of</strong> the laser cavity. If your floor has a pattern on it,<br />
you could determine the lengths based on some amount<br />
<strong>of</strong> the pattern, for example, 2.0 tiles for violet light, 2.5<br />
tiles for green light, 3.0 tiles for red light. Another method<br />
might be to lay down meter sticks on the floor and label<br />
them with colored sticky notes.<br />
A table with the approximate range <strong>of</strong> wavelengths for<br />
each color in the visible spectrum, the average wave-<br />
Teacher’s Notes<br />
Teacher Edition Lesson 1: Properties <strong>of</strong> LASER light<br />
length for each, and a suggested value for the stride length is<br />
provided below.<br />
Color <strong>of</strong> Light Approximate<br />
range <strong>of</strong> wavelengths<br />
(nm)<br />
Suggested Stride<br />
length<br />
Red 635-700 1 (set = 1 m)<br />
Orange 590-635 0.92<br />
Yellow 560-590 0.86<br />
Green 490-560 0.79<br />
Blue 450-490 0.70<br />
Violet 400-450 0.64<br />
Note: You could emphasize the relationship between frequency<br />
and wavelength by having one student represent a<br />
red light wave, and another represent violet, but have the student<br />
representing violet light take “baby” steps for its wavelength<br />
and the student representing red light take “giant”<br />
steps. Since light waves travel at the same speed in air, the<br />
two students would have to stay side-by-side as they walked<br />
around, showing that they travel at the same speed. This is<br />
a good way to emphasize that violet light has a small wavelength<br />
(step length) and a high frequency (number <strong>of</strong> steps<br />
per second), whereas red light has a large wavelength (step<br />
length) and a low frequency (number <strong>of</strong> steps per second).<br />
You should emphasize that this is an exaggeration <strong>of</strong> the difference<br />
between the wavelengths <strong>of</strong> visible light so that students<br />
do not end up with misconceptions about their wavelengths<br />
and frequencies.<br />
<strong>The</strong> <strong>Physics</strong> <strong>of</strong> <strong>LASERs</strong>, Teacher Edition<br />
9
Teacher Edition Lesson 1: Properties <strong>of</strong> LASER light<br />
I. What’s Special about Laser Light?<br />
Introductory Questions<br />
You could use these questions as a warm up for the<br />
class. Consider having them displayed when students<br />
walk in the classroom.<br />
Facilitate a class discussion on students’ initial<br />
ideas about properties <strong>of</strong> laser light, and encourage<br />
students to provide their reasoning. Record students’<br />
ideas as you may want to revisit these ideas<br />
at the end <strong>of</strong> this lesson.<br />
Some initial ideas students have expressed about laser light:<br />
Laser light is fast, bright, fluorescent, not fluorescent,<br />
infrared, many colors, one color, can be different<br />
colors, red, blue, green, not white. You can see<br />
the thin line going to a dot <strong>of</strong> light - like the laser<br />
line for building things, or laser lines used to detect<br />
if an object is in the way <strong>of</strong> garage doors. <strong>The</strong> most<br />
common laser light is red because it can travel the<br />
farthest. Laser light is special light that can blind<br />
people. Lasers can be weapons. Lasers are like a<br />
frequency. Most lights like the ones above us are<br />
burning out and dispersing, but lasers last longer<br />
and they can’t bounce <strong>of</strong>f <strong>of</strong> objects; you see an object<br />
because light reflects <strong>of</strong>f <strong>of</strong> it but a laser is not<br />
reflective like that.<br />
A. What is special about the color <strong>of</strong> laser<br />
light?<br />
Notes on Student Edition, Part A, Step 1<br />
It is generally good practice when teaching a concept<br />
to have students verbalize what they think<br />
first and then do an activity that refutes misconceptions<br />
and supports correct ideas. Students should<br />
discuss what they think after the activity based on<br />
their observations and logical reasoning.<br />
Have a class discussion on students’ ideas. Having<br />
students consider this question will focus their<br />
thinking as they do the activity and it will provide<br />
you with some <strong>of</strong> their prior knowledge and possible<br />
misconceptions that may be addressed with<br />
this activity.<br />
Goal <strong>of</strong> Part A: Students should be able to state<br />
that laser light is monochromatic and provide some<br />
supporting evidence for this.<br />
Some initial ideas students have expressed about the color <strong>of</strong><br />
laser light:<br />
fast, bright, fluorescent, not fluorescent, infrared,<br />
many colors, one color, can be different colors, red,<br />
blue, green, not white. Some colors can’t be made,<br />
for example, colors not seen by the human eye. Red<br />
is the most common laser light because it can travel<br />
the farthest. Red is the most concentrated [bright]<br />
light. Most lasers are red because it is easy to see,<br />
can see through smoke. Lasers like a frequency,<br />
most lights like the ones above us are burning out<br />
and dispersing, but lasers last longer and they can’t<br />
bounce <strong>of</strong>f objects, see white board because light<br />
10<br />
<strong>The</strong> <strong>Physics</strong> <strong>of</strong> <strong>LASERs</strong>, Teacher Edition<br />
Student Edition Lesson 1: Properties <strong>of</strong> LASER light<br />
Lesson 1.<br />
!<br />
Introductory Questions<br />
• Where do you see lasers in your everyday experiences?<br />
• Lasers have many applications because laser light has special properties. What<br />
do you think these properties are?<br />
Discuss your ideas with your group and write down your group’s ideas. Be prepared to<br />
share your group’s ideas with the class.<br />
Goal<br />
By the end <strong>of</strong> this lesson you should be able to describe the properties <strong>of</strong> laser light that<br />
make it different from light produced by other light sources, along with supporting observations<br />
made during this lesson.<br />
Safety<br />
Never look directly into the laser beam. Never look at laser light reflected <strong>of</strong>f <strong>of</strong> a highly<br />
reflective surface like a mirror or a ring. Instead, view a reflection <strong>of</strong> the beam from a piece<br />
<strong>of</strong> paper or a wall. Viewing laser light directly can burn your eye, causing permanent damage.<br />
A. What is special about the color <strong>of</strong> laser light?<br />
2 <strong>The</strong> <strong>Physics</strong> <strong>of</strong> <strong>LASERs</strong><br />
What’s Special about LASER Light?<br />
Materials list<br />
• red LED (light emitting diode)<br />
• white LED<br />
• laser pointer<br />
• diffraction grating (in slide mount)<br />
• 1 sheet <strong>of</strong> white paper (8.5” x 11”)<br />
1. With your group discuss what you think is special<br />
about the color <strong>of</strong> laser light. Be ready to share your<br />
group’s ideas with the class. By the end <strong>of</strong> Part A,<br />
you should be able to answer this question with supporting<br />
observations.<br />
2. Find the slide that has clear plastic in it. This tool is<br />
called a diffraction grating. <strong>The</strong> diffraction grating<br />
separates the wavelengths <strong>of</strong> the light being viewed<br />
through it. Hold this slide by the plastic frame; do<br />
not touch the clear plastic in the frame.<br />
3. Before making observations, watch your teacher<br />
demonstrate for you how to observe the light sources.<br />
Student Version Page 2<br />
Laser<br />
35mm slide mount<br />
with di�raction grating<br />
LED<br />
Grooves are<br />
too closely<br />
spaced to<br />
be visible<br />
without a<br />
microscope.<br />
Image credit: Nancy Bennett-Karasik, @ <strong>American</strong><br />
<strong>Physical</strong> <strong>Society</strong><br />
reflects <strong>of</strong>f <strong>of</strong> it but a laser is not reflective like that. Maybe each color<br />
can do different things. Maybe [there are] 3 or 4 colors.<br />
Part A, Step 3<br />
Demonstrate for students how to hold the LED light sources and<br />
view them through the diffraction grating. (See the diagram in the<br />
Student Edition, Step 4). In one hand, hold the diffraction grating<br />
by its frame, near your eye. In the other hand, at an arm’s length<br />
away, hold the LED so it points sideways (not directly at the eyes).<br />
<strong>The</strong> purpose <strong>of</strong> this is to make the LED as much <strong>of</strong> a point source as<br />
possible, which will make it easier to notice the diffracted light, and<br />
this is generally safer for the eye. Emphasize to students not to look<br />
into the laser beam. <strong>The</strong>y should shine the laser <strong>of</strong>f <strong>of</strong> a non-shiny<br />
surface that is below eye level. <strong>The</strong> laser should be held an arms<br />
length away, pointing down toward the surface below eye level, and<br />
the diffraction grating should be held near the eye.<br />
Point out to students that this isn’t a fair test because the light sources<br />
are being viewed differently. However they cannot look at the<br />
laser beam directly. <strong>The</strong> reflected laser light <strong>of</strong>f <strong>of</strong> the table is not as<br />
strong and gives similar results when viewing it through the diffraction<br />
grating.<br />
Have students read Steps 4 through 8. Let students know how much<br />
time they have to complete Steps 4 through 8, and then darken the<br />
room.
!<br />
Student Edition Lesson 1: Properties <strong>of</strong> LASER light<br />
4. What do you think you will see when you look at the …<br />
• white LED directly through the diffraction grating?<br />
• red LED directly through the diffraction grating?<br />
• laser light reflected <strong>of</strong>f a sheet <strong>of</strong> paper through the diffraction grating?<br />
5. Hold the diffraction grating near your eye and look<br />
at the lights in your classroom. Describe what you<br />
observe. Draw and label a diagram <strong>of</strong> what you see.<br />
6. As your teacher demonstrated, hold the white LED<br />
at about arm’s-length and point it sideways, as<br />
shown in the drawing. Hold the diffraction grating<br />
near your eye and look at the white LED. Draw a<br />
diagram showing what you observe, and label the<br />
colors that you see.<br />
7. Repeat Step 6 for the red LED.<br />
In the next step, for safety, point the laser down at<br />
the table, so the beam hits a piece <strong>of</strong> paper. Never<br />
look directly into laser light. It can burn your eye.<br />
8. Place a piece <strong>of</strong> paper on the table, below eye level. Shine the laser light down onto<br />
the paper, as shown in the drawing below. View the reflected laser light through the<br />
diffraction grating at a distance <strong>of</strong> an arm’s length away. Describe what you observe.<br />
Draw a diagram showing what you observe and label the colors that you see.<br />
Part A, Step 4<br />
Check that students record their expectations <strong>of</strong> what they will observe.<br />
Part A, Step 6<br />
Check students’ responses. Students’ descriptions should be similar<br />
to those listed below. Encourage students to list all the colors, the<br />
patterns, and shapes in their diagrams.<br />
Troubleshooting: Students should hold the diffraction grating near<br />
their eye. Rotating the grating by 90˚ will rotate the diffraction pattern<br />
by 90˚. Let students know that there may be diffracted ambient<br />
light that affects what they are viewing. Make sure the room<br />
lights are dimmed. To help students identify the light from the LED,<br />
have them move the LED back and forth and look for light patterns<br />
moving in the same way. Reflected light <strong>of</strong>f <strong>of</strong> the surface <strong>of</strong> the<br />
light source will also move; if they are seeing this, the lights can be<br />
dimmed further or a box could be used to shield the ambient light.<br />
Laser<br />
Beam<br />
Viewing the reflected laser light through a diffraction grating<br />
Student Version Page 3<br />
Image credit: Nancy Bennett-Karasik @ <strong>American</strong> <strong>Physical</strong><br />
<strong>Society</strong><br />
Viewing the LED through a diffraction grating<br />
Piece <strong>of</strong> paper<br />
on tabletop<br />
Image credit: Nancy Bennett-Karasik, @ <strong>American</strong> <strong>Physical</strong> <strong>Society</strong><br />
<strong>The</strong> <strong>Physics</strong> <strong>of</strong> <strong>LASERs</strong><br />
White LED viewed through a diffraction<br />
grating.<br />
Image credit: Ken Cole, APS<br />
<strong>The</strong> photograph and photocopying may not show the actual colors observed.<br />
3<br />
Teacher Edition Lesson 1: Properties <strong>of</strong> LASER light<br />
Note the colors observed (red, orange, yellow,<br />
green, blue, and violet) and the pattern observed<br />
(a narrow strip <strong>of</strong> light containing the colors <strong>of</strong> the<br />
rainbow).<br />
Part A, Step 7<br />
Check students’ responses. Students’ descriptions<br />
should match those below. Encourage students to<br />
list all the colors, the patterns, and shapes in their<br />
diagrams. Again, if students are having trouble<br />
viewing the source they should follow the procedure<br />
described in Step 6 troubleshooting.<br />
Red light viewed through a diffraction<br />
grating.<br />
Image credit: by Ken Cole, APS<br />
<strong>The</strong> photograph and photocopying may not show the<br />
actual colors observed.<br />
<strong>The</strong> red LED produces red, orange, yellow, and<br />
green light. Students may not observe all <strong>of</strong> these<br />
colors. <strong>The</strong> pattern should be similar to the pattern<br />
formed by the white LED.<br />
Part A, Step 8<br />
Check students’ responses. Students’ descriptions<br />
should be similar to the descriptions listed for the<br />
red laser pointer. Encourage students to draw detailed<br />
diagrams.<br />
Image credit: by Ken Cole, APS<br />
Reflected red laser pointer shining from a desk top<br />
when viewed through a diffraction grating.<br />
Only red light is observed. <strong>The</strong> pattern is a bright<br />
central spot along with two diffracted spots as<br />
shown in the photograph above. This narrow diffraction<br />
spot suggests that the red laser light is composed<br />
<strong>of</strong> one wavelength <strong>of</strong> light. (Note: if the diffracted<br />
light were a strip, rather than a dot, it would<br />
indicate that the red light was composed <strong>of</strong> a number<br />
<strong>of</strong> wavelengths).<br />
FYI: Laser light actually consists <strong>of</strong> a tiny range <strong>of</strong><br />
wavelengths, but this range cannot be observed<br />
with the equipment used in this lesson.<br />
<strong>The</strong> <strong>Physics</strong> <strong>of</strong> <strong>LASERs</strong>, Teacher Edition<br />
11
Teacher Edition Lesson 1: Properties <strong>of</strong> LASER light<br />
Part A, Step 9<br />
Check students’ responses. When viewing the<br />
LEDs through the diffraction grating, students<br />
should note that in the center <strong>of</strong> their field <strong>of</strong> view<br />
they saw the source almost unchanged from viewing<br />
without the diffraction grating. Students should<br />
describe a strip <strong>of</strong> different colors <strong>of</strong>f to each side <strong>of</strong><br />
the field <strong>of</strong> view. For the laser, only a small dot is<br />
observed in the center and <strong>of</strong>f to each side. <strong>The</strong> side<br />
dots are not spread out and are only one color. If<br />
students do not notice the difference between the<br />
red LED and the laser, have them repeat Steps 7 and<br />
8.<br />
As a class review students’ observations and make<br />
sure all groups have noticed multiple colors for the<br />
white LED, more than one color for the red LED<br />
(usually red, orange and yellow are observed, and<br />
sometimes green), and just one color for the laser.<br />
As a class complete the rest <strong>of</strong> Part A.<br />
Let the class know that although the slide looks<br />
like a piece <strong>of</strong> clear plastic, it has thousands <strong>of</strong> very<br />
closely spaced parallel grooves. <strong>The</strong>se grooves<br />
cause the light to spread out (diffract) according to<br />
their wavelength or frequency. Each wavelength<br />
(or frequency) <strong>of</strong> light is associated with a different<br />
energy, and each is part <strong>of</strong> the electromagnetic<br />
spectrum.<br />
Note: <strong>The</strong> diffraction pattern <strong>of</strong> the white LED provides<br />
evidence that white light is made up <strong>of</strong> many<br />
colors. <strong>The</strong> colors <strong>of</strong> a rainbow provide further evidence<br />
that white light is made up <strong>of</strong> many colors<br />
(although the rainbow colors are caused by refraction<br />
rather than diffraction).<br />
Consider discussing living creatures that see in<br />
other parts <strong>of</strong> the spectrum; for example, bees and<br />
butterflies can see in the ultraviolet.<br />
Discuss the electromagnetic spectrum with the<br />
class. Describe how the wavelength changes as the<br />
colors in the spectrum go from violet to red. <strong>The</strong><br />
wavelength increases as the visible spectrum goes<br />
from violet to red.<br />
Part A, Step 10<br />
Check that students describe how their observations<br />
differed from what they expected to observe.<br />
<strong>The</strong>ir expectations were described in Step 3.<br />
Part A, Step 11<br />
Briefly discuss the observation that the grating separates<br />
the components <strong>of</strong> the light source.<br />
Example response follows. Check for evidence<br />
supporting claims.<br />
12<br />
Both LEDs produce multiple wavelengths. We<br />
think this because when we viewed the light they<br />
produce through a diffraction grating we saw a<br />
<strong>The</strong> <strong>Physics</strong> <strong>of</strong> <strong>LASERs</strong>, Teacher Edition<br />
Student Edition Lesson 1: Properties <strong>of</strong> LASER light<br />
4<br />
9. Compare your observations <strong>of</strong> the three light sources.<br />
10. How were your observations the same and different from what you expected to observe?<br />
11. For each light source answer the following questions:<br />
<strong>The</strong> <strong>Physics</strong> <strong>of</strong> <strong>LASERs</strong><br />
• Do you think the light source produces a single wavelength or multiple wavelengths?<br />
• What evidence do you have?<br />
12. Scientists call laser light monochromatic. What do you think this means?<br />
13. Wrap-up: What is special about the color <strong>of</strong> laser light? With your group, come up with<br />
your best group answer to this question and support your answer with evidence you<br />
obtained from your observations.<br />
B. What’s special about how laser light travels?<br />
Materials list<br />
• 1 red LED per group<br />
• 1 laser pointer per group<br />
• 1 meter stick per group<br />
1. With your group discuss what you think is special about laser beams. Do you think a<br />
laser beam changes as it travels? Does it spread out like a flashlight beam, or does it do<br />
something else? Be ready to share your group’s ideas with the class. <strong>The</strong> goal is to be<br />
able to answer this question by the end <strong>of</strong> Part B with supporting evidence.<br />
2. Place a piece <strong>of</strong> paper on the table. Shine the red LED<br />
and the laser pointer down at the paper, keeping the distance<br />
between the light sources and the paper the same.<br />
Slowly move both light sources a little further away<br />
from the paper. Describe what happens to the illuminated<br />
area on the paper produced by each light source<br />
as the distance between the light source and the paper<br />
increases.<br />
3. To gather some quantitative evidence for the laser, you<br />
will take three measurements <strong>of</strong> the illuminated spot’s<br />
diameter for three different distances between 0 and 100<br />
cm. First you need to set up the experiment. Place the<br />
laser pointer on a book or two to keep it steady. No more<br />
than a meter away, tape a piece <strong>of</strong> paper to a wall or a<br />
book. Shine the laser directly at the paper so the beam<br />
does not reflect from the book or from the tabletop.<br />
Student Version Page 4<br />
• 1 metric ruler per group<br />
• 1 sheet <strong>of</strong> white paper (8.5” x 11”)<br />
• several books<br />
Image credit: Nancy Bennett-Karasik, @ <strong>American</strong><br />
<strong>Physical</strong> <strong>Society</strong><br />
spread <strong>of</strong> light <strong>of</strong> different colors. <strong>The</strong> white LED produced red, orange,<br />
yellow, green, blue, and purple. <strong>The</strong> red LED produced red,<br />
orange, and yellow light.<br />
We concluded that laser light is made up <strong>of</strong> one wavelength, because<br />
when we viewed its reflected light through the diffraction grating it<br />
produced only one color <strong>of</strong> light – red. Also, the diffracted light we<br />
observed <strong>of</strong>f to the sides was not spread out.<br />
Part A, Step 12<br />
Introduce the term monochromatic, which means single wavelength<br />
or one color. Have students consider each part <strong>of</strong> the word:<br />
mono means one, chromatic is related to color. In reality laser light is<br />
composed <strong>of</strong> a narrow range <strong>of</strong> wavelengths.<br />
Part A, Step 13<br />
Have groups answer this question and present their answers to the<br />
class. Have the class come to a consensus on how to answer this<br />
question along with providing their evidence.<br />
Example answer: “Laser light is made up <strong>of</strong> only one wavelength<br />
<strong>of</strong> light. <strong>The</strong> evidence we have to support this is our observations <strong>of</strong><br />
light through a diffraction grating. Diffraction gratings spread out<br />
the light according the light’s wavelength. For the white LED we observed<br />
that the diffracted light had spread out and contained many<br />
colors. For the red LED the diffracted light was spread out and had<br />
few colors. For the laser we did not see the diffracted light spread
!<br />
!<br />
Student Edition Lesson 1: Properties <strong>of</strong> LASER light<br />
4. Safety check - Make sure you never look directly into the laser light coming from the<br />
laser. When you are doing this experiment, make sure your eye level is above the level<br />
<strong>of</strong> the laser beam. How would you tell this to another student?<br />
5. Measure the distance between the front <strong>of</strong> the laser and the paper. Outline the illuminated<br />
spot on the paper and label this spot with the distance between the laser and the<br />
paper. Repeat this for two different distances between the laser and the paper.<br />
6. Measure the diameter <strong>of</strong> each spot on the paper and record your data in a table like the<br />
one below. List the possible sources <strong>of</strong> error for your experiment.<br />
Distance between laser<br />
pointer and paper<br />
(cm)<br />
Diameter <strong>of</strong> illuminated<br />
spot on paper<br />
(mm)<br />
7. What can you conclude about the laser beam based on your results?<br />
8. Scientists call laser light “collimated.” What do you think this means? Share your ideas<br />
with your group and be prepared for a class discussion.<br />
9. Wrap-up: What’s special about how laser light travels? With your group, come up<br />
with your best group answer to this question and support your answer with evidence<br />
you obtained from your observations.<br />
C. Is there anything else special about laser light?<br />
Materials list<br />
• 1 red LED per group<br />
• 1 laser pointer per group<br />
SAFETY REMINDER: Never look directly into a laser beam. Never point the laser<br />
towards anyone’s eye or toward a highly reflective surface.<br />
1. Hold the laser very close to a sheet <strong>of</strong> paper so that it<br />
makes a small angle with the paper, as shown in the<br />
diagram. Turn on the laser.<br />
• Draw a diagram and describe what you see.<br />
• What do you think causes this?<br />
Student Version Page 5<br />
• 2 copies <strong>of</strong> sine waves (original is in<br />
Teacher Edition) per group<br />
• 1 sheet <strong>of</strong> white paper (8.5” x 11”)<br />
Image credit: Nancy Bennett-Karasik, @ <strong>American</strong><br />
<strong>Physical</strong> <strong>Society</strong><br />
and it was just one color. From this we conclude that the laser light<br />
is composed <strong>of</strong> one wavelength. Different colors <strong>of</strong> light have different<br />
wavelengths.”<br />
Make sure students understand that each color <strong>of</strong> light represents a<br />
different wavelength <strong>of</strong> light.<br />
Did students reach the goal <strong>of</strong> Part A? Students should be able to<br />
state that laser light has one wavelength and provide some supporting<br />
evidence for this. Note: Careful measurements with special<br />
equipment show that laser light is in fact composed <strong>of</strong> a narrow<br />
spread <strong>of</strong> wavelengths (or equivalently, frequencies). Laser light is almost<br />
monochromatic (consisting <strong>of</strong> a single wavelength/frequency).<br />
B. What’s special about how laser light travels?<br />
Note on Student Edition, Part B<br />
<strong>The</strong> <strong>Physics</strong> <strong>of</strong> <strong>LASERs</strong><br />
Demonstrate laser light traveling through space by shining the laser<br />
pointer at a wall in the room.<br />
Notes on Part B, Step 1<br />
Have a class discussion about what students think the answers to<br />
these questions are.<br />
5<br />
Teacher Edition Lesson 1: Properties <strong>of</strong> LASER light<br />
Goal <strong>of</strong> Part B: Students should be able to state that<br />
laser light is very collimated (the light produced is<br />
composed <strong>of</strong> light rays traveling parallel to each<br />
other) and provide supporting evidence for this. If<br />
you do the optional enrichment they should be able<br />
to say that laser light is more collimated than light<br />
produced by other sources and provide some supporting<br />
evidence for this.<br />
Part B, Step 2<br />
Students should see that the illuminated area from<br />
the red LED increases a lot as the distance between<br />
the red LED and paper increases, and that the illumination<br />
on the paper from the laser pointer does<br />
not seem to spread out.<br />
Part B, Step 3<br />
Check on groups and assist as needed.<br />
Part B, Step 5<br />
Check on groups and assist as needed. (In the unlikely<br />
event that the students’ illuminated spot is<br />
oblong rather than a circle, have them measure the<br />
longest and shortest distance across for each spot.)<br />
Part B, Step 6<br />
Example data is provided<br />
Have students make a table <strong>of</strong> their results, which<br />
could be on the paper they used to record their<br />
data. Sources <strong>of</strong> error might include pencil width,<br />
difficulty with measuring, and human error.<br />
Part B, Step 7<br />
Check student work. For the inexpensive lasers<br />
used in these lessons,<br />
the spot size may<br />
increase a bit; for a<br />
better-designed laser,<br />
the spot size should increase<br />
less.<br />
Experimental note: In the example data provided<br />
here, the spot changed its location on the paper as<br />
the distance to the paper increased because the tabletop<br />
was not level.<br />
Note about lasers: Lasers utilize mirrors to create<br />
a resonant cavity. <strong>The</strong> resonant cavity makes possible<br />
the intense, collimated beam. Some lasers may<br />
also include a lens. <strong>The</strong>se devices and any apertures<br />
interact with the light, and hence the beam’s width<br />
and collimation are limited by the laser’s design.<br />
Part B, Step 8<br />
Have a class discussion on collimated light. Because<br />
the light in a laser beam travels in the same<br />
direction; it neither spreads out (diverges) nor<br />
comes together (converges). Point out that a perfectly<br />
collimated beam cannot be produced. If we<br />
try to put light through a small aperture it spreads<br />
out due to diffraction. Let students know that laser<br />
light is collimated because it is created in a cavity<br />
between two mirrors that allows light traveling in<br />
<strong>The</strong> <strong>Physics</strong> <strong>of</strong> <strong>LASERs</strong>, Teacher Edition<br />
13
Teacher Edition Lesson 1: Properties <strong>of</strong> LASER light<br />
one direction to build up, (and it is coherent, but<br />
that hasn’t been discussed yet).<br />
If students are not doing the optional exploration<br />
below, then demonstrate to the class how light<br />
from a flashlight spreads differently than light from<br />
a laser. Simultaneously shine each light source on a<br />
wall while moving away from the wall.<br />
Part B, Step 9<br />
Have groups answer this and discuss their answers<br />
in a class discussion. Model the language that<br />
groups should use to respond to each other during<br />
the class discussion: I agree/disagree with ______<br />
because _______.<br />
Make sure students understand what collimated<br />
light is (light travels in one direction – light rays are<br />
parallel) and that laser light is collimated.<br />
Did students reach the goal <strong>of</strong> Part B? Students<br />
should be able to state that laser light is very collimated<br />
(light rays are parallel) and provide supporting<br />
evidence for this. If you do the optional enrichment<br />
they should be able to say that laser light<br />
is more collimated than light from other sources,<br />
and provide some supporting evidence for this.<br />
Students should have some sense that the collimation<br />
<strong>of</strong> the light is due to the cavity (mirrors) <strong>of</strong> the<br />
laser.<br />
Note: You may want to point out that lasers are not<br />
the only collimated light source. Light from great<br />
distances, such as the sun or another star, is considered<br />
collimated. Also, parabolic mirrors and con-<br />
14<br />
Optional Enrichment Activity<br />
How does light from a small light bulb spread<br />
out? Design and conduct an experiment with<br />
your group to measure how light from a bulb<br />
spreads out.<br />
Notes on Optional Enrichment Activity:<br />
If students are conducting this experiment<br />
with a bulb, and they hold their aperture too<br />
close to the bulb, then light produced from<br />
multiple points on the filament may make the<br />
edge <strong>of</strong> the shadow fuzzy.<br />
Note: If students use a flashlight they would<br />
observe the spot <strong>of</strong> light on the screen spreading<br />
out substantially as the distance between<br />
the light source and the screen increased. If<br />
students use a bulb with no reflector, they<br />
should consider placing the bulb behind an<br />
aperture, such as a piece <strong>of</strong> cardboard with<br />
a 5 cm diameter circular cutout. <strong>The</strong>y could<br />
also devise an experiment observing shadows<br />
made by an object at various distances from<br />
the light source.<br />
<strong>The</strong> <strong>Physics</strong> <strong>of</strong> <strong>LASERs</strong>, Teacher Edition<br />
!<br />
!<br />
vex lenses are <strong>of</strong>ten employed to collimate light. Mirrors are used in<br />
laser systems to help collimate the light.<br />
C. Is there anything else special about laser light?<br />
Notes on Student Edition, Part C<br />
Student Edition Lesson 1: Properties <strong>of</strong> LASER light<br />
4. Safety check - Make sure you never look directly into the laser light coming from the<br />
laser. When you are doing this experiment, make sure your eye level is above the level<br />
<strong>of</strong> the laser beam. How would you tell this to another student?<br />
5. Measure the distance between the front <strong>of</strong> the laser and the paper. Outline the illuminated<br />
spot on the paper and label this spot with the distance between the laser and the<br />
paper. Repeat this for two different distances between the laser and the paper.<br />
6. Measure the diameter <strong>of</strong> each spot on the paper and record your data in a table like the<br />
one below. List the possible sources <strong>of</strong> error for your experiment.<br />
Distance between laser<br />
pointer and paper<br />
(cm)<br />
Diameter <strong>of</strong> illuminated<br />
spot on paper<br />
(mm)<br />
7. What can you conclude about the laser beam based on your results?<br />
8. Scientists call laser light “collimated.” What do you think this means? Share your ideas<br />
with your group and be prepared for a class discussion.<br />
9. Wrap-up: What’s special about how laser light travels? With your group, come up<br />
with your best group answer to this question and support your answer with evidence<br />
you obtained from your observations.<br />
C. Is there anything else special about laser light?<br />
Materials list<br />
• 1 red LED per group<br />
• 1 laser pointer per group<br />
SAFETY REMINDER: Never look directly into a laser beam. Never point the laser<br />
towards anyone’s eye or toward a highly reflective surface.<br />
1. Hold the laser very close to a sheet <strong>of</strong> paper so that it<br />
makes a small angle with the paper, as shown in the<br />
diagram. Turn on the laser.<br />
• Draw a diagram and describe what you see.<br />
• What do you think causes this?<br />
Student Version Page 5<br />
• 2 copies <strong>of</strong> sine waves (original is in<br />
Teacher Edition) per group<br />
• 1 sheet <strong>of</strong> white paper (8.5” x 11”)<br />
Image credit: Nancy Bennett-Karasik, @ <strong>American</strong><br />
<strong>Physical</strong> <strong>Society</strong><br />
<strong>The</strong> <strong>Physics</strong> <strong>of</strong> <strong>LASERs</strong><br />
Have a discussion about what students think the answer to this<br />
question is, besides single wavelength (monochromatic) and parallel<br />
light rays (collimated).<br />
Goal <strong>of</strong> Part C: To describe that laser light is coherent (light waves<br />
are in phase, or light travels “in step”), and provide some supporting<br />
evidence for this.<br />
Students may say: <strong>The</strong>y shine a really far distance; they don’t get<br />
blurry and dim like flashlights.<br />
Part C, Step 1<br />
Students’ drawings and descriptions should include an illuminated<br />
region with bright shimmering spots, and dark spots. <strong>The</strong>re should<br />
also be an indication that the light is red.<br />
Part C, Step 2<br />
Students’ drawings and descriptions should include an illuminated<br />
5
Student Edition Lesson 1: Properties <strong>of</strong> LASER light<br />
6<br />
2. Hold the red LED very close to a sheet <strong>of</strong> paper, so that<br />
it makes a small angle with the paper. Turn on the red<br />
LED.<br />
• Draw a diagram and describe what you see.<br />
• Compare it to your observations <strong>of</strong> the laser.<br />
Image credit: Dr. Del Atkinson<br />
Paper Fibers<br />
3. Look at the image <strong>of</strong> paper fibers and notice how rough the surface <strong>of</strong> the paper is.<br />
When the laser light strikes the paper and reflects <strong>of</strong>f <strong>of</strong> the paper fibers, the light<br />
waves travel various distances to get to your eye. <strong>The</strong>se waves interfere with each<br />
other inside your eye to produce the speckled pattern you see.<br />
4. Laser light creates a speckle pattern because the light waves leaving the laser have one<br />
wavelength and are in-step. After reflecting from the paper and entering the eye, these<br />
waves can either reinforce, producing bright spots, or cancel, producing dark spots.<br />
<strong>The</strong> <strong>Physics</strong> <strong>of</strong> <strong>LASERs</strong><br />
• Using two pieces <strong>of</strong> paper with sine waves on them, show how the reflected laser<br />
light creates a dark spot and a bright spot.<br />
• When the red LED light reflected <strong>of</strong>f <strong>of</strong> the paper, you did not see a speckle pattern.<br />
Why not?<br />
5. Scientists say that laser light is coherent. What do you think coherent means?<br />
Have a class discussion on coherent light.<br />
6. Wrap-up: What have you learned in Part C about how laser light is special? Be prepared<br />
to share your group’s ideas with the class.<br />
Completing the Lesson: What’s special about laser light?<br />
1. What are the properties that make laser light so special?<br />
2. If you have observed or participated in a model in which students represented photons<br />
<strong>of</strong> different light sources, tell what you have learned from this model about different<br />
light sources.<br />
Student Version Page 6<br />
region with a seemingly homogenous or averaged-out central area<br />
<strong>of</strong> red light, with a dimmer area <strong>of</strong> homogenous red light around<br />
the central area. Students should note that the red LED source does<br />
not produce the “sparkly” or “speckled” pattern that the laser light<br />
produces. For example they may state that the laser light produces<br />
tiny bright and dark spots in the illuminated area, whereas the LED<br />
does not produce these bright or dark spots.<br />
Part C, Step 4<br />
• Have students use two graphs <strong>of</strong> the sine wave and show how<br />
these waves would interfere as they enter the eye. For the bright<br />
spot the two waves enter the eye, in phase. For the dark spots<br />
the two waves enter the eye out <strong>of</strong> phase. Discuss with students<br />
what would happen when the two waves enter the eye<br />
at different angles. For example, hold the two waves together<br />
at one end, and about a foot apart at the other. Have students<br />
consider what the amplitude <strong>of</strong> each wave would be where they<br />
meet, and what the resulting amplitude <strong>of</strong> the combined waves<br />
would be.<br />
• <strong>The</strong> brighter areas are caused by constructive interference, and<br />
the darker areas by destructive interference.<br />
• Let students know that ordinary light is composed <strong>of</strong> many<br />
different wavelengths <strong>of</strong> incoherent or out-<strong>of</strong>-step light that is<br />
Teacher Edition Lesson 1: Properties <strong>of</strong> LASER light<br />
usually not collimated. When this type <strong>of</strong> light<br />
interferes, the multitude <strong>of</strong> light waves that interfere<br />
average out, resulting in a homogenous<br />
spot <strong>of</strong> light that doesn’t show a speckle pattern.<br />
NOTE you can create a speckle pattern from sunlight<br />
reflecting <strong>of</strong>f <strong>of</strong> your fingernail! For more information<br />
conduct an internet search on “Science<br />
News for Kids, Speckle.”<br />
Part C, Step 5<br />
Have a class discussion on coherent light.<br />
Let students know that waves traveling in the<br />
same direction with a constant difference in phase<br />
are called coherent. Laser light is composed <strong>of</strong> coherent<br />
waves that are in-step.<br />
Consider sharing this example: When many<br />
waves are <strong>of</strong> the same wavelength and in-step,<br />
they add up to make a very large amplitude<br />
wave. <strong>The</strong>se waves are coherent. For example, if<br />
100 waves <strong>of</strong> the same wavelength and amplitude<br />
all were in phase, they would add up to act as a<br />
single wave with 100 times the amplitude. <strong>The</strong><br />
amplitude <strong>of</strong> the wave is related to the amount<br />
<strong>of</strong> energy the wave carries. As the amplitude increases<br />
the energy increases.<br />
Have students draw a diagram showing how<br />
three identical waves that are in-step add up.<br />
Students’ answers should show the amplitude <strong>of</strong><br />
the resultant wave being three times the amplitude<br />
<strong>of</strong> the initial wave.<br />
Part C, Step 6<br />
Have groups tell what they have learned in Part C<br />
and discuss their answers with the class. Help the<br />
class come to consensus on answering this question.<br />
Did students reach the goal <strong>of</strong> Part C? Students<br />
should be able to describe coherence, state that laser<br />
light is coherent, and provide supporting evidence.<br />
Make sure students understand that coherence<br />
means that the light waves have a constant relative<br />
phase, and that a special property <strong>of</strong> laser light is<br />
that it is coherent and in phase.<br />
Completing the Lesson: What’s so special<br />
about laser light?<br />
Notes on Completing the Lesson, Step 1<br />
Laser light:<br />
• has one wavelength (it is monochromatic or<br />
has one color)<br />
• is collimated (parallel rays <strong>of</strong> light)<br />
• is coherent (constant relative phase and in-step).<br />
<strong>The</strong> <strong>Physics</strong> <strong>of</strong> <strong>LASERs</strong>, Teacher Edition<br />
15
Teacher Edition Lesson 1: Properties <strong>of</strong> LASER light<br />
A helpful acronym may be the three c’s or c 3 : color,<br />
collimation, coherence.<br />
Point out that laser light is very bright because <strong>of</strong><br />
the property <strong>of</strong> coherence (constant relative phase<br />
and in-step), as well as for other reasons. Let students<br />
know that laser light can carry enough energy<br />
to burn through objects such as one’s eye and<br />
sheets <strong>of</strong> metal. <strong>The</strong> first lasers (ruby lasers) used<br />
to have their strength discussed in terms <strong>of</strong> how<br />
many razor blades they could burn holes through.<br />
A one-Gillette (type <strong>of</strong> razor blade) laser did not<br />
have as bright a laser beam or deliver as much energy<br />
as a five-Gillette laser.<br />
Optional: Show students the 4.5 minute video <strong>of</strong><br />
<strong>The</strong>odore Maiman explaining the first ruby laser,<br />
located on the LaserFest website found by conducting<br />
an internet search on “laserfest, Maiman video.”<br />
This can be used as a transition to discussing what<br />
is needed for a laser to function (an active medium,<br />
an energy source, and a resonant cavity).<br />
Notes on the kinesthetic model <strong>of</strong> different<br />
light sources<br />
Goal <strong>of</strong> kinesthetic model: For students to have an<br />
experience that deepens their understanding <strong>of</strong> the<br />
special properties laser light.<br />
For this model students represent photons (packets<br />
<strong>of</strong> light energy). Students’ step length represents<br />
the photon’s wavelength. Since the different colors<br />
<strong>of</strong> light have the same speed, the frequency <strong>of</strong> steps<br />
taken increases as the step length (wavelength) decreases.<br />
Simulate light from each light source using<br />
this model. <strong>The</strong>n have students describe how the<br />
model represented the light produced by the light<br />
sources.<br />
Consider having the entire class participate for<br />
each type <strong>of</strong> light or having groups model each<br />
type <strong>of</strong> light.<br />
Trouble-shooting: One issue that may arise is if<br />
the students try to walk with the same frequency<br />
rather than the same speed. If this occurs some students<br />
may say that blue light travels slower than<br />
red light, which is not the case. Remind students<br />
that because the index <strong>of</strong> refraction <strong>of</strong> air is so close<br />
to that <strong>of</strong> a vacuum, we consider that all light in<br />
the visible spectrum travels at the same speed in<br />
air. Consider having students representing different<br />
wavelengths walk side-by-side, holding a rod,<br />
if needed, to keep them side-by-side, while taking<br />
different sized steps so that they have the same<br />
speed. In this case the student representing violet<br />
light might take twice the steps the student representing<br />
red light takes. A suggested table <strong>of</strong> stride<br />
lengths is listed in the Preparation before class section<br />
<strong>of</strong> this lesson.<br />
White LED: Place a red, orange, yellow, green, blue,<br />
16<br />
<strong>The</strong> <strong>Physics</strong> <strong>of</strong> <strong>LASERs</strong>, Teacher Edition<br />
Student Edition Lesson 1: Properties <strong>of</strong> LASER light<br />
6<br />
2. Hold the red LED very close to a sheet <strong>of</strong> paper, so that<br />
it makes a small angle with the paper. Turn on the red<br />
LED.<br />
• Draw a diagram and describe what you see.<br />
• Compare it to your observations <strong>of</strong> the laser.<br />
Image credit: Dr. Del Atkinson<br />
Paper Fibers<br />
3. Look at the image <strong>of</strong> paper fibers and notice how rough the surface <strong>of</strong> the paper is.<br />
When the laser light strikes the paper and reflects <strong>of</strong>f <strong>of</strong> the paper fibers, the light<br />
waves travel various distances to get to your eye. <strong>The</strong>se waves interfere with each<br />
other inside your eye to produce the speckled pattern you see.<br />
4. Laser light creates a speckle pattern because the light waves leaving the laser have one<br />
wavelength and are in-step. After reflecting from the paper and entering the eye, these<br />
waves can either reinforce, producing bright spots, or cancel, producing dark spots.<br />
<strong>The</strong> <strong>Physics</strong> <strong>of</strong> <strong>LASERs</strong><br />
• Using two pieces <strong>of</strong> paper with sine waves on them, show how the reflected laser<br />
light creates a dark spot and a bright spot.<br />
• When the red LED light reflected <strong>of</strong>f <strong>of</strong> the paper, you did not see a speckle pattern.<br />
Why not?<br />
5. Scientists say that laser light is coherent. What do you think coherent means?<br />
Have a class discussion on coherent light.<br />
6. Wrap-up: What have you learned in Part C about how laser light is special? Be prepared<br />
to share your group’s ideas with the class.<br />
Completing the Lesson: What’s special about laser light?<br />
1. What are the properties that make laser light so special?<br />
2. If you have observed or participated in a model in which students represented photons<br />
<strong>of</strong> different light sources, tell what you have learned from this model about different<br />
light sources.<br />
Student Version Page 6<br />
or violet colored sticky or other indicator on students to show what<br />
color <strong>of</strong> light they represent. Each color will have a different stride<br />
length, red being the longest and violet the shortest. If you have<br />
a pattern on your floor you could devise a different stride length<br />
based on the pattern. If you do not have a pattern on your floor,<br />
use colored masking tape to represent the different wavelengths <strong>of</strong><br />
light, as described in the Preparation before class section for this lesson.<br />
Have the students move away from the location you designate<br />
as the light source on the floor at the assigned stride lengths. This<br />
incoherent light source should have photons <strong>of</strong> all visible colors<br />
traveling at many different angles from the light source.<br />
Red LED: Place a red, orange and yellow (and green if observed)<br />
colored sticky (or construction paper) on students to indicate what<br />
color <strong>of</strong> light they represent. Each color will have a different stride<br />
length, as before. Run the model as you did with the white LED,<br />
but in this case use only the observed colors produced by the red<br />
LED. You could try to represent the relatively dim yellow light that<br />
students saw through their diffraction gratings by having fewer students<br />
represent yellow photons than red photons.<br />
Red laser light: Place a red colored sticky on each student to indicate<br />
the single color <strong>of</strong> laser light that they represent. Each student<br />
will move with the same stride length, and in step (perhaps five
Teacher Edition Lesson 1: Properties <strong>of</strong> LASER light<br />
students wide with elbows interlocked) like a marching band. Have the students move along a straight line between two<br />
objects that represent mirrors. Point out that the mirrors within a laser cavity help to collimate the laser light. Let students<br />
know that coherent laser light is caused by a special process, which they will explore in Lesson 2.<br />
Teacher’s Notes<br />
<strong>The</strong> <strong>Physics</strong> <strong>of</strong> <strong>LASERs</strong>, Teacher Edition<br />
17
18<br />
Lesson 2.<br />
How Does a LASER Work?<br />
Goal<br />
Students should gain understanding about the fundamental parts <strong>of</strong> a laser<br />
and how they affect the output <strong>of</strong> the laser. <strong>The</strong> fundamental parts <strong>of</strong> a laser<br />
are:<br />
• atoms or molecules (the active medium)<br />
• an energy source<br />
• a resonant cavity<br />
Time: 60 to 80 minutes – Prior to students working with the computer simulation,<br />
20 to 40 minutes is needed to discuss the parts <strong>of</strong> a laser and how it<br />
works. An additional 40 minutes is needed for Parts A and B, or these could<br />
be assigned as homework depending on computer availability.<br />
Summary <strong>of</strong> Lesson 2<br />
Students consider what causes laser light to have its special properties. <strong>The</strong>y<br />
are introduced to the three essential parts <strong>of</strong> a laser: the active medium (atoms<br />
or molecules that transform the input energy into the output energy),<br />
an energy source, and a resonant cavity. Students revisit the concept <strong>of</strong><br />
conservation <strong>of</strong> energy to support the need for an energy source. Students relate the resonant cavity to collimation.<br />
Students then explore the role the active medium plays. <strong>The</strong>y are introduced to the interaction <strong>of</strong> light and matter by<br />
absorption, spontaneous emission, and stimulated emission. Through participation in a kinesthetic model, students simulate<br />
the processes <strong>of</strong> absorption and the two types <strong>of</strong> emission. Students relate stimulated emission to coherence.<br />
In Part A <strong>of</strong> this lesson, students explore the fundamentals <strong>of</strong> a laser using a computer model called the PhET simulator.<br />
Students investigate the laser using a single atom for the active medium, and observe how the three basic parts <strong>of</strong> the<br />
laser produce laser light.<br />
In Part B, students explore how to construct a multi-atom laser with the PhET simulator in order to understand how the<br />
variables <strong>of</strong> the laser affect the lasing process. Parts A and B can be completed independently, as a group, or as a class<br />
activity.<br />
Preparation before class<br />
Familiarize yourself with the PhET laser simulator and prepare for the demonstration. Determine if you will have each<br />
group use a computer, a set <strong>of</strong> groups use a computer, or if the simulations will be teacher-led with the entire class participating.<br />
Decide if students will do Part A and or Part B during class or outside <strong>of</strong> class.<br />
Materials<br />
• computer projection system<br />
• computer(s) that can run the PhET<br />
simulator with simulator loaded onto<br />
each<br />
• to find the PhET simulator, search on<br />
“PhET Laser Simulator ” or go to http://<br />
phet.colorado.edu/simulations/sims.<br />
php?sim=Lasers<br />
• projections <strong>of</strong> Lesson 2 images<br />
• masking tape<br />
• sheets <strong>of</strong> paper (e.g. red construction<br />
paper)<br />
Prepare the room for the kinesthetic models as was done at the end <strong>of</strong> Lesson 1, for the laser. Two objects will be needed<br />
to represent the mirrors that create the laser cavity. <strong>The</strong>se objects could be walls or desks. <strong>The</strong> width <strong>of</strong> the cavity should<br />
be at least 5 students wide. <strong>The</strong> length <strong>of</strong> the cavity (distance between two mirrors) should be an integer number <strong>of</strong> steps,<br />
marked by tape or a pattern on the floor. A reasonable cavity distance for this model is about 10 steps.
Lesson 2.<br />
2. How does a laser work?<br />
Student Edition Lesson 2: How Does a LASER Work?<br />
Introductory Questions<br />
• What causes laser light to have the special properties you found in Lesson 1 (monochromatic,<br />
collimated, and coherent)?<br />
• What are the essential parts <strong>of</strong> a laser?<br />
Discuss your ideas with your group and write down your groups’ ideas. Be prepared to<br />
share your groups’ ideas with the class.<br />
Goal<br />
To describe how a laser works.<br />
How Does a LASER Work?<br />
A. How could you use a computer model to find out how a laser works?<br />
1. You observed a model in which students represented photons and atoms. Describe<br />
what you have learned from this model about how atoms and light interact.<br />
2. How do you think you can use a computer model to find out how a laser works?<br />
3. In this part <strong>of</strong> the lesson you are going to explore a computer model <strong>of</strong> a laser – but at<br />
first, the laser will have only one atom. Open the PhET simulator. Make sure the “one<br />
atom” tab is selected, and that the energy levels are set at “two.” This will allow you<br />
to get an idea <strong>of</strong> how the simulator works by considering only two energy levels <strong>of</strong><br />
an atom.<br />
Student Version Page 7<br />
Image credit: PhET Interactive Simulations, University <strong>of</strong> Colorado<br />
http://phet.colorado.edu<br />
<strong>The</strong> <strong>Physics</strong> <strong>of</strong> <strong>LASERs</strong> 7<br />
Facilitate a class discussion on students’ initial ideas about what<br />
causes laser light to have its special properties. Encourage students<br />
to provide their reasoning. Record students’ ideas as you may want<br />
to revisit these ideas at the end <strong>of</strong> this lesson.<br />
An example <strong>of</strong> a discussion format with preconceptions is provided<br />
below (e.g. I agree/disagree with___because __).<br />
Student 1: “I think there are mirrors in there because it bounces <strong>of</strong>f stuff, a<br />
light bulb, and a battery.”<br />
Student 2: “I agree with Sabrina but I think that instead <strong>of</strong> a bulb there is<br />
a little lens inside.”<br />
Student 3 talking to teacher: “I think there is a tube or something that has<br />
something inside it that reacts. Something that is reacting to make the laser<br />
red, and the way it is positioned too.”<br />
Teacher discussing inquiry method: “Don’t talk to me. I’m standing behind<br />
you to try to get you to talk to the class not me. … I want you to address the<br />
class, even if I’ve asked the question. I’m not trying to be rude.”<br />
Student 4: “We think that there are two lights reflecting toward each other<br />
and a mirror shooting the light out and making it stronger.”<br />
Teacher Edition Lesson 2: How Does a LASER Work?<br />
Laser Components<br />
Keep this fast-paced, about 10 minutes.<br />
Goal <strong>of</strong> Laser Components: Students should be able<br />
to state that a laser has three essential parts<br />
• an energy source<br />
• atoms or molecules that transform the input<br />
energy to the output energy (an active medium)<br />
• and a resonant cavity.<br />
Students are not expected to know the details <strong>of</strong><br />
these parts by the end this discussion, but should<br />
make connections between the resonant cavity and<br />
collimation and realize that conservation <strong>of</strong> energy<br />
requires an energy source for the laser.<br />
Review with students the special properties <strong>of</strong> laser<br />
light that you explored in Lesson 1.<br />
Color – monochromatic or single wavelength (or,<br />
equivalently, a single frequency), collimated, coherent<br />
Have each group answer the question: What do<br />
you think causes these special properties <strong>of</strong> laser<br />
light? Be prepared to discuss your ideas with the<br />
class.<br />
Students should be able to indicate that the mirrors<br />
in a laser help to collimate the beam. Let students<br />
know that they will later use a computer simulation<br />
to observe that the mirrors create the laser<br />
cavity and help build up the coherent light waves<br />
within the cavity. Some <strong>of</strong> these light waves emerge<br />
to produce the laser beam.<br />
Students may or may not have an idea about how<br />
the single wavelength and coherence arise. This<br />
will be discussed before they start the computer<br />
simulation.<br />
Have each group answer the following questions:<br />
Does a laser give <strong>of</strong>f energy? If so, where does this<br />
energy come from? Have them describe or draw<br />
any energy inputs into the laser and any energy<br />
outputs from it. Tell them to think about conservation<br />
<strong>of</strong> energy.<br />
If a group is having trouble, have them consider<br />
where a light bulb gets its energy or ask them about<br />
where the energy to operate the laser pointer they<br />
used came from.<br />
Students should realize that the laser outputs light<br />
energy (and thermal energy) and is capable <strong>of</strong> producing<br />
a great amount <strong>of</strong> light energy in a single<br />
beam <strong>of</strong> light. Students should utilize the concept<br />
<strong>The</strong> <strong>Physics</strong> <strong>of</strong> <strong>LASERs</strong>, Teacher Edition<br />
19
Teacher Edition Lesson 2: How Does a LASER Work?<br />
<strong>of</strong> energy conservation to support the idea that an energy<br />
input is required. Most students will realize that the laser<br />
pointer uses batteries as its energy input or energy source;<br />
others may mention electrical energy supplied from a wall<br />
outlet for a plug-in laser.<br />
Make sure students understand that lasers require an energy<br />
source.<br />
Have each group answer the question: What transforms the<br />
input energy into the output light energy <strong>of</strong> a laser? (Hint:<br />
Some popular lasers are the helium-neon laser, argon-ion laser,<br />
krypton laser, ruby laser, carbon dioxide laser)<br />
Preconceptions: Students may have a variety <strong>of</strong> answers depending<br />
on their background knowledge. <strong>The</strong> hint in the<br />
previous paragraph should make them think <strong>of</strong> atoms or<br />
molecules, but they may need further hints. You could ask<br />
them what they think is in a helium-neon laser or an argon<br />
laser. What is similar about the two? Students may say gas,<br />
but encourage them further by asking what “gas” is made<br />
up <strong>of</strong>, and reminding them that ruby is also in the list and<br />
it isn’t a gas.<br />
Let students know that the input energy is eventually transferred<br />
to atoms or molecules within the laser system (in the<br />
laser cavity) and these atoms/molecules absorb the input<br />
energy. <strong>The</strong>se atoms/molecules then emit light energy. <strong>The</strong><br />
atoms/molecules transform the input energy into the output<br />
energy. <strong>The</strong> process by which this occurs will be discussed<br />
and modeled soon.<br />
FYI: You could let students know that the atoms/molecules<br />
that perform this energy transformation can be in a gas, liquid,<br />
or a solid state. Scientists call these atoms/molecules<br />
the “active medium.” <strong>The</strong> simulator students will use later<br />
has a gas as the active medium.<br />
Make sure students understand that the atoms/molecules<br />
in the laser system transform the energy put into the laser<br />
system to the output energy. Let them know that scientists<br />
call these atoms/molecules the active medium.<br />
Consider letting students know how electromagnetic waves<br />
are formed (a national standard). You could tell the class<br />
that electromagnetic waves (e.g., visible light waves) are<br />
created by a charged particle that is changing its motion or<br />
by a changing magnetic field. (For more information conduct<br />
an Internet search on “production <strong>of</strong> electromagnetic<br />
waves”.) This may also be brought up again in Lesson 3, Part<br />
1 (optional) that discusses the application <strong>of</strong> the transportation<br />
<strong>of</strong> information via electromagnetic waves.<br />
Summarize: <strong>The</strong> essential parts <strong>of</strong> a laser are<br />
• an energy input or energy source, which is required<br />
by the law <strong>of</strong> conservation <strong>of</strong> energy,<br />
• atoms or molecules that transform the energy source<br />
to the energy output (laser light),<br />
• and a resonant cavity (or mirrors) which aid in the<br />
collimation (and build-up) <strong>of</strong> the laser light.<br />
Introduce students to the term resonant cavity - a resonant<br />
cavity allows a standing wave to be formed. Let students<br />
20<br />
<strong>The</strong> <strong>Physics</strong> <strong>of</strong> <strong>LASERs</strong>, Teacher Edition<br />
know that the mirrors act as the resonant cavity, which allows<br />
a fixed number <strong>of</strong> wavelengths to go back and forth<br />
within the laser cavity. This helps in collimating the laser<br />
light, and also in building up the coherent light energy.<br />
Goal <strong>of</strong> Laser Components: Students should be able to state<br />
that a laser has three essential parts-<br />
• an energy source<br />
• atoms or molecules that transform the input energy<br />
to the output energy (an active medium)<br />
• and a resonant cavity.<br />
Students are not expected to know the details <strong>of</strong> these parts<br />
by the end this discussion, but should make connections between<br />
the resonant cavity and collimation and realize that<br />
conservation <strong>of</strong> energy requires an energy source for the laser.<br />
Interaction <strong>of</strong> Light and Matter<br />
Time: not take more than 20 minutes. To save time, you<br />
could skip having students draw the energy level diagrams.<br />
Discuss atoms in the laser cavity: For simplicity, consider<br />
atoms in a gas that transform the input energy to the output<br />
energy. Have each group discuss how they think the atoms<br />
in the laser system transform the input energy to the laser’s<br />
output energy. Have a class discussion with each group contributing<br />
their ideas.<br />
Goal <strong>of</strong> Interaction <strong>of</strong> Light and Matter: Students should<br />
be able to describe absorption, spontaneous emission, and<br />
stimulated emission, and how the active medium transforms<br />
the energy put into the laser to the light energy that<br />
comes out <strong>of</strong> the laser. Students should be able to make connections<br />
between stimulated emission and coherence.<br />
n<br />
5<br />
4<br />
3<br />
6<br />
2<br />
1<br />
UV<br />
Balmer<br />
series<br />
Lyman<br />
series<br />
Paschen<br />
series<br />
E(eV)<br />
0.00<br />
-0.38<br />
-0.54<br />
-0.85<br />
-1.51<br />
-3.40<br />
-13.6<br />
(Image credit: David Darling, http://www.daviddarling.info/<br />
encyclopedia/H/hydrogen_spectrum.html)<br />
Excited<br />
states<br />
Ground<br />
state<br />
Point out that unlike everyday objects that can have a continuous<br />
range <strong>of</strong> energies (e.g., a soccer ball), an atom’s electrons<br />
are allowed to have only certain distinct energies.<br />
IR
Let students know that when an electron moves from one<br />
allowed energy level to another it is called a transition. <strong>The</strong><br />
pattern <strong>of</strong> an electron’s allowed energy transitions are like<br />
fingerprints. Each element has its own distinct pattern <strong>of</strong><br />
transitions. This pattern is used to determine what elements<br />
are present in stars, gases, and other substances.<br />
Draw or project the first seven atomic energy levels <strong>of</strong> hydrogen<br />
on the board (see drawing on previous page) and<br />
show the five transitions from state “2” in the drawing (this<br />
is also called the first excited state).<br />
Show the students a color version <strong>of</strong> the spectrum (“fingerprints”)<br />
<strong>of</strong> hydrogen, or even better, have students observe<br />
excited hydrogen gas through diffraction gratings. What are<br />
the colors <strong>of</strong> visible light in hydrogen’s “fingerprint?” Point<br />
out the colors <strong>of</strong> the absorption and emission spectra and<br />
the transitions that they correspond to on the energy level<br />
diagram (Balmer Series: red, cyan, blue, violet)<br />
Consider letting students know that an atom’s electrons are<br />
only allowed in certain energy levels, and these energy levels<br />
are discrete or quantized. Scientists usually express the<br />
energy levels <strong>of</strong> an atom in units <strong>of</strong> electron-volts (eV). 1eV<br />
= 1.602x10 -19 Joules. Students don’t need to know the details<br />
<strong>of</strong> electron volts for this lesson, just that it is a unit <strong>of</strong> energy,<br />
Teacher Edition Lesson 2: How Does a LASER Work?<br />
which is also used in the PhET simulator.<br />
Discuss absorption: when an atom’s electron moves to a<br />
higher energy level, the atom absorbs energy, and increases<br />
its internal energy. This energy could be transferred to it by<br />
the absorption <strong>of</strong> a photon (light energy) <strong>of</strong> just the right<br />
wavelength (or frequency). Energy is conserved–the light<br />
energy was transferred to the atom, absorbed and transformed,<br />
increasing the atom’s internal energy, as shown in<br />
the first two columns <strong>of</strong> the diagrams below. Display the<br />
first two columns below for the class<br />
Discuss spontaneous emission: When an atom naturally<br />
decays to a lower energy state, it is called “spontaneous decay”<br />
or spontaneous emission. In this process some <strong>of</strong> the<br />
atom’s internal energy is transformed into light energy. <strong>The</strong><br />
light energy is emitted as the atom’s electron moves from a<br />
higher energy level to a lower one. <strong>The</strong> emitted photon has<br />
a frequency proportional to the energy difference between<br />
the atom’s two energy levels involved in the transition. Emphasize<br />
that the emitted photon may travel in any direction.<br />
<strong>The</strong> amount <strong>of</strong> time it takes for the atom to decay depends<br />
on the difference between the energy levels involved in the<br />
transition. <strong>The</strong> greater the energy difference, the faster the<br />
atom transitions to a lower energy state.<br />
Absorption and Spontaneous Emission <strong>of</strong> a Photon by an Atom<br />
photon approaches an atom atom has absorbed photon atom has emitted a photon<br />
photon energy = E 2 - E 1<br />
photon<br />
Energy <strong>of</strong> atom<br />
A photon with energy approaches an atom.<br />
<strong>The</strong> atom is in its lowest energy level.<br />
photon energy = E 3 - E 1<br />
photon<br />
Energy <strong>of</strong> atom<br />
E3 E2 E 1<br />
E 3<br />
E 2<br />
E 1<br />
atom<br />
_____3<br />
_____2<br />
_____1<br />
Energy <strong>of</strong> atom<br />
<strong>The</strong> atom has absorbed the photon. <strong>The</strong><br />
photon energy has been transformed into<br />
internal energy <strong>of</strong> the atom. Note that the<br />
photon is absorbed only if its energy is equal<br />
to the difference in energy <strong>of</strong> the atomic levels<br />
involved in the transition.<br />
E 3<br />
E 2<br />
E 1<br />
photon energy = E 2 - E 1<br />
atom atom<br />
_____3<br />
_____2<br />
_____1<br />
<strong>The</strong> atom has returned to the lowest energy<br />
level and has emitted a photon. <strong>The</strong> photon<br />
may be emitted in any direction. <strong>The</strong> photon’s<br />
energy is equal to the difference in energy <strong>of</strong><br />
the atomic levels involved in the transition.<br />
This process is called spontaneous emission.<br />
photon energy = E 3 - E 1<br />
atom atom atom<br />
_____3<br />
_____2<br />
_____1<br />
Energy <strong>of</strong> atom<br />
E 3<br />
E 2<br />
E 1<br />
_____3<br />
_____2<br />
_____1<br />
Energy <strong>of</strong> atom<br />
Energy <strong>of</strong> atom<br />
E 3<br />
E 2<br />
E 1<br />
E 3<br />
E 2<br />
E 1<br />
_____3<br />
_____2<br />
_____1<br />
_____3<br />
_____2<br />
_____1<br />
<strong>The</strong> <strong>Physics</strong> <strong>of</strong> <strong>LASERs</strong>, Teacher Edition<br />
21
Teacher Edition Lesson 2: How Does a LASER Work?<br />
Kinesthetic model for absorption and spontaneous<br />
emission<br />
22<br />
• explain model<br />
• run model for absorption only<br />
• run model for absorption and spontaneous emission<br />
• discuss stimulated emission<br />
• run model again with stimulated emission.<br />
Let students know that in this model<br />
• students participating in the model will represent<br />
energy, either as photons (packets <strong>of</strong> light energy) or<br />
as internal energy <strong>of</strong> the atom.<br />
• a piece <strong>of</strong> paper will represent the atom. When the<br />
paper is on the ground the atom is in its lowest energy<br />
or ground state.<br />
• the photons all have just the right amount <strong>of</strong> energy<br />
to be absorbed by an atom, causing it to move to a<br />
higher energy state.<br />
• to express the absorption <strong>of</strong> the photon, and the<br />
increase in the atom’s internal energy, the student<br />
stops moving and lifts up the paper (atom in an excited<br />
state).<br />
• two walls (or desks) represent mirrors creating the<br />
laser cavity.<br />
(Atomic “states” correspond to atomic energy levels.)<br />
photon energy = E 2 - E 1<br />
photon energy = E 3 - E 1<br />
<strong>The</strong> <strong>Physics</strong> <strong>of</strong> <strong>LASERs</strong>, Teacher Edition<br />
Stimulated Emission<br />
Run the kinesthetic model to simulate absorption <strong>of</strong> photons<br />
• Have a cleared area on the floor, preferably where<br />
students had performed the kinesthetic models during<br />
Lesson 1.<br />
• Place some sheets <strong>of</strong> construction paper on the floor.<br />
• Let the students know that the construction paper<br />
on the floor represents atoms in their ground state.<br />
• <strong>The</strong>n have a few students be photons. Label the students<br />
with different colors <strong>of</strong> light.<br />
• Let the class know that only photons that are red<br />
are just the right frequency (meaning they carry just<br />
the right energy) to be absorbed by the atoms in this<br />
model. <strong>The</strong>n have photons travel to the atoms. All<br />
the photons but the red ones should walk straight to<br />
the other side <strong>of</strong> the room. <strong>The</strong> red photons should<br />
stop at the atom and lift up the construction paper<br />
to simulate an atom absorbing a red photon and increasing<br />
in internal energy.<br />
If some red photons forget and walk straight through that<br />
is okay. Let the class know that realistically, not all the red<br />
photons would be absorbed by the atoms.<br />
Remind students that the students represent energy in<br />
the model. Initially all students are photons (light energy).<br />
photon approaches an excited atom atom emits a photon<br />
photon<br />
atom<br />
A photon approaches an atom that is already in an “excited state”–in<br />
this case, in energy level 2 (above) or energy level 3 (below). Note<br />
that the energy <strong>of</strong> the emitted photon is equal to the difference between<br />
the initial energy <strong>of</strong> the atom and its final energy<br />
photon<br />
Energy <strong>of</strong> atom<br />
atom<br />
Energy <strong>of</strong> atom<br />
E3 E2 E 1<br />
E 3<br />
E 2<br />
E 1<br />
_____3<br />
_____2<br />
_____1<br />
_____3<br />
_____2<br />
_____1<br />
photon energy = E 2 - E 1<br />
atom<br />
<strong>The</strong> atom emits a photon by “stimulated emission.” This photon has<br />
the same energy as the photon that approached the atom, and also<br />
the same phase (the photons are in step). <strong>The</strong> internal energy <strong>of</strong> the<br />
atom changes into the energy <strong>of</strong> the emitted photon.<br />
photon energy= E 3 - E 1<br />
atom<br />
2 photons<br />
2 photons<br />
Energy <strong>of</strong> atom<br />
Energy <strong>of</strong> atom<br />
E 3<br />
E 2<br />
E 1<br />
E 3<br />
E 2<br />
E 1<br />
_____3<br />
_____2<br />
_____1<br />
_____3<br />
_____2<br />
_____1
Some students that represent red photons are absorbed by<br />
the atom (paper) – after absorption, these students represent<br />
internal energy in the atom. <strong>The</strong> paper on the ground<br />
represents the atom in its ground state. <strong>The</strong> paper lifted up<br />
represents the atom in an excited state with increased internal<br />
energy.<br />
Discuss the absorption and spontaneous emission. An<br />
atom is in an excited state when it has absorbed energy and<br />
is no longer in its lowest energy state. Excited atoms will<br />
naturally “decay” or go back to their ground energy state.<br />
When they do this, the atom “loses” internal energy, but<br />
where does the energy go? A photon is emitted. If the atom<br />
absorbed a photon <strong>of</strong> red light, and then naturally decays<br />
back to its original state, it will spontaneously emit a photon<br />
<strong>of</strong> red light.<br />
Run kinesthetic model to simulate absorption and spontaneous<br />
emission <strong>of</strong> photons.<br />
• Decide how many students you want to participate.<br />
• Use pieces <strong>of</strong> construction paper on the floor to represent<br />
atoms.<br />
• Number the students one through four.<br />
• Review the absorption process by having students<br />
start as photons that will be absorbed by the atoms.<br />
Let the class know that only photons <strong>of</strong> just the<br />
right frequency (and hence energy) are absorbed by<br />
the atoms.<br />
• <strong>The</strong>n have photons (students) travel to the atoms<br />
(construction paper).<br />
• <strong>The</strong> photons (students) should stop at the atom<br />
(construction paper) and lift up the construction<br />
paper to simulate the absorption <strong>of</strong> the photon’s energy<br />
and its transformation into the atom’s internal<br />
energy.<br />
• Students should count until they reach about twice<br />
their assigned number before the atom decays.<br />
When this occurs, the students should put down<br />
the construction paper to simulate the atom going<br />
to its ground state, and travel in any direction (in<br />
a straight line) across the room. It is important to<br />
emphasize that there is no preferred direction in<br />
spontaneous emission.<br />
Consider having students answer the following questions:<br />
Describe what the students you observed represent. What<br />
does the paper represent? What does the position <strong>of</strong> the paper<br />
represent? Was there a pattern to the way the emitted<br />
photons traveled? If so, describe the pattern.<br />
Remind students that in the model students represent energy<br />
(first light energy, then internal energy, and finally<br />
light energy again). <strong>The</strong> paper on the ground represents<br />
the atom in its ground state. <strong>The</strong> paper lifted up represents<br />
the atom in an excited state. <strong>The</strong> photons can be emitted in<br />
any direction. (Some students may say that the photons are<br />
emitted within a certain time frame.)<br />
Emphasize energy. In this model the students represent<br />
energy – first light energy, then energy in an atom, then<br />
Teacher Edition Lesson 2: How Does a LASER Work?<br />
light energy again. It is important for them to follow the energy.<br />
Point out that realistically not all the photons would be<br />
absorbed, and that all the excited atoms would decay over<br />
a period <strong>of</strong> time.<br />
Discuss and model stimulated emission<br />
Introduce stimulated emission by letting students know<br />
that there is another type <strong>of</strong> interaction between light and<br />
an atom – a special one. Ask students to imagine an excited<br />
atom, one that has just absorbed a photon <strong>of</strong> red light, and<br />
suddenly another red photon comes by. Ask students what<br />
they think happens and briefly discuss their ideas.<br />
Demonstrate and explain stimulated emission model<br />
with four students<br />
Using this model, students will review absorption and<br />
spontaneous emission, and be introduced to stimulated<br />
emission.<br />
• Have the construction paper in the middle <strong>of</strong> the<br />
room.<br />
• Have a line <strong>of</strong> four students that represent red photons.<br />
• Have all but one <strong>of</strong> the students (red photons) get<br />
absorbed by three atoms. Immediately send in the<br />
last student (red photon).<br />
• When the last student (photon) reaches an excited<br />
atom (lifted construction paper), have the last student<br />
tickle the lifted construction paper. <strong>The</strong> student<br />
holding the tickled construction paper should put it<br />
down, transforming from internal energy within the<br />
atom to a photon (light energy), and lock arms with<br />
the incoming photon (last student).<br />
• <strong>The</strong>se two students become coherent photons, walking<br />
right next to each other, in step, and in the direction<br />
that the incoming photon (last student) was<br />
traveling in. <strong>The</strong> incoming photon is said to have<br />
stimulated the excited atom to emit a photon. Let<br />
the other two excited atoms decay spontaneously so<br />
that those students travel <strong>of</strong>f in any direction.<br />
Remind students <strong>of</strong> what each part <strong>of</strong> the model represents.<br />
Students are initially photons (light energy), then they are<br />
absorbed by the atom (paper) and transform into internal<br />
energy <strong>of</strong> the atom (paper lifted <strong>of</strong>f ground). When the atom<br />
(paper) decays, the atom returns to its ground state (paper<br />
on ground), and the students (energy) transform from internal<br />
energy into light energy. Emphasize that, as a result <strong>of</strong><br />
stimulated emission, the two photons are completely in<br />
phase (coherent) and travel in the direction <strong>of</strong> the incoming<br />
photon that caused the emission.<br />
Run the stimulated emission model again with many students<br />
Explain to the students that they are going to run this model<br />
again according to the following conditions:<br />
• Students will initially represent photons (light energy<br />
<strong>of</strong> a given wavelength).<br />
• Some photons (students representing light energy)<br />
<strong>The</strong> <strong>Physics</strong> <strong>of</strong> <strong>LASERs</strong>, Teacher Edition<br />
23
Teacher Edition Lesson 2: How Does a LASER Work?<br />
24<br />
will be absorbed by the atoms (paper on the<br />
floor), and transform into internal energy<br />
within the atom. <strong>The</strong> atoms will be in an excited<br />
state (paper lifted <strong>of</strong>f the floor).<br />
• Some <strong>of</strong> the excited atoms (paper held up<br />
by student) will decay spontaneously so<br />
that some students may transform back into<br />
photons (light energy) and travel in any direction.<br />
• Other atoms will stay excited. <strong>The</strong> students<br />
will remain as internal energy within an<br />
atom, until the atom undergoes a stimulated<br />
emission.<br />
• Two walls will represent mirrors.<br />
Disclaimer: Let students know that atoms usually<br />
decay spontaneously after a short amount <strong>of</strong> time,<br />
but in this model, in order to demonstrate what is<br />
happening within the laser cavity, we let the atom<br />
stay in an excited state for a prolonged period <strong>of</strong><br />
time.<br />
Run model<br />
• Have the students be photons that will be<br />
absorbed by the atoms (paper on the floor).<br />
• Have about 1/4 <strong>of</strong> the atoms decay spontaneously,<br />
making sure that at least two <strong>of</strong> the<br />
students are heading toward the walls that<br />
represent mirrors.<br />
• As the photons reach a wall, they should<br />
turn around, moving along the marks on<br />
the floor from the previous lesson.<br />
• When they reach an excited atom they<br />
should tap or tickle the lifted paper, and the<br />
student representing the internal energy in<br />
the atom should put the paper on the floor<br />
and then walk arm in arm, or side by side<br />
and in step, with the student that stimulated<br />
the emission.<br />
• This should continue until all the atoms are<br />
in the ground state. (It should look something<br />
similar to a marching band between<br />
the “mirrors.”)<br />
Consider having students answer the following:<br />
Describe what you observed when your class ran<br />
this model. What did each part <strong>of</strong> the model represent?<br />
Students should describe each part <strong>of</strong> the model.<br />
Make sure students do not confuse what they represent.<br />
<strong>The</strong>y are not the atom, nor the electron, they<br />
are energy – initially light energy, then internal<br />
energy within the atom (paper), then light energy<br />
again. <strong>The</strong> paper represents the atom. <strong>The</strong> paper on<br />
the ground represents an atom in its ground state,<br />
and in the air it is an atom in an excited state. Emphasize<br />
that students walking in step or in phase<br />
are coherent photons (which could become three<br />
or four or more depending on how many excited<br />
<strong>The</strong> <strong>Physics</strong> <strong>of</strong> <strong>LASERs</strong>, Teacher Edition<br />
Lesson 2.<br />
atoms they pass by).<br />
Student Edition Lesson 2: How Does a LASER Work?<br />
Introductory Questions<br />
• What causes laser light to have the special properties you found in Lesson 1 (monochromatic,<br />
collimated, and coherent)?<br />
• What are the essential parts <strong>of</strong> a laser?<br />
Discuss your ideas with your group and write down your groups’ ideas. Be prepared to<br />
share your groups’ ideas with the class.<br />
Goal<br />
To describe how a laser works.<br />
How Does a LASER Work?<br />
A. How could you use a computer model to find out how a laser works?<br />
1. You observed a model in which students represented photons and atoms. Describe<br />
what you have learned from this model about how atoms and light interact.<br />
2. How do you think you can use a computer model to find out how a laser works?<br />
3. In this part <strong>of</strong> the lesson you are going to explore a computer model <strong>of</strong> a laser – but at<br />
first, the laser will have only one atom. Open the PhET simulator. Make sure the “one<br />
atom” tab is selected, and that the energy levels are set at “two.” This will allow you<br />
to get an idea <strong>of</strong> how the simulator works by considering only two energy levels <strong>of</strong><br />
an atom.<br />
Student Version Page 7<br />
Image credit: PhET Interactive Simulations, University <strong>of</strong> Colorado<br />
http://phet.colorado.edu<br />
<strong>The</strong> <strong>Physics</strong> <strong>of</strong> <strong>LASERs</strong> 7<br />
How does coherence fit in? What does coherence have to do with<br />
a laser?<br />
Discuss: When an excited atom undergoes stimulated emission (a<br />
photon <strong>of</strong> just the right energy goes by an excited atom and stimulates<br />
the excited atom to emit a photon <strong>of</strong> the same energy), the two<br />
photons are coherent and in step with each other. This coherence is<br />
one <strong>of</strong> the special features <strong>of</strong> laser light.<br />
Emphasize that the mirrors create the resonant cavity and allow the<br />
build-up <strong>of</strong> coherent photons along one direction in the laser, causing<br />
a collimated coherent beam.<br />
Ask: Based on what we’ve done so far, what do you now think the<br />
atoms in a laser do? With your group, come up with your best group<br />
answer to this question and support your answer.<br />
Have a discussion about what students now think the answer to<br />
these questions are. Get the class to agree on the wording <strong>of</strong> their<br />
answer. Guide students to discuss how this fits in with a laser.<br />
<strong>The</strong> atoms that make up a laser transform the input energy into the<br />
desired output energy. <strong>The</strong> goal is to get the atoms excited by hav-
Student Edition Lesson 2: How Does a LASER Work?<br />
8<br />
4. Change the settings <strong>of</strong> the lamp control to observe how this affects the incoming light.<br />
See if you can produce all the colors <strong>of</strong> the rainbow.<br />
<strong>The</strong> <strong>Physics</strong> <strong>of</strong> <strong>LASERs</strong><br />
• How can you make the lamp output a lot <strong>of</strong> photons and just a few?<br />
• What is this incoming light used for in the PhET simulator?<br />
Image credit: PhET Interactive Simulations<br />
University <strong>of</strong> Colorado<br />
http://phet.colorado.edu<br />
5. Change the settings <strong>of</strong> the excited level <strong>of</strong> the atom. See if you can get it to absorb and<br />
emit each the colors <strong>of</strong> the rainbow (red, orange, yellow, green, blue, and violet) – <strong>of</strong><br />
course not all at the same time!<br />
6. <strong>The</strong> atom’s energy levels are important in determining the input and output energies<br />
<strong>of</strong> the laser. How does changing these allowed energy levels affect the laser?<br />
7. Change the lifetime <strong>of</strong> the energy level by moving the slider next to the excited state <strong>of</strong><br />
the atom at the top right <strong>of</strong> the screen. Describe what affect this has.<br />
Image credit: PhET Interactive Simulations<br />
University <strong>of</strong> Colorado<br />
http://phet.colorado.edu<br />
8. Make the energy spacing <strong>of</strong> the two-level atom correspond to red light. Set the lamp to<br />
red light that has just the right energy for the two-level atom. Increase the lamp output<br />
so it is maximized. Change the lifetime <strong>of</strong> the atom. How does changing the lifetime <strong>of</strong><br />
the atom’s energy level affect the system?<br />
Student Version Page 8<br />
ing them absorb energy, and then to create stimulated emission. <strong>The</strong><br />
more this happens the more coherent photons that are produced.<br />
Having coherent light (produced by stimulated emission) is an essential<br />
part <strong>of</strong> a laser.<br />
Parts A and B <strong>of</strong> this lesson may be done by student groups, or independently<br />
outside <strong>of</strong> class. If you don’t have enough computers<br />
available you could conduct Parts A and B as a teacher-led lesson,<br />
utilizing suggestions from the class.<br />
A. How could you use a computer model to find out how a laser<br />
works? In this part <strong>of</strong> this lesson students will explore the PhET simulator<br />
and investigate how the variables <strong>of</strong> the laser affect the lasing<br />
process. Students gain evidence supporting the need for the three<br />
basic ingredients <strong>of</strong> a laser and the role that they play.<br />
Goal <strong>of</strong> Part A: To make connections between the color <strong>of</strong> laser light<br />
and the allowed energy transitions <strong>of</strong> the active medium; the coherence<br />
<strong>of</strong> the light and stimulated emission; mirrors (resonant cavity),<br />
and the collimation <strong>of</strong> the light, and the buildup <strong>of</strong> coherent light<br />
within the laser. Students should know that stimulated emission requires<br />
the atom to already be in an excited state. Students should<br />
have a sense that it’s easier to create a laser with atoms that have<br />
three energy levels.<br />
Teacher Edition Lesson 2: How Does a LASER Work?<br />
More on the importance <strong>of</strong> using an atom with three energy<br />
levels: If we only had two energy levels, then<br />
the lamp photons that cause the atoms to be excited<br />
would also cause stimulated emission, but not in<br />
the direction between the mirrors <strong>of</strong> the laser (along<br />
the laser’s axis). Usually the higher the energy level<br />
the shorter the lifetime <strong>of</strong> the level. Using the incident<br />
energy we can excite the atom from its lowest<br />
energy level to its third energy level, which rapidly<br />
decays to the second level. This second level has<br />
a longer lifetime and is responsible for lasing. As<br />
this intermediate level decays, some <strong>of</strong> the photons<br />
emitted will cause stimulated emission in the direction<br />
<strong>of</strong> the laser mirrors.<br />
Students should be able to<br />
• describe what the atoms in a laser do: absorption,<br />
spontaneous emission, and stimulated<br />
emission.<br />
• describe how the atoms transform the input energy<br />
into the desired output energy <strong>of</strong> the laser.<br />
• make connections between stimulated emission<br />
and coherence.<br />
Let students know that the atoms (or molecules)<br />
used in a laser are called the active medium.<br />
Tell students: <strong>The</strong> word LASER is an acronym that<br />
stands for Light Amplification by Stimulated Emission<br />
<strong>of</strong> Radiation.<br />
Part A Step 4<br />
Note that the incoming light supplies the energy<br />
that is absorbed by the atoms within the laser (the<br />
active medium).<br />
To make the lamp increase the number <strong>of</strong> photons<br />
it outputs (or its intensity) slide the slider directly<br />
under the label “lamp control,” to the right.<br />
Part A, Step 6<br />
Changing the allowed energy levels changes the<br />
energy that can be absorbed by the atoms in the laser,<br />
and the energy emitted by the laser. <strong>The</strong> energy<br />
levels determine the laser’s output wavelength and<br />
energy.<br />
Part A, Step 7<br />
<strong>The</strong> longer the lifetime (slider moved to the right),<br />
the more time it takes before the atom spontaneously<br />
decays. During spontaneous emission the<br />
electron goes from the excited state to the ground<br />
state and emits a photon in any direction.<br />
Part A, Step 8<br />
Decreasing the lifetime causes the spontaneous decay<br />
to occur more rapidly. Students should observe<br />
photons emitted during spontaneous decay traveling<br />
in a different direction than the incoming light<br />
being absorbed by the atom.<br />
<strong>The</strong> <strong>Physics</strong> <strong>of</strong> <strong>LASERs</strong>, Teacher Edition<br />
25
Teacher Edition Lesson 2: How Does a LASER Work?<br />
Part A, Step 9<br />
Students should observe that the atom undergoes<br />
absorption and both spontaneous and stimulated<br />
emission. However, eventually all the energy<br />
leaves the system through spontaneous emissions<br />
in directions not along the axis <strong>of</strong> the laser. Without<br />
a constant source <strong>of</strong> energy, the laser system cannot<br />
build up coherent, collimated light.<br />
Part A, Step 10<br />
<strong>The</strong> top lamp (purple light source) excites the atom<br />
to the third level. <strong>The</strong> atom undergoes spontaneous<br />
emission to the second energy level. <strong>The</strong> red lamp<br />
causes stimulated emission in the atom, or the atom<br />
spontaneously decays to the ground state. <strong>The</strong> process<br />
repeats.<br />
Part A, Step 11<br />
When the mirrors are put into the system the red<br />
lamp is turned <strong>of</strong>f. Students should note that the<br />
red light eventually becomes coherent and collimated<br />
along the axis <strong>of</strong> the laser (between the mirrors).<br />
Image credit: PhET Interactive Simulations, University <strong>of</strong><br />
Colorado, http://phet.colorado.edu<br />
Part A, Step 12<br />
Utilizing three levels <strong>of</strong> the atom for a laser provides<br />
scientists with the ability to create a significant<br />
build-up <strong>of</strong> energy within the laser cavity.<br />
Here’s why and how:<br />
26<br />
• First, the higher an atom’s energy level, the<br />
more quickly the atom will spontaneously<br />
decay to a lower energy level. This reduces<br />
the chances for stimulated emission to occur.<br />
<strong>The</strong> PhET simulator models this with<br />
the third energy level having a very short<br />
lifetime. By having the energy source excite<br />
to the third energy level, the intermediate<br />
energy level used for the lasing process can<br />
be quickly populated, since the third level<br />
quickly decays.<br />
• Second, the atom spontaneously decays<br />
from its second energy level to its lowest<br />
energy level slowly enough that stimulated<br />
<strong>The</strong> <strong>Physics</strong> <strong>of</strong> <strong>LASERs</strong>, Teacher Edition<br />
Student Edition Lesson 2: How Does a LASER Work?<br />
9. Keep the settings the same as in Step 8, but now turn on the mirrors. <strong>The</strong> right mirror<br />
can be made to be partially reflective. For now keep it at 100%. When you turn on the<br />
mirrors, it turns <strong>of</strong>f the lamp because no light would be able to go through the left<br />
mirror. What do you observe?<br />
10. Change the settings to those shown in the image below. Make sure you select the tab<br />
on the top for the three-level atom. Note also that there are now two lamps – one for<br />
each energy level. One lamp points along the axis <strong>of</strong> the laser cavity and the other<br />
lamp (on top) is perpendicular to the laser axis. Set the lamp above the laser cavity to<br />
the energy difference between levels 1 and 3. Set the side lamp to the energy difference<br />
between levels 2 and 1. Don’t have the mirrors on yet! Watch what happens for<br />
at least 30 seconds. Write down your observations.<br />
11. Put in the mirrors. <strong>The</strong> left mirror does not allow any light to go through it (it is 100%<br />
reflective); the right mirror you can adjust. To be a useful laser you want to allow<br />
some light to get out. Set the right mirror to 95%. By putting in the mirrors you turn<br />
<strong>of</strong>f the red lamp on the side. Watch what happens for about a minute and describe<br />
what you observe.<br />
12. What do you think the advantage is to having three-level atoms? Hint: In this case<br />
there is a three-step process<br />
• <strong>The</strong> atom is excited into its highest energy level.<br />
• <strong>The</strong> atom spontaneously decays to a lower (intermediate) energy level.<br />
• <strong>The</strong> atom undergoes stimulated emission from its intermediate energy level to its<br />
lowest energy level.<br />
13. With your group, summarize how the PhET simulator helps you to understand how<br />
a laser works.<br />
14. Wrap-up: Describe how the essential components <strong>of</strong> a laser produce laser light (light<br />
<strong>of</strong> a single wavelength that is collimated and coherent).<br />
Student Version Page 9<br />
Image credit: PhET Interactive Simulations<br />
University <strong>of</strong> Colorado<br />
http://phet.colorado.edu<br />
<strong>The</strong> <strong>Physics</strong> <strong>of</strong> <strong>LASERs</strong> 9<br />
emission can occur. When a spontaneously emitted photon<br />
from the second level to the ground state is emitted in the direction<br />
<strong>of</strong> the mirrors, it can then go back and forth between<br />
the mirrors and stimulate the emission <strong>of</strong> coherent photons<br />
that will eventually become the laser output.<br />
• Third, if the input energy were the same as the output energy,<br />
the stimulated emission process would occur along the<br />
same direction <strong>of</strong> the incident photons. You can demonstrate<br />
this to the class by setting the PhET simulator for a single,<br />
two-level atom, no mirrors, and the lamp turned on high.<br />
<strong>The</strong> amplification is in the direction <strong>of</strong> the incident photons,<br />
and the amplification would not produce a significant buildup<br />
<strong>of</strong> energy, but there would be an increase <strong>of</strong> coherence.<br />
Part A, Step 13<br />
Have the students summarize how the PhET simulator works and<br />
how it corresponds to the essential components <strong>of</strong> the laser.<br />
Example: <strong>The</strong> lamp provides the incident photons that are absorbed<br />
by the atoms in the cavity. <strong>The</strong> atoms transform this input energy to<br />
the output light energy. <strong>The</strong> atom’s energy levels determine the incident<br />
photon energy needed (in the PhET simulator), and also the energy<br />
<strong>of</strong> the laser output photons. <strong>The</strong> mirrors, which form the cavity,<br />
help to build up the coherent radiation that is caused by stimulated<br />
emission, and they help to collimate the light.
Student Edition Lesson 2: How Does a LASER Work?<br />
B. What conditions do you need to get the Phet simulator laser to work?<br />
You are going to try to get the PhET simulator to lase (produce laser light). You will<br />
need more than one atom, so use the PhET simulator with the multi-atom tab selected.<br />
1. With your group decide on your procedure to make this computer model <strong>of</strong> a laser<br />
work (lase). List all <strong>of</strong> the variables. For each one determine an initial setting, and<br />
why you chose it.<br />
2. As you go through your procedure, record your observations. How do the variables<br />
you change affect the lasing process? Record any changes you make and why you<br />
made them.<br />
3. What could you do to get the PhET simulator into the danger zone? (See the laser<br />
power indicator). Watch out, the laser could blow up!<br />
4. What conditions do you need to get a laser to work? Using what you have learned<br />
from the PhET simulator, describe how you could make a working laser.<br />
Student Version Page 10<br />
<strong>The</strong> <strong>Physics</strong> <strong>of</strong> <strong>LASERs</strong> 11<br />
NOTE: Many lasers do not use a lamp to excite the atoms or molecules,<br />
but rather use an electric discharge to excite the atoms or<br />
molecules into various energy states.<br />
Part A, Step 14<br />
Example: <strong>The</strong> energy source provides energy to be transformed<br />
to laser light. <strong>The</strong> active medium (atoms/molecules) transforms<br />
this energy into single wavelength (monochromatic), coherent<br />
light energy. <strong>The</strong> resonant cavity (mirrors) help to collimate the<br />
light and build up the coherent light.<br />
Did students reach the goal <strong>of</strong> Part A? Students should be able<br />
to make connections between 1) the color <strong>of</strong> laser light and the<br />
allowed energy transitions <strong>of</strong> the atoms in the active medium; 2)<br />
the coherence <strong>of</strong> the light and stimulated emission; 3) mirrors (a<br />
laser cavity) to assist in collimating the light and building up the<br />
coherence <strong>of</strong> light. Students should know that stimulated emission<br />
requires an atom to be in an excited state. Students should<br />
have a sense that it’s easier to create a laser with atoms that have<br />
three energy levels, which allows the atom to be in an excited<br />
state long enough for stimulated emission to occur.<br />
Teacher Edition Lesson 2: How Does a LASER Work?<br />
B. What conditions do you need to get<br />
the PhET simulator laser to work?<br />
Part B Goal: Students should be able to set the simulator<br />
variables to get it to lase.<br />
Individuals, groups, or the class determine how<br />
variables within a laser affect the process <strong>of</strong> lasing<br />
for a multi-atom system. You may also have students<br />
determine how to get the laser to self-destruct.<br />
If you only have one computer available, lead the<br />
class through the exploration.<br />
Part B may also be assigned as an out-<strong>of</strong> class activity<br />
if students have computers available to them.<br />
Part B, Step 1<br />
Check to see that students can explain how they<br />
chose their initial settings <strong>of</strong> the variables.<br />
Part B, Step 2<br />
Students should record their observations. Based<br />
on their observations students should record any<br />
changes made and their reasons for making those<br />
changes.<br />
Encourage students to view the actual laser<br />
through the link in the PhET simulator. <strong>The</strong> button<br />
for this is at the bottom <strong>of</strong> the window. Pushing this<br />
button brings up the pop up window shown below.<br />
Image credit: Meredith Instruments<br />
Atoms in a laser can be excited either by light, as in the<br />
simulation, or by collisions with energetic electrons (like<br />
what happens in a florescent light). <strong>The</strong> helium-neon laser<br />
shown here is particularly photogenic, but it excites<br />
the atoms with energetic electrons produced by having<br />
an electrical discharge through the gas. <strong>The</strong> discharge is<br />
produced by applying a voltage between the ends <strong>of</strong> the<br />
tube <strong>of</strong> gas via the two wires in the picture.<br />
An example <strong>of</strong> how the PhET simulator could be<br />
set up to create lasing is shown on the following<br />
page. <strong>The</strong> laser will lase over a range <strong>of</strong> wavelenths<br />
corresponding to the range between red and blue.<br />
<strong>The</strong> <strong>Physics</strong> <strong>of</strong> <strong>LASERs</strong>, Teacher Edition<br />
27
Teacher Edition Lesson 2: How Does a LASER Work?<br />
Guidelines for variable settings:<br />
28<br />
• Use the Multiple Atoms (Lasing) tab<br />
• Select three energy levels<br />
• Maximize level two’s lifetime<br />
• Match lamp output energy to energy between<br />
levels three and one<br />
• Enable mirrors, and set mirror reflectivity to<br />
96%<br />
• Adjust slider for lamp intensity so that level<br />
two’s population is maximized<br />
Image credit: PhET Interactive Simulations, University <strong>of</strong><br />
Colorado, http://phet.colorado.edu<br />
Image credit: PhET Interactive Simulations, University <strong>of</strong><br />
Colorado, http://phet.colorado.edu<br />
Part B, Step 3<br />
An easy way to achieve this is to have the same laser<br />
settings as those that worked for Step 2, but now<br />
make both mirrors 100% reflective.<br />
Part B, Step 4<br />
Students should indicate that an energy source is<br />
needed to initially excite atoms that make up the active<br />
laser medium. <strong>The</strong> active medium transforms<br />
the incident input energy into the laser output light<br />
energy. Mirrors are needed to collimate this light<br />
energy and allow it to build up. From the PhET<br />
simulator students should recognize that the active<br />
medium is composed <strong>of</strong> atoms. <strong>The</strong> atom’s energy<br />
levels used in the lasing process must have a long<br />
enough lifetime to allow for stimulated emission to<br />
<strong>The</strong> <strong>Physics</strong> <strong>of</strong> <strong>LASERs</strong>, Teacher Edition<br />
Student Edition Lesson 2: How Does a LASER Work?<br />
B. What conditions do you need to get the Phet simulator laser to work?<br />
You are going to try to get the PhET simulator to lase (produce laser light). You will<br />
need more than one atom, so use the PhET simulator with the multi-atom tab selected.<br />
1. With your group decide on your procedure to make this computer model <strong>of</strong> a laser<br />
work (lase). List all <strong>of</strong> the variables. For each one determine an initial setting, and<br />
why you chose it.<br />
2. As you go through your procedure, record your observations. How do the variables<br />
you change affect the lasing process? Record any changes you make and why you<br />
made them.<br />
3. What could you do to get the PhET simulator into the danger zone? (See the laser<br />
power indicator). Watch out, the laser could blow up!<br />
4. What conditions do you need to get a laser to work? Using what you have learned<br />
from the PhET simulator, describe how you could make a working laser.<br />
Student Version Page 10<br />
occur. Students might have a sense that it is easier for this process to<br />
occur with multi-level atoms making up the active medium.<br />
Did students reach the goal <strong>of</strong> Part B? Students should have adjusted<br />
the variables in the PhET simulator using the multi-atom, threelevel<br />
settings, to obtain the lasing process. <strong>The</strong>ir answer in Part B,<br />
Step 4 should describe the conditions they needed to get the PhET<br />
simulator to lase.<br />
Image credit: PhET Interactive Simulations, University <strong>of</strong><br />
Colorado, http://phet.colorado.edu<br />
<strong>The</strong> <strong>Physics</strong> <strong>of</strong> <strong>LASERs</strong> 11
Teachers Notes<br />
Teacher Edition Lesson 2: How Does a LASER Work?<br />
<strong>The</strong> <strong>Physics</strong> <strong>of</strong> <strong>LASERs</strong>, Teacher Edition<br />
29
30<br />
Lesson 3.<br />
What are Some Applications <strong>of</strong> <strong>LASERs</strong>?<br />
Goal: Students should be able to describe some laser applications, and give<br />
examples <strong>of</strong> how science and technology can affect society.<br />
Time: 20 to 40 minutes – ½ to 1 class period.<br />
Summary <strong>of</strong> Lesson 3<br />
Through hands-on experiences students explore several laser applications.<br />
Part A <strong>of</strong> this lesson is an optional activity 1 that has students investigate one<br />
way in which information can be carried by light. Students transmit sound<br />
on a laser beam and use a solar cell as the receiver.<br />
Students determine the width <strong>of</strong> their hair in Part B using the diffraction pattern<br />
formed by shining a laser pointer on a strand <strong>of</strong> their hair. Criminalists,<br />
scientists that analyze evidence from crime scenes, use lasers to analyze<br />
evidence collected. (Although most measurements <strong>of</strong> hair thickness are done<br />
with microscopes, forensic technicians use lasers to collect evidence at the<br />
scene <strong>of</strong> a crime.)<br />
Students read about the evidence provided by X-ray diffraction for the helical<br />
structure <strong>of</strong> DNA in Part C. Students build a model <strong>of</strong> X-ray diffraction by<br />
DNA using a laser and helical spring. This laser application helps students<br />
understand how diffraction can be used to determine the structure <strong>of</strong> an object.<br />
In the last part <strong>of</strong> this lesson students explore laser speckle and read about<br />
how it is used to measure blood velocity.<br />
To find information on applications and research involving lasers, explore the<br />
<strong>American</strong> <strong>Physical</strong> <strong>Society</strong>’s outreach website <strong>Physics</strong> Central.<br />
!<br />
Safety<br />
Lasers are powerful light sources that can cause permanent eye damage. If a<br />
student stares deliberately into a laser beam, permanent and irreparable eye<br />
damage can occur. Because <strong>of</strong> this, it is suggested that students use a Class<br />
II laser. Class II lasers are no greater than 1 mW and the blink reflex will prevent<br />
eye damage, unless deliberate staring into the beam occurs. Most laser<br />
pointers are Class III A lasers, which are up to 5 mW. Class III A lasers can<br />
cause permanent and irreparable eye damage if they are used with lenses or<br />
mirrors or if direct viewing <strong>of</strong> the beam occurs. Direct viewing <strong>of</strong> the beam<br />
<strong>of</strong>f <strong>of</strong> highly reflective surfaces such as mirrors will also cause permanent and<br />
irreparable damage. <strong>The</strong> National Science Teachers Association recommends<br />
that students below high school level should not handle laser pointers; rather<br />
the teacher should perform demonstrations with the laser pointer. 2 Additionally,<br />
it is suggested that safety posters be displayed in the classroom when<br />
using lasers. If conducting the optional Part A <strong>of</strong> Lesson 3, review the safety<br />
issues involved with the different classes <strong>of</strong> lasers. <strong>The</strong> Spectra Sound kit includes<br />
in it a Class III A laser. <strong>The</strong> safety information for lasers can be found<br />
online by conducting an Internet search on “laser safety”.<br />
1Adapted from the <strong>American</strong> <strong>Physical</strong> <strong>Society</strong>’s Spectra Sound kit<br />
2Roy, K. (2007). Shedding Light on Laser Pointer Safety, Science Scope, Summer 2007<br />
Materials<br />
• 1 spring per group<br />
• 1 laser pointer per group<br />
• 1 slide holder per group<br />
• tape<br />
• 1 meter stick per group<br />
• 1 metric ruler per group<br />
• 1 sheet <strong>of</strong> white paper per group<br />
• optional: 1 box or box lid per group<br />
Materials for optional part carrying<br />
sound on laser light (Suggested<br />
purchase: the Spectra Sound kit<br />
(below cost) through <strong>Physics</strong> Central<br />
http://www.physicscentral.com/)<br />
• 1 white LED<br />
• 1 pen laser (Laser Lesson kit laser<br />
can be used)<br />
• 1 headphone jack with stripped<br />
wires<br />
• 3 AAA batteries and battery holder<br />
• 1 1000 µF capacitor<br />
• 2 alligator clip wires<br />
• 8 B connectors or other wire connectors<br />
• pliers if using B connectors<br />
• powered speaker such as a computer<br />
speaker or a stereo with an Aux<br />
input<br />
• a music player such as an iPod or<br />
any MP3 player (Tests showed that<br />
the SanDisk Sansa and the latest<br />
iPod shuffle are not compatible with<br />
the Spectra Sound kit. It has been<br />
successfully tested with the Apple<br />
iPod, iPod Nano and the iPhone.)<br />
• Solar cell connected to headphone<br />
jack with ends <strong>of</strong> wires stripped<br />
• Computer speaker or a similar device<br />
with an auxiliary output jack.<br />
• Optional: flour or baby powder.
Preparation before class<br />
Conduct the explorations to become familiar with the apparatus<br />
and the difficulties your students might have.<br />
If you plan on having your students investigate how sound is<br />
carried by light (Part A), then put together the Spectra Sound<br />
kits in advance. In addition to the instructions in the Spectra<br />
Sound kit, we list a set <strong>of</strong> suggestions on how to put together<br />
the circuit.<br />
• Consider using a Class II laser.<br />
• Do not tape down or use a rubber band to hold down<br />
the button <strong>of</strong> the laser. Students can depress the laser<br />
button when they need to turn it on.<br />
• Follow the procedure below and solder the wires in<br />
the B connectors together.<br />
1. Gather the equipment you need to make a transmitter<br />
and a receiver. Note that the photocell has very fragile<br />
connections. Handle it carefully and do not touch it directly<br />
to make sure that no oils from your hands get on<br />
it. Connect the microphone jack with the solar panel (the<br />
receiver) into the AUX input <strong>of</strong> a speaker or stereo system.<br />
<strong>The</strong> photodetector you will be using in the receiver<br />
converts light into electrical energy.<br />
2. Tape the wire leading to the photodetector to a wall below<br />
eye level. Do not put any wire near the photocell as<br />
it is very fragile. Shine the white LED at the solar cell and<br />
turn it on and <strong>of</strong>f. You should hear a clicking sound each<br />
time you turn the white LED light on and <strong>of</strong>f.<br />
Assembly Diagram<br />
Battery Pack<br />
B<br />
A<br />
+<br />
-<br />
Music Device<br />
Teacher Edition Lesson 3: What are Some Applications <strong>of</strong> <strong>LASERs</strong>?<br />
Capacitor<br />
3. To build the transmitter, remove the back <strong>of</strong> the laser<br />
and the laser’s batteries.<br />
<strong>The</strong> following diagram will be used in the next three<br />
steps:<br />
4. At point A on the drawing above, connect the following<br />
three wires: the red lead from the battery holder,<br />
the positive lead from the 1000 µF capacitor, and the<br />
red wire from an alligator clip. You can use a B connector<br />
supplied with the Spectra Sound kit, or you<br />
can solder the wires together.<br />
5. At point B, connect the following two wires: the negative<br />
lead from the capacitor, and one wire from the<br />
headphone jack (which plugs into the music device).<br />
You can use a B connector supplied with the Spectra<br />
Sound kit, or you can solder the wires together.<br />
6. At point C, connect the following three wires: the<br />
black wire from the battery holder, the other wire<br />
from the headphone jack, and the black wire from<br />
an alligator clip. You can use a B connector supplied<br />
with the Spectra Sound kit, or you can solder the<br />
wires together.<br />
7. Go to Part A, Step 3 <strong>of</strong> the student version and go<br />
through the students’ steps to make sure the system<br />
is functioning and to familiarize yourself with the<br />
equipment and how students will be using it. When<br />
you are done, remove the photocell from the wall.<br />
C<br />
Alligator Clips<br />
Spring Inside<br />
Laser Pointer<br />
Laser Pointer<br />
<strong>The</strong> <strong>Physics</strong> <strong>of</strong> <strong>LASERs</strong>, Teacher Edition<br />
31
Teacher Edition Lesson 3: What are Some Applications <strong>of</strong> <strong>LASERs</strong>?<br />
3. What are Some Applications <strong>of</strong> LASERS?<br />
Introductory Questions<br />
Have a brief class discussion on what students<br />
know about laser applications.<br />
Describe some <strong>of</strong> the many uses <strong>of</strong> lasers.<br />
• Reading bar-codes (see below for more information)<br />
• Reading and writing CDs, DVDs and Bluray<br />
disks<br />
• Communications, for example, sending<br />
Internet, telephone, and television/movie<br />
signals through fiber-optic cables (in some<br />
cases, right inside your home) <br />
• Cutting things, from hard metals to s<strong>of</strong>t tissues<br />
in the eye<br />
◊ In surgery laser cutting is considered<br />
better than a surgical knife because the<br />
laser cauterizes the wound as it cuts.<br />
Cauterizing means that it burns as it cuts<br />
which stops bleeding and helps to prevent<br />
infection.<br />
• Measuring distances: from within an atom<br />
(7 fm for the halo <strong>of</strong> the Be nucleus), to distances<br />
in a house under construction, to the<br />
distance from Earth to the Moon (384,403<br />
km)<br />
• Measuring the speed <strong>of</strong> cars and blood cells<br />
• Investigating how energy is produced in a<br />
star (conduct an Internet search on the National<br />
Ignition Facility).<br />
• Collecting evidence at a crime scene or accident<br />
scene<br />
◊ Forensic technicians or criminalists use<br />
lasers in gathering evidence. For example,<br />
lasers are used to measure distances,<br />
and to find fibers, hairs, fingerprints, and<br />
other samples. Three-dimensional laser<br />
scans <strong>of</strong> crime scenes or accident scenes<br />
can reproduce every detail <strong>of</strong> the scene,<br />
accurate to within a few millimeters, and<br />
miniature models can then be constructed.<br />
Lasers are also used to determine<br />
where shots may have originated (bullet<br />
trajectory projections), and to determine<br />
molecular compositions <strong>of</strong> substances.<br />
Bar code information: Laser light shines on an object<br />
with a barcode. <strong>The</strong> light that bounces <strong>of</strong>f <strong>of</strong><br />
the object is detected by a photodiode. <strong>The</strong> amount<br />
<strong>of</strong> light that bounces <strong>of</strong>f and enters the light detector<br />
(photodiode) depends on the color <strong>of</strong> paper (or<br />
plastic) it is bouncing <strong>of</strong>f <strong>of</strong>. White objects reflect<br />
far more light than black objects, for example. This<br />
difference in absorption <strong>of</strong> the laser light creates a<br />
change in the amount <strong>of</strong> light that bounces <strong>of</strong>f the<br />
object and is detected by a photodiode or photocell<br />
in an electric circuit, which causes a change in voltage<br />
or current. Some laser scanners use a mirror or<br />
a rotating prism to scan the laser beam back and<br />
32<br />
<strong>The</strong> <strong>Physics</strong> <strong>of</strong> <strong>LASERs</strong>, Teacher Edition<br />
Lesson 3.<br />
!<br />
forth across the bar code.<br />
Student Edition Lesson 3: What are Some Applications <strong>of</strong> <strong>LASERs</strong>?<br />
What are Some Applications <strong>of</strong> <strong>LASERs</strong>?<br />
Introductory Questions<br />
• Where have you seen lasers used?<br />
• Why is it important to learn about lasers?<br />
Share your answers with your group and make a list <strong>of</strong> your group’s ideas. Be ready to<br />
share your group’s ideas with your class.<br />
Goal: To be able to describe some laser applications.<br />
Safety Reminder: Never look directly into the laser beam. Never look at laser light reflected<br />
<strong>of</strong>f <strong>of</strong> a highly reflective surface like a mirror or a ring. Laser light can cause permanent<br />
damage to the eye.<br />
A. How can light transmit sound? 1 (Optional)<br />
Materials list<br />
• Assembled Spectra Sound Kit with<br />
speaker<br />
• comb<br />
• laser pointer<br />
• white LED<br />
Discuss with your group how light can be used to communicate. Record your group’s<br />
ideas. Be ready to share your ideas with the class.<br />
1. Lasers are used to transmit digital data through fiber optic systems. In this investigation<br />
you will explore how light can carry information through air. Gather the equipment<br />
you will need from your teacher. Note that the photocell has very fragile connections.<br />
Handle it carefully and do not touch it directly to make sure that no oils from your<br />
hands get on it.<br />
2. Tape the wire leading to the photodetector to a wall below eye level. Do not put any<br />
wire near the photocell as it is very fragile. Shine the white LED at the solar cell and turn<br />
it on and <strong>of</strong>f. What do you observe?<br />
3. Shine the laser beam on and <strong>of</strong>f <strong>of</strong> the solar cell. Record your observations.<br />
4. Shine the laser beam on the solar cell and run a comb quickly and slowly through the<br />
beam. Record your observations.<br />
5. Plug the headphone jack into a music player and play your favorite song. Point the<br />
laser beam at the solar cell. You may have to adjust the volume (turn all the volumes to<br />
maximum). Record your observations.<br />
6. In Step 5, the signal from the music modulated the amplitude <strong>of</strong> the laser light, which<br />
correspondingly modulated the voltage produced by the solar cell to the speaker.<br />
1 Adapted from the <strong>American</strong> <strong>Physical</strong> <strong>Society</strong>’s Spectra Sound kit<br />
Student Version Page 11<br />
<strong>The</strong> <strong>Physics</strong> <strong>of</strong> <strong>LASERs</strong><br />
More information on laser applications can be found on the Internet<br />
by doing a search on the following key words, “laser applications”.<br />
For video conduct an Internet search on “laser applications, video”.<br />
A. How can light transmit information? 1 (Optional)<br />
Check that groups are discussing ideas and consider having a class<br />
discussion.<br />
Goal for Part A: For students to explore and describe how laser light<br />
can be used for communication.<br />
Part A, Step 1<br />
Lasers are used to carry encoded digital data along fiber optic cables.<br />
However in this exploration students will encode information<br />
by modulating the amplitude <strong>of</strong> the laser light.<br />
FYI: Radio waves are used for wireless transmissions (such as from<br />
cell phone towers to the cell phone and wireless internet connections).<br />
<strong>The</strong> radio wave is created by an accelerated charge (e.g. in an<br />
alternating current circuit). As it travels it collects and deposits the<br />
information by interacting with a conductor (an antenna). When the<br />
1Adapted from the <strong>American</strong> <strong>Physical</strong> <strong>Society</strong>’s Spectra Sound kit.<br />
11
Student Edition Lesson 3: What are Some Applications <strong>of</strong> <strong>LASERs</strong>?<br />
12<br />
!<br />
7. Repeat Step 5 but this time run a comb through the laser beam as it shines on the solar<br />
cell. Record your observations.<br />
8. What problems might occur with transmitting information using laser light through air?<br />
B. How thick is your hair?<br />
<strong>The</strong> <strong>Physics</strong> <strong>of</strong> <strong>LASERs</strong><br />
Materials list<br />
• laser pointer<br />
• empty slide holder<br />
• tape<br />
• meter stick<br />
• metric ruler<br />
• white paper<br />
Criminalists analyze evidence, such as hair and fibers, collected at the scene <strong>of</strong> a crime. If<br />
you didn’t have a microscope, how could you use a laser to measure the width <strong>of</strong> a hair?<br />
Discuss your ideas with your group and record your group’s best ideas. Be prepared to<br />
share your group’s ideas with the class.<br />
1. When waves have to go around objects or through small openings, they diffract (spread<br />
out). <strong>The</strong> diffracted waves can interfere, causing what is known as a diffraction pattern.<br />
2. What do you think happens when you shine a laser beam at a strand <strong>of</strong> hair? Collect a<br />
strand <strong>of</strong> hair from several group members. Tape the strands <strong>of</strong> hair to the slide holder.<br />
SAFETY REMINDER: Never look into the laser beam. Never point the laser at anyone’s eye.<br />
Never shine the laser on a highly reflective surface, as it may reflect into someone’s eye.<br />
Lasers can burn the eye causing permanent damage.<br />
3. Set up a white screen, below eye level, in a cardboard box or against a stack <strong>of</strong> books.<br />
Place the slide with the strand(s) <strong>of</strong> hair one or two meters from the screen and then<br />
shine the laser pointer at a strand <strong>of</strong> hair. Keep the laser steady by having it rest on a<br />
desktop. Raise the laser if needed by placing it on a book.<br />
4. Observe the pattern that you see on the screen.<br />
• Is it a shadow <strong>of</strong> the hair? Explain your answer.<br />
• Describe the pattern and make a drawing <strong>of</strong> it.<br />
5. You should have observed a diffraction pattern similar to the one below. To measure the<br />
width <strong>of</strong> your hair, you will need to measure the distance between the first set <strong>of</strong> dark<br />
spaces in the diffraction pattern. First identify the bright central spot (see central oval<br />
in drawing below). Find the middle <strong>of</strong> the dark spaces between the central spot and the<br />
bright spots immediately to the left and the right (see diagram). Record your measurement.<br />
Repeat this measurement for each group member’s hair.<br />
Student Version Page 12<br />
electromagnetic radiation interacts with a conductor it travels along<br />
the conductor’s surface and induces an electric current on the surface<br />
<strong>of</strong> the conductor. Consider having students try out the PhET<br />
simulator on antennas.<br />
<strong>The</strong> laser in the Spectra Sound kit is stronger than the laser in the<br />
kit used with this lesson. You could use the laser in the kit provided<br />
with these lessons as well. Review the safety requirements for the<br />
laser the students are using.<br />
Part A, Step 2<br />
Students should hear a clicking sound each time they turn the white<br />
LED light on and <strong>of</strong>f. By turning on and <strong>of</strong>f the light source, students<br />
are modulating the amount <strong>of</strong> the light reaching the solar cell. This in<br />
turn modulates the voltage produced by the solar cell.<br />
Part A, Step 3<br />
Students should observe that when the laser beam intermittently illuminates<br />
the solar cell, a clicking or scratching sound is produced.<br />
<strong>The</strong> sound is very loud because <strong>of</strong> the large and abrupt change in<br />
light intensity on the solar cell, as the beam is repeatedly interrupted.<br />
Correspondingly, this produces an abrupt and large change in voltage<br />
supplied to the speaker.<br />
Teacher Edition Lesson 3: What are Some Applications <strong>of</strong> <strong>LASERs</strong>?<br />
Part A, Step 4<br />
Students should recognize that when the comb is<br />
run through the laser beam it is like rapidly turning<br />
the laser on and <strong>of</strong>f. <strong>The</strong>y should observe a clicking<br />
or scratching sound as the beam shining on the<br />
solar cell is interrupted with the comb.<br />
Part A, Step 5<br />
Students should observe that when the laser light<br />
shines upon the solar cell, the songs playing on the<br />
audio device (transmitter) can be heard through the<br />
speaker <strong>of</strong> the receiver.<br />
Part A, Step 6<br />
You may want to point out that most information<br />
carried on light waves is transmitted digitally,<br />
which is different than modulating the amplitude<br />
or frequency <strong>of</strong> a wave.<br />
Part A, Step 7<br />
Students should hear the song being turned on and<br />
<strong>of</strong>f as the laser beam carrying the information is interrupted.<br />
Part A, Step 8<br />
Have a class discussion on students’ ideas. Students<br />
may recognize that air is turbulent and has<br />
particles in it that can alter the amplitude <strong>of</strong> the<br />
signal being transmitted. You may want to demonstrate<br />
what happens to the transmitted signal when<br />
a powdery substance such as flour or baby powder<br />
interrupts the beam, by sprinkling a small quantity<br />
in the beam. Demonstrate this for students and<br />
have them sit far enough away so that they do not<br />
get particulate matter in their lungs.<br />
B. How thick is your hair?<br />
Check group responses. Consider having a class<br />
discussion on group’s ideas.<br />
Part B, Step 1<br />
Discuss diffraction as needed: When waves have<br />
to go around objects or through small openings,<br />
they diffract (spread out). <strong>The</strong> diffracting waves<br />
can interfere, causing what is known as a diffraction<br />
pattern. For example, when light waves go through<br />
a single narrow slit, the light waves can interfere<br />
and produce a diffraction pattern on a screen like<br />
the one shown to the right <strong>of</strong> the diagram.<br />
Show a projection <strong>of</strong> this image to the class.<br />
Let students know that scientists determined the<br />
mathematical relationship shown in the diagram.<br />
Describe the diffraction pattern shown to the right<br />
<strong>of</strong> the diagram.<br />
<strong>The</strong> <strong>Physics</strong> <strong>of</strong> <strong>LASERs</strong>, Teacher Edition<br />
33
Teacher Edition Lesson 3: What are Some Applications <strong>of</strong> <strong>LASERs</strong>?<br />
Image credit: From http://hyperphysics.phy-astr.gsu.edu/<br />
hbase/phyopt/sinslit.html<br />
Students should note that the central bright spot is<br />
larger than the other bands <strong>of</strong> light or dark, and that<br />
the pattern is made up <strong>of</strong> alternating light and dark<br />
bands.<br />
Part B, Step 2<br />
Check students’ responses.<br />
Part B, Step 3<br />
Make sure students stabilize the screen by placing<br />
it against a solid object, like a book or on a wall. Students<br />
should also make sure the laser is stabilized.<br />
Students should not try to hold the laser steady in<br />
their hand; instead they should place the laser on<br />
the desktop or on a book and shine it at the strand<br />
<strong>of</strong> hair.<br />
Part B, Step 4<br />
Students should note that they do not see a shadow<br />
<strong>of</strong> the hair but instead they see a diffraction pattern.<br />
<strong>The</strong> diffraction pattern would look the same as the<br />
diffraction pattern produced through a thin slit!<br />
(Consider asking: Why isn’t there a dark shadow<br />
produced in the middle? Doesn’t the object block<br />
the light? To learn more look up Babinet’s Principle<br />
and conduct some other experiments.)<br />
Students should obtain diffraction patterns like the<br />
one shown. If students have trouble seeing this pattern,<br />
have them shield the screen from the ambient<br />
light by placing the screen in a box.<br />
34<br />
<strong>The</strong> <strong>Physics</strong> <strong>of</strong> <strong>LASERs</strong>, Teacher Edition<br />
Student Edition Lesson 3: What are Some Applications <strong>of</strong> <strong>LASERs</strong>?<br />
12<br />
!<br />
7. Repeat Step 5 but this time run a comb through the laser beam as it shines on the solar<br />
cell. Record your observations.<br />
8. What problems might occur with transmitting information using laser light through air?<br />
B. How thick is your hair?<br />
Criminalists analyze evidence, such as hair and fibers, collected at the scene <strong>of</strong> a crime. If<br />
you didn’t have a microscope, how could you use a laser to measure the width <strong>of</strong> a hair?<br />
Discuss your ideas with your group and record your group’s best ideas. Be prepared to<br />
share your group’s ideas with the class.<br />
1. When waves have to go around objects or through small openings, they diffract (spread<br />
out). <strong>The</strong> diffracted waves can interfere, causing what is known as a diffraction pattern.<br />
2. What do you think happens when you shine a laser beam at a strand <strong>of</strong> hair? Collect a<br />
strand <strong>of</strong> hair from several group members. Tape the strands <strong>of</strong> hair to the slide holder.<br />
SAFETY REMINDER: Never look into the laser beam. Never point the laser at anyone’s eye.<br />
Never shine the laser on a highly reflective surface, as it may reflect into someone’s eye.<br />
Lasers can burn the eye causing permanent damage.<br />
3. Set up a white screen, below eye level, in a cardboard box or against a stack <strong>of</strong> books.<br />
Place the slide with the strand(s) <strong>of</strong> hair one or two meters from the screen and then<br />
shine the laser pointer at a strand <strong>of</strong> hair. Keep the laser steady by having it rest on a<br />
desktop. Raise the laser if needed by placing it on a book.<br />
4. Observe the pattern that you see on the screen.<br />
• Is it a shadow <strong>of</strong> the hair? Explain your answer.<br />
• Describe the pattern and make a drawing <strong>of</strong> it.<br />
5. You should have observed a diffraction pattern similar to the one below. To measure the<br />
width <strong>of</strong> your hair, you will need to measure the distance between the first set <strong>of</strong> dark<br />
spaces in the diffraction pattern. First identify the bright central spot (see central oval<br />
in drawing below). Find the middle <strong>of</strong> the dark spaces between the central spot and the<br />
bright spots immediately to the left and the right (see diagram). Record your measurement.<br />
Repeat this measurement for each group member’s hair.<br />
<strong>The</strong> <strong>Physics</strong> <strong>of</strong> <strong>LASERs</strong><br />
Materials list<br />
• laser pointer<br />
• empty slide holder<br />
• tape<br />
• meter stick<br />
• metric ruler<br />
• white paper<br />
Student Version Page 12<br />
Part B, Step 5<br />
For the strand <strong>of</strong> hair we used, the distance between the centers <strong>of</strong><br />
the first dark fringes, or to the average distance between the edges<br />
<strong>of</strong> the dark fringes, was measured to be 1.5 cm or 0.015 m.<br />
Photos by Ken Cole/APS
Student Edition Lesson 3: What are Some Applications <strong>of</strong> LASERS?<br />
14<br />
6. You can calculate the width <strong>of</strong> the hair using the following mathematical relationship:<br />
width <strong>of</strong> hair ≈ (wavelength <strong>of</strong> laser light) (distance from hair to screen)<br />
(distance between centers <strong>of</strong> first dark bands/2)<br />
7. To measure the distance needed in the denominator in the equation above, simply take<br />
your result from Step 5 and divide it by two.<br />
8. You will need to know the wavelength <strong>of</strong> the laser light you are using. A range <strong>of</strong> values<br />
might be found on the side <strong>of</strong> the laser pointer. Calculate the average wavelength and<br />
record your calculations. If no values are listed on the laser pointer, assume the following<br />
average wavelength: 650nm.<br />
9. Apply the formula in Step 7 above to determine the width <strong>of</strong> the hair. Remember to<br />
check your units.<br />
10. Repeat Step 10 for each hair sample. Record your results.<br />
11. Make a table <strong>of</strong> your results. Is there a relationship between the width <strong>of</strong> the hair and<br />
the width <strong>of</strong> the diffraction pattern? Record this relationship.<br />
12. Look at your metric ruler and note the distance <strong>of</strong> 1 mm (0.001 m). How many strands <strong>of</strong><br />
your hair could you fit in 1 mm?<br />
13. How else could this technique <strong>of</strong> measuring small distances with a laser be used?<br />
C. How could you model X-ray diffraction <strong>of</strong> DNA?<br />
<strong>The</strong> <strong>Physics</strong> <strong>of</strong> <strong>LASERs</strong><br />
Materials list<br />
• laser pointer<br />
• spring<br />
Part B, Step 6<br />
Head hair is usually between 50 to 180 microns. Fine hair is 50 microns;<br />
medium hair is 60 to 90 microns; coarse hair is 100 to 180 microns.<br />
Arm hair, or other finer hairs may be measured between 20<br />
microns to 50 microns. Typically black hair is thicker than red hair,<br />
and red hair is thicker than blond hair.<br />
Blond hair sometimes has unusual results because the laser light<br />
may go through it (it may be transparent to the laser light) and it<br />
may also cause a lensing effect. Curly hair may give various readings<br />
because <strong>of</strong> its shape.<br />
Other hair facts: Hair becomes thicker with age. Hair is thicker the<br />
closer it is to the root. Hair’s diameter increases with warmer weather.<br />
Part B, Step 7<br />
<strong>The</strong> formula the students are using in the steps that follow is:<br />
width <strong>of</strong> hair ≈<br />
• tape<br />
• meter stick<br />
• white paper<br />
Just as you used the diffraction <strong>of</strong> laser light to measure the width <strong>of</strong> a hair, scientists used<br />
X-ray diffraction to measure the structure <strong>of</strong> molecules. Discuss with your group how diffraction<br />
<strong>of</strong> laser light could be used to model X-ray diffraction. Record your best group<br />
answer and be ready to discuss your ideas with the class.<br />
1. Discuss what you know about DNA with your group. Record your groups’ ideas. Be<br />
ready to share your ideas with the class.<br />
2. This image shows Rosalind Franklin’s x-ray diffraction pattern<br />
<strong>of</strong> DNA. DNA is the helical molecule that carries genetic<br />
information. James Watson (one <strong>of</strong> the discoverers <strong>of</strong> DNA)<br />
said, “<strong>The</strong> instant I saw the picture my mouth fell open and<br />
my pulse began to race ...“ (from his book <strong>The</strong> Double Helix).<br />
Before the image shown was observed, scientists did not have<br />
conclusive evidence <strong>of</strong> DNA’s shape. A molecules shape is important<br />
because it helps determine properties <strong>of</strong> the molecule<br />
and how it will interact with other molecules.<br />
Student Version Page 13<br />
Image credit: Reprinted by permission<br />
from Macmillan Publishers Ltd: Nature<br />
171, 740-741, © 1953<br />
(wavelength <strong>of</strong> laser light) (distance from hair to screen)<br />
(distance between centers <strong>of</strong> first dark bands/2)<br />
For the strand <strong>of</strong> hair we used, the distance between the centers <strong>of</strong><br />
the first dark fringes, as shown in the drawing above, was measured<br />
to be 1.5 cm or 0.015 m. Half <strong>of</strong> this is 0.75 cm.<br />
<strong>The</strong> denominator is divided by two because the quantity measured<br />
is twice the distance from the central maximum to the middle <strong>of</strong> the<br />
Teacher Edition Lesson 3: What are Some Applications <strong>of</strong> <strong>LASERs</strong>?<br />
first dark band.<br />
Part B, Step 8<br />
On the laser pointer used in this example the range<br />
listed is 630 nm to 680 nm. <strong>The</strong> average is<br />
Part B, Step 9<br />
or 87.3 micrometers (0.0000873 m).<br />
Part B, Step 11<br />
See comments under Step 6.<br />
Part B, Step 12<br />
Example:<br />
average = 630nm + 680nm = 655nm<br />
2<br />
width <strong>of</strong> hair ≈ (1)(655x10-9m)(1m) = 8.73x10⁻⁵m = 87.3x10⁻⁶m = 87.3μm<br />
(0.015 m/2)<br />
Arm hair is usually <strong>of</strong> the order <strong>of</strong> 20 microns<br />
(0.00002 m). How many arm hairs could fit in 1 mm?<br />
About 50.<br />
Part B, Step 13<br />
Check group responses. Students should describe<br />
how light diffracts around thin objects and that this<br />
can be used to measure the thickness <strong>of</strong> the object<br />
blocking the light. It is not expected that students<br />
will have a deep understanding <strong>of</strong> diffraction<br />
from this exploration. Diffraction patterns can also<br />
be used to measure the width <strong>of</strong> a thin slit, or the<br />
wavelength <strong>of</strong> light.<br />
C. How could you model X-ray diffraction<br />
<strong>of</strong> DNA?<br />
Hold a class discussion on groups’ responses.<br />
If students bring up X-ray lasers let them know that<br />
you can discuss this later, but it is not the point <strong>of</strong><br />
this part. At the end <strong>of</strong> this part, if you have time,<br />
you could share with students that X-rays were<br />
discovered in the late 1800’s by Wilhelm Röntgen.<br />
Non-scientists typically associate X-rays with the<br />
study <strong>of</strong> bones, but scientists <strong>of</strong>ten associate X-rays<br />
with the study <strong>of</strong> molecular structure through the<br />
use <strong>of</strong> diffraction. Visible light lasers were developed<br />
in the 1960’s, but X-ray lasers were first predicted<br />
in the 1970s, and realized in 1984. <strong>The</strong> first<br />
laboratory demonstration <strong>of</strong> an X-ray laser was<br />
Nova at Lawrence Livermore Laboratory. Nova<br />
uses a high-energy light pulse (about a nanosecond<br />
in duration) to cause lasing at X-ray frequencies,<br />
but it can only be fired about six times a day due<br />
to the heat it produces. It is used to study plasmas.<br />
Part C, Step 1<br />
Check to see if students know that DNA has a helical<br />
structure. Consider having a class discussion.<br />
<strong>The</strong> <strong>Physics</strong> <strong>of</strong> <strong>LASERs</strong>, Teacher Edition<br />
35
Teacher Edition Lesson 3: What are Some Applications <strong>of</strong> <strong>LASERs</strong>?<br />
Part C, Step 4<br />
Students should observe an “X” pattern on the<br />
screen. <strong>The</strong> arms <strong>of</strong> the X show a diffraction pattern<br />
with bright and dark fringes.<br />
Part C, Step 5<br />
Check students’ responses. X-ray diffraction was<br />
used to provide evidence <strong>of</strong> the helical structure <strong>of</strong><br />
DNA. Students should note that similar diffraction<br />
patterns—bright and dark bands along each arm <strong>of</strong><br />
the “X” were produced using the model <strong>of</strong> a laser<br />
shining on a spring.<br />
Part C, Step 6<br />
Students should describe how the laser and spring<br />
model they constructed show that diffraction patterns<br />
provide information about structure. <strong>The</strong>y<br />
should note the “X” pattern and the bright and dark<br />
bands produced along each “arm” <strong>of</strong> the “X”.<br />
You might want to tell students the following:<br />
To better understand how the “X” diffraction pattern<br />
is observed, consider that the laser “sees” the spring<br />
as two crossed metal wires. One wire extends from<br />
bottom left to top right, and the other from bottom<br />
right to top left. As the laser beam is diffracted by<br />
the spring it produces a pair <strong>of</strong> patterns, one from<br />
36<br />
<strong>The</strong> <strong>Physics</strong> <strong>of</strong> <strong>LASERs</strong>, Teacher Edition<br />
Watson used the information in the image on the<br />
right to verify the correctness <strong>of</strong> the model <strong>of</strong> DNA<br />
that he and Francis Crick developed in the early<br />
1950s. <strong>The</strong>ir work won them the Nobel Prize. (To find<br />
out more visit the Exploratorium’s website, which<br />
has an annotated version <strong>of</strong> the Crick & Watson’s<br />
paper announcing their discovery <strong>of</strong> DNA in the<br />
scientific journal Nature).<br />
3. A helix is like a three-dimensional spiral. A spring <strong>of</strong> a<br />
retractable ballpoint pen is an everyday example <strong>of</strong> a<br />
helix. In this part <strong>of</strong> the lesson you will make a model<br />
to simulate an X-ray diffraction pattern <strong>of</strong> a DNA molecule,<br />
using a laser and a spring.<br />
Student Edition Lesson 3: What are Some Applications <strong>of</strong> LASERS?<br />
Set up a piece <strong>of</strong> white paper (preferably in a cardboard<br />
box or on a stack <strong>of</strong> books) – below eye level.<br />
Place a meter stick along the table or floor with the<br />
paper at one end. At the other end <strong>of</strong> the meter stick, place a small piece <strong>of</strong> doublesided<br />
tape or a loop <strong>of</strong> tape. Place a spring on top <strong>of</strong> the tape as shown in the image<br />
below. Don’t shine the laser light yet!<br />
4. Place the laser near the spring on a stack <strong>of</strong> books to raise and<br />
to stabilize the laser. Shine the laser at the spring, keeping your<br />
eyes above the laser light level. You should see a diffraction pattern<br />
on the screen. As you observe the diffraction pattern, make<br />
sure that the laser level is well below eye level. Record your<br />
observations by drawing a diagram <strong>of</strong> what you see and describing<br />
it.<br />
5. How is shining laser light at a spring similar to making an X-ray diffraction <strong>of</strong> DNA?<br />
With your group answer the question. Record your answer.<br />
6. If you couldn’t see or touch the spring, what could you learn about the spring from the<br />
diffraction pattern?<br />
D. What can speckle patterns be used for?<br />
Materials list<br />
• laser pointer • white paper<br />
Discuss with your group what you know about speckle patterns (e.g. what causes<br />
them?) and what you think they could be used for.<br />
Record your group’s ideas. Be ready to share your ideas<br />
with the class.<br />
1. Place a piece <strong>of</strong> paper on your table. Hold the<br />
laser so the beam makes a very small angle with<br />
the paper surface, as shown in the drawing. Describe<br />
what you see.<br />
Student Version Page 14<br />
each spring segment. Each pattern is similar to the pattern made by<br />
a human hair in Part B <strong>of</strong> this lesson. <strong>The</strong>se two crossed diffraction<br />
patterns form the “X” diffraction pattern observed.<br />
D. What can speckle patterns be used for?<br />
Image credit: Wikimedia Commons<br />
<strong>The</strong> <strong>Physics</strong> <strong>of</strong> <strong>LASERs</strong><br />
Check that groups are discussing ideas, and consider having a class<br />
discussion.<br />
Part D, Step 1<br />
Students should describe a pattern <strong>of</strong> bright and dark spots as they<br />
did in Lesson 1. This is due to the constructive and destructive interference<br />
that occurs between the light reflected <strong>of</strong>f <strong>of</strong> the paper. You<br />
may want to refer students back to Lesson 1 and the picture <strong>of</strong> the<br />
paper fibers.<br />
15
Student Edition Lesson 3: What are Some Applications <strong>of</strong> LASERS?<br />
16<br />
<strong>The</strong> <strong>Physics</strong> <strong>of</strong> <strong>LASERs</strong><br />
2. Create the laser speckle pattern on a sheet <strong>of</strong> paper again, and slowly move your<br />
head back and forth. Make sure each group member gets to make observations.<br />
Describe what you observe.<br />
3. Now produce the speckle pattern again, and move the paper from side to side. As<br />
you do this, keep your head and the laser as still as possible. Describe what you<br />
observe.<br />
4. Shine the laser at a small angle in the crook <strong>of</strong> your inner elbow. Keep your head<br />
still. What do you see? Record your observations and your group members’ observations.<br />
Compare your observations <strong>of</strong> the speckle pattern on your skin with<br />
the speckle pattern observed when you moved the paper. Have a group discussion<br />
on your results. What do you think causes this?<br />
Cool Fact: Tiny changes in the surface <strong>of</strong> your skin from muscle movements and<br />
movement <strong>of</strong> blood near the surface <strong>of</strong> the skin cause the rapid changes in the<br />
speckle pattern you observe on your skin. <strong>The</strong> speckle pattern changes very rapidly<br />
– on the order <strong>of</strong> milliseconds. Do you think your eyes could keep track <strong>of</strong><br />
changes that occur every thousandth <strong>of</strong> a second?<br />
5. By tracking how the speckle pattern changes in time<br />
scientists can determine the speed <strong>of</strong> the blood flow!<br />
A system developed using laser speckle imaging<br />
employs a high-resolution camera and a computer to<br />
analyze how the speckle pattern changes on the scale<br />
<strong>of</strong> milliseconds. This information could help surgeons<br />
determine how well blood flows in the tissue<br />
<strong>of</strong> a skin graft.<br />
In the laser speckle imaging picture shown (which is<br />
not a photograph), one can clearly see the difference<br />
in blood flow between the body temperature finger<br />
on the left and the finger that was warmed in hot<br />
water on the right. When your body temperature<br />
increases, the blood flow increases.<br />
Summarize how laser speckle is used in this situation.<br />
Discuss this with your group members.<br />
6. What can speckle patterns be used for? Answer the<br />
question with your group and list your ideas about<br />
what speckle patterns could be used for. Be ready to<br />
share your ideas with your class.<br />
Student Version Page 15<br />
Image credit: Michael Smith, Institute for Biodiagnostics,<br />
Winnipeg, Canada.<br />
Laser speckle imaging <strong>of</strong> blood flow<br />
in warmed finger on right and body<br />
temperature finger on left, in arbitrary<br />
units <strong>of</strong> velocity.<br />
Please note that this is not a photograph<br />
<strong>of</strong> the speckle pattern.<br />
Part D, Step 2<br />
Students’ descriptions should include a movement or shimmering<br />
<strong>of</strong> the speckle pattern as the students move their heads. <strong>The</strong> movement<br />
<strong>of</strong> the head moves the position <strong>of</strong> the detector (eye) and changes<br />
the path length <strong>of</strong> the rays <strong>of</strong> light entering the eye, thus changing<br />
the speckle pattern. <strong>The</strong> apparent movement <strong>of</strong> the speckle pattern<br />
has to do with where your eyes naturally focus on the speckle pattern<br />
and parallax.<br />
Part D, Step 3<br />
Students’ descriptions should include a movement or shimmering<br />
<strong>of</strong> the speckle pattern.<br />
Part D, Step 4<br />
Students should observe a shimmering or changing speckle pattern,<br />
and provide reasons why they think this happens.<br />
Students should note that the speckle pattern changes, as it did<br />
when they created a speckle pattern on paper and moved their head<br />
or the paper (in Steps 2 and 3).<br />
<strong>The</strong> speckle pattern changes due to tiny muscle movements and<br />
blood flow under the skin.<br />
Teacher Edition Lesson 3: What are Some Applications <strong>of</strong> <strong>LASERs</strong>?<br />
Part D, Step 6<br />
Have a class discussion on students’ ideas. Students<br />
should include that laser speckle can be used as a<br />
fast and noninvasive way to measure the speed <strong>of</strong><br />
blood flow near the skin, which could have many<br />
medical applications. Encourage them to present<br />
other ideas and consider how these ideas could be<br />
proved as feasible or unfeasible.<br />
<strong>The</strong> <strong>Physics</strong> <strong>of</strong> <strong>LASERs</strong>, Teacher Edition<br />
37
Teacher Edition Lesson 3: What are Some Applications <strong>of</strong> <strong>LASERs</strong>?<br />
Teacher’s Notes<br />
38<br />
<strong>The</strong> <strong>Physics</strong> <strong>of</strong> <strong>LASERs</strong>, Teacher Edition<br />
Student Edition Lesson 3: What are Some Applications <strong>of</strong> LASERS?<br />
EXTRA! EXTRA! READ ALL ABOUT IT!<br />
Using lasers to create a star in the lab!<br />
One <strong>of</strong> the newest lasers is at the National Ignition Facility in Livermore, California. This<br />
laser produces beams carrying 60 times more energy than other lasers. It is be used to ignite<br />
a nuclear-fusion reaction. With two million Joules <strong>of</strong> energy focused on a pea-sized<br />
capsule <strong>of</strong> hydrogen isotopes inside a chamber, a star will be born inside the laboratory!<br />
This laser will provide insights into stars, and may lead to improvements and insights into<br />
controlling the fusion reaction to produce electrical energy. This would make it a useful<br />
alternative energy source to burning coal.<br />
To learn more conduct an Internet search on the following key words, “National Ignition<br />
Facility, world’s largest and highest energy laser”.<br />
Student Version Page 16<br />
<strong>The</strong> <strong>Physics</strong> <strong>of</strong> <strong>LASERs</strong><br />
17
Teacher’s Notes<br />
Teacher Edition Lesson 3: What are Some Applications <strong>of</strong> <strong>LASERs</strong>?<br />
<strong>The</strong> <strong>Physics</strong> <strong>of</strong> <strong>LASERs</strong>, Teacher Edition<br />
39
Appendix 1<br />
40<br />
Sine Waves
APS <strong>The</strong> <strong>American</strong> <strong>Physical</strong> <strong>Society</strong><br />
One <strong>Physics</strong> Ellipse<br />
College Park, MD 20740-3844<br />
www.aps.org<br />
www.laserfest.org