
Create successful ePaper yourself
Turn your PDF publications into a flip-book with our unique Google optimized e-Paper software.
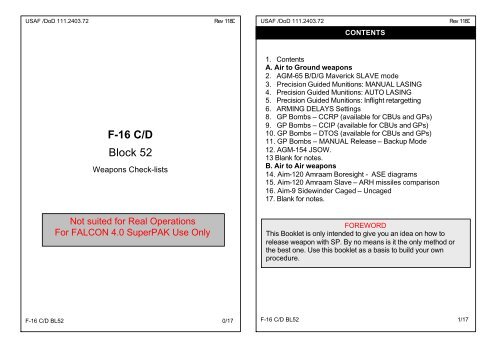
USAF /DoD 111.2403.72 Rev 118D<br />
F-<strong>16</strong> C/D<br />
Block 52<br />
Weapons Check-lists<br />
Not suited for Real Operations<br />
For FALCON 4.0 SuperPAK Use Only<br />
F-<strong>16</strong> C/D BL52 0/17<br />
USAF /DoD 111.2403.72 Rev 118D<br />
CONTENTS<br />
1. Contents<br />
A. Air to Ground weapons<br />
2. AGM-65 B/D/G Maverick SLAVE mode<br />
3. Precision Guided Munitions: MANUAL LASING<br />
4. Precision Guided Munitions: AUTO LASING<br />
5. Precision Guided Munitions: Inflight retargetting<br />
6. ARMING DELAYS Settings<br />
8. GP Bombs – CCRP (available for CBUs and GPs)<br />
9. GP Bombs – CCIP (available for CBUs and GPs)<br />
10. GP Bombs – DTOS (available for CBUs and GPs)<br />
11. GP Bombs – MANUAL Release – Backup Mode<br />
12. AGM-154 JSOW.<br />
13 Blank for notes.<br />
B. Air to Air weapons<br />
14. Aim-120 Amraam Boresight - ASE diagrams<br />
15. Aim-120 Amraam Slave – ARH missiles comparison<br />
<strong>16</strong>. Aim-9 Sidewinder Caged – Uncaged<br />
17. Blank for notes.<br />
FOREWORD<br />
This Booklet is only intended to give you an idea on how to<br />
release weapon with SP. By no means is it the only method or<br />
the best one. Use this booklet as a basis to build your own<br />
procedure.<br />
F-<strong>16</strong> C/D BL52 1/17
USAF /DoD 111.2403.72 Rev 118D<br />
AGM-65 B/D/G MAVERICK - SLAVE MODE<br />
Note:<br />
For a Maverick launch, you need the following MFD slots:<br />
FCR – SMS – WPN at minimum in your MFD SLOTS config<br />
First missile<br />
1. Master ARM<br />
2. Master Mode<br />
3. MFD Slot<br />
4. SMS<br />
5. SMS<br />
6. AG RADAR Mode<br />
7. AG RADAR<br />
8. Missile<br />
9. MFD<br />
10. Weapon<br />
11. Weapon<br />
12. Weapon<br />
Second missile<br />
13. SMS<br />
14. Missile<br />
15. MFD<br />
<strong>16</strong>. Weapon<br />
17. Weapon<br />
18. Weapon<br />
19. Master ARM<br />
SET ARM (SHF m)<br />
SET A-G<br />
Check Correct<br />
Select AGM-65<br />
Power Up Missile (OSB 7)<br />
AS Required<br />
Designate Target (TMS)<br />
Uncage (U)<br />
Select WPN SLOT (DMS)<br />
Ground designate and LOCK<br />
Confirm In Range<br />
Pickle<br />
Select next AGM-65<br />
Uncage (U)<br />
Select WPN SLOT (DMS)<br />
Ground designate and LOCK<br />
Confirm In Range<br />
Pickle<br />
SET SAFE (CTL m)<br />
Note:<br />
The WPN MFD slot is where the camera in the nose of the<br />
missile shows you what it sees. It’s activated by<br />
UNCAGING the missile (removing protecting lens cover)<br />
F-<strong>16</strong> C/D BL52 2/17<br />
USAF /DoD 111.2403.72 Rev 118D<br />
LASER GUIDED BOMBS – MANUAL LASING<br />
For a LGB release, you need the following MFD slots:<br />
TGP– SMS – FLIR – FCR in your MFD SLOTS config<br />
Note:<br />
In Manual LASING, the pilot has to fire the LASER<br />
manually. This is done by holding down the trigger detent.<br />
The laser fire is confirmed by the flashing L in the FLIR<br />
MFD. Check If Manual WPN FCR LASING SMS was Active started – the AUTO LASING<br />
is overridden. Manual LASING needs to be performed until<br />
weapon impact.<br />
1. Master ARM<br />
2. Master Mode<br />
3. MFD Slot<br />
4. SMS<br />
5. LASER ARM<br />
6. AG RADAR Mode<br />
7. AG RADAR<br />
8. MFD<br />
9. FLIR<br />
10. Weapon CUE<br />
11. Active LASING<br />
12. LASER ARM<br />
13. Master ARM<br />
SET ARM (SHF m)<br />
SET A-G<br />
Check Correct<br />
Select GBU to be released<br />
(note station number)<br />
SET ARM (ALT l)<br />
SET As Required<br />
Designate Target (TMS)<br />
Select TGP Slot<br />
(Confirm Hardpoint number)<br />
Slew and LOCK target in POINT (TMS)<br />
(Lock is not mandatory – maintaining<br />
the cursor over the target is enough)<br />
Pickle and HOLD (CCRP)<br />
Active Lase Target until impact with<br />
First trigger detent. (Press and Hold<br />
CTL /)<br />
Confirm LASING with flashing L<br />
SAFE (after impact) (ALT l)<br />
SET SAFE (CTL m)<br />
F-<strong>16</strong> C/D BL52 3/17
USAF /DoD 111.2403.72 Rev 118D<br />
LASER GUIDED BOMBS – AUTO LASING<br />
Note:<br />
AUTO lasing mode will lase target after bomb release according<br />
to the Laser Timer set in the LASER DED page. If you set 10<br />
sec in the LASER Timer the LASER will fire 10 seconds<br />
BEFORE bomb Impact. When the LASER fire, a flashing L is<br />
displayed on the FLIR MFD.<br />
1. Master ARM<br />
2. Master Mode<br />
3. MFD Slot<br />
4. SMS<br />
5. LASER ARM<br />
6. LASER TIMER<br />
7. AG RADAR Mode<br />
8. AG RADAR<br />
9. MFD<br />
10. FLIR<br />
11. Weapon CUE<br />
12. Weapon in flight<br />
13. LASER ARM<br />
14. Master ARM<br />
SET ARM (SHF m)<br />
SET A-G<br />
Check Correct<br />
Select GBU to be released<br />
(note station number)<br />
SET ARM (ALT l)<br />
Check Timer ACTIVE Access DED<br />
LASER page (LIST/MISC/LASER) and<br />
check that the timer is different than “0”<br />
SET As Required<br />
Designate Target (TMS)<br />
Select TGP Slot<br />
(Confirm Hardpoint number)<br />
Slew and LOCK target in POINT (TMS)<br />
(Lock is not mandatory – maintaining<br />
the cursor over the target is enough)<br />
Pickle and HOLD (CCRP) till bomb<br />
release<br />
Check that L starts flashing as soon as<br />
the impact timer meets the Laser timer<br />
value.<br />
SAFE (after impact) (ALT l)<br />
SET SAFE (CTL m)<br />
Note:<br />
DO NOT modify any settings after bomb release or the AUTO<br />
LASING will not work!<br />
F-<strong>16</strong> C/D BL52 4/17<br />
USAF /DoD 111.2403.72 Rev 118D<br />
LGB– INFLIGHT RETARGETTING<br />
Note:<br />
It is possible to destroy 2 targets in one pass with LGB. The<br />
procedure is tricky and requires a lot of practise and experience<br />
to perform. Manual Lasing is recommended altough Auto lasing<br />
will work too. Do not Lock the target !<br />
1. Flight parameters<br />
2. MFD Slots<br />
3. Master Arm<br />
4. Master Mode<br />
5. SMS<br />
6. Laser Arm<br />
7. AG RADAR<br />
8. MFD<br />
9. TGP FOV<br />
10. TGP cursor<br />
11. CCRP max range<br />
12. CCRP min range<br />
13. Manual Lasing<br />
14. Weapon hit<br />
15. Second hit<br />
<strong>16</strong>. Laser Arm<br />
17. Master Arm<br />
400 Kts, <strong>16</strong>000ft.<br />
FCR – TGP – xxx SMS – HSD – xxx<br />
SET ARM (SHF m)<br />
SET A-G<br />
Select GBU to be released<br />
SET ARM (ALT l)<br />
Designate Target (TMS)<br />
Switch to TGP<br />
As required (Pinky switch)<br />
Slew over primary tgt - DO NOT LOCK<br />
Release 1 st weapon (Pickle)<br />
Release 2 nd weapon (6 – 10 sec interv.)<br />
Start lasing when 1 st weapon counter<br />
hits 00:17 or less (Trigger detent)<br />
Stop lasing<br />
Slew cursor over secondary target<br />
Manual Lase (Trigger detent)<br />
Stop Lasing<br />
SAFE<br />
SAFE<br />
Note:<br />
The trick is not to miss the designation of the 2 nd target. Carefull<br />
planning is the key. Bear in mind also that the 1 st bomb will hit<br />
the target just after overflight. As the TGP looks backwards, The<br />
cursor direction will be inverted. Plan accordingly and inverse the<br />
cursor mouvement when you designate the 2 nd target if you have<br />
overflown the target area.<br />
F-<strong>16</strong> C/D BL52 5/17
USAF /DoD 111.2403.72 Rev 118D<br />
Note:<br />
Arming DELAYS are set<br />
in the CTNL page<br />
(Access via the SMS<br />
page).<br />
For SP2 C3, C4, and<br />
LADD are not<br />
implemented. Use C2<br />
for CBUs (burst altitude<br />
setting) and C1 for all<br />
the other weapons<br />
(dumb bombs and<br />
GBUs).<br />
ARMING DELAYS<br />
To set an ARMING DELAY:<br />
1. From the SMS page, select the OSB labelled CNTL.<br />
2. The highlighted mode is the active mode.<br />
3. The highlighted AD is dependant on the NOSE/TAIL/NSTL<br />
setting in the SMS page<br />
4. Depress the OSB next to the mode to change (C1 or C2)<br />
5. Use the labelled OSB to enter a new AD value<br />
6. Hit the OSB labelled ENT to confirm entry.<br />
7. Hit the OSB labelled RTN to return to the CNTL page.<br />
8. Repeat process for AD2 if you are in C1 mode.<br />
9. If you are in C2 mode, use labelled OSB to enter a new<br />
burst altitude value.<br />
10. Confirm by hitting the OSB labelled ENT to confirm<br />
11. Depress the OSB labelled CNTL to get back to SMS page.<br />
F-<strong>16</strong> C/D BL52 6/17<br />
USAF /DoD 111.2403.72 Rev 118D<br />
ARMING DELAYS (Continued)<br />
To set a RELease ANGle:<br />
The Release Angle is used ONLY for DTOS delivery. The set<br />
angle is the climb up angle the aircraft has to fly during bomb<br />
release to successfully hit the target.<br />
1. From the SMS page, select the OSB labelled CNTL.<br />
2. Depress OSB 10 to access the REL ANG page<br />
3. Use the labelled OSB to enter a new angle value<br />
4. Hit the OSB labelled ENT to confirm entry.<br />
5. Hit the OSB labelled RTN to return to the CNTL page<br />
6. Depress the OSB labelled CNTL to get back to SMS page.<br />
7. Fly at that angle during bomb release to ensure that the<br />
bomb hit the target<br />
NOSE / TAIL / NSTL Selection:<br />
1. By Selecting NOSE the value in AD1 will be active (C1)<br />
2. By selecting TAIL the value in AD2 will be active (C1)<br />
3. By Selecting NSTL – Both Detonators are selected.<br />
Select NSTL when using C2 in CNTL page<br />
Use NOSE or TAIL with C1 in CNTL page according to the<br />
inserted values in AD1 and AD2.<br />
F-<strong>16</strong> C/D BL52 7/17
USAF /DoD 111.2403.72 Rev 118D<br />
1. Master ARM<br />
2. Master Mode<br />
3. Release mode<br />
4. SMS<br />
5. Arming<br />
6. BURST ALT<br />
7. ALT CHECK<br />
8. AG RADAR MODE<br />
9. AG RADAR<br />
10. Weapon CUE<br />
11. Bomb release<br />
12. Master ARM<br />
CBUs RELEASE - CCRP<br />
SET ARM (SHF m)<br />
SET A-G<br />
SET CCRP<br />
Select CBU to be released<br />
SET Weapons (RIPPLE – INTVL)<br />
Select NOSE / TAIL / NSTL<br />
SET AD to C2 in CTNL Page and<br />
enter required AD values<br />
SET BA in CTNL Page<br />
Check release ALT>BA>FRAG<br />
Set AS REQUIRED<br />
Designate Target<br />
Pickle and HOLD (CCRP)<br />
Call BOMBS AWAY<br />
SET SAFE (after release) (CTL m)<br />
Note:<br />
The GP bomb release procedure is the same except that<br />
you select C1 as AD from the CTNL page. No BA value can<br />
be entered – but a second AD2 can.<br />
Note2:<br />
Be aware of Bomb FRAG Pattern – Stay on the safe<br />
altitude side. Check wingmen separation for deconfliction<br />
Note3<br />
If target area is defended by SHORAD (AAA or Manpads)<br />
Stay above 14000ft – USE A-LOW setting of <strong>16</strong>000ft and<br />
level off before 14000ft<br />
F-<strong>16</strong> C/D BL52 8/17<br />
USAF /DoD 111.2403.72 Rev 118D<br />
1. Master ARM<br />
2. Master Mode<br />
3. Release mode<br />
4. SMS<br />
5. Arming<br />
6. BURST ALT<br />
7. ALT CHECK<br />
8. TARGET<br />
9. ROLL IN<br />
10. Bomb release<br />
11. TARGET AREA<br />
12. Master ARM<br />
CBUs RELEASE - CCIP<br />
SET ARM (SHF m)<br />
SET A-G<br />
SET CCIP<br />
Select CBU to be released<br />
SET Weapons (RIPPLE – INTVL)<br />
Select NOSE / TAIL / NSTL<br />
SET AD to C2 in CTNL Page and<br />
enter required AD values<br />
SET BA in CTNL Page<br />
Check release ALT>BA>FRAG<br />
AQUIRE visually<br />
Place Piper before Target<br />
Call BOMBS AWAY<br />
EGRESS<br />
SET SAFE (CTL m)<br />
Note:<br />
The GP bomb release procedure is the same except that<br />
you select C1 as AD from the CTNL page. No BA value can<br />
be entered – but a second AD2 can.<br />
Note2:<br />
Be aware of Bomb FRAG Pattern – Stay on the safe<br />
altitude side. Check wingmen separation for deconfliction<br />
Note3<br />
If target area is defended by SHORAD (AAA or Manpads)<br />
Stay above 14000ft – USE A-LOW setting of <strong>16</strong>000ft and<br />
level off before 14000ft<br />
F-<strong>16</strong> C/D BL52 9/17
USAF /DoD 111.2403.72 Rev 118D<br />
IP – Low Level<br />
1. RADAR<br />
2. Master ARM<br />
3. Master Mode<br />
4. Release mode<br />
4. SMS<br />
5. Arming<br />
6. BURST ALT<br />
7. Release Angle<br />
10NM from Target<br />
8. Altitude<br />
9. Speed<br />
10. HUD TD Box<br />
11. HUD TD Box<br />
12. Altitude<br />
13. Speed<br />
14. CCRP Steering Line<br />
DTOS<br />
15. First solution CUE<br />
<strong>16</strong>. G-Forces.<br />
17. PICKLE<br />
18. Climb angle<br />
19. 2 nd solution CUE<br />
20. After bomb release<br />
21.Master ARM<br />
GP BOMB RELEASE - DTOS<br />
Setting Up<br />
CHECK STDBY - EMCON<br />
SET ARM (SHF m)<br />
SET A-G<br />
SET DTOS<br />
Select weapon to be released<br />
SET weapons (RIPPLE – INTVL)<br />
(be sure to release multiple bombs)<br />
Select NOSE / TAIL / NSTL<br />
SET AD to C2 in CTNL Page and<br />
enter required AD values<br />
SET BA in CTNL Page if required<br />
SET REL ANG in CTNL Page – 30°<br />
Acquiring Target<br />
Pop to 1500ft<br />
Reduce to 300-350Kts MAX<br />
Place ON TARGET and designate<br />
Refine with TMS if necessary<br />
Drop to 300 ft<br />
Accelerate to 450 Kts<br />
Align with FPM<br />
POP UP Manoeuvre<br />
Start climbing<br />
Do not climb before seeing the 1 st<br />
solution Cue<br />
MAX 3.5G<br />
DEPRESS and HOLD<br />
Set REL ANG – 30°<br />
Bomb release<br />
Execute dive turn to EGRESS<br />
Set SAFE (CTL m)<br />
F-<strong>16</strong> C/D BL52 10/17<br />
USAF /DoD 111.2403.72 Rev 118D<br />
Note:<br />
Dive-Toss is a Low Altitude mode. It’s very useful when flying<br />
NOE during INGRESS. A POP-UP manoeuvre is mandatory<br />
and is the weak point of the delivery. The method is not very<br />
precise – Best results are obtained when saturating the area<br />
with weapons.<br />
GP BOMB RELEASE – MANUAL BOMBING MODE<br />
Note:<br />
Manual Bombing Mode is a backup mode. Use it when FCR or<br />
HUD are damaged.<br />
1. Master ARM<br />
2. Master Mode<br />
3. Release mode<br />
4. SMS<br />
5. ARMING DELAY<br />
6. BURST ALT<br />
7. ALT CHECK<br />
8. RETICLE<br />
8. TARGET<br />
9. ROLL IN<br />
10. Master ARM<br />
SET ARM (SHF m)<br />
SET A-G<br />
SET MAN (OSB2 then OSB<strong>16</strong>)<br />
Select weapon to be released<br />
SET weapons (RIPPLE – INTVL)<br />
Select NOSE / TAIL / NSTL<br />
SET AD to C2 in CTNL Page and<br />
enter required AD values<br />
SET BA in CTNL page if required<br />
Check release ALT>BA>FRAG<br />
Toggle to PRI (SHF CTL m)<br />
Adjust MILS Up (CTL ])<br />
(see next table) Down (CTL [)<br />
AQUIRE visually<br />
Position Piper<br />
SET SAFE (CTL m)<br />
Note:<br />
In Manual bombing, Pilot has to account for all parameters that<br />
the FCR usually provides. Think WWII era when you use this<br />
mode.<br />
F-<strong>16</strong> C/D BL52 11/17
USAF /DoD 111.2403.72 Rev 118D<br />
Note:<br />
in SP3 the JSOW behaves exactly like an AGM-65 due to<br />
GPS code not being implemented. Release procedure is<br />
the same as the Maverick but don't wait till the DLZ shows<br />
IN RNG. Release weapon as soon as you have a solid lock.<br />
Range depends on release altitude.<br />
F-<strong>16</strong> C/D BL52 12/17<br />
USAF /DoD 111.2403.72 Rev 118D<br />
AGM-154 JSOW - SLAVE MODE PAGE INTENTIONALLY LEFT BLANK<br />
USE FOR NOTES<br />
Note:<br />
For a JSOW release, you need the following MFD slots:<br />
FCR – SMS – WPN at minimum in your MFD SLOTS config<br />
First bomb<br />
1. Master ARM<br />
2. Master Mode<br />
3. MFD Slot<br />
4. SMS<br />
5. SMS<br />
6. AG RADAR Mode<br />
7. AG RADAR<br />
8. Weapon<br />
9. MFD<br />
10. Weapon<br />
11. Range<br />
12. Weapon<br />
Second Jsow<br />
13. SMS<br />
14. Weapon<br />
15. MFD<br />
<strong>16</strong>. Weapon<br />
17. Range<br />
18. Weapon<br />
19. Master ARM<br />
SET ARM (SHF m)<br />
SET A-G<br />
Check Correct<br />
Select JSOW<br />
Power Up weapon (OSB 7)<br />
AS Required<br />
Designate Target (TMS)<br />
Uncage (U)<br />
Select WPN SLOT (DMS)<br />
Ground designate and LOCK<br />
According to ALT. Disregard DLZ<br />
Pickle<br />
Select next JSOW<br />
Uncage (U)<br />
Select WPN SLOT (DMS)<br />
Ground designate and LOCK<br />
According to ALT. Disregard DLZ<br />
Pickle<br />
SET SAFE (CTL m)<br />
F-<strong>16</strong> C/D BL52 13/17
USAF /DoD 111.2403.72 Rev 118D<br />
Note:<br />
In Boresight mode, the missile becomes active as soon as<br />
launched and attacks the first target found.<br />
DO NOT FIRE in this mode if friendly aircraft are in the<br />
area unless you are sure they are safe.<br />
1. Master Arm<br />
2. Master mode<br />
3. SMS<br />
4. MSL Mode<br />
5. Friendly AC<br />
6. Radio<br />
7. Weapon<br />
AIM-120: BORESIGHT MODE<br />
Arm<br />
Set AA<br />
Select AIM-120<br />
Set Bore (OSB 19)<br />
Check friendlies position<br />
Call FOX 3 – MADDOG<br />
Pickle<br />
This mode is suited when you want to distract a bandit or<br />
when you don't have time to go through the radar lock<br />
sequence.<br />
AIM-120: ASE<br />
Note<br />
This diagram<br />
shows the<br />
ASE geometry<br />
of a typical<br />
BVR head to<br />
head engage-<br />
ment based on<br />
F4 SP3<br />
avionics.<br />
F-<strong>16</strong> C/D BL52 14/17<br />
USAF /DoD 111.2403.72 Rev 118D<br />
1. Master Arm<br />
2. Master mode<br />
3. AA Radar<br />
4. SMS<br />
5. MSL Mode<br />
6. Target<br />
7. NCTR<br />
8. Target Parameters<br />
9. ASE<br />
10. DLZ<br />
11. Radio<br />
12. Weapon<br />
13. Target<br />
14. Countdown<br />
15. Radar<br />
ARH<br />
Missiles<br />
AIM-120: SLAVE MODE<br />
Guidance Max Range<br />
(Nm)<br />
ARM<br />
Set AA<br />
Radiate CRM (RWS or TWS)<br />
Select AIM-120<br />
Set SLAVE (OSB 19)<br />
bug or lock as required<br />
Check status<br />
Check (aspect – closure)<br />
Wait biggest<br />
Wait between Rmax2 and Rmin2<br />
Call FOX 3<br />
Pickle<br />
Maintain in WEZ<br />
Monitor A = guided by ac radar<br />
T = MSL onboard radar<br />
Break lock when counter shows T<br />
to engage another bandit – Call<br />
PITBULL<br />
AIM-120: ARH COMPARATIVE TABLE<br />
Active Range<br />
(Nm) From tgt<br />
Platform<br />
Aim-120 datalink - ARH 25-30 10 F14 - F15 - F<strong>16</strong> - F18<br />
Aim-54 ARH 45+ ? F14<br />
AA12 ARH 28 - 32 8 - 9 Mig29C - Su27/30/33<br />
Note<br />
Among the ARH missiles, the Phoenix has the longest<br />
range but it's carried only by the F-14. The AA-12 has the<br />
best range compared to to amraam but needs to be<br />
supported longer negating its advantage.<br />
F-<strong>16</strong> C/D BL52 15/17
USAF /DoD 111.2403.72 Rev 118D<br />
1. Master Arm<br />
2. Master mode<br />
3. AA Radar<br />
4. SMS<br />
5. Target<br />
6. NCTR<br />
7. Good tone<br />
8. HUD<br />
9. DLZ<br />
10. Radio<br />
11. Weapon<br />
1. Master Arm<br />
2. Master mode<br />
3. SMS<br />
Weapon<br />
4. HUD<br />
5. Good tone<br />
6. HUD<br />
7. Target<br />
8. Radio<br />
9. Weapon<br />
AIM-9 WITH RADAR LOCK<br />
ARM<br />
Set AA<br />
Radiate CRM (RWS or TWS)<br />
Select AIM-9<br />
Cool (see note) (OSB8)<br />
bug or lock as required<br />
Check status<br />
Uncage missile (u)<br />
Check diamond tracking target<br />
Check target range<br />
Call FOX 2<br />
Pickle<br />
AIM-9 WITHOUT RADAR LOCK<br />
ARM<br />
Set AA<br />
Select AIM-9<br />
Cool (see note) (OSB8)<br />
Place diamond over target<br />
Uncage missile (u)<br />
Check diamond tracking target<br />
Check aspect and range<br />
Call FOX 2<br />
Pickle<br />
Note<br />
The AIM-9L/M needs to be cooled by argon for better<br />
accuracy. Cooling is started when entering Dogfight master<br />
mode and can last 60 – 90 minutes. Manually stop cooling<br />
when required. If firing from outside Dogfight master mode,<br />
enable and disable manually the cooling system.<br />
TD Uncage automatically the missile when the IR signature<br />
goes higher than a preset level. BP bypasses TD.<br />
Scan nutates seeker about LOS, larger FOV. Spot requires<br />
the diamond to be placed over the target.<br />
F-<strong>16</strong> C/D BL52 <strong>16</strong>/17<br />
USAF /DoD 111.2403.72 Rev 118D<br />
PAGE INTENTIONALLY LEFT BLANK<br />
USE FOR NOTES<br />
F-<strong>16</strong> C/D BL52 17/17