VITA OMEGA 900 - Vident, a VITA
VITA OMEGA 900 - Vident, a VITA
VITA OMEGA 900 - Vident, a VITA

Create successful ePaper yourself
Turn your PDF publications into a flip-book with our unique Google optimized e-Paper software.
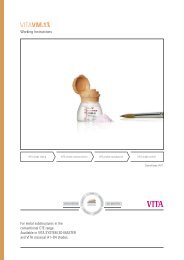
<strong>VITA</strong> <strong>OMEGA</strong> <strong>900</strong><br />
METAL CERAMICS<br />
Directions for use<br />
Date of issue: 11/03
<strong>VITA</strong> <strong>OMEGA</strong> <strong>900</strong><br />
METAL CERAMICS<br />
Directions for use
<strong>VITA</strong> <strong>OMEGA</strong> <strong>900</strong><br />
<strong>VITA</strong> <strong>OMEGA</strong> <strong>900</strong>,<br />
The new fine-particle<br />
ceramic<br />
The starting point for the<br />
development of <strong>VITA</strong> <strong>OMEGA</strong> <strong>900</strong> was<br />
the challenge to develop a metal ceramic<br />
system that avoids distortion on bio<br />
alloys and thus takes the heat resistance<br />
of the yellow, high-gold content<br />
alloys into account. This ceramic should<br />
also be universally suitable for the<br />
other alloy types such as reduced gold<br />
content bonding alloys, palladiumbased<br />
alloys and non-precious metal alloys.<br />
By means of modification of the<br />
manufacturing process <strong>VITA</strong> <strong>OMEGA</strong><br />
<strong>900</strong> demonstrates a fine-particle structure<br />
which has an extremely positive<br />
effect on the physical properties and<br />
considerably improves the processing<br />
by the dental technician, e.g. when<br />
grinding and polishing. The decisive<br />
factor is that it still applies that, compared<br />
to traditional ceramics, the low<br />
firing temperature of <strong>900</strong> °C was<br />
achieved not only for the dentine firing<br />
processes but also first and foremost<br />
for the opaque firing procedures.<br />
The term fine-particle ceramic<br />
does not describe a more finely ground<br />
ceramic powder but the particularly<br />
homogeneous distribution of glass, sinter<br />
and crystal phase in the structure of<br />
<strong>VITA</strong> Omega <strong>900</strong>, compared to conventional<br />
metal ceramics.<br />
Homogeneous<br />
distribution<br />
Compared to conventional metal<br />
ceramics the number of tension cracks<br />
is considerably reduced due to the<br />
more homogeneous distribution in the<br />
structure.<br />
Figure 1:<br />
SEM micrograph of conventional<br />
metal ceramic (magnification x 1000)<br />
The micrograph shows that leucite crystals<br />
are arranged in clusters with a diameter<br />
of approx. 30 µm. Tension cracks often form<br />
around these due to the great difference<br />
between the thermal expansion coefficients<br />
of leucite and glass phase.<br />
Figure 2:<br />
SEM micrograph of the<br />
fine-particle ceramic <strong>OMEGA</strong> <strong>900</strong><br />
(magnification x 1000)<br />
The polished surface of <strong>OMEGA</strong> <strong>900</strong><br />
shows that the leucite crystals of approx.<br />
3 µm in diameter have a finely dispersed<br />
distribution. Tension cracks are avoided<br />
due to the homogeneous distribution.<br />
<strong>VITA</strong> <strong>OMEGA</strong> <strong>900</strong> 2
Improved<br />
physical values<br />
The considerable improvement of the<br />
physical values with regard to bending<br />
strength, resistance to acids, bond (figure<br />
3) and thermal shock behaviour (figure 4)<br />
can also be attributed to the fine structure<br />
of the material.<br />
Thanks to the homogeneous,<br />
dense surface,<br />
<strong>OMEGA</strong> <strong>900</strong> features<br />
excellent grinding and<br />
polishing properties<br />
Kind to opposing teeth<br />
An additional advantage: Results<br />
of a study of the Dental Center of the<br />
University of Zurich indicate that the<br />
fine-particle ceramic Omega <strong>900</strong> exhibits<br />
a behaviour that is very similar to that of<br />
natural tooth enamel and is therefore<br />
kind to opposing teeth.<br />
<strong>VITA</strong> <strong>OMEGA</strong> <strong>900</strong><br />
Physical properties<br />
CET (25-500°C) 10 -6<br />
x K -1 opaque<br />
14.3 - 14.5<br />
Transformation point<br />
opaque<br />
°C approx. 571<br />
CET (25-500°C) 10 -6<br />
x K -1 dentine<br />
13.4 - 13.9<br />
Softening point - dentine °C approx. 655<br />
Transformation point<br />
dentine<br />
°C approx. 584<br />
Solubility - dentine µg/cm2 ISO 9693<br />
9.8<br />
Density - dentine g/cm3 2.4<br />
Flexural strength - dentine MPa (Nmm-2 ) 101<br />
Average particle size<br />
dentine<br />
µm (d50) 17.6<br />
Adhesive bond MPa (Nmm-2 Property<br />
Unit of<br />
Measure<br />
Value<br />
) 47<br />
Hardness (Vickers) enamel HV10 420<br />
hardness (Vickers)<br />
natural enamel<br />
HV10 400-500<br />
45<br />
40<br />
35<br />
30<br />
25<br />
20<br />
15<br />
10<br />
0<br />
min.<br />
value<br />
Figure 3: Adhesive bond<br />
70<br />
60<br />
50<br />
40<br />
30<br />
20<br />
10<br />
0<br />
Omega/<br />
Wiron<br />
Figure 4: Thermal shock behaviour<br />
Figure 5: Abrasion at opposing enamel in vitro<br />
The values given here<br />
with regard to the technical<br />
and physical properties<br />
refer to samples produced<br />
at <strong>VITA</strong> and <strong>VITA</strong> in-house<br />
measuring equipment.<br />
25<br />
42<br />
47<br />
Omega <strong>900</strong>/<br />
Wiron<br />
43<br />
VMK 95/<br />
Wiron<br />
63,04<br />
105°C 102°C 135°C 150°C 165°C Rest<br />
<strong>VITA</strong> <strong>OMEGA</strong> <strong>900</strong> 3<br />
Adhesive bond in MPa<br />
no. of defect crowns in %<br />
1,81<br />
9,7<br />
25,45
Standard layering of <strong>VITA</strong> <strong>OMEGA</strong> <strong>900</strong> METAL CERAMIC<br />
ENAMEL<br />
DENTINE<br />
OPAQUE DENTINE<br />
OPAQUE<br />
WASH-OPAQUE<br />
Information on framework design<br />
In order to produce crowns that are to be veneered with porcelain or pontics,<br />
reduced-size anatomical forms must be modelled. The wall thickness<br />
of the framework must not be less than 0.4 mm to ensure that the minimum<br />
thickness of the metal framework amounts to 0.3 - 0.35 mm after finishing.<br />
When modelling, sharp edges, undercuts and deep grooves must be avoided.<br />
Every effort should be made to achieve smooth transition zones.<br />
Sufficiently stable modellation of the approximal connections must be ensured.<br />
For extra stability (especially for large-span bridges) the palatal side<br />
of the pontics should be waxed-up with a thin metal collar or at least with<br />
inlay-like proximal reinforcements.<br />
The directions of the manufacturer of the alloy with regard to waxing-up,<br />
investing, casting, finishing, sandblasting and oxidation must be observed.<br />
<strong>VITA</strong> <strong>OMEGA</strong> <strong>900</strong> 4
Standard layering<br />
1. Application of wash porcelains<br />
• The metal coping, finished according<br />
to manufacturer's instructions with a fine<br />
cross-cut tungsten carbide burr before<br />
sandblasting.<br />
Sandblasting: 125 µm at a pressure of 2 bar<br />
•<br />
The coping after oxidation at <strong>900</strong> °C.<br />
Acid treatment is no longer required.<br />
Please follow manufacturer's instructions.<br />
• Applying the wash opaque powder (WO)<br />
for the 1st opaque firing.<br />
•<br />
Alternatively:<br />
Applying the wash opaque powder (WO)<br />
using the SPRAY-ON technique.<br />
Note:<br />
The wash opaque should be applied<br />
or sprayed on thinly.<br />
<strong>VITA</strong> <strong>OMEGA</strong> <strong>900</strong> 5
• Alternatively:<br />
Applying PASTE WASH OPAQUE.<br />
The paste must be brushed on thinly.<br />
Recommended<br />
firing cycle<br />
Preh.<br />
Temp.<br />
°C<br />
➞<br />
min.<br />
Temp.<br />
approx.<br />
min. °C/min. °C<br />
➞<br />
min.<br />
VAC<br />
min.<br />
Oxidation firing Follow manufacturer’s instructions!<br />
Wash opaque firing<br />
(powder)<br />
600 2.00 4.00 75 <strong>900</strong> 2.00 4.00<br />
Wash opaque firing<br />
(paste)<br />
500 6.00 6.00 67 <strong>900</strong> 3.00 6.00<br />
The given values are to be seen only as a guideline for the use. Should the surface<br />
characteristics, transparency or the degree of lustre not correspond to the result expected<br />
under optimum conditions, the firing cycle should be adjusted accordingly.<br />
The decisive factor for the firing cycle is not the firing temperature displayed by the<br />
furnance, but the appearance and the surface characteristics of the object after firing.<br />
• The wash opaque after firing.<br />
•<br />
2. Application of opaque porcelains<br />
Opaque applied to fully cover the surface<br />
(in this case with paste opaque)<br />
Note:<br />
Pastes should be stirred before use with a glass or plastic<br />
instrument. If after an extended storage period it is<br />
no longer possible to stir the <strong>OMEGA</strong> <strong>900</strong> PASTE OPAQUE,<br />
it can be restored to its original consistency by adding a<br />
specific amount of PASTE OPAQUE LIQUID.<br />
Recommended<br />
firing cycle<br />
Preh.<br />
Temp.<br />
°C<br />
➞<br />
min.<br />
Temp.<br />
➞ approx.<br />
min. °C/min. °C<br />
➞<br />
min.<br />
VAC<br />
min.<br />
Opaque firing<br />
(powder)<br />
600 2.00 4.00 75 <strong>900</strong> 1.00 4.00<br />
Opaque firing<br />
(paste)<br />
500 6.00 6.00 67 <strong>900</strong> 2.00 6.00<br />
The given values are to be seen only as a guideline for the use. Should the surface<br />
characteristics, transparency or the degree of lustre not correspond to the result expected<br />
under optimum conditions, the firing cycle should be adjusted accordingly.<br />
The decisive factor for the firing cycle is not the firing temperature displayed by the<br />
furnance, but the appearance and the surface characteristics of the object after firing.<br />
• Paste opaque after firing.<br />
<strong>VITA</strong> <strong>OMEGA</strong> <strong>900</strong> 6<br />
➞<br />
➞<br />
➞➞<br />
➞➞
3. Dentine layering<br />
• Applying the opaque dentine thinly,<br />
completely covering the labial surface<br />
• Completed opaque dentine build-up.<br />
• Dentine is first built up to the full tooth form…<br />
•<br />
… and then reduced in the incisal third<br />
to accomodate the enamel.<br />
<strong>VITA</strong> <strong>OMEGA</strong> <strong>900</strong> 7
• Applying the enamel.<br />
• After completing enamel build-up. To compensate for firing shrinkage,<br />
the porcelain should be built up slightly larger than the desired tooth<br />
size.<br />
Recommended<br />
firing cycle<br />
Preh.<br />
Temp.<br />
°C<br />
➞<br />
min.<br />
Temp.<br />
➞ approx.<br />
min. °C/min. °C<br />
➞<br />
min.<br />
VAC<br />
min.<br />
Dentine firing 600 6.00 6.00 50 <strong>900</strong> 1.00 6.00<br />
The given values are to be seen only as a guideline for the use. Should the surface<br />
characteristics, transparency or the degree of lustre not correspond to the result expected<br />
under optimum conditions, the firing cycle should be adjusted accordingly.<br />
The decisive factor for the firing cycle is not the firing temperature displayed by the<br />
furnance, but the appearance and the surface characteristics of the object after firing.<br />
• The finished crown before glazing.<br />
Characterizations can now be added<br />
using <strong>VITA</strong> Akzent stains.<br />
Recommended<br />
firing cycle<br />
Preh.<br />
Temp.<br />
°C<br />
➞<br />
min.<br />
Temp.<br />
➞ approx.<br />
min. °C/min. °C<br />
➞<br />
min.<br />
VAC<br />
min.<br />
Glaze firing<br />
with glaze Akz 25<br />
600 4.00 4.00 75 <strong>900</strong> 1.00 –<br />
The given values are to be seen only as a guideline for the use. Should the surface<br />
characteristics, transparency or the degree of lustre not correspond to the result expected<br />
under optimum conditions, the firing cycle should be adjusted accordingly.<br />
The decisive factor for the firing cycle is not the firing temperature displayed by the<br />
furnance, but the appearance and the surface characteristics of the object after firing.<br />
• The finished restoration on the model after glazing.<br />
<strong>VITA</strong> <strong>OMEGA</strong> <strong>900</strong> 8<br />
➞<br />
➞<br />
➞➞<br />
➞➞
Firing Chart <strong>VITA</strong> <strong>OMEGA</strong> <strong>900</strong><br />
Recommended<br />
firing cycle<br />
Preh.<br />
Temp.<br />
°C<br />
➞<br />
min.<br />
➞<br />
➞<br />
min.<br />
Oxidation Please follow manufacturer's instructions<br />
➞➞<br />
°C/min.<br />
Temp.<br />
approx.<br />
°C<br />
➞ VAC<br />
min. min.<br />
Wash opaque firing (powder) 600 2.00 4.00 75 <strong>900</strong> 2.00 4.00<br />
Wash opaque firing (paste) 500 6.00 6.00 67 <strong>900</strong> 3.00 6.00<br />
Opaque firing (powder) 600 2.00 4.00 75 <strong>900</strong> 1.00 4.00<br />
Opaque firing (paste) 500 6.00 6.00 67 <strong>900</strong> 2.00 6.00<br />
Shoulder porcelain firing<br />
with MARGIN 600 6.00 6.00 50 <strong>900</strong> 2.00 6.00<br />
Dentine firing 600 6.00 6.00 50 <strong>900</strong> 1.00 6.00<br />
1st corrective firing 600 6.00 6.00 48 890 1.00 6.00<br />
Correction firing with COR 600 4.00 6.00 33 800 1.00 6.00<br />
Glaze firing with<br />
glaze Akz 25 600 4.00 4.00 75 <strong>900</strong> 1.00 —<br />
Glaze firing 600 — 4.00 75 <strong>900</strong> 2.00 —<br />
Glaze firing with<br />
Akzent fluid 600 4.00 4.00 75 <strong>900</strong> 2.00 —<br />
The firing result of dental ceramics depends to a great extent on the individual firing cycle of the user, i.e. on the type<br />
of furnance, the position of the temperature sensor, the firing tray as well as the size of the oject to be fired.<br />
Our recommendations for the firing temperatures (irrespective of whether these are given orally, in writing or by means<br />
of partical instruction) are based on our own numerous experiences and tests.<br />
Nevertheless, the values indicated here can only be seen as a guideline for the user. Should the surface characteristics,<br />
transparency or the degree of lustre not correspond to the result expected under optimum conditions, the firing cycle<br />
should be adjusted accordingly. The decisive factor for the firing cycle is not the firing temperature displayed by the<br />
furnance, but the appearance and surface quality of the object after firing.<br />
To obtain an optimum metal/ceramic bond the ceramic should be under slight compressive strain. A good result depends also on<br />
the size of the workpiece, the type, hardness and heat conducting properties of the alloy used, and particularly in the way each<br />
individual technician carries out the firing. Our practical experience has shown that good results can be achieved when the thermal<br />
expansion coefficient of the alloy – measured between 25 °C and 600 °C – lies in the range of 14,0 -14,4 x 10 -6<br />
K -1<br />
and that<br />
of the <strong>VITA</strong> <strong>OMEGA</strong> <strong>900</strong> Metal Ceramics – measured between 25 °C and 500 °C – in the range of 13,4-13,9 x 10 -6<br />
K -1<br />
. With higher<br />
thermal expansion coefficients of the alloy slow cooling is required from the 1st dentine firing onwards as the cooling period from<br />
<strong>900</strong> °C - 700 °C should not take less than 3 minutes.<br />
<strong>VITA</strong> <strong>OMEGA</strong> <strong>900</strong> 9
Individual layering technique<br />
• Opaque applied with individual shading in the<br />
cervical and incisal area with CO 8 and CO 4.<br />
• Opaque after firing.<br />
• MARGIN applied to the shoulder.<br />
MAR 3 was used here.<br />
Recommended<br />
firing cycle<br />
Preh.<br />
Temp.<br />
°C<br />
➞<br />
min.<br />
Temp.<br />
➞ approx.<br />
min. °C/min. °C<br />
➞<br />
min.<br />
VAC<br />
min.<br />
Shoulder porcelain<br />
firing with MARGIN<br />
600 6.00 6.00 50 <strong>900</strong> 2.00 6.00<br />
The given values are to be seen only as a guideline for the use. Should the surface<br />
characteristics, transparency or the degree of lustre not correspond to the result expected<br />
under optimum conditions, the firing cycle should be adjusted accordingly.<br />
The decisive factor for the firing cycle is not the firing temperature displayed by the<br />
furnance, but the appearance and the surface characteristics of the object after firing.<br />
• Shoulder after firing.<br />
<strong>VITA</strong> <strong>OMEGA</strong> <strong>900</strong> 10<br />
➞<br />
➞➞
• Applying the opaque dentine, which was here<br />
enhanced with LUMINARIES – LM4 in the cervical<br />
area and LM1 in the body…<br />
• … and NUANCE powder NU8 in the incisal area.<br />
Completed build-up with opaque dentine.<br />
• Applying the dentine with a lightened<br />
zone, e.g. dentine B1 or 1M1.<br />
•<br />
Completed dentine build-up of a crown.<br />
<strong>VITA</strong> <strong>OMEGA</strong> <strong>900</strong> 11
• Dentine reduced to accomodate<br />
the NUANCE and TRANSLUCENT porcelains.<br />
• Before the NUANCE porcelains<br />
are used, a thin translucent layer<br />
(T1 and T5) is applied…<br />
• … into which the NUANCE porcelains<br />
are then washed (NU1, NU4 and NU8).<br />
Recommended<br />
firing cycle<br />
Preh.<br />
Temp.<br />
°C<br />
➞<br />
min.<br />
Temp.<br />
➞ approx.<br />
min. °C/min. °C<br />
➞<br />
min.<br />
VAC<br />
min.<br />
Dentine firing 600 6.00 6.00 50 <strong>900</strong> 1.00 6.00<br />
The given values are to be seen only as a guideline for the use. Should the surface<br />
characteristics, transparency or the degree of lustre not correspond to the result expected<br />
under optimum conditions, the firing cycle should be adjusted accordingly.<br />
The decisive factor for the firing cycle is not the firing temperature displayed by the<br />
furnance, but the appearance and the surface characteristics of the object after firing.<br />
• Intermediate firing as visual control<br />
of the NU and T porcelains.<br />
<strong>VITA</strong> <strong>OMEGA</strong> <strong>900</strong> 12<br />
➞<br />
➞➞
• The surface should be ground before<br />
the final tooth form is modelled by adding<br />
cervical, translucent and enamel porcelains.<br />
• Crown before the 2nd dentine firing.<br />
Recommended<br />
firing cycle<br />
Preh.<br />
Temp.<br />
°C<br />
➞<br />
min.<br />
Temp.<br />
➞ approx.<br />
min. °C/min. °C<br />
➞<br />
min.<br />
VAC<br />
min.<br />
Dentine firing 600 6.00 6.00 50 <strong>900</strong> 1.00 6.00<br />
The given values are to be seen only as a guideline for the use. Should the surface<br />
characteristics, transparency or the degree of lustre not correspond to the result expected<br />
under optimum conditions, the firing cycle should be adjusted accordingly.<br />
The decisive factor for the firing cycle is not the firing temperature displayed by the<br />
furnance, but the appearance and the surface characteristics of the object after firing.<br />
• Crown after finishing, prepared for glaze firing.<br />
Recommended<br />
firing cycle<br />
Preh.<br />
Temp.<br />
°C<br />
➞<br />
min.<br />
Temp.<br />
➞ approx.<br />
min. °C/min. °C<br />
➞<br />
min.<br />
VAC<br />
min.<br />
Glaze firing<br />
Glaze firing with<br />
600 – 4.00 75 <strong>900</strong> 2.00 –<br />
Akzent fluid 600 4.00 4.00 75 <strong>900</strong> 2.00 –<br />
The given values are to be seen only as a guideline for the use. Should the surface<br />
characteristics, transparency or the degree of lustre not correspond to the result expected<br />
under optimum conditions, the firing cycle should be adjusted accordingly.<br />
The decisive factor for the firing cycle is not the firing temperature displayed by the<br />
furnance, but the appearance and the surface characteristics of the object after firing.<br />
• The finished restoration after glaze firing.<br />
<strong>VITA</strong> <strong>OMEGA</strong> <strong>900</strong> 13<br />
➞<br />
➞<br />
➞➞<br />
➞➞
Trouble Shooting<br />
Important:<br />
When sprayed on, the opaque<br />
must not be too dry.<br />
T r o u b l e<br />
Recommended firing parameters<br />
must not be changed.<br />
The porcelain consistency is too watery. Porcelain too dry when stirred. Optimal consistency of<br />
the porcelain.<br />
Due to applying material that is<br />
too watery, the layers "merge" with<br />
each other.<br />
Insufficient quality of surface does not feature resistance to plaque in the<br />
oral environment. Layers that are too wet and reduced drying time result in<br />
large cracks of the porcelain surface.<br />
Build-up of porcelains too dry. Optimum consistency ensures<br />
simple building up of layers.<br />
Perfect firing result.<br />
<strong>VITA</strong> <strong>OMEGA</strong> <strong>900</strong> 14
S h o o t i n g<br />
Furnace:<br />
Thorough testing of the ceramic furnace represents<br />
the most important precondition to successful firing<br />
on of <strong>VITA</strong> <strong>OMEGA</strong> <strong>900</strong>.<br />
Preconditions:<br />
considerable amount of oxide deposits may cause<br />
weakening of the bond and discolouration of the<br />
porcelain (discolourations of the fireclay base)<br />
furnaces featuring large temperature fluctuations<br />
are not suitable<br />
damaged fireclay bases as well as contaminated<br />
furnace linings must be exchanged before firing<br />
The working parameters of the manufacturer described<br />
should be completed by the routine and the experience of the<br />
dental technician. Temperature fluctuations of +/- 10 °C<br />
can already be recognized clearly and are decisive factors<br />
for success or failure. The evaluation of the surface lustre<br />
(texture of an egg shell) is the only reliable and safe method<br />
to ensure correct firing.<br />
A slight lustre (egg shell) of the porcelain surface<br />
confirms correct firing. If the porcelain appears to be milky<br />
and not homogeneous, the temperature is too low.<br />
Use steps of 10 °C to approach the correct firing temperature.<br />
<strong>VITA</strong> <strong>OMEGA</strong> <strong>900</strong> 15
Trouble Shooting<br />
<strong>VITA</strong> <strong>OMEGA</strong> <strong>900</strong> METAL CERAMICS<br />
Problem Cause<br />
Opaque<br />
Formation of cracks in the<br />
paste opaque<br />
Formation of cracks in the OPAQUE<br />
Formation of bubbles in the OPAQUE<br />
Layering<br />
Surface reveals tear-ups<br />
Onion skin-like chippings<br />
after 2nd dentine firing<br />
Microporosities in the surface<br />
Cracks<br />
Cracks parallel to the tooth axle<br />
Paste opaque was applied too thickly.<br />
Organic substances in the paste<br />
opaque burnt out too rapidly.<br />
OPAQUE was applied too thickly or<br />
runs in recesses, e.g. fissures, collars<br />
Opaque dried too quickly<br />
- Faulty casting<br />
T r o u b l e<br />
- incorrect sandblasting<br />
- Contaminated metal surface<br />
- Sintering of Al 20 3 in the metal surface<br />
- Layers were built up too dry<br />
- Layers were built up too dry<br />
- Surface not ground prior<br />
to 2nd dentine firing<br />
- Layers were built up too dry<br />
- extraction too powerful<br />
- TEC was not adhered to<br />
- Incorrect design of framework<br />
- Insufficient separating of the<br />
porcelain in the interdental spaces<br />
Elimination<br />
First apply wash opaque and fire,<br />
then apply again until opaque<br />
layer covers the object entirely.<br />
Extend predrying time.<br />
Apply more thinly and evenly;<br />
do not vibrate too strongly.<br />
Adjust predrying times and predrying<br />
temperature in accordance with<br />
firing chart<br />
- See working instructions of the<br />
manufacturer of the metal<br />
- Follow manufacturer's instructions<br />
or use suitable type of alloy<br />
- Thorough cleaning of the metal surface<br />
- Reduction of blasting pressure<br />
1. Layers need more moisture,<br />
do not blot or condense.<br />
2. If required, use<br />
<strong>VITA</strong> SPECIAL MODELLING FLUID<br />
3. Lower predrying temperature<br />
to 500 °C.<br />
see above<br />
- grind surface with stones or<br />
diamond-coated instruments<br />
or sandblast carefully<br />
- Wet the ceramic and place it<br />
onto the firing tray when wet<br />
- Cool down slowly from TEC<br />
25-600 °C ≥ 14.5<br />
- see framework guide 908 E<br />
Separate down to the opaque<br />
Note: Wet the scalpel slightly.<br />
<strong>VITA</strong> <strong>OMEGA</strong> <strong>900</strong> 16
S h o o t i n g<br />
Problem Cause<br />
Layering<br />
Lack of translucency / brilliance<br />
Core shines through<br />
Shade too pale<br />
Shade too "glowing", too intense<br />
Runmarks in the porcelain<br />
Black dots in the porcelain<br />
Runmarks after glaze firing<br />
1. Excessive condensing<br />
2. Error in the vacuum system<br />
3. Firing temperature too low (incorrect)<br />
4. Predrying and/or heating<br />
time too short<br />
5. Use of oily modelling liquids<br />
6. Too much enamel<br />
1. OPAQUE DENTINE only applied<br />
up to the incisal edge of the<br />
metal framework<br />
2. OPAQUE DENTINE applied too thinly<br />
1. Insufficient amount of<br />
OPAQUE DENTINE applied<br />
2. Firing temperature for porcelain<br />
too high or too low<br />
WASH OPAQUE applied<br />
too richly<br />
Firing temperature for porcelain<br />
too high<br />
OPAQUE DENTINE shines<br />
through if veneer is too thin<br />
Opaque residues in the water<br />
for the brush<br />
Water for the brush contaminated<br />
1. Residues of protective foil<br />
that remained on the bottle<br />
2. Silicone residues of rubber polishers<br />
3. Porcelains became contaminated<br />
with metal/grinding dust<br />
Residues of grinding dust on the<br />
surface<br />
Elimination<br />
1. Do not condense or condense<br />
only slightly.<br />
2. Test of vacuum pump<br />
3. Temperature check with silver sample<br />
4. Adhere to firing<br />
instructions<br />
5. Use original <strong>VITA</strong> liquids<br />
6. Adhere to recommended layering<br />
technique<br />
1. Extending the cap with<br />
OPAQUE DENTINE<br />
2. Apply covering layer of OPAQUE<br />
DENTINE across the labial surface<br />
1. Spread OPAQUE DENTINE<br />
across the entire labial surface<br />
2. Temperature check with silver sample<br />
Apply WASH OPAQUE more thinly,<br />
see working instructions<br />
Temperature check with<br />
silver sample<br />
Mixing ratio OPAQUE DENTINE /<br />
DENTINE 50:50, instead of pure<br />
OPAQUE DENTINE<br />
Use fresh water after applying<br />
the opaque<br />
Use fresh water<br />
1. Protective foil must always<br />
be removed completely<br />
2. Clean carefully<br />
3. Ensure that the "ceramic" working<br />
place is clean<br />
Clean object carefully before glaze firing<br />
<strong>VITA</strong> <strong>OMEGA</strong> <strong>900</strong> 17
Accurate shade reproduction in the case of thin wall<br />
thicknesses in the <strong>VITA</strong> SYSTEM 3D-MASTER ®<br />
Working procedure:<br />
Standard layering technique HIGH CHROMA layering technique<br />
ENAMEL<br />
DENTINE<br />
OPAQUE DENTINE<br />
OPAQUE<br />
WASH-OPAQUE<br />
• a high degree of accuracy in the case of thin wall thicknesses<br />
• simple handling thanks to the logical structure according to colorimetric principles<br />
• reduces the no. of repeats since there is an in-depth shading even<br />
in the case of thin wall thicknesses<br />
• conditions for shade reproduction even in the case of younger patient<br />
(space is often lacking due to tooth substance-saving grinding)<br />
• excellent aesthetics can be achieved even when space is lacking<br />
• simple and safe to use, therefore also suitable for "newcomers" to ceramics<br />
• no mixing of colours necessary – accurate handling<br />
• natural shade effect guaranteed even in the cervical area<br />
In the case of very thin wall thicknesses or thinly tapering marginal areas there may not be sufficient<br />
space for accurate shade reproduction on account of the natural looking translucency of the<br />
<strong>VITA</strong> <strong>OMEGA</strong> <strong>900</strong> metal ceramic materials. The colorimetric structure principle of the <strong>VITA</strong> SYSTEM<br />
3D-MASTER offers an optimum solution in the case of thin wall thicknesses thanks to its wide<br />
variety of possibilities with regard to colour saturation (chroma). By using the <strong>VITA</strong> <strong>OMEGA</strong> <strong>900</strong><br />
OPAQUE DENTINE of the next highest degree of colour saturation the chroma of the selected shade<br />
can be increased. This does not alter the lightness and hue of the chosen shade.<br />
Example: 3M3 in the case of a thin wall thickness<br />
Instead of the standard layering technique:<br />
OPAQUE 3M3 - OPAQUE DENTINE 3M3 -<br />
DENTINE 3M3 - ENAMEL EN2<br />
Now HIGH CHROMA layering technique:<br />
OPAQUE 3M3 - OPAQUE DENTINE 3M4 -<br />
DENTINE 3M3 - ENAMEL EN2<br />
ENAMEL<br />
DENTINE<br />
OPAQUE DENTINE<br />
OPAQUE DENTINE<br />
(HIGH CHROMA<br />
version)*<br />
OPAQUE<br />
WASH-OPAQUE<br />
* The build-up can be individually designed<br />
according to the desired chroma.<br />
In order to close the gap when selecting the<br />
highest degree of colour saturation (e.g. 3M3),<br />
11 new additional <strong>VITA</strong> <strong>OMEGA</strong> <strong>900</strong> OPAQUE<br />
DENTINE with a higher chroma are available:<br />
OD1M3 -<br />
OD2L3.5 - OD2M4 - OD2R3.5 -<br />
OD3L3.5 - OD3M4 - OD3R3.5 -<br />
OD4L3.5 - OD4M4 - OD4R3.5 -<br />
OD5M4 -<br />
<strong>VITA</strong> <strong>OMEGA</strong> <strong>900</strong> 18
Determination table for <strong>VITA</strong> <strong>OMEGA</strong> <strong>900</strong> ENAMEL<br />
<strong>VITA</strong> SYSTEM 3D-MASTER ®<br />
1M1 1M2 2L1.5 2L2.5 2M1 2M2 2M3 2R1.5 2R2.5 3L1.5 3L2.5 3M1<br />
EN2 EN2 EN2 EN2 EN2 EN2 EN2 EN2 EN2 EN2 EN2 EN2<br />
3M3 3R1.5 3R2.5 4L1.5 4L2.5 4 M1 4 M2 4 M3 4R1.5 4R2.5 5M1 5M2 5M3<br />
EN2 EN2 EN2 EN4 EN4 EN4 EN4 EN4 EN4 EN4 EN4 EN4 EN4<br />
<strong>VITA</strong>PAN classical<br />
A1 A2 A3 A3,5 A4 B1 B2 B3 B4 C1 C2 C3<br />
EN2 EN2 EN2 EN4 EN4 EN1 EN1 EN2 EN2 EN2 EN2 EN2<br />
Determination table for <strong>VITA</strong> <strong>OMEGA</strong> <strong>900</strong> MARGIN<br />
<strong>VITA</strong> SYSTEM 3D-MASTER <strong>VITA</strong>PAN classical<br />
1M1 50% MAR 1 + 50% MAR N<br />
1M2 MAR 1<br />
2L1.5 50% MAR 2 + 50% MAR N<br />
2L2.5 MAR 2<br />
2M1 50% MAR 2 + 50% MAR N<br />
2M2 MAR 2<br />
2M3 MAR 2<br />
2R1.5 50% MAR 2 + 50% MAR N<br />
2R2.5 MAR 2<br />
3L1.5 50% MAR 3 + 50% MAR N<br />
3L2.5 MAR 3<br />
3M1 50% MAR 3 + 50% MAR N<br />
3M2 MAR 3<br />
3M3 MAR 3<br />
3R1.5 50% MAR 3 + 50% MAR N<br />
3R2.5 MAR 3<br />
4L1.5 50% MAR 4 + 50% MAR N<br />
4L2.5 MAR 4<br />
4M1 50% MAR 4 + 50% MAR N<br />
4M2 MAR 4<br />
4M3 MAR 4<br />
4R1.5 50% MAR 4 + 50% MAR N<br />
4R2.5 MAR 4<br />
5M1 50% MAR 5 + 50% MAR N<br />
5M2 MAR 5<br />
5M3 MAR 5<br />
A1 MAR 2<br />
A2 MAR 3<br />
A3 MAR 3<br />
A3,5 MAR 4<br />
A4 MAR 5<br />
B1 MAR 1<br />
B2 MAR 2<br />
B3 MAR 3<br />
B4 MAR 4<br />
C1 25% MAR 6 + 75% MAR N<br />
C2 50% MAR 6 + 50% MAR N<br />
C3 MAR 6<br />
C4 MAR 6<br />
D2 MAR 4<br />
D3 MAR 4<br />
D4 50% MAR 6 + 50% MAR N<br />
<strong>VITA</strong> <strong>OMEGA</strong> <strong>900</strong> 19<br />
3M2<br />
EN2<br />
C4<br />
EN3<br />
D2<br />
EN2<br />
D3<br />
EN4<br />
D4<br />
EN4
Application of the porcelains from the PROFESSIONAL KIT<br />
LUMINARY<br />
The LUMINARIES can be used to vary the fluorescence of restorations.<br />
If LUMINARIES are used as "shoulder porcelains", the surface must be glazed or polished.<br />
LM 1 moonbeam (white) can be mixed with any of the LUMINARIES;<br />
it is the most fluorescent porcelain.<br />
LM 2 vanille (yellow)<br />
LM 3 sesame (greenish-yellow) yellowish tones; recommended for use mainly within the<br />
B colours and 2L2.5, 2M2, 2M3, 2R2.5, 3L1.5, 3L2.5.<br />
LM 4 candy (reddish-yellow)<br />
LM 5 nugget (brownish-yellow) reddish tones; recommended for use mainly within the<br />
A colours and 4L2.5, 4M3, 5M3.<br />
LM 6 sand (beige) greyish tone; recommended for use mainly within the<br />
C colours and 3M2, 3M3, 3R2.5, 4L1.5, 4M2, 4R1.5, 5M2.<br />
LM 7 blush (brownish-pink) reddish-brown tone; recommended for use mainly in cases<br />
where a stronger red tone is needed in the cervical area.<br />
Application examples of <strong>VITA</strong> <strong>OMEGA</strong> <strong>900</strong> LUMINARIES<br />
A B C<br />
D<br />
A ... applied cervically on anterior crowns and bridges, also in the basal area of the pontic,<br />
<strong>VITA</strong> <strong>OMEGA</strong> <strong>900</strong> LUMINARIES enhance the light distribution.<br />
B ... applied over the entire crown if required, thus providing brilliant and harmonious<br />
reproduction of the tooth colour. In certain special cases, opaque dentine can be omitted entirely.<br />
C / D ... integrated laterally, they can also serve to intensify light distibution. This allows the degree<br />
of brightness to be controlled individually and to prevent undesirable formation of shadowed areas.<br />
E / F ... used as "effect powders", the <strong>VITA</strong> <strong>OMEGA</strong> <strong>900</strong> LUMINARIES serve to add more vitality to<br />
certain areas. They also enhance the brilliance of the <strong>VITA</strong> <strong>OMEGA</strong> <strong>900</strong> porcelains.<br />
Note: Never apply <strong>VITA</strong> <strong>OMEGA</strong> <strong>900</strong> LUMINARIES to the surface.<br />
E<br />
F<br />
<strong>VITA</strong> <strong>OMEGA</strong> <strong>900</strong> 20
OPAL TRANSLUCENT<br />
OT 1 azure (bluish translucent)<br />
OT 2 rosewood (reddish translucent)<br />
OT 3 sunlight (whitish translucent)<br />
are all-purpose opalescent translucent porcelains;<br />
they can be layered into the enamel or applied as a<br />
final coating to the entire surface of the crown<br />
CORRECTIVE<br />
COR 1 incisal<br />
for small corrections in the<br />
enamel area<br />
COR 2 body<br />
for small corrections in the<br />
body of the tooth<br />
COR 3 translucent<br />
for small corrections in the<br />
translucent incisal area<br />
TRANSLUCENT<br />
T 1 milky for whitish incisal areas,<br />
margins and triangular protuberances<br />
T 2 opal for ridges, wedges and covering<br />
the labial surfaces<br />
T 4 clear neutral-coloured, translucent<br />
porcelain<br />
T 5 polar layered under the enamel to<br />
emphasize bluish incisal areas<br />
T 6 blue for bluish wedges and ridges<br />
T 8 shell (light reddish-brown)<br />
for enamel discolorations for all teeth<br />
T 9 navajo (reddish, translucent)<br />
for enamel discolorations,<br />
especially with older teeth<br />
CERVICAL<br />
These porcelains are layered onto the dentine above<br />
the neck of the tooth extending into the approximal<br />
areas to increase the illusion of depth.<br />
CE 1 light orange<br />
CE 2 light yellow<br />
CE 3 gold (golden-yellow)<br />
NUANCE<br />
These porcelains can be layered under, or "washed"<br />
into the dentine in order to create natural, in-depth<br />
shade effects.<br />
NU 1 flesh (yellowish-beige)<br />
NU 2 corn silk (corn-yellow)<br />
NU 3 golden glow (dark yellow)<br />
NU 4 saffron (light orange)<br />
NU 5 gold earth (orange)<br />
NU 6 salmon (pink)<br />
NU 7 caramel (brown)<br />
NU 8 brown sugar (greenish-brown)<br />
NU 9 cloud (greyish-blue)<br />
NU 10 snow (white)<br />
GINGIVA<br />
G 1 light flesh (light pink)<br />
G 2 dark flesh (dark pink)<br />
MARGIN<br />
The MARGIN materials (MAR) were especially developed<br />
to create a perfect transition between crown and die in<br />
the area of the crown margin in case of labially shortened<br />
metal coping. The MARGIN material applied can be<br />
hardened by heating.<br />
It is recommended to stabilize the shoulder with a drier<br />
or with radiated heat at the furnace opening.<br />
MAR N Neutral MARGIN material for<br />
mixing MAR 1 - MAR 6<br />
MAR 1 The colours of the MARGIN materials<br />
MAR 2 have been matched with the<br />
MAR 3 <strong>VITA</strong> Toothguide 3D-MASTER ®<br />
as well as the<br />
MAR 4 <strong>VITA</strong>PAN ® classical shade guide.<br />
MAR 5 For determination of MARGIN<br />
MAR 6 materials see separate table (page 19).<br />
<strong>VITA</strong> <strong>OMEGA</strong> <strong>900</strong> 21
Presentation<br />
<strong>VITA</strong> <strong>OMEGA</strong> <strong>900</strong> METAL CERAMICS<br />
<strong>VITA</strong> SYSTEM 3D-MASTER ®<br />
<strong>VITA</strong> <strong>OMEGA</strong> <strong>900</strong> 3D-MASTER STANDARD SET 12<br />
with powder opaque*<br />
Contents<br />
1x12g<br />
26 x 12g<br />
26 x 12g<br />
26 x 12g<br />
2x12g<br />
1x12g<br />
1x12g<br />
1x 50 ml<br />
1x 50 ml<br />
1 pack<br />
1 pack<br />
1<br />
2<br />
1<br />
<strong>VITA</strong> <strong>OMEGA</strong> <strong>900</strong> 3D-MASTER STARTER KIT 3M2<br />
with powder opaque*<br />
Contents<br />
1x12g<br />
1x12g<br />
1x12g<br />
1x12g<br />
1x12g<br />
1x12g<br />
1x 50 ml<br />
1x 50 ml<br />
1<br />
1<br />
<strong>VITA</strong> <strong>OMEGA</strong> <strong>900</strong> 3D-MASTER HIGH CHROMA<br />
OPAQUE DENTINE SET<br />
Contents<br />
11 x 12 g<br />
1<br />
1<br />
Material<br />
WASH OPAQUE<br />
OPAQUE<br />
DENTINE<br />
OPAQUE DENTINE<br />
ENAMEL EN2<br />
TRANSLUCENT T4<br />
WINDOW<br />
<strong>OMEGA</strong> <strong>900</strong> OPAQUE LIQUID<br />
MODELLING FLUID<br />
Firing trays A+B<br />
Firing trays G<br />
<strong>OMEGA</strong> <strong>900</strong> 3D-MASTER Shade Indicator<br />
with 107 laminae<br />
<strong>VITA</strong> Toothguides 3D-MASTER<br />
Working instructions<br />
Material<br />
OPAQUE<br />
DENTINE<br />
OPAQUE DENTINE<br />
ENAMEL EN2<br />
TRANSLUCENT T4<br />
WINDOW<br />
<strong>OMEGA</strong> <strong>900</strong> OPAQUE LIQUID<br />
MODELLING FLUID<br />
<strong>VITA</strong> Toothguide 3D-MASTER<br />
Working instructions<br />
*each also available with PASTE OPAQUE<br />
Material<br />
OPAQUE DENTINE<br />
<strong>VITA</strong> <strong>OMEGA</strong> <strong>900</strong> 3D-MASTER HIGH CHROMA<br />
OPAQUE DENTINE Shade Indicator<br />
Working instructions<br />
<strong>VITA</strong> <strong>OMEGA</strong> <strong>900</strong> 22
<strong>VITA</strong> <strong>OMEGA</strong> <strong>900</strong> 3D-MASTER PASTE OPAQUE SET<br />
Contents<br />
1x 7g<br />
26 x 5g<br />
1x15ml<br />
1<br />
1<br />
1<br />
<strong>VITA</strong> <strong>OMEGA</strong> <strong>900</strong> PROFESSIONAL KIT°<br />
Contents<br />
6x12g<br />
3x12g<br />
3x12g<br />
7x12g<br />
2x12g<br />
10 x 9g<br />
3x12g<br />
7x12g<br />
3<br />
1<br />
<strong>VITA</strong> <strong>OMEGA</strong> <strong>900</strong> MARGIN KIT°<br />
Contents<br />
7x12g<br />
1<br />
1<br />
Material<br />
PASTE WASH OPAQUE<br />
PASTE OPAQUE<br />
PASTE OPAQUE LIQUID<br />
Mixing spatula<br />
Flat brush<br />
Working instructions<br />
aMaterial<br />
TRANSLUCENT<br />
OPAL TRANSLUCENT<br />
CERVICAL<br />
LUMINARY<br />
GINGIVA<br />
NUANCE<br />
CORRECTIVE<br />
MARGIN<br />
Shade sample blades<br />
Working instructions<br />
Material<br />
MARGIN<br />
Shade sample blade<br />
Working instructions<br />
<strong>VITA</strong> <strong>OMEGA</strong> <strong>900</strong> COLOR OPAQUE°<br />
CO3, CO4, CO6, CO8 are available separately<br />
in 12 g (Powder) and in 5 g (Paste)<br />
°can also be used for <strong>VITA</strong>PAN classical shades<br />
What advantages does the <strong>VITA</strong> Toothguide 3D-MASTER offer you ?<br />
The <strong>VITA</strong> Toothguide 3D-MASTER enables you to determine all natural<br />
tooth shades accurately and systematically. It is at present the only shade<br />
guide available for determining natural tooth shades that is structured<br />
according to a colorimetric order principle. It takes into account the three<br />
dimensions (3D) of colour perception, namely:<br />
1. Lightness (value)<br />
2. Colour saturation (chroma)<br />
3. Hue<br />
The colour system on which this shade is based allows and a clear and<br />
unambiguous shade selection with unparalleled accuracy. It considerably<br />
simplifies communication between shade-taker and shade reproducer,<br />
which greatly increases the accuracy of shade selection.<br />
<strong>VITA</strong> <strong>OMEGA</strong> <strong>900</strong> 23
<strong>VITA</strong>PAN ® classical<br />
<strong>VITA</strong> <strong>OMEGA</strong> <strong>900</strong> classical STANDARD SET 12*<br />
with powder opaque**<br />
Contents<br />
1x12g<br />
16 x 12g<br />
16 x 12g<br />
16 x 12g<br />
5x12g<br />
1x12g<br />
1x12g<br />
1x50ml<br />
1x50ml<br />
1 pack<br />
1 pack<br />
1<br />
1<br />
*also available as <strong>VITA</strong> <strong>OMEGA</strong> <strong>900</strong> classical STANDARD SET 50<br />
**also available with PASTE OPAQUE<br />
<strong>VITA</strong> <strong>OMEGA</strong> <strong>900</strong> classical PASTE OPAQUE SET<br />
Contents<br />
1x 7g<br />
16 x 5g<br />
1x15ml<br />
1<br />
1<br />
1<br />
Material<br />
WASH OPAQUE<br />
OPAQUE<br />
DENTINE<br />
OPAQUE DENTINE<br />
ENAMEL<br />
TRANSLUCENT T4<br />
WINDOW<br />
<strong>OMEGA</strong> <strong>900</strong> OPAQUE LIQUID<br />
MODELLING FLUID<br />
Firing trays A+B<br />
Firing trays G<br />
<strong>OMEGA</strong> <strong>900</strong> classical Shade Indicator<br />
with 68 laminae<br />
Working instructions<br />
Material<br />
PASTE WASH OPAQUE<br />
PASTE OPAQUE<br />
OPAQUE LIQUID<br />
Flat brush<br />
Mixing spatula<br />
Working instructions<br />
If used as the manufacturer intended, no dangers are<br />
known to us for the user of <strong>VITA</strong> <strong>OMEGA</strong> <strong>900</strong> OPAQUE LIQUID,<br />
<strong>VITA</strong> MODELLING LIQUID EXTRA, <strong>VITA</strong> MODELLING FLUID,<br />
<strong>VITA</strong> SPECIAL MODELLING FLUID and <strong>VITA</strong> PASTE OPAQUE<br />
LIQUID. As regards biocompatibility no long-term reactions have<br />
been documented in the case of dental ceramics.<br />
<strong>VITA</strong> <strong>OMEGA</strong> <strong>900</strong> METAL CERAMIC powders consist<br />
of modified feldspar frits and admixtures of low proportions<br />
of colour frits melted into the shade-giving metal oxides.<br />
If used as the manufacturer intended no dangers are known<br />
to us for the user.<br />
<strong>VITA</strong> <strong>OMEGA</strong> <strong>900</strong> classical 6-COLOR-SET°<br />
with PASTE OPAQUE°°<br />
Contents Material<br />
1x 7g<br />
6x 5g<br />
6x12g<br />
6x12g<br />
3x12g<br />
4x 9g<br />
3x12g<br />
1x12g<br />
2x12g<br />
1x12g<br />
1x15ml<br />
1x50ml<br />
1<br />
1<br />
1<br />
PASTE WASH OPAQUE<br />
PASTE OPAQUE<br />
DENTINE<br />
OPAQUE DENTINE<br />
ENAMEL<br />
NUANCE NU1, 3, 5, 9<br />
TRANSLUCENT T1, 4, 5<br />
OPAL TRANSLUCENT OT2<br />
CERVICAL CE1, 3<br />
WINDOW<br />
PASTE OPAQUE LIQUID<br />
MODELLING FLUID<br />
Flat brush<br />
Mixing spatula<br />
Working instructions<br />
°in the <strong>VITA</strong>PAN classical shades A2/A3/A3,5/B2/B3 and D3<br />
°°also available with PASTE OPAQUE<br />
In the case of dust formation use an extractor unit or<br />
the dust mask P2 (or grind when wet). Protective goggles<br />
should be worn when grinding the fired ceramic.<br />
The following products are certified and bear the CE mark<br />
<strong>VITA</strong> <strong>OMEGA</strong> <strong>900</strong> 24<br />
:<br />
<strong>VITA</strong> <strong>OMEGA</strong> <strong>900</strong> METAL CERAMIC<br />
<strong>VITA</strong> Akzent
<strong>VITA</strong> SYSTEM 3D-MASTER ® With the unique<br />
<strong>VITA</strong> SYSTEM 3D-MASTER ®<br />
<strong>VITA</strong> Service<br />
<strong>VITA</strong> Equipment<br />
<strong>VITA</strong> Teeth<br />
Veneering Materials<br />
<strong>VITA</strong> All-Ceramics<br />
<strong>VITA</strong><br />
all natural tooth shades<br />
are systematically determined<br />
and completely reproduced.<br />
<strong>VITA</strong> <strong>OMEGA</strong> <strong>900</strong> METAL CERAMIC<br />
is available in the <strong>VITA</strong> SYSTEM<br />
3D-MASTER ® and <strong>VITA</strong>PAN ® classical<br />
system. Shade compatibility is<br />
guaranteed with all <strong>VITA</strong> materials.<br />
Please note: Our products should be used according to the working<br />
instructions. We cannot be held liable for damages resulting from incorrect<br />
handling or usage. The user is furthermore obliged to check the product<br />
before use with regard to its suitability for the intended area of applications.<br />
We cannot accept any liability if the product is used in conjunction with<br />
materials and equipment from other manufacturers which are not compatible<br />
or not authorized for use with our product. Furthermore, our liability for the correctness<br />
of this information is independent of the legal ground and, in as far as<br />
legally permissible, is limited to the invoiced value of the goods<br />
supplied excluding turnover tax. In particular, as far as legally permissible, we<br />
do not assume any liability for profit loss, for indirect damages, for<br />
consequential damages or for claims of third parties against the purchaser.<br />
Claims for damages based on fault liability (culpa in contrahendo, breach<br />
of contract, unlawful acts, etc.) can only be made in the case of intent or gross<br />
negligence. The <strong>VITA</strong> Module Box is not a compulsory component of the<br />
product. Date of issue of these directions for use: 11/03<br />
<strong>VITA</strong> Zahnfabrik H. Rauter GmbH & Co.KG<br />
Postfach 1338 · D-79704 Bad Säckingen . Germany<br />
Tel. +49/7761/562-222 · Fax +49/7761/562-446<br />
Internet: http://www.vita-zahnfabrik.com<br />
E-mail: info@vita-zahnfabrik.com<br />
906 E - 1103 (5.) Si