By Jason Davis, Tom McBride, James Huff, and ... - Flames of War
By Jason Davis, Tom McBride, James Huff, and ... - Flames of War
By Jason Davis, Tom McBride, James Huff, and ... - Flames of War

You also want an ePaper? Increase the reach of your titles
YUMPU automatically turns print PDFs into web optimized ePapers that Google loves.
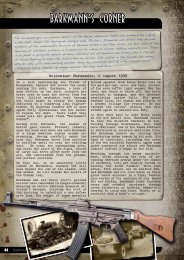
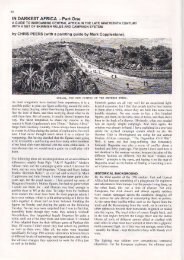
A DelAyeD StArt<br />
The 11 th Armoured Division, minus the 15 th /19 th King’s<br />
Royal Hussars who were supporting XXX Corps, commenced<br />
its advance across the Escaut Canal at Lille-St-Hubert. It<br />
had orders to clear the enemy forces east <strong>of</strong> Eindhoven <strong>and</strong><br />
Grave, but due to some delays they were too late to <strong>of</strong>fer any<br />
immediate protection to the Airborne corridor.<br />
Meanwhile as the 11 th waited impatiently for the bridge to<br />
be completed, the German 107. Panzerbrigade (107 th Panzer<br />
Brigade) had unloaded 36 Panther tanks at Venlo station,<br />
<strong>and</strong> advanced west to Helmond. The following day, their<br />
first Panzer battalion was fully operational <strong>and</strong> set out from<br />
Helmond on its mission to destroy the bridge at Son just<br />
north <strong>of</strong> Eindhoven.<br />
FirSt BruSh with the 107 th<br />
On 21 September, the 29 Armoured Brigade continued<br />
their advance north. At 1600 hrs their advance elements<br />
were able to make contact with the American 101 st Airborne<br />
Division at Nuenen where the 23 Hussars intercepted eight<br />
Panthers from the 107 th Panzer Brigade. The Germans had<br />
been on their way to launch another attack on the battered<br />
101 st Airborne forces defending the narrow corridor. The<br />
23 Hussars’ Shermans managed to destroy three Panthers<br />
<strong>and</strong> forced the Germans to withdraw to Helmond. Although<br />
the first skirmish between the 11 th Armoured Division <strong>and</strong><br />
107 th Panzer Brigade was a limited engagement, the right<br />
flank <strong>of</strong> Operation Market Garden was now in operation,<br />
<strong>and</strong> that the Germans would have to deal with another<br />
advance from the south, which significantly curtailed their<br />
attacks against the highway in the area.<br />
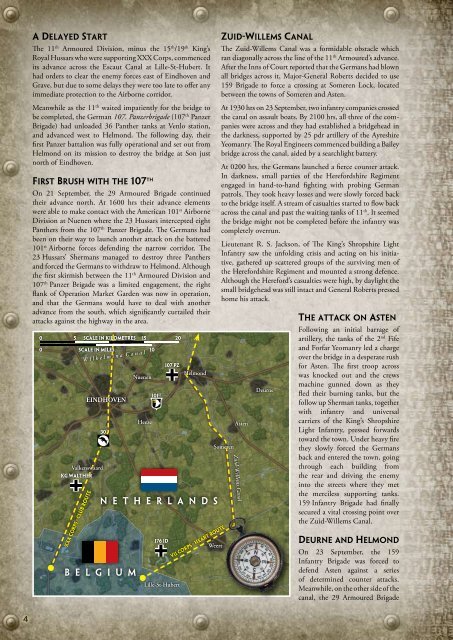
0 5 Scale in Kilometres 15 20<br />
0 Scale in MILES 10<br />
Valkenswaard<br />
KG walther<br />
XXX CORPS • CLUB ROUTE<br />
W i l h e l m i n a C a n a l<br />
EINDHOVEN<br />
30<br />
B E L G I U M<br />
Nuenen<br />
Heeze<br />
101 st<br />
176 id<br />
107 PZ<br />
Helmond<br />
N E T H E R L A N D S<br />
Lille-St-Hubert<br />
Weert<br />
VII CORPS • HEART ROUTE<br />
ZuiD-willemS cAnAl<br />
The Zuid-Willems Canal was a formidable obstacle which<br />
ran diagonally across the line <strong>of</strong> the 11th Armoured’s advance.<br />
After the Inns <strong>of</strong> Court reported that the Germans had blown<br />
all bridges across it, Major-General Roberts decided to use<br />
159 Brigade to force a crossing at Someren Lock, located<br />
between the towns <strong>of</strong> Someren <strong>and</strong> Asten.<br />
At 1930 hrs on 23 September, two infantry companies crossed<br />
the canal on assault boats. <strong>By</strong> 2100 hrs, all three <strong>of</strong> the companies<br />
were across <strong>and</strong> they had established a bridgehead in<br />
the darkness, supported by 25 pdr artillery <strong>of</strong> the Ayreshire<br />
Yeomanry. The Royal Engineers commenced building a Bailey<br />
bridge across the canal, aided by a searchlight battery.<br />
At 0200 hrs, the Germans launched a fierce counter attack.<br />
In darkness, small parties <strong>of</strong> the Herefordshire Regiment<br />
engaged in h<strong>and</strong>-to-h<strong>and</strong> fighting with probing German<br />
patrols. They took heavy losses <strong>and</strong> were slowly forced back<br />
to the bridge itself. A stream <strong>of</strong> casualties started to flow back<br />
across the canal <strong>and</strong> past the waiting tanks <strong>of</strong> 11 th . It seemed<br />
the bridge might not be completed before the infantry was<br />
completely overrun.<br />
Lieutenant R. S. Jackson, <strong>of</strong> The King’s Shropshire Light<br />
Infantry saw the unfolding crisis <strong>and</strong> acting on his initiative,<br />
gathered up scattered groups <strong>of</strong> the surviving men <strong>of</strong><br />
the Herefordshire Regiment <strong>and</strong> mounted a strong defence.<br />
Although the Hereford’s casualties were high, by daylight the<br />
small bridgehead was still intact <strong>and</strong> General Roberts pressed<br />
home his attack.<br />
Someren<br />
Zuid-Willems Canal<br />
Asten<br />
Deurne<br />
the AttAck on ASten<br />
Following an initial barrage <strong>of</strong><br />
artillery, the tanks <strong>of</strong> the 2 nd Fife<br />
<strong>and</strong> Forfar Yeomanry led a charge<br />
over the bridge in a desperate rush<br />
for Asten. The first troop across<br />
was knocked out <strong>and</strong> the crews<br />
machine gunned down as they<br />
fled their burning tanks, but the<br />
follow up Sherman tanks, together<br />
with infantry <strong>and</strong> universal<br />
carriers <strong>of</strong> the King’s Shropshire<br />
Light Infantry, pressed forwards<br />
toward the town. Under heavy fire<br />
they slowly forced the Germans<br />
back <strong>and</strong> entered the town, going<br />
through each building from<br />
the rear <strong>and</strong> driving the enemy<br />
into the streets where they met<br />
the merciless supporting tanks.<br />
159 Infantry Brigade had finally<br />
secured a vital crossing point over<br />
the Zuid-Willems Canal.<br />
Deurne AnD helmonD<br />
On 23 September, the 159<br />
Infantry Brigade was forced to<br />
defend Asten against a series<br />
<strong>of</strong> determined counter attacks.<br />
Meanwhile, on the other side <strong>of</strong> the<br />
canal, the 29 Armoured Brigade