Teach Yourself Borland C++ in 14 Days - portal
Teach Yourself Borland C++ in 14 Days - portal
Teach Yourself Borland C++ in 14 Days - portal

You also want an ePaper? Increase the reach of your titles
YUMPU automatically turns print PDFs into web optimized ePapers that Google loves.
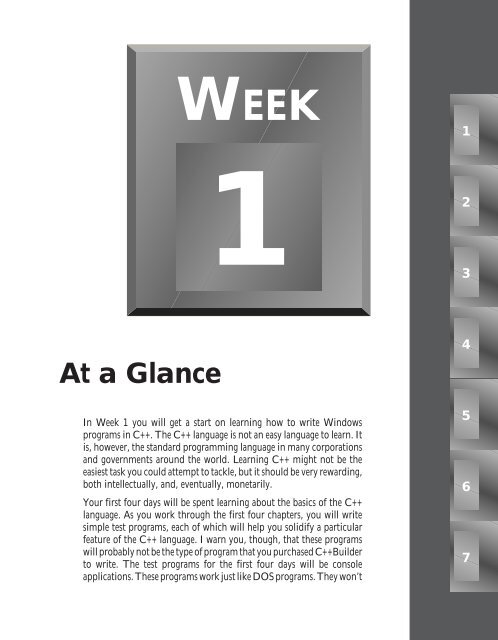
At a Glance<br />
At A Glance<br />
WEEK<br />
1<br />
In Week 1 you will get a start on learn<strong>in</strong>g how to write W<strong>in</strong>dows<br />
programs <strong>in</strong> <strong>C++</strong>. The <strong>C++</strong> language is not an easy language to learn. It<br />
is, however, the standard programm<strong>in</strong>g language <strong>in</strong> many corporations<br />
and governments around the world. Learn<strong>in</strong>g <strong>C++</strong> might not be the<br />
easiest task you could attempt to tackle, but it should be very reward<strong>in</strong>g,<br />
both <strong>in</strong>tellectually, and, eventually, monetarily.<br />
Your first four days will be spent learn<strong>in</strong>g about the basics of the <strong>C++</strong><br />
language. As you work through the first four chapters, you will write<br />
simple test programs, each of which will help you solidify a particular<br />
feature of the <strong>C++</strong> language. I warn you, though, that these programs<br />
will probably not be the type of program that you purchased <strong>C++</strong>Builder<br />
to write. The test programs for the first four days will be console<br />
applications. These programs work just like DOS programs. They won’t<br />
1<br />
1<br />
2<br />
3<br />
4<br />
5<br />
6<br />
7
2 Week 1<br />
have any flash or glitter. You probably won’t be terribly impressed. These programs will,<br />
however, help to teach you the basics of <strong>C++</strong>, and that is what the first four days of this book<br />
are about.<br />
Start<strong>in</strong>g on Day 5 you’ll beg<strong>in</strong> to learn about some of the th<strong>in</strong>gs that make the visual<br />
programm<strong>in</strong>g aspect of <strong>C++</strong>Builder the great tool that it is. We will talk about frameworks<br />
and what a framework means to you as a W<strong>in</strong>dows programmer. On Day 5 you will build<br />
a simple test program us<strong>in</strong>g <strong>C++</strong>Builder’s visual programm<strong>in</strong>g tools. After that we will spend<br />
a couple days go<strong>in</strong>g over the <strong>C++</strong>Builder IDE so that you can become familiar with how the<br />
entire <strong>C++</strong>Builder IDE works together to make your programm<strong>in</strong>g tasks easier. This is where<br />
th<strong>in</strong>gs start to get more <strong>in</strong>terest<strong>in</strong>g. You will get an opportunity to write some work<strong>in</strong>g<br />
W<strong>in</strong>dows programs <strong>in</strong> the last part of this first week. So, with that <strong>in</strong> m<strong>in</strong>d, let’s get to it.
Day 1<br />
Gett<strong>in</strong>g Your Feet Wet<br />
Week<br />
Gett<strong>in</strong>g Your Feet Wet<br />
by Kent Reisdorph<br />
Congratulations—you’ve chosen one of today’s hottest new programm<strong>in</strong>g<br />
tools! Before you can jump <strong>in</strong>to us<strong>in</strong>g all of what <strong>C++</strong>Builder has to offer,<br />
though, you’ll need to learn a little about <strong>C++</strong> first. In this chapter you will f<strong>in</strong>d<br />
■ A quick tour of <strong>C++</strong>Builder<br />
■ Information about how to write a W<strong>in</strong>32 console-mode application<br />
■ An <strong>in</strong>troduction to the <strong>C++</strong> language<br />
■ Facts about <strong>C++</strong> variables and data types<br />
■ Information about functions <strong>in</strong> <strong>C++</strong> (<strong>in</strong>clud<strong>in</strong>g the ma<strong>in</strong>() function)<br />
■ A discussion of arrays<br />
1<br />
3<br />
1
4 Day 1<br />
What Is <strong>C++</strong>Builder?<br />
By now you know that <strong>C++</strong>Builder is <strong>Borland</strong>’s hot new rapid application development<br />
(RAD) product for writ<strong>in</strong>g <strong>C++</strong> applications. With <strong>C++</strong>Builder you can write <strong>C++</strong> W<strong>in</strong>dows<br />
programs more quickly and more easily than was ever possible before. You can create W<strong>in</strong>32<br />
console applications or W<strong>in</strong>32 GUI (graphical user <strong>in</strong>terface) programs. When creat<strong>in</strong>g<br />
W<strong>in</strong>32 GUI applications with <strong>C++</strong>Builder, you have all the power of <strong>C++</strong> wrapped up <strong>in</strong> a<br />
RAD environment. What this means is that you can create the user <strong>in</strong>terface to a program<br />
(the user <strong>in</strong>terface means the menus, dialog boxes, ma<strong>in</strong> w<strong>in</strong>dow, and so on) us<strong>in</strong>g drag-anddrop<br />
techniques for true rapid application development. You can also drop OCX controls<br />
on forms to create specialized programs such as Web browsers <strong>in</strong> a matter of m<strong>in</strong>utes.<br />
<strong>C++</strong>Builder gives you all of this, but you don’t sacrifice program execution speed because you<br />
still have the power that the <strong>C++</strong> language offers you.<br />
I can hear you say<strong>in</strong>g, “This is go<strong>in</strong>g to be so cool!” And guess what? You’re right! But before<br />
you go slobber<strong>in</strong>g all over yourself with anticipation, I also need to po<strong>in</strong>t out that the <strong>C++</strong><br />
language is not an easy one to master. I don’t want you to th<strong>in</strong>k that you can buy a program<br />
like <strong>C++</strong>Builder and be a master W<strong>in</strong>dows programmer overnight. It takes a great deal of<br />
work to be a good W<strong>in</strong>dows programmer. <strong>C++</strong>Builder does a great job of hid<strong>in</strong>g some of the<br />
low-level details that make up the guts of a W<strong>in</strong>dows program, but it cannot write programs<br />
for you. In the end, you must still be a programmer, and that means you have to learn<br />
programm<strong>in</strong>g. That can be a long, uphill journey some days. The good news is that<br />
<strong>C++</strong>Builder can make your trek fairly pa<strong>in</strong>less and even fun. Yes, you can work and have fun<br />
do<strong>in</strong>g it!<br />
So roll up your sleeves and get your hik<strong>in</strong>g shoes on. <strong>C++</strong>Builder is cool, so have fun.<br />
A Quick Look at the <strong>C++</strong>Builder IDE<br />
This section conta<strong>in</strong>s a quick look at the <strong>C++</strong>Builder IDE. We’ll give the IDE a once-over<br />
here, and we’ll exam<strong>in</strong>e it <strong>in</strong> more detail on Day 6, “The <strong>C++</strong>Builder IDE Explored: Projects<br />
and Forms.” Because you are tackl<strong>in</strong>g W<strong>in</strong>dows programm<strong>in</strong>g, I’ll assume you are advanced<br />
enough to have figured out how to start <strong>C++</strong>Builder. When you first start the program, you<br />
are presented with both a blank form and the IDE, as shown <strong>in</strong> Figure 1.1.<br />
The <strong>C++</strong>Builder IDE (which stands for <strong>in</strong>tegrated development environment) is divided <strong>in</strong>to<br />
three parts. The top w<strong>in</strong>dow might be considered the ma<strong>in</strong> w<strong>in</strong>dow. It conta<strong>in</strong>s the speedbar<br />
on the left and the Component Palette on the right. The speedbar gives you one-click access<br />
to tasks like open<strong>in</strong>g, sav<strong>in</strong>g, and compil<strong>in</strong>g projects. The Component Palette conta<strong>in</strong>s a<br />
wide array of components that you can drop onto your forms. (Components are th<strong>in</strong>gs like<br />
text labels, edit controls, list boxes, buttons, and the like.) For convenience, the components
Gett<strong>in</strong>g Your Feet Wet<br />
are divided <strong>in</strong>to groups. Did you notice the tabs along the top of the Component Palette? Go<br />
ahead and click on the tabs to explore the different components available to you. To place<br />
a component on your form, you simply click the component’s button <strong>in</strong> the Component<br />
Palette and then click on your form where you want the component to appear. Don’t worry<br />
about the fact that you don’t yet know how to use components. We’ll get to that <strong>in</strong> due time.<br />
When you are done explor<strong>in</strong>g, click on the tab labeled Standard, because you’ll need it <strong>in</strong> a<br />
moment.<br />
Figure 1.1.<br />
The <strong>C++</strong>Builder<br />
IDE and the <strong>in</strong>itial<br />
blank form.<br />
NEW TERM<br />
A component is a self-conta<strong>in</strong>ed piece of b<strong>in</strong>ary software that performs some specific<br />
predef<strong>in</strong>ed task, such as a text label, an edit control, or a list box.<br />
Below the speedbar and Component Palette and glued to the left side of the screen is the<br />
Object Inspector. It is through the Object Inspector that you modify a component’s<br />
properties and events. You will use the Object Inspector constantly as you work with<br />
<strong>C++</strong>Builder. The Object Inspector has one or two tabs, depend<strong>in</strong>g on the component<br />
currently selected. It always has a Properties tab. A component’s properties control how the<br />
component operates. For example, chang<strong>in</strong>g the Color property of a component will change<br />
the background color of that component. The list of available properties varies from<br />
component to component, although components usually have several common elements<br />
(Width and Height properties, for <strong>in</strong>stance).<br />
5<br />
1
6 Day 1<br />
NEW TERM<br />
A property determ<strong>in</strong>es the operation of a component.<br />
Usually the Object Inspector has an Events tab <strong>in</strong> addition to the Properties tab. Events occur<br />
as the user <strong>in</strong>teracts with a component. For example, when a component is clicked, an event<br />
fires and tells W<strong>in</strong>dows that the component was clicked. You can write code that responds<br />
to those events, perform<strong>in</strong>g specific actions when an event occurs. As with properties, the<br />
events that you can respond to vary from component to component.<br />
An event is a method that is <strong>in</strong>voked <strong>in</strong> a component as a result of that component’s<br />
<strong>in</strong>teraction with the user.<br />
NEW TERM<br />
To the right of the Object Inspector is the <strong>C++</strong>Builder workspace. The workspace <strong>in</strong>itially<br />
displays the Form Editor. It should come as no surprise that the Form Editor allows you to<br />
create forms. In <strong>C++</strong>Builder a form represents a w<strong>in</strong>dow <strong>in</strong> your program. The form might<br />
be the program’s ma<strong>in</strong> w<strong>in</strong>dow, a dialog box, or any other type of w<strong>in</strong>dow. You use the Form<br />
Editor to place, move, and size components as part of the form creation process. Hid<strong>in</strong>g<br />
beh<strong>in</strong>d the Form Editor is the Code Editor. The Code Editor is where you type code when<br />
writ<strong>in</strong>g your programs. The Object Inspector, Form Editor, Code Editor, and Component<br />
Palette work <strong>in</strong>teractively as you build applications.<br />
Now that you’ve had a look at what makes up the <strong>C++</strong>Builder IDE, let’s actually do<br />
someth<strong>in</strong>g.<br />
Hello World<br />
It’s tradition. Almost all programm<strong>in</strong>g books start you off by hav<strong>in</strong>g you create a program<br />
that displays Hello World on the screen. I’m tempted to do someth<strong>in</strong>g else, but tradition is<br />
a force to be reckoned with, so Hello World it is. You’ve got some work ahead of you <strong>in</strong> the<br />
next few chapters, so I thought I’d give you a taste of <strong>C++</strong>Builder’s goodies before putt<strong>in</strong>g<br />
you to work on learn<strong>in</strong>g the seem<strong>in</strong>gly less-glamorous basics of <strong>C++</strong>. You’ll have a little fun<br />
before you have to go on the cha<strong>in</strong> gang. <strong>C++</strong>Builder (and its cous<strong>in</strong>, Delphi) possibly allow<br />
you the quickest route to Hello World of any W<strong>in</strong>dows programm<strong>in</strong>g environment to date.<br />
Right now you should have <strong>C++</strong>Builder runn<strong>in</strong>g, and you should be look<strong>in</strong>g at a blank form.<br />
By default, the form is named Form1. (The form name is significant <strong>in</strong> <strong>C++</strong>Builder, but I’ll<br />
address that a little later.) To the left of the form, the Object Inspector shows the properties<br />
for the form. Click on the title bar of the Object Inspector. The Caption property is<br />
highlighted, and the cursor is sitt<strong>in</strong>g there wait<strong>in</strong>g for you to do someth<strong>in</strong>g. (If the Caption<br />
property is not <strong>in</strong> view, you might have to scroll the Object Inspector w<strong>in</strong>dow to locate it.<br />
Properties are listed <strong>in</strong> alphabetical order.) Type Hello World! to change the form’s caption.
NOTE<br />
Gett<strong>in</strong>g Your Feet Wet<br />
As you modify properties, <strong>C++</strong>Builder will immediately display the<br />
results of the property change when appropriate. As you type the new<br />
caption, notice that the w<strong>in</strong>dow caption of the form is chang<strong>in</strong>g to<br />
reflect the text you are typ<strong>in</strong>g.<br />
Now click the Run button on the speedbar (the one with the green arrow). (You could also<br />
press F9 or choose Run | Run from the ma<strong>in</strong> menu.) <strong>C++</strong>Builder beg<strong>in</strong>s to build the<br />
program. The compiler status dialog box, shown <strong>in</strong> Figure 1.2, is displayed, and you can<br />
watch as <strong>C++</strong>Builder whips through the files necessary to build your program. After a brief<br />
wait, the compiler status box disappears, the form is displayed, and the caption shows Hello<br />
World!. In this case, the runn<strong>in</strong>g program looks almost identical to the blank form. You may<br />
scarcely have noticed when the program was displayed because it is displayed <strong>in</strong> the exact<br />
location of the form <strong>in</strong> the Form Editor. (There is a difference, though, because the Form<br />
Editor displays an alignment grid and the runn<strong>in</strong>g program does not.) Congratulations—<br />
you’ve just written your first <strong>C++</strong> W<strong>in</strong>dows program with <strong>C++</strong>Builder. Wow, that was easy!<br />
“But what is it?” you ask. It’s not a lot, I agree, but it is a true W<strong>in</strong>dows program. It can be<br />
moved by dragg<strong>in</strong>g the title bar, it can be sized, it can be m<strong>in</strong>imized, it can be maximized,<br />
and it can be closed by click<strong>in</strong>g the Close button.<br />
Figure 1.2.<br />
The compiler status<br />
dialog box.<br />
Okay, so maybe display<strong>in</strong>g Hello World! just <strong>in</strong> the caption was cheat<strong>in</strong>g a little. Let’s spruce<br />
it up a bit. If you still have the Hello World program runn<strong>in</strong>g, close it by click<strong>in</strong>g the Close<br />
button <strong>in</strong> the upper-right corner of the w<strong>in</strong>dow. The Form Editor is displayed aga<strong>in</strong>, and you<br />
are ready to modify the form (and, as a result, the program).<br />
To make the program more viable, we’re go<strong>in</strong>g to add text to the center of the w<strong>in</strong>dow itself.<br />
To do this, we’ll add a text label to the form. First, click on the Standard tab of the<br />
Component Palette. The third component button on the palette has an A on it. If you put<br />
your mouse cursor over that button, the tool tip will display Label. Click the label button and<br />
then click anywhere on the form. A label component is placed on the form. Now turn your<br />
attention to the Object Inspector. It now displays the properties for Label1 (remember that<br />
before it was show<strong>in</strong>g the properties for Form1). Aga<strong>in</strong> the Caption property is highlighted.<br />
7<br />
1
8 Day 1<br />
Click on the title bar of the Object Inspector or on the Caption property and type Hello<br />
World!. Now the label on the form shows Hello World!. As long as we’re at it, let’s change<br />
the size of the label’s text as well. Double-click on the Font property. The property will expand<br />
to show the additional font attributes below it. Locate the Size property under Font and<br />
change the font size to 24 (it is currently set to 8). As soon as you press the Enter key or click<br />
on the form, the label <strong>in</strong>stantly changes to the new size.<br />
Because the label is probably not centered on the form, you may want to move it. To move<br />
a component, simply click on it and drag it to the position you want it to occupy. Once you<br />
have the label where you want it, you’re ready to recompile and run the program. Click the<br />
Run button aga<strong>in</strong>. <strong>C++</strong>Builder compiles the program aga<strong>in</strong> and, after a moment (shorter this<br />
time), the program runs. Now you see Hello World! displayed <strong>in</strong> the center of the form as<br />
well as <strong>in</strong> the caption. Figure 1.3 shows the Hello World program runn<strong>in</strong>g.<br />
Figure 1.3.<br />
The Hello World<br />
program runn<strong>in</strong>g.<br />
With this little taste of <strong>C++</strong>Builder, you can see that writ<strong>in</strong>g <strong>C++</strong> W<strong>in</strong>dows programs with<br />
<strong>C++</strong>Builder is go<strong>in</strong>g to be a great deal more <strong>in</strong>terest<strong>in</strong>g than it was <strong>in</strong> the good ol’ days. To<br />
prepare for what you are go<strong>in</strong>g to do next, you need to close the current project <strong>in</strong> the<br />
<strong>C++</strong>Builder IDE. Choose File | Close All from the ma<strong>in</strong> menu. Click No when prompted<br />
to save changes to Project1, or save the project as HelloWorld if you are fond of your new<br />
creation.<br />
Hello World, Part II—A W<strong>in</strong>32 Console<br />
Application<br />
In the next couple chapters you are go<strong>in</strong>g to learn the basics of the <strong>C++</strong> language. Along the<br />
way you will write some simple test programs. These test programs will work best as console<br />
applications. For all <strong>in</strong>tents and purposes, these programs look like DOS programs when they<br />
run. There are some major differences between a W<strong>in</strong>32 console app and a DOS program,
Gett<strong>in</strong>g Your Feet Wet<br />
but you need not be concerned about that right now. So, without further ado, let’s create<br />
Hello World as a W<strong>in</strong>32 console program with <strong>C++</strong>Builder.<br />
A W<strong>in</strong>32 console application is a 32-bit program that runs <strong>in</strong> a DOS box under<br />
W<strong>in</strong>dows 95 or W<strong>in</strong>dows NT.<br />
NEW TERM<br />
From the ma<strong>in</strong> menu, choose File | New. <strong>C++</strong>Builder displays the Object Repository.<br />
Curiously enough, the Object Repository’s title bar says New Items, but don’t be thrown by<br />
that. The Object Repository conta<strong>in</strong>s predef<strong>in</strong>ed projects, forms, dialog boxes, and other<br />
objects you can add to your applications or use to beg<strong>in</strong> a new project. I will discuss the Object<br />
Repository <strong>in</strong> detail on Day 9, “Creat<strong>in</strong>g Applications <strong>in</strong> <strong>C++</strong>Builder.” For now, click on the<br />
New tab <strong>in</strong> the Object Repository and double-click Console App to start a new console<br />
application project. <strong>C++</strong>Builder creates the project and displays the Code Editor so that you<br />
can enter code for the program. Figure 1.4 shows the Code Editor as it appears when start<strong>in</strong>g<br />
a new console-mode application.<br />
Figure 1.4.<br />
The <strong>C++</strong>Builder<br />
Code Editor w<strong>in</strong>dow.<br />
You will notice a couple of differences between the <strong>C++</strong>Builder IDE now and how it looked<br />
earlier when we created a GUI application. First, there is no Form Editor. That’s because a<br />
console application can’t display forms (well, that’s not completely true, but it’s accurate<br />
enough for this discussion). Also notice that the Object Inspector is blank. You can only place<br />
components on a form, so the Object Inspector is useless <strong>in</strong> a console application.<br />
TIP<br />
When writ<strong>in</strong>g console applications, you can close the Object Inspector<br />
to make more room for the Code Editor w<strong>in</strong>dow. Close the Object<br />
Inspector by click<strong>in</strong>g the Close button on the Object Inspector’s title<br />
bar. To br<strong>in</strong>g back the Object Inspector, press F11 or choose<br />
View | Object Inspector from the ma<strong>in</strong> menu.<br />
9<br />
1
10 Day 1<br />
When you exam<strong>in</strong>e the Code Editor, you should see the follow<strong>in</strong>g text displayed <strong>in</strong> the editor<br />
w<strong>in</strong>dow:<br />
//--------------------------------<br />
#<strong>in</strong>clude <br />
#<strong>in</strong>clude <br />
#<strong>in</strong>clude <br />
#pragma hdrstop<br />
//-------------------------------<strong>in</strong>t<br />
ma<strong>in</strong>(<strong>in</strong>t argc, char **argv)<br />
{<br />
return 0;<br />
}<br />
//--------------------------------<br />
This is a do-noth<strong>in</strong>g <strong>C++</strong> program, but a valid <strong>C++</strong> program nonetheless. We’ll<br />
modify the code <strong>in</strong> just a moment to make this program actually do someth<strong>in</strong>g, but<br />
first I want you to notice the l<strong>in</strong>es that beg<strong>in</strong> with //. These are comment l<strong>in</strong>es that, <strong>in</strong> this<br />
program, serve no purpose other than to divide the program’s code visually. (You will<br />
normally use comment l<strong>in</strong>es to document your code.) <strong>C++</strong>Builder adds these comment l<strong>in</strong>es<br />
automatically when a new console application is first created. (In future code list<strong>in</strong>gs I will<br />
elim<strong>in</strong>ate the comment l<strong>in</strong>es to save space.) Notice also that the s<strong>in</strong>gle statement <strong>in</strong> this code<br />
ends <strong>in</strong> a semicolon. (I know it doesn’t make sense right now, but there is only one actual<br />
executable statement <strong>in</strong> this program.) The semicolon is used at the end of each statement<br />
<strong>in</strong> a <strong>C++</strong> program.<br />
Very early <strong>in</strong> the process of learn<strong>in</strong>g the C and <strong>C++</strong> languages, the budd<strong>in</strong>g programmer<br />
must learn the difference between an expression and a statement. The “official” def<strong>in</strong>ition<br />
of a statement is “an expression that is followed by a semicolon.” The semicolon closes an<br />
expression and makes it a k<strong>in</strong>d of s<strong>in</strong>gle-l<strong>in</strong>e block of code. I’ll get <strong>in</strong>to the code block soon,<br />
but for now you should realize that an expression is a unit of code that evaluates to some<br />
quantity. A statement is an expression that is closed. For example, consider the follow<strong>in</strong>g<br />
statement:<br />
ANALYSIS<br />
c = a + b;<br />
In this example, the portion to the right of the equal sign, a + b, is an expression. The entire<br />
l<strong>in</strong>e is a statement. I know this may be a bit confus<strong>in</strong>g at the moment, but it should become<br />
clearer as we go along. I’ll try to be very careful when I use these two terms. For now, though,<br />
just remember that a statement is followed by a semicolon and is a closed expression.<br />
Also notice the open<strong>in</strong>g and clos<strong>in</strong>g braces <strong>in</strong> the program. In <strong>C++</strong>, a block of code beg<strong>in</strong>s<br />
with the open<strong>in</strong>g brace ({) and ends with the clos<strong>in</strong>g brace (}). The braces are used to del<strong>in</strong>eate<br />
the beg<strong>in</strong>n<strong>in</strong>g and end of code blocks associated with loops, functions, if statements, and <strong>in</strong><br />
other cases as well. In this program there is only one set of braces because it is a simple<br />
program.
NOTE<br />
Gett<strong>in</strong>g Your Feet Wet<br />
In order to display Hello World! on the screen, we need to make use of a <strong>C++</strong> class called<br />
iostream, so a quick tutorial on that class is needed. (You don’t know about classes yet, but<br />
don’t worry about that right now.) The iostream class uses streams to perform basic <strong>in</strong>put and<br />
output, such as pr<strong>in</strong>t<strong>in</strong>g text on the screen or gett<strong>in</strong>g <strong>in</strong>put from the user. The cout stream<br />
is used to send data to the standard output stream. In a console application, the standard<br />
output stream means the console, or the screen. The c<strong>in</strong> stream is used to get data from the<br />
console, such as user <strong>in</strong>put. iostream implements two special operators to place <strong>in</strong>formation<br />
on a stream or to extract <strong>in</strong>formation from a stream. The <strong>in</strong>sertion operator () is used to extract data from an<br />
<strong>in</strong>put stream. To output <strong>in</strong>formation to the console, you would use<br />
cout
12 Day 1<br />
Now the compiler will be able to f<strong>in</strong>d the iostream class and will understand what to do when<br />
it encounters the cout statement.<br />
TIP<br />
If you forget to <strong>in</strong>clude the header file for a class or a function your<br />
program references, you will get a compiler error. The compiler error<br />
will say someth<strong>in</strong>g to the effect of Undef<strong>in</strong>ed symbol ‘cout’. If you see<br />
this error message, you should immediately check to be sure that you<br />
have <strong>in</strong>cluded all of the headers your program needs. To f<strong>in</strong>d out what<br />
header file a class or function’s declaration is <strong>in</strong>, click on the function<br />
or class name and press the F1 key. W<strong>in</strong>dows help will run, and the<br />
help topic for the item under the cursor will be displayed. Toward the<br />
top of the help topic you will see a reference to the header file <strong>in</strong> which<br />
the function or class is declared.<br />
There’s one more th<strong>in</strong>g I’ll mention before we write the console version of Hello World. The<br />
iostream class conta<strong>in</strong>s special manipulators that can be used to control how streams are<br />
handled. The only one we are concerned with right now is the endl (end l<strong>in</strong>e) manipulator,<br />
which is used to <strong>in</strong>sert a new l<strong>in</strong>e <strong>in</strong> the output stream. We’ll use endl to <strong>in</strong>sert a new l<strong>in</strong>e after<br />
we output text to the screen.<br />
Now that you have some understand<strong>in</strong>g of the iostream class, we can proceed to write Hello<br />
World as a console application. Edit the program until it looks like List<strong>in</strong>g 1.1. Each of the<br />
l<strong>in</strong>es <strong>in</strong> the list<strong>in</strong>g has a number that I’ve put there for identification. Be sure to skip that<br />
number and the space after it when you type <strong>in</strong> the l<strong>in</strong>es.<br />
List<strong>in</strong>g 1.1. HELLO.CPP.<br />
1: #<strong>in</strong>clude <br />
2: #<strong>in</strong>clude <br />
3: #<strong>in</strong>clude <br />
4: #<strong>in</strong>clude // add this l<strong>in</strong>e<br />
5: #pragma hdrstop<br />
6:<br />
7: <strong>in</strong>t ma<strong>in</strong>(<strong>in</strong>t argc, char **argv)<br />
8: {<br />
9: cout
NOTE<br />
Gett<strong>in</strong>g Your Feet Wet<br />
In <strong>C++</strong>, whitespace is ignored. For the most part, it doesn’t matter<br />
where you put spaces or new l<strong>in</strong>es. Obviously you cannot <strong>in</strong>sert spaces<br />
<strong>in</strong> the middle of keywords or variable names, but other than that just<br />
about anyth<strong>in</strong>g goes. For example, the follow<strong>in</strong>g bits of code are<br />
equivalent:<br />
<strong>in</strong>t ma<strong>in</strong>(<strong>in</strong>t argc, char **argv)<br />
{<br />
cout
<strong>14</strong> Day 1<br />
List<strong>in</strong>g 1.2. cont<strong>in</strong>ued<br />
9: {<br />
10: cout
Gett<strong>in</strong>g Your Feet Wet<br />
An object, like components described earlier, is a piece of b<strong>in</strong>ary software that<br />
performs a specific programm<strong>in</strong>g task. (Components are objects, but not all objects<br />
are components. I’ll get <strong>in</strong>to that later.)<br />
An object reveals to the user (the programmer us<strong>in</strong>g the object) only as much of itself as<br />
needed <strong>in</strong> order to simplify its use. All <strong>in</strong>ternal mechanisms that the user doesn’t need to know<br />
about are hidden from sight. All of this is rolled up <strong>in</strong> the concept of object-oriented<br />
programm<strong>in</strong>g. OOP allows you to take a modular approach to programm<strong>in</strong>g, thus keep<strong>in</strong>g<br />
you from constantly re-<strong>in</strong>vent<strong>in</strong>g the wheel. <strong>C++</strong>Builder programs are OOP-oriented due to<br />
<strong>C++</strong>Builder’s heavy use of components. Once a component is created (either one of your own<br />
or one of the built-<strong>in</strong> <strong>C++</strong>Builder components), it can be reused <strong>in</strong> any <strong>C++</strong>Builder program.<br />
A component can also be extended by <strong>in</strong>heritance to create a new component with additional<br />
features. Best of all, components hide their <strong>in</strong>ternal details and let the programmer<br />
concentrate on gett<strong>in</strong>g the most out of the component. Objects and <strong>C++</strong> classes are discussed<br />
<strong>in</strong> detail on Day 4, “Totally Immersed: <strong>C++</strong> Classes and Object-Oriented Programm<strong>in</strong>g.”<br />
NEW TERM<br />
Humble Beg<strong>in</strong>n<strong>in</strong>gs<br />
In the beg<strong>in</strong>n<strong>in</strong>g there was C…as far as <strong>C++</strong> is concerned, anyway. <strong>C++</strong> is built on the C<br />
programm<strong>in</strong>g language. It has been described as “C with classes.” This foundation <strong>in</strong> C is still<br />
very prevalent <strong>in</strong> <strong>C++</strong> programs written today. It’s not as if <strong>C++</strong> were written to replace C,<br />
but rather to augment it. The rest of this chapter and much of the next chapter focus primarily<br />
on the part of the <strong>C++</strong> language that has its roots <strong>in</strong> C. Actually, we will be deal<strong>in</strong>g with the<br />
C language here and mov<strong>in</strong>g to <strong>C++</strong> later, on Day 2, “Wad<strong>in</strong>g In Deeper.” You don’t have<br />
to be concerned with which of the <strong>in</strong>formation presented is from C and which is from <strong>C++</strong><br />
because it’s all rolled up <strong>in</strong>to the language we call <strong>C++</strong>.<br />
It would be nice if present<strong>in</strong>g the <strong>C++</strong> language could be handled sequentially. That’s not<br />
the case, though, because all of the features we will be discuss<strong>in</strong>g are <strong>in</strong>tertw<strong>in</strong>ed. Present<strong>in</strong>g<br />
the <strong>C++</strong> language sequentially is not possible, so I’ll take the <strong>in</strong>dividual puzzle pieces one at<br />
a time and start fitt<strong>in</strong>g them together. Toward the end of Day 3, “Up to Your Neck <strong>in</strong> <strong>C++</strong>,”<br />
you’ll have a fairly complete picture of the <strong>C++</strong> language. Don’t be concerned if you do not<br />
<strong>in</strong>stantly grasp every concept presented. Some of what is required to fully understand <strong>C++</strong><br />
can only come with real-world experience.<br />
Variables<br />
Well, we have to start somewhere, so let’s take a look at variables. A variable is essentially a<br />
name assigned to a memory location. Once you have declared a variable, you can then use<br />
it to manipulate data <strong>in</strong> memory. That probably doesn’t make much sense to you, so let me<br />
15<br />
1
16 Day 1<br />
give you a few examples. The follow<strong>in</strong>g code snippet uses two variables. At the end of each<br />
l<strong>in</strong>e of code is a comment that describes what is happen<strong>in</strong>g when that l<strong>in</strong>e executes:<br />
<strong>in</strong>t x; // variable declared as an <strong>in</strong>teger variable<br />
x = 100; // ‘x’ now conta<strong>in</strong>s the value 100<br />
x += 50; // ‘x’ now conta<strong>in</strong>s the value 150<br />
<strong>in</strong>t y = 150; // ‘y’ declared and <strong>in</strong>itialized to 150<br />
x += y; // ‘x’ now conta<strong>in</strong>s the value 300<br />
x++; // ‘x’ now conta<strong>in</strong>s the value 301<br />
NEW TERM<br />
A variable is a location set aside <strong>in</strong> computer memory to conta<strong>in</strong> some value.<br />
Notice that the value of x changes as the variable is manipulated. I’ll discuss the <strong>C++</strong> operators<br />
used to manipulate variables a little later.<br />
WARNING<br />
Variables that are declared but are not <strong>in</strong>itialized will conta<strong>in</strong> random<br />
values. Because the memory to which the variable po<strong>in</strong>ts has not been<br />
<strong>in</strong>itialized, there is no tell<strong>in</strong>g what that memory location conta<strong>in</strong>s. For<br />
<strong>in</strong>stance, look at the follow<strong>in</strong>g code:<br />
<strong>in</strong>t x;<br />
<strong>in</strong>t y;<br />
x = y + 10; // oops!<br />
In this example the variable x could conta<strong>in</strong> any value because y was<br />
not <strong>in</strong>itialized prior to use.<br />
The exception to this rule is that global variables and variables declared<br />
with the static modifier are <strong>in</strong>itialized to 0. All other variables conta<strong>in</strong><br />
random data until <strong>in</strong>itialized or assigned a value.<br />
Variable names can mix upper- and lowercase letters and can <strong>in</strong>clude numbers and the<br />
underscore (_), but they cannot conta<strong>in</strong> spaces or other special characters. The variable name<br />
must start with a character or the underscore. Generally speak<strong>in</strong>g, it’s not a good idea to beg<strong>in</strong><br />
a variable name with an underscore because compilers often start special variable and function<br />
names with the underscore. The maximum allowed length of a variable name will vary from<br />
compiler to compiler. If you keep your variable names to 31 characters or less, you’ll be safe.<br />
In reality, anyth<strong>in</strong>g more than about 20 characters is too long to be useful anyway.<br />
<strong>C++</strong> Data Types<br />
NEW TERM<br />
In <strong>C++</strong> a data type def<strong>in</strong>es the way the compiler stores <strong>in</strong>formation <strong>in</strong> memory.
Gett<strong>in</strong>g Your Feet Wet<br />
In some programm<strong>in</strong>g languages you can get by with assign<strong>in</strong>g any type of value to a variable.<br />
For example, look at the follow<strong>in</strong>g examples of BASIC code:<br />
x = -1;<br />
x = 1000;<br />
x = 3.<strong>14</strong><br />
x = 457000;<br />
In BASIC the <strong>in</strong>terpreter takes care of allocat<strong>in</strong>g enough storage to fit any size or type of<br />
number. In <strong>C++</strong>, however, you must declare a variable’s type before you can use the variable:<br />
<strong>in</strong>t x1 = -1;<br />
<strong>in</strong>t x = 1000;<br />
float y = 3.<strong>14</strong>;<br />
long z = 457000;<br />
This allows the compiler to do type-check<strong>in</strong>g and to make sure that th<strong>in</strong>gs are kept straight<br />
when the program runs. Improper use of a data type will result <strong>in</strong> a compiler error or warn<strong>in</strong>g<br />
that can be analyzed and corrected so that you can head off a problem before it starts. Some<br />
data types can have both signed and unsigned versions. A signed data type can conta<strong>in</strong> both<br />
negative and positive numbers, whereas an unsigned data type can conta<strong>in</strong> only positive<br />
numbers. Table 1.1 shows the basic data types <strong>in</strong> <strong>C++</strong>, the amount of memory they require,<br />
and the range of values possible for that data type.<br />
Table 1.1. Data types used <strong>in</strong> <strong>C++</strong> (32-bit programs).<br />
Data Type Size <strong>in</strong> Bytes Possible Range of Values<br />
char 1 -128 to 126<br />
unsigned char 1 0 to 255<br />
short 2 -32,768 to 32,767<br />
unsigned short 2 0 to 65,535<br />
long 4 -2,<strong>14</strong>7,483,648 to<br />
2,<strong>14</strong>7,483,648<br />
unsigned long 4 0 to 4,294,967,295<br />
<strong>in</strong>t 4 Same as long<br />
unsigned <strong>in</strong>t 4 Same as unsigned long<br />
float 4 1.2E-38 to 3.4E381<br />
double 8 2.2E-308 to 1.8E3082<br />
bool 1 true or false<br />
17<br />
1
18 Day 1<br />
NOTE<br />
NOTE<br />
In <strong>C++</strong>Builder (as well as <strong>in</strong> <strong>Borland</strong> <strong>C++</strong> 5.0), bool is a true data type.<br />
Some <strong>C++</strong> compilers have a BOOL keyword, but bool is not a data type<br />
<strong>in</strong> those compilers. In those cases BOOL is a typedef that makes the BOOL<br />
equivalent to an <strong>in</strong>t. A typedef <strong>in</strong> effect sets up an alias so that the<br />
compiler can equate one symbol with another. A typedef looks like this:<br />
typedef <strong>in</strong>t BOOL;<br />
This tells the compiler, “BOOL is another word for <strong>in</strong>t.”<br />
Only the double and float data types use float<strong>in</strong>g-po<strong>in</strong>t numbers<br />
(numbers with decimal places). The other data types deal only with<br />
<strong>in</strong>teger values. Although it’s legal to assign a value conta<strong>in</strong><strong>in</strong>g a decimal<br />
fraction to an <strong>in</strong>teger data type, the fractional amount will be discarded<br />
and only the whole-number portion will be assigned to the <strong>in</strong>teger<br />
variable. For example,<br />
<strong>in</strong>t x = 3.75;<br />
will result <strong>in</strong> x conta<strong>in</strong><strong>in</strong>g a value of 3. Note that the result<strong>in</strong>g <strong>in</strong>teger<br />
value is not rounded to the nearest whole number; rather, the decimal<br />
fraction is discarded altogether. By the way, you’d be surprised how few<br />
times you need float<strong>in</strong>g-po<strong>in</strong>t numbers <strong>in</strong> most W<strong>in</strong>dows programs.<br />
<strong>C++</strong> will perform conversion between different data types when possible. Take the follow<strong>in</strong>g<br />
code snippet for an example:<br />
short result;<br />
long num1 = 200;<br />
long num2 = 200;<br />
result = num1 * num2;<br />
In this case I am try<strong>in</strong>g to assign the result of multiply<strong>in</strong>g two long <strong>in</strong>tegers to a short <strong>in</strong>teger.<br />
Even though this formula mixes two data types, <strong>C++</strong> is able to perform a conversion. Would<br />
you like to take a guess at the result of this calculation? You may be surprised to f<strong>in</strong>d out that<br />
the result is -25,536. This is due to wrapp<strong>in</strong>g. If you look at Table 1.1, you’ll see that a short<br />
can have a maximum value of 32,767. What happens if you take a short with a value of 32,767<br />
and add 1 to it? You will end up with a value of -32,768. This is essentially the same as the<br />
odometer on a car turn<strong>in</strong>g over from 99,999 to 00,000 when you drive that last mile. To<br />
illustrate, type <strong>in</strong> and run the program conta<strong>in</strong>ed <strong>in</strong> List<strong>in</strong>g 1.3.
List<strong>in</strong>g 1.3. WRAPME.CPP.<br />
Gett<strong>in</strong>g Your Feet Wet<br />
1: #<strong>in</strong>clude <br />
2: #<strong>in</strong>clude <br />
3: #pragma hdrstop<br />
4:<br />
5: <strong>in</strong>t ma<strong>in</strong>(<strong>in</strong>t argc, char **argv)<br />
6: {<br />
7: short x = 32767;<br />
8: cout
20 Day 1<br />
never get <strong>in</strong>to. There are a lot of operators <strong>in</strong> <strong>C++</strong>. Rather than present them all here, I will<br />
list only those most commonly used. Table 1.2 conta<strong>in</strong>s a list of those operators.<br />
Table 1.2. Commonly used <strong>C++</strong> operators.<br />
Operator Description Example<br />
Mathematical Operators<br />
+ Addition x = y + z;<br />
– Subtraction x = y - z;<br />
∗ Multiplication x = y * z;<br />
/ Division x = y / z;<br />
Assignment Operators<br />
= Assignment x = 10;<br />
+= Assign and sum x += 10; (same as x = x + 10;)<br />
-= Assign and subtract x -= 10;<br />
*= Assign and multiply x *= 10;<br />
\= Assign and divide x \= 10;<br />
&= Assign bitwise AND x &= 0x02;<br />
|= Assign bitwise OR x |= 0x02;<br />
Logical Operators<br />
&& Logical AND if (x && 0xFF) {...}<br />
|| Logical OR if (x || 0xFF) {...}<br />
Equality Operators<br />
== Equal to if (x == 10) {...}<br />
!= Not equal to if (x != 10) {...}<br />
< Less than if (x < 10) {...}<br />
> Greater than if (x > 10) {...}<br />
= 10) {...}
Gett<strong>in</strong>g Your Feet Wet<br />
Operator Description Example<br />
Unary Operators<br />
* Indirection operator <strong>in</strong>t x = *y;<br />
& Address of operator <strong>in</strong>t* x = &y;<br />
~ Bitwise NOT x &= ~0x02;<br />
! Logical NOT if (!valid) {...}<br />
++ Increment operator x++; (same as x = x + 1;)<br />
-- Decrement operator x--;<br />
Class and Structure Operators<br />
:: Scope resolution MyClass::SomeFunction();<br />
-> Indirect membership myClass->SomeFunction();<br />
. Direct membership myClass.SomeFunction();<br />
As you can see, the list of operators is a bit overwhelm<strong>in</strong>g, so don’t worry about try<strong>in</strong>g to<br />
memorize each one. As you work with <strong>C++</strong> you will gradually learn how to use all of the<br />
operators.<br />
It should be noted that <strong>in</strong> some cases an operator can be used either pre-<strong>in</strong>crement (++x) or<br />
post-<strong>in</strong>crement (x++). A pre-<strong>in</strong>crement operator tells the compiler, “Increment the variable’s<br />
value and then use the variable.” A post-<strong>in</strong>crement operator tells the compiler, “Use the<br />
variable first and then <strong>in</strong>crement its value.” For example, this code<br />
<strong>in</strong>t x = 10;<br />
cout
22 Day 1<br />
NOTE<br />
In <strong>C++</strong>, operators can be overloaded. This is a technique by which a<br />
programmer can take one of the standard operators and make it perform<br />
<strong>in</strong> a specific manner for a specific class. For example, you could overload<br />
the ++ operator for one of your classes and have it <strong>in</strong>crement the value of<br />
a variable by 10, rather than by 1. Operator overload<strong>in</strong>g is an advanced<br />
<strong>C++</strong> technique and won’t be covered <strong>in</strong> any detail <strong>in</strong> this book.<br />
You will notice that some of the operators use the same symbol. The mean<strong>in</strong>g of the symbol<br />
is different depend<strong>in</strong>g on the context. For <strong>in</strong>stance, the asterisk (*) can be used to perform<br />
multiplication, declare a po<strong>in</strong>ter, or dereference a po<strong>in</strong>ter. This can be confus<strong>in</strong>g at first, and<br />
to be honest, it can be confus<strong>in</strong>g at times no matter how long you’ve been programm<strong>in</strong>g <strong>in</strong><br />
<strong>C++</strong>. Just keep plugg<strong>in</strong>g away and eventually it will start to s<strong>in</strong>k <strong>in</strong>.<br />
You will see many examples of these operators as you go through this book. Rather than try<strong>in</strong>g<br />
to memorize the function of each operator, try <strong>in</strong>stead to learn through careful study of the<br />
example programs and code snippets.<br />
Functions <strong>in</strong> <strong>C++</strong><br />
Functions are sections of code separate from the ma<strong>in</strong> program. These code sections are called<br />
(executed) when needed to perform specific actions <strong>in</strong> a program. For example, you might<br />
have a function that takes two values, performs a complex mathematical calculation on those<br />
two values, and returns the result. Or you might need a function that takes a str<strong>in</strong>g, parses<br />
it, and returns a portion of the parsed str<strong>in</strong>g.<br />
Functions are sections of code, separate from the ma<strong>in</strong> program, that perform a<br />
s<strong>in</strong>gle, well-def<strong>in</strong>ed service.<br />
NEW TERM<br />
Functions are an important part of any programm<strong>in</strong>g language, and <strong>C++</strong> is no exception. The<br />
simplest type of function takes no parameters and returns void (mean<strong>in</strong>g it returns noth<strong>in</strong>g<br />
at all). Other functions may take one or more parameters, and may return a value. Rules for<br />
nam<strong>in</strong>g functions are the same as those discussed earlier for variables. Figure 1.5 shows the<br />
anatomy of a function.<br />
A parameter is a value passed to a function that is used to alter its operation or <strong>in</strong>dicate<br />
the extent of its operation.<br />
NEW TERM<br />
Before a function can be used, it must have first been declared. The function declaration, or<br />
prototype, tells the compiler how many parameters the function takes, the data type of each<br />
parameter, and the data type of the return value for the function. List<strong>in</strong>g 1.4 illustrates this<br />
concept.
NEW TERM<br />
Figure 1.5.<br />
Anatomy of a<br />
function.<br />
Gett<strong>in</strong>g Your Feet Wet<br />
A prototype is a declaration of a function’s appearance or a foreshadow<strong>in</strong>g of its<br />
def<strong>in</strong>ition.<br />
List<strong>in</strong>g 1.4. MULTIPLY.CPP.<br />
Function Body<br />
Return<br />
Statement<br />
Return Type Function Name Parameter List<br />
<strong>in</strong>t SomeFunction (<strong>in</strong>t x, <strong>in</strong>t y)<br />
{<br />
<strong>in</strong>t z = (x * y);<br />
return z;<br />
}<br />
1: #<strong>in</strong>clude <br />
2: #<strong>in</strong>clude <br />
3: #pragma hdrstop<br />
4:<br />
5: <strong>in</strong>t multiply(<strong>in</strong>t, <strong>in</strong>t);<br />
6: void showResult(<strong>in</strong>t);<br />
7:<br />
8: <strong>in</strong>t ma<strong>in</strong>(<strong>in</strong>t argc, char **argv)<br />
9: {<br />
10: <strong>in</strong>t x, y, result;<br />
11: cout x;<br />
13: cout > y;<br />
15: result = multiply(x, y);<br />
16: showResult(result);<br />
17: cout
24 Day 1<br />
function prototypes for the multiply() and showResult() functions on l<strong>in</strong>es 5 and 6, just<br />
above the ma<strong>in</strong> program. The prototypes list only the return type, the function name, and<br />
the data type of the function’s parameters. That is the m<strong>in</strong>imum requirement for a function<br />
declaration.<br />
If desired, the function prototype may conta<strong>in</strong> variable names that can be used to document<br />
what the function does. For example, the function declaration for the multiply() function<br />
could have been written like this:<br />
<strong>in</strong>t multiply(<strong>in</strong>t firstNumber, <strong>in</strong>t secondNumber);<br />
In this case it’s pretty obvious what the multiply() function does, but it can’t hurt to<br />
document your code both through comments and through the code itself.<br />
Look aga<strong>in</strong> at List<strong>in</strong>g 1.4. Notice that the function def<strong>in</strong>ition for the multiply() function<br />
(l<strong>in</strong>es 22 through 25) is outside of the block of code def<strong>in</strong><strong>in</strong>g the ma<strong>in</strong> function (l<strong>in</strong>es 8<br />
through 20). The function def<strong>in</strong>ition conta<strong>in</strong>s the actual body of the function. In this case<br />
the body of the function is m<strong>in</strong>imal because the function simply multiplies the two function<br />
parameters together and returns the result.<br />
The multiply() function <strong>in</strong> List<strong>in</strong>g 1.4 could be called one of several ways. You can pass<br />
variables, literal values, or even the results of other function calls:<br />
result = multiply(2, 5); // pass<strong>in</strong>g literal values<br />
result = multiply(x, y); // pass<strong>in</strong>g variables<br />
showResult(multiply(x,y)); // return value used as a<br />
// parameter for another function<br />
multiply(x, y); // return value ignored<br />
Notice <strong>in</strong> this example that the return value is not used. In this case it doesn’t make much<br />
sense to call the multiply() function and ignore the return value, but ignor<strong>in</strong>g the return<br />
value is someth<strong>in</strong>g that is done frequently <strong>in</strong> <strong>C++</strong> programm<strong>in</strong>g. There are many functions<br />
that perform a specific action and then return a value <strong>in</strong>dicat<strong>in</strong>g the status of the function call.<br />
In some cases the return value is not relevant to your program, so you can just ignore it. If<br />
you don’t do anyth<strong>in</strong>g with the return value, it is simply discarded and no harm is done. For<br />
example, we have been ignor<strong>in</strong>g the return value of the getch() function (which returns the<br />
ASCII value of the key that was pressed) <strong>in</strong> our sample programs.<br />
Functions can (and frequently do) call other functions. Functions can even call themselves.<br />
This is called recursion, and is one way to get <strong>in</strong>to trouble <strong>in</strong> <strong>C++</strong> programm<strong>in</strong>g. Recursion<br />
is best left alone until you’ve put <strong>in</strong> some time with the <strong>C++</strong> language.<br />
Recursion is the process by which a function calls itself.<br />
NEW TERM<br />
The material on functions presented <strong>in</strong> this section deals with standalone functions <strong>in</strong> a C<br />
or <strong>C++</strong> program (they are standalone <strong>in</strong> that they are not members of a class). Standalone
SYNTAX<br />
▼<br />
▲<br />
Gett<strong>in</strong>g Your Feet Wet<br />
functions can be used <strong>in</strong> <strong>C++</strong> exactly as they can be used <strong>in</strong> C. However, <strong>C++</strong> takes functions<br />
a bit further. I’ll leave that discussion for now and pick it up aga<strong>in</strong> later when we look deeper<br />
<strong>in</strong>to <strong>C++</strong>.<br />
HOUSE RULES FOR FUNCTIONS<br />
■ A function can take any number of parameters or no parameters at all.<br />
■ A function can be written to return a value, but it is not mandatory that a function<br />
return a value.<br />
■ If a function has a return type of void, it cannot return a value. If you attempt to<br />
return a value from a function with a return type of void, a compiler error will be<br />
issued. A function that returns void need not conta<strong>in</strong> a return statement at all, but<br />
it may if desired. Either way is acceptable. If no return statement is provided, the<br />
function returns automatically when it gets to the end of the function block (the<br />
clos<strong>in</strong>g brace).<br />
■ If the function prototype <strong>in</strong>dicates that the function returns a value, the function<br />
body should conta<strong>in</strong> a return statement that returns a value. If the function does<br />
not return a value, a compiler warn<strong>in</strong>g is issued.<br />
■ Functions can take any number of parameters but can return only one value.<br />
■ Variables can be passed to functions by value, by po<strong>in</strong>ter, or by reference. (I’ll<br />
discuss this a little later.)<br />
The function statement, <strong>in</strong> declaration (prototype) format:<br />
ret_type function_name(argtype_1 arg_1, argtype_2 arg_2, ..., argtype_n arg_n);<br />
The function declaration identifies a function that will be <strong>in</strong>cluded <strong>in</strong> the code. It shows the<br />
return data type (ret_type) of the function and the name of the function (function_name),<br />
and identifies the order (arg_1, arg_2, …, arg_n) and types (argtype_1, argtype_2, …,<br />
argtype_n) of data arguments the function will expect.<br />
The function statement, <strong>in</strong> def<strong>in</strong>ition format:<br />
ret_type function_name(argtype_1 arg_1, argtype_2 arg_2, ..., argtype_n arg_n) {<br />
statements;<br />
}<br />
The function def<strong>in</strong>ition identifies the code block (statements) that makes up the function<br />
and shows the return data type (ret_type) of the function. function_name identifies the<br />
function. The parameters supplied to the function (arg_1, arg_2, …, arg_n) and their types<br />
(argtype_1, argtype_2, …, argtype_n) are <strong>in</strong>cluded.<br />
25<br />
1
26 Day 1<br />
The ma<strong>in</strong>() Function<br />
NOTE<br />
A <strong>C++</strong> program must have a ma<strong>in</strong>() function. This function serves as the entry po<strong>in</strong>t <strong>in</strong>to the<br />
program. You have seen this <strong>in</strong> each of the sample programs you’ve seen thus far. Not all <strong>C++</strong><br />
programs have a traditional ma<strong>in</strong>() function, however. W<strong>in</strong>dows programs written <strong>in</strong> C and<br />
<strong>C++</strong> have an entry-po<strong>in</strong>t function called W<strong>in</strong>Ma<strong>in</strong>() rather than the traditional ma<strong>in</strong>()<br />
function.<br />
A <strong>C++</strong>Builder GUI application has a W<strong>in</strong>Ma<strong>in</strong>(), but it is hidden from<br />
you. <strong>C++</strong>Builder frees you from hav<strong>in</strong>g to worry about the low-level<br />
details of a W<strong>in</strong>dows program and allows you to concentrate on<br />
creat<strong>in</strong>g the user <strong>in</strong>terface and the rema<strong>in</strong>der of the program.<br />
ma<strong>in</strong>() is a function like any other function. That is, it has the same basic anatomy. You<br />
already saw that for a 32-bit console application <strong>C++</strong>Builder creates a default ma<strong>in</strong>() function<br />
with the follow<strong>in</strong>g prototype:<br />
<strong>in</strong>t ma<strong>in</strong>(<strong>in</strong>t argc, char** argv);<br />
This form of ma<strong>in</strong>() takes two parameters and returns an <strong>in</strong>teger value. As you learned earlier,<br />
you pass values to a function when you call the function. In the case of ma<strong>in</strong>(), though, you<br />
never call the function directly—it’s automatically executed when the program runs. So how<br />
does the ma<strong>in</strong>() function get its parameters? The answer: From the command l<strong>in</strong>e. Let me<br />
illustrate.<br />
Let’s assume that you have a W<strong>in</strong>32 console application that you execute from a DOS prompt<br />
with the follow<strong>in</strong>g command l<strong>in</strong>e:<br />
grep WM_KILLFOCUS -d -i<br />
In this case you are start<strong>in</strong>g a program called grep with command-l<strong>in</strong>e arguments of<br />
WM_KILLFOCUS, -d, and -i. Given that example, let me show you how that translates to argc<br />
and argv <strong>in</strong>side the ma<strong>in</strong>() function. First of all, the <strong>in</strong>teger variable argc will conta<strong>in</strong> the<br />
number of parameters passed <strong>in</strong> the command l<strong>in</strong>e. This will always be at least 1 because the<br />
program name counts as a parameter. The variable argv is an array of po<strong>in</strong>ters to str<strong>in</strong>gs. This<br />
array will conta<strong>in</strong> each str<strong>in</strong>g passed <strong>in</strong> the command l<strong>in</strong>e. For this code example, the<br />
follow<strong>in</strong>g are true:<br />
argv conta<strong>in</strong>s 4<br />
argc[0] conta<strong>in</strong>s c:\bc5\b<strong>in</strong>\grep.com<br />
argc[1] conta<strong>in</strong>s WM_KILLFOCUS<br />
argc[2] conta<strong>in</strong>s -d<br />
argc[3] conta<strong>in</strong>s -i
Gett<strong>in</strong>g Your Feet Wet<br />
Let’s prove that this works with a little sample program. Create a new console application <strong>in</strong><br />
<strong>C++</strong>Builder and enter the program shown <strong>in</strong> List<strong>in</strong>g 1.5.<br />
List<strong>in</strong>g 1.5. ARGSTEST.CPP.<br />
1: #<strong>in</strong>clude <br />
2: #<strong>in</strong>clude <br />
3: #pragma hdrstop<br />
4:<br />
5: <strong>in</strong>t ma<strong>in</strong>(<strong>in</strong>t argc, char **argv)<br />
6: {<br />
7: cout
28 Day 1<br />
In most programs the value returned from ma<strong>in</strong>() is irrelevant because the return value is not<br />
typically used. In fact, you don’t need your ma<strong>in</strong>() function to return a value at all. There is<br />
more than one form of ma<strong>in</strong>(). The follow<strong>in</strong>g all represent valid declarations:<br />
ma<strong>in</strong>();<br />
<strong>in</strong>t ma<strong>in</strong>();<br />
<strong>in</strong>t ma<strong>in</strong>(<strong>in</strong>t argc, char** argv);<br />
void ma<strong>in</strong>(); // same as the first form above<br />
void ma<strong>in</strong>(<strong>in</strong>t argc, char** argv);<br />
Believe it or not, there are even more possibilities than those listed here. If you are not go<strong>in</strong>g<br />
to be us<strong>in</strong>g the command-l<strong>in</strong>e arguments and are not return<strong>in</strong>g a value from ma<strong>in</strong>(), you can<br />
use the first form of ma<strong>in</strong>() listed here. This form returns a void and takes no parameters<br />
(signified by the empty parentheses). In other words, the most basic form of the ma<strong>in</strong>()<br />
function takes no parameters and returns no value.<br />
Arrays<br />
You can place any of the <strong>in</strong>tr<strong>in</strong>sic <strong>C++</strong> data types <strong>in</strong>to an array. An array is simply a collection<br />
of values. For example, let’s say you wanted to keep an array of <strong>in</strong>ts that held five <strong>in</strong>teger<br />
values. You would declare the array as follows:<br />
<strong>in</strong>t myArray[5];<br />
In this case the compiler allocates memory for the array as illustrated <strong>in</strong> Figure 1.7. Because<br />
each <strong>in</strong>t requires 4 bytes of storage, the entire array will take up 20 bytes <strong>in</strong> memory.<br />
Figure 1.7.<br />
Memory allocation<br />
for an array of<br />
five <strong>in</strong>ts.<br />
myArray[0] myArray[1] myArray[2] myArray[3] myArray[4]<br />
baseAddr baseAddr+4 baseAddr+8 baseAddr+12 baseAddr+16<br />
Now that you have the array declared, you can fill it with values us<strong>in</strong>g the subscript operator<br />
([]) as follows:<br />
myArray[0] = -200;<br />
myArray[1] = -100;<br />
myArray[2] = 0;<br />
myArray[3] = 100;<br />
myArray[4] = 200;<br />
Later <strong>in</strong> your program you can access the <strong>in</strong>dividual elements of the array aga<strong>in</strong> us<strong>in</strong>g the<br />
subscript operator:<br />
<strong>in</strong>t result = myArray[3] + myArray[4]; // result will be 300
Gett<strong>in</strong>g Your Feet Wet<br />
There is a shortcut method to declar<strong>in</strong>g and fill<strong>in</strong>g an array all at one time. It looks like this:<br />
<strong>in</strong>t myArray[5] = { -200, -100, 0, 100, 200 };<br />
To take this one step further, if you know exactly how many elements your array will have,<br />
and if you fill the array when you declare it, you can even leave out the array size when you<br />
declare the array. In that case you would use the follow<strong>in</strong>g:<br />
<strong>in</strong>t myArray[] = { -200, -100, 0, 100, 200 };<br />
This works because the compiler can figure out from the list of values be<strong>in</strong>g assigned how<br />
many elements are <strong>in</strong> the array and how much memory to allocate for the array.<br />
Arrays can be multidimensional. To create a two-dimensional array of <strong>in</strong>tegers, you would<br />
use code like this:<br />
<strong>in</strong>t mdArray[3][5];<br />
This allocates storage for 15 <strong>in</strong>ts (a total of 60 bytes, if you’re keep<strong>in</strong>g score). You access<br />
elements of the array like you do a simple array, with the obvious difference that you must<br />
supply two subscript operators:<br />
<strong>in</strong>t x = mdArray[1][1] + mdArray[2][1];<br />
Figure 1.8 illustrates how a two-dimensional array might look <strong>in</strong> memory.<br />
Figure 1.8.<br />
A two-dimensional<br />
array <strong>in</strong> memory.<br />
WARNING<br />
Array[0][]<br />
Array[1][]<br />
Array[2][]<br />
myArray[][0] myArray[][1] myArray[][2] myArray[][3] myArray[][4]<br />
baseAddr baseAddr+4 baseAddr+8 baseAddr+12 baseAddr+16<br />
baseAddr+20 baseAddr+24 baseAddr+28 baseAddr+32 baseAddr+36<br />
baseAddr+40 baseAddr+44 baseAddr+48 baseAddr+52 baseAddr+56<br />
You must be careful not to overwrite the end of an array. One powerful<br />
feature of <strong>C++</strong> is direct access to memory. Because of this feature, <strong>C++</strong><br />
will not prevent you from writ<strong>in</strong>g to a particular memory location even<br />
if that location is memory your program isn’t supposed to have access<br />
to. The follow<strong>in</strong>g code is legal, but will result <strong>in</strong> a crash <strong>in</strong> your<br />
program (or <strong>in</strong> W<strong>in</strong>dows):<br />
<strong>in</strong>t array[5];<br />
array[5] = 10;<br />
This is a common error to make because you might th<strong>in</strong>k the last<br />
element of this array is 5 when it is really 4. If you overwrite the end of<br />
an array, you have no idea what memory you are overwrit<strong>in</strong>g. The<br />
29<br />
1
30 Day 1<br />
NEW TERM<br />
results will be unpredictable at best. At worst, you will crash your<br />
program and maybe even crash W<strong>in</strong>dows, too. This type of problem<br />
can be difficult to diagnose because often the affected memory is not<br />
accessed until much later, and the crash occurs at that time (leav<strong>in</strong>g you<br />
wonder<strong>in</strong>g what happened). Be careful when writ<strong>in</strong>g to an array.<br />
HOUSE RULES FOR ARRAYS<br />
■ Arrays are 0 based. The first element <strong>in</strong> the array is 0, the second element is 1, the<br />
third element is 2, and so on.<br />
■ Array sizes must be compile-time constants. The compiler must know at compile<br />
time how much space to allocate for the array. You cannot use a variable to assign<br />
an array size, so the follow<strong>in</strong>g is not legal and will result <strong>in</strong> a compiler error:<br />
<strong>in</strong>t x = 10;<br />
<strong>in</strong>t myArray[x]; // compiler error here<br />
■ Be careful not to overwrite the end of an array.<br />
■ Allocate large arrays from the heap rather than from the stack. (You’ll learn more<br />
about this later.)<br />
Character Arrays<br />
Odd as it may seem, there is no support <strong>in</strong> <strong>C++</strong> for a str<strong>in</strong>g variable (a variable that holds text).<br />
Instead, str<strong>in</strong>gs <strong>in</strong> <strong>C++</strong> programs are represented by arrays of the char data type. For <strong>in</strong>stance,<br />
you could assign a str<strong>in</strong>g to a char array as follows:<br />
char text[] = “This is a str<strong>in</strong>g.”;<br />
This allocates 18 bytes of storage <strong>in</strong> memory and stores the str<strong>in</strong>g <strong>in</strong> that memory location.<br />
Depend<strong>in</strong>g on how quick you are, you may have noticed that there are only 17 characters <strong>in</strong><br />
this str<strong>in</strong>g. The reason that 18 bytes are allocated is that at the end of each str<strong>in</strong>g is a<br />
term<strong>in</strong>at<strong>in</strong>g null, and <strong>C++</strong> accounts for the term<strong>in</strong>at<strong>in</strong>g null when allocat<strong>in</strong>g storage.<br />
The term<strong>in</strong>at<strong>in</strong>g null is a special character that is represented with /0, which equates<br />
to a numerical 0.
Gett<strong>in</strong>g Your Feet Wet<br />
When the program encounters a 0 <strong>in</strong> the character array, it <strong>in</strong>terprets that location as the end<br />
of the str<strong>in</strong>g. To see how this is done, enter and run List<strong>in</strong>g 1.6 as a console application.<br />
List<strong>in</strong>g 1.6. NULLTEST.CPP.<br />
1: #<strong>in</strong>clude <br />
2: #<strong>in</strong>clude <br />
3: #pragma hdrstop<br />
4:<br />
5: <strong>in</strong>t ma<strong>in</strong>(<strong>in</strong>t argc, char **argv)<br />
6: {<br />
7: char str[] = “This is a str<strong>in</strong>g.”;<br />
8: cout
32 Day 1<br />
Figure 1.10.<br />
The contents of a<br />
character array.<br />
NOTE<br />
I could have simply assigned a 0 <strong>in</strong> place of ‘\0’ <strong>in</strong> List<strong>in</strong>g 1.6. Either is acceptable because<br />
a numerical 0 and the char data type version, ‘\0’, are equivalent.<br />
There is a difference between s<strong>in</strong>gle and double quotes <strong>in</strong> a <strong>C++</strong><br />
program. When assign<strong>in</strong>g the term<strong>in</strong>al null (or any other character<br />
value) to an element of an array, you must use s<strong>in</strong>gle quotes. The s<strong>in</strong>gle<br />
quotes effectively turn the character with<strong>in</strong> the quotes <strong>in</strong>to an <strong>in</strong>teger<br />
value (the ASCII value of the character) that is then stored <strong>in</strong> the<br />
memory location. When assign<strong>in</strong>g str<strong>in</strong>gs to character arrays, you must<br />
use double quotes. If you get it wrong <strong>in</strong> either case, the compiler will<br />
let you know by issu<strong>in</strong>g a compiler error.<br />
Str<strong>in</strong>g-Manipulation Functions<br />
If you are com<strong>in</strong>g from a programm<strong>in</strong>g language that has a str<strong>in</strong>g data type, all of this might<br />
seem like a pa<strong>in</strong>. The truth is, it takes very little time to get used to. You’re not completely<br />
on your own, by the way. In order to aid <strong>in</strong> str<strong>in</strong>g operations, the standard C library has several<br />
functions for str<strong>in</strong>g manipulation. Table 1.3 lists the most frequently used str<strong>in</strong>gmanipulation<br />
functions and a description of each. For a complete description of each of these<br />
functions and examples of their use, see the <strong>C++</strong>Builder onl<strong>in</strong>e help.<br />
Table 1.3. Str<strong>in</strong>g-manipulation functions.<br />
Function Description<br />
Before<br />
T h i s i s a s t r i n g . \0<br />
After<br />
T h i s i s \0 a s t r i n g . \0<br />
strcat() Concatenates (adds) a str<strong>in</strong>g to the end of the target str<strong>in</strong>g.<br />
strcmp() Compares two str<strong>in</strong>gs for equality.<br />
strcmpi() Compares two str<strong>in</strong>gs for equality without case sensitivity.<br />
strcpy() Copies the contents of one str<strong>in</strong>g to the target str<strong>in</strong>g.<br />
strstr() Scans a str<strong>in</strong>g for the first occurrence of a substr<strong>in</strong>g.
NOTE<br />
Function Description<br />
Gett<strong>in</strong>g Your Feet Wet<br />
strlen() Returns the length of the str<strong>in</strong>g.<br />
strupr() Converts all characters <strong>in</strong> a str<strong>in</strong>g to uppercase.<br />
spr<strong>in</strong>tf() Builds a str<strong>in</strong>g based on a variable number of parameters.<br />
The str<strong>in</strong>g operations discussed here are how str<strong>in</strong>gs are handled <strong>in</strong> C.<br />
Most <strong>C++</strong> compilers provide a cstr<strong>in</strong>g class that simplifies the difficulties<br />
<strong>in</strong>herent <strong>in</strong> the C way of handl<strong>in</strong>g str<strong>in</strong>gs. (<strong>C++</strong>Builder’s Visual<br />
Component Library conta<strong>in</strong>s a class called Str<strong>in</strong>gs that handles str<strong>in</strong>g<br />
operations. Check the <strong>C++</strong>Builder onl<strong>in</strong>e help for more <strong>in</strong>formation on<br />
Str<strong>in</strong>gs.) Although the C way of handl<strong>in</strong>g str<strong>in</strong>gs is a little quirky, it is<br />
by no means obsolete. <strong>C++</strong> programmers use C-style str<strong>in</strong>g operations<br />
on a daily basis as well as str<strong>in</strong>g classes such as cstr<strong>in</strong>g.<br />
I won’t go <strong>in</strong>to examples of all of the str<strong>in</strong>g-manipulation functions listed <strong>in</strong> the table, but<br />
I’ll touch on a couple of the more widely used ones. The strcpy() function is used to copy<br />
one str<strong>in</strong>g to another. The source str<strong>in</strong>g can be a variable or a str<strong>in</strong>g literal. Take the follow<strong>in</strong>g<br />
code, for example:<br />
// set up a str<strong>in</strong>g to hold 29 characters<br />
char buff[30];<br />
// copy a str<strong>in</strong>g literal to the buffer<br />
strcpy(buff, “This is a test.”);<br />
// display it<br />
cout
34 Day 1<br />
NOTE<br />
array by 6 bytes. Six bytes of some memory location somewhere just got tromped on by our<br />
little faux pas. Be careful when copy<strong>in</strong>g data to character arrays.<br />
Another frequently used str<strong>in</strong>g function is spr<strong>in</strong>tf(). This function allows you to build a<br />
formatted str<strong>in</strong>g by mix<strong>in</strong>g text and numbers together. Here is an example that adds two<br />
numbers and then uses spr<strong>in</strong>tf() to build a str<strong>in</strong>g to report the result:<br />
char buff[20];<br />
<strong>in</strong>t x = 10 * 20;<br />
spr<strong>in</strong>tf(buff, “The result is: %d”, x);<br />
cout
NOTE<br />
Gett<strong>in</strong>g Your Feet Wet<br />
numbers <strong>in</strong> the formatted str<strong>in</strong>g. You can use either function <strong>in</strong> your <strong>C++</strong>Builder programs,<br />
but spr<strong>in</strong>tf() is preferred because it has full float<strong>in</strong>g-po<strong>in</strong>t support (and it’s one less character<br />
to type!). To get a real appreciation of what spr<strong>in</strong>tf() can do for you, consult the <strong>C++</strong>Builder<br />
onl<strong>in</strong>e help.<br />
Arrays of Str<strong>in</strong>gs<br />
Not only can you have character arrays, but you can have an array of character arrays<br />
(effectively an array of str<strong>in</strong>gs). That might sound complicated, but you have already seen this<br />
type of array <strong>in</strong> the ARGSTEST program we looked at earlier. You can allocate this k<strong>in</strong>d of array<br />
as follows:<br />
char str<strong>in</strong>gs[][20] = {<br />
“This is str<strong>in</strong>g 1”,<br />
“This is str<strong>in</strong>g 2”,<br />
“This is str<strong>in</strong>g 3”,<br />
“This is str<strong>in</strong>g 4”<br />
};<br />
Although you can use this type of str<strong>in</strong>g array, there are easier ways to handle arrays of str<strong>in</strong>gs<br />
<strong>in</strong> <strong>C++</strong>Builder. (I’ll save that discussion for after you’ve had a chance to learn more about<br />
<strong>C++</strong>Builder.)<br />
Summary<br />
If you are go<strong>in</strong>g to use arrays of str<strong>in</strong>gs extensively, you should look<br />
<strong>in</strong>to the Standard Template Library (STL). STL provides <strong>C++</strong> classes<br />
that allow you to store and manipulate arrays of str<strong>in</strong>gs much more<br />
easily than is possible us<strong>in</strong>g C-style character arrays. STL also <strong>in</strong>cludes a<br />
str<strong>in</strong>g class.<br />
You’ve covered a lot of ground today. First you t<strong>in</strong>kered with the <strong>C++</strong>Builder IDE by<br />
creat<strong>in</strong>g a GUI Hello World program. Follow<strong>in</strong>g that you were <strong>in</strong>troduced to console mode<br />
applications where you created Hello World, Part II. After the <strong>in</strong>itial play<strong>in</strong>g around, you<br />
were put to work learn<strong>in</strong>g the basics of C as a foundation to learn<strong>in</strong>g <strong>C++</strong>. You have learned<br />
about the follow<strong>in</strong>g C and <strong>C++</strong> features:<br />
■ Variables<br />
■ Operators<br />
■ Data types<br />
35<br />
1
36 Day 1<br />
■ Functions<br />
■ The ma<strong>in</strong>() function<br />
■ Arrays<br />
■ How str<strong>in</strong>gs are handled <strong>in</strong> C and <strong>C++</strong><br />
There is a lot of material to absorb <strong>in</strong> this chapter. Don’t feel bad if it didn’t all s<strong>in</strong>k <strong>in</strong>. Go<br />
back and review if you are unclear about anyth<strong>in</strong>g presented <strong>in</strong> this chapter.<br />
Workshop<br />
The Workshop conta<strong>in</strong>s quiz questions to help you solidify your understand<strong>in</strong>g of the<br />
material covered and exercises to provide you with experience <strong>in</strong> us<strong>in</strong>g what you have learned.<br />
You can f<strong>in</strong>d answers to the quiz questions <strong>in</strong> Appendix A, “Answers to Quiz Questions.”<br />
Q&A<br />
Q What’s the difference between a W<strong>in</strong>32 GUI application and a W<strong>in</strong>32<br />
console-mode application?<br />
A A GUI application is a traditional W<strong>in</strong>dows program. It usually has a title bar,<br />
menu, and w<strong>in</strong>dow area. A console-mode application is a 32-bit application that<br />
runs <strong>in</strong> an MS-DOS box <strong>in</strong> W<strong>in</strong>dows. The console application looks like a DOS<br />
program.<br />
Q Do my functions have to take parameters and return values?<br />
A Functions you write may take parameters and may return a value, but they are not<br />
required to do either. Once a function has been written to return a value, you must<br />
provide a return statement that returns a value or the compiler will issue a warn<strong>in</strong>g.<br />
Q Can I assign a number conta<strong>in</strong><strong>in</strong>g decimal places to an <strong>in</strong>teger data type<br />
variable?<br />
A Yes, but the decimal fraction will be dropped (not rounded) and only the whole<br />
number portion will be assigned to the <strong>in</strong>teger variable.<br />
Q Will <strong>C++</strong> make sure I don’t overwrite memory somewhere if I accidentally<br />
write past the end of an array?<br />
A No. One of the strengths of <strong>C++</strong> is that it gives you the power to access memory<br />
directly. With that power comes responsibility. It’s up to you, the programmer, to<br />
be sure that the memory you are access<strong>in</strong>g is memory that your program owns. If<br />
you accidentally overwrite memory that you are not supposed to have access to,
Quiz<br />
Gett<strong>in</strong>g Your Feet Wet<br />
W<strong>in</strong>dows will issue a general protection fault (GPF) or an access-violation error.<br />
The GPF might come immediately, or it may not come until later when the<br />
overwritten memory is used by another part of your program, by another program,<br />
or by W<strong>in</strong>dows itself.<br />
1. What is wrong with this program?<br />
#<strong>in</strong>clude <br />
#<strong>in</strong>clude <br />
#pragma hdrstop<br />
void displayText();<br />
displayText()<br />
{<br />
cout
38 Day 1<br />
Exercises<br />
1. Write a W<strong>in</strong>dows GUI program that displays the words “Welcome to<br />
<strong>C++</strong>Builder!” on the w<strong>in</strong>dow when the program runs.<br />
2. Rewrite the program you wrote <strong>in</strong> exercise 1 and change the displayed text to Hello<br />
There! (H<strong>in</strong>t: You only have to change the Caption property of the Label component.)<br />
3. Write a W<strong>in</strong>dows console-mode application that outputs This is a test to the<br />
screen.<br />
4. Write a W<strong>in</strong>dows console-mode application. In the program, declare two variables<br />
and assign values to those variables. Multiply the two numbers together and display<br />
the result on the screen.<br />
5. Write a console-mode application that calls a function to display Function<br />
entered, sir!! on the screen.<br />
6. Write a console-mode application that takes an <strong>in</strong>teger as a parameter, multiplies it<br />
by itself, and returns the result.<br />
7. Enter and compile the follow<strong>in</strong>g program:<br />
#<strong>in</strong>clude <br />
#<strong>in</strong>clude <br />
#<strong>in</strong>clude <br />
#<strong>in</strong>clude <br />
#pragma hdrstop<br />
void getSqrRoot(char* buff, <strong>in</strong>t x);<br />
<strong>in</strong>t ma<strong>in</strong>(<strong>in</strong>t argc, char** argv)<br />
{<br />
<strong>in</strong>t x;<br />
char buff[30];<br />
cout > x;<br />
getSqrRoot(buff, x);<br />
cout
Day 2<br />
Wad<strong>in</strong>g In Deeper<br />
Wad<strong>in</strong>g In Deeper<br />
by Kent Reisdorph<br />
You’ve now got a pretty good start on learn<strong>in</strong>g <strong>C++</strong>. In this chapter you will<br />
cont<strong>in</strong>ue to learn about the <strong>C++</strong> language by exam<strong>in</strong><strong>in</strong>g more of the fundamentals<br />
of <strong>C++</strong> that have their roots <strong>in</strong> C. Today you will learn about<br />
■ The if and else keywords<br />
■ Loops: for, do, and do-while<br />
■ The switch statement<br />
■ Scope<br />
■ Structures<br />
Week<br />
1<br />
39<br />
2
40 Day 2<br />
If…<br />
There are some aspects of programm<strong>in</strong>g that are common to all programm<strong>in</strong>g languages.<br />
One such item that <strong>C++</strong> has <strong>in</strong> common with other programm<strong>in</strong>g languages is the if<br />
statement. The if statement is used to test for a condition and then execute sections of code<br />
based on whether that condition is true or false. Here’s an example:<br />
<strong>in</strong>t x;<br />
cout > x;<br />
if (x > 10)<br />
cout 10) {<br />
cout
NOTE<br />
Wad<strong>in</strong>g In Deeper<br />
If the conditional expression evaluates to false, the code block associated with the if<br />
expression is ignored, and program execution cont<strong>in</strong>ues with the first statement follow<strong>in</strong>g the<br />
code block.<br />
<strong>C++</strong> conta<strong>in</strong>s a lot of shortcuts. One of those shortcuts <strong>in</strong>volves us<strong>in</strong>g<br />
just the variable name to test for true. Look at this code:<br />
if (fileGood) ReadData();<br />
This method is a shortcut for the longer form, which is illustrated with<br />
this l<strong>in</strong>e:<br />
if (fileGood == true) ReadData();<br />
This example uses a bool variable, but any data type will do. The<br />
expression evaluates to true as long as the variable conta<strong>in</strong>s any nonzero<br />
value. You can test for false by apply<strong>in</strong>g the logical NOT (!)<br />
operator to a variable name:<br />
bool fileGood = OpenSomeFile();<br />
if (!fileGood) ReportError();<br />
Learn<strong>in</strong>g the <strong>C++</strong> shortcuts will help you write code that conta<strong>in</strong>s a<br />
degree of elegance. Know<strong>in</strong>g the shortcuts also helps you understand<br />
<strong>C++</strong> code that you read <strong>in</strong> examples and sample list<strong>in</strong>gs.<br />
In some cases you want to perform an action if the conditional expression evaluates to true<br />
and perform some other action if the conditional expression evaluates to false. In this case<br />
you can implement the else statement:<br />
if (x == 20) {<br />
DoSometh<strong>in</strong>g(x);<br />
}<br />
else {<br />
DoADifferentTh<strong>in</strong>g(x);<br />
}<br />
NEW TERM<br />
The else statement is used <strong>in</strong> conjunction with the if statement and identifies<br />
sections of code that are executed when the if statement fails (that is, evaluates to<br />
false).<br />
In this example one of the two functions will be called, but not both.<br />
41<br />
2
42 Day 2<br />
WARNING<br />
Note that the equality operator is the double equal sign (==) and that<br />
the assignment operator is the s<strong>in</strong>gle equal sign (=). A common cod<strong>in</strong>g<br />
mistake is to use the assignment operator where you meant to use the<br />
equality operator. For <strong>in</strong>stance, if the previous example were <strong>in</strong>advertently<br />
written like this:<br />
if (x = 20) {<br />
DoSometh<strong>in</strong>g(x);<br />
}<br />
x would be assigned the value of 20. Because this operation would be<br />
successful, the expression would evaluate to true. A bug like this,<br />
although seem<strong>in</strong>gly obvious, can be hard to spot, so take care when<br />
test<strong>in</strong>g for equality.<br />
You can nest if statements if needed. Nest<strong>in</strong>g is noth<strong>in</strong>g more than follow<strong>in</strong>g an if statement<br />
with one or more additional if statements. Here’s an example:<br />
if (x > 10)<br />
if (x < 20)<br />
cout 200) {<br />
y = 40;<br />
if (x > 400) {<br />
y = 60;<br />
DoSometh<strong>in</strong>g(y);<br />
}<br />
}<br />
}<br />
else if (x < -100) {<br />
y = -20;<br />
if (x < -200) {<br />
y = -40;<br />
if (x < -400) {<br />
y = -60;<br />
DoSometh<strong>in</strong>g(y);<br />
}<br />
}<br />
}<br />
Even this is a fairly simple example, but you get the idea.
SYNTAX<br />
▼<br />
▼<br />
TIP<br />
TIP<br />
Wad<strong>in</strong>g In Deeper<br />
The <strong>C++</strong>Builder Code Editor has a handy function to help you f<strong>in</strong>d<br />
match<strong>in</strong>g braces. Position the cursor on the brace for which you want<br />
to f<strong>in</strong>d the correspond<strong>in</strong>g brace. Press either the Alt+[ or the Alt+] key<br />
comb<strong>in</strong>ation, and the cursor will be positioned at the brace you are<br />
look<strong>in</strong>g for. It doesn’t matter whether you start on the open<strong>in</strong>g brace or<br />
the clos<strong>in</strong>g brace. In either case, the match<strong>in</strong>g brace will be located.<br />
If a section of code conta<strong>in</strong>s more than two or three consecutive if<br />
statements test<strong>in</strong>g for different values of the same variable, it might be a<br />
candidate for a switch statement. The switch statement is discussed<br />
later <strong>in</strong> this chapter <strong>in</strong> the section “The switch Statement.”<br />
Earlier I mentioned <strong>C++</strong> shortcuts. There is a shortcut for the if-else comb<strong>in</strong>ation. Look<br />
at the follow<strong>in</strong>g code:<br />
if (direction == EAST) lost = true;<br />
else (lost = false);<br />
These two l<strong>in</strong>es can be condensed <strong>in</strong>to a s<strong>in</strong>gle l<strong>in</strong>e:<br />
direction == EAST ? lost = true : lost = false;<br />
Although this shortcut notation might look a little odd at first, you will quickly learn to<br />
recognize it when you see it. The if statement is heavily used <strong>in</strong> <strong>C++</strong>. It’s pretty straightforward,<br />
so you won’t have any trouble with it. The ma<strong>in</strong> th<strong>in</strong>g is keep<strong>in</strong>g all of the braces<br />
straight.<br />
The if statement, Form 1:<br />
if (cond_expr) {<br />
true_statements;<br />
}<br />
else {<br />
false_statements;<br />
}<br />
If the conditional expression, cond_expr, is true (nonzero), the block of code represented by<br />
true_statements is executed. If the optional else clause is specified, the block of code<br />
represented by false_statements is executed when the conditional expression, cond_expr, is<br />
false.<br />
43<br />
2
44 Day 2<br />
▼<br />
▲<br />
The if statement, Form 2:<br />
if (cond_expr_1) {<br />
true_statements_1;<br />
}<br />
else if (cond_expr_2) {<br />
true_statements_2;<br />
}<br />
else {<br />
false_statements;<br />
}<br />
If the conditional expression cond_expr_1 is true (nonzero), the block of code represented<br />
by true_statements_1 is executed. If it is false and the conditional expression cond_expr_2<br />
is true, the block of code represented by true_statements_2 is executed. If both cond_expr_1<br />
and cond_expr_2 are false, the block of code represented by false_statements is executed.<br />
Thrown for a Loop<br />
The loop is a common element <strong>in</strong> all programm<strong>in</strong>g languages. A loop can be used to iterate<br />
through an array, to perform an action a specific number of times, to read a file from<br />
disk…the possibilities are endless. I will exam<strong>in</strong>e several types of loops here, and for the most<br />
part they work <strong>in</strong> very similar ways. All loops have these common elements:<br />
NEW TERM<br />
■ A start<strong>in</strong>g po<strong>in</strong>t<br />
■ A body, usually enclosed <strong>in</strong> braces, that conta<strong>in</strong>s the statements to execute on each<br />
pass<br />
■ An end<strong>in</strong>g po<strong>in</strong>t<br />
■ A test for a condition that determ<strong>in</strong>es when the loop should end<br />
■ Optional use of the break and cont<strong>in</strong>ue statements<br />
A loop is an element <strong>in</strong> a programm<strong>in</strong>g language that is used to perform an action<br />
a specific number of times.<br />
The start<strong>in</strong>g po<strong>in</strong>t for the loop is one of the <strong>C++</strong> loop statements (for, while, or do) followed<br />
by an open<strong>in</strong>g brace. The body conta<strong>in</strong>s the statements that will execute each time through<br />
the loop. The body can conta<strong>in</strong> any valid <strong>C++</strong> code. The end<strong>in</strong>g po<strong>in</strong>t for the loop is the<br />
clos<strong>in</strong>g brace.<br />
Most loops work someth<strong>in</strong>g like this: The loop is entered and the test condition is evaluated.<br />
If the test condition is not met, the body of the loop is executed. When program execution<br />
reaches the bottom of the loop (usually the clos<strong>in</strong>g brace), it jumps back to the top of the loop,<br />
where the test condition is aga<strong>in</strong> evaluated. If the test condition is not met, the whole process<br />
is repeated. If the test condition is met, program execution jumps to the l<strong>in</strong>e of code
SYNTAX<br />
Wad<strong>in</strong>g In Deeper<br />
immediately follow<strong>in</strong>g the loop code block. The exception to this description is the do-while<br />
loop, which tests for the condition at the bottom of the loop rather than at the top.<br />
The test condition tells the loop when to stop execut<strong>in</strong>g. In effect the test condition says, for<br />
example, “Keep do<strong>in</strong>g this until x is equal to 10,” or, “Keep read<strong>in</strong>g the file until the end-offile<br />
is reached.” Once the loop starts it cont<strong>in</strong>ues to execute the body of the loop until the test<br />
condition is met.<br />
WARNING<br />
▼<br />
▲<br />
TIP<br />
It’s easy to accidentally write a loop so that the test condition is never<br />
met. This will result <strong>in</strong> a program that is locked up or hung. Your only<br />
recourse at that po<strong>in</strong>t is to press Ctrl+Alt+Del and kill the task. The<br />
W<strong>in</strong>dows Close Program box will come up and will display the name<br />
of your program with (Not Respond<strong>in</strong>g) next to it. You’ll have to select<br />
your program from the list and click End Task to term<strong>in</strong>ate the<br />
runaway program.<br />
In <strong>C++</strong>Builder you typically run a program us<strong>in</strong>g the Run button on<br />
the Speed Bar or by press<strong>in</strong>g F9. If you need to kill a runaway program<br />
that was run from the IDE, you can choose Run | Reset Process from<br />
the ma<strong>in</strong> menu or press Ctrl+F2 on the keyboard.<br />
Given that general overview, let’s take a look at each type of loop <strong>in</strong>dividually.<br />
The for Loop<br />
The for loop is probably the most commonly used type of loop. It takes three parameters:<br />
the start<strong>in</strong>g number, the test condition that determ<strong>in</strong>es when the loop stops, and the<br />
<strong>in</strong>crement expression.<br />
The for loop statement:<br />
for (<strong>in</strong>itial; cond_expr; adjust) {<br />
statements;<br />
}<br />
The for loop repeatedly executes the block of code <strong>in</strong>dicated by statements as long as the<br />
conditional expression, cond_expr, is true (nonzero). The state of the loop is <strong>in</strong>itialized by<br />
the statement <strong>in</strong>itial. After the execution of statements, the state is modified us<strong>in</strong>g the<br />
statement <strong>in</strong>dicated by adjust.<br />
45<br />
2
46 Day 2<br />
NOTE<br />
NOTE<br />
That won’t make much sense until you see some examples. First take a look at a typical for<br />
loop:<br />
for (<strong>in</strong>t i=0;i
List<strong>in</strong>g 2.1. FORLOOP.CPP.<br />
Wad<strong>in</strong>g In Deeper<br />
1: #<strong>in</strong>clude <br />
2: #<strong>in</strong>clude <br />
3: #pragma hdrstop<br />
4:<br />
5: <strong>in</strong>t ma<strong>in</strong>(<strong>in</strong>t argv, char** argc)<br />
6: {<br />
7: cout
48 Day 2<br />
Now that you’ve seen the for loop <strong>in</strong> action, it won’t be too difficult to apply the same<br />
concepts to the while and do-while loops. Let’s take a look at those now.<br />
The while Loop<br />
The while loop differs from the for loop <strong>in</strong> that it conta<strong>in</strong>s only a test condition that is<br />
checked at the start of each iteration. As long as the test condition is true, the loop keeps<br />
runn<strong>in</strong>g. Here’s an example:<br />
<strong>in</strong>t x;<br />
while (x < 1000) {<br />
x = DoSomeCalculation();<br />
}<br />
In this example I am call<strong>in</strong>g a function that I assume will eventually return a value greater than<br />
1,000. As long as the return value from this function is less than 1,000, the while loop<br />
cont<strong>in</strong>ues to run. When the variable x conta<strong>in</strong>s a value greater than or equal to 1,000, the test<br />
condition yields false, and program execution jumps to the first l<strong>in</strong>e follow<strong>in</strong>g the while<br />
loop’s end<strong>in</strong>g brace. A common implementation of a while loop uses a bool as a test variable.<br />
The state of the test variable can be set somewhere with<strong>in</strong> the body of the loop:<br />
bool done = false;<br />
while (!done) {<br />
// some code here<br />
done = SomeFunctionReturn<strong>in</strong>gABool();<br />
// more code<br />
}<br />
At some po<strong>in</strong>t it is expected that the variable done will be false and the loop will term<strong>in</strong>ate.<br />
The program <strong>in</strong> List<strong>in</strong>g 2.2 illustrates the use of the while loop.<br />
List<strong>in</strong>g 2.2. WHILETST.CPP.<br />
1: #<strong>in</strong>clude <br />
2: #<strong>in</strong>clude <br />
3: #pragma hdrstop<br />
4: <strong>in</strong>t ma<strong>in</strong>(<strong>in</strong>t argv, char** argc)<br />
5: {<br />
6: cout
SYNTAX<br />
▼<br />
▲<br />
SYNTAX<br />
▼<br />
▲<br />
The while loop statement:<br />
while (cond_expr) {<br />
statements;<br />
}<br />
Wad<strong>in</strong>g In Deeper<br />
The while loop repeatedly executes the block of code <strong>in</strong>dicated by statements as long as the<br />
conditional expression, cond_expr, is true (nonzero). The state of the loop must be <strong>in</strong>itialized<br />
prior to the while statement, and modification of the state must be explicit <strong>in</strong> the block of<br />
code. When the conditional expression, cond_expr, evaluates to false the loop term<strong>in</strong>ates.<br />
The do-while Loop<br />
The do-while loop is nearly identical to the while loop. The dist<strong>in</strong>ction between the two is<br />
important, though. As you can see from List<strong>in</strong>g 2.2, the while loop checks the conditional<br />
expression at the top of the loop. In the case of the do-while loop, the conditional expression<br />
is checked at the bottom of the loop:<br />
bool done = false;<br />
do {<br />
// some code<br />
done = SomeFunctionReturn<strong>in</strong>gABool();<br />
// more code<br />
} while (!done)<br />
Whether you use a while or a do-while loop depends on what the loop itself does.<br />
The do-while loop statement:<br />
do {<br />
statements;<br />
} while (cond_expr)<br />
The do loop repeatedly executes the block of code <strong>in</strong>dicated by statements as long as the<br />
conditional expression, cond_expr, is true (nonzero). The state of the loop must be <strong>in</strong>itialized<br />
prior to the do statement, and modification of the state must be explicit <strong>in</strong> the block of code.<br />
When the conditional expression, cond_expr, evaluates to false, the loop term<strong>in</strong>ates.<br />
goto<br />
I’ll mention goto just so you know it exists. The goto statement allows you to jump program<br />
execution to a label that you have previously declared by us<strong>in</strong>g a term followed by a colon.<br />
The follow<strong>in</strong>g code snippet illustrates this:<br />
bool done = false;<br />
startPo<strong>in</strong>t:<br />
// do some stuff<br />
if (!done) goto(startPo<strong>in</strong>t);<br />
// loop over, mov<strong>in</strong>g on...<br />
49<br />
2
50 Day 2<br />
SYNTAX<br />
NOTE<br />
▼<br />
▲<br />
It is not necessary to use braces here because all l<strong>in</strong>es of code between the goto statement and<br />
the label will be executed.<br />
The goto statement:<br />
goto label<br />
.<br />
.<br />
.<br />
label:<br />
The goto statement is considered bad form <strong>in</strong> a <strong>C++</strong> program. Just<br />
about anyth<strong>in</strong>g you can accomplish with goto you can accomplish with<br />
a while or do-while loop. Very few self-respect<strong>in</strong>g <strong>C++</strong> programmers<br />
have goto <strong>in</strong> their code. If you are mov<strong>in</strong>g to <strong>C++</strong> from another<br />
language that uses goto statements, you will f<strong>in</strong>d that the basic structure<br />
of <strong>C++</strong> makes the goto statement unnecessary.<br />
The goto statement unconditionally transfers the program execution sequence to the label<br />
represented by label.<br />
cont<strong>in</strong>ue and break<br />
Before we leave this discussion of loops, you need to know about two keywords that help<br />
control program execution <strong>in</strong> a loop. The cont<strong>in</strong>ue statement is used to force program<br />
execution back to the top of the loop. For example, you might have part of a loop that you<br />
don’t want to execute if a particular test returns true. In that case you would use cont<strong>in</strong>ue<br />
to jump back to the start of the loop and avoid execution of any code below the cont<strong>in</strong>ue<br />
statement:<br />
bool done = false;<br />
while (!done) {<br />
// some code<br />
bool error = SomeFunction();<br />
if (error) cont<strong>in</strong>ue; // jumps to the top of the loop<br />
// other code that will execute only if no error occured<br />
}<br />
The break statement is used to halt execution of a loop prior to the loop’s normal test<br />
condition be<strong>in</strong>g met. For example, you might be search<strong>in</strong>g an array of <strong>in</strong>ts for a particular<br />
number. By break<strong>in</strong>g execution of your search loop when the number is found, you can<br />
obta<strong>in</strong> the array <strong>in</strong>dex where the number is located:<br />
<strong>in</strong>t <strong>in</strong>dex = 0;<br />
<strong>in</strong>t searchNumber = 50;
Wad<strong>in</strong>g In Deeper<br />
for (<strong>in</strong>t i=0;i
52 Day 2<br />
SYNTAX<br />
amountOverSpeedLimit is equal to 10, a value of 20 is assigned to f<strong>in</strong>e, and so on. In each of<br />
the first three cases you see a break statement. The break statement is used to jump out of<br />
the switch block—it means that a case match<strong>in</strong>g the expression has been found, and the rest<br />
of the switch statement can be ignored. F<strong>in</strong>ally, you see the default statement. The code<br />
block follow<strong>in</strong>g the default statement will be executed if no match<strong>in</strong>g cases are found.<br />
Notice that cases 20 and 25 have no statements follow<strong>in</strong>g them. If the expression<br />
amountOverSpeedLimit evaluates to 20 or 25, those cases fall through and the next code block<br />
encountered will be executed. In this situation, the values 20, 25, or 30 will all result <strong>in</strong> the<br />
same code be<strong>in</strong>g executed.<br />
WARNING<br />
▼<br />
▼<br />
Don’t forget your break statements! Without break statements the<br />
switch will cont<strong>in</strong>ue on even after f<strong>in</strong>d<strong>in</strong>g a match and may execute<br />
code you didn’t <strong>in</strong>tend to be executed. Sometimes that is how you want<br />
your switch to perform, but most of the time it is not.<br />
Inclusion of the default statement is not mandatory. You could write a switch without a<br />
default statement:<br />
switch (x) {<br />
case 10 : DoSometh<strong>in</strong>g(); break;<br />
case 20 : DoAnotherTh<strong>in</strong>g(); break;<br />
case 30 : TakeABreak();<br />
}<br />
Note that there is no break statement follow<strong>in</strong>g the last case statement. Because this is the<br />
last l<strong>in</strong>e of the switch, there is no po<strong>in</strong>t <strong>in</strong> <strong>in</strong>clud<strong>in</strong>g the break statement for this l<strong>in</strong>e.<br />
As I said earlier, you might want to use a switch if you f<strong>in</strong>d that you have several if statements<br />
back-to-back. The switch is a bit clearer to others read<strong>in</strong>g your program.<br />
The switch statement:<br />
switch (expr) {<br />
case value_1:<br />
statements_1;<br />
break;<br />
case value_2:<br />
statements_2;<br />
break;<br />
.<br />
.<br />
.<br />
case value_n:<br />
statements_n;<br />
break;
▲<br />
default:<br />
dflt_statements;<br />
break;<br />
}<br />
Wad<strong>in</strong>g In Deeper<br />
The switch statement offers a way to execute different blocks of code depend<strong>in</strong>g on various<br />
values of an expression (expr). The block of code represented by statements_1 is executed<br />
when expr is equal to value_1, the block of code represented by statements_2 when expr is<br />
equal to value_2, and so on through the block of code represented by statements_n when<br />
expr is equal to value_n. When expr is not equal to any of value_1 through value_n, the block<br />
of code at dflt_statements is executed. The break statements are optional.<br />
Learn<strong>in</strong>g About Scope<br />
The term scope refers to the visibility of variables with<strong>in</strong> different parts of your program. Most<br />
variables have local scope. This means that the variable is visible only with<strong>in</strong> the code block<br />
<strong>in</strong> which it is declared. Take a look at the program <strong>in</strong> List<strong>in</strong>g 2.3.<br />
NEW TERM<br />
List<strong>in</strong>g 2.3. SCOPE.CPP.<br />
The term scope refers to the visibility of variables <strong>in</strong> different parts of your program.<br />
1: #<strong>in</strong>clude <br />
2: #<strong>in</strong>clude <br />
3: #pragma hdrstop<br />
4: <strong>in</strong>t x = 20;<br />
5: void CountLoops(<strong>in</strong>t);<br />
6: <strong>in</strong>t ma<strong>in</strong>(<strong>in</strong>t, char**)<br />
7: {<br />
8: <strong>in</strong>t x = 40;<br />
9: <strong>in</strong>t i = 0;<br />
10: cout
54 Day 2<br />
List<strong>in</strong>g 2.3. cont<strong>in</strong>ued<br />
26: return 0;<br />
27: }<br />
28: void CountLoops(<strong>in</strong>t x)<br />
29: {<br />
30: cout
Wad<strong>in</strong>g In Deeper<br />
This code generates a compiler error because the variable i is visible<br />
only <strong>in</strong>side the for loop code block. In order to get this code to<br />
compile, you would have to declare i outside the for statement:<br />
<strong>in</strong>t i;<br />
for (i=0;i
56 Day 2<br />
The extern keyword tells the compiler, “I’m go<strong>in</strong>g to be us<strong>in</strong>g a variable <strong>in</strong> this source file<br />
that you will f<strong>in</strong>d declared <strong>in</strong> another source file.” The compiler sorts it all out at compile time<br />
and makes sure you get access to the correct variable.<br />
While global variables are convenient, they aren’t particularly OOP friendly. Usually there<br />
are better solutions (which you will learn about when I discuss classes). In addition, global<br />
variables consume memory for the life of the program. Local variables use up memory only<br />
while they are <strong>in</strong> scope. Use local variables whenever possible, and keep the use of global<br />
variables to a m<strong>in</strong>imum.<br />
Structures<br />
A structure is a collection of related data rolled up <strong>in</strong>to a s<strong>in</strong>gle storage unit. For <strong>in</strong>stance, let’s<br />
say you wanted to keep a mail<strong>in</strong>g list. It would be convenient to be able to have a s<strong>in</strong>gle data<br />
variable that could be used to hold all the fields needed <strong>in</strong> a typical mail<strong>in</strong>g list. A structure<br />
will allow you to do that. You first declare a structure and then later create an <strong>in</strong>stance of that<br />
structure when you want to put the structure to use. A structure is declared with the struct<br />
keyword:<br />
struct mail<strong>in</strong>gListRecord {<br />
char firstName[20];<br />
char lastName[20];<br />
char address[50];<br />
char city[20];<br />
char state[4];<br />
<strong>in</strong>t zip;<br />
bool aFriend;<br />
bool aFoe;<br />
};<br />
Each of the elements of a structure is called a data member. You will notice that each of the<br />
data members must be declared just as it would be if it were a variable <strong>in</strong> a code block. In this<br />
example I have five char arrays, one <strong>in</strong>t, and two bool data members. (My apologies to my<br />
friends around the world if this looks like a U.S.-slanted mail<strong>in</strong>g-list record.) F<strong>in</strong>ally, make<br />
note of the semicolon follow<strong>in</strong>g the clos<strong>in</strong>g brace of the structure declaration. This is a<br />
requirement for structure and class declarations.<br />
A structure is a collection of related data identified as a s<strong>in</strong>gle storage unit. After a<br />
structure has been declared, an <strong>in</strong>stance of that structure can be created for use. Each<br />
of the elements of a structure is called a data member.<br />
NEW TERM
NOTE<br />
Wad<strong>in</strong>g In Deeper<br />
You can create <strong>in</strong>stances of a structure when you declare the structure.<br />
At the end of the structure declaration, <strong>in</strong>sert a variable name (one or<br />
more) between the clos<strong>in</strong>g brace and the semicolon that follows the<br />
structure declaration. Here’s an example:<br />
struct po<strong>in</strong>t {<br />
<strong>in</strong>t x;<br />
<strong>in</strong>t y;<br />
} upperLeft, lowerRight;<br />
This code declares the structure and creates two <strong>in</strong>stances of the<br />
structure with variable names upperLeft and lowerRight.<br />
Now that I have the structure declared, I need to put it to use. I first need to create an <strong>in</strong>stance<br />
of the structure. Here’s how that looks:<br />
mail<strong>in</strong>gListRecord record;<br />
This statement allocates memory for the structure (120 bytes, give or take) and assigns that<br />
memory to a variable named record. Now that I have an <strong>in</strong>stance of the structure set up, I<br />
can assign values to the data members:<br />
strcpy(record.firstName, “Bruce”);<br />
strcpy(record.lastName, “Reisdorph”);<br />
strcpy(record.address, “123 Inspiration Pt.”);<br />
strcpy(record.city, “Merced”);<br />
strcpy(record.state, “CA”);<br />
record.zip = 95031;<br />
record.aFriend = true;<br />
record.aFoe = false;<br />
There is someth<strong>in</strong>g you haven’t seen yet <strong>in</strong> this code. In order to access the data members of<br />
a structure, you need to employ the structure member operator, which is a period placed<br />
between the variable name and the data member. (If you forget to add the structure member<br />
operator, you will probably have the compiler wh<strong>in</strong><strong>in</strong>g about undef<strong>in</strong>ed symbols.) The<br />
structure member operator allows you to access a particular member of the structure—either<br />
to read the value of the data member or to change the value of the data member.<br />
If you want to, you can <strong>in</strong>stantiate an object and supply its members all at one time:<br />
mail<strong>in</strong>gListRecord rec = {<br />
“Bruce”,<br />
“Reisdorph”,<br />
“123 Inspiration Pt.”,<br />
“Merced”,<br />
“CA”,<br />
95031,<br />
true,<br />
false<br />
};<br />
57<br />
2
58 Day 2<br />
SYNTAX<br />
▼<br />
▲<br />
This saves you some typ<strong>in</strong>g over the first method I showed you, but is not always practical<br />
<strong>in</strong> real-world situations. In a real-world program a structure would likely be filled out as a<br />
result of user <strong>in</strong>put or possibly with data read from a file. Assign<strong>in</strong>g data to the structure like<br />
you see here is not practical <strong>in</strong> those situations.<br />
The struct statement:<br />
struct name {<br />
data_member_1;<br />
data_member_2;<br />
.<br />
.<br />
.<br />
data_member_n;<br />
} <strong>in</strong>stance;<br />
The struct statement declares a group<strong>in</strong>g of data members (data_member_1, data_member_2,<br />
…, data_member_n) and provides a name for this group<strong>in</strong>g (name). The optional <strong>in</strong>stance<br />
statement creates an occurrence of this group<strong>in</strong>g.<br />
Arrays of Structures<br />
Just as you can have arrays of <strong>in</strong>ts, chars, or longs, you can also have arrays of structures.<br />
Declar<strong>in</strong>g and us<strong>in</strong>g an array of structures is not terribly complicated:<br />
mail<strong>in</strong>gListRecord listArray[5];<br />
strcpy(listArray[0].firstName, “Chuck”);<br />
listArray[4].aFoe = true; // grrrrr!!<br />
// etc.<br />
This is only slightly more complicated than us<strong>in</strong>g an array of one of the <strong>in</strong>tegral data types.<br />
You will notice that the subscript operator and the structure member operator are used backto-back.<br />
Headers and Source Files<br />
The source file is an ASCII text file that conta<strong>in</strong>s the program’s source code. The compiler<br />
takes the source code file, parses it, and produces mach<strong>in</strong>e language that the computer can<br />
execute.<br />
One of the problems with books on programm<strong>in</strong>g is that they use simple examples to<br />
communicate concepts and ideas. You will undoubtedly f<strong>in</strong>d that th<strong>in</strong>gs are never that<br />
simple. So far, we have been deal<strong>in</strong>g with very short programs conta<strong>in</strong>ed <strong>in</strong> a s<strong>in</strong>gle source<br />
file. In the real world, a program of any consequence will have several source files. A program’s<br />
code is divided <strong>in</strong>to different source files for a number of reasons. One of the primary reasons<br />
is organization. By keep<strong>in</strong>g related chunks of code together, you can more easily f<strong>in</strong>d a certa<strong>in</strong><br />
section of code when needed.
Wad<strong>in</strong>g In Deeper<br />
So how do the source files all get tied together? First, the compiler compiles each source file<br />
(.cpp) <strong>in</strong>to an object file (.obj). After each module has been compiled, the l<strong>in</strong>ker l<strong>in</strong>ks all the<br />
object files together to make a s<strong>in</strong>gle executable file (the .exe). The l<strong>in</strong>ker also may l<strong>in</strong>k <strong>in</strong><br />
other needed files such as resource files (.res) and library files (.lib).<br />
The declarations for classes and structures are often kept <strong>in</strong> a separate file called a<br />
header file. Headers have a filename extension of .h or .hpp. (I touched on headers<br />
briefly when I discussed the iostream class <strong>in</strong> Day 1, “Gett<strong>in</strong>g Your Feet Wet.”) A header file<br />
should conta<strong>in</strong> only class, structure, and function declarations. You should never put any<br />
code statements <strong>in</strong> a header.<br />
NEW TERM<br />
NOTE<br />
There is an exception to the rule that no code should be placed <strong>in</strong><br />
headers. You may put <strong>in</strong>l<strong>in</strong>e functions <strong>in</strong> headers. An <strong>in</strong>l<strong>in</strong>e function is a<br />
special function <strong>in</strong> terms of the way the compiler generates code for the<br />
function. You’ll learn more about <strong>in</strong>l<strong>in</strong>e functions on Day 4, “Totally<br />
Immersed: <strong>C++</strong> Classes and Object-Oriented Programm<strong>in</strong>g,” when I<br />
discuss classes.<br />
Once you have created a header file for a class or structure, you can <strong>in</strong>clude that header <strong>in</strong><br />
any source code module that needs to see the class or structure declaration. To do that you<br />
use the #<strong>in</strong>clude directive:<br />
#<strong>in</strong>clude “structur.h”<br />
When you use the #<strong>in</strong>clude directive, it is as if the contents of the file be<strong>in</strong>g <strong>in</strong>cluded<br />
were pasted <strong>in</strong>to the source file at that po<strong>in</strong>t. List<strong>in</strong>g 2.4, <strong>in</strong> the next section, conta<strong>in</strong>s a<br />
program that uses the #<strong>in</strong>clude directive. The header file used <strong>in</strong> List<strong>in</strong>g 2.4 is conta<strong>in</strong>ed <strong>in</strong><br />
List<strong>in</strong>g 2.5.<br />
TIP<br />
Header files typically implement a sentry to ensure that the header is<br />
<strong>in</strong>cluded only once for a program. A sentry essentially tells the compiler,<br />
“I’ve already been <strong>in</strong>cluded once, so don’t <strong>in</strong>clude me aga<strong>in</strong>.” A<br />
sentry looks like this:<br />
#ifndef _MYCLASS_H<br />
#def<strong>in</strong>e _MYCLASS_H<br />
class MyClass {<br />
// class declared here<br />
};<br />
#endif<br />
59<br />
2
60 Day 2<br />
<strong>C++</strong>Builder automatically adds sentries to units that you create as a<br />
result of creat<strong>in</strong>g new forms or components. You should add sentries to<br />
any headers you create for classes used outside the <strong>C++</strong>Builder VCL<br />
framework.<br />
A header file can conta<strong>in</strong> more than one class or structure declaration. Us<strong>in</strong>g a separate header<br />
for each class or structure helps keep your project organized and makes it easier to reuse classes<br />
and structures <strong>in</strong> other programs. Sometimes you will group related classes together <strong>in</strong> one<br />
header. For <strong>in</strong>stance, you may have a class that implements a helper class to carry out its<br />
duties. In that case, both the ma<strong>in</strong> class and the helper class would be declared <strong>in</strong> the same<br />
header. Ultimately, it’s up to you how you organize your headers.<br />
Don’t be too concerned if this is all a little fuzzy right now. It will probably take some<br />
experience writ<strong>in</strong>g real programs for all this to come together for you.<br />
An Example Us<strong>in</strong>g Structures<br />
List<strong>in</strong>g 2.4 conta<strong>in</strong>s a program that has the user <strong>in</strong>put three names and addresses and stores<br />
those records <strong>in</strong> an array of structures. After the names are <strong>in</strong>put, they are displayed on the<br />
screen. The user is asked to choose one of the records. When the user chooses one of<br />
the records, it is displayed on the screen. List<strong>in</strong>g 2.5 conta<strong>in</strong>s the header file for the<br />
mail<strong>in</strong>gListRecord structure used <strong>in</strong> the MAILLIST program shown <strong>in</strong> List<strong>in</strong>g 2.4.<br />
List<strong>in</strong>g 2.4. MAILLIST.CPP.<br />
1: #<strong>in</strong>clude <br />
2: #<strong>in</strong>clude <br />
3: #<strong>in</strong>clude <br />
4: #pragma hdrstop<br />
5: #<strong>in</strong>clude “structur.h”<br />
6: void displayRecord(<strong>in</strong>t, mail<strong>in</strong>gListRecord mlRec);<br />
7: <strong>in</strong>t ma<strong>in</strong>(<strong>in</strong>t, char**)<br />
8: {<br />
9: //<br />
10: // create an array of mail<strong>in</strong>gListRecord structures<br />
11: //<br />
12: mail<strong>in</strong>gListRecord listArray[3];<br />
13: cout
Wad<strong>in</strong>g In Deeper<br />
20: sizeof(listArray[<strong>in</strong>dex].firstName) - 1);<br />
21: cout
62 Day 2<br />
List<strong>in</strong>g 2.4. cont<strong>in</strong>ued<br />
75: }<br />
76: void displayRecord(<strong>in</strong>t num, mail<strong>in</strong>gListRecord mlRec)<br />
77: {<br />
78: cout
NOTE<br />
Wad<strong>in</strong>g In Deeper<br />
The displayRecord() function, which beg<strong>in</strong>s on l<strong>in</strong>e 76, takes two parameters. The first<br />
parameter, num, is an <strong>in</strong>t that conta<strong>in</strong>s the <strong>in</strong>dex number of the record to display. This variable<br />
is used only to display the record number. On l<strong>in</strong>e 78 I add 1 to num when I display it because<br />
users are accustomed to lists beg<strong>in</strong>n<strong>in</strong>g with 1 rather than with 0. (I aim to please!) The second<br />
parameter of the displayRecord() function is an <strong>in</strong>stance of the mail<strong>in</strong>gListRecord structure.<br />
Inside the displayRecord() function I use the local <strong>in</strong>stance of the structure passed <strong>in</strong><br />
(which represents a copy of the structure) to display the contents of the structure.<br />
In this case I am pass<strong>in</strong>g the mail<strong>in</strong>gListRecord structure by value.<br />
What this means is that a copy of the structure is created each time the<br />
displayRecord() function is called. This is not very efficient because of<br />
the overhead required to pass a structure by value. The overhead comes<br />
<strong>in</strong> the form of the extra time and memory required to make a copy of<br />
the structure each time the function is called. It would be better to<br />
pass the structure by reference, but I haven’t talked about that yet,<br />
because the structure is passed by value <strong>in</strong> this program. You will<br />
learn about pass<strong>in</strong>g by reference tomorrow when we discuss functions<br />
<strong>in</strong> <strong>C++</strong>.<br />
Note that the displayRecord() function is called from both the for loop when all the records<br />
are displayed (l<strong>in</strong>e 49) and aga<strong>in</strong> from the ma<strong>in</strong> body of the program to display the actual<br />
record chosen (l<strong>in</strong>e 72). That’s precisely why the code to display a record has been placed <strong>in</strong><br />
a function. By putt<strong>in</strong>g it <strong>in</strong> a function, I only have to write the code once and can avoid<br />
duplicat<strong>in</strong>g the code unnecessarily.<br />
TIP<br />
Any time you f<strong>in</strong>d yourself repeat<strong>in</strong>g code more than a couple times <strong>in</strong><br />
your programs, th<strong>in</strong>k about mov<strong>in</strong>g that code to a function. Then you<br />
can call the function when you need that code executed.<br />
There is another segment of this program that deserves mention. Look at this do-while loop,<br />
which beg<strong>in</strong>s on l<strong>in</strong>e 59:<br />
do {<br />
rec = getch();<br />
rec -= 49;<br />
} while (rec < 0 || rec > 2);<br />
This code first gets a character from the keyboard us<strong>in</strong>g the getch() function. As you have<br />
63<br />
2
64 Day 2<br />
NOTE<br />
seen, I have been us<strong>in</strong>g getch() at the end of my programs to keep the program from clos<strong>in</strong>g<br />
prematurely, but have been ignor<strong>in</strong>g the return value. The getch() function returns the<br />
ASCII value of the key pressed. Because the ASCII value of the 1 key is 49, I want to subtract<br />
49 from the value of the key pressed to obta<strong>in</strong> the equivalent <strong>in</strong>dex number for that record<br />
<strong>in</strong> the records array. If the user presses 1, an ASCII 49 is returned, and 49–49 is 0, which<br />
is the first <strong>in</strong>dex of the array. If the user presses 2, the calculation yields 1 (50–49), and so on.<br />
The do-while loop ensures that the user presses a key between 1 and 3. If a key other than<br />
1, 2, or 3 is pressed, the loop cont<strong>in</strong>ues to fetch keystrokes until a valid key is pressed.<br />
F<strong>in</strong>ally, I want to po<strong>in</strong>t out l<strong>in</strong>e 66 <strong>in</strong> List<strong>in</strong>g 2.4:<br />
mail<strong>in</strong>gListRecord temp = listArray[rec];<br />
This code is not necessary <strong>in</strong> this program, but I <strong>in</strong>cluded it to illustrate a po<strong>in</strong>t. This code<br />
creates an <strong>in</strong>stance of the mail<strong>in</strong>gListRecord structure and assigns to it the contents of one<br />
of the structures <strong>in</strong> the array. A simple assignment is possible here because the compiler knows<br />
how to copy one structure to another. It does a simple member-to-member copy and copies<br />
all structure members to the newly created <strong>in</strong>stance of the structure.<br />
Our discussion of structures up to this po<strong>in</strong>t describes how a structure<br />
works <strong>in</strong> C. In <strong>C++</strong> a structure operates like it does <strong>in</strong> C, but <strong>C++</strong><br />
extends structures to allow them to conta<strong>in</strong> functions as well as data<br />
members. In fact, a structure <strong>in</strong> <strong>C++</strong> is essentially a class where all data<br />
members and functions have public access. That won’t make sense<br />
until later on when I discuss classes on Day 4, but you can file this<br />
tidbit away for future reference.<br />
Now you know about structures. Chances are you won’t use a lot of structures <strong>in</strong> your<br />
programs. This section is important, though, because it serves as sort of a primer for<br />
discuss<strong>in</strong>g classes <strong>in</strong> Day 3, “Up to Your Neck <strong>in</strong> <strong>C++</strong>.”<br />
Summary<br />
This chapter conta<strong>in</strong>s essential <strong>in</strong>formation on some of <strong>C++</strong>’s basic operations. You need<br />
what is presented here <strong>in</strong> order to program <strong>in</strong> <strong>C++</strong>Builder. First you learned about the<br />
different types of loops <strong>in</strong> <strong>C++</strong>; then you learned about the switch statement and how to use<br />
it. I talked a little about scope and what that means to your variables. Then you found out<br />
what structures are and how they can be used <strong>in</strong> your programs. Tomorrow we’ll tackle some<br />
of the big stuff.
Workshop<br />
Wad<strong>in</strong>g In Deeper<br />
The Workshop conta<strong>in</strong>s quiz questions to help you solidify your understand<strong>in</strong>g of the<br />
material covered and exercises to provide you with experience <strong>in</strong> us<strong>in</strong>g what you have learned.<br />
You can f<strong>in</strong>d answers to the quiz questions <strong>in</strong> Appendix A, “Answers to Quiz Questions.”<br />
Q&A<br />
Quiz<br />
Q How many levels deep can I nest if statements?<br />
A There’s no limit. There is, however, a practical limit. If you have too many nested<br />
if statements it gets very hard to keep all those brackets straight!<br />
Q Will loops automatically term<strong>in</strong>ate if someth<strong>in</strong>g goes wrong?<br />
A No. If you accidentally write an endless loop, that loop will cont<strong>in</strong>ue to run until<br />
you do someth<strong>in</strong>g to stop it. You can stop a program stuck <strong>in</strong> an endless loop by<br />
br<strong>in</strong>g<strong>in</strong>g up the W<strong>in</strong>dows Task Manager (or the Close Program box) and end<strong>in</strong>g<br />
the errant task. If you executed the program via the <strong>C++</strong>Builder IDE, you can<br />
choose Run | Reset Program from the ma<strong>in</strong> menu to kill the program.<br />
Q Does a switch statement have to <strong>in</strong>clude a default section?<br />
A No. The default section is optional.<br />
Q Can I have more than one variable with the same name?<br />
A Yes, provided they are <strong>in</strong> different scopes. You cannot have two variables named x<br />
that are both declared with<strong>in</strong> a code block. You can, however, have a global<br />
variable named x and a local variable with the same name.<br />
Q Can I use a structure by itself, without an object?<br />
A No. Before you can use a structure you have to create an <strong>in</strong>stance of the structure<br />
and access the structure through the <strong>in</strong>stance variable.<br />
1. What statements are executed <strong>in</strong> the event that an if expression evaluates to true?<br />
2. What do the three parameters of a for statement represent?<br />
3. Besides syntax, what is the difference between a while loop and a do-while loop?<br />
4. What do the break and cont<strong>in</strong>ue statements do?<br />
5. What is a global variable?<br />
6. Can a structure conta<strong>in</strong> a mixture of data types (char, <strong>in</strong>t, long, and so on)?<br />
65<br />
2
66 Day 2<br />
7. How do you access the members of a structure?<br />
8. Is it legal to have arrays of structures?<br />
Exercises<br />
1. Write a program that counts from 200 to 300 by 5s and displays the results.<br />
2. Write a program that asks the user to <strong>in</strong>put the day of the week and then displays<br />
the name of the day us<strong>in</strong>g a switch statement.<br />
3. See if you can figure out what the \b and \n do <strong>in</strong> this l<strong>in</strong>e from List<strong>in</strong>g 2.2:<br />
cout
Day 3<br />
Up to Your Neck <strong>in</strong> <strong>C++</strong><br />
Up to Your Neck <strong>in</strong> <strong>C++</strong><br />
by Kent Reisdorph<br />
“Don’t worry, I’ve got you.” Do you remember hear<strong>in</strong>g those words when you<br />
were learn<strong>in</strong>g to ride a bike? The <strong>C++</strong> language is often unforgiv<strong>in</strong>g. With the<br />
<strong>in</strong>formation <strong>in</strong> this chapter, you will be branch<strong>in</strong>g out <strong>in</strong>to the concepts of <strong>C++</strong><br />
that most people trip over. Although I can’t promise to be there to pick you up<br />
if you fall, I can at least po<strong>in</strong>t out some of the bumps <strong>in</strong> the road you might<br />
encounter. Today you will learn about<br />
■ Po<strong>in</strong>ters<br />
■ References<br />
■ The new and delete operators<br />
■ Functions <strong>in</strong> <strong>C++</strong><br />
Week<br />
1<br />
67<br />
3
68 Day 3<br />
Po<strong>in</strong>ters: Welcome to My Nightmare<br />
Po<strong>in</strong>ters are one of the most confus<strong>in</strong>g aspects of the <strong>C++</strong> language. They are also one of the<br />
most powerful features of <strong>C++</strong>. My goal <strong>in</strong> this section is not to teach you the textbook<br />
def<strong>in</strong>ition of po<strong>in</strong>ters, but rather to teach you po<strong>in</strong>ters <strong>in</strong> the context of how you will use them<br />
<strong>in</strong> your <strong>C++</strong>Builder programs. So what is a po<strong>in</strong>ter? It’s a variable that holds the address of<br />
another variable. There, that wasn’t so bad, was it? I wish it were that simple! Because a po<strong>in</strong>ter<br />
holds the address of another variable, it is said to “po<strong>in</strong>t to” the second variable. This is called<br />
<strong>in</strong>direction because the po<strong>in</strong>ter does not have a direct association with the actual data, but<br />
rather an <strong>in</strong>direct association.<br />
A po<strong>in</strong>ter is a variable that holds the address of another variable.<br />
NEW TERM<br />
NEW TERM<br />
NOTE<br />
Because the po<strong>in</strong>ter does not have a direct association with the actual data,<br />
<strong>in</strong>direction is the term used when referr<strong>in</strong>g to this <strong>in</strong>direct association.<br />
Let’s look at an example. Earlier we talked about arrays. Let’s say that you had an array of <strong>in</strong>ts.<br />
You could access the <strong>in</strong>dividual elements of the array us<strong>in</strong>g the subscript operator, as I talked<br />
about on Day 1, “Gett<strong>in</strong>g Your Feet Wet”:<br />
<strong>in</strong>t array[] = { 5, 10, 15, 20, 25 };<br />
<strong>in</strong>t someVariable = array[3]; // the value 20<br />
You could also use a po<strong>in</strong>ter to accomplish the same th<strong>in</strong>g:<br />
<strong>in</strong>t array[] = { 5, 10, 15, 20, 25 };<br />
<strong>in</strong>t* ptr = array;<br />
<strong>in</strong>t someVariable = ptr[3];<br />
In this example, the memory location of the beg<strong>in</strong>n<strong>in</strong>g of the array is assigned to the po<strong>in</strong>ter<br />
named ptr. Note that the po<strong>in</strong>ter is a po<strong>in</strong>ter of the data type <strong>in</strong>t and that the <strong>in</strong>direction<br />
operator (the * symbol) is used when you declare a po<strong>in</strong>ter. You can declare a po<strong>in</strong>ter to any<br />
of the <strong>in</strong>tegral data types (<strong>in</strong>t, char, long, short, and so on), as well as a po<strong>in</strong>ter to objects<br />
(structures or classes). After the assignment the po<strong>in</strong>ter conta<strong>in</strong>s the memory address of the<br />
start of the array, and as such po<strong>in</strong>ts to the array.<br />
The name of an array variable, when used without the subscript<br />
operator, returns the memory address of the first element of the array.<br />
Put another way, the variable name of an array is a po<strong>in</strong>ter, to the start<br />
of the array. That makes it possible to assign an array to a po<strong>in</strong>ter, as <strong>in</strong><br />
the preced<strong>in</strong>g example.
Up to Your Neck <strong>in</strong> <strong>C++</strong><br />
In this case you can now use the po<strong>in</strong>ter, ptr, just as you would the array name itself. I can<br />
hear you wonder<strong>in</strong>g, though: “But why would you want to?” The truth is that <strong>in</strong> this example<br />
there is no real benefit to us<strong>in</strong>g a po<strong>in</strong>ter. The real benefit of po<strong>in</strong>ters is when it comes to<br />
creat<strong>in</strong>g objects dynamically <strong>in</strong> memory. In that case, a po<strong>in</strong>ter is necessary to access the<br />
object. I really can’t go on with this discussion, though, until I digress a moment and talk<br />
about the two ways you can create variables and objects.<br />
Local Versus Dynamic Memory Usage<br />
So far all my sample programs have used local allocation of objects—that is, the memory<br />
required for a variable or object is obta<strong>in</strong>ed from the program’s stack.<br />
Local allocation means that the memory required for a variable or object is obta<strong>in</strong>ed<br />
from the program’s stack.<br />
NEW TERM<br />
NEW TERM<br />
The stack is an area of work<strong>in</strong>g memory set aside by the program when the program<br />
starts.<br />
Any memory the program needs for th<strong>in</strong>gs such as local variables, function calls, and so on<br />
is taken from the stack. This memory is allocated as needed and then freed when it is no longer<br />
needed. Usually this happens when the program enters a function or other local code block.<br />
Memory for any local variables the function uses is allocated when the function is entered.<br />
When the function returns, all of the memory allocated for the function’s use is freed. It all<br />
happens for you automatically; you don’t have to give any thought to how or if the memory<br />
is freed.<br />
Local allocation has its good po<strong>in</strong>ts and its bad po<strong>in</strong>ts. On the plus side, memory can be<br />
allocated from the stack very quickly. The downside is that the stack is of a fixed size and<br />
cannot be changed as the program runs. If your program runs out of stack space, weird th<strong>in</strong>gs<br />
start to happen. Your program might just crash, it might start behav<strong>in</strong>g oddly, or it might<br />
seem to perform normally but crash when the program term<strong>in</strong>ates. This is less of a problem<br />
<strong>in</strong> the 32-bit world than it is <strong>in</strong> 16-bit programm<strong>in</strong>g, but it’s still a consideration.<br />
For th<strong>in</strong>gs like variables of the built-<strong>in</strong> data types and small arrays, there is no po<strong>in</strong>t <strong>in</strong> do<strong>in</strong>g<br />
anyth<strong>in</strong>g other than local allocation. But if you are go<strong>in</strong>g to be us<strong>in</strong>g large arrays, structures,<br />
or classes, you will probably want to use dynamic allocation from the heap. This amounts to<br />
your free physical RAM plus all of your free hard disk space. In other words, you could easily<br />
have 100MB of heap memory available on a typical W<strong>in</strong>dows system. The good news here<br />
is that you have virtually unlimited memory available for your programs. The bad news is that<br />
memory allocated dynamically requires some additional overhead, and as such is just a<br />
smidgen slower than memory allocated from the stack. In most programs the extra overhead<br />
is not noticed <strong>in</strong> the least. An additional drawback of dynamic allocation is that it requires<br />
more from the programmer. Not a lot more, m<strong>in</strong>d you, but a little.<br />
69<br />
3
70 Day 3<br />
NEW TERM<br />
NEW TERM<br />
Dynamic allocation means that memory required for an object is allocated from the<br />
heap.<br />
The heap <strong>in</strong> a W<strong>in</strong>dows program refers to all of your computer’s virtual memory.<br />
Dynamic Allocation and Po<strong>in</strong>ters<br />
NEW TERM<br />
In a <strong>C++</strong> program, memory is allocated dynamically by us<strong>in</strong>g the new operator.<br />
I’m go<strong>in</strong>g to talk about new a little later <strong>in</strong> the chapter, but you need a little sampler as I<br />
cont<strong>in</strong>ue the discussion about po<strong>in</strong>ters. Earlier I talked about structures and used the<br />
mail<strong>in</strong>gListRecord structure as an example. Allocat<strong>in</strong>g a structure from the stack looks like<br />
this:<br />
mail<strong>in</strong>gListRecord listArray;<br />
strcpy(listArray.firstName, “Ian”);<br />
strcpy(listArray.lastName, “Spencer”);<br />
// etc.<br />
That’s what I did earlier when I talked about structures. Now I’ll create the array dynamically<br />
rather than locally:<br />
mail<strong>in</strong>gListRecord* listArray;<br />
listArray = new mail<strong>in</strong>gListRecord;<br />
strcpy(listArray->firstName, “Ian”);<br />
strcpy(listArray->lastName, “Spencer”);<br />
// etc.<br />
The first l<strong>in</strong>e declares a po<strong>in</strong>ter to a mail<strong>in</strong>gListRecord structure. The next l<strong>in</strong>e <strong>in</strong>itializes the<br />
po<strong>in</strong>ter by creat<strong>in</strong>g a new <strong>in</strong>stance of a mail<strong>in</strong>gListRecord structure dynamically. This is the<br />
process by which you dynamically create and access objects <strong>in</strong> <strong>C++</strong>.<br />
And Now Back to Our Program<br />
Now you beg<strong>in</strong> to see where po<strong>in</strong>ters fit <strong>in</strong>to the scheme of th<strong>in</strong>gs. When you create an object<br />
dynamically, the new operator returns a po<strong>in</strong>ter to the object <strong>in</strong> memory. You need that<br />
po<strong>in</strong>ter to be able to do anyth<strong>in</strong>g with the object. Figure 3.1 illustrates how the po<strong>in</strong>ter po<strong>in</strong>ts<br />
to the object <strong>in</strong> memory. Note that although the memory for the dynamically created object<br />
is allocated from heap memory, the actual po<strong>in</strong>ter is a local variable and is allocated from the<br />
stack.
Up to Your Neck <strong>in</strong> <strong>C++</strong><br />
Figure 3.1.<br />
A po<strong>in</strong>ter to an object<br />
<strong>in</strong> memory. mail<strong>in</strong>gListRecord*<br />
listArray<br />
Let’s go back to a code snippet you saw earlier:<br />
mail<strong>in</strong>gListRecord* listArray;<br />
listArray = new mail<strong>in</strong>gListRecord;<br />
strcpy(listArray->firstName, “Ian”);<br />
strcpy(listArray->lastName, “Spencer”);<br />
// etc.<br />
On the third l<strong>in</strong>e you see that the firstName data member of the structure is accessed us<strong>in</strong>g<br />
the <strong>in</strong>direct member operator (->) rather than the structure member operator. (We discussed<br />
the structure member operator yesterday <strong>in</strong> the section titled “Structures.” The term direct<br />
member operator is also used and is more representative than structure member operator, so<br />
I will use direct member operator from now on.) When you create an object dynamically, you<br />
must access the object’s data members and functions us<strong>in</strong>g this operator.<br />
Creat<strong>in</strong>g an array of structures dynamically requires a bit more work. Aga<strong>in</strong>, here’s the stackbased<br />
version:<br />
mail<strong>in</strong>gListRecord listArray[3];<br />
listArray[0].zip = 57441;<br />
And the dynamic version:<br />
stack memory<br />
listArray<br />
listArray po<strong>in</strong>ts to<br />
address 0x00780E50,<br />
which is an <strong>in</strong>stance<br />
of the mail<strong>in</strong>gListRecord<br />
structure <strong>in</strong> memory<br />
mail<strong>in</strong>gListRecord* listArray[3];<br />
for (<strong>in</strong>t i=0;izip = 57441;<br />
mail<strong>in</strong>gListRecord<br />
structure <strong>in</strong> memory<br />
heap memory<br />
0x00780E50<br />
firstName<br />
lastName<br />
address<br />
city<br />
state<br />
zip<br />
Note that I have to create a new <strong>in</strong>stance of the structure for each element of the array. Notice<br />
also that to access a data member of the array, I use the <strong>in</strong>direct membership operator<br />
comb<strong>in</strong>ed with the subscript operator.<br />
71<br />
3
72 Day 3<br />
WARNING<br />
Un<strong>in</strong>itialized po<strong>in</strong>ters conta<strong>in</strong> random values just like any other<br />
un<strong>in</strong>itialized variable. Attempt<strong>in</strong>g to use an un<strong>in</strong>itialized po<strong>in</strong>ter can<br />
wreak havoc on a program. In many cases, a po<strong>in</strong>ter is declared and<br />
immediately <strong>in</strong>itialized:<br />
MyArray* array = new MyArray;<br />
Sometimes, however, you will declare a po<strong>in</strong>ter and then not <strong>in</strong>itialize<br />
it until sometime later <strong>in</strong> the program. If you attempt to use the<br />
po<strong>in</strong>ter before <strong>in</strong>itializ<strong>in</strong>g it, the po<strong>in</strong>ter will po<strong>in</strong>t to some random<br />
memory location, and modify<strong>in</strong>g that memory could cause all sorts of<br />
nasty problems. Often the problems caused by modify<strong>in</strong>g unknown<br />
memory do not show up immediately, mak<strong>in</strong>g the bug appear to be<br />
random. To be safe, you should <strong>in</strong>itialize a po<strong>in</strong>ter to 0 when you<br />
declare it:<br />
MyArray* array = 0;<br />
If you attempt to use a NULL po<strong>in</strong>ter (any po<strong>in</strong>ter set to NULL or 0), you<br />
will immediately get an access violation or GPF from W<strong>in</strong>dows.<br />
Although this may not sound like a good th<strong>in</strong>g, it is certa<strong>in</strong>ly the lesser<br />
of two evils. It is far better to have an immediate error at the po<strong>in</strong>t of<br />
the <strong>in</strong>fraction than to have a random problem that may show up<br />
further down the road.<br />
Dereferenc<strong>in</strong>g a Po<strong>in</strong>ter<br />
Frequently you will need to dereference a po<strong>in</strong>ter <strong>in</strong> order to retrieve the contents of the<br />
memory location (the object) that a po<strong>in</strong>ter po<strong>in</strong>ts to. Take the follow<strong>in</strong>g example:<br />
<strong>in</strong>t x = 20;<br />
<strong>in</strong>t* ptrx = &x;<br />
// later...<br />
<strong>in</strong>t z = *ptrx;<br />
I can just imag<strong>in</strong>e your frustration right now. What a mess! Take heart; it’s not quite as bad<br />
as it might appear. The first l<strong>in</strong>e <strong>in</strong> this example declares an <strong>in</strong>t variable called x and assigns<br />
it a value of 20. The next l<strong>in</strong>e declares a po<strong>in</strong>ter to an <strong>in</strong>t and assigns to the po<strong>in</strong>ter the address<br />
of the variable x. This is done by us<strong>in</strong>g the address-of operator (&). In this example, the addressof<br />
operator tells the compiler, “Give me the address of the variable x, not the value of x itself.”<br />
After the assignment, ptrx conta<strong>in</strong>s the memory address of x. Later on <strong>in</strong> the program you<br />
might need to get the value of the object po<strong>in</strong>ted to by ptrx. You might th<strong>in</strong>k to try this:<br />
<strong>in</strong>t z = ptrx; // wrong!
Up to Your Neck <strong>in</strong> <strong>C++</strong><br />
That won’t work, however, because you are try<strong>in</strong>g to assign a memory address to a regular<br />
variable. When you try to compile this l<strong>in</strong>e, the compiler will spit back an error stat<strong>in</strong>g, Cannot<br />
convert <strong>in</strong>t* to <strong>in</strong>t. That makes sense because you are deal<strong>in</strong>g with two different types of<br />
variables. So you need to dereference the po<strong>in</strong>ter us<strong>in</strong>g the <strong>in</strong>direction operator:<br />
<strong>in</strong>t z = *ptrx;<br />
This could be considered the opposite of the address-of operator. Here you don’t want the<br />
actual value of ptrx because the actual value is a memory address. Instead you want the value<br />
of the object po<strong>in</strong>ted to by that memory address. So, <strong>in</strong> this case, the <strong>in</strong>direction operator tells<br />
the compiler, “Give me the value of the object ptrx po<strong>in</strong>ts to, not the actual value of ptrx.”<br />
NEW TERM<br />
NOTE<br />
NOTE<br />
Dereferenc<strong>in</strong>g a po<strong>in</strong>ter means to retrieve the contents of the memory location (the<br />
object) that a po<strong>in</strong>ter po<strong>in</strong>ts to.<br />
As you can see, the <strong>in</strong>direction operator is used to declare a po<strong>in</strong>ter<br />
(<strong>in</strong>t* x;) and also to dereference a po<strong>in</strong>ter (<strong>in</strong>t z = *x;). The compiler<br />
can tell from the context <strong>in</strong> which the <strong>in</strong>direction operator is used<br />
what to do <strong>in</strong> each case. You don’t have to worry that the compiler<br />
won’t know what you <strong>in</strong>tend.<br />
<strong>C++</strong> syntax is largely a personal th<strong>in</strong>g. I prefer to use the <strong>in</strong>direction<br />
operator next to the data type when declar<strong>in</strong>g a po<strong>in</strong>ter, and next to the<br />
po<strong>in</strong>ter when dereferenc<strong>in</strong>g a po<strong>in</strong>ter:<br />
<strong>in</strong>t* x;<br />
SomeClass* aClass = new SomeClass;<br />
char* s = new char[256];<br />
<strong>in</strong>t z = *x;<br />
SomeClass temp = *aClass;<br />
Others prefer to place the <strong>in</strong>direction operator next to the variable<br />
name:<br />
<strong>in</strong>t *x;<br />
// or even...<br />
<strong>in</strong>t * x;<br />
I happen to th<strong>in</strong>k that the syntax I use makes the most sense, but<br />
others could probably argue that their way is best, too. In the end,<br />
settle on the method you like best and then stick to it.<br />
73<br />
3
74 Day 3<br />
Putt<strong>in</strong>g It Together<br />
Let’s try to tie together what you have learned <strong>in</strong> the previous section. I’ll take the MAILLIST<br />
program from Day 2, “Wad<strong>in</strong>g In Deeper,” and modify it so that it uses dynamic memory<br />
allocation. This will require a few changes. First, take a look at the modified program, and<br />
then I’ll expla<strong>in</strong> the changes. List<strong>in</strong>g 3.1 conta<strong>in</strong>s the modified MAILLIST program.<br />
List<strong>in</strong>g 3.1. POINTER.CPP.<br />
1: #<strong>in</strong>clude <br />
2: #<strong>in</strong>clude <br />
3: #<strong>in</strong>clude <br />
4: #pragma hdrstop<br />
5: #<strong>in</strong>clude “structur.h”<br />
6: void displayRecord(<strong>in</strong>t, mail<strong>in</strong>gListRecord mlRec);<br />
7: <strong>in</strong>t ma<strong>in</strong>(<strong>in</strong>t, char**)<br />
8: {<br />
9: //<br />
10: // create an array of po<strong>in</strong>ters to<br />
11: // the mail<strong>in</strong>gListRecord structure<br />
12: //<br />
13: mail<strong>in</strong>gListRecord* listArray[3];<br />
<strong>14</strong>: //<br />
15: // create an object for each element of the array<br />
16: //<br />
17: for (<strong>in</strong>t i=0;ilastName) - 1);<br />
31: cout address,<br />
33: sizeof(listArray[<strong>in</strong>dex]->address) - 1);<br />
34: cout city,<br />
36: sizeof(listArray[<strong>in</strong>dex]->city) - 1);<br />
37: cout state,<br />
39: sizeof(listArray[<strong>in</strong>dex]->state) - 1);<br />
40: char buff[10];<br />
41: cout
Up to Your Neck <strong>in</strong> <strong>C++</strong><br />
42: c<strong>in</strong>.getl<strong>in</strong>e(buff, sizeof(buff) - 1);<br />
43: listArray[<strong>in</strong>dex]->zip = atoi(buff);<br />
44: <strong>in</strong>dex++;<br />
45: cout
76 Day 3<br />
First, on l<strong>in</strong>e 13 I declared the listArray array as an array of po<strong>in</strong>ters. Follow<strong>in</strong>g that,<br />
ANALYSIS<br />
I created objects for each element of the array. This takes place <strong>in</strong> the for loop on<br />
l<strong>in</strong>es 17 and 18. After that, I changed the direct membership operators (.) to <strong>in</strong>direct<br />
membership operators (->). I also have to dereference the po<strong>in</strong>ters on l<strong>in</strong>e 57 and aga<strong>in</strong> on<br />
l<strong>in</strong>e 72. This is necessary because an object is expected and we cannot use a po<strong>in</strong>ter <strong>in</strong> place<br />
of an object. Notice that the displayRecord function (start<strong>in</strong>g on l<strong>in</strong>e 82) doesn’t change. I<br />
haven’t changed the fact that the mail<strong>in</strong>gListRecord structure is passed to the function by<br />
value, so the code <strong>in</strong> the function doesn’t need to be modified.<br />
If you’ve had previous experience with <strong>C++</strong>, you may have noticed that this program has a<br />
bug <strong>in</strong> it. I’ll let you <strong>in</strong> on the secret before the end of the chapter.<br />
References<br />
NEW TERM<br />
A reference is a special type of po<strong>in</strong>ter that allows you to treat a po<strong>in</strong>ter like a regular<br />
object.<br />
References, like po<strong>in</strong>ters, can be confus<strong>in</strong>g. A reference is declared us<strong>in</strong>g the reference operator.<br />
The symbol for the reference operator is the ampersand (&) which is the same symbol used<br />
for the address-of operator (don’t worry, the compiler knows how to keep it all straight). As<br />
I said, a reference allows you to treat a po<strong>in</strong>ter like an object. Here’s an example:<br />
MyStruct* pStruct = new MyStruct;<br />
MyStruct& ref = *pStruct;<br />
ref.X = 100;<br />
Notice that with references you use the direct member operator rather than the <strong>in</strong>direct<br />
member operator as you do with po<strong>in</strong>ters. Now you can get rid of all of those pesky -><br />
operators! Although you won’t use references a lot, they can be very handy when you need<br />
them. By the way, this code snippet could be condensed a little. Here’s how I would write<br />
it <strong>in</strong> a real program:<br />
MyStruct& ref = *new MyStruct;<br />
ref.X = 100;<br />
Although this might look odd, it does exactly the same th<strong>in</strong>g as the first example. Comb<strong>in</strong><strong>in</strong>g<br />
statements like this is common and avoids unnecessary overhead.<br />
Let’s go once more to the MAILLIST example. This time I’ll modify it by implement<strong>in</strong>g a<br />
reference <strong>in</strong> the do-while loop. Actually, I’ll be modify<strong>in</strong>g the POINTER example found <strong>in</strong><br />
List<strong>in</strong>g 3.1. The new program, found <strong>in</strong> List<strong>in</strong>g 3.2, illustrates this change.
List<strong>in</strong>g 3.2. REFERENC.CPP.<br />
Up to Your Neck <strong>in</strong> <strong>C++</strong><br />
1: #<strong>in</strong>clude <br />
2: #<strong>in</strong>clude <br />
3: #<strong>in</strong>clude <br />
4: #pragma hdrstop<br />
5: #<strong>in</strong>clude “structur.h”<br />
6: void displayRecord(<strong>in</strong>t, mail<strong>in</strong>gListRecord mlRec);<br />
7: <strong>in</strong>t ma<strong>in</strong>(<strong>in</strong>t, char**)<br />
8: {<br />
9: cout
78 Day 3<br />
List<strong>in</strong>g 3.2. cont<strong>in</strong>ued<br />
52: for (<strong>in</strong>t i=0;i
Up to Your Neck <strong>in</strong> <strong>C++</strong><br />
Although it might appear that references are preferred over po<strong>in</strong>ters, that is not the case.<br />
References have some peculiarities that make them unsuitable <strong>in</strong> many cases. For one th<strong>in</strong>g,<br />
references cannot be declared and then later assigned a value. They must be <strong>in</strong>itialized when<br />
declared. For <strong>in</strong>stance, the follow<strong>in</strong>g code snippet will result <strong>in</strong> a compiler error:<br />
MyStruct* pStruct = new MyStruct;<br />
MyStruct& ref;<br />
ref = *pStruct;<br />
ref.X = 100;<br />
Another problem with references is that they cannot be set to 0 or NULL as po<strong>in</strong>ters can. That<br />
means you’ll have to take special care to ensure that a reference is not deleted twice. References<br />
and po<strong>in</strong>ters can often serve the same purpose, but neither is perfect <strong>in</strong> every programm<strong>in</strong>g<br />
situation.<br />
Pass<strong>in</strong>g Function Parameters by<br />
Reference and by Po<strong>in</strong>ter<br />
Earlier I talked about pass<strong>in</strong>g objects to functions by value. I said that <strong>in</strong> the case of structures<br />
and classes, it is usually better to pass those objects by reference rather than by value. Any<br />
object can be passed by reference. This <strong>in</strong>cludes the primitive data types such as <strong>in</strong>t and long,<br />
as well as <strong>in</strong>stances of a structure or class. To review, when you pass function parameters by<br />
value, a copy of the object is made, and the function works with the copy. When you pass<br />
by reference, a po<strong>in</strong>ter to the object is passed and not the object itself. This has two primary<br />
implications. First, it means that objects passed by reference can by modified by the function.<br />
Second, pass<strong>in</strong>g by reference elim<strong>in</strong>ates the overhead of creat<strong>in</strong>g a copy of the object.<br />
The fact that an object can be modified by the function is the most important aspect of<br />
pass<strong>in</strong>g by reference. Take this code, for <strong>in</strong>stance:<br />
void IncrementPosition(<strong>in</strong>t& xPos, <strong>in</strong>t& yPos)<br />
{<br />
xPos++;<br />
yPos++;<br />
}<br />
<strong>in</strong>t x = 20;<br />
<strong>in</strong>t y = 40;<br />
IncrementPosition(x, y);<br />
// x now equals 21 and y equals 41<br />
Notice that when the function returns, both of the parameters passed have been <strong>in</strong>cremented<br />
by one. This is because the function is modify<strong>in</strong>g the actual object via the po<strong>in</strong>ter (remember<br />
that a reference is a type of po<strong>in</strong>ter).<br />
79<br />
3
80 Day 3<br />
TIP<br />
Remember that a function can return only one value. By pass<strong>in</strong>g<br />
parameters by reference you can achieve the effect of a function<br />
return<strong>in</strong>g more than one value. The function still only returns one<br />
value, but the objects passed by reference are updated, so the function<br />
effectively returns multiple values.<br />
As I said, the other reason to pass parameters by reference is to elim<strong>in</strong>ate the overhead of<br />
mak<strong>in</strong>g a copy of the object each time the function is called. When deal<strong>in</strong>g with primitive<br />
data types, there is no real overhead <strong>in</strong>volved <strong>in</strong> mak<strong>in</strong>g a copy. When deal<strong>in</strong>g with structures<br />
and classes, however, the overhead is someth<strong>in</strong>g to be considered. You should pass structures<br />
of any consequence by reference, as the follow<strong>in</strong>g code demonstrates:<br />
// structure passed by reference<br />
void someFunction(MyStructure& s)<br />
{<br />
// do some stuff with ‘s’<br />
return;<br />
}<br />
MyStructure myStruct;<br />
// do some stuff, then later...<br />
someFunction(myStruct);<br />
Notice that the function call looks exactly the same whether the object is be<strong>in</strong>g passed by<br />
reference or by value.<br />
Do you see a potential problem with pass<strong>in</strong>g by reference? If you pass by reference, you avoid<br />
the overhead of mak<strong>in</strong>g a copy of the object, but now the object can be modified by the<br />
function. Sometimes you don’t want the object to be modified by the function. So what if you<br />
want to pass by reference but make sure the object is not modified? Read on and I’ll tell you.<br />
The const Keyword<br />
NEW TERM<br />
The const keyword will allow you to declare a variable as constant.<br />
Once a variable is declared with const, it cannot be changed. The solution, then, is to pass<br />
by reference and make the object const:<br />
void someFunction(const MyStruct& s)<br />
{<br />
// do some stuff with ‘s’<br />
return;<br />
}<br />
MyStructure myStruct;<br />
// later<br />
someFunction(myStruct);
NOTE<br />
Up to Your Neck <strong>in</strong> <strong>C++</strong><br />
Now you are free to pass by reference and not worry that your object might be modified by<br />
the function. Note that the function call itself stays the same and that only the function<br />
def<strong>in</strong>ition (and declaration) is modified with the const keyword.<br />
If you attempt to modify a const object, you will get a compiler error<br />
stat<strong>in</strong>g, Cannot modify a const object. The follow<strong>in</strong>g code will<br />
generate that error message:<br />
void someFunction(const MyStruct& s)<br />
{<br />
s.dataMember = 100; // cannot modify a const object<br />
return;<br />
}<br />
Once you declare an object as const, the compiler will make sure you<br />
don’t modify the object.<br />
Note that the object is const only with<strong>in</strong> the function. The object can be modified both<br />
before and after the function returns (provided it was not <strong>in</strong>itially declared as const).<br />
Pass<strong>in</strong>g by po<strong>in</strong>ter is essentially the same as pass<strong>in</strong>g by reference. Pass<strong>in</strong>g by po<strong>in</strong>ter has a<br />
couple of syntactical headaches that make it less desirable than pass<strong>in</strong>g by reference. Let’s take<br />
the IncrementPosition() function from the first example <strong>in</strong> this section and modify it to pass<br />
by po<strong>in</strong>ter rather than by reference:<br />
void IncrementPosition(<strong>in</strong>t* xPos, <strong>in</strong>t* yPos)<br />
{<br />
*xPos++; // dereference, then <strong>in</strong>crement<br />
*yPos++;<br />
}<br />
Note that the po<strong>in</strong>ter has to be dereferenced before it can be <strong>in</strong>cremented. Most of the time<br />
your needs will be best served by pass<strong>in</strong>g by reference, but you may pass by po<strong>in</strong>ter if a<br />
situation dictates the need. When pass<strong>in</strong>g char arrays, you will usually pass by po<strong>in</strong>ter rather<br />
than by reference because you can use a po<strong>in</strong>ter to a char array and the name of the array<br />
<strong>in</strong>terchangeably. When pass<strong>in</strong>g character arrays, it is better to pass by po<strong>in</strong>ter.<br />
The new and delete Operators<br />
Up to this po<strong>in</strong>t I have been talk<strong>in</strong>g primarily about aspects of the <strong>C++</strong> language that come<br />
from C. From this po<strong>in</strong>t on we’ll be look<strong>in</strong>g at features that are specific to the <strong>C++</strong> language.<br />
The new and delete operators are two important <strong>C++</strong> language features.<br />
81<br />
3
82 Day 3<br />
As mentioned <strong>in</strong> the preced<strong>in</strong>g section, memory <strong>in</strong> a <strong>C++</strong> program is allocated dynamically<br />
us<strong>in</strong>g operator new. You free memory us<strong>in</strong>g the delete operator. Unless you have previously<br />
programmed <strong>in</strong> C, you might not appreciate the simplicity of new and delete. In C programs,<br />
you use malloc(), calloc(), realloc(), and free() to dynamically allocate memory.<br />
W<strong>in</strong>dows really complicates th<strong>in</strong>gs by offer<strong>in</strong>g a whole raft of local and global memoryallocation<br />
functions. Although this is not exactly difficult, it can be confus<strong>in</strong>g to say the least.<br />
<strong>C++</strong> removes those headaches through the use of new and delete.<br />
A new World Order<br />
NOTE<br />
You’ve already seen new <strong>in</strong> action, so let’s review. As discussed earlier, you can allocate<br />
memory locally (from the stack) or dynamically (from the heap). The follow<strong>in</strong>g code snippet<br />
shows examples of allocat<strong>in</strong>g two character arrays. One is allocated from the stack (local<br />
allocation), and the other is allocated from the heap (dynamic allocation):<br />
char buff[80];<br />
char* bigBuff = new char[4096];<br />
In the first case the buffer size is <strong>in</strong>significant, so it doesn’t really matter whether the stack<br />
or the heap is used. In the second case a large char array is needed, so it makes sense to allocate<br />
it from the heap rather than from the stack. This preserves stack space. In the case of arrays<br />
(remember, a str<strong>in</strong>g is just an array of type char), the dynamic and local flavors can be used<br />
<strong>in</strong>terchangeably. That is, they use the same syntax:<br />
strcpy(buff, “Ricky Rat”);<br />
strcpy(bigBuff, “A very long str<strong>in</strong>g that goes on and on...”);<br />
// later on...<br />
strcpy(bigBuff, buff);<br />
Remember that the name of an array when used by itself po<strong>in</strong>ts to the first memory location<br />
of the array. A po<strong>in</strong>ter also po<strong>in</strong>ts to the first memory location of the array, so that is why the<br />
two forms can be used <strong>in</strong>terchangeably.<br />
If the new operator fails to allocate the requested memory, it returns<br />
NULL. In theory, you should check the po<strong>in</strong>ter after call<strong>in</strong>g new to ensure<br />
that it conta<strong>in</strong>s a non-zero value:<br />
char* buff = new char[1024];<br />
if (buff) strcpy(buff, “Buteo Regalis”);<br />
else ReportError(); // someth<strong>in</strong>g went wrong<br />
In reality, if the new operator fails <strong>in</strong> a 32-bit W<strong>in</strong>dows program, the<br />
entire system is <strong>in</strong> trouble, and neither your program nor any other will<br />
be runn<strong>in</strong>g for long.
Up to Your Neck <strong>in</strong> <strong>C++</strong><br />
If you are attempt<strong>in</strong>g to allocate very large chunks of memory (several<br />
megabytes <strong>in</strong> size) or are try<strong>in</strong>g to allocate memory at critical po<strong>in</strong>ts <strong>in</strong><br />
your program, you should check the po<strong>in</strong>ter for validity before cont<strong>in</strong>u<strong>in</strong>g.<br />
For rout<strong>in</strong>e memory-allocation chores, you can probably get<br />
by without check<strong>in</strong>g to ensure that the new operator succeeded.<br />
delete<br />
All memory allocated must be deallocated (released or freed) after you are done with the<br />
memory. With local objects, this happens for you automatically, and you don’t have to worry<br />
about it. The memory manager allocates the memory your object needs from the stack and<br />
then frees that memory when the object goes out of scope (usually when a function returns<br />
or when the code block <strong>in</strong> which the object was declared ends). When us<strong>in</strong>g dynamic memory<br />
allocation, the programmer must take the responsibility of free<strong>in</strong>g any memory allocated with<br />
the new operator.<br />
NEW TERM<br />
WARNING<br />
Free<strong>in</strong>g memory allocated with new is accomplished with the delete operator.<br />
All calls to new need to have a match<strong>in</strong>g delete. If you do not free all<br />
memory allocated with the new operator, your program will leak<br />
memory. You need to be diligent <strong>in</strong> match<strong>in</strong>g new/delete pairs.<br />
Us<strong>in</strong>g the delete operator is frightfully easy:<br />
SomeObject* myObject = new SomeObject;<br />
// do a bunch of stuff with myObject<br />
delete myObject; // so long!<br />
That’s all there is to it! There isn’t a lot to the delete operator, but there are a couple of th<strong>in</strong>gs<br />
about po<strong>in</strong>ters and delete that you should be aware of. The first is that you must not delete<br />
a po<strong>in</strong>ter that has already been deleted, or you will get access violations and all sorts of other<br />
fun stuff. Second, it is okay to delete a po<strong>in</strong>ter that has been set to 0. So what does that mean<br />
<strong>in</strong> the real world? Let me expla<strong>in</strong>.<br />
Sometimes you declare a po<strong>in</strong>ter just <strong>in</strong> case it might be used, but you don’t know for sure<br />
whether it will be used <strong>in</strong> a given <strong>in</strong>stance of your program. For example, let’s say you have<br />
an object that is created if the user chooses a certa<strong>in</strong> menu item. If the user never chooses that<br />
83<br />
3
84 Day 3<br />
menu item, the object never gets created. So far, so good. The problem is that you need to<br />
delete the po<strong>in</strong>ter if the object was created, but not delete the po<strong>in</strong>ter if the object was not<br />
created. Delet<strong>in</strong>g an <strong>in</strong>itialized po<strong>in</strong>ter is ask<strong>in</strong>g for trouble because you have no idea what<br />
memory the po<strong>in</strong>ter po<strong>in</strong>ts to. There are two ways to work around this.<br />
I said earlier that it is a good idea to <strong>in</strong>itialize po<strong>in</strong>ters to 0 if you don’t use them right away.<br />
This is a good idea for two reasons. The first reason I expla<strong>in</strong>ed earlier (un<strong>in</strong>itialized po<strong>in</strong>ters<br />
conta<strong>in</strong> random values, which is undesirable). The second reason is because it’s okay to delete<br />
a NULL po<strong>in</strong>ter—you can call delete for that po<strong>in</strong>ter and not worry about whether it was ever<br />
used:<br />
Monster* swampTh<strong>in</strong>g = 0;<br />
// later when it’s time to exit the program...<br />
delete swampTh<strong>in</strong>g; // so long, sucker!<br />
In this case you don’t really care whether memory for the object was ever allocated because<br />
the call to delete is safe whether the po<strong>in</strong>ter po<strong>in</strong>ts to an object or is NULL.<br />
TIP<br />
You may run <strong>in</strong>to situations where delete could be called more than<br />
once for an object. For <strong>in</strong>stance, you may create an object <strong>in</strong> one part<br />
of your program and delete it <strong>in</strong> another part of the program. A<br />
situation might exist where the section of code that deletes the object<br />
might never be executed. In that case you will also want to delete the<br />
object when the program closes (for <strong>in</strong>surance). To avoid the possibility<br />
of a po<strong>in</strong>ter gett<strong>in</strong>g deleted twice, get <strong>in</strong>to the habit of sett<strong>in</strong>g the<br />
po<strong>in</strong>ter to NULL or 0 after delet<strong>in</strong>g it:<br />
Monster* borg = new Monster;<br />
// later....<br />
delete borg;<br />
borg = 0;<br />
Now, if delete is called twice for the object, it won’t matter because it’s<br />
okay to delete a NULL po<strong>in</strong>ter.<br />
Another way around the double-delete problem is to check the po<strong>in</strong>ter for a non-zero value<br />
before call<strong>in</strong>g delete:<br />
if (swampTh<strong>in</strong>g) delete swampTh<strong>in</strong>g;<br />
This assumes that you have been diligent <strong>in</strong> sett<strong>in</strong>g deleted po<strong>in</strong>ters to 0 <strong>in</strong> other parts of the<br />
program. It doesn’t matter which method you use, but be sure to use one of them <strong>in</strong> any case<br />
where a po<strong>in</strong>ter could accidentally be deleted twice.
NOTE<br />
Up to Your Neck <strong>in</strong> <strong>C++</strong><br />
If you use a reference when dynamically creat<strong>in</strong>g an object, the syntax<br />
for delete requires a twist. Here’s an example that illustrates this po<strong>in</strong>t:<br />
MyStruct& ref = *new MyStruct;<br />
ref.X = 100;<br />
// later...<br />
delete &ref;<br />
Note that you need the address-of operator to delete the po<strong>in</strong>ter <strong>in</strong> the<br />
case of a reference. Remember that a reference cannot be set to 0, so<br />
you must be careful not to delete a reference twice.<br />
Another Mystery Solved<br />
Have you figured it out yet? “Huh?” you say? The bug <strong>in</strong> the POINTER and REFERENC<br />
programs… have you figured out what it is? You got it! The program leaks memory. I created<br />
an array of structures allocated from the heap but never freed the memory. So what I need<br />
is a couple of l<strong>in</strong>es to clean th<strong>in</strong>gs up just before the program ends:<br />
getch(); // exist<strong>in</strong>g l<strong>in</strong>e<br />
for (<strong>in</strong>t i=0;i
86 Day 3<br />
HOUSE RULES: POINTERS AND DYNAMIC MEMORY ALLOCATION<br />
■ Be sure to <strong>in</strong>itialize po<strong>in</strong>ters to 0 if they are not used right away.<br />
■ Be sure not to delete a po<strong>in</strong>ter twice.<br />
■ It is OK to delete po<strong>in</strong>ters set to NULL or 0.<br />
■ Set po<strong>in</strong>ters to NULL or 0 after delet<strong>in</strong>g them.<br />
■ Dereference po<strong>in</strong>ters to obta<strong>in</strong> the object the po<strong>in</strong>ter po<strong>in</strong>ts to.<br />
Functions <strong>in</strong> <strong>C++</strong><br />
A function <strong>in</strong> <strong>C++</strong> can do everyth<strong>in</strong>g that a function can do <strong>in</strong> C. In addition, <strong>C++</strong> functions<br />
can do th<strong>in</strong>gs that functions <strong>in</strong> C cannot. Specifically, this section looks at the follow<strong>in</strong>g:<br />
■ Function overload<strong>in</strong>g<br />
■ Default parameters<br />
■ Class member functions<br />
■ Inl<strong>in</strong>e functions<br />
Function Overload<strong>in</strong>g<br />
<strong>C++</strong> allows you to have functions that have the same name but take different parameters.<br />
Function overload<strong>in</strong>g is when you have two or more functions with the same name<br />
but with different parameter lists.<br />
NEW TERM<br />
NEW TERM<br />
Functions that share a common name are called overloaded functions.<br />
On Day 1 I showed you an example program which conta<strong>in</strong>ed a function called multiply().<br />
Not surpris<strong>in</strong>gly, this function multiplied two values together. The function took two<br />
<strong>in</strong>tegers, multiplied them, and returned the result. But what if you wanted to have the<br />
function multiply two float<strong>in</strong>g-po<strong>in</strong>t numbers? In C you would have to have two functions:<br />
// declarations for a program written <strong>in</strong> c<br />
<strong>in</strong>t multiplyInt(<strong>in</strong>t num1, <strong>in</strong>t num2);<br />
float multiplyFloat(float num1, float num2);<br />
short multiplyShort(short num1, short num2);<br />
Wouldn’t it be a lot easier if you could just have a function called multiply() that would be<br />
smart enough to know whether you wanted to multiply shorts, <strong>in</strong>ts, or longs? In <strong>C++</strong> you
NOTE<br />
NOTE<br />
Up to Your Neck <strong>in</strong> <strong>C++</strong><br />
can create such a scenario thanks to function overload<strong>in</strong>g. Here’s how the declarations for an<br />
overloaded function look:<br />
// declarations <strong>in</strong> <strong>C++</strong><br />
<strong>in</strong>t multiply(<strong>in</strong>t num1, <strong>in</strong>t num2);<br />
float multiply(float num1, float num2);<br />
short multiply(short num1, short num2);<br />
You still have to write separate functions for each of these declarations, but at least you can<br />
use the same function name. The compiler takes care of call<strong>in</strong>g the correct function based on<br />
the parameters you pass the function. For example:<br />
float x = 1.5;<br />
float y = 10.5;<br />
float result = multiply(x, y);<br />
The compiler sees that two floats are passed to the function and calls the version of the<br />
multiply() function that takes two float<strong>in</strong>g-po<strong>in</strong>t values for parameters. Likewise, if two <strong>in</strong>ts<br />
are passed, the compiler calls the version of multiply() that takes two <strong>in</strong>tegers.<br />
It is the parameter list that makes overloaded functions work. You can<br />
vary either the type or the number of parameters a function takes (or<br />
both), but you cannot create an overloaded function by chang<strong>in</strong>g just<br />
the return value. For example, the follow<strong>in</strong>g does not constitute an<br />
overloaded function:<br />
<strong>in</strong>t DoSometh<strong>in</strong>g();<br />
void DoSometh<strong>in</strong>g();<br />
If you try to compile a program conta<strong>in</strong><strong>in</strong>g these l<strong>in</strong>es, you will get a<br />
compiler error that says, Type mismatch <strong>in</strong> redeclaration of<br />
‘DoSometh<strong>in</strong>g()’. The two functions need to vary by more than just the<br />
return value <strong>in</strong> order to have overloaded functions.<br />
Compilers keep track of overloaded functions <strong>in</strong>ternally through a<br />
process called name mangl<strong>in</strong>g. Name mangl<strong>in</strong>g means that the compiler<br />
creates a function name that takes <strong>in</strong>to account the parameter list of the<br />
function. Internally, the compiler refers to the mangled name rather<br />
than the pla<strong>in</strong> text name you would recognize. For example, for the<br />
multiply function tak<strong>in</strong>g two float values, the mangled name might be<br />
multiply$qff.<br />
87<br />
3
88 Day 3<br />
Let’s take a quick detour and talk about someth<strong>in</strong>g you will need to use on occasion when<br />
deal<strong>in</strong>g with overloaded functions.<br />
Meet the Cast<br />
Us<strong>in</strong>g overloaded functions works f<strong>in</strong>e as long as you use the proper data types when call<strong>in</strong>g<br />
an overloaded function. But what if you mix and match? In this case, you will need to cast<br />
a variable or literal value.<br />
A cast tells the compiler to temporarily treat one data type as if it were another.<br />
NEW TERM<br />
A cast looks like this:<br />
float x = (float)10 * 5.5;<br />
In this case the cast tells the compiler, “Make the number 10 a float.” (The second number<br />
is automatically <strong>in</strong>terpreted as a float because it conta<strong>in</strong>s a decimal place.) Take a look at the<br />
follow<strong>in</strong>g code snippet:<br />
<strong>in</strong>t anInt = 5;<br />
float aFloat = 10.5;<br />
float result = multiply(anInt, aFloat);<br />
In this case you will get a compiler error because there is an ambiguity between the parameters<br />
passed and the function declarations. The compiler error, <strong>in</strong> effect, says, “I can’t figure out<br />
from the parameters passed which version of multiply() to call.” The same error will be<br />
produced if you use code like this:<br />
<strong>in</strong>t result = multiply(10, 10);<br />
// is 10 a float, <strong>in</strong>t or short?<br />
Here the compiler cannot figure out whether the numeric constants are to be <strong>in</strong>terpreted as<br />
floats, <strong>in</strong>ts, or shorts. When this occurs, you basically have two choices. First, you can<br />
simply avoid us<strong>in</strong>g literal values <strong>in</strong> the function call. If you want to multiply two <strong>in</strong>ts, you<br />
can declare two <strong>in</strong>t variables and pass those to the function:<br />
<strong>in</strong>t x = 10;<br />
<strong>in</strong>t y = 10;<br />
<strong>in</strong>t result = multiply(x, y);<br />
Now there is no ambiguity because x and y are both obviously <strong>in</strong>ts. That’s probably overkill<br />
for simple situations, though. The other th<strong>in</strong>g you can do is to cast the numeric constants<br />
to tell the compiler what type to expect:<br />
<strong>in</strong>t result = multiply((<strong>in</strong>t)10, (<strong>in</strong>t)10);
Up to Your Neck <strong>in</strong> <strong>C++</strong><br />
Now the compiler knows to treat the literal values as <strong>in</strong>ts. A cast is also used to temporarily<br />
force the compiler to treat one data type as if it were someth<strong>in</strong>g else. Let’s go back to the first<br />
example <strong>in</strong> this section and this time cast one of the variables to remove the ambiguity:<br />
<strong>in</strong>t x = 5;<br />
float y = 10.5;<br />
float result = multiply((float)x, y);<br />
In this case x is an <strong>in</strong>t, but you are cast<strong>in</strong>g it to a float, thereby tell<strong>in</strong>g the compiler to treat<br />
it as a float. The compiler happily calls the float version of multiply() and goes on its way.<br />
Ultimately, you want to write overloaded functions so that ambiguities do not exist and<br />
cast<strong>in</strong>g is not necessary. In some cases that is not possible, and <strong>in</strong> those cases cast<strong>in</strong>g will be<br />
required.<br />
Default Parameters for Functions<br />
NEW TERM<br />
A function <strong>in</strong> <strong>C++</strong> can have default parameters which, as the name implies, supply<br />
a default value for a function if no value is specified when the function is called.<br />
A function implement<strong>in</strong>g a default parameter might look like this:<br />
// declaration, parameter ‘eraseFirst’ will be false by default<br />
void Redraw(bool eraseFirst = false);<br />
// def<strong>in</strong>ition<br />
void Redraw(bool eraseFirst)<br />
{<br />
if (eraseFirst) {<br />
// erase code<br />
}<br />
// draw<strong>in</strong>g code<br />
}<br />
When this function is called, it can be called with or without a parameter. If the parameter<br />
is supplied at the time the function is called, the function behaves as a regular function would.<br />
If the parameter is not supplied when the function is called, the default parameter is used<br />
automatically. Given this example, the follow<strong>in</strong>g two l<strong>in</strong>es of code are identical:<br />
Redraw();<br />
Redraw(false);<br />
Note that when a parameter has a default value, it can be omitted from the function call<br />
altogether. You can mix default and non-default parameters <strong>in</strong> the same function:<br />
<strong>in</strong>t PlaySound(char* name, bool loop = false, <strong>in</strong>t loops = 10);<br />
// call function<br />
<strong>in</strong>t res;<br />
res = PlaySound(“chime.wav”); // does not loop sound<br />
res = PlaySound(“d<strong>in</strong>g.wav”, true); // plays sound 10 times<br />
res = PlaySound(“bell.wave”, true, 5); // plays sound 5 times<br />
89<br />
3
90 Day 3<br />
NOTE<br />
Default parameters are helpful for many reasons. For one th<strong>in</strong>g, they make your life easier.<br />
You may have a function that you call with the same parameters 99 percent of the time. By<br />
giv<strong>in</strong>g it default parameters, you shorten the amount of typ<strong>in</strong>g required each time you make<br />
a call to the function. Whenever you want to supply parameters other than the defaults, all<br />
you have to do is plug <strong>in</strong> values for the default parameters.<br />
Any default parameters must come at the end of the function’s parameter<br />
list. The follow<strong>in</strong>g is not a valid function declaration:<br />
<strong>in</strong>t MyFunction(<strong>in</strong>t x, <strong>in</strong>t y = 10, <strong>in</strong>t t = 5, <strong>in</strong>t z);<br />
In order for this function declaration to compile, the default parameters<br />
must be moved to the end of the function list:<br />
<strong>in</strong>t MyFunction(<strong>in</strong>t x, <strong>in</strong>t z, <strong>in</strong>t y = 10, <strong>in</strong>t t = 5);<br />
If you don’t put the default parameters at the end of the parameter list,<br />
the compile will generate a compiler error.<br />
Class Member Functions<br />
NEW TERM<br />
As you will f<strong>in</strong>d out <strong>in</strong> this section, classes can conta<strong>in</strong> their own functions. Such<br />
functions are called member functions because they are members of a class.<br />
Class member functions follow the same rules as regular functions: They can be overloaded,<br />
they can have default parameters, they can take any number of parameters, and so on.<br />
Class member functions can be called only through an object of the class to which the<br />
function belongs. To call a class member function, you use the direct member operator (<strong>in</strong><br />
the case of local objects) or the <strong>in</strong>direct member operator (for dynamically created objects)<br />
just like you did when access<strong>in</strong>g data members of a structure on Day 2. For example, let’s say<br />
that you had a class called Airplane that was used to track an airplane for aircraft-control<br />
software. That class would probably have the capability to retrieve the current speed of a given<br />
aircraft via a function called GetSpeed(). The follow<strong>in</strong>g example illustrates how you would<br />
call the GetSpeed() function of an Airplane object:<br />
Airplane plane; // create a class <strong>in</strong>stance<br />
<strong>in</strong>t speed = plane.GetSpeed();<br />
cout
NOTE<br />
Up to Your Neck <strong>in</strong> <strong>C++</strong><br />
<strong>in</strong>t Airplane::GetSpeed()<br />
{<br />
return speed; // speed is a class member variable<br />
}<br />
In this case, the scope-resolution operator tells the compiler that the GetSpeed() function is<br />
a member of the Airplane class. I’ll talk more about class member functions when I discuss<br />
classes tomorrow.<br />
Inl<strong>in</strong>e Functions<br />
Tradition has it that class member function names beg<strong>in</strong> with uppercase<br />
letters. There is no hard and fast rule about this, but you will f<strong>in</strong>d<br />
that most <strong>C++</strong> programs follow this tradition. As a further note, I am<br />
not a fan of the underscore character <strong>in</strong> function names. For example, I<br />
much prefer the function name GetVideoRect() over the name<br />
get_video_rect(). Regardless of what nam<strong>in</strong>g convention you use for<br />
your functions, be consistent and use the same nam<strong>in</strong>g convention<br />
throughout your programs.<br />
Normally a function only appears <strong>in</strong> the executable file once. Each section of code that uses<br />
the function calls the function. This means that program execution jumps from the po<strong>in</strong>t<br />
of the function call to the po<strong>in</strong>t <strong>in</strong> the program where the function resides. The statements<br />
<strong>in</strong> the function are executed, and then the function returns. When the function returns,<br />
program execution jumps back to the statement follow<strong>in</strong>g the function call.<br />
An <strong>in</strong>l<strong>in</strong>e function, as its name implies, is placed <strong>in</strong>l<strong>in</strong>e <strong>in</strong> the compiled code wherever<br />
a call to that function occurs.<br />
NEW TERM<br />
NOTE<br />
Inl<strong>in</strong>e functions are declared like regular functions but are def<strong>in</strong>ed with the <strong>in</strong>l<strong>in</strong>e keyword.<br />
Each time the compiler encounters a call to an <strong>in</strong>l<strong>in</strong>e function <strong>in</strong> the source code, it places<br />
a separate copy of the function’s code <strong>in</strong> the executable program at that po<strong>in</strong>t. Inl<strong>in</strong>e<br />
functions execute quickly because no actual function call takes place (the code is already<br />
<strong>in</strong>l<strong>in</strong>ed <strong>in</strong> the program).<br />
Inl<strong>in</strong>e functions should be reserved for functions that are very small or<br />
for those that need to be executed very quickly. Large functions or<br />
those that are called from many places <strong>in</strong> your program should not be<br />
<strong>in</strong>l<strong>in</strong>ed because your executable file will be larger as a result.<br />
91<br />
3
92 Day 3<br />
Inl<strong>in</strong>e functions are usually class member functions. Often the <strong>in</strong>l<strong>in</strong>e function def<strong>in</strong>ition (the<br />
function itself) is placed <strong>in</strong> the header file follow<strong>in</strong>g the class declaration. (This is the one time<br />
that you can place code <strong>in</strong> your header files.) Because the GetSpeed() function mentioned<br />
previously is so small, it can be <strong>in</strong>l<strong>in</strong>ed easily. Here’s how it would look:<br />
<strong>in</strong>l<strong>in</strong>e <strong>in</strong>t Airplane::GetSpeed() {<br />
return speed; // speed is a class member variable<br />
}<br />
An <strong>in</strong>l<strong>in</strong>e function can also be def<strong>in</strong>ed with<strong>in</strong> a class declaration. Because I haven’t talked<br />
about classes yet, though, I’ll hold that discussion for tomorrow.<br />
Summary<br />
Wow, that’s some pretty heavy stuff! Because you are read<strong>in</strong>g this, you must still be left<br />
stand<strong>in</strong>g. That’s good news. Today we got out the big guns and took on po<strong>in</strong>ters and<br />
references. Once you get a handle on po<strong>in</strong>ters, you are well on your way to understand<strong>in</strong>g<br />
<strong>C++</strong>. As part of the discussion on po<strong>in</strong>ters you learned about local versus dynamic memory<br />
allocation, which led to a discussion about the new and delete operators. Today ends with<br />
an explanation of how <strong>C++</strong> extends the use of functions over what the C language provides.<br />
Workshop<br />
The Workshop conta<strong>in</strong>s quiz questions to help you solidify your understand<strong>in</strong>g of the<br />
material covered and exercises to provide you with experience <strong>in</strong> us<strong>in</strong>g what you have learned.<br />
You can f<strong>in</strong>d answers to the quiz questions <strong>in</strong> Appendix A, “Answers to Quiz Questions.”<br />
Q&A<br />
Q Po<strong>in</strong>ters and references confuse me. Am I alone?<br />
A Absolutely not! Po<strong>in</strong>ters and references are complicated and take some time to fully<br />
understand. You will probably have to work with <strong>C++</strong> a while before you get a<br />
handle on po<strong>in</strong>ters and references.<br />
Q Do I always have to delete an object that I created dynamically with the new<br />
operator?<br />
A Yes and no. All objects created with new must have a correspond<strong>in</strong>g delete, or the<br />
program will leak memory. Some objects, however, have parent objects that will<br />
take the responsibility for delet<strong>in</strong>g them. So the question is not whether an object<br />
created with new should be deleted, but rather who should delete it. You will always<br />
want to call delete for classes you write. Later, when you learn about VCL (on
Quiz<br />
Up to Your Neck <strong>in</strong> <strong>C++</strong><br />
Day 5, “<strong>C++</strong> Class Frameworks and the Visual Component Model”), you will see<br />
that VCL parent objects take the responsibility for delet<strong>in</strong>g their children.<br />
Q Should I create my objects on the stack or on the heap?<br />
A That depends on the object. Large objects should be created on the heap <strong>in</strong> order<br />
to preserve stack space. Small objects and primitive data types should be created on<br />
the stack for simplicity and speed of execution.<br />
Q What’s the po<strong>in</strong>t of hav<strong>in</strong>g overloaded functions?<br />
A Overloaded functions provide you a means by which you can have several functions<br />
that perform the same basic operation and have the same function name, but take<br />
different parameters. For example, you might have an overloaded function called<br />
DrawObject(). One version might take a Circle class as a parameter, another might<br />
take a Square class as a parameter, and a third could take a class called Polygon as a<br />
parameter. By hav<strong>in</strong>g three functions with the same name, you avoid the need to<br />
have three different function names.<br />
Q Should I use a lot of <strong>in</strong>l<strong>in</strong>e functions?<br />
A That depends on the function, of course. In general, though, the answer is no.<br />
Inl<strong>in</strong>e functions should be reserved for functions that are very small or seldom<br />
used, or where execution speed is critical.<br />
1. What is a po<strong>in</strong>ter?<br />
2. What does it mean to dereference a po<strong>in</strong>ter?<br />
3. What is the return value of operator new?<br />
4. Should <strong>in</strong>stances of classes and structures be passed to functions by reference or by<br />
value?<br />
5. What does the const keyword do?<br />
6. Does the follow<strong>in</strong>g qualify as an overloaded function? Why or why not?<br />
void MyFunction(<strong>in</strong>t x);<br />
long MyFunction(<strong>in</strong>t x);<br />
7. Which is better to use, a reference or a po<strong>in</strong>ter?<br />
8. What is a class member function?<br />
9. How does the compiler treat an <strong>in</strong>l<strong>in</strong>e function as opposed to a regular function?<br />
10. What, if anyth<strong>in</strong>g, is wrong with the follow<strong>in</strong>g code snippet?<br />
char* buff = new char[200];<br />
// later...<br />
delete buff;<br />
93<br />
3
94 Day 3<br />
Exercises<br />
1. Write a program that declares a structure, dynamically creates an <strong>in</strong>stance of the<br />
structure, and fills the structure with data. (H<strong>in</strong>t: Don’t forget to delete the<br />
po<strong>in</strong>ter.)<br />
2. Modify the program from Exercise 1 to use a reference rather than a po<strong>in</strong>ter.<br />
3. Rewrite the REFERENC program <strong>in</strong> List<strong>in</strong>g 3.2 so that the mail<strong>in</strong>gListRecord<br />
structure is passed to the displayRecord() function by reference rather than by<br />
value.<br />
4. What is wrong with the follow<strong>in</strong>g function declaration?<br />
void SomeFunction(<strong>in</strong>t param1, <strong>in</strong>t param2 = 0, <strong>in</strong>t param3);<br />
5. Expla<strong>in</strong> to a five-year-old the difference between po<strong>in</strong>ters and references.
Totally Immersed: <strong>C++</strong> Classes and Object-Oriented Programm<strong>in</strong>g<br />
Day 4<br />
Totally Immersed: <strong>C++</strong><br />
Classes and Object-<br />
Oriented Programm<strong>in</strong>g<br />
by Kent Reisdorph<br />
Week<br />
Today you get to the good stuff. In this chapter you will learn about classes.<br />
Classes are the heart of <strong>C++</strong> and a major part of object-oriented programm<strong>in</strong>g.<br />
Classes are also the heart of the Visual Component Library (VCL), which you<br />
will use when you start writ<strong>in</strong>g W<strong>in</strong>dows GUI applications. (VCL is discussed<br />
<strong>in</strong> detail on Day 5, “<strong>C++</strong> Class Frameworks and the Visual Component<br />
Model.”) First you will f<strong>in</strong>d out what a class is and how it’s expected to be used.<br />
Along the way you will learn the mean<strong>in</strong>g of <strong>C++</strong> buzzwords like <strong>in</strong>heritance,<br />
object, and data abstraction. At the end of the chapter you will get an<br />
<strong>in</strong>troduction to file <strong>in</strong>put and output <strong>in</strong> <strong>C++</strong>.<br />
1<br />
95<br />
4
96 Day 4<br />
So, uh…What’s a Class?<br />
A class, like a structure, is a collection of data members and functions that work together to<br />
accomplish a specific programm<strong>in</strong>g task. In this way a class is said to encapsulate the task.<br />
Classes have the follow<strong>in</strong>g features:<br />
■ The capability to control access<br />
■ Constructors<br />
■ Destructors<br />
■ Data members<br />
■ Member functions<br />
■ A hidden, special po<strong>in</strong>ter called this<br />
Before div<strong>in</strong>g <strong>in</strong>to an exam<strong>in</strong>ation of those features, let me give you a quick example of how<br />
a class might work. Let’s use a typical W<strong>in</strong>dows control as an example—a check box, for<br />
<strong>in</strong>stance. A class that represents a check box could have data members for the caption of the<br />
check box and for the state (checked or unchecked). This class would also have functions that<br />
would allow you to set and query both the check box caption and the check state. These<br />
functions might be named GetCheck(), SetCheck(), GetCaption(), and SetCaption(). Once<br />
the class has been written, you can create an <strong>in</strong>stance of the class to control a check box <strong>in</strong><br />
W<strong>in</strong>dows. (It’s not quite that simple, but this is just an example, after all.) If you have three<br />
check boxes, you could have three <strong>in</strong>stances of the CheckBox class that could then be used to<br />
control each check box <strong>in</strong>dividually. Here’s an example:<br />
MyCheckBox check1(ID_CHECK1);<br />
MyCheckBox check2(ID_CHECK2);<br />
MyCheckBox check3(ID_CHECK3);<br />
check1.SetCaption(“Th<strong>in</strong>gamabob Option”);<br />
check1.SetCheck(true);<br />
check2.SetCaption(“Doohickey Options”);<br />
check2.SetCheck(false);<br />
check3.SetCaption(“Whodyacallum Options”);<br />
check3.SetCheck(true);<br />
if (check1.GetCheck()) DoTh<strong>in</strong>gamabobTask();<br />
if (check2.GetCheck()) DoDoohickeyTask();<br />
// etc.<br />
In this example, each <strong>in</strong>stance of the class is a separate object. Each <strong>in</strong>stance has its own data<br />
members, and the objects operate <strong>in</strong>dependently of one another. They are all objects of the<br />
same type, but are separate <strong>in</strong>stances <strong>in</strong> memory. With that brief <strong>in</strong>troduction, let’s roll up<br />
our sleeves once more and go to work on understand<strong>in</strong>g classes.
Totally Immersed: <strong>C++</strong> Classes and Object-Oriented Programm<strong>in</strong>g<br />
Anatomy of a Class<br />
A class, like a structure, has a declaration. The class declaration is usually conta<strong>in</strong>ed <strong>in</strong> a header<br />
file. In simple cases, both the class declaration and the def<strong>in</strong>ition can be conta<strong>in</strong>ed <strong>in</strong> a s<strong>in</strong>gle<br />
source file, but you typically won’t do that for real applications. Usually you create a class<br />
source file with a filename closely match<strong>in</strong>g the class name and with a .cpp extension. Because<br />
W<strong>in</strong>dows 95 and W<strong>in</strong>dows NT both support long filenames, you can use filenames that<br />
exactly match your class name if you want. The header file for the class usually has the same<br />
name as the source file but with the extension .h. For example, if you had a class called<br />
MyClass, you would have a source file named MYCLASS.CPP and a header named MYCLASS.H.<br />
Class Access Levels<br />
Classes can have three levels of access: private, public, or protected. Each of these<br />
access levels is def<strong>in</strong>ed <strong>in</strong> this section.<br />
Class access levels control how a class is utilized by users of the class. As a sole programmer,<br />
you might be the class’s creator but also a user of the class. In team programm<strong>in</strong>g<br />
environments, one programmer might be the creator of the class and other programmers are<br />
users of the class.<br />
NEW TERM<br />
NOTE<br />
Let me clarify a couple comments I made on Day 2, “Wad<strong>in</strong>g In<br />
Deeper.” I said that a structure is a class <strong>in</strong> which all data members and<br />
functions are public. In fact, <strong>in</strong> <strong>C++</strong> this is the only th<strong>in</strong>g that dist<strong>in</strong>guishes<br />
a structure from a class. A structure can have functions as well<br />
as data members. A structure cannot use the access-modifier keywords<br />
(private, protected, and private) because a structure can only have<br />
public access. I also said that you probably won’t use structures very<br />
much <strong>in</strong> your <strong>C++</strong> programs. Because a class and a structure are nearly<br />
the same, you will probably prefer to use classes over structures.<br />
To understand what role levels of access play <strong>in</strong> class operation, you first need to understand<br />
how classes will be used. In any class there is the public part of the class, which the outside<br />
world has access to, and there is the private part of a class. The private part of a class is the<br />
<strong>in</strong>ternal implementation of the class—the <strong>in</strong>ner work<strong>in</strong>gs, so to speak.<br />
97<br />
4
98 Day 4<br />
Part of a well-designed class <strong>in</strong>cludes hid<strong>in</strong>g anyth<strong>in</strong>g from public view that the user of the<br />
class doesn’t need to know.<br />
Data abstraction is the hid<strong>in</strong>g of <strong>in</strong>ternal implementations with<strong>in</strong> the class from<br />
outside view.<br />
NEW TERM<br />
Data abstraction prevents the user from know<strong>in</strong>g more than he or she needs to know about<br />
the class, but also prevents the user from mess<strong>in</strong>g with th<strong>in</strong>gs that shouldn’t be messed with.<br />
For <strong>in</strong>stance, when you get <strong>in</strong> your car and turn the key to start the car, do you want to know<br />
every detail about how the car operates? Of course not. You only want to know as much as<br />
you need to know to operate the car safely. So <strong>in</strong> this analogy the steer<strong>in</strong>g wheel, pedals, gear<br />
shift lever, speedometer, and so on represent the public <strong>in</strong>terface between the car and the<br />
driver. The driver knows which of those components to manipulate <strong>in</strong> order to make the car<br />
perform the way he wants.<br />
Conversely, the eng<strong>in</strong>e, drive tra<strong>in</strong>, and electrical system of the car are hidden from public<br />
view. The eng<strong>in</strong>e is tucked neatly away where you never have to look at it if you don’t want<br />
to. (That’s what service stations are for!) It’s a detail that you don’t need to know about, so<br />
it is hidden from you—kept private, if you prefer. Imag<strong>in</strong>e how much trouble driv<strong>in</strong>g would<br />
be if you had to keep track of everyth<strong>in</strong>g the car was do<strong>in</strong>g at all times: Is the carburetor gett<strong>in</strong>g<br />
enough gas? Does the differential have enough grease? Is the alternator produc<strong>in</strong>g adequate<br />
voltage for both the ignition and the radio to operate? Are the <strong>in</strong>take valves open<strong>in</strong>g properly?<br />
Arggghhhh!!! Who needs it! In the same way, a class keeps its <strong>in</strong>ternal implementation private<br />
so the user of the class doesn’t have to worry about what’s go<strong>in</strong>g on under the hood. The<br />
<strong>in</strong>ternal work<strong>in</strong>gs of the class are kept private, and the user <strong>in</strong>terface is public.<br />
The protected access level is a little harder to expla<strong>in</strong>. Protected class members, like private<br />
class members, cannot be accessed by users of the class. They can, however, be accessed by<br />
classes that are derived from this class. I will talk about protected access more a little later, <strong>in</strong><br />
the section “Member Functions.”<br />
The <strong>C++</strong> language has three keywords that perta<strong>in</strong> to class access. The keywords are (not<br />
surpris<strong>in</strong>gly) public, private, and protected. You specify a class member’s access level when<br />
you declare the class. A class is declared with the class keyword. A class declaration looks like<br />
a structure declaration with the access modifiers added:<br />
class Vehicle {<br />
public:<br />
bool haveKey;<br />
bool Start();<br />
void SetGear(<strong>in</strong>t gear);<br />
void Accelerate(<strong>in</strong>t acceleration);<br />
void Break(<strong>in</strong>t factor);<br />
void Turn(<strong>in</strong>t direction);
NOTE<br />
Totally Immersed: <strong>C++</strong> Classes and Object-Oriented Programm<strong>in</strong>g<br />
void ShutDown();<br />
protected:<br />
void StartupProcedure();<br />
private:<br />
void StartElectricalSystem();<br />
void StartEng<strong>in</strong>e();<br />
<strong>in</strong>t currentGear;<br />
bool started;<br />
<strong>in</strong>t speed;<br />
};<br />
Notice how you break the class organization down <strong>in</strong>to the three access levels. You may not<br />
use all three levels of access <strong>in</strong> a given class. You are not required to use any of the access levels<br />
if you don’t want, but typically you will have a public and a private section at the least.<br />
Constructors<br />
Class-member access defaults to private. If you do not add any access<br />
keywords, all data and functions <strong>in</strong> the class will be private. A class<br />
where all data members and functions are private is not very useful <strong>in</strong><br />
most cases.<br />
Classes <strong>in</strong> <strong>C++</strong> have a special function called the constructor.<br />
The constructor is a function that is automatically called when an <strong>in</strong>stance of a class<br />
is created.<br />
The constructor is used to <strong>in</strong>itialize any class member variables, allocate memory the class will<br />
need, or do any other startup tasks. The Vehicle example you just saw does not have a<br />
constructor. If you do not provide a constructor, the <strong>C++</strong>Builder compiler will create a default<br />
constructor for you. While this is OK for simple classes, you will almost always provide a<br />
constructor for classes of any significance. The constructor must have the same name as the<br />
name of the class. This is what dist<strong>in</strong>guishes it as a constructor. Given that, let’s add a<br />
constructor declaration to the Vehicle class:<br />
NEW TERM<br />
class Vehicle {<br />
public:<br />
Vehicle(); // constructor<br />
bool haveKey;<br />
bool Start();<br />
void SetGear(<strong>in</strong>t gear);<br />
void Accelerate(<strong>in</strong>t acceleration);<br />
void Break(<strong>in</strong>t factor);<br />
void Turn(<strong>in</strong>t direction);<br />
void ShutDown();<br />
99<br />
4
100 Day 4<br />
protected:<br />
void StartupProcedure();<br />
private:<br />
void StartElectricalSystem();<br />
void StartEng<strong>in</strong>e();<br />
<strong>in</strong>t currentGear;<br />
bool started;<br />
<strong>in</strong>t speed;<br />
};<br />
Notice that the constructor does not have a return type. A constructor cannot return a value,<br />
so no return type is specified. If you try to add a return type to the constructor declaration,<br />
you will get a compiler error.<br />
A class can have more than one constructor. This is possible through function overload<strong>in</strong>g,<br />
which I discussed on Day 3, “Up to Your Neck <strong>in</strong> <strong>C++</strong>.” For <strong>in</strong>stance, a class might have a<br />
constructor that takes no parameters (a default constructor) and a constructor that takes one<br />
or more parameters <strong>in</strong> order to <strong>in</strong>itialize data members to certa<strong>in</strong> values. For example, let’s<br />
say you have a class called Rect that encapsulates a rectangle (rectangles are frequently used<br />
<strong>in</strong> W<strong>in</strong>dows programm<strong>in</strong>g). This class could have several constructors. It could have a default<br />
constructor that sets all the data members to 0, and another constructor that allows you to<br />
set the class’s data members through the constructor. First, let’s take a look at how the class<br />
declaration might look:<br />
class Rect {<br />
public:<br />
Rect();<br />
Rect(<strong>in</strong>t _left, <strong>in</strong>t _top, <strong>in</strong>t _bottom, <strong>in</strong>t _right);<br />
<strong>in</strong>t GetWidth();<br />
<strong>in</strong>t GetHeight();<br />
void SetRect(<strong>in</strong>t _left, <strong>in</strong>t _top, <strong>in</strong>t _bottom, <strong>in</strong>t _right);<br />
private:<br />
<strong>in</strong>t left;<br />
<strong>in</strong>t top;<br />
<strong>in</strong>t bottom;<br />
<strong>in</strong>t right;<br />
};<br />
The def<strong>in</strong>itions for the constructors, then, would look someth<strong>in</strong>g like this:<br />
Rect::Rect()<br />
{<br />
left = 0;<br />
top = 0;<br />
bottom = 0;<br />
right = 0;<br />
}<br />
Rect::Rect(<strong>in</strong>t _left, <strong>in</strong>t _top, <strong>in</strong>t _bottom, <strong>in</strong>t _right)<br />
{<br />
left = _left;<br />
top = _top;<br />
bottom = _bottom;<br />
right = _right;<br />
}
Totally Immersed: <strong>C++</strong> Classes and Object-Oriented Programm<strong>in</strong>g<br />
The first constructor is a default constructor by virtue of the fact that it takes no parameters.<br />
It simply <strong>in</strong>itializes each data member to 0. The second constructor takes the parameters<br />
passed and assigns them to the correspond<strong>in</strong>g class data members. The variable names <strong>in</strong> the<br />
parameter list are local to the constructor, so each of the variable names beg<strong>in</strong>s with an<br />
underscore to differentiate between the local variables and the class data members.<br />
TIP<br />
NEW TERM<br />
Remember that an un<strong>in</strong>itialized variable will conta<strong>in</strong> random data.<br />
This is true for class data members as well as other variables. To be safe,<br />
you should set class member variables to some <strong>in</strong>itial value.<br />
Instantiation is the creation of an object, an <strong>in</strong>stance, or a class.<br />
It’s important to understand that you can’t call a constructor directly. So how do you use one<br />
of these constructors over the other? You do that when you create or <strong>in</strong>stantiate an object or<br />
a class. The follow<strong>in</strong>g code snippet creates two <strong>in</strong>stances of the Rect class. The first uses the<br />
default constructor, and the second uses the second form of the constructor:<br />
Rect rect1; // object created us<strong>in</strong>g default constructor<br />
Rect rect2(0, 0, 100, 100); // created us<strong>in</strong>g 2nd constructor<br />
You can have as many constructors as you like, but be sure that your constructors don’t have<br />
ambiguous parameter lists (as per the rules on function overload<strong>in</strong>g).<br />
Initializer Lists<br />
NEW TERM<br />
<strong>C++</strong> provides a means by which you can <strong>in</strong>itialize class data members <strong>in</strong> what<br />
is called an <strong>in</strong>itializer list.<br />
The follow<strong>in</strong>g is the proper way to <strong>in</strong>itialize data members of a class. Rather than try<strong>in</strong>g to<br />
expla<strong>in</strong> how to use an <strong>in</strong>itializer list, let me show you an example. Let’s take the two<br />
constructors for the Rect class and <strong>in</strong>itialize the data members with an <strong>in</strong>itializer list rather<br />
than <strong>in</strong> the body of the function as I did before. It looks like this:<br />
Rect::Rect() :<br />
left(0),<br />
top(0),<br />
bottom(0),<br />
right(0)<br />
{<br />
}<br />
101<br />
4
102 Day 4<br />
NOTE<br />
Rect::Rect(<strong>in</strong>t _left, <strong>in</strong>t _top, <strong>in</strong>t _right , <strong>in</strong>t _bottom) :<br />
left(_left),<br />
top(_top),<br />
bottom(_bottom),<br />
right(_right)<br />
{<br />
}<br />
Notice two th<strong>in</strong>gs <strong>in</strong> this code snippet. First, notice that the <strong>in</strong>itializer list is preceded by a<br />
colon. (The colon is at the end of the function header, so you may not have noticed it.) Notice<br />
also that each variable <strong>in</strong> the <strong>in</strong>itializer list is followed by a comma except the last variable.<br />
Forgett<strong>in</strong>g either of these two th<strong>in</strong>gs will cause compiler errors.<br />
On Day 3 I talked about references. You can have a class data member<br />
that is a reference, but the reference can only be <strong>in</strong>itialized <strong>in</strong> the<br />
<strong>in</strong>itializer list of the class and nowhere else. Here’s an example:<br />
class MyClass {<br />
public:<br />
MyClass();<br />
// other public stuff<br />
private:<br />
OtherClass& other;<br />
// other private stuff<br />
};<br />
MyClass::MyClass() :<br />
other(*new OtherClass) // must do this here!<br />
{<br />
}<br />
Attempts to <strong>in</strong>itialize the reference anywhere else will result <strong>in</strong> compiler<br />
errors.<br />
In most cases it doesn’t matter whether you <strong>in</strong>itialize your data members <strong>in</strong> the body of the<br />
constructor or the <strong>in</strong>itializer list. I have done it both ways, but I prefer the <strong>in</strong>itializer list.<br />
Destructors<br />
The destructor is a special function that is automatically called just before the object<br />
is destroyed.<br />
The destructor could be considered the opposite of the constructor. It is usually used to free any<br />
memory allocated by the class or do any other cleanup chores. A class is not required to have<br />
a destructor, but if it does, it can have only one. A destructor has no return value and takes no<br />
parameters. The destructor’s name must be the name of the class preceded by a tilde (~).<br />
NEW TERM
Totally Immersed: <strong>C++</strong> Classes and Object-Oriented Programm<strong>in</strong>g<br />
As mentioned, the destructor is called just before the class is destroyed. The class may be<br />
destroyed because it was allocated from the stack and is go<strong>in</strong>g out of scope, or it might be<br />
destroyed as a result of delete be<strong>in</strong>g called for the class (if the class was created dynamically).<br />
In either case, the destructor will be called as the last th<strong>in</strong>g before the class breathes its last<br />
breath.<br />
The follow<strong>in</strong>g shows the updated code for the Rect class:<br />
class Rect {<br />
public:<br />
Rect();<br />
Rect(<strong>in</strong>t _left, <strong>in</strong>t _top, <strong>in</strong>t _bottom, <strong>in</strong>t _right);<br />
~Rect(); // destructor added<br />
<strong>in</strong>t GetWidth();<br />
<strong>in</strong>t GetHeight();<br />
void SetRect(<strong>in</strong>t _left, <strong>in</strong>t _top, <strong>in</strong>t _bottom, <strong>in</strong>t _right);<br />
private:<br />
<strong>in</strong>t left;<br />
<strong>in</strong>t top;<br />
<strong>in</strong>t bottom;<br />
<strong>in</strong>t right;<br />
char* text; // new class member added<br />
};<br />
Rect::Rect() :<br />
left(0),<br />
top(0),<br />
bottom(0),<br />
right(0)<br />
{<br />
text = new char[256];<br />
strcpy(text, “Any Colour You Like”);<br />
}<br />
// code omitted<br />
Rect::~Rect()<br />
{<br />
delete[] text;<br />
}<br />
The modified version of the Rect class allocates storage for a char array named text <strong>in</strong> its<br />
constructor and frees that storage <strong>in</strong> the destructor. (I can’t th<strong>in</strong>k of a good reason for a class<br />
that handles rectangles to have a text data member, but you never know!) Aga<strong>in</strong>, use the<br />
destructor for any cleanup tasks that need to be done before the <strong>in</strong>stance of the class is<br />
destroyed.<br />
Data Members<br />
Data members of a class are simply variables that are declared <strong>in</strong> the class declaration. They<br />
could be considered variables that have class scope. Data members <strong>in</strong> classes are essentially<br />
the same as data members <strong>in</strong> structures except that you can control their access by declar<strong>in</strong>g<br />
them as private, public, or protected. Regardless of a data member’s access, it is available for<br />
103<br />
4
104 Day 4<br />
NOTE<br />
use <strong>in</strong> all functions of the class. Depend<strong>in</strong>g on the data member’s access level, it might be<br />
visible outside the class as well. Private and protected data members, for <strong>in</strong>stance, are private<br />
to the class and cannot be seen outside the class. Public data members, however, can be<br />
accessed from outside the class, but only through an object. Take the Rect class declared<br />
previously, for example. It has no public data members. You could try the follow<strong>in</strong>g, but<br />
you’d get a compiler error:<br />
Rect rect(10, 10, 200, 200);<br />
<strong>in</strong>t x = rect.left; // compiler error!<br />
The compiler error will say Rect::left is not accessible. The compiler is tell<strong>in</strong>g you that<br />
left is a private data member and you can’t get to it. If left were <strong>in</strong> the public section of the<br />
class declaration, this code would compile.<br />
You can use getters and setters to change private data members. That is, getters are functions<br />
that get the value of a private data member, and setters are functions that set the value of a<br />
private data member. Both getters and setters are public member functions that act on private<br />
data members.<br />
To illustrate, let’s say that for the Rect class you had the follow<strong>in</strong>g getters and setters for the<br />
left data member:<br />
<strong>in</strong>t Rect::GetLeft()<br />
{<br />
return left;<br />
}<br />
void Rect::SetLeft(<strong>in</strong>t newLeft)<br />
{<br />
left = newLeft;<br />
}<br />
Now, when you want to obta<strong>in</strong> the value of the left member of the Rect class, use this:<br />
TRect rect;<br />
<strong>in</strong>t x = rect.GetLeft();<br />
In some cases this is overkill. Setters have one ma<strong>in</strong> advantage, though—they allow you to<br />
validate <strong>in</strong>put. By validat<strong>in</strong>g <strong>in</strong>put, you can control the values your data members conta<strong>in</strong>.<br />
Some OOP extremists say that data members should never be public.<br />
They would say that you should use getters and setters to access all data<br />
members. On the other end of the spectrum is the group that says to<br />
make all your data members public. The truth lies somewhere <strong>in</strong><br />
between. Some data members are noncritical and may be left public if<br />
it is more convenient. Other data members are critical to the way the<br />
class operates and should not be made public. If you are go<strong>in</strong>g to err, it<br />
is better to err on the side of mak<strong>in</strong>g data members private.
Totally Immersed: <strong>C++</strong> Classes and Object-Oriented Programm<strong>in</strong>g<br />
Each <strong>in</strong>stance of your class gets its own copy of the class’s data members <strong>in</strong> memory. The<br />
exception to this is that if any class data members are declared with the static storage<br />
modifier, all <strong>in</strong>stances of the class will share the same copy of that data member <strong>in</strong> memory.<br />
In that case only one copy of that data member will exist <strong>in</strong> memory. If any one <strong>in</strong>stance of the<br />
class changes a static data member, it changes <strong>in</strong> all the classes. Use of static data members<br />
<strong>in</strong> classes is not common, so don’t worry about it if this doesn’t make sense right now.<br />
HOUSE RULES: CLASS DATA MEMBERS<br />
■ Use as many data members as you need for vital class operations, but use local<br />
variables where possible.<br />
■ Don’t make all data members public.<br />
■ Use getters and setters for data members that you want to rema<strong>in</strong> private but that<br />
you need to be able to access.<br />
■ Validate data <strong>in</strong> your setters to ensure that improper values are not be<strong>in</strong>g <strong>in</strong>put.<br />
■ Initialize all data members either <strong>in</strong> the <strong>in</strong>itializer list or <strong>in</strong> the body of your<br />
constructor.<br />
■ Don’t forget to delete any data members that dynamically allocate memory.<br />
Member Functions<br />
Class member functions are functions that belong to your class. They are local to the class and<br />
do not exist outside the class. Class member functions can be called only from with<strong>in</strong> the class<br />
itself or through an <strong>in</strong>stance of the class. They have access to all public, protected, and private<br />
data members of the class. Member functions can be declared <strong>in</strong> the private, protected, or<br />
public sections of your class. Good class design requires that you th<strong>in</strong>k about which of these<br />
sections your member functions should go <strong>in</strong>to.<br />
Public member functions represent the user <strong>in</strong>terface to the class. It is through the public<br />
member functions that users of the class access the class <strong>in</strong> order to ga<strong>in</strong> whatever<br />
functionality the class provides. For example, let’s say you have a class that plays and records<br />
wave audio. Public member functions might <strong>in</strong>clude functions like Open(), Play(), Record(),<br />
Save(), Rew<strong>in</strong>d(), and so on.<br />
Private member functions are functions that the class uses <strong>in</strong>ternally to do its th<strong>in</strong>g. These<br />
functions are not <strong>in</strong>tended to be called by users of the class; they are private <strong>in</strong> order to be<br />
hidden from the outside world. Frequently a class has startup chores to perform when the class<br />
is created. (For example, you have already seen that the constructor is called when a class is<br />
created.) In some classes the startup process<strong>in</strong>g might be significant, requir<strong>in</strong>g many l<strong>in</strong>es of<br />
105<br />
4
106 Day 4<br />
SYNTAX<br />
▼<br />
▲<br />
code. To remove clutter from the constructor, a class might have an Init() function that is<br />
called from the constructor to perform those startup tasks. This function would never be<br />
called directly by a user of the class. In fact, more than likely bad th<strong>in</strong>gs would happen if this<br />
function were to be called by a user at the wrong time, so the function is private <strong>in</strong> order to<br />
protect both the <strong>in</strong>tegrity of the class and the user.<br />
Protected member functions are functions that cannot be accessed by the outside world but can<br />
be accessed by classes that are derived from this class. I haven’t talked yet about classes be<strong>in</strong>g<br />
derived from other classes, so I’ll save this discussion for a little later when it will make more<br />
sense. I discuss deriv<strong>in</strong>g classes <strong>in</strong> the section “Inheritance.”<br />
The <strong>in</strong>l<strong>in</strong>e function, Form 1:<br />
ClassName {<br />
public:<br />
ReturnType FunctionName();<br />
};<br />
<strong>in</strong>l<strong>in</strong>e ReturnType ClassName::FunctionName() {<br />
statements<br />
}<br />
The function FunctionName is declared with<strong>in</strong> the body of the class ClassName. The function<br />
def<strong>in</strong>ition (the function itself) is def<strong>in</strong>ed outside the class declaration us<strong>in</strong>g the <strong>in</strong>l<strong>in</strong>e<br />
keyword. FunctionName must be proceeded by ClassName and the scope resolution operator.<br />
The <strong>in</strong>l<strong>in</strong>e function, Form 2:<br />
ClassName {<br />
public:<br />
ReturnType FunctionName()<br />
{<br />
statements<br />
}<br />
};<br />
The function FunctionName is declared and def<strong>in</strong>ed entirely with<strong>in</strong> the ClassName declaration.<br />
The function is an <strong>in</strong>l<strong>in</strong>e function by virtue of the fact that it is conta<strong>in</strong>ed with<strong>in</strong> the<br />
ClassName declaration. The <strong>in</strong>l<strong>in</strong>e keyword is not required.<br />
As with data members, member functions can be declared with the static modifier. A static<br />
member function operates more like a regular function than a member function. Specifically,<br />
a static member function cannot access data members of the class. (I’ll tell you why this<br />
restriction exists <strong>in</strong> just a bit.) Most of the time you will not use static member functions, but<br />
sometimes you will be required to. For <strong>in</strong>stance, some W<strong>in</strong>dows API functions use callbacks<br />
to perform repeated tasks. If you used this k<strong>in</strong>d of function <strong>in</strong> your class, the callback function<br />
would have to be declared as static.
Totally Immersed: <strong>C++</strong> Classes and Object-Oriented Programm<strong>in</strong>g<br />
HOUSE RULES: CLASS MEMBER FUNCTIONS<br />
■ Make public only those functions that users will need <strong>in</strong> order to properly utilize<br />
the class.<br />
■ Make private any functions that users do not need to know about.<br />
■ Make protected any functions that derived classes may need access to but that<br />
users do not need to know about.<br />
■ Use static member functions only under special circumstances.<br />
■ Declare any class member functions that have to be executed quickly as <strong>in</strong>l<strong>in</strong>e<br />
functions. Remember to keep <strong>in</strong>l<strong>in</strong>e functions short.<br />
■ Place any code duplicated more than twice <strong>in</strong> a function.<br />
What’s this?<br />
All classes have a hidden data member called this. this is a po<strong>in</strong>ter to the <strong>in</strong>stance of<br />
NEW TERM<br />
the class <strong>in</strong> memory. (A discussion on the this po<strong>in</strong>ter quickly starts to look like a<br />
“Who’s on First?” comedy sketch, but I’ll try anyway.)<br />
Obviously this (pun <strong>in</strong>tended) will require some explanation. First, let’s take a look at how<br />
the Rect class would look if this were not a hidden data member:<br />
class Rect {<br />
public:<br />
Rect();<br />
Rect(<strong>in</strong>t _left, <strong>in</strong>t _top, <strong>in</strong>t _bottom, <strong>in</strong>t _right);<br />
~Rect();<br />
<strong>in</strong>t GetWidth();<br />
<strong>in</strong>t GetHeight();<br />
void SetRect(<strong>in</strong>t _left, <strong>in</strong>t _top, <strong>in</strong>t _bottom, <strong>in</strong>t _right);<br />
private:<br />
Rect* this; // if ‘this’ were not <strong>in</strong>visible<br />
<strong>in</strong>t left;<br />
<strong>in</strong>t top;<br />
<strong>in</strong>t bottom;<br />
<strong>in</strong>t right;<br />
char* text;<br />
};<br />
This is effectively what the Rect class looks like to the compiler. When a class object is created,<br />
the this po<strong>in</strong>ter automatically gets <strong>in</strong>itialized to the address of the class <strong>in</strong> memory:<br />
TRect* rect = new TRect(20, 20, 100, 100);<br />
// now ‘rect’ and ‘rect->this’ have the same value<br />
// because both po<strong>in</strong>t to the object <strong>in</strong> memory<br />
107<br />
4
108 Day 4<br />
“But,” you ask, “what does this mean?” Remember that each class <strong>in</strong>stance gets its own copy<br />
of the class’s data members. But all class <strong>in</strong>stances share the same set of functions for the class<br />
(there’s no po<strong>in</strong>t <strong>in</strong> duplicat<strong>in</strong>g that code for each <strong>in</strong>stance of the class). How does the<br />
compiler figure out which <strong>in</strong>stance goes with which function call? Each class member<br />
function has a hidden this parameter that goes with it. To illustrate, let’s say you have a<br />
function for the Rect class called GetWidth(). It would look like this (no pun <strong>in</strong>tended):<br />
<strong>in</strong>t Rect::GetWidth()<br />
{<br />
return right - left;<br />
}<br />
That’s how the function looks to you and me. To the compiler, though, it looks someth<strong>in</strong>g<br />
like this:<br />
<strong>in</strong>t Rect::GetWidth(Rect* this)<br />
{<br />
return this->right - this->left;<br />
}<br />
That’s not exactly accurate from a technical perspective, but it’s close enough for this<br />
discussion. From this code you can see that this is work<strong>in</strong>g beh<strong>in</strong>d the scenes to keep<br />
everyth<strong>in</strong>g straight for you. You don’t have to worry about how that happens, but only that<br />
it does happen.<br />
WARNING<br />
Never modify the this po<strong>in</strong>ter. You can use it to pass a po<strong>in</strong>ter to your<br />
class to other functions, or as a parameter <strong>in</strong> construct<strong>in</strong>g other classes,<br />
but don’t change its value. Learn to treat this as a read-only variable.<br />
Although this works beh<strong>in</strong>d the scenes, it is still a variable that you can access from with<strong>in</strong><br />
the class. As an illustration, let’s take a quick peek <strong>in</strong>to VCL. Most of the time you will create<br />
components <strong>in</strong> VCL by dropp<strong>in</strong>g them on the form at design time. When you do that,<br />
<strong>C++</strong>Builder creates a po<strong>in</strong>ter to the component and does all sorts of housekeep<strong>in</strong>g chores on<br />
your behalf, sav<strong>in</strong>g you from concern<strong>in</strong>g yourself with the technical end of th<strong>in</strong>gs.<br />
Sometimes, however, you will create a component at runtime. VCL has this funny <strong>in</strong>sistence<br />
(as all good frameworks do) on want<strong>in</strong>g to keep track of which child objects belong to which<br />
parent. For <strong>in</strong>stance, let’s say you wanted to create a button on a form when another button<br />
is clicked. You need to tell VCL who the parent of the new button is. The code would look<br />
like this:<br />
void __fastcall TMyForm::Button1Click(TObject *Sender)<br />
{<br />
TButton* button = new TButton(this);<br />
button->Parent = this;
NOTE<br />
Totally Immersed: <strong>C++</strong> Classes and Object-Oriented Programm<strong>in</strong>g<br />
button->Caption = “New Button”;<br />
button->Left = 100;<br />
button->Top = 100;<br />
button->Show();<br />
// more code<br />
}<br />
In this code you can see that this is used <strong>in</strong> the constructor (this sets the Owner property of<br />
the button, but I’ll get <strong>in</strong>to that later when I cover VCL components on Day 8, “VCL<br />
Components”) and also that it is assigned to the Parent property of the newly created button.<br />
This will be how you use the this po<strong>in</strong>ter the vast majority of the time <strong>in</strong> your <strong>C++</strong>Builder<br />
applications.<br />
Earlier I said that static member functions can’t access class data<br />
members. This is true because static member functions do not have a<br />
hidden this parameter as regular class member functions do. Without<br />
this, a function cannot access class members.<br />
Don’t get too hung up on this…er, this (whatever!). When you beg<strong>in</strong> to use VCL, it will<br />
quickly become clear when you are required to use this <strong>in</strong> your <strong>C++</strong>Builder applications.<br />
An Example<br />
Right now it would be nice if you had an example that uses classes. The follow<strong>in</strong>g list<strong>in</strong>gs<br />
conta<strong>in</strong> a program that implements classes. This program allows you to play air traffic<br />
controller by issu<strong>in</strong>g commands to three aircrafts. List<strong>in</strong>g 4.1 is the header for the Airplane<br />
class, List<strong>in</strong>g 4.2 is the source code for the Airplane class, and List<strong>in</strong>g 4.3 is the ma<strong>in</strong> program.<br />
List<strong>in</strong>g 4.1. AIRPLANE.H.<br />
1: //------------------------------------------------------<br />
2: #ifndef airplaneH<br />
3: #def<strong>in</strong>e airplaneH<br />
4: #def<strong>in</strong>e AIRLINER 0<br />
5: #def<strong>in</strong>e COMMUTER 1<br />
6: #def<strong>in</strong>e PRIVATE 2<br />
7: #def<strong>in</strong>e TAKINGOFF 0<br />
8: #def<strong>in</strong>e CRUISING 1<br />
9: #def<strong>in</strong>e LANDING 2<br />
10: #def<strong>in</strong>e ONRAMP 3<br />
11: #def<strong>in</strong>e MSG_CHANGE 0<br />
109<br />
cont<strong>in</strong>ues<br />
4
110 Day 4<br />
List<strong>in</strong>g 4.1. cont<strong>in</strong>ued<br />
12: #def<strong>in</strong>e MSG_TAKEOFF 1<br />
13: #def<strong>in</strong>e MSG_LAND 2<br />
<strong>14</strong>: #def<strong>in</strong>e MSG_REPORT 3<br />
15: class Airplane {<br />
16: public:<br />
17: Airplane(const char* _name, <strong>in</strong>t _type = AIRLINER);<br />
18: ~Airplane();<br />
19: virtual <strong>in</strong>t GetStatus(char* statusStr<strong>in</strong>g);<br />
20: <strong>in</strong>t GetStatus()<br />
21: {<br />
22: return status;<br />
23: }<br />
24: <strong>in</strong>t Speed()<br />
25: {<br />
26: return speed;<br />
27: }<br />
28: <strong>in</strong>t Head<strong>in</strong>g()<br />
29: {<br />
30: return head<strong>in</strong>g;<br />
31: }<br />
32: <strong>in</strong>t Altitude()<br />
33: {<br />
34: return altitude;<br />
35: }<br />
36: void ReportStatus();<br />
37: bool SendMessage(<strong>in</strong>t msg, char* response,<br />
38: <strong>in</strong>t spd = -1, <strong>in</strong>t dir = -1, <strong>in</strong>t alt = -1);<br />
39: char* name;<br />
40: protected:<br />
41: virtual void TakeOff(<strong>in</strong>t dir);<br />
42: virtual void Land();<br />
43: private:<br />
44: <strong>in</strong>t speed;<br />
45: <strong>in</strong>t altitude;<br />
46: <strong>in</strong>t head<strong>in</strong>g;<br />
47: <strong>in</strong>t status;<br />
48: <strong>in</strong>t type;<br />
49: <strong>in</strong>t ceil<strong>in</strong>g;<br />
50: };<br />
51: #endif<br />
List<strong>in</strong>g 4.2. AIRPLANE.CPP.<br />
1: #<strong>in</strong>clude <br />
2: #<strong>in</strong>clude <br />
3: #<strong>in</strong>clude “airplane.h”<br />
4: //<br />
5: // Constructor performs <strong>in</strong>itialization<br />
6: //
Totally Immersed: <strong>C++</strong> Classes and Object-Oriented Programm<strong>in</strong>g<br />
7: Airplane::Airplane(const char* _name, <strong>in</strong>t _type) :<br />
8: type(_type),<br />
9: status(ONRAMP),<br />
10: speed(0),<br />
11: altitude(0),<br />
12: head<strong>in</strong>g(0)<br />
13: {<br />
<strong>14</strong>: switch (type) {<br />
15: case AIRLINER : ceil<strong>in</strong>g = 35000; break;<br />
16: case COMMUTER : ceil<strong>in</strong>g = 20000; break;<br />
17: case PRIVATE : ceil<strong>in</strong>g = 8000;<br />
18: }<br />
19: name = new char[50];<br />
20: strcpy(name, _name);<br />
21: }<br />
22: //<br />
23: // Destructor performs cleanup.<br />
24: //<br />
25: Airplane::~Airplane()<br />
26: {<br />
27: delete[] name;<br />
28: }<br />
29: //<br />
30: // Gets a message from the user.<br />
31: //<br />
32: bool<br />
33: Airplane::SendMessage(<strong>in</strong>t msg, char* response,<br />
34: <strong>in</strong>t spd, <strong>in</strong>t dir, <strong>in</strong>t alt)<br />
35: {<br />
36: //<br />
37: // Check for bad commands.<br />
38: //<br />
39: if (spd > 500) {<br />
40: strcpy(response, “Speed cannot be more than 500.”);<br />
41: return false;<br />
42: }<br />
43: if (dir > 360) {<br />
44: strcpy(response, “Head<strong>in</strong>g cannot be over 360 degrees.”);<br />
45: return false;<br />
46: }<br />
47: if (alt < 100 && alt != -1) {<br />
48: strcpy(response, “I’d crash, bonehead!”);<br />
49: return false;<br />
50: }<br />
51: if (alt > ceil<strong>in</strong>g) {<br />
52: strcpy(response, “I can’t go that high.”);<br />
53: return false;<br />
54: }<br />
55: //<br />
56: // Do someth<strong>in</strong>g base on which command was sent.<br />
57: //<br />
58: switch (msg) {<br />
111<br />
cont<strong>in</strong>ues<br />
4
112 Day 4<br />
List<strong>in</strong>g 4.2. cont<strong>in</strong>ued<br />
59: case MSG_TAKEOFF : {<br />
60: // Can’t take off if already <strong>in</strong> the air!<br />
61: if (status != ONRAMP) {<br />
62: strcpy(response, “I’m already <strong>in</strong> the air!”);<br />
63: return false;<br />
64: }<br />
65: TakeOff(dir);<br />
66: break;<br />
67: }<br />
68: case MSG_CHANGE : {<br />
69: // Can’t change anyth<strong>in</strong>g if on the ground.<br />
70: if (status == ONRAMP) {<br />
71: strcpy(response, “I’m on the ground”);<br />
72: return false;<br />
73: }<br />
74: // Only change if a non-negative value was passed.<br />
75: if (spd != -1) speed = spd;<br />
76: if (dir != -1) head<strong>in</strong>g = dir;<br />
77: if (alt != -1) altitude = alt;<br />
78: status == CRUISING;<br />
79: break;<br />
80: }<br />
81: case MSG_LAND : {<br />
82: if (status == ONRAMP) {<br />
83: strcpy(response, “I’m already on the ground.”);<br />
84: return false;<br />
85: }<br />
86: Land();<br />
87: break;<br />
88: }<br />
89: case MSG_REPORT : ReportStatus();<br />
90: }<br />
91: //<br />
92: // Standard reponse if all went well.<br />
93: //<br />
94: strcpy(response, “Roger.”);<br />
95: return true;<br />
96: }<br />
97: //<br />
98: // Perform takeoff.<br />
99: //<br />
100: void<br />
101: Airplane::TakeOff(<strong>in</strong>t dir)<br />
102: {<br />
103: head<strong>in</strong>g = dir;<br />
104: status = TAKINGOFF;<br />
105: }<br />
106: //<br />
107: // Perform land<strong>in</strong>g.<br />
108: //<br />
109: void<br />
110: Airplane::Land()<br />
111: {
Totally Immersed: <strong>C++</strong> Classes and Object-Oriented Programm<strong>in</strong>g<br />
112: speed = head<strong>in</strong>g = altitude = 0;<br />
113: status == ONRAMP;<br />
1<strong>14</strong>: }<br />
115: //<br />
116: // Build a str<strong>in</strong>g to report the airplane’s status.<br />
117: //<br />
118: <strong>in</strong>t<br />
119: Airplane::GetStatus(char* statusStr<strong>in</strong>g)<br />
120: {<br />
121: spr<strong>in</strong>tf(statusStr<strong>in</strong>g, “%s, Altitude: %d, Head<strong>in</strong>g: %d, “<br />
122: “Speed: %d\n”, name, altitude, head<strong>in</strong>g, speed);<br />
123: return status;<br />
124: }<br />
125: //<br />
126: // Get the status str<strong>in</strong>g and output it to the screen.<br />
127: //<br />
128: void<br />
129: Airplane::ReportStatus()<br />
130: {<br />
131: char buff[100];<br />
132: GetStatus(buff);<br />
133: cout
1<strong>14</strong> Day 4<br />
List<strong>in</strong>g 4.3. cont<strong>in</strong>ued<br />
25: do {<br />
26: <strong>in</strong>t plane, message, speed, altitude, direction;<br />
27: speed = altitude = direction = -1;<br />
28: //<br />
29: // Get a plane to whom a message will be sent.<br />
30: // List all of the planes and let the user pick one.<br />
31: //<br />
32: cout
Totally Immersed: <strong>C++</strong> Classes and Object-Oriented Programm<strong>in</strong>g<br />
75: //<br />
76: // Someth<strong>in</strong>g was wrong with the message<br />
77: //<br />
78: if (!goodMsg) cout
116 Day 4<br />
NOTE<br />
Another way of declar<strong>in</strong>g constants is to declare a variable us<strong>in</strong>g the<br />
const modifier. Here’s an example:<br />
const <strong>in</strong>t airl<strong>in</strong>er = 0;<br />
Us<strong>in</strong>g a const variable is probably the more modern method of<br />
def<strong>in</strong><strong>in</strong>g constants.<br />
The next th<strong>in</strong>g to note <strong>in</strong> the header is that the class <strong>in</strong>cludes some <strong>in</strong>l<strong>in</strong>e functions. These<br />
functions are so small that it makes sense to <strong>in</strong>l<strong>in</strong>e them. You might also notice that the<br />
Airplane class has one overloaded function called GetStatus(). When called with a character<br />
array parameter, it will return a status str<strong>in</strong>g as well as the status data member. When called<br />
without a parameter, it just returns status. Note that there is only one public data member.<br />
The rest of the data members are kept private. The only way to access the private data<br />
members is via the public functions. For <strong>in</strong>stance, you can change the speed, altitude, and<br />
head<strong>in</strong>g of an airplane only by send<strong>in</strong>g it a message. To use an analogy, consider that an air<br />
traffic controller cannot physically change an aircraft’s head<strong>in</strong>g. The best he can do is send<br />
a message to the pilot and tell him to change to a new head<strong>in</strong>g.<br />
Now turn your attention to List<strong>in</strong>g 4.2. This is the def<strong>in</strong>ition of the Airplane class. The<br />
constructor performs <strong>in</strong>itialization, <strong>in</strong>clud<strong>in</strong>g dynamically allocat<strong>in</strong>g storage for the char<br />
array that holds the name of the airplane. That memory is freed <strong>in</strong> the destructor. The<br />
SendMessage() function does most of the work. A switch statement determ<strong>in</strong>es which<br />
message was sent and takes the appropriate action. Notice that the TakeOff() and Land()<br />
functions cannot be called directly (they are protected), but rather are called through the<br />
SendMessage() function. Aga<strong>in</strong>, you can’t make an aircraft take off or land; you can only send<br />
it a message tell<strong>in</strong>g it what you want it to do. The ReportStatus() function calls GetStatus()<br />
to get a status str<strong>in</strong>g, which it outputs.<br />
The ma<strong>in</strong> program is shown <strong>in</strong> List<strong>in</strong>g 4.3. The program first sets up an array of Airplane<br />
po<strong>in</strong>ters and creates three <strong>in</strong>stances of the Airplane class. Then a loop starts. You can send<br />
messages to any of the airplanes by call<strong>in</strong>g the object’s SendMessage() function. When you<br />
send a message, you get a response back from the airplane. The do-while loop cheats a little<br />
<strong>in</strong> this program. Notice that the test condition is simply 1. This means that the loop will keep<br />
runn<strong>in</strong>g <strong>in</strong>def<strong>in</strong>itely. In this case it’s not a problem because I am us<strong>in</strong>g the break statement<br />
to break out of the loop rather than rely<strong>in</strong>g on the test condition. Run the program and play<br />
with it to get a feel for how it works.<br />
Inheritance<br />
One of the most powerful features of classes <strong>in</strong> <strong>C++</strong> is that they can be extended through<br />
<strong>in</strong>heritance.
Totally Immersed: <strong>C++</strong> Classes and Object-Oriented Programm<strong>in</strong>g<br />
NEW TERM<br />
NEW TERM<br />
NOTE<br />
Inheritance means tak<strong>in</strong>g an exist<strong>in</strong>g class and add<strong>in</strong>g functionality by deriv<strong>in</strong>g a new<br />
class from it.<br />
The class you start with is called the base class, and the new class you create is called<br />
the derived class.<br />
Let’s take the Airplane class as an example. The civilian and military worlds are quite<br />
different, as you know. In order to represent a military aircraft, I can derive a class from<br />
Airplane and add functionality to it:<br />
class MilitaryPlane : public Airplane {<br />
public:<br />
MilitaryPlane(char* name, <strong>in</strong>t _type);<br />
virtual <strong>in</strong>t GetStatus(char* statusStr<strong>in</strong>g);<br />
protected:<br />
virtual void TakeOff();<br />
virtual void Land()<br />
virtual void Attack();<br />
virtual void SetMission();<br />
private:<br />
Mission theMission;<br />
};<br />
A MilitaryPlane has everyth<strong>in</strong>g an Airplane has, plus a few more goodies. Note the first l<strong>in</strong>e<br />
of the class def<strong>in</strong>ition. The colon after the class name is used to tell the compiler that I am<br />
<strong>in</strong>herit<strong>in</strong>g from another class. The class name follow<strong>in</strong>g the colon is the base class from which<br />
I am deriv<strong>in</strong>g. The public keyword, when used here, means that I am claim<strong>in</strong>g access to all<br />
the public functions and data members of the base class.<br />
When you derive a class from another class, the new class gets all the<br />
functionality of the base class plus whatever new features you add. You<br />
can add data members and functions to the new class, but you cannot<br />
remove anyth<strong>in</strong>g from what the base class offers.<br />
You’ll notice that <strong>in</strong> the private section there is a l<strong>in</strong>e that declares a variable of the Mission<br />
class. The Mission class could encapsulate everyth<strong>in</strong>g that deals with the mission of a military<br />
aircraft: the target, navigation waypo<strong>in</strong>ts, <strong>in</strong>gress and egress altitudes and head<strong>in</strong>gs, and so<br />
on. This illustrates the use of a data member that is an <strong>in</strong>stance of another class. In fact, you’ll<br />
see that a lot when programm<strong>in</strong>g <strong>in</strong> <strong>C++</strong>Builder.<br />
There’s someth<strong>in</strong>g else here that I haven’t discussed yet. Note the virtual keyword. This<br />
specifies that the function is a virtual function.<br />
117<br />
4
118 Day 4<br />
NEW TERM<br />
A virtual function is a function that will be automatically called if a function by that<br />
name exists <strong>in</strong> the derived class.<br />
For example, note that the TakeOff() function is a virtual function <strong>in</strong> the Airplane class. Refer<br />
to List<strong>in</strong>g 4.2. Notice that TakeOff() is called by SendMessage() <strong>in</strong> response to the<br />
MSG_TAKEOFF message. If the MilitaryPlane class did not provide its own TakeOff() function,<br />
the base class’s TakeOff() function would be called. Because the MilitaryPlane class does<br />
provide a TakeOff() function, that function, rather than the function <strong>in</strong> the base class, will<br />
be called.<br />
NEW TERM<br />
Replac<strong>in</strong>g a base class function <strong>in</strong> a derived class is called overrid<strong>in</strong>g the function.<br />
In order for overrid<strong>in</strong>g to work, the function signature must exactly match that of the<br />
function <strong>in</strong> the base class. In other words, the return type, function name, and parameter list<br />
must all be the same as the base class function.<br />
You can override a function with the <strong>in</strong>tention of replac<strong>in</strong>g the base class function, or you<br />
can override a function to enhance the base class function. Take the TakeOff() function, for<br />
example. If you wanted to completely replace what the TakeOff() function of Airplane does,<br />
you would override it and supply whatever code you wanted:<br />
void MilitaryPlane::TakeOff(<strong>in</strong>t dir)<br />
{<br />
// new code goes here<br />
}<br />
But if you wanted your function to take the functionality of the base class and add to it, you<br />
would first call the base class function and then add new code:<br />
void MilitaryPlane::TakeOff(<strong>in</strong>t dir)<br />
{<br />
Airplane::TakeOff(dir);<br />
// new code goes here<br />
}<br />
By call<strong>in</strong>g the base class function, you get the orig<strong>in</strong>al functionality of the function. You could<br />
then add code before or after the base class call to enhance the function. The scope-resolution<br />
operator is used to tell the compiler that you are call<strong>in</strong>g the TakeOff() function of the<br />
Airplane class. Note that the TakeOff() function is <strong>in</strong> the protected section of the Airplane<br />
class. If it were <strong>in</strong> the private section, this would not work because even a derived class cannot<br />
access the private members of its ancestor class. By mak<strong>in</strong>g the TakeOff() function protected,<br />
it is hidden from the outside world but still accessible to derived classes.
NOTE<br />
Totally Immersed: <strong>C++</strong> Classes and Object-Oriented Programm<strong>in</strong>g<br />
The scope-resolution operator is required only when you have derived<br />
and base class functions with the same name and the same function<br />
signature. You can call a public or protected function of the base class<br />
at any time without the need for the scope-resolution operator,<br />
provided they aren’t overridden. For example, if you wanted to check<br />
the status of the aircraft prior to takeoff, you could do someth<strong>in</strong>g like<br />
this:<br />
void MilitaryPlane::TakeOff(<strong>in</strong>t dir)<br />
{<br />
if (GetStatus() != ONRAMP) Land(); // gotta land first!<br />
Airplane::TakeOff(dir);<br />
// new code goes here<br />
}<br />
In this case, the GetStatus() function exists only <strong>in</strong> the base class, so<br />
there is no need for the scope-resolution operator. In the case of the<br />
Land() function, the MilitaryPlane version will be called because it has<br />
the most immediate scope.<br />
When you derive a class from another class, you must be sure to call the base class’s<br />
constructor so that all ancestor classes are properly <strong>in</strong>itialized. Call<strong>in</strong>g the base class<br />
constructor is done <strong>in</strong> the <strong>in</strong>itializer list. Here’s how the constructor for MilitaryPlane might<br />
look:<br />
MilitaryPlane:: MilitaryPlane(char* _name)<br />
: Airplane(_name, MILITARY) // call base class<br />
{<br />
// body of constructor<br />
}<br />
Be sure to call the base class constructor whenever you derive a class from a base class. Figure<br />
4.1 illustrates the concept of <strong>in</strong>heritance.<br />
Figure 4.1.<br />
An example of<br />
<strong>in</strong>heritance.<br />
MilitaryFighter MilitaryCargo Airl<strong>in</strong>er Commuter S<strong>in</strong>gleEng<strong>in</strong>e Tw<strong>in</strong>Eng<strong>in</strong>e<br />
F16<br />
C130<br />
Airplane<br />
Commerical<br />
MilitaryPlane Airplane<br />
CivilianPlane<br />
PrivatePlane CargoPlane<br />
119<br />
4
120 Day 4<br />
You can see from Figure 4.1 that the class called F16 is descended from the class called<br />
MilitaryFighter. Ultimately, F16 is derived from Airplane s<strong>in</strong>ce Airplane is the base class for<br />
all classes.<br />
Multiple Inheritance<br />
NEW TERM<br />
NOTE<br />
The act of deriv<strong>in</strong>g a class from two or more base classes is called multiple <strong>in</strong>heritance.<br />
Multiple <strong>in</strong>heritance is not used frequently, but it can be very handy when needed. For<br />
example, let’s say you had a class called Armaments that kept track of the armaments for a<br />
particular aircraft. It might look like this:<br />
class Armaments {<br />
public:<br />
Armaments();<br />
LoadArms();<br />
private:<br />
bool isArmed;<br />
<strong>in</strong>t numSidew<strong>in</strong>ders;<br />
<strong>in</strong>t numSparrows;<br />
// etc.<br />
};<br />
Now let’s say that you were to create a class to represent a military fighter. You could <strong>in</strong>herit<br />
from both MilitaryPlane and Armaments:<br />
class Fighter : public MilitaryPlane, public Armaments {<br />
public:<br />
Fighter(char* name);<br />
private:<br />
// other stuff<br />
};<br />
Now you have a class that conta<strong>in</strong>s all the public elements of MilitaryPlane and all the public<br />
elements of Armaments. This would allow you to do the follow<strong>in</strong>g:<br />
Fighter fighter(“F16”);<br />
fighter.LoadArms();<br />
fighter.SendMessage(...);<br />
// etc.<br />
The two base classes are blended to form a s<strong>in</strong>gle class.<br />
You should call the base class constructor for all base classes. The<br />
follow<strong>in</strong>g illustrates:<br />
F16::F16(char* _name)<br />
: MilitaryPlane(_name, F16), Armaments()<br />
{
Totally Immersed: <strong>C++</strong> Classes and Object-Oriented Programm<strong>in</strong>g<br />
}<br />
// body of constructor<br />
If a class has a default constructor, it is not strictly necessary to call the<br />
base class constructor for that class. In most situations, though, you will<br />
call the base class constructor for all ancestor classes.<br />
Let me give you one other example. In the United States, the Military Air Command (MAC)<br />
is responsible for mov<strong>in</strong>g military personnel from place to place. MAC is sort of like the U.S.<br />
military’s own personal airl<strong>in</strong>e. S<strong>in</strong>ce personnel are ultimately cargo, this requires a military<br />
cargo plane. But s<strong>in</strong>ce people are special cargo, you can’t just throw them <strong>in</strong> the back of a cargo<br />
plane designed to haul freight (not usually, anyway). So what is needed is a military cargo plane<br />
that also has all the amenities of a commercial airl<strong>in</strong>er. Look back to Figure 4.1. It appears<br />
that to get what we want, we can derive from both MilitaryCargo and Airl<strong>in</strong>er—and we can.<br />
Figure 4.2 illustrates.<br />
Figure 4.2.<br />
An example of<br />
multiple <strong>in</strong>heritance.<br />
MilitaryPlane<br />
MilitaryCargo<br />
Airplane<br />
MACPlane<br />
While you may not use multiple <strong>in</strong>heritance very often, it is a very handy feature to have<br />
available when you need it.<br />
04TYE02.<br />
Commercial<br />
Airplane<br />
Airl<strong>in</strong>er<br />
121<br />
4
122 Day 4<br />
NOTE<br />
Basic File I/O<br />
Classes <strong>in</strong> VCL do not support multiple <strong>in</strong>heritance. You can still use<br />
multiple <strong>in</strong>heritance <strong>in</strong> any classes you write for use <strong>in</strong> your <strong>C++</strong>Builder<br />
applications.<br />
It won’t be long before you are go<strong>in</strong>g to need the ability to read and write files <strong>in</strong> your<br />
applications. I saved this discussion for now because you needed an understand<strong>in</strong>g of classes<br />
<strong>in</strong> order to understand how file <strong>in</strong>put and output is handled <strong>in</strong> <strong>C++</strong>.<br />
If you are go<strong>in</strong>g to be do<strong>in</strong>g heavy database operations with <strong>C++</strong>Builder, you might be<br />
relieved to know that you don’t have to worry about deal<strong>in</strong>g with read<strong>in</strong>g and writ<strong>in</strong>g<br />
database files directly. That is all handled for you beh<strong>in</strong>d the scenes through <strong>C++</strong>Builder’s<br />
VCL database components. VCL also provides support for read<strong>in</strong>g and writ<strong>in</strong>g the contents<br />
of edit controls, list boxes, and other basic W<strong>in</strong>dows controls. The W<strong>in</strong>dows API provides<br />
functions for read<strong>in</strong>g configuration files (.INI files). Many OCX and ActiveX controls know<br />
how to save and load files specific to the type of action the control performs.<br />
As you can see, many of the objects you will use <strong>in</strong> <strong>C++</strong>Builder will handle file I/O for you.<br />
Still, there will be times when you have to read and write your own files, and you’ll need a<br />
basic understand<strong>in</strong>g of file I/O <strong>in</strong> order to do that.<br />
Basic file I/O is accomplished via three <strong>C++</strong> classes:<br />
■ The ofstream class, which handles file output<br />
■ The ifstream class, which handles file <strong>in</strong>put<br />
■ The fstream class, which handles both file <strong>in</strong>put and output<br />
These classes are derived from the iostream class. You have had some experience with<br />
iostream already, although you may not know it. The cout and c<strong>in</strong> classes I have been us<strong>in</strong>g<br />
for console <strong>in</strong>put and output are also derived from iostream. iostream itself is derived from<br />
a class called ios, which is the base class for all stream <strong>in</strong>put and output <strong>in</strong> <strong>C++</strong>.<br />
Does this sound complicated? Well, it is. Sometimes the labyr<strong>in</strong>th of the stream<strong>in</strong>g classes<br />
can be pretty confus<strong>in</strong>g. What I am go<strong>in</strong>g to do here is give you a cursory glance at file I/O,<br />
but then we’ll have to move on. You’ll be relieved to know that basic file I/O is not terribly<br />
complicated. If you need to do sophisticated file operations, you’ll need to dig <strong>in</strong>to the class<br />
library help files or get a good book on <strong>C++</strong> (such as <strong>Teach</strong> <strong>Yourself</strong> <strong>Borland</strong> <strong>C++</strong> 4.5 <strong>in</strong> 21<br />
<strong>Days</strong>, Second Edition by Sams Publish<strong>in</strong>g) that deals with file I/O <strong>in</strong> detail.
Totally Immersed: <strong>C++</strong> Classes and Object-Oriented Programm<strong>in</strong>g<br />
Basic File Input<br />
Read<strong>in</strong>g a text file <strong>in</strong> <strong>C++</strong> is a fairly pa<strong>in</strong>less task. List<strong>in</strong>g 4.4 conta<strong>in</strong>s a program that reads<br />
its own source file and displays each l<strong>in</strong>e as it reads it from disk. First, enter the program as<br />
it appears <strong>in</strong> the list<strong>in</strong>g (remember, don’t type the l<strong>in</strong>e numbers). Then save the project with<br />
the name READFILE. If you don’t save the program with this name, the program will not run<br />
properly. Compile and run the program. S<strong>in</strong>ce the program reads its own source file, the<br />
output from the program will be the contents of List<strong>in</strong>g 4.4.<br />
List<strong>in</strong>g 4.4. READFILE.CPP.<br />
1: #<strong>in</strong>clude <br />
2: #<strong>in</strong>clude <br />
3: #<strong>in</strong>clude <br />
4: #<strong>in</strong>clude <br />
5: #<strong>in</strong>clude <br />
6: #<strong>in</strong>clude <br />
7: #pragma hdrstop<br />
8:<br />
9: <strong>in</strong>t ma<strong>in</strong>(<strong>in</strong>t argc, char **argv)<br />
10: {<br />
11: char buff[80];<br />
12: ifstream <strong>in</strong>file;<br />
13: <strong>in</strong>file.open(“readfile.cpp”);<br />
<strong>14</strong>: if (!<strong>in</strong>file) return 0;<br />
15: while (!<strong>in</strong>file.eof()) {<br />
16: <strong>in</strong>file.getl<strong>in</strong>e(buff, sizeof(buff));<br />
17: cout
124 Day 4<br />
NOTE<br />
One of the ifstream constructors takes a char* as a parameter so that you can provide a<br />
filename when you <strong>in</strong>stantiate the class. Us<strong>in</strong>g this constructor, l<strong>in</strong>es 12 and 13 could be<br />
condensed <strong>in</strong>to a s<strong>in</strong>gle l<strong>in</strong>e:<br />
ifstream <strong>in</strong>file(“readfil.cpp”);<br />
If you create the object this way, the call to open() is unnecessary because the file will<br />
automatically be opened from the constructor.<br />
TIP<br />
Don’t forget about the double backslash <strong>in</strong> constant str<strong>in</strong>gs! For<br />
example, if you wanted to open the WIN.INI file <strong>in</strong> the W<strong>in</strong>dows<br />
directory, you would have to use this:<br />
ifstream <strong>in</strong>file(“c:\\w<strong>in</strong>dows\\w<strong>in</strong>.<strong>in</strong>i”);<br />
I know I’ve mentioned this before, but I’ll guarantee you that at some<br />
po<strong>in</strong>t you’ll goof this up, so I want to drill it <strong>in</strong>to your head while I’ve<br />
got the opportunity.<br />
The call to close() on l<strong>in</strong>e 19 of List<strong>in</strong>g 4.4 is not strictly needed. The ifstream destructor<br />
checks whether the file was left open. If it was, the destructor calls close() to ensure that the<br />
file is closed before the <strong>in</strong>stance of the class is destroyed. In my programs I almost always call<br />
close() even though it is not strictly required. Explicitly call<strong>in</strong>g close() has the added benefit<br />
of document<strong>in</strong>g that the file is no longer needed.<br />
The program <strong>in</strong> List<strong>in</strong>g 4.4 conta<strong>in</strong>s a m<strong>in</strong>or bug. Due to the way the<br />
end of the file is determ<strong>in</strong>ed, the program will pr<strong>in</strong>t one blank l<strong>in</strong>e<br />
before the loop term<strong>in</strong>ates. In order to avoid the extra l<strong>in</strong>e, the loop<br />
would have to be written like this:<br />
while (!<strong>in</strong>file.getl<strong>in</strong>e(buff, sizeof(buff)).eof()) {<br />
cout
Totally Immersed: <strong>C++</strong> Classes and Object-Oriented Programm<strong>in</strong>g<br />
operator (>>) stops at the first whitespace it encounters. (Whitespace <strong>in</strong>cludes blank spaces,<br />
tabs, and so on.) The getl<strong>in</strong>e() function, on the other hand, reads from the file until an EOL<br />
(end-of-l<strong>in</strong>e) character is detected, which is what you want when read<strong>in</strong>g l<strong>in</strong>es of text. When<br />
read<strong>in</strong>g s<strong>in</strong>gle values without whitespace, the extraction operator is very useful. The follow<strong>in</strong>g<br />
code snippet reads a file conta<strong>in</strong><strong>in</strong>g numbers and outputs the numbers to the screen:<br />
ifstream <strong>in</strong>file(“somefil.dat”);<br />
while (!<strong>in</strong>file.eof()) {<br />
<strong>in</strong>t x;<br />
<strong>in</strong>file >> x; // read number from file and assign it to x<br />
cout
126 Day 4<br />
List<strong>in</strong>g 4.5. cont<strong>in</strong>ued<br />
20: outfile.close();<br />
21: cout
Totally Immersed: <strong>C++</strong> Classes and Object-Oriented Programm<strong>in</strong>g<br />
For example, sometimes you want to append data to the end of an exist<strong>in</strong>g file rather than<br />
create a new file. In that case you can append data to the end of a file by open<strong>in</strong>g the file <strong>in</strong><br />
append mode. To specify append mode, you must use one of the ios class’s open_mode<br />
specifiers <strong>in</strong> the ofstream constructor when you create the object:<br />
ofstream outfile(“test.dat”, ios::app); // open <strong>in</strong> append mode<br />
This file will be opened <strong>in</strong> append mode and any new data written to the file will be written<br />
to the end of the file. There are several specifiers you can use when open<strong>in</strong>g files. Table 4.1<br />
lists the open_mode enumeration’s values and their descriptions.<br />
Table 4.1. ios class open_mode specifiers.<br />
Specifier Description<br />
app The file is opened and any new data will be appended to the end of<br />
the file.<br />
ate Seek to the end of the file when the file is opened.<br />
<strong>in</strong> The file is opened for <strong>in</strong>put (read<strong>in</strong>g). This is the default for the<br />
ifstream class.<br />
out The file is opened for output (writ<strong>in</strong>g). This is the default for the<br />
ofstream class.<br />
b<strong>in</strong>ary The file is opened <strong>in</strong> b<strong>in</strong>ary mode. The default is to open the file <strong>in</strong><br />
text mode. In text mode, when the file is read, carriage-return/<br />
l<strong>in</strong>efeed (CR/LF) pairs are converted to a s<strong>in</strong>gle l<strong>in</strong>efeed character<br />
(LF). When the file is written, l<strong>in</strong>efeed characters are converted to<br />
CR/LF pairs before be<strong>in</strong>g written to the file. In b<strong>in</strong>ary mode no<br />
conversion of CR/LR pairs takes place.<br />
trunc Opens the file and clears the contents. If neither app nor ate are<br />
specified, trunc is the default.<br />
nocreate The file will not be created if it does not exist. Open() will fail if the<br />
file does not exist. Open<strong>in</strong>g an ifstream with this flag can be used<br />
to check for the existence of a file.<br />
noreplace Similar to nocreate except that Open will fail unless either app or ate<br />
is specified.<br />
You can or together two or more of the values listed <strong>in</strong> Table 4.1 if needed. For example, let’s<br />
say you wanted to open a file <strong>in</strong> b<strong>in</strong>ary mode and that you wanted to append data to the end<br />
of the file. In that case the constructor would look like this:<br />
ofstream outfile(“test.dat”, ios::app | ios::b<strong>in</strong>ary);<br />
127<br />
4
128 Day 4<br />
NOTE<br />
This will open the file <strong>in</strong> b<strong>in</strong>ary mode and move the file po<strong>in</strong>ter to the end of the file. Any<br />
new data will be written to the end of the file.<br />
B<strong>in</strong>ary files are treated differently than text files (see the b<strong>in</strong>ary specifier<br />
<strong>in</strong> Table 4.1). To read b<strong>in</strong>ary files, you will have to have an understand<strong>in</strong>g<br />
of the read(), write(), put(), and get() functions. We don’t<br />
have the time to go <strong>in</strong>to each of those functions at this po<strong>in</strong>t. If you<br />
need more <strong>in</strong>formation on b<strong>in</strong>ary file operations, you might want to<br />
get a good book on <strong>C++</strong> that covers file I/O <strong>in</strong> detail.<br />
Basic file I/O is pretty easy, really. But as I said earlier, if you need to do complicated file<br />
I/O, you are go<strong>in</strong>g to have to tie <strong>in</strong>to the onl<strong>in</strong>e help or get hold of a good book on file I/O<br />
<strong>in</strong> <strong>C++</strong> (aga<strong>in</strong>, <strong>Teach</strong> <strong>Yourself</strong> <strong>Borland</strong> <strong>C++</strong> 4.5 <strong>in</strong> 21 <strong>Days</strong>, Second Edition by Sams Publish<strong>in</strong>g<br />
is a good bet).<br />
Summary<br />
Today you have learned about classes <strong>in</strong> <strong>C++</strong>. A well-designed class is easy to use and saves<br />
many programm<strong>in</strong>g hours. I’d even go so far as to say that a well-designed class is a joy to<br />
use—especially when it’s of your own creation. Early <strong>in</strong> the chapter you learned about some<br />
of the features of functions that are specific to <strong>C++</strong>. You learned about function overload<strong>in</strong>g,<br />
virtual functions, <strong>in</strong>l<strong>in</strong>e functions, and default parameters <strong>in</strong> functions. All these are heavily<br />
used <strong>in</strong> design<strong>in</strong>g classes <strong>in</strong> <strong>C++</strong>. F<strong>in</strong>ally, the chapter f<strong>in</strong>ished up with an <strong>in</strong>troduction to basic<br />
file I/O operations.<br />
The lessons of these first four days are important to understand as you cont<strong>in</strong>ue through this<br />
book. If it doesn’t make complete sense to you, don’t despair. As we cont<strong>in</strong>ue through the<br />
follow<strong>in</strong>g days, you will see these concepts repeated and put to use <strong>in</strong> programs that have more<br />
practical application than the console apps we’ve been work<strong>in</strong>g with thus far.<br />
WARNING<br />
Learn<strong>in</strong>g <strong>C++</strong> can and will lead to bra<strong>in</strong> overload! It’s natural, and you<br />
shouldn’t worry about it. You might put down this book for the<br />
even<strong>in</strong>g, turn out the lights, and th<strong>in</strong>k, “I’ll never get it.” Trust me, you<br />
will.
Totally Immersed: <strong>C++</strong> Classes and Object-Oriented Programm<strong>in</strong>g<br />
Workshop<br />
Sometimes it’s necessary to take a couple days off and let it all soak <strong>in</strong>.<br />
In fact, if I thought I could get by with it I’d make Day 5 a blank<br />
chapter called “A Day of Rest.” Take it a little at a time, and one of<br />
these days you’ll be just like Archimedes—you’ll be runn<strong>in</strong>g around<br />
your office or your house shout<strong>in</strong>g “Eureka!” because the light just<br />
came on <strong>in</strong> your nogg<strong>in</strong>. But keep track of your clothes, will you? The<br />
neighbors could be watch<strong>in</strong>g.<br />
The Workshop conta<strong>in</strong>s quiz questions to help you solidify your understand<strong>in</strong>g of the<br />
material covered and exercises to provide you with experience <strong>in</strong> us<strong>in</strong>g what you have learned.<br />
You can f<strong>in</strong>d answers to the quiz questions <strong>in</strong> Appendix A, “Answers to Quiz Questions.”<br />
Q&A<br />
Q How can I keep a class member function private to the outside world but<br />
allow derived classes to call it?<br />
A Make it protected. A protected function is not accessible to users of your class but<br />
is accessible to derived classes.<br />
Q What does data abstraction mean?<br />
A Data abstraction means hid<strong>in</strong>g the details of the class that the users of the class<br />
don’t need to see. A class might have dozens of data members and functions, but<br />
only a few that the user can see. Make visible (public) only the functions that a user<br />
needs to know about to use the class.<br />
Q What is an object?<br />
A Effectively speak<strong>in</strong>g, an object is any block of code that can be treated as a separate<br />
entity <strong>in</strong> your programs. An object <strong>in</strong> <strong>C++</strong> generally means a class. In <strong>C++</strong>Builder,<br />
that def<strong>in</strong>ition is expanded to <strong>in</strong>clude VCL components. OCX and ActiveX<br />
controls could also be considered objects.<br />
Q Can my class have more than one constructor?<br />
A Yes. Your class can have as many constructors as needed, provided that you follow<br />
the rules of function overload<strong>in</strong>g.<br />
129<br />
4
130 Day 4<br />
Quiz<br />
Q Do I have to understand every aspect of file I/O to program <strong>in</strong> <strong>C++</strong>Builder?<br />
A No. <strong>C++</strong>Builder has plenty of built-<strong>in</strong> file I/O through its use of components. A<br />
basic understand<strong>in</strong>g of file I/O is a good idea <strong>in</strong> any case. As always, it depends on<br />
what your program does.<br />
Q Can I open a file <strong>in</strong> such a way that I can read from and write to the file as<br />
needed?<br />
A Yes. In addition to the file I/O classes I discussed <strong>in</strong> this chapter, there is also a class<br />
called fstream. This class allows you to read from a file, write to the file, and<br />
reposition the file po<strong>in</strong>ter as needed.<br />
1. How do classes and structures differ <strong>in</strong> <strong>C++</strong>?<br />
2. What is the purpose of hav<strong>in</strong>g private data members and functions?<br />
3. How can you keep data members private, yet allow users to read and set their<br />
values?<br />
4. How and when is a class’s destructor called?<br />
5. What does it mean to override a function of the base class?<br />
6. How can you override a base class function and still get the benefit of the operation<br />
the base class function performs?<br />
7. What does an <strong>in</strong>itializer list do?<br />
8. Can a class conta<strong>in</strong> other class <strong>in</strong>stances as data members?<br />
9. How can you get the functionality of two separate classes all rolled <strong>in</strong>to a s<strong>in</strong>gle<br />
class?<br />
Exercises<br />
1. Write a class that takes a person’s height <strong>in</strong> <strong>in</strong>ches and returns the height <strong>in</strong> feet.<br />
2. Derive a class from the class <strong>in</strong> exercise 1 that also returns the height <strong>in</strong> meters,<br />
centimeters, or millimeters. (H<strong>in</strong>t: There are 25.4 millimeters <strong>in</strong> an <strong>in</strong>ch.)<br />
3. Write a program that takes user <strong>in</strong>put and writes it to a data file.<br />
4. Modify the program <strong>in</strong> exercise 3 so that it reads the data file and displays the<br />
output after the file is written.<br />
5. Take a day off from work. You’ve earned it!
<strong>C++</strong> Class Frameworks and the Visual Component Model<br />
Day 5<br />
<strong>C++</strong> Class Frameworks<br />
and the Visual<br />
Component Model<br />
by Kent Reisdorph<br />
Week<br />
Today I am go<strong>in</strong>g to talk about class frameworks. I will tell you what a framework<br />
is and let you know what your options are for writ<strong>in</strong>g W<strong>in</strong>dows programs <strong>in</strong><br />
today’s fast-paced software <strong>in</strong>dustry. In do<strong>in</strong>g so, I will look at the follow<strong>in</strong>g:<br />
■ <strong>Borland</strong>’s Object W<strong>in</strong>dows Library (OWL)<br />
■ Microsoft’s Microsoft Foundation Class Library (MFC)<br />
■ <strong>Borland</strong>’s Visual Component Library (VCL)<br />
1<br />
131<br />
5
132 Day 5<br />
Frameworks 101<br />
“In the beg<strong>in</strong>n<strong>in</strong>g there was C….” If you recall, I started my discussion of the <strong>C++</strong><br />
programm<strong>in</strong>g language with that statement. The same is true of W<strong>in</strong>dows programm<strong>in</strong>g—<br />
<strong>in</strong> the beg<strong>in</strong>n<strong>in</strong>g, the vast majority of W<strong>in</strong>dows programs were written <strong>in</strong> C. In fact, the<br />
W<strong>in</strong>dows Application Programm<strong>in</strong>g Interface (API) is just a huge collection of C functions—hundreds<br />
of them. There are still undoubtedly thousands of programmers out there<br />
writ<strong>in</strong>g W<strong>in</strong>dows programs <strong>in</strong> C.<br />
Somewhere along the l<strong>in</strong>e, some folks at <strong>Borland</strong> decided, “There has got to be an easier way!”<br />
(Actually, the framework revolution may have started on several different fronts at once, but<br />
<strong>Borland</strong> was certa<strong>in</strong>ly a leader <strong>in</strong> the field.) It was apparent that W<strong>in</strong>dows programm<strong>in</strong>g was<br />
very well suited to the <strong>C++</strong> language, and vice versa. By creat<strong>in</strong>g classes that encapsulate<br />
common W<strong>in</strong>dows programm<strong>in</strong>g tasks, a programmer could be much more productive.<br />
Once a class was created to encapsulate the various duties of a w<strong>in</strong>dow, for <strong>in</strong>stance, that class<br />
could be used over and over aga<strong>in</strong>. The framework revolution began.<br />
But I haven’t actually told you what a framework is yet.<br />
A framework is a collection of classes that simplifies programm<strong>in</strong>g <strong>in</strong> W<strong>in</strong>dows by<br />
encapsulat<strong>in</strong>g often-used programm<strong>in</strong>g techniques. Frameworks are also called class<br />
libraries.<br />
Popular frameworks have classes that encapsulate w<strong>in</strong>dows, edit controls, list boxes, graphics<br />
operations, bitmaps, scrollbars, dialog boxes, and on and on.<br />
NEW TERM<br />
So What’s the Big Deal?<br />
That’s a good question. The bottom l<strong>in</strong>e is that frameworks make W<strong>in</strong>dows programm<strong>in</strong>g<br />
much easier than it would be <strong>in</strong> straight C. Let me give you an example. List<strong>in</strong>g 5.1 conta<strong>in</strong>s<br />
a portion of a W<strong>in</strong>dows program written <strong>in</strong> C. This section of code loads a bitmap file from<br />
disk and displays the bitmap <strong>in</strong> the center of the screen. None of this will make sense to you<br />
right now, but that’s not the po<strong>in</strong>t.<br />
List<strong>in</strong>g 5.1. C code to load and display a bitmap.<br />
1: HPALETTE hPal;<br />
2: BITMAPFILEHEADER bfh;<br />
3: BITMAPINFOHEADER bih;<br />
4: LPBITMAPINFO lpbi = 0;<br />
5: HFILE hFile;<br />
6: DWORD nClrUsed, nSize;<br />
7: HDC hDC;
<strong>C++</strong> Class Frameworks and the Visual Component Model<br />
8: HBITMAP hBitmap;<br />
9: void _huge *bits;<br />
10: do<br />
11: {<br />
12: if ((hFile = _lopen(data.FileName, OF_READ)) == HFILE_ERROR) break;<br />
13: if (_hread(hFile, &bfh, sizeof(bfh)) != sizeof(bfh)) break;<br />
<strong>14</strong>: if (bfh.bfType != ‘BM’) break;<br />
15: if (_hread(hFile, &bih, sizeof(bih)) != sizeof(bih)) break;<br />
16: nClrUsed =<br />
17: (bih.biClrUsed) ? bih.biClrUsed : 1 bmiColors, nSize) != nSize) break;<br />
25: if (_llseek(hFile, bfh.bfOffBits, 0) == HFILE_ERROR) break;<br />
26: nSize = bfh.bfSize-bfh.bfOffBits;<br />
27: if ((bits = GlobalAllocPtr(GHND, nSize)) == NULL) break;<br />
28: if (_hread(hFile, bits, nSize) != nSize) break;<br />
29: hDC = GetDC(hWnd);<br />
30: hBitmap = CreateDIBitmap(hDC, &(lpbi->bmiHeader), CBM_INIT,<br />
31: bits, lpbi, DIB_RGB_COLORS);<br />
32: if (hBitmap) {<br />
33: LPLOGPALETTE lppal;<br />
34: DWORD nsize = sizeof(LOGPALETTE)<br />
35: + (nClrUsed-1) * sizeof(PALETTEENTRY);<br />
36: lppal = (LPLOGPALETTE) GlobalAllocPtr(GHND, nSize);<br />
37: if (lppal) {<br />
38: lppal->palVersion = 0x0300;<br />
39: lppal->palNumEntries = (WORD) nClrUsed;<br />
40: hmemcpy(lppal->palPalEntry, lpbi->bmiColors,<br />
41: nClrUsed * sizeof(PALETTEENTRY));<br />
42: hPal = CreatePalette(lppal);<br />
43: (void) GlobalFreePtr(lppal);<br />
44: }<br />
45: }<br />
46: } while(FALSE);<br />
47: if (hFile != HFILE_ERROR) _lclose(hFile);<br />
48: HPALETTE oldPal = SelectPalette(hDC, hPal, FALSE);<br />
49: RealizePalette(hDC);<br />
50: HDC hMemDC = CreateCompatibleDC(hDC);<br />
51: HBITMAP oldBitmap =(HBITMAP)SelectObject(hMemDC, hBitmap);<br />
52: BitBlt(hDC, 0, 0, (WORD)bih.biWidth, (WORD)bih.biHeight,<br />
53: hMemDC, 0, 0, SRCCOPY);<br />
54: SelectObject(hMemDC, oldBitmap);<br />
55: DeleteDC(hMemDC);<br />
56: SelectPalette(hDC, oldPal, FALSE);<br />
57: ReleaseDC(hWnd, hDC);<br />
58: if (bits) (void) GlobalFreePtr(bits);<br />
59: if (lpbi) (void) GlobalFreePtr(lpbi);<br />
133<br />
5
134 Day 5<br />
That looks just a little <strong>in</strong>timidat<strong>in</strong>g, doesn’t it? The fact is, I even had to get some help from<br />
my friends on the BCPPLIB forum of CompuServe (thanks, Paul!). Now look at the<br />
equivalent us<strong>in</strong>g <strong>Borland</strong>’s Object W<strong>in</strong>dows Library, shown <strong>in</strong> List<strong>in</strong>g 5.2.<br />
List<strong>in</strong>g 5.2. OWL code to load and display a bitmap.<br />
1: TDib dib(“test.bmp”);<br />
2: TPalette pal(dib);<br />
3: TBitmap bitmap(dib, &pal);<br />
4: TClientDC dc(*this);<br />
5: dc.SelectObject(pal);<br />
6: dc.RealizePalette();<br />
7: TMemoryDC memdc(dc);<br />
8: memdc.SelectObject(bitmap);<br />
9: dc.BitBlt(0, 0, bitmap.Width(), bitmap.Height(), memdc, 0, 0);<br />
So which would you rather use? You don’t even have to know what these code snippets do<br />
to make that decision. It’s easy to see that the OWL version is shorter and more readable.<br />
(VCL makes the task even easier by provid<strong>in</strong>g a bitmap component that you drop on a form.<br />
I don’t want to get ahead of myself, though, so I’ll save that discussion for a little later.)<br />
These examples sum up what frameworks are all about. Frameworks hide details from you<br />
that you don’t need to know about. Everyth<strong>in</strong>g that is conta<strong>in</strong>ed <strong>in</strong> List<strong>in</strong>g 5.1 is performed<br />
beh<strong>in</strong>d the scenes <strong>in</strong> the OWL code <strong>in</strong> List<strong>in</strong>g 5.2. You don’t need to know every detail about<br />
what goes on beh<strong>in</strong>d the scenes when OWL does its th<strong>in</strong>g, and you probably don’t want to<br />
know. All you want to do is take the objects that make up a framework and put them to use<br />
<strong>in</strong> your programs.<br />
A good framework takes full advantage of OOP. Some do that better than others. <strong>Borland</strong>’s<br />
Object W<strong>in</strong>dows Library and Visual Component Model are tremendous examples of objectoriented<br />
programm<strong>in</strong>g. They provide the proper abstraction needed for you to rise above the<br />
clutter and get down to the serious bus<strong>in</strong>ess of programm<strong>in</strong>g.<br />
So What’s the Catch?<br />
A little skeptical, are you? Good. You’re bright enough to figure out that if you have all of<br />
that ease of use, you must be giv<strong>in</strong>g someth<strong>in</strong>g up. Truth is, you are right. You might th<strong>in</strong>k<br />
that a program written with a framework will be larger and slower than its counterpart written<br />
<strong>in</strong> C. That’s partially correct. Applications written with frameworks don’t necessarily have<br />
to be slower than programs written <strong>in</strong> C, though. There is some additional overhead <strong>in</strong>herent<br />
<strong>in</strong> the <strong>C++</strong> language, certa<strong>in</strong>ly, but for the most part it is not noticeable <strong>in</strong> a typical W<strong>in</strong>dows<br />
program.
<strong>C++</strong> Class Frameworks and the Visual Component Model<br />
The primary trade-off is that W<strong>in</strong>dows programs written <strong>in</strong> <strong>C++</strong> tend to be larger than their<br />
straight C counterparts. For example, let’s say you had a simple W<strong>in</strong>dows program written<br />
<strong>in</strong> C that was 75KB <strong>in</strong> size. The equivalent program written with one of the framework<br />
libraries might end up be<strong>in</strong>g 200KB <strong>in</strong> size. That’s a significant difference, yet this example<br />
demonstrates the worst-case scenario. The difference <strong>in</strong> f<strong>in</strong>al program size between a C<br />
application and a <strong>C++</strong> application written with a framework is go<strong>in</strong>g to be most noticeable<br />
<strong>in</strong> very small programs. As your programs <strong>in</strong>crease <strong>in</strong> size and become more sophisticated,<br />
the difference <strong>in</strong> size is much less noticeable.<br />
One of the differences is simply the difference between C and <strong>C++</strong>. <strong>C++</strong> carries additional<br />
overhead for features such as exception handl<strong>in</strong>g, runtime type <strong>in</strong>formation (RTTI), and<br />
other <strong>C++</strong> goodies. In my op<strong>in</strong>ion, the difference <strong>in</strong> code size is an acceptable trade-off for<br />
the features that <strong>C++</strong> provides. Now, before you label me as a code-bloat proponent, let me<br />
say that I am as conscientious as the next guy when it comes to code bloat. I believe that we<br />
should all write the tightest code we can, given the tools we use. I am also a realist, and I<br />
understand that time-to-market is a driv<strong>in</strong>g force <strong>in</strong> the software <strong>in</strong>dustry today. I am will<strong>in</strong>g<br />
to trade some code size for the power that <strong>C++</strong> and an application framework give me.<br />
Frameworks <strong>Teach</strong> Object-Oriented Programm<strong>in</strong>g<br />
and Design<br />
NOTE<br />
If you end up gett<strong>in</strong>g serious about this crazy game we call W<strong>in</strong>dows programm<strong>in</strong>g, you will<br />
eventually end up peek<strong>in</strong>g <strong>in</strong>to the source code of your favorite framework. Sooner or later<br />
you’ll want to know how the big boys do th<strong>in</strong>gs. The OWL or VCL source code is a great<br />
place to go for that k<strong>in</strong>d of <strong>in</strong>formation.<br />
The MFC source code is probably not the best place to go to see good<br />
object-oriented design <strong>in</strong> action. MFC lacks the elegance, abstraction,<br />
and overall design that makes a top-notch framework. In addition, it<br />
tends to break OOP rules from time to time. MFC may well be the<br />
most popular framework, but that doesn’t mean it is the best framework<br />
from an OOP standpo<strong>in</strong>t.<br />
Some weekend when the leaves are all raked, the house trim has been pa<strong>in</strong>ted, the laundry<br />
is all done, the kids are shipped off for a weekend at grandma’s, and you th<strong>in</strong>k you have a<br />
pretty good handle on <strong>C++</strong>, you should spend some time brows<strong>in</strong>g your favorite framework’s<br />
source code. It can be <strong>in</strong>timidat<strong>in</strong>g at first, but after a while you start to see what the designers<br />
were up to. Don’t stra<strong>in</strong> yourself. Attempt to understand the th<strong>in</strong>gs that bump up aga<strong>in</strong>st<br />
135<br />
5
136 Day 5<br />
the limits of your knowledge regard<strong>in</strong>g <strong>C++</strong>. Leave the complicated stuff for next month. But<br />
notice how the framework designers use private, protected, and public access <strong>in</strong> classes.<br />
Notice how and when they implement <strong>in</strong>l<strong>in</strong>e functions. Notice how th<strong>in</strong>gs that should be<br />
kept hidden from the user aren’t <strong>in</strong> public view. Study<strong>in</strong>g a good <strong>C++</strong> class library can teach<br />
you a great deal about <strong>C++</strong> and object-oriented design.<br />
The <strong>C++</strong> Framework Wars<br />
The frameworks need to be separated <strong>in</strong>to two categories: <strong>C++</strong> frameworks and VCL. First<br />
I’ll discuss the <strong>C++</strong> frameworks and then I’ll move on to VCL. There are really only two viable<br />
<strong>C++</strong> frameworks, and they are <strong>Borland</strong>’s OWL and Microsoft’s MFC.<br />
<strong>Borland</strong>’s Object W<strong>in</strong>dows Library<br />
<strong>Borland</strong> took the lead role <strong>in</strong> the framework race with OWL a few years back. First there was<br />
OWL 1.0. This first version of OWL was a separate product sold by <strong>Borland</strong> for use with its<br />
<strong>Borland</strong> <strong>C++</strong> 3.0 compiler. (Actually, the very first OWL was written for Turbo Pascal and<br />
was later converted to <strong>C++</strong>.) OWL 1.0 was a good framework, but because of some<br />
proprietary syntax and other issues, it wasn’t the design that <strong>Borland</strong> would eventually stick<br />
with for the future of OWL. OWL 1.0 did, however, do the entire W<strong>in</strong>dows programm<strong>in</strong>g<br />
community a service—it got the framework ball roll<strong>in</strong>g. Although OWL 1.0 was not the first<br />
framework ever written, it certa<strong>in</strong>ly was the first to ga<strong>in</strong> mass-market appeal.<br />
After OWL 1 came OWL 2.0. OWL 2 was a masterpiece. It implemented many of the latest<br />
<strong>C++</strong> language features—not because they were new, but because they made sense. Best of all,<br />
OWL 2 was <strong>in</strong>cluded as part of the <strong>Borland</strong> <strong>C++</strong> 4.0 compiler. From this po<strong>in</strong>t on, <strong>Borland</strong><br />
would <strong>in</strong>clude OWL as part of its <strong>Borland</strong> <strong>C++</strong> package. <strong>Borland</strong> <strong>C++</strong> compilers have always<br />
been first to implement new <strong>C++</strong> features, and OWL 2 put those features to good use. OWL<br />
2 also did away with the proprietary syntax that plagued OWL 1. OWL 2 was all standard<br />
<strong>C++</strong> that could be compiled with any <strong>C++</strong> compiler—at least <strong>in</strong> theory. As it was, there were<br />
few <strong>C++</strong> compilers implement<strong>in</strong>g the latest and greatest <strong>C++</strong> features, so OWL 2 was<br />
typically used only with <strong>Borland</strong> compilers.<br />
<strong>Borland</strong> released a revision to OWL 2.0 called OWL 2.5. For the most part, the changes were<br />
m<strong>in</strong>or. They were m<strong>in</strong>or <strong>in</strong> the sense that they didn’t add a lot to OWL 2 itself; a few bug<br />
fixes here and there and a few new classes. But <strong>in</strong> one way OWL 2.5 was a major release—<br />
it added OLE (object l<strong>in</strong>k<strong>in</strong>g and embedd<strong>in</strong>g) support <strong>in</strong> a new set of classes called the Object<br />
Components Framework (OCF). OCF is not technically part of OWL. It works very well<br />
with OWL, but at the same time it can be used <strong>in</strong>dependently of OWL.
<strong>C++</strong> Class Frameworks and the Visual Component Model<br />
The latest and greatest OWL is 5.0. OWL 5 represents significant enhancements to<br />
OWL 2.5. The primary changes come <strong>in</strong> new OWL classes that encapsulate the new W<strong>in</strong>32<br />
custom controls. OCF was also updated <strong>in</strong> the OWL 5.0 release.<br />
OWL’s strengths are considerable. First, it is an architectural wonder. It is obvious that OWL<br />
was very well thought out from the beg<strong>in</strong>n<strong>in</strong>g. I can’t say enough about my admiration for<br />
OWL designers Carl Qu<strong>in</strong>n, Bruneau Babet, and the other OWL team members. OWL is<br />
very OOP friendly and follows all the OOP rules. Its level of abstraction strikes a good balance<br />
between ease of use and power. OWL has one major advantage over its competitors: It can<br />
be used <strong>in</strong> both 16-bit and 32-bit programs. <strong>Borland</strong> has even emulated some of the<br />
32-bit custom controls for use <strong>in</strong> 16-bit programs. While these emulations are not perfect <strong>in</strong><br />
all cases, they are usable and give you a method of gett<strong>in</strong>g the 32-bit look and feel even <strong>in</strong><br />
16-bit programs.<br />
OWL also has its weaknesses. Ironically, one of OWL’s strengths leads, <strong>in</strong> some people’s<br />
m<strong>in</strong>ds, to one of its weaknesses. OWL has done a great job of encapsulat<strong>in</strong>g the W<strong>in</strong>dows<br />
environment and that is certa<strong>in</strong>ly a strength. Part of the problem with that level of<br />
encapsulation is that OWL is complex, and it is sometimes difficult to f<strong>in</strong>d your way around<br />
when you are first learn<strong>in</strong>g OWL. The complexity of OWL is considered by some to be one<br />
of its weaknesses. It takes time to master, no question about it. But once you have mastered<br />
OWL, you can be very efficient <strong>in</strong> writ<strong>in</strong>g W<strong>in</strong>dows programs.<br />
The Microsoft Foundation Class Library<br />
Sometime between OWL 1 and OWL 2, the Microsoft Foundation Class (MFC) Library<br />
was born. MFC is <strong>in</strong>cluded as part of Microsoft’s Visual <strong>C++</strong> compiler package. Actually,<br />
versions of MFC ship with compilers by Symantec, Watcom, and, believe it or not, <strong>Borland</strong><br />
(there may be others as well). Typically Microsoft has not licensed the most current version<br />
of MFC to other compiler vendors (Symantec and Watcom), but <strong>Borland</strong> <strong>C++</strong> 5.01 <strong>in</strong>cluded<br />
MFC version 4.1, which at the time was the latest version of MFC (a newer version, 4.2, came<br />
out shortly thereafter).<br />
It could be said that MFC is a different type of class library than OWL. MFC is less abstract<br />
and lies closer to the W<strong>in</strong>dows API. MFC’s strengths come <strong>in</strong> three primary areas. First, it<br />
is relatively easy to learn. (Understand that no <strong>C++</strong> framework deal<strong>in</strong>g with W<strong>in</strong>dows<br />
programm<strong>in</strong>g is go<strong>in</strong>g to be easy to learn, but MFC is a little easier to pick up than the<br />
competition.) It is easier to learn primarily because it is less abstract <strong>in</strong> some areas. If you are<br />
new to W<strong>in</strong>dows programm<strong>in</strong>g, you will probably f<strong>in</strong>d OWL and MFC about equal when<br />
it comes to learn<strong>in</strong>g the framework. If you are com<strong>in</strong>g from a C programm<strong>in</strong>g background<br />
and already know the W<strong>in</strong>dows API, MFC is almost certa<strong>in</strong>ly go<strong>in</strong>g to be easier to learn.<br />
137<br />
5
138 Day 5<br />
Another strength of MFC, accord<strong>in</strong>g to some, is that it is a th<strong>in</strong> wrapper around the W<strong>in</strong>dows<br />
API. Aga<strong>in</strong>, for W<strong>in</strong>dows programmers who are mov<strong>in</strong>g from programm<strong>in</strong>g <strong>in</strong> C to<br />
programm<strong>in</strong>g <strong>in</strong> <strong>C++</strong> with MFC, this is an advantage. They can beg<strong>in</strong> to use MFC and feel<br />
somewhat at home.<br />
F<strong>in</strong>ally, MFC has the dist<strong>in</strong>ct advantage of belong<strong>in</strong>g to Microsoft. The advantage is that as<br />
new W<strong>in</strong>dows features and technologies come along, MFC can be first to implement them.<br />
Microsoft can release a new technology, and MFC can already have support for that<br />
technology when it is announced. That certa<strong>in</strong>ly doesn’t hurt!<br />
MFC has its weaknesses too. First and foremost, it is a th<strong>in</strong> wrapper around the W<strong>in</strong>dows<br />
API. “Wait a m<strong>in</strong>ute!” you say. “I thought you said that was one of MFC’s strengths!” Yes,<br />
I did. It’s also one of its weaknesses. Some folks would consider MFC’s close tie to the API<br />
a strength. I consider it a weakness. The whole idea beh<strong>in</strong>d a class library is to shield the user<br />
from th<strong>in</strong>gs he or she doesn’t need to know about. MFC fails that test <strong>in</strong> many cases. Folks<br />
who are com<strong>in</strong>g from W<strong>in</strong>dows programm<strong>in</strong>g <strong>in</strong> C consider that a strength. You can form<br />
your own op<strong>in</strong>ion. Along those same l<strong>in</strong>es, MFC is not OOP friendly. Sometimes it appears<br />
to be a hastily implemented collection of classes that don’t work and play well together rather<br />
than someth<strong>in</strong>g planned and designed from the ground up to work as a unit.<br />
Another problem with MFC is that the latest version is 32-bit only, as is the Visual <strong>C++</strong> 4.0<br />
compiler. Although you can still write 16-bit programs us<strong>in</strong>g Microsoft’s Visual <strong>C++</strong> 1.5<br />
(which comes with Visual <strong>C++</strong> 4.0), you will likely f<strong>in</strong>d a disappo<strong>in</strong>t<strong>in</strong>g development<br />
environment.<br />
So Who’s W<strong>in</strong>n<strong>in</strong>g?<br />
Without question, MFC is more widely used than OWL. Part of the reason is that both MFC<br />
and the Visual <strong>C++</strong> compiler bear the Microsoft name. It’s no secret that Microsoft is k<strong>in</strong>g<br />
of the hill <strong>in</strong> the PC software <strong>in</strong>dustry. It is also no secret that Microsoft has market<strong>in</strong>g power<br />
that other companies can only dream about. In addition, there is a prevail<strong>in</strong>g attitude of (to<br />
slightly modify a co<strong>in</strong>ed phrase) “No one ever got fired for buy<strong>in</strong>g Microsoft.”<br />
I firmly believe that OWL is the better framework. Few who have used both OWL and MFC<br />
extensively would argue that po<strong>in</strong>t. But MFC is undoubtedly the <strong>C++</strong> framework of choice<br />
today. There are many reasons, some of which I’ve alluded to already. Other reasons <strong>in</strong>clude<br />
a perceived lack of direction on <strong>Borland</strong>’s part <strong>in</strong> recent years. Some managers prefer to play<br />
it safe and buy a product produced by “the big M” regardless of technical merit. Hopefully<br />
that attitude won’t eventually lead us to a software <strong>in</strong>dustry with a gross lack of competition.<br />
This <strong>in</strong>dustry desperately needs companies like <strong>Borland</strong> that will push the envelope.<br />
So what is the future of <strong>C++</strong> frameworks? It’s nearly impossible to guess at this po<strong>in</strong>t. It could<br />
be that both MFC and OWL are los<strong>in</strong>g to the new kid on the block—components. Let’s take<br />
a look at the Visual Component Library now.
<strong>C++</strong> Class Frameworks and the Visual Component Model<br />
The Visual Component Library: The New<br />
Kid on the Block<br />
In 1995 <strong>Borland</strong> <strong>in</strong>troduced a revolutionary new product called Delphi. It was an <strong>in</strong>stant hit.<br />
Delphi offered rapid application development (RAD) us<strong>in</strong>g someth<strong>in</strong>g called components.<br />
Components are objects that can be dropped on a form and manipulated via properties,<br />
methods, and events. It’s visual programm<strong>in</strong>g, if you will.<br />
The concept of form-based programm<strong>in</strong>g was first popularized by Microsoft’s Visual Basic.<br />
Unlike Visual Basic, though, Delphi used a derivative of Pascal as its programm<strong>in</strong>g language.<br />
This new language, called Object Pascal, <strong>in</strong>troduced OOP to the Pascal language. In a sense,<br />
Object Pascal is to Pascal what <strong>C++</strong> is to C. Delphi and Object Pascal represented the<br />
marriage of object-oriented programm<strong>in</strong>g and form-based programm<strong>in</strong>g. In addition,<br />
Delphi could produce standalone executables. Real programs. Programs that did not require<br />
a runtime DLL <strong>in</strong> order to run; programs that were compiled, not <strong>in</strong>terpreted; programs that<br />
ran tens of times faster than Visual Basic programs. The programm<strong>in</strong>g world was impressed.<br />
Delphi didn’t just throw Object Pascal at you and let you flounder. It also <strong>in</strong>troduced the<br />
Visual Component Library (VCL). VCL is an application framework for W<strong>in</strong>dows programm<strong>in</strong>g<br />
<strong>in</strong> Object Pascal. But VCL is not really comparable to OWL and MFC. Yes, it is a<br />
framework, but the core is very different. It is different primarily because it was designed<br />
around the concept of properties, methods, and events.<br />
You may be wonder<strong>in</strong>g why I’m talk<strong>in</strong>g about Delphi. The reason is simple—it’s because the<br />
very same VCL that is the heart of Delphi is also the heart of <strong>C++</strong>Builder. That may come<br />
as a shock to you. If you are com<strong>in</strong>g from a <strong>C++</strong> background, you might be scratch<strong>in</strong>g your<br />
head right now, wonder<strong>in</strong>g how that works. If you are com<strong>in</strong>g from a Pascal background,<br />
you’re probably gr<strong>in</strong>n<strong>in</strong>g from ear to ear. If you are com<strong>in</strong>g to <strong>C++</strong>Builder from any other<br />
type of background, you probably don’t care either way. In the end, it doesn’t really matter<br />
because it works. Let’s look a little deeper <strong>in</strong>to VCL.<br />
Components<br />
As I talked about on Day 1, “Gett<strong>in</strong>g Your Feet Wet,” VCL components are objects that<br />
perform a specific programm<strong>in</strong>g task. VCL components are wrapped up <strong>in</strong> Object Pascal<br />
classes. From this po<strong>in</strong>t on <strong>in</strong> this book, we will be encounter<strong>in</strong>g components on a daily basis.<br />
I won’t spend a lot of time expla<strong>in</strong><strong>in</strong>g every detail of components right now because you will<br />
see by example how components work as you go through the rest of the book. Tomorrow I’ll<br />
expla<strong>in</strong> components <strong>in</strong> more detail.<br />
139<br />
5
<strong>14</strong>0 Day 5<br />
Properties, Methods, and Events<br />
On Day 1 I gave you a brief <strong>in</strong>troduction to the properties, methods, and events model. These<br />
three <strong>in</strong>gredients make up the public <strong>in</strong>terface of components <strong>in</strong> VCL (the part of the<br />
component the user will see). Let’s take a look at these elements one at a time.<br />
Properties<br />
Properties are elements of a component that control how the component operates. Many<br />
components have common properties. All visual components, for example, have a Top and<br />
a Left property. These two properties control where the component will be positioned on<br />
a form. In the case of form components, the Top and Left properties control where the form<br />
will be placed on the screen when the form is displayed. All components have an Owner<br />
property, which VCL uses to keep track of the child components a particular parent form or<br />
component owns.<br />
A picture is always worth a thousand words, so let’s fire up <strong>C++</strong>Builder aga<strong>in</strong> and I’ll show<br />
you properties <strong>in</strong> action. When you start <strong>C++</strong>Builder, you are greeted with a blank form and<br />
the Object Inspector.<br />
NOTE<br />
If you have the <strong>C++</strong>Builder options configured to save the desktop<br />
when you close <strong>C++</strong>Builder, you may see the last project you were<br />
work<strong>in</strong>g on when you start <strong>C++</strong>Builder. If that’s the case, choose<br />
File | New Application from the ma<strong>in</strong> menu to get a blank form.<br />
Right now the Object Inspector should look someth<strong>in</strong>g like Figure 5.1. If necessary, click on<br />
the Properties tab of the Object Inspector w<strong>in</strong>dow so that the form’s properties are displayed.<br />
The component’s properties are arranged <strong>in</strong> alphabetical order. If more properties exist than<br />
can be displayed at one time, the Object Inspector will have a scrollbar so that you can view<br />
additional properties. The Object Inspector w<strong>in</strong>dow can be moved and sized. I like my<br />
Object Inspector as tall as my screen permits so that I can see the maximum number of<br />
properties at one time. Scroll down through the properties until you locate the Left property<br />
and then click on it. Change the value for the Left property (any number between 0 and 600<br />
will do) and press Enter on the keyboard. Notice how the form moves as you change the value.<br />
This illustrates an important aspect of properties—they are more than simple data members<br />
of a class. Each property has an underly<strong>in</strong>g data member associated with it, but the property<br />
itself is not a class data member. Chang<strong>in</strong>g a property often leads to code executed beh<strong>in</strong>d<br />
the scenes.
Figure 5.1.<br />
The Object Inspector<br />
w<strong>in</strong>dow.<br />
NEW TERM<br />
NOTE<br />
<strong>C++</strong> Class Frameworks and the Visual Component Model<br />
Properties are often tied to access methods that execute when the property is modified.<br />
Th<strong>in</strong>gs start to get a little confus<strong>in</strong>g at this po<strong>in</strong>t. As I said, VCL is<br />
written <strong>in</strong> Pascal. Pascal uses the term method where <strong>C++</strong> uses the term<br />
function. To further muddy the waters, Pascal uses the term function to<br />
refer to a method that returns a value, and the term procedure to refer to<br />
a method that does not return a value. I would be happy enough to call<br />
them all functions (be<strong>in</strong>g the old <strong>C++</strong> hacker that I am), but when<br />
discuss<strong>in</strong>g VCL I will use the Pascal parlance. For the most part I will<br />
use the generic term method.<br />
Properties can be changed at design time (when you are design<strong>in</strong>g your form) and at runtime<br />
(when the program is runn<strong>in</strong>g through code you write). In either case, if the property has an<br />
access method, that access method will be called and executed when the property is modified.<br />
You have already seen an example of chang<strong>in</strong>g a property at design time when you changed<br />
the Left property and watched the form move on the screen. That is one of the strengths of<br />
VCL and how it is used <strong>in</strong> <strong>C++</strong>Builder: You can <strong>in</strong>stantly see on the screen what the result<br />
of your design change will be. Not all properties are able to show a visible change on the form<br />
at design time, however, so this does not happen <strong>in</strong> every case. Still, when possible the results<br />
of the new property value are immediately shown on the form.<br />
To change a property at runtime, you simply make an assignment to the property. When you<br />
make an assignment, VCL works beh<strong>in</strong>d the scenes to call the access method for that<br />
property. To change the Left property at runtime, you would use code like this:<br />
Ma<strong>in</strong>Form->Left = 200;<br />
<strong>14</strong>1<br />
5
<strong>14</strong>2 Day 5<br />
NOTE<br />
In the case of the Left property (as well as the Top property), VCL moves and repa<strong>in</strong>ts the<br />
form. (You W<strong>in</strong>dows API programmers can figure out that this eventually translates <strong>in</strong>to calls<br />
to the W<strong>in</strong>dows API functions SetW<strong>in</strong>dowPos() and InvalidateRect().)<br />
NEW TERM<br />
Notice that the previous code l<strong>in</strong>e uses the <strong>in</strong>direct member operator<br />
(->) to set the property. All VCL components are allocated from the<br />
heap. The <strong>in</strong>direction operator is always used to access a component’s<br />
properties and methods. Classes you write for use <strong>in</strong> your <strong>C++</strong>Builder<br />
applications can be allocated either from the heap or from the stack,<br />
but all VCL component classes, and all classes derived from them,<br />
must be allocated from the heap.<br />
Properties actually have two access specifiers, which are used when properties are read<br />
or modified. There is a read specifier and a write specifier.<br />
Suffice it to say that the access specifiers associate read and write methods (functions) with<br />
the property. When the property is read or written to, the functions associated with the<br />
property are called automatically. When you make an assignment as <strong>in</strong> the previous example,<br />
you are access<strong>in</strong>g the write specifier. In effect, VCL checks to see whether an access method<br />
exists for the write specifier. If so, the access method is called. If no access method exists, VCL<br />
simply assigns the new value to the data member associated with the property.<br />
When you reference a property (use the property as the right side of an equation), you are<br />
access<strong>in</strong>g the read specifier:<br />
<strong>in</strong>t x = Ma<strong>in</strong>Form->Left;<br />
In this case, VCL calls the read specifier to read the value of the Left property. In many cases,<br />
the read specifier does very little more than return the current value for a property.<br />
The properties of the property (sorry, I couldn’t resist!) are determ<strong>in</strong>ed by the writer of the<br />
component. A property can be read-only. A read-only property can be read—its value can<br />
be retrieved—but not written to. In other words, you can fetch the value of the property, but<br />
you can’t change it. In rare cases, a property could be made write-only (a property that can<br />
be written to but not read is not very useful <strong>in</strong> most cases). This is obviously the opposite of<br />
a read-only property.<br />
F<strong>in</strong>ally, some properties can be specified to be runtime-only. A runtime-only property is one<br />
that can only be accessed at runtime but not at design time. S<strong>in</strong>ce a runtime-only property<br />
does not apply at design time, it is not displayed <strong>in</strong> the Object Inspector. A runtime-only<br />
property can be declared as read-only, too, which means that it can only be accessed at<br />
runtime and can only be read (but not written to).
NOTE<br />
<strong>C++</strong> Class Frameworks and the Visual Component Model<br />
Some properties use an array as the underly<strong>in</strong>g data member. To illustrate let’s put a memo<br />
component on our blank form. Go to the <strong>C++</strong>Builder Component Palette, choose the<br />
Standard tab, and click on the Memo button. (The tool tip will tell when you are over the<br />
Memo button.) Now move to the form and click on the form where you want the top-left<br />
corner of the memo to appear. As soon as you place the memo component on the form, the<br />
Object Inspector switches to show you the properties of the component just placed on the<br />
form, <strong>in</strong> this case a TMemo. Locate the L<strong>in</strong>es property and click on it. Notice that the property<br />
value conta<strong>in</strong>s the text (TStr<strong>in</strong>gs) and that there is a little button with an ellipsis (…) to the<br />
right of the property value.<br />
The ellipsis button tells you that this property can be edited by <strong>in</strong>vok<strong>in</strong>g<br />
a property editor dialog box. For an array of str<strong>in</strong>gs, for <strong>in</strong>stance, a<br />
dialog box will be displayed <strong>in</strong> which you can type the str<strong>in</strong>gs. In the<br />
case of the Font property, click<strong>in</strong>g the ellipsis button will <strong>in</strong>voke the<br />
Choose Font dialog box. The exact type of the property editor is<br />
property specific, although certa<strong>in</strong> properties can share a common<br />
editor. You can br<strong>in</strong>g up the property editor by click<strong>in</strong>g the ellipsis<br />
button or by double-click<strong>in</strong>g the property value.<br />
The L<strong>in</strong>es property for a memo component is an array of str<strong>in</strong>gs. When you double-click the<br />
Value column, the str<strong>in</strong>g editor is displayed and you can then type the str<strong>in</strong>gs you want to<br />
be displayed <strong>in</strong> the memo component when the application runs. If you don’t want any<br />
str<strong>in</strong>gs displayed <strong>in</strong> the memo component, you will need to clear the property editor of any<br />
str<strong>in</strong>gs.<br />
Properties can be <strong>in</strong>stances of other VCL classes. The Font property is an obvious example.<br />
A font <strong>in</strong>cludes th<strong>in</strong>gs like the typeface, the color, the font size, and so on. Locate the Font<br />
property <strong>in</strong> the Object Inspector. (It doesn’t matter whether you have the memo component<br />
or the form selected.) Notice that there is a plus sign before the word “Font.” This tells you<br />
that there are <strong>in</strong>dividual properties with<strong>in</strong> this property that can be set. If you double-click<br />
on the property name, you will see that the Object Inspector expands the property to reveal<br />
the <strong>in</strong>dividual elements of that property. You can now edit the elements of the Font property<br />
<strong>in</strong>dividually. The same sett<strong>in</strong>gs can be edited by <strong>in</strong>vok<strong>in</strong>g the Property Editor. Either method<br />
can be used, and <strong>in</strong> the end the results are the same.<br />
NEW TERM<br />
Some properties are sets, or collections of other properties.<br />
The Style property with<strong>in</strong> the Font object is a good example of a set. Notice that Style has<br />
a plus sign <strong>in</strong> front of it. If you double-click on the Style property, you will see that the Style<br />
<strong>14</strong>3<br />
5
<strong>14</strong>4 Day 5<br />
node expands to reveal the contents of the set. In this case the set consists of the various styles<br />
available for fonts: bold, italic, underl<strong>in</strong>e, and strikeout. By double-click<strong>in</strong>g a style, you can<br />
turn that style on or off (set the value to true or false). Some properties can be enumerations.<br />
NEW TERM<br />
An enumeration is a list of possible choices for a property.<br />
When you click on an enumeration property, a drop-down arrow button appears to the right<br />
of the value. To see the choices <strong>in</strong> the enumeration, click the drop-down button to display<br />
the list of choices. Alternatively, you can double-click the value column for the property. As<br />
you double-click on the property’s value, the Object Inspector will cycle through (or<br />
enumerate) the choices. The Cursor property gives a good example of an enumerated<br />
property. Locate the Cursor property and click the arrow button to expose the list of possible<br />
cursors you can choose from.<br />
As long as you’ve got <strong>C++</strong>Builder runn<strong>in</strong>g and a blank form displayed, you might as well<br />
spend some time exam<strong>in</strong><strong>in</strong>g the various components and their properties. Go ahead; I’ll wait.<br />
HOUSE RULES: PROPERTIES<br />
■ Properties appear to be class data members and are accessed like class data<br />
members.<br />
■ Properties are not class data members. They are a special category of class member.<br />
■ Properties often <strong>in</strong>voke an access method when they are written to (assigned a<br />
value), but not always. It depends on how the particular component is written.<br />
■ Properties cannot be used as parameters <strong>in</strong> function calls.<br />
■ Properties usually have default values. The default value is the value that <strong>in</strong>itially<br />
shows up <strong>in</strong> the Object Inspector when a component is first utilized and is the<br />
value that will be used if no specific value is assigned.<br />
■ Properties can be designed as read-only, write-only, or runtime-only.<br />
■ Runtime-only properties do not show up <strong>in</strong> the Object Inspector and can be<br />
modified only at runtime.<br />
■ Properties can <strong>in</strong>clude<br />
■ Simple data types<br />
■ Arrays<br />
■ Sets<br />
■ Enumerations<br />
■ VCL class objects
<strong>C++</strong> Class Frameworks and the Visual Component Model<br />
Methods<br />
Methods <strong>in</strong> VCL components are functions (ahem…procedures and functions) that can be<br />
called to make the component perform certa<strong>in</strong> actions. For example, all visual components<br />
have a method called Show(), which displays the component, and a method called Hide(),<br />
which hides the component. Call<strong>in</strong>g these methods is exactly the same as call<strong>in</strong>g class member<br />
functions as we did on Day 3, “Up to Your Neck <strong>in</strong> <strong>C++</strong>”:<br />
MyW<strong>in</strong>dow->Show();<br />
// do some stuff, then later...<br />
MyW<strong>in</strong>dow->Hide();<br />
In <strong>C++</strong> parlance, methods are member functions of a component class. Methods <strong>in</strong> VCL can<br />
be declared as public, protected, or private just as functions <strong>in</strong> <strong>C++</strong> can be public, protected,<br />
or private. These keywords mean the same th<strong>in</strong>g <strong>in</strong> Object Pascal classes as they do <strong>in</strong> <strong>C++</strong><br />
classes. Public methods can be accessed by users of the component. In this example, both the<br />
Show() and Hide() methods are public. Protected methods cannot be accessed by users of the<br />
component, but can be accessed by classes (components) derived from a component. And,<br />
of course, private methods can be accessed only with<strong>in</strong> a class itself.<br />
Just like <strong>C++</strong> functions, some methods take parameters and return values, and others do not.<br />
It depends entirely on how the method was written by the component writer. For example,<br />
the GetTextBuf() method retrieves the text of a TEdit component. This method could be used<br />
to get the text from an edit control as follows:<br />
char buff[256];<br />
<strong>in</strong>t numChars = EditControl->GetTextBuf(buff, sizeof(buff));<br />
As you can see, this particular method takes two parameters and returns an <strong>in</strong>teger. When<br />
this method is called, the contents of the edit control are placed <strong>in</strong> buff, and the return value<br />
will be the number of characters retrieved from the edit control.<br />
For now, that’s all you need to know to use methods. I’ll get <strong>in</strong>to more detail later when I<br />
talk about writ<strong>in</strong>g components.<br />
HOUSE RULES: METHODS<br />
■ Methods can be private, protected, or public.<br />
■ Methods are called us<strong>in</strong>g the <strong>in</strong>direct membership operator.<br />
■ Methods may take parameters and may return values.<br />
■ Some methods take no parameters and return no value.<br />
■ A procedure is a method that does not return a value.<br />
■ A function is a method that returns a value.<br />
■ Only public methods can be called by component users.<br />
<strong>14</strong>5<br />
5
<strong>14</strong>6 Day 5<br />
Events<br />
W<strong>in</strong>dows is said to be an event-driven environment. Event-driven means that a<br />
program is driven by events that occur with<strong>in</strong> the W<strong>in</strong>dows environment. Events<br />
<strong>in</strong>clude mouse movements, mouse clicks, and keypresses.<br />
Programmers mov<strong>in</strong>g from DOS or ma<strong>in</strong>frame programm<strong>in</strong>g environments may have some<br />
difficulty with the concept of someth<strong>in</strong>g be<strong>in</strong>g event driven. A W<strong>in</strong>dows program cont<strong>in</strong>ually<br />
polls W<strong>in</strong>dows for events. Events <strong>in</strong> W<strong>in</strong>dows <strong>in</strong>clude a menu be<strong>in</strong>g activated, a button<br />
be<strong>in</strong>g clicked, a w<strong>in</strong>dow be<strong>in</strong>g moved, a w<strong>in</strong>dow need<strong>in</strong>g repa<strong>in</strong>t<strong>in</strong>g, a w<strong>in</strong>dow be<strong>in</strong>g<br />
activated, and so forth. W<strong>in</strong>dows notifies a program of an event by send<strong>in</strong>g a W<strong>in</strong>dows<br />
message. There are somewhere <strong>in</strong> the neighborhood of 175 possible messages that W<strong>in</strong>dows<br />
can send to an application. That’s a lot of messages! Fortunately, you don’t have to know<br />
about each and every one of them to program <strong>in</strong> <strong>C++</strong>Builder; there are only a couple dozen<br />
that are used frequently.<br />
In VCL, an event is anyth<strong>in</strong>g that occurs <strong>in</strong> the component that the user might need to know<br />
about. Each component is designed to respond to certa<strong>in</strong> events. Usually this means a<br />
W<strong>in</strong>dows event, but it can mean other th<strong>in</strong>gs as well. For example, a button component is<br />
designed to respond to a mouse click, as you would expect. But a nonvisual control such as<br />
a database component might respond to non-W<strong>in</strong>dows events such as the user reach<strong>in</strong>g the<br />
end of the table.<br />
When you respond to a component’s event, you are said to handle the event.<br />
Events are handled through functions called event handlers.<br />
NEW TERM<br />
NEW TERM<br />
NOTE<br />
VCL makes it <strong>in</strong>credibly easy to handle events. The events that a component has been<br />
designed to handle are listed under the Events tab <strong>in</strong> the Object Inspector w<strong>in</strong>dow. An event<br />
name is descriptive of the event to which it responds. For <strong>in</strong>stance, the event to handle a<br />
mouse click is called OnClick.<br />
You don’t have to handle every event that a component def<strong>in</strong>es. In fact,<br />
you rarely do. If you do not respond to a particular event, the event<br />
message is either discarded or handled <strong>in</strong> a default manner, as described<br />
by either VCL or the component itself. You can handle any events you<br />
have an <strong>in</strong>terest <strong>in</strong> and ignore the rest.<br />
This will make more sense if you can put it <strong>in</strong>to practice. To beg<strong>in</strong>, let’s start a new application<br />
from scratch. Choose File | New Application from the ma<strong>in</strong> menu. If you are prompted to<br />
save the current project, click No. Now you should aga<strong>in</strong> have a blank form. First, let’s set<br />
up the ma<strong>in</strong> form:
<strong>C++</strong> Class Frameworks and the Visual Component Model<br />
1. Change the Name property to PMEForm (PME for “properties, methods, and events”).<br />
2. Change the Caption property to PME Test Program.<br />
Next we need to add a memo component to the form:<br />
1. Choose the Standard tab on the Component Palette and click the Memo button.<br />
2. Click on the form to place a memo component on the form.<br />
3. Change the Name property to Memo. Be sure the memo component is selected so you<br />
don’t accidentally change the name of the form rather than the memo component.<br />
4. Double-click on the L<strong>in</strong>es property <strong>in</strong> the value column. The Str<strong>in</strong>g list editor will<br />
be displayed.<br />
5. Delete the word Memo and type A test program us<strong>in</strong>g properties, methods, and<br />
events. Click OK to close the Str<strong>in</strong>g list editor.<br />
6. Resize the memo component so that it occupies most of the form. Leave room for a<br />
button at the bottom.<br />
Your form should now look someth<strong>in</strong>g like the form shown <strong>in</strong> Figure 5.2.<br />
Figure 5.2.<br />
The form with a<br />
memo component<br />
added.<br />
Now let’s place a button on the form:<br />
1. Choose the Standard tab on the Component Palette and click the Button component<br />
button.<br />
2. Click on the form below the memo component to place the button on the form.<br />
3. Change the Name property for the button to Button.<br />
4. Change the Caption property to Show/Hide.<br />
5. Center the button on the form.<br />
<strong>14</strong>7<br />
5
<strong>14</strong>8 Day 5<br />
TIP<br />
You can center components visually, but for a more exact method you<br />
can use the Alignment Palette. Choose View | Alignment Palette from<br />
the ma<strong>in</strong> menu and then click the Center horizontally <strong>in</strong> w<strong>in</strong>dow<br />
button on the Alignment Palette to center a component horizontally on<br />
the form.<br />
We will use this button to alternately show and hide the memo component. Now we need<br />
to write some code so that the button does someth<strong>in</strong>g when clicked. Be sure the button<br />
component is selected and then click on the Events tab <strong>in</strong> the Object Inspector. A list of the<br />
events that a button component is designed to handle is presented. The top event should be<br />
the OnClick event. Double-click on the value column of the OnClick event. What happens<br />
next is one of the great th<strong>in</strong>gs about visual programm<strong>in</strong>g. The Code Editor comes to the top<br />
and displays the OnClick function, ready for you to type code. Figure 5.3 shows the Code<br />
Editor with the OnClick handler displayed.<br />
Figure 5.3.<br />
The <strong>C++</strong>Builder<br />
Code Editor with the<br />
OnClick handler<br />
displayed.<br />
NOTE<br />
This function looks like the class member functions I discussed on Day<br />
3 and, <strong>in</strong> fact, that’s exactly what it is. The only difference is that<br />
<strong>C++</strong>Builder functions use the __fastcall keyword (note that two
<strong>C++</strong> Class Frameworks and the Visual Component Model<br />
underscores proceed the fastcall keyword). It’s not important that<br />
you understand what __fastcall does, but just that every <strong>C++</strong>Builder<br />
function uses this call<strong>in</strong>g convention.<br />
You’ll probably want to make the Code Editor w<strong>in</strong>dow a little wider so you can see all of the<br />
text that is displayed. Before you go on, save the project. Choose File | Save from the ma<strong>in</strong><br />
menu. The first th<strong>in</strong>g you are prompted for is the name of the unit (source file). Type PMEMa<strong>in</strong><br />
and click OK. Next you are prompted for a filename for the project. Type PMETest and press<br />
Enter or click OK. Now on to the good stuff….<br />
Notice that the function is already set up for you and all you have to do is type the code. If<br />
you take a good look at the function, you will see that the function is called ButtonClick, that<br />
it is a member function of the TPMEForm class, that it returns void, and that it takes a po<strong>in</strong>ter<br />
to a TObject called Sender as a parameter. (I’ll talk about the Sender parameter <strong>in</strong> just a bit.)<br />
All that is left to do now is type code that alternately shows or hides the button each time the<br />
button is clicked. We’ll borrow a little code from our earlier discussion of methods. Edit the<br />
ButtonClick function until it looks like this:<br />
void __fastcall TPMEForm::ButtonClick(TObject *Sender)<br />
{<br />
static bool isVisible;<br />
isVisible = !isVisible;<br />
if (isVisible) Memo->Hide();<br />
else Memo->Show();<br />
}<br />
This code sets up a static variable named isVisible.<br />
NEW TERM<br />
A static variable is one that reta<strong>in</strong>s its value between function calls.<br />
Static variables are the exception to the rule regard<strong>in</strong>g un<strong>in</strong>itialized variables—static variables<br />
are <strong>in</strong>itially set to 0. In this case, isVisible is a bool variable, so it is <strong>in</strong>itially set to false.<br />
The second l<strong>in</strong>e of code <strong>in</strong> this function flips the bool variable between true and false by<br />
apply<strong>in</strong>g a logical NOT to the present value of the variable. It works like this: Initially the static<br />
variable is set to false. The first time the function executes, the variable is assigned NOT false,<br />
which is, of course, true. The next time the function executes, the variable is assigned NOT<br />
true, and so on. So each time the function executes, isVisible conta<strong>in</strong>s the opposite value<br />
it had on the previous function call. After that, the if/else pair calls either Show() or Hide()<br />
depend<strong>in</strong>g on the value of isVisible.<br />
<strong>14</strong>9<br />
5
150 Day 5<br />
NOTE<br />
Remember when you changed the Name property of the memo component<br />
to Memo? When you did that, <strong>C++</strong>Builder went to work beh<strong>in</strong>d the<br />
scenes. <strong>C++</strong>Builder first derived a class from TMemo. Then it created a<br />
dynamic <strong>in</strong>stance of the new class and gave it the variable name Memo.<br />
In the code <strong>in</strong> this section, Memo is a po<strong>in</strong>ter to the object. That is why<br />
the Show() and Hide() functions are accessed us<strong>in</strong>g the <strong>in</strong>direct member<br />
operator.<br />
That’s all there is to it! But does it work? Let’s f<strong>in</strong>d out. Click the Run button on the speedbar.<br />
After be<strong>in</strong>g compiled, the program runs and is displayed. It’s the moment of truth. Click the<br />
button, and the memo component is hidden. Click the button aga<strong>in</strong>, and the memo<br />
component is aga<strong>in</strong> displayed. It works! Hallelujah! After play<strong>in</strong>g with that for a m<strong>in</strong>ute, close<br />
the program (use the Close Program button <strong>in</strong> the upper-left corner of the title bar) and you<br />
are back to the Code Editor.<br />
Hmmm…all that mess<strong>in</strong>g with the static bool variable is a bit cumbersome. Th<strong>in</strong>k back to<br />
the discussion about properties. Wouldn’t it be nice if the memo component had a property<br />
that could tell us whether the component was currently visible? Is there such a beast? Of<br />
course there is! It’s called, predictably, Visible. Let’s make use of it. Aga<strong>in</strong>, edit the function<br />
until it looks like this:<br />
void __fastcall TPMEForm::ButtonClick(TObject *Sender)<br />
{<br />
if (Memo->Visible) Memo->Hide();<br />
else Memo->Show();<br />
}<br />
Aga<strong>in</strong> click the Run button. The program is displayed and, lo and behold, the button does<br />
what it’s supposed to. How about that? We managed to use properties, methods, and events<br />
<strong>in</strong> the same example.<br />
Are you gett<strong>in</strong>g the fever yet? Hold on, because there’s lots more to come. Oh, and wipe that<br />
silly gr<strong>in</strong> off your face…your boss th<strong>in</strong>ks you’re work<strong>in</strong>g!<br />
As you can see, the ButtonClick() function takes a po<strong>in</strong>ter to a TObject called Sender. Every<br />
event-handl<strong>in</strong>g function will have at least a Sender parameter. Depend<strong>in</strong>g on the event be<strong>in</strong>g<br />
handled, the function might have one or more additional parameters. For <strong>in</strong>stance, the<br />
OnMouseDown event handler looks like this:<br />
void __fastcall TPMEForm::ButtonMouseDown(TObject *Sender,<br />
TMouseButton Button, TShiftState Shift, Integer X, Integer Y)<br />
{<br />
}
<strong>C++</strong> Class Frameworks and the Visual Component Model<br />
In this case, you are gett<strong>in</strong>g <strong>in</strong>formation on the button that was pressed, which keyboard keys<br />
were pressed at the time the mouse was clicked, and the x,y coord<strong>in</strong>ate of the cursor when<br />
the mouse button was clicked. The event-handl<strong>in</strong>g function conta<strong>in</strong>s all the <strong>in</strong>formation you<br />
need to deal with the particular event that the event handler is designed to handle.<br />
So what exactly is Sender? Sender is a po<strong>in</strong>ter to the component that is send<strong>in</strong>g the message<br />
to the message handler. In this example, the Sender parameter is extra baggage because we<br />
know that the Show/Hide button is the sender. Sender exists to allow you to have more than<br />
one component use the same event handler. To illustrate, let’s create a new button and have<br />
one of our buttons be the Show button and the other be the Hide button:<br />
1. If the Code Editor is on top, press F12 to switch back to the Form Editor.<br />
2. Click on the Show/Hide button to select it. Change both the Name and Caption<br />
properties to Show.<br />
3. Add a new button to the form to the right of the Show button. Arrange the<br />
buttons, if desired, to give an even look to the form.<br />
4. Change the Name property for the new button to Hide. The Caption property will<br />
also change to Hide (you’ll have to press Enter before the Caption property will<br />
change).<br />
5. Click the Show button and then click on the Events tab <strong>in</strong> the Object Inspector.<br />
Notice that the OnClick event now says ShowClick. Edit it to say ButtonClick aga<strong>in</strong>.<br />
(The <strong>in</strong>itial event handler name is a default name. You can change it to any name<br />
you like.)<br />
6. Click the Hide button and f<strong>in</strong>d the OnClick event <strong>in</strong> the Object Inspector (it<br />
should be selected already). Next to the value is a drop-down arrow button. Click<br />
the arrow button and then choose ButtonClick from the list that drops down (there<br />
should only be one function name <strong>in</strong> the list at this po<strong>in</strong>t).<br />
7. Double-click on the value ButtonClick. You are presented with the Code Editor<br />
with the cursor <strong>in</strong> the ButtonClick() function. Modify the code so that it reads like<br />
this:<br />
void __fastcall TPMEForm::ButtonClick(TObject *Sender)<br />
{<br />
if (Sender == Hide) Memo->Hide();<br />
else Memo->Show();<br />
}<br />
8. Bake at 425 degrees for 1 hour or until golden brown. (Just mak<strong>in</strong>g sure you’re still<br />
awake.)<br />
Right now your form should look similar to Figure 5.4. Compile and run the program. Click<br />
each of the buttons to be sure that they do as advertised.<br />
151<br />
5
152 Day 5<br />
Figure 5.4.<br />
The form with all<br />
components added.<br />
What we have done here is create a s<strong>in</strong>gle event-handl<strong>in</strong>g function that handles the OnClick<br />
event of both buttons. We use the Sender parameter to determ<strong>in</strong>e which of the two buttons<br />
sent the OnClick event and then either hide or show the memo component as needed. We<br />
could have created a separate OnClick handler for each button, but with this method the code<br />
is a little more compact. Besides, it’s a good illustration of how Sender can be used.<br />
You can see from this exercise that once you have created an OnClick event handler for a<br />
particular component, you can attach that same handler to the OnClick event of any<br />
component on the form. I’ll discuss more of the details of events as we move through the<br />
book.<br />
HOUSE RULES: EVENTS<br />
■ You may respond to any of a component’s events as needed.<br />
■ You are not required to respond to all events a component def<strong>in</strong>es.<br />
■ Events are handled by event-handl<strong>in</strong>g functions called event handlers.<br />
■ Several components may share a common event handler.<br />
■ Event handler names produced by <strong>C++</strong>Builder are default names and may be<br />
changed by the programmer.<br />
■ Be sure to change an event handler’s name only <strong>in</strong> the Object Inspector.<br />
■ The Sender parameter of an event handler can be used to determ<strong>in</strong>e which<br />
component fired the event.
<strong>C++</strong> Class Frameworks and the Visual Component Model<br />
■ Double-click<strong>in</strong>g the event handler’s name <strong>in</strong> the Object Inspector will display the<br />
Code Editor and take you to the section of code conta<strong>in</strong><strong>in</strong>g the event handler.<br />
■ Each event handler conta<strong>in</strong>s the function parameters needed to properly<br />
handle that event.<br />
<strong>C++</strong>Builder and VCL<br />
As I have said, VCL is a library written <strong>in</strong> Object Pascal. VCL is written <strong>in</strong> Object Pascal<br />
because it was written for Delphi. It made perfect sense for the people at <strong>Borland</strong> to take an<br />
already-exist<strong>in</strong>g class library and adapt it for use <strong>in</strong> <strong>C++</strong>Builder. There was no po<strong>in</strong>t <strong>in</strong><br />
start<strong>in</strong>g from scratch to build <strong>C++</strong>Builder when they could hit the ground runn<strong>in</strong>g by<br />
implement<strong>in</strong>g Delphi’s VCL. An added benefit is that users of Delphi can easily move to<br />
<strong>C++</strong>Builder, and vice versa. Because both are us<strong>in</strong>g the same VCL, you don’t have to learn<br />
a new framework when mov<strong>in</strong>g around <strong>in</strong> the Delphi/<strong>C++</strong>Builder family.<br />
<strong>C++</strong>Builder is a <strong>C++</strong> compiler, and VCL is an Object Pascal library. How does that work,<br />
exactly? Truthfully, you shouldn’t be concerned about how it works at the compiler level, but<br />
rather how it affects the way you program <strong>in</strong> <strong>C++</strong>Builder. The bottom l<strong>in</strong>e is that VCL is<br />
Object Pascal and is nearly <strong>in</strong>visible. Take the follow<strong>in</strong>g code snippet, for <strong>in</strong>stance:<br />
<strong>in</strong>t screenW = GetSystemMetrics(SM_CXSCREEN);<br />
<strong>in</strong>t screenH = GetSystemMetrics(SM_CYSCREEN);<br />
<strong>in</strong>t h = Ma<strong>in</strong>Form->Height;<br />
<strong>in</strong>t w = Ma<strong>in</strong>Form->Width;<br />
Ma<strong>in</strong>Form->Top = (screenH / 2) - (h / 2);<br />
Ma<strong>in</strong>Form->Left = (screenW / 2) - (w / 2);<br />
TPo<strong>in</strong>t cPt;<br />
GetCursorPos(cPt);<br />
h -= 150;<br />
w -= 150;<br />
Ma<strong>in</strong>Form->Height = h;<br />
Ma<strong>in</strong>Form->Width = w;<br />
for (<strong>in</strong>t i=0;iHeight = h + i;<br />
Ma<strong>in</strong>Form->Width = w + i;<br />
SetCursorPos(<br />
Ma<strong>in</strong>Form->Left + Ma<strong>in</strong>Form->Width,<br />
Ma<strong>in</strong>Form->Top + Ma<strong>in</strong>Form->Height);<br />
}<br />
SetCursorPos(cPt.x, cPt.y);<br />
Now, <strong>in</strong> this code, which is Object Pascal and which is <strong>C++</strong>? As far as you are concerned, it’s<br />
all <strong>C++</strong>. VCL and <strong>C++</strong> work together seamlessly to give you rapid application development<br />
us<strong>in</strong>g <strong>C++</strong>. VCL gives you RAD through components, and the rest of your code can be<br />
written <strong>in</strong> <strong>C++</strong>.<br />
153<br />
5
154 Day 5<br />
VCL for <strong>C++</strong> Programmers<br />
This section is for current <strong>C++</strong> programmers mov<strong>in</strong>g to <strong>C++</strong>Builder, but will also be of<br />
<strong>in</strong>terest to new <strong>C++</strong> programmers. Although the follow<strong>in</strong>g is not terribly advanced, it is<br />
aimed at <strong>C++</strong> programmers, so if you get lost, muddle your way through and meet us on the<br />
other side.<br />
There are a couple th<strong>in</strong>gs <strong>C++</strong> programmers might f<strong>in</strong>d odd when mov<strong>in</strong>g to <strong>C++</strong>Builder.<br />
First, don’t forget that VCL is Object Pascal and not <strong>C++</strong>. Don’t try to make it <strong>C++</strong>. The<br />
system works very well as long as you understand that and work with<strong>in</strong> those parameters. All<br />
the code you write will be <strong>C++</strong>, but remember that VCL itself is not <strong>C++</strong>. With that <strong>in</strong> m<strong>in</strong>d,<br />
let me give you a couple th<strong>in</strong>gs to consider when us<strong>in</strong>g VCL.<br />
NOTE<br />
All VCL Objects Must Be Allocated Dynamically<br />
When you drop components on a form, <strong>C++</strong>Builder automatically writes code that<br />
dynamically creates the components, so you don’t have to th<strong>in</strong>k about it. However, you may<br />
need to create and use VCL classes at runtime. For <strong>in</strong>stance, let’s say you needed to display<br />
a File Open dialog box and you didn’t have a TFileOpen component on your form. No<br />
problem—you can just create the object on-the-fly. The code would look someth<strong>in</strong>g like this:<br />
TOpenDialog* dlg = new TOpenDialog(this);<br />
dlg->Title = “Open a New File”;<br />
dlg->Execute();<br />
Note that the object must be created us<strong>in</strong>g the new operator. If you attempt to use local<br />
allocation, you will get a compiler error that says VCL classes must be constructed us<strong>in</strong>g<br />
operator new.<br />
Most VCL components can be created at runtime as well as at design<br />
time. It’s easier to create the components at design time because it is<br />
much easier to set the properties us<strong>in</strong>g the Object Inspector than it is to<br />
set the properties through code. Still, there are times when you need to<br />
create components at runtime, and <strong>C++</strong>Builder allows you to do that.<br />
Object Pascal Does Not Support Overloaded Functions;<br />
Hence, VCL Classes Have No Overloaded Constructors<br />
In fact, VCL constructors typically do very little. Take the VCL version of the TRect class,<br />
for <strong>in</strong>stance. In order to construct and set up a TRect object <strong>in</strong> VCL, you would use code like<br />
this:
<strong>C++</strong> Class Frameworks and the Visual Component Model<br />
TRect rect;<br />
rect->left = 20;<br />
rect->top = 20;<br />
rect->right = 220;<br />
rect->bottom = 220;<br />
OWL also has a TRect class. In OWL you can create a TRect object and supply the top, left,<br />
bottom, and right members through the constructor:<br />
TRect rect(20, 20, 220, 220);<br />
Obviously, specify<strong>in</strong>g the rectangle’s parameters <strong>in</strong> the constructor saves you some typ<strong>in</strong>g.<br />
In addition, the OWL version of TRect has several constructors to create TRect <strong>in</strong>stances <strong>in</strong><br />
different ways. MFC’s CRect class has basically the same type of constructors as OWL’s TRect.<br />
What this means is that <strong>in</strong> some cases you have to give up the flexibility that <strong>C++</strong> allows you<br />
when construct<strong>in</strong>g VCL classes. It’s a m<strong>in</strong>or sacrifice <strong>in</strong> most cases.<br />
VCL Does Not Have Default Parameters for Functions<br />
To illustrate, let’s exam<strong>in</strong>e the W<strong>in</strong>dows API function MessageBox(). This function takes<br />
four parameters: the w<strong>in</strong>dow handle of the w<strong>in</strong>dow that is display<strong>in</strong>g the message box, the<br />
message box text, the message box title, and a Flags parameter that controls which buttons<br />
and icons are displayed on the message box. In MFC or OWL, you can call a message box<br />
by just specify<strong>in</strong>g the message box text:<br />
MessageBox(“This is a message.”);<br />
This is possible because the OWL and MFC versions of MessageBox() have default<br />
parameters for the message box title and style flags. You can specify the additional parameters,<br />
but if you don’t, the default values will be used. This is convenient for throw<strong>in</strong>g up message<br />
boxes with a m<strong>in</strong>imum of fuss. Here is the VCL equivalent to the previous l<strong>in</strong>e:<br />
Application->MessageBox(“This is a message”, “Message”, MB_OK);<br />
Because VCL does not have default parameters, you have to specify all the parameters. It’s<br />
not convenient, but not the end of the world, either. Note that <strong>in</strong> all three cases (MFC, OWL,<br />
and VCL), the framework takes care of supply<strong>in</strong>g the w<strong>in</strong>dow handle parameter.<br />
VCL Classes Do Not Support Multiple Inheritance<br />
This means that you cannot create a new component derived from two exist<strong>in</strong>g components.<br />
I don’t see this as a serious restriction because multiple <strong>in</strong>heritance is not widely used. Regular<br />
<strong>C++</strong> classes that you write for use <strong>in</strong> your <strong>C++</strong>Builder applications may use multiple<br />
<strong>in</strong>heritance.<br />
155<br />
5
156 Day 5<br />
VCL Explored<br />
The Visual Component Library is a well-designed framework. As with most good frameworks,<br />
VCL makes maximum use of <strong>in</strong>heritance. The bulk of the VCL framework is made<br />
up of classes that represent components. Other VCL classes are not related to components.<br />
These classes perform housekeep<strong>in</strong>g chores, act as helper classes, and provide some utility<br />
services.<br />
The VCL class hierarchy deal<strong>in</strong>g with components is fairly complex. Fortunately, you don’t<br />
have to know every detail of VCL to beg<strong>in</strong> programm<strong>in</strong>g <strong>in</strong> <strong>C++</strong>Builder. At the top of the<br />
VCL cha<strong>in</strong> you will f<strong>in</strong>d TObject. Figure 5.5 shows some of the ma<strong>in</strong> base classes and classes<br />
derived from them.<br />
Figure 5.5.<br />
The VCL class<br />
hierarchy.<br />
Nonvisual<br />
components<br />
TTimer,etc.<br />
TObject<br />
TPersistent<br />
TComponent<br />
TSpeedButton,etc.<br />
Visual<br />
components<br />
TControl<br />
TGraphicControl TW<strong>in</strong>Control<br />
TPanel,etc.<br />
TObject is the granddaddy of all component classes <strong>in</strong> VCL. Below TObject you see<br />
TPersistent. This class deals with a component’s ability to save itself to files and to memory<br />
as well as tak<strong>in</strong>g care of other messy details we don’t need to know about. I’m thankful (and<br />
you should be, too) that we don’t need to know much about TPersistent to program most<br />
applications <strong>in</strong> <strong>C++</strong>Builder.<br />
The TComponent class serves as a more direct base class for components. This class provides<br />
all the functionality that a basic component requires. Nonvisual components are derived<br />
from TComponent itself. Visual components are derived from TControl, which, as you can see<br />
from Figure 5.5, is derived from TComponent. TControl provides additional functionality that<br />
visual components require. The <strong>in</strong>dividual components, then, are derived from either<br />
TGraphicControl or TW<strong>in</strong>Control.
<strong>C++</strong> Class Frameworks and the Visual Component Model<br />
When you drop a component on a form, <strong>C++</strong>Builder creates code that <strong>in</strong>herits a class from<br />
the VCL class that represents that component. A po<strong>in</strong>ter to the object is created so that you<br />
can access the objects <strong>in</strong> your code. <strong>C++</strong>Builder uses the Name property <strong>in</strong> the class name and<br />
for the po<strong>in</strong>ter variable’s name. When we created the sample application earlier, we placed<br />
a memo component on the form. At that po<strong>in</strong>t <strong>C++</strong>Builder derived a class from TMemo and<br />
created an <strong>in</strong>stance of that class. Similarly, when we created a button on the form, <strong>C++</strong>Builder<br />
derived a class from TButton and created an <strong>in</strong>stance of that class. Before any of that took<br />
place, <strong>C++</strong>Builder had already derived a class from TForm and, of course, created an <strong>in</strong>stance<br />
of that class to represent the form.<br />
Some understand<strong>in</strong>g of the VCL classes is obviously required to beg<strong>in</strong> work<strong>in</strong>g with VCL.<br />
Although I cannot review each and every class <strong>in</strong> VCL, I can hit the high po<strong>in</strong>ts. Let’s take<br />
a look at some of the classes that you will use most frequently.<br />
Form and Application Classes<br />
Form and application classes represent forms and the Application object <strong>in</strong> VCL. These<br />
classes are all derived from TComponent and <strong>in</strong>deed are components themselves. They are listed<br />
separately to dist<strong>in</strong>guish them from the controls you drop on a form.<br />
TApplication<br />
The TApplication class encapsulates the basic operations of a W<strong>in</strong>dows program. TApplication<br />
takes care of th<strong>in</strong>gs like manag<strong>in</strong>g the application’s icon, provid<strong>in</strong>g context-sensitive help,<br />
and do<strong>in</strong>g basic message handl<strong>in</strong>g. Every <strong>C++</strong>Builder application has a po<strong>in</strong>ter to the<br />
TApplication object called Application. You will use the TApplication class primarily to<br />
execute message boxes, manage context-sensitive help, and set h<strong>in</strong>t text for buttons and status<br />
bars. TApplication is a bit of an oddity <strong>in</strong> VCL <strong>in</strong> that some of its properties (Icon, HelpFile,<br />
and Title) can be set via the Application page of the Project Options dialog box.<br />
TForm<br />
The TForm class encapsulates forms <strong>in</strong> VCL. Forms are used for ma<strong>in</strong> w<strong>in</strong>dows, dialog boxes,<br />
secondary w<strong>in</strong>dows, and just about any other w<strong>in</strong>dow type you can imag<strong>in</strong>e. TForm is a<br />
workhorse class <strong>in</strong> VCL. It has nearly 60 properties, 45 methods, and about 20 events it can<br />
respond to. I am go<strong>in</strong>g to discuss forms <strong>in</strong> detail tomorrow, so I won’t go <strong>in</strong>to a lot of detail<br />
right here.<br />
Component Classes<br />
This group encompasses a wide range of classes. This group could be further broken down<br />
<strong>in</strong>to separate categories, which I’ve done <strong>in</strong> the follow<strong>in</strong>g sections.<br />
157<br />
5
158 Day 5<br />
Standard Component Classes<br />
The standard components are those components that encapsulate the most common<br />
W<strong>in</strong>dows controls. The standard component classes <strong>in</strong>clude TButton, TEdit, TListBox,<br />
TMemo, TMa<strong>in</strong>Menu, TPopupMenu, TCheckBox, TRadioButton, TRadioGroup, TGroupBox, and<br />
TPanel.<br />
Most of these classes encapsulate a W<strong>in</strong>dows control, so I won’t discuss all of them right now.<br />
The TMa<strong>in</strong>Menu class encapsulates an application’s ma<strong>in</strong> menu. At design time, doubleclick<strong>in</strong>g<br />
the Ma<strong>in</strong>Menu component’s icon br<strong>in</strong>gs up the Menu Editor. TMa<strong>in</strong>Menu has properties<br />
that control whether the menu item is grayed out, whether it is checked, the help context ID,<br />
the item’s h<strong>in</strong>t text, and others. Each menu item has a s<strong>in</strong>gle event, OnClick, so that you can<br />
attach a function to a menu item be<strong>in</strong>g selected. I’ll discuss menus and the Menu Editor <strong>in</strong><br />
more detail on Day 7, “Work<strong>in</strong>g with the Form Designer and the Menu Designer.”<br />
Another of the standard components of <strong>in</strong>terest is TPanel.<br />
A panel represents a rectangular region on a form, usually with its own components,<br />
that can be treated as a s<strong>in</strong>gle unit.<br />
NEW TERM<br />
For <strong>in</strong>stance, if you wanted to build a speedbar for an application, you would start with a<br />
panel and then place speed buttons on the panel. If you move the panel, the speed buttons<br />
move with it. Panels can be used for a wide variety of tasks <strong>in</strong> <strong>C++</strong>Builder. You could use a<br />
panel to build a status bar, for example. Panels have properties that control what type of edge<br />
the panel should have; whether the panel is raised, sunken, or flat; and the width of the border.<br />
Comb<strong>in</strong>ations of these properties can be used to create a variety of 3D panels.<br />
<strong>C++</strong>Builder has another group of components that I’ll throw <strong>in</strong> with the standard controls.<br />
These controls can be found under the Additional tab on the Component Palette. The classes<br />
represent<strong>in</strong>g these components <strong>in</strong>clude TBitBtn, TSpeedButton, TMaskEdit, TStr<strong>in</strong>gGrid,<br />
TDrawGrid, TImage, TShape, TBevel, and TScrollBox. The TBitBtn class represents a button<br />
that has an image on it. TSpeedButton is also a button with an image, but this component is<br />
designed to be used as a speed button on a control bar. A TSpeedButton is not a true button,<br />
but rather a graphical depiction of a button. This allows you to have a large number of speed<br />
buttons and not consume W<strong>in</strong>dows resources for each of the buttons. The TImage component<br />
allows you to place an image on a form that can then be selected from a file on disk. The<br />
TBevel component can be used to create boxes and l<strong>in</strong>es that are raised (bumps) or lowered<br />
(dips). Bevels can be used to divide up a form <strong>in</strong>to visual regions and generally to provide an<br />
aesthetically pleas<strong>in</strong>g form.<br />
W<strong>in</strong>dows 95 Custom Control Classes<br />
VCL has component classes that encapsulate many of the W<strong>in</strong>dows 32-bit custom controls.<br />
These classes <strong>in</strong>clude TListView, TTreeView, TProgressBar, TTabControl, TPageControl,
<strong>C++</strong> Class Frameworks and the Visual Component Model<br />
TRichEdit, TImageList, TStatusBar, and a few others. Some of these controls are, by nature,<br />
complicated, and the VCL classes that represent them are fairly complicated as well. Trust<br />
me when I say that VCL does a great deal to ease the burden of work<strong>in</strong>g with these common<br />
controls. You’ll have to spend some time with these classes before you fully understand them.<br />
Database Component Classes<br />
VCL has a host of database components, which <strong>in</strong>clude both visual and nonvisual classes.<br />
Nonvisual database components <strong>in</strong>clude TDataSource, TDatabase, TTable, and TQuery. These<br />
classes encapsulate beh<strong>in</strong>d-the-scenes database operations.<br />
Visual database component classes are the part of the VCL database operations that users can<br />
see and <strong>in</strong>teract with. For <strong>in</strong>stance, a TDBGrid component is used to give users access to a<br />
database table that might be represented as a TTable component. In this way, the TDBGrid acts<br />
as the <strong>in</strong>terface between the user and the TTable. Through the TDBGrid, the user can view and<br />
edit the database table on disk.<br />
The TDBNavigator component provides buttons that allow the user to move through a<br />
database table. This class <strong>in</strong>cludes buttons for next record, previous record, first record, last<br />
record, cancel edit, accept edit, and undo edit.<br />
Other data-aware component classes hook standard W<strong>in</strong>dows controls to database fields.<br />
These classes <strong>in</strong>clude TDBText, TDBEdit, TDBListBox, and TDBImage, among others.<br />
Common Dialog Classes<br />
As you are no doubt aware, W<strong>in</strong>dows has common dialog boxes for th<strong>in</strong>gs like open<strong>in</strong>g files,<br />
sav<strong>in</strong>g files, choos<strong>in</strong>g fonts, and choos<strong>in</strong>g colors. VCL encapsulates these common dialog<br />
boxes <strong>in</strong> classes represent<strong>in</strong>g each type. The classes are TOpenDialog, TSaveDialog, TFontDialog,<br />
TColorDialog, TPr<strong>in</strong>tDialog, and TPr<strong>in</strong>terSetupDialog. VCL also adds the TF<strong>in</strong>dDialog and<br />
TReplaceDialog classes to this group of components. These components are nonvisual <strong>in</strong> that<br />
they do not have a design-time <strong>in</strong>terface that you can see. The dialog boxes are visible when<br />
displayed at runtime, of course.<br />
System Component Classes<br />
The System tab on the Component Palette conta<strong>in</strong>s a mixture of visual and nonvisual<br />
components. The TTimer class is used to represent a W<strong>in</strong>dows system timer. Its s<strong>in</strong>gle event<br />
is OnTimer, which is called each time the timer fires. The timer <strong>in</strong>terval is set through the<br />
Interval property. TTimer is a nonvisual component.<br />
VCL <strong>in</strong>cludes several component classes that allow you to build your own custom File Open<br />
or File Save dialog box. The classes are TFileListBox, TDirectoryListBox, TDriveComboBox,<br />
and TFilterComboBox.<br />
159<br />
5
160 Day 5<br />
Tucked <strong>in</strong>to this group of classes is the TMediaPlayer class. This class allows you to play media<br />
files like WAV audio, AVI video, and MIDI audio. The media can be played, stopped,<br />
paused, or positioned at a particular po<strong>in</strong>t <strong>in</strong> the file, as well as many other operations. This<br />
class has many properties and events that greatly simplify the complex world of the W<strong>in</strong>dows<br />
Media Control Interface (MCI).<br />
The System group <strong>in</strong>cludes OLE and dynamic data exchange (DDE) classes as well.<br />
GDI Classes<br />
The GDI (graphics device <strong>in</strong>terface) classes typically get a lot of work <strong>in</strong> W<strong>in</strong>dows GUI<br />
applications. These classes encapsulate the use of bitmaps, fonts, device contexts (DCs),<br />
brushes, and pens. It is through these GDI objects that graphics and text are displayed on a<br />
w<strong>in</strong>dow. The GDI classes are not associated with a specific component, but many components<br />
have <strong>in</strong>stances of these classes as properties. For example, an edit control has a property<br />
called Font that is an <strong>in</strong>stance of the TFont class.<br />
The term device context is well known by W<strong>in</strong>dows programmers whether they program <strong>in</strong><br />
C or with one of the <strong>C++</strong> frameworks. In VCL, though, the term is not widely used. This<br />
is because VCL calls DCs canvases and encapsulates the complex world of DCs <strong>in</strong> the TCanvas<br />
class. A canvas provides a surface that you can draw on us<strong>in</strong>g methods like MoveTo(),<br />
L<strong>in</strong>eTo(), and TextOut(). Bitmaps can be displayed on the canvas us<strong>in</strong>g the Draw() or<br />
StretchDraw() methods. The concept of a canvas that you draw on makes more sense than<br />
the archaic term device context, don’t you th<strong>in</strong>k?<br />
The TCanvas class conta<strong>in</strong>s <strong>in</strong>stances of the other GDI classes. For example, when you do a<br />
MoveTo()/L<strong>in</strong>eTo() sequence, a l<strong>in</strong>e is drawn with the current pen color. The Pen property is<br />
used to determ<strong>in</strong>e the current pen color and is an <strong>in</strong>stance of the TPen class. TPen has properties<br />
that determ<strong>in</strong>e what type of l<strong>in</strong>e to draw: the l<strong>in</strong>e width, the l<strong>in</strong>e style (solid, dashed, dotted,<br />
and so on), and the mode with which to draw the l<strong>in</strong>e.<br />
The TBrush class represents a brush that is used as the fill pattern for canvas operations like<br />
FillRect(), Polygon(), and Ellipse(). TBrush properties <strong>in</strong>clude Color, Style, and Bitmap.<br />
The Style property allows you to set a hatch pattern for the brush. The Bitmap property allows<br />
you to specify a bitmap that will be used for the fill pattern.<br />
TBitmap encapsulates bitmap operations <strong>in</strong> VCL. Properties <strong>in</strong>clude Palette, Height, Width,<br />
and TransparentColor. Methods <strong>in</strong>clude LoadFromFile(), LoadFromResourceID(), and<br />
SaveToFile(). TBitmap is used by other component classes such as TImage, TBitBtn, and<br />
TSpeedButton <strong>in</strong> addition to TCanvas.<br />
The TFont class handles font operations. Properties <strong>in</strong>clude Color, Height, and Style (bold,<br />
italic, normal, and so on). The TFont class is used by all component classes that display text.
<strong>C++</strong> Class Frameworks and the Visual Component Model<br />
In addition to the GDI classes listed here, there are others that either work as helper classes<br />
or extend a base class to provide extra functionality. As you work with <strong>C++</strong>Builder you will<br />
learn more about these classes and how to use them. Figure 5.6 shows the hierarchy of the<br />
VCL classes that encapsulate GDI operations.<br />
Figure 5.6.<br />
VCL GDI class<br />
hierarchy.<br />
TPicture<br />
TObject<br />
TPersistent<br />
TGraphic TCanvas<br />
TGraphicsObject<br />
TBitmap TIcon TMetaFile TMetaFileCanvas TControlCanvas TBrush TFont TPen<br />
Utility Classes<br />
So far I have discussed component classes. VCL also conta<strong>in</strong>s utility classes you can use <strong>in</strong><br />
your applications. A utility class simplifies some tasks <strong>in</strong> W<strong>in</strong>dows programm<strong>in</strong>g. For<br />
<strong>in</strong>stance, the TIniFile class eases the use of writ<strong>in</strong>g and read<strong>in</strong>g W<strong>in</strong>dows configuration files<br />
(.INI files). Conventional wisdom has it that the use of .INI files is out and the Registry is<br />
<strong>in</strong>. To aid <strong>in</strong> Registry operations, VCL has the TRegistry and TRegkeyInfo classes.<br />
The TRect and TPo<strong>in</strong>t classes (which are really just structures) aid <strong>in</strong> us<strong>in</strong>g various VCL and<br />
W<strong>in</strong>dows functions requir<strong>in</strong>g a po<strong>in</strong>t or rectangle parameter.<br />
The TStr<strong>in</strong>gs class is used to manipulate str<strong>in</strong>gs, and the TStr<strong>in</strong>gList class allows for arrays<br />
of str<strong>in</strong>gs. These classes are used by many of the component classes to store str<strong>in</strong>gs. For<br />
<strong>in</strong>stance, the TMemo class uses a TStr<strong>in</strong>gList object for its L<strong>in</strong>es property. TStr<strong>in</strong>gList has the<br />
capability to save its list of str<strong>in</strong>gs to file or load str<strong>in</strong>gs from a file us<strong>in</strong>g the LoadFromFile()<br />
and SaveToFile() methods.<br />
And That’s Not All…<br />
By no means did I cover all of the VCL classes here. I did, however, touch on the classes that<br />
you are most likely to use <strong>in</strong> your applications.<br />
Flip back a few pages and take another look at List<strong>in</strong>g 5.1 and the OWL example that<br />
performs the equivalent code <strong>in</strong> List<strong>in</strong>g 5.2. If you recall, I said that plac<strong>in</strong>g a bitmap image<br />
on a w<strong>in</strong>dow is even easier <strong>in</strong> <strong>C++</strong>Builder. Let me show you what I mean. First, beg<strong>in</strong> a new<br />
application <strong>in</strong> <strong>C++</strong>Builder. You should be look<strong>in</strong>g at a blank form. Perform the follow<strong>in</strong>g<br />
steps:<br />
1. Change the Caption property of the form to Bitmap Test Program.<br />
2. Click on the Additional tab on the Component Palette, choose the Image component,<br />
and place the component on the form.<br />
161<br />
5
162 Day 5<br />
3. Locate the Align property and change it to alClient. The picture component fills<br />
the client area of the form.<br />
4. Locate the Stretch property and change it to true.<br />
5. Locate the Picture property and double-click the Value column.<br />
6. The Picture Editor dialog box is displayed. Click the Load button. The File Open<br />
dialog box is displayed.<br />
7. Navigate to the \CBUILDER\IMAGES\SPLASH\256COLOR directory and choose an image<br />
from those presented (I like HANDSHAKE.BMP). Click OK.<br />
8. You are now back to the Image Editor dialog box, and the bitmap you chose is<br />
displayed <strong>in</strong> the preview w<strong>in</strong>dow. Click OK. (If you want to choose a different<br />
bitmap, click the Load button aga<strong>in</strong>.) The bitmap now fills the client area of the<br />
form.<br />
9. Click the Run button. When the application runs you can size the w<strong>in</strong>dow, and<br />
the bitmap will always fill the client area of the w<strong>in</strong>dow.<br />
See how easy it is? It would have been even easier if we hadn’t bothered to make the image<br />
fill the client area of the form. Figure 5.7 shows the bitmap test program runn<strong>in</strong>g.<br />
Figure 5.7.<br />
The bitmap test<br />
program runn<strong>in</strong>g.<br />
Summary<br />
Today you have learned about frameworks. You first learned about OWL and MFC and the<br />
role they have had <strong>in</strong> shap<strong>in</strong>g W<strong>in</strong>dows programm<strong>in</strong>g today. After that you learned about<br />
VCL and how it differs from the <strong>C++</strong> frameworks. We discussed properties, methods, and<br />
events, and you got a little hands-on experience <strong>in</strong> the process. We f<strong>in</strong>ished up today with<br />
an overview of the VCL classes that you are likely to encounter when programm<strong>in</strong>g <strong>in</strong><br />
<strong>C++</strong>Builder. I didn’t cover them all, but I gave you a brief look at the most commonly used<br />
classes.
<strong>C++</strong> Class Frameworks and the Visual Component Model<br />
So where is this <strong>in</strong>dustry go<strong>in</strong>g? The wave of the future appears to be components, but it is<br />
apparent that there will be a need for class libraries like MFC and OWL for quite some time<br />
to come. Some of you who are now us<strong>in</strong>g MFC or OWL will abandon them <strong>in</strong> favor of<br />
programs like <strong>C++</strong>Builder and Delphi. Others of you will use both your old tool and the new<br />
RAD tools. Still others will stick with what you know best. In any event, it is important to<br />
realize that each of these frameworks is a tool. My advice is simple: Use the most appropriate<br />
tool for the current job.<br />
If you have never used OWL or MFC, you don’t have to worry about what you are miss<strong>in</strong>g.<br />
<strong>C++</strong>Builder and VCL allow you to build robust applications <strong>in</strong> much less time than you could<br />
with one of the <strong>C++</strong> frameworks. This is particularly true when you take <strong>in</strong>to account the<br />
learn<strong>in</strong>g curve of VCL compared to that of MFC or OWL. Programm<strong>in</strong>g <strong>in</strong> <strong>C++</strong>Builder is<br />
much easier to learn, and you can write programs faster, too.<br />
Workshop<br />
The Workshop conta<strong>in</strong>s quiz questions to help you solidify your understand<strong>in</strong>g of the<br />
material covered and exercises to provide you with experience <strong>in</strong> us<strong>in</strong>g what you have learned.<br />
You can f<strong>in</strong>d answers to the quiz questions <strong>in</strong> Appendix A, “Answers to Quiz Questions.”<br />
Q&A<br />
Q What is a framework?<br />
A A framework, also called a class library, is a set of classes that simplifies W<strong>in</strong>dows<br />
programm<strong>in</strong>g. A good framework implements object-oriented design and objectoriented<br />
programm<strong>in</strong>g to apply an object-oriented approach to writ<strong>in</strong>g W<strong>in</strong>dows<br />
applications.<br />
Q Is VCL a <strong>C++</strong> framework?<br />
A No. VCL is a framework that works with <strong>C++</strong> <strong>in</strong> <strong>C++</strong>Builder, but it is written <strong>in</strong><br />
Object Pascal rather than <strong>C++</strong>. VCL is written <strong>in</strong> Object Pascal because it was<br />
<strong>in</strong>itially created for <strong>Borland</strong>’s Delphi.<br />
Q Am I supposed to know how to program <strong>in</strong> Pascal and <strong>C++</strong> <strong>in</strong> order to write<br />
W<strong>in</strong>dows programs with <strong>C++</strong>Builder?<br />
A No. The fact that VCL is Pascal is virtually transparent to you. As far as you are<br />
concerned, you are just programm<strong>in</strong>g <strong>in</strong> <strong>C++</strong>. Advanced <strong>C++</strong> users might notice<br />
some situations where VCL limits their choices, but most users of <strong>C++</strong>Builder<br />
will not.<br />
163<br />
5
164 Day 5<br />
Quiz<br />
Q It seems like the component way of do<strong>in</strong>g th<strong>in</strong>gs is the best approach. Is that<br />
true?<br />
A It is true for many applications, but certa<strong>in</strong>ly not for all. In some cases a framework<br />
such as OWL or MFC will be better suited to the task. For applications that use a<br />
lot of dialog boxes and w<strong>in</strong>dows, and for database applications, VCL is probably a<br />
very good choice. Overall, <strong>C++</strong>Builder is much easier to learn and easier to use<br />
than the <strong>C++</strong> class libraries.<br />
Q Are properties just class data members?<br />
A No. Properties are special creatures. Some properties simply set a data member <strong>in</strong><br />
the class. Other properties, when modified, <strong>in</strong>voke a method that performs special<br />
operations with that property. In these cases, a property does more than just set a<br />
data member.<br />
Q Do I have to respond to each and every event a component def<strong>in</strong>es?<br />
A No. You can respond to as many events as is appropriate for your application, or<br />
not respond to any events at all.<br />
Q There sure are a lot of VCL classes. I thought programm<strong>in</strong>g with <strong>C++</strong>Builder<br />
was go<strong>in</strong>g to be easy.<br />
A Programm<strong>in</strong>g with <strong>C++</strong>Builder is much easier than programm<strong>in</strong>g W<strong>in</strong>dows <strong>in</strong> C,<br />
and easier than programm<strong>in</strong>g with a <strong>C++</strong> framework like OWL or MFC. W<strong>in</strong>dows<br />
programm<strong>in</strong>g, no matter how good the programm<strong>in</strong>g tool, requires a lot of<br />
experience and knowledge to master. Over time, you will master it if you keep at it.<br />
Q Can I use <strong>C++</strong>Builder forms <strong>in</strong> my OWL and MFC programs?<br />
A Yes. Later <strong>in</strong> the book I’ll show you how you can do that.<br />
1. Are all components visible at design time and runtime?<br />
2. Which is better—OWL, MFC, or VCL?<br />
3. Can VCL objects be allocated locally (from the stack) as well as dynamically?<br />
4. Are methods <strong>in</strong> VCL components equivalent to functions <strong>in</strong> <strong>C++</strong>?<br />
5. Are all VCL classes ultimately derived from TObject?<br />
6. Name one nonvisual VCL component.<br />
7. Do all components share certa<strong>in</strong> common properties?<br />
8. Name two common properties that all visual components share.<br />
9. Can two or more components share the same event-handl<strong>in</strong>g function?<br />
10. What is the VCL term<strong>in</strong>ology for a W<strong>in</strong>dows device context? What is the name of<br />
the VCL class that encapsulates device contexts?
Exercises<br />
<strong>C++</strong> Class Frameworks and the Visual Component Model<br />
1. Write a paragraph describ<strong>in</strong>g how properties and class data members differ.<br />
2. Create a <strong>C++</strong>Builder application that displays a bitmap on the ma<strong>in</strong> form when a<br />
button is clicked.<br />
3. Create a <strong>C++</strong>Builder application that displays a message box that displays the text<br />
Hello, Bubba! when the ma<strong>in</strong> form is clicked.<br />
4. Create a <strong>C++</strong>Builder application that displays the text I’ve been resized! <strong>in</strong> red<br />
letters when the application is resized.<br />
5. Extra credit: Modify the program <strong>in</strong> exercise 4 so that the text disappears aga<strong>in</strong><br />
after 5 seconds.<br />
165<br />
5
166 Day 5
The <strong>C++</strong>Builder IDE Explored: Projects and Forms<br />
Day 6<br />
Week<br />
The <strong>C++</strong>Builder IDE<br />
Explored: Projects and<br />
Forms<br />
by Kent Reisdorph<br />
One of the most difficult aspects of learn<strong>in</strong>g how to use a new program is f<strong>in</strong>d<strong>in</strong>g<br />
your way around: gett<strong>in</strong>g to know the basic menu structure, what all the options<br />
do, and how the program works as a whole. If you are new to programm<strong>in</strong>g or<br />
new to <strong>C++</strong>, this task is complicated by the fact that you have to learn a new program<br />
(the <strong>C++</strong>Builder IDE) and learn a new language at the same time. It can<br />
be a bit overwhelm<strong>in</strong>g at times. I’ll do my best to make learn<strong>in</strong>g the <strong>C++</strong>Builder<br />
IDE a pa<strong>in</strong>less experience. For the most part, you will learn by example, which<br />
is more <strong>in</strong>terest<strong>in</strong>g (not to mention more effective). So, without further ado, and<br />
referr<strong>in</strong>g to Figure 6.1, let’s get on with it.<br />
1<br />
167<br />
6
6<br />
168 Day 6<br />
Figure 6.1.<br />
The <strong>C++</strong>Builder IDE<br />
w<strong>in</strong>dows.<br />
Ma<strong>in</strong> menu<br />
Toolbar<br />
Object<br />
Inspector<br />
Code Editor<br />
The <strong>C++</strong>Builder IDE consists of these ma<strong>in</strong> parts:<br />
■ The ma<strong>in</strong> menu and toolbar<br />
■ The Component Palette<br />
■ The Form Designer<br />
■ The Code Editor<br />
■ The Object Inspector<br />
Component Palette Form Designer<br />
■ The Project Manager<br />
I can’t cover all these <strong>in</strong> a s<strong>in</strong>gle chapter, so over the next several chapters I will show you<br />
around the <strong>C++</strong>Builder IDE and exam<strong>in</strong>e each of these features <strong>in</strong> detail. I’ll start today by<br />
discuss<strong>in</strong>g projects and how they are used <strong>in</strong> writ<strong>in</strong>g <strong>C++</strong>Builder applications. After that,<br />
we’ll look at the <strong>C++</strong>Builder toolbar and the Component Palette. Then I’ll move to<br />
discuss<strong>in</strong>g forms <strong>in</strong> greater detail than I have up to this po<strong>in</strong>t. Along the way we’ll create some<br />
sample programs to illustrate various aspects of <strong>C++</strong>Builder. We’ll close the day by look<strong>in</strong>g<br />
at the Object Inspector. This will be a warm-up for tomorrow, when you will learn all about<br />
the <strong>C++</strong>Builder Form Designer.<br />
For starters, let’s look at the way <strong>C++</strong>Builder views applications and how it has simplified the<br />
process of creat<strong>in</strong>g programs.
The <strong>C++</strong>Builder IDE Explored: Projects and Forms<br />
Projects <strong>in</strong> <strong>C++</strong>Builder<br />
As you know by now, a lot goes on beh<strong>in</strong>d the scenes as you write a <strong>C++</strong>Builder application.<br />
In fact, more goes on than I have told you about up to this po<strong>in</strong>t. It’s not vital that you know<br />
every detail about what happens beh<strong>in</strong>d the scenes as you write a <strong>C++</strong>Builder application, but<br />
it is a good idea to have a general overview.<br />
A project is a collection of files that work together to create a standalone executable<br />
file or DLL.<br />
NEW TERM<br />
Files Used <strong>in</strong> <strong>C++</strong>Builder Projects<br />
<strong>C++</strong>Builder manages a project through the use of several support files. To illustrate, let’s<br />
create a simple application to get a look at some of what goes on when <strong>C++</strong>Builder builds an<br />
executable file for your program. Do the follow<strong>in</strong>g:<br />
1. Before you beg<strong>in</strong>, create a fresh directory on your hard drive.<br />
2. Now choose File | New Application from the ma<strong>in</strong> menu. A blank form is displayed.<br />
3. Before you do anyth<strong>in</strong>g else, choose File | Save Project from the ma<strong>in</strong> menu.<br />
4. First, you will be prompted for the name of the unit file. Be sure to switch to the<br />
empty directory you just created.<br />
5. Next, type <strong>in</strong> the name MyUnit for the unit filename and click OK.<br />
6. Now you are prompted for the project name. Type TEST <strong>in</strong> the File name field and<br />
click OK.<br />
7. Now choose Project | Build All from the ma<strong>in</strong> menu. <strong>C++</strong>Builder displays the<br />
compile status box and goes to work compil<strong>in</strong>g the program.<br />
8. After a while, the compile status box reports that it is done compil<strong>in</strong>g, and the OK<br />
button is enabled. Click OK to close the compile status dialog box<br />
9. Now choose Project | Close All from the ma<strong>in</strong> menu. (Yes, this exercise does have a<br />
purpose.)<br />
10. Now run W<strong>in</strong>dows Explorer and locate the directory where you saved the project.<br />
You should see a number of files.<br />
Wow! All that to create just one little program that does noth<strong>in</strong>g? Yep, it’s true. First, let me<br />
tell you what happens when <strong>C++</strong>Builder builds an application; then I’ll expla<strong>in</strong> what each<br />
of these files is for.<br />
169<br />
6
6<br />
170 Day 6<br />
NOTE<br />
Files with extensions that beg<strong>in</strong> with a tilde (~) are backup files.<br />
<strong>C++</strong>Builder may create several backup files, depend<strong>in</strong>g on the number<br />
of source files <strong>in</strong> the project and the project options you have set.<br />
Project options are discussed on Day 10, “More on Projects.”<br />
When you first create a project, <strong>C++</strong>Builder creates a m<strong>in</strong>imum of six files (assum<strong>in</strong>g a typical<br />
<strong>C++</strong>Builder GUI application):<br />
■ The project source file<br />
■ The ma<strong>in</strong> form source file<br />
■ The ma<strong>in</strong> form header file<br />
■ The ma<strong>in</strong> form resource file<br />
■ The application resource file<br />
■ The project makefile<br />
The project source file is the file that conta<strong>in</strong>s the W<strong>in</strong>Ma<strong>in</strong>() function and other <strong>C++</strong>Builder<br />
startup code. You can view the project source file by choos<strong>in</strong>g View | Project Source from the<br />
ma<strong>in</strong> menu. The ma<strong>in</strong> form source file and ma<strong>in</strong> form header file are files that conta<strong>in</strong> the class<br />
declaration and def<strong>in</strong>ition for the ma<strong>in</strong> form’s class. <strong>C++</strong>Builder will create an additional<br />
source file and header for each new form you create. The ma<strong>in</strong> form resource file and<br />
application resource file are b<strong>in</strong>ary files that describe the ma<strong>in</strong> form and the application’s icon.<br />
I’ll expla<strong>in</strong> that <strong>in</strong> more detail a little later, <strong>in</strong> the section titled “Dialog Boxes <strong>in</strong> Traditional<br />
W<strong>in</strong>dows Programs.”<br />
Somewhere <strong>in</strong> this process, <strong>C++</strong>Builder creates the project makefile. The makefile is a text file<br />
that conta<strong>in</strong>s <strong>in</strong>formation about the compiler options you have set, the names of the source<br />
files and forms that make up the project, and what library files have to be <strong>in</strong>cluded.<br />
NOTE<br />
There are two types of library files. A static library conta<strong>in</strong>s common<br />
code that an application needs <strong>in</strong> order to run. An import library is<br />
needed when your application references functions <strong>in</strong> a DLL, such as<br />
the W<strong>in</strong>dows API functions. The number and exact filenames of the<br />
library files required depend on the features your application uses.<br />
Fortunately, you don’t have to worry about manag<strong>in</strong>g the library files<br />
because <strong>C++</strong>Builder takes care of that detail for you. Library files have<br />
an .LIB extension and are tucked away <strong>in</strong> your <strong>C++</strong>Builder \lib<br />
directory.
The <strong>C++</strong>Builder IDE Explored: Projects and Forms<br />
There are a few more odds and ends, but that’s the bulk of what is conta<strong>in</strong>ed <strong>in</strong> the makefile.<br />
When you tell <strong>C++</strong>Builder to compile the project, it hands the makefile to the compiler.<br />
(Technically, the makefile is read by the Make utility, but why quibble over details?) The<br />
compiler reads the makefile and beg<strong>in</strong>s compil<strong>in</strong>g all the source files that make up the project.<br />
Several th<strong>in</strong>gs happen dur<strong>in</strong>g this process. First, the <strong>C++</strong> compiler compiles the <strong>C++</strong> source<br />
files <strong>in</strong>to b<strong>in</strong>ary object files. Then the resource compiler compiles any resources, such as the<br />
program’s icon and form files, <strong>in</strong>to b<strong>in</strong>ary resource files. Next, the l<strong>in</strong>ker takes over. The<br />
l<strong>in</strong>ker takes the b<strong>in</strong>ary files the compilers created, adds any library files the project needs, and<br />
b<strong>in</strong>ds them all together to produce the f<strong>in</strong>al executable file. Along the way it produces more<br />
files that perform some special operations (I’ll get to that <strong>in</strong> a m<strong>in</strong>ute). When it’s all over, you<br />
have a standalone program that can be run <strong>in</strong> the usual ways.<br />
Okay, but what are all those files for? Table 6.1 lists the file extensions <strong>C++</strong>Builder uses, with<br />
a description of the role that each file type plays.<br />
Table 6.1. Types of files used <strong>in</strong> <strong>C++</strong>Builder.<br />
Extension Description<br />
.CPP The <strong>C++</strong> source files. There will usually be one for each unit and<br />
one for the ma<strong>in</strong> project file, as well as any other source files that<br />
you add to the project.<br />
.DFM The form file. This file is actually a b<strong>in</strong>ary resource file (.RES) <strong>in</strong><br />
disguise. It is a description of the form and all its components. Each<br />
form has its own .DFM file.<br />
.DSK The desktop file. This file keeps track of the way the desktop<br />
appeared when you last saved (or closed) the project. All the open<br />
w<strong>in</strong>dows’ sizes and positions are saved so that when you reopen the<br />
project it looks the same as it did when you left it.<br />
.EXE The f<strong>in</strong>al executable program.<br />
.H <strong>C++</strong> header files that conta<strong>in</strong> class declarations. These could be<br />
<strong>C++</strong>Builder-generated files or your own class headers.<br />
.IL? The four files whose extension beg<strong>in</strong>s with .IL are files created by<br />
the <strong>in</strong>cremental l<strong>in</strong>ker. The <strong>in</strong>cremental l<strong>in</strong>ker saves you time by<br />
l<strong>in</strong>k<strong>in</strong>g only the parts of the program that have changed s<strong>in</strong>ce the<br />
last build.<br />
171<br />
cont<strong>in</strong>ues<br />
6
6<br />
172 Day 6<br />
Table 6.1. cont<strong>in</strong>ued<br />
Extension Description<br />
NOTE<br />
NOTE<br />
.OBJ The compiled b<strong>in</strong>ary object files. These are the files that the compiler<br />
produces when it compiles your <strong>C++</strong> source files.<br />
.MAK The project makefile. This is a text file that conta<strong>in</strong>s a description of<br />
which files <strong>C++</strong>Builder needs to compile and l<strong>in</strong>k.<br />
.RES A compiled b<strong>in</strong>ary resource file produced by the resource compiler.<br />
.TDW The debugger symbol table. This file is used by the debugger dur<strong>in</strong>g<br />
debugg<strong>in</strong>g sessions.<br />
<strong>C++</strong>Builder database applications will use other database-specific file<br />
types as well. Database applications are discussed <strong>in</strong> detail <strong>in</strong> later<br />
chapters.<br />
The files that <strong>C++</strong>Builder produces can be broken down <strong>in</strong>to two categories: files that<br />
<strong>C++</strong>Builder relies on to build the project and files that it will create when it compiles and l<strong>in</strong>ks<br />
a project. If you were to move all your source files to another computer, for <strong>in</strong>stance, you<br />
wouldn’t have to move all the files, just the files <strong>C++</strong>Builder needs to build the application.<br />
Conveniently, the source files happen to be the smallest files <strong>in</strong> the project. It does not take<br />
a lot of disk space to back up just the project source files.<br />
The m<strong>in</strong>imum set of files consists of the .CPP, .H, .DFM, and .MAK files. All other files are files<br />
that <strong>C++</strong>Builder will re-create when you compile the program. The desktop file (.DSK) is one<br />
that you may want to hang on to because it keeps track of the state your project was <strong>in</strong> when<br />
you last worked on it.<br />
In addition to the source files I’ve mentioned, some applications use a<br />
resource script file. Resource scripts have an .RC extension. Resource<br />
scripts are text files that are used to def<strong>in</strong>e resources like bitmaps, icons,<br />
or cursors. If you use a resource script, be sure to keep it with the<br />
project if you move the project to another location.
The <strong>C++</strong>Builder IDE Explored: Projects and Forms<br />
Figure 6.2 illustrates how <strong>C++</strong>Builder takes source files and compiles and l<strong>in</strong>ks them to form<br />
the f<strong>in</strong>al executable file.<br />
Figure 6.2.<br />
The <strong>C++</strong>Builder<br />
compile/l<strong>in</strong>k process.<br />
TIP<br />
Source files<br />
MYMAIN.CPP MYUNIT.CPP MYUNIT2.CPP<br />
B<strong>in</strong>ary<br />
code files<br />
MYMAIN.OBJ MYUNIT.OBJ MYUNIT2.OBJ MYMAIN.RES<br />
Library files<br />
<strong>C++</strong> compiler<br />
L<strong>in</strong>ker<br />
MYMAIN.EXE<br />
B<strong>in</strong>ary<br />
resource files<br />
MY MYUNIT.DFM<br />
UNIT.DFM<br />
MYUNIT2.DFM<br />
If you f<strong>in</strong>d yourself runn<strong>in</strong>g low on hard disk space, you can delete<br />
some of the <strong>C++</strong>Builder files from projects you are not currently<br />
work<strong>in</strong>g on. It is safe to delete the files with the .OBJ, .RES, and .TDW<br />
extensions, as well as any files with extensions beg<strong>in</strong>n<strong>in</strong>g with .IL.<br />
Some of these files can grow quite large, and there is no use keep<strong>in</strong>g<br />
them for noncurrent projects.<br />
173<br />
6
6<br />
174 Day 6<br />
WARNING<br />
Source Code Units<br />
Do not delete any files from the <strong>C++</strong>Builder directories other than the<br />
Examples directory. If <strong>in</strong> doubt, don’t delete!<br />
Earlier I mentioned that most applications of any size have several source files, which <strong>Borland</strong><br />
calls units. The use of the term unit <strong>in</strong> <strong>C++</strong>Builder is a holdover from Pascal and Delphi.<br />
<strong>C++</strong>Builder has its roots <strong>in</strong> the Delphi IDE, and unit is used throughout both VCL and the<br />
<strong>C++</strong>Builder IDE itself. <strong>C++</strong> programmers would typically refer to a file conta<strong>in</strong><strong>in</strong>g a<br />
program’s source as a module. While us<strong>in</strong>g the term module would have been more <strong>C++</strong><br />
friendly (and less Pascal-like), replac<strong>in</strong>g the word unit with module would have required<br />
major changes to the <strong>C++</strong>Builder <strong>in</strong>frastructure, so the term unit was left <strong>in</strong>. If you are<br />
com<strong>in</strong>g from a <strong>C++</strong> programm<strong>in</strong>g background, it might seem odd to refer to modules as<br />
units, but you will get used to it soon enough. In the end, there’s no po<strong>in</strong>t <strong>in</strong> gett<strong>in</strong>g hung<br />
up over term<strong>in</strong>ology.<br />
<strong>C++</strong>Builder uses the term unit to refer to source files.<br />
NEW TERM<br />
NOTE<br />
Each time you create a new form, <strong>C++</strong>Builder does the follow<strong>in</strong>g:<br />
■ Creates a form file (.DFM)<br />
■ Derives a class from TForm or from another form class<br />
■ Creates a header (.H file) conta<strong>in</strong><strong>in</strong>g the class declaration<br />
■ Creates a unit (.CPP file) for the class def<strong>in</strong>ition<br />
■ Adds the new form <strong>in</strong>formation to the project makefile<br />
Initially <strong>C++</strong>Builder assigns the default name Form1 to the form, Unit1.cpp for the associated<br />
unit, and Unit1.h for the header. The second form created for the project would have the<br />
default name Form2, and so on.<br />
As soon as you create a new project, you should save it with a mean<strong>in</strong>gful<br />
name. Likewise, every time you create a new form, you should save<br />
it with a descriptive name. This makes it easier to locate forms and<br />
units when you need to make modifications.
NOTE<br />
The <strong>C++</strong>Builder IDE Explored: Projects and Forms<br />
When do<strong>in</strong>g a technical book, a nasty situation often arises. I want to<br />
use mean<strong>in</strong>gful examples to re<strong>in</strong>force the presentation of <strong>in</strong>formation.<br />
In order to complete those examples, I have to use techniques or<br />
methods that I haven’t talked about yet. But I can’t talk about those<br />
methods until I’ve given you some good, mean<strong>in</strong>gful examples. But I<br />
can’t… well, you see my dilemma. So I’m go<strong>in</strong>g to digress a little here<br />
and talk about the ma<strong>in</strong> menu, toolbar, and Component Palette. As<br />
you read this section, remember that we’re off on a tangent.<br />
The <strong>C++</strong>Builder Ma<strong>in</strong> Menu and Toolbar<br />
The <strong>C++</strong>Builder ma<strong>in</strong> menu has all the choices necessary to make <strong>C++</strong>Builder work. Because<br />
programm<strong>in</strong>g <strong>in</strong> <strong>C++</strong>Builder is a highly visual operation, you may not use the ma<strong>in</strong> menu<br />
as much as you might <strong>in</strong> other programm<strong>in</strong>g environments. Still, just about anyth<strong>in</strong>g you<br />
need is available from the ma<strong>in</strong> menu if you prefer to work that way. I’m not go<strong>in</strong>g to go over<br />
every item on the ma<strong>in</strong> menu here because you will encounter each item as you work through<br />
the next several chapters.<br />
The <strong>C++</strong>Builder toolbar is a convenient way of accomplish<strong>in</strong>g often-repeated tasks. A button<br />
is easier to locate than a menu item, not to mention that it requires less mouse movement.<br />
The <strong>C++</strong>Builder toolbar’s default configuration is illustrated <strong>in</strong> Figure 6.3.<br />
Figure 6.3.<br />
The <strong>C++</strong>Builder<br />
toolbar.<br />
Add to Project<br />
Save All<br />
Open Project<br />
Open File<br />
Save<br />
File<br />
Remove<br />
from<br />
Project<br />
Select Unit Select Form Run<br />
Toggle<br />
Unit/Form<br />
New<br />
Form<br />
Trace<br />
Into<br />
Pause<br />
Step<br />
Over<br />
If you are like me, you often forget to use the toolbar. But I’m tell<strong>in</strong>g you: Don’t forget to<br />
learn to use the toolbar. As the old say<strong>in</strong>g goes, “Do as I say, not as I do.” If you take the time<br />
to learn the toolbar, it will save you time and make you more efficient <strong>in</strong> the long run. One<br />
of the reasons you bought <strong>C++</strong>Builder was to produce W<strong>in</strong>dows applications quickly, so you<br />
might as well make the most of it.<br />
175<br />
6
6<br />
176 Day 6<br />
The <strong>C++</strong>Builder toolbar is fully customizable. As you saw back <strong>in</strong> Figure 6.1, between the<br />
toolbar and the Component Palette is a vertical l<strong>in</strong>e that acts as a siz<strong>in</strong>g bar. When you place<br />
the mouse cursor over the siz<strong>in</strong>g bar, you will see the siz<strong>in</strong>g cursor (a double-headed black<br />
arrow). Once you have the siz<strong>in</strong>g cursor, you can drag the siz<strong>in</strong>g bar right or left to make the<br />
toolbar take more or less room on the <strong>C++</strong>Builder ma<strong>in</strong> w<strong>in</strong>dow.<br />
Customiz<strong>in</strong>g the toolbar is remarkably easy. <strong>C++</strong>Builder allows you to add buttons to the<br />
toolbar, remove buttons, and rearrange buttons however you see fit. To configure the toolbar,<br />
you must use the toolbar speed menu. To display the speed menu, place your mouse cursor<br />
over the toolbar and click the secondary mouse button. The speed menu choices are listed<br />
<strong>in</strong> Table 6.2.<br />
Table 6.2. Items on the toolbar’s speed menu.<br />
Menu Item Description<br />
Show H<strong>in</strong>ts Controls whether the h<strong>in</strong>ts (tool tips) are displayed for the<br />
toolbar buttons.<br />
Hide Hides the toolbar.<br />
Help Invokes <strong>C++</strong>Builder help with the toolbar page displayed.<br />
Properties Displays the Toolbar Editor dialog box, which allows you to<br />
customize the toolbar.<br />
NOTE<br />
If you have hidden the toolbar, you will have to choose View | Toolbar<br />
from the ma<strong>in</strong> menu to display the toolbar aga<strong>in</strong>.<br />
To customize the toolbar, choose Properties from the speed menu. When you choose this<br />
menu item, the Toolbar Editor dialog box is displayed. This dialog box conta<strong>in</strong>s all the<br />
possible toolbar buttons. To add a button to the toolbar, just locate it <strong>in</strong> the Toolbar Editor<br />
and drag it to the place you want it to occupy on the toolbar. To remove a button, grab it<br />
and drag it off the toolbar. It’s as simple as that. If you really make a mess of th<strong>in</strong>gs, just click<br />
the Reset button <strong>in</strong> the Toolbar Editor dialog box (see Figure 6.4), and the toolbar will revert<br />
to its default sett<strong>in</strong>gs.<br />
If you want to make room for more buttons, drag the siz<strong>in</strong>g bar to the right to make the<br />
toolbar wider. Now just drag any buttons you want from the Toolbar Editor to the toolbar.<br />
The toolbar has an <strong>in</strong>visible grid that aids you when dropp<strong>in</strong>g new buttons; just get the<br />
buttons close to where you want them and they will snap <strong>in</strong>to place. I happen to like the Cut,
The <strong>C++</strong>Builder IDE Explored: Projects and Forms<br />
Copy, and Paste buttons on the toolbar, so I have customized my toolbar to <strong>in</strong>clude those<br />
buttons. Figure 6.4 illustrates the process of dragg<strong>in</strong>g the Paste button to the toolbar (the<br />
Cut, Copy, and Undo buttons have already been placed).<br />
Figure 6.4.<br />
Customiz<strong>in</strong>g the<br />
toolbar.<br />
Feel free to customize the <strong>C++</strong>Builder IDE any way you like. It’s your development<br />
environment, so make it work for you.<br />
Us<strong>in</strong>g the Component Palette<br />
The <strong>C++</strong>Builder Component Palette is used to select a component or other control (such as<br />
an ActiveX control) <strong>in</strong> order to place that control on a form. The Component Palette is a<br />
multipage w<strong>in</strong>dow. Tabs are provided to allow you to navigate between pages. Click<strong>in</strong>g on<br />
a tab will display the available components or controls on that page.<br />
Plac<strong>in</strong>g a component on a form is a two-step process. First, go to the Component Palette and<br />
select the button represent<strong>in</strong>g the component you want to use. Then click on the form to<br />
place the component on the form. The component appears with its upper-left corner placed<br />
where you clicked with the mouse.<br />
You have already seen the Component Palette’s basic operations, but it has a couple other<br />
features that you haven’t seen yet. The follow<strong>in</strong>g sections expla<strong>in</strong> these features.<br />
Plac<strong>in</strong>g Multiple Copies of a Component<br />
So far you have only placed one component at a time on a form. You can easily place multiple<br />
components of the same type without select<strong>in</strong>g the component from the Component Palette<br />
177<br />
6
6<br />
178 Day 6<br />
each time. To place multiple components on the form, press and hold the Shift key when<br />
select<strong>in</strong>g the component from the Component Palette. After you select the component, you<br />
can release the Shift key. The component’s button on the Component Palette will appear<br />
pressed and will be highlighted with a blue border. Click on the form to place the first<br />
component. Notice that the button stays pressed <strong>in</strong> the Component Palette. You can click<br />
as many times as you like; a new component will be placed each time you click the form. To<br />
stop plac<strong>in</strong>g components, click the selector button on the Component Palette (the arrow<br />
button). The component button pops up to <strong>in</strong>dicate that you are done plac<strong>in</strong>g components.<br />
See<strong>in</strong>g is believ<strong>in</strong>g, so follow these steps:<br />
1. Create a new project.<br />
2. Press and hold the Shift key on the keyboard and click on the Label component<br />
button <strong>in</strong> the Component Palette.<br />
3. Click three times on the form, mov<strong>in</strong>g the cursor each time to <strong>in</strong>dicate where you<br />
want the new component placed.<br />
4. Click the arrow button on the Component Palette to end the process and return to<br />
form design mode.<br />
NOTE<br />
TIP<br />
It’s fastest to place all components of a particular type on your form at<br />
one time us<strong>in</strong>g this technique. Components can always be rearranged<br />
and resized at a later time.<br />
When plac<strong>in</strong>g multiple copies of a particular component, it’s easy to<br />
forget to click the arrow button when you’re done. If you accidentally<br />
place more components than you <strong>in</strong>tended, you can simply delete any<br />
extras.<br />
Plac<strong>in</strong>g and Center<strong>in</strong>g a Component on the Form<br />
<strong>C++</strong>Builder provides a shortcut method of plac<strong>in</strong>g a component on a form. Simply doubleclick<br />
the component’s button <strong>in</strong> the Component Palette, and the component will be placed<br />
on the form. The component will be centered on the form both horizontally and vertically.<br />
Components placed with this method can be moved to another location on the form just like<br />
components placed <strong>in</strong> the usual method.
NOTE<br />
The <strong>C++</strong>Builder IDE Explored: Projects and Forms<br />
Each time you double-click a button on the Component Palette, a<br />
component is placed on the center of the form <strong>in</strong> the component’s<br />
default size. If you repeatedly double-click the component button,<br />
multiple copies of the component will be placed on the form. Each<br />
component will be placed <strong>in</strong> the center of the form and will be stacked<br />
on top of the previous one. It will appear as if you have a s<strong>in</strong>gle<br />
component, so you may not realize that you have several components<br />
occupy<strong>in</strong>g the same space. If you accidentally place multiple components,<br />
just click on the extra components and delete them from the<br />
form.<br />
The Component Palette Speed Menu<br />
When you place the mouse cursor over the Component Palette and click the right mouse<br />
button, you will see a speed menu specific to the Component Palette. (See Figure 6.5.)<br />
Figure 6.5.<br />
The Component<br />
Palette speed menu.<br />
The Show H<strong>in</strong>ts item toggles the tool tips on and off for the component buttons. Unless you<br />
really dislike tool tips, this should be left on. The Hide item on the speed menu hides the<br />
Component Palette. In order to show the Component Palette aga<strong>in</strong>, you will have to choose<br />
View | Component Palette from the ma<strong>in</strong> menu. The Help item on the speed menu br<strong>in</strong>gs<br />
up <strong>C++</strong>Builder help with the Component Palette page displayed. The Properties item br<strong>in</strong>gs<br />
up the Palette page of the Environment Options dialog box, where you can customize the<br />
Component Palette. Here you can add and remove pages of the Component Palette. You can<br />
also add, remove, or rearrange the order of components on the <strong>in</strong>dividual pages. I’ll discuss<br />
this <strong>in</strong> more detail on Day 10, when we look at sett<strong>in</strong>g the environment options.<br />
Navigat<strong>in</strong>g the Component Palette<br />
As mentioned earlier, you can drag the siz<strong>in</strong>g bar, located between the toolbar and the<br />
Component Palette, to make the Component Palette occupy more or less room on the<br />
<strong>C++</strong>Builder ma<strong>in</strong> w<strong>in</strong>dow. If the Component Palette is sized small enough so that it cannot<br />
display all its tabs, you will see scroll buttons <strong>in</strong> the upper-right corner of the Component<br />
179<br />
6
6<br />
180 Day 6<br />
Palette. Click these scroll buttons to display tabs not currently <strong>in</strong> view. Likewise, if a particular<br />
page of the Component Palette conta<strong>in</strong>s more buttons than will fit the width of the display<br />
w<strong>in</strong>dow, scroll buttons will be enabled to allow you to scroll through the available buttons.<br />
Figure 6.6 shows the Component Palette with both types of scroll buttons enabled.<br />
Figure 6.6.<br />
The Component<br />
Palette scroll buttons.<br />
The Component Palette is not terribly complicated, but a basic understand<strong>in</strong>g of its use is<br />
vital for programm<strong>in</strong>g with <strong>C++</strong>Builder. Now that we’ve f<strong>in</strong>ished with these little tasks, we<br />
can get back to the ma<strong>in</strong> topic aga<strong>in</strong>.<br />
Back on Track—A Multiple-Form<br />
Application<br />
To illustrate how <strong>C++</strong>Builder uses units, let’s create an application with multiple forms. We’ll<br />
create a simple application that displays a second form when you click a button:<br />
1. Create a new project by choos<strong>in</strong>g File | New Application from the ma<strong>in</strong> menu.<br />
2. Change the Name property to Ma<strong>in</strong>Form and the Caption property to Multiple Forms<br />
Test Program.<br />
3. Save the project. Save the unit as Ma<strong>in</strong> and the project as Multiple.<br />
4. Now place a button on the form. Make the button’s Name property ShowForm2 and<br />
the Caption property Show Form 2.<br />
5. Choose File | New Form from the ma<strong>in</strong> menu (or click the New Form button on<br />
the speed menu) to create a new form.<br />
At this po<strong>in</strong>t the new form has a name of Form1 and is placed exactly over the ma<strong>in</strong> form. We<br />
want the new form to be smaller than the ma<strong>in</strong> form and more or less centered on the ma<strong>in</strong><br />
form. Cont<strong>in</strong>u<strong>in</strong>g on, then….<br />
6. Size and position the new form so that it is about 50 percent the size of the ma<strong>in</strong><br />
form and centered on the ma<strong>in</strong> form. Use the title bar to move the new form. Size<br />
the form by dragg<strong>in</strong>g the lower-right corner.
The <strong>C++</strong>Builder IDE Explored: Projects and Forms<br />
7. Change the new form’s Name property to SecondForm and the form’s Caption<br />
property to A Second Form.<br />
8. Choose File | Save from the ma<strong>in</strong> menu (or click the Save File button on the<br />
toolbar) and save the file with the name Second.<br />
9. Choose a Label component and drop it on the new form. Change the label’s<br />
Caption property to This is the second form. Change the label’s size and color as<br />
desired. Center the label on the form. Your form should now look roughly similar<br />
to the one <strong>in</strong> Figure 6.7.<br />
Figure 6.7.<br />
The form up to this<br />
po<strong>in</strong>t.<br />
10. Click on the ma<strong>in</strong> form. Notice that the second form is covered by the ma<strong>in</strong> form.<br />
Double-click the Show Form 2 button. The Code Editor is displayed, and the<br />
cursor is placed just where you need it to beg<strong>in</strong> typ<strong>in</strong>g code.<br />
11. Type <strong>in</strong> code so that the function looks like this (you have to type only one l<strong>in</strong>e of<br />
code):<br />
void __fastcall TMa<strong>in</strong>Form::ShowForm2Click(TObject *Sender)<br />
{<br />
SecondForm->ShowModal();<br />
}<br />
12. Run the program.<br />
At this po<strong>in</strong>t you will get a compiler error that says Undef<strong>in</strong>ed symbol ‘SecondForm’.<br />
Hmmm…SecondForm should be a valid symbol because that’s the name of the second form<br />
we created…I wonder…Aha! Remember that we have two source files with a header for each<br />
source file. The problem is that the Ma<strong>in</strong>Form unit can’t see the declaration for the SecondForm<br />
variable (which is a po<strong>in</strong>ter to the TSecondForm class). We have to tell it where to f<strong>in</strong>d the class<br />
declaration. (Recall Day 2, “Wad<strong>in</strong>g In Deeper.” We have to #<strong>in</strong>clude the header for<br />
181<br />
6
6<br />
182 Day 6<br />
SecondForm <strong>in</strong> Ma<strong>in</strong>Form’s source file.) Switch to the Code Editor and click on the Ma<strong>in</strong>.cpp<br />
tab to display the unit for the ma<strong>in</strong> form. Scroll up to the top of the file. The first few l<strong>in</strong>es<br />
look like this:<br />
//--------------------------------<br />
#<strong>in</strong>clude <br />
#pragma hdrstop<br />
#<strong>in</strong>clude “Ma<strong>in</strong>.h”<br />
//--------------------------------<br />
You can see the #<strong>in</strong>clude for Ma<strong>in</strong>.h, but there isn’t one for Second.h. That’s because we<br />
haven’t yet told <strong>C++</strong>Builder to add it. Let’s do that now:<br />
Figure 6.8.<br />
The Include Unit<br />
dialog box.<br />
NOTE<br />
1. Choose File | Include Unit Hdr from the ma<strong>in</strong> menu. The Include Unit dialog box<br />
is displayed. Figure 6.8 shows the Include Unit dialog box as it looks at this po<strong>in</strong>t.<br />
2. You will see a list of available units. In this case, the only unit <strong>in</strong> the list is Second.<br />
Click on Second and then click OK to close the dialog box.<br />
The Include Unit dialog box will show only those units that exist <strong>in</strong> the<br />
project and have not yet been <strong>in</strong>cluded <strong>in</strong> this unit. Units that have<br />
already been <strong>in</strong>cluded do not show <strong>in</strong> the list of available units.<br />
If you bl<strong>in</strong>ked, you missed it, but <strong>C++</strong>Builder added the #<strong>in</strong>clude for Second.h when you<br />
clicked OK. Now the first few l<strong>in</strong>es of the file show this:<br />
//--------------------------------<br />
#<strong>in</strong>clude <br />
#pragma hdrstop<br />
#<strong>in</strong>clude “Ma<strong>in</strong>.h”<br />
#<strong>in</strong>clude “Second.h”<br />
//--------------------------------<br />
Now the Ma<strong>in</strong> unit can see the class declaration for the Second unit. Click the Run button to<br />
run the program. This time the compile goes off without a hitch, and the program runs.<br />
When you click the Show Form 2 button on the ma<strong>in</strong> form, the second form is displayed.<br />
You can close the second form by click<strong>in</strong>g the system close box on the form’s title bar.
The <strong>C++</strong>Builder IDE Explored: Projects and Forms<br />
As you can see, <strong>C++</strong>Builder does a good job of manag<strong>in</strong>g units for you. You have to be sure<br />
that you use the Include Unit Hdr option so that one unit can see the class declarations of<br />
other units, but for the most part, <strong>C++</strong>Builder frees you from hav<strong>in</strong>g to worry about your<br />
source files. Later, when your programm<strong>in</strong>g needs are more sophisticated, you’ll have to do<br />
a little more source file management, but at this stage of the game, <strong>C++</strong>Builder does most of<br />
the work for you.<br />
Now let’s take a moment to look at the different compil<strong>in</strong>g options available to you when<br />
you’re writ<strong>in</strong>g programs <strong>in</strong> <strong>C++</strong>Builder.<br />
Compil<strong>in</strong>g, Build<strong>in</strong>g, and L<strong>in</strong>k<strong>in</strong>g<br />
Each time you click the Run button, <strong>C++</strong>Builder compiles and l<strong>in</strong>ks your program. But it<br />
doesn’t necessarily compile every unit <strong>in</strong> the project. It only compiles any units that have<br />
changed s<strong>in</strong>ce the last compile. This feature saves you time because you don’t have to wait<br />
for the compiler to compile files that haven’t changed. <strong>C++</strong>Builder keeps track of which files<br />
have changed and which haven’t, so you don’t need to do anyth<strong>in</strong>g special to use this<br />
feature—it’s automatic.<br />
Most of the time you want to see <strong>in</strong> action the results of any changes you have made. In those<br />
cases you click the Run button and the program is compiled, l<strong>in</strong>ked, and executed.<br />
Sometimes, however, you don’t want to run the program. For <strong>in</strong>stance, you might want to<br />
compile the program just to see whether there are any errors. <strong>C++</strong>Builder has three menu<br />
items <strong>in</strong> addition to Run that allow you to control the compile/l<strong>in</strong>k process. If you choose<br />
the Project menu item on the ma<strong>in</strong> menu, you will see three menu items called Compile Unit,<br />
Make, and Build All. Let’s take these <strong>in</strong> order of simplest to most complex (from the<br />
compiler’s perspective).<br />
The Compile Unit option is one I really like. This feature causes <strong>C++</strong>Builder to compile the<br />
current unit <strong>in</strong> the Code Editor and report any errors and warn<strong>in</strong>gs. This is the fastest way<br />
to check for errors <strong>in</strong> your code. <strong>C++</strong>Builder only compiles the file—it does not perform a<br />
l<strong>in</strong>k. The purpose of the Compile Unit option is to check your code for syntax errors as<br />
quickly as possible. Because the l<strong>in</strong>k phase takes extra time, the Compile Unit option skips<br />
that step.<br />
The Make option compiles any units that have changed s<strong>in</strong>ce the last compile just as the<br />
Compile Unit options does, but it also l<strong>in</strong>ks the entire project. Naturally, this takes slightly<br />
longer than the Compile Unit option. Use the Make option when you want to be sure the<br />
program will compile and l<strong>in</strong>k but you don’t want to run the program.<br />
183<br />
6
6<br />
184 Day 6<br />
TIP<br />
The keyboard shortcut for Make is Ctrl+F9.<br />
The Build All option takes the longest to perform. This option compiles every unit <strong>in</strong> the<br />
project regardless of whether it has changed s<strong>in</strong>ce the last build. After compil<strong>in</strong>g all units,<br />
<strong>C++</strong>Builder l<strong>in</strong>ks the entire project. So far we have been lett<strong>in</strong>g <strong>C++</strong>Builder add units to our<br />
projects. Further on down the road you may have to do some hand edit<strong>in</strong>g of your source files<br />
to add headers and other needed directives. You may even end up edit<strong>in</strong>g the makefile. From<br />
time to time, you know, th<strong>in</strong>gs can get goofed up (we all make mistakes). Perform<strong>in</strong>g a Build<br />
All will br<strong>in</strong>g everyth<strong>in</strong>g up-to-date so you can better sort out any problems you might be<br />
runn<strong>in</strong>g <strong>in</strong>to. Sometimes a Build All will resolve compiler and l<strong>in</strong>ker errors without requir<strong>in</strong>g<br />
you to do anyth<strong>in</strong>g further.<br />
TIP<br />
Any time you get unexpected (out of the ord<strong>in</strong>ary) compiler or l<strong>in</strong>ker<br />
errors, first try a Build All. It could just be that someth<strong>in</strong>g is out of<br />
sync, and a Build All may cure it. If perform<strong>in</strong>g a Build All doesn’t fix<br />
the problem, you’ll have to go to work figur<strong>in</strong>g out where the problem<br />
lies.<br />
Regardless of the method chosen to compile the project, if errors are detected the compile<br />
status dialog box will report There are errors. and will list the number of errors that were<br />
detected as well as any warn<strong>in</strong>gs. Figure 6.9 shows the compile status dialog box after errors<br />
are detected.<br />
Figure 6.9.<br />
The compile status<br />
dialog box show<strong>in</strong>g<br />
warn<strong>in</strong>gs and errors.<br />
After you click OK to dismiss the compile status dialog box, the Code Editor will come to<br />
the top with the first error l<strong>in</strong>e highlighted. The message w<strong>in</strong>dow at the bottom of the Code<br />
Editor is displayed, and the errors and warn<strong>in</strong>gs are listed there. After a successful Compile<br />
Unit, Make, or Build All you can immediately run the program via the Run button if you<br />
choose.
The <strong>C++</strong>Builder IDE Explored: Projects and Forms<br />
Compil<strong>in</strong>g and Build<strong>in</strong>g Other <strong>C++</strong><br />
Programs<br />
<strong>C++</strong>Builder’s strength is <strong>in</strong> its visual programm<strong>in</strong>g environment. That environment is tied<br />
directly to VCL and cannot be separated from it. To get the most out of <strong>C++</strong>Builder, you<br />
will most likely be writ<strong>in</strong>g applications based on VCL. There are times, however, when<br />
you want to write other types of applications. <strong>C++</strong>Builder is a standard <strong>C++</strong> compiler, so you<br />
can compile any type of 32-bit <strong>C++</strong> program with <strong>C++</strong>Builder.<br />
Probably the most obvious type of “other” program you may want to build is a dynamic l<strong>in</strong>k<br />
library (DLL). DLLs might seem a bit like black magic, but they are really not very<br />
complicated; they are simply bits of compiled code that you can call from your application.<br />
Once you have the DLL created and your ma<strong>in</strong> program’s source file has the needed header,<br />
call<strong>in</strong>g a function conta<strong>in</strong>ed <strong>in</strong> a DLL is no different than call<strong>in</strong>g a function conta<strong>in</strong>ed <strong>in</strong> your<br />
ma<strong>in</strong> program.<br />
Another type of application you might write with <strong>C++</strong>Builder is the console application.<br />
Earlier we built several W<strong>in</strong>32 console applications when you were learn<strong>in</strong>g about the <strong>C++</strong><br />
language. Console applications are useful <strong>in</strong> teach<strong>in</strong>g situations and for quick test programs.<br />
They can also be very useful for small utility programs, servers such as Web servers or mail<br />
servers, and a whole host of other possibilities. Basically, any application that does not require<br />
a graphical <strong>in</strong>terface is a good candidate for a console application. Earlier <strong>in</strong> the chapter I<br />
talked about the <strong>C++</strong>Builder <strong>C++</strong> compiler, the resource compiler, and the <strong>C++</strong>Builder<br />
l<strong>in</strong>ker. All these programs are W<strong>in</strong>32 console applications that are executed from with<strong>in</strong><br />
<strong>C++</strong>Builder.<br />
You can also compile programs written <strong>in</strong> either MFC or OWL. This allows you to use a<br />
s<strong>in</strong>gle compiler for all of your development regardless of what framework you are us<strong>in</strong>g.<br />
Although you probably won’t develop full-scale MFC or OWL applications with <strong>C++</strong>Builder,<br />
there is certa<strong>in</strong>ly no reason you could not do so if you chose to. Of course, you would have<br />
to have the OWL or MFC library files and headers <strong>in</strong> order to build an OWL or MFC<br />
application. List<strong>in</strong>g 6.1 conta<strong>in</strong>s an OWL version of the Hello World program. First, set up<br />
<strong>C++</strong>Builder to build an OWL application (see the <strong>C++</strong>Builder documentation on how to<br />
configure <strong>C++</strong>Builder to build an OWL application). Then enter the program from the<br />
keyboard. Compile and run, and you’ve got an OWL program built with <strong>C++</strong>Builder.<br />
185<br />
6
6<br />
186 Day 6<br />
List<strong>in</strong>g 6.1. OWLHELLO.CPP.<br />
1: #<strong>in</strong>clude <br />
2: #<strong>in</strong>clude <br />
3: #pragma hdrstop<br />
4: class TestW<strong>in</strong>dow : public TW<strong>in</strong>dow {<br />
5: public:<br />
6: TestW<strong>in</strong>dow() : TW<strong>in</strong>dow(0, 0, 0) {}<br />
7: protected:<br />
8: void Pa<strong>in</strong>t(TDC&, bool, TRect&);<br />
9: };<br />
10: void<br />
11: TestW<strong>in</strong>dow::Pa<strong>in</strong>t(TDC& dc, bool, TRect&)<br />
12: {<br />
13: TRect rect = GetClientRect();<br />
<strong>14</strong>: dc.DrawText(“HelloWorld!”, -1,<br />
15: rect, DT_CENTER | DT_VCENTER | DT_SINGLELINE);<br />
16: }<br />
17: class TestApp : public TApplication {<br />
18: public:<br />
19: TestApp() : TApplication(“”) {}<br />
20: void InitMa<strong>in</strong>W<strong>in</strong>dow()<br />
21: {<br />
22: TFrameW<strong>in</strong>dow* frame = new TFrameW<strong>in</strong>dow(<br />
23: 0, “OWL Hello World”, new TestW<strong>in</strong>dow);<br />
24: SetMa<strong>in</strong>W<strong>in</strong>dow(frame);<br />
25: }<br />
26: };<br />
27: <strong>in</strong>t OwlMa<strong>in</strong>(<strong>in</strong>t, char* [])<br />
28: {<br />
29: return TestApp().Run();<br />
30: }<br />
More About <strong>C++</strong>Builder Forms<br />
Before I cont<strong>in</strong>ue with the discussion about the <strong>C++</strong>Builder IDE, I need to spend some time<br />
expla<strong>in</strong><strong>in</strong>g forms. You have seen several forms <strong>in</strong> action as you have worked through this<br />
book, and tomorrow you are go<strong>in</strong>g to learn all about the Form Designer. Before we get there,<br />
you need some more background <strong>in</strong>formation on forms, so I’ll cover that base now.<br />
Ma<strong>in</strong> W<strong>in</strong>dow Forms<br />
Forms are the ma<strong>in</strong> build<strong>in</strong>g block of a <strong>C++</strong>Builder application. Every GUI application has<br />
at least one form that serves as the ma<strong>in</strong> w<strong>in</strong>dow. The ma<strong>in</strong> w<strong>in</strong>dow form might be just a<br />
blank w<strong>in</strong>dow, it might have controls on it, or it might have a bitmap displayed on it. In a
The <strong>C++</strong>Builder IDE Explored: Projects and Forms<br />
typical W<strong>in</strong>dows program, your ma<strong>in</strong> w<strong>in</strong>dow would have a menu. It might also have<br />
decorations such as a toolbar or a status bar. Just about anyth<strong>in</strong>g goes when you’re creat<strong>in</strong>g<br />
the ma<strong>in</strong> w<strong>in</strong>dow of your application. Each application is unique, and each has different<br />
requirements.<br />
Dialog Box Forms<br />
Forms are also used where traditional W<strong>in</strong>dows programs use dialog boxes. In fact, to the user<br />
there is no difference between a <strong>C++</strong>Builder form act<strong>in</strong>g as a dialog box and a true dialog box.<br />
Dialog boxes usually have several traits that dist<strong>in</strong>guish them from ord<strong>in</strong>ary w<strong>in</strong>dows:<br />
■ Dialog boxes are not usually sizable. They usually perform a specific function, and<br />
siz<strong>in</strong>g of the dialog box is neither useful nor desirable.<br />
■ Dialog boxes almost always have an OK button. Some dialog boxes have a button<br />
labeled Close that accomplishes the same th<strong>in</strong>g. Simple dialog boxes like an About<br />
dialog box typically have only the OK button.<br />
■ Dialog boxes may also have a Cancel button and a Help button.<br />
■ Dialog boxes typically have only the system close button on the title bar. They do<br />
not usually have m<strong>in</strong>imize and maximize buttons.<br />
■ Some dialog boxes are tabbed dialog boxes that display several tabs from which the<br />
user can choose. When a tab is clicked on, a different page of the dialog box is<br />
displayed.<br />
■ The Tab key can be used to move from one control to the next <strong>in</strong> most dialog<br />
boxes.<br />
There are certa<strong>in</strong>ly exceptions to every rule. Most dialog boxes have the usual characteristics,<br />
but some perform specialty tasks and therefore depart from the norm <strong>in</strong> one way or another.<br />
Dialog boxes <strong>in</strong> <strong>C++</strong>Builder are slightly different than <strong>in</strong> other programm<strong>in</strong>g environments.<br />
First, let’s take a look at how other programm<strong>in</strong>g environments handle dialog boxes; then<br />
we’ll look at how they are implemented <strong>in</strong> <strong>C++</strong>Builder.<br />
Dialog Boxes <strong>in</strong> Traditional W<strong>in</strong>dows Programs<br />
In a traditional W<strong>in</strong>dows program (one written <strong>in</strong> C or with one of the frameworks), a dialog<br />
box is created with a dialog box editor. In most cases, the dialog box editor is a visual tool that<br />
works somewhat like the <strong>C++</strong>Builder Form Editor. When the user is done design<strong>in</strong>g the<br />
dialog box, the visual representation of the dialog box is converted <strong>in</strong>to a dialog box def<strong>in</strong>ition<br />
<strong>in</strong> a resource script. (A resource script is a text file that is later compiled <strong>in</strong>to a b<strong>in</strong>ary resource<br />
file by the resource compiler.) To illustrate, take a look at the dialog box <strong>in</strong> Figure 6.10.<br />
187<br />
6
6<br />
188 Day 6<br />
Figure 6.10.<br />
A typical About<br />
dialog box.<br />
Figure 6.10 represents a typical About dialog box. It conta<strong>in</strong>s the program name, the<br />
copyright <strong>in</strong>formation, and the application’s icon. The resource script def<strong>in</strong>ition for the<br />
dialog box is shown <strong>in</strong> List<strong>in</strong>g 6.2.<br />
List<strong>in</strong>g 6.2. A dialog box resource def<strong>in</strong>ition.<br />
1: IDD_ABOUT DIALOG 58, 53, 194, 119<br />
2: STYLE DS_MODALFRAME | WS_POPUP |<br />
3: WS_VISIBLE | WS_CAPTION | WS_SYSMENU<br />
4: CAPTION “About TMMPlayer Example Program”<br />
5: FONT 8, “MS Sans Serif”<br />
6: {<br />
7: DEFPUSHBUTTON “OK”, IDOK, 72, 96, 50, <strong>14</strong><br />
8: CTEXT “TMMPlayer Example Program”, -1, 48, 22, 128, 8<br />
9: CTEXT “Copyright © 1996, by Kent Reisdorph”, -1, 32, 47, 136, 8<br />
10: CTEXT “March 15, 1996”, -1, 24, 59, <strong>14</strong>6, 8<br />
11: CONTROL “”, 99, “button”, BS_GROUPBOX |<br />
12: WS_CHILD | WS_VISIBLE | WS_GROUP, 12, 4, 176, 70<br />
13: CONTROL 1, 1, “static”, SS_ICON |<br />
<strong>14</strong>: SS_SUNKEN | WS_CHILD | WS_VISIBLE, 24, 17, 20, 20<br />
15: }<br />
The resource script conta<strong>in</strong>s <strong>in</strong>formation that W<strong>in</strong>dows uses to build the dialog box at<br />
runtime. This <strong>in</strong>formation <strong>in</strong>cludes the number and type of controls on the dialog box, as<br />
well as their size, position, text, options, and so on. Of course, the resource script also <strong>in</strong>cludes<br />
the same type of <strong>in</strong>formation for the dialog box itself.<br />
Some W<strong>in</strong>dows programmers don’t use a dialog box editor at all, but prefer to write the dialog<br />
box def<strong>in</strong>ition from scratch with a text editor. While I can’t fault those programmers for<br />
creat<strong>in</strong>g dialog boxes <strong>in</strong> this manner, I can say that for most programmers to take that<br />
approach would be, er, less than 100 percent efficient. It would take many times longer to<br />
create a dialog box <strong>in</strong> that manner than with the visual approach.<br />
Usually all of the application’s dialog box def<strong>in</strong>itions are conta<strong>in</strong>ed <strong>in</strong> a s<strong>in</strong>gle resource script<br />
file that has the filename extension .RC. At some po<strong>in</strong>t <strong>in</strong> the program-creation process, the
NOTE<br />
The <strong>C++</strong>Builder IDE Explored: Projects and Forms<br />
resource script is compiled <strong>in</strong>to an .RES file (the b<strong>in</strong>ary resource file), which then gets l<strong>in</strong>ked<br />
to the .EXE by the l<strong>in</strong>ker. At runtime the dialog box is displayed either modally or modelessly,<br />
depend<strong>in</strong>g on the dialog box’s <strong>in</strong>tended purpose. When the dialog box is executed, W<strong>in</strong>dows<br />
loads the dialog box resource from the executable file, builds the dialog box, and displays it.<br />
A modal dialog box is one that must be dismissed before the user can<br />
cont<strong>in</strong>ue us<strong>in</strong>g the application. The ma<strong>in</strong> w<strong>in</strong>dow of an application is<br />
disabled while this type of dialog box is open. Most dialog boxes are<br />
modal. The Compile Status dialog box <strong>in</strong> <strong>C++</strong>Builder is an example of<br />
a modal dialog box.<br />
A modeless dialog box is one that allows the user to cont<strong>in</strong>ue to work<br />
with the application while the dialog box is displayed. The F<strong>in</strong>d dialog<br />
box <strong>in</strong> some word-process<strong>in</strong>g programs is an example of a modeless<br />
dialog box.<br />
Now, with that background <strong>in</strong>formation on how dialog boxes are handled <strong>in</strong> a traditional<br />
W<strong>in</strong>dows program, let’s take a look at how <strong>C++</strong>Builder handles dialog boxes.<br />
Dialog Boxes <strong>in</strong> <strong>C++</strong>Builder<br />
In <strong>C++</strong>Builder, a dialog box is simply another form. You create a dialog box just like you do<br />
a ma<strong>in</strong> w<strong>in</strong>dow form or any other form. To prevent the dialog box from be<strong>in</strong>g sized, you can<br />
change the BorderStyle property to bsDialog or bsS<strong>in</strong>gle. If you use bsDialog, your dialog<br />
box will have only the close box on the title bar, which is traditional for dialog boxes. Other<br />
than that, you don’t have to do anyth<strong>in</strong>g special to get a form to behave like a dialog box. All<br />
<strong>C++</strong>Builder forms have tabb<strong>in</strong>g support built <strong>in</strong>. You can set the tab order by alter<strong>in</strong>g the<br />
TabOrder property of the <strong>in</strong>dividual controls on the dialog box.<br />
A <strong>C++</strong>Builder dialog box (any <strong>C++</strong>Builder form, actually) is modal or modeless, depend<strong>in</strong>g<br />
on how it is displayed. To execute a modal dialog box, you call the ShowModal() method of<br />
TForm. To create a modeless dialog box, you call the Show() method.<br />
Let’s add an About box to the multiple-forms project we created earlier. If you don’t have that<br />
project open, choose File | Open from the ma<strong>in</strong> menu or click the Open Project button on<br />
the toolbar and locate the file (you should have saved it with the project name Multiple).<br />
189<br />
6
6<br />
190 Day 6<br />
TIP<br />
<strong>C++</strong>Builder keeps a list of the files and projects you have used most<br />
recently. Chose File | Reopen to view the MRU (most recently used)<br />
list. The MRU list is divided <strong>in</strong>to two parts. The top part shows the<br />
projects you have used most recently, and the bottom part shows the<br />
<strong>in</strong>dividual files that you have used most recently. Just click on one of<br />
the items to reopen that project or file.<br />
First we’ll add a button to the form that will display the About dialog box:<br />
1. Br<strong>in</strong>g the ma<strong>in</strong> form <strong>in</strong>to view. Choose the button component from the Component<br />
Palette and drop a button on the form.<br />
2. Arrange the two buttons that are now on the form to balance the look of the form.<br />
3. Change the Name property of the new button to AboutButton and the Caption<br />
property to About....<br />
4. Double-click the AboutButton you just created on the form. The Code Editor is<br />
displayed with the cursor placed <strong>in</strong> the event-handler function. Add this l<strong>in</strong>e of<br />
code at the cursor:<br />
AboutBox->ShowModal();<br />
We haven’t actually created the About box yet, but when we do we’ll name it AboutBox so we<br />
know enough to go ahead and type the code to display the About box.<br />
Now we’ll create the dialog box itself:<br />
1. Create a new form (click the New Form button on the toolbar). Size the form to<br />
the size of a typical About box (roughly the same size as the form named<br />
SecondForm that we created earlier).<br />
2. Change the Name property to AboutBox and change the Caption property to About<br />
This Program.<br />
3. Locate the BorderStyle property (it’s just above Caption) and change it to<br />
bsDialog.<br />
4. Now add three text labels to the box. Edit the labels so that the About box resembles<br />
that <strong>in</strong> Figure 6.11. (You can type any text you want, of course.) You can leave<br />
the default names <strong>C++</strong>Builder generates for the text labels’ Name properties. We<br />
aren’t actually go<strong>in</strong>g to do anyth<strong>in</strong>g with the Name property, so we don’t need a<br />
descriptive name.
TIP<br />
Figure 6.11.<br />
The About box with<br />
text labels added.<br />
The <strong>C++</strong>Builder IDE Explored: Projects and Forms<br />
The copyright symbol (©) has an ASCII value of 169. To create the<br />
copyright symbol, press and hold the Alt key and type the numbers<br />
0169 on the numeric keypad (be sure Num Lock is on). When you let<br />
go of the Alt key, the copyright symbol appears. You can <strong>in</strong>sert the<br />
ASCII value of any character this way. You must type all four numbers,<br />
though. For example, the ASCII value of a capital A is 65. To <strong>in</strong>sert an<br />
A, you would have to hold down Alt and type 0065 on the numeric<br />
keypad.<br />
Next we’ll add an icon to the About box:<br />
1. Click on the Additional tab on the Component Palette and choose the Image<br />
component. Place the component to the left of the text on the form.<br />
2. Locate the AutoSize property for the Image component and change it to true.<br />
3. Locate the Picture property and double-click the Value column. The Picture<br />
Editor dialog box is displayed.<br />
4. Click the Load button. In the File Open dialog box, navigate to the<br />
\CBuilder\Images\Icons directory and choose an icon from the icon files listed.<br />
Click OK. The icon you selected is displayed <strong>in</strong> the Picture Editor w<strong>in</strong>dow. Click<br />
OK aga<strong>in</strong> to close the Picture Editor. The icon is displayed on the form. Note that<br />
the Image component has sized itself to the size of the icon.<br />
5. Position the icon as desired.<br />
At this po<strong>in</strong>t we need an OK button on the form. I’ll be a little creative and show you a new<br />
component:<br />
1. If you’re not already there, click on the Additional tab on the Component Palette.<br />
Select the BitBtn component and place a BitBtn on the form near the bottom and<br />
centered horizontally.<br />
2. Locate the K<strong>in</strong>d property and change it to bkOK. Notice that a green check mark has<br />
appeared on the button, and the Caption property has changed to OK. That’s all we<br />
191<br />
6
6<br />
192 Day 6<br />
have to do with the button. The BitBtn component already <strong>in</strong>cludes code to close<br />
the form when the OK button is clicked.<br />
Let’s add one f<strong>in</strong>al touch to the About box:<br />
1. Locate the Bevel button (on the Additional tab <strong>in</strong> the Component Palette) and<br />
click it.<br />
2. Move to the form, but rather than click<strong>in</strong>g on the form, drag a box around the<br />
three text labels. The Bevel component appears when you stop dragg<strong>in</strong>g. If you<br />
didn’t get it quite right, you can resize or reposition the component.<br />
3. Locate the Shape property and change it to bsFrame. You now have a 3D frame<br />
around the static text.<br />
Your form should now look someth<strong>in</strong>g like the one shown <strong>in</strong> Figure 6.12. Save the unit<br />
(File | Save) and give it the name About.<br />
Figure 6.12.<br />
The f<strong>in</strong>ished<br />
About box.<br />
Are we ready to compile and run the program? Not yet. We need to tell the ma<strong>in</strong> form to<br />
#<strong>in</strong>clude the About unit:<br />
1. Switch to the Code Editor (press F12) and select the Ma<strong>in</strong>.cpp tab.<br />
2. Choose File | Include Unit Hdr from the ma<strong>in</strong> menu.<br />
3. Choose the About unit from the Include Unit dialog box and click OK.<br />
Now you’re ready to run the program. Click the Run button. When the program runs, click<br />
the About button, and the About dialog box is displayed. Note that the dialog box is modal<br />
(you can’t go back to the ma<strong>in</strong> w<strong>in</strong>dow while the dialog box is displayed) and that it cannot<br />
be sized. The About form behaves <strong>in</strong> every way like a regular W<strong>in</strong>dows dialog box.<br />
NOTE<br />
The common dialog box classes (TOpenDialog, TSaveDialog,<br />
TFontDialog, and so on) do not represent dialog boxes created as<br />
<strong>C++</strong>Builder forms. W<strong>in</strong>dows provides these dialog boxes as a set of<br />
common dialog boxes that all W<strong>in</strong>dows applications can use (the actual
NOTE<br />
The <strong>C++</strong>Builder IDE Explored: Projects and Forms<br />
dialog boxes are conta<strong>in</strong>ed <strong>in</strong> a file called COMDLG32.DLL). The VCL<br />
dialog box classes encapsulate the common dialog boxes to make us<strong>in</strong>g<br />
them easier.<br />
<strong>C++</strong>Builder <strong>in</strong>cludes several prebuilt forms that you can choose from to<br />
help you build dialog boxes as quickly as possible. I’ll discuss those on<br />
Day 9, “Creat<strong>in</strong>g Applications <strong>in</strong> <strong>C++</strong>Builder.”<br />
Secondary W<strong>in</strong>dows Versus Dialog Boxes<br />
A secondary w<strong>in</strong>dow is a form that you display from your ma<strong>in</strong> w<strong>in</strong>dow. So when is a form<br />
a secondary w<strong>in</strong>dow and when is it a dialog box? When it really comes down to it, there is<br />
no difference between a secondary w<strong>in</strong>dow and a dialog box <strong>in</strong> <strong>C++</strong>Builder. You might have<br />
dialog box–look<strong>in</strong>g w<strong>in</strong>dows, and you may have other w<strong>in</strong>dows that resemble traditional<br />
w<strong>in</strong>dows. In the grand scheme of th<strong>in</strong>gs, they are all forms and it doesn’t make much sense<br />
to differentiate between the terms dialog box and secondary form. It’s all the same <strong>in</strong> the end.<br />
In traditional programm<strong>in</strong>g environments, you have to specifically create a dialog box or<br />
specifically create a secondary w<strong>in</strong>dow <strong>in</strong> an application. <strong>C++</strong>Builder frees you from that<br />
restriction and allows you to treat both dialog boxes and w<strong>in</strong>dows exactly the same.<br />
The Multiple-Document Interface Model<br />
So far we have built only s<strong>in</strong>gle-document <strong>in</strong>terface (SDI) applications. An SDI application has<br />
a s<strong>in</strong>gle ma<strong>in</strong> w<strong>in</strong>dow and typically displays dialog boxes as needed, but does not otherwise<br />
display child w<strong>in</strong>dows.<br />
Some programs follow the multiple-document <strong>in</strong>terface (MDI) model. MDI applications<br />
consist of a ma<strong>in</strong> w<strong>in</strong>dow (the MDI parent) and child w<strong>in</strong>dows (the MDI children).<br />
Examples of programs that use the MDI model are the W<strong>in</strong>dows System Configuration<br />
Editor (SYSEDIT) and the W<strong>in</strong>dows 3.1 Program Manager. One of the most obvious<br />
characteristics of the MDI model is that the MDI child w<strong>in</strong>dows are conf<strong>in</strong>ed to the parent.<br />
You can drag the child w<strong>in</strong>dows with<strong>in</strong> the parent w<strong>in</strong>dow, but you cannot drag them outside<br />
the parent. MDI applications almost always have a W<strong>in</strong>dow pop up on their ma<strong>in</strong> menu. The<br />
pop-up menu usually conta<strong>in</strong>s items named Cascade and Tile, which allow you to display<br />
the MDI child w<strong>in</strong>dows <strong>in</strong> either a cascaded or tiled arrangement. When an MDI child is<br />
193<br />
6
6<br />
194 Day 6<br />
m<strong>in</strong>imized, its icon is conta<strong>in</strong>ed with<strong>in</strong> the MDI parent’s frame. When a regular (non-MDI)<br />
child w<strong>in</strong>dow is m<strong>in</strong>imized, its icon is placed on the W<strong>in</strong>dows desktop.<br />
To create an MDI application <strong>in</strong> <strong>C++</strong>Builder, you must set the ma<strong>in</strong> form’s FormStyle<br />
property to fsMDIForm. Each of the MDI child w<strong>in</strong>dows must have the FormStyle property<br />
set to fsMDIChild. Aside from that restriction, there is very little to creat<strong>in</strong>g an MDI<br />
application <strong>in</strong> <strong>C++</strong>Builder. You simply create the ma<strong>in</strong> w<strong>in</strong>dow form and one or more forms<br />
to be used as child w<strong>in</strong>dows, and you’re off and runn<strong>in</strong>g.<br />
Key Properties for Forms<br />
The TForm class has a lot of properties. Some of these properties are obscure and rarely used;<br />
others are widely used. I’ll touch on the most widely used properties here. I won’t <strong>in</strong>clude<br />
obvious properties like Color, Left, Top, Width, and Height unless they have a particular<br />
feature you should be aware of.<br />
Runtime and Design-Time Properties<br />
The properties outl<strong>in</strong>ed <strong>in</strong> this section can be set at design time and also at runtime. Almost<br />
all of these properties can be read at runtime as well.<br />
ActiveControl<br />
The ActiveControl property is used to set the control that will have focus when the form is<br />
activated. For <strong>in</strong>stance, you may want a particular edit control to have focus when a dialog<br />
box form is displayed. At design time the Value column for the ActiveControl property<br />
conta<strong>in</strong>s a list of components on the form. You can choose one of the components from this<br />
list to make that component the active control when the form is first displayed.<br />
AutoScroll, HorzScrollBar, and VertScrollBar<br />
Together, the AutoScroll, HorzScrollBar, and VertScrollBar properties control the scrollbars<br />
for a form. If AutoScroll is set to true (the default), scrollbars automatically appear when the<br />
form is too small to display all of its components. The HorzScrollBar and VertScrollBar<br />
properties each have several properties of their own that control the scrollbar operations.<br />
BorderStyle<br />
The BorderStyle property <strong>in</strong>dicates what type of border the form will have. The default value<br />
is bsSizeable, which creates a w<strong>in</strong>dow that can be sized. Nonsizable styles <strong>in</strong>clude bsDialog<br />
and bsNone.
The <strong>C++</strong>Builder IDE Explored: Projects and Forms<br />
ClientWidth and ClientHeight<br />
You can specify the client area width and height rather than the full form’s width and height<br />
by us<strong>in</strong>g the ClientWidth and ClientHeight properties. (The client area of the form is the area<br />
<strong>in</strong>side the borders and below the title bar and menu bar.) Use these properties when you want<br />
the client area to be a specific size and the rest of the w<strong>in</strong>dow to adjust as necessary. Sett<strong>in</strong>g<br />
the ClientWidth and ClientHeight properties makes automatic changes to the Width and<br />
Height properties.<br />
Font<br />
The Font property specifies the font that the form uses. The important th<strong>in</strong>g to understand<br />
here is that the form’s font is <strong>in</strong>herited by any components placed on the form. This also<br />
means that you can change the font used by all components at one time by chang<strong>in</strong>g just the<br />
form’s font. If an <strong>in</strong>dividual control’s font had been manually changed, that control’s font<br />
will not be changed when the ma<strong>in</strong> form’s font changes.<br />
FormStyle<br />
This property is usually set to fsNormal. If you want a form to always be on top, use the<br />
fsStayOnTop style. MDI forms should use the fsMDIForm style and MDI child forms should<br />
use the fsMDIChild style. MDI forms and MDI child w<strong>in</strong>dows were discussed previously <strong>in</strong><br />
the chapter, <strong>in</strong> the section “The Multiple-Document Interface Model.”<br />
HelpContext<br />
The HelpContext property is used to set the help context ID for a form. If context help is<br />
enabled for a form, the W<strong>in</strong>dows Help system will activate when the F1 key is pressed. The<br />
context ID is used to tell the Help system which page <strong>in</strong> the help file to display.<br />
Icon<br />
The Icon property sets the icon that is used on the title bar for the form when the form is<br />
displayed at runtime, and also when the form is m<strong>in</strong>imized. In some cases, sett<strong>in</strong>g this<br />
property has no effect. For <strong>in</strong>stance, when the FormStyle is set to fsDialog, the Icon property<br />
is ignored.<br />
Position<br />
The Position property determ<strong>in</strong>es the size and position of the form when the form is <strong>in</strong>itially<br />
displayed. The three basic choices are poDesigned, poDefault, and poScreenCenter. poDesigned<br />
causes the form to be displayed <strong>in</strong> the exact position it was <strong>in</strong> when it was designed. poDefault<br />
allows W<strong>in</strong>dows to set the size and position accord<strong>in</strong>g to the usual W<strong>in</strong>dows Z-order<strong>in</strong>g<br />
195<br />
6
6<br />
196 Day 6<br />
algorithm. (Z-order<strong>in</strong>g is what W<strong>in</strong>dows uses to decide where it displays a new w<strong>in</strong>dow on<br />
the screen. If the new w<strong>in</strong>dow does not have specific placement <strong>in</strong>formation, it will be<br />
displayed just below and to the right of the last w<strong>in</strong>dow displayed on the screen.) The<br />
poScreenCenter option causes the form to be displayed <strong>in</strong> the center of the screen each time<br />
it is shown.<br />
Visible<br />
The Visible property controls whether the form is <strong>in</strong>itially visible. This property is not<br />
particularly useful at design time, but at runtime it can be read to determ<strong>in</strong>e whether the form<br />
is currently visible. It can also be used to hide or display the form.<br />
W<strong>in</strong>dowState<br />
The W<strong>in</strong>dowState property can be read to determ<strong>in</strong>e the form’s current state (maximized,<br />
m<strong>in</strong>imized, or normal). It can also be used to <strong>in</strong>dicate how the form should <strong>in</strong>itially be<br />
displayed. Choices are wsM<strong>in</strong>imized, wsMaximized, and wsNormal.<br />
Runtime-Only Properties<br />
Some properties can be accessed only at runtime through code. The follow<strong>in</strong>g are the most<br />
commonly used runtime properties.<br />
ActiveMDIChild<br />
When read, the ActiveMDIChild property returns a po<strong>in</strong>ter to the currently active MDI child<br />
w<strong>in</strong>dow. This property is read-only.<br />
Canvas<br />
The form’s canvas represents the draw<strong>in</strong>g surface of the form. The Canvas property gives you<br />
access to the form’s canvas. By us<strong>in</strong>g the Canvas property you can draw bitmaps, l<strong>in</strong>es, shapes,<br />
or text on the form at runtime. Most of the time you will use a Label component to draw text<br />
on a form, an Image component to display graphics, and a Shape component to draw shapes.<br />
However, there are times when you need to draw on the canvas at runtime and the Canvas<br />
property allows you to do that. The Canvas property can also be used to save an image of the<br />
form to disk.<br />
ClientRect<br />
The ClientRect property conta<strong>in</strong>s the top, left, right, and bottom coord<strong>in</strong>ates of the client<br />
area of the form. This is useful <strong>in</strong> a variety of programm<strong>in</strong>g situations. For <strong>in</strong>stance, you may<br />
need to know the client area’s width and height <strong>in</strong> order to place a bitmap on the center of<br />
the form.
The <strong>C++</strong>Builder IDE Explored: Projects and Forms<br />
Handle<br />
The Handle property returns the w<strong>in</strong>dow handle (HWND) of the form. Use this property when<br />
you need the w<strong>in</strong>dow handle to pass to a W<strong>in</strong>dows API function.<br />
ModalResult<br />
The ModalResult property is used to close a modal w<strong>in</strong>dow. If you have a dialog box that has<br />
OK and Cancel buttons, you can set ModalResult to mrOK when the user clicks the OK button,<br />
and to mrCancel when the user clicks the Cancel button. The call<strong>in</strong>g form can then read<br />
ModalResult to see which button was clicked to close the form. Other possibilities <strong>in</strong>clude<br />
mrYes, mrNo, and mrAbort.<br />
Owner<br />
The Owner property is a po<strong>in</strong>ter to the owner of the form. The owner of the form is the object<br />
that is responsible for delet<strong>in</strong>g the form when the form is no longer needed. The parent of<br />
a component, on the other hand, is the w<strong>in</strong>dow (a form or another component) that acts as<br />
the conta<strong>in</strong>er for the component. In the case of a ma<strong>in</strong> form, the application object is both<br />
the owner of the form and the parent of the form. In the case of components, the owner would<br />
be the form, but the parent could be another component, such as a panel.<br />
Parent<br />
The Parent property is a po<strong>in</strong>ter to the parent of the form. See the previous section about<br />
Owner for an explanation of Owner versus Parent.<br />
Form Methods<br />
Forms are components, too. As such, forms have many methods <strong>in</strong> common with components.<br />
Common methods <strong>in</strong>clude Show(), ShowModal(), and Invalidate(), to name just a<br />
few. There are some methods, however, that are specific to forms. As before, I’ll discuss only<br />
the most commonly used methods.<br />
Br<strong>in</strong>gToFront()<br />
The Br<strong>in</strong>gToFront() method causes the form to be brought to the top of all other forms <strong>in</strong><br />
the application.<br />
Close() and CloseQuery()<br />
The Close() method closes a form after first call<strong>in</strong>g CloseQuery() to be sure that it’s okay to<br />
close the form. The CloseQuery() function, <strong>in</strong> turn, calls the OnCloseQuery event handler. If<br />
197<br />
6
6<br />
198 Day 6<br />
the bool variable passed to the OnCloseQuery handler is set to false, the form is not closed.<br />
If it is set to true, the form closes normally. You can use the OnCloseQuery event handler to<br />
prompt the user to save a file that needs sav<strong>in</strong>g and to control whether a form can close.<br />
Pr<strong>in</strong>t()<br />
The Pr<strong>in</strong>t() method pr<strong>in</strong>ts the contents of the form. Only the client area of the form is<br />
pr<strong>in</strong>ted, not the caption, title bar, or borders. Pr<strong>in</strong>t() is handy for quick screen dumps of a<br />
form.<br />
ScrollInView()<br />
The ScrollInView() method scrolls the form so that the specified component is visible on<br />
the form.<br />
SetFocus()<br />
The SetFocus() method activates the form and br<strong>in</strong>gs it to the top. If the form has<br />
components, the component specified <strong>in</strong> the ActiveControl property will receive <strong>in</strong>put focus<br />
(see the ActiveControl property <strong>in</strong> the section “Runtime and Design-Time Properties”).<br />
Show() and ShowModal()<br />
The Show() and ShowModal()methods display the form. The Show() method displays the form<br />
as modeless, so other forms can be activated while the form is visible. The ShowModal()<br />
method executes the form modally. A modal form must be dismissed before the user can<br />
cont<strong>in</strong>ue to use the application.<br />
MDI Methods<br />
Several form methods deal specifically with MDI operations. The ArrangeIcons() method<br />
arranges the icons of any m<strong>in</strong>imized MDI children <strong>in</strong> an MDI parent w<strong>in</strong>dow. The<br />
Cascade() method cascades all non-m<strong>in</strong>imized MDI child w<strong>in</strong>dows. The Tile() method<br />
tiles all open MDI child w<strong>in</strong>dows. The Next() method activates (br<strong>in</strong>gs to the top) the next<br />
MDI child <strong>in</strong> the child list, and the Previous() method activates the previous MDI child <strong>in</strong><br />
the child list. The MDI methods apply only to MDI parent w<strong>in</strong>dows.<br />
Form Events<br />
Forms can respond to a wide variety of events. Some of the most commonly used are listed<br />
<strong>in</strong> the follow<strong>in</strong>g sections.
The <strong>C++</strong>Builder IDE Explored: Projects and Forms<br />
OnActivate<br />
The OnActivate event occurs when the form is activated. The form might be activated as a<br />
result of its <strong>in</strong>itial creation, when the user switches from one form to another, or when the<br />
user switches from another application.<br />
OnClose and OnCloseQuery<br />
When an application is closed, the OnClose event is sent. OnClose calls the OnCloseQuery event<br />
to see whether it is okay to close the form. If the OnCloseQuery event returns false, the form<br />
is not closed.<br />
OnCreate<br />
The OnCreate event occurs when the form is <strong>in</strong>itially created. Only one OnCreate event will<br />
occur for any <strong>in</strong>stance of a particular form. Use the OnCreate handler to perform any startup<br />
tasks that the form needs <strong>in</strong> order to operate.<br />
OnDestroy<br />
The OnDestroy event is the opposite of OnCreate. Use this event to clean up any memory a<br />
form allocates dynamically or to do other cleanup chores.<br />
OnDragDrop<br />
The OnDragDrop event occurs when an object is dropped on the form. Respond to this event<br />
if your form supports drag-and-drop.<br />
OnMouseDown, OnMouseMove, and OnMouseUp<br />
Respond to the OnMouseDown, OnMouseMove, and OnMouseUp events to respond to mouse clicks<br />
on a form.<br />
OnPa<strong>in</strong>t<br />
The OnPa<strong>in</strong>t event occurs whenever the form needs repa<strong>in</strong>t<strong>in</strong>g, which could happen for a<br />
variety of reasons. Respond to this event to do any pa<strong>in</strong>t<strong>in</strong>g that your application needs to<br />
display at all times. In most cases, <strong>in</strong>dividual components will take care of pa<strong>in</strong>t<strong>in</strong>g<br />
themselves, but <strong>in</strong> some cases you may need to draw on the form itself.<br />
OnResize<br />
The OnResize event is sent every time the form is resized. You may need to respond to this<br />
event to adjust components on the form or to repa<strong>in</strong>t the form.<br />
199<br />
6
6<br />
200 Day 6<br />
OnShow<br />
The OnShow event occurs just before the form becomes visible. You could use this event to<br />
perform any process<strong>in</strong>g that your form needs to do just before it is shown.<br />
The Object Inspector<br />
An <strong>in</strong>tegral part of the <strong>C++</strong>Builder IDE is the Object Inspector. This w<strong>in</strong>dow works <strong>in</strong><br />
conjunction with the Form Designer to aid <strong>in</strong> the creation of components. I’m go<strong>in</strong>g to<br />
discuss the Form Designer tomorrow, but before I do, I want to talk a little about the Object<br />
Inspector.<br />
The Object Inspector is where you set the design-time properties that affect how the<br />
component acts at runtime. The Object Inspector has three ma<strong>in</strong> areas:<br />
■ The Component Selector<br />
■ The Properties page<br />
■ The Events page<br />
You have been us<strong>in</strong>g the Object Inspector quite a bit up to this po<strong>in</strong>t, so I’ll review what you<br />
already know and show you a few th<strong>in</strong>gs you don’t know.<br />
The Component Selector<br />
NOTE<br />
The Component Selector is a drop-down combo box that is located at the top of the Object<br />
Inspector w<strong>in</strong>dow. The Component Selector allows you to choose a component to view or<br />
modify.<br />
Usually the quickest way to select a component is by click<strong>in</strong>g on the<br />
component on the form. Choos<strong>in</strong>g the component from the Component<br />
Selector is convenient if the component you are look<strong>in</strong>g for is<br />
hidden beneath another component or is off the visible area of the<br />
form.<br />
The Component Selector displays the name of the component and the class from which it<br />
is derived. For example, a memo component named Memo would appear <strong>in</strong> the Component<br />
Selector as<br />
Memo: TMemo
NOTE<br />
The <strong>C++</strong>Builder IDE Explored: Projects and Forms<br />
The class name does not show up <strong>in</strong> the drop-down list of components, but only <strong>in</strong> the top<br />
portion of the Component Selector. To select a component, click the drop-down button to<br />
reveal the list of components and then click on the one you want to select.<br />
The Component Selector shows only the components available on the<br />
current form and the name of the form itself. Other forms and their<br />
components will not be displayed until they’re made the active forms <strong>in</strong><br />
the Form Designer.<br />
After you select a component <strong>in</strong> the Component Selector, the component is selected on the<br />
form as well. The Properties and Events tabs change to display the properties and events for<br />
the selected component. (Remember that a form is a component, too.) Figure 6.13 shows the<br />
Object Inspector with the Component Selector list displayed.<br />
Figure 6.13.<br />
The Component<br />
Selector list.<br />
The Properties Page<br />
The Properties page of the Object Inspector displays all the design-time properties for the<br />
currently selected control. The Properties page has two columns. The Property column is on<br />
the left side of the Properties page and shows the property name. The Value column is on the<br />
right side of the Properties page and is where you type or select the value for the property.<br />
If the component selected has more properties than will fit <strong>in</strong> the Object Inspector, a scrollbar<br />
will be provided so you can scroll up or down to locate other properties.<br />
NOTE<br />
If you have multiple components selected on the form, the Object<br />
Inspector shows all the properties that those components have <strong>in</strong><br />
common. You can use this feature to modify the properties of several<br />
201<br />
6
6<br />
202 Day 6<br />
components at one time. For example, to change the width of several<br />
components at one time, you can select all the buttons and then modify<br />
the Width property <strong>in</strong> the Object Inspector. When you press Enter or<br />
move to another property, all the components you selected will have<br />
their Width property modified.<br />
Figure 6.<strong>14</strong> shows the Object Inspector when a Memo component is selected.<br />
Figure 6.<strong>14</strong>.<br />
The Object Inspector<br />
show<strong>in</strong>g Memo<br />
component properties.<br />
NOTE<br />
On Day 5, “<strong>C++</strong> Class Frameworks and the Visual Component Model,” I talked about<br />
properties. I discussed how properties can be <strong>in</strong>teger values, enumerations, sets, other objects,<br />
str<strong>in</strong>gs, and other types. The Object Inspector deals with each type of property accord<strong>in</strong>g to<br />
the data type of the property. <strong>C++</strong>Builder has several built-<strong>in</strong> property editors to handle data<br />
<strong>in</strong>put for the property. For example, the Top property accepts an <strong>in</strong>teger value. Because an<br />
<strong>in</strong>t is a basic data type, no special handl<strong>in</strong>g is required, so the property editor is fairly basic.<br />
The property editor for this type of property allows you to type a value (such as Top, Left,<br />
Width, and Height) directly <strong>in</strong> the Value column for <strong>in</strong>teger properties.<br />
In most cases, the property editor does parameter check<strong>in</strong>g for any<br />
properties <strong>in</strong> which you can enter an <strong>in</strong>teger value. The Width property,<br />
for <strong>in</strong>stance, cannot be a negative number. If you attempt to enter a<br />
negative number for the width of a control, <strong>C++</strong>Builder will force the<br />
width to the m<strong>in</strong>imum allowed for that control (usually 0). If you enter<br />
a str<strong>in</strong>g value for a property that expects an <strong>in</strong>teger value, <strong>C++</strong>Builder<br />
will display an error message. It is the job of the property editor to do<br />
parameter check<strong>in</strong>g.
The <strong>C++</strong>Builder IDE Explored: Projects and Forms<br />
In many cases, the property editor for the property conta<strong>in</strong>s a list of items from which you<br />
can choose. Properties that have an enumeration or boolean value as their base data type fall<br />
<strong>in</strong>to this category. When you click on the Value column with this type of property editor,<br />
you will see a drop-down button on the right side of the Value column. Click<strong>in</strong>g this button<br />
will display the list of possible values.<br />
TIP<br />
If you double-click the Value column for this type of property, the<br />
property editor will cycle through the possible choices. To quickly<br />
change a bool property, for <strong>in</strong>stance, simply double-click its value.<br />
Because the only choices are true and false double-click<strong>in</strong>g the value<br />
has the effect of toggl<strong>in</strong>g the property’s value.<br />
If you look closely at the Object Inspector, you will see that some properties have a plus sign<br />
preced<strong>in</strong>g the property name. Properties that are sets and properties that are objects both have<br />
the plus sign <strong>in</strong> front of their names. The plus sign <strong>in</strong>dicates that the property node can be<br />
expanded to show the set or, <strong>in</strong> the case of properties that are objects, the properties of that<br />
object. To expand a node, double-click on the Property column for that property (on the<br />
property name) or choose Expand from the Object Inspector speed menu. To collapse the<br />
node, double-click on it aga<strong>in</strong> or choose Collapse from the Object Inspector speed menu.<br />
To see an example of a set, choose a form and then double-click on the BorderIcons property.<br />
The node expands and you see four boolean members of the set. You can turn on or off any<br />
of the four members as needed.<br />
In the case of properties that are objects (<strong>in</strong>stances of a VCL class), you have two choices <strong>in</strong><br />
edit<strong>in</strong>g the property. First, you can click on the Value column for the property and then click<br />
the button to the right side of the value. This button is <strong>in</strong>dicated by an ellipsis (…) on its face.<br />
Click<strong>in</strong>g this button will <strong>in</strong>voke the property editor for that particular control. For example,<br />
click on the Font property and then click the ellipsis button. The Choose Font dialog box is<br />
displayed so that you can select the font. The second way you can edit this type of property<br />
is by expand<strong>in</strong>g the property node. The property’s properties (yes, it’s true) will be displayed,<br />
and you can edit them just like any other property. Aga<strong>in</strong>, locate the Font property and<br />
double-click on it. The TFont properties will be displayed. You can now modify the font’s<br />
Height, Color, or Name properties.<br />
For some properties you can use only the ellipsis button as a means of edit<strong>in</strong>g the property.<br />
Earlier you used the Image component to select an icon for the Multiple program’s About box.<br />
As you found out then, the Image component’s Picture property can be changed only by<br />
<strong>in</strong>vok<strong>in</strong>g that property’s property editor. In that case, the property editor is the <strong>C++</strong>Builder<br />
Image Editor.<br />
203<br />
6
6<br />
204 Day 6<br />
Rest assured that each property knows what it needs to do to present you with the correct<br />
property editor. You will see different types of property editors as you are <strong>in</strong>troduced to new<br />
components and new properties.<br />
The Events Page<br />
The Events page lists all the events that the property is designed to handle. Us<strong>in</strong>g the Events<br />
page is pretty basic. In order to create an event handler for an event, you simply double-click<br />
<strong>in</strong> the Value column next to the event you want to handle. When you do, <strong>C++</strong>Builder creates<br />
an event-handl<strong>in</strong>g function for you with all the parameters needed to handle that event. The<br />
Code Editor is displayed, and the cursor is placed <strong>in</strong> the event handler. All you have to do<br />
is start typ<strong>in</strong>g code. The name of the function is generated based on the Name property of the<br />
component and the event be<strong>in</strong>g handled. If, for <strong>in</strong>stance, you had a button named OK and<br />
were handl<strong>in</strong>g the OnClick event, the function name generated would be OKClick().<br />
You can let <strong>C++</strong>Builder generate the name of the event-handl<strong>in</strong>g function for you or you can<br />
provide the function name for <strong>C++</strong>Builder to use. To provide the function name yourself,<br />
type the name <strong>in</strong> the Value column next to the event and press Enter. The Code Editor is<br />
displayed, and so is the event-handl<strong>in</strong>g function, complete with the name you supplied.<br />
Once you have created an event-handl<strong>in</strong>g function for a component, you can use that event<br />
handler for any component that handles the same event. Sometimes it’s convenient to have<br />
several buttons use the same OnClick event, for <strong>in</strong>stance. To take it a step further, you might<br />
have a ma<strong>in</strong> menu item, a pop-up menu item, and a speedbar button all use the same OnClick<br />
handler. You will learn to appreciate this k<strong>in</strong>d of code reuse as you ga<strong>in</strong> experience with<br />
<strong>C++</strong>Builder. Even though you are deal<strong>in</strong>g with three different components, they can still<br />
share a common OnClick handler. The Value column of the Events page conta<strong>in</strong>s a dropdown<br />
button that can be used to display a list of all event handlers compatible with the current<br />
event. All you have to do is choose an event from the list.<br />
An MDI Sample Program<br />
To help solidify today’s discussion of projects and forms, let’s create an MDI application.<br />
This application will allow you to open and save graphics files like bitmaps, icons, and<br />
metafiles. In order to complete our task, we’ll have to have a master plan. Here’s what we need<br />
to do:<br />
1. Create the ma<strong>in</strong> w<strong>in</strong>dow form (an MDI parent), <strong>in</strong>clud<strong>in</strong>g a menu.<br />
2. Write code for the File | Open and File | Save menu selections.<br />
3. Write code for the Cascade, Tile, and Arrange All items on the W<strong>in</strong>dow menu.
The <strong>C++</strong>Builder IDE Explored: Projects and Forms<br />
4. Create the MDI child forms.<br />
5. Create an About box.<br />
6. Stand back and admire our work.<br />
There’s no po<strong>in</strong>t <strong>in</strong> dawdl<strong>in</strong>g (time is money!), so let’s get right to it.<br />
Step 1: Create the Ma<strong>in</strong> W<strong>in</strong>dow Form<br />
First we’ll create the ma<strong>in</strong> w<strong>in</strong>dow form. The ma<strong>in</strong> w<strong>in</strong>dow for an MDI application must<br />
have the FormStyle property set to fsMDIForm. We will also need to add a menu to the<br />
application, as well as File Open and File Save dialog boxes:<br />
1. Start <strong>C++</strong>Builder and choose File | New Application from the ma<strong>in</strong> menu.<br />
2. For the ma<strong>in</strong> form, change the Name property to Ma<strong>in</strong>Form.<br />
3. Change the Caption property to Picture Viewer.<br />
4. Change the Height to 450 and the Width to 575.<br />
5. Change the FormStyle to fsMDIForm.<br />
Okay, now we’ve got the ma<strong>in</strong> part of the form done. Next we’ll add a menu to the form.<br />
Because I haven’t discussed the Menu Editor yet, we’ll take the easy route to creat<strong>in</strong>g a menu.<br />
To do that, we’ll take advantage of a <strong>C++</strong>Builder feature that allows us to import a predef<strong>in</strong>ed<br />
menu:<br />
1. Click on the Standard tab of the Component Palette and click the Ma<strong>in</strong>Menu<br />
button.<br />
2. Drop a Ma<strong>in</strong>Menu component on the form. It doesn’t matter where you drop it<br />
because the icon represent<strong>in</strong>g the menu is just a placeholder and won’t show on the<br />
form at runtime.<br />
3. Change the Name property to Ma<strong>in</strong>Menu.<br />
4. Double-click on the Ma<strong>in</strong>Menu component. The Menu Editor is displayed. (We’ll<br />
look at the Menu Editor <strong>in</strong> more detail tomorrow.)<br />
5. Place your cursor over the Menu Editor and click your right mouse button. The<br />
Insert Template dialog box appears. Choose Insert from template… from the speed<br />
menu. Figure 6.15 shows the Insert Template dialog box with the Menu Editor<br />
beh<strong>in</strong>d it.<br />
6. Choose MDI Frame Menu and click OK. The menu is displayed <strong>in</strong> the Menu<br />
Editor.<br />
7. Click the system close box on the Menu Editor to close it.<br />
205<br />
6
6<br />
206 Day 6<br />
Figure 6.15.<br />
The Menu Editor<br />
with the Insert<br />
Template dialog box<br />
open.<br />
Now you should be back to the ma<strong>in</strong> form. Notice that you have a menu on the form. You<br />
can click on the top-level items to see the full menu. Don’t click on any menu subitems at<br />
this po<strong>in</strong>t—we’ll do that <strong>in</strong> a m<strong>in</strong>ute. Notice that there are a lot of menu items. For now we’ll<br />
just leave the extra items where they are.<br />
Now we need to prepare the File Open and File Save dialog boxes:<br />
1. Click on the Dialogs tab on the Component Palette. Choose an OpenDialog<br />
component and place it on the form. The OpenDialog component’s icon can be<br />
placed anywhere on the form.<br />
2. Change the Name property of the open dialog box to OpenDialog.<br />
3. Change the Title property to Open a Picture for View<strong>in</strong>g.<br />
4. Add a SaveDialog component.<br />
5. Change the Name property of the component to SaveDialog and the Title property<br />
to Save a Picture.<br />
Your form should now look like the one <strong>in</strong> Figure 6.16.<br />
Figure 6.16.<br />
The form up to this<br />
po<strong>in</strong>t.
The <strong>C++</strong>Builder IDE Explored: Projects and Forms<br />
Step 2: Write Code for the File|Open and<br />
File|Save As Menu Items<br />
So far, so good. Now let’s write the code to implement the File | Open and File | Save As<br />
menu items. <strong>C++</strong>Builder provides a slick way of writ<strong>in</strong>g menu handlers with a m<strong>in</strong>imum<br />
amount of fuss. Keep <strong>in</strong> m<strong>in</strong>d that we haven’t created the MDI child form yet, but we know<br />
enough about it to write the code for the menu handlers. Here goes:<br />
1. On the ma<strong>in</strong> form, choose File | Open from the menu. An event handler is created<br />
for that menu item, and the Code Editor is displayed.<br />
2. Type code so that the event handler looks like this:<br />
NOTE<br />
void __fastcall TMa<strong>in</strong>Form::Open1Click(TObject *Sender)<br />
{<br />
if (OpenDialog->Execute())<br />
{<br />
TChild* child = new TChild(this);<br />
child->SetParent(this);<br />
child->Image->Picture->LoadFromFile(OpenDialog->FileName);<br />
child->ClientWidth = child->Image->Picture->Width;<br />
child->ClientHeight = child->Image->Picture->Height;<br />
child->Caption = OpenDialog->FileName;<br />
child->Show();<br />
}<br />
}<br />
This code first executes the File Open dialog box and gets a filename. If the Cancel<br />
button on the File Open dialog box is clicked, the function returns without do<strong>in</strong>g<br />
anyth<strong>in</strong>g further. If the OK button on the File Open dialog box is clicked, a new<br />
TChild object is created (TChild will be the name of the MDI child class we’re<br />
go<strong>in</strong>g to create later). The image file is loaded <strong>in</strong>to the Image component on the<br />
child form; then the MDI child’s client area is sized to match the size of the image.<br />
F<strong>in</strong>ally, the Caption property is set to the filename selected and the child w<strong>in</strong>dow is<br />
displayed.<br />
Remember our earlier discussion about call<strong>in</strong>g delete for all objects<br />
created with new? Notice that I appear to be violat<strong>in</strong>g that rule <strong>in</strong> the<br />
preced<strong>in</strong>g code. In reality I am not, because VCL will take the responsibility<br />
of free<strong>in</strong>g the memory allocated for the MDI child w<strong>in</strong>dows.<br />
Notice that the s<strong>in</strong>gle parameter <strong>in</strong> the TChild constructor is this. That<br />
tells VCL that the Owner of the MDI child is the MDI form w<strong>in</strong>dow.<br />
When the MDI form is destroyed (when the application closes), it will<br />
be sure to delete all of its MDI child objects.<br />
207<br />
6
6<br />
208 Day 6<br />
NOTE<br />
3. Press F12 to switch back to the form. Now choose File | Save As from the menu.<br />
The File | Save As event handler is displayed.<br />
4. Type code so that the File | Save As event handler looks like this:<br />
void __fastcall TMa<strong>in</strong>Form::SaveAs1Click(TObject *Sender)<br />
{<br />
TChild* child = dynamic_cast(ActiveMDIChild);<br />
if (!child) return;<br />
if (SaveDialog->Execute())<br />
{<br />
child->Image->Picture->SaveToFile(SaveDialog->FileName);<br />
}<br />
}<br />
The code for the File | Save menu item is pretty simple. The first two l<strong>in</strong>es check to see<br />
whether an MDI child w<strong>in</strong>dow is active. If, so the File Save dialog box is displayed. If the user<br />
clicks OK, the image is saved to disk us<strong>in</strong>g the TPicture class’s SaveToFile() method.<br />
In the preced<strong>in</strong>g code you see a special <strong>C++</strong> operator called<br />
dynamic_cast. dynamic_cast is used to cast a po<strong>in</strong>ter of a base class<br />
to a po<strong>in</strong>ter of a derived class. The ActiveMDIChild property returns<br />
a po<strong>in</strong>ter to a TForm object. What we actually need <strong>in</strong> this case is a po<strong>in</strong>ter<br />
to a TChild object (our MDI child class, derived from TForm) so that<br />
we can access the Image property of the MDI child form.<br />
If dynamic_cast is unable to perform the cast, it returns NULL. Attempt<strong>in</strong>g<br />
to use a NULL po<strong>in</strong>ter will result <strong>in</strong> an access violation, but the<br />
debugger will conveniently po<strong>in</strong>t out the offend<strong>in</strong>g l<strong>in</strong>e so you know<br />
exactly where the problem lies. This is much better than the alternative<br />
of attempt<strong>in</strong>g to use the old-style cast, where a bad cast could result <strong>in</strong><br />
some random memory location be<strong>in</strong>g overwritten.<br />
Before we go on, it would be a good idea to save the project. Choose File | Save All from the<br />
ma<strong>in</strong> menu. Save Unit1 (the default name <strong>C++</strong>Builder assigns to a new unit) as ViewMa<strong>in</strong> and<br />
the project as ViewPict.<br />
Step 3: Write Code for the W<strong>in</strong>dow Menu<br />
Now we’ll add code to the W<strong>in</strong>dow menu. This part is simple:
The <strong>C++</strong>Builder IDE Explored: Projects and Forms<br />
1. Switch back to the form by press<strong>in</strong>g F12. Choose W<strong>in</strong>dow | Tile from the form’s<br />
menu.<br />
2. You need to enter only a s<strong>in</strong>gle l<strong>in</strong>e of code for the event handler. The f<strong>in</strong>ished<br />
event handler will look like this:<br />
void __fastcall TMa<strong>in</strong>Form::Tile1Click(TObject *Sender)<br />
{<br />
Tile();<br />
}<br />
3. Switch back to the form and repeat the process for W<strong>in</strong>dow | Cascade. The<br />
f<strong>in</strong>ished function looks like this:<br />
void __fastcall TMa<strong>in</strong>Form::Cascade1Click(TObject *Sender)<br />
{<br />
Cascade();<br />
}<br />
4. Repeat the steps for the W<strong>in</strong>dow | Arrange All menu item. The s<strong>in</strong>gle l<strong>in</strong>e of code<br />
to add for the function body is<br />
ArrangeIcons();<br />
Okay, now we’re done with the ma<strong>in</strong> form. We can now move on to creat<strong>in</strong>g the MDI child<br />
form.<br />
Step 4: Create the MDI Child Form<br />
The MDI child form is surpris<strong>in</strong>gly simple. In fact, we don’t have to write any code at all:<br />
1. Create a new form us<strong>in</strong>g the New Form button on the toolbar or by choos<strong>in</strong>g<br />
File | New Form from the ma<strong>in</strong> menu.<br />
2. Change the Name property to Child. The Caption property can be ignored because<br />
we will be sett<strong>in</strong>g the dialog box’s caption at runtime.<br />
3. Change the FormStyle property to fsMDIChild. This is necessary for the form to be<br />
treated as an MDI child w<strong>in</strong>dow.<br />
That’s it for the form itself. Now let’s put an Image component on the form. The Image<br />
component will display the graphics file selected by the user.<br />
1. Click on the Additional tab on the Component Palette. Click the Image button<br />
and place an Image component anywhere on the form.<br />
2. Change the Name property to Image.<br />
209<br />
6
6<br />
210 Day 6<br />
3. Change the Stretch property to true.<br />
4. Change the Align property to alClient. The Image component expands to fill the<br />
client area of the form.<br />
5. Choose File | Save and save the form’s unit as MDIChild.<br />
6. Switch to the Code Editor (press F12). Click on the ViewMa<strong>in</strong>.cpp tab. Now choose<br />
File | Include Unit Hdr from the ma<strong>in</strong> menu, select the MDIChild unit, and click<br />
OK. This is so the compiler is happy when we reference the TChild object.<br />
The form is pretty unimpressive at this po<strong>in</strong>t, but it should look similar to Figure 6.17.<br />
Figure 6.17.<br />
The MDI child form<br />
with an Image<br />
component.<br />
We still have to create the About box, but right now you’re probably eager to try the program.<br />
Go ahead and click the Run button. After a while, the program is displayed. You can choose<br />
File | Open and open any graphics file (any file with a .bmp, a .wmf, or an .ico extension, that<br />
is). Notice that the MDI child w<strong>in</strong>dow sizes itself to the graphic it conta<strong>in</strong>s. Open several files<br />
and then try the Cascade and Tile options under the W<strong>in</strong>dow menu. If you want, you can<br />
save a file with a different name us<strong>in</strong>g the File | Save As menu item.<br />
Step 5: Create the About Box<br />
By now you should know enough about <strong>C++</strong>Builder to create the About box on your own.<br />
Create the About box so that it looks someth<strong>in</strong>g like Figure 6.18. If you get stuck, you can<br />
jump back a few pages and review the steps you took to create the About box earlier <strong>in</strong> the<br />
chapter. Feel free to make your About box as personalized as you like.
Figure 6.18.<br />
The About box for the<br />
application.<br />
NOTE<br />
The <strong>C++</strong>Builder IDE Explored: Projects and Forms<br />
After you have the box created, you can take these steps to call the box from the menu:<br />
1. Change the Name property to AboutBox.<br />
2. Save the unit as PVAbout.<br />
<strong>C++</strong>Builder has full support for long filenames. I use the 8.3 filenam<strong>in</strong>g<br />
convention <strong>in</strong> this book for reasons related to electronic<br />
publish<strong>in</strong>g. For applications you write, you can take advantage of long<br />
filenames.<br />
3. Switch to the ViewMa<strong>in</strong>.cpp tab <strong>in</strong> the Code Editor (press F12). Choose<br />
File | Include Unit Hdr from the ma<strong>in</strong> menu and <strong>in</strong>clude the PVAbout header.<br />
4. Press F12 to switch back to the ma<strong>in</strong> form. Choose Help | About from the menu.<br />
You are taken to the Code Editor with the OnClick handler for the menu item<br />
displayed.<br />
5. Add this l<strong>in</strong>e to the event handler:<br />
AboutBox->ShowModal();<br />
That should do it for now. Click the Run button and try out the About item on the Help<br />
menu. Figure 6.19 shows the Picture Viewer program runn<strong>in</strong>g with several child w<strong>in</strong>dows<br />
open.<br />
211<br />
6
6<br />
212 Day 6<br />
Figure 6.19.<br />
The Picture Viewer<br />
program runn<strong>in</strong>g.<br />
At this po<strong>in</strong>t the program is functional, but it isn’t polished by any means. Still, for a 30m<strong>in</strong>ute<br />
programm<strong>in</strong>g job, it’s not too bad! There are a few problems with the program as it<br />
stands right now. If you try to open a file that is not a graphic, you will f<strong>in</strong>d that the program<br />
will throw an exception. We’ll deal with that later. Also, we have a lot of extra menu items<br />
that we need to get rid of. You’ll learn how to do that tomorrow as we work more with the<br />
Menu Designer.<br />
There is one problem that I th<strong>in</strong>k we should deal with because it’s easy to fix. Did you notice<br />
that a blank MDI child w<strong>in</strong>dow was displayed when the application started? That’s because<br />
a <strong>C++</strong>Builder application automatically creates all forms when the application runs. In the<br />
case of an MDI child, that means the w<strong>in</strong>dow is displayed when the application becomes<br />
visible. We are creat<strong>in</strong>g each MDI child as needed, so we don’t need to have <strong>C++</strong>Builder autocreate<br />
the form for us.<br />
Fortunately, remov<strong>in</strong>g the MDI child w<strong>in</strong>dow form from the auto-create list is easy. Choose<br />
Project | Options from the ma<strong>in</strong> menu. The Project Options dialog box is displayed. If<br />
necessary, click on the Forms tab. The list of forms to auto-create is displayed. Click on the<br />
child form and then click the > button. This removes the child form from the Auto-create<br />
list and puts it <strong>in</strong> the Available forms list. Figure 6.20 shows the Project Options dialog box<br />
after you move the child form to the Available forms list.
Figure 6.20.<br />
The Project Options<br />
dialog box.<br />
The <strong>C++</strong>Builder IDE Explored: Projects and Forms<br />
Now run the program aga<strong>in</strong>. This time the blank MDI child is not displayed.<br />
WARNING<br />
Summary<br />
If you remove a form from the auto-create list, you must be sure to<br />
specifically create the form before us<strong>in</strong>g it. If you do not create the<br />
form, the po<strong>in</strong>ter to the form is un<strong>in</strong>itialized, and attempt<strong>in</strong>g to use the<br />
po<strong>in</strong>ter will result <strong>in</strong> an access violation or erratic program behavior.<br />
Once you remove a form from the auto-create list, it is your responsibility<br />
to make sure the form has been created before us<strong>in</strong>g it.<br />
The <strong>C++</strong>Builder IDE can be <strong>in</strong>timidat<strong>in</strong>g until you become familiar with it. If you learn it<br />
a little at a time, it’s not nearly so daunt<strong>in</strong>g. Today you learned about how projects are used<br />
to create an executable file. You also learned more about forms. You found out how<br />
<strong>C++</strong>Builder deals with dialog boxes and other child w<strong>in</strong>dows. After that you got to create a<br />
program that actually does someth<strong>in</strong>g <strong>in</strong>terest<strong>in</strong>g. F<strong>in</strong>ally, you ended up with a look at the<br />
<strong>C++</strong>Builder Object Inspector. Tomorrow we’ll go after the Form Designer and the Menu<br />
Designer.<br />
Workshop<br />
The Workshop conta<strong>in</strong>s quiz questions to help you solidify your understand<strong>in</strong>g of the<br />
material covered and exercises to provide you with experience <strong>in</strong> us<strong>in</strong>g what you have learned.<br />
You can f<strong>in</strong>d answers to the quiz questions <strong>in</strong> Appendix A, “Answers to Quiz Questions.”<br />
213<br />
6
6<br />
2<strong>14</strong> Day 6<br />
Q&A<br />
Q The <strong>C++</strong>Builder toolbar doesn’t have buttons for the features I use most often.<br />
Can I change the toolbar?<br />
A Absolutely. The toolbar is fully customizable. You can add or remove buttons as<br />
you see fit.<br />
Q I placed multiple Label components on a form and then attempted to select<br />
them all by dragg<strong>in</strong>g. Instead I just got another big Label component. What<br />
have I done wrong?<br />
A You forgot to turn off the multiple placement option. After plac<strong>in</strong>g multiple<br />
components on the form, you need to click the arrow button on the Component<br />
Palette to turn off the multiple placement option.<br />
Q I have several components on a panel. I’m try<strong>in</strong>g to select the components by<br />
dragg<strong>in</strong>g, but I keep mov<strong>in</strong>g the panel <strong>in</strong>stead. What must I do to select a<br />
group of components on a panel?<br />
A Either use Shift+click to select each component or hold down the Ctrl key and drag<br />
a bound<strong>in</strong>g rectangle around the components.<br />
Q Can I write, compile, and run a simple <strong>C++</strong> program without a project?<br />
A No. In order to create an executable file, you need a project. The project makes<br />
sure that all needed library rout<strong>in</strong>es are l<strong>in</strong>ked to the f<strong>in</strong>al executable.<br />
Q What are library files for?<br />
A There is a common set of rout<strong>in</strong>es used <strong>in</strong> <strong>C++</strong> programs. The str<strong>in</strong>g manipulation<br />
functions I discussed on Day 1, “Gett<strong>in</strong>g Your Feet Wet,” are examples of such<br />
rout<strong>in</strong>es. If your program calls a <strong>C++</strong> function, that function must be <strong>in</strong>cluded <strong>in</strong><br />
the executable file for your program. These functions are conta<strong>in</strong>ed <strong>in</strong> a library file<br />
(.LIB). The l<strong>in</strong>ker makes a copy of the function found <strong>in</strong> the library file and places<br />
it <strong>in</strong> your executable. Any VCL methods your program calls are handled <strong>in</strong> the<br />
same way.<br />
Q Why does <strong>C++</strong>Builder use the term unit to refer to a source file?<br />
A <strong>C++</strong>Builder uses the term unit because <strong>C++</strong>Builder was created from <strong>Borland</strong>’s<br />
Delphi. Delphi is based on Pascal, and unit is a Pascal term for a source file.<br />
Q What do I need to do <strong>in</strong> order for my application to be an MDI application?<br />
A Just be sure that the ma<strong>in</strong> form has a FormStyle of fsMDIForm and that any MDI<br />
child forms have a FormStyle of fsMDIChild.
Quiz<br />
The <strong>C++</strong>Builder IDE Explored: Projects and Forms<br />
Q What’s the difference between a dialog box and a child w<strong>in</strong>dow <strong>in</strong><br />
<strong>C++</strong>Builder?<br />
A There is no real difference. A dialog box form might have certa<strong>in</strong> traits such as a<br />
dialog box border rather than a siz<strong>in</strong>g border; OK, Cancel, and Help buttons; and<br />
no M<strong>in</strong>imize or Maximize buttons. But a dialog box is still just a form like any<br />
other. A form might have the appearance of a dialog box or of a child w<strong>in</strong>dow, but<br />
a form is just a form.<br />
Q Can I check my program for errors without runn<strong>in</strong>g the program?<br />
A Yes. Just choose Project | Syntax Check from the ma<strong>in</strong> menu. <strong>C++</strong>Builder will<br />
compile any units that have changed s<strong>in</strong>ce the last compile and will report any<br />
errors encountered.<br />
Q Can I build OWL or MFC applications with <strong>C++</strong>Builder?<br />
A Yes. Because <strong>C++</strong>Builder’s strengths lie <strong>in</strong> its use of VCL, you probably won’t want<br />
to develop complex applications <strong>in</strong> <strong>C++</strong>Builder us<strong>in</strong>g OWL or MFC, but you<br />
certa<strong>in</strong>ly may if you want.<br />
1. How do you <strong>in</strong>voke the Toolbar Editor dialog box?<br />
2. Once you have the Toolbar Editor dialog box, how do you add buttons to the<br />
toolbar?<br />
3. How do you remove buttons from the toolbar?<br />
4. What’s the easiest way to place multiple components of the same type on a form?<br />
5. What’s the easiest way to place a component <strong>in</strong> the center of the form?<br />
6. List the file types needed to build an application <strong>in</strong> <strong>C++</strong>Builder.<br />
7. What VCL method do you use to display a form modelessly?<br />
8. What VCL method do you use to display a form modally?<br />
9. How can you attach an event to an event handler that has been previously def<strong>in</strong>ed?<br />
10. When us<strong>in</strong>g the Object Inspector, how can you enumerate the choices for a<br />
particular property?<br />
215<br />
6
6<br />
216 Day 6<br />
Exercises<br />
1. Remove the Pause, Step Over, and Trace Into buttons from the toolbar. Add Cut,<br />
Copy, and Paste buttons to the toolbar.<br />
2. Reset the toolbar to its default sett<strong>in</strong>gs.<br />
3. Spend some time look<strong>in</strong>g over the components on each page of the Component<br />
Palette. Place any components you are curious about on a form and experiment<br />
with them.<br />
4. Create a new directory on your hard drive. Create a new application <strong>in</strong><br />
<strong>C++</strong>Builder. Add three new forms to the project (they can be blank if you want).<br />
Save the project to the new directory you created and run the program. Close the<br />
program. Now exam<strong>in</strong>e the directory where the project was saved. Compare the<br />
files you see there with the file types listed <strong>in</strong> Table 6.1.<br />
5. Run the Picture Viewer program you created earlier. Open several graphics files.<br />
Drag the MDI child w<strong>in</strong>dows around <strong>in</strong> the parent w<strong>in</strong>dow. Attempt to move a<br />
child w<strong>in</strong>dow outside of the parent. What happens?<br />
6. With the Picture Viewer program still runn<strong>in</strong>g, m<strong>in</strong>imize all w<strong>in</strong>dows. Drag the<br />
m<strong>in</strong>imized w<strong>in</strong>dows to random locations on the screen and then choose<br />
W<strong>in</strong>dow | Arrange All from the menu.<br />
7. Start a new application. Place several components on the form. Click on each<br />
component and observe the properties for each component <strong>in</strong> the Object Inspector.<br />
8. Create a blank form. Double-click <strong>in</strong> the Value column next to the Color property<br />
to <strong>in</strong>voke the Color dialog box. Choose a color and click OK.<br />
9. Get some rest. Tomorrow is go<strong>in</strong>g to be a big day.
Work<strong>in</strong>g with the Form Designer and the Menu Designer<br />
Day 7<br />
Week<br />
Work<strong>in</strong>g with the Form<br />
Designer and the Menu<br />
Designer<br />
by Kent Reisdorph<br />
As you know by now, <strong>C++</strong>Builder is heavily form based, a model that takes<br />
maximum advantage of the visual programm<strong>in</strong>g environment. In this chapter<br />
you will explore<br />
■ The Form Designer<br />
■ The Menu Designer<br />
To illustrate the use of the Form Designer, we will build an application that<br />
approximates the W<strong>in</strong>dows Notepad program. Along the way you will ga<strong>in</strong><br />
valuable experience work<strong>in</strong>g with the Form Designer. Later <strong>in</strong> the chapter you’ll<br />
explore the Menu Designer <strong>in</strong> detail.<br />
1<br />
217<br />
7
218 Day 7<br />
Work<strong>in</strong>g with the Form Designer<br />
The <strong>C++</strong>Builder Form Designer is a powerful visual programm<strong>in</strong>g tool. It allows you to<br />
place, select, move, resize, and align components, and much more. The Form Designer also<br />
allows you to size and position the form itself, add menus, and create specialized dialog<br />
boxes—everyth<strong>in</strong>g you need to create the user <strong>in</strong>terface to a typical W<strong>in</strong>dows program.<br />
We’ll exam<strong>in</strong>e each of the features of the Form Designer <strong>in</strong> the follow<strong>in</strong>g sections. As you<br />
read, I encourage you to stop and experiment any time you are curious about how someth<strong>in</strong>g<br />
works. Sometimes a few m<strong>in</strong>utes of play<strong>in</strong>g around can teach you a technique that you can<br />
carry with you for a long time to come.<br />
The Form Designer’s Speed Menu<br />
The Form Designer, like most <strong>C++</strong>Builder w<strong>in</strong>dows, has a speed menu associated with it.<br />
Table 7.1 lists the items on the Form Designer speed menu and provides a description of each.<br />
Table 7.1. The Form Designer’s speed menu items.<br />
Item Description<br />
Align To Grid Aligns selected components to the Form Designer grid.<br />
Br<strong>in</strong>g To Front Br<strong>in</strong>gs selected components to the front its components<br />
layer.<br />
Send To Back Sends selected components beh<strong>in</strong>d its component layer.<br />
Revert to Inherited When you are work<strong>in</strong>g with a form you have <strong>in</strong>herited<br />
from the Object Repository, choos<strong>in</strong>g this menu item will<br />
cause the form to revert back to its orig<strong>in</strong>al state. (Inherit<strong>in</strong>g<br />
forms from the Object Repository is covered on Day 9,<br />
“Creat<strong>in</strong>g Applications <strong>in</strong> <strong>C++</strong>Builder.”)<br />
Align Displays the Alignment dialog box.<br />
Size Displays the Size dialog box.<br />
Scale Displays the Scale dialog box.<br />
Tab Order Displays the Edit Tab Order dialog box.<br />
Creation Order Displays the Creation Order dialog box.<br />
Add to Repository Adds this form to the Object Repository. Custom forms<br />
can be saved to be used later. (The Object Repository is<br />
discussed on Day 9.)
NOTE<br />
Work<strong>in</strong>g with the Form Designer and the Menu Designer<br />
Item Description<br />
View as Text Shows the form description as text <strong>in</strong> the Code Editor. You<br />
may edit the text version of the form if you like. Choose<br />
View as Form from the Code Editor speed menu to go back<br />
to the form. You can also use Alt+F12 to switch from the<br />
View As Text and View As Form options.<br />
<strong>C++</strong>Builder creates a form file (DFM) for every form you create and<br />
places it <strong>in</strong> your project’s directory. The form file is a b<strong>in</strong>ary resource<br />
file that can’t be read by mere humans. When you choose the View As<br />
Text speed menu item, <strong>C++</strong>Builder converts the b<strong>in</strong>ary resource to<br />
readable form. When you switch back to the View as Form option,<br />
<strong>C++</strong>Builder recompiles the form file to implement any changes you<br />
have made.<br />
Most of the speed menu options are discussed <strong>in</strong> the follow<strong>in</strong>g sections. Others are discussed<br />
<strong>in</strong> later chapters when we discuss the particular aspect of <strong>C++</strong>Builder that they perta<strong>in</strong> to.<br />
Plac<strong>in</strong>g Components<br />
The act of plac<strong>in</strong>g a component on a form is trivial. You simply select the component you<br />
want from the Component Palette and click on the form to place the component. When you<br />
click on the form, the component’s upper-left corner is placed at the location you clicked.<br />
Notice that when you click a button on the Component Palette, the button appears as<br />
pressed. When you click on the form to place the component, the button on the Component<br />
Palette pops up aga<strong>in</strong> to <strong>in</strong>dicate that the action is completed.<br />
TIP<br />
As you learned <strong>in</strong> the last chapter, to place a component on a form<br />
multiple times, press and hold Shift when you first select the<br />
component’s button on the Component Palette. Each time you click<br />
on the form, a new component will be added. Click the Arrow button<br />
on the Component Palette to stop plac<strong>in</strong>g components.<br />
219<br />
7
220 Day 7<br />
NOTE<br />
Most components can be sized. You can place a component on a form and then size it, or you<br />
can size the component at the same time you place it on the form. To size while plac<strong>in</strong>g the<br />
component, click on the form where you want the top-left corner to be placed and then drag<br />
with the mouse until the component is the desired size. When you release the mouse button,<br />
the component will be placed with the size you specified.<br />
TIP<br />
Not all components will allow siz<strong>in</strong>g <strong>in</strong> this manner. Nonvisual components,<br />
for <strong>in</strong>stance, are represented on the form by an icon. Although you<br />
can click-and-drag to place a nonvisual component, the drag size will be<br />
ignored. Another example is a s<strong>in</strong>gle-l<strong>in</strong>e edit component. The edit<br />
component can be placed by dragg<strong>in</strong>g, but only the drag width will be<br />
used. The drag height will be ignored because a s<strong>in</strong>gle-l<strong>in</strong>e edit<br />
component’s height defaults to the height of a s<strong>in</strong>gle-l<strong>in</strong>e edit control.<br />
If you change your m<strong>in</strong>d while plac<strong>in</strong>g the control via the dragg<strong>in</strong>g<br />
method, you can press the Esc key on the keyboard before you release<br />
the mouse button to cancel the operation. The component’s button<br />
will still be pressed on the Component Palette, however, so you may<br />
need to click the Arrow button to return to component-selection mode.<br />
Plac<strong>in</strong>g components is simple enough that we don’t need to spend a lot of time on the subject.<br />
You had some experience with plac<strong>in</strong>g components yesterday, so let’s move on to other<br />
th<strong>in</strong>gs.<br />
The Form Designer Grid<br />
The Form Designer has a built-<strong>in</strong> grid that aids <strong>in</strong> design<strong>in</strong>g forms. By default, <strong>C++</strong>Builder<br />
shows the grid. The grid size is <strong>in</strong>itially set to 8 pixels horizontally and 8 pixels vertically.<br />
When the Form Designer is set to display the grid, a dot is placed at the <strong>in</strong>tersection of each<br />
grid po<strong>in</strong>t. Components placed on a form will snap to the nearest grid po<strong>in</strong>t. By snap to I mean<br />
that the component’s top-left corner will automatically jump to the nearest grid po<strong>in</strong>t. This<br />
is an advantage because you frequently want a group of controls to be aligned either on their<br />
left, right, top, or bottom edges. When the Snap to Grid option is on, you can simply get close<br />
enough to the correct location and the Form Designer will automatically place your<br />
component at the nearest grid po<strong>in</strong>t. This saves you time by sav<strong>in</strong>g you from tweak<strong>in</strong>g the<br />
<strong>in</strong>dividual component’s size or position on the form.
Work<strong>in</strong>g with the Form Designer and the Menu Designer<br />
The grid sett<strong>in</strong>gs can be modified via the Preferences page of the Environment Options dialog<br />
box. (I’ll discuss the Environment Options <strong>in</strong> detail on Day 10, “More on Projects.”) Here<br />
you can change the grid size or turn off the Snap to Grid feature. You can also turn the grid<br />
display on or off. When the grid display is off, the grid is still active (assum<strong>in</strong>g that Snap to<br />
Grid is on), but the dots mark<strong>in</strong>g grid po<strong>in</strong>ts are not drawn on the form.<br />
Select<strong>in</strong>g Components<br />
After you place a component on a form, you often have to select the component <strong>in</strong> order to<br />
modify it <strong>in</strong> some way. You may have to select a component <strong>in</strong> order to perform one of the<br />
follow<strong>in</strong>g actions:<br />
■ Move the component<br />
■ Change the component’s properties<br />
■ Align the component<br />
■ Size the component<br />
■ Cut or copy the component<br />
■ Order the component (br<strong>in</strong>g to front or move to back)<br />
■ Delete the component<br />
Select<strong>in</strong>g Individual Components<br />
To select a s<strong>in</strong>gle component, just click on it. When you select the component, eight black<br />
siz<strong>in</strong>g handles appear around the component to <strong>in</strong>dicate that it is selected. (I’ll discuss the<br />
siz<strong>in</strong>g handles <strong>in</strong> a moment.) Figure 7.1 shows a form with a button component selected.<br />
As soon as you select a component, the Object Inspector changes to show the properties and<br />
events for the control selected. To deselect a control, click on the form’s background or<br />
Shift+click on the control. (Shift+click is described <strong>in</strong> the next section.)<br />
TIP<br />
Each component has a default event handler associated with it. When<br />
you double-click a component on a form, the Code Editor displays the<br />
default event handler for that component, ready for you to type code.<br />
In most cases, the default event handler is the OnClick handler. Exactly<br />
what happens when the component is double-clicked depends on how<br />
the component is designed. For example, <strong>in</strong> the case of the Image<br />
component, double-click<strong>in</strong>g will display the Picture Editor dialog box.<br />
221<br />
7
222 Day 7<br />
Figure 7.1.<br />
A form with a button<br />
component selected.<br />
Group Selection<br />
You can also select multiple components so that you can act on them as a group. You can select<br />
multiple components <strong>in</strong> one of three ways:<br />
■ Shift+click with the keyboard and mouse<br />
■ Drag with the mouse<br />
■ Choose Edit | Select All from the ma<strong>in</strong> menu<br />
To select all components on the form, choose Edit | Select All from the ma<strong>in</strong> menu. All<br />
components on the form are then selected.<br />
Select<strong>in</strong>g Components with Shift+Click<br />
To use the Shift+click sequence, first select one control. Then press and hold the Shift key<br />
on the keyboard and click on any other controls you want to <strong>in</strong>clude <strong>in</strong> the selection. Each<br />
control you click is bound by four gray boxes to <strong>in</strong>dicate that it is part of the selection.<br />
You can remove a control from the selection by cont<strong>in</strong>u<strong>in</strong>g to hold the Shift key and click<strong>in</strong>g<br />
on the component aga<strong>in</strong>. In other words, the Shift+click sequence toggles a component’s<br />
<strong>in</strong>clusion <strong>in</strong> the selection.
Work<strong>in</strong>g with the Form Designer and the Menu Designer<br />
To illustrate, first start with a blank form and then perform the follow<strong>in</strong>g steps:<br />
1. Place three button components anywhere on the form. They will automatically be<br />
labeled Button1, Button2, and Button3.<br />
2. Click Button1. The black siz<strong>in</strong>g rectangles are placed around the component.<br />
3. Press and hold the Shift key on the keyboard. Click Button2. It is added to the<br />
selection. Gray boxes now appear at the corners of both Button1 and Button2.<br />
4. Shift+click on Button3. Now all three buttons are part of the selection.<br />
5. Shift+click aga<strong>in</strong> on Button2. Button2 is removed from the selection (the gray<br />
boxes disappear), but Button1 and Button3 are still <strong>in</strong> the selection.<br />
6. Shift+click on Button1. Now Button3 is the only component <strong>in</strong> the selection. The<br />
gray boxes are replaced with the black siz<strong>in</strong>g rectangles.<br />
7. Shift+click on Button1 and Button2. All three buttons are now part of the selection<br />
aga<strong>in</strong>.<br />
Figure 7.2 shows the form as it should look at the end of this sequence. Keep <strong>in</strong> m<strong>in</strong>d that<br />
your buttons could have been placed anywhere on the form.<br />
Figure 7.2.<br />
A form with three<br />
buttons selected.<br />
NOTE<br />
Keep the form handy because you’ll use it aga<strong>in</strong> <strong>in</strong> the next exercise.<br />
If you click on a component that is part of a group selection, noth<strong>in</strong>g<br />
will happen. In order to select a s<strong>in</strong>gle control that is currently part of a<br />
group selection, you need to first click on the form’s background or<br />
press the Esc key to remove the group selection. Then you can click on<br />
the <strong>in</strong>dividual control you want to select.<br />
223<br />
7
224 Day 7<br />
Multiple Selection by Dragg<strong>in</strong>g<br />
You can select multiple controls by dragg<strong>in</strong>g a bound<strong>in</strong>g rectangle around the controls to be<br />
selected. The bound<strong>in</strong>g rectangle is a dashed (or is it dotted?) gray rectangle that changes size<br />
as you drag. In fact, you don’t have to drag the bound<strong>in</strong>g rectangle completely around the<br />
components. You only have to touch a component with the bound<strong>in</strong>g rectangle <strong>in</strong> order for<br />
it to be <strong>in</strong>cluded <strong>in</strong> the selection.<br />
Be sure that you start by plac<strong>in</strong>g the mouse cursor over the background of the form and not<br />
on a component. Hold the primary mouse button down and beg<strong>in</strong> dragg<strong>in</strong>g. You will see the<br />
bound<strong>in</strong>g rectangle as you drag. Surround or touch the components you want selected and<br />
release the mouse button. Any components that were <strong>in</strong>side the bound<strong>in</strong>g rectangle (or<br />
touch<strong>in</strong>g it) are <strong>in</strong>cluded <strong>in</strong> the selection.<br />
When you have a group of controls selected, you can use the Shift+click technique expla<strong>in</strong>ed<br />
<strong>in</strong> the previous section to add other controls from the selection or to remove controls from<br />
the selection. For example, you might want to select all controls <strong>in</strong> one area of your<br />
form except for one. Surround the controls and then deselect the control you want to<br />
exclude from the selection.<br />
Go back to the form with the three buttons you created earlier (if you’ve already discarded<br />
that form, create a new one and place three buttons on it). Start at the top-left corner and drag<br />
down and to the right to surround the buttons. Let go of the mouse button, and the controls<br />
will be selected. Figure 7.3 shows the form and the bound<strong>in</strong>g rectangle be<strong>in</strong>g dragged.<br />
Figure 7.3.<br />
Controls be<strong>in</strong>g selected<br />
by dragg<strong>in</strong>g.<br />
TIP<br />
You can use Shift+drag to select non-adjacent groups of controls. If, for<br />
<strong>in</strong>stance, you had two separate groups of controls <strong>in</strong> separate areas on<br />
your form, you could drag around the first set of controls and then<br />
hold the Shift key down and drag around the second set of controls.<br />
Both groups of controls will be selected.
NOTE<br />
Work<strong>in</strong>g with the Form Designer and the Menu Designer<br />
You don’t have to drag down and to the right. You can drag <strong>in</strong> any<br />
direction to select components.<br />
Select<strong>in</strong>g Multiple Items: Components With<strong>in</strong> Components<br />
Frequently you will have components placed with<strong>in</strong> other components. The Panel component<br />
is frequently used as a conta<strong>in</strong>er for other components. Speedbars are built this way, for<br />
example. To select a group of components on a panel, you have to hold down the Ctrl key<br />
on the keyboard while you drag to select the components. (Try it without hold<strong>in</strong>g down the<br />
Ctrl key and see what happens!) In case you’re wonder<strong>in</strong>g, yes, you can use a comb<strong>in</strong>ation<br />
of Ctrl+Shift+drag. (I suppose the <strong>Borland</strong> designers could have figured out some way of<br />
work<strong>in</strong>g the Alt key <strong>in</strong> there, too.)<br />
To illustrate, first start with a blank form. Then do the follow<strong>in</strong>g:<br />
1. Select a Panel component from the Component Palette and place it on the form<br />
us<strong>in</strong>g the drag method. Drag it so that it occupies most of the form.<br />
2. Now select a Button component and place six buttons on the form. Your form<br />
should look someth<strong>in</strong>g like Figure 7.4.<br />
3. Drag a bound<strong>in</strong>g rectangle around Button1, Button2, and Button3. You will<br />
notice that you moved the panel, which is not what you expected (and not what<br />
you wanted). Move the panel back to where it was.<br />
4. Hold down the Ctrl key and drag a rectangle around Button1, Button2, and<br />
Button3. The buttons are selected.<br />
5. Now hold down both the Ctrl and Shift keys and drag the bound<strong>in</strong>g rectangle<br />
around Button5 and Button6. Now all buttons are selected except Button4.<br />
Figure 7.4.<br />
The form with a<br />
panel and six buttons.<br />
225<br />
7
226 Day 7<br />
Us<strong>in</strong>g the Ctrl+drag sequence is the only way to select a group of components that are<br />
conta<strong>in</strong>ed with<strong>in</strong> another component if you are us<strong>in</strong>g the drag method. You can use the<br />
Shift+click method to select components conta<strong>in</strong>ed with<strong>in</strong> another component just as you<br />
do when select<strong>in</strong>g components on a form.<br />
Mov<strong>in</strong>g Components<br />
NOTE<br />
NOTE<br />
Mov<strong>in</strong>g components is a common and fairly simple task. To move an <strong>in</strong>dividual component,<br />
simply place the mouse cursor over the component and drag. As you drag, a white rectangle<br />
that represents the component moves with the mouse cursor. When you have the white<br />
rectangle where you want it, let go of the mouse button, and the component will be moved<br />
to that location.<br />
When you move a control via drag-and-drop, the Left and Top properties<br />
of the control are automatically updated.<br />
It’s easiest to move a component by drag-and-drop. If you need f<strong>in</strong>er<br />
control, you can modify the Left and Top properties of the component.<br />
You can also use various alignment options, which I’ll discuss later <strong>in</strong><br />
the chapter <strong>in</strong> the section “Align<strong>in</strong>g Components.”<br />
If you have the Snap to Grid option on, the white dragg<strong>in</strong>g rectangle will snap to the nearest<br />
grid po<strong>in</strong>t as you drag.<br />
TIP<br />
If you change your m<strong>in</strong>d while dragg<strong>in</strong>g, you can press the Esc key on<br />
the keyboard before you release the mouse button to cancel the drag<br />
operation. The component will return to its orig<strong>in</strong>al position.<br />
Dragg<strong>in</strong>g a group of controls works the same way. After you have a group of components<br />
selected, place the mouse cursor over any one of the controls and beg<strong>in</strong> dragg<strong>in</strong>g. The white<br />
dragg<strong>in</strong>g rectangle will be displayed for each of the controls <strong>in</strong> the group. This allows you to<br />
visualize where the group will be placed when you release the mouse button.
NOTE<br />
TIP<br />
TIP<br />
Work<strong>in</strong>g with the Form Designer and the Menu Designer<br />
You cannot move a group of components if components <strong>in</strong> the group<br />
have different parent controls. For <strong>in</strong>stance, let’s say you had selected<br />
both a Button component on the ma<strong>in</strong> form and a SpeedButton on a<br />
panel. S<strong>in</strong>ce these two components have different parent controls, you<br />
cannot move them as a group.<br />
Once you have a control selected, you can nudge the control by<br />
hold<strong>in</strong>g down the Ctrl key while us<strong>in</strong>g the arrow keys on the keyboard.<br />
This allows you to move the control one pixel at a time. This technique<br />
works for both groups of controls and <strong>in</strong>dividual controls. The Snap to<br />
Grid feature is overridden when you use this technique.<br />
After you have moved a component us<strong>in</strong>g this method, the component<br />
is no longer on a grid po<strong>in</strong>t—it is offset by some amount. If you now<br />
drag the component, it will ma<strong>in</strong>ta<strong>in</strong> its offset from the grid po<strong>in</strong>t as<br />
you drag.<br />
If you have moved a control us<strong>in</strong>g the Ctrl+arrow method and want to<br />
aga<strong>in</strong> align it to the grid, choose Edit | Align to Grid from the ma<strong>in</strong><br />
menu or choose Align to Grid from the local menu. The control’s topleft<br />
corner will snap to the nearest grid po<strong>in</strong>t.<br />
A control cannot be dragged outside its parent. If you drag a component off the left or top<br />
edge of the form, you will see that the component is clipped at the edge of the form. If,<br />
however, you drag the component off the right or bottom of the form and drop it, scrollbars<br />
will appear on the form to allow you to scroll to see the rest of the form. The Width and Height<br />
properties of the form are not altered. If you drag the component back onto the visible part<br />
of the form, the scrollbars disappear aga<strong>in</strong>. This is the default behavior and will occur unless<br />
you change the AutoScroll property of the form to False. Figure 7.5 shows a Memo component<br />
that has been dragged partially off the left edge of the form. Notice the scrollbar that appears<br />
at the bottom of the form.<br />
227<br />
7
228 Day 7<br />
Figure 7.5.<br />
A form with<br />
AutoScroll <strong>in</strong><br />
action.<br />
Prevent<strong>in</strong>g Components from Be<strong>in</strong>g Moved<br />
or Sized<br />
Components can be locked <strong>in</strong>to place so that they cannot be moved. Lock<strong>in</strong>g components<br />
is useful if you know that a form’s design is f<strong>in</strong>al and you don’t want to worry about<br />
accidentally mov<strong>in</strong>g controls. To lock a form’s controls, choose Edit | Lock Controls from<br />
the ma<strong>in</strong> menu. Locked controls cannot be moved or sized. When controls are locked, their<br />
siz<strong>in</strong>g handles are gray with a black border. To unlock the controls aga<strong>in</strong>, choose Edit | Lock<br />
Controls aga<strong>in</strong>. The controls can now be moved as before.<br />
Order<strong>in</strong>g, Cutt<strong>in</strong>g, Copy<strong>in</strong>g, and Past<strong>in</strong>g<br />
Components<br />
You will place some components on top of one another <strong>in</strong> order to achieve a visual effect. For<br />
example, you can create a shadowed box by plac<strong>in</strong>g a white box over a black box (both would<br />
be Shape components). Obviously, you can’t have the shadow on top of the box, so you have<br />
to have some way of order<strong>in</strong>g the controls to tell <strong>C++</strong>Builder which controls go on top and<br />
which go on the bottom. Let’s do a simple exercise that illustrates this. Along the way you<br />
will also see how you can use Copy and Paste with components. First (as always), start with<br />
a blank form. Now do this:<br />
1. Click on the Additional tab on the Component Palette and choose the Shape<br />
component. Click on the form to place the shape. A white square appears on the<br />
form.<br />
2. Size the shape as desired (m<strong>in</strong>e ended up be<strong>in</strong>g 209 pixels by 129 pixels).<br />
3. Be sure the Shape component is selected. Choose Edit | Copy from the ma<strong>in</strong> menu.<br />
4. Choose Edit | Paste from the ma<strong>in</strong> menu. A copy of the shape is placed below and<br />
to the right of the orig<strong>in</strong>al shape. Conveniently, this is exactly where we want it.
NOTE<br />
Work<strong>in</strong>g with the Form Designer and the Menu Designer<br />
After a paste operation, the component just pasted will be selected.<br />
5. Double-click the Brush property and change the Color property under Brush to<br />
clBlack. The new shape is now black, but it is on top of the orig<strong>in</strong>al shape. Can’t<br />
have that!<br />
6. Click the secondary mouse button and choose Send to Back from the speed menu<br />
(you could also choose Edit | Send to Back from the ma<strong>in</strong> menu). The black shape<br />
is moved beh<strong>in</strong>d the white shape. You now have a box with a shadow. (As an<br />
alternative, we could have clicked on the white shape and used Br<strong>in</strong>g to Front to<br />
move it on top of the black shape.)<br />
This exercise illustrates two features of the Form Designer. It shows how you can change the<br />
stack<strong>in</strong>g order of controls, and also that you can use Copy and Paste to copy components.<br />
The orig<strong>in</strong>al component’s properties are copied exactly and pasted <strong>in</strong> as part of the past<strong>in</strong>g<br />
process. Each time you paste a component, it is placed below and to the right of the previous<br />
component pasted.<br />
NOTE<br />
If a component that can serve as a conta<strong>in</strong>er is selected when you<br />
perform a paste, the component <strong>in</strong> the Clipboard will be pasted as a<br />
child of the conta<strong>in</strong>er component. For <strong>in</strong>stance, you might want to<br />
move a button from the ma<strong>in</strong> form to a panel. You could select the<br />
button and then choose Edit | Cut from the ma<strong>in</strong> menu to remove the<br />
button from the form and place it <strong>in</strong> the Clipboard. Then you could<br />
select the panel and choose Edit | Paste from the ma<strong>in</strong> menu to paste<br />
the button onto the panel.<br />
I don’t need to go <strong>in</strong>to a lot of detail on the cut operation. When you cut a component, the<br />
component disappears from the form and is placed <strong>in</strong> the Clipboard. Later you can paste the<br />
component onto the form or onto another component, such as a Panel component.<br />
Siz<strong>in</strong>g Components<br />
With some components, you drop them on a form and accept the default size. Buttons are<br />
a good example. A standard button has a height of 25 pixels and a width of 75 pixels. For many<br />
situations, the default button size is exactly what you want. With some components,<br />
however, the default size is rarely exactly what you need. For example, a Memo component<br />
nearly always has to be sized to fit the specific form on which you are work<strong>in</strong>g.<br />
229<br />
7
230 Day 7<br />
Siz<strong>in</strong>g by Dragg<strong>in</strong>g<br />
When you select a control, eight black siz<strong>in</strong>g handles appear around the control. When you<br />
place the mouse cursor over one of the siz<strong>in</strong>g handles, the cursor changes to a black, doubleheaded<br />
arrow known as the siz<strong>in</strong>g cursor. Once you see the siz<strong>in</strong>g cursor, you can beg<strong>in</strong><br />
dragg<strong>in</strong>g to size the control. How the component is sized depends on which of the siz<strong>in</strong>g<br />
handles you grab.<br />
The siz<strong>in</strong>g handles centered on the component at the top and bottom can be used to size the<br />
component vertically (to make the selected control taller or shorter). Likewise, the right and<br />
left siz<strong>in</strong>g handles can be used to size the component horizontally (to make the selected<br />
control wider or narrower). If you grab one of the siz<strong>in</strong>g handles at the corners of the<br />
component, you can size both horizontally and vertically at the same time. As with mov<strong>in</strong>g<br />
a component, a siz<strong>in</strong>g rectangle appears as you drag. When you have the siz<strong>in</strong>g rectangle at<br />
the desired size, let go of the mouse button and the component will be resized. Figure 7.6<br />
illustrates a memo component be<strong>in</strong>g sized by dragg<strong>in</strong>g; Figure 7.7 shows the form after the<br />
drag operation.<br />
Figure 7.6.<br />
A memo component<br />
be<strong>in</strong>g sized.<br />
Figure 7.7.<br />
The form after the<br />
memo component is<br />
sized.<br />
NOTE<br />
Siz<strong>in</strong>g applies to visual components only. A nonvisual component<br />
appears on the form as an icon that cannot be sized. The siz<strong>in</strong>g handles
Work<strong>in</strong>g with the Form Designer and the Menu Designer<br />
appear on nonvisual components, and the handles can be dragged, but<br />
the results of the dragg<strong>in</strong>g operation will be ignored.<br />
Groups of controls cannot be sized by dragg<strong>in</strong>g. The siz<strong>in</strong>g handles (black squares) are<br />
replaced by selection <strong>in</strong>dicators (gray squares) when you select more than one component.<br />
TIP<br />
TIP<br />
To size all the components <strong>in</strong> a group at one time, modify the Width or<br />
Height property <strong>in</strong> the Object Inspector or use the Size dialog box (the<br />
Size dialog is discussed <strong>in</strong> the section “Siz<strong>in</strong>g Components”). All<br />
components <strong>in</strong> the selection will take on the new values.<br />
To size a control or group of controls one pixel at a time, hold down<br />
the Shift key and press any of the arrow keys on the keyboard. The up<br />
and down arrows will size the control vertically, and the right and left<br />
arrows will size the control horizontally. Only the Width and Height<br />
properties of the component are affected. The Top and Left properties<br />
are not modified.<br />
Siz<strong>in</strong>g with the Size Dialog Box<br />
Another siz<strong>in</strong>g option is the Size dialog box. You can br<strong>in</strong>g up the Size dialog box by choos<strong>in</strong>g<br />
Edit | Size from the ma<strong>in</strong> menu. Figure 7.8 shows the Size dialog box.<br />
Figure 7.8.<br />
The Size dialog box.<br />
This dialog box is used when you want to force a group of controls to the same width or<br />
height. For <strong>in</strong>stance, let’s say you had six edit components on a form, all with different widths.<br />
To make the form appear more balanced, you might want to make all the edit components<br />
the same width. You would first select the components and then <strong>in</strong>voke the Size dialog box.<br />
From there you could choose Shr<strong>in</strong>k to Smallest <strong>in</strong> the Width column to make all the<br />
231<br />
7
232 Day 7<br />
components the width of the shortest edit component, or Grow to Largest to make all the<br />
components the width of the longest component <strong>in</strong> the group. You could also enter an exact<br />
width <strong>in</strong> the Width box, <strong>in</strong> which case you would leave the Height set on No Change. When<br />
you click OK, the components will all be the same width.<br />
TIP<br />
The Size dialog box can also be <strong>in</strong>voked from the Form Designer speed<br />
menu.<br />
Siz<strong>in</strong>g with the Scale Dialog Box<br />
Another siz<strong>in</strong>g tool is the Scale dialog box, shown <strong>in</strong> Figure 7.9. This dialog box allows you<br />
to specify a scal<strong>in</strong>g percentage. To make the components twice as large as they currently are,<br />
enter 200 <strong>in</strong> the Scal<strong>in</strong>g Factor box. To reduce the components’ size by half, enter 50 <strong>in</strong> the<br />
Scal<strong>in</strong>g Factor box. The Scale dialog box is convenient for quickly chang<strong>in</strong>g the size of all<br />
components on the form. You can br<strong>in</strong>g up the Scale dialog box by choos<strong>in</strong>g Edit | Scale from<br />
the ma<strong>in</strong> menu or Scale from the Form Designer speed menu.<br />
Figure 7.9.<br />
The Scale dialog box.<br />
NOTE<br />
A control can also be sized and moved by us<strong>in</strong>g the various alignment options. Let’s take a<br />
look at those now.<br />
Remember that you can always move components by modify<strong>in</strong>g their<br />
Left and Top properties, and you can size them by modify<strong>in</strong>g their<br />
Width and Height properties.<br />
Align<strong>in</strong>g Components<br />
Regardless of whether you have the Snap to Grid option turned on, you sometimes need to<br />
align components after plac<strong>in</strong>g them. Align<strong>in</strong>g components could mean align<strong>in</strong>g several<br />
components along a common edge, center<strong>in</strong>g components on the form, or spac<strong>in</strong>g<br />
components. There are two different ways to go about align<strong>in</strong>g components:
NOTE<br />
Figure 7.10.<br />
The Alignment<br />
Palette.<br />
Work<strong>in</strong>g with the Form Designer and the Menu Designer<br />
■ Us<strong>in</strong>g the Alignment Palette and Alignment dialog box<br />
■ Modify<strong>in</strong>g a component’s Align property<br />
The follow<strong>in</strong>g sections expla<strong>in</strong> the use of these two methods.<br />
You might have noticed the Alignment property for some components.<br />
This property only perta<strong>in</strong>s to the way the text <strong>in</strong> the component is<br />
aligned (centered, right-justified, or left-justified) and has noth<strong>in</strong>g to<br />
do with align<strong>in</strong>g components on a form.<br />
The Alignment Palette and the Alignment Dialog Box<br />
It is often necessary to move or size components relative to the form or relative to one another.<br />
The Alignment Palette conta<strong>in</strong>s several buttons that aid <strong>in</strong> that task. The Alignment dialog<br />
box performs the same operations as the Alignment Palette, but <strong>in</strong> a different format. To<br />
display the Alignment Palette, choose View | Alignment Palette from the ma<strong>in</strong> menu. Figure<br />
7.10 shows the Alignment Palette and a description of each button.<br />
TIP<br />
Align horizontal centers<br />
Align left edges<br />
Align tops<br />
Align vertical centers<br />
Center vertically <strong>in</strong> w<strong>in</strong>dow<br />
Center horizontally <strong>in</strong> w<strong>in</strong>dow<br />
Space equally horizontally<br />
Align right edges<br />
Align bottoms<br />
Space equally <strong>in</strong> w<strong>in</strong>dow<br />
The Alignment Palette can save you a lot of work. Don’t spend too<br />
much time try<strong>in</strong>g to get controls to l<strong>in</strong>e up exactly. Place the components<br />
on the form and then use the Alignment Palette to l<strong>in</strong>e them up.<br />
The Align Left Edges button is used to l<strong>in</strong>e up components on their left edges. Start with a<br />
blank form and then do the follow<strong>in</strong>g:<br />
1. Place five button components vertically on the form without regard to where their<br />
left edges fall.<br />
233<br />
7
234 Day 7<br />
2. Select the buttons by dragg<strong>in</strong>g a bound<strong>in</strong>g rectangle around them (or just touch<strong>in</strong>g<br />
them). The selection <strong>in</strong>dicators show that all of the buttons are selected. The form<br />
should now look someth<strong>in</strong>g like the one <strong>in</strong> Figure 7.11.<br />
3. Choose View | Alignment Palette from the ma<strong>in</strong> menu. The Alignment Palette is<br />
displayed. Move the Alignment Palette if necessary so that it does not obscure the<br />
form.<br />
4. Click the Align Left Edges button on the Alignment Palette. The buttons are all<br />
l<strong>in</strong>ed up.<br />
Figure 7.11.<br />
The form with the<br />
buttons randomly<br />
placed.<br />
See how easy that is? As long as we have the buttons selected, let’s look at another alignment<br />
option. The Space Equally Vertically alignment option can now be used to space the buttons<br />
evenly. The buttons should still be selected, so all you have to do is click the Space Equally<br />
Vertically button on the Alignment Palette, and voilà! the buttons are perfectly spaced. The<br />
form should now look like Figure 7.12.<br />
Figure 7.12.<br />
The form with the<br />
buttons aligned and<br />
equally spaced.<br />
NOTE<br />
The Space Equally Vertically alignment option will space the components<br />
equally between the first component <strong>in</strong> the column (the top<br />
component) and the last component <strong>in</strong> the column (the bottom
NOTE<br />
Work<strong>in</strong>g with the Form Designer and the Menu Designer<br />
component). Be sure to set the first and last components where you want<br />
them before choos<strong>in</strong>g the Space Equally Vertically alignment option.<br />
This is true of the Space Equally Horizontally alignment option as well.<br />
The Center Horizontally <strong>in</strong> W<strong>in</strong>dow and Center Vertically <strong>in</strong> W<strong>in</strong>dow alignment options<br />
do exactly as their names <strong>in</strong>dicate. These options are convenient for center<strong>in</strong>g a s<strong>in</strong>gle control,<br />
such as a button, on the form or for center<strong>in</strong>g a group of controls. As long as you still have<br />
the group of buttons selected, click both the Center Horizontally <strong>in</strong> W<strong>in</strong>dow and Center<br />
Vertically <strong>in</strong> W<strong>in</strong>dow buttons on the Alignment Palette. The buttons will be centered on the<br />
form both vertically and horizontally.<br />
When you have a group of controls selected and you click one of the<br />
center<strong>in</strong>g buttons, the controls will be treated as a group. If you were to<br />
choose each control <strong>in</strong>dividually and center it both horizontally and<br />
vertically on the form, all the controls would be stacked on top of one<br />
another <strong>in</strong> the middle of the form. By select<strong>in</strong>g the group and then<br />
center<strong>in</strong>g, you will get the entire group centered as you <strong>in</strong>tended.<br />
The form should now look like the one <strong>in</strong> Figure 7.13.<br />
Figure 7.13.<br />
The form with the<br />
buttons centered.<br />
NOTE<br />
The two w<strong>in</strong>dow-center<strong>in</strong>g alignment options can be used to align<br />
components that are conta<strong>in</strong>ed with<strong>in</strong> other components, such as<br />
buttons on a panel. The components will be centered horizontally<br />
or vertically on their parent component whether the parent is a panel<br />
or a form.<br />
235<br />
7
236 Day 7<br />
The Align Tops, Align Bottoms, and Align Right Edges options work just like the Align Left<br />
Edges option we used earlier. There’s not much po<strong>in</strong>t <strong>in</strong> go<strong>in</strong>g over all the possibilities that<br />
exist for their use.<br />
TIP<br />
The first component selected will be the anchor po<strong>in</strong>t when you’re<br />
us<strong>in</strong>g any of the edge-alignment options. Refer to Figure 7.4. Let’s say<br />
you had selected Button3 first and then used Shift+click to select the<br />
rema<strong>in</strong><strong>in</strong>g buttons. When you chose Align Left Edges, Button3 would<br />
rema<strong>in</strong> where it is and all other buttons would be l<strong>in</strong>ed up with<br />
Button3’s left edge because Button3 is the anchor component.<br />
The Align Horizontally Across Centers and Align Vertically Across Centers options can be<br />
used to center components relative to one another. This is best illustrated with shapes. Start<br />
with a new form (or delete the buttons from the form you have been work<strong>in</strong>g on). Now do<br />
the follow<strong>in</strong>g:<br />
1. Click on the Additional tab on the Component Palette and choose the Shape<br />
component. Click somewhere on the upper left of the form to add the shape.<br />
2. Change the Shape property to stCircle.<br />
3. Change the Width property to 150.<br />
4. Double-click the Brush property and change the Color property of the Brush<br />
property to clBlack.<br />
5. Place another Shape component on the form.<br />
6. Change the second shape’s Shape property to stCircle as well. Now you have two<br />
circles of different sizes on the screen—a white circle and a black circle.<br />
7. Click on the black circle. Hold the Shift key and click on the white circle. Both<br />
shapes are selected.<br />
8. Choose View | Alignment Palette from the ma<strong>in</strong> menu, if necessary (it may already<br />
be displayed). Arrange the Alignment Palette so you can see the two shapes on the<br />
form. Observe the shapes as you perform the follow<strong>in</strong>g two steps.<br />
9. Click the Align Vertically Across Centers button on the Alignment Palette. The<br />
vertical centers are aligned.<br />
10. Click the Align Horizontally Across Centers button on the Alignment Palette. The<br />
horizontal centers are aligned. Congratulations—you made a tire!<br />
Did you see the impact as you performed the last two steps? Notice that because you selected<br />
the black circle first, it did not move (it is the anchor component), but the white circle moved<br />
as you clicked the alignment buttons. You can use these alignment options to center any
Work<strong>in</strong>g with the Form Designer and the Menu Designer<br />
number of controls on one another. These two alignment options have no effect when used<br />
on a s<strong>in</strong>gle control.<br />
Like the Component Palette, the Alignment Palette has a speed menu associated with it. Place<br />
the mouse cursor over the Alignment Palette and click the secondary mouse button. The<br />
speed menu is displayed. Table 7.2 lists the items on the Alignment Palette’s speed menu and<br />
expla<strong>in</strong>s their use.<br />
Table 7.2. The Alignment Palette’s speed menu items.<br />
Menu Item Description<br />
Stay on top Forces the Alignment Palette to always be on top. This is<br />
useful if you are frequently switch<strong>in</strong>g back and forth between<br />
the Form Designer and the Code Editor. Because the Alignment<br />
Palette is a small w<strong>in</strong>dow, it’s easy to lose it.<br />
Show H<strong>in</strong>ts Turns the h<strong>in</strong>ts (tool tips) for the Alignment Palette buttons<br />
on and off.<br />
Hide Hides the Alignment Palette. (You can also use the close box<br />
on the Alignment Palette to hide it.) In order to show the<br />
Alignment Palette aga<strong>in</strong>, you have to choose View | Alignment<br />
Palette from the ma<strong>in</strong> menu.<br />
Help Br<strong>in</strong>gs up <strong>C++</strong>Builder Help with the Alignment Palette page<br />
displayed.<br />
The Alignment dialog box performs the same actions as the Alignment Palette. To br<strong>in</strong>g up<br />
the Alignment dialog box, choose Edit | Align from the ma<strong>in</strong> menu or Align from the Form<br />
Designer’s speed menu. Figure 7.<strong>14</strong> shows the Alignment dialog box.<br />
Figure 7.<strong>14</strong>.<br />
The Alignment<br />
dialog box.<br />
In most cases, the Alignment Palette is easier to use, but you may certa<strong>in</strong>ly use the Alignment<br />
dialog box if you prefer.<br />
237<br />
7
238 Day 7<br />
The Align Property<br />
The Align property controls how a component is aligned with its parent. The possible values<br />
for the Align property and a description of each are listed <strong>in</strong> Table 7.3.<br />
Table 7.3. Possible values for the Align property.<br />
Value Description<br />
alBottom The component will be aligned at the bottom of the parent w<strong>in</strong>dow.<br />
A status bar is an example of a component aligned along the bottom<br />
of a ma<strong>in</strong> form.<br />
alClient The component will expand to fill the client area of the parent<br />
w<strong>in</strong>dow. If other components occupy part of the client area, the<br />
component will fill what client area rema<strong>in</strong>s. Examples <strong>in</strong>clude Memo<br />
components, Image components, and RichEdit components.<br />
alLeft The component will be aligned along the left edge of the parent<br />
w<strong>in</strong>dow. A horizontal speedbar is an example of a left-aligned<br />
component.<br />
alNone The component will be placed as designed with no special<br />
relationship to the parent. This is the default for most components.<br />
alRight The component will be aligned along the right edge of the parent.<br />
alTop The component will be aligned along the top of the parent’s<br />
w<strong>in</strong>dow. A speedbar is an example of this type of alignment.<br />
An illustration will help expla<strong>in</strong> alignment. Start with a blank form. Then perform these steps:<br />
1. Click on the Standard tab on the Component Palette and choose a Panel component.<br />
Place the panel anywhere on the form.<br />
2. Locate the Align property <strong>in</strong> the Object Inspector (it’s at the top of the list). Notice<br />
that it is set on alNone. Change the Align property to alTop. The panel is aligned at<br />
the top of the form, and it expands to fill the width of the form.<br />
3. Try to move the panel back to the middle of the form. The panel will snap back to<br />
the top of the form.<br />
4. Try to make the panel narrower. Notice that the panel reta<strong>in</strong>s its width.<br />
5. Change the panel’s height. Note that the panel’s height can be changed (while the<br />
width cannot).<br />
6. Change the Align to alBottom. Now the panel is glued to the bottom of the form.<br />
7. Change the Align to alRight and then alLeft. Notice how the panel keeps its<br />
orig<strong>in</strong>al shape. The width is now the same as the height was before. In effect, the<br />
panel is rotated. Aga<strong>in</strong>, attempts to vertically move or size the panel fail.
Work<strong>in</strong>g with the Form Designer and the Menu Designer<br />
8. Change the Align property to alClient. The panel expands to fill the entire client<br />
area of the form. The panel cannot be resized <strong>in</strong> any dimension.<br />
9. Change the Align property to alNone. The panel can aga<strong>in</strong> be sized and moved.<br />
As you can see, chang<strong>in</strong>g Align to anyth<strong>in</strong>g other than alNone effectively glues the panel to<br />
one edge of the form. In the case of alClient, the panel is glued to all four edges of the form.<br />
To illustrate how different components work together, let’s build a prototype of an<br />
application that resembles W<strong>in</strong>dows Notepad.<br />
NEW TERM<br />
NOTE<br />
A prototype is an application that has the appearance of a work<strong>in</strong>g application but lacks<br />
full functionality.<br />
<strong>C++</strong>Builder is perfect for quick prototyp<strong>in</strong>g of an application. You can<br />
have the ma<strong>in</strong> screens and dialog boxes designed and able to be<br />
displayed <strong>in</strong> much less time than it would take with traditional <strong>C++</strong><br />
W<strong>in</strong>dows programm<strong>in</strong>g tools like OWL or MFC. That is not, however,<br />
to say that <strong>C++</strong>Builder is just for prototyp<strong>in</strong>g. <strong>C++</strong>Builder is fully<br />
capable of handl<strong>in</strong>g all your 32-bit W<strong>in</strong>dows programm<strong>in</strong>g needs.<br />
Step 1: Start<strong>in</strong>g a New Application<br />
1. Choose New Application from the ma<strong>in</strong> menu. If you’re prompted to save the<br />
current project, click No.<br />
2. Change the Name property to ScratchPad.<br />
3. Change the Caption to ScratchPad 1.0.<br />
4. Choose Project | Options from the ma<strong>in</strong> menu. Click on the Application tab and<br />
enter ScratchPad 1.0 for the application’s title. Click OK to close the Project<br />
Options dialog box.<br />
Step 2: Build<strong>in</strong>g a Speedbar<br />
Most W<strong>in</strong>dows applications these days have a speedbar. Build<strong>in</strong>g a speedbar requires several<br />
steps itself. First, we’ll put a spacer at the top of the w<strong>in</strong>dow. (You’ll see the benefit of the<br />
spacer later, when we add a menu to the application.) Here we go:<br />
1. Choose a Bevel component from the Component Palette and place it on the form<br />
(it’s located on the Additional tab).<br />
2. Change the Height property to 2.<br />
3. Change the Align property to alTop. The bevel is placed along the top of the form’s<br />
client area.<br />
239<br />
7
240 Day 7<br />
Step 3: Creat<strong>in</strong>g the Speedbar Conta<strong>in</strong>er<br />
Now we can add the panel that will serve as the conta<strong>in</strong>er for the speedbar buttons:<br />
1. Choose a Panel component from the Component Palette and place it anywhere on<br />
the form.<br />
NOTE<br />
2. Change the Name property to SpeedBar.<br />
3. Change the Height property to 32.<br />
4. Change the BevelOuter property to bvNone.<br />
5. Clear the Caption property.<br />
6. Change the Align property to alTop. The panel moves to the top, but just underneath<br />
the bevel we placed there earlier.<br />
The last step <strong>in</strong> this sequence illustrates a po<strong>in</strong>t about the Align<br />
property. If you make a component’s Align property alTop, it will move<br />
to the top of the client area or to the bottom edge of the first component<br />
it encounters. This allows you to place several components on the top of<br />
a form and have them adjust automatically as the form is sized.<br />
Step 4: Decorat<strong>in</strong>g the Panel<br />
Now all that’s left to do is add a button or two to the panel:<br />
1. Click on the Additional tab of the Component Palette and choose a SpeedButton<br />
component.<br />
2. Place a speed button on the panel (not on the ma<strong>in</strong> form). Don’t worry about its<br />
exact placement.<br />
3. Change the Name property to FileOpenBtn.<br />
4. Change the Left property to 5.<br />
5. Choose View | Alignment Palette from the ma<strong>in</strong> menu. Click the Center Vertically<br />
<strong>in</strong> W<strong>in</strong>dow button.<br />
6. Locate the Glyph property and double-click the Value column. The Image Editor is<br />
displayed.<br />
7. Click the Load button on the Image Editor. The Load picture dialog box is<br />
displayed. Navigate to the \Images\Buttons subdirectory of <strong>C++</strong>Builder and choose<br />
the fileopen.bmp file. Click OK.
Work<strong>in</strong>g with the Form Designer and the Menu Designer<br />
8. Repeat the first seven steps to add a File Save button. Place it to the right of the<br />
File Open button. Name it FileSaveBtn and use the filesave.bmp file for the<br />
glyph.<br />
The form should now look like Figure 7.15.<br />
Figure 7.15.<br />
The ScratchPad<br />
form up to this po<strong>in</strong>t.<br />
Step 5: Add<strong>in</strong>g a Status Bar<br />
Okay, so far, so good. W<strong>in</strong>dows Notepad doesn’t have a status bar (or a speedbar, for that<br />
matter), but we’ll put one <strong>in</strong> our application (we’re cooler!):<br />
1. Click on the W<strong>in</strong>95 tab on the Component Palette and choose the StatusBar<br />
component.<br />
2. Click anywhere on the form. The status bar is automatically placed at the bottom<br />
of the form. The status bar has a default Align value of alBottom.<br />
3. Change the Name property to StatusBar.<br />
Step 6: Add<strong>in</strong>g the Memo Component<br />
We need some component <strong>in</strong> which to type text, so we’ll use a memo component (believe<br />
it or not, we’re almost done with our prototype):<br />
1. Click on the Standard tab on the Component Palette and choose a Memo component.<br />
Place the memo anywhere on the client area of the form.<br />
2. Change the Name property to Memo.<br />
3. Change the WordWrap property to True (if necessary).<br />
4. Double-click the Value column next to the L<strong>in</strong>es property. The Str<strong>in</strong>g List Editor<br />
is displayed. Delete the word Memo and click OK.<br />
5. Change the Scrollbar property to ssVertical. (Initially, we only want a vertical<br />
scrollbar on the memo.)<br />
241<br />
7
242 Day 7<br />
6. Change the Name property of the Font property to Fixedsys. (Because this is a<br />
Notepad copycat, we’ll use the system font.)<br />
7. Change the Align property to alClient. The memo expands to fill the client area<br />
between the speedbar and the status bar.<br />
Hey, this is start<strong>in</strong>g to look like a real application! Before we go on, let’s do one more th<strong>in</strong>g<br />
so you can see the value of the Align property. We need to make the ma<strong>in</strong> form a little larger.<br />
Grab the lower-right corner of the form with the mouse and drag the form to a larger size.<br />
If you want to be exact, you can change the form’s Height property to 375 and the Width<br />
property to 575.<br />
TIP<br />
The client area of our form is completely covered by components. This<br />
makes it impossible to select the form by click<strong>in</strong>g on it if you want to<br />
change the form’s properties. To make the form the active component<br />
<strong>in</strong> the Object Inspector, select any component on the form and then<br />
press the Esc key on the keyboard. You can also choose the form from<br />
the Component Selector combo box on the Object Inspector.<br />
Notice that all the controls automatically resize themselves to reta<strong>in</strong> their relationship with<br />
the parent w<strong>in</strong>dow—the form, <strong>in</strong> this case. That is one of the ma<strong>in</strong> advantages of the Align<br />
property. The form now looks like the one <strong>in</strong> Figure 7.16.<br />
Figure 7.16.<br />
The completed<br />
prototype.<br />
Run, Baby, Run<br />
You can now click the Run button to run the program. You can type text <strong>in</strong> the client area<br />
of the w<strong>in</strong>dow, and you can press the speedbar buttons (although they don’t do anyth<strong>in</strong>g at<br />
this po<strong>in</strong>t). Keep <strong>in</strong> m<strong>in</strong>d that this is a prototype and is mostly for show right now. We’ll add<br />
more to the program by the end of the chapter.
Work<strong>in</strong>g with the Form Designer and the Menu Designer<br />
We better save the project because we’re go<strong>in</strong>g to use it later <strong>in</strong> the chapter. Choose File | Save<br />
All from the ma<strong>in</strong> menu. Save the ma<strong>in</strong> form’s source unit as SPMa<strong>in</strong> and the project as<br />
Scratch.<br />
Sett<strong>in</strong>g the Tab Order<br />
NEW TERM<br />
NOTE<br />
The tab order refers to the order <strong>in</strong> which components will receive <strong>in</strong>put focus when<br />
the user presses the Tab key on the keyboard.<br />
<strong>C++</strong>Builder forms automatically support component navigation us<strong>in</strong>g the Tab key. You can<br />
move forward from component to component us<strong>in</strong>g Tab and backward us<strong>in</strong>g Shift+Tab.<br />
There are two types of visual components. W<strong>in</strong>dowed components are<br />
components that accept focus. W<strong>in</strong>dowed components <strong>in</strong>clude the Edit,<br />
Memo, ListBox, ComboBox, and Button components, as well as many more.<br />
Non-w<strong>in</strong>dowed components are components that do not accept<br />
keyboard focus. Components such as Image, SpeedButton, Label, Shape,<br />
and many others are non-w<strong>in</strong>dowed components.<br />
The tab order applies only to w<strong>in</strong>dowed components. Non-w<strong>in</strong>dowed<br />
components are excluded from the tab order.<br />
The tab order is <strong>in</strong>itially set based on the order the components were placed on the form when<br />
the form was designed. You can modify the tab order by chang<strong>in</strong>g the TabOrder property for<br />
each control <strong>in</strong> the Object Inspector. That method is tedious because you have to go to each<br />
control <strong>in</strong>dividually. An easier way is provided via the Edit Tab Order dialog box. (See Figure<br />
7.17.)<br />
Figure 7.17.<br />
The Edit Tab Order<br />
dialog box.<br />
243<br />
7
244 Day 7<br />
NOTE<br />
The Edit Tab Order dialog box displays all w<strong>in</strong>dowed components currently on the form.<br />
Non-w<strong>in</strong>dowed components are not displayed. To change the tab order, click on the name<br />
of the component you want to move <strong>in</strong> the tab order and then click the up or down buttons<br />
as needed. You can also drag the component to its new position <strong>in</strong> the tab order. Once you<br />
get the tab order set the way you want it, click OK and the tab order will be set. You can<br />
confirm the new sett<strong>in</strong>gs by view<strong>in</strong>g the TabOrder property of each control.<br />
The tab order starts with 0. The first component <strong>in</strong> the tab order is 0,<br />
the second is 1, and so on.<br />
May I See a Menu, Please?<br />
Menus are a big part of most W<strong>in</strong>dows applications. Some W<strong>in</strong>dows programs do not have<br />
menus, but the vast majority do. <strong>C++</strong>Builder makes creat<strong>in</strong>g menus easy with the Menu<br />
Designer. The Menu Designer has the follow<strong>in</strong>g features:<br />
■ It can create both ma<strong>in</strong> menus and pop-up menus (speed menus).<br />
■ It provides immediate access to the Code Editor to handle the OnClick events for<br />
menu items.<br />
■ It can <strong>in</strong>sert menus from templates or from resource files.<br />
■ It can save custom menus as templates.<br />
All of the Menu Designer’s commands are accessed via the Menu Designer speed menu or<br />
by <strong>in</strong>teract<strong>in</strong>g with the Object Inspector. Figure 7.18 shows the Menu Designer’s speed<br />
menu.<br />
Figure 7.18.<br />
The Menu Designer’s<br />
speed menu.
Work<strong>in</strong>g with the Form Designer and the Menu Designer<br />
For the most part these menu items are self-explanatory, so I’m not go<strong>in</strong>g to go over each one<br />
right now. Rather, you will learn about each item on the speed menu via the hands-on<br />
approach. To beg<strong>in</strong>, let’s add a ma<strong>in</strong> menu to the ScratchPad application we created earlier.<br />
After that we’ll add a speed menu.<br />
Creat<strong>in</strong>g a Ma<strong>in</strong> Menu<br />
NOTE<br />
The Menu Designer allows you to quickly build any menu. The menu structure for a ma<strong>in</strong><br />
menu consists of a Ma<strong>in</strong>Menu component, which is represented by the VCL class TMa<strong>in</strong>Menu.<br />
Each item on the menu is a MenuItem component that is encapsulated <strong>in</strong> the TMenuItem class.<br />
You don’t need to be too concerned about the <strong>in</strong>tricacies of how these classes work together<br />
because the Menu Designer makes creat<strong>in</strong>g menus easy. With that brief overview, let’s add<br />
a ma<strong>in</strong> menu to the ScratchPad application.<br />
Add<strong>in</strong>g a Ma<strong>in</strong> Menu to the Form<br />
The first th<strong>in</strong>g you must do is add a Ma<strong>in</strong>Menu component to your form:<br />
By this time you have had some experience with <strong>C++</strong>Builder. From this<br />
po<strong>in</strong>t on I will abbreviate some of the steps that you need to take to<br />
perform certa<strong>in</strong> actions. For example, from here on I’ll say, “Place a<br />
Ma<strong>in</strong>Menu component on the form” rather than “Click on the Standard<br />
tab on the Component Palette. Click the Ma<strong>in</strong>Menu button and click on<br />
the form to place the component.” Don’t worry; I’ll still give plenty of<br />
detail when new operations are <strong>in</strong>troduced.<br />
1. Open the ScratchPad project created earlier <strong>in</strong> the chapter.<br />
2. Place a Ma<strong>in</strong>Menu component on the form and change its Name property to Ma<strong>in</strong>Menu.<br />
Notice that a Ma<strong>in</strong>Menu component has very few properties and no events. All the<br />
work of a menu is done by the MenuItem component.<br />
3. Double-click on the ma<strong>in</strong> menu icon. The Menu Designer is displayed.<br />
The Menu Designer looks like a blank form without grid po<strong>in</strong>ts. The Menu Designer can<br />
be sized <strong>in</strong> any way you want. The size is just for your convenience and has no bear<strong>in</strong>g on how<br />
the menu operates at runtime. At this po<strong>in</strong>t, the Menu Designer is wait<strong>in</strong>g for you to beg<strong>in</strong><br />
build<strong>in</strong>g the menu. Once you have created your first menu, you will f<strong>in</strong>d that menu creation<br />
is fairly easy and <strong>in</strong>tuitive.<br />
245<br />
7
246 Day 7<br />
NOTE<br />
Creat<strong>in</strong>g a Menu by Hand<br />
Although there are easier ways to create a File menu, you will create your first menu by hand.<br />
The Menu Designer always has a blank menu item that acts as a placeholder for any new menu<br />
items you create. When you first start the Menu Designer, the blank item is selected:<br />
1. Change the Name property to FileMenu.<br />
2. Click on the Caption property <strong>in</strong> the Object Inspector, type &File, and press Enter.<br />
The ampersand (&) is used to create the underl<strong>in</strong>ed character for a<br />
menu item. The underl<strong>in</strong>ed character is the accelerator the user can<br />
type, <strong>in</strong> comb<strong>in</strong>ation with the Alt key, to navigate a menu us<strong>in</strong>g the<br />
keyboard. You can put ampersands anywhere <strong>in</strong> the menu item’s text.<br />
For <strong>in</strong>stance, the customary text str<strong>in</strong>g for the Exit menu item is E&xit.<br />
All you have to do is provide the ampersands where appropriate and<br />
W<strong>in</strong>dows will take it from there.<br />
At this po<strong>in</strong>t, several th<strong>in</strong>gs happen. First, the File menu shows up <strong>in</strong> the Menu Designer.<br />
It also shows on the ma<strong>in</strong> form beh<strong>in</strong>d the Menu Designer. (Remember when we added the<br />
Bevel component to the ScratchPad ma<strong>in</strong> form to use as a spacer? Now you can see why. The<br />
bevel provides visual dist<strong>in</strong>ction between the menu and the speedbar.) The other th<strong>in</strong>g that<br />
happens is that a new, blank placeholder is added below the File menu you just created, plus<br />
a new, pop-up placeholder is created to the right of the File menu. The Object Inspector is<br />
display<strong>in</strong>g a blank MenuItem component, wait<strong>in</strong>g for you to enter the Caption and Name<br />
property values. Figure 7.19 shows the Menu Designer as it appears at this po<strong>in</strong>t.<br />
Figure 7.19.<br />
The Menu Designer<br />
and Object Inspector<br />
after the File menu is<br />
created.
Work<strong>in</strong>g with the Form Designer and the Menu Designer<br />
Let’s cont<strong>in</strong>ue with the creation of the menu:<br />
1. Change the Name property for the new item to FileNew.<br />
2. Change the Caption property to &New and press Enter. Aga<strong>in</strong>, a blank item is<br />
created <strong>in</strong> the Menu Designer.<br />
3. Repeat steps 1 and 2 and create menu items for Open, Save, and Save As. If you<br />
need help know<strong>in</strong>g where to place the ampersand, refer to Figure 7.20. Don’t<br />
worry that you might not get it exactly right. You can always go back later and fix<br />
any errors.<br />
TIP<br />
Make your menus as standard as possible. Be sure that your accelerators<br />
(the underl<strong>in</strong>ed character) are the same as <strong>in</strong> other W<strong>in</strong>dows programs.<br />
Also, remember that an ellipsis (…) follow<strong>in</strong>g a menu is a visual cue<br />
that <strong>in</strong>dicates to the user that choos<strong>in</strong>g the menu item will <strong>in</strong>voke a<br />
dialog box.<br />
At this po<strong>in</strong>t, we need a menu separator.<br />
A separator is the horizontal l<strong>in</strong>e on a menu that separates groups of menu items.<br />
NEW TERM<br />
Add<strong>in</strong>g a separator is easy with the <strong>C++</strong>Builder Menu Designer. All you have to do is put <strong>in</strong><br />
a hyphen for the Caption property. Move to the blank menu item under Save As, type a<br />
hyphen for the Caption, and press Enter. A separator is placed <strong>in</strong> the menu. Cont<strong>in</strong>ue add<strong>in</strong>g<br />
menu items until your menu looks like the one <strong>in</strong> Figure 7.20. If you need to modify any of<br />
the menu items, just click on the item you want to modify and then change properties <strong>in</strong> the<br />
Object Inspector as needed.<br />
Figure 7.20.<br />
The Menu Designer<br />
with the f<strong>in</strong>ished<br />
File menu.<br />
247<br />
7
248 Day 7<br />
NOTE<br />
The Menu Designer always provides a blank menu item at the bottom<br />
of each pop-up menu and on the right side of the menu bar. You<br />
cannot delete these blank items, but there’s no need to—they are only<br />
used <strong>in</strong> the Menu Designer and won’t show on the menu when your<br />
program runs.<br />
Now that the File menu is done, we need to create an Edit menu and a Help menu.<br />
Insert<strong>in</strong>g a Menu from a Template<br />
This time we’ll take the easy approach. First, click on the blank pop-up menu placeholder<br />
to the right of the File menu. Now click your secondary mouse button and choose Insert<br />
From Template from the speed menu. The Insert Template dialog box is displayed, as shown<br />
<strong>in</strong> Figure 7.21.<br />
Figure 7.21.<br />
The Insert Template<br />
dialog box.<br />
This dialog box shows a list of templates from which you can choose. You can use the<br />
predef<strong>in</strong>ed templates or create your own. In this case, we are only <strong>in</strong>terested <strong>in</strong> add<strong>in</strong>g an Edit<br />
menu, so choose Edit Menu and click OK. A full Edit menu is immediately <strong>in</strong>serted <strong>in</strong>to the<br />
Menu Designer. In fact, it’s a little too full. We’ll deal with that <strong>in</strong> a moment.<br />
As long as we’re here, let’s add the Help menu, too. Click on the placeholder to the right of<br />
the Edit menu. Choose Insert From Template aga<strong>in</strong>, and this time <strong>in</strong>sert a Help menu.<br />
(Don’t choose the Expanded Help menu, though.) We’ll tidy up both the Edit and Help<br />
menus <strong>in</strong> the next section. Notice that the ma<strong>in</strong> form has been updat<strong>in</strong>g to show the new<br />
menu items as they are placed.<br />
NOTE<br />
You can <strong>in</strong>sert templates to create pop-up menus as easily as you can<br />
when creat<strong>in</strong>g ma<strong>in</strong> menu items.
NOTE<br />
Work<strong>in</strong>g with the Form Designer and the Menu Designer<br />
Yes, <strong>in</strong>sert<strong>in</strong>g from a template is really that easy. After us<strong>in</strong>g <strong>C++</strong>Builder for a period of time,<br />
you will no doubt have your own custom templates that you can choose from to build menus<br />
quickly and easily. You still have to update the Name properties to mean<strong>in</strong>gful names, but it’s<br />
a whole lot easier than creat<strong>in</strong>g the entire menu from scratch.<br />
The Insert From Resource choice works essentially the same as Insert<br />
From Template, except that it expects a resource script file (a resource<br />
script file has the extension .RC) conta<strong>in</strong><strong>in</strong>g a valid menu def<strong>in</strong>ition.<br />
You won’t use this option as much as Insert From Template except<br />
when convert<strong>in</strong>g exist<strong>in</strong>g C or <strong>C++</strong> programs to <strong>C++</strong>Builder.<br />
Delet<strong>in</strong>g Menu Items<br />
The process of creat<strong>in</strong>g a W<strong>in</strong>dows application is a liv<strong>in</strong>g, breath<strong>in</strong>g th<strong>in</strong>g. Rarely will you<br />
get everyth<strong>in</strong>g exactly right the first time. Users will request new features, the boss will come<br />
up with a few of his own, and some features will even be dropped. Your application’s menus<br />
will often need to be updated as these changes take place. For example, the Edit menu that<br />
we <strong>in</strong>serted earlier is a tad verbose for our needs. Specifically, there are several items on the<br />
Edit menu that we just don’t need. No problem—we’ll just delete them:<br />
1. Click on the Edit menu.<br />
2. Click on the item called Repeat .<br />
3. Press Delete on the keyboard or choose Delete from the Menu Designer speed<br />
menu to delete the item. The item disappears, and the rema<strong>in</strong><strong>in</strong>g items move up.<br />
4. Delete the Paste Special menu item as well.<br />
There, that was easy! We’re not quite done with the Edit menu, but before we go on I want<br />
to mention a feature of the Menu Designer that is really handy. You are probably familiar with<br />
us<strong>in</strong>g Shift+click and Ctrl+click when select<strong>in</strong>g items <strong>in</strong> other W<strong>in</strong>dows programs. These<br />
techniques can be used <strong>in</strong> W<strong>in</strong>dows Explorer to select files, for <strong>in</strong>stance. The Menu Designer<br />
supports Shift+click and Ctrl+click with one caveat—these comb<strong>in</strong>ations can be used to<br />
select multiple menu items, but they cannot be used to deselect an item. As always, an exercise<br />
will illustrate better than I can expla<strong>in</strong>:<br />
1. The Edit menu should still be displayed. If it’s not, click on Edit to reveal the Edit<br />
menu.<br />
2. Click on the menu item called Goto.<br />
3. Hold down the Shift key and click on the menu item called Object. All items<br />
between those two po<strong>in</strong>ts are selected.<br />
249<br />
7
250 Day 7<br />
4. Press Delete on the keyboard to delete all the items at one time.<br />
5. Move to the Help menu and delete the two middle items. Only the Contents and<br />
About items will rema<strong>in</strong>.<br />
As you can see, the Shift+click technique can be used to quickly delete unwanted menu items.<br />
Now we have the menus trimmed back to the way we want them to appear <strong>in</strong> the ScratchPad<br />
application.<br />
Insert<strong>in</strong>g Menu Items<br />
Insert<strong>in</strong>g menu items is pretty straightforward. Just click on the menu item above which you<br />
want to <strong>in</strong>sert a new item and press the Insert key on the keyboard (or choose Insert from the<br />
Menu Designer’s speed menu). A blank menu item is <strong>in</strong>serted, and you can now modify the<br />
Name and Caption properties just as you did earlier. Let’s <strong>in</strong>sert an item <strong>in</strong>to the Edit menu:<br />
1. Drop down the Edit menu.<br />
2. Click on the F<strong>in</strong>d menu item.<br />
3. Press the Insert key on the keyboard. A new menu item is provided, and all other<br />
menu items below the new item move down.<br />
4. Change the Name property to EditSelectAll and change the Caption property to<br />
Select &All.<br />
5. Click on the empty placeholder at the bottom of the Edit menu. Add a menu<br />
separator (remember, just enter a hyphen for the Caption property).<br />
6. Click on the placeholder aga<strong>in</strong> and add a new item. Make the Name property<br />
EditWordWrap and the Caption property &Word Wrap.<br />
Mov<strong>in</strong>g Menu Items<br />
You can easily move menu items as needed. You can move them up or down with<strong>in</strong> the popup<br />
menu they are already <strong>in</strong>, or you can move them across pop-ups. There are two ways to<br />
move a menu item. The first is by us<strong>in</strong>g Cut and Paste. Cut and Paste work as you would<br />
expect, so there’s no need to go over that. The other way to move a menu item is by dragg<strong>in</strong>g<br />
it to a new location and dropp<strong>in</strong>g it. Let’s try it out. We really want the Select All menu item<br />
just below the Undo item. No problem—just move it:<br />
1. Click on Edit to display the Edit menu.<br />
2. Click on the Select All item and drag it up until the separator under the Undo item<br />
is highlighted.<br />
3. Let go of the mouse, and the menu item is moved.<br />
Too easy, right? Yep, but that’s what <strong>C++</strong>Builder is all about!
Work<strong>in</strong>g with the Form Designer and the Menu Designer<br />
Batch Modification of Properties<br />
Sometimes you want to modify several menu items’ properties at one time. For example, we<br />
have a few menu items <strong>in</strong> the ScratchPad application that we are not ready to implement at<br />
this time. We aren’t ready for pr<strong>in</strong>t<strong>in</strong>g support, for <strong>in</strong>stance, nor are we ready to implement<br />
the help system. We need to gray out (disable) those menu items:<br />
1. Choose Help | Contents <strong>in</strong> the Menu Designer.<br />
2. Change the Enabled property to False. The menu item is grayed out.<br />
3. Click on the File menu.<br />
4. Click on the Pr<strong>in</strong>t menu item, hold down the Shift key, and click on the Pr<strong>in</strong>t<br />
Setup menu item. Both items are selected.<br />
5. In the Object Inspector, change the Enabled property to False. Both menu items<br />
are disabled.<br />
6. Repeat steps 4 and 5 to disable the F<strong>in</strong>d and Replace items on the Edit menu.<br />
You can modify a group of menu items at one time with this method. Simply select the items<br />
you want to modify and then change the property you want to modify. All menu items<br />
currently selected will have the new property value.<br />
Creat<strong>in</strong>g Submenus<br />
There’s noth<strong>in</strong>g special or tricky about creat<strong>in</strong>g submenus. A submenu is a menu item that,<br />
when clicked, expands to show more menu choices. A submenu is denoted by a rightpo<strong>in</strong>t<strong>in</strong>g<br />
arrow next to the menu item text. You can create a submenu by choos<strong>in</strong>g Create<br />
Submenu from the Menu Designer speed menu or by hold<strong>in</strong>g down the Ctrl key and press<strong>in</strong>g<br />
the right-arrow key. When you create a submenu, a blank menu item is placed to the right<br />
of the submenu. You can add menu items to the submenu just as you did when creat<strong>in</strong>g the<br />
ma<strong>in</strong> menu. You can create a submenu by <strong>in</strong>sert<strong>in</strong>g a menu template as well.<br />
Add<strong>in</strong>g Shortcuts<br />
You can easily add keyboard shortcuts to your menu items by chang<strong>in</strong>g the ShortCut property<br />
of the menu item <strong>in</strong> the Object Inspector. The Edit menu that we <strong>in</strong>serted earlier already had<br />
keyboard shortcuts built <strong>in</strong>. For <strong>in</strong>stance, the customary shortcut for Cut is Ctrl+X. If you<br />
look at the Edit menu, you will see Ctrl+X listed next to the Cut item. Click on the Cut menu<br />
item, and you will see that the ShortCut property says Ctrl+X. Click on the Value column<br />
next to the ShortCut property. On the right side of the Value column you will see a drop-down<br />
button. Click on the button to display the list of available shortcuts. The list you see there<br />
conta<strong>in</strong>s just about any keyboard shortcut you would need. To set the keyboard shortcut for<br />
a menu item, simply pick one of the shortcuts from the list.<br />
251<br />
7
252 Day 7<br />
The standard shortcut for Select All is Ctrl+A, so let’s add that as a shortcut for our Select All<br />
menu item:<br />
1. Choose Edit | Select All from your menu <strong>in</strong> the Menu Designer.<br />
2. Click on the ShortCut property <strong>in</strong> the Object Inspector.<br />
3. Choose Ctrl+A from the list of available shortcuts. Now the Select All menu item<br />
shows Ctrl+A next to it.<br />
That’s all you have to do; <strong>C++</strong>Builder takes care of it from there. The shortcuts function<br />
without you hav<strong>in</strong>g to write any code.<br />
Odds and Ends<br />
Let’s tie up a few loose ends to f<strong>in</strong>ish off our menu. First, we’ll turn on the Word Wrap menu<br />
item by default. This menu item is go<strong>in</strong>g to be used to turn word wrapp<strong>in</strong>g on or off. When<br />
word wrapp<strong>in</strong>g is on, the Word Wrap menu item will have a check mark next to it. When<br />
word wrapp<strong>in</strong>g is off, it will not have a check mark next to it. Click on the Word Wrap menu<br />
item and then change the Checked property to True. A check mark shows up to <strong>in</strong>dicate that<br />
the word wrap feature is on.<br />
Another th<strong>in</strong>g we need to do is change the Name property on all the menu items we <strong>in</strong>serted<br />
from a template. They were given default names, and we want to change them to more<br />
mean<strong>in</strong>gful names. Select the Edit | Undo menu item. Change the Name property from Undo1<br />
to EditUndo. Notice that you append the pop-up menu name, Edit, to the front of the menu<br />
item name and remove the 1 at the end. You can use any nam<strong>in</strong>g convention you like, but<br />
be consistent. Repeat the process for the Cut, Copy, Paste, F<strong>in</strong>d, and Replace menu items.<br />
Now move to the Help menu and modify the Name property of the Contents item to<br />
HelpContents, and that of the About menu item to HelpAbout.<br />
NOTE<br />
That about wraps up our menu. Run through the menu to check it over once more. If you<br />
f<strong>in</strong>d any errors, make the necessary changes. When you are satisfied that the menu is correct,<br />
click the close box to close the Menu Designer.<br />
You can access the Code Editor directly from the Menu Designer by<br />
double-click<strong>in</strong>g on any menu item. When you double-click a menu<br />
item, the Code Editor will display the OnClick event for that item, and<br />
you can start typ<strong>in</strong>g code. In this case, we are go<strong>in</strong>g to go back to the<br />
ma<strong>in</strong> form and do our code edit<strong>in</strong>g there.
Work<strong>in</strong>g with the Form Designer and the Menu Designer<br />
Writ<strong>in</strong>g the Code<br />
Okay, so we have all these menu items but no code to make them work. It’s go<strong>in</strong>g to be a lot<br />
of work to implement all these menu items, right? Actually, it’s pretty easy. Most of the code<br />
required is already part of the TMemo class. All we have to do is call the appropriate TMemo<br />
methods <strong>in</strong> our menu handlers. We’ll have to do a few other th<strong>in</strong>gs, but most of what we will<br />
add is code you have seen before.<br />
Before we write the code, we need to add the usual OpenDialog and SaveDialog components<br />
to the form:<br />
1. Place an OpenDialog component on the form.<br />
2. Change the Name property to OpenDialog.<br />
3. Place a SaveDialog component on the form.<br />
4. Change the Name property to SaveDialog.<br />
5. L<strong>in</strong>e up the Ma<strong>in</strong>Menu, OpenDialog, and SaveDialog icons on the form.<br />
That was easy enough. Now let’s get on with writ<strong>in</strong>g the code for the menu items. We’ll start<br />
with the File Exit menu item (hey, it’s the easiest!). Be sure that the Menu Designer is closed<br />
so you don’t confuse the Menu Designer with the Form Designer.<br />
1. Choose File | Exit from the ma<strong>in</strong> menu. The Code Editor comes to the top, and<br />
the FileExitClick() event handler is displayed.<br />
2. The cursor is positioned and ready to go. Type the follow<strong>in</strong>g at the cursor:<br />
NOTE<br />
Close();<br />
In step 2 I had you use the Close() function to close the form. This<br />
works f<strong>in</strong>e here because this is the ma<strong>in</strong> form of the application. But if<br />
you want to term<strong>in</strong>ate the application from anywhere <strong>in</strong> the program<br />
you should use this:<br />
Application->Term<strong>in</strong>ate();<br />
This will ensure that the application is term<strong>in</strong>ated regardless of which<br />
form is currently open.<br />
That’s it. I told you it was the easiest! Let’s do one more; then I’m go<strong>in</strong>g to turn you loose<br />
to f<strong>in</strong>ish the rest on your own.<br />
253<br />
7
254 Day 7<br />
NOTE<br />
1. Choose Edit | Cut from the ma<strong>in</strong> menu. The Code Editor comes to the top, and<br />
the EditCutClick() event handler is displayed.<br />
2. Type the follow<strong>in</strong>g at the cursor:<br />
Memo->CutToClipboard();<br />
And that’s all there is to that particular menu item! You may not fully realize it, but VCL does<br />
a lot for you beh<strong>in</strong>d the scenes. The whole idea of a framework is to take the burden of the<br />
low-level details off the programmer’s back. Life is good.<br />
One of the <strong>in</strong>terest<strong>in</strong>g aspects of a program like <strong>C++</strong>Builder is that you rarely view your<br />
program as a whole. <strong>C++</strong>Builder conveniently takes you to the section of code you need to<br />
work on to deal with a particular event, so you usually only see your program <strong>in</strong> small chunks.<br />
List<strong>in</strong>g 7.1 conta<strong>in</strong>s the header for the ScratchPad program up to this po<strong>in</strong>t. The header is<br />
entirely <strong>C++</strong>Builder generated. The entire SPMAIN.CPP program is shown <strong>in</strong> List<strong>in</strong>g 7.2.<br />
Follow the examples you’ve just worked through to write code for each of the rema<strong>in</strong><strong>in</strong>g<br />
menu items. Copy the code for each of the menu OnClick handlers from List<strong>in</strong>g 7.2. (The<br />
comment l<strong>in</strong>es are there to expla<strong>in</strong> to you what the code is do<strong>in</strong>g. You don’t have to <strong>in</strong>clude<br />
them when you type the code.)<br />
List<strong>in</strong>g 7.1. SPMAIN.H.<br />
The event handlers appear <strong>in</strong> the source file <strong>in</strong> the order <strong>in</strong> which they<br />
were created. Don’t be concerned if the order of the event handlers <strong>in</strong><br />
your source file does not exactly match List<strong>in</strong>g 7.2. The order <strong>in</strong> which<br />
the functions appear makes no difference to the compiler.<br />
1: //------------------------------------------------------------<br />
2: #ifndef SPMa<strong>in</strong>H<br />
3: #def<strong>in</strong>e SPMa<strong>in</strong>H<br />
4: //------------------------------------------------------------<br />
5: #<strong>in</strong>clude <br />
6: #<strong>in</strong>clude <br />
7: #<strong>in</strong>clude <br />
8: #<strong>in</strong>clude <br />
9: #<strong>in</strong>clude <br />
10: #<strong>in</strong>clude <br />
11: #<strong>in</strong>clude <br />
12: #<strong>in</strong>clude <br />
13: #<strong>in</strong>clude <br />
<strong>14</strong>: //------------------------------------------------------------<br />
15: class TScratchPad : public TForm<br />
16: {
Work<strong>in</strong>g with the Form Designer and the Menu Designer<br />
17: __published: // IDE-managed Components<br />
18: TPanel *Panel1;<br />
19: TBevel *Bevel1;<br />
20: TSpeedButton *SpeedButton1;<br />
21: TSpeedButton *SpeedButton2;<br />
22: TStatusBar *StatusBar;<br />
23: TMa<strong>in</strong>Menu *Ma<strong>in</strong>Menu;<br />
24: TMenuItem *FileMenu;<br />
25: TMenuItem *FileOpen;<br />
26: TMenuItem *FileSave;<br />
27: TMenuItem *FileSaveAs;<br />
28: TMenuItem *N1;<br />
29: TMenuItem *FilePr<strong>in</strong>tSetup;<br />
30: TMenuItem *N2;<br />
31: TMenuItem *FileExit;<br />
32: TMenuItem *FilePr<strong>in</strong>t;<br />
33: TMenuItem *Edit1;<br />
34: TMenuItem *EditReplace;<br />
35: TMenuItem *EditF<strong>in</strong>d;<br />
36: TMenuItem *N4;<br />
37: TMenuItem *EditPaste;<br />
38: TMenuItem *EditCopy;<br />
39: TMenuItem *EditCut;<br />
40: TMenuItem *N5;<br />
41: TMenuItem *EditUndo;<br />
42: TMenuItem *Help1;<br />
43: TMenuItem *HelpAbout;<br />
44: TMenuItem *HelpContents;<br />
45: TMenuItem *EditSelectAll;<br />
46: TMenuItem *N3;<br />
47: TMenuItem *EditWordWrap;<br />
48: TOpenDialog *OpenDialog;<br />
49: TSaveDialog *SaveDialog;<br />
50: TMenuItem *FileNew;<br />
51: TMemo *Memo;<br />
52: void __fastcall FileOpenClick(TObject *Sender);<br />
53: void __fastcall FileSaveClick(TObject *Sender);<br />
54: void __fastcall FileSaveAsClick(TObject *Sender);<br />
55: void __fastcall FileExitClick(TObject *Sender);<br />
56: void __fastcall EditSelectAllClick(TObject *Sender);<br />
57: void __fastcall EditCutClick(TObject *Sender);<br />
58: void __fastcall EditCopyClick(TObject *Sender);<br />
59: void __fastcall EditPasteClick(TObject *Sender);<br />
60:<br />
61:<br />
62: void __fastcall EditWordWrapClick(TObject *Sender);<br />
63: void __fastcall FileNewClick(TObject *Sender);<br />
64: private: // User declarations<br />
65: public: // User declarations<br />
66: virtual __fastcall TScratchPad(TComponent* Owner);<br />
67: };<br />
68: //------------------------------------------------------------<br />
69: extern TScratchPad *ScratchPad;<br />
70: //-----------------------------------------------------------<br />
71: #endif<br />
255<br />
7
256 Day 7<br />
List<strong>in</strong>g 7.2. SPMAIN.CPP.<br />
1: //------------------------------------------------------------<br />
2: #<strong>in</strong>clude <br />
3: #pragma hdrstop<br />
4: #<strong>in</strong>clude “SPMa<strong>in</strong>.h”<br />
5: //------------------------------------------------------------<br />
6: #pragma resource “*.dfm”<br />
7: TScratchPad *ScratchPad;<br />
8: //------------------------------------------------------------<br />
9: __fastcall TScratchPad::TScratchPad(TComponent* Owner)<br />
10: : TForm(Owner)<br />
11: {<br />
12: }<br />
13: //------------------------------------------------------------<br />
<strong>14</strong>: void __fastcall TScratchPad::FileNewClick(TObject *Sender)<br />
15: {<br />
16: //<br />
17: // Open a file. First check to see if the current file<br />
18: // needs to be saved.<br />
19: //<br />
20: if (Memo->Modified) {<br />
21: //<br />
22: // Display a message box.<br />
23: //<br />
24: <strong>in</strong>t result = Application->MessageBox(<br />
25: “The current file has changed. Save changes?”,<br />
26: “ScratchPad Message”, MB_YESNOCANCEL);<br />
27: //<br />
28: // If Yes was clicked then save the current file.<br />
29: //<br />
30: if (result == IDYES) FileSaveClick(Sender);<br />
31: //<br />
32: // If No was clicked then do noth<strong>in</strong>g.<br />
33: //<br />
34: if (result == IDCANCEL) return;<br />
35: }<br />
36: //<br />
37: // Delete the str<strong>in</strong>gs <strong>in</strong> the memo, if any.<br />
38: //<br />
39: if (Memo->L<strong>in</strong>es->Count > 0) Memo->Clear();<br />
40: //<br />
41: // Set the FileName property of the Save Dialog to a<br />
42: // blank str<strong>in</strong>g. This lets us know that the file has<br />
43: // not yet been saved.<br />
44: //<br />
45: SaveDialog->FileName = “”;<br />
46: }<br />
47: //---------------------------------------------------- -- -- -- --<br />
48: void __fastcall TScratchPad::FileOpenClick(TObject *Sender)<br />
49: {<br />
50: //<br />
51: // Open a file. First check to see if the current file needs<br />
52: // to be saved. Same logic as <strong>in</strong> FileNewClick() above.<br />
53: //
Work<strong>in</strong>g with the Form Designer and the Menu Designer<br />
54: if (Memo->Modified) {<br />
55: <strong>in</strong>t result = Application->MessageBox(<br />
56: “The current file has changed. Save changes?”,<br />
57: “ScratchPad Message”, MB_YESNOCANCEL);<br />
58: if (result == IDYES) FileSaveClick(0);<br />
59: if (result == IDCANCEL) return;<br />
60: }<br />
61: //<br />
62: // Execute the File Open dialog. If OK was pressed then<br />
63: // open the file us<strong>in</strong>g the LoadFromFile() method. First<br />
64: // clear the FileName property.<br />
65: //<br />
66: OpenDialog->FileName = “”;<br />
67: if (OpenDialog->Execute())<br />
68: {<br />
69: if (Memo->L<strong>in</strong>es->Count > 0) Memo->Clear();<br />
70: Memo->L<strong>in</strong>es->LoadFromFile(OpenDialog->FileName);<br />
71: SaveDialog->FileName = OpenDialog->FileName;<br />
72: }<br />
73: }<br />
74: //--------------------------------------------------- -- -- -- --<br />
75: void __fastcall TScratchPad::FileSaveClick(TObject *Sender)<br />
76: {<br />
77: //<br />
78: // If a filename has already been provided then there is<br />
79: // no need to br<strong>in</strong>g up the File Save dialog. Just save the<br />
80: // file us<strong>in</strong>g SaveToFile().<br />
81: //<br />
82: if (SaveDialog->FileName != “”)<br />
83: {<br />
84: Memo->L<strong>in</strong>es->SaveToFile(SaveDialog->FileName);<br />
85: //<br />
86: // Set Modified to false s<strong>in</strong>ce we’ve just saved.<br />
87: //<br />
88: Memo->Modified = false;<br />
89: }<br />
90: //<br />
91: // If no filename was set then do a SaveAs().<br />
92: //<br />
93: else FileSaveAsClick(Sender);<br />
94: }<br />
95: //---------------------------------------------------- -- -- -- --<br />
96: void __fastcall TScratchPad::FileSaveAsClick(TObject *Sender)<br />
97: {<br />
98: //<br />
99: // Display the File Save dialog to save the file.<br />
100: // Set Modified to false s<strong>in</strong>ce we just saved.<br />
101: //<br />
102: SaveDialog->Title = “Save As”;<br />
103: if (SaveDialog->Execute())<br />
104: {<br />
105: Memo->L<strong>in</strong>es->SaveToFile(SaveDialog->FileName);<br />
106: Memo->Modified = false;<br />
107: }<br />
108: }<br />
257<br />
cont<strong>in</strong>ues<br />
7
258 Day 7<br />
List<strong>in</strong>g 7.2. cont<strong>in</strong>ued<br />
109: //------------------------------------------------------------<br />
110: void __fastcall TScratchPad::FileExitClick(TObject *Sender)<br />
111: {<br />
112: //<br />
113: // All done. Close the form.<br />
1<strong>14</strong>: //<br />
115: Close();<br />
116: }<br />
117: //------------------------------------------------------------<br />
118: void __fastcall TScratchPad::EditUndoClick(TObject *Sender)<br />
119: {<br />
120: //<br />
121: // TMemo doesn’t have an Undo method so we have to send<br />
122: // a W<strong>in</strong>dows WM_UNDO message to the memo component.<br />
123: //<br />
124: SendMessage(Memo->Handle, WM_UNDO, 0, 0);<br />
125: }<br />
126: //------------------------------------------------------------<br />
127: void __fastcall TScratchPad::EditSelectAllClick(TObject *Sndr)<br />
128: {<br />
129: //<br />
130: // Just call TMemo::SelectAll().<br />
131: //<br />
132: Memo->SelectAll();<br />
133: }<br />
134: //------------------------------------------------------------<br />
135: void __fastcall TScratchPad::EditCutClick(TObject *Sender)<br />
136: {<br />
137: //<br />
138: // Call TMemo::CutToClipboard().<br />
139: //<br />
<strong>14</strong>0: Memo->CutToClipboard();<br />
<strong>14</strong>1: }<br />
<strong>14</strong>2: //------------------------------------------------------------<br />
<strong>14</strong>3: void __fastcall TScratchPad::EditCopyClick(TObject *Sender)<br />
<strong>14</strong>4: {<br />
<strong>14</strong>5: //<br />
<strong>14</strong>6: // Call TMemo::CopyToClipboard().<br />
<strong>14</strong>7: //<br />
<strong>14</strong>8: Memo->CopyToClipboard();<br />
<strong>14</strong>9: }<br />
150: //---------------------------------------------------- -- -- -- --<br />
151: void __fastcall TScratchPad::EditPasteClick(TObject *Sender)<br />
152: {<br />
153: //<br />
154: // Call TMemo::PasteFromClipboard().<br />
155: //<br />
156: Memo->PasteFromClipboard();<br />
157: }<br />
158: //------------------------------------------------------------<br />
159: void __fastcall TScratchPad::EditWordWrapClick(TObject *Sender)<br />
160: {<br />
161: //
Work<strong>in</strong>g with the Form Designer and the Menu Designer<br />
162: // Toggle the TMemo::WordWrap property. Set the Checked<br />
163: // property of the menu item to the same value as WordWrap.<br />
164: //<br />
165: Memo->WordWrap = !Memo->WordWrap;<br />
166: EditWordWrap->Checked = Memo->WordWrap;<br />
167: //<br />
168: // If WordWrap is on then we only need the vertical scroll<br />
169: // bar. If it’s off, then we need both scroll bars.<br />
170: //<br />
171: if (Memo->WordWrap) Memo->ScrollBars = ssVertical;<br />
172: else Memo->ScrollBars = ssBoth;<br />
173: }<br />
174: //------------------------------------------------------------<br />
And Now, the Moment You’ve All Been Wait<strong>in</strong>g For<br />
After you have created the event handlers for the menu items, you are ready to run the<br />
program. Click the Run button, and the program should compile and run. If you get<br />
compiler errors, carefully compare your source code with the code <strong>in</strong> List<strong>in</strong>g 7.2. Make any<br />
changes and click the Run button aga<strong>in</strong>. You might have to go through this process a few<br />
times before the program will compile and run. Eventually, though, it will run (I promise!).<br />
When the program runs you will f<strong>in</strong>d a program that, although not 100 percent featurecomplete<br />
yet, acts a lot like W<strong>in</strong>dows Notepad. Although we have a few th<strong>in</strong>gs to add before<br />
we’re f<strong>in</strong>ished, we have a pretty good start—especially when you consider the actual time<br />
<strong>in</strong>volved up to this po<strong>in</strong>t. Figure 7.22 shows the ScratchPad program runn<strong>in</strong>g.<br />
Figure 7.22.<br />
The ScratchPad<br />
program <strong>in</strong> action.<br />
259<br />
7
260 Day 7<br />
Pop-up Menus (Speed Menus)<br />
We’re not quite done with our discussion of menus. In <strong>C++</strong>Builder, you can create pop-up<br />
menus as easily as you can create a ma<strong>in</strong> menu. A nice feature of <strong>C++</strong>Builder is that you can<br />
assign a particular pop-up menu to a component via the PopupMenu property of the<br />
component. When the cursor is placed over the component and the secondary mouse button<br />
is clicked, that pop-up will automatically be displayed. Writ<strong>in</strong>g event handlers for pop-up<br />
menus is exactly the same as writ<strong>in</strong>g event handlers for ma<strong>in</strong> menus.<br />
A common feature of text-edit<strong>in</strong>g programs is that the Cut, Copy, and Paste operations are<br />
on a speed menu. We’ll add that capability to ScratchPad. To create the pop-up, we’ll cheat<br />
and copy part of the ma<strong>in</strong> menu. Here we go:<br />
1. Choose a PopupMenu component from the Component Palette and place it on the<br />
form.<br />
2. Change the Name property to MemoPopup.<br />
3. Double-click the PopupMenu icon to run the Menu Designer.<br />
4. Click the secondary mouse button to br<strong>in</strong>g up the Menu Designer speed menu.<br />
Choose Select Menu from the speed menu. A dialog box is displayed that shows<br />
the menus available for your application. Choose Ma<strong>in</strong>Menu and click OK.<br />
5. Click on the Edit menu. Click on the Cut menu item, hold down the Shift key,<br />
and click on the Paste menu item. Cut, Copy, and Paste are all now highlighted.<br />
6. To copy the selected items to the Clipboard, choose Edit | Copy from the<br />
<strong>C++</strong>Builder ma<strong>in</strong> menu (don’t choose Edit | Copy from the menu you are creat<strong>in</strong>g<br />
<strong>in</strong> the Menu Designer) or press Ctrl+C.<br />
7. Aga<strong>in</strong>, choose Select Menu from the Menu Designer speed menu. This time, choose<br />
MemoPopup and click OK. The Menu Designer shows a blank pop-up menu.<br />
8. Choose Edit | Paste from the ma<strong>in</strong> menu or type Ctrl+V on the keyboard. The<br />
Cut, Copy, and Paste menu items are <strong>in</strong>serted <strong>in</strong>to the pop-up.<br />
Okay, just a few more th<strong>in</strong>gs and we’ll be done. We need to change the Name property for the<br />
new menu items:<br />
1. For the Cut menu item, change the Name property to PopupCut.<br />
2. Change the Name property for the Copy menu item to PopupCopy.<br />
3. F<strong>in</strong>ally, change the Name property for the Paste menu item to PopupPaste.<br />
The f<strong>in</strong>al step is to write event handlers for the pop-up menu items. Hmmm…we already have<br />
code written for the ma<strong>in</strong> menu’s Cut, Copy, and Paste items. It would be a shame to duplicate<br />
that code (even if it is just a s<strong>in</strong>gle l<strong>in</strong>e <strong>in</strong> each case). It would be nice if we could just use the<br />
same event handlers that we created earlier. Can we? Sure we can! Just follow these steps:
Work<strong>in</strong>g with the Form Designer and the Menu Designer<br />
1. Click on the Cut menu item.<br />
2. Click on the Events tab <strong>in</strong> the Object Inspector.<br />
3. Click the drop-down arrow button <strong>in</strong> the Value column next to the OnClick event<br />
(the only event <strong>in</strong> the list). A list of event handlers that you have created up to this<br />
po<strong>in</strong>t is displayed.<br />
4. Choose the EditCutClick event handler from the list. Now, when the Cut pop-up<br />
menu item is clicked, the Edit | Cut handler will be called. No code duplication is<br />
required. Cool.<br />
5. Repeat steps 1 through 4 for the Copy and Paste items on the pop-up menu. When<br />
you are done, close the Menu Designer.<br />
6. On the ma<strong>in</strong> form, click on the Memo component. Change the PopupMenu property<br />
to MemoPopup (by choos<strong>in</strong>g it from the list).<br />
You can attach just about any event to any event handler us<strong>in</strong>g this method. Now run the<br />
program aga<strong>in</strong> to test the new speed menu. Of course it works!<br />
You can attach a speed button OnClick event to an exist<strong>in</strong>g event<br />
handler just as easily as you did with the pop-up menu. Click the File<br />
Open speed button on your form. Locate the OnClick event <strong>in</strong> the<br />
Object Inspector and select the FileOpenClick event handler. Repeat<br />
this for the File Save speed button, except choose the FileSaveClick<br />
event handler.<br />
Creat<strong>in</strong>g and Sav<strong>in</strong>g Menu Templates<br />
NOTE<br />
TIP<br />
<strong>C++</strong>Builder provides you with several menu templates that you can <strong>in</strong>sert <strong>in</strong>to your ma<strong>in</strong><br />
menus and pop-ups. You can also create and save your own templates for future use <strong>in</strong> your<br />
programs. First, start the Menu Designer and create the menu.<br />
When creat<strong>in</strong>g menus to use as templates, you first must have a ma<strong>in</strong><br />
menu or a pop-up menu on a form <strong>in</strong> order to start the Menu Designer.<br />
You can use a temporary, blank form if you want. Start with a<br />
blank form, place a Ma<strong>in</strong>Menu component on it, and double-click the<br />
menu component’s icon to start the Menu Designer. When you are<br />
done creat<strong>in</strong>g menu templates, discard the blank form without sav<strong>in</strong>g.<br />
261<br />
7
262 Day 7<br />
After you have the menu created, choose Save As Template from the Menu Designer’s speed<br />
menu. The Save Template dialog box is displayed. Give the menu a mean<strong>in</strong>gful name and<br />
click the OK button, and the menu is saved as a template. To <strong>in</strong>sert the menu, choose Insert<br />
From Template from the Menu Designer’s speed menu just as you did earlier. Any menus<br />
you have created will show up along with <strong>C++</strong>Builder’s prebuilt templates.<br />
To remove a template that you have previously created, choose Delete Templates from the<br />
Menu Designer’s speed menu. The Delete Templates dialog box is displayed, and you can<br />
choose the templates you want to delete. When you click the OK button, the selected menu<br />
templates will be deleted. Press Cancel to close the dialog box without delet<strong>in</strong>g any templates.<br />
Summary<br />
Congratulations! You have just covered the bulk of the visual programm<strong>in</strong>g features of<br />
<strong>C++</strong>Builder. Hopefully it was enjoyable for you as well as educational. The Form Designer<br />
is a powerful tool that allows you to do as much of your programm<strong>in</strong>g as possible visually.<br />
If you haven’t had to place controls on a w<strong>in</strong>dow <strong>in</strong> C or <strong>C++</strong>, you may not fully appreciate<br />
this advantage. Trust me, it’s significant. The Menu Designer is also a powerful tool,<br />
particularly because of the capability to import menus, which makes menu creation easy and<br />
actually fun with <strong>C++</strong>Builder. The Menu Designer also makes updat<strong>in</strong>g exist<strong>in</strong>g menus a<br />
snap.<br />
Workshop<br />
The Workshop conta<strong>in</strong>s quiz questions to help you solidify your understand<strong>in</strong>g of the<br />
material covered and exercises to provide you with experience <strong>in</strong> us<strong>in</strong>g what you have learned.<br />
You can f<strong>in</strong>d answers to the quiz questions <strong>in</strong> Appendix A, “Answers to Quiz Questions.”<br />
Q&A<br />
Q I’m us<strong>in</strong>g the Alignment Palette a lot, and every time I switch from the Code<br />
Editor back to the Form Designer, the Alignment Palette gets lost somewhere.<br />
Is there anyth<strong>in</strong>g I can do about that?<br />
A Locate the Alignment Palette (it’s there somewhere!) and click your secondary<br />
mouse button to br<strong>in</strong>g up the Alignment Palette’s speed menu. Choose the Stay on<br />
Top item from the speed menu. Now the Alignment Palette will always be on top<br />
where you can f<strong>in</strong>d it.
Quiz<br />
Work<strong>in</strong>g with the Form Designer and the Menu Designer<br />
Q I am try<strong>in</strong>g to select a group of components on a panel by dragg<strong>in</strong>g the<br />
selection rectangle around them, but I keep mov<strong>in</strong>g the panel. What’s wrong?<br />
A You need to hold down the Ctrl key while dragg<strong>in</strong>g when you are select<strong>in</strong>g<br />
components conta<strong>in</strong>ed on a panel.<br />
Q I’ve moved my components around my form several times and now the tab<br />
order is erratic. What can I do to fix that?<br />
A Choose Tab Order from the Form Designer’s speed menu. Arrange the tab order<br />
the way you want it. When you click OK, the new tab order will be implemented.<br />
Q The templates provided are nice, but they’ve got so much stuff on them that I<br />
don’t need. What can I do about that?<br />
A Basically, you can do two th<strong>in</strong>gs. First, you can import a menu and then simply<br />
delete the items you don’t want. Us<strong>in</strong>g the click, Shift+click method you can get<br />
rid of unwanted menu items <strong>in</strong> just a few seconds. Delet<strong>in</strong>g items from a menu<br />
<strong>in</strong>serted from a template has no adverse effects. The second th<strong>in</strong>g you can do is to<br />
follow the click, Shift+click method and then, when you have the menu just the<br />
way you want it, you can save it as a new template. That way you can keep the<br />
orig<strong>in</strong>al <strong>C++</strong>Builder-supplied template and have your customized template as well.<br />
Q Can I save my own menus as templates?<br />
A Yes. First create the menu and then choose Save As Template from the Menu<br />
Designer speed menu. Give the template a name, click OK, and the template is<br />
saved. Now all you have to do to reuse the menu later is <strong>in</strong>sert the menu us<strong>in</strong>g the<br />
Insert From Template feature.<br />
1. When do you use Ctrl+drag <strong>in</strong> select<strong>in</strong>g components?<br />
2. What significance does the first component selected have when you’re align<strong>in</strong>g a<br />
group of components?<br />
3. What is the quickest method of select<strong>in</strong>g a group of components?<br />
4. How can you make a group of components all have the width of the widest<br />
component <strong>in</strong> the group?<br />
5. What happens when you double-click a component on a form?<br />
6. What does the alClient option of the Align property do?<br />
7. What does the ellipsis follow<strong>in</strong>g a menu item mean?<br />
8. What two ways can you move a menu item?<br />
9. How do you add keyboard shortcuts to menu items?<br />
10. How do you <strong>in</strong>itially disable a menu item?<br />
263<br />
7
264 Day 7<br />
Exercises<br />
1. Place five edit components on a form and arrange them so that they are stacked<br />
vertically with their left edges aligned.<br />
2. Turn off the Snap to Grid option (choose Tools | Options from the ma<strong>in</strong> menu).<br />
Place five controls of your choice on a form and align their right edges.<br />
3. Place a ListBox component on a blank form and modify it so that it always<br />
occupies the entire client area of the form.<br />
4. Add an About box to the ScratchPad program. Use the Alignment Palette to<br />
quickly align the text labels.<br />
5. Add an Undo item and a menu separator to the speed menu for the ScratchPad<br />
program.<br />
6. Start a new application. Place six edit components on a form <strong>in</strong> random fashion.<br />
Now arrange the tab order so that tabb<strong>in</strong>g proceeds from top to bottom. Run the<br />
program to test the tabb<strong>in</strong>g order.<br />
7. Add speedbar buttons for Cut, Copy, and Paste to the ScratchPad program, as well<br />
as any others you want to add. Assign the menu event handlers for the same<br />
functions to the speed buttons.<br />
8. Add the Ctrl+S keyboard shortcut to the File | Save menu item <strong>in</strong> the ScratchPad<br />
program.<br />
9. Open the Picture Viewer project you created on Day 6, “The <strong>C++</strong>Builder IDE<br />
Explored: Projects and Forms.” Remove all unused menu items.
In Review<br />
In Review<br />
WEEK<br />
1<br />
You covered a lot of ground this week! In some ways this was the tougher<br />
week <strong>in</strong> the book. <strong>C++</strong> is not an easy language to learn. But there is no<br />
doubt that you can learn to be a <strong>C++</strong> programmer if you stay with it.<br />
Don’t forget to take a break now and then. This book is titled <strong>Teach</strong><br />
<strong>Yourself</strong> <strong>Borland</strong> <strong>C++</strong>Builder <strong>in</strong> <strong>14</strong> <strong>Days</strong>, but that doesn’t mean you have<br />
to read them as consecutive days! Sometimes it’s good to take a few days<br />
off to let it all soak <strong>in</strong>.<br />
If you are confused by some of the <strong>C++</strong> syntax, don’t feel you are alone.<br />
Po<strong>in</strong>ters and references; * versus &; direct and <strong>in</strong>direct operators…it can<br />
all be pretty confus<strong>in</strong>g at first. Don’t worry, though, because you will<br />
start to get the hang of it before long. As you work with <strong>C++</strong>Builder, little<br />
by little it beg<strong>in</strong>s to make sense. What you probably lack at this po<strong>in</strong>t is<br />
real-world experience. That is where you really learn. Knowledge ga<strong>in</strong>ed<br />
by experience is the k<strong>in</strong>d that really sticks. My advice is to take an idea<br />
265<br />
1<br />
2<br />
3<br />
4<br />
5<br />
6<br />
7
266 Week 1<br />
and turn it <strong>in</strong>to a work<strong>in</strong>g program. You can’t necessarily do that at this po<strong>in</strong>t, but you can<br />
get a good start. The program doesn’t have to be a Word, a Netscape Navigator, or an Excel<br />
program, m<strong>in</strong>d you—just a little someth<strong>in</strong>g to help you tie <strong>in</strong> your education with some<br />
experience.<br />
The first part of this week you worked on <strong>C++</strong> language keywords and syntax. Th<strong>in</strong>gs like<br />
loops and if statements are fairly easy to comprehend. Don’t be concerned, though, if you<br />
have to go back and look up the syntax once <strong>in</strong> a while. There is a lot to learn, and you aren’t<br />
expected to be able to memorize every keyword and its syntax. Later on you will, but at this<br />
stage of the game it isn’t expected.<br />
Toward the middle of the week you were <strong>in</strong>troduced to structures and then to <strong>C++</strong> classes.<br />
Classes are the bulk of what <strong>C++</strong> is about. The th<strong>in</strong>gs we discussed on <strong>Days</strong> 1, 2, and 3 are<br />
primarily features of the <strong>C++</strong> language that come from the C language. Classes, though, are<br />
pure <strong>C++</strong>. Sometimes it takes a while for you to grasp where classes can be used <strong>in</strong> your<br />
programs. For a long time you might only deal with the classes that the VCL provides and<br />
not write any classes of your own. Later on you will probably f<strong>in</strong>d situations where a class<br />
would fit perfectly with a particular task you have to accomplish. When that time comes, you<br />
will be ready to tackle writ<strong>in</strong>g your own class. After you’ve written one or two, you will likely<br />
be off and runn<strong>in</strong>g.<br />
On Day 5 you got an <strong>in</strong>troduction to class libraries, also known as frameworks. VCL is a<br />
framework. A framework makes your life easier by encapsulat<strong>in</strong>g difficult W<strong>in</strong>dows<br />
programm<strong>in</strong>g tasks <strong>in</strong>to classes that you can deal with on a more rational level. Believe me,<br />
sometimes the raw W<strong>in</strong>dows API appears to be anyth<strong>in</strong>g but rational. VCL takes care of<br />
deal<strong>in</strong>g with those issues for you and provides you with a higher level of programm<strong>in</strong>g objects<br />
that you can easily <strong>in</strong>corporate <strong>in</strong>to your applications. No, VCL is not easy, but it is much<br />
easier than deal<strong>in</strong>g with the API that the VCL works to shield you from. As part of the<br />
discussion on frameworks, you were <strong>in</strong>troduced to the PME (properties, methods, and<br />
events) model. You learned a bit about properties, methods, and events, and how you will<br />
use them to build W<strong>in</strong>dows programs <strong>in</strong> <strong>C++</strong>Builder.<br />
At the end of this first week you were able to play around with the IDE a little. You learned<br />
about the IDE: how to customize it to your lik<strong>in</strong>g, how the Component Palette works, what<br />
the Object Inspector is for, and how to use the Menu Designer. This part of the week you<br />
got <strong>in</strong>to the fun stuff. It’s okay to use the word fun. I f<strong>in</strong>d all k<strong>in</strong>ds of programm<strong>in</strong>g a great<br />
deal of fun. That’s why I do it. Hopefully, you f<strong>in</strong>d it fun, too.<br />
F<strong>in</strong>ally, you ended the week by learn<strong>in</strong>g all about the Form Designer. The Form Designer<br />
is where the bulk of your <strong>C++</strong>Builder applications will be designed—the graphical part of the<br />
application, anyway. Work<strong>in</strong>g with the Form Designer can be fun, too. Us<strong>in</strong>g the Form<br />
Designer you can create great-look<strong>in</strong>g forms. Remember, a form represents a w<strong>in</strong>dow <strong>in</strong> your<br />
applications. Most applications have a ma<strong>in</strong> w<strong>in</strong>dow and several dialog boxes that are
In Review<br />
displayed based on user <strong>in</strong>teraction with the program. The Form Designer gives you an<br />
advantage that you can’t appreciate unless you have had to design dialog boxes with more<br />
traditional programm<strong>in</strong>g tools. As great as the resource editors that come with <strong>Borland</strong> <strong>C++</strong><br />
or Visual <strong>C++</strong> are, they are no match for <strong>C++</strong>Builder when it comes to build<strong>in</strong>g forms. Be<strong>in</strong>g<br />
able to place forms and set their properties at design time gives you a big edge when it comes<br />
to beat<strong>in</strong>g the competition to market. <strong>C++</strong>Builder’s visual programm<strong>in</strong>g model is both<br />
powerful and easy to use. What could be better?<br />
On Day 7 you got to create a simple but useful program. This program, ScratchPad, got you<br />
started on how to build an application with <strong>C++</strong>Builder. We are go<strong>in</strong>g to use ScratchPad<br />
throughout the book. As you build your programm<strong>in</strong>g knowledge, we will add new features<br />
to ScratchPad to solidify the techniques presented. If you are develop<strong>in</strong>g an application of<br />
your own, I encourage you to add new features to your program as you learn about them.<br />
I hope this week hasn’t left you too worn out. If it has, then take a short break and jump right<br />
back <strong>in</strong>to the game. If you found this week exhilarat<strong>in</strong>g and energiz<strong>in</strong>g, just keep on turn<strong>in</strong>’<br />
those pages! I’m ready if you are!<br />
267
268 Week 1
At a Glance<br />
At A Glance<br />
WEEK<br />
2<br />
Are you ready for the fun stuff? This week you are go<strong>in</strong>g to learn about<br />
W<strong>in</strong>dows programm<strong>in</strong>g <strong>in</strong> earnest. You are go<strong>in</strong>g to start off with a<br />
discussion of components that will go well beyond the <strong>in</strong>troduction you<br />
had dur<strong>in</strong>g Week 1. You are go<strong>in</strong>g to f<strong>in</strong>d out about specific components<br />
and how to use them. You will spend some time read<strong>in</strong>g and, hopefully,<br />
a lot of time experiment<strong>in</strong>g. Read<strong>in</strong>g this book is not a race. The first one<br />
done does not receive a prize. Better to be the tortoise than the hare when<br />
it comes to learn<strong>in</strong>g programm<strong>in</strong>g. Take time to experiment!<br />
This week you will learn about creat<strong>in</strong>g applications us<strong>in</strong>g <strong>C++</strong>Builder’s<br />
experts. These experts help you get a program up and runn<strong>in</strong>g <strong>in</strong> the<br />
m<strong>in</strong>imum amount of time. After that, you will learn about debugg<strong>in</strong>g<br />
your programs. Yes, your programs will have bugs. Don’t fight it. Just<br />
learn how to f<strong>in</strong>d those nasty critters <strong>in</strong> your programs and squash them.<br />
269<br />
8<br />
9<br />
10<br />
11<br />
12<br />
13<br />
<strong>14</strong>
270 Week 2<br />
Debugg<strong>in</strong>g is a vital application-development tool, and you must learn how to debug your<br />
programs. Know<strong>in</strong>g how to use the debugger will save you hours and hours of time <strong>in</strong> the<br />
long run.<br />
Toward the end of the week you will learn about database operations. First, you will get an<br />
overview of how <strong>C++</strong>Builder and VCL deal with database operations. After that you will get<br />
a more <strong>in</strong>-depth look <strong>in</strong>to database programm<strong>in</strong>g. You will end the week by build<strong>in</strong>g a<br />
database program. I th<strong>in</strong>k you will f<strong>in</strong>d that database programm<strong>in</strong>g is very easy with<br />
<strong>C++</strong>Builder. And away we go!
Day 8<br />
VCL Components<br />
VCL Components<br />
by Kent Reisdorph<br />
Week<br />
As you know by now, components are much of what gives <strong>C++</strong>Builder its power.<br />
Components are designed us<strong>in</strong>g the properties, methods, and events model.<br />
Us<strong>in</strong>g the Form Designer, you can place a component on a form and modify its<br />
design-time properties. In some cases, that’s all you have to do. If needed, you<br />
can also manipulate the component at runtime by chang<strong>in</strong>g its properties and<br />
call<strong>in</strong>g its methods. Further, each component is designed to respond to certa<strong>in</strong><br />
events. I discussed properties, methods, and events on Day 5, “<strong>C++</strong> Class<br />
Frameworks and the Visual Component Model,” so I’m not go<strong>in</strong>g to go over<br />
that aga<strong>in</strong> here.<br />
Today you will f<strong>in</strong>d out more about components. You will learn about oftenused<br />
components and, as a result, learn about the VCL classes that represent<br />
those components. As you go through this chapter, feel free to experiment. If you<br />
read someth<strong>in</strong>g that you want to test, by all means do so. Learn<strong>in</strong>g by experience<br />
is as valuable as anyth<strong>in</strong>g you can do, so don’t be afraid to experiment.<br />
2<br />
271<br />
8
272 Day 8<br />
Review<br />
Let’s review some of what you already know about components. But first, I want to take a<br />
moment to expla<strong>in</strong> the differences between a VCL component and a W<strong>in</strong>dows control.<br />
W<strong>in</strong>dows controls <strong>in</strong>clude th<strong>in</strong>gs such as edit controls, list boxes, combo boxes, static<br />
controls (labels), and buttons, not to mention all the W<strong>in</strong>dows 95 controls. W<strong>in</strong>dows<br />
controls, by nature, do not have properties, methods, and events. Instead, messages are used<br />
to tell the control what to do or to get <strong>in</strong>formation from the control. To say that deal<strong>in</strong>g with<br />
controls on this level is tedious and cumbersome would be an understatement.<br />
A VCL component is a class that encapsulates a W<strong>in</strong>dows control (not all VCL components<br />
encapsulate controls, though). A VCL component <strong>in</strong> effect adds properties, methods, and<br />
events to a W<strong>in</strong>dows control to make work<strong>in</strong>g with the control easier. You might say that<br />
VCL takes a fresh approach to work<strong>in</strong>g with W<strong>in</strong>dows controls. It could be said that all VCL<br />
components are controls, but not all controls are components. A VCL Edit component, for<br />
<strong>in</strong>stance, is a control, but a standard W<strong>in</strong>dows edit control is not a VCL component. VCL<br />
components work with W<strong>in</strong>dows controls to raise the job of deal<strong>in</strong>g with those controls to<br />
a higher level.<br />
Given that discussion, then, I will use the terms control and component <strong>in</strong>terchangeably when<br />
referr<strong>in</strong>g to VCL components. (But I will never call a W<strong>in</strong>dows control a component!)<br />
Visual and Nonvisual Components<br />
Some components are visual components; others are nonvisual components.<br />
NEW TERM<br />
A visual component, as its name implies, is one that can be seen by the user at design<br />
time.<br />
Visual components <strong>in</strong>clude th<strong>in</strong>gs like edit controls, buttons, list boxes, labels, and so on.<br />
Most components you use <strong>in</strong> a <strong>C++</strong>Builder application are visual components. Visual<br />
components, as much as possible, show you at design time what the component will look like<br />
when the program runs.<br />
NEW TERM<br />
A nonvisual component is one that cannot be seen by the user at design time.<br />
Nonvisual components work beh<strong>in</strong>d the scenes to perform specific programm<strong>in</strong>g tasks.<br />
Examples <strong>in</strong>clude system timers, database components, and image lists. Common dialog<br />
boxes like File Open, File Save, choose Font, and so on are considered nonvisual components.<br />
They are nonvisual because they don’t show themselves at design time. At runtime, they<br />
become visible when they are <strong>in</strong>voked. When you place a nonvisual component on a form,
VCL Components<br />
<strong>C++</strong>Builder displays an icon represent<strong>in</strong>g the component on the form. This icon is used to<br />
access the component at design time <strong>in</strong> order to change the component’s properties, but the<br />
icon does not show up when the program runs. Nonvisual components have properties,<br />
methods, and events just like visual components do.<br />
The Name Property<br />
NOTE<br />
The Name property serves a vital role <strong>in</strong> components. As mentioned earlier, when you place<br />
a component on a form, <strong>C++</strong>Builder goes to work <strong>in</strong> the background while you ponder your<br />
next move. One th<strong>in</strong>g <strong>C++</strong>Builder does is create a po<strong>in</strong>ter to the component and assign the<br />
Name property as the variable name. For example, let’s say you place an Edit component on<br />
a form and change the Name property to MyEdit. At that po<strong>in</strong>t <strong>C++</strong>Builder places the follow<strong>in</strong>g<br />
<strong>in</strong> the header file for the form:<br />
TEdit* MyEdit;<br />
When the application runs, <strong>C++</strong>Builder creates an <strong>in</strong>stance of the TEdit class and assigns it<br />
to MyEdit. You can use this po<strong>in</strong>ter to access the component at runtime. To set the text for<br />
the edit control, you would use<br />
MyEdit->Text = “Jenna Lynn”;<br />
<strong>C++</strong>Builder also uses the Name property when creat<strong>in</strong>g event handler names. Let’s say that you<br />
wanted to respond to the OnChange event for an Edit component. Normally, you double-click<br />
the Value column next to the OnChange event to have <strong>C++</strong>Builder generate an event handler<br />
for the event. <strong>C++</strong>Builder creates a default function name based on the Name property of the<br />
component and the event be<strong>in</strong>g handled. In this case, <strong>C++</strong>Builder would generate a function<br />
called MyEditChange().<br />
You can change the Name property at any time, provided that you change it only via the Object<br />
Inspector. When you change a component’s Name property at design time, <strong>C++</strong>Builder goes<br />
through all the code that <strong>C++</strong>Builder had previously generated and changes the name of the<br />
po<strong>in</strong>ter and all event-handl<strong>in</strong>g functions.<br />
<strong>C++</strong>Builder will change all the code generated by <strong>C++</strong>Builder to reflect<br />
the new value of the component’s Name property, but it will not modify<br />
any code you wrote. In other words, <strong>C++</strong>Builder will take care of<br />
modify<strong>in</strong>g the code it wrote, but it is up to you to update and ma<strong>in</strong>ta<strong>in</strong><br />
the code you wrote. Generally speak<strong>in</strong>g, you should change the Name<br />
property when you <strong>in</strong>itially place the component on the form and leave<br />
it alone after that.<br />
273<br />
8
274 Day 8<br />
Cont<strong>in</strong>u<strong>in</strong>g with this example, if you change the Name property of the edit control from<br />
MyEdit to FirstName, <strong>C++</strong>Builder will change the po<strong>in</strong>ter name to FirstName and the<br />
OnChange handler name to FirstNameChange(). It’s all done automatically; you don’t have to<br />
do anyth<strong>in</strong>g but change the Name property and trust that <strong>C++</strong>Builder will do its th<strong>in</strong>g.<br />
WARNING<br />
NOTE<br />
Never change the Name property at runtime. Never manually change a<br />
component’s name (the name that <strong>C++</strong>Builder assigned to the<br />
component’s po<strong>in</strong>ter) or event handler names <strong>in</strong> the Code Editor. If<br />
you do either of these, <strong>C++</strong>Builder loses track of components, and the<br />
results are not good, to say the least. You might even lose the ability to<br />
load your form. The only safe way to change the Name property of a<br />
component is through the Object Inspector.<br />
<strong>C++</strong>Builder assigns a default value to the Name property for all components placed on a form.<br />
If you place an Edit component, for example, <strong>C++</strong>Builder assigns Edit1 to the Name property.<br />
If you place a second Edit component on the form, <strong>C++</strong>Builder assigns Edit2 to that<br />
component’s Name property, and so on. You should give your components mean<strong>in</strong>gful names<br />
as soon as possible to avoid confusion and extra work later on.<br />
You can leave the default names for components that will never be<br />
referenced <strong>in</strong> code. For example, if you have several label components<br />
that conta<strong>in</strong> static (unchang<strong>in</strong>g) text, you can leave the default names<br />
because you won’t be access<strong>in</strong>g the components at runtime.<br />
HOUSE RULES: THE Name PROPERTY<br />
■ Change the Name property of a component from the default name to a mean<strong>in</strong>gful<br />
name as soon as possible.<br />
■ Components not referenced at runtime can be left with the <strong>C++</strong>Buildersupplied<br />
name.<br />
■ Never change the Name property of a component <strong>in</strong> code or at runtime.<br />
■ Make your components’ names mean<strong>in</strong>gful but not overly long.
VCL Components<br />
Important Common Properties<br />
All components have certa<strong>in</strong> properties <strong>in</strong> common. For <strong>in</strong>stance, all visual components have<br />
Left and Top properties that determ<strong>in</strong>e where the component is placed on the form.<br />
Properties such as Left, Top, Height, and Width are self-explanatory, so I won’t go over them.<br />
A few of the common properties, however, warrant a closer look.<br />
The Align Property<br />
On Day 7, “Work<strong>in</strong>g with the Form Designer and the Menu Designer,” I discussed the Align<br />
and Alignment properties, so I won’t go over those aga<strong>in</strong> <strong>in</strong> detail. Refer to Day 7 for complete<br />
<strong>in</strong>formation on Align. It should be noted here, however, that not all components expose the<br />
Align property at design time. A s<strong>in</strong>gle-l<strong>in</strong>e edit control, for <strong>in</strong>stance, should occupy a<br />
standard height, so the features of the Align property do not make sense for that type of<br />
component. As you ga<strong>in</strong> experience with <strong>C++</strong>Builder, and depend<strong>in</strong>g on the type of<br />
applications you write, you will probably rely heavily on the Align property.<br />
Color My World<br />
NOTE<br />
The Color property sets the background color for the component. (The text color is set<br />
through the Font property.) Although the Color property is simple to use, there are a few<br />
aspects of component colors that should be po<strong>in</strong>ted out.<br />
The way the Color property is handled <strong>in</strong> the Object Inspector is somewhat unique. If you<br />
click on the Value column, you will see the drop-down arrow button <strong>in</strong>dicat<strong>in</strong>g that you can<br />
choose from a list of color values. That is certa<strong>in</strong>ly the case, but there’s more to it than that.<br />
If you double-click on the Value column, the Color dialog box is displayed. This dialog box<br />
allows you to choose a color from one of the predef<strong>in</strong>ed colors or to create your own colors<br />
by click<strong>in</strong>g the Def<strong>in</strong>e Custom Colors button. Figure 8.1 shows the Color dialog box after<br />
the Def<strong>in</strong>e Custom Colors button has been clicked.<br />
This is the same Color dialog box that will be displayed if you implement<br />
the ColorDialog component <strong>in</strong> your application.<br />
If you choose a color from the Color dialog box, you will see that the value of the Color<br />
property changes to a hexadecimal str<strong>in</strong>g. This str<strong>in</strong>g represents the red, green, and blue<br />
(RGB) values that make up the color. If you know the exact RGB value of a color (not likely!),<br />
you can type it <strong>in</strong>.<br />
275<br />
8
276 Day 8<br />
Figure 8.1.<br />
The Color dialog box.<br />
Most of the time you will probably choose a color from the list of color values provided. When<br />
you click the drop-down button to display the list of possible values, you will see what<br />
essentially amounts to two groups of values. The first group of colors beg<strong>in</strong>s with clBlack and<br />
ends with clWhite. These are the <strong>C++</strong>Builder predef<strong>in</strong>ed colors; this list represents the most<br />
commonly used colors. To choose one of the listed colors, simply click on the color <strong>in</strong> the<br />
list. If you can’t f<strong>in</strong>d a color <strong>in</strong> the list that suits your needs, you can <strong>in</strong>voke the Color dialog<br />
box, as discussed.<br />
The second group of colors <strong>in</strong> the list beg<strong>in</strong>s with clScrollBar. This group of colors<br />
represents the W<strong>in</strong>dows system colors. If you use colors from this list, your application will<br />
automatically adjust its colors when the user changes color schemes <strong>in</strong> W<strong>in</strong>dows. If you want<br />
your application to follow the color scheme the user has chosen for his or her system, you<br />
should choose colors from this list rather than from the first list.<br />
Use of color should be carefully considered. Proper use of color provides an aesthetically<br />
pleas<strong>in</strong>g environment for the user. Abuse of color makes for an obnoxious application that<br />
is annoy<strong>in</strong>g to use. Color is like a magnet to new programmers. It is common to want to throw<br />
lots of colors on a form because it’s fun and easy, but don’t get caught up <strong>in</strong> the fun at the<br />
expense of your users.<br />
HOUSE RULES: COLORS<br />
■ Use color for accent and emphasis.<br />
■ Don’t use loud colors that are hard on the eyes.<br />
■ Use the system colors <strong>in</strong> your application where appropriate. If the user changes<br />
color schemes, your application will follow suit.<br />
■ Be consistent <strong>in</strong> your use of colors across your forms.
Cursors<br />
VCL Components<br />
The Cursor property controls the cursor that is displayed when the user moves the mouse<br />
cursor over the component. W<strong>in</strong>dows automatically changes cursors for some components.<br />
For example, W<strong>in</strong>dows changes the cursor to an I-beam when the cursor is moved over an<br />
Edit, a Memo, or a RichEdit component, to name just a few. To let W<strong>in</strong>dows manage the<br />
cursor, leave the Cursor property set to crDefault. If you have specialized w<strong>in</strong>dows<br />
(components), you can specify one of the other cursors. When the mouse is moved over that<br />
component, W<strong>in</strong>dows will change the cursor to the one you have specified.<br />
Frequently you will need to change cursors at runtime. A long process, for <strong>in</strong>stance, should<br />
be <strong>in</strong>dicated to the user by display<strong>in</strong>g the hourglass cursor. When you reset the cursor you<br />
need to be sure to set the cursor back to whatever it was orig<strong>in</strong>ally. The follow<strong>in</strong>g code snippet<br />
illustrates:<br />
TCursor oldCursor = Cursor;<br />
Cursor = TCursor(crHourGlass);<br />
// do some stuff which takes a long time<br />
Cursor = oldCursor;<br />
This ensures that the cursor that was orig<strong>in</strong>ally set for the application is properly restored.<br />
Another cursor property, DragCursor, is used to set the cursor that is used when the mouse<br />
cursor is be<strong>in</strong>g dragged from the component and the target can accept the drag. As with<br />
colors, you should be prudent <strong>in</strong> your use of cursors. Use custom cursors when needed, but<br />
don’t overdo it.<br />
Enabled<br />
NOTE<br />
Components can be enabled or disabled through the Enabled property. When a component<br />
is disabled, it cannot accept focus (click<strong>in</strong>g on it has no effect), and usually it gives some visual<br />
cue to <strong>in</strong>dicate that it is disabled. In the case of buttons, for <strong>in</strong>stance, the button text is grayed<br />
out as is any bitmap on the button. Enabled is a boolean property—set it to true to enable<br />
the component, or set it to false to disable the component. Enabl<strong>in</strong>g and disabl<strong>in</strong>g w<strong>in</strong>dows<br />
(remember that w<strong>in</strong>dowed components are w<strong>in</strong>dows, too) is a feature of W<strong>in</strong>dows itself.<br />
Some components show their disabled state at design time, but most do<br />
not. The BitBtn component is one that does show its disabled state at<br />
design time.<br />
The Enabled property applies mostly to w<strong>in</strong>dowed components, but can apply to nonw<strong>in</strong>dowed<br />
components as well. The SpeedButton component is an example of a non-w<strong>in</strong>dowed<br />
component that can be disabled.<br />
277<br />
8
278 Day 8<br />
NOTE<br />
Modify<strong>in</strong>g the Enabled property for a panel component has additional<br />
implications. Panels are often used as conta<strong>in</strong>ers for other controls.<br />
Therefore, they become the parents of the controls that are placed<br />
with<strong>in</strong> them. If you disable a panel, the components on the panel will<br />
not show as disabled, but will not function because their parent (the<br />
panel) is disabled.<br />
Although components can be disabled at design time, enabl<strong>in</strong>g and disabl<strong>in</strong>g components<br />
is someth<strong>in</strong>g that is usually done at runtime. Menu items, for <strong>in</strong>stance, should be enabled or<br />
disabled accord<strong>in</strong>g to whether they apply at a given time. The same is true of buttons. There<br />
are a variety of reasons why you might want to disable other types of controls as well.<br />
To disable a component at runtime, just assign false to its Enabled property, and to enable<br />
a component assign true to Enabled. The follow<strong>in</strong>g code snippet enables or disables a menu<br />
item based on some condition:<br />
if (saveEnabled) FileSave->Enabled = true;<br />
else FileSave->Enabled = false;<br />
This process is often referred to as command enabl<strong>in</strong>g and is an important part of a<br />
professional-look<strong>in</strong>g W<strong>in</strong>dows program.<br />
The Font Property<br />
The Font property is a major property and therefore needs to be <strong>in</strong>cluded here, but there is<br />
not a lot that needs to be said about it. The Font property is an <strong>in</strong>stance of the TFont class,<br />
and as such has its own properties. You can set the Font properties by double-click<strong>in</strong>g on the<br />
font name <strong>in</strong> the Object Inspector (which will expand the Font node and show the Font<br />
properties) or by <strong>in</strong>vok<strong>in</strong>g the Font dialog box. (The Font dialog box is discussed <strong>in</strong> more<br />
detail later <strong>in</strong> the chapter <strong>in</strong> the section “The Font Dialog Box.”) Figure 8.2 shows the Object<br />
Inspector with the Font property node expanded to reveal the TFont properties.<br />
The Color property sets the color of the font, and the Name property allows you to choose the<br />
typeface for the font.<br />
The Height and Size properties of TFont deserve special mention. The Height property is used<br />
to specify the height of the font <strong>in</strong> pixels, whereas the Size property is used to specify the<br />
height of the font <strong>in</strong> po<strong>in</strong>ts. When you change one of these properties, the other will change<br />
automatically. The Height is often specified as a negative number. Refer to the onl<strong>in</strong>e help<br />
for TFont for an explanation of why this is the case.
Figure 8.2.<br />
The Object Inspector<br />
show<strong>in</strong>g the Font<br />
property.<br />
VCL Components<br />
The Pitch property is not particularly useful. I’ll expla<strong>in</strong> it <strong>in</strong> just a moment, but first a quick<br />
tutorial on fonts. A font can be either proportionally spaced or fixed space. Most fonts are<br />
proportionally spaced. This means that each letter takes only as much space as needed. For<br />
example, an uppercase M takes up much more space than a lowercase i. Take a look at the<br />
letters <strong>in</strong> this book, and you will see what I mean. Examples of proportional fonts <strong>in</strong>clude<br />
Times New Roman, Arial, and Bookman. With a fixed-space font (typically called a fixedpitch<br />
font), on the other hand, all characters take exactly the same amount of space. This is<br />
convenient for w<strong>in</strong>dows such as code editors (the <strong>C++</strong>Builder Code Editor, for <strong>in</strong>stance) or<br />
any other w<strong>in</strong>dow where a fixed-pitch font is desired. Courier New is probably the most<br />
commonly used fixed-pitch font, although Fixedsys is the W<strong>in</strong>dows fixed-pitch font of<br />
choice.<br />
In theory, the Pitch property can be used to force a proportionally spaced font to fixed space<br />
and vice versa. The problem is that W<strong>in</strong>dows might perform font substitutions <strong>in</strong> order to<br />
carry out the conversion. In other words, you really don’t know what you might get. It is far<br />
better to pick exactly the font you require than to rely on the Pitch property.<br />
F<strong>in</strong>ally, the Style property of TFont can be used to toggle bold, italic, underl<strong>in</strong>e, or<br />
strikethrough. These styles are not mutually exclusive, so you can mix styles <strong>in</strong> any way you<br />
choose.<br />
TIP<br />
Although you can use the Object Inspector to change font properties,<br />
the Font dialog box has the added benefit of show<strong>in</strong>g you a sample of<br />
what the font looks like as you choose different font options. To simply<br />
change the font’s Style property or Size property, use the Object<br />
Inspector. But if you are look<strong>in</strong>g for just the right font, the Font dialog<br />
box is a better choice.<br />
279<br />
8
280 Day 8<br />
Give Me a H<strong>in</strong>t<br />
The H<strong>in</strong>t property is used to set h<strong>in</strong>t text for a component. The h<strong>in</strong>t text has two parts. The<br />
first part is sometimes called the short h<strong>in</strong>t. This is the h<strong>in</strong>t text that is displayed when the user<br />
places the cursor over the component and pauses. The pop-up w<strong>in</strong>dow that displays the h<strong>in</strong>t<br />
text is called a tool tip.<br />
The second part of the h<strong>in</strong>t text is sometimes called the long h<strong>in</strong>t. The long h<strong>in</strong>t is the optional<br />
h<strong>in</strong>t text that will show <strong>in</strong> the status bar when the user moves the mouse cursor over the<br />
component. The short and long h<strong>in</strong>t texts are separated by a pipe (|). For example, to specify<br />
both the short h<strong>in</strong>t text and the long h<strong>in</strong>t text for a File Open speed button, you would enter<br />
the follow<strong>in</strong>g for the H<strong>in</strong>t property:<br />
NOTE<br />
File Open|Open a file for edit<strong>in</strong>g<br />
In order for short h<strong>in</strong>ts to show, you must have the Application object’s ShowH<strong>in</strong>t property<br />
set to true (the default) as well as the component’s ShowH<strong>in</strong>t property. Display<strong>in</strong>g the long<br />
h<strong>in</strong>t <strong>in</strong> the status bar requires a little more work, so I’ll save that discussion for tomorrow.<br />
You can specify the short h<strong>in</strong>t text, the long h<strong>in</strong>t text, or both. You can<br />
use the pipe to tell <strong>C++</strong>Builder which h<strong>in</strong>t text you are supply<strong>in</strong>g. If<br />
you do not use the pipe, both the short h<strong>in</strong>t and the long h<strong>in</strong>t will use<br />
the same text.<br />
ParentColor, ParentCtl3D, ParentFont, and<br />
ParentShowH<strong>in</strong>t<br />
The ParentColor, ParentCtl3D, ParentFont, and ParentShowH<strong>in</strong>t properties all work the<br />
same way, so I’ll discuss them at the same time. When these properties are set to true, the<br />
component takes its Color, Ctl3D, Font, or ShowH<strong>in</strong>t sett<strong>in</strong>gs from its parent. For example,<br />
for most components the ParentFont property is set to true by default. This means the<br />
component will <strong>in</strong>herit the font that its parent is currently us<strong>in</strong>g. To illustrate, do this<br />
exercise:<br />
1. Create a blank form. Set the Font property’s Size property to 16.<br />
2. Place a Label component on the form. Notice that the label automatically uses a<br />
16-po<strong>in</strong>t type size.<br />
3. Place a Button component on the form. It also uses a 16-po<strong>in</strong>t type size.
VCL Components<br />
You can set this property to false, but by the time the component is placed, it is already too<br />
late and you will have to change the font manually to the font you want for the component.<br />
The Tag Property<br />
The Tag property is noth<strong>in</strong>g more than a 4-byte variable set aside for your use. You can use<br />
the Tag property to store any data that your component might need. The data stored might<br />
be a po<strong>in</strong>ter to another class, an <strong>in</strong>dex value, or any number of other possibilities. Us<strong>in</strong>g the<br />
Tag property would probably be considered an advanced programm<strong>in</strong>g technique.<br />
Other Common Properties<br />
Table 8.1 lists other common properties that are frequently used. These properties don’t<br />
require as much explanation, so I just listed them here for your reference. Not all components<br />
have each of the properties listed.<br />
Table 8.1. Additional component properties.<br />
Property Description<br />
BorderStyle Can be bsS<strong>in</strong>gle or bsNone. Use bsNone when you want the component<br />
to blend <strong>in</strong> with the background.<br />
Caption Sets the component’s caption. Many components do not have<br />
captions, so for those components the Caption property is not<br />
exposed.<br />
Ctl3D Indicates whether the control should be drawn with a 3D border. If<br />
BorderStyle is set to bsNone, this property has no effect.<br />
Height Sets the component’s height.<br />
HelpContext The HelpContext property is used to associate an <strong>in</strong>dex number <strong>in</strong> a<br />
help file with a particular component.<br />
Left Sets the x coord<strong>in</strong>ate of the component.<br />
PopupMenu Specifies the pop-up menu that will be displayed when the user clicks<br />
the secondary mouse button.<br />
TabOrder For w<strong>in</strong>dowed components. Sets this component’s position <strong>in</strong> the tab<br />
order.<br />
TabStop For w<strong>in</strong>dowed components. Indicates that this component can be<br />
tabbed <strong>in</strong>to. Sett<strong>in</strong>g this property to false removes the component<br />
from the tab order.<br />
281<br />
cont<strong>in</strong>ues<br />
8
282 Day 8<br />
Table 8.1. cont<strong>in</strong>ued<br />
Property Description<br />
Top Sets the y coord<strong>in</strong>ate of the component.<br />
Visible When read, <strong>in</strong>dicates whether the component is currently visible.<br />
When written to, Visible either hides or shows the component.<br />
Width Sets the width of the component.<br />
Primary Methods of Components<br />
There are more than 20 methods that most components have <strong>in</strong> common. W<strong>in</strong>dowed<br />
components have more than 40 common methods from which you can choose. Interest<strong>in</strong>gly,<br />
not many of these are widely used. Much of the functionality of components is accomplished<br />
via properties. For example, to hide a component, you can call the Hide() method, or you<br />
can set the Visible property to false. In addition, components typically have methods<br />
specific to their purpose, and it will likely be those methods that you use most when deal<strong>in</strong>g<br />
with a particular component.<br />
There are a few methods worthy of note, however, which are listed <strong>in</strong> Table 8.2. Note that<br />
some of these methods are not available to all controls. These are not the most often-used<br />
methods common to every component, but rather the most commonly used methods of<br />
components <strong>in</strong> general. Also, this list concentrates on components represent<strong>in</strong>g controls<br />
(components placed on forms) rather than components as forms. Methods particular to<br />
forms were discussed on Day 6, “The <strong>C++</strong>Builder IDE Explored: Projects and Forms.”<br />
Table 8.2. Common methods of components.<br />
Method Description<br />
Broadcast Used to send a message to all w<strong>in</strong>dowed child components.<br />
ClientToScreen Converts client w<strong>in</strong>dow coord<strong>in</strong>ates <strong>in</strong>to screen coord<strong>in</strong>ates.<br />
Conta<strong>in</strong>sControl Returns true if the specified component is a child of the component<br />
or form.<br />
HandleAllocated Returns true if the Handle property for the component has been<br />
created. Simply read<strong>in</strong>g the Handle property automatically creates<br />
a handle if it hasn’t already been created, so HandleAllocated()<br />
can be used to check for the existence of the handle without<br />
creat<strong>in</strong>g it.<br />
Hide Hides the component. The component is still available to be<br />
shown aga<strong>in</strong> later.
VCL Components<br />
Method Description<br />
Invalidate Requests that the component be redrawn. The component will be<br />
redrawn at W<strong>in</strong>dows’s earliest convenience.<br />
Perform Allows a component to send a message to itself directly rather<br />
than go<strong>in</strong>g through the W<strong>in</strong>dows messag<strong>in</strong>g system.<br />
Refresh Requests that a component be redrawn immediately and erases<br />
the component prior to repa<strong>in</strong>t<strong>in</strong>g.<br />
Repa<strong>in</strong>t Requests that a component be redrawn immediately. The<br />
component’s background is not erased prior to repa<strong>in</strong>t<strong>in</strong>g.<br />
SetBounds Allows you to set the Top, Left, Width, and Height properties all<br />
at one time. This saves time over hav<strong>in</strong>g to set them <strong>in</strong>dividually.<br />
SetFocus Sets the focus to a component and makes it the active component.<br />
Applies only to w<strong>in</strong>dowed components.<br />
Update Forces an immediate repa<strong>in</strong>t of the control. Typically, you should<br />
use Refresh or Repa<strong>in</strong>t to repa<strong>in</strong>t components.<br />
Now let’s take look at some of the events to which a component is most likely to respond.<br />
Common Events<br />
As with properties and methods, there are some events that will be responded to most often.<br />
Components cover a wide variety of possible W<strong>in</strong>dows controls, so each component will have<br />
<strong>in</strong>dividual needs. Events specific to forms are not covered here because I covered that<br />
<strong>in</strong>formation on Day 6. The most commonly used events are listed <strong>in</strong> Table 8.3.<br />
Table 8.3. Commonly handled component events.<br />
Event Description<br />
OnChange This event is triggered when a control changes <strong>in</strong> one way or another.<br />
Exact implementation depends on the component.<br />
OnClick Sent when the component is clicked with either mouse button.<br />
OnDblClick This event occurs when the user double-clicks the component.<br />
OnEnter This event occurs when a w<strong>in</strong>dowed component receives focus (is<br />
activated).<br />
OnExit This event occurs when a w<strong>in</strong>dowed component loses focus as the<br />
result of the user switch<strong>in</strong>g to a different control. It does not occur,<br />
283<br />
cont<strong>in</strong>ues<br />
8
284 Day 8<br />
Table 8.3. cont<strong>in</strong>ued<br />
Event Description<br />
however, when the user switches forms or switches to another<br />
application.<br />
OnKeyDown This event is triggered when the user presses a key while the control<br />
has focus. Keys <strong>in</strong>clude all alphanumeric keys as well as keys such as<br />
the arrow keys, Home, End, Ctrl, and so on.<br />
OnKeyPress This event is also triggered when the user presses a key, but only when<br />
alphanumeric keys or the Tab, backspace, Enter, or Esc keys are<br />
pressed.<br />
OnKeyUp This event occurs whenever a key is released.<br />
OnMouseDown This event is triggered when the mouse button is pressed while over<br />
the component. The parameters passed to the event handler give you<br />
<strong>in</strong>formation on which mouse button was clicked, special keys that<br />
were pressed (Alt, Shift, Ctrl), and the x,y coord<strong>in</strong>ate of the mouse<br />
po<strong>in</strong>ter when the event occurred.<br />
OnMouseMove This event occurs any time the mouse is moved over the control.<br />
OnMouseUp This event is triggered when the mouse button is released while over a<br />
control. The mouse button must first have been clicked while on the<br />
control.<br />
OnPa<strong>in</strong>t This event is sent any time a component needs repa<strong>in</strong>t<strong>in</strong>g. You can<br />
respond to this event to do any custom pa<strong>in</strong>t<strong>in</strong>g a component<br />
requires.<br />
DEALING WITH MOUSE EVENTS<br />
Mouse events have a couple peculiarities that you should be aware of. If you are<br />
respond<strong>in</strong>g just to a mouse click on a component, you will want to keep it simple<br />
and only respond to the OnClick event. If you must use OnMouseDown and<br />
OnMouseUp, you should be aware that the OnClick event will be sent as well as the<br />
OnMouseDown and OnMouseUp events. For example, a s<strong>in</strong>gle click will result <strong>in</strong> these<br />
events occurr<strong>in</strong>g (and <strong>in</strong> this order):<br />
OnMouseDown<br />
OnClick<br />
OnMouseUp
VCL Components<br />
Similarly, when the user double-clicks with the mouse, it could result <strong>in</strong> the<br />
application gett<strong>in</strong>g more events than you might th<strong>in</strong>k. When a component is<br />
double-clicked, the follow<strong>in</strong>g events occur:<br />
OnMouseDown<br />
OnClick<br />
OnDblClick<br />
OnMouseUp<br />
The po<strong>in</strong>t I am try<strong>in</strong>g to make is that you need to take care when respond<strong>in</strong>g to<br />
both double-click and s<strong>in</strong>gle-click events for a component. Be aware that you will<br />
get four events for a double-click event.<br />
Multiple events will occur when a key is pressed, too. A keypress <strong>in</strong> an edit control,<br />
for <strong>in</strong>stance, will result <strong>in</strong> OnKeyDown, OnKeyPress, OnChange, and OnKeyUp events<br />
occurr<strong>in</strong>g.<br />
You can obta<strong>in</strong> a program called EventTst from http://www.mcp.com/sams/<br />
codecenter.html . This program illustrates the fact that multiple events occur on<br />
mouse clicks and keypresses. Run this program and you will see how multiple<br />
events can be triggered based on certa<strong>in</strong> user actions.<br />
In just a moment we’re go<strong>in</strong>g to look at some of the VCL components <strong>in</strong> more detail. First,<br />
however, I want to <strong>in</strong>troduce you to a class that is used by certa<strong>in</strong> VCL components.<br />
TStr<strong>in</strong>gs<br />
The TStr<strong>in</strong>gs class is a VCL class that manages lists of str<strong>in</strong>gs. Several VCL components use<br />
<strong>in</strong>stances of TStr<strong>in</strong>gs to manage their data (usually text). For example, on Day 7 you used<br />
TStr<strong>in</strong>gs when you built the ScratchPad application. “Hmmm…I don’t recall us<strong>in</strong>g a<br />
TStr<strong>in</strong>gs class,” you say. Well, you did, but you just weren’t aware of it. Remember when we<br />
saved and loaded files? You used someth<strong>in</strong>g like this:<br />
Memo->L<strong>in</strong>es->SaveToFile(SaveDialog->FileName);<br />
The L<strong>in</strong>es property of TMemo is an <strong>in</strong>stance of the TStr<strong>in</strong>gs class. The SaveToFile() method<br />
of TStr<strong>in</strong>gs takes the str<strong>in</strong>gs and saves them to a file on disk. You can do the same th<strong>in</strong>g to<br />
load a list box from a file on disk or save the contents of a list box to disk. In the case of the<br />
285<br />
8
286 Day 8<br />
TListBox class, the property that holds the list box items is called Items. For example, do this<br />
exercise:<br />
1. Create a new application and place a ListBox component on the form. Size the list<br />
box as desired.<br />
2. Change the Name property of the list box to ListBox.<br />
3. Double-click on the background of the form (not on the list box). The Code<br />
Editor displays the FormCreate() function.<br />
4. Type the follow<strong>in</strong>g code <strong>in</strong> the FormCreate() function:<br />
char w<strong>in</strong>Dir[256], fileName[256];<br />
GetW<strong>in</strong>dowsDirectory(w<strong>in</strong>Dir, sizeof(w<strong>in</strong>Dir));<br />
spr<strong>in</strong>tf(fileName, “%s\\w<strong>in</strong>.<strong>in</strong>i”, w<strong>in</strong>Dir);<br />
ListBox->Items->LoadFromFile(fileName);<br />
5. Click the Run button to compile and run the program.<br />
When the program runs, the list box will conta<strong>in</strong> the contents of your WIN.INI file. Us<strong>in</strong>g this<br />
method, it’s easy to load a list box from any ASCII text data file. The ComboBox component<br />
also has an Items property, and it works <strong>in</strong> exactly the same way.<br />
You can add, delete, <strong>in</strong>sert, and move items <strong>in</strong> a list box, combo box, or memo by call<strong>in</strong>g the<br />
Add(), Append(), Delete(), Insert(), and Move() methods of the TStr<strong>in</strong>gs class.<br />
NOTE<br />
How Add() performs depends on the value of the Sorted property. If<br />
the Sorted property is set to true, Add() will <strong>in</strong>sert the str<strong>in</strong>g where it<br />
needs to be <strong>in</strong> the list of items. If Sorted is false, the new str<strong>in</strong>g will be<br />
added at the end of the list.<br />
You can clear a component of its contents by call<strong>in</strong>g the Clear() method. You can access an<br />
<strong>in</strong>dividual str<strong>in</strong>g by us<strong>in</strong>g the Str<strong>in</strong>gs property of TStr<strong>in</strong>gs and the array subscript operator.<br />
For example, to retrieve the first str<strong>in</strong>g <strong>in</strong> a list of str<strong>in</strong>gs, you would use<br />
Edit->Text = ListBox->Items->Str<strong>in</strong>gs[0];<br />
Each str<strong>in</strong>g <strong>in</strong> a TStr<strong>in</strong>gs array conta<strong>in</strong>s the str<strong>in</strong>g itself and 4 bytes of extra storage. This extra<br />
storage can be accessed through the Objects property. You can use the extra storage any way<br />
you like. Let’s say, for example, that you were creat<strong>in</strong>g an owner-drawn list box that displayed<br />
bitmaps. You could store the str<strong>in</strong>g <strong>in</strong> the usual way, plus store a po<strong>in</strong>ter to the TBitmap object<br />
<strong>in</strong> the Objects array.
NOTE<br />
TIP<br />
VCL Components<br />
There may be a time when you need to manage a list of str<strong>in</strong>gs unrelated<br />
to a component. The TStr<strong>in</strong>gList class is provided for exactly<br />
that purpose. This class works just like TStr<strong>in</strong>gs but can be used<br />
outside components.<br />
In reality TStr<strong>in</strong>gs is what is called an abstract base class. An abstract<br />
base class is never used directly, but only serves as a base class from<br />
which to derive other classes. Technically, the L<strong>in</strong>es property of the<br />
Memo component is an <strong>in</strong>stance of the TMemoStr<strong>in</strong>gs class and not an<br />
<strong>in</strong>stance of the TStr<strong>in</strong>gs class as I said <strong>in</strong> this section. I didn’t mean to<br />
lead you astray, but I thought it was best to make this dist<strong>in</strong>ction after<br />
the discussion on TStr<strong>in</strong>gs rather than confuse you with this <strong>in</strong>formation<br />
dur<strong>in</strong>g that discussion.<br />
Standard W<strong>in</strong>dows Control Components<br />
Back <strong>in</strong> the Jurassic age, there was someth<strong>in</strong>g called W<strong>in</strong>dows 3.0. W<strong>in</strong>dows 3.0 gave us<br />
th<strong>in</strong>gs like edit controls (s<strong>in</strong>gle l<strong>in</strong>e and multil<strong>in</strong>e), list boxes, combo boxes, buttons, check<br />
boxes, radio buttons, and static controls. These controls must have been pretty well designed<br />
because they are very prevalent <strong>in</strong> W<strong>in</strong>dows programs today—even consider<strong>in</strong>g all the new<br />
W<strong>in</strong>32 controls.<br />
I’m not go<strong>in</strong>g to go over every W<strong>in</strong>dows control and its correspond<strong>in</strong>g VCL component.<br />
There are a few th<strong>in</strong>gs, though, that you should know regard<strong>in</strong>g the standard components.<br />
Edit Controls<br />
<strong>C++</strong>Builder comes with four edit-control components. The Edit, Memo, and MaskEdit<br />
components are based on the standard W<strong>in</strong>dows edit control. The RichEdit component is<br />
based on the W<strong>in</strong>32 rich edit control, which is not one of the standard W<strong>in</strong>dows controls.<br />
Still, I will discuss RichEdit here because it has many th<strong>in</strong>gs <strong>in</strong> common with the other edit<br />
controls.<br />
287<br />
8
288 Day 8<br />
NOTE<br />
The Edit component encapsulates the basic s<strong>in</strong>gle-l<strong>in</strong>e edit control. This component has no<br />
Align or Alignment property. It has no Alignment property because the text <strong>in</strong> a s<strong>in</strong>gle-l<strong>in</strong>e<br />
edit control can only be left-justified. The Edit component has no Align property because<br />
it cannot (or more accurately, should not) be expanded to fill the client area of a w<strong>in</strong>dow.<br />
TIP<br />
If you need text <strong>in</strong> an edit component to be right-justified or centered,<br />
use a Memo component but make its height the height of a standard Edit<br />
component. Then set the Alignment property as needed.<br />
Keep your forms standard whenever possible. Although you can make<br />
an Edit component as tall as you like, it will confuse users if you make<br />
its height greater than a standard W<strong>in</strong>dows edit control (it might<br />
appear to the user to be a multil<strong>in</strong>e edit).<br />
The MaskEdit component is an Edit component with an <strong>in</strong>put filter, or mask, attached. The<br />
MaskEdit does not represent a W<strong>in</strong>dows control per se, but rather is just a VCL extension of<br />
a standard edit control. A mask is used to force <strong>in</strong>put to a specific range of numbers or<br />
characters. In addition, the mask can conta<strong>in</strong> special characters that are placed <strong>in</strong> the edit<br />
control by default. For example, a date is commonly formatted as follows:<br />
10/25/97<br />
An edit mask for a date can already have the slashes <strong>in</strong> place so that the user only has to enter<br />
the numbers. The edit mask would specify that only numbers can be entered to avoid the<br />
possibility of the user enter<strong>in</strong>g a nonnumeric character.<br />
The EditMask property controls the mask used. When you press the ellipsis (…) button <strong>in</strong><br />
the Value column for the EditMask property, the Input Mask Editor is displayed. This dialog<br />
box allows you to choose one of the predef<strong>in</strong>ed masks or to create your own. You can choose<br />
prebuilt masks from several countries. Figure 8.3 shows the Input Mask Editor display<strong>in</strong>g the<br />
United K<strong>in</strong>gdom set of predef<strong>in</strong>ed <strong>in</strong>put masks.<br />
For more <strong>in</strong>formation on build<strong>in</strong>g your own masks, see the <strong>C++</strong>Builder onl<strong>in</strong>e help.<br />
The Memo component encapsulates a multil<strong>in</strong>e edit control. The L<strong>in</strong>es property is the most<br />
significant property <strong>in</strong> a Memo component. As mentioned earlier <strong>in</strong> the discussion on<br />
TStr<strong>in</strong>gs, the L<strong>in</strong>es property allows you to save the contents of the Memo component to disk
VCL Components<br />
or load the Memo with text from a file, as well as other th<strong>in</strong>gs. The ScrollBars property is<br />
unique to the Memo component. This property allows you to specify whether your component<br />
has a horizontal scrollbar, a vertical scrollbar, or both. You used the ScrollBars property on<br />
Day 7 when you wrote the ScratchPad application. The Memo component is a very versatile<br />
component that you will probably f<strong>in</strong>d yourself us<strong>in</strong>g frequently.<br />
Figure 8.3.<br />
The Input Mask<br />
Editor.<br />
The RichEdit component is the biggest and the best of all the edit components. It is based<br />
on the W<strong>in</strong>32 rich edit control. The RichEdit component allows you to change fonts; use<br />
<strong>in</strong>dentation; set text to bold, italic, or underl<strong>in</strong>ed; and much more. Basically, the RichEdit<br />
component is a m<strong>in</strong>i word processor <strong>in</strong> one neat package. RichEdit has surpris<strong>in</strong>gly few<br />
design-time properties compared to the Memo component. Key runtime properties <strong>in</strong>clude<br />
SelAttributes and Paragraph. The RichEdit component is fairly complex, but still easy to<br />
use consider<strong>in</strong>g its complexities. See the <strong>C++</strong>Builder onl<strong>in</strong>e help for full details on the<br />
RichEdit component.<br />
Table 8.4 lists the properties specific to components based on edit controls.<br />
Table 8.4. Properties for edit controls.<br />
Item Applies To Description<br />
Properties<br />
AutoSelect Edit, MaskEdit When set to true, text <strong>in</strong> the edit control<br />
will automatically be selected when the<br />
user tabs to the control. Default: true<br />
AutoSize Edit, MaskEdit When set to true, the edit control will<br />
automatically resize itself when the font<br />
of the edit control changes. Otherwise,<br />
the edit control does not change size<br />
when the font changes. Default: true<br />
289<br />
cont<strong>in</strong>ues<br />
8
290 Day 8<br />
Table 8.4. cont<strong>in</strong>ued<br />
Item Applies To Description<br />
Properties<br />
CharCase Edit, MaskEdit Determ<strong>in</strong>es whether the edit control<br />
displays uppercase (ecUpperCase),<br />
lowercase (ecLowerCase), or mixed text<br />
(ecNormal). Default: ecNormal<br />
HideScrollBars RichEdit When set to true, the scrollbars will be<br />
shown when needed but hidden otherwise.<br />
When set to false, the scrollbars are<br />
shown as determ<strong>in</strong>ed by the value of the<br />
ScrollBars property.<br />
HideSelection Edit, Memo, RichEdit When set to true, any text selected will<br />
not show as selected when the user tabs to<br />
another control. Default: false<br />
L<strong>in</strong>es Memo, RichEdit The text conta<strong>in</strong>ed <strong>in</strong> the component.<br />
L<strong>in</strong>es is an <strong>in</strong>stance of the TStr<strong>in</strong>gs class.<br />
MaxLength All Specifies the maximum number of<br />
characters that the component will hold.<br />
When set to 0, the amount of text that<br />
can be <strong>in</strong>put is unlimited (limited only by<br />
system considerations). When set to any<br />
nonzero value, limits the number of<br />
characters to that value. Default: 0<br />
OEMConvert Edit, Memo Set to true when the text <strong>in</strong>put will<br />
consist of filenames. Default: false<br />
PasswordChar Edit, MaskEdit When this property is set to a value other<br />
than ASCII #0, any text entered will be<br />
echoed with the character provided. The<br />
actual text <strong>in</strong> the edit control is unaffected.<br />
Most password edits use the<br />
asterisk (*) as the password character.<br />
Default: #0
VCL Components<br />
Item Applies To Description<br />
Properties<br />
291<br />
Pla<strong>in</strong>Text RichEdit When set to true, RTF (rich text format)<br />
files will be shown as pla<strong>in</strong> text without<br />
character and paragraph formatt<strong>in</strong>g.<br />
When set to false, RTF files are displayed<br />
with full formatt<strong>in</strong>g. Default: false<br />
ReadOnly All When set to true, the component will<br />
display its text, but new text cannot be<br />
entered. The user can, however, highlight<br />
text and copy it to the Clipboard.<br />
Default: false<br />
ScrollBars Memo, RichEdit Determ<strong>in</strong>es which scrollbars to display.<br />
Choices are ssNone, ssBoth, ssHorizontal,<br />
and ssVertical. Default: ssNone<br />
Text Edit, MaskEdit Conta<strong>in</strong>s the text <strong>in</strong> the component.<br />
WantReturns Memo, RichEdit When set to true, the component keeps<br />
the return character, and a new l<strong>in</strong>e is<br />
<strong>in</strong>serted <strong>in</strong> the edit control when the user<br />
presses Enter. When set to false, return<br />
characters go to the form and are not<br />
placed <strong>in</strong> the edit control. If you have a<br />
form with a default button and<br />
WantReturns set to false, press<strong>in</strong>g Enter<br />
will cause the form to close. Default: true<br />
WantTabs Memo, RichEdit When set to true, a tab character is<br />
placed <strong>in</strong> the edit control when the user<br />
presses the Tab key. When set to false,<br />
tab characters go to the form, which<br />
would allow tabb<strong>in</strong>g out of the edit<br />
control. Default: false<br />
WordWrap Memo, RichEdit When set to true, text entered will wrap<br />
to a new l<strong>in</strong>e when the right edge of the<br />
edit control is reached. When set to false,<br />
the edit control automatically scrolls as<br />
new text is entered. Default: true<br />
cont<strong>in</strong>ues<br />
8
292 Day 8<br />
Table 8.4. cont<strong>in</strong>ued<br />
Item Applies To Description<br />
Runtime Properties<br />
Modified All Indicates whether the contents of the edit<br />
control have changed s<strong>in</strong>ce the last time<br />
the Modified property was set. After<br />
sav<strong>in</strong>g the contents of a Memo or RichEdit<br />
component to a file, you should set<br />
Modified to false.<br />
SelLength All Conta<strong>in</strong>s the length of the text currently<br />
selected <strong>in</strong> the edit control.<br />
SelStart All Conta<strong>in</strong>s the start<strong>in</strong>g po<strong>in</strong>t of the selected<br />
text <strong>in</strong> the edit control. The first character<br />
<strong>in</strong> the edit control is 0.<br />
SelText All Conta<strong>in</strong>s the currently selected text <strong>in</strong> an<br />
edit control.<br />
Edit controls have many common methods; they are too numerous to list here. The<br />
CutToClipboard(), CopyToClipboard(), PasteFromClipboard(), and Clear() methods deal<br />
with Clipboard operations and text manipulation. The GetSelTextBuff() and GetTextBuff()<br />
methods retrieve the selected text <strong>in</strong> the component and the entire text <strong>in</strong> the component,<br />
respectively. See the <strong>C++</strong>Builder onl<strong>in</strong>e help topics TEdit, TMaskEdit, TMemo, and TRichEdit<br />
for a complete list of methods perta<strong>in</strong><strong>in</strong>g to each type of edit component.<br />
The edit component events that you are most likely to be <strong>in</strong>terested <strong>in</strong> are dependent on the<br />
type of edit control you are us<strong>in</strong>g. In general, though, the OnEnter, OnExit, OnChange,<br />
OnKeyDown (or OnKeyPress), and OnKeyUp events will be the most widely used.<br />
The ListBox and ComboBox Components<br />
The ListBox and ComboBox components are also widely used. The ListBox component<br />
represents a standard W<strong>in</strong>dows list box, which simply presents a list of choices that the user<br />
can choose from. If the list box conta<strong>in</strong>s more items than can be shown at one time, scrollbars<br />
appear to allow access to the rest of the items <strong>in</strong> the list box.<br />
NEW TERM<br />
Some list boxes are owner-drawn list boxes. In an owner-drawn list box, the<br />
programmer takes the responsibility for draw<strong>in</strong>g the items <strong>in</strong> the list box.
VCL Components<br />
You can use owner-drawn list boxes if needed. Owner-drawn list boxes are fairly common,<br />
although you may not realize it. On Day 6 I talked about customiz<strong>in</strong>g the <strong>C++</strong>Builder<br />
speedbar. As part of that discussion, we looked at the <strong>C++</strong>Builder Speedbar Editor dialog box,<br />
which was shown <strong>in</strong> Figure 6.2. Go back and take another look at that figure. The Speedbar<br />
Editor dialog box conta<strong>in</strong>s two list boxes. The list box on the left is a regular list box. It lists<br />
the possible button groups you can choose from. The list box on the right is an owner-drawn<br />
list box. It shows the actual button as it will appear on the speedbar, as well as a textual<br />
description of what function the button performs.<br />
Combo boxes are specialized list boxes. Actually, a combo box is a comb<strong>in</strong>ation of a list box<br />
and an edit control. The user can choose from the list or type <strong>in</strong> a value <strong>in</strong> the edit portion.<br />
When the user chooses an item from the list, that item is placed <strong>in</strong> the edit control. There<br />
are three different types of combo boxes. Table 8.5 lists the types of combo boxes and gives<br />
a description of each.<br />
Table 8.5. Types of combo boxes.<br />
Item Description<br />
Simple The simple style of the combo box is noth<strong>in</strong>g more than an edit<br />
control placed on top of a list box. The user can choose from the<br />
list or type text <strong>in</strong> the edit portion.<br />
Drop-down Similar to the simple style, except the list box portion is not<br />
<strong>in</strong>itially displayed. A drop-down button is provided so that the<br />
user can view the list and choose an item. The user can also type<br />
text <strong>in</strong> the edit portion.<br />
Drop-down list This is the most restrictive type of combo box. As with the dropdown<br />
style, the list is not <strong>in</strong>itially exposed. The user can click the<br />
drop-down button to expose the list and choose an item from<br />
the list, but cannot enter text <strong>in</strong> the edit portion. Use this style<br />
when you want the user to select only from a predeterm<strong>in</strong>ed set<br />
of choices.<br />
You can get a program called ComboBox Test from http://www.mcp.com/sams/codecenter.html<br />
that illustrates the different types of combo boxes. Figure 8.4 shows the test program runn<strong>in</strong>g.<br />
Run the program and try out the combo boxes to get a feel for how each works.<br />
Table 8.6 lists the properties common to list boxes and combo boxes.<br />
293<br />
8
294 Day 8<br />
Figure 8.4.<br />
The ComboBox Test<br />
program.<br />
Table 8.6. Properties for list boxes and combo boxes.<br />
Property Applies To Description<br />
Properties<br />
Columns ListBox Conta<strong>in</strong>s the number of columns <strong>in</strong> the list box.<br />
You can make a list box have multiple columns by<br />
mak<strong>in</strong>g this property greater than 1. Default: 0<br />
ExtendedSelection ListBox Determ<strong>in</strong>es whether extended selection is allowed.<br />
Extended selection allows the user to select items<br />
us<strong>in</strong>g Shift+click and Ctrl+click. Has no effect if<br />
IntegralHeight ListBox<br />
MultiSelect is set to false. Default: true<br />
When true, the list box height will be resized to<br />
be sure that no partial l<strong>in</strong>es are displayed. When<br />
false, the list box may show partial l<strong>in</strong>es.<br />
Default: false<br />
ItemHeight Both For use with owner-drawn list boxes and combo<br />
boxes. Sets the height of the items <strong>in</strong> the control.<br />
Default: 13<br />
Items Both A TStr<strong>in</strong>gs <strong>in</strong>stance that conta<strong>in</strong>s the list of<br />
items <strong>in</strong> the list box. (See the section on TStr<strong>in</strong>gs<br />
earlier <strong>in</strong> this chapter for a description of<br />
available properties and methods.)<br />
MaxLength ComboBox The maximum number of characters the user can<br />
type <strong>in</strong> the edit portion of the combo box. Same<br />
as MaxLength <strong>in</strong> edit controls. Default: 0 (no limit)<br />
MultiSelect ListBox When true, the list box allows multiple items to<br />
be selected. Default: false<br />
Sorted Both When set to true, the list box items are sorted <strong>in</strong><br />
ascend<strong>in</strong>g order. When set to false, the items are<br />
not sorted at all. Default: false
VCL Components<br />
Property Applies To Description<br />
Properties<br />
Style ComboBox The style of the combo box. Choices are<br />
csSimple, csDropDown, csDropDownList,<br />
lbOwnderDrawFixed, and csOwnerDrawVariable.<br />
(See Table 8.5 for a description of the three basic<br />
styles.) Default: csDropDown<br />
ListBox Style choices for list boxes are lbStandard,<br />
lbOwnderDrawFixed, and csOwnerDrawVariable.<br />
Default: lbStandard<br />
TabWidth ListBox List boxes can use tabs. This property sets the tab<br />
width, <strong>in</strong> pixels. Default: 0<br />
Text ComboBox Conta<strong>in</strong>s the text <strong>in</strong> the edit portion of the<br />
combo box.<br />
Runtime Properties<br />
ItemIndex ListBox Conta<strong>in</strong>s the <strong>in</strong>dex of the currently selected item,<br />
with 0 be<strong>in</strong>g the first item <strong>in</strong> the list. Returns -1<br />
if no item is selected. When written to, selects<br />
the specified <strong>in</strong>dex.<br />
SelCount ListBox Conta<strong>in</strong>s the number of items selected <strong>in</strong> a<br />
multiple-selection list box.<br />
Selected ListBox Returns true if the specified item is selected or<br />
false if it is not.<br />
SelLength ComboBox Conta<strong>in</strong>s the length of the text currently selected<br />
<strong>in</strong> the edit control part of the combo box.<br />
SelStart ComboBox Conta<strong>in</strong>s the start<strong>in</strong>g po<strong>in</strong>t of the selected text <strong>in</strong><br />
the edit control. The first character <strong>in</strong> the edit<br />
control is 0.<br />
SelText ComboBox Conta<strong>in</strong>s the currently selected text <strong>in</strong> the edit<br />
control.<br />
TopIndex ListBox Returns the list box item that is at the top of the<br />
list box. Can be used to set the top item to a<br />
certa<strong>in</strong> list box item.<br />
295<br />
8
296 Day 8<br />
NOTE<br />
As with the edit components we looked at earlier, there are very few ListBox and ComboBox<br />
methods. The Clear() method will clear the control of all data. The ItemAtPos() methods<br />
will return the list box item at the specified x and y coord<strong>in</strong>ates. The SelectAll() method<br />
will select the text <strong>in</strong> the edit control portion of a combo box.<br />
Easily the most-used event when deal<strong>in</strong>g with combo boxes and list boxes is the OnClick<br />
event. Use this event to determ<strong>in</strong>e when a selection has been made <strong>in</strong> the list box.<br />
Click<strong>in</strong>g on the edit portion of a combo box or the drop-down button<br />
does not result <strong>in</strong> an OnClick event be<strong>in</strong>g sent. Only when the list box<br />
portion of a combo box is clicked will the OnClick event occur.<br />
The OnChange event can be used to detect changes to the edit portion of a combo box just as<br />
it is used with edit controls. The OnDropDown event is used to detect when the drop-down<br />
button on a combo box has been clicked. The OnMeasureItem and OnDrawItem events are used<br />
with owner-drawn list boxes and owner-drawn combo boxes.<br />
Button, Button, Who’s Got the Button?<br />
NOTE<br />
VCL conta<strong>in</strong>s several types of buttons that you can use <strong>in</strong> your applications. Although not<br />
all of them could be considered to be based on the standard W<strong>in</strong>dows button control, I will<br />
still address all the button types here. Before we look at the specific button components,<br />
though, let’s cover some of the basics.<br />
When sett<strong>in</strong>g the Caption property of a button, use the ampersand (&)<br />
just as you would when sett<strong>in</strong>g the Caption property of menu items.<br />
The character after the ampersand will be underl<strong>in</strong>ed and will be the<br />
accelerator for the button.<br />
Button Basics<br />
The button components only have about three properties of note.<br />
The ModalResult Property<br />
The ModalResult property is used to provide built-<strong>in</strong> form clos<strong>in</strong>g for forms displayed with<br />
ShowModal(). By default, ModalResult is set to mrNone (which is #def<strong>in</strong>ed as 0). Use this value
VCL Components<br />
for buttons that are used as regular buttons on the form and that do not close the form. If you<br />
use any nonzero value for ModalResult, press<strong>in</strong>g the button will close the form and return the<br />
ModalResult value. For example, if you place a button on a form and set the ModalResult<br />
property to mrOk, press<strong>in</strong>g the button will close the form, and the return value from<br />
ShowModal() will be mrOk (1). Given that, then, you can do someth<strong>in</strong>g like the follow<strong>in</strong>g:<br />
<strong>in</strong>t result = MyForm->ShowModal();<br />
if (result == mrOK) DoSometh<strong>in</strong>g();<br />
if (result == mrCancel) return;<br />
Table 8.7 lists the ModalResult constants that VCL def<strong>in</strong>es.<br />
Table 8.7. VCL ModalResult constants.<br />
Constant Value<br />
NOTE<br />
mrNone 0<br />
mrOk 1<br />
mrCancel 2<br />
mrAbort 3<br />
mrRetry 4<br />
mrIgnore 5<br />
mrYes 6<br />
mrNo 7<br />
mrAll 8<br />
You don’t have to use one of the predef<strong>in</strong>ed ModalResult constants for<br />
your buttons. You can use any value you like. Let’s say, for example,<br />
you had a custom dialog box that could be closed by us<strong>in</strong>g a variety of<br />
buttons. You could assign a different ModalResult value to each button<br />
(100, 150, and 200, for example), and you would then know which<br />
button closed the dialog box. Any nonzero number is valid, up to the<br />
maximum value of an <strong>in</strong>t.<br />
You can get a program called ButtnTst from http://www.mcp.com/sams/codecenter.html; it<br />
demonstrates the use of ModalResult. The program allows you to execute a form conta<strong>in</strong><strong>in</strong>g<br />
several buttons. When you click a button, the ModalResult will be reported back on the ma<strong>in</strong><br />
form.<br />
297<br />
8
298 Day 8<br />
NOTE<br />
NOTE<br />
NOTE<br />
The Default Property<br />
The Default property is another key property of buttons. W<strong>in</strong>dows has a standard<br />
mechanism for deal<strong>in</strong>g with dialog boxes. One of the features of this mechanism is as follows:<br />
If a control other than a button has keyboard focus and the user presses the Enter key on the<br />
keyboard, the dialog box will behave as if the user had clicked the default button. The default<br />
button is the button that has the BS_DEFPUSHBUTTON style set (usually the OK button). This<br />
feature has been the bane of programmers and the curse of data-entry personnel for years. The<br />
Default property is used to set a button as the default button for a form. The default value<br />
for this property is false. To make a button the default button, set its Default property to<br />
true. If you don’t specifically set any button’s Default property to true, the form will not<br />
close when the user presses the Enter key.<br />
When the user closes the form by press<strong>in</strong>g the Enter key, the OnClick<br />
handler of the default button (if one exists) will be called before the<br />
form closes.<br />
The Cancel Property<br />
The Cancel property works with the Esc key <strong>in</strong> much the same way as the Default property<br />
works with the Enter key. When the user presses the Esc key to close a form, the return value<br />
from ShowModal() will be the ModalResult value of the button whose Cancel property is set<br />
to true. If no button has its Cancel property set to true, mrCancel will be returned if the user<br />
uses the Esc key to close the form (mrCancel is equal to 2; see Table 8.7).<br />
Clos<strong>in</strong>g a form by click<strong>in</strong>g the system close box or by press<strong>in</strong>g Alt+F4<br />
will result <strong>in</strong> mrCancel be<strong>in</strong>g returned from ShowModal() as you would<br />
expect. Press<strong>in</strong>g the Esc key, however, will result <strong>in</strong> a return value of<br />
the ModalResult property be<strong>in</strong>g set to whatever button has the Cancel<br />
property set to true. The OnClick handler for the Cancel button will be<br />
called before the form closes. No OnClick handler is called if the user<br />
uses the system close box or Alt+F4 to close the form. Be sure to<br />
anticipate the different ways users might use (or abuse) your forms.<br />
You may have more than one button with a Default property set to<br />
true. Likewise, you may have more than one button with the Cancel
VCL Components<br />
property set to true. However, when the user presses Enter on the<br />
keyboard, the first button <strong>in</strong> the tab order that has its Default property<br />
set to true will be <strong>in</strong>voked. Similarly, when the user presses the Esc key<br />
to close the form, the return value from ShowModal() will be the<br />
ModalResult value of the first button <strong>in</strong> the tab order that has its Cancel<br />
property set to true.<br />
The Enabled Property<br />
Earlier I discussed the Enabled property when I discussed components <strong>in</strong> general. This<br />
property is used a lot with buttons to enable or disable the button depend<strong>in</strong>g on the current<br />
state of the program or of a particular form. When a button is disabled (its Enabled property<br />
is set to false), its text is grayed out, and the button does not function. In the case of buttons<br />
with bitmaps on them (BitBtn and SpeedButton), the bitmap will also be grayed out<br />
automatically.<br />
Button components have only one method of <strong>in</strong>terest: the Click() method, which simulates<br />
a mouse click. When you call Click() for a button, the OnClick event of the button is executed<br />
just as if the user had clicked the button. As for events, typically only the OnClick event is used.<br />
Now let’s take a look at the different button components <strong>C++</strong>Builder provides.<br />
The Button Component<br />
The standard Button component is sort of like actor Danny DeVito—he a<strong>in</strong>’t pretty, but he<br />
sure gets a lot of work. There really isn’t anyth<strong>in</strong>g to add concern<strong>in</strong>g the standard Button<br />
component. It has a default Height property value of 25 pixels and a default Width property<br />
value of 75. Typically you will place a button on a form and respond to its OnClick event, and<br />
that’s about it.<br />
The BitBtn Component<br />
The BitBtn component is a perfect example of how a component can be extended to provide<br />
additional functionality. In this case the standard Button component is extended to allow a<br />
bitmap to be displayed on the face of the button.<br />
The BitBtn component has several properties over what the Button component provides. All<br />
these properties work together to manage the bitmap on the button and the layout between<br />
the bitmap and the button’s text. They are expla<strong>in</strong>ed <strong>in</strong> the follow<strong>in</strong>g sections.<br />
299<br />
8
300 Day 8<br />
The Glyph Property<br />
The Glyph property represents the bitmap on the button. The value of the Glyph property is<br />
a picture, or glyph.<br />
NEW TERM<br />
A glyph is a picture that is typically <strong>in</strong> the form of a W<strong>in</strong>dows bitmap file (BMP).<br />
The glyph itself consists of one or more bitmaps that represent the four possible states a<br />
button can be <strong>in</strong>: up, down, disabled, and stay down. If you are creat<strong>in</strong>g your own buttons,<br />
you can probably get by with supply<strong>in</strong>g just one glyph, which the BitBtn component will then<br />
modify to represent the other three possible states. The bitmap will move down and to the<br />
left when the button is clicked and will be grayed out when disabled. The glyph <strong>in</strong> the staydown<br />
state will be the same as <strong>in</strong> the up state, although the button face will change to give<br />
a pressed look.<br />
If you provide more than one glyph, the glyphs must all be the same height and width and<br />
must be conta<strong>in</strong>ed <strong>in</strong> a bitmap strip. The bitmaps that ship with <strong>C++</strong>Builder provide two<br />
glyphs. Figure 8.5 shows the bitmap for the pr<strong>in</strong>t button that comes with <strong>C++</strong>Builder<br />
(PRINT.BMP) <strong>in</strong> both its actual size and zoomed <strong>in</strong> to show detail. Note that the two glyphs<br />
each occupy the same width <strong>in</strong> the bitmap.<br />
Figure 8.5.<br />
The PRINT.BMP<br />
bitmap.<br />
TIP<br />
The pixel <strong>in</strong> the lower-left corner of the bitmap is the color that will be<br />
used for the transparent color. Any pixels <strong>in</strong> the bitmap hav<strong>in</strong>g that<br />
color will be transparent when the glyph is displayed on the button.<br />
You must keep this <strong>in</strong> m<strong>in</strong>d when design<strong>in</strong>g your bitmaps. If you are<br />
not us<strong>in</strong>g transparency, you will need the pixel <strong>in</strong> the lower-left corner<br />
to be a color not present anywhere else on the bitmap.
NOTE<br />
VCL Components<br />
To set the glyph for a BitBtn, double-click the Value column <strong>in</strong> the Object Inspector next<br />
to the Glyph property. The Image Editor will be displayed, and you can choose the bitmap<br />
that will be used for the glyph.<br />
The standard button glyphs that come with <strong>C++</strong>Builder are 15×15<br />
pixels <strong>in</strong> size. This size fits well with the standard button height of 25<br />
pixels. Your glyphs can be any size you like, but the BitBtn component<br />
makes no effort to size the button accord<strong>in</strong>g to the size of the bitmap.<br />
If you use larger glyphs, you will have to size the button accord<strong>in</strong>gly.<br />
The K<strong>in</strong>d Property<br />
The K<strong>in</strong>d property is a nice feature of the BitBtn component that allows you to choose from<br />
several predef<strong>in</strong>ed k<strong>in</strong>ds of buttons. The default value for the K<strong>in</strong>d property is bkCustom,<br />
which means that you will supply the glyph and set any other properties for the button.<br />
Choos<strong>in</strong>g any of the other predef<strong>in</strong>ed k<strong>in</strong>ds will result <strong>in</strong> these five th<strong>in</strong>gs happen<strong>in</strong>g:<br />
■ The Glyph property is automatically set for the k<strong>in</strong>d of button chosen.<br />
■ The Cancel or Default properties are modified accord<strong>in</strong>g to the k<strong>in</strong>d of button<br />
chosen.<br />
■ The Caption property is modified for the type of button chosen.<br />
■ The ModalResult property is set accord<strong>in</strong>g to the k<strong>in</strong>d of button chosen.<br />
■ The button on the form is updated to reflect all these sett<strong>in</strong>gs.<br />
For <strong>in</strong>stance, if you set the value of K<strong>in</strong>d to bkOK, the button will become an OK button. The<br />
glyph is set to a green check mark, the Cancel property is set to false, the Default property<br />
is set to true, the ModalResult property is set to mrOk, the Caption property is set to OK, and<br />
the results show up on the form. You can always override any of the properties modified by<br />
chang<strong>in</strong>g the K<strong>in</strong>d property, but it is not usually necessary to do so. Figure 8.6 shows the<br />
Button Test program from http://www.mcp.com/sams/codecenter.html, with the BitBtn<br />
Test form displayed. The form conta<strong>in</strong>s each of the predef<strong>in</strong>ed button types available plus<br />
one custom button.<br />
The Layout Property<br />
The Layout property determ<strong>in</strong>es where the button is placed relative to the text. The default<br />
is blGlyphLeft. You can also choose to place the glyph on the face of the button to the right<br />
of the text, above the text, or below the text.<br />
301<br />
8
302 Day 8<br />
Figure 8.6.<br />
The predef<strong>in</strong>ed<br />
BitBtn types.<br />
The Marg<strong>in</strong> Property<br />
The Marg<strong>in</strong> property specifies the marg<strong>in</strong> between the glyph and the edge of the button<br />
(which edge this property affects is determ<strong>in</strong>ed by the value of the Layout property). The<br />
default is -1, which centers the glyph and the text <strong>in</strong> the button. Enter any positive value to<br />
set an absolute marg<strong>in</strong> (<strong>in</strong> pixels).<br />
The NumGlyphs Property<br />
The NumGlyphs property specifies the number of glyphs you have <strong>in</strong> your bitmap strip for a<br />
particular button. You can supply from one to four glyphs, as mentioned. The glyphs must<br />
appear <strong>in</strong> the bitmap strip <strong>in</strong> this order: Up, Disabled, Down, Stay Down.<br />
The Spac<strong>in</strong>g Property<br />
The Spac<strong>in</strong>g property controls the distance, <strong>in</strong> pixels, between the glyph and the button’s<br />
text. The default value is 4 pixels.<br />
The SpeedButton Component<br />
The SpeedButton component was designed to be used on speedbars. It is different from the<br />
Button and BitBtn components <strong>in</strong> that it is not a w<strong>in</strong>dowed component. This means that a<br />
speed button cannot receive <strong>in</strong>put focus and cannot be tabbed to. On the other hand, the<br />
SpeedButton component has several th<strong>in</strong>gs <strong>in</strong> common with the BitBtn component. The way<br />
<strong>in</strong> which the Glyph property is handled by the SpeedButton component is exactly the same<br />
as with the BitBtn component, so I’m not go<strong>in</strong>g to go over that ground aga<strong>in</strong>. There are a<br />
couple major differences, though, so let’s go over those.<br />
By default, speed buttons are square and are 25×25 pixels. Your speed buttons may be any<br />
size you like and can conta<strong>in</strong> text, although typically speed buttons do not conta<strong>in</strong> text. There<br />
are some properties specific to speed buttons that you should be aware of, which I’ve broken<br />
down <strong>in</strong> the follow<strong>in</strong>g sections.
VCL Components<br />
The GroupIndex Property<br />
Speed buttons can be grouped to make them behave like radio buttons (radio buttons are<br />
discussed later <strong>in</strong> the chapter <strong>in</strong> the section “Radio Buttons and Check Boxes”). When one<br />
button <strong>in</strong> the group is pressed, it stays down, and the button that was previously pressed pops<br />
up aga<strong>in</strong>. To group speed buttons, simply assign the same value to the GroupIndex property<br />
for all buttons <strong>in</strong> a group. (The default value of 0 <strong>in</strong>dicates that the button is not part of any<br />
group.) To illustrate, do the follow<strong>in</strong>g exercise:<br />
1. Create a blank form and place five speed buttons on the form. (I won’t bother with<br />
add<strong>in</strong>g glyphs to the buttons <strong>in</strong> this simple exercise, but you certa<strong>in</strong>ly may if you<br />
want.)<br />
2. Select all the buttons and change the value of the GroupIndex property to 1. The<br />
GroupIndex for all buttons will be changed to 1.<br />
3. Optional: Change the Down property of one of the buttons to true.<br />
4. Click the Run button to compile and run the program.<br />
When you run the program, click on several of the buttons. You will notice that only one<br />
button can be <strong>in</strong> the down state at one time. As you can see when you assign a nonzero value<br />
to GroupIndex, the speed buttons change their behavior. A speed button with a GroupIndex<br />
of 0 pops back up when you click it, whereas a speed button that is part of a group stays down<br />
when clicked.<br />
The AllowAllUp Property<br />
By default, one button <strong>in</strong> the group must be down at all times. You can change that behavior<br />
by sett<strong>in</strong>g the AllowAllUp property to true. Do<strong>in</strong>g this for one button automatically changes<br />
the AllowAllUp property for all other buttons <strong>in</strong> the group to true as well. Now you can have<br />
any one button <strong>in</strong> the group selected or no buttons at all.<br />
TIP<br />
Sometimes you want a speed button to act as a toggle button. A toggle<br />
button is used to turn an option on or off and is not part of a button<br />
group. To make an <strong>in</strong>dividual speed button a toggle button, assign a<br />
nonzero value to its GroupIndex property and set its AllowAllUp property<br />
to true. Be sure to set the GroupIndex property to a value not used by any<br />
other components on the form. When the user clicks the button, it stays<br />
down. When the button is clicked aga<strong>in</strong>, it pops back up.<br />
303<br />
8
304 Day 8<br />
The Down Property<br />
The Down property, when read, returns true if the button is currently down and false if it<br />
is not. When written to, the Down property can be used to toggle a button as pressed or not<br />
pressed. Writ<strong>in</strong>g to the Down property has no effect unless the speed button is part of a group.<br />
Radio Buttons and Check Boxes<br />
Radio buttons and check boxes are specialized buttons but are, <strong>in</strong> the end, still buttons. I’m<br />
not go<strong>in</strong>g to spend a lot of time discuss<strong>in</strong>g these two buttons because implement<strong>in</strong>g them<br />
is pretty straightforward. Both the RadioButton and CheckBox components have a property<br />
called Checked that can be used to set the check state and can be read to retrieve the current<br />
check state.<br />
The radio button is usually used <strong>in</strong> a group of buttons. A radio button typically signifies a<br />
group of options, only one of which can be selected at one time (like a group of speed buttons,<br />
which you just learned about). Although you can use a radio button by itself, it is not<br />
recommended because it is confus<strong>in</strong>g to your users. When tempted to use a radio button by<br />
itself, use a check box <strong>in</strong>stead—that’s what a check box is for, after all.<br />
Any buttons placed on a form will automatically be considered part of the same group. If you<br />
have more than one group of radio buttons, and those groups need to operate <strong>in</strong>dependently<br />
of one another, you need to use a RadioGroup component. This component allows you to<br />
quickly set up a group of radio buttons with a 3D frame around the buttons and a caption<br />
as well. To illustrate this concept, do the follow<strong>in</strong>g exercise:<br />
1. Create a blank form or use the form you created <strong>in</strong> the previous exercise. Place a<br />
RadioGroup component on the form.<br />
2. Locate the Items property and double-click the Value column.<br />
3. The Str<strong>in</strong>g list editor is displayed. Type the follow<strong>in</strong>g l<strong>in</strong>es <strong>in</strong> the Str<strong>in</strong>g list editor:<br />
Redtailed Hawk<br />
Peregr<strong>in</strong>e Falcon<br />
Gyrfalcon<br />
Northern Goshawk<br />
4. Click OK to close the Str<strong>in</strong>g list editor. The group box is populated with radio<br />
buttons conta<strong>in</strong><strong>in</strong>g the text you typed.<br />
5. Change the Caption property of the radio group box to Apprentice Falconers Can<br />
Legally Possess:.<br />
6. Click Run to compile and run the program.<br />
When you click one of the radio buttons, the previously selected button pops up as expected.<br />
Us<strong>in</strong>g the RadioGroup component, you can put more than one group of radio buttons on a
NOTE<br />
VCL Components<br />
form. Like the ListBox and ComboBox components discussed earlier, the RadioGroup component<br />
has an ItemIndex property that you can read at runtime to determ<strong>in</strong>e which item <strong>in</strong> the<br />
group is selected. Oh, by the way—the answer to the quiz is Redtailed Hawk (American<br />
Kestrel would also have been an acceptable answer, but it was not presented <strong>in</strong> the list).<br />
You can also use a GroupBox component to hold radio buttons. The<br />
GroupBox component is less convenient to use than the RadioGroup<br />
component, but it has more flexibility. You can place any type of<br />
control <strong>in</strong> a group box. Once placed <strong>in</strong> the group box, the controls and<br />
the group box itself can be moved as a unit at design time.<br />
The CheckBox component is used to allow users to turn an option on or off or to <strong>in</strong>dicate to<br />
a user that an option is currently on or off. A check box can have up to three states, depend<strong>in</strong>g<br />
on its style: on, off, or grayed. If the check box’s AllowGrayed property is false, it can only<br />
be checked or unchecked. When the AllowGrayed property is true, the check box can be any<br />
one of the three states. The grayed, or <strong>in</strong>determ<strong>in</strong>ate, state is handled programmatically. In<br />
other words, it’s up to you to decide what the grayed state means for your application. If the<br />
AllowGrayed property is false (the default), you can use the Checked property to determ<strong>in</strong>e<br />
whether the check box is checked or unchecked. If the AllowGrayed property is true, you must<br />
use the State property to determ<strong>in</strong>e (or set) the check box state. State will return either<br />
cbChecked, cbUnchecked, or cbGrayed.<br />
TIP<br />
To make a check box read-only but not grayed, place it on a panel and<br />
change the panel’s Enabled property to false.<br />
The Label Component<br />
The Label component is used to display text on a form. Sometimes the label text is<br />
determ<strong>in</strong>ed at design time and never changed. In other cases, the label is dynamic and is<br />
changed at runtime as the program dictates. Use the label’s Caption property to set the label<br />
text at runtime. The Label component has no specialized methods or events beyond what is<br />
available with other components. Table 8.8 lists the properties specific to the Label<br />
component.<br />
305<br />
8
306 Day 8<br />
Table 8.8. Properties for the Label component.<br />
Property Description<br />
AutoSize When set to true, the label will size itself accord<strong>in</strong>g to the text<br />
conta<strong>in</strong>ed <strong>in</strong> the Caption property. When set to false, text will<br />
be clipped at the right edge of the label.<br />
FocusControl A label is a non-w<strong>in</strong>dowed component, so it cannot receive <strong>in</strong>put<br />
focus and it cannot be tabbed to. Sometimes, however, a label<br />
serves as the text for a control such as an edit control. In those<br />
cases you could assign an accelerator key to the label (us<strong>in</strong>g the<br />
ampersand) and then change the FocusControl property to the<br />
name of the control you want to receive focus when the label’s<br />
accelerator key is pressed.<br />
ShowAccelChar Set this property to true if you want an actual ampersand to<br />
show up <strong>in</strong> the label rather than the ampersand serv<strong>in</strong>g as the<br />
accelerator key.<br />
Transparent When this property is set to true, the Color property is ignored<br />
and anyth<strong>in</strong>g beneath the label shows through. This is useful for<br />
plac<strong>in</strong>g labels on bitmap backgrounds, for <strong>in</strong>stance.<br />
WordWrap When set to true, text <strong>in</strong> the label will wrap around to a new l<strong>in</strong>e<br />
when it reaches the right edge of the label.<br />
The ScrollBar Component<br />
The ScrollBar component represents a standalone scrollbar. It’s standalone <strong>in</strong> the sense that<br />
it is not connected to an edit control, a list box, a form, or anyth<strong>in</strong>g else. I have not found<br />
that the scrollbar is a control I use very frequently. Certa<strong>in</strong> types of applications use scrollbars<br />
heavily, of course, but for day-<strong>in</strong>, day-out applications its use is fairly uncommon. The<br />
scrollbar’s performance is set by sett<strong>in</strong>g the M<strong>in</strong>, Max, LargeChange, and SmallChange<br />
properties. The scrollbar’s position can be set or obta<strong>in</strong>ed via the Position property. The K<strong>in</strong>d<br />
property allows you to specify a horizontal or vertical scrollbar.<br />
The Panel Component<br />
The Panel component is sort of a workhorse <strong>in</strong> <strong>C++</strong>Builder. There is almost no limit to what<br />
you can use panels for. Panels can be used to hold speedbar buttons, to display text labels such<br />
as a title for a form, display graphics, and to hold regular buttons as well. One of the<br />
advantages to a panel is that components placed on the panel become children of the panel.
VCL Components<br />
As such, they go with the panel wherever the panel goes. This can be a great aid at runtime<br />
and at design time.<br />
Much of the power of the Panel component lies <strong>in</strong> its Align property. For <strong>in</strong>stance, let’s say<br />
you want a title to be displayed on the top of a form. Let’s further assume that you want it<br />
centered no matter how the user sizes the w<strong>in</strong>dow. By sett<strong>in</strong>g the Align property to alTop and<br />
the Alignment property to taCenter, your title will always be centered. It’s a simple as that.<br />
A panel can have many different appearances. The panel’s appearance can be altered<br />
by chang<strong>in</strong>g the BevelInner, BevelOuter, BorderStyle, and BorderWidth properties (see<br />
Figure 8.7).<br />
Figure 8.7.<br />
The panel styles<br />
example show<strong>in</strong>g<br />
different styles.<br />
The Panel component is so versatile that it will take you a while to discover all its possible uses.<br />
And That’s Not All…<br />
Unfortunately, there isn’t sufficient space here to go over all the components <strong>C++</strong>Builder<br />
provides. You saw the Image component on Day 6, when you created the Picture Viewer<br />
program. You also got a brief glimpse at the Bevel component on Day 6 when you built an<br />
About dialog box, and the Shape component on Day 7 as part of an exercise on align<strong>in</strong>g<br />
components. These represent just a sampl<strong>in</strong>g of the components that are wait<strong>in</strong>g for you. You<br />
need to test drive each one of them to determ<strong>in</strong>e its usefulness for you.<br />
There is one other group of components that I need to discuss before we move on: the Dialog<br />
group.<br />
The Common Dialog Boxes<br />
W<strong>in</strong>dows provides a set of common dialog boxes that any W<strong>in</strong>dows program can use, <strong>in</strong>clud<strong>in</strong>g<br />
■ File Open<br />
■ File Save<br />
307<br />
8
308 Day 8<br />
■ Font<br />
■ Color<br />
■ Pr<strong>in</strong>t<br />
■ Pr<strong>in</strong>ter Setup<br />
■ F<strong>in</strong>d<br />
■ Replace<br />
The common dialog boxes are found on the Dialogs tab of the Component Palette. These<br />
components are nonvisual because they do not have a visual design-time <strong>in</strong>terface. The<br />
follow<strong>in</strong>g sections discuss each of these dialog boxes with one exception—I’ll leave the<br />
discussion of the Pr<strong>in</strong>t and Pr<strong>in</strong>ter Setup dialog boxes for later, when I discuss pr<strong>in</strong>t<strong>in</strong>g.<br />
The Execute Method<br />
NOTE<br />
One th<strong>in</strong>g that all the common dialog boxes have <strong>in</strong> common is the Execute() method, which<br />
is used to create and display the dialog box. The dialog box is displayed modally except for<br />
the F<strong>in</strong>d and Replace dialog boxes, which are displayed modelessly. Execute() returns true<br />
if the user clicked the OK button, double-clicked a file name, or pressed Enter on the<br />
keyboard. Execute() returns false if the user clicked the Cancel button, pressed the Esc key,<br />
or closed the dialog box with the system close box. A common dialog box is often<br />
implemented like this:<br />
if (OpenDialog->Execute()) {<br />
// user pressed OK so use the filename<br />
Memo->L<strong>in</strong>es->LoadFromFile(OpenDialog->FileName);<br />
}<br />
return;<br />
This code displays the File Open dialog box and gets a filename from the user. If the user<br />
clicked the OK button, the code <strong>in</strong>side the if block is executed and the file is loaded <strong>in</strong> to<br />
a Memo component. If OK was not pressed, the code <strong>in</strong>side the if block is ignored and no<br />
action takes place.<br />
The code used <strong>in</strong> the previous snippet is another example of <strong>C++</strong><br />
shortcut syntax. The first l<strong>in</strong>e:<br />
if (OpenDialog->Execute()) {<br />
is equivalent to this:<br />
if (OpenDialog->Execute() == true) {<br />
Use either method, but the first is preferred.
VCL Components<br />
The File Open and File Save Dialog Boxes<br />
The File Open and File Save dialog boxes have several properties <strong>in</strong> common. File Open is<br />
used when you want to allow the user to open a file <strong>in</strong> your application (see Figure 8.8). It<br />
is encapsulated <strong>in</strong> the OpenDialog component. You use the File Save dialog box when gett<strong>in</strong>g<br />
a filename from the user <strong>in</strong> order to save a file. It is also used as the Save As dialog box. The<br />
File Save dialog box is encapsulated by the SaveDialog component.<br />
Figure 8.8.<br />
A typical File Open<br />
dialog box.<br />
NOTE<br />
The File dialog boxes are fairly easy to use <strong>in</strong> their most basic form. They do have a few<br />
features, however, that need to be expla<strong>in</strong>ed <strong>in</strong> order for you to get the full benefit of us<strong>in</strong>g<br />
them. The follow<strong>in</strong>g sections exam<strong>in</strong>e the properties that are specific to the File dialog boxes.<br />
The OpenDialog and SaveDialog components merely retrieve a filename<br />
from the user. It is up to the programmer to write code that actually<br />
does someth<strong>in</strong>g with the filename.<br />
The DefaultExt Property<br />
Use the DefaultExt property to set the default extension that the dialog box will use. The<br />
default extension is the extension that will automatically be appended to the filename if the<br />
user does not supply an extension.<br />
The FileName Property<br />
The FileName property is the most obvious of the File dialog box properties; it holds the text<br />
of the file that the user chooses. Set this property before call<strong>in</strong>g the dialog box if you want<br />
a filename to show <strong>in</strong> the edit portion of the File dialog box when it is <strong>in</strong>itially displayed. After<br />
the user clicks OK to close the dialog box, this property will conta<strong>in</strong> the full path and filename<br />
of the file chosen.<br />
309<br />
8
310 Day 8<br />
The Files Property<br />
Files, a read-only property, is a TStr<strong>in</strong>gs <strong>in</strong>stance that conta<strong>in</strong>s the list of files selected when<br />
multiple file selection is enabled.<br />
The Filter Property<br />
The Filter property conta<strong>in</strong>s a list of the file types from which the user can choose. The file<br />
types are displayed <strong>in</strong> the File of type: combo box <strong>in</strong> the file dialog box. You can set Filter<br />
to reflect types of files specific to your application. For <strong>in</strong>stance, a simple text-edit<strong>in</strong>g program<br />
could have the filter set to show files of type TXT, INI, and LOG, to name just a few. The filter<br />
can easily be set at design time through the Filter Editor dialog box. To <strong>in</strong>voke the Filter<br />
Editor, double-click the Value column next to the Filter property <strong>in</strong> the Object Inspector.<br />
Figure 8.9 shows the Filter Editor for a File Open dialog box, as described previously.<br />
Figure 8.9.<br />
The Filter Editor<br />
dialog box.<br />
The Filter Name column conta<strong>in</strong>s a textual description of the file type. The Filter column<br />
is the actual file mask that will be used to display files of that type.<br />
Although you can enter the filter str<strong>in</strong>g directly <strong>in</strong> the Value column of the Object Inspector,<br />
it is easiest to use the Filter Editor. If you are only us<strong>in</strong>g a s<strong>in</strong>gle filter, you can type it directly<br />
<strong>in</strong>to the Value column for the Filter property. Separate the description and filter with a pipe.<br />
For <strong>in</strong>stance, to have a s<strong>in</strong>gle filter for all file types, you would enter the follow<strong>in</strong>g:<br />
All Files (*.*)|*.*<br />
The FilterIndex Property<br />
The FilterIndex property is used to set the filter that will be used when the dialog box is<br />
<strong>in</strong>itially displayed. The <strong>in</strong>dex is not zero based as you might expect, however. The first filter<br />
<strong>in</strong> the list is 1, the second is 2, and so on. For example, refer to Figure 8.9. If you wanted the<br />
All Files filter to be the one <strong>in</strong>itially displayed, you would set the FilterIndex property to 4.
VCL Components<br />
The InitialDir Property<br />
The InitialDir property is used to specify the directory that will be used as the <strong>in</strong>itial<br />
directory when the File dialog box is displayed. If no value is supplied for the InitialDir<br />
property, the current directory will be used (as determ<strong>in</strong>ed by W<strong>in</strong>dows).<br />
TIP<br />
A top-notch W<strong>in</strong>dows program keeps track of the last directory the<br />
user used both when open<strong>in</strong>g files and when sav<strong>in</strong>g them. Usually this<br />
<strong>in</strong>formation is stored <strong>in</strong> the Registry. Before display<strong>in</strong>g a File Open or<br />
File Save dialog box, set the InitialDir to the previous directory the<br />
user used. After the user selects a file, update the registry to reflect the<br />
new directory if necessary.<br />
The Options Property<br />
The Options property controls the way the File dialog box is used. The list of options is too<br />
long to list here, but common items <strong>in</strong>clude whether you allow new files or directories to be<br />
created, whether the Help button is shown on the dialog box, whether long filenames are<br />
allowed, whether multiple file selection is allowed, and others. See the <strong>C++</strong>Builder onl<strong>in</strong>e<br />
help for the OpenDialog and SaveDialog components for complete <strong>in</strong>formation.<br />
The Title Property<br />
The Title property is used to set or read the title of the File dialog box. If no title is specified,<br />
the common dialog box defaults of Open for the OpenDialog component and Save for the<br />
SaveDialog component will be used.<br />
TIP<br />
A Save As dialog box is noth<strong>in</strong>g more than a SaveDialog component<br />
with the Title property set to Save As.<br />
The File dialog boxes have no events associated with them.<br />
TIP<br />
You can implement a File Open dialog box (or any of the common<br />
dialog boxes) at runtime without ever plac<strong>in</strong>g an OpenDialog component<br />
311<br />
8
312 Day 8<br />
on your form. To accomplish this, create an <strong>in</strong>stance of the<br />
TOpenDialog class and then call its Execute() method:<br />
TOpenDialog openDlg = new TOpenDialog(this);<br />
if (openDlg->Execute()) {<br />
// do someth<strong>in</strong>g here<br />
}<br />
delete openDlg;<br />
If necessary, you can set any of the OpenDialog component’s properties<br />
before call<strong>in</strong>g Execute().<br />
The Color Dialog Box<br />
The Color dialog box allows the user to choose a color. When the OK button is clicked, the<br />
Color property will conta<strong>in</strong> the color <strong>in</strong>formation. (Refer to Figure 8.1, which shows the<br />
Color dialog box.) The Color dialog box, like the file dialog boxes, has no events to respond to.<br />
The Font Dialog Box<br />
The Font dialog box allows the user to choose a font from the list of fonts available on his<br />
or her system. Through the Device property, you can choose whether you want screen fonts,<br />
pr<strong>in</strong>ter fonts, or both types of fonts to be displayed. You can limit the maximum and<br />
m<strong>in</strong>imum font sizes that the user can select by modify<strong>in</strong>g the MaxFontSize and M<strong>in</strong>FontSize<br />
properties. As with the File dialog boxes, the Options property conta<strong>in</strong>s a wide variety of<br />
options you can use to control how the Font dialog box functions.<br />
If the user clicks OK, the Font property will conta<strong>in</strong> all the <strong>in</strong>formation you need to<br />
implement the new font. Figure 8.10 shows the Font dialog box <strong>in</strong> the default configuration.<br />
Figure 8.10.<br />
The Font dialog box.
VCL Components<br />
The Font dialog box has a s<strong>in</strong>gle event, OnApply, that will occur when the user clicks the Apply<br />
button on the F<strong>in</strong>d dialog box. The Apply button will not be present on the Font dialog box<br />
unless you have first created a valid (not empty) event handler for the OnApply event.<br />
The F<strong>in</strong>d and Replace Dialog Boxes<br />
The F<strong>in</strong>d and Replace dialog boxes provide users the capability to enter text to search for and<br />
text to replace the found text with, and a variety of search and replace options. The F<strong>in</strong>d dialog<br />
box is encapsulated <strong>in</strong> the VCL component F<strong>in</strong>dDialog, and the Replace dialog box is<br />
represented by the ReplaceDialog component. The Replace dialog box, which conta<strong>in</strong>s<br />
everyth<strong>in</strong>g found on the F<strong>in</strong>d dialog box, plus the extra replace features, is shown <strong>in</strong> Figure<br />
8.11.<br />
Figure 8.11.<br />
The Replace dialog box.<br />
Major properties of the F<strong>in</strong>dDialog and ReplaceDialog components <strong>in</strong>clude F<strong>in</strong>dText (the<br />
text to f<strong>in</strong>d), ReplaceText (the text with which to replace the found text), and Options.<br />
Obviously, the F<strong>in</strong>dDialog does not have a ReplaceText property. The Options property<br />
conta<strong>in</strong>s a wide variety of <strong>in</strong>formation about the various options that the user had set at the<br />
time the F<strong>in</strong>d Next, Replace, or Replace All button was clicked.<br />
The Execute() method for the F<strong>in</strong>dDialog and ReplaceDialog components is a little different<br />
than it is with the other common Dialog components. First, the F<strong>in</strong>d and Replace dialog<br />
boxes are modeless dialog boxes. As soon as the dialog is displayed, the Execute() method<br />
returns. Because the dialog is modeless, the return value from Execute() is mean<strong>in</strong>gless (it’s<br />
always true). Instead, the F<strong>in</strong>d and Replace dialog boxes use the OnF<strong>in</strong>d and OnReplace events<br />
along with the Options property to determ<strong>in</strong>e what is happen<strong>in</strong>g with the dialog box. The<br />
OnF<strong>in</strong>d event occurs when the F<strong>in</strong>d Next button is clicked. The ReplaceDialog has an OnF<strong>in</strong>d<br />
event, but it also has an OnReplace event that is fired when the Replace or Replace All button<br />
is clicked. Use these events to determ<strong>in</strong>e when the user has requested a f<strong>in</strong>d or replace action.<br />
Your programs should read the Options property to determ<strong>in</strong>e how the user <strong>in</strong>tended the f<strong>in</strong>d<br />
or replace operation to be carried out.<br />
313<br />
8
3<strong>14</strong> Day 8<br />
Summary<br />
Today you have had a look <strong>in</strong>to some of the basic components that <strong>C++</strong>Builder provides. You<br />
have learned about components <strong>in</strong> general, and you have learned about some of the specifics<br />
of the components that are based on W<strong>in</strong>dows controls. It is important to understand the<br />
basic controls available <strong>in</strong> W<strong>in</strong>dows and the <strong>C++</strong>Builder components that represent those<br />
controls. Today ends with an exam<strong>in</strong>ation of the W<strong>in</strong>dows common dialog boxes.<br />
Workshop<br />
The Workshop conta<strong>in</strong>s quiz questions to help you solidify your understand<strong>in</strong>g of the<br />
material covered and exercises to provide you with experience <strong>in</strong> us<strong>in</strong>g what you have learned.<br />
You can f<strong>in</strong>d answers to the quiz questions <strong>in</strong> Appendix A, “Answers to Quiz Questions.”<br />
Q&A<br />
Q If I change the Name property of a component us<strong>in</strong>g the Object Inspector,<br />
<strong>C++</strong>Builder will automatically change all references to that component <strong>in</strong> my<br />
code, right?<br />
A Yes and no. <strong>C++</strong>Builder will change all references to that component name <strong>in</strong><br />
<strong>C++</strong>Builder-generated code, but it will not change any user-written code.<br />
Q The OpenDialog component is obviously a visible component. Why is it called a<br />
nonvisual component?<br />
A Because it is not visible at design time. It is visible only at runtime when you<br />
<strong>in</strong>voke it with the Execute() method.<br />
Q Why is it important to change the Name property only with the Object Inspector?<br />
A As you work with the Form Designer, <strong>C++</strong>Builder writes code based on the Name<br />
property. If you later change the Name property either by directly edit<strong>in</strong>g the source<br />
files or at runtime, all references to that form or component will be <strong>in</strong>correct and<br />
will likely lead to your program refus<strong>in</strong>g to compile or crash<strong>in</strong>g at runtime.<br />
Q I seem to be us<strong>in</strong>g properties more than methods when deal<strong>in</strong>g with my<br />
components <strong>in</strong> code. Is that wrong?<br />
A Not at all. In fact, that’s the way VCL components are designed. A well-written<br />
component makes maximum use of properties. For this reason you may not use a<br />
component’s methods very often. Use methods when necessary, but otherwise use<br />
properties to manipulate your components at runtime.
Quiz<br />
VCL Components<br />
Q I’m respond<strong>in</strong>g to both the OnDblClick and the OnClick events for a component.<br />
Every time I double-click on a component, both the OnClick and the<br />
OnDblClick event handlers are called. Why?<br />
A Because when you double-click on a component, W<strong>in</strong>dows will generate both<br />
s<strong>in</strong>gle- and double-click messages. You can’t prevent it, so you will have to write<br />
code to account for that fact.<br />
Q I want to use the features of the TStr<strong>in</strong>gs class to keep a list of str<strong>in</strong>gs my<br />
program needs <strong>in</strong> order to operate. The compiler won’t let me use a TStr<strong>in</strong>gs<br />
object. What do I do?<br />
A Use a TStr<strong>in</strong>gList object <strong>in</strong>stead. The TStr<strong>in</strong>gList class is provided for this<br />
purpose.<br />
Q I need a s<strong>in</strong>gle-l<strong>in</strong>e edit control to be right-justified, but there is no Alignment<br />
property for the Edit component. Can I right-align text <strong>in</strong> a s<strong>in</strong>gle-l<strong>in</strong>e edit?<br />
A No. What you can do, though, is use a Memo component and make it appear to be a<br />
regular Edit component. Be sure to set the Memo component’s WantReturn property<br />
to false, its Height to the height of a standard edit component (21 pixels), and its<br />
Alignment property to taRightJustify. The component will give all appearances of<br />
be<strong>in</strong>g a s<strong>in</strong>gle-l<strong>in</strong>e edit control that is right-justified.<br />
Q I have a form that has several buttons on it. When the user closes the form<br />
us<strong>in</strong>g the Esc key, I get one return value from ShowModal(), and when the user<br />
closes the form with the system close box I get a different return value from<br />
ShowModal(). Why?<br />
A You have a button on the forum whose Cancel property is set to true. When the<br />
user presses the Esc key, the ModalResult value of that button is used as the return<br />
value from ShowModal(). When the user closes the form with the system close box,<br />
you will always get a return value of mrCancel. You need to be prepared to take <strong>in</strong>to<br />
account both ways a form can be closed.<br />
1. Can you change the Name property of a component at runtime?<br />
2. What property is used to enable and disable controls?<br />
3. How can you tell at runtime that a button is disabled?<br />
4. What is the difference between the long h<strong>in</strong>t and the short h<strong>in</strong>t?<br />
5. Name three of the four methods that can be used to force a control to repa<strong>in</strong>t itself.<br />
315<br />
8
316 Day 8<br />
6. How many types of combo boxes are there?<br />
7. How is the ModalResult property used for button components?<br />
8. Which component is often used as a conta<strong>in</strong>er for other components?<br />
9. What is the return value from the Execute() method for an OpenDialog component<br />
if the user clicks OK to close the dialog box?<br />
10. How do you make the SaveDialog component <strong>in</strong>to a Save As dialog box?<br />
Exercises<br />
1. Create a program that conta<strong>in</strong>s two edit components. When the user types <strong>in</strong>formation<br />
<strong>in</strong> the first control, make it appear <strong>in</strong> the second edit control as it is<br />
entered.<br />
2. Create a program with a list box. Write code to load the list box from a text file<br />
prior to the application be<strong>in</strong>g visible.<br />
3. Add an edit component to the program <strong>in</strong> exercise 2. When the user selects an item<br />
<strong>in</strong> the list box, have the item’s text appear <strong>in</strong> the edit control.<br />
4. Add a button to the program <strong>in</strong> exercises 2 and 3. Write code so that when the<br />
button is clicked, any text <strong>in</strong> the edit control is added as a new item <strong>in</strong> the list box.<br />
5. Create a program that has a RadioGroup with four items <strong>in</strong> the group. Add a label<br />
component whose text changes depend<strong>in</strong>g on which radio button is clicked.<br />
6. Create a program that has a title on the form that is centered at the top of the form<br />
regardless of how the program’s w<strong>in</strong>dow is sized.<br />
7. Modify the program <strong>in</strong> exercise 6 so that the font of the title can be changed to any<br />
font available on the system by click<strong>in</strong>g a button.<br />
8. Reopen the Picture Viewer program created on Day 5. Modify the OpenDialog and<br />
SaveDialog components so that their Filter properties allow for selection of<br />
Bitmap (*.bmp), Metafile (*.wmf), Icon (*.ico), and All Files (*.*).
Day 9<br />
Creat<strong>in</strong>g Applications <strong>in</strong> <strong>C++</strong>Builder<br />
Creat<strong>in</strong>g Applications<br />
<strong>in</strong> <strong>C++</strong>Builder<br />
by Kent Reisdorph<br />
Week<br />
<strong>C++</strong>Builder provides a variety of tools that aid <strong>in</strong> creat<strong>in</strong>g forms, dialog boxes,<br />
and applications. Today you will learn about<br />
■ The Object Repository<br />
■ The Dialog Wizard<br />
■ The Application Wizard<br />
■ Add<strong>in</strong>g functions and data members to your code<br />
■ Us<strong>in</strong>g resources <strong>in</strong> your <strong>C++</strong>Builder applications<br />
2<br />
317<br />
9
318 Day 9<br />
For starters, I’ll spend some time discuss<strong>in</strong>g the Object Repository, which is where<br />
<strong>C++</strong>Builder stores any prebuilt forms or applications for you to reuse. Follow<strong>in</strong>g that<br />
discussion, you will meet the Wizards, which guide you step-by-step through the creation<br />
process. You provide the details, and <strong>C++</strong>Builder builds the form or application based on the<br />
<strong>in</strong>formation you provided. The Wizards are a powerful tool for rapid application development.<br />
F<strong>in</strong>ally, we’ll close the day talk<strong>in</strong>g about how you can use resources <strong>in</strong> your <strong>C++</strong>Builder<br />
applications. So let’s get to it.<br />
Work<strong>in</strong>g with the Object Repository<br />
NOTE<br />
The Object Repository dialog box is the means by which you can select predef<strong>in</strong>ed objects<br />
to use <strong>in</strong> your applications.<br />
The Object Repository is a text file that conta<strong>in</strong>s the <strong>in</strong>formation that<br />
the Object Repository dialog box displays. For the sake of simplicity, I<br />
will refer to the Object Repository dialog box and the repository file<br />
collectively as simply the Object Repository.<br />
The Object Repository allows you to do the follow<strong>in</strong>g:<br />
■ Choose a predef<strong>in</strong>ed application, form, or dialog box to implement <strong>in</strong> your<br />
application<br />
■ Add your own forms, dialog boxes, and applications to the Object Repository<br />
■ Add other objects to your application such as ASCII text files and additional source<br />
code units<br />
■ Manage data modules<br />
■ Create new components<br />
■ Invoke Wizards to help you build a dialog box or an application<br />
Object Repository Pages and Options<br />
The Object Repository is displayed automatically whenever you choose File | New from the<br />
ma<strong>in</strong> menu. Figure 9.1 shows the Object Repository w<strong>in</strong>dow as it <strong>in</strong>itially appears if you<br />
choose File | New with no project open.
Figure 9.1.<br />
The Object Repository<br />
w<strong>in</strong>dow.<br />
NOTE<br />
Creat<strong>in</strong>g Applications <strong>in</strong> <strong>C++</strong>Builder<br />
Strange as it may seem, the Object Repository dialog box is titled New<br />
Item, and the Object Repository configuration dialog box is titled<br />
Object Repository. To say that this is confus<strong>in</strong>g is a bit of an understatement.<br />
The Object Repository has several pages, each of which conta<strong>in</strong>s different objects that you<br />
can <strong>in</strong>corporate <strong>in</strong>to your applications. As you can see from Figure 9.1, the New tab is what<br />
is <strong>in</strong>itially selected when the Object Repository is displayed. Table 9.1 lists the Repository<br />
pages and a description of the items you will f<strong>in</strong>d on each page.<br />
Table 9.1. The Object Repository pages.<br />
Page/Tab Description<br />
New Allows you to create a new application, console app, form, or source<br />
code unit for use <strong>in</strong> your application. Also allows you to create<br />
advanced objects such as DLLs, components, and data modules.<br />
Forms Allows you to create standard forms from prebuilt forms such as an<br />
About box, a database form, or Quick Reports.<br />
Dialogs Presents choices of several different basic dialog box types from<br />
which you can choose. Also conta<strong>in</strong>s the Dialog Wizard.<br />
Data Modules Allows you to choose from data modules <strong>in</strong> your application.<br />
Projects Displays full projects that you can choose from to <strong>in</strong>itially set up an<br />
application. Also conta<strong>in</strong>s the Application Wizard.<br />
319<br />
9
320 Day 9<br />
NOTE<br />
NOTE<br />
If you <strong>in</strong>voke the Object Repository when you already have a project<br />
open, you will see an additional tab <strong>in</strong> the Object Repository. The tab<br />
will have the name of your project on it. Click<strong>in</strong>g on this tab will<br />
display a page that conta<strong>in</strong>s all the objects currently <strong>in</strong> the project. This<br />
allows you to quickly reuse a form or other object by simply select<strong>in</strong>g it<br />
from the Object Repository.<br />
Across the bottom of each page you see three radio buttons. These buttons, labeled Copy,<br />
Inherit, and Use, determ<strong>in</strong>e how the selected object is implemented.<br />
Depend<strong>in</strong>g on the object selected, some (or all) of the radio buttons<br />
may be disabled. For example, all three radio buttons are always grayed<br />
out when the New page is displayed. This is because Copy is the only<br />
option available for objects on this page, so <strong>C++</strong>Builder grays out all<br />
choices and applies the Copy option automatically.<br />
Copy<br />
When you choose the Copy radio button, <strong>C++</strong>Builder creates a copy of the object selected<br />
and places it <strong>in</strong> your application. At that po<strong>in</strong>t you are free to modify the object <strong>in</strong> any way<br />
you choose. The orig<strong>in</strong>al object <strong>in</strong> the Repository is not altered when you make changes to<br />
the new object <strong>in</strong> your application.<br />
To illustrate, let’s say you had an often-used form (a form <strong>in</strong> the traditional sense, not <strong>in</strong> the<br />
<strong>C++</strong>Builder sense) pr<strong>in</strong>ted on paper—a work schedule, for <strong>in</strong>stance. Let’s say that you<br />
wanted to fill <strong>in</strong> that form with schedul<strong>in</strong>g <strong>in</strong>formation. You wouldn’t modify the orig<strong>in</strong>al<br />
form because it would then be unusable for future reuse. Instead, you would put the orig<strong>in</strong>al<br />
form <strong>in</strong> the copy mach<strong>in</strong>e, make a copy, and then return the orig<strong>in</strong>al to some location for<br />
safekeep<strong>in</strong>g. You would then fill out the copy of the form as needed. Mak<strong>in</strong>g a copy of an<br />
object <strong>in</strong> the Repository works <strong>in</strong> exactly the same way. You are free to modify the copy <strong>in</strong><br />
any way you choose while the orig<strong>in</strong>al rema<strong>in</strong>s safely tucked away. Mak<strong>in</strong>g a copy is the safest<br />
method of object usage.
Creat<strong>in</strong>g Applications <strong>in</strong> <strong>C++</strong>Builder<br />
Inherit<br />
The Inherit method of usage is similar to Copy, but with one important dist<strong>in</strong>ction: The new<br />
object is still tied to the base object. If you modify the base object, the newly created object<br />
will be updated to reflect the changes made to the base object. The <strong>in</strong>verse is not true,<br />
however. You can modify the new object without it hav<strong>in</strong>g any effect on the base object.<br />
To illustrate this type of object usage, consider the follow<strong>in</strong>g scenario: Frequently, <strong>in</strong>formation<br />
managers will create a spreadsheet <strong>in</strong> a spreadsheet program and use the contents of that<br />
spreadsheet <strong>in</strong> a word process<strong>in</strong>g program <strong>in</strong> order to present a report. They will usually opt<br />
to l<strong>in</strong>k the data to the spreadsheet when past<strong>in</strong>g from the Clipboard or import<strong>in</strong>g the<br />
spreadsheet <strong>in</strong>to the word processor. That way, when changes are made to the spreadsheet,<br />
the word process<strong>in</strong>g document is automatically updated to reflect the new data. In the same<br />
way, changes made to a base form will automatically be reflected <strong>in</strong> all forms <strong>in</strong>herited from<br />
the base form. Use the Inherit option when you want to have several forms based on a<br />
common form that might change at some po<strong>in</strong>t. Any changes <strong>in</strong> the base form will be<br />
reflected <strong>in</strong> all <strong>in</strong>herited forms.<br />
Use<br />
The Use option is not common. When you use an object, you are open<strong>in</strong>g that object directly<br />
for edit<strong>in</strong>g. Use this option when you have saved an object <strong>in</strong> the Repository and you want<br />
to make permanent changes to that object. In the section “Inherit” I said that changes made<br />
to a base form would be reflected <strong>in</strong> all <strong>in</strong>herited forms. If you wanted to make changes to<br />
a base form, you would open it <strong>in</strong> the Object Repository with the Use option.<br />
Now What?<br />
Exactly what takes place when you select an object from the Object Repository depends on<br />
several factors. The factors <strong>in</strong>clude the type of object selected, whether a project is currently<br />
open, and the usage type you have selected (Copy, Inherit, or Use). If you have an application<br />
open and you choose to create a new application from the Object Repository, you will be<br />
prompted to save the current project (if necessary) before the new project is displayed.<br />
TIP<br />
Choos<strong>in</strong>g File | New Application from the ma<strong>in</strong> menu is a shortcut for<br />
start<strong>in</strong>g a new application. It is equivalent to choos<strong>in</strong>g New from the<br />
ma<strong>in</strong> menu and then choos<strong>in</strong>g the Application object from the Object<br />
Repository. Similarly, the New Form, New Data Module, and New<br />
Unit items on the ma<strong>in</strong> menu are shortcuts for their equivalents <strong>in</strong> the<br />
Object Repository.<br />
321<br />
9
322 Day 9<br />
Creat<strong>in</strong>g a new form from the Object Repository is treated differently based on whether a<br />
project is open at the time. If a project is open, the new form is added to the application as<br />
a form/unit pair. If no project is open, a new form and unit are created as a standalone form.<br />
Use this option when creat<strong>in</strong>g a new base form to add to the Object Repository.<br />
If you choose to create a new unit or text file, the new file is simply created <strong>in</strong> the Code Editor<br />
(and, <strong>in</strong> the case of a new unit, added to the current project). You might create a new text<br />
file for several reasons. For example, let’s say you wanted to implement a configuration file<br />
(an .INI file) <strong>in</strong> your application. You could create a new text file <strong>in</strong> the Object Repository<br />
<strong>in</strong> order to <strong>in</strong>itially create the configuration file. You create a new unit any time you want to<br />
start a new source file for your application that is not associated with a form.<br />
Choos<strong>in</strong>g a new DLL or console application results <strong>in</strong> a new project be<strong>in</strong>g created with the<br />
project set up for a DLL or console application target. Creat<strong>in</strong>g a new Automation, Component,<br />
or Thread object will result <strong>in</strong> a dialog box be<strong>in</strong>g presented that asks for more <strong>in</strong>formation<br />
about the object you are creat<strong>in</strong>g.<br />
The Object Repository Views<br />
The actual Object Repository w<strong>in</strong>dow is a W<strong>in</strong>32 list view control similar to the right side<br />
of W<strong>in</strong>dows Explorer (where the files are listed). As such, it has several views that you can<br />
choose from: Large Icons, Small Icons, List, and Details. By default, the view is set to Large<br />
Icons. To change the Object Repository view, right-click on the Object Repository and<br />
choose the view you want from the Object Repository speed menu. Figure 9.2 shows the<br />
Object Repository with the Dialogs page selected and the view set to Details.<br />
Figure 9.2.<br />
The Object Repository<br />
<strong>in</strong> Details view.<br />
The Object Repository speed menu also shows several sort<strong>in</strong>g options. You can sort by object<br />
name, description, date, or author.
TIP<br />
Creat<strong>in</strong>g Applications <strong>in</strong> <strong>C++</strong>Builder<br />
When the Object Repository is <strong>in</strong> the Details view, you can click on a<br />
column header (Name, Description, Date, or Author) to <strong>in</strong>stantly sort<br />
by that category.<br />
Creat<strong>in</strong>g New Objects from the Object Repository<br />
Certa<strong>in</strong>ly the most basic use of the Object Repository is creat<strong>in</strong>g a new object us<strong>in</strong>g an object<br />
from the Repository. To illustrate, let’s create a simple application with a ma<strong>in</strong> form, an<br />
About dialog box, and a second form. Follow these steps:<br />
1. Be sure no other application is open. Choose File | New from the ma<strong>in</strong> menu. The<br />
Object Repository is displayed.<br />
2. Click on the Application icon and click OK to create a new application. A new<br />
application is created, and a blank form is displayed.<br />
3. Place two buttons on the form. Change the Caption property of one of the buttons<br />
to About... and the Caption property of the other button to Display Form2.<br />
Change the Name properties if desired.<br />
4. Choose File | New from the ma<strong>in</strong> menu. The Object Repository is aga<strong>in</strong> displayed.<br />
5. Click on the Forms tab <strong>in</strong> the Object Repository.<br />
6. Choose the About box object. Be sure that the Copy radio button is selected, and<br />
click OK to create a new About Box form. The About box is displayed. Change<br />
any properties as needed.<br />
7. Modify the About box as desired. (Enter your own <strong>in</strong>formation, change the icon,<br />
change the size and position, and so on.)<br />
8. Select File | New from the ma<strong>in</strong> menu aga<strong>in</strong>. The Object Repository is displayed<br />
for the third time.<br />
9. Click on the Forms tab and choose the Dual list box object. Click OK to close the<br />
Object Repository. A dual list box form is displayed. (I had you choose this one<br />
just so you could see it.)<br />
10. Write event handlers for the two buttons that display the About box and the<br />
second form as required.<br />
11. Compile, run, and test the program.<br />
323<br />
9
324 Day 9<br />
No, this program doesn’t do anyth<strong>in</strong>g, but it does illustrate how you can use the Object<br />
Repository to quickly prototype an application. As time goes on, you will add your own<br />
custom objects to the Object Repository and then you can really be effective! Let’s look at<br />
that next.<br />
Add<strong>in</strong>g Objects to the Object Repository<br />
The Object Repository wouldn’t be nearly so effective a tool if you couldn’t add your own<br />
objects to it. But you can add your own objects and you should. Add<strong>in</strong>g often-used objects<br />
to the Object Repository makes you a more efficient and, therefore, a more valuable<br />
programmer. There is no po<strong>in</strong>t <strong>in</strong> re<strong>in</strong>vent<strong>in</strong>g the wheel over and over aga<strong>in</strong>. Once you have<br />
an application, a form, or another object created, save it to the Repository so that you can<br />
reuse it whenever you want. Of course, you don’t want to save every form you ever created<br />
<strong>in</strong> the Object Repository—just the ones you will reuse most often.<br />
You can set out to create an object with the express purpose of add<strong>in</strong>g it to the Repository,<br />
or you can add an object to the Repository dur<strong>in</strong>g the normal course of application<br />
development. (The term object is pretty broad, so I’ll have to use a specific example <strong>in</strong> order<br />
for this to make sense.) Let’s say that you create an About box form while creat<strong>in</strong>g an<br />
application. Suddenly it dawns on you that you’d like to save this About box to use <strong>in</strong> all your<br />
programs. After all, it has your company name, logo, and all the copyright <strong>in</strong>formation laid<br />
out just the way you like it, so it’d be a shame to have to re-create the same About box for<br />
every application you write. No problem—just add it to the Repository. To add a form to<br />
the Object Repository, first save the form (if you don’t save the form, you will be prompted<br />
to save it before cont<strong>in</strong>u<strong>in</strong>g). Next, right-click the mouse anywhere on the form and choose<br />
Add To Repository from the Form Designer speed menu. When you do, the Add To<br />
Repository dialog box is displayed, as shown <strong>in</strong> Figure 9.3.<br />
Figure 9.3.<br />
The Add To<br />
Repository dialog box.
NOTE<br />
NOTE<br />
Creat<strong>in</strong>g Applications <strong>in</strong> <strong>C++</strong>Builder<br />
The Forms list box on the left side of this dialog box lists the current forms as well as any other<br />
objects <strong>in</strong> the application (such as data modules). First, select the form that you want to add<br />
to the Object Repository.<br />
The active form <strong>in</strong> the Form Designer will already be selected <strong>in</strong> the<br />
Forms list box <strong>in</strong> the Add To Repository dialog box.<br />
Now enter the object’s title. This is the title that will appear below the icon <strong>in</strong> the Object<br />
Repository. The Description field is used to give further <strong>in</strong>formation about the object. This<br />
description is displayed when the Object Repository view is set to display all object details<br />
(refer back to Figure 9.2). The Author field is where you type your name as the author of the<br />
object. You can enter your personal name, a company name, or any other identify<strong>in</strong>g name.<br />
The prebuilt objects <strong>in</strong> the Object Repository that come with<br />
<strong>C++</strong>Builder have “<strong>Borland</strong>” as the author name.<br />
The Page field is used to select the Object Repository page where the new object will be<br />
placed. You can choose from one of the exist<strong>in</strong>g pages or simply type <strong>in</strong> the name of a new<br />
page <strong>in</strong> the Page field. If a page with the name you type does not exist, <strong>C++</strong>Builder will create<br />
a new page with that name. Near the bottom of the dialog box is a button labeled Browse that<br />
you can use to select the icon used to represent the object.<br />
TIP<br />
You can choose icons from the CBuilder\Images\Icons directory or the<br />
CBuilder\Objrepos directory. The icons <strong>in</strong> the Cbuilder\Objrepos<br />
directory are the icons used by <strong>C++</strong>Builder for the items it places <strong>in</strong> the<br />
Object Repository.<br />
Once you’ve filled <strong>in</strong> all the fields and selected an icon, you can click OK to add the object<br />
to the Repository. The object is added to the Object Repository on the page you specified.<br />
You can now reuse that object any time you want. As you can see, add<strong>in</strong>g an object to the<br />
Object Repository is nearly as easy as us<strong>in</strong>g an object.<br />
325<br />
9
326 Day 9<br />
WARNING<br />
When you add an object to the Object Repository, <strong>C++</strong>Builder makes<br />
an entry <strong>in</strong> the Object Repository file that describes the object. This<br />
<strong>in</strong>formation <strong>in</strong>cludes the pathname where the form and source file for<br />
the object are located. If you move or delete an object’s form or source<br />
file, you will not be able to use the object from the Object Repository.<br />
Add<strong>in</strong>g Projects to the Object Repository<br />
Add<strong>in</strong>g projects to the Object Repository is not much different from add<strong>in</strong>g <strong>in</strong>dividual<br />
forms. To add a project to the Object Repository, choose Project | Add To Repository from<br />
the ma<strong>in</strong> menu. The Add To Repository dialog box is displayed just like it is when you’re<br />
add<strong>in</strong>g objects to the Repository, except the Forms list box is not displayed. Fill <strong>in</strong> any<br />
required <strong>in</strong>formation (Title, Description, Author, and so on) and click OK, and the project<br />
is added to the Repository.<br />
After you are familiar with <strong>C++</strong>Builder, you should create an application shell that has the<br />
features you use most often <strong>in</strong> your applications. Each time you start a new standard<br />
application, make a copy of the shell from the Object Repository. This way you can have your<br />
menus, speedbar, About box, and other standard dialog boxes all set up and ready to go <strong>in</strong><br />
a matter of seconds. Once the new application has been created, it can then be modified as<br />
with any project. You can add new forms, delete any unwanted forms, and so on.<br />
Object Repository Housekeep<strong>in</strong>g<br />
You can manage the pages and objects <strong>in</strong> the Object Repository by us<strong>in</strong>g the Object<br />
Repository configuration dialog box.<br />
To view the Object Repository configuration dialog box, choose Options | Repository from<br />
the ma<strong>in</strong> menu or, if you have the Object Repository open, choose Properties from the Object<br />
Repository speed menu. The configuration dialog box is displayed, as shown <strong>in</strong> Figure 9.4.<br />
This dialog box allows you to delete objects and pages from the Object Repository, move<br />
objects from one page to another, change the order of pages <strong>in</strong> the Object Repository, and<br />
more. The list of pages <strong>in</strong> the Object Repository is displayed <strong>in</strong> the list box labeled Pages on<br />
the left side of the dialog box. When you select one of the pages <strong>in</strong> the Pages list, the list box<br />
on the right (labeled Objects) displays the objects conta<strong>in</strong>ed on that page.
Figure 9.4.<br />
The Object Repository<br />
configuration dialog<br />
box.<br />
NOTE<br />
Creat<strong>in</strong>g Applications <strong>in</strong> <strong>C++</strong>Builder<br />
The Pages list box has two important items of note. First, notice that<br />
the New page, which is always the first page displayed when the Object<br />
Repository is <strong>in</strong>voked, is not listed here. The New page is fixed and<br />
cannot be altered. Also notice that there is an item labeled [Object<br />
Repository]. This item is actually a list of all items on all pages of the<br />
Repository.<br />
Manag<strong>in</strong>g Objects<br />
Before you can edit, delete, or move an object, you must first select it. To select an object,<br />
click on the object <strong>in</strong> the Objects list box. After you have selected an object, you can edit it<br />
by click<strong>in</strong>g on the Edit Object button. Edit<strong>in</strong>g an object allows you to change the object’s<br />
name, description, and author, as well as the page on which the object is displayed.<br />
To quickly edit an object, double-click on the object <strong>in</strong> the Objects<br />
list box.<br />
You can delete an object by select<strong>in</strong>g it and then click<strong>in</strong>g the Delete Object button. You are<br />
prompted for confirmation before the object is removed from the page and from the<br />
Repository.<br />
NOTE<br />
TIP<br />
When an object is deleted from the Object Repository, it is removed<br />
from the object repository file and no longer shows up on any page <strong>in</strong><br />
327<br />
9
328 Day 9<br />
the Object Repository. However, the actual form file and source file<br />
that describe the object are not deleted from your hard drive.<br />
Objects can be moved from one page to another by simply dragg<strong>in</strong>g the object from<br />
the Objects list box to the Pages list box. Drop the object on the page on which you want the<br />
object to be located, and the object is moved.<br />
Manag<strong>in</strong>g Pages<br />
The previous section deals with edit<strong>in</strong>g, delet<strong>in</strong>g, and mov<strong>in</strong>g <strong>in</strong>dividual objects. You may<br />
also add, delete, or remove Object Repository pages through the Object Repository<br />
configuration dialog box. Before you can delete a page, you must first delete all the objects<br />
on the page. Once a page is empty, you can remove the page by click<strong>in</strong>g on the page name<br />
<strong>in</strong> the Pages list box and then click<strong>in</strong>g the Delete Page button. After check<strong>in</strong>g to be sure the<br />
page is empty, <strong>C++</strong>Builder deletes the page from the Object Repository.<br />
You can add a new page by click<strong>in</strong>g the Add Page button. A dialog box pops up, ask<strong>in</strong>g for<br />
the name of the new page. Just supply a new page name, and when you click OK the new page<br />
appears <strong>in</strong> the Pages list box. Renam<strong>in</strong>g a page works essentially the same way. When you<br />
select a page and click the Rename Page button, a dialog box appears, prompt<strong>in</strong>g you for the<br />
new page name.<br />
The order <strong>in</strong> which the pages appear <strong>in</strong> the Object Repository can be changed. To change<br />
a page’s position <strong>in</strong> the page order, click on the page to highlight it and then click the up or<br />
down arrow button underneath the Pages list box to move the page up or down <strong>in</strong> the list.<br />
You can also drag a page to its new location if you want.<br />
Sett<strong>in</strong>g Default Forms and Projects<br />
The Object Repository configuration dialog box allows you to set three default objects:<br />
■ The default form that will be used when you choose File | New Form from the<br />
ma<strong>in</strong> menu<br />
■ The default form that will be used as the ma<strong>in</strong> form when you choose File | New<br />
Application from the ma<strong>in</strong> menu<br />
■ The default project that will be used when you choose File | New Project from the<br />
ma<strong>in</strong> menu<br />
You will notice that, depend<strong>in</strong>g on the object you have selected, one or two check boxes<br />
appear beneath the Objects list box. If you have selected a form, the New Form and Ma<strong>in</strong><br />
Form check boxes appear. If you have selected a project, the New Project check box appears.<br />
Mak<strong>in</strong>g a form or project the default is easy. Let’s say you create a ma<strong>in</strong> form that you want
Creat<strong>in</strong>g Applications <strong>in</strong> <strong>C++</strong>Builder<br />
to be the default ma<strong>in</strong> form when a new application is created. Select the form from the<br />
Objects list box and click the Ma<strong>in</strong> Form check box at the bottom of the screen. When you<br />
click OK, that form will now be the default. Similarly, if you have a project that you want<br />
to be the default project, first locate it <strong>in</strong> the Object Repository configuration dialog box, click<br />
on it, and then check the New Project check box. From that po<strong>in</strong>t on, when you choose<br />
File | New Application from the ma<strong>in</strong> menu, the project you set as the default will appear.<br />
Build<strong>in</strong>g Forms and Applications<br />
with the Wizards<br />
NOTE<br />
<strong>C++</strong>Builder has two built-<strong>in</strong> wizards designed to guide you through the application-creation<br />
process. The Dialog Wizard aids you <strong>in</strong> creat<strong>in</strong>g dialog boxes, and the Application Wizard<br />
helps you create the basic layout of an application.<br />
<strong>C++</strong>Builder has a couple other dialog boxes that it calls wizards.<br />
Choos<strong>in</strong>g a new component from the Object Repository, for <strong>in</strong>stance,<br />
results <strong>in</strong> a dialog box that asks you for <strong>in</strong>formation regard<strong>in</strong>g the new<br />
component. Because that’s the extent of the “wizard,” I hesitate to<br />
group that type of Wizard with the Dialog Wizard and the Application<br />
Wizard.<br />
Now let’s see what the <strong>in</strong>dividual wizards do.<br />
The Dialog Wizard<br />
Truthfully, there isn’t very much for a dialog box wizard to do because dialog boxes of any<br />
real value will have to be customized with the Form Designer. The Dialog Wizard is started<br />
from the Object Repository. First, choose File | New from the ma<strong>in</strong> menu to display the<br />
Object Repository. Next, switch to the Dialogs page and then double-click the Dialog<br />
Wizard icon. The Dialog Wizard is displayed, as shown <strong>in</strong> Figure 9.5.<br />
Figure 9.5.<br />
The Dialog Wizard.<br />
329<br />
9
330 Day 9<br />
You can choose to create a s<strong>in</strong>gle-page dialog box or a tabbed (multipage) dialog box. The<br />
icon on the left side of the dialog box shows you what the dialog box will look like at each<br />
step. If you choose to create a s<strong>in</strong>gle-page dialog box, when you click the Next button you<br />
will see the next page of the Dialog Wizard (see Figure 9.6).<br />
Figure 9.6.<br />
The second page of the<br />
Dialog Wizard.<br />
Figure 9.7.<br />
The Dialog Wizard<br />
creat<strong>in</strong>g a tabbed<br />
dialog box.<br />
NOTE<br />
This page allows you to choose whether you want buttons on the dialog box and, if so,<br />
whether you want them on the right side or the bottom of the dialog box. As you can see from<br />
Figure 9.6 (see the F<strong>in</strong>ish button?), this is the last page of the Dialog Wizard when you’re<br />
creat<strong>in</strong>g a s<strong>in</strong>gle-page dialog box. After choos<strong>in</strong>g the button layout you want, click the F<strong>in</strong>ish<br />
button to have <strong>C++</strong>Builder create the dialog box for you.<br />
The new dialog box is displayed on the Form Designer, complete with the features you chose<br />
through the wizard. It also has its BorderStyle property set to bsDialog, which is customary<br />
for forms used as dialog boxes. Once the Dialog Wizard has created the basic dialog box, you<br />
can go to work with the Form Designer to add functionality to the dialog box.<br />
If you choose to create a tabbed dialog box, the second page of the dialog box looks like the<br />
one <strong>in</strong> Figure 9.7.<br />
This page has a multil<strong>in</strong>e edit control where you can enter the names of the <strong>in</strong>dividual tabs<br />
you want to see on the dialog box. Enter the text for each tab on a separate l<strong>in</strong>e, as illustrated<br />
<strong>in</strong> Figure 9.7. When you click the Next button, you will see the last page of the Dialog Wizard<br />
as you saw <strong>in</strong> Figure 9.6. Choose the location of the buttons, if any, and click the F<strong>in</strong>ish<br />
button to have <strong>C++</strong>Builder create the tabbed dialog box.<br />
The Dialog Wizard is most useful when you’re creat<strong>in</strong>g tabbed dialog<br />
boxes. When you’re creat<strong>in</strong>g s<strong>in</strong>gle-page dialog boxes, it is easier to
Creat<strong>in</strong>g Applications <strong>in</strong> <strong>C++</strong>Builder<br />
choose one of the predef<strong>in</strong>ed dialog boxes from the Object Repository<br />
than to go through the Dialog Wizard.<br />
Creat<strong>in</strong>g Applications with the Application Wizard<br />
NOTE<br />
The Application Wizard is a useful tool that can help you quickly set up the shell of an<br />
application. To create a new application us<strong>in</strong>g the Application Wizard, choose File | New<br />
from the ma<strong>in</strong> menu. When the Object Repository is displayed, click on the Projects tab and<br />
then double-click on the Application Wizard icon.<br />
The New Application item on the ma<strong>in</strong> menu creates a new application<br />
based on the current default project sett<strong>in</strong>g. It does not start the<br />
Application Wizard as you might expect.<br />
Let’s walk through the Application Wizard one page at a time.<br />
Page One: Select<strong>in</strong>g the Menus<br />
When you start the Application Wizard, the first page is displayed, as shown <strong>in</strong> Figure 9.8.<br />
Figure 9.8.<br />
Page one of the<br />
Application Wizard.<br />
This page allows you to select the items you want on your application’s ma<strong>in</strong> menu. You can<br />
choose to add a File menu, an Edit menu, a W<strong>in</strong>dow menu, and a Help menu. Place a check<br />
<strong>in</strong> the box for each menu item you want to appear on your menu bar.<br />
331<br />
9
332 Day 9<br />
NOTE<br />
TIP<br />
The W<strong>in</strong>dow menu is usually reserved for MDI applications. You<br />
probably won’t put a W<strong>in</strong>dow menu on your SDI application’s menu<br />
bar unless you have a specialty app that requires it.<br />
The menus added by the Application Wizard are a reasonable representation<br />
of the menu items that are most commonly used <strong>in</strong> W<strong>in</strong>dows<br />
applications. Remember that the Application Wizard is <strong>in</strong>tended to<br />
give you a head start <strong>in</strong> creat<strong>in</strong>g your application. It is up to you to take<br />
the basic structure and modify it to make a work<strong>in</strong>g application.<br />
After you have chosen the menus you want for your application, click the Next button to<br />
move on to the next page.<br />
Page Two: Sett<strong>in</strong>g the File Dialog Filters<br />
If you chose to add a File menu to your application, the next page displayed will look like the<br />
one <strong>in</strong> Figure 9.9.<br />
Figure 9.9.<br />
Sett<strong>in</strong>g filters for the<br />
File dialog boxes.<br />
This page allows you to set the filters that your application’s File Open and File Save dialog<br />
boxes will use. (Figure 9.9 shows the dialog box after the filters have been added.) Click the<br />
Add button to add a new filter. A dialog box is displayed, ask<strong>in</strong>g for the description and the<br />
filter. Enter the filters exactly as you do when sett<strong>in</strong>g the Filter property for the common<br />
file dialog box components. Enter the textual description and then the actual file mask (*.bmp,<br />
for <strong>in</strong>stance). The Edit, Delete, Up, and Down buttons can be used as necessary to change,<br />
delete, or move the filter <strong>in</strong> the list.
NOTE<br />
Creat<strong>in</strong>g Applications <strong>in</strong> <strong>C++</strong>Builder<br />
Pages two and three will be displayed only if you had previously<br />
selected menus on page one of the Application Wizard. More specifically,<br />
page two will be displayed only if you selected a File menu on<br />
page one.<br />
Page Three: Sett<strong>in</strong>g Up the Speedbar<br />
Page three of the Application Wizard aids you <strong>in</strong> sett<strong>in</strong>g up a speedbar for your application.<br />
This is possibly the most useful feature of the Application Wizard (not that the other features<br />
aren’t useful). You can quickly lay out your speedbar us<strong>in</strong>g this page. Figure 9.10 shows the<br />
third page of the Application Wizard after a speedbar has been created.<br />
Figure 9.10.<br />
Sett<strong>in</strong>g up the<br />
speedbar.<br />
NOTE<br />
The list box on the left side of the page, labeled Menus, shows the four menus for which you<br />
can add buttons. When you choose one of the menus, the available buttons for that menu<br />
are displayed <strong>in</strong> the list box to the right of the Menus list box (labeled Available commands).<br />
To add a speedbar button, click the button <strong>in</strong> the Available Commands list box and then click<br />
the Insert button. The button will be added to the sample speedbar at the top of the page.<br />
The Space button can be used to add a separator to the speedbar. Add<strong>in</strong>g separators visually<br />
dist<strong>in</strong>guishes groups of buttons. Cont<strong>in</strong>ue to add buttons and spaces as needed until the<br />
speedbar is complete. If you decide to remove a button, just click it <strong>in</strong> the sample speedbar<br />
and then click the Remove button.<br />
If you elected not to add a particular menu to your application, no<br />
buttons will be shown for that menu group. For <strong>in</strong>stance, if you did<br />
not add a W<strong>in</strong>dow menu, the Available Commands list box will be<br />
empty when you click on the W<strong>in</strong>dow item <strong>in</strong> the Menus list box.<br />
333<br />
9
334 Day 9<br />
The Application Wizard even takes care of sett<strong>in</strong>g the short h<strong>in</strong>t text for the speed buttons.<br />
Do you remember creat<strong>in</strong>g a speedbar by hand on Day 7, “Work<strong>in</strong>g with the Form Designer<br />
and the Menu Designer”? Compare that process with the process of creat<strong>in</strong>g the speedbar<br />
through the Application Wizard. It should be apparent that us<strong>in</strong>g the Application Wizard<br />
is by far the easiest way to create a speedbar.<br />
TIP<br />
Some specialty applications have a speedbar but do not have a menu.<br />
To create a speedbar with the Application Wizard, you must first have<br />
created a menu. To work around this, tell the Application Wizard that<br />
you want a menu and then build the speedbar. After the application has<br />
been generated, you can delete the Ma<strong>in</strong>Menu component from the<br />
application to remove the menu.<br />
Page Four: Sett<strong>in</strong>g the F<strong>in</strong>al Options<br />
The fourth and last page of the Application Wizard allows you to set the program name, the<br />
path where the project should be stored on disk, and a few f<strong>in</strong>al options. Figure 9.11 shows<br />
the last page of the Application Wizard.<br />
Figure 9.11.<br />
The f<strong>in</strong>al Application<br />
Wizard sett<strong>in</strong>gs.<br />
The first field on this page is where you specify the name of the application. This is not the<br />
name as it appears on the Project Options dialog box, but rather the filename that <strong>C++</strong>Builder<br />
will use to save the project. You will still need to set the application name <strong>in</strong> the Project<br />
Options dialog box. The second field is used to specify the directory where the project should<br />
be saved. If you don’t know the exact path, click the Browse button to the right of this field<br />
and choose the path from the Select Directory dialog box.
TIP<br />
Creat<strong>in</strong>g Applications <strong>in</strong> <strong>C++</strong>Builder<br />
You can use the Select Directory dialog box to create a directory as well<br />
as to select a directory. Click the Browse button to display the Select<br />
Directory dialog box. Enter the path for the directory you want to<br />
create and then click OK or press Enter. <strong>C++</strong>Builder will prompt you<br />
to create the new directory if the directory you entered does not exist.<br />
The bottom half of this page gives you three additional options. If you are creat<strong>in</strong>g an MDI<br />
application, click <strong>in</strong> the check box marked Create MDI Application. (MDI applications were<br />
discussed on Day 6, “The <strong>C++</strong>Builder IDE Explored: Projects and Forms.”) The rema<strong>in</strong><strong>in</strong>g<br />
two check boxes allow you to implement a status bar and h<strong>in</strong>t text for your components.<br />
When you are sure you have made all the choices for your new application, click the Next<br />
button. <strong>C++</strong>Builder creates the application based on the options you specified. <strong>C++</strong>Builder<br />
writes as much code as possible for the application. This doesn’t amount to a lot of code, but<br />
some of the basic code is already written for you. For example, if you chose a File menu, the<br />
FileOpenClick() handler has been written and looks like this:<br />
void __fastcall TMa<strong>in</strong>Form::FileOpen(TObject *Sender)<br />
{<br />
if (OpenDialog->Execute())<br />
{<br />
//-- Add code to open OpenDialog.FileName --<br />
}<br />
}<br />
The code to execute the File Open dialog box is <strong>in</strong> place; you only have to write the code that<br />
actually deals with the returned filename.<br />
TIP<br />
After you create an Application Wizard project, you can choose<br />
Project | Save To Repository to save the project for later use. This will<br />
save you the trouble of go<strong>in</strong>g through the Application Wizard to create<br />
your basic application. You might want to add an About box before<br />
sav<strong>in</strong>g the project to the Repository.<br />
Us<strong>in</strong>g the wizards is fast and easy. You will still need to write the program, of course, but<br />
<strong>C++</strong>Builder gives you a head start by sav<strong>in</strong>g you from the tedium of creat<strong>in</strong>g the basic<br />
application elements. As RAD-friendly as <strong>C++</strong>Builder is overall, the wizards simplify th<strong>in</strong>gs<br />
even more. The <strong>C++</strong>Builder wizards are sort of like RAD on RAD!<br />
335<br />
9
336 Day 9<br />
Add<strong>in</strong>g Functions and Data Members<br />
to Code<br />
As you know by now, <strong>C++</strong>Builder is a great tool for quickly creat<strong>in</strong>g the user <strong>in</strong>terface portion<br />
of a W<strong>in</strong>dows application. It creates event handlers for you so that you can beg<strong>in</strong> enter<strong>in</strong>g<br />
code to drive your application. It won’t be long, however, before you f<strong>in</strong>d the need to start<br />
add<strong>in</strong>g more complicated code to your applications. That means add<strong>in</strong>g your own data<br />
members and functions to the code that <strong>C++</strong>Builder generates. For example, a simple<br />
application might conta<strong>in</strong> two dozen event handlers of various types. <strong>C++</strong>Builder creates all<br />
these event handlers for you; you simply fill <strong>in</strong> the blanks with work<strong>in</strong>g code. In order to make<br />
the application a viable, work<strong>in</strong>g application, however, you might have to write another two<br />
dozen functions of your own.<br />
Add<strong>in</strong>g your own functions and data members to <strong>C++</strong>Builder-generated code is not a<br />
difficult task, but you need to know the rules or you can get <strong>in</strong>to trouble.<br />
How <strong>C++</strong>Builder Manages Class Declarations<br />
As you know, when you create a new form <strong>in</strong> the Form Designer, <strong>C++</strong>Builder creates three<br />
files for you: the form file, the source code unit, and the unit’s header. When <strong>C++</strong>Builder<br />
creates the class declaration <strong>in</strong> the header, it essentially creates two sections. The first section<br />
is the part of the class declaration that <strong>C++</strong>Builder manages. The second section is the part<br />
that you manage. On Day 7 you created the ScratchPad program. If you did the exercises at<br />
the end of that chapter, you also created an About box for the program and added a few more<br />
buttons. List<strong>in</strong>g 9.1 conta<strong>in</strong>s the ma<strong>in</strong> form’s header as it appears after add<strong>in</strong>g these<br />
enhancements.<br />
List<strong>in</strong>g 9.1. SPMa<strong>in</strong>.h.<br />
1: class TScratchPad : public TForm<br />
2: {<br />
3: __published: // IDE-managed Components<br />
4: TPanel *Panel1;<br />
5: TBevel *Bevel1;<br />
6: TSpeedButton *FileOpenBtn;<br />
7: TSpeedButton *FileSaveBtn;<br />
8: TStatusBar *StatusBar;<br />
9: TMa<strong>in</strong>Menu *Ma<strong>in</strong>Menu;<br />
10: TMenuItem *FileMenu;<br />
11: TMenuItem *FileOpen;<br />
12: TMenuItem *FileSave;<br />
13: TMenuItem *FileSaveAs;<br />
<strong>14</strong>: TMenuItem *N1;<br />
15: TMenuItem *FilePr<strong>in</strong>tSetup;<br />
16: TMenuItem *N2;
Creat<strong>in</strong>g Applications <strong>in</strong> <strong>C++</strong>Builder<br />
17: TMenuItem *FileExit;<br />
18: TMenuItem *FilePr<strong>in</strong>t;<br />
19: TMenuItem *Edit1;<br />
20: TMenuItem *EditReplace;<br />
21: TMenuItem *EditF<strong>in</strong>d;<br />
22: TMenuItem *N4;<br />
23: TMenuItem *EditPaste;<br />
24: TMenuItem *EditCopy;<br />
25: TMenuItem *EditCut;<br />
26: TMenuItem *N5;<br />
27: TMenuItem *EditUndo;<br />
28: TMenuItem *Help1;<br />
29: TMenuItem *HelpAbout;<br />
30: TMenuItem *HelpContents;<br />
31: TMenuItem *EditSelectAll;<br />
32: TMenuItem *N3;<br />
33: TMenuItem *EditWordWrap;<br />
34: TOpenDialog *OpenDialog;<br />
35: TSaveDialog *SaveDialog;<br />
36: TMenuItem *FileNew;<br />
37: TMemo *Memo;<br />
38: TPopupMenu *MemoPopup;<br />
39: TMenuItem *PopupCut;<br />
40: TMenuItem *PopupCopy;<br />
41: TMenuItem *PopupPaste;<br />
42: TSpeedButton *EditCutBtn;<br />
43: TSpeedButton *SpeedButton2;<br />
44: TSpeedButton *SpeedButton3;<br />
45: TSpeedButton *SpeedButton4;<br />
46: void __fastcall FileOpenClick(TObject *Sender);<br />
47: void __fastcall FileSaveClick(TObject *Sender);<br />
48: void __fastcall FileSaveAsClick(TObject *Sender);<br />
49: void __fastcall FileExitClick(TObject *Sender);<br />
50: void __fastcall EditSelectAllClick(TObject *Sender);<br />
51: void __fastcall EditCutClick(TObject *Sender);<br />
52: void __fastcall EditCopyClick(TObject *Sender);<br />
53: void __fastcall EditPasteClick(TObject *Sender);<br />
54: void __fastcall EditWordWrapClick(TObject *Sender);<br />
55: void __fastcall FileNewClick(TObject *Sender);<br />
56: void __fastcall EditUndoClick(TObject *Sender);<br />
57: void __fastcall HelpAboutClick(TObject *Sender);<br />
58: void __fastcall FormCreate(TObject *Sender);<br />
59: private: // User declarations<br />
60: public: // User declarations<br />
61: virtual __fastcall TScratchPad(TComponent* Owner);<br />
62: };<br />
Look at l<strong>in</strong>e 3 <strong>in</strong> the code. Notice the published keyword and the comment that says<br />
IDE-managed Components. The section between the published keyword and the private<br />
keyword (on l<strong>in</strong>e 59 <strong>in</strong> this case) should be considered off-limits. As they say, don’t go there.<br />
Leave the published section to <strong>C++</strong>Builder to manage.<br />
337<br />
9
338 Day 9<br />
WARNING<br />
NOTE<br />
Plac<strong>in</strong>g any code between the published keyword and the private<br />
keyword can cause problems with your program. In some cases, you<br />
might just get compiler or l<strong>in</strong>ker errors. In other cases, your program<br />
might be beyond repair (unusual but possible). Get <strong>in</strong> the habit of<br />
avoid<strong>in</strong>g the published section like the plague.<br />
If you’re an astute student, you may be scratch<strong>in</strong>g your head right now.<br />
In the first four chapters we covered the basics of the <strong>C++</strong> language.<br />
You learned about private, protected, and public class access, but not<br />
a word about the published keyword. The reason is simple: published<br />
is not a <strong>C++</strong> keyword. The published keyword is a <strong>Borland</strong> extension<br />
to <strong>C++</strong> and doesn’t exist <strong>in</strong> ANSI standard <strong>C++</strong>. This keyword was<br />
added to allow the <strong>C++</strong> language to take advantage of the power of<br />
components.<br />
Notice that l<strong>in</strong>es 59 and 60 <strong>in</strong> List<strong>in</strong>g 9.1 have comments that say User declarations. You<br />
can safely place any of your own class data members or class member function declarations<br />
<strong>in</strong> either the private or the public section of the class declaration.<br />
A Word About Status Bars and H<strong>in</strong>ts<br />
In a moment we’re go<strong>in</strong>g to add support for h<strong>in</strong>t text displayed <strong>in</strong> the status bar of the<br />
ScratchPad program. Before we do, though, you need a brief primer on how h<strong>in</strong>t text is<br />
handled.<br />
When the Application object’s ShowH<strong>in</strong>t property is set to true (the default), and the mouse<br />
cursor is placed over a component that also has its ShowH<strong>in</strong>t property set to true, a h<strong>in</strong>t event<br />
is triggered. The Application object has an event called OnH<strong>in</strong>t that occurs whenever a h<strong>in</strong>t<br />
event is triggered. The Application’s H<strong>in</strong>t property will conta<strong>in</strong> the h<strong>in</strong>t text for the control<br />
that generated the h<strong>in</strong>t event. An application can use the OnH<strong>in</strong>t event to display the h<strong>in</strong>t on<br />
a status bar.<br />
The problem is that you can’t directly access the OnH<strong>in</strong>t event of the Application object.<br />
What you can do, however, is reassign the value of OnH<strong>in</strong>t to po<strong>in</strong>t to one of your own<br />
functions. Then, when the h<strong>in</strong>t event occurs, the event gets rerouted to your own OnH<strong>in</strong>t<br />
handler. To do that, you have to write your own event handler for the OnH<strong>in</strong>t event. Let’s do<br />
that next.
Creat<strong>in</strong>g Applications <strong>in</strong> <strong>C++</strong>Builder<br />
Add<strong>in</strong>g a Function to Your Code<br />
In order to illustrate add<strong>in</strong>g a function to an application, let’s implement h<strong>in</strong>t text for the<br />
ScratchPad program you wrote earlier. First, reopen the ScratchPad program. If you skipped<br />
your homework assignment for Day 7, get ScratchPad from http://www.mcp.com/sams/<br />
codecenter.html.<br />
First, we need to prepare the way. We need to assign h<strong>in</strong>t text to each of the speed buttons<br />
and prepare the status bar to receive the h<strong>in</strong>ts. Do the follow<strong>in</strong>g:<br />
1. Be sure the ScratchPad ma<strong>in</strong> form is visible. Click the File Open speed button on<br />
the ma<strong>in</strong> form’s speedbar.<br />
2. Locate the H<strong>in</strong>t property <strong>in</strong> the Object Inspector and type the follow<strong>in</strong>g for the<br />
h<strong>in</strong>t text:<br />
New|Create a New File<br />
3. Change the ShowH<strong>in</strong>t property to true.<br />
4. Repeat steps 2 and 3 for all buttons on the speedbar, add<strong>in</strong>g appropriate h<strong>in</strong>t text<br />
for each type of button.<br />
5. Click on the status bar component along the bottom of the ma<strong>in</strong> form. Change the<br />
SimplePanel property to true. This will allow the full status bar to display a text<br />
str<strong>in</strong>g through the SimpleText property.<br />
Okay, now we have everyth<strong>in</strong>g ready to go, so it’s time we did what you came here for. We’re<br />
go<strong>in</strong>g to create our own OnH<strong>in</strong>t handler and, not surpris<strong>in</strong>gly, we’re go<strong>in</strong>g to name the<br />
function OnH<strong>in</strong>t(). Let’s take this one step at a time. First, we’ll add the function declaration<br />
to the class declaration. Here goes:<br />
1. Switch to the Code Editor and click on the SPMa<strong>in</strong>.cpp tab.<br />
2. Right-click on the Code Editor w<strong>in</strong>dow and choose Swap Cpp/Hdr Files from the<br />
speed menu. The SPMa<strong>in</strong>.h tab appears next to the SPMa<strong>in</strong>.cpp tab and becomes the<br />
active code w<strong>in</strong>dow.<br />
3. Scroll down through the class declaration for the TScratchPad class until you locate<br />
the private section. Add this l<strong>in</strong>e of code after the private keyword:<br />
void __fastcall OnH<strong>in</strong>t(TObject* Sender);<br />
To give you perspective, the last few l<strong>in</strong>es of the class declaration should now look<br />
like this:<br />
void __fastcall FormCreate(TObject *Sender);<br />
private: // User declarations<br />
void __fastcall OnH<strong>in</strong>t(TObject* Sender);<br />
public: // User declarations<br />
virtual __fastcall TScratchPad(TComponent* Owner);<br />
};<br />
339<br />
9
340 Day 9<br />
So far, so good. Now you’ve added the function declaration for your new function. Two more<br />
steps and we’ll be done. First we need to add the actual function to the source unit. After that,<br />
we need to assign our new function to the Application object’s OnH<strong>in</strong>t event.<br />
1. Click on the SPMa<strong>in</strong>.cpp tab and scroll to the bottom of the file.<br />
2. Enter the follow<strong>in</strong>g code:<br />
void __fastcall TScratchPad::OnH<strong>in</strong>t(TObject* Sender)<br />
{<br />
StatusBar->SimpleText = Application->H<strong>in</strong>t;<br />
}<br />
3. Go to the Object Inspector. Select the ma<strong>in</strong> form, ScratchPad, from the Object<br />
Selector.<br />
4. Switch to the Events page <strong>in</strong> the Object Inspector and double-click <strong>in</strong> the Value<br />
column next to the OnCreate event. The Code Editor is displayed and is ready for<br />
you to type code.<br />
5. Enter this code at the cursor:<br />
Application->OnH<strong>in</strong>t = &OnH<strong>in</strong>t;<br />
The complete FormCreate() function should now look like this:<br />
void __fastcall TScratchPad::FormCreate(TObject *Sender)<br />
{<br />
Application->OnH<strong>in</strong>t = &OnH<strong>in</strong>t;<br />
}<br />
6. Compile and run the program. The long h<strong>in</strong>t text you entered will show <strong>in</strong> the<br />
status bar, and the short h<strong>in</strong>t text will be displayed <strong>in</strong> the tool tip over the button.<br />
Step 2 sets the h<strong>in</strong>t text (from the H<strong>in</strong>t property of the Application object) to the SimpleText<br />
property of the StatusBar class. Step 5 takes the function we created <strong>in</strong> step 2 and assigns its<br />
address to the OnH<strong>in</strong>t event of the Application class. Each time an OnH<strong>in</strong>t event occurs, your<br />
OnH<strong>in</strong>t() function is called and the h<strong>in</strong>t text is displayed <strong>in</strong> the status bar.<br />
Add<strong>in</strong>g a Class Data Member<br />
Add<strong>in</strong>g a class data member to a <strong>C++</strong>Builder-generated class works <strong>in</strong> exactly the same way.<br />
All you have to do is be sure that you add the data member to the private or public section<br />
of the class declaration as you did earlier when add<strong>in</strong>g a class member function.<br />
Delet<strong>in</strong>g <strong>C++</strong>Builder–Generated Code<br />
There may be a time when you’ll need to delete code that <strong>C++</strong>Builder generated <strong>in</strong> your<br />
application. For <strong>in</strong>stance, you might have a button on a form that, because of design changes,<br />
is no longer needed. To delete the button, of course, all you have to do is click it and press<br />
the Delete button on the keyboard. No more button. <strong>C++</strong>Builder deletes the button, but the
NOTE<br />
NOTE<br />
Creat<strong>in</strong>g Applications <strong>in</strong> <strong>C++</strong>Builder<br />
OnClick handler associated with that button is still <strong>in</strong> the code. <strong>C++</strong>Builder knows that the<br />
button associated with that OnClick handler is gone, but it still doesn’t delete the event<br />
handler because it is possible that other components are us<strong>in</strong>g the same event handler. It’s<br />
up to you to delete the event handler if you want it removed from your code.<br />
The actual deletion of the event handler is an easy task:<br />
■ Delete the function def<strong>in</strong>ition from the source unit.<br />
■ Delete the function declaration from the header.<br />
This is the exception to the rule that you should never modify the<br />
published section of your form’s class declaration.<br />
Before you delete the event handler, you need to make sure that no other components are<br />
us<strong>in</strong>g that handler. Unfortunately, there is no simple way of determ<strong>in</strong><strong>in</strong>g whether another<br />
component is us<strong>in</strong>g a particular event handler. You need to be aware of how the components<br />
<strong>in</strong> your application <strong>in</strong>teract.<br />
Some might say that if you are unsure about an event handler be<strong>in</strong>g<br />
used by other components, just leave it <strong>in</strong> the code. That’s a bad<br />
solution, <strong>in</strong> my op<strong>in</strong>ion. You need to take responsibility for know<strong>in</strong>g<br />
what is <strong>in</strong> your code and gett<strong>in</strong>g rid of any unused functions. Although<br />
unused code doesn’t hurt anyth<strong>in</strong>g, it leads to a larger .exe file. In<br />
some cases, unused code can lead to performance degradation. Be<br />
diligent <strong>in</strong> par<strong>in</strong>g your programs of unused or <strong>in</strong>efficient code.<br />
Us<strong>in</strong>g Resource Files<br />
Every W<strong>in</strong>dows program uses resources.<br />
Resources are the elements of a program that support the program but are not<br />
executable code.<br />
A typical W<strong>in</strong>dows program’s resources <strong>in</strong>clude<br />
NEW TERM<br />
■ Accelerators<br />
■ Bitmaps<br />
■ Cursors<br />
341<br />
9
342 Day 9<br />
■ Dialog boxes<br />
■ Icons<br />
■ Menus<br />
■ Data tables<br />
■ Str<strong>in</strong>g tables<br />
■ Version <strong>in</strong>formation<br />
■ User-def<strong>in</strong>ed specialty resources (sound files and AVI files, for example)<br />
Resources are generally conta<strong>in</strong>ed <strong>in</strong> a resource script file (a text file with an .rc extension),<br />
which is compiled by a resource compiler and then bound to the application’s .exe file dur<strong>in</strong>g<br />
the l<strong>in</strong>k phase.<br />
Resources are usually thought of as be<strong>in</strong>g bound to the executable file. Some resources, such<br />
as bitmaps, str<strong>in</strong>g tables, and wave files, can be placed <strong>in</strong> external files (.bmp, .txt, and .wav),<br />
or they can be bound to the .exe and conta<strong>in</strong>ed with<strong>in</strong> the application file. You can opt to<br />
do it either way. Plac<strong>in</strong>g resources <strong>in</strong> the .exe file has two ma<strong>in</strong> advantages:<br />
■ The resources can be accessed more quickly because it takes less time to locate a<br />
resource <strong>in</strong> the executable file than it does to load it from a disk file.<br />
■ The program file and resources can be conta<strong>in</strong>ed <strong>in</strong> a s<strong>in</strong>gle unit (the .exe file)<br />
without the need for a lot of support<strong>in</strong>g files.<br />
The downside to this approach is that your .exe will be slightly larger. The program file won’t<br />
be any larger than the comb<strong>in</strong>ed external resource files plus the executable, but the extra size<br />
could result <strong>in</strong> slightly longer load times for the program.<br />
Your exact needs will determ<strong>in</strong>e whether you decide to keep your resources <strong>in</strong> external files<br />
or have your resources bound to the .exe. The important th<strong>in</strong>g to remember is that you can<br />
do it either way (or even both ways <strong>in</strong> the same program).<br />
A traditional W<strong>in</strong>dows program will almost always conta<strong>in</strong> at least one dialog box and an<br />
icon. A <strong>C++</strong>Builder application, however, is a little different. First, there are no true dialog<br />
boxes <strong>in</strong> a <strong>C++</strong>Builder application, so there are no dialog box resources per se<br />
(<strong>C++</strong>Builder forms are stored as resources, but they are RCDATA resources and not dialog box<br />
resources). A <strong>C++</strong>Builder application does have a traditional icon resource, though. <strong>C++</strong>Builder<br />
takes care of creat<strong>in</strong>g the resource file for the icon for you when you create the application.<br />
Similarly, when you choose bitmaps for speed buttons, Image components, or BitBtn<br />
components, <strong>C++</strong>Builder <strong>in</strong>cludes the bitmap file you chose as part of the form’s resource.<br />
The form and all its resources are then bound to the program file when the application is built.<br />
It’s all more or less handled for you automatically.<br />
There are times, however, when you will want to implement resources aside from the normal<br />
<strong>C++</strong>Builder processes. For <strong>in</strong>stance, if you want to do animation, you will have to have a series
Creat<strong>in</strong>g Applications <strong>in</strong> <strong>C++</strong>Builder<br />
of bitmaps that can be loaded as resources for the fastest possible execution speed. In this k<strong>in</strong>d<br />
of situation, you are go<strong>in</strong>g to need to know how to b<strong>in</strong>d the resources to your <strong>C++</strong>Builder<br />
program file.<br />
The act of b<strong>in</strong>d<strong>in</strong>g the resource file to the executable is trivial, actually. It’s much more<br />
difficult to actually create the resources. Creat<strong>in</strong>g basic resources such as bitmaps, icons, and<br />
cursors is not difficult with a good resource editor, but creat<strong>in</strong>g professional-quality 3D<br />
bitmaps and icons is an art. How many times have you seen a pretty decent program with<br />
really awful bitmap buttons? I’ve seen plenty. (Oops, looks like I’m gett<strong>in</strong>g off track here.)<br />
You can create bitmaps, icons, and cursors with the <strong>C++</strong>Builder Image Editor. If you are<br />
go<strong>in</strong>g to create str<strong>in</strong>g resources, user data resources, wave file resources, or other specialty<br />
resources, you will probably need a third-party resource editor.<br />
NOTE<br />
If you have <strong>Borland</strong> <strong>C++</strong>, you can use the Resource Workshop from<br />
that package to edit specialty resources. After creat<strong>in</strong>g the resources,<br />
you will have an .rc file that you can either add to your <strong>C++</strong>Builder<br />
project directly or compile <strong>in</strong>to a .res file us<strong>in</strong>g the <strong>Borland</strong> Resource<br />
Compiler (BRCC32.EXE). The <strong>Borland</strong> Resource Compiler comes with<br />
both <strong>Borland</strong> <strong>C++</strong> and <strong>C++</strong>Builder. Technically, you could create the<br />
.rc file with any text editor and compile it with the Resource Compiler,<br />
but <strong>in</strong> reality it is much easier to use a resource editor.<br />
You can add either a .res file or an .rc file to your project via the Project Manager. To add<br />
a resource file to a project us<strong>in</strong>g the Project Manager, you first choose View | Project Manger<br />
from the ma<strong>in</strong> menu. When the Project Manager dialog box is displayed, click the Add To<br />
Project button. When the File Open dialog box appears, select the resource file you want to<br />
add to the project and click OK. The resource file shows up <strong>in</strong> the Project Manager with the<br />
rest of the application’s files. I’ll discuss the Project Manager <strong>in</strong> more detail tomorrow.<br />
List<strong>in</strong>gs 9.2 and 9.3 conta<strong>in</strong> the header and ma<strong>in</strong> form unit for a program called Jump<strong>in</strong>g<br />
Jack. This program shows a simple animation with sound effects. The ma<strong>in</strong> form conta<strong>in</strong>s<br />
just two buttons, an Image component, and a Label component. The Jump<strong>in</strong>g Jack program<br />
illustrates several aspects of us<strong>in</strong>g resources <strong>in</strong> a <strong>C++</strong>Builder application. (The program can<br />
be found at http://www.mcp.com/sams/codecenter.html.) Specifically, it shows how to load<br />
a bitmap stored as a resource, how to load and display a str<strong>in</strong>g resource, and how to play wave<br />
audio conta<strong>in</strong>ed as a resource. List<strong>in</strong>g 9.4 is a partial list<strong>in</strong>g of the resource file that is used<br />
by the Jump<strong>in</strong>g Jack program. Exam<strong>in</strong>e the list<strong>in</strong>gs, and then we’ll discuss what the program<br />
does.<br />
343<br />
9
344 Day 9<br />
List<strong>in</strong>g 9.2. JJMa<strong>in</strong>.h.<br />
1: //--------------------------------<br />
2: #ifndef JJMa<strong>in</strong>H<br />
3: #def<strong>in</strong>e JJMa<strong>in</strong>H<br />
4: //--------------------------------<br />
5: #<strong>in</strong>clude <br />
6: #<strong>in</strong>clude <br />
7: #<strong>in</strong>clude <br />
8: #<strong>in</strong>clude <br />
9: #<strong>in</strong>clude <br />
10: //----------------------------------<br />
11: class TMa<strong>in</strong>Form : public TForm<br />
12: {<br />
13: __published: // IDE-managed Components<br />
<strong>14</strong>: TButton *Start;<br />
15: TButton *Stop;<br />
16: TImage *Image;<br />
17: TLabel *Label;<br />
18: void __fastcall FormCreate(TObject *Sender);<br />
19:<br />
20: void __fastcall StartClick(TObject *Sender);<br />
21: void __fastcall StopClick(TObject *Sender);<br />
22: private: // User declarations<br />
23: bool done;<br />
24: void DrawImage(Str<strong>in</strong>g& name);<br />
25: public: // User declarations<br />
26: virtual __fastcall TMa<strong>in</strong>Form(TComponent* Owner);<br />
27: };<br />
28: //--------------------------------<br />
29: extern TMa<strong>in</strong>Form *Ma<strong>in</strong>Form;<br />
30: //--------------------------------<br />
31: #endif<br />
List<strong>in</strong>g 9.3. JJMa<strong>in</strong>.cpp.<br />
1: //----------------------------------------------------------<br />
2: #<strong>in</strong>clude <br />
3: //<br />
4: // have to add this <strong>in</strong>clude for the PlaySound() function<br />
5: //<br />
6: #<strong>in</strong>clude <br />
7: #pragma hdrstop<br />
8:<br />
9: #<strong>in</strong>clude “JJMa<strong>in</strong>.h”<br />
10: //----------------------------------------------------------<br />
11: #pragma resource “*.dfm”<br />
12: //<br />
13: // def<strong>in</strong>es for the str<strong>in</strong>g resources<br />
<strong>14</strong>: //<br />
15: #def<strong>in</strong>e IDS_UP 101<br />
16: #def<strong>in</strong>e IDS_DOWN 102<br />
17:<br />
18: TMa<strong>in</strong>Form *Ma<strong>in</strong>Form;
Creat<strong>in</strong>g Applications <strong>in</strong> <strong>C++</strong>Builder<br />
19: //----------------------------------------------------------<br />
20: __fastcall TMa<strong>in</strong>Form::TMa<strong>in</strong>Form(TComponent* Owner)<br />
21: : TForm(Owner),<br />
22: done(false)<br />
23: {<br />
24: }<br />
25: //----------------------------------------------------------<br />
26: void __fastcall TMa<strong>in</strong>Form::FormCreate(TObject *Sender)<br />
27: {<br />
28: //<br />
29: // load and display the first bitmap<br />
30: //<br />
31: Image->Picture->Bitmap-><br />
32: LoadFromResourceName((<strong>in</strong>t)HInstance, “ID_BITMAP1”);<br />
33: }<br />
34: //----------------------------------------------------------<br />
35: void __fastcall TMa<strong>in</strong>Form::StartClick(TObject *Sender)<br />
36: {<br />
37: //<br />
38: // When the Start button is clicked the animation<br />
39: // loop starts. The bitmap resources are named<br />
40: // ID_BITMAP1 through ID_BITMAP5 so we’ll start with<br />
41: // a str<strong>in</strong>g called “ID_BITMAP” and append the last<br />
42: // digit when needed.<br />
43: //<br />
44: Str<strong>in</strong>g s = “ID_BITMAP”;<br />
45: //<br />
46: // a buffer for the str<strong>in</strong>g resources<br />
47: //<br />
48: char buff[10];<br />
49: //<br />
50: // a flag to let us know when we’re done<br />
51: //<br />
52: done = false;<br />
53: //<br />
54: // start the loop and keep loop<strong>in</strong>g until the ‘Stop’<br />
55: // button is pressed<br />
56: //<br />
57: while (!done) {<br />
58: //<br />
59: // loop through the five bitmaps start<strong>in</strong>g with<br />
60: // 1 and end<strong>in</strong>g with 5<br />
61: //<br />
62: for (<strong>in</strong>t i=1;i
346 Day 9<br />
List<strong>in</strong>g 9.3. cont<strong>in</strong>ued<br />
75: // function LoadStr<strong>in</strong>g(), display the str<strong>in</strong>g,<br />
76: // and tell W<strong>in</strong>dows to repa<strong>in</strong>t the Label<br />
77: //<br />
78: LoadStr<strong>in</strong>g(HInstance, IDS_UP, buff, sizeof(buff));<br />
79: Label->Caption = buff;<br />
80: Label->Refresh();<br />
81: //<br />
82: // play the ‘up’ sound us<strong>in</strong>g the W<strong>in</strong>API function<br />
83: // PlaySound(), play it asynchronously<br />
84: //<br />
85: PlaySound(“ID_WAVEUP”,<br />
86: HInstance, SND_ASYNC | SND_RESOURCE);<br />
87: //<br />
88: // pause for a moment at the top of the jump<br />
89: //<br />
90: Sleep(200);<br />
91: //<br />
92: // repeat all of the above except <strong>in</strong> reverse<br />
93: //<br />
94: for (<strong>in</strong>t i=5;i>0;i--) {<br />
95: Str<strong>in</strong>g resName = s + Str<strong>in</strong>g(i);<br />
96: DrawImage(resName);<br />
97: }<br />
98: PlaySound(“ID_WAVEDOWN”,<br />
99: HInstance, SND_ASYNC | SND_RESOURCE);<br />
100: LoadStr<strong>in</strong>g(HInstance, IDS_DOWN, buff, sizeof(buff));<br />
101: Label->Caption = buff;<br />
102: Label->Refresh();<br />
103: Sleep(200);<br />
104: }<br />
105: }<br />
106: //----------------------------------------------------------<br />
107: void __fastcall TMa<strong>in</strong>Form::StopClick(TObject *Sender)<br />
108: {<br />
109: //<br />
110: // Stop button pressed, so tell the loop to stop execut<strong>in</strong>g<br />
111: //<br />
112: done = true;<br />
113: }<br />
1<strong>14</strong>: //----------------------------------------------------------<br />
115: //<br />
116: // a class member function to display the bitmap<br />
117: //<br />
118: void<br />
119: TMa<strong>in</strong>Form::DrawImage(Str<strong>in</strong>g& name)<br />
120: {<br />
121: //<br />
122: // load the bitmap from a resource<br />
123: // us<strong>in</strong>g the name passed to us<br />
124: //<br />
125: Image->Picture->Bitmap-><br />
126: LoadFromResourceName((<strong>in</strong>t)HInstance, name);<br />
127: //<br />
128: // must pump the message loop so that W<strong>in</strong>dows gets<br />
129: // a chance to display the bitmap
Creat<strong>in</strong>g Applications <strong>in</strong> <strong>C++</strong>Builder<br />
130: //<br />
131: Application->ProcessMessages();<br />
132: //<br />
133: // take a short nap so the animation doesn’t go too fast<br />
134: //<br />
135: Sleep(20);<br />
136: }<br />
List<strong>in</strong>g 9.4. JJRes.rc.<br />
1: #def<strong>in</strong>e IDS_UP 101<br />
2: #def<strong>in</strong>e IDS_DOWN 102<br />
3:<br />
4: STRINGTABLE<br />
5: {<br />
6: IDS_UP, “Up”<br />
7: IDS_DOWN, “Down”<br />
8: }<br />
9:<br />
10: ID_WAVEUP WAVE “up.wav”<br />
11: ID_WAVEDOWN WAVE “down.wav”<br />
12:<br />
13: ID_BITMAP1 BITMAP LOADONCALL MOVEABLE DISCARDABLE IMPURE<br />
<strong>14</strong>: {<br />
15: ’42 4D 76 02 00 00 00 00 00 00 76 00 00 00 28 00'<br />
16: ’00 00 20 00 00 00 20 00 00 00 01 00 04 00 00 00'<br />
17: //<br />
18: // rema<strong>in</strong>der of bitmap resources follow<br />
Notice l<strong>in</strong>es 23 and 24 <strong>in</strong> the header for the ma<strong>in</strong> form class <strong>in</strong> List<strong>in</strong>g 9.2. L<strong>in</strong>e 23<br />
ANALYSIS<br />
declares a bool data member that is used to determ<strong>in</strong>e when to stop the animation.<br />
The class member function declared on l<strong>in</strong>e 24 is used to display the bitmap <strong>in</strong> the Image<br />
component.<br />
In List<strong>in</strong>g 9.3 you will notice that two W<strong>in</strong>dows API functions are used to load the str<strong>in</strong>g and<br />
wave file resources. On l<strong>in</strong>e 78, the LoadStr<strong>in</strong>g() function loads a str<strong>in</strong>g resource <strong>in</strong>to a text<br />
buffer based on the numerical identifier of the str<strong>in</strong>g (see List<strong>in</strong>g 9.4 to see how the str<strong>in</strong>g<br />
resources are created). The str<strong>in</strong>g is then assigned to the Caption property of the label<br />
component on the form. On l<strong>in</strong>e 83, the PlaySound() function is used to play a wave file<br />
conta<strong>in</strong>ed as a resource. The SND_ASYNC flag used with the PlaySound() function tells<br />
W<strong>in</strong>dows to play the sound and immediately return control to the program. This allows the<br />
animation to cont<strong>in</strong>ue while the sound is be<strong>in</strong>g played. The SND_RESOURCE flag tells W<strong>in</strong>dows<br />
that the sound is conta<strong>in</strong>ed as a resource and not as a file on disk. Both the LoadStr<strong>in</strong>g() and<br />
PlaySound() functions use the HInstance global variable to tell W<strong>in</strong>dows to look <strong>in</strong> the<br />
executable file for the resources.<br />
347<br />
9
348 Day 9<br />
NOTE<br />
L<strong>in</strong>es 1 through 8 of List<strong>in</strong>g 9.4 illustrate how a str<strong>in</strong>g table looks <strong>in</strong> a resource script file.<br />
Creat<strong>in</strong>g str<strong>in</strong>g tables is very easy with any text editor. On l<strong>in</strong>es 10 and 11, a WAVE resource<br />
is created for each of the two wave files, which were previously recorded and reside <strong>in</strong> the<br />
project’s directory. When the resource compiler sees the WAVE declaration, it reads the<br />
<strong>in</strong>dividual sound files and compiles them <strong>in</strong>to the b<strong>in</strong>ary resource file.<br />
As you can see from List<strong>in</strong>g 9.4, you can create some resources easily<br />
with a text editor. If you have bitmaps or wave audio stored as external<br />
files, you can <strong>in</strong>clude them <strong>in</strong> an .rc file as illustrated <strong>in</strong> List<strong>in</strong>g 9.4<br />
and have them compiled <strong>in</strong>to the b<strong>in</strong>ary resource file us<strong>in</strong>g the resource<br />
compiler. Later, the b<strong>in</strong>ary resource file can be bound to your<br />
application’s executable file.<br />
List<strong>in</strong>g 9.4 is a partial list<strong>in</strong>g. Bitmaps are conta<strong>in</strong>ed <strong>in</strong> the resource file as numerical data.<br />
The resource descriptions for bitmaps can get very long. The rest of the bitmap resource<br />
descriptions for the Jump<strong>in</strong>g Jack bitmaps require about 200 l<strong>in</strong>es of resource code, so I<br />
decided not to list them all. Figure 9.12 shows Jump<strong>in</strong>g Jack <strong>in</strong> mid-stride.<br />
Figure 9.12.<br />
Jump<strong>in</strong>g Jack <strong>in</strong><br />
action.<br />
NOTE<br />
Creat<strong>in</strong>g additional resources for your programs is not rocket science, but it is not exactly<br />
trivial, either. It takes some time to realize how it all fits together. You may never need to add<br />
additional resources to your applications. If you do, though, it’s good to have an idea where<br />
to beg<strong>in</strong>. If this section left you a little dazed and confused, don’t worry. Over time, it all starts<br />
to make sense.<br />
Bitmaps, icons, and cursors found <strong>in</strong> other programs are usually<br />
copyrighted material. Do not use resources from any copyrighted<br />
program without permission. Further, assume that all programs are<br />
copyrighted unless they are specifically said to be freeware. You are free<br />
to use the bitmaps, icons, and cursors that are provided with
Summary<br />
Creat<strong>in</strong>g Applications <strong>in</strong> <strong>C++</strong>Builder<br />
<strong>C++</strong>Builder (<strong>in</strong> the \CBuilder\Images directory) <strong>in</strong> your applications<br />
without permission from <strong>Borland</strong>.<br />
The Object Repository is a great tool for reus<strong>in</strong>g previously created forms, dialog boxes,<br />
projects, and other objects. The capability to add your own objects to the Repository is a huge<br />
advantage when you’re do<strong>in</strong>g RAD. The Dialog Wizard and Application Wizard take it a step<br />
further and guide you through the creation process. The Application Wizard, <strong>in</strong> particular,<br />
is a very useful tool. In the middle of the chapter you learned how to add data members and<br />
functions to the classes that <strong>C++</strong>Builder generates. The last part of the chapter touches on<br />
the different types of resources that you might need to <strong>in</strong>corporate <strong>in</strong>to your applications and<br />
how to add them to your <strong>C++</strong>Builder projects.<br />
Workshop<br />
The Workshop conta<strong>in</strong>s quiz questions to help you solidify your understand<strong>in</strong>g of the<br />
material covered and exercises to provide you with experience <strong>in</strong> us<strong>in</strong>g what you have learned.<br />
You can f<strong>in</strong>d answers to the quiz questions <strong>in</strong> Appendix A, “Answers to Quiz Questions.”<br />
Q&A<br />
Q When would I use the Use option of the Object Repository?<br />
A When you have an object stored <strong>in</strong> the Object Repository that you want to update<br />
or make other changes to.<br />
Q Is there a limit to the number of objects that can be stored <strong>in</strong> the Object<br />
Repository?<br />
A Technically, you can store as many objects as you like. Remember, though, that the<br />
purpose of the Object Repository is to help you quickly locate and reuse your<br />
forms, dialog boxes, and other objects. If you put too many seldom-used objects <strong>in</strong><br />
the Object Repository, you will start to lose efficiency because it takes longer to<br />
f<strong>in</strong>d the specific object you are look<strong>in</strong>g for. It also takes longer for the Object<br />
Repository to load and display all those objects.<br />
349<br />
9
350 Day 9<br />
Quiz<br />
Q I’ve got a bunch of old objects <strong>in</strong> the Object Repository that I don’t use anymore.<br />
How can I get rid of them?<br />
A Choose Options | Repository from the ma<strong>in</strong> menu. The Object Repository<br />
configuration dialog box is displayed. To remove an object, first select the object <strong>in</strong><br />
the Objects list box, and then click the Delete Object button. The object will be<br />
removed from the Object Repository.<br />
Q I had an object stored <strong>in</strong> the Object Repository. Now when I try to use that<br />
object I get a message box that says Unable to f<strong>in</strong>d both a form and a source<br />
file. What’s the problem?<br />
A You have either moved or deleted the source and/or form file for the object. The<br />
Object Repository keeps track of the directory where the object is stored. If you<br />
move or delete the object, the Object Repository is unable to f<strong>in</strong>d the object and<br />
reports an error.<br />
Q Can I add objects to the New page of the Object Repository?<br />
A No. The New page of the Object Repository is fixed. It cannot be deleted or<br />
modified. You’ll have to place your objects on another page.<br />
Q I added a function to my ma<strong>in</strong> form class. Now I can’t compile. What’s the<br />
problem?<br />
A You probably added the function declaration to the published section of the class<br />
declaration accidentally. Be sure that the declaration for your class is <strong>in</strong> either the<br />
public or the private section of the class declaration.<br />
Q I have a resource editor that allows me to decompile resources conta<strong>in</strong>ed <strong>in</strong><br />
other programs. This lets me “borrow” bitmaps and other resources from<br />
other programs. Is this okay?<br />
A The short answer is “No.” You should assume all resources <strong>in</strong> other programs to be<br />
copyrighted material that cannot be freely copied. Consult a lawyer for a qualified<br />
op<strong>in</strong>ion.<br />
Q I have a lot of bitmaps and sound files that go with my application. Can I put<br />
all those resources <strong>in</strong> a file other than the program’s executable file?<br />
A Yes. You can have resources stored <strong>in</strong> a dynamic l<strong>in</strong>k library (DLL).<br />
1. When do you use the Inherit option when select<strong>in</strong>g an object <strong>in</strong> the Object<br />
Repository?<br />
2. What is the procedure for sav<strong>in</strong>g a project to the Object Repository?<br />
3. What happens to <strong>in</strong>herited forms when you change the base form?<br />
4. Where <strong>in</strong> the form’s class declaration do you place user function declarations?
Creat<strong>in</strong>g Applications <strong>in</strong> <strong>C++</strong>Builder<br />
5. Where do you place the function def<strong>in</strong>ition (the function itself ) when you add<br />
your own functions to <strong>C++</strong>Builder code?<br />
6. How can you determ<strong>in</strong>e who wrote a particular object <strong>in</strong> the Object Repository?<br />
7. Where do you add and delete pages <strong>in</strong> the Object Repository?<br />
8. Is it easier to create a basic application from scratch or by us<strong>in</strong>g the Application<br />
Wizard?<br />
9. What are the two ways you can add a resource file to your project?<br />
10. Can you create a resource script file conta<strong>in</strong><strong>in</strong>g a str<strong>in</strong>g table with a text editor?<br />
Exercises<br />
1. Create a new form. Add several components of your choos<strong>in</strong>g to the form. Save the<br />
form to the Forms page of the Object Repository with the name BaseForm.<br />
2. Start a new application. Choose File | New to view the Object Repository. Switch<br />
to the Forms page. Click the Inherit radio button. Choose the BaseForm object you<br />
created <strong>in</strong> exercise 1 and add it to the application. (Be sure you used the Inherit<br />
option.) Save the project and close it.<br />
3. Open the BaseForm object you created <strong>in</strong> exercise 1. Delete all components on the<br />
form and save the form.<br />
4. Reopen the project you created <strong>in</strong> exercise 2. Display the new form you created <strong>in</strong><br />
that exercise. Note that the components are all gone. (Remember, you <strong>in</strong>herited<br />
this object, so all changes made to the base form were also made to the <strong>in</strong>herited<br />
form.)<br />
5. Choose Options | Repository from the ma<strong>in</strong> menu. Delete the BaseForm created<br />
earlier.<br />
6. Create a project us<strong>in</strong>g the Application Wizard. Use all menu options and make the<br />
application an MDI application. Create a speedbar for the application.<br />
7. Add a multipage dialog box to the application you created <strong>in</strong> exercise 6. Use the<br />
Dialog Wizard.<br />
8. Use the Object Repository to add an About box to the program you created <strong>in</strong><br />
exercise 6.<br />
9. Create a str<strong>in</strong>g table resource with a text editor and compile it with the resource<br />
compiler (BRCC32.EXE). Extra Credit: Write a program to load the str<strong>in</strong>gs and<br />
display them on a form.<br />
10. Us<strong>in</strong>g a text editor, open the JJRes.rc file from http://www.mcp.com/sams/<br />
codecenter.html and exam<strong>in</strong>e its contents.<br />
11. Write “I will not borrow bitmaps from other programs.” 100 times on the blackboard.<br />
351<br />
9
352 Day 9
More on Projects<br />
Day 10<br />
More on Projects<br />
by Kent Reisdorph<br />
Week<br />
On Day 6, “The <strong>C++</strong>Builder IDE Explored: Projects and Forms,” you were<br />
<strong>in</strong>troduced to <strong>C++</strong>Builder projects and found out a little about how projects<br />
work. Today you will f<strong>in</strong>d out about projects <strong>in</strong> more detail.<br />
You will also learn more about the <strong>C++</strong>Builder Code Editor. The Code Editor<br />
has features that make work<strong>in</strong>g with code easier; you’ll f<strong>in</strong>d out all about those<br />
features today.<br />
Everyone Needs a Project<br />
Projects are a fact of life with <strong>C++</strong>Builder. You cannot create a program without<br />
a project. The project makes sure that everyth<strong>in</strong>g works together to create a<br />
work<strong>in</strong>g application. In this section I will talk about<br />
■ The Project Manager<br />
2<br />
353<br />
10
354 Day 10<br />
■ The Project Explorer<br />
■ The Project Options dialog box<br />
■ Ma<strong>in</strong>ta<strong>in</strong><strong>in</strong>g and us<strong>in</strong>g projects<br />
So, without further ado, let’s get to it.<br />
Us<strong>in</strong>g the Project Manager<br />
At some po<strong>in</strong>t, every project needs some management. It could be that you need to add a new<br />
source unit to the project, or maybe you need to remove a source unit. You might need to add<br />
other types of files to the project, such as a b<strong>in</strong>ary resource file or an import library for a DLL.<br />
It is through the Project Manager that you add and remove units and other project files.<br />
The Project Manager W<strong>in</strong>dow<br />
The Project Manager w<strong>in</strong>dow shows you the current files <strong>in</strong> your project. To view the Project<br />
Manager, choose View | Project Manager from the ma<strong>in</strong> menu. Figure 10.1 shows the<br />
Project Manager w<strong>in</strong>dow for the ScratchPad program created on Day 6.<br />
The Project Manager w<strong>in</strong>dow tells you at a glance the state of each file <strong>in</strong> the project. Files<br />
that are up-to-date are displayed <strong>in</strong> a regular font; files that have been modified but have not<br />
yet been saved are shown <strong>in</strong> a bold font. This serves to rem<strong>in</strong>d you which of your files have<br />
changed s<strong>in</strong>ce you last saved the project.<br />
You will notice <strong>in</strong> Figure 10.1 that the Project Manager file list has three columns. The first<br />
column shows the name of the source unit that represents that file. For example, the source<br />
unit for the ma<strong>in</strong> form of the ScratchPad program is called SPMa<strong>in</strong>.cpp.<br />
The second column shows the name of the form that is associated with that file. The form<br />
name is taken from the Name property for the form. In some cases, there is no form associated<br />
with a source unit. Each project has a project source file associated with it that conta<strong>in</strong>s the<br />
VCL startup code for the application. Because there is no form associated with the project<br />
source file, the Form column for that file will always be blank. Look<strong>in</strong>g at Figure 10.1, you<br />
can see that the project source file for the ScratchPad program is named Scratch.cpp and that<br />
the Form column is blank.<br />
The last column <strong>in</strong> the File list of the Project Manager w<strong>in</strong>dow conta<strong>in</strong>s the path where the<br />
file is located. This column is always blank for files that reside <strong>in</strong> the project’s own directory.
More on Projects<br />
The only time this column conta<strong>in</strong>s a directory path is when you add a file from a location<br />
other than the project’s work<strong>in</strong>g directory. This column tells you at a glance where each file<br />
<strong>in</strong> your project is located.<br />
Figure 10.1.<br />
The Project Manager<br />
w<strong>in</strong>dow.<br />
NOTE<br />
TIP<br />
The columns <strong>in</strong> the Project Manager w<strong>in</strong>dow can be resized. To<br />
change a column’s width, place your mouse cursor on the divid<strong>in</strong>g l<strong>in</strong>e<br />
between two columns on the column header. When you see the mouse<br />
cursor change to the drag cursor, you can drag right to make the<br />
column wider or drag left to make the column narrower.<br />
The status bar of the Project Manager w<strong>in</strong>dow shows you the project’s work<strong>in</strong>g directory and<br />
the total count of the project’s units and forms.<br />
The status bar text is generous <strong>in</strong> its count of units conta<strong>in</strong>ed <strong>in</strong> the<br />
project. The status bar text considers every file <strong>in</strong> the project a unit<br />
whether or not it is actually a source code unit. For example, add<strong>in</strong>g a<br />
text file to the project will <strong>in</strong>crement the unit count <strong>in</strong> the status bar<br />
even though the text file does not constitute a code unit.<br />
The Project Manager Speedbar<br />
The Project Manager speedbar can be used to navigate the project. Figure 10.2 shows the<br />
Project Manager speedbar buttons.<br />
355<br />
10
356 Day 10<br />
Figure 10.2.<br />
The Project Manager<br />
speedbar.<br />
Add Unit<br />
Use the Add Unit button to add files to the project. When you click this button, the Add To<br />
Project dialog box is displayed. The Add To Project dialog box has file filters for the follow<strong>in</strong>g<br />
types of files:<br />
■ <strong>C++</strong> source files (.cpp)<br />
■ C source files (.c)<br />
■ Pascal source files (.pas)<br />
■ Library files (.lib)<br />
■ B<strong>in</strong>ary object files (.obj)<br />
■ Resource script files (.rc)<br />
Add Unit<br />
Remove Unit<br />
View Unit<br />
■ B<strong>in</strong>ary resource files (.res)<br />
If you add files of any of these types, <strong>C++</strong>Builder will know what to do with them. For<br />
example, if you add a C source file (.c), <strong>C++</strong>Builder will compile it as C rather than <strong>C++</strong> (the<br />
differences are subtle, and most of you don’t care about the differences, but to some<br />
programmers it matters). If you add a Pascal file (.pas), the Pascal compiler will compile the<br />
source file before pass<strong>in</strong>g it to the l<strong>in</strong>ker. If you add a b<strong>in</strong>ary object file (.obj), <strong>C++</strong>Builder<br />
passes it to the l<strong>in</strong>ker at l<strong>in</strong>k time.<br />
NOTE<br />
NOTE<br />
Update<br />
Project Options<br />
View Form<br />
You cannot add a unit to a project if a form with the same name<br />
already exists <strong>in</strong> the project. For example, if you have a form called<br />
Ma<strong>in</strong>Form and try to add a unit from another project that also has a<br />
form named Ma<strong>in</strong>Form, you will get an error message from <strong>C++</strong>Builder<br />
even if the filenames are different.<br />
Add<strong>in</strong>g files to your project of types other than those listed <strong>in</strong> this<br />
section is not advised. <strong>C++</strong>Builder will try to compile any unknown file<br />
types, and an error message will result.
TIP<br />
More on Projects<br />
You can add more than one source file at a time. To add multiple files,<br />
select the files to add <strong>in</strong> the Add To Project dialog box. When you click<br />
OK, all of the files selected will be added to the project.<br />
Remove Unit<br />
Use this option to remove files from the project. Files removed from the project are not<br />
deleted from your hard drive, but are just removed from the project compile/l<strong>in</strong>k process.<br />
WARNING<br />
Be careful when remov<strong>in</strong>g units from your projects. You need to take<br />
care not to remove units that are referenced by other units <strong>in</strong> the<br />
project. If you remove units that are required by your project, a<br />
compiler or l<strong>in</strong>ker error will result. Before remov<strong>in</strong>g a unit, be sure that<br />
it is not used anywhere <strong>in</strong> your project.<br />
The Project Manager w<strong>in</strong>dow itself does not allow multiple selection. If you want to delete<br />
several units, you will have to delete them one at a time.<br />
View Unit<br />
When you click the View Unit speed button, the source code for the currently selected unit<br />
is displayed <strong>in</strong> the Code Editor. If no unit is selected or if no source unit exists for the selected<br />
unit, this button is disabled. For example, a b<strong>in</strong>ary resource file (.res) does not have a source<br />
file. If you click on a b<strong>in</strong>ary resource file <strong>in</strong> the Project Manager w<strong>in</strong>dow, the View Unit<br />
button will be disabled.<br />
View Form<br />
The View Form button displays the form associated with the currently selected unit. The<br />
form is displayed <strong>in</strong> the Form Designer. As with the View Unit button, the View Form button<br />
will be disabled if no form exists for the selected unit.<br />
357<br />
10
358 Day 10<br />
NOTE<br />
TIP<br />
The Project Manager provides shortcuts for view<strong>in</strong>g a unit’s source file<br />
or form. To view a unit’s source file, double-click on the unit’s<br />
filename (<strong>in</strong> the File column). To view a form, double-click on the<br />
form name <strong>in</strong> the Form column. Double-click<strong>in</strong>g on units that do not<br />
have a source file has no effect.<br />
Project Options<br />
The Project Options speedbar button displays the Project Options dialog box for the project.<br />
Project options are discussed later <strong>in</strong> the chapter, <strong>in</strong> the section titled “Understand<strong>in</strong>g Project<br />
Options.”<br />
Update<br />
The Update button updates the project after the project source file has been modified.<br />
Normally, this button is disabled. If you manually change the project source file, the Update<br />
button is enabled and all files <strong>in</strong> the Project Manager file list will be grayed out. Click<strong>in</strong>g the<br />
Update button will ensure that all files <strong>in</strong> the project are reconciled. This button is also<br />
enabled after you change the project options.<br />
Sav<strong>in</strong>g the project will also resynchronize the project, and you won’t<br />
need to click the Update speed button.<br />
The Project Manager Speed Menu<br />
The Project Manager has a speed menu to aid you <strong>in</strong> project management. Many of the items<br />
on the speed menu are also available via the speedbar. Figure 10.3 shows the Project Manager<br />
speed menu. Table 10.1 lists the speed menu items along with a description of what each item<br />
does.<br />
Figure 10.3.<br />
The Project Manager<br />
speed menu.
More on Projects<br />
Table 10.1. The Project Manager speed menu items.<br />
Item Description<br />
Save Project Saves the project and all source files <strong>in</strong> the project.<br />
Add Project To Repository Saves the project to the Object Repository.<br />
New Unit Creates a blank source code unit and displays the new<br />
unit <strong>in</strong> the Code Editor.<br />
New Form Creates a blank form and displays the new form <strong>in</strong><br />
the Form Designer.<br />
Add File Same as the Add Unit speed button.<br />
Remove File Same as the Remove Unit speed button.<br />
View Unit Displays the currently selected unit’s source code <strong>in</strong><br />
the Code Editor.<br />
View Form Displays the currently selected unit’s form <strong>in</strong> the<br />
Form Designer.<br />
View Project Source Displays the project source file <strong>in</strong> the Code Editor.<br />
Options Displays the Project Options dialog box.<br />
Update Same as the Update speed button.<br />
Several of the speed menu items are also accessible from the ma<strong>in</strong> menu, from the Project<br />
Manager speedbar, or via keyboard shortcuts.<br />
Explor<strong>in</strong>g Your Projects<br />
The Project Explorer is a nifty little item that gives you a unique look at your project. Figure<br />
10.4 shows the Project Explorer while explor<strong>in</strong>g the ScratchPad program.<br />
Figure 10.4.<br />
The Project Explorer.<br />
359<br />
10
360 Day 10<br />
The Project Explorer shows all of your project’s source units, forms, and components <strong>in</strong> a tree<br />
view. Nodes can be contracted or expanded to reveal more details. Each component is listed<br />
under its parent. For example, notice the SpeedBar node <strong>in</strong> Figure 10.4. In this project, the<br />
SpeedBar node is a Panel component that conta<strong>in</strong>s several speed buttons. The speed buttons<br />
are displayed underneath the panel to show that the panel is the parent of the speed buttons.<br />
The Project Explorer is a hierarchical w<strong>in</strong>dow. At the top of the Project Explorer you<br />
have the project file; under the project file you have the project’s source units. Immediately<br />
under the project source file is the form file for that unit. Under the form file you have all the<br />
components that are direct children of the form. If a component on the form has children,<br />
they are listed under their parent, and so on. Figure 10.5 shows how the Project Explorer<br />
would look if the component and unit names were replaced with descriptive text.<br />
Figure 10.5.<br />
The Project Explorer<br />
hierarchy.<br />
When you click on an item <strong>in</strong> the Project Explorer, the status bar at the bottom of the Project<br />
Explorer w<strong>in</strong>dow shows <strong>in</strong>formation about the item selected. If the item is a source file or<br />
form file, the status bar displays the full path and filename of the file. If the item is a<br />
component, the status bar displays the class name of the component. For example, if you click<br />
a speed button component, the Project Explorer status bar will display TSpeedButton.<br />
Project Explorer Commands<br />
You can do more than just view your objects <strong>in</strong> the Project Explorer. The Project Explorer<br />
has a speed menu that allows you to delete, rename, edit, or select an item. Not all speed menu<br />
items are available at all times, however. If you have selected a unit’s source file, for example,<br />
the Rename speed menu item is disabled because you cannot rename a source file from the<br />
Project Explorer. Let’s look at the Project Explorer commands <strong>in</strong>dividually.<br />
Select<br />
The Select menu item selects the current object and displays the object <strong>in</strong> the Object<br />
Inspector. The effect is the same as if you had selected the object <strong>in</strong> the Form Designer. If<br />
you place the Object Inspector and Project Explorer side by side, you can quickly go through<br />
all the objects <strong>in</strong> your project and view their properties. This command is available only if<br />
you have selected a form or a control.
Figure 10.6.<br />
The Project Explorer<br />
speed menu.<br />
NOTE<br />
More on Projects<br />
Just highlight<strong>in</strong>g (select<strong>in</strong>g) the control <strong>in</strong> the Project Explorer tree is<br />
not the same as select<strong>in</strong>g it us<strong>in</strong>g the Select command. If you want the<br />
component to be displayed <strong>in</strong> the Object Inspector, you must first<br />
select the component <strong>in</strong> the Project Explorer tree and then choose<br />
Select from the speed menu.<br />
Edit<br />
The Edit speed menu item allows you to edit the object selected. If the object is a source file,<br />
choos<strong>in</strong>g the Edit menu item will result <strong>in</strong> the Code Editor be<strong>in</strong>g displayed with the selected<br />
file loaded. If the object selected <strong>in</strong> the Project Explorer w<strong>in</strong>dow is a form, the Form Designer<br />
comes to the top with the selected form displayed. If the object selected is a component on<br />
a form, the Form Designer is displayed, and the object is selected <strong>in</strong> the Form Designer as<br />
if you had clicked it with the mouse. In the case of forms and components, the Object<br />
Inspector changes to show the object selected.<br />
Rename<br />
The Rename menu item allows you to change the Name property of a form or a control from<br />
the Project Explorer. To change the name of a component, for example, first select the<br />
component <strong>in</strong> the Project Explorer w<strong>in</strong>dow and then choose Rename from the speed menu.<br />
You can then type a new name for the component. As when chang<strong>in</strong>g the Name property <strong>in</strong><br />
the Object Inspector, the change is immediately reflected throughout your program’s source<br />
code.<br />
361<br />
10
362 Day 10<br />
TIP<br />
The Project Explorer w<strong>in</strong>dow is a W<strong>in</strong>dows tree view, and as such<br />
has the same characteristics as most tree views. Specifically, you can<br />
change the text of a particular item <strong>in</strong> the Project Explorer by click<strong>in</strong>g<br />
once on the item to select it and click<strong>in</strong>g aga<strong>in</strong> to beg<strong>in</strong> edit<strong>in</strong>g. This is<br />
called <strong>in</strong>-place edit<strong>in</strong>g. By us<strong>in</strong>g this method you don’t have to use the<br />
Rename item on the speed menu at all. If you attempt to change the<br />
name of an item that cannot be changed via the Project Explorer (a<br />
source file, for example), the results of the <strong>in</strong>-place edit will be ignored.<br />
Delete<br />
The Delete item on the Project Explorer speed menu does exactly as its name <strong>in</strong>dicates. If you<br />
select an object <strong>in</strong> the Project Explorer and choose Delete, that object will be removed from<br />
the project.<br />
WARNING<br />
Be careful when delet<strong>in</strong>g objects from the Project Explorer w<strong>in</strong>dow.<br />
The Project Explorer does not have an Undo or Undelete option, so if<br />
you delete an object via the Project Explorer by accident, you will have<br />
to close the project without sav<strong>in</strong>g it and then reopen the project.<br />
The Project Explorer is one of those features that is easy to overlook. Spend some time with<br />
the Project Explorer and I’m sure you’ll f<strong>in</strong>d it a useful feature <strong>in</strong> application development.<br />
Understand<strong>in</strong>g Project Options<br />
Project options are another of those th<strong>in</strong>gs that are easy to ignore. For one th<strong>in</strong>g, the defaults<br />
are usually good enough when you are just start<strong>in</strong>g out. After all, who has time to worry about<br />
all those compiler/l<strong>in</strong>ker options when you are just struggl<strong>in</strong>g to learn a new programm<strong>in</strong>g<br />
environment? At some po<strong>in</strong>t, though, you will start to become more <strong>in</strong>terested <strong>in</strong> what all<br />
those options do, and it’s good to have some reference when the time comes.<br />
In this section we’ll look at the Project Options dialog box. You can <strong>in</strong>voke this dialog box<br />
by choos<strong>in</strong>g Options | Project from the ma<strong>in</strong> menu, press<strong>in</strong>g Alt+F6 on the keyboard, or<br />
choos<strong>in</strong>g Options from the Project Manager speed menu. The Project Options dialog box<br />
is a tabbed dialog box with several pages:
■ Forms<br />
■ Application<br />
■ <strong>C++</strong><br />
■ Pascal<br />
■ L<strong>in</strong>ker<br />
More on Projects<br />
■ Directories/Conditionals<br />
We’ll take a look at each page of the dialog box so that you can understand exactly what each<br />
page does. I’ll start you out easy by discuss<strong>in</strong>g the Forms and Application pages. After that<br />
we’ll move on to the more complicated stuff.<br />
NOTE<br />
The Forms Page<br />
At the bottom of each page of the Project Options dialog box is a check<br />
box labeled Default. If you want the current sett<strong>in</strong>gs to become the<br />
default sett<strong>in</strong>gs for all new projects created, check the Default box.<br />
When you click OK, the current sett<strong>in</strong>gs will become the new default<br />
sett<strong>in</strong>gs.<br />
The Forms page of the Project Options dialog box is where you control how your application<br />
handles its forms. You saw this dialog box on Day 5, “<strong>C++</strong> Class Frameworks and the Visual<br />
Component Model,” when you created the Picture Viewer program. Figure 10.7 shows the<br />
Forms page of the Project Options dialog box for (what else?) the ScratchPad program.<br />
Figure 10.7.<br />
The Forms page of<br />
the Project Options<br />
dialog box.<br />
363<br />
10
364 Day 10<br />
At the top of the Forms page is the Ma<strong>in</strong> form combo box. This is where you tell <strong>C++</strong>Builder<br />
which form to display when the application starts. By default, the first form you create will<br />
be the ma<strong>in</strong> form. If you change your project <strong>in</strong> such a way that a different form becomes the<br />
ma<strong>in</strong> form, you will need to change this sett<strong>in</strong>g so that the new form becomes the<br />
application’s ma<strong>in</strong> form.<br />
In the middle of the dialog box, you see two list boxes. The list box on the left is labeled Autocreate<br />
forms; the one on the right is labeled Available forms. Before I talk about how to use<br />
these two list boxes, let’s take a moment to talk about auto-creation of forms.<br />
Each time you create a form, <strong>C++</strong>Builder places that form <strong>in</strong> the auto-create list for the<br />
application. Auto-creation means that <strong>C++</strong>Builder will construct the form dur<strong>in</strong>g the<br />
application startup process. Forms that are auto-created will display more quickly than forms<br />
that are not auto-created. The disadvantage to auto-creation of forms is that your application<br />
will use more memory than it would if your forms were not auto-created. Another<br />
disadvantage, although probably <strong>in</strong>significant, is that your application will take slightly<br />
longer to load if you are auto-creat<strong>in</strong>g a lot of forms.<br />
NOTE<br />
The first form <strong>in</strong> the Auto-create forms list box is always the ma<strong>in</strong><br />
form. If you change the ma<strong>in</strong> form, the new form selected will move to<br />
the top of the Auto-create forms list box. Another way to set the ma<strong>in</strong><br />
form is to drag-and-drop any one of the forms <strong>in</strong> the Auto-create forms<br />
list box to the top of the list.<br />
The nice th<strong>in</strong>g about auto-creation is that display<strong>in</strong>g an auto-created form is easy. All you<br />
have to do is call that form’s Show() or ShowModal() function:<br />
AboutBox->ShowModal();<br />
If you do not have your forms auto-created by <strong>C++</strong>Builder, you will have to take the<br />
responsibility of creat<strong>in</strong>g the form before you use it:<br />
TAboutBox* aboutBox = new TAboutBox(this);<br />
aboutBox->ShowModal();<br />
delete aboutBox;<br />
This example does not use the <strong>C++</strong>Builder-generated po<strong>in</strong>ter to the About box. It creates a<br />
local po<strong>in</strong>ter, displays the form, and then deletes the po<strong>in</strong>ter as soon as the form is no longer<br />
needed. As is often the case <strong>in</strong> <strong>C++</strong> programm<strong>in</strong>g, there are several ways to perform this<br />
particular task. Because <strong>C++</strong>Builder always creates a po<strong>in</strong>ter to the form object, I could have<br />
written the previous code like this:
NOTE<br />
NOTE<br />
More on Projects<br />
if (!AboutBox->Handle) {<br />
AboutBox = new TAboutBox(this);<br />
AboutBox->SetParent(this);<br />
}<br />
aboutBox->ShowModal();<br />
This code checks to see if the form has already been created. If it has not, the object is created<br />
and then the ShowModal() method is called. This code also calls SetParent() to set the parent<br />
of the form to the call<strong>in</strong>g form (the ma<strong>in</strong> form, <strong>in</strong> most cases). It’s up to you to decide which<br />
method you use, but I prefer the former.<br />
Each time you create a form <strong>in</strong> the Form Designer, <strong>C++</strong>Builder creates<br />
a po<strong>in</strong>ter to the form. If you allow <strong>C++</strong>Builder to auto-create a form,<br />
you don’t have to worry about the po<strong>in</strong>ter be<strong>in</strong>g valid. If you choose<br />
not to have a form auto-created, the po<strong>in</strong>ter to the form will be NULL<br />
until you explicitly create the form and <strong>in</strong>itialize the po<strong>in</strong>ter. If you<br />
forget and use the po<strong>in</strong>ter before it is <strong>in</strong>itialized, W<strong>in</strong>dows will generate<br />
an access-violation error.<br />
Okay, so back to the Project Options dialog box. The Auto-create forms list box conta<strong>in</strong>s a<br />
list of the forms that will be auto-created. If you do not want a form to be auto-created, drag<br />
the form from the Auto-create forms list box to the Available forms list box. You can move<br />
forms from one list box to the other us<strong>in</strong>g drag-and-drop, too. To move several forms at one<br />
time, simply select the forms you want to move (both list boxes support multiple selection)<br />
and drag-and-drop them all at once. It’s as easy as that.<br />
You can use the buttons between the two list boxes to move forms from<br />
one list box to the other, but it’s usually easier to use drag-and-drop.<br />
The Application Page<br />
The Application page of the Project Options dialog box is very simple. (See Figure 10.8.)<br />
The Title field on this page is used to set the title of the application. The title is the text that<br />
will appear on the W<strong>in</strong>dows taskbar when your application is m<strong>in</strong>imized.<br />
365<br />
10
366 Day 10<br />
Figure 10.8.<br />
The Application page.<br />
NOTE<br />
The application’s title and the caption of the ma<strong>in</strong> form are two<br />
separate items. If you want your program’s name to show up when you<br />
m<strong>in</strong>imize your program, you will have to be sure that you set the title<br />
for the application <strong>in</strong> the Project Options dialog box. If you do not<br />
provide an application title, the name of the project file will be used by<br />
default.<br />
The Help file field of the Application page is used to set the help file that your application<br />
will use. This is the help file that the program will load when you press F1 while your<br />
application is runn<strong>in</strong>g. You can use the Browse button to locate the help file if you can’t<br />
remember the name or location of the help file. If you do not supply a help file, press<strong>in</strong>g F1<br />
<strong>in</strong> your application will have no effect.<br />
The Icon option allows you to choose an icon for your application. This is the icon that will<br />
be displayed <strong>in</strong> the W<strong>in</strong>dows taskbar when your application runs and when it is m<strong>in</strong>imized.<br />
In addition, this icon will be displayed on your ma<strong>in</strong> form’s title bar unless you have explicitly<br />
set an icon for the ma<strong>in</strong> form. To choose an icon, click the Load Icon button and locate the<br />
icon file (.ico) us<strong>in</strong>g the Application Icon dialog box.<br />
The <strong>C++</strong> Page<br />
The <strong>C++</strong> page of the Project Options dialog box is where you set the options that the compiler<br />
uses to build your project. (See Figure 10.9.)
Figure 10.9.<br />
The <strong>C++</strong> page of the<br />
Project Options dialog<br />
box.<br />
NOTE<br />
More on Projects<br />
At the top of this page is a section called Speed Sett<strong>in</strong>gs that conta<strong>in</strong>s two buttons. The Full<br />
Debug button sets the default compiler options for a typical debug session. These are the<br />
sett<strong>in</strong>gs you will be most likely to use while debugg<strong>in</strong>g your application. The Release button<br />
sets the compiler options for a typical release build. Use the Release sett<strong>in</strong>gs after you have<br />
debugged your application and are ready to ship the f<strong>in</strong>al product. Be sure that you do a Build<br />
All of your project after chang<strong>in</strong>g compiler sett<strong>in</strong>gs.<br />
The Full Debug and Release buttons set the compiler sett<strong>in</strong>gs to the<br />
suggested sett<strong>in</strong>gs for debugg<strong>in</strong>g or f<strong>in</strong>al release, respectively. You can<br />
always change <strong>in</strong>dividual options after choos<strong>in</strong>g one of these speed<br />
buttons.<br />
The rema<strong>in</strong>der of the <strong>C++</strong> page is broken down <strong>in</strong>to four sections. Let’s exam<strong>in</strong>e each section<br />
so that you can better understand the different compiler options.<br />
Code Optimization<br />
The compiler can be configured to perform optimizations on your code. When optimizations<br />
are turned off (the None radio button is selected) <strong>in</strong> the Code optimization section of the <strong>C++</strong><br />
page, the compiler makes no attempts to optimize code <strong>in</strong> any way.<br />
If you choose the Speed option, the compiler will generate the fastest code possible without<br />
regard to code size. When optimizations are set to Speed with schedul<strong>in</strong>g, the compiler will<br />
optimize to take advantage of Pentium Pipel<strong>in</strong>e Instructions. In most cases you should leave<br />
this option on the default sett<strong>in</strong>g chosen when you press either the Full Debug or Release<br />
speed buttons.<br />
367<br />
10
368 Day 10<br />
NOTE<br />
The results of chang<strong>in</strong>g optimization sett<strong>in</strong>gs can vary widely. Each<br />
application is different. Sometimes optimiz<strong>in</strong>g for size has a big impact<br />
on the f<strong>in</strong>al executable file size; other times the difference is negligible.<br />
The same is true of optimiz<strong>in</strong>g for speed.<br />
Debugg<strong>in</strong>g<br />
The Debugg<strong>in</strong>g section of the <strong>C++</strong> page of the Project Options dialog box controls how the<br />
compiler generates code for debugg<strong>in</strong>g sessions. This section has four options, which are<br />
expla<strong>in</strong>ed <strong>in</strong> the follow<strong>in</strong>g sections. (I’ll discuss debugg<strong>in</strong>g operations <strong>in</strong> detail tomorrow.)<br />
Debug Information<br />
When the Debug <strong>in</strong>formation option is enabled, <strong>C++</strong>Builder will generate debug <strong>in</strong>formation<br />
for the project. The debug <strong>in</strong>formation is stored <strong>in</strong> a separate file <strong>in</strong> the project’s<br />
directory. The filename of the file conta<strong>in</strong><strong>in</strong>g the debug <strong>in</strong>formation has a .TDS extension.<br />
For example, if you had a program with a project name MyApp, <strong>C++</strong>Builder would generate<br />
a symbol file called MyApp.tds. This file is read by the debugger dur<strong>in</strong>g debug sessions. If you<br />
do not generate debug <strong>in</strong>formation, you will not be able to stop on breakpo<strong>in</strong>ts and <strong>in</strong>spect<br />
variables dur<strong>in</strong>g debugg<strong>in</strong>g. Put another way, you can’t debug your program unless you tell<br />
<strong>C++</strong>Builder to generate debug <strong>in</strong>formation.<br />
L<strong>in</strong>e Number Information<br />
The L<strong>in</strong>e number <strong>in</strong>formation option tells <strong>C++</strong>Builder to generate l<strong>in</strong>e number <strong>in</strong>formation<br />
for the project. L<strong>in</strong>e number <strong>in</strong>formation is used by the debugger to allow you to step through<br />
your code l<strong>in</strong>e by l<strong>in</strong>e. This option is automatically enabled when you have the Debug<br />
Information option turned on (even though the check box doesn’t show it). You can,<br />
however, turn debug <strong>in</strong>formation off and then turn l<strong>in</strong>e number <strong>in</strong>formation on. This will<br />
allow you to set breakpo<strong>in</strong>ts and step through your code, but you won’t be able to <strong>in</strong>spect<br />
any variables. The benefit is that your .tds file will be smaller. In reality, it is unlikely that<br />
you will opt to turn debug <strong>in</strong>formation off and l<strong>in</strong>e number<strong>in</strong>g on.<br />
Automatic Register Variables<br />
When the Automatic Register Variables option is on, the compiler will make use of register<br />
variables as it sees fit. The use of register variables allows for much faster code. Register<br />
variables can, however, be a bit of a pa<strong>in</strong> while debugg<strong>in</strong>g. The compiler might optimize<br />
your variables dur<strong>in</strong>g debugg<strong>in</strong>g, mak<strong>in</strong>g the variable unavailable for <strong>in</strong>spection. When a<br />
variable has been optimized, the watch w<strong>in</strong>dow will display the message Variable ‘x’ has<br />
been optimized and is not available when you attempt to <strong>in</strong>spect the variable.
NOTE<br />
TIP<br />
More on Projects<br />
To avoid the problem with register variables, you can do one of two<br />
th<strong>in</strong>gs. The first is to turn off the Automatic Register Variables option<br />
while debugg<strong>in</strong>g your application. Turn it back on aga<strong>in</strong> when you are<br />
done debugg<strong>in</strong>g and before your product ships.<br />
The other th<strong>in</strong>g you can do is to declare a local variable with the<br />
volatile keyword:<br />
volatile <strong>in</strong>t x;<br />
This will prevent the compiler from optimiz<strong>in</strong>g the variable, thereby<br />
mak<strong>in</strong>g it available for <strong>in</strong>spection.<br />
If you turn off the Automatic Register Variables option, you can still force the compiler to<br />
treat a particular variable as a register variable by declar<strong>in</strong>g it with the register keyword.<br />
Here’s an example:<br />
register <strong>in</strong>t x = 20;<br />
Disable Inl<strong>in</strong>e Expansions<br />
The Disable Inl<strong>in</strong>e Expansions option controls how <strong>in</strong>l<strong>in</strong>e functions are handled by the<br />
compiler. By default, <strong>in</strong>l<strong>in</strong>e functions are expanded <strong>in</strong>l<strong>in</strong>e (placed <strong>in</strong> the code where<br />
necessary) as you would expect. If you turn on this option, thereby disabl<strong>in</strong>g <strong>in</strong>l<strong>in</strong>e expansion,<br />
<strong>in</strong>l<strong>in</strong>e functions will be treated as regular functions rather than as <strong>in</strong>l<strong>in</strong>e functions. Use of this<br />
option is rare, but you may need to use it on occasion when debugg<strong>in</strong>g certa<strong>in</strong> <strong>in</strong>l<strong>in</strong>e<br />
functions.<br />
If you change any of the options on the <strong>C++</strong> page, you should do a<br />
Build All immediately follow<strong>in</strong>g. This will ensure that all modules are<br />
built us<strong>in</strong>g the same compiler sett<strong>in</strong>gs.<br />
Pre-compiled Headers<br />
Note the Pre-compiled Headers section on the <strong>C++</strong> page of the Project Options dialog box.<br />
A pre-compiled header is essentially an image of the symbol table for a project stored on disk.<br />
The first time you build your program, <strong>C++</strong>Builder creates the pre-compiled header. On<br />
subsequent makes, <strong>C++</strong>Builder can load the pre-compiled header from disk, which is much<br />
faster than compil<strong>in</strong>g the headers for each build. In addition, you can opt to cache the precompiled<br />
header <strong>in</strong> memory. This <strong>in</strong>creases compile speed even more because the precompiled<br />
header can be held <strong>in</strong> memory rather than be<strong>in</strong>g loaded from disk when needed.<br />
369<br />
10
370 Day 10<br />
You can set the Pre-compiled Headers option to None, Use pre-compiled headers, or Cache<br />
pre-compiled headers depend<strong>in</strong>g on your needs and the hardware available on your system.<br />
Generally speak<strong>in</strong>g, you will use pre-compiled headers <strong>in</strong> one way or another. Turn<strong>in</strong>g off<br />
pre-compiled headers almost always results <strong>in</strong> much slower build times.<br />
TIP<br />
The option to cache pre-compiled headers will dramatically speed up<br />
compile and build times if you have enough system RAM. If you do<br />
not have enough system RAM, cach<strong>in</strong>g pre-compiled headers can<br />
actually slow down your builds. Do your own tests to determ<strong>in</strong>e<br />
whether cach<strong>in</strong>g of pre-compiled headers is faster or slower on your<br />
system. In general, though, I would recommend turn<strong>in</strong>g cach<strong>in</strong>g off if<br />
you have less than 32MB of system RAM.<br />
Compil<strong>in</strong>g<br />
The Compil<strong>in</strong>g group of options on the <strong>C++</strong> page is used to control how the <strong>C++</strong> compiler<br />
performs certa<strong>in</strong> options. For the most part, you should leave these options set at the defaults<br />
until you get more familiar with <strong>C++</strong>Builder and <strong>C++</strong> <strong>in</strong> general. These sett<strong>in</strong>gs are expla<strong>in</strong>ed<br />
<strong>in</strong> the follow<strong>in</strong>g sections.<br />
Merge Duplicate Str<strong>in</strong>gs<br />
When the Merge Duplicate Str<strong>in</strong>gs option is on, it tells the compiler to merge duplicate<br />
str<strong>in</strong>gs <strong>in</strong>to one memory location. This saves overall program size but can lead to problems<br />
if one of the str<strong>in</strong>gs is modified.<br />
Stack Frames<br />
Leave the Stack frames option on when debugg<strong>in</strong>g. When you are done debugg<strong>in</strong>g, you can<br />
turn off this option to have the compiler generate smaller and faster code, but compile times<br />
will be slightly longer with the Stack frames option off. Most of the time the speed and size<br />
sav<strong>in</strong>gs are not significant enough to warrant turn<strong>in</strong>g off this option. As always, do your own<br />
test to be sure.<br />
Show Warn<strong>in</strong>gs<br />
When the Show warn<strong>in</strong>gs option is on, any compiler warn<strong>in</strong>gs are displayed <strong>in</strong> the Code<br />
Editor message w<strong>in</strong>dow. I always leave this option on. Compiler warn<strong>in</strong>gs should not be<br />
ignored for the long term. Most of the time compiler warn<strong>in</strong>gs can, and should, be resolved.
NOTE<br />
More on Projects<br />
Compiler and l<strong>in</strong>ker errors are always displayed <strong>in</strong> the message w<strong>in</strong>dow.<br />
Show General Msgs<br />
When the Show general msgs option is on, various status messages are displayed <strong>in</strong> the<br />
message w<strong>in</strong>dow of the Code Editor. For example, compil<strong>in</strong>g the ScratchPad program with<br />
general messages turned on results <strong>in</strong> the follow<strong>in</strong>g text be<strong>in</strong>g output to the message w<strong>in</strong>dow:<br />
[<strong>C++</strong>] Compil<strong>in</strong>g: Scratch.cpp<br />
[<strong>C++</strong>] Compil<strong>in</strong>g: SPMa<strong>in</strong>.cpp<br />
[<strong>C++</strong>] Loaded cached pre-compiled headers.<br />
[<strong>C++</strong>] Compil<strong>in</strong>g: SPAbout.cpp<br />
[L<strong>in</strong>ker] Incremental L<strong>in</strong>k<strong>in</strong>g: D:\Projects\Scratch\Scratch.exe<br />
Turn on this option if you want to see the status messages <strong>in</strong> the message w<strong>in</strong>dow.<br />
The Pascal Page<br />
The Pascal page of the Project Options dialog box is used to set the Pascal compiler options.<br />
The Pascal compiler is used if you add Pascal units (.pas) to your <strong>C++</strong>Builder projects. The<br />
Pascal compiler sett<strong>in</strong>gs are numerous and beyond the scope of this discussion, so I’m not<br />
go<strong>in</strong>g to go over each one. See the <strong>C++</strong>Builder onl<strong>in</strong>e help for details about the sett<strong>in</strong>gs on<br />
this page.<br />
The L<strong>in</strong>ker Page<br />
The L<strong>in</strong>ker page of the Project Options dialog box is where you set options that specify how<br />
you want the l<strong>in</strong>ker to function. Until you get very familiar with <strong>C++</strong>Builder, you can leave<br />
this page alone and accept the default sett<strong>in</strong>gs. Figure 10.10 shows the L<strong>in</strong>ker page of the<br />
Project Options dialog box. The sections of this page are expla<strong>in</strong>ed <strong>in</strong> the follow<strong>in</strong>g sections.<br />
Figure 10.10.<br />
Project L<strong>in</strong>ker<br />
options.<br />
371<br />
10
372 Day 10<br />
Application Target<br />
The Application target section specifies whether the project target is an EXE or a DLL. If you<br />
create your projects us<strong>in</strong>g the Object Repository, this option is set for you and you don’t have<br />
to worry about it.<br />
Application Type<br />
The Application type section allows you to set the application type. The available choices are<br />
W<strong>in</strong>dows GUI and Console Application. As with the Application target option, if you create<br />
a new project us<strong>in</strong>g the Object Repository this option will already be set for you.<br />
Map File<br />
The Map file sett<strong>in</strong>gs control whether a map file is generated and how much detail is <strong>in</strong>cluded<br />
<strong>in</strong> the map file. (A map file is an advanced debugg<strong>in</strong>g tool and is someth<strong>in</strong>g you will not likely<br />
use.)<br />
L<strong>in</strong>k<strong>in</strong>g<br />
The L<strong>in</strong>k<strong>in</strong>g section has three l<strong>in</strong>ker options. The Use <strong>in</strong>cremental l<strong>in</strong>ker option tells<br />
<strong>C++</strong>Builder whether it should use the <strong>in</strong>cremental l<strong>in</strong>ker. The <strong>in</strong>cremental l<strong>in</strong>ker saves a lot<br />
of time when you are develop<strong>in</strong>g your applications. For example, let’s say you have a project<br />
with 20 units. If you change one l<strong>in</strong>e of a unit, that unit will have to be recompiled and<br />
rel<strong>in</strong>ked. When <strong>in</strong>cremental l<strong>in</strong>k<strong>in</strong>g is on, only the object file that has changed is rel<strong>in</strong>ked.<br />
When <strong>in</strong>cremental l<strong>in</strong>k<strong>in</strong>g is off, the l<strong>in</strong>ker must rel<strong>in</strong>k every b<strong>in</strong>ary file <strong>in</strong> the project,<br />
regardless of whether it has changed s<strong>in</strong>ce the last l<strong>in</strong>k. L<strong>in</strong>k<strong>in</strong>g takes a fair amount of time,<br />
so the <strong>in</strong>cremental l<strong>in</strong>ker is a big advantage when work<strong>in</strong>g on a project of any significance.<br />
The disadvantage of <strong>in</strong>cremental l<strong>in</strong>k<strong>in</strong>g is twofold. First, the <strong>in</strong>itial l<strong>in</strong>k takes longer when<br />
<strong>in</strong>cremental l<strong>in</strong>k<strong>in</strong>g is enabled. Second, the <strong>in</strong>cremental l<strong>in</strong>ker sets up several files <strong>in</strong> order<br />
to do its th<strong>in</strong>g. These files can get very large (several megabytes) and use up a lot of disk space.<br />
If disk space is a problem, you might want to turn off <strong>in</strong>cremental l<strong>in</strong>k<strong>in</strong>g. Otherwise, it’s<br />
probably just as well to leave <strong>in</strong>cremental l<strong>in</strong>k<strong>in</strong>g on.<br />
NOTE<br />
There is actually a third disadvantage to us<strong>in</strong>g the <strong>in</strong>cremental l<strong>in</strong>ker: It<br />
results <strong>in</strong> slightly larger executable sizes. Before you ship your f<strong>in</strong>al<br />
product you should do a Build All with the Use <strong>in</strong>cremental l<strong>in</strong>ker<br />
option turned off.
More on Projects<br />
The Show warn<strong>in</strong>gs option tells <strong>C++</strong>Builder to display any l<strong>in</strong>ker warn<strong>in</strong>gs <strong>in</strong> the Code<br />
Editor message w<strong>in</strong>dow.<br />
The L<strong>in</strong>k debug version of VCL option allows you to l<strong>in</strong>k to the version of VCL that is built<br />
with debug <strong>in</strong>formation. This will allow you to step <strong>in</strong>to the VCL source code while<br />
debugg<strong>in</strong>g your application.<br />
NOTE<br />
Stepp<strong>in</strong>g <strong>in</strong>to VCL code is not generally a fruitful endeavor. This is<br />
particularly true if you are not an experienced programmer. Any<br />
problems you are experienc<strong>in</strong>g <strong>in</strong> your application are almost certa<strong>in</strong>ly<br />
<strong>in</strong> your code and not <strong>in</strong> the VCL code. There are times when stepp<strong>in</strong>g<br />
<strong>in</strong>to the VCL source code is useful, but it has been my experience that<br />
those times are <strong>in</strong>frequent. Remember, also, that VCL is written <strong>in</strong><br />
Object Pascal, so if the VCL source looks like a foreign language, it is.<br />
Stack Sizes<br />
The Stack sizes section allows you to set the m<strong>in</strong>imum and maximum stack sizes for the<br />
project. It is not usually necessary to change these sett<strong>in</strong>gs.<br />
The Directories/Conditionals Page<br />
The Directories/Conditionals page of the Project Options dialog box is where you set the<br />
directories that your project uses to f<strong>in</strong>d th<strong>in</strong>gs like library files and headers. You can also set<br />
the directory where you want the compiler to put the output files. (See Figure 10.11.) The<br />
fields on this page are described <strong>in</strong> the follow<strong>in</strong>g sections.<br />
Figure 10.11.<br />
The Directories/<br />
Conditionals page.<br />
373<br />
10
374 Day 10<br />
Include Path<br />
The Include Path sett<strong>in</strong>g is the path where <strong>C++</strong>Builder will look for the headers it needs to<br />
build your application (the .h and .hpp files). By default this field is set to po<strong>in</strong>t to the various<br />
<strong>C++</strong>Builder directories where the system headers are found. You should leave this field set<br />
to the default directories unless you have a third-party library that resides <strong>in</strong> a separate<br />
directory. If you need to add directories to the Include Path field, you can add them to the<br />
end of the exist<strong>in</strong>g directories. Separate each directory with a semicolon and be sure to <strong>in</strong>clude<br />
the full path.<br />
Library Path<br />
The Library Path field conta<strong>in</strong>s the paths where the <strong>C++</strong>Builder library files (.lib) can be<br />
found. As with the Include Path field, you can add directories by separat<strong>in</strong>g each with a<br />
semicolon.<br />
WARNING<br />
Do not remove the list of default directories <strong>in</strong> either the Include Path<br />
or Library Path fields. If you need to modify these fields, add directories<br />
to the end of the directories listed, but do not delete any of the<br />
default directories. If you remove the default directories, your application<br />
will not compile.<br />
Conditional Def<strong>in</strong>es<br />
The Conditional def<strong>in</strong>es field is used to specify any #def<strong>in</strong>es that you want to add at the<br />
project level. For example, to add support for the TRACE and WARN diagnostic macros you<br />
would add this text to the Conditional Def<strong>in</strong>es field:<br />
__TRACE;__WARN<br />
Note that each #def<strong>in</strong>e is separated by a semicolon.<br />
Pascal Unit Aliases<br />
The Pascal Unit Aliases field associates a Pascal unit name with a specific <strong>C++</strong> header file. The<br />
aliases are separated by a semicolon.
More on Projects<br />
The <strong>C++</strong>Builder Code Editor<br />
There is no question that <strong>C++</strong>Builder is highly visual <strong>in</strong> nature. That’s one of the great th<strong>in</strong>gs<br />
about programm<strong>in</strong>g with it. Still, any program of any significance will have a great deal of<br />
code that must be written by hand. After you get the user <strong>in</strong>terface part of your application<br />
written with <strong>C++</strong>Builder’s impressive visual tools, you’ll likely spend a long stretch with the<br />
<strong>C++</strong>Builder Code Editor. The Code Editor has some features you’ll learn to appreciate once<br />
you discover them.<br />
In this section you will learn about<br />
NOTE<br />
■ Basic editor operations<br />
■ Specialized editor features<br />
■ The Code Editor speed menu<br />
■ Chang<strong>in</strong>g the editor options<br />
The <strong>C++</strong>Builder Code Editor allows you to choose from four<br />
keyboard-mapp<strong>in</strong>g configurations: Default, IDE Classic, BRIEF, and<br />
Epsilon. The rest of this chapter assumes Default keyboard mapp<strong>in</strong>g.<br />
If you are already familiar with one of the other keyboard-mapp<strong>in</strong>g<br />
configurations, you can ignore any references to specific keystrokes.<br />
Basic Editor Operations<br />
NOTE<br />
I’m go<strong>in</strong>g to assume that you know enough to be able to enter and delete text; highlight text<br />
with the mouse; cut, copy, and paste; and so on. I won’t spend any time go<strong>in</strong>g over th<strong>in</strong>gs<br />
at that level.<br />
If you have a lot of time <strong>in</strong> the pilot’s seat writ<strong>in</strong>g code, you may be a<br />
heavy keyboard user. If that is the case, you will likely use the keyboard<br />
shortcuts for simple th<strong>in</strong>gs like cutt<strong>in</strong>g, copy<strong>in</strong>g, and past<strong>in</strong>g. If you are<br />
not as experienced with the keyboard (or you just prefer us<strong>in</strong>g the<br />
mouse), you may want to customize your <strong>C++</strong>Builder speedbar to add<br />
speed buttons for operations like cutt<strong>in</strong>g, copy<strong>in</strong>g, and past<strong>in</strong>g.<br />
Whichever method you choose, you will probably get lots of practice—<br />
if you are anyth<strong>in</strong>g like me, you will do a lot of cut, copy, and paste<br />
while writ<strong>in</strong>g your programs.<br />
375<br />
10
376 Day 10<br />
When it comes right down to it, the <strong>C++</strong>Builder Code Editor is a typical code editor. It<br />
features syntax highlight<strong>in</strong>g, which makes it easy to identify keywords, str<strong>in</strong>gs, numeric<br />
constants, and comments at a glance. We’ll look at sett<strong>in</strong>g the editor preferences a little<br />
later on.<br />
The Code Editor is a tabbed w<strong>in</strong>dow. You can open as many editor w<strong>in</strong>dows as you like; each<br />
will be represented by a tab along the top of the editor w<strong>in</strong>dow. The tab will display the name<br />
of the file. To switch to a source file, simply click on the tab correspond<strong>in</strong>g to the file you want<br />
to view. If more tabs exist than can be displayed at one time, scroll buttons will appear so that<br />
you can scroll among the tabs.<br />
NOTE<br />
The status bar at the bottom of the Code Editor gives status <strong>in</strong>formation (obviously). The<br />
current l<strong>in</strong>e number and the cursor position on the l<strong>in</strong>e are reported <strong>in</strong> the left panel of<br />
the status bar. If the file has changed s<strong>in</strong>ce it was last saved, the status bar will say Modified<br />
<strong>in</strong> the center panel of the status bar. The right panel of the status bar shows the current mode,<br />
either Insert or Overwrite. If the file has been set to read-only, this panel will say Read Only.<br />
The editor w<strong>in</strong>dow has a left marg<strong>in</strong> that is called the gutter. The gutter is used to display icons<br />
at different stages of the development process. For example, when you set a debugger<br />
breakpo<strong>in</strong>t (discussed tomorrow), a red stop-sign icon is placed <strong>in</strong> the gutter. When you set<br />
a bookmark (discussed <strong>in</strong> just a bit), an icon represent<strong>in</strong>g the bookmark is placed <strong>in</strong> the gutter.<br />
The gutter can be annoy<strong>in</strong>g at times. If you accidentally click on the<br />
gutter when try<strong>in</strong>g to select text or place the cursor, you will f<strong>in</strong>d that a<br />
breakpo<strong>in</strong>t is set on that l<strong>in</strong>e. Click the gutter aga<strong>in</strong> to clear the<br />
breakpo<strong>in</strong>t.<br />
Open<strong>in</strong>g and Sav<strong>in</strong>g Files<br />
There’s noth<strong>in</strong>g too mysterious about open<strong>in</strong>g and sav<strong>in</strong>g files <strong>in</strong> the Code Editor. It should<br />
be po<strong>in</strong>ted out, though, that there is a difference between open<strong>in</strong>g a project and open<strong>in</strong>g a<br />
source file. When you choose File | Open Project from the ma<strong>in</strong> menu, you are prompted<br />
for the name of a project file (.mak) to open. When you choose File | Open from the ma<strong>in</strong><br />
menu, you can open any text file. (You can also open a form file, but that’s a different<br />
discussion.) Both the Open and Open Project menu items have correspond<strong>in</strong>g speedbar<br />
buttons.
NOTE<br />
More on Projects<br />
If you open a source file (.cpp) that is the source code unit for a form,<br />
<strong>C++</strong>Builder will open the source file <strong>in</strong> the Code Editor and will also<br />
open the form <strong>in</strong> the Form Designer.<br />
You can open multiple files at one time. To open multiple files, choose the files you want to<br />
open <strong>in</strong> the Open dialog box and click OK. Each file selected will be loaded, and a tab for<br />
each file will be placed at the top of the editor w<strong>in</strong>dow.<br />
TIP<br />
You can also use drag-and-drop to open files. For <strong>in</strong>stance, you can<br />
choose a file (or a group of files) <strong>in</strong> Explorer, drag it onto the Code<br />
Editor, and drop it. The file will be opened <strong>in</strong> the Code Editor.<br />
To save a file, choose File | Save or File | Save As from the ma<strong>in</strong> menu or type Ctrl+S on the<br />
keyboard. If the file has not been previously saved, the Save As dialog box will appear, and<br />
you can enter a filename at that time.<br />
Highlight<strong>in</strong>g Text<br />
Although text highlight<strong>in</strong>g is basic text editor stuff, I thought it wouldn’t hurt to rem<strong>in</strong>d you<br />
of a couple basic highlight<strong>in</strong>g techniques you can use <strong>in</strong> the <strong>C++</strong>Builder Code Editor.<br />
To highlight a short block of text, you can use the mouse to drag across any text you want<br />
to highlight. After you’ve selected the text, you can cut, copy, or paste as needed. To highlight<br />
longer blocks of code, you can use the click+Shift+click method. First, click at the beg<strong>in</strong>n<strong>in</strong>g<br />
of the block you want to highlight. Next, hold the Shift key on the keyboard, and then click<br />
aga<strong>in</strong> at the end of the block. All text between the start<strong>in</strong>g po<strong>in</strong>t and the end<strong>in</strong>g po<strong>in</strong>t is<br />
highlighted.<br />
Another useful feature is the capability to quickly select an <strong>in</strong>dividual word. To select a<br />
keyword, function name, or variable, just double-click on the word. Now you can perform<br />
any edit<strong>in</strong>g operations you want with the highlighted word.<br />
377<br />
10
378 Day 10<br />
TIP<br />
To select a s<strong>in</strong>gle l<strong>in</strong>e of code with the mouse, click at the beg<strong>in</strong>n<strong>in</strong>g of<br />
the l<strong>in</strong>e and drag straight down to the beg<strong>in</strong>n<strong>in</strong>g of the next l<strong>in</strong>e. To<br />
highlight a s<strong>in</strong>gle l<strong>in</strong>e of code with the keyboard, first press the Home<br />
key to move to the beg<strong>in</strong>n<strong>in</strong>g of the l<strong>in</strong>e and then use Shift+downarrow<br />
key to highlight the l<strong>in</strong>e.<br />
There are dozens of keyboard comb<strong>in</strong>ations that can be used to highlight text and do other<br />
edit<strong>in</strong>g chores. For a complete list of all the keyboard shortcuts available, consult the<br />
<strong>C++</strong>Builder onl<strong>in</strong>e help.<br />
TIP<br />
As you program you often add, delete, or move blocks of text. Sometimes<br />
you will need to <strong>in</strong>dent an entire block of code. At other times<br />
you will need to un-<strong>in</strong>dent (outdent?) an entire block of code. To<br />
<strong>in</strong>dent a block of code, highlight the l<strong>in</strong>es that you want to <strong>in</strong>dent and<br />
then press Ctrl+Shift+I on the keyboard. The entire block will be<br />
<strong>in</strong>dented. To un-<strong>in</strong>dent a block of code, press Ctrl+Shift+U on the<br />
keyboard.<br />
Undo<br />
The Code Editor has a virtually limitless number of undo levels (32,767 by default).<br />
Normally, you can only undo commands up to the last time you saved a file. By chang<strong>in</strong>g<br />
the editor options, you will be able to undo past commands even after sav<strong>in</strong>g the file. I’ll talk<br />
about editor options and preferences later <strong>in</strong> the chapter, <strong>in</strong> the section titled “Chang<strong>in</strong>g the<br />
Editor Options.”<br />
In general, it pays to remember this simple maxim: “Undo is your friend.”<br />
F<strong>in</strong>d and Replace<br />
F<strong>in</strong>d and Replace are used fairly heavily <strong>in</strong> programm<strong>in</strong>g. F<strong>in</strong>d might be used to f<strong>in</strong>d a specific<br />
piece of code or a specific variable <strong>in</strong> your code. Replace might be used to change a variable’s<br />
name or to change the name of a function. The possibilities are endless.<br />
The <strong>C++</strong>Builder F<strong>in</strong>d and Replace dialog boxes implement more or less standard f<strong>in</strong>d-andreplace<br />
operations. To br<strong>in</strong>g up the F<strong>in</strong>d dialog box, choose Search | F<strong>in</strong>d from the ma<strong>in</strong>
More on Projects<br />
menu or press Ctrl+F. To <strong>in</strong>voke the Replace dialog box, choose Search | Replace from the<br />
menu or press Ctrl+R. Figure 10.12 shows the <strong>C++</strong>Builder Replace dialog box. With a couple<br />
of obvious exceptions, the F<strong>in</strong>d dialog box conta<strong>in</strong>s the same options.<br />
Figure 10.12.<br />
The Replace Text<br />
dialog box.<br />
For the most part, the options on the F<strong>in</strong>d and Replace dialog boxes do exactly what they<br />
<strong>in</strong>dicate. If you choose the Case sensitive option, you need to type <strong>in</strong> the search text exactly<br />
as it appears <strong>in</strong> the source file.<br />
The Whole words only option requires a word of explanation. <strong>C++</strong> code is, obviously, not<br />
pla<strong>in</strong> text. Take the follow<strong>in</strong>g l<strong>in</strong>e, for <strong>in</strong>stance:<br />
Memo->Caption = GetCaption();<br />
In this case neither Memo, Caption, nor GetCaption could be considered a whole word because<br />
they are surrounded by special <strong>C++</strong> syntax characters. If you search for the word Memo and have<br />
the Whole words only option on, the F<strong>in</strong>d operation will ignore syntax characters and will<br />
still f<strong>in</strong>d Memo <strong>in</strong> this l<strong>in</strong>e.<br />
The Regular expressions option requires explanation as well. When this option is on, you can<br />
use special wildcard characters when do<strong>in</strong>g searches. For a complete description of the<br />
wildcard characters, see the <strong>C++</strong>Builder onl<strong>in</strong>e help under the topic Regular Expressions.<br />
When replac<strong>in</strong>g text, it is safest to leave on the Prompt on replace option. When you do a<br />
Replace All operation with this option on, the editor highlights each found word and prompts<br />
you whether to replace it. It is easy to miscalculate the results of a Replace All operation, so<br />
always use Replace with care. Even then, it still pays to remember that maxim: “Undo is your<br />
friend.”<br />
The rest of the F<strong>in</strong>d and Replace options are self-explanatory and therefore don’t need<br />
additional mention.<br />
379<br />
10
380 Day 10<br />
NOTE<br />
<strong>C++</strong>Builder comes with a utility that allows you to search for text<br />
across source files. The utility is called grep (for Global Regular<br />
Expression Pr<strong>in</strong>t) and can be found <strong>in</strong> the CBuilder\B<strong>in</strong> directory. This<br />
command-l<strong>in</strong>e program is a powerful search utility. Unfortunately<br />
<strong>C++</strong>Builder does not <strong>in</strong>tegrate grep <strong>in</strong>to the IDE as <strong>Borland</strong> <strong>C++</strong> does.<br />
Still, you can run grep from the command l<strong>in</strong>e or search various onl<strong>in</strong>e<br />
sources for a host of third-party W<strong>in</strong>dows-based grep tools.<br />
Gett<strong>in</strong>g Help<br />
One of the most useful features of the Code Editor is its <strong>in</strong>tegration with the <strong>C++</strong>Builder help<br />
system. Just place the editor cursor over a <strong>C++</strong> keyword, a VCL property or method, or any<br />
other <strong>C++</strong>Builder-specific text and press F1. If a help topic for the text under the cursor exists<br />
<strong>in</strong> the <strong>C++</strong>Builder help files, W<strong>in</strong>Help will run with the appropriate page show<strong>in</strong>g. If no help<br />
topic exists for the selected text, an error message will be displayed. This feature is extremely<br />
useful when you can’t remember how to use a particular aspect of <strong>C++</strong>Builder, <strong>C++</strong>, or VCL.<br />
Help, as they say, is just a keystroke away.<br />
Specialized Editor Features<br />
The <strong>C++</strong>Builder Code Editor has a few features that are extremely useful when you are<br />
writ<strong>in</strong>g a lot of code. They are expla<strong>in</strong>ed <strong>in</strong> the follow<strong>in</strong>g sections.<br />
Us<strong>in</strong>g Bookmarks<br />
You can set bookmarks <strong>in</strong> your code to temporarily mark your place <strong>in</strong> a source file. For<br />
example, you often have to temporarily leave a block of code you are work<strong>in</strong>g on to review<br />
previously written code or to copy code from another location. By dropp<strong>in</strong>g a bookmark at<br />
that po<strong>in</strong>t <strong>in</strong> your code before runn<strong>in</strong>g off to do your other work, you can return to that<br />
section of code with a simple keystroke. You can have up to 10 bookmarks set at any one time.<br />
To set a bookmark at a particular location, press Ctrl+Shift and the number of the bookmark<br />
to set. For example, to set bookmark 0 (the first bookmark), place the editor cursor at the<br />
location you want to mark and then press Ctrl+Shift+0. When you set a bookmark, an icon<br />
is placed <strong>in</strong> the Code Editor gutter to <strong>in</strong>dicate that a bookmark exists on that l<strong>in</strong>e. The icon<br />
shows the number of the bookmark. Figure 10.13 shows the Code Editor with a bookmark<br />
dropped on a l<strong>in</strong>e.
Figure 10.13.<br />
The Code Editor with<br />
a bookmark set.<br />
NOTE<br />
More on Projects<br />
To return to the bookmark, press Ctrl plus the number of the bookmark to which you want<br />
to return. Us<strong>in</strong>g the same example, you would type Ctrl+0 to go back to the bookmark. To<br />
clear a bookmark, place the editor cursor anywhere on the l<strong>in</strong>e conta<strong>in</strong><strong>in</strong>g the bookmark and<br />
aga<strong>in</strong> press Ctrl+Shift+0.<br />
Bookmarks can be set for each file you have open <strong>in</strong> the Code Editor.<br />
For <strong>in</strong>stance, you can have bookmark 0 set <strong>in</strong> one source file and<br />
another bookmark 0 set <strong>in</strong> another source file. This means that<br />
bookmarks cannot be found across source files. If you set bookmark 0<br />
<strong>in</strong> Unit1.cpp, you cannot press Ctrl+0 from Unit2.cpp and expect to be<br />
taken to the bookmark <strong>in</strong> Unit1.cpp.<br />
To illustrate the use of bookmarks, do the follow<strong>in</strong>g:<br />
1. Open any source file <strong>in</strong> the Code Editor.<br />
2. Scroll almost to the bottom of the file and click on a l<strong>in</strong>e of code.<br />
3. Press Ctrl+Shift+0 to set a bookmark. The bookmark icon shows <strong>in</strong> the Code<br />
Editor gutter.<br />
4. Press Ctrl+Home to move to the top of the source file.<br />
5. Now press Ctrl+0 to jump back to the bookmark. The Code Editor changes to<br />
show the l<strong>in</strong>e of code where the bookmark was set, and the cursor is placed exactly<br />
where it was when you set the bookmark.<br />
6. Type Ctrl+Shift+0 aga<strong>in</strong> to clear the bookmark. The bookmark is cleared, and the<br />
bookmark icon disappears from the Code Editor gutter.<br />
Bookmarks are temporary. When you close the source file and reopen it, the bookmark is not<br />
preserved.<br />
381<br />
10
382 Day 10<br />
Incremental Search<br />
You can use the <strong>in</strong>cremental search option to quickly f<strong>in</strong>d a short series of characters. To start<br />
an <strong>in</strong>cremental search, choose Search | Incremental Search from the ma<strong>in</strong> menu or press<br />
Ctrl+E on the keyboard. To understand how the <strong>in</strong>cremental search works, it is easiest to do<br />
an exercise. Do the follow<strong>in</strong>g:<br />
1. Create a new text file from the Object Repository. (It doesn’t matter whether you<br />
currently have a project open.)<br />
2. Type the follow<strong>in</strong>g text:<br />
Learn<strong>in</strong>g to write W<strong>in</strong>dows<br />
programs a bit at a time<br />
is not so bad. Isn’t it<br />
time you got back to work?<br />
3. Move the cursor back to the top of the file (Ctrl+Home).<br />
4. Press Ctrl+E to start the <strong>in</strong>cremental search. You will be search<strong>in</strong>g for the word<br />
back. Note that the Code Editor status bar says Search<strong>in</strong>g for:.<br />
5. Type a b on the keyboard. The letter b <strong>in</strong> the word bit is highlighted. Hmmm…<br />
that’s not what you are look<strong>in</strong>g for.<br />
6. Now type an a on the keyboard. The next occurrence of ba is found, this time <strong>in</strong><br />
the word bad. That’s still not what you are look<strong>in</strong>g for.<br />
7. Type a c on the keyboard. The letters bac <strong>in</strong> the word back are highlighted. Now<br />
type a k. The Code Editor status bar now says Search<strong>in</strong>g for: back and the word<br />
back is highlighted. Congratulations, you found what you were look<strong>in</strong>g for!<br />
8. Press Esc (or Enter) on the keyboard to stop the <strong>in</strong>cremental search. Close the text<br />
file without sav<strong>in</strong>g it.<br />
That’s all there is to it. The <strong>in</strong>cremental search is handy when you’re search<strong>in</strong>g for short<br />
amounts of text.<br />
TIP<br />
If you make a mistake when typ<strong>in</strong>g <strong>in</strong> the characters while do<strong>in</strong>g an<br />
<strong>in</strong>cremental search, you can use the Backspace key to remove the last<br />
character typed from the search str<strong>in</strong>g.<br />
F<strong>in</strong>d<strong>in</strong>g Match<strong>in</strong>g Braces<br />
As you have seen, <strong>C++</strong> code can often get pretty convoluted when you start nest<strong>in</strong>g if<br />
statements, if-else pairs, and so on. To tell the truth, it’s easy to get lost. The Code Editor<br />
has a feature to help you f<strong>in</strong>d a brace that matches the brace the cursor is currently on. To
More on Projects<br />
f<strong>in</strong>d a match<strong>in</strong>g brace, place the cursor before a brace (it doesn’t matter if it’s the open<strong>in</strong>g or<br />
clos<strong>in</strong>g brace). Now press Ctrl+[ on the keyboard. The cursor jumps to the brace that matches<br />
the brace you started on. Press Ctrl+[ aga<strong>in</strong>, and the cursor jumps back to where you started.<br />
Gett<strong>in</strong>g lost <strong>in</strong> the maze of braces <strong>in</strong> a long series of if statements is still a possibility, but at<br />
least now you know how to f<strong>in</strong>d your way out aga<strong>in</strong>.<br />
The Code Editor Speed Menu<br />
Like most of the different w<strong>in</strong>dows you encounter <strong>in</strong> <strong>C++</strong>Builder, the Code Editor has its<br />
own speed menu. The Code Editor speed menu can essentially be broken down <strong>in</strong>to two<br />
parts: editor items and debugger items. I will leave the debugger items of the speed menu for<br />
tomorrow when I discuss debugg<strong>in</strong>g, but I’ll go over the editor items on the speed menu now.<br />
Table 10.2 conta<strong>in</strong>s a list of the speed menu items that perta<strong>in</strong> to the editor, along with a<br />
description of each.<br />
Table 10.2. The Code Editor speed menu items.<br />
Item Description<br />
Swap Cpp/Hdr Files If the header file correspond<strong>in</strong>g to the current source<br />
file is not opened <strong>in</strong> the Code Editor, choos<strong>in</strong>g this<br />
menu item opens the header file, creates a new tab for<br />
it, and changes focus to that w<strong>in</strong>dow. Choos<strong>in</strong>g this<br />
option when both the .cpp and .h files are open<br />
switches focus back and forth between the two files.<br />
Close Page Closes the active page <strong>in</strong> the edit w<strong>in</strong>dow. If the file on<br />
the page has been modified s<strong>in</strong>ce it was last saved, you<br />
will be prompted to save the file.<br />
Open File At Cursor Opens the file under the cursor. This option has an<br />
effect only when the text under the cursor represents a<br />
source code file. For example, if you had a header<br />
<strong>in</strong>cluded with #<strong>in</strong>clude “myclass.h”, you could place<br />
the cursor over the filename and choose this menu item<br />
to open the file. The file will be placed <strong>in</strong> a new editor<br />
w<strong>in</strong>dow, and focus will be set to the w<strong>in</strong>dow.<br />
New Edit W<strong>in</strong>dow Opens a new copy of the Code Editor. This is convenient<br />
if you want to compare two source files side-byside.<br />
383<br />
cont<strong>in</strong>ues<br />
10
384 Day 10<br />
Table 10.2. cont<strong>in</strong>ued<br />
Item Description<br />
Topic Search Displays the help topic for the item under the cursor (if<br />
it can be found). Same as press<strong>in</strong>g F1 on the keyboard.<br />
View As Form If the active source unit <strong>in</strong> the Code Editor has a<br />
correspond<strong>in</strong>g form, choos<strong>in</strong>g this option will switch<br />
from the Code Editor to the Form Designer where the<br />
form will be displayed. (Same as press<strong>in</strong>g F12.)<br />
Read Only Toggles the currently active file between read-only and<br />
read/write mode. When set to read-only, the file<br />
cannot be modified, although text can be selected and<br />
copied to the Clipboard. The status bar displays Read<br />
Only to <strong>in</strong>dicate that the file is read only. When the<br />
file is closed and reopened, it is aga<strong>in</strong> <strong>in</strong> read/write<br />
mode.<br />
Message View Displays or hides the <strong>C++</strong>Builder message w<strong>in</strong>dow.<br />
The message w<strong>in</strong>dow automatically appears when there<br />
are compiler or l<strong>in</strong>ker errors or warn<strong>in</strong>gs, but can be<br />
specifically shown or hidden with this command.<br />
Properties Displays the Environment Options dialog box so that<br />
the editor options can be set.<br />
Depend<strong>in</strong>g on the current state of the Code Editor and the particular type of file open, some<br />
of the items <strong>in</strong> Table 10.2 may be disabled at any given time.<br />
Chang<strong>in</strong>g the Editor Options<br />
The editor options occupy three pages of the Environment Options dialog box. To view this<br />
dialog box, choose Options | Environment from the ma<strong>in</strong> menu.<br />
TIP<br />
You can also choose Properties from the Code Editor speed menu to<br />
view the editor options. The difference with this method is that only<br />
the three pages perta<strong>in</strong><strong>in</strong>g to the editor options will be displayed <strong>in</strong> the<br />
Environment Options dialog box.<br />
The three pages of the Environment Options that are specific to the Code Editor are the<br />
Editor, Display, and Colors pages. We’ll exam<strong>in</strong>e these pages next.
More on Projects<br />
The Editor Page<br />
The Editor page of the Environment Options dialog box allows you to control how the editor<br />
works for you. As you can see from Figure 10.<strong>14</strong>, there are a lot of options available on this<br />
page.<br />
Figure 10.<strong>14</strong>.<br />
The Editor page of the<br />
Environment Options<br />
dialog box.<br />
NOTE<br />
At the top of the page is a combo box labeled Editor SpeedSett<strong>in</strong>g. You can choose Default<br />
keymapp<strong>in</strong>g, IDE Classic, BRIEF emulation, or Epsilon emulation from the combo box. If<br />
you change the sett<strong>in</strong>g <strong>in</strong> this combo box, the Editor Options will change to reflect the<br />
defaults for the type you chose.<br />
If you are new to programm<strong>in</strong>g or if you have been us<strong>in</strong>g other <strong>Borland</strong><br />
compilers us<strong>in</strong>g the Default keymapp<strong>in</strong>g, you don’t have to worry<br />
about what you are miss<strong>in</strong>g. For those of you who are accustomed to<br />
years of us<strong>in</strong>g a particular type of editor, you will be glad to know that<br />
you can still use the keyboard shortcuts and editor options you know<br />
and love by simply chang<strong>in</strong>g the Editor SpeedSett<strong>in</strong>g on this page and<br />
on the Display page.<br />
Toward the bottom of the screen you will see the Block <strong>in</strong>dent and Tab stops fields. You can<br />
use these two fields to change the amount by which code is <strong>in</strong>dented when you block <strong>in</strong>dent<br />
or when you tab to the next tab stop. Block <strong>in</strong>dent<strong>in</strong>g is discussed <strong>in</strong> the section “Highlight<strong>in</strong>g<br />
Text.”<br />
385<br />
10
386 Day 10<br />
NOTE<br />
Real programmers use tab stops of either two or three characters. (I use<br />
two-character tabs.)<br />
The Undo limit of 32,767 is probably sufficient for most needs (I hope!), so I doubt you’ll<br />
feel the need to modify that sett<strong>in</strong>g. The Syntax extensions field allows you to select the types<br />
of files for which syntax highlight<strong>in</strong>g will be applied. For example, you probably don’t want<br />
syntax highlight<strong>in</strong>g applied to regular text files (.txt) that you open <strong>in</strong> the Code Editor, so<br />
that file type is not listed by default.<br />
In the middle of the Editor page, you will f<strong>in</strong>d a whole gaggle of editor options from which<br />
to choose. Because there are so many options available, and because it is difficult to determ<strong>in</strong>e<br />
exactly which of the available options are the most important, I’ll refer you to the <strong>C++</strong>Builder<br />
onl<strong>in</strong>e help. Simply press F1 while on this page or click the Help button and you will have<br />
explanations of each of the editor options you see on this page. As with some of the other<br />
options you looked at today, you can probably feel comfortable <strong>in</strong> accept<strong>in</strong>g the <strong>C++</strong>Builder<br />
defaults. (Except for the tab stops and block <strong>in</strong>dent!)<br />
The Display Page<br />
The Display page of the Environment Options dialog box has additional options from which<br />
you can choose. These options perta<strong>in</strong> to the actual display of the text <strong>in</strong> the Code Editor<br />
w<strong>in</strong>dow. (See Figure 10.15.)<br />
Figure 10.15.<br />
The Display page.<br />
In the Display and file options section, you will f<strong>in</strong>d the BRIEF cursor shapes option. Turn<br />
on this option if you want the horizontal cursor <strong>in</strong> the editor w<strong>in</strong>dow rather than the vertical<br />
cursor. Check the Create backup file option if you want <strong>C++</strong>Builder to create a backup file<br />
every time you save your file or your project. Backup file extensions beg<strong>in</strong> with a tilde (~). For<br />
<strong>in</strong>stance, the backup file for a source file called MyApp.cpp would by MyApp.~cp.
NOTE<br />
More on Projects<br />
I usually get fed up with all those backup files clutter<strong>in</strong>g up my project<br />
directories and turn off file backups. Suit yourself.<br />
The Zoom to full screen option controls how the Code Editor acts when maximized. If this<br />
option is on, the Code Editor will fill the entire screen when maximized. When this option<br />
is off (the default), the top of the Code Editor w<strong>in</strong>dow will stop at the bottom of the<br />
<strong>C++</strong>Builder ma<strong>in</strong> w<strong>in</strong>dow when maximized. In other words, the <strong>C++</strong>Builder ma<strong>in</strong> w<strong>in</strong>dow<br />
will always be visible when the Code Editor is maximized if this option is off.<br />
You can also choose whether your editor w<strong>in</strong>dows have a visible right marg<strong>in</strong>. The right<br />
marg<strong>in</strong> is not b<strong>in</strong>d<strong>in</strong>g—you can still type text beyond it—but it gives you a visual cue that<br />
your l<strong>in</strong>es might be gett<strong>in</strong>g too long.<br />
You can also change the Code Editor font and po<strong>in</strong>t size. A combo box is provided for you<br />
to choose these options. Only fixed-space screen fonts are listed; proportional and pr<strong>in</strong>ter<br />
fonts are not. Choose the typeface and po<strong>in</strong>t size that best suit your needs. A preview w<strong>in</strong>dow<br />
is provided so that you can see how the font you have chosen will look.<br />
The Colors Page<br />
The Colors page of the Environment Options dialog box allows you to fully customize the<br />
Code Editor’s w<strong>in</strong>dow and syntax highlight<strong>in</strong>g options. (See Figure 10.16.)<br />
Figure 10.16.<br />
The Colors page <strong>in</strong> the<br />
Environment Options<br />
dialog box.<br />
At the top of the page is the Color SpeedSett<strong>in</strong>g combo box. This combo box gives you four<br />
predef<strong>in</strong>ed color schemes from which to choose. You can choose one of these color schemes<br />
or use one of them as a base for creat<strong>in</strong>g your own color scheme.<br />
387<br />
10
388 Day 10<br />
The Colors page is very easy to use. At the bottom of the page is a text w<strong>in</strong>dow that conta<strong>in</strong>s<br />
sample code. If you click on one of the key elements of the code, that element will be selected<br />
<strong>in</strong> the Elements list box, and its current sett<strong>in</strong>gs will be displayed on the Color grid. To change<br />
the foreground, background, and text attributes for that element, simply choose the sett<strong>in</strong>gs<br />
you like. For example, keywords are displayed <strong>in</strong> bold text with a black foreground and a<br />
white background (assum<strong>in</strong>g the Default color scheme). To change the keywords to green,<br />
bold text, click on the void keyword <strong>in</strong> the sample code w<strong>in</strong>dow and then change the<br />
foreground color to green. The text colors <strong>in</strong> the sample w<strong>in</strong>dow change to reflect the new<br />
color you have chosen. Cont<strong>in</strong>ue chang<strong>in</strong>g colors as desired until you have the example<br />
w<strong>in</strong>dow just the way you want it. When you click OK, the Code Editor will change to the<br />
new colors you have chosen.<br />
Summary<br />
Today was one of those days when you learned a lot about the k<strong>in</strong>ds of th<strong>in</strong>gs that often get<br />
overlooked. I hope you picked up some tips that you can use as you work with <strong>C++</strong>Builder<br />
projects and the <strong>C++</strong>Builder Code Editor. You also got an explanation of what some of the<br />
project and editor options are for. Even if it didn’t make much sense to you now, this chapter<br />
is someth<strong>in</strong>g you can refer to at a later date.<br />
Workshop<br />
The Workshop conta<strong>in</strong>s quiz questions to help you solidify your understand<strong>in</strong>g of the<br />
material covered and exercises to provide you with experience <strong>in</strong> us<strong>in</strong>g what you have learned.<br />
You can f<strong>in</strong>d answers to the quiz questions <strong>in</strong> Appendix A, “Answers to Quiz Questions.”<br />
Q&A<br />
Q When I use the Project Manager w<strong>in</strong>dow, the units <strong>in</strong> my project seem to<br />
alternate between bold and normal text. Why is that?<br />
A Any units that have changed and that have not yet been saved show up <strong>in</strong> bold text<br />
<strong>in</strong> the Project Manager w<strong>in</strong>dow. Units that are up-to-date (that do not need to be<br />
saved) are shown <strong>in</strong> normal text.<br />
Q Whenever I try to change the name of my project source code unit <strong>in</strong> the<br />
Project Explorer, it reverts back to its orig<strong>in</strong>al filename. Why is that?<br />
A You cannot change the filenames of source code units through the Project Explorer.<br />
You can only change those objects <strong>in</strong> the Project Explorer that have a Name<br />
property. In other words, you can only change the names of forms and components.<br />
To change a source code filename, choose File | Save As from the Code<br />
Editor ma<strong>in</strong> menu.
Quiz<br />
More on Projects<br />
Q When I start my application, my ma<strong>in</strong> form isn’t displayed, but <strong>in</strong>stead one of<br />
my dialog boxes is displayed. What gives?<br />
A You have accidentally set the ma<strong>in</strong> form for the application to be the dialog form.<br />
Go to the Project Options dialog box, click on the Forms tab, and select your ma<strong>in</strong><br />
form from the Ma<strong>in</strong> Form combo box on the top of the page. Run your program<br />
aga<strong>in</strong>, and the ma<strong>in</strong> form will be displayed as you would expect.<br />
Q All those project compiler and l<strong>in</strong>ker options confuse me. Do I need to know<br />
about each of those options to write programs with <strong>C++</strong>Builder?<br />
A No. The default project options work well for almost all <strong>C++</strong>Builder applications.<br />
At some po<strong>in</strong>t you may get further <strong>in</strong>to the mysteries of the compiler and l<strong>in</strong>ker,<br />
and at that time you can learn more about the project options. Until then, don’t<br />
worry about them.<br />
Q When my application is m<strong>in</strong>imized, the icon and caption do not match what I<br />
set up <strong>in</strong> my application’s ma<strong>in</strong> form. Why not?<br />
A Sett<strong>in</strong>g the icon and caption of the ma<strong>in</strong> form does not affect the way your<br />
application is displayed when m<strong>in</strong>imized. To set the caption and icon for the<br />
application, go to the Project Options dialog box, choose the Application page, and<br />
supply the application name and icon.<br />
Q Can I open several source files at one time <strong>in</strong> the Code Editor?<br />
A Yes. You can either choose File | Open and select multiple files to open, or you can<br />
select a group of files <strong>in</strong> W<strong>in</strong>dows Explorer and drop them on the Code Editor.<br />
Q Can I f<strong>in</strong>d and replace a variable name across all my source files?<br />
A No. You will have to open each source file and execute the Replace dialog box <strong>in</strong><br />
each source file. You can, however, use the F3 key to repeat the last f<strong>in</strong>d or replace<br />
command. Remember not to change any <strong>C++</strong>Builder-generated variable names.<br />
Q I f<strong>in</strong>d that 32,767 undo levels is not enough for my needs. What do you<br />
suggest?<br />
A Don’t quit your day job.<br />
1. How can you quickly switch between a unit’s form and source code when work<strong>in</strong>g<br />
with <strong>C++</strong>Builder?<br />
2. If you remove a file from your project via the Project Manager, is the file removed<br />
from your hard drive?<br />
3. How do you set the ma<strong>in</strong> form for an application?<br />
4. What does it mean if you do not have <strong>C++</strong>Builder auto-create forms?<br />
389<br />
10
390 Day 10<br />
5. What’s the m<strong>in</strong>imum amount of memory your computer should have before you<br />
turn on the option to cache pre-compiled headers?<br />
6. What is the significance of generat<strong>in</strong>g debug <strong>in</strong>formation for your application?<br />
7. If you do not specify an Output Directory <strong>in</strong> the Project Options, where will<br />
<strong>C++</strong>Builder create your .exe file?<br />
8. What is the keyboard shortcut for sav<strong>in</strong>g a file <strong>in</strong> the Code Editor?<br />
9. How do you set a bookmark <strong>in</strong> an editor w<strong>in</strong>dow? How many bookmarks are<br />
available?<br />
10. How do you set a file to read-only <strong>in</strong> the Code Editor?<br />
Exercises<br />
1. Create a new application. Display the Project Manager. Click the Add Unit button<br />
to add a new unit to the project. Navigate to the<br />
\CBuilder\Examples\Apps\Contacts directory and choose the file called<br />
Contacts.cpp. Click OK to add the file to the project.<br />
2. Remove the Contacts.cpp unit from the project <strong>in</strong> Exercise 1.<br />
3. Open the ScratchPad project. Change the ma<strong>in</strong> form to the AboutBox form. Close<br />
the Project Options dialog box and run the program. The About box will be<br />
displayed when the program starts. Close the About box to end the program and<br />
change the ma<strong>in</strong> form back to the ScratchPad form.<br />
4. Open the RichEdit application that is supplied with <strong>C++</strong>Builder. Go to the Project<br />
Options dialog box and confirm that the Optimization sett<strong>in</strong>g on the <strong>C++</strong> page is<br />
set to Optimize for Speed. Do a Build All to build the program. Check the size of<br />
the produced .exe. Go back to the Project Options dialog box and change the<br />
optimization to Optimize for Size. Aga<strong>in</strong> do a Build All. Check the f<strong>in</strong>al .exe size<br />
aga<strong>in</strong> to compare the difference. How much smaller or larger was the .exe when<br />
the compiler optimized for size?<br />
5. Open any source file <strong>in</strong> the Code Editor. Set four bookmarks at random locations<br />
<strong>in</strong> the source file. Jump from bookmark to bookmark and observe the effects <strong>in</strong> the<br />
Code Editor. When you are f<strong>in</strong>ished, clear all the bookmarks.<br />
6. Open the ScratchPad project (or any other project) and switch to the Code Editor.<br />
View the project’s ma<strong>in</strong> form source file. Choose Search | F<strong>in</strong>d from the ma<strong>in</strong><br />
menu. Type Click <strong>in</strong> the Text To F<strong>in</strong>d box and click OK to f<strong>in</strong>d the first occurrence<br />
of the word Click.<br />
7. Press F3 several times to repeat the search until the entire file has been searched.
More on Projects<br />
8. Cont<strong>in</strong>u<strong>in</strong>g with the same project, press Ctrl+Home to go to the top of the file.<br />
Press Ctrl+R to display the Replace Text dialog box. Type Click <strong>in</strong> the Text To<br />
F<strong>in</strong>d box and Test <strong>in</strong> the Replace With box. Turn off the Prompt On Replace<br />
option and then click the Replace All button. Scroll through the file to view the<br />
results. Important: Select Edit | Undo to undo the Replace operation. Close the<br />
project without sav<strong>in</strong>g (just to be safe).<br />
9. Open a file <strong>in</strong> the Code Editor. Choose Properties from the Code Editor speed<br />
menu. Change the syntax highlight<strong>in</strong>g for str<strong>in</strong>gs, <strong>in</strong>tegers, and floats to dark gray.<br />
Click OK to view the results <strong>in</strong> the Code Editor.<br />
10. Change the colors back to the default color scheme.<br />
391<br />
10
392 Day 10
Us<strong>in</strong>g the Debugger<br />
Day 11<br />
Us<strong>in</strong>g the Debugger<br />
by Kent Reisdorph<br />
Week<br />
A major feature of the <strong>C++</strong>Builder IDE is the <strong>in</strong>tegrated debugger. The<br />
debugger allows you to easily set breakpo<strong>in</strong>ts, watch variables, <strong>in</strong>spect objects,<br />
and much more. The IDE debugger allows you to see what is go<strong>in</strong>g on <strong>in</strong> your<br />
program while the program runs. Us<strong>in</strong>g the debugger you can quickly f<strong>in</strong>d out<br />
what is happen<strong>in</strong>g (or not happen<strong>in</strong>g) with your program as it runs. A good<br />
debugger is vital to efficient program development.<br />
Debugg<strong>in</strong>g is one of those th<strong>in</strong>gs that is easy to overlook. Don’t tell anyone, but<br />
when I first started W<strong>in</strong>dows programm<strong>in</strong>g (not with <strong>C++</strong>Builder, of course)<br />
I ignored the debugger for a long time because I had my hands full just learn<strong>in</strong>g<br />
how to do W<strong>in</strong>dows programm<strong>in</strong>g. When I found out how valuable a good<br />
debugger is, I felt a little silly for cheat<strong>in</strong>g myself out of the use of that tool for<br />
so long. Oh well, live and learn. You have the luxury of learn<strong>in</strong>g from my<br />
mistakes. Today you will learn about what the debugger can do for you.<br />
2<br />
393<br />
11
394 Day 11<br />
The IDE debugger provides several features and tools to help you <strong>in</strong> your debugg<strong>in</strong>g chores.<br />
Specifically, the follow<strong>in</strong>g features are discussed here:<br />
■ Debugger menu items<br />
■ Us<strong>in</strong>g breakpo<strong>in</strong>ts<br />
■ Inspect<strong>in</strong>g variables with the Watch List<br />
■ Inspect<strong>in</strong>g objects with the Debug Inspector<br />
■ Other debugg<strong>in</strong>g tools<br />
■ Stepp<strong>in</strong>g through code<br />
■ Debugg<strong>in</strong>g techniques<br />
Why Use the Debugger?<br />
The quick answer is that the debugger helps you track down bugs <strong>in</strong> your program. But the<br />
debugg<strong>in</strong>g process is not just for f<strong>in</strong>d<strong>in</strong>g and fix<strong>in</strong>g bugs—it is a development tool as well.<br />
As important as debugg<strong>in</strong>g is, many programmers don’t take the time to learn how to use all<br />
the features of the IDE debugger. As a result, they cost themselves time and money, not to<br />
mention the frustration of a bug that can’t easily be tracked down.<br />
You beg<strong>in</strong> a debugg<strong>in</strong>g session by start<strong>in</strong>g up the program under the debugger. You<br />
automatically run your program us<strong>in</strong>g the debugger when you click the Run button on the<br />
speedbar. You can also choose Run | Run from the ma<strong>in</strong> menu or press F9 on the keyboard.<br />
The Debugg<strong>in</strong>g Menu Items<br />
Before we get <strong>in</strong>to the details of the debugger, let’s go over the menu items that perta<strong>in</strong> to<br />
the debugger. Some of these menu items are on the ma<strong>in</strong> menu under Run, and others are<br />
on the Code Editor speed menu. Most of these items are discussed <strong>in</strong> detail as you work<br />
through the chapter, so I’ll just touch on them here so that you are at least familiar with them.<br />
Table 11.1 lists the Code Editor speed menu items that are specific to the debugger and their<br />
descriptions.<br />
Table 11.1. The Code Editor speed menu’s debugg<strong>in</strong>g items.<br />
Item Shortcut Description<br />
Toggle Breakpo<strong>in</strong>t F5 Toggles a breakpo<strong>in</strong>t on or off for the current<br />
l<strong>in</strong>e <strong>in</strong> the Code Editor.<br />
Run to Cursor none Starts the program (if necessary) and runs it<br />
until the l<strong>in</strong>e <strong>in</strong> the editor w<strong>in</strong>dow conta<strong>in</strong><strong>in</strong>g<br />
the cursor is reached.
Us<strong>in</strong>g the Debugger<br />
Item Shortcut Description<br />
Inspect Alt+F5 Opens the Debug Inspect w<strong>in</strong>dow for the<br />
object under the cursor.<br />
Go To Address none Allows you to specify a specific address <strong>in</strong> the<br />
program at which program execution will<br />
resume.<br />
Evaluate/Modify none Allows you to view and/or modify a variable<br />
at runtime.<br />
Add Watch at Cursor Ctrl+F5 Adds the variable under the cursor to the<br />
Watch List.<br />
The Run item on the ma<strong>in</strong> menu has several selections that perta<strong>in</strong> to runn<strong>in</strong>g programs<br />
under the debugger. The Run menu items allow you to start a program under the debugger,<br />
to term<strong>in</strong>ate a program runn<strong>in</strong>g under the debugger, and to specify command-l<strong>in</strong>e<br />
parameters for your program, to name just a few. Some of the items found here are duplicated<br />
on the Code Editor speed menu. Table 11.2 shows the Run menu items that control<br />
debugg<strong>in</strong>g operations.<br />
Table 11.2. The Run menu’s debugg<strong>in</strong>g items.<br />
Item Shortcut Description<br />
Run F9 Compiles the program (if needed) and<br />
then runs the program under the<br />
control of the IDE debugger. Same as<br />
the Run speedbar button.<br />
Parameters none Allows you to enter command-l<strong>in</strong>e<br />
parameters for your program.<br />
Step Over F8 Executes the source code l<strong>in</strong>e at the<br />
execution po<strong>in</strong>t and pauses at the next<br />
source code l<strong>in</strong>e.<br />
Trace Into F7 Traces <strong>in</strong>to the function at the<br />
execution po<strong>in</strong>t.<br />
Trace to Next Source L<strong>in</strong>e Shift+F7 Causes the execution po<strong>in</strong>t to move to<br />
the next l<strong>in</strong>e <strong>in</strong> the program’s source<br />
code.<br />
Run to Cursor F4 Runs the program and pauses when<br />
program execution reaches the current<br />
l<strong>in</strong>e <strong>in</strong> the source code.<br />
395<br />
cont<strong>in</strong>ues<br />
11
396 Day 11<br />
Table 11.2. cont<strong>in</strong>ued<br />
Item Shortcut Description<br />
Show Execution Po<strong>in</strong>t none Displays the program execution po<strong>in</strong>t<br />
<strong>in</strong> the Code Editor. Scrolls the source<br />
code w<strong>in</strong>dow if necessary. Only works<br />
when program execution is paused.<br />
Program Pause none Pauses program execution as soon as<br />
the execution po<strong>in</strong>t enters the<br />
program’s source code.<br />
Program Reset Ctrl+F2 Closes down the program and returns<br />
to the <strong>C++</strong>Builder IDE.<br />
Inspect none Displays the Inspect dialog box so that<br />
you can enter the name of an object to<br />
<strong>in</strong>spect.<br />
Evaluate/Modify Ctrl+F7 Displays the Evaluate/Modify dialog<br />
box.<br />
Add Watch Ctrl+F5 Displays the Watch Properties dialog<br />
box.<br />
Add Breakpo<strong>in</strong>t none Displays the Edit Breakpo<strong>in</strong>t dialog<br />
box to allow you to add a breakpo<strong>in</strong>t.<br />
You will use these menu items a lot when you are debugg<strong>in</strong>g your programs. You should also<br />
become familiar with the various keyboard shortcuts for the debugg<strong>in</strong>g operations.<br />
Now let’s take a look at breakpo<strong>in</strong>ts and how you use them <strong>in</strong> your program.<br />
Breakpo<strong>in</strong>ts<br />
When you run your program from the <strong>C++</strong>Builder IDE it runs at full speed, stopp<strong>in</strong>g only<br />
where you have set breakpo<strong>in</strong>ts.<br />
A breakpo<strong>in</strong>t is a marker that tells the debugger to pause program execution when<br />
that po<strong>in</strong>t <strong>in</strong> the program is reached.<br />
NEW TERM<br />
Sett<strong>in</strong>g and Clear<strong>in</strong>g Breakpo<strong>in</strong>ts<br />
To set a breakpo<strong>in</strong>t, click <strong>in</strong> the editor w<strong>in</strong>dow’s gutter to the left of the l<strong>in</strong>e on which you<br />
want to pause program execution. A stop sign icon appears <strong>in</strong> the gutter, and the entire l<strong>in</strong>e
NOTE<br />
Us<strong>in</strong>g the Debugger<br />
is highlighted <strong>in</strong> red. To clear the breakpo<strong>in</strong>t, click on the stop sign icon and the breakpo<strong>in</strong>t<br />
is removed. You can also press F5 or choose Toggle Breakpo<strong>in</strong>t from the Code Editor speed<br />
menu to toggle a breakpo<strong>in</strong>t on or off.<br />
A breakpo<strong>in</strong>t can only be set on a l<strong>in</strong>e that generates actual code.<br />
Breakpo<strong>in</strong>ts are not valid if set on blank l<strong>in</strong>es, comment l<strong>in</strong>es, or<br />
declaration l<strong>in</strong>es. You are not prevented from sett<strong>in</strong>g a breakpo<strong>in</strong>t on<br />
these types of l<strong>in</strong>es, but the debugger will warn you about the fact that<br />
you have set a breakpo<strong>in</strong>t on a l<strong>in</strong>e that conta<strong>in</strong>s no code. The follow<strong>in</strong>g<br />
l<strong>in</strong>es will produce an <strong>in</strong>valid breakpo<strong>in</strong>t warn<strong>in</strong>g:<br />
// this is a comment followed by a blank l<strong>in</strong>e<br />
<strong>in</strong>t x; // a declaration<br />
Breakpo<strong>in</strong>ts can be set on return statements or on the clos<strong>in</strong>g brace of<br />
a function.<br />
If you set a breakpo<strong>in</strong>t on an <strong>in</strong>valid l<strong>in</strong>e, the debugger will warn you that the breakpo<strong>in</strong>t may<br />
not be valid, but it won’t do that until you attempt to run the program. Figure 11.1 shows<br />
the warn<strong>in</strong>g message that is displayed when the debugger detects an <strong>in</strong>valid breakpo<strong>in</strong>t.<br />
Figure 11.1.<br />
A warn<strong>in</strong>g message for<br />
an <strong>in</strong>valid breakpo<strong>in</strong>t.<br />
If you click the Yes button <strong>in</strong> the warn<strong>in</strong>g dialog box, the program will run and any <strong>in</strong>valid<br />
breakpo<strong>in</strong>ts will be ignored. If you click No, you will be taken back to the Code Editor, where<br />
you can clear the <strong>in</strong>valid breakpo<strong>in</strong>t. Any <strong>in</strong>valid breakpo<strong>in</strong>ts will be highlighted <strong>in</strong> green,<br />
and the stop sign icon <strong>in</strong> the gutter will be grayed out.<br />
When the program is run under the debugger, it behaves as it normally would—until a<br />
breakpo<strong>in</strong>t is hit, that is. When a breakpo<strong>in</strong>t is hit, the IDE is brought to the top, and the<br />
breakpo<strong>in</strong>t l<strong>in</strong>e is highlighted <strong>in</strong> the source code. If you are us<strong>in</strong>g the default colors, the l<strong>in</strong>e<br />
where the program has stopped is highlighted <strong>in</strong> red because red <strong>in</strong>dicates a l<strong>in</strong>e conta<strong>in</strong><strong>in</strong>g<br />
a breakpo<strong>in</strong>t.<br />
NEW TERM<br />
The execution po<strong>in</strong>t <strong>in</strong>dicates the l<strong>in</strong>e that will be executed next <strong>in</strong> your source code.<br />
397<br />
11
398 Day 11<br />
As you step through the program, the execution po<strong>in</strong>t is highlighted <strong>in</strong> blue and the editor<br />
w<strong>in</strong>dow gutter displays a black arrow glyph. Understand that the l<strong>in</strong>e highlighted <strong>in</strong> blue has<br />
not yet been executed but will be executed when program execution resumes.<br />
Once you have stopped at a breakpo<strong>in</strong>t, you can view variables, view the call stack, browse<br />
symbols, or step through your code. After you have <strong>in</strong>spected any variables and objects, you<br />
can resume normal program execution by click<strong>in</strong>g the Run button. Your application will<br />
aga<strong>in</strong> run normally until the next breakpo<strong>in</strong>t is encountered.<br />
NOTE<br />
It’s common to detect cod<strong>in</strong>g errors <strong>in</strong> your program after you have<br />
stopped at a breakpo<strong>in</strong>t. If you change your source code <strong>in</strong> the middle<br />
of a debugg<strong>in</strong>g session and then choose Run to resume program<br />
execution, the IDE will prompt you with a message box ask<strong>in</strong>g whether<br />
you want to rebuild the source code. If you choose Yes, the current<br />
process will be term<strong>in</strong>ated, the source code will be recompiled, and the<br />
program will be restarted.<br />
The problem with this approach is that your program does not get a<br />
chance to close normally, and any resources currently <strong>in</strong> use might not<br />
be freed properly, which could result <strong>in</strong> memory leaks. While W<strong>in</strong>dows<br />
95 and W<strong>in</strong>dows NT handle resource leaks better than 16-bit W<strong>in</strong>dows,<br />
it is still advisable to term<strong>in</strong>ate the program normally and then<br />
recompile.<br />
The Breakpo<strong>in</strong>t List W<strong>in</strong>dow<br />
The <strong>C++</strong>Builder IDE keeps track of the breakpo<strong>in</strong>ts you have set <strong>in</strong> the Breakpo<strong>in</strong>t list<br />
w<strong>in</strong>dow. To view the breakpo<strong>in</strong>t list, choose View | Breakpo<strong>in</strong>ts from the ma<strong>in</strong> menu. The<br />
Breakpo<strong>in</strong>t list w<strong>in</strong>dow will be displayed, as shown <strong>in</strong> Figure 11.2.<br />
Figure 11.2.<br />
The Breakpo<strong>in</strong>t list<br />
w<strong>in</strong>dow.<br />
The Breakpo<strong>in</strong>t list w<strong>in</strong>dow has four columns. The first column, Filename, shows the<br />
filename of the source code unit <strong>in</strong> which the breakpo<strong>in</strong>t is set. The second column, labeled<br />
L<strong>in</strong>e, shows the l<strong>in</strong>e number on which the breakpo<strong>in</strong>t is set. The Condition column shows
NOTE<br />
Us<strong>in</strong>g the Debugger<br />
any conditions that have been set for the breakpo<strong>in</strong>t, and the Pass column shows the pass<br />
count condition that has been set for the breakpo<strong>in</strong>t. (Breakpo<strong>in</strong>t conditions and pass count<br />
conditions are discussed later, <strong>in</strong> the section “Conditional Breakpo<strong>in</strong>ts.”) You can size the<br />
columns by dragg<strong>in</strong>g the divid<strong>in</strong>g l<strong>in</strong>e between two columns <strong>in</strong> the column header.<br />
The Pass column does not show the number of times the breakpo<strong>in</strong>t<br />
has been hit; it only shows the pass condition that you have set for the<br />
breakpo<strong>in</strong>t.<br />
The Breakpo<strong>in</strong>t list w<strong>in</strong>dow actually has two speed menus. Table 11.3 lists the speed menu<br />
items you will see if you click the right mouse button while over the Filename column. I will<br />
refer to this as the w<strong>in</strong>dow’s primary speed menu.<br />
Table 11.3. The primary Breakpo<strong>in</strong>t list speed menu.<br />
Item Description<br />
Enable Enables or disables the breakpo<strong>in</strong>t. When a breakpo<strong>in</strong>t is disabled,<br />
its glyph is grayed out <strong>in</strong> the Breakpo<strong>in</strong>t list w<strong>in</strong>dow. In the source<br />
w<strong>in</strong>dow the breakpo<strong>in</strong>t glyph is also grayed, and the breakpo<strong>in</strong>t l<strong>in</strong>e<br />
is highlighted <strong>in</strong> green to <strong>in</strong>dicate that the breakpo<strong>in</strong>t is disabled.<br />
Delete Removes the breakpo<strong>in</strong>t.<br />
View Source Scrolls the source file <strong>in</strong> the Code Editor to display the source l<strong>in</strong>e<br />
conta<strong>in</strong><strong>in</strong>g the breakpo<strong>in</strong>t. (The breakpo<strong>in</strong>t list reta<strong>in</strong>s focus.)<br />
Edit Source Places the edit cursor on the l<strong>in</strong>e <strong>in</strong> the source file where the<br />
breakpo<strong>in</strong>t is set and switches focus to the Code Editor.<br />
Properties Displays the Edit breakpo<strong>in</strong>t dialog box.<br />
TIP<br />
To quickly edit the source code l<strong>in</strong>e on which a breakpo<strong>in</strong>t is set,<br />
double-click on the breakpo<strong>in</strong>t <strong>in</strong> the Filename column of the<br />
Breakpo<strong>in</strong>t list w<strong>in</strong>dow. This is the same as choos<strong>in</strong>g Edit Source from<br />
the Breakpo<strong>in</strong>t list speed menu.<br />
The secondary speed menu can be displayed by click<strong>in</strong>g the right mouse button while the<br />
cursor is over any part of the Breakpo<strong>in</strong>t list w<strong>in</strong>dow except <strong>in</strong> the Filename column.<br />
This speed menu has items called Add, Delete All, Disable All, and Enable All. These items<br />
are self-explanatory, so I won’t bother to comment on them.<br />
399<br />
11
400 Day 11<br />
NOTE<br />
In my op<strong>in</strong>ion, the Add speed menu item is not very useful. It is much<br />
easier to set a breakpo<strong>in</strong>t <strong>in</strong> the Code Editor than it is to add a<br />
breakpo<strong>in</strong>t via the Add command <strong>in</strong> the Breakpo<strong>in</strong>t list w<strong>in</strong>dow.<br />
Breakpo<strong>in</strong>ts can be enabled or disabled any time you like. You might disable a breakpo<strong>in</strong>t<br />
if you want to run the program normally for a while; you can then enable the breakpo<strong>in</strong>t aga<strong>in</strong><br />
later without hav<strong>in</strong>g to re-create it. Breakpo<strong>in</strong>ts that are disabled are ignored by the debugger.<br />
If you want to modify a breakpo<strong>in</strong>t, you can choose Properties from the primary Breakpo<strong>in</strong>t<br />
list speed menu. When you do, the Edit breakpo<strong>in</strong>t dialog box is displayed. (See Figure 11.3.)<br />
Figure 11.3.<br />
The Edit breakpo<strong>in</strong>t<br />
dialog box.<br />
The primary reason to modify a breakpo<strong>in</strong>t is to add conditions to the breakpo<strong>in</strong>t.<br />
(Conditional breakpo<strong>in</strong>ts are discussed <strong>in</strong> the section “Conditional Breakpo<strong>in</strong>ts.”) The New<br />
button <strong>in</strong> the Edit breakpo<strong>in</strong>t dialog box works <strong>in</strong> a curious way. If you click the New button,<br />
a breakpo<strong>in</strong>t will be set on the l<strong>in</strong>e conta<strong>in</strong><strong>in</strong>g the cursor <strong>in</strong> the Code Editor. This is not a<br />
particularly useful feature, so you can happily ignore the New button <strong>in</strong> the Edit breakpo<strong>in</strong>t<br />
dialog box.<br />
To remove a breakpo<strong>in</strong>t, you can select the breakpo<strong>in</strong>t <strong>in</strong> the breakpo<strong>in</strong>t list and then press<br />
the Delete key on the keyboard. To delete all breakpo<strong>in</strong>ts, right-click the mouse to br<strong>in</strong>g up<br />
the secondary speed menu and then choose Delete All from the speed menu.<br />
Now let’s take a look at the two breakpo<strong>in</strong>t types.<br />
Simple Breakpo<strong>in</strong>ts<br />
Breakpo<strong>in</strong>ts can be either simple or conditional. A simple breakpo<strong>in</strong>t will cause program<br />
execution to be suspended whenever the breakpo<strong>in</strong>t is hit. When you <strong>in</strong>itially set a<br />
breakpo<strong>in</strong>t, it is, by default, a simple breakpo<strong>in</strong>t. Simple breakpo<strong>in</strong>ts don’t really require<br />
additional explanation. When the breakpo<strong>in</strong>t is encountered, program execution pauses at<br />
the breakpo<strong>in</strong>t, and the debugger awaits your bidd<strong>in</strong>g. There’s no need to belabor the po<strong>in</strong>t.
Us<strong>in</strong>g the Debugger<br />
Conditional Breakpo<strong>in</strong>ts<br />
NOTE<br />
NOTE<br />
In the case of a conditional breakpo<strong>in</strong>t, program execution is paused only when predef<strong>in</strong>ed<br />
conditions are met. To create a conditional breakpo<strong>in</strong>t, first set the breakpo<strong>in</strong>t <strong>in</strong> the Code<br />
Editor. Then choose View | Breakpo<strong>in</strong>ts from the ma<strong>in</strong> menu to display the Breakpo<strong>in</strong>t list<br />
dialog box. Right-click on the breakpo<strong>in</strong>t for which you want to set conditions and choose<br />
Properties from the speed menu. When the Edit breakpo<strong>in</strong>t dialog box is displayed, set the<br />
conditions for the breakpo<strong>in</strong>t.<br />
Conditional breakpo<strong>in</strong>ts come <strong>in</strong> two flavors. The first type is a conditional expression<br />
breakpo<strong>in</strong>t. Enter the conditional expression <strong>in</strong> the Condition field of the Edit breakpo<strong>in</strong>t<br />
dialog box (refer to Figure 11.3). When the program runs, the conditional expression is<br />
evaluated each time the breakpo<strong>in</strong>t is encountered. When the conditional expression<br />
evaluates to true, program execution is halted. If the condition does not evaluate to true, the<br />
breakpo<strong>in</strong>t is ignored. For example, look back at the last breakpo<strong>in</strong>t <strong>in</strong> the Breakpo<strong>in</strong>t list<br />
w<strong>in</strong>dow shown <strong>in</strong> Figure 11.2. This breakpo<strong>in</strong>t has a conditional expression of x > 10. If at<br />
some po<strong>in</strong>t <strong>in</strong> the execution of the program x is greater than 10, the program will stop at the<br />
breakpo<strong>in</strong>t. If x is never greater than 10, program execution will not stop at the breakpo<strong>in</strong>t.<br />
The other type of conditional breakpo<strong>in</strong>t is the pass count breakpo<strong>in</strong>t. With a pass count<br />
breakpo<strong>in</strong>t, program execution is paused only after the breakpo<strong>in</strong>t is encountered the<br />
specified number of times. To specify a pass count breakpo<strong>in</strong>t, edit the breakpo<strong>in</strong>t and specify<br />
a value for the Pass count field <strong>in</strong> the Edit breakpo<strong>in</strong>t dialog box. Figure 11.2 shows a<br />
breakpo<strong>in</strong>t that has the pass count set to 3. Program execution will stop at this breakpo<strong>in</strong>t<br />
the third time the breakpo<strong>in</strong>t is encountered.<br />
The pass count is 1 based and not 0 based. As <strong>in</strong>dicated <strong>in</strong> the previous<br />
example, a pass count of 3 means that the breakpo<strong>in</strong>t will be valid the<br />
third time the breakpo<strong>in</strong>t is encountered by the program.<br />
Use pass count breakpo<strong>in</strong>ts when you need your program to execute through a breakpo<strong>in</strong>t<br />
a certa<strong>in</strong> number of times before you break to <strong>in</strong>spect variables, step through code, or<br />
someth<strong>in</strong>g similar.<br />
Conditional breakpo<strong>in</strong>ts will slow down the normal execution of the<br />
program because the conditions need to be evaluated each time a<br />
conditional breakpo<strong>in</strong>t is encountered. If your program is act<strong>in</strong>g sluggish<br />
dur<strong>in</strong>g debugg<strong>in</strong>g, check your breakpo<strong>in</strong>ts <strong>in</strong> the breakpo<strong>in</strong>t list and see<br />
whether you have conditional breakpo<strong>in</strong>ts that you have forgotten about.<br />
401<br />
11
402 Day 11<br />
TIP<br />
The fact that conditional breakpo<strong>in</strong>ts slow down program execution<br />
can work <strong>in</strong> your favor at times. If you have a process that you want to<br />
view <strong>in</strong> slow motion, set one or more conditional breakpo<strong>in</strong>ts <strong>in</strong> that<br />
section of code. Set the conditions so that they will never be met and<br />
your program will be slowed down but not stopped.<br />
The Run to Cursor Command<br />
There is another debugg<strong>in</strong>g command that deserves mention here. The Run to Cursor<br />
command (found under the Run menu on the ma<strong>in</strong> menu and on the Code Editor speed<br />
menu) will run the program until the source l<strong>in</strong>e conta<strong>in</strong><strong>in</strong>g the edit<strong>in</strong>g cursor is reached. At<br />
that po<strong>in</strong>t the program stops as if a breakpo<strong>in</strong>t were placed on that l<strong>in</strong>e.<br />
Run to Cursor acts like a temporary breakpo<strong>in</strong>t. You can use this command rather than<br />
sett<strong>in</strong>g a breakpo<strong>in</strong>t on a l<strong>in</strong>e that you want to immediately <strong>in</strong>spect. Just place the cursor on<br />
the l<strong>in</strong>e you want to break on and choose Run to Cursor (or press F4). The debugger behaves<br />
exactly as if you had placed a breakpo<strong>in</strong>t on that l<strong>in</strong>e. The benefit is that you don’t have to<br />
clear the breakpo<strong>in</strong>t after you are done debugg<strong>in</strong>g that section of code.<br />
Watch<strong>in</strong>g Variables<br />
So what do you do once you’ve stopped at a breakpo<strong>in</strong>t? Usually you will stop at a breakpo<strong>in</strong>t<br />
to <strong>in</strong>spect the value of one or more variables. You might want to ensure that a particular<br />
variable has the value you th<strong>in</strong>k it should have, or you may not have any idea what a variable’s<br />
value is and simply want to f<strong>in</strong>d out. The Watch List allows you to do that.<br />
The function of the Watch List is pretty basic: It allows you to <strong>in</strong>spect the values of variables.<br />
This simple but essential feature often gets overlooked because a lot of programmers don’t<br />
take the time to learn to use the debugger fully. You can add as many variables to the Watch<br />
List as you like. Figure 11.4 shows the Watch List dur<strong>in</strong>g a debugg<strong>in</strong>g session.<br />
Figure 11.4.<br />
The Watch List<br />
<strong>in</strong> action.
Us<strong>in</strong>g the Debugger<br />
The variable name is displayed <strong>in</strong> the Watch List followed by its value. How the variable value<br />
is displayed is determ<strong>in</strong>ed by the data type of the variable and the current display sett<strong>in</strong>gs for<br />
that watch item.<br />
The Watch List Speed Menu<br />
As with every other <strong>C++</strong>Builder w<strong>in</strong>dow discussed up to this po<strong>in</strong>t, the Watch List has its<br />
own speed menu. (You’d be disappo<strong>in</strong>ted if it didn’t, right?) Table 11.4 lists the Watch List<br />
speed menu items and their descriptions.<br />
Table 11.4. The Watch List speed menu.<br />
Item Description<br />
Edit Watch Allows you to edit the watch item with the Watch Properties<br />
dialog box.<br />
Add Watch Adds a new item to the Watch List.<br />
Enable Watch Enables the watch item.<br />
Disable Watch Disables the watch item.<br />
Delete Watch Removes the watch item from the Watch List.<br />
Enable All Watches Enables all items <strong>in</strong> the Watch List.<br />
Disable All Watches Disables all items <strong>in</strong> the Watch List.<br />
Delete All Watches Deletes all items <strong>in</strong> the Watch List.<br />
The Edit Watch and Add Watch speed menu items both <strong>in</strong>voke the Watch Properties dialog<br />
box, so let’s look at that next.<br />
Us<strong>in</strong>g the Watch Properties Dialog Box<br />
You use the Watch Properties dialog box when you add a watch and when you edit a watch.<br />
Figure 11.5 shows the Watch Properties dialog box as it looks when you’re edit<strong>in</strong>g a variable<br />
called buff.<br />
Figure 11.5.<br />
The Watch Properties<br />
dialog box.<br />
403<br />
11
404 Day 11<br />
NOTE<br />
The Expression field at the top of the Watch Properties dialog box is where you can enter a<br />
variable name to edit or to add to the Watch List. If you are add<strong>in</strong>g a watch by select<strong>in</strong>g it<br />
from the Code Editor w<strong>in</strong>dow, this field will already be filled <strong>in</strong> (see the section titled “Add<strong>in</strong>g<br />
Variables to the Watch List”). This field is a combo box that can be used to select previously<br />
used watch items.<br />
You use the Repeat count field when you are <strong>in</strong>spect<strong>in</strong>g arrays. For example, let’s say you have<br />
an array of 20 <strong>in</strong>tegers. To <strong>in</strong>spect the first 10 <strong>in</strong>ts <strong>in</strong> the array, you would enter the first<br />
element of the array <strong>in</strong> the Expression field (array[0], for example) and then enter 10 <strong>in</strong> the<br />
Repeat count field. The first 10 elements of the array would then be displayed <strong>in</strong> the Watch<br />
List.<br />
If you just add the array name to the Watch List, all elements <strong>in</strong> the<br />
array will be displayed. Use the Repeat count field when you want to<br />
view only a specific number of array elements.<br />
You use the Digits field only when <strong>in</strong>spect<strong>in</strong>g float<strong>in</strong>g-po<strong>in</strong>t numbers. Enter the number of<br />
significant digits you want to see when your float<strong>in</strong>g-po<strong>in</strong>t number is displayed <strong>in</strong> the Watch<br />
List. The displayed digits are rounded, not truncated. Another field <strong>in</strong> this dialog box, the<br />
Enabled field, determ<strong>in</strong>es whether the watch item is currently enabled.<br />
The rema<strong>in</strong>der of the Watch Properties dialog box is comprised of the various display options<br />
from which you can choose. Each data type has a default display type, and that type will be<br />
used if you choose the Default view<strong>in</strong>g option. The Default view<strong>in</strong>g option is the default.<br />
(Sorry, there’s just no other way to say it!) Select one of the other view<strong>in</strong>g options to view the<br />
data <strong>in</strong> other ways. Figure 11.6 shows the Watch List w<strong>in</strong>dow with two variables added and<br />
with various view<strong>in</strong>g options applied. The buff variable is a character array, and the i variable<br />
is an <strong>in</strong>teger.<br />
Figure 11.6.<br />
The Watch List with<br />
various view<strong>in</strong>g<br />
options.<br />
To modify a watch item, click on the item <strong>in</strong> the Watch List and choose Edit Watch from<br />
the Watch List speed menu. The Watch Properties dialog box is displayed, and you can edit<br />
the watch item as needed.
Us<strong>in</strong>g the Debugger<br />
The fastest way to edit a watch item is to double-click on its name <strong>in</strong><br />
the Watch List.<br />
Enabl<strong>in</strong>g and Disabl<strong>in</strong>g Watch Items<br />
As with breakpo<strong>in</strong>ts, <strong>in</strong>dividual items <strong>in</strong> the Watch List can be enabled or disabled. When<br />
a watch item is disabled, it is grayed and its value shows .<br />
To disable a watch item, click on the item’s name <strong>in</strong> the Watch List and choose Disable<br />
Watch from the Watch List speed menu. To enable the watch item aga<strong>in</strong>, choose Enable<br />
Watch from the speed menu.<br />
NOTE<br />
You may want to disable watch items that you don’t currently want to<br />
watch but that you will need aga<strong>in</strong> later. Hav<strong>in</strong>g a number of enabled<br />
items <strong>in</strong> the Watch List can slow down program execution dur<strong>in</strong>g the<br />
debugg<strong>in</strong>g process because all the variables <strong>in</strong> the Watch List must be<br />
updated each time a l<strong>in</strong>e of code executes. It doesn’t take many items <strong>in</strong><br />
the Watch List to slow th<strong>in</strong>gs down, so don’t forget to delete or disable<br />
any unused items <strong>in</strong> the Watch List.<br />
Add<strong>in</strong>g Variables to the Watch List<br />
You can add variables to the Watch List <strong>in</strong> one of several ways. The quickest is to click on<br />
the variable name <strong>in</strong> the editor w<strong>in</strong>dow and then select Add Watch at Cursor from the Code<br />
Editor speed menu or press Ctrl+F5. The Watch Properties dialog box will be displayed,<br />
where you can either select watch options for the watch item or click OK (or press Enter) to<br />
accept the defaults. The watch item will be added to the Watch List.<br />
To add a variable to the watch without first locat<strong>in</strong>g it <strong>in</strong> the source file, choose Run | Add<br />
Watch from the ma<strong>in</strong> menu. When the Watch Properties dialog box comes up, enter the<br />
name of the variable you want to add to the Watch List and click OK.<br />
NOTE<br />
TIP<br />
Although you can add a class <strong>in</strong>stance variable to the Watch List, the<br />
displayed value will not likely be useful. In the case of po<strong>in</strong>ters to<br />
objects, this is useful for determ<strong>in</strong><strong>in</strong>g if the po<strong>in</strong>ter is valid, but often<br />
405<br />
11
406 Day 11<br />
you want to view the details of the class. For view<strong>in</strong>g all the data<br />
members of a class, you should use the Debug Inspector, which I’ll<br />
discuss <strong>in</strong> a m<strong>in</strong>ute.<br />
Us<strong>in</strong>g the Watch List<br />
When a breakpo<strong>in</strong>t is hit, the Watch List will display the current value of any variables that<br />
have been added to the Watch List. If the Watch List is not currently open, you can choose<br />
View | Watches from the ma<strong>in</strong> menu to display it.<br />
Under certa<strong>in</strong> circumstances, a message will be displayed next to the variable rather than the<br />
variable’s value. If, for <strong>in</strong>stance, a variable is out of scope or not found, the Watch List displays<br />
Undef<strong>in</strong>ed symbol ‘x’ next to the variable name. If the program is not runn<strong>in</strong>g or if the<br />
program is not stopped at a breakpo<strong>in</strong>t, the Watch List will display [process not accessible]<br />
for all watch items. A disabled watch item will have next to it. Other messages<br />
may be displayed depend<strong>in</strong>g on the current state of the application or the current state of a<br />
particular variable.<br />
As I said yesterday, you may on occasion see Variable has been optimized and is not<br />
available <strong>in</strong> the Watch List. This is one of the m<strong>in</strong>or disadvantages to hav<strong>in</strong>g an optimiz<strong>in</strong>g<br />
compiler. If you need to <strong>in</strong>spect variables that are subject to optimization, either declare the<br />
variable with the volatile keyword or turn off the Register Variables option on the Compiler<br />
page of the Project Options dialog box. After debugg<strong>in</strong>g, remove the volatile modifier from<br />
the variable.<br />
TIP<br />
The Watch List can be used as a quickie decimal/hexadecimal converter.<br />
To convert a hex number to decimal, choose Run | Add Watch<br />
from the ma<strong>in</strong> menu. Type the hexadecimal number <strong>in</strong> the Expression<br />
field and click OK. Both the hexadecimal number and the decimal<br />
equivalent will be displayed <strong>in</strong> the Watch List. To convert a decimal<br />
number to hex, perform the same procedure, except click the Hexadecimal<br />
radio button to change the display type to hexadecimal. Because<br />
the Expression field will accept a mathematical expression, you can also<br />
use the Watch List as a hex calculator. You can even mix hexadecimal<br />
and decimal values <strong>in</strong> the same expression.
Us<strong>in</strong>g the Debugger<br />
The Watch List is a simple but vital tool when you’re debugg<strong>in</strong>g applications. To illustrate<br />
the use of the Watch List, perform this exercise:<br />
1. Create a new application and place a button on the form. Change the button’s Name<br />
property to WatchBtn and its Caption to Watch Test. Change the Name property of<br />
the form to DebugMa<strong>in</strong> and the Caption property to whatever you like.<br />
2. Double-click the button to display its OnClick handler <strong>in</strong> the Code Editor. Enter<br />
the follow<strong>in</strong>g code at the cursor:<br />
Str<strong>in</strong>g s;<br />
<strong>in</strong>t x = Width;<br />
s = Str<strong>in</strong>g(x);<br />
<strong>in</strong>t y = Height;<br />
x *= y;<br />
s = Str<strong>in</strong>g(x);<br />
x /= y;<br />
s = Str<strong>in</strong>g(x);<br />
Width = x;<br />
Height = y;<br />
3. Choose Options | Project from the ma<strong>in</strong> menu and click on the <strong>C++</strong> page. Change<br />
the Optimization option to None. (See the note <strong>in</strong> the section titled “Stepp<strong>in</strong>g<br />
Through Your Code” for an explanation of this step.)<br />
4. Save the project. Name the unit DbgMa<strong>in</strong> and the project DebugTst.<br />
5. Set a breakpo<strong>in</strong>t on the second l<strong>in</strong>e <strong>in</strong> the code you entered <strong>in</strong> step 2. Run the<br />
program.<br />
6. Click the Watch Test button. The debugger will stop at the breakpo<strong>in</strong>t.<br />
7. Add watches for the variables s, x, and y. (Initially the variables x and y will display<br />
the message Variable ‘x’ has been optimized, but don’t worry about that.)<br />
8. Arrange the Watch List and Code Editor so that you can see both.<br />
9. Switch focus to the Code Editor and press F8 to execute the next l<strong>in</strong>e of code. That<br />
l<strong>in</strong>e is executed, and the execution po<strong>in</strong>t moves to the next l<strong>in</strong>e. The variable x now<br />
shows a value (probably 435).<br />
10. Cont<strong>in</strong>ue to step through the program by press<strong>in</strong>g F8. Watch the results of the<br />
variables <strong>in</strong> the Watch List.<br />
11. When the execution po<strong>in</strong>t gets to the last l<strong>in</strong>e <strong>in</strong> the function, click the Run button<br />
on the speedbar to cont<strong>in</strong>ue runn<strong>in</strong>g the program.<br />
12. Click the Watch Test button as many times as you want to get a feel for how the<br />
Watch List works. Experiment with different watch sett<strong>in</strong>gs each time through.<br />
407<br />
11
408 Day 11<br />
NOTE<br />
The code <strong>in</strong> this example gets the values for the Width and Height<br />
properties of the form, performs some calculations, and then sets Width<br />
and Height back to where they were when you started. In the end<br />
noth<strong>in</strong>g changes, but there is a good reason for assign<strong>in</strong>g values to the<br />
Width and Height properties at the end of the function.<br />
If you don’t actually do someth<strong>in</strong>g with the variables x and y, you<br />
wouldn’t be able to <strong>in</strong>spect them because the compiler will optimize<br />
them and they won’t be available to watch. Essentially, the compiler<br />
can look ahead, see that the variables are never used, and just more or<br />
less discard them. Putt<strong>in</strong>g the variables to use at the end of the function<br />
avoids hav<strong>in</strong>g them optimized away by the compiler.<br />
I’ve brought this up several times now, but I want to make sure you<br />
have a basic understand<strong>in</strong>g of how an optimiz<strong>in</strong>g compiler works.<br />
When you start debugg<strong>in</strong>g your applications, this knowledge will help<br />
avoid some frustration when you start gett<strong>in</strong>g those Variable ‘x’ has<br />
been optimized and is not available messages <strong>in</strong> the Watch List.<br />
The Debug Inspector<br />
NOTE<br />
Simply stated, the Debug Inspector allows you to view data objects such as classes and<br />
components (components are really just classes, anyway). You can also <strong>in</strong>spect simple data<br />
types such as <strong>in</strong>tegers, character arrays, and so on, but those are best viewed with the Watch<br />
List. The Debug Inspector is most useful <strong>in</strong> exam<strong>in</strong><strong>in</strong>g classes and structures.<br />
You can use the Debug Inspector only when program execution is<br />
paused under the debugger.<br />
To <strong>in</strong>spect an object, click on the object’s name <strong>in</strong> a source file and choose Inspect from the<br />
Code Editor speed menu (or press Alt+F5). You could also choose Run | Inspect from the<br />
ma<strong>in</strong> menu.
NOTE<br />
Us<strong>in</strong>g the Debugger<br />
When you use Inspect from the speed menu or use Alt+F5, the Debug<br />
Inspector automatically displays the object under the cursor. If you<br />
choose Run | Inspect from the ma<strong>in</strong> menu, you will first get a dialog<br />
box that asks you to <strong>in</strong>put the object to <strong>in</strong>spect. Enter a variable name<br />
and click OK. The Debug Inspector will be shown with the requested<br />
object displayed.<br />
The Debug Inspector w<strong>in</strong>dow comes up with details of the object displayed. If the object is<br />
a simple data type, the Debug Inspector w<strong>in</strong>dow shows the current value (<strong>in</strong> both decimal<br />
and hex for numeric data types), and the status l<strong>in</strong>e at the bottom displays the data type. For<br />
example, if you <strong>in</strong>spect an <strong>in</strong>teger variable, the value will be shown and the status bar will say<br />
<strong>in</strong>t. At the top of the Debug Inspector is a combo box that <strong>in</strong>itially conta<strong>in</strong>s a description<br />
of the object be<strong>in</strong>g <strong>in</strong>spected.<br />
If you are <strong>in</strong>spect<strong>in</strong>g a class, the Debug Inspector will look someth<strong>in</strong>g like Figure 11.7.<br />
Figure 11.7.<br />
The Debug Inspector<br />
<strong>in</strong>spect<strong>in</strong>g a form<br />
class.<br />
In order to better understand the Debug Inspector, do the follow<strong>in</strong>g:<br />
1. Load the DebugTst program you created earlier (if it’s not already loaded).<br />
2. Set a breakpo<strong>in</strong>t somewhere <strong>in</strong> the WatchBtnClick() function.<br />
3. Run the program and click the Watch button. The debugger stops at the<br />
breakpo<strong>in</strong>t you have set.<br />
409<br />
11
410 Day 11<br />
NOTE<br />
NOTE<br />
4. From the ma<strong>in</strong> menu, choose Run | Inspect. The Inspect dialog box is displayed.<br />
5. Type this <strong>in</strong> the Expression field and click OK.<br />
6. The Debug Inspector is displayed.<br />
You can only <strong>in</strong>spect this from with<strong>in</strong> a class member function. If you<br />
happen to set a breakpo<strong>in</strong>t <strong>in</strong> a regular function and then attempt to<br />
<strong>in</strong>spect this, you will get an error stat<strong>in</strong>g that this is an <strong>in</strong>valid<br />
symbol.<br />
As you can see, when you’re <strong>in</strong>spect<strong>in</strong>g classes the Debug Inspector w<strong>in</strong>dow conta<strong>in</strong>s three<br />
pages. The Data page shows all the data members for the class. The list of data members is<br />
hierarchical. The first items listed are the data items that belong to the immediate class. The<br />
next group of items listed is the data members of that class’s immediate ancestor class—<strong>in</strong><br />
this case, TForm. If you scroll down through the Debug Inspector list, you will see that<br />
follow<strong>in</strong>g the TForm data members are the data members for the TScroll<strong>in</strong>gW<strong>in</strong>Control class<br />
(TForm’s immediate ancestor) and on and on.<br />
By us<strong>in</strong>g the arrow keys to move up and down through the list of data members, you can tell<br />
at a glance what each data member’s type is (look at the status bar). To further <strong>in</strong>spect a data<br />
member, double-click on the value column on the l<strong>in</strong>e show<strong>in</strong>g the data member. A second<br />
Debug Inspector w<strong>in</strong>dow is opened with the selected data member displayed. You can have<br />
multiple Debug Inspector w<strong>in</strong>dows open simultaneously.<br />
The Debug Inspector has a lot of <strong>in</strong>formation to load, so scroll<strong>in</strong>g<br />
down through the list of items can be slow on some systems.<br />
The Methods page of the Debug Inspector displays the class’s methods. As with the data<br />
members discussed earlier, the list of methods is hierarchical. The first methods are those <strong>in</strong><br />
the immediate class, followed by the methods <strong>in</strong> the ancestor classes. In some cases the<br />
Methods tab is not displayed (when <strong>in</strong>spect<strong>in</strong>g simple data types, for <strong>in</strong>stance).<br />
The Properties page of the Debug Inspector shows the properties for the class be<strong>in</strong>g<br />
<strong>in</strong>spected. Inspect<strong>in</strong>g properties through the Debug Inspector is very slow if you<br />
are <strong>in</strong>spect<strong>in</strong>g a VCL <strong>in</strong>herited class. Most of the time you can accomplish the same th<strong>in</strong>g<br />
by <strong>in</strong>spect<strong>in</strong>g the data member associated with a particular property on the Data page <strong>in</strong>stead.<br />
Inspect<strong>in</strong>g the data member is much faster than <strong>in</strong>spect<strong>in</strong>g properties.
NOTE<br />
Us<strong>in</strong>g the Debugger<br />
The Methods page and the Properties page of the Debug Inspector are<br />
only available when you’re <strong>in</strong>spect<strong>in</strong>g a class. When you’re <strong>in</strong>spect<strong>in</strong>g<br />
simple data types, only the Data page will be displayed.<br />
The Debug Inspector speed menu has several items that allow you to work with the Debug<br />
Inspector and the <strong>in</strong>dividual variables. For example, <strong>in</strong>stead of open<strong>in</strong>g a new Debug<br />
Inspector w<strong>in</strong>dow for each object, you can choose Descend from the speed menu to replace<br />
the current object <strong>in</strong> the Debug Inspector w<strong>in</strong>dow with the object under the cursor. This<br />
method has an added advantage: The IDE will keep a history list of the objects you <strong>in</strong>spect.<br />
To go back to an object you have previously <strong>in</strong>spected, just choose the object from the combo<br />
box at the top of the Debug Inspector w<strong>in</strong>dow. Choos<strong>in</strong>g one of the objects <strong>in</strong> the history<br />
list will aga<strong>in</strong> show that object <strong>in</strong> the Debug Inspector w<strong>in</strong>dow.<br />
The Change item on the Debug Inspector speed menu will allow you to change the value of<br />
a variable. Change data members with care. Chang<strong>in</strong>g the wrong data member or specify<strong>in</strong>g<br />
a value that is <strong>in</strong>valid for that data member could lead to your program crash<strong>in</strong>g. The Inspect<br />
item on the speed menu allows you to open a second Debug Inspector w<strong>in</strong>dow with the item<br />
under the cursor displayed. The New Expression speed menu item allows you to enter a new<br />
expression to <strong>in</strong>spect <strong>in</strong> the Debug Inspector.<br />
The Show Inherited item on the Debug Inspector speed menu is a toggle that determ<strong>in</strong>es how<br />
much <strong>in</strong>formation the Debug Inspector should display. When the Show Inherited option is<br />
on, the Debug Inspector shows all data members, methods, and properties of the class be<strong>in</strong>g<br />
<strong>in</strong>spected as well as the data members, methods, and properties of all ancestor classes. When<br />
the Show Inherited option is off, only the data members, methods, and properties of the class<br />
itself are shown. Turn<strong>in</strong>g off this option can greatly speed up the Debug Inspector s<strong>in</strong>ce it<br />
does not have as much <strong>in</strong>formation to display.<br />
TIP<br />
If you have a class data member and you don’t remember that data<br />
member’s type, you can click on it when stopped at a breakpo<strong>in</strong>t and<br />
press Alt+F5 to display the Debug Inspector. The status bar at the<br />
bottom of the Debug Inspector w<strong>in</strong>dow will tell you the data type of<br />
the variable. This also works for W<strong>in</strong>dows and system #def<strong>in</strong>es such as<br />
HINSTANCE, HWND, DWORD, and so on.<br />
411<br />
11
412 Day 11<br />
Other Debugg<strong>in</strong>g Tools<br />
<strong>C++</strong>Builder has some additional debugg<strong>in</strong>g tools to aid you <strong>in</strong> track<strong>in</strong>g down bugs. Some of<br />
these tools are, by nature, advanced debugg<strong>in</strong>g tools. Although the advanced debugg<strong>in</strong>g tools<br />
are not as commonly used as the other tools, they can be very powerful <strong>in</strong> the hands of an<br />
experienced programmer.<br />
Evaluate/Modify<br />
The Evaluate/Modify dialog box allows you to <strong>in</strong>spect the current value of a variable and to<br />
modify the value of a variable if you want. Us<strong>in</strong>g this dialog box, you can test for different<br />
outcomes by modify<strong>in</strong>g a particular variable. This allows you to play a what-if game with your<br />
program as it runs. Figure 11.8 shows the Evaluate/Modify dialog box <strong>in</strong>spect<strong>in</strong>g an <strong>in</strong>teger<br />
variable called x.<br />
Figure 11.8.<br />
The Evaluate/Modify<br />
dialog box.<br />
The Evaluate/Modify dialog box works similarly to the Watch List or the Debug Inspector.<br />
If you click on a variable <strong>in</strong> the source code and choose Evaluate/Modify from the Code<br />
Editor speed menu, the variable will be evaluated. If you want to enter a value that is not<br />
currently show<strong>in</strong>g <strong>in</strong> the source code, you can choose Run | Evaluate/Modify from the ma<strong>in</strong><br />
menu and then type a variable name to evaluate.<br />
The Evaluate field is used to enter the variable name or expression you want to evaluate.<br />
When you click the Evaluate button (or press Enter), the expression will be evaluated and the<br />
result displayed <strong>in</strong> the Result field.<br />
TIP<br />
The Evaluate/Modify dialog box can be used as a quickie calculator.<br />
You can enter hex or decimal numbers (or a comb<strong>in</strong>ation) <strong>in</strong> a mathematical<br />
formula and have the result evaluated. For <strong>in</strong>stance, if you<br />
type<br />
0x400 - 256
NOTE<br />
Us<strong>in</strong>g the Debugger<br />
<strong>in</strong> the Evaluate field and press Enter, the result, 768, will be displayed<br />
<strong>in</strong> the Result field.<br />
You can also enter logical expressions <strong>in</strong> the Evaluate field and have the<br />
result shown <strong>in</strong> the Results field. For <strong>in</strong>stance, if you entered<br />
20 * 20 == 400<br />
the Result field would show true. The only problem with this scenario<br />
is that the program must be stopped at a breakpo<strong>in</strong>t for the Evaluate/<br />
Modify dialog box to function.<br />
If you want to change the value of a variable, enter a new value for the variable <strong>in</strong> the New<br />
Value field and click the Modify button. The variable’s value will be changed to the new value<br />
entered. When you click the Run button to restart the program (or cont<strong>in</strong>ue stepp<strong>in</strong>g), the<br />
new value will be used.<br />
View Call Stack<br />
The Evaluate/Modify dialog box does not update automatically when<br />
you step through your code as do the Watch List and Debug Inspector.<br />
If your code modifies the variable <strong>in</strong> the Evaluate/Modify dialog box,<br />
you must click the Evaluate button aga<strong>in</strong> to see the results. A typical<br />
<strong>in</strong>teraction with this dialog box would be to evaluate a variable or<br />
expression and then immediately close the Evaluate/Modify dialog box.<br />
While your program is runn<strong>in</strong>g, you can view the call stack to <strong>in</strong>spect any functions your<br />
program called. From the ma<strong>in</strong> menu, choose View | Call Stack to display the Call stack<br />
w<strong>in</strong>dow. This w<strong>in</strong>dow displays a list of the functions that were called by your program and<br />
the order <strong>in</strong> which they were called. The most recently called function will be at the top of<br />
the w<strong>in</strong>dow. The functions listed will be a comb<strong>in</strong>ation of functions <strong>in</strong> your program, VCL<br />
methods, and functions conta<strong>in</strong>ed <strong>in</strong> W<strong>in</strong>dows DLLs. Figure 11.9 shows the call stack as it<br />
appears after you run the DebugTst program you created earlier <strong>in</strong> the chapter.<br />
413<br />
11
4<strong>14</strong> Day 11<br />
Figure 11.9.<br />
The Call stack<br />
w<strong>in</strong>dow.<br />
NOTE<br />
In this case the first function on the list is TMa<strong>in</strong>Form::WatchBtnClick(). Follow<strong>in</strong>g that you<br />
see calls to some VCL functions and a couple calls to functions (unnamed) <strong>in</strong> the W<strong>in</strong>dows<br />
KERNEL32.DLL. Remember that the functions are listed <strong>in</strong> reverse order—the function<br />
executed last shows up first <strong>in</strong> the call stack list.<br />
Double-click<strong>in</strong>g on a function name <strong>in</strong> the Call stack w<strong>in</strong>dow will take you to the source code<br />
l<strong>in</strong>e for that function if the function is <strong>in</strong> your program. In case of functions <strong>in</strong> W<strong>in</strong>dows<br />
DLLs, the Call stack w<strong>in</strong>dow will conta<strong>in</strong> just an address and the name of the DLL. Doubleclick<strong>in</strong>g<br />
on a listed function that is conta<strong>in</strong>ed <strong>in</strong> a DLL will display the CPU View w<strong>in</strong>dow<br />
(the CPU View is discussed <strong>in</strong> the next section).<br />
If you have l<strong>in</strong>ked to the debug version of VCL, double-click<strong>in</strong>g on a<br />
VCL method <strong>in</strong> the Call stack w<strong>in</strong>dow will display the VCL source<br />
code for that method. If you have not l<strong>in</strong>ked to the debug version of<br />
VCL, double-click<strong>in</strong>g on a VCL method <strong>in</strong> the Call stack w<strong>in</strong>dow will<br />
display the CPU View.<br />
View<strong>in</strong>g the call stack is most useful after a W<strong>in</strong>dows Access Violation error. By view<strong>in</strong>g the<br />
call stack, you can see where your program was just before the error occurred. Know<strong>in</strong>g where<br />
your program was just before it crashed is often the first step <strong>in</strong> determ<strong>in</strong><strong>in</strong>g what went wrong.<br />
TIP<br />
If the call stack list conta<strong>in</strong>s seem<strong>in</strong>gly nonsensical <strong>in</strong>formation, it<br />
could be that the call stack was corrupted. A corrupted call stack is<br />
usually an <strong>in</strong>dicator of a stack problem. This is not as likely to occur <strong>in</strong><br />
a 32-bit program as it is <strong>in</strong> a 16-bit program, but it can still happen.
CPU View<br />
Us<strong>in</strong>g the Debugger<br />
The CPU View allows you to view your program at the assembly level. Obviously this is an<br />
advanced debugg<strong>in</strong>g feature. Us<strong>in</strong>g this view you can step <strong>in</strong>to or over <strong>in</strong>structions one<br />
assembly <strong>in</strong>struction at a time. You can also run the program to a certa<strong>in</strong> assembly <strong>in</strong>struction<br />
just as you can run the program to a certa<strong>in</strong> source l<strong>in</strong>e with the regular debugger. The CPU<br />
View w<strong>in</strong>dow has five panes: the disassembly pane, the register pane, the flags pane, the raw<br />
stack pane, and the dump pane. Each pane has a speed menu associated with it. The speed<br />
menus provide all the functions necessary to utilize that pane. The CPU View requires a<br />
knowledge of assembly language to be used effectively. To display the CPU View, choose<br />
View | CPU from the ma<strong>in</strong> menu.<br />
The Go to Address Command<br />
The Go to Address command is also an advanced debugg<strong>in</strong>g tool. When your program<br />
crashes, W<strong>in</strong>dows displays an error message show<strong>in</strong>g the address of the violation. You can use<br />
the Go to Address command to attempt to f<strong>in</strong>d out where <strong>in</strong> your program the crash<br />
occurred. When you get an Access Violation error from W<strong>in</strong>dows, you will see a dialog box<br />
similar to the one <strong>in</strong> Figure 11.10.<br />
Figure 11.10.<br />
A W<strong>in</strong>dows message<br />
box report<strong>in</strong>g an<br />
access violation.<br />
When you see this error message, write down the address at which the violation occurred and<br />
then choose Search | Go to Address from the ma<strong>in</strong> menu to display the Go to Address dialog<br />
box. Enter the address you just wrote down <strong>in</strong> the Address field of the Go to Address dialog<br />
box. When you click OK, the debugger will attempt to f<strong>in</strong>d the source code l<strong>in</strong>e where the<br />
error occurred. If the error occurred <strong>in</strong> your code, the cursor will be placed on the l<strong>in</strong>e that<br />
generated the error. If the error occurred somewhere outside of your code, you will get a<br />
message box say<strong>in</strong>g that the address could not be found. As I said, this is an advanced<br />
debugg<strong>in</strong>g tool and is someth<strong>in</strong>g you might never use.<br />
415<br />
11
416 Day 11<br />
Stepp<strong>in</strong>g Through Your Code<br />
Stepp<strong>in</strong>g through code is one of the most basic debugg<strong>in</strong>g operations, yet it still needs to be<br />
mentioned here. Sometimes we fail to see the forest for the trees. ( Just like sometimes authors<br />
of programm<strong>in</strong>g books fail to <strong>in</strong>clude the obvious!) Review<strong>in</strong>g the basics from time to time<br />
may reveal someth<strong>in</strong>g you were not previously aware of.<br />
When you stop at a breakpo<strong>in</strong>t, you can do many th<strong>in</strong>gs to determ<strong>in</strong>e what is go<strong>in</strong>g on with<br />
your code. You can set up variables to watch <strong>in</strong> the Watch List, <strong>in</strong>spect objects with the Debug<br />
Inspector, or view the call stack. You can also step through your code to watch what happens<br />
to your variables and objects as each l<strong>in</strong>e of code is executed. As you cont<strong>in</strong>ue to step through<br />
your code, you will see that the l<strong>in</strong>e <strong>in</strong> your source code that will be executed next is<br />
highlighted <strong>in</strong> blue. If you have the Watch List and Debug Inspector w<strong>in</strong>dows open, they will<br />
be updated as each l<strong>in</strong>e of code is executed. Any changes to variables or objects will be<br />
immediately seen <strong>in</strong> the watch or <strong>in</strong>spector w<strong>in</strong>dow.<br />
NOTE<br />
The compiler optimization option is set to Optimize for Speed by<br />
default. (Optimization options were discussed yesterday.) When the<br />
compiler optimizes code, it “rearranges” your source code us<strong>in</strong>g<br />
mysterious means about which mere mortals can only speculate. (Your<br />
source code is not rearranged per se, but the result<strong>in</strong>g assembly code<br />
may not exactly match the source code as it appears <strong>in</strong> your source file.)<br />
The end result is that you end up with a program that runs faster—and<br />
that is, of course, a good th<strong>in</strong>g.<br />
This benefit does come at a cost, however. Earlier I discussed the fact<br />
that variables can be optimized by the compiler mak<strong>in</strong>g them unavailable<br />
for <strong>in</strong>spection, and this is one of the disadvantages of us<strong>in</strong>g<br />
optimizations.<br />
Another <strong>in</strong>terest<strong>in</strong>g side effect of us<strong>in</strong>g optimizations is that your code<br />
gets rearranged as I mentioned. The net result of this rearrang<strong>in</strong>g is that<br />
when you step through your code, the execution po<strong>in</strong>t may not proceed<br />
sequentially from l<strong>in</strong>e to l<strong>in</strong>e as you might expect. Rather, the execution<br />
po<strong>in</strong>t appears to jump around <strong>in</strong> your source and may even land<br />
on a s<strong>in</strong>gle l<strong>in</strong>e of code multiple times.<br />
This is all perfectly normal, but it can be disconcert<strong>in</strong>g when you are<br />
just learn<strong>in</strong>g to use the debugger. If you prefer to see the execution<br />
po<strong>in</strong>t proceed sequentially through your code, turn off optimizations<br />
while debugg<strong>in</strong>g. Turn optimizations back on aga<strong>in</strong> for your f<strong>in</strong>al
NOTE<br />
Us<strong>in</strong>g the Debugger<br />
builds. Remember that when you change optimization sett<strong>in</strong>gs, you<br />
need to do a Build All for all modules to be rebuilt us<strong>in</strong>g the new<br />
sett<strong>in</strong>gs.<br />
The IDE debugger has two primary stepp<strong>in</strong>g commands that you can use to aid <strong>in</strong> your<br />
debugg<strong>in</strong>g operations: Step Over and Trace Into. Step Over means to execute the next l<strong>in</strong>e<br />
<strong>in</strong> the source code and pause on the l<strong>in</strong>e immediately follow<strong>in</strong>g. Step Over is sort of a<br />
misnomer. The name would seem to <strong>in</strong>dicate that you can step over a source l<strong>in</strong>e and the l<strong>in</strong>e<br />
would not be executed. That is not the case, however. Step Over means that the current l<strong>in</strong>e<br />
will be executed and any functions that that source l<strong>in</strong>e calls will be run at full speed. For<br />
<strong>in</strong>stance, let’s say you have set a breakpo<strong>in</strong>t at a l<strong>in</strong>e that calls another function <strong>in</strong> your<br />
program. When you tell the debugger to step over the function, the debugger executes the<br />
function and stops on the next l<strong>in</strong>e. (Contrast this with how Trace Into works, which you’ll<br />
learn about <strong>in</strong> a m<strong>in</strong>ute, and it will make more sense.) To use Step Over to step through your<br />
program, you can either press F8 or choose Run | Step Over from the ma<strong>in</strong> menu.<br />
As you step through various source code units <strong>in</strong> your program, the<br />
Code Editor automatically loads and displays the needed source units if<br />
they are not already open.<br />
The Trace Into command allows you to trace <strong>in</strong>to any functions that are encountered as you<br />
step through your code. Rather than execut<strong>in</strong>g the function and return<strong>in</strong>g to the next l<strong>in</strong>e<br />
as Step Over does, Trace Into will place the execution po<strong>in</strong>t on the first source code l<strong>in</strong>e <strong>in</strong><br />
the function be<strong>in</strong>g called. You can then step through that function l<strong>in</strong>e by l<strong>in</strong>e us<strong>in</strong>g Step<br />
Over or Trace Into as necessary. The keyboard shortcut for Trace Into is F7.<br />
After you have <strong>in</strong>spected variables and done whatever debugg<strong>in</strong>g you need to do, you can<br />
aga<strong>in</strong> run the program at full speed by click<strong>in</strong>g the Run button. The program will then<br />
function as normal until the next breakpo<strong>in</strong>t is encountered.<br />
TIP<br />
If you have enabled the L<strong>in</strong>k Debug Version of VCL L<strong>in</strong>ker option,<br />
when you encounter a VCL method Trace Into will take you <strong>in</strong>to the<br />
VCL source code for that method. Once <strong>in</strong> the VCL source, you can<br />
<strong>in</strong>spect whatever variables you need to see. If you turn on this option,<br />
you must do a Build All for it to take effect. As I said earlier, stepp<strong>in</strong>g<br />
<strong>in</strong>to the VCL source is of doubtful benefit to most programmers.<br />
417<br />
11
418 Day 11<br />
NOTE<br />
Another, less frequently used, debugg<strong>in</strong>g command is Trace To Next Source L<strong>in</strong>e (Shift+F7<br />
on the keyboard). You will not likely use this command a lot, particularly not until you get<br />
more familiar with debugg<strong>in</strong>g and W<strong>in</strong>dows programm<strong>in</strong>g <strong>in</strong> general. Some W<strong>in</strong>dows API<br />
functions use what is termed a callback function. This means that the W<strong>in</strong>dows function calls<br />
one of your functions to perform some action. If the execution po<strong>in</strong>t is on a W<strong>in</strong>dows API<br />
function that uses a callback function, us<strong>in</strong>g Trace To Next Source L<strong>in</strong>e will jump the<br />
execution po<strong>in</strong>t to the first l<strong>in</strong>e <strong>in</strong> the callback function. The effect is similar to that of<br />
Trace Into, but the specific situation where Trace To Next Source L<strong>in</strong>e is used is altogether<br />
different. If that doesn’t make any sense to you, don’t worry about it. It’s not important for<br />
what you need to learn today.<br />
When you are stepp<strong>in</strong>g through a function, the execution po<strong>in</strong>t will<br />
eventually get to the clos<strong>in</strong>g brace. If the function you are stepp<strong>in</strong>g<br />
through returns control to W<strong>in</strong>dows when it f<strong>in</strong>ishes, press<strong>in</strong>g F8 when<br />
on the clos<strong>in</strong>g brace will exit the function and will return control to the<br />
program be<strong>in</strong>g debugged. There is no obvious <strong>in</strong>dication that the<br />
program is no longer paused because the IDE still has focus. This<br />
behavior can be confus<strong>in</strong>g the first few times you encounter it unless<br />
you are aware of what has happened. To switch back to your program,<br />
just activate it like you would any other program (click on its glyph on<br />
the W<strong>in</strong>dows taskbar or use Alt+Tab).<br />
As I said, stepp<strong>in</strong>g through your code is a basic debugg<strong>in</strong>g technique, but it is one that you<br />
will use constantly while debugg<strong>in</strong>g. Of all the keyboard shortcuts available to you <strong>in</strong><br />
<strong>C++</strong>Builder, F7 and F8 should def<strong>in</strong>itely be <strong>in</strong> your arsenal.<br />
Debugg<strong>in</strong>g Techniques<br />
I have touched on a few debugg<strong>in</strong>g techniques as we looked at the various aspects of the IDE<br />
debugger up to this po<strong>in</strong>t <strong>in</strong> the chapter. I will mention a few more techniques to make your<br />
debugg<strong>in</strong>g tasks easier.<br />
The Diagnostic Macros: TRACE and WARN<br />
Sometimes it is helpful to track your program’s execution. For <strong>in</strong>stance, it would be nice to<br />
have a log file that could be used to log events, such as when your program executes certa<strong>in</strong><br />
functions. Or maybe you would like to send the value of a variable to a log file so that you<br />
could <strong>in</strong>spect its value without stopp<strong>in</strong>g program execution at a breakpo<strong>in</strong>t. The diagnostic
Us<strong>in</strong>g the Debugger<br />
macros, TRACE and WARN, allow you to do exactly that. These macros are convenient debugg<strong>in</strong>g<br />
tools that many programmers overlook because of sparse documentation and general lack of<br />
discussion on the subject.<br />
When you use TRACE or WARN <strong>in</strong> your programs, the messages produced by these macros go<br />
to a log file called OutDbg1.txt. <strong>C++</strong>Builder automatically creates this text file and displays<br />
it <strong>in</strong> a Code Editor w<strong>in</strong>dow whenever a TRACE or WARN statement is encountered. You can then<br />
browse the log file to see what has happened <strong>in</strong> your program.<br />
NOTE<br />
NOTE<br />
The OutDbg1.txt file has a couple <strong>in</strong>terest<strong>in</strong>g characteristics. For<br />
one, the file is not considered part of the project. When you do a Save<br />
All, the OutDbg1.txt file is not saved as the rest of the files <strong>in</strong> the project<br />
are. Along those same l<strong>in</strong>es, when you close the OutDbg1.txt file, you<br />
are not prompted to save the file. If you want the file saved, you must<br />
specifically do a Save or Save All prior to clos<strong>in</strong>g it.<br />
This might seem a little odd, but it makes sense when you th<strong>in</strong>k about<br />
it. The log file is almost always used as a temporary debugg<strong>in</strong>g tool.<br />
Rarely do you need to save the contents of the log file, so by not<br />
prompt<strong>in</strong>g you to save the file, <strong>C++</strong>Builder saves you the aggravation of<br />
hav<strong>in</strong>g to deal with another message box.<br />
The TRACE macro simply outputs a l<strong>in</strong>e of text to the log file <strong>in</strong> the Code Editor. For example,<br />
you might have the follow<strong>in</strong>g code <strong>in</strong> your FormCreate() function:<br />
void __fastcall TMa<strong>in</strong>Form::FormCreate(TObject *Sender)<br />
{<br />
TRACE(“Enter<strong>in</strong>g FormCreate()”);<br />
// <strong>in</strong>tialization code<br />
TRACE(“Leav<strong>in</strong>g FormCreate()”);<br />
}<br />
When this code is executed, two l<strong>in</strong>es will be written to the OutDbg1.txt file. You can view<br />
the messages <strong>in</strong> the log file at any time—either dur<strong>in</strong>g program execution or after the program<br />
term<strong>in</strong>ates—simply by click<strong>in</strong>g on the OutDbg1.txt tab <strong>in</strong> the Code Editor.<br />
The diagnostic macros make use of <strong>C++</strong> streams (remember when we<br />
used those way back on Day 1, “Gett<strong>in</strong>g Your Feet Wet”?). This makes<br />
it possible to create log messages like the follow<strong>in</strong>g:<br />
TRACE(“Varible x = “
420 Day 11<br />
The WARN macro is similar to TRACE except that it allows you to <strong>in</strong>troduce conditions—the<br />
message will be output only if the condition is met. The follow<strong>in</strong>g example sends a message<br />
to the message w<strong>in</strong>dow only if the variable x is greater than 200:<br />
WARN(x > 200, “x = “
Us<strong>in</strong>g the Debugger<br />
The diagnostic macros are declared <strong>in</strong> a file called checks.h, so you need to add the l<strong>in</strong>e<br />
#<strong>in</strong>clude <br />
to your source code as well. If you neglect to <strong>in</strong>clude checks.h, you will get a compiler error<br />
on any l<strong>in</strong>es that conta<strong>in</strong> TRACE or WARN.<br />
Track<strong>in</strong>g Down GPFs<br />
NOTE<br />
All W<strong>in</strong>dows programmers have encountered general protection faults and general protection<br />
exceptions while develop<strong>in</strong>g their applications. For simplicity, I will refer to both<br />
universally as GPFs.<br />
The term GPF is a holdover from 16-bit W<strong>in</strong>dows. Its use is still<br />
prevalent <strong>in</strong> the 32-bit W<strong>in</strong>dows programm<strong>in</strong>g world even though<br />
32-bit W<strong>in</strong>dows actually generates access violation errors rather than<br />
general protection faults.<br />
GPFs can be difficult to track down for beg<strong>in</strong>n<strong>in</strong>g and experienced W<strong>in</strong>dows programmers<br />
alike. Often, as programmers ga<strong>in</strong> experience <strong>in</strong> writ<strong>in</strong>g W<strong>in</strong>dows programs, they develop<br />
a sixth sense of sorts regard<strong>in</strong>g locat<strong>in</strong>g the cause of GPFs. The follow<strong>in</strong>g sections describe<br />
some th<strong>in</strong>gs to look for when try<strong>in</strong>g to track down the elusive GPF. These are not the only<br />
situations that cause a program to crash, but they are some of the most common.<br />
Un<strong>in</strong>itialized Po<strong>in</strong>ters<br />
An un<strong>in</strong>itialized po<strong>in</strong>ter is a po<strong>in</strong>ter that has been declared but has not been set to po<strong>in</strong>t to<br />
anyth<strong>in</strong>g mean<strong>in</strong>gful <strong>in</strong> your program. An un<strong>in</strong>itialized po<strong>in</strong>ter will conta<strong>in</strong> random data.<br />
In the best case it po<strong>in</strong>ts to some harmless spot <strong>in</strong> memory. In the worst cases the un<strong>in</strong>itialized<br />
po<strong>in</strong>ter po<strong>in</strong>ts to a random memory location somewhere <strong>in</strong> your program. This can lead to<br />
erratic program behavior because the po<strong>in</strong>ter might po<strong>in</strong>t to a different memory location each<br />
time the program is run. Always set po<strong>in</strong>ters to NULL both before they are used for the first<br />
time and after the object po<strong>in</strong>ted to is deleted. If you try to access a NULL po<strong>in</strong>ter, your program<br />
will GPF, but the offend<strong>in</strong>g l<strong>in</strong>e <strong>in</strong> the source code will be highlighted by the debugger, and<br />
you can immediately identify the problem po<strong>in</strong>ter.<br />
421<br />
11
422 Day 11<br />
Delet<strong>in</strong>g Previously Deleted Po<strong>in</strong>ters<br />
Delet<strong>in</strong>g a po<strong>in</strong>ter that has already been deleted will result <strong>in</strong> a GPF. The advice given for<br />
work<strong>in</strong>g with un<strong>in</strong>itialized po<strong>in</strong>ters applies here as well: Set any deleted po<strong>in</strong>ters to NULL or<br />
0. In <strong>C++</strong> it is perfectly safe to delete a NULL po<strong>in</strong>ter. By sett<strong>in</strong>g your deleted po<strong>in</strong>ters to NULL,<br />
you ensure that no ill effects will occur if you accidentally delete the po<strong>in</strong>ter a second time.<br />
Array Overwrites<br />
Overwrit<strong>in</strong>g the end of an array can cause a GPF. In some cases the overwritten memory may<br />
not be critical, and the problem might not show up right away, but some time later the<br />
program crashes. When that happens you will likely be look<strong>in</strong>g for a bug at the po<strong>in</strong>t where<br />
the program crashed when the actual problem occurred <strong>in</strong> a completely different part of the<br />
program. In other cases, the memory tromped on is critical, and the program GPFs<br />
immediately. In extreme cases you may even crash W<strong>in</strong>dows. Check all arrays to be sure you<br />
are not overwrit<strong>in</strong>g the end of the array.<br />
GPF on Program Term<strong>in</strong>ation<br />
When a program GPFs on normal shutdown, it is usually an <strong>in</strong>dication that the stack size<br />
is set too small. Although this is not likely <strong>in</strong> a 32-bit program, it could happen under extreme<br />
circumstances. A GPF on program term<strong>in</strong>ation can also be caused by delet<strong>in</strong>g an already<br />
deleted po<strong>in</strong>ter, as I’ve discussed.<br />
Debug Quick Tips<br />
In addition to the many tips offered on the preced<strong>in</strong>g pages, you might want to implement<br />
some of these:<br />
■ For quick <strong>in</strong>spection of a variable without us<strong>in</strong>g breakpo<strong>in</strong>ts, change the form’s<br />
Caption property to display the variable <strong>in</strong> question. Because plac<strong>in</strong>g a Label<br />
component on a form is so easy, you could use a label, too. Change the text <strong>in</strong> the<br />
label to show the value of a variable or any other <strong>in</strong>formation you might want to<br />
display.<br />
■ To slow down your program temporarily (possibly to view program effects <strong>in</strong> slow<br />
motion), enable a conditional breakpo<strong>in</strong>t or a data watch breakpo<strong>in</strong>t. These<br />
breakpo<strong>in</strong>ts slow down program execution while they check the condition of the<br />
breakpo<strong>in</strong>t.<br />
■ Use the Evaluate/Modify dialog box to temporarily change the value of a variable at<br />
runtime. This will allow you to view the effects that different values have on your<br />
program without recompil<strong>in</strong>g your code each time.
Us<strong>in</strong>g the Debugger<br />
■ Ord<strong>in</strong>arily you cannot use Trace Into with <strong>in</strong>l<strong>in</strong>e functions. To be able to trace<br />
<strong>in</strong>to <strong>in</strong>l<strong>in</strong>e functions, you can turn on the Disable Inl<strong>in</strong>e Expansions option. Turn<br />
off the option aga<strong>in</strong> before your f<strong>in</strong>al build.<br />
■ To <strong>in</strong>spect the class that the debugger is currently stopped <strong>in</strong>, choose Run | Inspect<br />
from the ma<strong>in</strong> menu and enter this <strong>in</strong> the Expression field.<br />
■ Use MessageBeep(-1) as an audible <strong>in</strong>dicator that a certa<strong>in</strong> po<strong>in</strong>t <strong>in</strong> your program<br />
has been reached. This W<strong>in</strong>dows API function beeps the PC speaker when called<br />
with a parameter of -1.<br />
■ You can stop an errant debuggee by choos<strong>in</strong>g Run | Program Reset from the ma<strong>in</strong><br />
menu or by press<strong>in</strong>g Ctrl+F2.<br />
■ Use temporary variables to break down long equations or cha<strong>in</strong>ed function calls so<br />
that you can exam<strong>in</strong>e the results <strong>in</strong> more manageable pieces.<br />
■ Use the MessageBox() function to display program trac<strong>in</strong>g <strong>in</strong>formation.<br />
Summary<br />
Debugg<strong>in</strong>g is a never-end<strong>in</strong>g task. Debugg<strong>in</strong>g means more than just track<strong>in</strong>g down a bug <strong>in</strong><br />
your program. Savvy programmers learn to use the debugger from the outset of a new project.<br />
The debugger is a development tool as well as a bug-f<strong>in</strong>d<strong>in</strong>g tool. After today, you should at<br />
least have a basic understand<strong>in</strong>g of how to use the debugger. You will still have to spend a lot<br />
of time actually us<strong>in</strong>g the debugger before you are proficient at it, but you’ve now got a place<br />
to start.<br />
Workshop<br />
The Workshop conta<strong>in</strong>s quiz questions to help you solidify your understand<strong>in</strong>g of the<br />
material covered and exercises to provide you with experience <strong>in</strong> us<strong>in</strong>g what you have learned.<br />
You can f<strong>in</strong>d answers to the quiz questions <strong>in</strong> Appendix A, “Answers to Quiz Questions.”<br />
Q&A<br />
Q My program used to run at regular speed when I ran it from the IDE. Now it’s<br />
as slow as molasses <strong>in</strong> January. Why is that?<br />
A More than likely you’ve got either a large number of breakpo<strong>in</strong>ts that you have<br />
disabled and forgotten about, or one or more conditional breakpo<strong>in</strong>ts <strong>in</strong> your code.<br />
Go to the breakpo<strong>in</strong>t list and delete any breakpo<strong>in</strong>ts you are not currently us<strong>in</strong>g.<br />
Also, be sure you do not have a lot of variables listed <strong>in</strong> the Watch List.<br />
423<br />
11
424 Day 11<br />
Q I have a variable that I want to view <strong>in</strong> both decimal and hexadecimal format.<br />
Can I do that with the Watch List?<br />
A Yes. First add the variable to the Watch List. When the Watch Properties dialog<br />
box comes up, choose the Decimal view<strong>in</strong>g option. Now add the variable aga<strong>in</strong>,<br />
but this time choose the Hexadecimal view<strong>in</strong>g option. Both items will be listed <strong>in</strong><br />
the Watch List, one <strong>in</strong> decimal format and the other <strong>in</strong> hex format.<br />
Q I’m try<strong>in</strong>g to add the Width property of a component on my form to the Watch<br />
List. I get some strange error like, “Po<strong>in</strong>ter to structure required on left side of<br />
someth<strong>in</strong>g or another.” What am I do<strong>in</strong>g wrong?<br />
A You can’t <strong>in</strong>spect a property of a component us<strong>in</strong>g the Watch List. You can,<br />
however, <strong>in</strong>spect the component us<strong>in</strong>g the Debug Inspector and locate the FWidth<br />
data member rather than the Width property. (The FWidth data member holds the<br />
value of the Width property.)<br />
Q I want to stop at a breakpo<strong>in</strong>t only when a variable reaches a certa<strong>in</strong> value and<br />
after the breakpo<strong>in</strong>t has been hit a certa<strong>in</strong> number of times. Can I do that?<br />
A Sure. Enter a conditional expression <strong>in</strong> the Condition field of the Edit Breakpo<strong>in</strong>t<br />
dialog box and a value <strong>in</strong> the Pass Count field. When the condition is met for the<br />
number of times <strong>in</strong>dicated by the pass count, the program will pause at the<br />
breakpo<strong>in</strong>t.<br />
Q I’m stepp<strong>in</strong>g through my code, and I get to a function <strong>in</strong> my program that I<br />
want to debug. When I press F8, the execution po<strong>in</strong>t jumps right over the<br />
function <strong>in</strong>stead of go<strong>in</strong>g <strong>in</strong>to it. What do I do to get <strong>in</strong>to that function?<br />
A When the execution po<strong>in</strong>t is on the l<strong>in</strong>e where the function is called, press F7<br />
(Trace Into) <strong>in</strong>stead of F8. Now you can step through the function a l<strong>in</strong>e at a time.<br />
Q When I step through my code, the execution po<strong>in</strong>t jumps all over the place<br />
rather than proceed<strong>in</strong>g through my code a l<strong>in</strong>e at a time. What causes that?<br />
A In a word: optimization. If you want to be able to debug your program one source<br />
code l<strong>in</strong>e at a time, sequentially, turn off all optimizations and then do a Build All<br />
to rebuild the project.<br />
Q I step through a function l<strong>in</strong>e by l<strong>in</strong>e. Sometimes when I get to the clos<strong>in</strong>g<br />
brace of the function I press F8 one more time and noth<strong>in</strong>g happens. Why?<br />
A Because when that particular function returns, your program has noth<strong>in</strong>g more to<br />
do, so it goes back <strong>in</strong>to its idle state. Essentially, there is no more code to step<br />
through at that po<strong>in</strong>t, so the debugger returns control to the program be<strong>in</strong>g<br />
debugged.<br />
Q How do I use the CPU View when debugg<strong>in</strong>g?<br />
A Just choose View | CPU from the ma<strong>in</strong> menu to display the CPU View. Know<strong>in</strong>g<br />
what to do with the CPU View, however, is another matter entirely!
Quiz<br />
Us<strong>in</strong>g the Debugger<br />
1. How do you set a breakpo<strong>in</strong>t on a particular l<strong>in</strong>e of code?<br />
2. What is an <strong>in</strong>valid breakpo<strong>in</strong>t?<br />
3. How do you set a conditional breakpo<strong>in</strong>t?<br />
4. How can you change the properties of an item <strong>in</strong> the Watch List?<br />
5. What’s the quickest way to add a variable to the Watch List?<br />
6. What tool do you use to view the data members and methods of a class?<br />
7. How do you trace <strong>in</strong>to a function call when stepp<strong>in</strong>g with the debugger?<br />
8. How can you change the value of a variable at runtime?<br />
9. What is the difference between the TRACE and WARN macros?<br />
10. How do you view the output from the TRACE and WARN macros?<br />
Exercises<br />
1. Load the ScratchPad program that you created a few days ago. Place breakpo<strong>in</strong>ts <strong>in</strong><br />
the FileOpenClick() and FileSaveClick() functions. Run the program. When<br />
program execution pauses, <strong>in</strong>spect the OpenDialog and SaveDialog classes, respectively.<br />
2. Cont<strong>in</strong>u<strong>in</strong>g with exercise 1, step through the program when you stop at a<br />
breakpo<strong>in</strong>t and exam<strong>in</strong>e the program’s operation as you step through the functions.<br />
3. Load the DebugTst program you created earlier <strong>in</strong> this chapter. Place a breakpo<strong>in</strong>t<br />
<strong>in</strong> the WatchBtnClick() function. Add the s and x variables to the Watch List. Add<br />
each variable to the Watch List four times. Edit each of the watches and change the<br />
display options. Run the program and step through the function to see the effects<br />
<strong>in</strong> the Watch List.<br />
4. Add a conditional breakpo<strong>in</strong>t to the function <strong>in</strong> exercise 3. Place it on the l<strong>in</strong>e<br />
immediately after the l<strong>in</strong>e that reads <strong>in</strong>t x = Width. Make the condition x == 0<br />
and run the program. What happens?<br />
5. Cont<strong>in</strong>u<strong>in</strong>g with exercise 4, edit the breakpo<strong>in</strong>t and change the condition to<br />
x > 400. Run the program. Change the w<strong>in</strong>dow’s size and click the Watch Test<br />
button. Repeat this process several times, chang<strong>in</strong>g the w<strong>in</strong>dow’s size each time.<br />
What happens?<br />
6. Load any program and switch to the Code Editor. Place the cursor on any l<strong>in</strong>e of<br />
code and choose the Run to Cursor item from the Code Editor speed menu.<br />
Experiment with the program until the breakpo<strong>in</strong>t is hit.<br />
425<br />
11
426 Day 11<br />
7. Aga<strong>in</strong> load the DebugTst program you created earlier. Place a breakpo<strong>in</strong>t <strong>in</strong> the<br />
WatchBtnClick() function and run the program. When the breakpo<strong>in</strong>t is hit, use<br />
the Debug Inspector to <strong>in</strong>spect the WatchBtn.<br />
8. Write a program that does some simple th<strong>in</strong>gs when buttons are pressed (it doesn’t<br />
matter what exactly). Place calls to TRACE <strong>in</strong> each function <strong>in</strong> the program. Run the<br />
program and try each button. Close the program. View the OutDbg1.txt file <strong>in</strong> the<br />
Code Editor to see the results of the TRACE macro.<br />
9. Add several WARN calls to the program created <strong>in</strong> exercise 8. Run the program and<br />
aga<strong>in</strong> view the OutDbg1.txt file.
<strong>C++</strong>Builder Database Architecture<br />
Day 12<br />
Week<br />
<strong>C++</strong>Builder Database<br />
Architecture<br />
by Ken Henderson<br />
Today’s work consists of explor<strong>in</strong>g the <strong>C++</strong>Builder database component hierarchy.<br />
I’ll discuss <strong>in</strong> detail the classes that make up the <strong>C++</strong>Builder database<br />
architecture and po<strong>in</strong>t out the key properties, methods, and events of each one. By<br />
the end of the day, you’ll be thoroughly familiar with how the various classes fit<br />
together <strong>in</strong> the grand scheme of th<strong>in</strong>gs and how they’re used to build applications.<br />
Specifically, you’ll learn<br />
■ How the <strong>C++</strong>Builder database architecture is constructed<br />
■ Which components are essential to build<strong>in</strong>g database applications<br />
■ The purpose of the TSession component<br />
■ TDatabase’s key elements<br />
■ How to use the TDatasource component<br />
2<br />
427<br />
12
428 Day 12<br />
■ The properties, events, and key methods of the TTable, TQuery, and TStoredProc<br />
components<br />
■ How to use the TBatchMove component to copy rows and create tables<br />
Some Terms You’ll Need to Know<br />
Throughout this chapter, I’ll refer to various elements of the <strong>C++</strong>Builder database architecture<br />
by name when describ<strong>in</strong>g them or how they <strong>in</strong>ter-operate with other elements. So, before<br />
we beg<strong>in</strong>, I need to def<strong>in</strong>e some terms so that you’ll understand what I’m say<strong>in</strong>g as we go.<br />
Some of these are <strong>C++</strong>Builder terms; some are database terms. These may or may not be terms<br />
with which you’re already familiar. Table 12.1 summarizes today’s key terms.<br />
Table 12.1. Common <strong>C++</strong>Builder database access terms.<br />
Term Description<br />
Table A collection of rows (or entities) <strong>in</strong> a database. For example, you<br />
might construct an INVOICE table to store <strong>in</strong>voice entities or rows.<br />
Row A record or an entity <strong>in</strong> a table. For example, a CUSTOMER table<br />
would conta<strong>in</strong> rows of customer data. Each row would conta<strong>in</strong><br />
<strong>in</strong>formation for a different customer.<br />
Column A field or an attribute that’s conta<strong>in</strong>ed <strong>in</strong> the rows of a table.<br />
For example, your INVOICE table might conta<strong>in</strong> a<br />
CustomerNumber column. The CustomerNumber column would be<br />
present <strong>in</strong> every row <strong>in</strong> the table.<br />
<strong>Borland</strong> Database The set of DLLs and support files that allows <strong>C++</strong>Builder (and<br />
Eng<strong>in</strong>e other <strong>Borland</strong> products) to access databases. The <strong>Borland</strong><br />
Database Eng<strong>in</strong>e (BDE) saves much of the work normally<br />
associated with build<strong>in</strong>g full-featured database applications by<br />
provid<strong>in</strong>g a high-level database API that is consistent across all<br />
the DBMS platforms it supports. This developer-friendly<br />
<strong>in</strong>terface is provided <strong>in</strong> <strong>C++</strong>Builder’s database controls so that<br />
you rarely have to work directly with the BDE itself.<br />
IDAPI <strong>Borland</strong>’s Independent Database Application Programm<strong>in</strong>g<br />
Interface. It’s the <strong>in</strong>terface whereby applications (<strong>in</strong>clud<strong>in</strong>g<br />
<strong>C++</strong>Builder apps) talk to the BDE. Because nearly all necessary<br />
IDAPI calls are made for you by <strong>C++</strong>Builder’s database components,<br />
you’ll rarely write code that directly references IDAPI.<br />
Instead, you’ll <strong>in</strong>teract with the methods, properties, and events<br />
of <strong>C++</strong>Builder’s database components, which, <strong>in</strong> turn, make the<br />
necessary IDAPI calls.
<strong>C++</strong>Builder Database Architecture<br />
Term Description<br />
BDE Driver A DLL (or set of DLLs) that allows the BDE to communicate<br />
with a particular DBMS platform. The client/server version of<br />
<strong>C++</strong>Builder <strong>in</strong>cludes drivers to connect with Sybase, Microsoft,<br />
Oracle, InterBase, Informix, DB2, Paradox, dBase, and any 32bit<br />
ODBC data source. <strong>C++</strong>Builder programs don’t communicate<br />
directly with BDE drivers. Instead, they utilize BDE aliases,<br />
which are themselves based on BDE drivers.<br />
BDE Alias A collection of configuration parameters that tells the BDE how<br />
to connect to a given database. Aliases are based on BDE<br />
database drivers. You create aliases us<strong>in</strong>g either the BDE<br />
Configuration program or <strong>C++</strong>Builder’s Database Explorer.<br />
Aliases are usually database specific. For example, you might<br />
create one alias to reference the Microsoft Access Northw<strong>in</strong>d<br />
database and another to reference its Orders database. Both<br />
drivers would be based on the Access ODBC driver because<br />
they both reference Access databases. However, each would<br />
differ <strong>in</strong> that it would connect to a different Access database.<br />
This is what dist<strong>in</strong>guishes BDE aliases from BDE drivers—a<br />
driver references a particular DBMS platform; an alias references<br />
a s<strong>in</strong>gle database on a given DBMS platform.<br />
SQL L<strong>in</strong>ks drivers High-performance database access drivers that the BDE can use<br />
to connect with client/server DBMSs. The client/server version<br />
of <strong>C++</strong>Builder ships with SQL L<strong>in</strong>ks drivers for the Sybase,<br />
Microsoft, Oracle, InterBase, Informix, and DB2 platforms.<br />
Because these drivers are <strong>in</strong>cluded with <strong>C++</strong>Builder, you don’t<br />
need to use alternative methods such as ODBC to access these<br />
DBMS platforms, although you still can if you want to.<br />
ODBC drivers Database access drivers based on Microsoft’s Open Database<br />
Connectivity specification. <strong>C++</strong>Builder can use 32-bit ODBC<br />
drivers to connect with database back ends. You set up and<br />
manage ODBC data sources (which are similar to BDE aliases)<br />
via the ODBC Adm<strong>in</strong>istrator applet <strong>in</strong> the W<strong>in</strong>dows Control<br />
Panel.<br />
Data access control A nonvisual (<strong>in</strong>visible at runtime) component that provides<br />
database access to your application. Data access controls are<br />
located on the Data Access page of the <strong>C++</strong>Builder Component<br />
Palette. TDatabase, TTable, and TDatasource are all data access<br />
controls.<br />
429<br />
cont<strong>in</strong>ues<br />
12
430 Day 12<br />
Table 12.1. cont<strong>in</strong>ued<br />
Term Description<br />
TDataset The <strong>C++</strong>Builder class that provides access to database tables and<br />
table-like query result sets. Because the TTable, TQuery, and<br />
TStoredProc components <strong>in</strong>directly descend from the TDataset<br />
class, you’ll often see me refer to them collectively as TDatasets.<br />
TTable The <strong>C++</strong>Builder component that provides access to database<br />
tables. You use TTable’s TableName property to reference the<br />
actual table that you want to access <strong>in</strong> your database.<br />
TQuery The <strong>C++</strong>Builder component that allows you to construct,<br />
execute, and process your own SQL queries.<br />
TStoredProc The <strong>C++</strong>Builder component that allows you to run compiled<br />
SQL procedures that reside on a database server (also known as<br />
stored procedures).<br />
Data-aware control A visual (visible at runtime) component that uses the data access<br />
provided by your app’s data access controls to allow the user to<br />
see and modify data <strong>in</strong> a database. Data-aware controls reside<br />
on the Data Controls page <strong>in</strong> <strong>C++</strong>Builder’s Component Palette.<br />
For the most part, you can th<strong>in</strong>k of them as “data smart”<br />
versions of the controls on the Palette’s Standard page. TDBGrid,<br />
TDBNavigator, and TDBEdit are examples of data-aware controls.<br />
TDatasource The <strong>C++</strong>Builder component that facilitates l<strong>in</strong>k<strong>in</strong>g TDatasets<br />
with data-aware controls. Data-aware components reference<br />
TDatasource components that, <strong>in</strong> turn, reference TDataset<br />
controls.<br />
TField The <strong>C++</strong>Builder class that provides access to fields <strong>in</strong> a database<br />
table. <strong>C++</strong>Builder creates TField descendants such as<br />
TStr<strong>in</strong>gField and TIntegerField when you use the Fields<br />
Editor to add field components to a form. TField components<br />
that have been added to a form are owned by the form, not by<br />
their associated Tdataset.<br />
An Overview of the Architecture<br />
<strong>C++</strong>Builder applications communicate with local and remote databases us<strong>in</strong>g the <strong>Borland</strong><br />
Database Eng<strong>in</strong>e. In the case of local formats such as Paradox and dBase tables, the BDE<br />
makes use of its own, built-<strong>in</strong>, local DBMS drivers. In the case of remote formats like Oracle
<strong>C++</strong>Builder Database Architecture<br />
and Sybase, the BDE communicates with back-end database servers us<strong>in</strong>g SQL L<strong>in</strong>ks and/<br />
or ODBC drivers. Often these drivers make calls to native driver libraries supplied by the<br />
DBMS vendor. Figure 12.1 illustrates this relationship.<br />
Figure 12.1.<br />
<strong>C++</strong>Builder implements<br />
a simple, yet<br />
flexible, databaseaccess<br />
architecture.<br />
Native DBMS driver<br />
Your application<br />
BDE alias<br />
BDE driver<br />
ODBC driver<br />
With<strong>in</strong> your applications, data-aware controls reference TDatasource components. Usually,<br />
a given form makes use of only a handful of TDatasource controls, although it may <strong>in</strong>clude<br />
numerous data-aware components. These components reference one or more TDatasource<br />
controls that, <strong>in</strong> turn, reference one or more TDatasets. It’s not unusual for a form to <strong>in</strong>clude<br />
just one TDataset and one TDatasource. Figure 12.2 illustrates how these elements relate to<br />
one another.<br />
The flexibility <strong>in</strong>herent <strong>in</strong> this multilevel architecture makes it quite easy to develop database<br />
applications that are not only robust, but also scalable. Thanks to the separation of the backend<br />
BDE drivers from your front-end application components, it’s at least theoretically<br />
possible to change an application’s database back end without even recompil<strong>in</strong>g the app. The<br />
architecture’s modularity allows <strong>in</strong>dividual pieces of it to be replaced without hav<strong>in</strong>g to<br />
reeng<strong>in</strong>eer it or rebuild applications based on it.<br />
Now that I’ve given you a broad overview of the architecture, let me make a few general<br />
statements that may help re<strong>in</strong>force the concepts I’ve just discussed. You may be say<strong>in</strong>g, “This<br />
architecture stuff sounds nifty, but how do I use it? How does it apply to me? What does all<br />
this really mean?” If this sounds like you, hopefully the follow<strong>in</strong>g tips will help crystallize the<br />
discussion thus far.<br />
431<br />
12
432 Day 12<br />
Figure 12.2.<br />
Database access from<br />
the perspective of a<br />
<strong>C++</strong>Builder app.<br />
TQuery<br />
TDBGrid<br />
TDatabase<br />
TTable<br />
TDatasource<br />
TDBEdit<br />
TStoredProc<br />
TDBListBox<br />
■ You do not need to use the TDatabase component to access databases. The<br />
TDatabase component provides some additional features and controls that you may<br />
or may not need, but it’s not required to build <strong>C++</strong>Builder database applications.<br />
■ You will probably not access the TSession component unless you’re develop<strong>in</strong>g<br />
multithreaded database applications. A multithreaded application opens multiple<br />
execution “pipel<strong>in</strong>es” simultaneously. This means that several operations can occur<br />
at the same time. Normal database applications are not multithreaded, so, as a rule,<br />
you won’t need to concern yourself with the TSession component. <strong>C++</strong>Builder<br />
automatically creates a TSession (stored <strong>in</strong> a global variable named Session) for<br />
database apps when they start up. This means that for s<strong>in</strong>gle-threaded apps, you<br />
can just reference the Session variable when you need access to TSession’s properties<br />
or methods.
<strong>C++</strong>Builder Database Architecture<br />
■ You do not need the TQuery or TStoredProc components unless you’re writ<strong>in</strong>g your<br />
own SQL or access<strong>in</strong>g server-based stored procedures. You can open database tables<br />
<strong>in</strong> any of the local or remote formats supported by <strong>C++</strong>Builder us<strong>in</strong>g just the<br />
TTable component.<br />
■ You’ll normally use the TTable component to send/receive data from databases. As<br />
mentioned, TTable is the centerpiece of <strong>C++</strong>Builder’s database access. You use it to<br />
reference database tables and to exchange data with data-aware controls.<br />
■ The components on the Data Controls page are visual, data-aware controls—they<br />
allow data to be displayed and allow users to change the data visually. They’re “data<br />
smart” versions of the controls you often see <strong>in</strong> W<strong>in</strong>dows applications. You’ll use<br />
these components to build the user <strong>in</strong>terface of database applications. They <strong>in</strong>teract<br />
with data access controls such as TTable to provide users with database access.<br />
■ TDataset descendants (for example, TTable, TQuery, and TStoredProc) retrieve data<br />
from databases, but they cannot supply this data directly to data-aware components<br />
(such as TDBEdit); they need TDatasource to function as the conduit between them<br />
and your application’s data-aware controls. This means that data-aware components<br />
such as TDBEdit do not refer directly to the TDataset that provides their data<br />
access. Instead, they reference a TDatasource that, <strong>in</strong> turn, references a TDataset.<br />
■ So, to build a simple data-aware form you need three th<strong>in</strong>gs: a TTable, a<br />
TDatasource, and whatever data-aware controls the form requires (TDBEdit,<br />
TDBMemo, and so on).<br />
A Tour of the <strong>C++</strong>Builder Database<br />
Components<br />
Now that you’ve received a basic overview of the <strong>C++</strong>Builder database architecture, let’s cover<br />
the components <strong>in</strong>dividually. I’ll go through <strong>C++</strong>Builder’s database components one by one<br />
and discuss the key elements of each. I’ll build on the general discussion of the database<br />
architecture by giv<strong>in</strong>g you a thorough tour of the <strong>C++</strong>Builder database components that<br />
encompass it.<br />
I’ve <strong>in</strong>tentionally omitted components that act only as support classes. If a class is not actually<br />
a component—that is, if it’s merely an ancestor of a component—I don’t <strong>in</strong>clude it. This<br />
<strong>in</strong>cludes the TDataset and TDBDataSet classes, for example. They’re class ancestors of the<br />
TTable, TQuery, and TStoredProc components. My emphasis here is on components that you<br />
can manipulate us<strong>in</strong>g <strong>C++</strong>Builder’s visual tools. Although the ancestor class hierarchy is<br />
important, most of the properties, events, and methods you’ll need to be aware of are<br />
provided <strong>in</strong> <strong>C++</strong>Builder’s components by design.<br />
433<br />
12
434 Day 12<br />
Each component narrative consists of three sections:<br />
■ A description of the component, its module, and class ancestor, as well as tables<br />
list<strong>in</strong>g its key properties, methods, and events<br />
■ A key elements section<br />
■ A tasks section<br />
The key properties, methods, and events tables are by no means exhaustive—see the<br />
<strong>C++</strong>Builder documentation, or, better yet, the VCL source code, for complete lists of these.<br />
The idea is to give you a thorough baptism <strong>in</strong>to the <strong>C++</strong>Builder database architecture without<br />
ventur<strong>in</strong>g <strong>in</strong>to every nook and cranny of the VCL.<br />
TSession<br />
Module: DB Class ancestor: Tcomponent<br />
Because <strong>C++</strong>Builder automatically creates a TSession component for you each time your<br />
application runs, you won’t normally need to create one yourself. This built-<strong>in</strong> TSession can<br />
be referenced us<strong>in</strong>g <strong>C++</strong>Builder’s global Session variable.<br />
As a rule, you won’t need more than one TSession per application. The only exception to this<br />
is when you’re build<strong>in</strong>g multithreaded database applications. When do<strong>in</strong>g that, you may<br />
need to use TSession components to open extra connections <strong>in</strong>to your server <strong>in</strong> order to keep<br />
database access <strong>in</strong> one thread from <strong>in</strong>terfer<strong>in</strong>g with that <strong>in</strong> another. You can drop as many<br />
TSession components as you need onto a form or data module and then utilize them <strong>in</strong> your<br />
Database and TDataset components. In a multithreaded database application, you typically<br />
set up one TSession per thread. Note that <strong>C++</strong>Builder def<strong>in</strong>es another global variable,<br />
Sessions, for track<strong>in</strong>g multiple Session components <strong>in</strong> a s<strong>in</strong>gle application. Sessions is of<br />
type TSessionList and conta<strong>in</strong>s an entry for each Session component <strong>in</strong> the application.<br />
Table 12.2 lists the key properties, Table 12.3 lists the key methods, and Table 12.4 lists the<br />
key events for TSession.<br />
Table 12.2. TSession key properties.<br />
Property Description<br />
DatabaseCount Returns a count of the number of active TDatabases.<br />
Databases Returns the array of active TDatabases.<br />
Handle Provides access to the BDE handle—used for direct BDE calls.<br />
KeepConnections Determ<strong>in</strong>es whether <strong>in</strong>active connects are reta<strong>in</strong>ed.
<strong>C++</strong>Builder Database Architecture<br />
Property Description<br />
NetFileDir Specifies the location of PDOXUSRS.NET.<br />
PrivateDir Specifies the location of temporary files.<br />
SessionName Specifies the session name to publish to other components.<br />
Table 12.3. TSession key methods.<br />
Method Function<br />
AddPassword Adds a password to the current session (for Paradox connections).<br />
CloseDatabase Explicitly closes a TDatabase component.<br />
DropConnections Drops all <strong>in</strong>active TDatabase connections.<br />
F<strong>in</strong>dDatabase Locates a TDatabase by name.<br />
GetAliasNames Returns the available BDE aliases.<br />
GetAliasParams Returns the parameters for a given alias.<br />
GetDatabaseNames Lists all available aliases, <strong>in</strong>clud<strong>in</strong>g local ones.<br />
GetDriverNames Lists the available BDE drivers.<br />
GetDriverParams Returns the parameters for a given driver.<br />
GetPassword Prompts for a password; returns true if successful.<br />
GetTableNames Lists all tables <strong>in</strong> a given database.<br />
GetStoredProcNames Lists all stored procedures <strong>in</strong> a given database.<br />
OpenDatabase Explicitly opens a TDatabase.<br />
RemoveAllPasswords Removes all Paradox-related passwords.<br />
RemovePassword Removes a given Paradox-related password.<br />
Table 12.4. TSession key events.<br />
Event Catalyst<br />
OnPassword Occurs when the BDE needs a Paradox table password.<br />
OnStartup Occurs when the session becomes active.<br />
435<br />
12
436 Day 12<br />
Key Elements<br />
TSession is the central control facility for an application’s database connections. Use the<br />
DatabaseCount property to determ<strong>in</strong>e the number of active TDatabases; use the Databases<br />
property to access them by <strong>in</strong>dex.<br />
Similar to the Database component’s DatabaseName property, the Session component’s<br />
SessionName property enables you to specify a name to publish to other components. In a<br />
multithreaded application, you would set this property to a name of your choice and then<br />
set the SessionName property of an associated Database and TDataset component (a Table,<br />
Query, or StoredProc) to match. By sett<strong>in</strong>g SessionName of a Database and, say, a Query<br />
component to match the one used <strong>in</strong> a TSession, you specify which database connection the<br />
Query is to use. By extension, if you then <strong>in</strong>teract with Query from with<strong>in</strong> a process thread,<br />
you’ve effectively specified which database connection the thread is to utilize. On some<br />
servers, this is a must because database access <strong>in</strong> one thread <strong>in</strong>terferes with that of another.<br />
The KeepConnections property determ<strong>in</strong>es whether <strong>in</strong>active database connections are<br />
reta<strong>in</strong>ed for temporary TDatabase components. Use DropConnections to drop all <strong>in</strong>active<br />
database connections. Keep <strong>in</strong> m<strong>in</strong>d that if all the current connections to a database server<br />
are <strong>in</strong>active and you drop them, you’ll have to log back <strong>in</strong>to the server the next time you need<br />
to access it. There is, however, a way to set KeepConnections to false and still avoid be<strong>in</strong>g<br />
prompted for a username and password each time the BDE reconnects to your back end.<br />
(This is covered <strong>in</strong> the discussion of the Database component later today.)<br />
The location of the BDE network control directory is stored <strong>in</strong> the NetFileDir property.<br />
Note that this is used for Paradox tables only. The directory path <strong>in</strong> which temporary files<br />
are located is stored <strong>in</strong> the PrivateDir property.<br />
Tasks<br />
Use the TSession component when you need to get at the <strong>in</strong>ternals of the BDE. You can access<br />
<strong>in</strong>formation such as alias lists, alias parameters, and driver sett<strong>in</strong>gs. You can also make direct<br />
BDE API calls us<strong>in</strong>g TSession’s Handle property.<br />
You can use the predef<strong>in</strong>ed Session <strong>in</strong>stance variable to call TSession methods. The follow<strong>in</strong>g<br />
three code excerpts are examples of TSession method calls.<br />
This method call replaces the contents of ListBox1.Items with the list of currently def<strong>in</strong>ed<br />
BDE aliases:<br />
Session->GetAliasNames(ListBox1->Items);<br />
This method call replaces the contents of ListBox1.Items with the list of all BDE and<br />
application-specific aliases:<br />
Session->GetDatabaseNames(ListBox1->Items);
<strong>C++</strong>Builder Database Architecture<br />
This tells your application to drop <strong>in</strong>active temporary database connections:<br />
Session->KeepConnections=false;<br />
Note that this affects only temporary database connections—those constructed by the BDE<br />
itself, not those you’ve explicitly created. Databases that have their own TDatabase component<br />
use that component’s KeepConnections property <strong>in</strong>stead.<br />
The ma<strong>in</strong> advantage of dropp<strong>in</strong>g <strong>in</strong>active database connections is the conservation of<br />
network bandwidth. On local area networks (LANs), this may be barely perceptible.<br />
However, over wide area networks or dial-up connections, the difference this makes can be<br />
huge. Note that releas<strong>in</strong>g unused database connections also frees up connections on the server<br />
and local PC resources, although this rarely justifies hav<strong>in</strong>g to log back <strong>in</strong> to the server<br />
repeatedly.<br />
As mentioned previously, you can set up the OnLog<strong>in</strong> event of a TDatabase component such<br />
that the user is not actually required to log <strong>in</strong> to the server each time the TDatabase reconnects,<br />
so dropp<strong>in</strong>g <strong>in</strong>active connections is perhaps not as bad as it sounds. (See the “Tasks” section<br />
for the Tdatabase component for <strong>in</strong>structions on how to do this.)<br />
TDatabase<br />
Module: DB Class ancestor: TComponent<br />
Although the explicit use of a TDatabase component is not required for database access, it does<br />
provide access to certa<strong>in</strong> aspects of database connections that you cannot otherwise reference.<br />
Typically, you have only one TDatabase per application. <strong>C++</strong>Builder <strong>in</strong>stantiates a temporary<br />
TDatabase component <strong>in</strong>ternally if you do not <strong>in</strong>clude one yourself.<br />
Table 12.5 lists the key properties, Table 12.6 lists the key methods, and Table 12.7 lists the<br />
key events for TDatabase.<br />
Table 12.5. TDatabase key properties.<br />
Property Description<br />
AliasName Refers to the BDE alias used.<br />
Connected Reflects whether the TDatabase is open.<br />
DatabaseName Def<strong>in</strong>es an application-specific database alias.<br />
DriverName Specifies a driver type to use.<br />
KeepConnection Toggles retention of <strong>in</strong>active database connections.<br />
Log<strong>in</strong>Prompt Toggles whether the user is prompted to log <strong>in</strong>.<br />
437<br />
12
438 Day 12<br />
Table 12.6. TDatabase key methods.<br />
Method Function<br />
Open Explicitly opens a database connection.<br />
Close Explicitly close a database connection.<br />
Table 12.7. TDatabase key events.<br />
Event Catalyst<br />
OnLog<strong>in</strong> Occurs when a SQL TDatabase is opened and Log<strong>in</strong>Prompt is true.<br />
Key Elements<br />
You use the DatabaseName property to def<strong>in</strong>e an application-specific, or local, BDE alias.<br />
Once you’ve specified a name here (it can be the same as the component’s Name property, if<br />
you like), you’ll see it “published” <strong>in</strong> the drop-down DatabaseName property list of TDataset<br />
components like TTable and TQuery. You can then select it from those lists to l<strong>in</strong>k the<br />
associated TDataset component with your Tdatabase.<br />
AliasName specifies the BDE alias you want this TDatabase to use. It refers to an alias you’ve<br />
already def<strong>in</strong>ed us<strong>in</strong>g the BDE Configuration utility and uses it to get default sett<strong>in</strong>gs. Note<br />
that this property and the DriverName property are mutually exclusive. Sett<strong>in</strong>g one automatically<br />
clears the other.<br />
If you elect not to set AliasName, use the DriverName property to identify a BDE driver that<br />
you want to use <strong>in</strong>stead. This can <strong>in</strong>clude the STANDARD driver for local tables (dBASE<br />
and Paradox), or the INTERBASE, SYBASE, ORACLE, or MSSQL drivers for SQL<br />
database servers. As mentioned previously, the DriverName property and the AliasName<br />
property are mutually exclusive.<br />
Toggl<strong>in</strong>g the Connected property opens and closes the database connection. You can set it to<br />
true <strong>in</strong> the <strong>C++</strong>Builder Object Inspector to open a database connection while you’re<br />
design<strong>in</strong>g. If you open a TDataset that refers to your TDatabase, the TDatabase will<br />
automatically be opened. If you close a TDatabase that has associated TDatasets, you’ll close<br />
them as well.<br />
TIP<br />
Note that if you def<strong>in</strong>e an application-specific alias, the form or data<br />
module that conta<strong>in</strong>s the associated TDatabase must be currently loaded<br />
<strong>in</strong> order for you to open TDatasets that reference it.
<strong>C++</strong>Builder Database Architecture<br />
To avoid logg<strong>in</strong>g <strong>in</strong> each time the database is opened, set the KeepConnection property<br />
to true.<br />
If the Log<strong>in</strong>Prompt property is set to true, the user will be prompted for log<strong>in</strong> <strong>in</strong>formation<br />
when connect<strong>in</strong>g to the database server. You can override this us<strong>in</strong>g the OnLog<strong>in</strong> event<br />
(detailed <strong>in</strong> the follow<strong>in</strong>g section, “Tasks”).<br />
Set the TransIsolation property to specify the transaction isolation level (TIL) to establish on<br />
the database server. The TIL you select affects both your ability to see transactions orig<strong>in</strong>ated<br />
by other users and their ability to see transactions you <strong>in</strong>itiate.<br />
Tasks<br />
Your application must <strong>in</strong>clude a Database component to do any of the follow<strong>in</strong>g:<br />
■ Establish a permanent database connection<br />
■ Establish local, application-specific database aliases<br />
■ Change server log<strong>in</strong> parameters<br />
■ Manipulate server-based transaction-control mechanisms<br />
Establish<strong>in</strong>g Database Connections<br />
<strong>C++</strong>Builder applications connect to SQL servers us<strong>in</strong>g the SQL L<strong>in</strong>ks drivers for the <strong>Borland</strong><br />
Database Eng<strong>in</strong>e. These drivers provide access to the InterBase, Sybase, Oracle, and<br />
Microsoft DBMSs.<br />
Typically, you’ll use the Database Explorer or the BDE Configuration utility to construct<br />
database aliases through which your application will connect to these back-end servers. A<br />
BDE alias is no more than a named parameter list—a set of connection <strong>in</strong>formation that the<br />
BDE uses to connect you to your database. Once you’ve set up an alias, it appears <strong>in</strong> the<br />
DatabaseName property list of TDataset components such as TTable and TQuery. You can<br />
override the defaults provided by a BDE alias by edit<strong>in</strong>g TDatabase’s Params property. The<br />
sett<strong>in</strong>gs you make <strong>in</strong> Params override the parameters that are embedded <strong>in</strong> the alias def<strong>in</strong>ition.<br />
Reta<strong>in</strong><strong>in</strong>g Database Connections<br />
You set the KeepConnection property of a TDatabase component to true to cause database<br />
connections to be reta<strong>in</strong>ed even when no TDatasets are open. This is necessary if you want<br />
to avoid hav<strong>in</strong>g to log <strong>in</strong> the next time a connection is needed.<br />
439<br />
12
440 Day 12<br />
NOTE<br />
Don’t confuse TDatabase’s KeepConnections property with TSession’s<br />
property of the same name. TSession’s property affects only temporary<br />
TDatabase components, not those you create. Sett<strong>in</strong>g TSession’s<br />
KeepConnections property will have no effect on whether your explicit<br />
TDatabase connections are reta<strong>in</strong>ed.<br />
Chang<strong>in</strong>g Server Log<strong>in</strong> Parameters<br />
You can use TDatabase’s OnLog<strong>in</strong> event handler to keep the default password dialog box from<br />
display<strong>in</strong>g when a connection is <strong>in</strong>itiated. OnLog<strong>in</strong> gets passed two parameters: a TDatabase<br />
component that po<strong>in</strong>ts to the database the user is try<strong>in</strong>g to log on to, and a TStr<strong>in</strong>gs object<br />
for stor<strong>in</strong>g the required log<strong>in</strong> parameters. Here’s the header def<strong>in</strong>ition for a typical OnLog<strong>in</strong><br />
event method handler:<br />
void __fastcall TForm1::Database1Log<strong>in</strong>(TDatabase *Database, TStr<strong>in</strong>gs<br />
*Log<strong>in</strong>Params)<br />
From <strong>in</strong>side the OnLog<strong>in</strong> method handler, you can use TStr<strong>in</strong>gs’s <strong>in</strong>dexed Values property<br />
to access <strong>in</strong>dividual parameters, like so:<br />
Log<strong>in</strong>Params->Values[“SERVER NAME”] = “VH1”;<br />
Log<strong>in</strong>Params->Values[“USER NAME”] = “dave”;<br />
Log<strong>in</strong>Params->Values[“PASSWORD”] = “ureally”;<br />
To prevent the default log<strong>in</strong> dialog box from display<strong>in</strong>g, you’ll have to at least set the PASSWORD<br />
parameter. You can gather the parameters you need from a dialog box of your own, retrieve<br />
them from another Database component, or hard-code them—it doesn’t matter. If they leave<br />
your OnLog<strong>in</strong> method handler with values, <strong>C++</strong>Builder will attempt to use them to establish<br />
a connection.<br />
Application-Controlled Transaction Process<strong>in</strong>g<br />
A transaction is a unit of database work—a set of data modifications that you want to treat<br />
as a s<strong>in</strong>gle unit. It may consist of a s<strong>in</strong>gle data-modification command; it may consist of<br />
thousands. When you group a series of data changes together as a s<strong>in</strong>gle transaction, you<br />
ensure that either all the changes occur or none of them do. If a transaction consists of 1,000<br />
changes and the 999th one fails, they all fail, and the database behaves as though none of them<br />
ever occurred. Normally, <strong>C++</strong>Builder handles transaction-related issues for you automatically<br />
by start<strong>in</strong>g and committ<strong>in</strong>g transactions when your application attempts to make<br />
changes to a database. If this level of control isn’t sufficient, you can guide transaction<br />
process<strong>in</strong>g yourself us<strong>in</strong>g the TransIsolation property and the StartTransaction, Commit,<br />
and Rollback methods.
<strong>C++</strong>Builder Database Architecture<br />
The TransIsolation property controls the transaction isolation level (TIL) on the database<br />
server. The TIL on the server controls the accessibility of concurrent transactions to changes<br />
made by one another.<br />
TransIsolation has three possible values: tiDirtyRead, tiReadCommitted, and tiRepeatableRead<br />
(default is tiReadCommited). These TransIsolation values have the follow<strong>in</strong>g effects:<br />
■ tiDirtyRead—Uncommitted changes by other transactions are visible.<br />
■ tiReadCommitted—Only committed changes by other transactions are visible.<br />
■ tiRepeatableRead—Changes by other transactions to previously read data are not<br />
visible, which means that every time a transaction reads a given record, it always<br />
gets the exact same record.<br />
The StartTransaction method marks the beg<strong>in</strong>n<strong>in</strong>g of a group of database changes that you<br />
want to be treated as a unit. They will either all be applied to the database or none of them<br />
will be.<br />
NOTE<br />
Commit makes permanent the database changes that have occurred s<strong>in</strong>ce the transaction was<br />
started. Th<strong>in</strong>k of it as a database save command.<br />
Rollback discards the database changes that have been made s<strong>in</strong>ce the transaction began.<br />
Th<strong>in</strong>k of it as a database undo command.<br />
TTable<br />
You can also control transaction process<strong>in</strong>g on your server us<strong>in</strong>g<br />
Passthrough SQL. To do this, you issue SQL commands that change<br />
the transaction process<strong>in</strong>g on your server. Be aware that do<strong>in</strong>g this with<br />
SQLPASSTHRUMODE set to SHARED AUTOCOMMIT or SHARED NOAUTOCOMMIT<br />
could cause your new TIL sett<strong>in</strong>g to affect other transactions <strong>in</strong>itiated<br />
by your application.<br />
Module: DBTables Class ancestor: TDBDataSet<br />
TTable is a direct descendant of the TDBDataSet class and an <strong>in</strong>direct descendant of the<br />
TDataset class. You access database tables us<strong>in</strong>g the TTable component. When you open a<br />
TTable, you establish a connection between your application and the table. You add, change,<br />
and delete rows <strong>in</strong> database tables us<strong>in</strong>g the TTable component.<br />
Table 12.8 lists the key properties, Table 12.9 the key methods, and Table 12.10 the key<br />
events of TTable.<br />
441<br />
12
442 Day 12<br />
Table 12.8. TTable key properties.<br />
Property Description<br />
Active Toggles whether the TDataset is open.<br />
AutoCalcFields Determ<strong>in</strong>es how calculated fields are calculated.<br />
Bof Reflects whether the TDataset is at its beg<strong>in</strong>n<strong>in</strong>g.<br />
CachedUpdates Toggles whether updates are cached.<br />
Database Identifies the TDatabase <strong>in</strong> use by the TDataset.<br />
DatabaseName Names the alias used to connect to the database.<br />
Eof Reflects whether the TDataset is at its end.<br />
Exclusive Toggles whether other users can access the TDataset.<br />
FieldCount Returns the number of fields <strong>in</strong> the TDataset.<br />
FieldDefs Lists important <strong>in</strong>formation about fields <strong>in</strong> the TDataset.<br />
Fields (Indexed) returns a specific field from the TDataset.<br />
Filter Specifies an expression to filter records by.<br />
Filtered Toggles whether the filter<strong>in</strong>g specified by Filter or<br />
OnFilterRecord is active.<br />
FilterOptions Controls the behavior of filters.<br />
IndexDefs Lists important <strong>in</strong>formation about the TDataset’s <strong>in</strong>dexes.<br />
IndexFieldCount Returns the number of fields <strong>in</strong> the current <strong>in</strong>dex key.<br />
IndexFieldNames Specifies a set of fields as an <strong>in</strong>dex key.<br />
IndexName Specifies the name of the <strong>in</strong>dex to use.<br />
IndexFields (Indexed) returns a specific <strong>in</strong>dex field from the TDataset.<br />
KeyExclusive Reverses the effect of the range and search functions.<br />
KeyFieldCount Specifies the number of key fields to use <strong>in</strong> a search.<br />
MasterFields Specifies the master fields <strong>in</strong> a master/detail relationship.<br />
MasterSource Specifies the master DataSource of a master/detail relationship.<br />
Modified Reflects whether the current record has been changed s<strong>in</strong>ce the<br />
last Post or Cancel.<br />
ReadOnly Determ<strong>in</strong>es whether the TDataset can be changed.<br />
RecordCount Returns the number of rows <strong>in</strong> the TDataset.<br />
SessionName Specifies the TSession component to use to connect to the<br />
database.
<strong>C++</strong>Builder Database Architecture<br />
Property Description<br />
State Returns the state of the TDataset (for example, dsEdit or<br />
dsBrowse).<br />
TableName Specifies the physical name of the associated table.<br />
TableType Specifies the type of (local) table.<br />
UpdateMode Determ<strong>in</strong>es the type of SQL used to perform data changes.<br />
UpdateObject Specifies the UpdateSQL component to use <strong>in</strong> conjunction with<br />
cached updates.<br />
Table 12.9. TTable key methods.<br />
Method Function<br />
AddIndex Creates a new <strong>in</strong>dex.<br />
Append Appends a blank row to the TDataset and puts it <strong>in</strong> edit mode.<br />
AppendRecord Appends a row to the TDataset us<strong>in</strong>g specified values.<br />
ApplyRange Activates the range established by the Set/EditRange methods.<br />
ApplyUpdates Saves cached updates to the database.<br />
BatchMove Copies a batch of rows between TDatasets.<br />
Cancel Discards pend<strong>in</strong>g modifications to the current row.<br />
CancelRange Cancels the effects of the Set/EditRange methods.<br />
CancelUpdates Discards pend<strong>in</strong>g cached updates.<br />
ClearFields Sets the current row’s fields to their default values.<br />
Close Closes the TDataset.<br />
CreateTable Creates a new table.<br />
Delete Deletes the current record.<br />
DeleteIndex Deletes a secondary <strong>in</strong>dex.<br />
DeleteTable Deletes the associated physical database table.<br />
Edit Puts the TDataset <strong>in</strong> edit mode.<br />
EditKey Allows search key values to be modified.<br />
EditRangeEnd Allows edit<strong>in</strong>g of the upper key limit of a range.<br />
EditRangeStart Allows edit<strong>in</strong>g of the lower key limit of a range.<br />
EmptyTable Deletes all the rows <strong>in</strong> the TDataset.<br />
EnableControls Enables associated data-aware controls.<br />
443<br />
cont<strong>in</strong>ues<br />
12
444 Day 12<br />
Table 12.9. cont<strong>in</strong>ued<br />
Method Function<br />
FetchAll Reads . all pend<strong>in</strong>g rows from the database.<br />
FieldByName Returns a TField us<strong>in</strong>g its database field name.<br />
F<strong>in</strong>dFirst F<strong>in</strong>ds a record us<strong>in</strong>g the filter conditions you specify.<br />
F<strong>in</strong>dNext F<strong>in</strong>ds the next record that meets the filter criteria.<br />
F<strong>in</strong>dKey Performs an exact search on the TDataset.<br />
F<strong>in</strong>dNearest Performs an <strong>in</strong>exact search on the TDataset.<br />
GetFieldNames Returns a list of the fields <strong>in</strong> the TDataset.<br />
GetIndexNames Returns a list of the TDataset’s <strong>in</strong>dexes.<br />
GotoKey Performs an exact SetKey-based search on the TDataset.<br />
GotoNearest Performs an <strong>in</strong>exact SetKey-based search on the TDataset.<br />
Insert Inserts a blank row and allows it to be edited.<br />
InsertRecord Inserts a row us<strong>in</strong>g supplied column values.<br />
Locate F<strong>in</strong>ds a record <strong>in</strong> a TDataset.<br />
LockTable Locks a local table.<br />
Lookup F<strong>in</strong>ds a record <strong>in</strong> a TDataset and returns values from it.<br />
MoveBy Moves the TDataset cursor by a given number of rows.<br />
Open Opens the TDataset.<br />
Post Saves pend<strong>in</strong>g modifications to the current row.<br />
RenameTable Renames a local table.<br />
RevertRecord Discards cached updates to the current row.<br />
SetKey Puts the TDataset <strong>in</strong> a key-based search mode.<br />
SetRange Puts the database <strong>in</strong> a range-based search mode.<br />
SetRangeEnd Sets the upper limit of a range.<br />
SetRangeStart Sets the lower limit of a range.<br />
UnlockTable Unlocks a local table.<br />
Table 12.10. TTable key events.<br />
Event Catalyst<br />
AfterCancel Occurs follow<strong>in</strong>g a Cancel.<br />
AfterClose Occurs follow<strong>in</strong>g the close of the TDataset.
Event Catalyst<br />
<strong>C++</strong>Builder Database Architecture<br />
AfterDelete Occurs follow<strong>in</strong>g a Delete.<br />
AfterEdit Occurs follow<strong>in</strong>g an Edit.<br />
AfterInsert Occurs follow<strong>in</strong>g an Insert or Append.<br />
AfterOpen Occurs after a TDataset is opened<br />
AfterPost Occurs follow<strong>in</strong>g a Post.<br />
BeforeCancel Occurs prior to a Cancel.<br />
BeforeClose Occurs before the close of the TDataset.<br />
BeforeDelete Occurs prior to a Delete.<br />
BeforeEdit Occurs prior to an Edit.<br />
BeforeInsert Occurs prior to an Insert or Append.<br />
BeforeOpen Occurs before a TDataset is opened.<br />
BeforePost Occurs prior to a Post.<br />
OnCalcFields Occurs when calculated fields need values.<br />
OnDeleteError Occurs when there is a problem delet<strong>in</strong>g a record.<br />
OnEditError Occurs when there is a problem edit<strong>in</strong>g a record.<br />
OnFilterRecord Occurs when filter<strong>in</strong>g is active and the TDataset needs a row.<br />
OnNewRecord Occurs when a new record is added to the TDataset.<br />
OnPostError Occurs when there is a problem post<strong>in</strong>g a record.<br />
OnUpdateError Occurs when there is a problem while apply<strong>in</strong>g cached updates.<br />
OnUpdateRecord Occurs for each row saved by a call to ApplyUpdates.<br />
Key Elements<br />
You use the DatabaseName property to specify the database you want to access. It po<strong>in</strong>ts either<br />
to a local application-specific alias or to one that you’ve def<strong>in</strong>ed us<strong>in</strong>g the Database Explorer<br />
or the BDE Configuration utility.<br />
The TableName property po<strong>in</strong>ts to the physical database table. On some platforms it may also<br />
<strong>in</strong>clude the name of the table’s home database and/or that of the table’s owner or schema.<br />
Set the IndexName or IndexFields property to make use of a secondary <strong>in</strong>dex with the table.<br />
To establish a master/detail relationship with another table, set the MasterSource property<br />
to reference a TDataset that shares a common key with this one. Once MasterSource is set,<br />
specify the key fields <strong>in</strong> the master DataSource us<strong>in</strong>g the MasterFields property. These keys<br />
must correspond with those of the current <strong>in</strong>dex, as specified by IndexName or IndexFields.<br />
445<br />
12
446 Day 12<br />
Note that you can double-click MasterFields to <strong>in</strong>voke <strong>C++</strong>Builder’s Field L<strong>in</strong>k Designer,<br />
which enables you to establish master/detail relationships visually.<br />
Sett<strong>in</strong>g the Active property to true is identical to call<strong>in</strong>g the TDataset’s Open method—it<br />
opens the TDataset. Likewise, sett<strong>in</strong>g Active to false is the same as call<strong>in</strong>g the TDataset’s<br />
Close method—it closes the TDataset.<br />
You can check the current status of a TDataset with the State property. It will have one of<br />
the follow<strong>in</strong>g values:<br />
■ dsInactive—The TDataset is closed.<br />
■ dsBrowse—The TDataset is <strong>in</strong> Browse mode. The TDataset can be navigated, but<br />
changes can’t be made to the data until State is switched to dsEdit.<br />
■ dsEdit—The TDataset is <strong>in</strong> EUdit mode and allows changes to the data.<br />
■ dsInsert—The TDataset is <strong>in</strong> Insert mode.<br />
■ dsSetKey—The TDataset is <strong>in</strong> SetKey mode because SetKey has just been called.<br />
When values are assigned to columns while <strong>in</strong> this mode, they are <strong>in</strong>terpreted as<br />
search values. A subsequent GotoKey will search for a record us<strong>in</strong>g these values.<br />
■ dsCalcFields—The OnCalcFields event handler is be<strong>in</strong>g called.<br />
Tasks<br />
The First method moves the current record po<strong>in</strong>ter (also known as the cursor) to the top<br />
of the TDataset, and the Last method moves to the bottom. The Prior and Next methods<br />
move to the previous and next rows, respectively. Use the MoveBy method to move a number<br />
of rows forward or backward from the current row.<br />
The SetKey, F<strong>in</strong>dKey, GotoKey, F<strong>in</strong>dNearest, and GotoNearest methods can be used to search<br />
the TDataset for a given set of field values.<br />
You use the Bof property to determ<strong>in</strong>e whether the TDataset cursor is at its beg<strong>in</strong>n<strong>in</strong>g. You<br />
use the Eof property to determ<strong>in</strong>e whether the cursor has reached the TDataset’s end. These<br />
two properties can be useful <strong>in</strong> loop<strong>in</strong>g through the rows <strong>in</strong> a TDataset. For example, here’s<br />
a simple rout<strong>in</strong>e that loops through a table’s rows, display<strong>in</strong>g a field from each as it goes:<br />
Table1->First();<br />
while (!(Table1->Eof)) {<br />
ShowMessage(“Category is: “+Table1->FieldByName(“Category”)->Value);<br />
Table1->Next();<br />
}
WARNING<br />
<strong>C++</strong>Builder Database Architecture<br />
Be careful that you don’t make bad assumptions about the Bof and Eof<br />
properties. You can’t assume that Bof will be true just because you’re on<br />
the first row of a table. Nor can you assume that Eof will be true when<br />
you’re on the last row of a table. Typically, an additional Prior or Next<br />
is required to set Bof or Eof to true. For example, the sequence First,<br />
Next, Prior won’t reset Bof to true, but First, Next, Prior, Prior will.<br />
Note that Bof is true immediately after open<strong>in</strong>g a table or call<strong>in</strong>g the<br />
First method, and Eof is true immediately after call<strong>in</strong>g the Last<br />
method.<br />
The Append and Insert methods are used to add blank rows to a TDataset. Append adds a<br />
record to the end of the TDataset, whereas Insert adds it at the current cursor position.<br />
Append and Insert both put the TDataset <strong>in</strong> dsEdit mode. The AppendRecord and InsertRecord<br />
methods are used to add non-blank rows to a TDataset us<strong>in</strong>g a supplied set of field values.<br />
The Delete method deletes the row at the current cursor position. The Edit method allows<br />
modification of rows <strong>in</strong> the TDataset, plac<strong>in</strong>g the TDataset <strong>in</strong> dsEdit mode. The Post method<br />
saves these changes to the database, whereas Cancel discards them. This is also true of the<br />
Append and Insert methods—you can Post or Cancel them as well.<br />
Local Filters<br />
The Filter, Filtered, and FilterOptions properties facilitate sett<strong>in</strong>g up local filters on the<br />
TDataset. Local filter<strong>in</strong>g enables you to filter a TDataset from with<strong>in</strong> the application. This can<br />
be advantageous with TDatasets that have a small number of rows; the entirety of the<br />
TDataset will typically be cached by the BDE anyway, so filter<strong>in</strong>g it locally saves <strong>in</strong>teraction<br />
with the database server or network.<br />
Filter enables you to specify a filter expression for restrict<strong>in</strong>g the rows that are visible <strong>in</strong> the<br />
TDataset. The syntax supported <strong>in</strong> the expression is similar to that of a SQL WHERE clause.<br />
Fields can be compared to each other and to static values. The operators shown here can be<br />
used to build your filter expressions:<br />
Operator Use<br />
< Less than<br />
> Greater than<br />
>= Greater than or equal to<br />
448 Day 12<br />
Operator Use<br />
() Encloses <strong>in</strong>dividual elements of a compound expression<br />
[] Encloses field names with spaces<br />
AND, OR, NOT Jo<strong>in</strong>s <strong>in</strong>dividual elements of compound expressions<br />
You can also filter records us<strong>in</strong>g the OnFilterRecord event. OnFilterEvent looks like this:<br />
void __fastcall TForm1::Table1FilterRecord(TDataset *TDataset,<br />
Boolean &Accept)<br />
{<br />
Accept=(dlr==vhlead);<br />
}<br />
The OnFilterRecord event handler sets the value of the Accept parameter to <strong>in</strong>dicate whether<br />
a row meets the filter criteria. Note that the TDataset to which the filter corresponds is also<br />
passed <strong>in</strong> as a parameter. In the previous example, only those properties with gas heat are<br />
visible when the filter is active. Note the use of the Value variant property to set the Accept<br />
parameter.<br />
You can also use the F<strong>in</strong>dFirst, F<strong>in</strong>dNext, F<strong>in</strong>dPrior, and F<strong>in</strong>dLast methods to search an<br />
unfiltered TDataset us<strong>in</strong>g a filter expression. F<strong>in</strong>dFirst locates the first row match<strong>in</strong>g the<br />
filter expression; F<strong>in</strong>dNext locates the next one that does. F<strong>in</strong>dPrior locates the previous row<br />
match<strong>in</strong>g the filter expression, and F<strong>in</strong>dLast locates the last one that does.<br />
FilterOptions is a set variable that can <strong>in</strong>clude two possible elements:<br />
Element Mean<strong>in</strong>g<br />
foCaseInsensitive The filter ignores the case of the TDataset’s data<br />
foNoPartialCompare Partial field matches aren’t allowed<br />
You can set them us<strong>in</strong>g <strong>C++</strong>Builder’s Object Inspector.<br />
Ranges<br />
The SetRangeStart, SetRangeEnd, EditRangeStart, EditRangeEnd, ApplyRange, and SetRange<br />
methods also allow you to limit the set of rows visible to your application. Unlike<br />
<strong>C++</strong>Builder’s more flexible local filters, the rows with<strong>in</strong> the set must correspond to a<br />
consecutive set of keys with<strong>in</strong> an <strong>in</strong>dex when you’re deal<strong>in</strong>g with local tables. For SQL tables,<br />
the fields can be any listed <strong>in</strong> the IndexFieldNames property. The CancelRange method makes<br />
all rows aga<strong>in</strong> visible to your application.<br />
Locate/Lookup<br />
The Locate and Lookup methods allow you to search for rows <strong>in</strong> a table. They’re much more<br />
flexible than the F<strong>in</strong>dKey/SetKey family of functions because they do not require the use of an<br />
<strong>in</strong>dex and can therefore be used with Query and StoredProc components <strong>in</strong> addition to Table<br />
components. You choose the data you want, and the BDE f<strong>in</strong>ds the best way to access it.
<strong>C++</strong>Builder Database Architecture<br />
Locate<br />
The Locate method takes three parameters: a str<strong>in</strong>g that identifies the field(s) you want to<br />
search, a variant that lists the values to search for, and a TLocateOptions set variable that<br />
specifies options for the search. Here’s the syntax for the Locate function:<br />
System::Boolean __fastcall Locate(const System::AnsiStr<strong>in</strong>g KeyFields,<br />
const System::Variant &KeyValues, TlocateOptions Options);<br />
You separate multiple field names with semicolons <strong>in</strong> Locate’s KeyFields parameter and pass<br />
their values as a variant array <strong>in</strong> its KeyValues parameter. Locate’s Options parameter is of type<br />
TLocateOptions and enables you to specify options that control the search. The parameter is<br />
a set variable and can have two possible values, loCaseInsensitive and loPartialKey. The<br />
first option, loCaseInsensitive, tells Locate to perform a search that is not case sensitive. The<br />
second one, loPartialKey, allows for partial key searches. You can pass either one or both of<br />
these by assign<strong>in</strong>g them to a set variable like so:<br />
TLocateOptions SearchOpts<br />
SearchOpts Locate(“NAME”,”Cri”,SearchOpts);<br />
Locate uses the fastest available means of satisfy<strong>in</strong>g your search criteria. If an <strong>in</strong>dex exists that<br />
can satisfy the search request, Locate uses it. If an <strong>in</strong>dex does not exist that can service the<br />
search, a BDE filter is constructed. Either way, the fastest possible path to your data is taken.<br />
Locate returns true if it’s able to locate the data you request, and false if it isn’t.<br />
Lookup<br />
Similarly to the Locate function, the Lookup function takes three parameters: a str<strong>in</strong>g<br />
parameter specify<strong>in</strong>g a semicolon-delimited list of columns to search for, a variant or variant<br />
array specify<strong>in</strong>g the column values to search for, and a str<strong>in</strong>g parameter list<strong>in</strong>g the names of<br />
columns to return <strong>in</strong> the function’s result. Here’s the syntax for the Lookup function:<br />
System::Boolean __fastcall Lookup(const System::AnsiStr<strong>in</strong>g KeyFields,<br />
const System::Variant &KeyValues,const System::AnsiStr<strong>in</strong>g ResultFields);<br />
In addition to perform<strong>in</strong>g a TDataset search, Lookup returns values from the operation as well.<br />
If a match<strong>in</strong>g row cannot be found, Lookup returns a null variant. If a match<strong>in</strong>g row is found,<br />
Lookup first processes any lookup fields you’ve def<strong>in</strong>ed for its associated TDataset, and then<br />
returns the values of the fields you’ve specified <strong>in</strong> ResultColumns. If ResultColumns lists<br />
multiple fields, the result is a variant array; otherwise, it’s just a simple variant.<br />
Cached Updates<br />
<strong>C++</strong>Builder’s cached updates mechanism enables you to delay apply<strong>in</strong>g updates to your<br />
database back end. You can decide when to apply updates, and then apply them all at once.<br />
Normally, updates are applied as soon as you make them. For client/server applications, this<br />
449<br />
12
450 Day 12<br />
results <strong>in</strong> <strong>in</strong>creased network utilization because your app must negotiate with the back end<br />
every time you make even the slightest change. By us<strong>in</strong>g cached updates, you take control of<br />
when and how often this negotiation takes place. Updates are cached locally until you apply<br />
them, so us<strong>in</strong>g cached updates can have a dramatic impact on performance, especially when<br />
you’re communicat<strong>in</strong>g over extremely slow wide area network (WAN) connections.<br />
A side benefit of us<strong>in</strong>g cached updates is the ability to update read-only TDatasets. Because<br />
you can control the SQL that’s generated to update a TDataset, you can set up code to modify<br />
result sets that would otherwise be read-only.<br />
Four methods relate to cached updates: ApplyUpdates, CancelUpdates, CommitUpdates, and<br />
RevertRecord. I’ve summarized what each one does <strong>in</strong> the follow<strong>in</strong>g:<br />
Method Function<br />
ApplyUpdates Saves cached updates to the database.<br />
CancelUpdates Discards cached updates.<br />
CommitUpdate Notifies the cache that updates have been applied.<br />
RevertRecord Returns a row to the state it was <strong>in</strong> prior to cached updates to it.<br />
There are also a couple of properties that relate directly to cached updates:<br />
Property Description<br />
CachedUpdates Toggles cached updates for a TDataset.<br />
UpdateRecordTypes Controls the visible rows <strong>in</strong> a cached update set.<br />
The follow<strong>in</strong>g is the process for mak<strong>in</strong>g use of cached updates <strong>in</strong> an application:<br />
1. Set the CachedUpdates property of the TDataset whose updates you want to cache<br />
to true.<br />
2. Set the UpdateRecordTypes property to control which rows should be visible <strong>in</strong> the<br />
cached set. UpdateRecordTypes is a set property that can have the follow<strong>in</strong>g values:<br />
rtModified, rtInserted, rtDeleted, and rtUnmodified. Each of these control the<br />
type of rows that are visible <strong>in</strong> a TDataset whose updates are be<strong>in</strong>g cached.<br />
3. Set up an OnUpdateError event handler to handle any errors dur<strong>in</strong>g a call to<br />
ApplyUpdates.<br />
4. Make changes to the TDataset’s data.<br />
5. Call the ApplyUpdates method to save your changes, or CancelUpdates to discard<br />
them.
<strong>C++</strong>Builder Database Architecture<br />
A good application of cached updates is <strong>in</strong> data-entry forms. There are three basic types of<br />
database forms: decision-support forms, transaction-process<strong>in</strong>g forms, and data-entry forms.<br />
Because users of data-entry forms will typically add several rows <strong>in</strong> succession, it makes sense<br />
to cache these additions locally and then save them <strong>in</strong> one pass. This will reduce table lock<strong>in</strong>g<br />
on your database and speed up the application.<br />
Updat<strong>in</strong>g read-only TDatasets is covered <strong>in</strong> the discussion of the UpdateSQL component later<br />
today.<br />
On...Error<br />
The OnEditError, OnDeleteError, and OnPostError events allow you to react to errors that<br />
occur while modify<strong>in</strong>g the data <strong>in</strong> a TDataset. These events all send the same three parameters<br />
to handlers you def<strong>in</strong>e for them: the TDataset <strong>in</strong> which the error occurred, the exception class<br />
raised by the error, and a var parameter that lets you specify what action to take once the<br />
handler f<strong>in</strong>ishes. Here’s a sample of the method handler that <strong>C++</strong>Builder generates for the<br />
On...Error events:<br />
void __fastcall TForm1::Table1DeleteError(TDataset *TDataset,<br />
EDatabaseError *E, TDataAction &Action)<br />
{<br />
}<br />
You can set Action to one of three values: daFail, daAbort, or daRetry.<br />
TQuery<br />
Module: DBTables Class ancestor: TDBDataSet<br />
Like TTable, TQuery is a direct descendant of the DBDataSet class and an <strong>in</strong>direct descendant<br />
of the TDataset class. You use TQuery to send explicit SQL statements to the database eng<strong>in</strong>e.<br />
This SQL either operates on local tables or is passed directly to your database server. You<br />
execute a query that returns a result set us<strong>in</strong>g TQuery’s Open method or by sett<strong>in</strong>g its Active<br />
property to true. Provided that the query adheres to <strong>C++</strong>Builder’s restrictions on “live”<br />
queries, you can then treat the result set as if it were a table, which is similar to the way a SQL<br />
VIEW works on many database servers. You can update, add to, and delete the rows <strong>in</strong> this live<br />
result set, just as you can when us<strong>in</strong>g a TTable component.<br />
Table 12.11 lists the key properties, Table 12.12 lists the key methods, and Table 12.13 lists<br />
the key events for the TQuery component.<br />
451<br />
12
452 Day 12<br />
Table 12.11. TQuery key properties.<br />
Property Description<br />
Active Toggles whether the TDataset is open.<br />
AutoCalcFields Determ<strong>in</strong>es how calculated fields are calculated.<br />
Bof Reflects whether the TDataset is at its beg<strong>in</strong>n<strong>in</strong>g.<br />
CachedUpdates Toggles whether updates are cached.<br />
Constra<strong>in</strong>ed Controls allowable updates to live result sets.<br />
Database Identifies the TDatabase <strong>in</strong> use by the TDataset.<br />
DatabaseName Names the alias used to connect to the database.<br />
DataSource Specifies a TDataSource from which to retrieve query parameters.<br />
DBHandle Returns the low-level BDE connection handle.<br />
Eof Reflects whether the TDataset is at its end.<br />
FieldCount Returns the number of fields <strong>in</strong> the TDataset.<br />
FieldDefs Lists important <strong>in</strong>formation about fields <strong>in</strong> the TDataset.<br />
Fields (Indexed) returns a specific field from the TDataset.<br />
Filter Specifies an expression to filter records by.<br />
Filtered Toggles whether the filter<strong>in</strong>g specified by Filter or OnFilterRecord<br />
is active.<br />
FilterOptions Controls the behavior of filters.<br />
Handle Returns the low-level BDE cursor handle.<br />
Modified Reflects whether the current record has been changed <strong>in</strong> a live<br />
result set.<br />
ParamCount Reflects the number of parameters for the SQL query.<br />
Params Specifies the parameters to use with the SQL query.<br />
Prepared Reflects whether the query has been prepared.<br />
RecordCount Returns the number of rows <strong>in</strong> the TDataset.<br />
RequestLive Specifies whether you want the query result to be updatable.<br />
SessionName Specifies the TSession component to use to connect to the database.<br />
SQL Specifies the SQL statements to execute on the server.<br />
State Returns the state of the TDataset (such as dsEdit or dsBrowse).<br />
StmtHandle Returns the low-level BDE handle for the last query result.<br />
UniDirectional Specifies that the cursor moves <strong>in</strong> only one direction.
<strong>C++</strong>Builder Database Architecture<br />
Property Description<br />
UpdateMode Determ<strong>in</strong>es the type of SQL used to perform data changes.<br />
UpdateObject Specifies the UpdateSQL component to use <strong>in</strong> conjunction with<br />
cached updates.<br />
Table 12.12. TQuery key methods.<br />
Method Function<br />
Append Appends a blank row to the TDataset.<br />
AppendRecord Appends a row to the TDataset us<strong>in</strong>g specified values.<br />
ApplyUpdates Saves cached updates to the database.<br />
Cancel Discards pend<strong>in</strong>g modifications to the current row.<br />
CancelUpdates Discards cached updates that are pend<strong>in</strong>g.<br />
ClearFields Sets the current row’s fields to their default values.<br />
Close Closes the TDataset.<br />
Delete Deletes the current record.<br />
Edit Puts the TDataset <strong>in</strong> edit mode.<br />
ExecSQL Executes the SQL without return<strong>in</strong>g a cursor.<br />
FetchAll Reads all pend<strong>in</strong>g rows from a database server connection.<br />
FieldByName Returns a TField us<strong>in</strong>g its database field name.<br />
F<strong>in</strong>dKey Performs an exact search on the TDataset.<br />
GetFieldNames Returns a list of the fields <strong>in</strong> the TDataset.<br />
Insert Inserts a blank row and allows it to be edited.<br />
InsertRecord Inserts a row us<strong>in</strong>g supplied column values.<br />
Locate F<strong>in</strong>ds a record <strong>in</strong> a TDataset.<br />
Lookup F<strong>in</strong>ds a record <strong>in</strong> a TDataset and returns values from it.<br />
MoveBy Moves the TDataset cursor by a given number of rows.<br />
Open Opens the TDataset.<br />
ParamByName Returns a query parameter us<strong>in</strong>g its name.<br />
Post Saves pend<strong>in</strong>g modifications to the current row.<br />
RevertRecord Discards changes to the current record when us<strong>in</strong>g cached updates.<br />
453<br />
12
454 Day 12<br />
Table 12.13. TQuery key methods.<br />
Event Catalyst<br />
AfterCancel Occurs follow<strong>in</strong>g a Cancel.<br />
AfterClose Occurs follow<strong>in</strong>g the close of the TDataset.<br />
AfterDelete Occurs follow<strong>in</strong>g a Delete.<br />
AfterEdit Occurs follow<strong>in</strong>g an Edit.<br />
AfterInsert Occurs follow<strong>in</strong>g an Insert or Append.<br />
AfterOpen Occurs after a TDataset is opened.<br />
AfterPost Occurs follow<strong>in</strong>g a Post.<br />
BeforeCancel Occurs prior to a Cancel.<br />
BeforeClose Occurs before the close of the TDataset.<br />
BeforeDelete Occurs prior to a Delete.<br />
BeforeEdit Occurs prior to an Edit.<br />
BeforeInsert Occurs prior to an Insert or Append.<br />
BeforeOpen Occurs before a TDataset is opened.<br />
BeforePost Occurs prior to a Post.<br />
OnCalcFields Occurs when calculated fields need values.<br />
OnDeleteError Occurs when there is a problem delet<strong>in</strong>g a record.<br />
OnEditError Occurs when there is a problem edit<strong>in</strong>g a record.<br />
OnFilterRecord Occurs when filter<strong>in</strong>g is active and the TDataset needs a row.<br />
OnNewRecord Occurs when a new record is added to the TDataset.<br />
OnPostError Occurs when there is a problem post<strong>in</strong>g a record.<br />
OnUpdateError Occurs when there is a problem while apply<strong>in</strong>g cached updates.<br />
OnUpdateRecord Occurs for each row saved by a call to ApplyUpdates.<br />
Key Elements<br />
SQL statements that do not return a result set can also be executed. This <strong>in</strong>cludes calls to the<br />
SQL INSERT, UPDATE, and DELETE commands, for example. Use the ExecSQL method for these<br />
types of queries.<br />
The DatabaseName property specifies the database you want to query. The SQL property<br />
specifies the s<strong>in</strong>gle SQL statement that you want to use <strong>in</strong> the query. When you query local<br />
tables, use Local SQL. When query<strong>in</strong>g server tables, you can use any SQL syntax that your
<strong>C++</strong>Builder Database Architecture<br />
database server supports, unless you <strong>in</strong>tend for the result set to be updatable. If you want an<br />
updatable result set, you must use Local SQL syntax so that the database eng<strong>in</strong>e can<br />
determ<strong>in</strong>e which database tables to actually update.<br />
The SQL statement can be a static SQL statement or one that <strong>in</strong>cludes parameters that are<br />
dynamically replaced with real values. A query that uses replaceable parameters (known as a<br />
dynamic SQL query) uses a colon to del<strong>in</strong>eate those parameters, like so:<br />
SELECT * FROM ORDERS<br />
WHERE CustomerNumber=:CustNo<br />
In this example, CustNo is the name of the replaceable parameter. You supply these named<br />
parameters us<strong>in</strong>g TQuery’s Params property.<br />
TIP<br />
When edit<strong>in</strong>g TQuery’s SQL property, you can edit your SQL us<strong>in</strong>g<br />
<strong>C++</strong>Builder’s full-blown Code Editor. You do this by click<strong>in</strong>g the Code<br />
Editor button from with<strong>in</strong> the SQL property editor. You’ll f<strong>in</strong>d<br />
<strong>C++</strong>Builder’s Code Editor to be much more versatile than the TMemo<br />
component that’s used to edit the property by default.<br />
The Constra<strong>in</strong>ed property enables you to control what updates may be made to a live result<br />
set. If you set Constra<strong>in</strong>ed to true, updates that would cause a row to be excluded from the<br />
result set are not permitted. That is, if you set up a Query component to return only those<br />
customers whose last names beg<strong>in</strong> with A, an attempt to change the LastName column <strong>in</strong> a row<br />
to start with B will fail. This works much the same as the WITH CHECK option on SQL VIEWs.<br />
Tasks<br />
To establish a live, or updatable, result set, two th<strong>in</strong>gs must happen. First, you must set<br />
TQuery’s RequestLive property to true. Second, the SQL you use to def<strong>in</strong>e the query must<br />
conform to certa<strong>in</strong> rules. These rules are different, depend<strong>in</strong>g on whether you are query<strong>in</strong>g<br />
local tables. For local tables, the SQL must<br />
■ Use Local SQL syntax only.<br />
■ Involve only one table.<br />
■ Not have an ORDER BY clause.<br />
■ Not conta<strong>in</strong> aggregate functions.<br />
■ Not conta<strong>in</strong> calculated fields.<br />
■ Use a WHERE clause <strong>in</strong>volv<strong>in</strong>g comparisons of column names to scalar constants<br />
only. Operators supported <strong>in</strong>clude LIKE, >, =, and
456 Day 12<br />
NOTE<br />
For server tables, the SQL must<br />
■ Use Local SQL syntax only<br />
■ Involve only one table<br />
■ Not conta<strong>in</strong> aggregate functions<br />
The TLiveQuery component that you can obta<strong>in</strong> at http://<br />
www.mcp.com/sams/codecenter.html provides an alternative method<br />
of acquir<strong>in</strong>g updatable result sets from database servers. Basically, it<br />
creates and opens a temporary view on your server that you may then<br />
update as though it were a table. The updates you can make to this<br />
“live” result set are limited only by the restrictions your server places<br />
on updatable views.<br />
The First method moves to the top of the TDataset, and the Last method moves to the<br />
bottom. The Prior and Next methods move to the previous and next rows, respectively. You<br />
use the MoveBy method to move a number of rows forward or backward from the current row.<br />
Use the Bof property to determ<strong>in</strong>e whether the TDataset cursor is at its beg<strong>in</strong>n<strong>in</strong>g. Use the<br />
Eof property to determ<strong>in</strong>e whether the cursor has reached the TDataset’s end. These two<br />
properties can be useful <strong>in</strong> loop<strong>in</strong>g through the rows <strong>in</strong> a TDataset.<br />
WARNING<br />
Be careful that you don’t make bad assumptions about the Bof and Eof<br />
properties. You can’t assume that Bof will be true just because you’re<br />
on the first row of a query result set, nor can you assume that Eof will<br />
be true when you’re on the last row of a result set. Typically, an<br />
additional Prior or Next is required to set Bof or Eof to true. For<br />
example, the sequence First, Next, Prior won’t reset Bof to true, but<br />
First, Next, Prior, Prior will. Note that Bof is true immediately after<br />
you open a query or call the First method, and Eof is true immediately<br />
after you call the Last method.<br />
The Append and Insert methods are used to add blank rows to a TDataset. Append adds a<br />
record to the end of the TDataset, whereas Insert adds it at the current cursor position. Along<br />
these same l<strong>in</strong>es, the AppendRecord and InsertRecord methods are used to add non-blank<br />
rows to a TDataset us<strong>in</strong>g a supplied set of field values.
<strong>C++</strong>Builder Database Architecture<br />
The Delete method deletes the row at the current cursor position. The Edit method allows<br />
you to modify rows <strong>in</strong> the TDataset, plac<strong>in</strong>g the TDataset <strong>in</strong> dsEdit mode. The Post method<br />
saves these changes to the database, whereas Cancel discards them.<br />
See the previous discussion on the Table component for <strong>in</strong>formation on other TDatasetbased<br />
properties, methods, and events.<br />
TStoredProc<br />
Module: DBTables Class ancestor: TDBDataSet<br />
Like TTable and TQuery, TStoredProc is a direct descendant of the DBDataSet class and an<br />
<strong>in</strong>direct descendant of the TDataset class. This means that, <strong>in</strong> addition to the methods,<br />
properties, and events def<strong>in</strong>ed by the class itself, TStoredProc <strong>in</strong>herits several class elements<br />
from the DBDataSet class. This establishes a lot of common ground between the three<br />
TDataset-based components, TTable, TQuery, and TStoredProc.<br />
You use the TStoredProc component to execute stored procedures from with<strong>in</strong> your<br />
<strong>C++</strong>Builder applications. A stored procedure is a compiled set of SQL statements executed<br />
as a s<strong>in</strong>gle program. TStoredProc enables you to <strong>in</strong>teract with the result sets returned by these<br />
stored procedures.<br />
Table 12.<strong>14</strong> lists the key properties, Table 12.15 lists the key methods, and Table 12.16 lists<br />
the key events for the TStoredProc component.<br />
Table 12.<strong>14</strong>. TStoredProc key properties.<br />
Property Description<br />
Active Toggles whether the TDataset is open.<br />
AutoCalcFields Determ<strong>in</strong>es how calculated fields are calculated.<br />
Bof Reflects whether the TDataset is at its beg<strong>in</strong>n<strong>in</strong>g.<br />
CachedUpdates Toggles whether updates are cached.<br />
Database Identifies the TDatabase <strong>in</strong> use by the TDataset.<br />
DatabaseName Names the alias used to connect to the database.<br />
Eof Reflects whether the TDataset is at its end.<br />
FieldCount Returns the number of fields <strong>in</strong> the TDataset.<br />
FieldDefs Lists important <strong>in</strong>formation about fields <strong>in</strong> the TDataset.<br />
Fields Returns a specific field from the TDataset. (Requires an <strong>in</strong>dex<br />
parameter to be passed <strong>in</strong>.)<br />
457<br />
cont<strong>in</strong>ues<br />
12
458 Day 12<br />
Table 12.<strong>14</strong>. cont<strong>in</strong>ued<br />
Property Description<br />
Filter Specifies an expression by which to filter records.<br />
Filtered Toggles whether the filter<strong>in</strong>g specified by Filter or OnFilterRecord<br />
is active.<br />
FilterOptions Controls the behavior of filters.<br />
Modified Reflects whether the current record has been changed <strong>in</strong> updatable<br />
result sets.<br />
Overload Specifies the overload procedure to use on the Oracle platform.<br />
ParamB<strong>in</strong>dMode Determ<strong>in</strong>es how Params will be bound to proc parameters.<br />
ParamCount Reflects the number of parameters for the SQL query.<br />
Params Specifies the parameters to use with the SQL query.<br />
Prepared Reflects whether the query has been prepared.<br />
RecordCount Returns the number of rows <strong>in</strong> the result set.<br />
SessionName Specifies the TSession component to use to connect to the database.<br />
State Returns the state of the TDataset (such as dsEdit or dsBrowse).<br />
StmtHandle Returns the low-level BDE handle for the last result set.<br />
StoredProcName Specifies the name of the procedure to execute.<br />
UpdateObject Specifies the UpdateSQL component to use <strong>in</strong> conjunction with<br />
cached updates.<br />
Table 12.15. TStoredProc key methods.<br />
Method Function<br />
Append Appends a blank row to the TDataset.<br />
AppendRecord Appends a row to the TDataset us<strong>in</strong>g specified values.<br />
ApplyUpdates Saves cached updates to the database.<br />
Cancel Discards pend<strong>in</strong>g modifications to the current row.<br />
CancelUpdates Discards cached updates that are pend<strong>in</strong>g.<br />
Close Closes the TDataset.<br />
Delete Deletes the current record.<br />
Edit Puts the TDataset <strong>in</strong> edit mode.<br />
ExecProc Executes the stored procedure.
Method Function<br />
<strong>C++</strong>Builder Database Architecture<br />
FetchAll Reads all pend<strong>in</strong>g rows from a database server connection.<br />
FieldByName Returns a TField us<strong>in</strong>g its database field name.<br />
F<strong>in</strong>dKey Performs an exact search on the TDataset.<br />
GetFieldNames Returns a list of the fields <strong>in</strong> the TDataset.<br />
GetResults Returns Sybase stored procedure output parameters.<br />
Insert Inserts a blank row and allows it to be edited.<br />
InsertRecord Inserts a row us<strong>in</strong>g supplied column values.<br />
Locate F<strong>in</strong>ds a record <strong>in</strong> the result set.<br />
Lookup F<strong>in</strong>ds a record <strong>in</strong> the result set and returns values from it.<br />
MoveBy Moves the TDataset cursor by a given number of rows.<br />
Open Opens a stored procedure that returns a result set.<br />
ParamByName Returns a query parameter us<strong>in</strong>g the parameter’s name.<br />
Post Saves pend<strong>in</strong>g modifications to the current row.<br />
Table 12.16. TStoredProc key events.<br />
Event Catalyst<br />
AfterCancel Occurs follow<strong>in</strong>g a Cancel.<br />
AfterClose Occurs follow<strong>in</strong>g the close of the TDataset.<br />
AfterDelete Occurs follow<strong>in</strong>g a Delete.<br />
AfterEdit Occurs follow<strong>in</strong>g an Edit.<br />
AfterInsert Occurs follow<strong>in</strong>g an Insert or Append.<br />
AfterOpen Occurs after a TDataset is opened.<br />
AfterPost Occurs follow<strong>in</strong>g a Post.<br />
BeforeCancel Occurs prior to a Cancel.<br />
BeforeClose Occurs before the close of the TDataset.<br />
BeforeDelete Occurs prior to a Delete.<br />
BeforeEdit Occurs prior to an Edit.<br />
BeforeInsert Occurs prior to an Insert or Append.<br />
BeforeOpen Occurs before a TDataset is opened.<br />
BeforePost Occurs prior to a Post.<br />
459<br />
cont<strong>in</strong>ues<br />
12
460 Day 12<br />
Table 12.16. cont<strong>in</strong>ued<br />
Event Catalyst<br />
OnCalcFields Occurs when calculated fields need values.<br />
OnDeleteError Occurs when there is a problem delet<strong>in</strong>g a record.<br />
OnEditError Occurs when there is a problem edit<strong>in</strong>g a record.<br />
OnFilterRecord Occurs when filter<strong>in</strong>g is active and the TDataset needs a row.<br />
OnNewRecord Occurs when a new record is added to the TDataset.<br />
OnPostError Occurs when there is a problem post<strong>in</strong>g a record.<br />
OnUpdateError Occurs when there is a problem while apply<strong>in</strong>g cached updates.<br />
OnUpdateRecord Occurs for each row saved by a call to ApplyUpdates.<br />
Key Elements<br />
Use the DatabaseName property to specify the database you want to access. It po<strong>in</strong>ts to either<br />
a local, application-specific alias or one that you’ve def<strong>in</strong>ed us<strong>in</strong>g the Database Explorer or<br />
BDE Configuration utility.<br />
The StoredProcName property po<strong>in</strong>ts to the stored procedure on the server that you want to<br />
execute.<br />
The Params property enables you to specify parameters for the stored procedure. You can edit<br />
this <strong>in</strong>formation at design time us<strong>in</strong>g the <strong>C++</strong>Builder Object Inspector. If the <strong>in</strong>formation<br />
is available from the server, the Object Inspector will list the parameters that the stored<br />
procedure expects.<br />
NOTE<br />
You can set these parameters at runtime by assign<strong>in</strong>g values to the Params property. For<br />
example, you could use the follow<strong>in</strong>g code to assign the parameter named CustomerNumber<br />
for the stored procedure associated with the TStoredProc:<br />
StoredProc1->ParamByName(“CustomerNumber”)->AsStr<strong>in</strong>g = “123”;<br />
Note that stored procedure return values are accessed us<strong>in</strong>g the Params property, as well. That<br />
is, if you’ve def<strong>in</strong>ed an output parameter named Balance <strong>in</strong> the Params property, you can<br />
reference its return value us<strong>in</strong>g ParamByName(“Balance”)->AsFloat follow<strong>in</strong>g the execution<br />
of the procedure.<br />
If you <strong>in</strong>tend to return output parameters from a Sybase stored<br />
procedure that also returns a result set, you’ll need to call TStoredProc’s<br />
GetResults method <strong>in</strong> order to retrieve them. Normally, the
<strong>C++</strong>Builder Database Architecture<br />
StoredProc component handles this automatically, but Sybase SQL<br />
Server does not return stored procedure output values until all results<br />
are read, so you’ll need to call GetResults yourself.<br />
Tasks<br />
If a stored procedure returns only one row, or no rows, execute it with the ExecProc method.<br />
If it returns multiple rows, use the Open method <strong>in</strong>stead.<br />
Note that you’ll need to prepare a stored procedure before execut<strong>in</strong>g it. At runtime, you do<br />
this us<strong>in</strong>g the Prepare method. At design time, you do so by edit<strong>in</strong>g the Params property.<br />
The First method moves to the top of the result set; Last moves to the bottom. The Next<br />
and Prior methods move to the previous and next rows, respectively. You use the MoveBy<br />
method to move a number of rows forward or backward from the current row.<br />
The Append and Insert methods are used to add blank rows to the result set of a TStoredProc<br />
component. AppendRecord and InsertRecord add non-blank rows to the result set, us<strong>in</strong>g a<br />
supplied set of field values.<br />
The Delete method deletes the row at the current cursor position. The Edit method allows<br />
modification of the row at the current cursor position, plac<strong>in</strong>g the result set <strong>in</strong> dsEdit mode.<br />
The Post method saves these changes to the database, whereas Cancel discards them.<br />
Cached Updates<br />
As mentioned previously, you can only update stored procedure result sets by us<strong>in</strong>g cached<br />
updates and a TUpdateSQL component. Basically, you set up the InsertSQL, DeleteSQL, and<br />
ModifySQL properties of a TUpdateSQL component to handle the TDataset modifications for<br />
you. When you then call the ApplyUpdates method of your TStoredProc, the relevant SQL<br />
is executed. Because you can control the SQL that’s generated to update a TDataset, you can<br />
set up code to modify result sets that would otherwise be read-only.<br />
You do this us<strong>in</strong>g an UpdateSQL component that def<strong>in</strong>es SQL statements for handl<strong>in</strong>g,<br />
<strong>in</strong>sert<strong>in</strong>g, modify<strong>in</strong>g, and delet<strong>in</strong>g rows. These SQL statements can be complex SQL queries<br />
that update multiple tables or even other stored procedure calls, so you should be able to<br />
update a stored procedure’s underly<strong>in</strong>g tables. You reference UpdateSQL objects us<strong>in</strong>g<br />
TStoredProc’s UpdateObject property.<br />
TStoredProc has two methods that relate directly to cached updates: ApplyUpdates and<br />
CancelUpdates. ApplyUpdates saves changes you’ve made to the database. In the case of the<br />
StoredProc component, this means that the relevant INSERT, UPDATE, or DELETE SQL<br />
461<br />
12
462 Day 12<br />
statements are executed <strong>in</strong> the l<strong>in</strong>ked UpdateSQL component. Note that you can set up the<br />
OnUpdateError event to handle errors that occur dur<strong>in</strong>g a call to ApplyUpdates.<br />
There are also a couple properties that relate directly to the use of cached updates with stored<br />
procedures: CachedUpdates and UpdateRecordTypes. CachedUpdates toggles cached update<br />
support for the StoredProc component. Unless CachedUpdates is enabled and you’ve l<strong>in</strong>ked<br />
and set up an UpdateSQL component properly, you won’t be able to update stored procedure<br />
result sets. UpdateRecordTypes determ<strong>in</strong>es which types of updates rema<strong>in</strong> visible <strong>in</strong> a TDataset<br />
with CachedUpdates set to true.<br />
Updat<strong>in</strong>g read-only TDatasets is discussed further <strong>in</strong> the section on the UpdateSQL component<br />
later today.<br />
TBatchMove<br />
Module: DBTables Class ancestor: TComponent<br />
The TBatchMove component enables you to work with sets of records <strong>in</strong> operations between<br />
two tables. These sets can range from a few records to all the records <strong>in</strong> a TDataset. When<br />
work<strong>in</strong>g with TBatchMove, you specify both a source and a dest<strong>in</strong>ation table. You can append,<br />
update, and delete rows <strong>in</strong> the target table. You can even replace the target table completely<br />
if you want to. The actual operation carried out when you call the component’s Execute<br />
method depends on the sett<strong>in</strong>g of the Mode property.<br />
Table 12.17 lists the key properties and Table 12.18 lists the key methods of the TBatchMove<br />
component. This component has no key events.<br />
Table 12.17. TBatchMove key properties.<br />
Property Description<br />
Dest<strong>in</strong>ation Specifies the dest<strong>in</strong>ation of the batch move operation.<br />
Mapp<strong>in</strong>g Specifies column-to-column mapp<strong>in</strong>gs between Source and Dest. If<br />
your source and dest<strong>in</strong>ation tables are not identical, you’ll need to<br />
provide field mapp<strong>in</strong>gs so that the BDE can figure out where to put<br />
your data. If you neglect to do this with tables that aren’t identical,<br />
the batch move will fail.<br />
Mode Specifies the type of move (such as batAppendUpdate or batCopy).<br />
Source Specifies the source of the batch move operation.
<strong>C++</strong>Builder Database Architecture<br />
Table 12.18. TBatchMove key methods.<br />
Method Function<br />
Execute Initiates the batch move operation.<br />
Key Elements<br />
You set the Source property to the TDataset from which you want to copy. You set the<br />
Dest<strong>in</strong>ation property to the target TDataset. You set Mode to one of the follow<strong>in</strong>g values,<br />
depend<strong>in</strong>g on what you want to do:<br />
■ batAppend—Appends rows to a preexist<strong>in</strong>g target TDataset.<br />
■ batUpdate—Updates rows <strong>in</strong> a preexist<strong>in</strong>g target TDataset with their counterparts<br />
<strong>in</strong> the source table. The mode requires an <strong>in</strong>dex <strong>in</strong> order to locate the rows to<br />
update.<br />
■ batAppendUpdate—Appends new rows to a preexist<strong>in</strong>g target TDataset and updates<br />
exist<strong>in</strong>g rows. This mode requires an <strong>in</strong>dex <strong>in</strong> order to locate the rows to update.<br />
■ batCopy—Copies rows <strong>in</strong> the source TDataset to the target TDataset. It creates the<br />
target table when executed, so an exist<strong>in</strong>g target table will be overwritten. Be aware<br />
that, because exist<strong>in</strong>g tables are deleted and replaced, any dependent objects such as<br />
<strong>in</strong>dexes and triggers are deleted as well. Note that these secondary objects are not recreated.<br />
■ batDelete—Deletes records from the target table that match the source table. This<br />
mode requires an <strong>in</strong>dex <strong>in</strong> order to locate the rows to delete.<br />
Tasks<br />
When Mode is set appropriately, call the Execute method to perform the copy. If there are<br />
problems, TBatchMove will behave differently based on the sett<strong>in</strong>gs of various properties:<br />
■ If AbortOnProblem has been set to true, the copy will abort the moment any errors<br />
occur.<br />
■ If AbortOnKeyViol is set to true, the operation will abort when any key violation<br />
error occurs.<br />
■ If the ProblemTableName property has been set, any rows caus<strong>in</strong>g errors will be<br />
placed <strong>in</strong> it. Obviously, if AbortOnProblem is also set to true, this table will conta<strong>in</strong><br />
no more than one record.<br />
463<br />
12
464 Day 12<br />
■ If the KeyViolTableName property has been specified, any rows caus<strong>in</strong>g key violation<br />
errors will be placed <strong>in</strong> it.<br />
■ If the ChangedTableName property has been specified, TBatchMove will move updated<br />
or changed rows to it from the target table rather than discard them.<br />
TDataSource<br />
Module: DBTables Class ancestor: TComponent<br />
The TDataSource component is the l<strong>in</strong>k between data-aware controls and the TDataset<br />
components (TTable, TQuery, and TStoredProc). It’s what allows data-aware components to<br />
<strong>in</strong>teract with physical database objects.<br />
Data-aware controls reference a common TDataSource through their DataSource properties.<br />
It, <strong>in</strong> turn, references the TDataset that supplies them with data. The TDataset supplies data<br />
to the TDataSource, which is then passed to the data-aware controls. When data is modified<br />
<strong>in</strong> a data-aware control, the change is passed to the TDataSource, which then passes it to the<br />
TDataset.<br />
By abstract<strong>in</strong>g the data control level from the TDataset level, <strong>C++</strong>Builder allows the<br />
<strong>in</strong>teraction between the TDataset and data-aware controls to be more easily coord<strong>in</strong>ated. It<br />
enables you, for example, to change the TDataset for a number of components without<br />
chang<strong>in</strong>g them <strong>in</strong>dividually. That is, if you want to change the TDataset to which a form’s<br />
data-aware controls refer, you don’t have to change the controls themselves. Instead, you<br />
change the TDataset property of the TDataSource to which they refer. This three-tiered<br />
approach allows the access of a group of controls to a given TDataset to be more easily<br />
controlled.<br />
Table 12.19 lists the key properties, Table 12.20 lists the key methods, and Table 12.21 lists<br />
the key events for TDataSource.<br />
Table 12.19. TDataSource key properties.<br />
Property Description<br />
Autoedit Determ<strong>in</strong>es whether modify<strong>in</strong>g the contents of a data-aware control<br />
automatically starts Edit mode.<br />
Dataset References the TDataset that provides data to this TDataSource.<br />
Enabled Specifies whether the display of associated data controls is updated.<br />
State Returns the state of the l<strong>in</strong>ked TDataset component.
<strong>C++</strong>Builder Database Architecture<br />
Table 12.20. TDataSource key methods.<br />
Method Function<br />
Edit Switches the associated TDataset <strong>in</strong>to Edit mode.<br />
Table 12.21. TDataSource key events.<br />
Event Catalyst<br />
OnDataChange Occurs when data is changed or the record po<strong>in</strong>ter moves.<br />
OnStateChange Occurs when the State property changes.<br />
OnUpdateData Occurs when Post or UpdateRecord is called.<br />
Key Elements<br />
The TDataset property identifies the TTable, TQuery, or TStoredProc that supplies the<br />
component with data. The AutoEdit property determ<strong>in</strong>es whether modify<strong>in</strong>g the contents<br />
of a data-aware control will automatically switch the TDataset <strong>in</strong>to Edit mode, allow<strong>in</strong>g<br />
changes to be made to the underly<strong>in</strong>g data.<br />
Tasks<br />
You can monitor changes to a TDataset and its associated data-aware controls by assign<strong>in</strong>g<br />
an event handler to the OnDataChange event.<br />
The OnStateChange event occurs when the State of the TDataset changes. For example, if you<br />
switch the TDataset’s State from dsBrowse to dsEdit by call<strong>in</strong>g the Edit rout<strong>in</strong>e, this event<br />
will be triggered. Because OnStateChange can occur for nil TDatasets, be sure to check for a<br />
nil TDataset before attempt<strong>in</strong>g to reference it.<br />
If you want to change the data <strong>in</strong> the current row before it is posted, set up an OnUpdateData<br />
event. It’s triggered when Post or UpdateRecord is called.<br />
TUpdateSQL<br />
Module: DBTables Class ancestor: TDataSetUpdateObject<br />
The TUpdateSQL component enables you to control the way that TDatasets are updated.<br />
Because you have complete control over the update process, you can even update read-only<br />
TDatasets. You do this via TUpdateSQL’s InsertSQL, DeleteSQL, and ModifySQL properties,<br />
which allow you to specify the SQL to execute for row <strong>in</strong>sertions, deletions, and updates.<br />
465<br />
12
466 Day 12<br />
Table 12.22 lists the key properties and Table 12.23 lists the key methods of the TUpdateSQL<br />
component. There are no key events for the TUpdateSQL component.<br />
Table 12.22. TUpdateSQL key properties.<br />
Property Description<br />
DeleteSQL Specifies the SQL to execute when a row is deleted.<br />
InsertSQL Specifies the SQL to execute when a row is added.<br />
ModifySQL Specifies the SQL to execute when a row is updated.<br />
Table 12.23. TUpdateSQL key methods.<br />
Method Function<br />
Apply Replaces parameters <strong>in</strong> and calls the SQL you specify (DeleteSQL,<br />
InsertSQL, or ModifySQL). Calls both SetParams and ExecSQL.<br />
ExecSQL Executes DeleteSQL, InsertSQL, or ModifySQL, as specified.<br />
SetParams Replaces the parameters <strong>in</strong> DeleteSQL, InsertSQL, or ModifySQL, as<br />
specified.<br />
Key Elements<br />
The InsertSQL, ModifySQL, and DeleteSQL properties provide the means of controll<strong>in</strong>g<br />
updates to TDatasets. These TDatasets can be TTables, TQuery result sets, or TStoredProc<br />
result sets. The SQL you specify can be a simple SQL INSERT, UPDATE, or DELETE statement.<br />
It can be a complex SQL query and can even consist of a call to a stored procedure. This<br />
flexibility gives you the control you need to update almost any type of result set.<br />
Tasks<br />
To make use of a TUpdateSQL component, follow these steps:<br />
1. Drop a TUpdateSQL component on a form and set its InsertSQL, DeleteSQL, and<br />
ModifySQL statements to update the database object(s) referenced by your TDataset.<br />
2. Set the TDataset’s UpdateObject property to po<strong>in</strong>t to your TUpdateSQL component.<br />
3. Set the TDataset’s CachedUpdates property to true.<br />
4. Call the ApplyUpdates command from with<strong>in</strong> your application when you want to<br />
<strong>in</strong>voke the SQL specified <strong>in</strong> the TUpdateSQL component.
<strong>C++</strong>Builder Database Architecture<br />
Updates that you make via the DeleteSQL and ModifySQL statements will, of course, need to<br />
be qualified by a SQL WHERE clause. Both of these properties support a special extension to<br />
SQL that enables you to refer to a field’s orig<strong>in</strong>al value by prefix<strong>in</strong>g its name with Old_. This<br />
is similar to InterBase’s Old. context variable. For example, the ModifySQL statement you set<br />
up for the CUSTOMER table might look like this:<br />
UPDATE CUSTOMER SET Name=:Name<br />
WHERE CustomerNo=:Old_CustomerNo<br />
Though this query doesn’t actually change CustomerNo, it’s a good idea to get <strong>in</strong>to the habit<br />
of us<strong>in</strong>g the Old_ prefix anyway, because some updates aren’t possible without it.<br />
TIP<br />
When edit<strong>in</strong>g the SQL associated with the TUpdateSQL component, you<br />
can edit your SQL us<strong>in</strong>g <strong>C++</strong>Builder’s full-blown Code Editor. You do<br />
this by click<strong>in</strong>g the Code Editor button from with<strong>in</strong> the InsertSQL,<br />
DeleteSQL, and ModifySQL property editors. You’ll f<strong>in</strong>d <strong>C++</strong>Builder’s<br />
Code Editor to be much more powerful than the TMemo component<br />
that’s used to edit the three properties by default.<br />
Use your TDataset’s OnUpdateRecord event when you want to perform additional process<strong>in</strong>g<br />
before send<strong>in</strong>g rows to TUpdateSQL. Once you’ve completed this additional process<strong>in</strong>g, you<br />
can call TUpdateSQL’s Apply method to replace the parameters embedded <strong>in</strong> your SQL and<br />
execute the SQL aga<strong>in</strong>st your database. Here’s a sample OnUpdateRecord handler:<br />
void __fastcall TForm1::Table1UpdateError(TDataset *TDataset, EDatabaseError *E,<br />
TUpdateK<strong>in</strong>d,TUpdateAction &UpdateAction)<br />
{<br />
#def<strong>in</strong>e DEFAULTRATE 5.00<br />
if (UpdateK<strong>in</strong>d == ukInsert)<br />
StoredProc1->FieldByName(“Rate”)->Value=DEFAULTRATE;<br />
UpdateSQL1->Apply(UpdateK<strong>in</strong>d);<br />
UpdateAction=uaApplied;<br />
}<br />
Notice that the rout<strong>in</strong>e sets the UpdateAction parameter to tell the cached updates ApplyUpdates<br />
rout<strong>in</strong>e that no further action is necessary.<br />
TField<br />
Module: DBTables Class ancestor: TComponent<br />
The TField component is used to access the columns <strong>in</strong> a TDataset’s rows. Everyth<strong>in</strong>g that<br />
<strong>C++</strong>Builder enables you to configure at the field level is done with the TField component.<br />
467<br />
12
468 Day 12<br />
You can toggle a database field’s visibility <strong>in</strong> a grid, determ<strong>in</strong>e what its valid values are, and<br />
control whether it can be changed—all us<strong>in</strong>g the TField component.<br />
Table 12.24 lists the key properties, Table 12.25 lists the key methods, and Table 12.26 lists<br />
the key events for TField.<br />
Table 12.24. TField key properties.<br />
Property Description<br />
Calculated Reflects whether a field is a calculated field.<br />
TDataset Returns the TDataset to which this TField belongs.<br />
EditMask Specifies an <strong>in</strong>put mask that limits text typed <strong>in</strong>to the control.<br />
FieldName Specifies the associated database field name.<br />
Lookup Reflects whether a field is a lookup field.<br />
Value Returns the TField’s underly<strong>in</strong>g data value as a variant.<br />
Visible Determ<strong>in</strong>es whether the TField is visible (by default) <strong>in</strong> DBGrid<br />
controls.<br />
Table 12.25. TField key methods.<br />
Method Function<br />
Assign Copies the value <strong>in</strong> one field to another.<br />
AssignValue Assigns a literal value to a TField.<br />
Clear Empties a TField.<br />
GetData Returns the data from a field <strong>in</strong> raw format.<br />
SetData Assigns raw data to a field.<br />
Table 12.26. TField key events.<br />
Event Catalyst<br />
OnChange Occurs when any modification is made to a TField.<br />
OnValidate Occurs when a field’s value is changed.
<strong>C++</strong>Builder Database Architecture<br />
Key Elements<br />
If you do not specifically create a set of TFields us<strong>in</strong>g the Fields Editor <strong>in</strong> <strong>C++</strong>Builder, field<br />
objects are automatically created for you each time a TDataset is opened. This list of TFields<br />
that’s created reflects the columns as they appear <strong>in</strong> the TDataset.<br />
By creat<strong>in</strong>g your own list of TFields us<strong>in</strong>g the Fields Editor, you ensure that your application<br />
is <strong>in</strong>deed access<strong>in</strong>g the TDataset columns it <strong>in</strong>tends to access. Without such a list, chang<strong>in</strong>g<br />
the underly<strong>in</strong>g table automatically changes the columns your application works with. Us<strong>in</strong>g<br />
TField components makes your application immune to column reorder<strong>in</strong>g and causes an<br />
exception to be raised if a column’s name or data type changes. The only time you shouldn’t<br />
make use of TField components is when you’re build<strong>in</strong>g a generic table browser. On all other<br />
occasions, you’ll want to be sure to establish TField components to service your TDatasets.<br />
When you establish your own TField list, referenc<strong>in</strong>g a field that’s been renamed or removed<br />
from the underly<strong>in</strong>g table raises an exception. This is preferable to allow<strong>in</strong>g the application<br />
to possibly work with the wrong data.<br />
A TField component itself is never actually created <strong>in</strong> <strong>C++</strong>Builder applications—it’s an<br />
abstract class and, therefore, parts of it must be overridden before it can be <strong>in</strong>stantiated. You<br />
must create a descendant of TField and fill <strong>in</strong> some of its abstract gaps <strong>in</strong> order to create a<br />
TField <strong>in</strong>stance. In OOP parlance, you do this via <strong>in</strong>heritance. The TField class type can also<br />
be used to typecast and manipulate its descendants. The technical term for this OOP concept<br />
is polymorphism. TField’s descendant classes are detailed <strong>in</strong> Table 12.27.<br />
Table 12.27. TField descendants.<br />
TField Descendant Type of Data Stored<br />
TStr<strong>in</strong>gField Fixed-length text data up to 255 characters.<br />
TIntegerField Whole numbers from -2,<strong>14</strong>7,483,648 to 2,<strong>14</strong>7,483,647.<br />
TSmall<strong>in</strong>tField Whole numbers from -32,768 to 32,767.<br />
TWordField Whole numbers from 0 to 65,535.<br />
TFloatField Real numbers from 5.0*10 -324 to 1.7*10 308 .<br />
TCurrencyField Currency values accurate to 15 to 16 digits; represented as a<br />
b<strong>in</strong>ary value with a range of ± 5.0*10 -324 to 1.7*10 308 .<br />
TBCDField B<strong>in</strong>ary Coded Decimal values with accuracy to 18 digits.<br />
TBooleanField Boolean values.<br />
469<br />
cont<strong>in</strong>ues<br />
12
470 Day 12<br />
Table 12.28. cont<strong>in</strong>ued<br />
TDateTimeField Date and time values.<br />
TDateField Date values.<br />
TTimeField Time values.<br />
TBlobField Variable-length field with no size limit.<br />
TBytesField Variable-length field with no size limit.<br />
TVarBytesField Variable-length field up to 65,535 characters.<br />
TMemoField Variable-length text field with no size limit.<br />
TGraphicField Variable-length graphics field with no size limit.<br />
You never specifically drop a TField descendant on a form. As mentioned, these are created<br />
for you, either via the Fields Editor or automatically when a TDataset is opened.<br />
Tasks<br />
TFields support a number of column-based sett<strong>in</strong>gs that you can use to customize your<br />
applications. You specify these sett<strong>in</strong>gs us<strong>in</strong>g the Fields Editor of a TDataset. You access the<br />
Fields Editor by right-click<strong>in</strong>g a TDataset component and select<strong>in</strong>g Fields Editor from the<br />
pop-up menu.<br />
For example, to prevent modifications to a field, right-click its TDataset, select Fields Editor,<br />
and then set the field’s ReadOnly property to true <strong>in</strong> the Object Inspector. To make a field<br />
<strong>in</strong>visible <strong>in</strong> a DBGrid, set its Visible property to false. If you want to control the types of<br />
characters allowed <strong>in</strong> the field, specify a mask <strong>in</strong> its EditMask property. To change the database<br />
field to which the TField is l<strong>in</strong>ked, change its FieldName property to the field you want to<br />
reference.<br />
NOTE<br />
TField Descendant Type of Data Stored<br />
Note that TField’s Visible property only controls whether a column<br />
appears <strong>in</strong> a DBGrid component if no columns have been def<strong>in</strong>ed us<strong>in</strong>g<br />
the grid’s Columns property.
TIP<br />
<strong>C++</strong>Builder Database Architecture<br />
You can drag TFields from the Fields Editor directly onto a form. This<br />
will create a data-aware control and a correspond<strong>in</strong>g label on the form.<br />
You can configure which data-aware component is dropped onto the<br />
form us<strong>in</strong>g the TControlClass property <strong>in</strong> the Database Explorer.<br />
TFields also support implicit data conversions. That is, you don’t have to know what type<br />
of data a TField actually stores to convert it to another data type. This is facilitated by TField’s<br />
Value property. Value is a variant type that is implicitly converted when it is assigned or<br />
receives a value. For example, you can assign a str<strong>in</strong>g to a boolean field us<strong>in</strong>g its Value variant,<br />
like so:<br />
TBooleanField MyBoolean;<br />
...<br />
MyBoolean->Value=”T”;<br />
You can also assign a numeric field to a str<strong>in</strong>g control us<strong>in</strong>g its Value property:<br />
TCurrencyField MyMoney;<br />
...<br />
Edit1->Text=MyMoney->Value;<br />
TField’s amaz<strong>in</strong>g ability to implicitly convert between different data types makes it<br />
chameleon-like <strong>in</strong> its capacity to adapt to vary<strong>in</strong>g data requirements. This simplifies your<br />
applications and makes for less work when an application’s underly<strong>in</strong>g data structure<br />
changes.<br />
Summary<br />
As you can see, the <strong>C++</strong>Builder database class hierarchy is rich, yet easy to use. Great attention<br />
has been given to mak<strong>in</strong>g the hierarchy not only extensive, but also coherent. The VCL<br />
database classes strike a good balance between functionality and ease of use.<br />
Workshop<br />
The Workshop conta<strong>in</strong>s quiz questions to help you solidify your understand<strong>in</strong>g of the<br />
material covered and exercises to provide you with experience <strong>in</strong> us<strong>in</strong>g what you have learned.<br />
You can f<strong>in</strong>d answers to the quiz questions <strong>in</strong> Appendix A, “Answers to Quiz Questions.”<br />
471<br />
12
472 Day 12<br />
Q&A<br />
Quiz<br />
Q What property of the TQuery component determ<strong>in</strong>es whether a result set is<br />
updatable?<br />
A The RequestLive property.<br />
Q What property of the TDatabase component is used to set up an applicationbased<br />
alias?<br />
A The DatabaseName property.<br />
Q At a m<strong>in</strong>imum, what components on the Data Access page must be <strong>in</strong> a<br />
<strong>C++</strong>Builder app that needs to <strong>in</strong>clude data-aware user <strong>in</strong>terface controls?<br />
A The TTable and TDatasource components.<br />
1. What’s the purpose of the TSession component?<br />
2. What are the advantages of us<strong>in</strong>g a TDatabase component <strong>in</strong> your applications?<br />
3. What conditions must be true <strong>in</strong> order for a TQuery result set to be updatable?<br />
4. What component is used to copy rows from one TDataset to another?<br />
Exercises<br />
1. Construct a sample form us<strong>in</strong>g a TTable, a TDataSource, and data-aware components<br />
from the Data Controls page of the Component Palette.<br />
2. Modify the form you constructed <strong>in</strong> exercise 1 to <strong>in</strong>clude a TDatabase component.<br />
3. Create a new table by copy<strong>in</strong>g rows from an exist<strong>in</strong>g one us<strong>in</strong>g the TBatchMove<br />
component.<br />
4. Set up a TQuery component to return rows from the BIOLIFE table <strong>in</strong> the DBDEMOS<br />
sample database.<br />
5. Configure this TQuery so that its result set is updatable.
Build<strong>in</strong>g Internet Applications<br />
Day 13<br />
Build<strong>in</strong>g Internet<br />
Applications<br />
by Ken Henderson<br />
Week<br />
Today you’ll explore build<strong>in</strong>g Internet applications with <strong>C++</strong>Builder. Because<br />
<strong>C++</strong>Builder ships with a suite of Internet-related OCX controls, it’s ideally<br />
suited for build<strong>in</strong>g applications that access the Internet. In this chapter you’ll<br />
learn the purpose of the Internet controls and use them to build your very own<br />
Web browser. Specifically, today’s lesson will consist of<br />
■ An <strong>in</strong>troduction to build<strong>in</strong>g Internet applications with <strong>C++</strong>Builder<br />
■ A tour of the Internet page of the <strong>C++</strong>Builder Component Palette<br />
■ A tutorial session that takes you through the process of build<strong>in</strong>g your<br />
own Web browser us<strong>in</strong>g <strong>C++</strong>Builder<br />
2<br />
473<br />
13
474 Day 13<br />
The Basics<br />
Because <strong>C++</strong>Builder’s underly<strong>in</strong>g language is <strong>C++</strong>, and <strong>C++</strong> is such a popular programm<strong>in</strong>g<br />
language, you can do almost anyth<strong>in</strong>g you’d like <strong>in</strong> <strong>C++</strong>Builder, <strong>in</strong>clud<strong>in</strong>g build Internet<br />
applications. The specifications have been published and the necessary <strong>in</strong>terfaces established<br />
to build Internet applications from scratch us<strong>in</strong>g <strong>C++</strong>Builder, if that’s your pleasure. Like any<br />
other natively compiled <strong>C++</strong> environment, you could <strong>in</strong>clude the appropriate header files<br />
and code whole Internet applications <strong>in</strong> <strong>C++</strong> if you really wanted to.<br />
But that would remove the biggest and best reason for us<strong>in</strong>g a tool like <strong>C++</strong>Builder <strong>in</strong> the first<br />
place—its expediency. You use RAD (rapid application development) tools like <strong>C++</strong>Builder<br />
because they’re fast. At the same time, you don’t want someth<strong>in</strong>g that’s just thrown<br />
together—you want a tool that generates efficient executables efficiently.<br />
<strong>C++</strong>Builder really sh<strong>in</strong>es <strong>in</strong> its capability to construct natively compiled executables through<br />
dragg<strong>in</strong>g and dropp<strong>in</strong>g components. Like its elder sister Delphi, <strong>C++</strong>Builder comb<strong>in</strong>es the<br />
best of the object-oriented and component-based development models to provide a development<br />
platform that is easy to use and extremely powerful.<br />
What does this have to do with Internet development? Well, for starters, it means that, thanks<br />
to <strong>C++</strong>Builder’s Internet component set, you can build Internet-related applications as easily<br />
as any other type of application—by dropp<strong>in</strong>g components on a form. It also means that you<br />
can extend these components to enhance them, while still be<strong>in</strong>g able to manipulate low-level<br />
API details, if you need to, because <strong>C++</strong>Builder is natively compiled and <strong>C++</strong> based.<br />
To work directly with the low-level APIs (for example, ISAPI) that are required to build<br />
Internet client and server applications, your tool of choice must be able to use and construct<br />
DLLs and to utilize the published <strong>in</strong>terfaces to these DLLs. <strong>C++</strong>Builder is natively compiled<br />
and can both use and create DLLs. Also, because it’s <strong>C++</strong> based, <strong>in</strong>terfaces to all the major<br />
Internet-related APIs are readily available for it. What you have <strong>in</strong> <strong>C++</strong>Builder is the Swiss<br />
Army Knife of W<strong>in</strong>32 development. Whether it’s a game, a database program, or an Internet<br />
application, you’ll f<strong>in</strong>d that <strong>C++</strong>Builder takes you where you want to go and even makes the<br />
trip somewhat enjoyable.<br />
A Tour of the Internet Component<br />
Palette Page<br />
Before we get started build<strong>in</strong>g your Web browser, let’s take a brief tour of the components<br />
on the Internet page of the <strong>C++</strong>Builder Component Palette. Although you’ll only use one<br />
of these components <strong>in</strong> today’s sample project, it’s helpful to know what’s available to you.<br />
Table 13.1 lists each component and describes its function.
Build<strong>in</strong>g Internet Applications<br />
Table 13.1. <strong>C++</strong>Builder’s Internet components and their respective<br />
functions.<br />
Component Description<br />
FTP Supports exchang<strong>in</strong>g files with remote mach<strong>in</strong>es<br />
THTML Supports pars<strong>in</strong>g and layout of HTML data and provides a<br />
scrollable view of the current HTML page<br />
THTTP Provides access to the Hypertext Transfer Protocol<br />
TNTTP Provides the ability to read and post to newsgroups<br />
TPOP Provides access to the POP3 electronic mail protocol<br />
TSMTP Supports send<strong>in</strong>g Internet mail messages to SMTP servers<br />
TTCP Provides access to the W<strong>in</strong>Sock Transfer Control Protocol<br />
(both client and server side)<br />
TUDP Provides access to the W<strong>in</strong>Sock User Datagram Protocol (both<br />
client and server)<br />
Some of these components provide access to popular Internet elements with which you’re<br />
probably familiar. For example, if you were go<strong>in</strong>g to build an FTP utility, you would use the<br />
FTP component. If you were build<strong>in</strong>g a newsreader, you’d use the NTTP component. If you<br />
were construct<strong>in</strong>g a Web browser (as we are today), you’d make use of the THTML control. If<br />
you wanted to send mail over the Internet, you might make use of the POP or SMTP component.<br />
This bevy of high-level controls makes much of the W<strong>in</strong>Sock cod<strong>in</strong>g of yesteryear obsolete<br />
and makes develop<strong>in</strong>g sophisticated Internet-related applications a snap.<br />
Build<strong>in</strong>g Your Web Browser<br />
Now that I’ve <strong>in</strong>troduced you to <strong>C++</strong>Builder’s Internet components, let’s build a simple Web<br />
browser. It’s not like the world really needs yet another Web browser; the purpose of this<br />
exercise is to demonstrate how easy it is to put together Internet apps that would have been<br />
major undertak<strong>in</strong>gs just a couple of years ago. <strong>C++</strong>Builder’s component-based approach to<br />
development allows you to concentrate on what you want to do rather than on how to do it.<br />
Let’s beg<strong>in</strong> by start<strong>in</strong>g a new project <strong>in</strong> <strong>C++</strong>Builder. Choose File | New Application from the<br />
<strong>C++</strong>Builder menu system to <strong>in</strong>itialize a new application project. When the new project is<br />
started, you’ll be presented with a new, blank form on which you can drop components. This<br />
form will be your Web browser. Set its Caption property to Surf and its Position property<br />
to poScreenCenter. Before you proceed, go ahead and save the new application as Surf.CPP<br />
and its associated form as Surf00.CPP. I suggest you use these similar yet different filenames<br />
475<br />
13
476 Day 13<br />
for project and form files because a project file and a form file cannot have the same name.<br />
For s<strong>in</strong>gle-form applications, nam<strong>in</strong>g the project and its one form differently may seem a bit<br />
strange, but <strong>C++</strong>Builder requires it nonetheless.<br />
Beg<strong>in</strong> construct<strong>in</strong>g your Web browser form by dropp<strong>in</strong>g a TTabControl component on the<br />
top of the form. This control will list URLs as you browse them so that you can easily return<br />
to one you’ve already visited. Set the control’s Align property to alTop. This will make it<br />
expand to occupy the top of the form. Thanks to alTop, your TTabControl will always occupy<br />
the topmost region of the form, no matter how large or how small the form becomes. You<br />
can drag the TTabControl’s bottom border to size it vertically.<br />
Next, change the TTabControl component’s TabWidth property to someth<strong>in</strong>g <strong>in</strong> the neighborhood<br />
of <strong>14</strong>5 pixels. This will ensure that each tab is large enough to display simple URLs<br />
without allow<strong>in</strong>g any one tab to take up too much space. Figure 13.1 shows what your<br />
TTabControl might look like.<br />
Figure 13.1.<br />
Your Web browser<br />
form with<br />
TTabControl<br />
<strong>in</strong> place.<br />
Now that the top of the browser form is <strong>in</strong> place, let’s set up the bottom. Drop a TPanel<br />
component onto the bottom of the form and set its Align property to alBottom. As with the<br />
TTabControl component, this will cause the TPanel control to always occupy the bottom of<br />
the form, regardless of how the form is resized.<br />
Press F11 to br<strong>in</strong>g up the Object Inspector; then delete TPanel’s Caption property. Set its<br />
TabOrder property to 0. This will cause TPanel’s default component (which you’ll drop <strong>in</strong><br />
place momentarily) to be the form’s default when it first displays.<br />
After you’ve set up the TPanel, you’re ready to drop its child controls onto it. Beg<strong>in</strong> by<br />
dropp<strong>in</strong>g another TPanel component onto the first TPanel’s right edge. Set the new TPanel’s<br />
Align property to alRight and delete its Caption property. This will allow you to position<br />
controls so that they are always on the form’s far right, no matter how the form is resized.<br />
Next, drop two TBitBtn components onto the new TPanel. Set the Caption property of the<br />
first button to Go! and the Caption property of the second to Home. You can set the Glyph
Build<strong>in</strong>g Internet Applications<br />
property of each button to the bitmap of your choos<strong>in</strong>g. Set the Go! button’s Default<br />
property to true. This will allow the user to simply type a URL and then press Enter to jump<br />
to it. The Go! button will cause your browser to attempt to open a URL you supply, while<br />
the Home button will cause it to jump directly to your home page. I’ll show you how to<br />
specify a home page <strong>in</strong> the browser’s source code <strong>in</strong> a moment.<br />
When your buttons are <strong>in</strong> place, drop a TComboBox onto the left edge of your bottom TPanel,<br />
stretch it so that it’s as wide as possible, and then delete its Text property. You’ll use this<br />
combo box to supply Web page addresses that you want to browse. When the application<br />
runs, you’ll type a URL <strong>in</strong>to the TComboBox and click the Go! button to browse it. Figure 13.2<br />
shows what your form should look like so far.<br />
Figure 13.2.<br />
Your Web browser<br />
form with its<br />
bottom and top<br />
sections <strong>in</strong> place.<br />
Now that the top and bottom of your Web browser form are complete, let’s supply the<br />
middle. Drop a THTML component onto the form’s middle and set its Align property to<br />
alClient. This will cause it to take all the form space not already occupied by the top<br />
TTabControl or the bottom TPanel. When the form is resized, m<strong>in</strong>imized, maximized, or<br />
restored, the area of the form that renders HTML will expand or shr<strong>in</strong>k with it. Figure 13.3<br />
shows your form with all its controls <strong>in</strong> place.<br />
Figure 13.3.<br />
Your new form as it<br />
appears with all its<br />
visual controls.<br />
477<br />
13
478 Day 13<br />
Giv<strong>in</strong>g the New Form Life<br />
When your form is all set up visually, you still need to attach code to its events <strong>in</strong> order for<br />
it to do anyth<strong>in</strong>g. The biggest event that you’ll customize is the OnBeg<strong>in</strong>Retrieval event of<br />
the THTML component. Of course, you’ll also attach custom code to the OnClick event of both<br />
your buttons and also to the OnChange event of your TTabControl.<br />
Beg<strong>in</strong> by click<strong>in</strong>g on your TTabControl and then double-click<strong>in</strong>g its OnChange event <strong>in</strong> the<br />
Object Inspector. Type the follow<strong>in</strong>g code <strong>in</strong>to the <strong>C++</strong>Builder Code Editor:<br />
NOTE<br />
cbURL->Text=tcURL->Tabs->Str<strong>in</strong>gs[tcURL->TabIndex];<br />
cbURL->SelectAll();<br />
bbGo->Click();<br />
This code sample and the others <strong>in</strong> this chapter assume you’ve adopted<br />
some sort of nam<strong>in</strong>g conventions for the objects <strong>in</strong> your application. I<br />
always prefix identifier names with a two-character mnemonic that<br />
allows me to identify the type of component represented by the<br />
identifier. Here, cbURL refers to the TComboBox control you placed on the<br />
bottom TPanel, tcURL refers to the TTabControl at the top of the form,<br />
and bbGo refers to the Go! TBitBtn component.<br />
Sett<strong>in</strong>g cbURL’s Text property to the text of the tab that was clicked when the OnChange event<br />
fired ensures that the cbURL control and the tcURL control stay synchronized. Call<strong>in</strong>g the<br />
SelectAll() method ensures that the TComboBox’s Text property value is highlighted. The call<br />
to bbGo’s Click() event simulates actually click<strong>in</strong>g the button. This allows click<strong>in</strong>g a tab and<br />
click<strong>in</strong>g the Go! button to behave identically.<br />
Now that the tab control is set up, click on the THTML component and then double-click on<br />
its OnBeg<strong>in</strong>Retrieve event <strong>in</strong> the <strong>C++</strong>Builder Object Inspector. Type this code <strong>in</strong>to the Code<br />
Editor:<br />
Cursor=(TCursor)crHourGlass;<br />
if (cbURL->Items->IndexOf(htBrowser->URL)==-1) {<br />
cbURL->Items->Add(htBrowser->URL);<br />
cbURL->Text=htBrowser->URL;<br />
cbURL->SelectAll();<br />
tcURL->Tabs->Add(htBrowser->URL);<br />
tcURL->TabIndex=tcURL->Tabs->Count-1;<br />
bbGo->Click();<br />
}<br />
This code checks whether the list of URLs ma<strong>in</strong>ta<strong>in</strong>ed by the TComboBox conta<strong>in</strong>s the one<br />
about to be browsed. If the URL isn’t there, the code adds it to both the TComboBox and the<br />
TTabControl.
Build<strong>in</strong>g Internet Applications<br />
Notice the assignment of the form’s Cursor property. This is done to show that the form is<br />
<strong>in</strong> the process of load<strong>in</strong>g a Web page.<br />
Of course, once the cursor is set to an hourglass, it needs to be reset to its normal<br />
representation at some po<strong>in</strong>t. The place to do this is <strong>in</strong> the THTML component’s OnEndRetrieve<br />
event. Type this code <strong>in</strong>to the OnEndRetrieve method handler:<br />
Cursor=(TCursor)crDefault;<br />
This will reset the cursor once the selected Web page loads.<br />
Now that the TTabControl and THTML controls are set up, you’re ready to configure your<br />
buttons. Double-click the Go! button <strong>in</strong> the Form Designer to br<strong>in</strong>g up its OnClick method<br />
handler. Type the follow<strong>in</strong>g code <strong>in</strong>to it:<br />
htBrowser->RequestDoc(cbURL->Text);<br />
This simply tells the THTML control (named htBrowser here) to open whatever URL is specified<br />
<strong>in</strong> the TComboBox (named cbURL here).<br />
When you’re f<strong>in</strong>ished with the Go! button, double-click the Home button to set it up. Type<br />
the follow<strong>in</strong>g code <strong>in</strong>to the <strong>C++</strong>Builder Code Editor:<br />
htBrowser->RequestDoc(HomePage);<br />
This code relies on a constant named HomePage, which you’ll need to def<strong>in</strong>e <strong>in</strong> advance. Go<br />
to the top of Surf00.CPP and type <strong>in</strong> a declaration for the HomePage variable like so:<br />
Str<strong>in</strong>g HomePage = “http://www.borland.com”;<br />
You can place the HomePage declaration right after your form’s <strong>in</strong>stance variable declaration<br />
if you want—it helps keep the form’s global variables together.<br />
After you’ve set up this constant, you’re f<strong>in</strong>ished with your very basic browser. List<strong>in</strong>gs 13.1<br />
through 13.3 show what your new application’s source code should look like thus far.<br />
List<strong>in</strong>g 13.1. The header file to your Web browser’s ma<strong>in</strong> form, Surf00.<br />
1: //----------------------------------------------------------------<br />
2: #ifndef Surf00H<br />
3: #def<strong>in</strong>e Surf00H<br />
4: //----------------------------------------------------------------<br />
5: #<strong>in</strong>clude <br />
6: #<strong>in</strong>clude <br />
7: #<strong>in</strong>clude <br />
8: #<strong>in</strong>clude <br />
9: #<strong>in</strong>clude <br />
10: #<strong>in</strong>clude <br />
479<br />
cont<strong>in</strong>ues<br />
13
480 Day 13<br />
List<strong>in</strong>g 13.1. cont<strong>in</strong>ued<br />
11: #<strong>in</strong>clude <br />
12: #<strong>in</strong>clude <br />
13: #<strong>in</strong>clude <br />
<strong>14</strong>: //----------------------------------------------------------------<br />
15: class TfmBrowser : public TForm<br />
16: {<br />
17: __published: // IDE-managed Components<br />
18: TTabControl *tcURL;<br />
19: TPanel *paHeader;<br />
20: TComboBox *cbURL;<br />
21: TBitBtn *bbGo;<br />
22: THTML *htBrowser;<br />
23: TBitBtn *bbHome;<br />
24: void __fastcall bbGoClick(TObject *Sender);<br />
25: void __fastcall htBrowserBeg<strong>in</strong>Retrieval(TObject *Sender);<br />
26: void __fastcall tcURLChange(TObject *Sender);<br />
27: void __fastcall bbHomeClick(TObject *Sender);<br />
28: void __fastcall htBrowserEndRetrieval(TObject *Sender);<br />
29: private: // User declarations<br />
30: public: // User declarations<br />
31: virtual __fastcall TfmBrowser(TComponent* Owner);<br />
32: };<br />
33: //----------------------------------------------------------------<br />
34: extern TfmBrowser *fmBrowser;<br />
35: //----------------------------------------------------------------<br />
36: #endif<br />
List<strong>in</strong>g 13.2. The <strong>C++</strong> source file of your Web browser’s ma<strong>in</strong> form,<br />
Surf00.<br />
1: //----------------------------------------------------------------<br />
2: #<strong>in</strong>clude <br />
3: #pragma hdrstop<br />
4:<br />
5: #<strong>in</strong>clude “Surf00.h”<br />
6: //----------------------------------------------------------------<br />
7: #pragma resource “*.dfm”<br />
8: TfmBrowser *fmBrowser;<br />
9: Str<strong>in</strong>g HomePage = “http://www.borland.com”;<br />
10:<br />
11: //----------------------------------------------------------------<br />
12: __fastcall TfmBrowser::TfmBrowser(TComponent* Owner)<br />
13: : TForm(Owner)<br />
<strong>14</strong>: {<br />
15: }<br />
16: //----------------------------------------------------------------<br />
17: void __fastcall TfmBrowser::bbGoClick(TObject *Sender)<br />
18: {<br />
19: htBrowser->RequestDoc(cbURL->Text);
Build<strong>in</strong>g Internet Applications<br />
20: }<br />
21: //----------------------------------------------------------------<br />
22: void __fastcall TfmBrowser::htBrowserBeg<strong>in</strong>Retrieval(TObject *Sender)<br />
23: {<br />
24: Cursor=(TCursor)crHourGlass;<br />
25: if (cbURL->Items->IndexOf(htBrowser->URL)==-1) {<br />
26: cbURL->Items->Add(htBrowser->URL);<br />
27: cbURL->Text=htBrowser->URL;<br />
28: cbURL->SelectAll();<br />
29: tcURL->Tabs->Add(htBrowser->URL);<br />
30: tcURL->TabIndex=tcURL->Tabs->Count-1;<br />
31: bbGo->Click();<br />
32: }<br />
33: }<br />
34: //----------------------------------------------------------------<br />
35: void __fastcall TfmBrowser::tcURLChange(TObject *Sender)<br />
36: {<br />
37: cbURL->Text=tcURL->Tabs->Str<strong>in</strong>gs[tcURL->TabIndex];<br />
38: cbURL->SelectAll();<br />
39: bbGo->Click();<br />
40: }<br />
41: //----------------------------------------------------------------<br />
42: void __fastcall TfmBrowser::bbHomeClick(TObject *Sender)<br />
43: {<br />
44: htBrowser->RequestDoc(HomePage);<br />
45: }<br />
46: //----------------------------------------------------------------<br />
47: void __fastcall TfmBrowser::htBrowserEndRetrieval(TObject *Sender)<br />
48: {<br />
49: Cursor=(TCursor)crDefault;<br />
50: }<br />
51: //----------------------------------------------------------------<br />
List<strong>in</strong>g 13.3. The text version of your Web browser’s ma<strong>in</strong> form,<br />
Surf00, as text.<br />
1: object fmBrowser: TfmBrowser<br />
2: Left = 249<br />
3: Top = 183<br />
4: Width = 500<br />
5: Height = 337<br />
6: Caption = ‘Surf’<br />
7: Font.Color = clW<strong>in</strong>dowText<br />
8: Font.Height = -13<br />
9: Font.Name = ‘MS Sans Serif’<br />
10: Font.Style = []<br />
11: Position = poScreenCenter<br />
12: PixelsPerInch = 120<br />
13: TextHeight = 16<br />
<strong>14</strong>: object tcURL: TTabControl<br />
15: Left = 0<br />
481<br />
cont<strong>in</strong>ues<br />
13
482 Day 13<br />
List<strong>in</strong>g 13.3. cont<strong>in</strong>ued<br />
16: Top = 0<br />
17: Width = 492<br />
18: Height = 33<br />
19: Align = alTop<br />
20: TabOrder = 1<br />
21: TabWidth = <strong>14</strong>5<br />
22: OnChange = tcURLChange<br />
23: end<br />
24: object paHeader: TPanel<br />
25: Left = 0<br />
26: Top = 264<br />
27: Width = 492<br />
28: Height = 41<br />
29: Align = alBottom<br />
30: TabOrder = 0<br />
31: object cbURL: TComboBox<br />
32: Left = 16<br />
33: Top = 8<br />
34: Width = 353<br />
35: Height = 24<br />
36: ItemHeight = 16<br />
37: TabOrder = 0<br />
38: end<br />
39: object bbGo: TBitBtn<br />
40: Left = 368<br />
41: Top = 8<br />
42: Width = 51<br />
43: Height = 25<br />
44: Caption = ‘Go!’<br />
45: Default = True<br />
46: TabOrder = 1<br />
47: OnClick = bbGoClick<br />
48: Glyph.Data = {<br />
49: 78010000424D7801000000000000760000002800000020000000100000000100<br />
50: 04000000000000000000120B0000120B00000000000000000000000000000000<br />
51: 800000800000008080008000000080008000808000007F7F7F00BFBFBF000000<br />
52: FF0000FF000000FFFF00FF000000FF00FF00FFFF0000FFFFFF00555555555555<br />
53: 555555FFFFFFFFFF55555000000000055555577777777775FFFF00B8B8B8B8B0<br />
54: 0000775F5555555777770B0B8B8B8B8B0FF07F75F555555575F70FB0B8B8B8B8<br />
55: B0F07F575FFFFFFFF7F70BFB0000000000F07F557777777777570FBFBF0FFFFF<br />
56: FFF07F55557F5FFFFFF70BFBFB0F000000F07F55557F777777570FBFBF0FFFFF<br />
57: FFF075F5557F5FFFFFF750FBFB0F000000F0575FFF7F777777575700000FFFFF<br />
58: FFF05577777F5FF55FF75555550F00FF00005555557F775577775555550FFFFF<br />
59: 0F055555557F55557F755555550FFFFF00555555557FFFFF7755555555000000<br />
60: 05555555557777777555555555555555555555555555555555550000}<br />
61: NumGlyphs = 2<br />
62: end<br />
63: object bbHome: TBitBtn<br />
64: Left = 424
Build<strong>in</strong>g Internet Applications<br />
65: Top = 8<br />
66: Width = 65<br />
67: Height = 25<br />
68: Caption = ‘Home’<br />
69: Default = True<br />
70: TabOrder = 2<br />
71: OnClick = bbHomeClick<br />
72: Glyph.Data = {<br />
73: 78010000424D7801000000000000760000002800000020000000100000000100<br />
74: 04000000000000000000120B0000120B00000000000000000000000000000000<br />
75: 800000800000008080008000000080008000808000007F7F7F00BFBFBF000000<br />
76: FF0000FF000000FFFF00FF000000FF00FF00FFFF0000FFFFFF00330000000000<br />
77: 03333377777777777F333301111111110333337F333333337F33330111111111<br />
78: 0333337F333333337F333301111111110333337F333333337F33330111111111<br />
79: 0333337F333333337F333301111111110333337F333333337F33330111111111<br />
80: 0333337F3333333F7F333301111111B10333337F333333737F33330111111111<br />
81: 0333337F333333337F333301111111110333337F33FFFFF37F3333011EEEEE11<br />
82: 0333337F377777F37F3333011EEEEE110333337F37FFF7F37F3333011EEEEE11<br />
83: 0333337F377777337F333301111111110333337F333333337F33330111111111<br />
84: 0333337FFFFFFFFF7F33330000000000033333777777777773330000}<br />
85: NumGlyphs = 2<br />
86: end<br />
87: end<br />
88: object htBrowser: THTML<br />
89: Left = 0<br />
90: Top = 33<br />
91: Width = 492<br />
92: Height = 231<br />
93: Align = alClient<br />
94: ParentColor = False<br />
95: ParentFont = False<br />
96: TabOrder = 2<br />
97: OnBeg<strong>in</strong>Retrieval = htBrowserBeg<strong>in</strong>Retrieval<br />
98: OnEndRetrieval = htBrowserEndRetrieval<br />
99: ControlData = {<br />
100: 2<strong>14</strong>3341208000000AE2800001A130000000001010100011E0000000100000000<br />
101: C0C0C000000000000000FF00FF00FF00010000009001C0D401000F54696D6573<br />
102: 204E657720526F6D616E010000009001007701000B436F7572696572204E6577<br />
103: 01000000BC0280A903000F54696D6573204E657720526F6D616E01000000BC02<br />
104: 20BF02000F54696D6573204E657720526F6D616E01000000BC02101B02000F54<br />
105: 696D6573204E657720526F6D616E01000000BC02C0D401000F54696D6573204E<br />
106: 657720526F6D616E01000000BC02007701000F54696D6573204E657720526F6D<br />
107: 616E01000000BC02B03001000F54696D6573204E657720526F6D616E}<br />
108: end<br />
109: end<br />
Now that your new Web browser is complete, you’re ready to run it. Save your work; then<br />
press F9 to run your new application. Figure 13.4 illustrates what your browser might look<br />
like at runtime.<br />
483<br />
13
484 Day 13<br />
Figure 13.4.<br />
Your new Web<br />
browser at runtime.<br />
Summary<br />
Today you have learned the purpose of each of the components on the Internet page of the<br />
<strong>C++</strong>Builder Component Palette. You have learned the process <strong>in</strong>volved with tak<strong>in</strong>g one of<br />
these components, the THTML control, and us<strong>in</strong>g it to build an Internet utility—<strong>in</strong> this case,<br />
a Web browser. If you wanted to build an e-mail client or a newsreader, the process would<br />
be much the same. <strong>C++</strong>Builder’s component-based architecture allows you to focus on what<br />
you want to build rather than on how to build it.<br />
Workshop<br />
The Workshop conta<strong>in</strong>s quiz questions to help you solidify your understand<strong>in</strong>g of the<br />
material covered and exercises to provide you with experience <strong>in</strong> us<strong>in</strong>g what you have learned.<br />
You can f<strong>in</strong>d the answers to these quiz questions <strong>in</strong> Appendix A, “Answers to Quiz<br />
Questions.”<br />
Q&A<br />
Q Who authored the Internet components that ship with <strong>C++</strong>Builder?<br />
A <strong>Borland</strong> licensed <strong>C++</strong>Builder’s Internet components from NetManage.<br />
Q If I already have Microsoft Internet Explorer 3.0 <strong>in</strong>stalled, is there a way I can<br />
utilize it <strong>in</strong> my browser application rather than the NetManage HTML<br />
control?<br />
A Yes—to do so, follow these steps:<br />
1. Select Component | Install from the <strong>C++</strong>Builder ma<strong>in</strong> menu.<br />
2. Click the OCX button.
Quiz<br />
Build<strong>in</strong>g Internet Applications<br />
3. When the Import OLE Control dialog box appears, select Microsoft Internet<br />
Controls <strong>in</strong> the Registered Controls list.<br />
4. Make sure the Palette page entry is set to Internet so that the new control will<br />
be <strong>in</strong>stalled onto the Internet page of the <strong>C++</strong>Builder Component Palette.<br />
5. Click OK and then click OK aga<strong>in</strong>. You should see a new control named<br />
TWebBrowser on the Internet page of <strong>C++</strong>Builder’s Component Palette. This<br />
is the Microsoft Internet Explorer 3.0 browser implemented as an OLE<br />
control. Browser applications that you build us<strong>in</strong>g it will have the same basic<br />
functionality as Microsoft Internet Explorer 3.0 itself.<br />
1. What <strong>C++</strong>Builder component would you use to build your own Internet<br />
newsreader application?<br />
2. What event is fired by the THTML control before a document is retrieved?<br />
3. What property of the THTML control conta<strong>in</strong>s the address of the current Web page?<br />
4. What component would you use to construct an FTP utility?<br />
Exercises<br />
1. Change the browser you created today to use the Microsoft Internet Explorer 3.0<br />
OCX control <strong>in</strong>stead.<br />
2. Construct a <strong>C++</strong>Builder application that allows you to subscribe and post to<br />
newsgroups.<br />
3. Construct a <strong>C++</strong>Builder exception handler than sends e-mail when an application<br />
exception is thrown.<br />
4. Construct server and client W<strong>in</strong>Sock applications that talk to one another us<strong>in</strong>g<br />
the TCP component.<br />
5. Build an application that automatically attaches to a given FTP site and downloads<br />
any files that you don’t already have.<br />
485<br />
13
486 Day 13
<strong>C++</strong>Builder Extensions to <strong>C++</strong><br />
Day <strong>14</strong><br />
<strong>C++</strong>Builder Extensions<br />
to <strong>C++</strong><br />
by Kent Reisdorph<br />
Week<br />
<strong>C++</strong>Builder is a powerful RAD tool. It is largely the PME (properties, methods,<br />
and events) model that gives <strong>C++</strong>Builder its power. The <strong>C++</strong> language, however,<br />
lacks some language features necessary to fully implement the PME model. In<br />
just a moment we’ll take a look at the <strong>C++</strong>Builder extensions to <strong>C++</strong>, but first<br />
I th<strong>in</strong>k it would help to talk about what brought us to this po<strong>in</strong>t.<br />
2<br />
487<br />
<strong>14</strong>
488 Day <strong>14</strong><br />
What Brought Us Here?<br />
For the past couple years, <strong>Borland</strong> <strong>C++</strong> users and <strong>C++</strong> users <strong>in</strong> general have been cry<strong>in</strong>g for<br />
a RAD tool that is based on <strong>C++</strong>. As great as <strong>Borland</strong>’s Delphi is, it is based on ObjectPascal.<br />
ObjectPascal is no less a language than <strong>C++</strong> <strong>in</strong> the hands of the average developer, but, as they<br />
say, image is everyth<strong>in</strong>g. There are many organizations (public, private, and government)<br />
that flatly refuse to use a product based on Pascal. Obviously, a <strong>C++</strong> RAD tool was needed.<br />
So <strong>Borland</strong> began work<strong>in</strong>g on a solution to the problem. It made sense to leverage both the<br />
popularity of Delphi and the exist<strong>in</strong>g Delphi IDE. After all, people were ask<strong>in</strong>g for “Delphi<br />
for <strong>C++</strong>,” so why not give them what they ask for? It was obvious that us<strong>in</strong>g the Delphi IDE<br />
would present no real problem. In fact, it was an immediate solution. There was no po<strong>in</strong>t <strong>in</strong><br />
try<strong>in</strong>g to modify the <strong>Borland</strong> <strong>C++</strong> IDE (or <strong>in</strong> try<strong>in</strong>g to hybridize the Delphi and <strong>Borland</strong> <strong>C++</strong><br />
IDEs) when the Delphi IDE had most of what users were ask<strong>in</strong>g for, not to mention the fact<br />
that it was a ready-made solution. So that part was easy.<br />
The hard part came when <strong>Borland</strong> began look<strong>in</strong>g at the PME model and at how to implement<br />
it and still stay 100 percent ANSI <strong>C++</strong> compliant. This was a dilemma for <strong>Borland</strong> because<br />
<strong>Borland</strong> <strong>C++</strong> has been one of the few PC-based <strong>C++</strong> compilers that has ma<strong>in</strong>ta<strong>in</strong>ed ANSI<br />
<strong>C++</strong> compliance over the years. (Microsoft has many extensions to Visual <strong>C++</strong> that preclude<br />
it from mak<strong>in</strong>g such a claim.) It didn’t take long to come to the realization that it just couldn’t<br />
be done—there was no way to implement the PME model, as it exists <strong>in</strong> Delphi, and stay<br />
with<strong>in</strong> current <strong>C++</strong> standards. The solution was to extend <strong>C++</strong> <strong>in</strong> order to leverage the power<br />
of the PME model and the already-exist<strong>in</strong>g Visual Component Library. At that po<strong>in</strong>t the<br />
question was not How can we do this? but rather Do we dare do this?<br />
When <strong>in</strong> doubt, ask the public. <strong>Borland</strong> conducted market<strong>in</strong>g surveys <strong>in</strong> an attempt to<br />
determ<strong>in</strong>e what developers wanted. The surveys were extensive. One important question<br />
<strong>Borland</strong> wanted answered was, “What is more important to you: rapid application development<br />
or ma<strong>in</strong>ta<strong>in</strong><strong>in</strong>g <strong>C++</strong> standards?” The results of the survey <strong>in</strong>dicated that strict compliance with<br />
<strong>C++</strong> standards was not as important to many <strong>C++</strong> programmers as it once was. Apparently the<br />
overall feel<strong>in</strong>g is that RAD is more allur<strong>in</strong>g than strict adherence to <strong>C++</strong> standards. Armed with<br />
that <strong>in</strong>formation, <strong>Borland</strong> proceeded to add to the <strong>C++</strong>Builder implementation of <strong>C++</strong> those<br />
extensions that it would need <strong>in</strong> order to implement the PME model.<br />
NOTE<br />
It is important to note that there is noth<strong>in</strong>g to preclude compil<strong>in</strong>g 100<br />
percent ANSI-compliant <strong>C++</strong> code with <strong>C++</strong>Builder. The <strong>C++</strong>Builder<br />
extensions to <strong>C++</strong> are there if you need them, but that does not <strong>in</strong> any<br />
way affect <strong>C++</strong>Builder’s ability to compile standard <strong>C++</strong> code. If you<br />
want strict adherence to <strong>C++</strong> standards, you can still use <strong>C++</strong>Builder to
<strong>C++</strong>Builder Extensions to <strong>C++</strong><br />
compile your code. If, however, you want to use the RAD aspect of<br />
<strong>C++</strong>Builder, you will have to accept the extensions <strong>C++</strong>Builder makes<br />
to <strong>C++</strong>. In the long run I’m confident you will f<strong>in</strong>d the extensions<br />
someth<strong>in</strong>g you can easily live with.<br />
Language Extensions: The Great Debate<br />
Back <strong>in</strong> 1994 or so <strong>Borland</strong> began work<strong>in</strong>g on a RAD tool that they codenamed Delphi. Once<br />
it was decided that the component model architecture was the best way to implement RAD,<br />
it was then necessary to settle on the programm<strong>in</strong>g language that would be the heart of the<br />
system. At that time <strong>Borland</strong> was the only compiler vendor mass market<strong>in</strong>g a Pascal compiler.<br />
They were known as the company that produced the best Pascal tools. If you were a Pascal<br />
programmer, you probably used <strong>Borland</strong>’s TurboPascal <strong>in</strong> one flavor or another. <strong>Borland</strong><br />
more or less “owned” Pascal. While <strong>Borland</strong> didn’t own the Pascal language <strong>in</strong> a legal sense,<br />
they no doubt felt that because of their position <strong>in</strong> the Pascal world, they could take<br />
considerable liberties <strong>in</strong> implement<strong>in</strong>g new language features and enhancements. In addition,<br />
there was no Pascal standards committee to deal with. So <strong>Borland</strong> created Delphi.<br />
Before Delphi came <strong>in</strong>to be<strong>in</strong>g, <strong>Borland</strong> had already been modify<strong>in</strong>g the Pascal language <strong>in</strong><br />
positive ways. For <strong>in</strong>stance, <strong>Borland</strong> had already extended Pascal by creat<strong>in</strong>g a new language<br />
called ObjectPascal. It could be said that ObjectPascal is to Pascal what <strong>C++</strong> is to C.<br />
ObjectPascal added classes to Pascal, thereby hurl<strong>in</strong>g Pascal <strong>in</strong>to the world of object-oriented<br />
programm<strong>in</strong>g languages. When Delphi came along, it was easy enough to add new keywords<br />
and new language behavior to deal with the component model. Keywords such as published<br />
and property were added, as were others. This allowed <strong>Borland</strong> to fully implement the power<br />
of the component model. By modify<strong>in</strong>g the Pascal language to suit the component model,<br />
<strong>Borland</strong> was able to do RAD right. In essence, the ObjectPascal language was modified as<br />
needed when design issues came up dur<strong>in</strong>g the development of the then-unknown product<br />
called Delphi. The result is a language that works seamlessly with the PME model (the<br />
component model).<br />
While modify<strong>in</strong>g Pascal could be considered a bold step for <strong>Borland</strong>, it was not without<br />
precedent. Previously Microsoft had taken the BASIC language and modified it to produce<br />
a new language called Visual Basic. This new language was nearly unrecognizable when<br />
compared to the BASIC language that served as its base. While it could be said that Microsoft<br />
took a risk <strong>in</strong> modify<strong>in</strong>g BASIC to create Visual Basic, Microsoft is after all Microsoft, and<br />
they could afford to take the risk. The BASIC language was not be<strong>in</strong>g used to any great degree<br />
and so there was little or no hue and cry when Microsoft came out with Visual Basic (there<br />
was hue and cry, but it was not of the negative type). <strong>Borland</strong> took more of a risk <strong>in</strong> modify<strong>in</strong>g<br />
489<br />
<strong>14</strong>
490 Day <strong>14</strong><br />
Pascal. After all, they had a loyal base of customers that might not take k<strong>in</strong>dly to<br />
enhancements to the language they had come to know and love. Still, <strong>Borland</strong> was <strong>in</strong> a solid<br />
position <strong>in</strong> the Pascal market and went ahead with their plans. The result was the smash hit<br />
Delphi (the <strong>Borland</strong> <strong>in</strong>ternal code name stuck and became the official product name).<br />
But modify<strong>in</strong>g <strong>C++</strong> is another matter entirely. As I said at the beg<strong>in</strong>n<strong>in</strong>g of the chapter, the<br />
world had been cry<strong>in</strong>g for a RAD <strong>C++</strong> product for a long time, so it was not a question of<br />
whether such a product was needed, but more a question of how to go about it. Simply put,<br />
the component model that was so brilliantly implemented <strong>in</strong> Delphi could not be emulated<br />
<strong>in</strong> <strong>C++</strong> given the current structure of the language. Someth<strong>in</strong>g had to give.<br />
The problems associated with modify<strong>in</strong>g the <strong>C++</strong> language are many. First, there is a <strong>C++</strong><br />
standards committee. It is this committee’s job to decide what features should be <strong>in</strong> the <strong>C++</strong><br />
language and how those features should be implemented (there is no such committee for<br />
Pascal or BASIC). I could write an entire chapter on whether this system actually works, but<br />
I’ll spare you the details. Suffice it to say that simply because a <strong>C++</strong> standards committee exists<br />
means that mess<strong>in</strong>g with the <strong>C++</strong> language can be expected to be met with some criticism.<br />
On the other hand, compiler vendors all implement extensions to the <strong>C++</strong> language <strong>in</strong> some<br />
form or another. The theory is that you should be able to take an MFC program, for example,<br />
and compile it with any <strong>C++</strong> compiler. After all, that’s why there is a standard, right?<br />
Unfortunately, it doesn’t work that way. For whatever reason, MFC conta<strong>in</strong>s a fair number<br />
of nonstandard extensions to <strong>C++</strong> so you cannot, for <strong>in</strong>stance, compile MFC with the<br />
<strong>Borland</strong> compiler without some tweak<strong>in</strong>g (<strong>Borland</strong> <strong>C++</strong> 5.0 does have the ability to compile<br />
MFC programs, although <strong>Borland</strong> had to bend a lot of <strong>C++</strong> rules to allow compil<strong>in</strong>g of MFC<br />
programs). So, as you can see, it’s a less-than-perfect world <strong>in</strong> which <strong>C++</strong> operates to beg<strong>in</strong><br />
with. S<strong>in</strong>ce all <strong>C++</strong> compiler vendors extend <strong>C++</strong> <strong>in</strong> one way or another, the debate then gets<br />
to be one of degree. Company A extended <strong>C++</strong> more than did Company B, so Company A<br />
has the better <strong>C++</strong> compiler. A po<strong>in</strong>tless debate, <strong>in</strong> my op<strong>in</strong>ion.<br />
One of the other problems with extend<strong>in</strong>g the <strong>C++</strong> language is public perception. S<strong>in</strong>ce <strong>C++</strong><br />
is rumored to have a “standard” (yes, I use the word loosely), modify<strong>in</strong>g it <strong>in</strong> any way might<br />
unnerve some dyed-<strong>in</strong>-the-wool <strong>C++</strong> programmers. This is probably a better reason to tread<br />
lightly when th<strong>in</strong>k<strong>in</strong>g about <strong>C++</strong> language extensions than the standards issue. After all, those<br />
people are your customers and you better have a handle on what they th<strong>in</strong>k before you start<br />
extend<strong>in</strong>g their programm<strong>in</strong>g language of choice. As I said before, <strong>Borland</strong> conducted<br />
surveys to determ<strong>in</strong>e the public’s feel<strong>in</strong>gs on this issue. Rest assured that they did not arrive<br />
at their decision without a great deal of corporate soul search<strong>in</strong>g. The result of the surveys<br />
<strong>in</strong>dicated that many programmers would be will<strong>in</strong>g to accept language extensions to have a<br />
true RAD product for <strong>C++</strong>. To them the language debate was not as important as the prospect<br />
of <strong>in</strong>creased productivity.
<strong>C++</strong>Builder Extensions to <strong>C++</strong><br />
Another problem with extend<strong>in</strong>g <strong>C++</strong> is the actual implementation. While such an<br />
undertak<strong>in</strong>g was no doubt monumental, there is no question <strong>in</strong> my m<strong>in</strong>d that the eng<strong>in</strong>eers<br />
at <strong>Borland</strong> handled it with relative ease. <strong>Borland</strong> has some of the best m<strong>in</strong>ds <strong>in</strong> the software<br />
<strong>in</strong>dustry. Once the decision was made to extend the <strong>C++</strong> language to take advantage of the<br />
component model, I have no doubt that the <strong>Borland</strong> people got right down to bus<strong>in</strong>ess. So<br />
the bottom l<strong>in</strong>e is that <strong>Borland</strong> felt it was worth the risk to extend <strong>C++</strong> <strong>in</strong> order to fully<br />
leverage the PME model.<br />
It should be po<strong>in</strong>ted out (aga<strong>in</strong>) that the extensions to <strong>C++</strong> that exist <strong>in</strong> <strong>C++</strong>Builder are just<br />
that: extensions. They are there for you to use if you want to take advantage of rapid<br />
application development <strong>in</strong> <strong>C++</strong>. At its heart, the <strong>C++</strong>Builder compiler is a standardscompliant<br />
<strong>C++</strong> compiler, implement<strong>in</strong>g some of the latest features announced by the <strong>C++</strong><br />
standards committee. If you don’t want to use the <strong>C++</strong>Builder extensions to <strong>C++</strong>, you<br />
certa<strong>in</strong>ly don’t have to. If that is the case, however, you probably won’t use <strong>C++</strong>Builder very<br />
much (and you probably wouldn’t be read<strong>in</strong>g this book!).<br />
New <strong>C++</strong> Keywords <strong>in</strong> <strong>C++</strong>Builder<br />
So <strong>C++</strong>Builder does, <strong>in</strong> fact, extend the <strong>C++</strong> language <strong>in</strong> order to ga<strong>in</strong> the most from the<br />
component model. In order to implement the new language extensions, <strong>C++</strong>Builder<br />
<strong>in</strong>troduces several new keywords. The new keywords are<br />
__automated<br />
__classid<br />
__closure<br />
__declspec (modified)<br />
__<strong>in</strong>t8<br />
__<strong>in</strong>t16<br />
__<strong>in</strong>t32<br />
__<strong>in</strong>t64<br />
__property<br />
__published<br />
Of these new keywords the most obvious, and probably the most important, are the<br />
__closure, __property, and __published keywords. Let’s take a look at all the new keywords<br />
<strong>in</strong>dividually.<br />
__automated<br />
The __automated keyword is similar to the public keyword except that the compiler generates<br />
automation-type <strong>in</strong>formation for functions and data members declared <strong>in</strong> the __automated<br />
section of the class declaration. This is needed when the class is used as an OLE automation<br />
server. This is an advanced topic and is not covered <strong>in</strong> detail here.<br />
491<br />
<strong>14</strong>
492 Day <strong>14</strong><br />
__classid<br />
The __classid keyword generates a po<strong>in</strong>ter to a class’s virtual function table (vtable).<br />
__classid is for <strong>C++</strong>Builder’s <strong>in</strong>ternal use and it is not recommended that you use this<br />
keyword <strong>in</strong> your applications.<br />
__closure<br />
A closure is a special type of function po<strong>in</strong>ter. A regular function po<strong>in</strong>ter is a 4-byte value that<br />
po<strong>in</strong>ts to a function with<strong>in</strong> the program’s code segment. A closure, on the other hand, is an<br />
8-byte value that conta<strong>in</strong>s not only the function address (<strong>in</strong> the first 4 bytes), but also the<br />
address of the specific object <strong>in</strong> which the function resides (<strong>in</strong> the last 4 bytes). This type of<br />
function po<strong>in</strong>ter is vital to the way <strong>C++</strong>Builder programs operate. In Pascal this is termed a<br />
method po<strong>in</strong>ter. A closure is the mechanism that allows you, at design time or runtime, to<br />
assign an event handler <strong>in</strong> one class (<strong>in</strong> your ma<strong>in</strong> form’s class, for <strong>in</strong>stance) with an event<br />
that occurs <strong>in</strong> another class (such as <strong>in</strong> a menu class or a button class). While this is very<br />
common <strong>in</strong> <strong>C++</strong>Builder programm<strong>in</strong>g, it might come as a surprise to learn that the <strong>C++</strong><br />
language does not <strong>in</strong>herently have this ability. The __closure keyword extends <strong>C++</strong> to allow<br />
events and event handlers to work as they do.<br />
A closure, then, is used with events. An event is a property that uses a function po<strong>in</strong>ter as its<br />
data type. So an event is a closure. You can declare a closure just as you do a regular function<br />
po<strong>in</strong>ter, only with the addition of the __closure keyword:<br />
void __fastcall (__closure *TMyEvent)(System::TObject *Sender);<br />
You will generally only use the __closure keyword when writ<strong>in</strong>g events for components.<br />
While your day-to-day use of <strong>C++</strong>Builder will rarely make direct use of the __closure<br />
keyword, you will still use closures heavily whether you realize it or not. Closures are<br />
someth<strong>in</strong>g that should, <strong>in</strong> my op<strong>in</strong>ion, be <strong>in</strong> the <strong>C++</strong> language standard.<br />
__declspec<br />
The __declspec keyword is not new to <strong>Borland</strong> <strong>C++</strong> compilers, but it has been extended for<br />
use <strong>in</strong> <strong>C++</strong>Builder. The delphiclass and delphireturn arguments are new to <strong>C++</strong>Builder.<br />
You use __delcspec(delphiclass) any time you forward declare a class derived from TObject<br />
(whether derived directly or <strong>in</strong>directly). You use __delcspec(delphireturn) any time you make<br />
a forward declaration of a class derived from Currency, AnsiStr<strong>in</strong>g, Variant, TDateTime, or Set.
<strong>C++</strong>Builder Extensions to <strong>C++</strong><br />
__<strong>in</strong>t8, __<strong>in</strong>t16, __<strong>in</strong>t32, and __<strong>in</strong>t64<br />
The new <strong>in</strong>teger keywords allow you to specify the size of an <strong>in</strong>teger variable: either 8, 16,<br />
32, or 64 bits. In 32-bit W<strong>in</strong>dows a regular <strong>in</strong>t will be 32 bits <strong>in</strong> size (as will a long). By us<strong>in</strong>g<br />
one of these new keywords you can specify the size of the variable you want. If, for <strong>in</strong>stance,<br />
you only need an <strong>in</strong>teger value between 0 and 255, you could use the __<strong>in</strong>t8 keyword as<br />
follows:<br />
__<strong>in</strong>t8 x = GetResult();<br />
As with the standard <strong>in</strong>t keyword, all <strong>in</strong>tegers declared with the new keywords are signed.<br />
To make a variable unsigned, precede the <strong>in</strong>teger keyword with the unsigned keyword. For<br />
example, to create a 16-bit unsigned <strong>in</strong>teger you would use this:<br />
unsigned __<strong>in</strong>t16 left = Ma<strong>in</strong>Form->Left;<br />
Use the new <strong>in</strong>teger keywords any time you need an <strong>in</strong>teger variable to be a specific size.<br />
__property<br />
The __property keyword is used to declare a property <strong>in</strong> a class declaration. It is easy to<br />
confuse a property with a regular class data member, but a property has several features that<br />
dist<strong>in</strong>guish it from a class data member:<br />
■ The ability to associate a read method with the property<br />
■ The ability to associate a write method with the property<br />
■ The ability to set a default value for the property<br />
■ The ability to store itself <strong>in</strong> the form file<br />
■ The ability to extend a property declared <strong>in</strong> a base class<br />
Read and Write Methods<br />
Writ<strong>in</strong>g to a property often causes someth<strong>in</strong>g to happen with<strong>in</strong> the component to which the<br />
property belongs. For example, chang<strong>in</strong>g the Color property of a component causes the<br />
background color of the component to be changed immediately without further action from<br />
the user. Side effects such as this are implemented through the read and write methods<br />
associated with a property. Take the Color property example, for <strong>in</strong>stance. A Color property<br />
might be declared like this:<br />
__property <strong>in</strong>t Color { read=GetColor, write=SetColor };<br />
493<br />
<strong>14</strong>
494 Day <strong>14</strong><br />
This declaration tells the compiler to call the GetColor() method of the class (the read<br />
method) when the Color property is read, and to call the SetColor() method of the class (the<br />
write method) when the Color property is written to. The exact implementation of the<br />
GetColor() and SetColor() methods is entirely up to the component writer.<br />
Properties can use direct access rather than read or write methods. A property almost always<br />
has a private class data member that is used to store the actual value of the property. It is<br />
common to use a write method to effect some change <strong>in</strong> the component when the property<br />
is written to, but no such method when the property is read. In that case you would specify<br />
a write method for the property but use direct access to read the property directly from the<br />
class data member that holds the property’s value. In that case the property’s declaration<br />
would look someth<strong>in</strong>g like this:<br />
__property <strong>in</strong>t Color { read=FColor, write=SetColor };<br />
Now when the property is written to, the SetColor() method is called as before, but when<br />
the property is read, the value of the FColor variable is returned rather than a read method<br />
be<strong>in</strong>g called. (The FColor variable would have been declared <strong>in</strong> the private section of the<br />
component’s class declaration.)<br />
A property need not declare either a read or write specifier. If no write specifier is <strong>in</strong>cluded,<br />
the property will be a read-only property (a valuable option at times). If no read specifier is<br />
<strong>in</strong>cluded, the property will be a write-only property (of dubious value). If neither a read nor<br />
a write specifier are <strong>in</strong>cluded, the property can neither be read nor written to, mak<strong>in</strong>g it a<br />
worthless property.<br />
Default Values<br />
Properties can specify the default value that the property should have when it is displayed <strong>in</strong><br />
the Object Inspector. For <strong>in</strong>stance, let’s say that your Color property should default to white<br />
(clWhite). In that case, the declaration of the property would look like this:<br />
__property <strong>in</strong>t Color { read=FColor, write=SetColor, default=clWhite };<br />
This tells the Form Designer to display the default value clWhite <strong>in</strong> the Object Inspector next<br />
to the property. Note that this does not automatically set the underly<strong>in</strong>g data member’s value<br />
to clWhite. You must still set the underly<strong>in</strong>g data member to the value clWhite <strong>in</strong> the<br />
component’s constructor. The use of the default specifier is optional. If you do not specify<br />
a default value, 0 will be used (or false <strong>in</strong> the case of bool properties) as the default value.<br />
Stor<strong>in</strong>g the Property<br />
The stored specifier controls how a property is stored <strong>in</strong> a form’s form file. Stor<strong>in</strong>g the<br />
property refers to stor<strong>in</strong>g the property’s value <strong>in</strong> the form file when the project is saved. The
<strong>C++</strong>Builder Extensions to <strong>C++</strong><br />
value is loaded aga<strong>in</strong> from the form file when the form is loaded <strong>in</strong> the Form Designer, or<br />
when the form is displayed <strong>in</strong> the application. By default all properties <strong>in</strong> the __published<br />
section of the class declaration will be stored automatically. Properties that are conta<strong>in</strong>ed <strong>in</strong><br />
the public section of a component’s class declaration are not automatically stored. To<br />
specifically store a property, you set the stored property to true:<br />
__property <strong>in</strong>t Value { read=FValue, write=SetValue, stored=true };<br />
As I said, all properties <strong>in</strong> the __published section of the class declaration will be stored<br />
automatically. This is almost always what you want, so you may never have to use the stored<br />
specifier for your published properties. But if, for some reason, you want to specifically<br />
preclude a property from be<strong>in</strong>g stored, you can specify a value of false for the stored<br />
specifier:<br />
__property <strong>in</strong>t Value { read=FValue, write=SetValue, stored=false };<br />
Most of the time you can allow <strong>C++</strong>Builder to use the default storage action for your<br />
properties.<br />
Extend<strong>in</strong>g Base Class Properties<br />
It is common to extend a property that is provided <strong>in</strong> the base class of the component you<br />
have created. One of the most common reasons to do so is to change the default value of the<br />
property. For <strong>in</strong>stance, let’s say you had derived a new component from the TLabel<br />
component and that this new component needed to have its text centered. In that case you<br />
could redeclare the Alignment property as follows:<br />
__property Alignment = { default=taCenter };<br />
When your new component is placed on a form <strong>in</strong> the Form Designer, the Alignment<br />
property will now default to taCenter. Note that you only need to add whatever specifiers<br />
are needed to change the property. In this example the default specifier is the only one that<br />
is changed, so it is the only one listed.<br />
Another common need is to override the default behavior of a component when a particular<br />
property is written to. In that case you could redeclare the property and just change the write<br />
specifier:<br />
__property Alignment = { write=MyWriteAlignment };<br />
When you redeclare a published property, be sure that you place the redeclaration <strong>in</strong> the<br />
__published section of the class declaration.<br />
495<br />
<strong>14</strong>
496 Day <strong>14</strong><br />
__published<br />
The __published keyword is used when you want a property to be displayed <strong>in</strong> the Object<br />
Inspector at design time. This keyword is used <strong>in</strong> a class declaration just like the public,<br />
private, and protected keywords are used. For example, a typical class declaration for a<br />
<strong>C++</strong>Builder component might look like this:<br />
class TFlash<strong>in</strong>gLabel : public TCustomLabel<br />
{<br />
private:<br />
//<br />
// Private data members and functions here.<br />
//<br />
protected:<br />
//<br />
// Protected data members and functions here.<br />
//<br />
public:<br />
//<br />
// Public data members and functions here.<br />
//<br />
__published:<br />
//<br />
// The component’s published properties here.<br />
//<br />
__property <strong>in</strong>t FlashLimit = {read=FFlashLimit, write=FFlashLimit, default=0};<br />
// more property declarations<br />
};<br />
Any properties <strong>in</strong> the __published section will be displayed <strong>in</strong> the Object Inspector at design<br />
time. Although the implementation of the __published keyword is trivial, this keyword is one<br />
of the major keywords from the standpo<strong>in</strong>t of <strong>C++</strong>Builder extensions to the <strong>C++</strong> language.<br />
Summary<br />
Programm<strong>in</strong>g languages evolve based on many factors. One of the most viable reasons for a<br />
language to evolve is because programmers require a language feature not found <strong>in</strong> the current<br />
<strong>in</strong>carnation of that language. That’s the way it should be: Ask and ye shall receive—or at least<br />
have a chance of receiv<strong>in</strong>g at some po<strong>in</strong>t <strong>in</strong> the future. Programm<strong>in</strong>g languages are rarely<br />
static. They are almost always chang<strong>in</strong>g to some degree or another. Changes to a language<br />
frequently challenge the comfort level of many of the users of that language. While I don’t<br />
promote change just for the sake of change, I am certa<strong>in</strong>ly open to language extensions when<br />
they make sense.<br />
The fact is that <strong>Borland</strong> decided to add extensions to the <strong>C++</strong> language. Those extensions give<br />
<strong>C++</strong>Builder much of its power. It is po<strong>in</strong>tless to debate the language extensions. You can<br />
either use <strong>C++</strong>Builder with all its power and accept the extensions to the <strong>C++</strong> language, or
<strong>C++</strong>Builder Extensions to <strong>C++</strong><br />
you can stick with standard <strong>C++</strong> and write W<strong>in</strong>dows programs the hard way. The decision<br />
is yours to make. I’m fairly confident that if you are still read<strong>in</strong>g this book at this po<strong>in</strong>t, you<br />
have decided that the RAD that <strong>C++</strong>Builder provides outweighs the perceived problem of<br />
<strong>Borland</strong>’s extensions to <strong>C++</strong>. So if you are an exist<strong>in</strong>g <strong>C++</strong> programmer, you may have to<br />
ponder the ramifications of language extensions and decide whether you can live with them.<br />
If you are new to <strong>C++</strong>, you probably don’t understand what the fuss is all about. Whichever<br />
camp you are from, you can almost certa<strong>in</strong>ly be more productive if you use the power that<br />
<strong>C++</strong>Builder offers. That power comes at a price, but I th<strong>in</strong>k that the price is a very small one.<br />
Workshop<br />
The Workshop conta<strong>in</strong>s quiz questions to help you solidify your understand<strong>in</strong>g of the<br />
material covered and exercises to provide you with experience <strong>in</strong> us<strong>in</strong>g what you have learned.<br />
You can f<strong>in</strong>d answers to the questions <strong>in</strong> Appendix A, “Answers to Quiz Questions.”<br />
Q&A<br />
Quiz<br />
Q I really like <strong>C++</strong>Builder, but I don’t know if I like the language extensions.<br />
What are my choices?<br />
A Your choices are fairly simple: Either use <strong>C++</strong>Builder and learn to accept the<br />
language extensions or don’t use <strong>C++</strong>Builder and give up RAD.<br />
Q Is the practice of extend<strong>in</strong>g <strong>C++</strong> common?<br />
A To a degree, yes, but generally not on the scale of the extensions that <strong>C++</strong>Builder<br />
<strong>in</strong>troduces. The <strong>C++</strong>Builder extensions are fairly significant.<br />
Q The <strong>C++</strong> extensions <strong>in</strong> <strong>C++</strong>Builder make <strong>C++</strong>Builder a nonstandard <strong>C++</strong><br />
compiler, right?<br />
A Wrong. The extensions do not prevent <strong>C++</strong>Builder from be<strong>in</strong>g an otherwise<br />
standard <strong>C++</strong> compiler. <strong>C++</strong>Builder is a standard <strong>C++</strong> compiler plus it gives you<br />
RAD through language extensions.<br />
1. What is the name of the keyword that is used to declare a property?<br />
2. Is an event a closure?<br />
3. What does the __published keyword do?<br />
4. Is the declspec keyword new to <strong>C++</strong>Builder?<br />
497<br />
<strong>14</strong>
498 Day <strong>14</strong><br />
Exercises<br />
1. Write a short paragraph on whether you th<strong>in</strong>k <strong>C++</strong> language extensions are<br />
acceptable to ga<strong>in</strong> RAD <strong>in</strong> W<strong>in</strong>dows programm<strong>in</strong>g.<br />
2. Search the various onl<strong>in</strong>e source for a copy of the <strong>C++</strong> standard draft. Read<br />
portions of the draft to ga<strong>in</strong> a better understand<strong>in</strong>g of what is <strong>in</strong>volved <strong>in</strong> ma<strong>in</strong>ta<strong>in</strong><strong>in</strong>g<br />
a language like <strong>C++</strong>.<br />
3. Extra Credit: Write a component that uses a published property.
In Review<br />
In Review<br />
WEEK<br />
2<br />
Wow, that was <strong>in</strong>tense, wasn’t it? But did you enjoy yourself? Are you<br />
start<strong>in</strong>g to get the fever? By now I’ll bet the wheels are really turn<strong>in</strong>g <strong>in</strong><br />
your head! Likely, you have already envisioned an application or two of<br />
your own. Maybe you have even begun work on an application. I hope<br />
you have, because, as I have said many times, that is where you really<br />
learn. If you haven’t yet developed an idea for an application, don’t<br />
worry about it. It will come to you <strong>in</strong> good time.<br />
This week <strong>in</strong>cluded a mixture of material. Early <strong>in</strong> the week you found<br />
out the basics of build<strong>in</strong>g a <strong>C++</strong>Builder application. You can drop<br />
components on a form all you want, but someday you have to get <strong>in</strong>to<br />
writ<strong>in</strong>g code. It can be a little daunt<strong>in</strong>g to branch out on your own.<br />
<strong>C++</strong>Builder has sort of taken you by the hand up to this po<strong>in</strong>t. But now<br />
it’s time to leave the nest. You found out how to add your own functions<br />
and data members to your code. You found out how to add resources<br />
499<br />
8<br />
9<br />
10<br />
11<br />
12<br />
13<br />
<strong>14</strong>
500 Week 2<br />
such as bitmaps and sounds to your programs. This is good stuff! Before long you’ll be do<strong>in</strong>g<br />
all these th<strong>in</strong>gs on your own like a pro.<br />
This week’s less-than-excit<strong>in</strong>g material deals with more on <strong>C++</strong>Builder projects and how to<br />
use the debugger. Those chapters might not be flashy, but they conta<strong>in</strong> vital <strong>in</strong>formation that<br />
you need when develop<strong>in</strong>g applications. It’s all about maximiz<strong>in</strong>g your time. Learn<strong>in</strong>g how<br />
to use the debugger takes a few hours or even a few days, but it will save you weeks of work<br />
<strong>in</strong> the long run. Trust me! If you know how to use the debugger, you can really get <strong>in</strong> there<br />
and f<strong>in</strong>d out what is go<strong>in</strong>g wrong when you encounter a bug <strong>in</strong> your program. If you don’t<br />
have a good handle on the debugger, I urge you to go back and review Day 11. As I said, the<br />
debugger is not the most thrill<strong>in</strong>g th<strong>in</strong>g you will learn about <strong>in</strong> this book, but it will certa<strong>in</strong>ly<br />
be one of the most valuable. Learn<strong>in</strong>g how to effectively use your projects falls <strong>in</strong>to this same<br />
category. Proper project management will save you time <strong>in</strong> the long run, too.<br />
You ended the week with a look <strong>in</strong>to database programm<strong>in</strong>g with <strong>C++</strong>Builder. Whether you<br />
found that discussion excit<strong>in</strong>g or bor<strong>in</strong>g depends to a large degree on what you plan to use<br />
<strong>C++</strong>Builder for. If you are go<strong>in</strong>g to be us<strong>in</strong>g <strong>C++</strong>Builder for database programm<strong>in</strong>g, you<br />
probably found it pretty <strong>in</strong>terest<strong>in</strong>g. Database programm<strong>in</strong>g is never simple, but <strong>C++</strong>Builder<br />
makes it fairly pa<strong>in</strong>less. With the knowledge that you ga<strong>in</strong>ed through the database chapters,x<br />
you should be well on your way to database programm<strong>in</strong>g with <strong>C++</strong>Builder.
Answers to Quiz Questions<br />
APPENDIX<br />
A<br />
Answers to Quiz<br />
Questions<br />
501<br />
A
502 Appendix A<br />
Day 1<br />
1. There is no ma<strong>in</strong>() function. Every program must have a ma<strong>in</strong>() function.<br />
2. One. A function can have many parameters but can only return one value.<br />
3. The strcpy() function copies the contents of one str<strong>in</strong>g to another.<br />
4. You never know. A variable will conta<strong>in</strong> random data until it is <strong>in</strong>itialized.<br />
5. There is no limit to the number of functions a program can have.<br />
6. Yes.<br />
7. There is no function declaration for the doSometh<strong>in</strong>g() function.<br />
8. One.<br />
9. 19 characters plus the term<strong>in</strong>at<strong>in</strong>g NULL.<br />
10. Zero.<br />
Day 2<br />
1. The statement immediately follow<strong>in</strong>g the if statement. If a code block follows an<br />
if statement, the entire code block will be executed.<br />
2. The first parameter is the start<strong>in</strong>g value, the second parameter is the test expression,<br />
and the f<strong>in</strong>al parameter is the <strong>in</strong>crement parameter.<br />
3. A while loop checks the conditional expression at the beg<strong>in</strong>n<strong>in</strong>g of the loop. A<br />
do-while loop checks the conditional expression at the end of the loop.<br />
4. The break statement is used to break out of a loop. The statement follow<strong>in</strong>g the<br />
loop will be executed follow<strong>in</strong>g a break statement. The cont<strong>in</strong>ue statement forces<br />
program execution back to the top of the loop.<br />
5. A global variable is one that is <strong>in</strong> scope anywhere <strong>in</strong> the program. It can be accessed<br />
by any function <strong>in</strong> the program.<br />
6. Yes. A structure can conta<strong>in</strong> any number and type of data members.<br />
7. With the direct member operator (.). Here’s an example:<br />
record.LastName = “Noble”;<br />
8. Yes.
Day 3<br />
Day 4<br />
Answers to Quiz Questions<br />
1. A po<strong>in</strong>ter is a variable that holds the address of another variable or an object <strong>in</strong><br />
memory.<br />
2. To de-reference a po<strong>in</strong>ter means to get the value of the variable that the po<strong>in</strong>ter<br />
po<strong>in</strong>ts to and not the value of the po<strong>in</strong>ter itself (which is just a memory location).<br />
3. The memory address where the newly created object resides.<br />
4. Usually classes and structures should be passed by reference to elim<strong>in</strong>ate unnecessary<br />
overhead.<br />
5. The const keyword prevents a variable from be<strong>in</strong>g modified.<br />
6. No. Overloaded functions must vary by the type and number of parameters. These<br />
two functions vary only by return type.<br />
7. It depends on the situation. No one situation is best every time. This is a trick<br />
question.<br />
8. A class member function is a function that belongs to a class.<br />
9. The compiler will place the entire contents of the <strong>in</strong>l<strong>in</strong>e function <strong>in</strong> the compiled<br />
code each time the <strong>in</strong>l<strong>in</strong>e function is encountered <strong>in</strong> the source code. In the case of<br />
a regular function, the function exists <strong>in</strong> the compiled code only once, and the<br />
compiler places a call to the function each time the function is encountered <strong>in</strong> the<br />
source code.<br />
10. The function should use the delete[] form of operator delete:<br />
delete[] buff;<br />
1. In <strong>C++</strong> a structure is simply a class <strong>in</strong> which all data members and functions have<br />
public access by default. Aside from that, there is no difference.<br />
2. Private data members protect data from be<strong>in</strong>g modified directly by users of the<br />
class. Private data members can be modified through public member functions but<br />
not directly.<br />
3. By us<strong>in</strong>g getters and setters, which are public member functions that can be called<br />
to change the value of a private data member.<br />
4. The destructor is called when the object is destroyed. For local objects this will<br />
occur when the object goes out of scope. For dynamically allocated objects this will<br />
occur when the object is deleted.<br />
503<br />
A
504 Appendix A<br />
Day 5<br />
5. To override a function means to replace a function <strong>in</strong> the base class with a function<br />
<strong>in</strong> your derived class. The new function must have the exact same name, parameters,<br />
and return type to override the base class function.<br />
6. Call the base class function from with<strong>in</strong> the overridden function:<br />
void MyClass::DoIt()<br />
{<br />
BaseClass::DoIt();<br />
// do some other stuff<br />
}<br />
7. An <strong>in</strong>itializer list <strong>in</strong>itializes a class’s data members and calls any base class constructors<br />
prior to the body of the constructor be<strong>in</strong>g entered.<br />
8. Yes. It’s very common.<br />
9. Multiple <strong>in</strong>heritance. Derive the class from two separate base classes.<br />
1. No. Only visual components can be seen at design time.<br />
2. None is best. All have their own strengths and weaknesses.<br />
3. No. VCL objects must be allocated dynamically (us<strong>in</strong>g the new operator).<br />
4. Yes and no. For the most part they are equivalent. S<strong>in</strong>ce VCL is written <strong>in</strong> Object<br />
Pascal, there are no overloaded VCL methods.<br />
5. Yes.<br />
6. TOpenDialog, TSaveDialog, TRegistry, TColorDialog, TTimer, TImageList,<br />
TFontDialog, and many more.<br />
7. Yes. All components are ultimately derived from TComponent, so they all have the<br />
properties found <strong>in</strong> TComponent (such as Name and Owner, for <strong>in</strong>stance).<br />
8. Top, Left, Owner, Parent, Width, Height, and so on.<br />
9. Yes.<br />
10. A canvas. VCL encapsulates device contexts through the TCanvas class.<br />
Day 6<br />
1. Right-click on the toolbar and choose Properties from the toolbar speed menu.<br />
2. Drag them to the toolbar and drop them where you want them.<br />
3. Drag unwanted buttons off the bottom of the toolbar and drop them.
Answers to Quiz Questions<br />
4. Hold down the Shift key when you click on the component <strong>in</strong> the Component<br />
Palette. Each time you click on the form, a new component will be placed.<br />
5. Double-click the component’s button <strong>in</strong> the Component Palette.<br />
6. .mak, .cpp, .h, .dfm, and .res.<br />
7. Show().<br />
8. ShowModal().<br />
9. In the Object Inspector, switch to the Events page. In the value column next to the<br />
event, click the drop-down arrow button. A list of compatible event handlers is<br />
displayed. Choose one.<br />
10. Click on a component <strong>in</strong> the Form Designer and press the Tab key on the keyboard.<br />
Each time you press the Tab key, the next component on the form is<br />
selected and will be displayed <strong>in</strong> the Object Inspector.<br />
Day 7<br />
1. When select<strong>in</strong>g components that are children of another component (components<br />
on a panel, for example).<br />
2. It is the anchor component. It will reta<strong>in</strong> its position, and all other components are<br />
aligned to it.<br />
3. Drag a bound<strong>in</strong>g rectangle around (or just touch<strong>in</strong>g) them.<br />
4. Select all the components you want to modify. Then choose Edit | Size from the<br />
ma<strong>in</strong> menu and choose the Grow to Largest radio button.<br />
5. The default event handler for that component is displayed <strong>in</strong> the Code Editor. In<br />
the case of many components, the OnClick event handler will be displayed. In some<br />
special cases (like the Image component, for <strong>in</strong>stance), a dialog is displayed.<br />
6. It forces the component to fill the entire client area of its parent, regardless of how<br />
the parent (usually a form) is sized.<br />
7. Traditionally, it means that choos<strong>in</strong>g that menu item will result <strong>in</strong> a dialog box<br />
be<strong>in</strong>g displayed.<br />
8. In the Menu Designer, you can drag the menu to a new location or you can use<br />
Cut and Paste.<br />
9. When typ<strong>in</strong>g the caption for the menu item, add the ampersand (&) before the<br />
shortcut key that you want to be the shortcut for that menu item. For <strong>in</strong>stance, the<br />
Caption property for the File | Exit menu item would read E&xit.<br />
10. Set its Enabled property to False.<br />
505<br />
A
506 Appendix A<br />
Day 8<br />
Day 9<br />
1. Yes, but it’s a very bad idea.<br />
2. The Enabled property.<br />
3. Its text is grayed out.<br />
4. The long h<strong>in</strong>t is used for the status bar text, and the short h<strong>in</strong>t is used for the tool<br />
tip text.<br />
5. Invalidate(), Repa<strong>in</strong>t(), Refresh(), and Update().<br />
6. Three: simple, drop-down, and drop-down list.<br />
7. When a button with a ModalResult property set to a whole number is clicked, the<br />
form will close. The value of the ModalResult property for the button clicked will<br />
be the return value from the ShowModal() method.<br />
8. The Panel component. Several others qualify, too.<br />
9. true.<br />
10. Change its Title property to Save As.<br />
1. When you want all the features of the base object and you want the <strong>in</strong>herited<br />
object to change if the base object ever changes.<br />
2. Choose Project | Add to Repository from the ma<strong>in</strong> menu or Add Project to<br />
Repository from the Project Manager speed menu.<br />
3. All the <strong>in</strong>herited forms change to reflect the change made to the base form.<br />
4. In the private or public sections. Never <strong>in</strong> the __published section (unless you<br />
know what you are do<strong>in</strong>g).<br />
5. In any source unit, but usually <strong>in</strong> the same unit as the rest of the code for that<br />
form.<br />
6. If you switch to the Details view, the author of the object is listed.<br />
7. In the Object Repository configuration dialog box (which you get by select<strong>in</strong>g<br />
Options | Repository from the ma<strong>in</strong> menu).<br />
8. By us<strong>in</strong>g the Application Expert <strong>in</strong> almost all cases.<br />
9. Add the .res file or the .rc file to the project via the Project Manager, or use the<br />
#pragma resource preprocessor directive.<br />
10. Yes, easily.
Day 10<br />
Answers to Quiz Questions<br />
1. F12.<br />
2. No. It is only removed from the project.<br />
3. On the Forms page of the Project Options dialog.<br />
4. You will have to take the responsibility of creat<strong>in</strong>g the forms before us<strong>in</strong>g them.<br />
5. It’s hard to say, but probably 32MB for W<strong>in</strong>dows 95 and 40MB for W<strong>in</strong>dows NT.<br />
6. When debug <strong>in</strong>fo is generated, you will be able to step through your code dur<strong>in</strong>g<br />
debugg<strong>in</strong>g sessions.<br />
7. In the directory where the project file resides.<br />
8. Ctrl+S.<br />
9. Set a bookmark with Ctrl+K+0 through Ctrl+K+9. There are 10 bookmarks<br />
available.<br />
10. Choose Read Only from the Code Editor speed menu.<br />
Day 11<br />
1. Click <strong>in</strong> the gutter (the left marg<strong>in</strong>) on that l<strong>in</strong>e of code. You can also press F5 or<br />
choose Toggle Breakpo<strong>in</strong>t from the Code Editor speed menu.<br />
2. A breakpo<strong>in</strong>t that is <strong>in</strong>advertently set on a source code l<strong>in</strong>e that generates no<br />
compiled code.<br />
3. Set the breakpo<strong>in</strong>t, choose View | Breakpo<strong>in</strong>ts from the ma<strong>in</strong> menu, click on the<br />
breakpo<strong>in</strong>t <strong>in</strong> the Breakpo<strong>in</strong>t List w<strong>in</strong>dow, and then choose Properties from the<br />
Breakpo<strong>in</strong>t List speed menu. Set the condition <strong>in</strong> the Condition field of the Edit<br />
Breakpo<strong>in</strong>t dialog.<br />
4. Double-click the watch <strong>in</strong> the Watch List w<strong>in</strong>dow. The Watch Properties dialog is<br />
displayed. Modify the properties as needed.<br />
5. Click on the variable and type Ctrl+F5 (or choose Add Watch at Cursor from the<br />
Code Editor speed menu).<br />
6. The Debug Inspector.<br />
7. F7.<br />
8. Click on the variable and then choose Evaluate/Modify from the Code Editor<br />
speed menu. Change the value <strong>in</strong> the Evaluate/Modify dialog.<br />
9. TRACE unconditionally displays a message. WARN displays the message only if the<br />
provided expression evaluates to true.<br />
10. In the OutDbg1.txt file <strong>in</strong> the Code Editor.<br />
507<br />
A
508 Appendix A<br />
Day 12<br />
1. Multithreaded database applications.<br />
2. Additional controls (for example, transaction isolation levels, transaction control<br />
statements, and greater flexibility when chang<strong>in</strong>g back ends).<br />
3. For local tables, the SQL must<br />
■ Use Local SQL syntax only.<br />
■ Involve only one table.<br />
■ Not have an ORDER BY clause.<br />
■ Not conta<strong>in</strong> aggregate functions.<br />
■ Not conta<strong>in</strong> calculated fields.<br />
■ Use a WHERE clause <strong>in</strong>volv<strong>in</strong>g comparisons of column names to scalar constants<br />
only. Operators supported <strong>in</strong>clude LIKE, >, =, and
Symbols<br />
& (ampersands), 246<br />
© (copyright symbols), 191<br />
~ (tildes), 170<br />
A<br />
abstract base classes, 287<br />
accelerator keys, 246<br />
access levels (classes), 97-98<br />
access methods (VCL<br />
components), <strong>14</strong>1<br />
access specifiers (VCL<br />
components), <strong>14</strong>2<br />
Access Violation errors, see<br />
GPFs<br />
ActiveControl property<br />
(TForm class), 194<br />
INDEX<br />
I<br />
ActiveMDIChild property<br />
(TForm class), 196<br />
Add Breakpo<strong>in</strong>t command<br />
(Run menu), 396<br />
Add File command (Project<br />
Manager speed menu), 359<br />
Add Project to Repository<br />
command (Project Manager<br />
speed menu), 359<br />
Add To Project dialog box, 356<br />
Add to Repository (Form<br />
Designer’s speed menu), 218<br />
Add To Repository dialog box,<br />
324<br />
Add Unit button (Project<br />
Manager speedbar), 356-357<br />
Add Watch at Cursor<br />
command (Code Editor speed<br />
menu), 395<br />
509<br />
Add Watch command (Run<br />
menu), 396, 405<br />
add<strong>in</strong>g<br />
data members, 340<br />
files to projects (Project<br />
Manager), 356-357<br />
functions, 339-340<br />
tabs (Object Repository), 328<br />
address-of operator (&), 72<br />
AIRPLANE.CPP list<strong>in</strong>g,<br />
110-113<br />
AIRPLANE.H list<strong>in</strong>g, 109-110<br />
AIRPORT.CPP list<strong>in</strong>g,<br />
113-115<br />
aliases, BDE, 429<br />
Align command<br />
Edit menu, 237<br />
Form Designer’s speed menu,<br />
218<br />
Align property (components),<br />
238, 275
510<br />
Align to Grid command<br />
Align to Grid command<br />
Edit menu, 227<br />
Form Designer’s speed menu,<br />
218<br />
align<strong>in</strong>g components (Form<br />
Designer), <strong>14</strong>8, 232-239<br />
Alignment dialog box, 237<br />
Alignment Palette (Form<br />
Designer), 233-237<br />
speed menu, 237<br />
Stay on Top item, 262<br />
Alignment Palette command<br />
(View menu), <strong>14</strong>8, 233<br />
AllowAllUp property<br />
(SpeedButton component),<br />
303<br />
ampersands (&), 246<br />
ANSI compliance, 488<br />
Application Expert, creat<strong>in</strong>g<br />
applications, 331, 334-335<br />
File dialog filters, 332<br />
menus, 332<br />
speedbars, 333-334<br />
Application object<br />
H<strong>in</strong>t property, 338<br />
ShowH<strong>in</strong>t property, 338<br />
Application tab (Project<br />
Options dialog box), 365-366<br />
Application Target section<br />
(L<strong>in</strong>ker tab, Project Options<br />
dialog box), 372<br />
Application Type section<br />
(L<strong>in</strong>ker tab, Project Options<br />
dialog box), 372<br />
applications<br />
console, 185<br />
creat<strong>in</strong>g, Application Expert,<br />
331-335<br />
error check<strong>in</strong>g, 215<br />
MDI example, 204-212<br />
MFC, 185<br />
multiple-form, 180-182<br />
OWL, 185<br />
term<strong>in</strong>at<strong>in</strong>g (GPFs), 422<br />
architecture (databases),<br />
430-433<br />
ARGSTEST.CPP list<strong>in</strong>g, 27<br />
ArrangeIcons( ) method, 198<br />
arrays, 28-35<br />
character, 30-32<br />
rules, 30<br />
str<strong>in</strong>gs, 35<br />
structures, 58<br />
ASCII characters, <strong>in</strong>sert<strong>in</strong>g,<br />
191<br />
assignment operator (=), 42<br />
atoi( ) function, 62<br />
__automated keyword, 491<br />
Automatic Register Variables<br />
option (<strong>C++</strong> tab, Project<br />
Options dialog box), 368-369<br />
AutoScroll property (TForm<br />
class), 194, 227<br />
AutoSelect property (edit<br />
controls), 289<br />
AutoSize property<br />
edit controls, 289<br />
Label component, 306<br />
B<br />
Babet, Bruneau, 137<br />
base classes, 117<br />
properties, extend<strong>in</strong>g, 495<br />
BDE (<strong>Borland</strong> Database<br />
Eng<strong>in</strong>e), 428-429<br />
b<strong>in</strong>ary mode files (file I/O),<br />
128<br />
b<strong>in</strong>d<strong>in</strong>g resources, 343<br />
BitBtn component, 299-302<br />
Glyph property, 300-301<br />
K<strong>in</strong>d property, 301<br />
Layout property, 301<br />
Marg<strong>in</strong> property, 302<br />
NumGlyphs property, 302<br />
Spac<strong>in</strong>g property, 302<br />
Bitmap Test Program example,<br />
161-162<br />
blank space, 13<br />
Bof property<br />
TQuery component, 456<br />
TTable component, 447<br />
bookmarks (Code Editor),<br />
380-381<br />
bool data type, 18<br />
BorderStyle property<br />
components, 281<br />
TForm class, 194<br />
<strong>Borland</strong> Database Eng<strong>in</strong>e, see<br />
BDE<br />
<strong>Borland</strong>’s Object W<strong>in</strong>dows<br />
Library, see OWL<br />
bound<strong>in</strong>g rectangle, 224<br />
braces<br />
clos<strong>in</strong>g (}), 10<br />
f<strong>in</strong>d<strong>in</strong>g, 43<br />
match<strong>in</strong>g (Code Editor),<br />
382<br />
open<strong>in</strong>g ({), 10<br />
break keyword (loops), 50-52<br />
switch statements, 52<br />
Breakpo<strong>in</strong>t list w<strong>in</strong>dow,<br />
398-399<br />
breakpo<strong>in</strong>ts, 396-402<br />
conditional, 401-402<br />
delet<strong>in</strong>g, 397<br />
<strong>in</strong>valid, 397<br />
modify<strong>in</strong>g, 400<br />
sett<strong>in</strong>g, 397<br />
simple, 400<br />
Breakpo<strong>in</strong>ts command (View<br />
menu), 398<br />
Br<strong>in</strong>gToFront( ) method,<br />
197-198<br />
Broadcast method<br />
(components), 282<br />
browsers, build<strong>in</strong>g, 475-479<br />
attach<strong>in</strong>g code, 478-479<br />
Build All option, 184<br />
Button component, 299<br />
buttons (components), 296<br />
BitBtn, 299-302<br />
Glyph property, 300-301<br />
K<strong>in</strong>d property, 301<br />
Layout property, 301<br />
Marg<strong>in</strong> property, 302<br />
NumGlyphs property,<br />
302<br />
Spac<strong>in</strong>g property, 302<br />
Button, 299<br />
Cancel property, 298-299<br />
CheckBox, 304-305<br />
Default property, 298<br />
Enabled property, 299<br />
ModalResult property,<br />
296-297<br />
RadioButton, 304-305<br />
SpeedButton, 302-304<br />
AllowAllUp property, 303<br />
Down property, 304<br />
GroupIndex property,<br />
303
C<br />
C (programm<strong>in</strong>g language),<br />
132<br />
C code to load and display a<br />
bitmap list<strong>in</strong>g, 132-133<br />
<strong>C++</strong><br />
ANSI compliance, 488<br />
draft, 54<br />
history, 15<br />
language extensions, 490-491<br />
standards, 488<br />
<strong>C++</strong> tab (Project Options<br />
dialog box)<br />
Code Optimization section,<br />
367-368<br />
Compil<strong>in</strong>g section, 370<br />
Merge Duplicate Str<strong>in</strong>gs<br />
option, 370<br />
Show General Msgs<br />
option, 371<br />
Show Warn<strong>in</strong>gs option,<br />
370<br />
Stack Frames option, 370<br />
Debugg<strong>in</strong>g section, 368<br />
Automatic Register<br />
Variables option,<br />
368-369<br />
Debug Information<br />
option, 368<br />
Disable Inl<strong>in</strong>e Expansions<br />
option, 369<br />
L<strong>in</strong>e Number Information<br />
option, 368<br />
Pre-compiled Headers<br />
section, 369-370<br />
cached updates (databases),<br />
449-450, 461-462<br />
Call Stack command (View<br />
menu), 413-4<strong>14</strong><br />
call stack w<strong>in</strong>dow, 413-4<strong>14</strong><br />
Cancel property (button<br />
components), 298-299<br />
Canvas property (TForm class),<br />
196<br />
canvases, 160<br />
Caption property<br />
(components), 281<br />
Cascade( ) method, 198<br />
cast<strong>in</strong>g, 88-89<br />
center<strong>in</strong>g, <strong>14</strong>8<br />
character arrays, 30-32<br />
characters, ASCII, 191<br />
CharCase property (edit<br />
controls), 290<br />
CheckBox component,<br />
304-305<br />
c<strong>in</strong> stream, 11<br />
class member functions, 90-91<br />
classes<br />
abstract base, 287<br />
access levels, 97-98<br />
base, 117<br />
components, TStr<strong>in</strong>gs,<br />
285-287<br />
constructors, 99-101, 129<br />
data abstraction, 98, 129<br />
data members, 103-109<br />
getters/setters, 104<br />
this, 107-109<br />
declarations, 11<br />
derived, 117<br />
destructors, 102-103<br />
fstream, 122<br />
ifstream, 122<br />
<strong>in</strong>heritance, 116-121<br />
multiple, 120-121<br />
<strong>in</strong>itializer lists, 101-102<br />
iostream, 11, 122<br />
member functions, 105-107<br />
private, 106<br />
protected, 106<br />
public, 105<br />
static, 106<br />
ofstream, 122<br />
references, 102<br />
str<strong>in</strong>g, 33<br />
VCL<br />
TApplication, 157<br />
TBevel, 158<br />
TBitmap, 160<br />
TBrush, 160<br />
TCanvas, 160<br />
TComponent, 156<br />
TControl, 156<br />
TDataset, 430<br />
TDBGrid, 159<br />
TDBNavigator, 159<br />
TField, 430<br />
TFont, 160, 278-279<br />
TForm, 157<br />
TGraphicControl, 156<br />
Code Editor<br />
511<br />
TImage, 158<br />
TIniFile, 161<br />
TMa<strong>in</strong>Menu, 158<br />
TMediaPlayer, 159-160<br />
TMemo, 253<br />
TObject, 156<br />
TPanel, 158<br />
TPersistent, 156<br />
TPo<strong>in</strong>t, 161<br />
TRect, 161<br />
TSpeedButton, 158<br />
TStr<strong>in</strong>gList, 161<br />
TStr<strong>in</strong>gs, 161<br />
TTable, 159<br />
TTimer, 159<br />
TW<strong>in</strong>Control, 156<br />
vs. structures, 97<br />
__classid keyword, 492<br />
ClientHeight property (TForm<br />
class), 195<br />
ClientRect property (TForm<br />
class), 196<br />
ClientToScreen method<br />
(components), 282<br />
ClientWidth property (TForm<br />
class), 195<br />
Close Page command (Code<br />
Editor speed menu), 383<br />
Close( ) method, 198<br />
CloseQuery( ) method, 198<br />
clos<strong>in</strong>g Object Inspector, 9<br />
__closure keyword, 492<br />
code<br />
<strong>C++</strong>Builder-generated,<br />
delet<strong>in</strong>g, 340-341<br />
creat<strong>in</strong>g menus, 253-254<br />
Code Editor, 6, 375-376<br />
access<strong>in</strong>g (Menu Designer),<br />
252<br />
bookmarks, 380-381<br />
files<br />
open<strong>in</strong>g, 376-377<br />
sav<strong>in</strong>g, 377<br />
F<strong>in</strong>d/Replace commands,<br />
378-380<br />
f<strong>in</strong>d<strong>in</strong>g match<strong>in</strong>g braces, 382<br />
gutter, 376<br />
help, 380<br />
highlight<strong>in</strong>g text, 377-378<br />
<strong>in</strong>cremental searches, 382
512<br />
Code Editor<br />
speed menu commands,<br />
383-384<br />
Add Watch at Cursor<br />
(Ctrl+F5), 395<br />
Evaluate/Modify, 395,<br />
412-413<br />
Go To Address, 395, 415<br />
Inspect (Alt+F5), 395,<br />
408<br />
Run to Cursor, 394, 402<br />
Toggle Breakpo<strong>in</strong>t (F5),<br />
394<br />
undo<strong>in</strong>g, 378<br />
Code Optimization section<br />
(<strong>C++</strong> tab, Project Options<br />
dialog box), 367-368<br />
Color dialog boxes, 275, 312<br />
Color property (components),<br />
275-276<br />
Colors tab (Environment<br />
Options dialog box), 387-388<br />
columns (databases), 428<br />
Columns property (ListBox<br />
component), 294<br />
ComboBox component,<br />
292-296<br />
properties, 294-296<br />
command enabl<strong>in</strong>g, 278<br />
commands<br />
Breakpo<strong>in</strong>t list primary speed<br />
menu<br />
Delete, 399<br />
Edit Source, 399<br />
Enable, 399<br />
Properties, 399<br />
View Source, 399<br />
Code Editor speed menu<br />
Add Watch at Cursor<br />
(Ctrl+F5), 395<br />
Evaluate/Modify, 395,<br />
412-413<br />
Go To Address, 395, 415<br />
Inspect (Alt+F5), 395,<br />
408<br />
Run to Cursor, 394, 402<br />
Toggle Breakpo<strong>in</strong>t (F5),<br />
394<br />
Edit menu<br />
Align, 237<br />
Align to Grid, 227<br />
Copy, 228<br />
Cut, 229<br />
Lock Controls, 228<br />
Paste, 228<br />
Scale, 232<br />
Select All, 222<br />
Send to Back, 229<br />
Size, 231<br />
File menu<br />
Include Unit Hdr, 182<br />
New, 318<br />
Options menu<br />
Environment, 384<br />
Project (Alt+F6), 362<br />
Repository, 326<br />
Run menu<br />
Add Breakpo<strong>in</strong>t, 396<br />
Add Watch (Ctrl+F5),<br />
396, 405<br />
Evaluate/Modify<br />
(Ctrl+F7), 396, 412-413<br />
Inspect, 396, 408<br />
Parameters, 395<br />
Program Pause, 396<br />
Program Reset (Ctrl+F2),<br />
396<br />
Reset Process (Ctrl+F2),<br />
45<br />
Run (F9), 395<br />
Run to Cursor (F4), 395,<br />
402<br />
Show Execution Po<strong>in</strong>t,<br />
396<br />
Step Over (F8), 395, 417<br />
Trace Into (F7), 395, 417<br />
Trace to Next Source L<strong>in</strong>e<br />
(Shift+F7), 395, 418<br />
Search menu<br />
F<strong>in</strong>d (Ctrl+F), 379<br />
Go To Address, 415<br />
Incremental Search<br />
(Ctrl+E), 382<br />
Replace (Ctrl+R), 379<br />
toolbar speed menu<br />
Help, 176<br />
Hide, 176<br />
Properties, 176<br />
Show H<strong>in</strong>ts, 176<br />
View menu<br />
Alignment Palette, <strong>14</strong>8,<br />
233<br />
Breakpo<strong>in</strong>ts, 398<br />
Call Stack, 413-4<strong>14</strong><br />
Component Palette, 179<br />
CPU, 415<br />
Object Inspector (F11), 9<br />
Project Manager, 354<br />
Project Source, 170<br />
Toolbar, 176<br />
Watches, 406<br />
comment l<strong>in</strong>es (//), 10<br />
compile status dialog box, 184<br />
Compile Unit option, 183<br />
compiler errors, 12<br />
compil<strong>in</strong>g, 183-184<br />
Compil<strong>in</strong>g section (<strong>C++</strong> tab,<br />
Project Options dialog box),<br />
370-371<br />
Merge Duplicate Str<strong>in</strong>gs<br />
option, 370<br />
Show General Msgs<br />
option, 371<br />
Show Warn<strong>in</strong>gs option,<br />
370<br />
Stack Frames option, 370<br />
Component Palette, 5<br />
Internet page, 474-475<br />
multiple components,<br />
177-178<br />
plac<strong>in</strong>g components, 178-179<br />
speed menu, 179<br />
Component Palette command<br />
(View menu), 179<br />
Component Selector, 200-201<br />
components, 5, 15, 139, 164<br />
align<strong>in</strong>g, 232-239<br />
buttons, 296<br />
BitBtn, 299-302<br />
Button, 299<br />
Cancel property, 298-299<br />
CheckBox, 304-305<br />
Default property, 298<br />
Enabled property, 299<br />
ModalResult property,<br />
296-297<br />
RadioButton, 304-305<br />
SpeedButton, 302-304<br />
classes, TStr<strong>in</strong>gs, 285-287<br />
ComboBox, 292-296<br />
properties, 294-296<br />
copy<strong>in</strong>g, 228<br />
cutt<strong>in</strong>g, 229<br />
dialog boxes, 307-313<br />
Color, 312<br />
Execute( ) method, 308<br />
File Open, 309-312
File Save, 309-312<br />
F<strong>in</strong>d/Replace, 313<br />
Font, 312-313<br />
Edit, 287-292<br />
properties, 289-292<br />
event handlers, 221<br />
events, 283-285<br />
FTP, 475<br />
Label, 305-306<br />
ListBox, 292-296<br />
properties, 294-296<br />
lock<strong>in</strong>g, 228<br />
Ma<strong>in</strong>Menu, 245<br />
MaskEdit, 287-292<br />
properties, 289-292<br />
Memo, 287-292<br />
properties, 289-292<br />
ScratchPad example,<br />
241-242<br />
MenuItem, 245<br />
methods, 282-283<br />
mov<strong>in</strong>g, 226-227<br />
nonvisual, 272<br />
order<strong>in</strong>g, 228-229<br />
Panel, 306-307<br />
past<strong>in</strong>g, 228<br />
plac<strong>in</strong>g, 177-179, 2<strong>14</strong>,<br />
219-220<br />
multiple, 177-178<br />
properties, 164<br />
Align, 275<br />
BorderStyle, 281<br />
Caption, 281<br />
Color, 275-276<br />
ct13D, 281<br />
Cursor, 277<br />
Enabled, 277-278<br />
Font, 278-279<br />
Height, 281<br />
HelpContext, 281<br />
H<strong>in</strong>t, 280<br />
Left, 281<br />
Name, 273-274, 3<strong>14</strong><br />
ParentColor, 280-281<br />
Parentct13D, 280-281<br />
ParentFont, 280-281<br />
ParentShowH<strong>in</strong>t,<br />
280-281<br />
PopupMenu, 281<br />
ShowH<strong>in</strong>t, 280<br />
TabOrder, 281<br />
TabStop, 281<br />
Tag, 281<br />
Top, 282<br />
Visible, 282<br />
Width, 282<br />
RichEdit, 287-292<br />
properties, 289-292<br />
ScrollBar, 306<br />
select<strong>in</strong>g, 2<strong>14</strong>, 221<br />
all, 222<br />
groups, 222-226<br />
siz<strong>in</strong>g, 220, 229-232<br />
TBatchMove, 462-464<br />
Mode property values,<br />
463<br />
properties, 462<br />
TDatabase, 437-441<br />
events, 438<br />
methods, 438<br />
properties, 437<br />
TDataSource, 430, 464-465<br />
TField, 467-471<br />
descendants, 469-470<br />
events, 468<br />
methods, 468<br />
properties, 468<br />
THTML, 475<br />
THTTP, 475<br />
TLiveQuery, 456<br />
TNTTP, 475<br />
TPOP, 475<br />
TQuery, 430, 451-457<br />
Bof/Eof properties, 456<br />
events, 454<br />
methods, 453<br />
properties, 453<br />
TSession, 434-437<br />
TSMTP, 475<br />
TStoredProc, 430, 457-462<br />
events, 459-460<br />
methods, 458-459<br />
properties, 457-458<br />
TTable, 430, 441-451<br />
Bof/Eof properties, 447<br />
events, 444-445<br />
Locate method, 448-449<br />
Lookup method, 449<br />
methods, 443-444<br />
properties, 442-443<br />
TTCP, 475<br />
TUDP, 475<br />
CPU View<br />
513<br />
TUpdateSQL, 465-467<br />
methods, 466<br />
properties, 466<br />
VCL<br />
access methods, <strong>14</strong>1<br />
access specifiers, <strong>14</strong>2<br />
events, <strong>14</strong>6-<strong>14</strong>8, 152-153<br />
methods, <strong>14</strong>5<br />
properties, <strong>14</strong>0-<strong>14</strong>4<br />
visual, 272<br />
vs. controls, 272<br />
conditional breakpo<strong>in</strong>ts,<br />
401-402<br />
Conditional Def<strong>in</strong>es field<br />
(Directories/Conditionals<br />
tab, Project Options dialog<br />
box), 374<br />
conditional expressions<br />
breakpo<strong>in</strong>ts, 401<br />
else statements, 41-44<br />
shortcuts, 43<br />
syntax, 43-44<br />
if statements, 40-44<br />
nest<strong>in</strong>g, 42, 65<br />
shortcuts, 41<br />
syntax, 43-44<br />
connections (databases),<br />
establish<strong>in</strong>g, 439<br />
console-mode applications, 9,<br />
<strong>14</strong>, 185<br />
const keyword, 80-81<br />
constants, def<strong>in</strong><strong>in</strong>g, 115-116<br />
constructors, 99-101, 129<br />
Conta<strong>in</strong>sControl method<br />
(components), 282<br />
cont<strong>in</strong>ue keyword (loops),<br />
50-51<br />
controls<br />
mov<strong>in</strong>g, 226<br />
vs. components, 272<br />
Copy command (Edit menu),<br />
228<br />
Copy option (Object<br />
Repository), 320<br />
copy<strong>in</strong>g components (Form<br />
Designer), 228<br />
copyright symbols (©), 191<br />
cout stream, 11<br />
CPP files, 171<br />
CPU command (View menu),<br />
415<br />
CPU View, 415
5<strong>14</strong><br />
ct13D property (components),<br />
281<br />
Cursor property (components),<br />
277<br />
cursors, siz<strong>in</strong>g, 230<br />
customiz<strong>in</strong>g toolbar, 176-177<br />
Cut command (Edit menu),<br />
229<br />
cutt<strong>in</strong>g components (Form<br />
Designer), 229<br />
D<br />
ct13D property (components)<br />
data abstraction, 98, 129<br />
data access controls, 429<br />
data members, 56, 103-109<br />
add<strong>in</strong>g, 336, 340<br />
getters/setters, 104<br />
this, 107-109<br />
Data Modules tab (Object<br />
Repository), 319<br />
data types, 16-19<br />
bool, 18<br />
double, 18<br />
float, 18<br />
<strong>in</strong>teger, 36<br />
signed/unsigned, 17<br />
wrapp<strong>in</strong>g, 18<br />
data-aware controls, 430<br />
databases<br />
architecture, 430-433<br />
BDE, 428-429<br />
cached updates, 449-450,<br />
461-462<br />
columns, 428<br />
components, 433<br />
connections, establish<strong>in</strong>g, 439<br />
data access controls, 429<br />
data-aware controls, 430<br />
fields, 467-471<br />
IDAPI, 428<br />
<strong>in</strong>active connections,<br />
dropp<strong>in</strong>g, 437<br />
local filter<strong>in</strong>g, 447-448<br />
ODBC drivers, 429<br />
queries, 454-457<br />
rows, 428<br />
server log<strong>in</strong> parameters, 440<br />
SQL, L<strong>in</strong>ks drivers, 429<br />
tables, 428<br />
terms list, 428-430<br />
transactions, process<strong>in</strong>g,<br />
440-441<br />
Debug Information option<br />
(<strong>C++</strong> tab, Project Options<br />
dialog box), 368<br />
Debug Inspector, 408-411<br />
speed menu, 411<br />
debugger, 393-396<br />
menu items, 394-396, 402<br />
debugg<strong>in</strong>g<br />
tips, 422-423<br />
see also debugger; stepp<strong>in</strong>g<br />
through code; Run menu<br />
commands<br />
Debugg<strong>in</strong>g section (<strong>C++</strong> tab,<br />
Project Options dialog box)<br />
Automatic Register Variables<br />
option, 368-369<br />
Debug <strong>in</strong>formation option,<br />
368<br />
Disable Inl<strong>in</strong>e Expansions<br />
option, 369<br />
L<strong>in</strong>e Number Information<br />
option, 368<br />
decimal/hexadecimal converter<br />
(Watch List), 406<br />
declarations, 11<br />
__declspec keyword, 492<br />
default parameters, 89-90<br />
Default property (button<br />
components), 298<br />
default section (switch<br />
statements), 65<br />
DefaultExt property (File<br />
Open/File Save dialog boxes),<br />
309<br />
defaults (Object Repository),<br />
sett<strong>in</strong>g, 328-329<br />
def<strong>in</strong><strong>in</strong>g constants, 115-116<br />
Delete command<br />
Breakpo<strong>in</strong>t list primary speed<br />
menu, 399<br />
Project Explorer speed menu,<br />
362<br />
delete operator, 81-85<br />
delet<strong>in</strong>g<br />
breakpo<strong>in</strong>ts, 397<br />
<strong>C++</strong>Builder-generated code,<br />
340-341<br />
deleted po<strong>in</strong>ters, 422<br />
files, 174<br />
menu items (Menu<br />
Designer), 249-250<br />
objects (Object Repository),<br />
327, 350<br />
tabs (Object Repository), 328<br />
Delphi, 139, 489<br />
dereferenc<strong>in</strong>g po<strong>in</strong>ters, 72-73<br />
derived classes, 117<br />
destructors, 102-103<br />
device contexts, 160<br />
DFM files, 171<br />
diagnostic macros (TRACE/<br />
WARN), 418-420<br />
dialog box forms, 187-193<br />
BorderStyle property, 189<br />
modal/modeless, 189<br />
secondary w<strong>in</strong>dows, 193<br />
TabOrder property, 189<br />
VCL classes, 193<br />
dialog box resource def<strong>in</strong>ition<br />
list<strong>in</strong>g, 188<br />
dialog boxes<br />
Add To Project, 356<br />
Add To Repository, 324<br />
Alignment, 237<br />
Color, 275, 312<br />
compile status, 184<br />
creat<strong>in</strong>g, Dialog Expert,<br />
330-331<br />
Edit Breakpo<strong>in</strong>t, 400<br />
Edit Tab Order, 243<br />
Environment Options,<br />
384-388<br />
Colors tab, 387-388<br />
Display tab, 386-387<br />
Editor tab, 385-386<br />
Evaluate/Modify, 412-413<br />
Execute( ) method, 308<br />
File Open/File Save, 309-312<br />
DefaultExt property, 309<br />
FileName property, 309<br />
Files property, 310<br />
Filter property, 310<br />
FilterIndex property, 310<br />
InitialDir property, 311<br />
Options property, 311<br />
Title property, 311<br />
Filter Editor, 310<br />
F<strong>in</strong>d/Replace, 313<br />
Font, 312-313<br />
Goto Address, 415<br />
Include Unit, 182
Insert Template, 248<br />
Object Repository, 318-320,<br />
349<br />
configuration, 326<br />
Copy option, 320<br />
defaults, 328-329<br />
Inherit option, 321<br />
objects, 322-328, 350<br />
projects, 326<br />
tabs, 319, 328<br />
views, 322<br />
Project Options, 212,<br />
362-374<br />
Application tab, 365-366<br />
<strong>C++</strong> tab, 366-371<br />
Directories/Conditionals<br />
tab, 373-374<br />
Forms tab, 363-365<br />
L<strong>in</strong>ker tab, 371-373<br />
Pascal tab, 371<br />
Replace, 379<br />
Scale, 232<br />
Select Directory, 334<br />
Size, 231<br />
Toolbar Editor, 176<br />
Watch Properties, 403-405<br />
Dialog Expert, 329-331<br />
creat<strong>in</strong>g dialog boxes,<br />
330-331<br />
Dialogs tab (Object<br />
Repository), 319<br />
direct member operators, see<br />
structure member operators<br />
Directories/Conditionals tab<br />
(Project Options dialog box),<br />
373-374<br />
Conditional Def<strong>in</strong>es field,<br />
374<br />
Include Path field, 374<br />
Library Path field, 374<br />
Pascal Unit Aliases field, 374<br />
Disable Inl<strong>in</strong>e Expansions<br />
option (<strong>C++</strong> tab, Project<br />
Options dialog box), 369<br />
disabl<strong>in</strong>g Watch List items,<br />
405<br />
Display tab (Environment<br />
Options dialog box), 386-387<br />
displayRecord( ) function, 63<br />
DLLs (dynamic l<strong>in</strong>k libraries),<br />
185<br />
do-while loops, 49<br />
double data type, 18<br />
double quotation marks ("), 32<br />
Down property (SpeedButton<br />
component), 304<br />
DrawText( ) function, 11<br />
drivers, 429<br />
drop-down list boxes, see<br />
ComboBox component<br />
dropp<strong>in</strong>g <strong>in</strong>active database<br />
connections, 437<br />
DSK files, 171<br />
dynamic allocation, 70<br />
po<strong>in</strong>ters, 70, 86<br />
VCL, 154<br />
dynamic cast operators, 208<br />
dynamic l<strong>in</strong>k libraries, see<br />
DLLs<br />
E<br />
Edit Breakpo<strong>in</strong>t dialog box,<br />
400<br />
Edit command (Project<br />
Explorer speed menu), 361<br />
Edit component, 287-292<br />
properties, 289-292<br />
Edit menu commands<br />
Align, 237<br />
Align to Grid, 227<br />
Copy, 228<br />
Cut, 229<br />
Lock Controls, 228<br />
Paste, 228<br />
Scale, 232<br />
Select All, 222<br />
Send to Back, 229<br />
Size, 231<br />
Edit Source command<br />
(Breakpo<strong>in</strong>t list primary<br />
speed menu), 399<br />
Edit Tab Order dialog box,<br />
243<br />
edit<strong>in</strong>g, 203-204<br />
<strong>in</strong>-place, 362<br />
objects (Object Repository),<br />
327<br />
Editor tab (Environment<br />
Options dialog box), 385-386<br />
Editors, 6<br />
events<br />
515<br />
ellipsis button, <strong>14</strong>3<br />
else statments, 41-44<br />
shortcuts, 43<br />
syntax, 43-44<br />
Enable command (Breakpo<strong>in</strong>t<br />
list primary speed menu), 399<br />
Enabled property<br />
(components), 277-278, 299<br />
enabl<strong>in</strong>g Watch List items, 405<br />
enumerations (VCL component<br />
properties), <strong>14</strong>4<br />
Environment command<br />
(Options menu), 384<br />
Environment Options dialog<br />
box, 384-388<br />
Colors tab, 387-388<br />
Display tab, 386-387<br />
Editor tab, 385-386<br />
Eof property<br />
TQuery component, 456<br />
TTable component, 447<br />
equality operator (==), 42<br />
error check<strong>in</strong>g, 215<br />
errors<br />
compiler, 12<br />
overload<strong>in</strong>g functions, 87<br />
establish<strong>in</strong>g database<br />
connections, 439<br />
Evaluate/Modify command<br />
Code Editor speed menu,<br />
395, 412-413<br />
Run menu, 396, 412-413<br />
Evaluate/Modify dialog box,<br />
412-413<br />
event handlers, <strong>14</strong>6<br />
components, 221<br />
OnClick, 152<br />
event-driven environments,<br />
<strong>14</strong>6<br />
events, 6<br />
components, 283-285<br />
forms, 198-200<br />
OnActivate, 199<br />
OnClose, 199<br />
OnCloseQuery, 199<br />
OnCreate, 199<br />
OnDestroy, 199<br />
OnDragDrop, 199<br />
OnMouseDown, 199<br />
OnMouseMove, 199<br />
OnMouseUp, 199
516<br />
OnPa<strong>in</strong>t, 199<br />
OnResize, 199<br />
OnShow, 200<br />
handl<strong>in</strong>g, 204<br />
mouse, 284-285<br />
VCL components, <strong>14</strong>6-<strong>14</strong>8,<br />
152-153<br />
event handlers, <strong>14</strong>6<br />
Events page, 204<br />
EXE files, 171<br />
Execute( ) method, 308<br />
execution po<strong>in</strong>ts, 397<br />
Experts, 329<br />
Application, 331-335<br />
Dialog, 329, 331<br />
expressions, 10<br />
ExtendedSelection property<br />
(ListBox component), 294<br />
extend<strong>in</strong>g base class properties,<br />
495<br />
extensions (language), <strong>C++</strong>,<br />
489-491<br />
extern keyword (global<br />
variables), 56<br />
extraction operator (>>), 11<br />
F<br />
events<br />
__fastcall keyword, <strong>14</strong>9<br />
fields (databases), 467-471<br />
File dialog filters, creat<strong>in</strong>g<br />
(Application Expert), 332<br />
File menu commands<br />
Include Unit Hdr, 182<br />
New, 318<br />
File Open/File Save dialog<br />
boxes, 309-312<br />
DefaultExt property, 309<br />
FileName property, 309<br />
Files property, 310<br />
Filter property, 310<br />
FilterIndex property, 310<br />
InitialDir property, 311<br />
Options property, 311<br />
Title property, 311<br />
FileName property (File Open/<br />
File Save dialog boxes), 309<br />
files<br />
add<strong>in</strong>g to projects (Project<br />
Manager), 356-357<br />
application resource file, 170<br />
CPP, 171<br />
delet<strong>in</strong>g, 174<br />
DFM, 171<br />
DSK, 171<br />
EXE, 171<br />
H, 171<br />
headers, 11, 59-60<br />
I/O, 122-130<br />
<strong>in</strong>put, 123-124<br />
modes, 126-128<br />
output, 125-126<br />
IL?, 171<br />
libraries, 170, 2<strong>14</strong><br />
ma<strong>in</strong> form header/resource/<br />
source, 170<br />
MAK, 172<br />
OBJ, 172<br />
open<strong>in</strong>g (Code Editor),<br />
376-377<br />
OutDbg1.txt, 419<br />
project makefile, 170-171<br />
project source, 170<br />
RC, 172<br />
remov<strong>in</strong>g from projects<br />
(Project Manager), 357<br />
RES, 172<br />
resource, 342-343<br />
resource script, 172, 342<br />
sav<strong>in</strong>g (Code Editor), 377<br />
source, 55, 58<br />
TDW, 172<br />
tildes(~), 170<br />
units, 174<br />
Files property (File Open/File<br />
Save dialog boxes), 310<br />
Filter Editor dialog box, 310<br />
Filter property (File Open/File<br />
Save dialog boxes), 310<br />
FilterIndex property (File<br />
Open/File Save dialog boxes),<br />
310<br />
filter<strong>in</strong>g, local (databases),<br />
447-448<br />
F<strong>in</strong>d command (Search menu),<br />
379<br />
F<strong>in</strong>d/Replace dialog boxes, 313<br />
f<strong>in</strong>d<strong>in</strong>g braces, 43<br />
float data type, 18<br />
float<strong>in</strong>g-po<strong>in</strong>t numbers, 18<br />
FocusControl property (Label<br />
component), 306<br />
Font dialog boxes, 312-313<br />
Font properties<br />
components, 278-279<br />
TForm class, 195<br />
for loops, 45-47<br />
FORLOOP.CPP list<strong>in</strong>g, 47<br />
Form Designer, 218<br />
Alignment Palette, 233-237<br />
speed menu, 237<br />
components<br />
align<strong>in</strong>g, 232-239<br />
copy<strong>in</strong>g, 228<br />
cutt<strong>in</strong>g, 229<br />
lock<strong>in</strong>g, 228<br />
mov<strong>in</strong>g, 226-227<br />
order<strong>in</strong>g, 228-229<br />
past<strong>in</strong>g, 228<br />
plac<strong>in</strong>g, 219-220<br />
select<strong>in</strong>g, 221-226<br />
siz<strong>in</strong>g, 220, 229-232<br />
grid, 220-221<br />
Snap to Grid option, 220<br />
mov<strong>in</strong>g controls, 226<br />
speed menu, 218-219<br />
tab order, sett<strong>in</strong>g, 243-244<br />
Form Editor, 6<br />
forms<br />
dialog boxes, 187-193<br />
BorderStyle property, 189<br />
CL classes, 193<br />
modal/modeless, 189<br />
secondary w<strong>in</strong>dows, 193<br />
TabOrder property, 189<br />
events, 198-200<br />
OnActivate, 199<br />
OnClose, 199<br />
OnCloseQuery, 199<br />
OnCreate, 199<br />
OnDestroy, 199<br />
OnDragDrop, 199<br />
OnMouseDown, 199<br />
OnMouseMove, 199<br />
OnMouseUp, 199<br />
OnPa<strong>in</strong>t, 199<br />
OnResize, 199<br />
OnShow, 200<br />
ma<strong>in</strong> w<strong>in</strong>dow, 187<br />
MDI sample application,<br />
204-212<br />
methods, 197-198<br />
ArrangeIcons( ), 198<br />
Br<strong>in</strong>gToFront( ), 197
Cascade( ), 198<br />
Close( ), 198<br />
CloseQuery( ), 198<br />
Next( ), 198<br />
Previous( ), 198<br />
Pr<strong>in</strong>t( ), 198<br />
ScrollInView( ), 198<br />
SetFocus( ), 198<br />
Show( ), 198<br />
ShowModal( ), 198<br />
Tile( ), 198<br />
multiple, creat<strong>in</strong>g<br />
applications, 180-182<br />
panels, 158<br />
properties, 194-197<br />
ActiveControl, 194<br />
ActiveMDIChild, 196<br />
AutoScroll, 194<br />
BorderStyle, 194<br />
Canvas, 196<br />
ClientHeight, 195<br />
ClientRect, 196<br />
ClientWidth, 195<br />
Font, 195<br />
FormStyle, 195<br />
Handle, 197<br />
HelpContext, 195<br />
HorzScrollBar, 194<br />
Icon, 195<br />
ModalResult, 197<br />
Owner, 197<br />
Parent, 197<br />
Position, 196<br />
VertScrollBar, 194<br />
Visible, 196<br />
W<strong>in</strong>dowState, 196<br />
Forms tab<br />
Object Repository, 319<br />
Project Options dialog box,<br />
363-365<br />
FormStyle property (TForm<br />
class), 195<br />
frameworks, 132-136, 163<br />
<strong>C++</strong><br />
MFC, 137-138<br />
OWL, 136-138<br />
VCL, 139-163<br />
class hierarchy, 156-157<br />
component classes,<br />
157-161<br />
components, 139-<strong>14</strong>8,<br />
152-153<br />
dynamic allocation, 154<br />
form/application classes,<br />
157<br />
functions, default<br />
parameters, 155<br />
multiple <strong>in</strong>heritance, 155<br />
overload<strong>in</strong>g, 154-155<br />
utility classes, 161<br />
fstream class, 122<br />
FTP component, 475<br />
function po<strong>in</strong>ters, 492<br />
functions<br />
add<strong>in</strong>g, 336, 339-340<br />
atoi( ), 62<br />
class member, 90, 105-107<br />
nam<strong>in</strong>g, 91<br />
constructors, 99-101, 129<br />
data members, this, 107-109<br />
destructors, 102-103<br />
displayRecord( ), 63<br />
DrawText( ), 11<br />
getch( ), 64<br />
<strong>in</strong>l<strong>in</strong>e, 59, 91-93<br />
LoadStr<strong>in</strong>g( ), 347<br />
ma<strong>in</strong>( ), 26-28<br />
multiply( ), 24<br />
overload<strong>in</strong>g, 86-87, 93<br />
errors, 87<br />
overrid<strong>in</strong>g, 118<br />
parameters, 22<br />
default, 89-90<br />
PlaySound( ), 347<br />
private member, 106<br />
protected member, 106<br />
prototypes, 22<br />
public member, 105<br />
recursion, 24<br />
rules, 25<br />
showResult( ), 24<br />
sizeof( ), 62<br />
spr<strong>in</strong>tf( ), 33-35<br />
static member, 106<br />
strcat( ), 32<br />
strcmp( ), 32<br />
strcmpi( ), 32<br />
strcpy( ), 32-34<br />
str<strong>in</strong>g manipulation, 32-34<br />
strlen( ), 33<br />
strstr( ), 33<br />
strupr( ), 33<br />
TextOut( ), 11<br />
Height property (components)<br />
virtual, 117<br />
W<strong>in</strong>Ma<strong>in</strong>( ), 26<br />
wspr<strong>in</strong>tf( ), 34-35<br />
see also methods<br />
G-H<br />
517<br />
general protection faults, see<br />
GPFs<br />
getch( ) function, 64<br />
getters (data member<br />
functions), 104<br />
global scope, 55<br />
global variables, 55-56<br />
extern keyword, 56<br />
Glyph property (BitBtn<br />
component), 300-301<br />
glyphs, 300-301<br />
Go To Address command<br />
Code Editor speed menu,<br />
395, 415<br />
Search menu, 415<br />
Goto Address dialog box, 415<br />
goto loops, 49-50<br />
GPFs (general protection<br />
faults), 37, 421-422<br />
application term<strong>in</strong>ation, 422<br />
delet<strong>in</strong>g deleted po<strong>in</strong>ters, 422<br />
overwritt<strong>in</strong>g arrays, 422<br />
un<strong>in</strong>itialized po<strong>in</strong>ters, 421<br />
grep (Global Regular<br />
Expression Pr<strong>in</strong>t), 379-380<br />
grid (Form Designer), 220-221<br />
GroupIndex property<br />
(SpeedButton component),<br />
303<br />
gutter (Code Editor), 376<br />
H files, 171<br />
Handle property (TForm<br />
class), 197<br />
HandleAllocated method<br />
(components), 282<br />
handl<strong>in</strong>g events, 204<br />
header files, 11<br />
headers, 59-60<br />
pre-compiled, 370<br />
sentries, 59-60<br />
heap, 69-70, 93<br />
Height property (components),<br />
281
518<br />
Hello World, 6-<strong>14</strong><br />
W<strong>in</strong>32 console app, 8-<strong>14</strong><br />
HELLO.CPP list<strong>in</strong>g, 12<br />
revised, 13-<strong>14</strong><br />
help (Code Editor), 380<br />
Help command<br />
Alignment Palette speed<br />
menu, 237<br />
toolbar speed menu, 176<br />
HelpContext property<br />
components, 281<br />
TForm class, 195<br />
Hide command<br />
Alignment Palette speed<br />
menu, 237<br />
toolbar speed menu, 176<br />
Hide method (components),<br />
282<br />
HideScrollBars property (edit<br />
controls), 290<br />
HideSelection property (edit<br />
controls), 290<br />
highlight<strong>in</strong>g text (Code<br />
Editor), 377-378<br />
H<strong>in</strong>t property<br />
Application object, 338<br />
components, 280<br />
h<strong>in</strong>ts, 338<br />
long, 280<br />
short, 280<br />
history of <strong>C++</strong>, 15<br />
HorzScrollBar property<br />
(TForm class), 194<br />
I<br />
Hello World<br />
i (iterator) variable name, 46<br />
I/O (files), 122-130<br />
<strong>in</strong>put, 123-124<br />
output, 125-126<br />
Icon property (TForm class),<br />
195<br />
IDAPI (Independant Database<br />
Application Programm<strong>in</strong>g<br />
Interface), 428<br />
if statements, 40-44<br />
nest<strong>in</strong>g, 42, 65<br />
shortcuts, 41<br />
syntax, 43-44<br />
ifstream class, 122<br />
IL? files, 171<br />
import libraries, 170<br />
<strong>in</strong>-place edit<strong>in</strong>g, 362<br />
<strong>in</strong>active database connections,<br />
dropp<strong>in</strong>g, 437<br />
Include Path field (Directories/<br />
Conditionals tab, Project<br />
Options dialog box), 374<br />
Include Unit dialog box, 182<br />
Include Unit Hdr command<br />
(File menu), 182<br />
Incremental Search command<br />
(Search menu), 382<br />
Independant Database<br />
Application Programm<strong>in</strong>g<br />
Interface, see IDAPI<br />
<strong>in</strong>direct member operators (->),<br />
71<br />
<strong>in</strong>direction operators<br />
*, 68<br />
->, 73<br />
Inherit option (Object<br />
Repository), 321<br />
<strong>in</strong>heritance, 116-121, 469<br />
multiple, 120-121<br />
VCL, 155<br />
InitialDir property (File Open/<br />
File Save dialog boxes), 311<br />
<strong>in</strong>itializer lists, 101-102<br />
<strong>in</strong>l<strong>in</strong>e functions, 59, 91-93<br />
<strong>in</strong>put (basic file I/O), 123-124<br />
Input Mask Editor, 288<br />
Insert Template dialog box,<br />
248<br />
<strong>in</strong>sert<strong>in</strong>g menu items (Menu<br />
Designer), 250<br />
<strong>in</strong>sertion operator (
Layout property (BitBtn<br />
component), 301<br />
Left property (components),<br />
281<br />
libraries, 2<strong>14</strong><br />
import, 170<br />
static, 170<br />
Library Path field (Directories/<br />
Conditionals tab, Project<br />
Options dialog box), 374<br />
L<strong>in</strong>e Number Information<br />
option (<strong>C++</strong> tab, Project<br />
Options dialog box), 368<br />
L<strong>in</strong>es property (edit controls),<br />
290<br />
L<strong>in</strong>ker tab (Project Options<br />
dialog box), 371-373<br />
Application Target section,<br />
372<br />
Application Type section,<br />
372<br />
L<strong>in</strong>k<strong>in</strong>g section, 372<br />
Map File section, 372<br />
Stack Sizes section, 373<br />
L<strong>in</strong>k<strong>in</strong>g section (L<strong>in</strong>ker tab,<br />
Project Options dialog box),<br />
372<br />
ListBox component, 292-296<br />
properties, 294-296<br />
list<strong>in</strong>gs<br />
AIRPLANE.CPP, 110-113<br />
AIRPLANE.H, 109-110<br />
AIRPORT.CPP, 113-115<br />
ARGSTEST.CPP, 27<br />
C code to load and display a<br />
bitmap, 132-133<br />
dialog box resource<br />
def<strong>in</strong>ition, 188<br />
FORLOOP.MAKCPP, 47<br />
HELLO.CPP, 12<br />
revised, 13-<strong>14</strong><br />
JJMa<strong>in</strong>.cpp, 344-347<br />
JJMa<strong>in</strong>.h, 344<br />
JJRes.rc, 347<br />
MAILLIST.CPP, 60-62<br />
MULTIPLY.CPP, 23<br />
NULLTEST.CPP, 31<br />
OWL code to load and<br />
display a bitmap, 134<br />
OWLHELLO.CPP, 186<br />
POINTER.CPP, 74-75<br />
READFILE.CPP, 123<br />
REFERENC.CPP, 77-78<br />
SCOPE.CPP, 53-54<br />
SPMAIN.CPP, 256-259<br />
SPMAIN.H, 254-255<br />
SPMa<strong>in</strong>.h, 336-337<br />
STRUCTUR.H, 62<br />
Surf00<br />
header file, 479-480<br />
source file, 480-481<br />
text version, 481-483<br />
WHILETST.CPP, 48<br />
WRAPME.CPP, 19<br />
WRITEFIL.CPP, 125-126<br />
LoadStr<strong>in</strong>g( ) function, 347<br />
local allocation, 69<br />
local filter<strong>in</strong>g (databases),<br />
447-448<br />
local scope, 54<br />
Locate method (TTable<br />
component), 448-449<br />
Lock Controls command (Edit<br />
menu), 228<br />
lock<strong>in</strong>g components (Form<br />
Designer), 228<br />
long h<strong>in</strong>ts, 280<br />
Lookup method (TTable<br />
component), 449<br />
loops, 44-52<br />
break keyword, 50-52<br />
switch statements, 52<br />
cont<strong>in</strong>ue keyword, 50-51<br />
do-while, 49<br />
for, 45-47<br />
goto, 49-50<br />
while, 48<br />
M<br />
macros, diagnostic (TRACE/<br />
WARN), 418-420<br />
MAILLIST.CPP list<strong>in</strong>g, 60-62<br />
ma<strong>in</strong> menu, 175<br />
ma<strong>in</strong> w<strong>in</strong>dow forms, 187<br />
ma<strong>in</strong>( ) function, 26-28<br />
Ma<strong>in</strong>Menu component, 245<br />
MAK files, 172<br />
Make option (Ctrl+F9), 183<br />
manipulators, 12<br />
Map File section (L<strong>in</strong>ker tab,<br />
MenuItem component<br />
519<br />
Project Options dialog box),<br />
372<br />
Marg<strong>in</strong> property (BitBtn<br />
component), 302<br />
MaskEdit component, 287-292<br />
properties, 289-292<br />
MaxLength property<br />
ComboBox component, 294<br />
edit controls, 290<br />
MDIs (multiple-document<br />
<strong>in</strong>terfaces), 193-194<br />
example application, 204-212<br />
member functions, 105-107<br />
private, 106<br />
protected, 106<br />
public, 105<br />
static, 106<br />
Memo component, 287-292<br />
properties, 289-292<br />
ScratchPad example, 241-242<br />
memory<br />
delete operator, 81-85<br />
dynamic allocation, 70<br />
po<strong>in</strong>ters, 70<br />
heap, 69-70, 93<br />
local allocation, 69<br />
new operator, 81-83<br />
stack, 69, 93<br />
Menu Designer, 244<br />
access<strong>in</strong>g Code Editor, 252<br />
add<strong>in</strong>g keyboard shortcuts,<br />
251-252<br />
creat<strong>in</strong>g<br />
menus (ScratchPad<br />
example), 245-248<br />
menu separators<br />
(ScratchPad example),<br />
247<br />
submenus, 251<br />
delet<strong>in</strong>g menu items<br />
(ScratchPad example),<br />
249-250<br />
<strong>in</strong>sert<strong>in</strong>g menu items<br />
(ScratchPad example), 250<br />
modify<strong>in</strong>g menu items<br />
(ScratchPad example), 251<br />
mov<strong>in</strong>g menu items<br />
(ScratchPad example), 250<br />
speed menu, 244<br />
MenuItem component, 245
520<br />
menus<br />
menus<br />
creat<strong>in</strong>g<br />
Application Expert, 332<br />
Menu Designer<br />
(ScratchPad example),<br />
245-248<br />
templates, 261<br />
writ<strong>in</strong>g code, 253-254<br />
items<br />
delet<strong>in</strong>g (ScratchPad<br />
example), 249-250<br />
<strong>in</strong>sert<strong>in</strong>g (ScratchPad<br />
example), 250<br />
modify<strong>in</strong>g (ScratchPad<br />
example), 251<br />
mov<strong>in</strong>g (ScratchPad<br />
example), 250<br />
Word Wrap, 252<br />
keyboard shortcuts, add<strong>in</strong>g,<br />
251-252<br />
ma<strong>in</strong>, 175<br />
pop-up, creat<strong>in</strong>g (ScratchPad<br />
example), 260-261<br />
sav<strong>in</strong>g (templates), 263<br />
separators, Menu Designer<br />
(ScratchPad example), 247<br />
submenus, creat<strong>in</strong>g, 251<br />
templates, 263<br />
Merge Duplicate Str<strong>in</strong>gs<br />
option (<strong>C++</strong> tab, Project<br />
Options dialog box), 370<br />
Message View command (Code<br />
Editor speed menu), 384<br />
method po<strong>in</strong>ters, see function<br />
po<strong>in</strong>ters<br />
methods<br />
ArrangeIcons( ), 198<br />
Br<strong>in</strong>gToFront( ), 197<br />
Cascade( ), 198<br />
Close( ), 198<br />
CloseQuery( ), 198<br />
components, 282-283<br />
Execute( ), 308<br />
Next( ), 198<br />
Previous( ), 198<br />
Pr<strong>in</strong>t( ), 198<br />
ScrollInView( ), 198<br />
SetFocus( ), 198<br />
Show( ), 189, 198<br />
ShowModal( ), 189, 198<br />
Tile( ), 198<br />
VCL components, <strong>14</strong>5<br />
MFC (Microsoft Foundation<br />
Class) Library, 135-138<br />
applications, 185<br />
modal/modeless dialog boxes,<br />
189<br />
ModalResult property<br />
button components, 296-297<br />
TForm class, 197<br />
Mode property (TBatchMove<br />
component), 463<br />
modes (file I/O), 126-128<br />
b<strong>in</strong>ary, 128<br />
open, specifiers, 127<br />
Modified property (edit<br />
controls), 292<br />
modify<strong>in</strong>g menu items (Menu<br />
Designer), 251<br />
modules, see units<br />
mouse events, 284-285<br />
mov<strong>in</strong>g<br />
components (Form<br />
Designer), 226-227<br />
controls (Form Designer),<br />
226<br />
menu items (Menu<br />
Designer), 250<br />
objects (Object Repository),<br />
328<br />
multiple document <strong>in</strong>terfaces,<br />
see MDIs<br />
multiple <strong>in</strong>heritance, 120-121<br />
multiply( ) function, 24<br />
MULTIPLY.CPP list<strong>in</strong>g, 23<br />
MultiSelect property (ListBox<br />
component), 294<br />
N-O<br />
name mangl<strong>in</strong>g, 87<br />
Name property (components),<br />
273-274, 3<strong>14</strong><br />
nam<strong>in</strong>g class member<br />
functions, 91<br />
nest<strong>in</strong>g if statements, 42, 65<br />
New command (File menu),<br />
318<br />
New Edit W<strong>in</strong>dow command<br />
(Code Editor speed menu),<br />
383<br />
New Form command (Project<br />
Manager speed menu), 359<br />
New Item dialog box, see<br />
Object Repository<br />
new operator, 70, 81-83, 92-93<br />
New tab (Object Repository),<br />
319<br />
New Unit command (Project<br />
Manager speed menu), 359<br />
new[ ] operator, 85<br />
Next( ) method, 198<br />
nonvisual components, 272<br />
null, term<strong>in</strong>at<strong>in</strong>g (/0), 30<br />
NULLTEST.CPP list<strong>in</strong>g, 31<br />
NumGlyphs property (BitBtn<br />
component), 302<br />
OBJ files, 172<br />
Object Components<br />
Framework, see OCF<br />
Object Inspector, 5, 6, 200<br />
clos<strong>in</strong>g, 9<br />
Component Selector,<br />
200-201<br />
Events tab, 6, 204<br />
Properties tab, 5, 201-204<br />
Object Inspector command<br />
(View menu), 9<br />
Object Pascal, 139, 489<br />
Object Repository, 317-320,<br />
349<br />
add<strong>in</strong>g<br />
objects, 324-326<br />
projects, 326<br />
tabs, 328<br />
configuration dialog box, 326<br />
Copy option, 320<br />
creat<strong>in</strong>g new objects, 321-323<br />
defaults, sett<strong>in</strong>g, 328-329<br />
delet<strong>in</strong>g<br />
objects, 327, 350<br />
tabs, 328<br />
dialog box, 318<br />
edit<strong>in</strong>g objects, 327<br />
Inherit option, 321<br />
mov<strong>in</strong>g objects, 328<br />
tabs, 319<br />
reorder<strong>in</strong>g, 328<br />
Use option, 321<br />
views, 322<br />
Object W<strong>in</strong>dows Library, see<br />
OWL
object-oriented programm<strong>in</strong>g,<br />
see OOP<br />
OCF (Object Components<br />
Framework), 136<br />
ODBC drivers, 429<br />
OEMConvert property (edit<br />
controls), 290<br />
ofstream class, 122<br />
OnActivate event, 199<br />
OnClick event handler, 152<br />
OnClose event, 199<br />
OnCloseQuery event, 199<br />
OnCreate event, 199<br />
OnDestroy event, 199<br />
OnDragDrop event, 199<br />
OnMouseDown event, 199<br />
OnMouseMove event, 199<br />
OnMouseUp event, 199<br />
OnPa<strong>in</strong>t event, 199<br />
OnResize event, 199<br />
OnShow event, 200<br />
OOP (object-oriented<br />
programm<strong>in</strong>g), <strong>14</strong><br />
Open File At Cursor command<br />
(Code Editor speed menu),<br />
383<br />
open mode specifiers (file I/O),<br />
127<br />
open<strong>in</strong>g files (Code Editor),<br />
376-377<br />
operators, 19-22<br />
address-of (&), 72<br />
assignment (=), 42<br />
delete, 81-85<br />
delete[ ], 85<br />
dynamic cast, 208<br />
equality (==), 42<br />
extraction (>>), 11<br />
<strong>in</strong>direct member (->), 71<br />
<strong>in</strong>direction<br />
*, 68<br />
->, 73<br />
<strong>in</strong>sertion (
522<br />
Program Reset command (Run menu)<br />
Program Reset command (Run<br />
menu), 396<br />
programs, see applications<br />
Project command (Options<br />
menu), 362<br />
Project Explorer, 359-362<br />
hierarchy, 360<br />
speed menu commands,<br />
360-362<br />
Project Manager, 354-359<br />
speedbar, 355-356<br />
Add Unit button,<br />
356-357<br />
Project Options button,<br />
358<br />
Remove Unit button, 357<br />
Update button, 358<br />
View Form button, 357<br />
View Unit button, 357<br />
speed menu, 358-359<br />
Project Manager commands<br />
(View menu), 354<br />
Project Options button<br />
(Project Manager speedbar),<br />
358<br />
Project Options dialog box,<br />
212, 362<br />
Application tab, 365-366<br />
<strong>C++</strong> tab, 366-371<br />
Code Optimization<br />
section, 367-368<br />
Compil<strong>in</strong>g section,<br />
370-371<br />
Debugg<strong>in</strong>g section,<br />
368-369<br />
Pre-compiled Headers<br />
section, 369-370<br />
Directories/Conditionals tab,<br />
373-374<br />
Forms tab, 363-365<br />
L<strong>in</strong>ker tab, 371-373<br />
Pascal tab, 371<br />
Project Source command (View<br />
menu), 170<br />
projects, 169<br />
add<strong>in</strong>g to Object Repository,<br />
326<br />
application resource file, 170<br />
ma<strong>in</strong> form header file, 170<br />
ma<strong>in</strong> form resource file, 170<br />
ma<strong>in</strong> form source file, 170<br />
project makefile, 170-171<br />
project source file, 170<br />
Projects tab (Object<br />
Repository), 319<br />
properties, 5-6, 164<br />
Align, 238<br />
AllowAllUp (SpeedButton<br />
component), 303<br />
AutoScroll, 227<br />
base class, extend<strong>in</strong>g, 495<br />
Cancel (button components),<br />
298-299<br />
ComboBox, 294-296<br />
components<br />
Align, 238, 275<br />
BorderStyle, 281<br />
Caption, 281<br />
Color, 275-276<br />
ct13D, 281<br />
Cursor, 277<br />
Enabled, 277-278<br />
Font, 278-279<br />
Height, 281<br />
HelpContext, 281<br />
H<strong>in</strong>t, 280<br />
Left, 281<br />
Name, 273-274, 3<strong>14</strong><br />
ParentColor, 280-281<br />
Parentct13D, 280-281<br />
ParentFont, 280-281<br />
ParentShowH<strong>in</strong>t,<br />
280-281<br />
PopupMenu, 281<br />
ShowH<strong>in</strong>t, 280<br />
TabOrder, 281<br />
TabStop, 281<br />
Tag, 281<br />
Top, 282<br />
Visible, 282<br />
Width, 282<br />
Default (button<br />
components), 298<br />
DefaultExt (File Open/File<br />
Save dialog boxes), 309<br />
Down (SpeedButton<br />
component), 304<br />
edit controls, 289-292<br />
edit<strong>in</strong>g, 203-204<br />
Enabled (button<br />
components), 299<br />
FileName (File Open/File<br />
Save dialog boxes), 309<br />
Files (File Open/File Save<br />
dialog boxes), 310<br />
Filter (File Open/File Save<br />
dialog boxes), 310<br />
FilterIndex (File Open/File<br />
Save dialog boxes), 310<br />
Glyph (BitBtn component),<br />
300-301<br />
GroupIndex (SpeedButton<br />
component), 303<br />
H<strong>in</strong>t (Application object),<br />
338<br />
InitialDir (File Open/File<br />
Save dialog boxes), 311<br />
K<strong>in</strong>d (BitBtn component),<br />
301<br />
Label component, 306<br />
Layout (BitBtn component),<br />
301<br />
ListBox, 294-296<br />
Marg<strong>in</strong> (BitBtn component),<br />
302<br />
ModalResult (button<br />
components), 296-297<br />
NumGlyphs (BitBtn<br />
component), 302<br />
Options (File Open/File Save<br />
dialog boxes), 311<br />
ShowH<strong>in</strong>t (Application<br />
object), 338<br />
Spac<strong>in</strong>g (BitBtn component),<br />
302<br />
stor<strong>in</strong>g, 494-495<br />
TabOrder, 243<br />
Title (File Open/File Save<br />
dialog boxes), 311<br />
values, 494<br />
writ<strong>in</strong>g, 493-494<br />
VCL components, <strong>14</strong>0-<strong>14</strong>4<br />
access methods, <strong>14</strong>1<br />
access specifiers, <strong>14</strong>2<br />
enumerations, <strong>14</strong>4<br />
sets, <strong>14</strong>3<br />
Properties command<br />
Breakpo<strong>in</strong>t list primary speed<br />
menu, 399<br />
Code Editor speed menu, 384<br />
toolbar speed menu, 176<br />
Properties page, 201-204<br />
protected access level, 98<br />
protected keyword (class access<br />
levels), 98
protected member functions,<br />
106<br />
prototypes, 22, 239<br />
public keyword (class access<br />
levels), 98<br />
public member functions, 105<br />
__published keyword, 338, 496<br />
Q-R<br />
queries (databases), 454-457<br />
Qu<strong>in</strong>n, Carl, 137<br />
quotation marks, s<strong>in</strong>gle/<br />
double, 32<br />
RAD (rapid application<br />
development), 4, 139<br />
vs. <strong>C++</strong> standards, 488<br />
RadioButton component,<br />
304-305<br />
RC files, 172<br />
Read Only command (Code<br />
Editor speed menu), 384<br />
READFILE.CPP list<strong>in</strong>g, 123<br />
ReadOnly property (edit<br />
controls), 291<br />
recursion, 24<br />
REFERENC.CPP list<strong>in</strong>g, 77-78<br />
reference operator (&), 76<br />
references, 76-78, 102<br />
Refresh method (components),<br />
283<br />
Remove File command (Project<br />
Manager speed menu), 359<br />
Remove Unit button (Project<br />
Manager speedbar), 357<br />
remov<strong>in</strong>g files from projects<br />
(Project Manager), 357<br />
Rename command (Project<br />
Explorer speed menu), 361<br />
reorder<strong>in</strong>g tabs (Object<br />
Repository), 328<br />
Repa<strong>in</strong>t method (components),<br />
283<br />
Replace command (Search<br />
menu), 379<br />
Replace dialog boxes, see F<strong>in</strong>d/<br />
Replace dialog boxes<br />
Repository command (Options<br />
menu), 326<br />
RES files, 172<br />
Reset Process command (Run<br />
menu), 45<br />
resource script files, 172, 187,<br />
342<br />
resources, 341-342, 348-349<br />
b<strong>in</strong>d<strong>in</strong>g, 343<br />
files, 342-343<br />
reta<strong>in</strong><strong>in</strong>g database connections,<br />
439<br />
Revert to <strong>in</strong>herited (Form<br />
Designer’s speed menu), 218<br />
RichEdit component, 287-292<br />
properties, 289-292<br />
rows (databases), 428<br />
Run command (Run menu),<br />
395<br />
Run menu commands<br />
Add Breakpo<strong>in</strong>t, 396<br />
Add Watch (Ctrl+F5), 396,<br />
405<br />
Evaluate/Modify (Ctrl+F7),<br />
396, 412-413<br />
Inspect, 396, 408<br />
Parameters, 395<br />
Program Pause, 396<br />
Program Reset (Ctrl+F2), 396<br />
Reset Process (Ctrl+F2), 45<br />
Run (F9), 395<br />
Run to Cursor (F4), 395, 402<br />
Show Execution Po<strong>in</strong>t, 396<br />
Step Over (F8), 395, 417<br />
Trace Into (F7), 395, 417<br />
Trace to Next Source L<strong>in</strong>e<br />
(Shift+F7), 395, 418<br />
Run to Cursor command<br />
Code Editor speed menu,<br />
394, 402<br />
Run menu, 395, 402<br />
runn<strong>in</strong>g ScratchPad example,<br />
259<br />
S<br />
Selected property (ListBox component)<br />
Save Project command (Project<br />
Manager speed menu), 359<br />
sav<strong>in</strong>g<br />
files (Code Editor), 377<br />
menus (templates), 263<br />
Scale command<br />
Edit menu, 232<br />
523<br />
Form Designer’s speed menu,<br />
218<br />
Scale dialog box, 232<br />
scope, 53-55<br />
global, 55<br />
local, 54<br />
scope resolution operator (::),<br />
55, 119<br />
SCOPE.CPP list<strong>in</strong>g, 53-54<br />
ScratchPad example, 239<br />
creat<strong>in</strong>g menu separators<br />
(Menu Designer), 247<br />
creat<strong>in</strong>g menus (Menu<br />
Designer), 245-248<br />
delet<strong>in</strong>g menu items (Menu<br />
Designer), 249-250<br />
<strong>in</strong>sert<strong>in</strong>g menu items (Menu<br />
Designer), 250<br />
memo component, 241-242<br />
modify<strong>in</strong>g menu items<br />
(Menu Designer), 251<br />
mov<strong>in</strong>g menu items (Menu<br />
Designer), 250<br />
pop-up menus, creat<strong>in</strong>g,<br />
260-261<br />
runn<strong>in</strong>g, 242, 259<br />
speedbar, 239-240<br />
status bar, 241<br />
writ<strong>in</strong>g code, 253-254<br />
ScrollBar component, 306<br />
ScrollBars property (edit<br />
controls), 291<br />
ScrollInView( ) method, 198<br />
SDIs (s<strong>in</strong>gle document<br />
<strong>in</strong>terfaces), 193<br />
Search menu commands<br />
F<strong>in</strong>d (Ctrl+F), 379<br />
Go To Address, 415<br />
Incremental Search (Ctrl+E),<br />
382<br />
Replace (Ctrl+R), 379<br />
secondary w<strong>in</strong>dows, 193<br />
SelCount property (ListBox<br />
component), 295<br />
Select All command (Edit<br />
menu), 222<br />
Select command (Project<br />
Explorer speed menu), 360<br />
Select Directory dialog box,<br />
334<br />
Selected property (ListBox<br />
component), 295
524<br />
select<strong>in</strong>g components (Form Designer)<br />
select<strong>in</strong>g components (Form<br />
Designer), 2<strong>14</strong>, 221<br />
all, 222<br />
groups, 222-226<br />
SelLength property<br />
ComboBox component, 295<br />
edit controls, 292<br />
SelStart property<br />
ComboBox component, 295<br />
edit controls, 292<br />
SelText property<br />
ComboBox component, 295<br />
edit controls, 292<br />
semicolons (;), 10<br />
Send To Back command<br />
Edit menu, 229<br />
Form Designer’s speed menu,<br />
218<br />
Sender parameter (eventhandl<strong>in</strong>g<br />
functions), 150<br />
sentries, 59-60<br />
separators, 247<br />
servers, log<strong>in</strong> parameters<br />
(databases), 440<br />
SetBounds method<br />
(components), 283<br />
SetFocus method<br />
(components), 283<br />
sets (VCL component<br />
properties), <strong>14</strong>3<br />
setters (data member<br />
functions), 104<br />
sett<strong>in</strong>g breakpo<strong>in</strong>ts, 397<br />
short h<strong>in</strong>ts, 280<br />
shortcuts (keyboard), 251-252<br />
Show Execution Po<strong>in</strong>t<br />
command (Run menu), 396<br />
Show General Msgs option<br />
(<strong>C++</strong> tab, Project Options<br />
dialog box), 371<br />
Show H<strong>in</strong>ts command<br />
Alignment Palette speed<br />
menu, 237<br />
toolbar speed menu, 176<br />
Show Warn<strong>in</strong>gs option (<strong>C++</strong><br />
tab, Project Options dialog<br />
box), 370<br />
Show( ) method, 189, 198<br />
ShowAccelChar property<br />
(Label component), 306<br />
ShowH<strong>in</strong>t property<br />
Application object, 338<br />
components, 280<br />
ShowModal( ) method, 189,<br />
198<br />
showResult( ) function, 24<br />
signed data types, 17<br />
simple breakpo<strong>in</strong>ts, 400<br />
s<strong>in</strong>gle-document <strong>in</strong>terfaces, see<br />
SDIs<br />
s<strong>in</strong>gle quotation marks (‘), 32<br />
Size command<br />
Edit menu, 231<br />
Form Designer’s speed menu,<br />
218<br />
Size dialog box, 231<br />
sizeof( ) function, 62<br />
siz<strong>in</strong>g components (Form<br />
Designer), 220, 229-232<br />
siz<strong>in</strong>g cursor, 230<br />
Snap to Grid option (Form<br />
Designer), 220<br />
Sorted property (ComboBox/<br />
ListBox components), 294<br />
source code, MFC, 135<br />
source files, 55, 58<br />
space, 13<br />
Spac<strong>in</strong>g property (BitBtn<br />
component), 302<br />
special characters, term<strong>in</strong>at<strong>in</strong>g<br />
null (/0), 30<br />
speedbars<br />
creat<strong>in</strong>g<br />
Application Expert,<br />
333-334<br />
ScratchPad example,<br />
239-240<br />
Project Manager<br />
Add Unit button,<br />
356-357<br />
Project Options button,<br />
358<br />
Remove Unit button, 357<br />
Update button, 358<br />
View Form button, 357<br />
View Unit button, 357<br />
speed menus<br />
Alignment Palette (Form<br />
Designer), 237<br />
Code Editor, 383-384<br />
Form Designer, 218-219<br />
Menu Designer, 244<br />
Project Manager, 358-359<br />
SpeedButton component, 302<br />
AllowAllUp property, 303<br />
Down property, 304<br />
GroupIndex property, 303<br />
SPMAIN.CPP list<strong>in</strong>g, 256-259<br />
SPMAIN.H list<strong>in</strong>g, 254-255,<br />
336-337<br />
spr<strong>in</strong>tf( ) function, 33-35<br />
SQL, L<strong>in</strong>ks drivers, 429<br />
stack, 69, 93<br />
Stack Frames option (<strong>C++</strong> tab,<br />
Project Options dialog box),<br />
370<br />
Stack Sizes section (L<strong>in</strong>ker tab,<br />
Project Options dialog box),<br />
373<br />
Standard Template Library<br />
(STL), 35<br />
standards, <strong>C++</strong>, 488<br />
statements, 10<br />
static libraries, 170<br />
static member functions, 106<br />
static variables, <strong>14</strong>9<br />
status bars, creat<strong>in</strong>g<br />
(ScratchPad example), 241<br />
Stay on top (Alignment Palette<br />
speed menu), 237<br />
Step Over command (Run<br />
menu), 395, 417<br />
stepp<strong>in</strong>g through code,<br />
416-418, 424<br />
optimization sett<strong>in</strong>gs, 417<br />
STL (Standard Template<br />
Library), 35<br />
stor<strong>in</strong>g properties, 494-495<br />
strcat( ) function, 32<br />
strcmp( ) function, 32<br />
strcmpi( ) function, 32<br />
strcpy( ) function, 32, 34<br />
streams, 11<br />
str<strong>in</strong>g manipulation functions,<br />
32-34<br />
str<strong>in</strong>gs, 33<br />
arrays, 35<br />
strlen( ) function, 33<br />
strstr( ) function, 33<br />
STRUCTUR.H list<strong>in</strong>g, 62<br />
structure member operators,<br />
57, 71
structures<br />
arrays, 58<br />
C vs. <strong>C++</strong>, 64<br />
data members, 56<br />
example, 60-64<br />
pass<strong>in</strong>g by value, 63<br />
struct keyword, 56<br />
syntax, 58<br />
vs. classes, 97<br />
strupr( ) function, 33<br />
Style property (ComboBox/<br />
ListBox components), 294<br />
submenus, 251<br />
subscript operator ([ ]), 28<br />
Surf00<br />
header file list<strong>in</strong>g, 479-480<br />
source file list<strong>in</strong>g, 480-481<br />
text version list<strong>in</strong>g, 481-483<br />
Swap Cpp/Hdr Files command<br />
(Code Editor speed menu),<br />
383<br />
switch statements, 51-53<br />
break keyword, 52<br />
default section, 65<br />
syntax, 52-53<br />
T<br />
tab order, sett<strong>in</strong>g, 243-244<br />
Tab Order command (Form<br />
Designer’s speed menu), 218<br />
tables (databases), 428<br />
TabOrder property, 243, 281<br />
tabs (Object Repository), 328<br />
TabStop property<br />
(components), 281<br />
TabWidth property (ListBox<br />
component), 295<br />
Tag property (components),<br />
281<br />
TApplication class (VCL), 157<br />
TBatchMove component,<br />
462-464<br />
TBevel class (VCL), 158<br />
TBitmap class (VCL), 160<br />
TBrush class (VCL), 160<br />
TCanvas class (VCL), 160<br />
TComponent class (VCL), 156<br />
TControl class (VCL), 156<br />
TDatabase component,<br />
437-441<br />
events, 438<br />
methods, 438<br />
properties, 437<br />
TDataset class, 430<br />
TDataSource component, 430,<br />
464-465<br />
TDBGrid class (VCL), 159<br />
TDBNavigator class (VCL),<br />
159<br />
TDW files, 172<br />
templates, menus, 261-263<br />
term<strong>in</strong>at<strong>in</strong>g null (/0), 30<br />
text, highlight<strong>in</strong>g (Code<br />
Editor), 377-378<br />
Text property<br />
ComboBox component, 295<br />
edit controls, 291<br />
TextOut( ) function, 11<br />
TField class, 430<br />
TField component, 467-471<br />
descendants, 469-470<br />
events, 468<br />
methods, 468<br />
properties, 468<br />
TFont class, 278-279<br />
VCL, 160<br />
TForm class (VCL), 157<br />
TGraphicControl class (VCL),<br />
156<br />
this (hidden data member),<br />
107-109<br />
THTML component, 475<br />
THTTP component, 475<br />
TIL (transaction isolation<br />
level), 439<br />
tildes (~), 170<br />
Tile( ) method, 198<br />
TImage class (VCL), 158<br />
TIniFile class (VCL), 161<br />
Title property (File Open/File<br />
Save dialog boxes), 311<br />
TLiveQuery component, 456<br />
TMa<strong>in</strong>Menu class (VCL), 158<br />
TMediaPlayer class (VCL),<br />
159-160<br />
TMemo class, 253<br />
TNTTP component, 475<br />
TObject class (VCL), 156<br />
Toggle Breakpo<strong>in</strong>t command<br />
(Code Editor speed menu),<br />
394<br />
tool tips, 280<br />
TTable class (VCL)<br />
525<br />
toolbar, 174-177, 2<strong>14</strong><br />
customiz<strong>in</strong>g, 176-177<br />
speed menu, 176<br />
Toolbar command (View<br />
menu), 176<br />
Toolbar Editor dialog box, 176<br />
Top property (components),<br />
282<br />
Topic Search command (Code<br />
Editor speed menu), 384<br />
TopIndex property (ListBox<br />
component), 295<br />
TPanel class (VCL), 158<br />
TPersistent class (VCL), 156<br />
TPo<strong>in</strong>t class (VCL), 161<br />
TPOP component, 475<br />
TQuery component, 430,<br />
451-457<br />
Bof/Eof properties, 456<br />
events, 454<br />
methods, 453<br />
properties, 453<br />
TRACE diagnostic macro,<br />
418-420<br />
Trace Into command (Run<br />
menu), 395, 417<br />
Trace to Next Source L<strong>in</strong>e<br />
command (Run menu), 395,<br />
418<br />
transaction isolation level, see<br />
TIL<br />
transactions (databases),<br />
process<strong>in</strong>g, 440-441<br />
Transparent property (Label<br />
component), 306<br />
TRect class (VCL), 161<br />
TSession component, 434-437<br />
events, 435<br />
methods, 435<br />
properties, 434<br />
TSMTP component, 475<br />
TSpeedButton class (VCL),<br />
158<br />
TStoredProc component, 430,<br />
457-462<br />
events, 459-460<br />
methods, 458-459<br />
properties, 457-458<br />
TStr<strong>in</strong>gList class (VCL), 161<br />
TStr<strong>in</strong>gs class, 285-287<br />
VCL, 161<br />
TTable class (VCL), 159
526<br />
TTable component, 430,<br />
441-451<br />
Bof/Eof properties, 447<br />
events, 444-445<br />
methods, 443-444<br />
Locate, 448-449<br />
Lookup, 449<br />
properties, 442-443<br />
TTCP component, 475<br />
TTimer class (VCL), 159<br />
TUDP component, 475<br />
TUpdateSQL component,<br />
465-467<br />
methods, 466<br />
properties, 466<br />
TW<strong>in</strong>Control class (VCL), 156<br />
typedefs, 18<br />
U-V<br />
TTable components<br />
undo<strong>in</strong>g (Code Editor), 378<br />
un<strong>in</strong>itialized po<strong>in</strong>ters, 72, 421<br />
units, 174, 2<strong>14</strong><br />
unsigned data types, 17<br />
Update button (Project<br />
Manager speedbar), 358<br />
Update command (Project<br />
Manager speed menu), 359<br />
Update method (components),<br />
283<br />
updates, cached (databases),<br />
449-450, 461-462<br />
Use option (Object<br />
Repository), 321<br />
variables, 16<br />
add<strong>in</strong>g to Watch List,<br />
405-406<br />
data members, 103-105<br />
getters/setters, 104<br />
global, 55-56<br />
extern keyword, 56<br />
nam<strong>in</strong>g, 46, 65<br />
po<strong>in</strong>ters, 68-73<br />
dereferenc<strong>in</strong>g, 72-73<br />
dynamic allocation, 70, 86<br />
references, 76-78<br />
un<strong>in</strong>itialized, 72<br />
static, <strong>14</strong>9<br />
VCL (Visual Component<br />
Library), 108-109, 139, 153,<br />
163<br />
class hierarchy, 156-157<br />
classes, 164<br />
component classes, 157-161<br />
components, 139<br />
access methods, <strong>14</strong>1<br />
access specifiers, <strong>14</strong>2<br />
events, <strong>14</strong>6-<strong>14</strong>8, 152-153<br />
methods, <strong>14</strong>5<br />
properties, <strong>14</strong>0-<strong>14</strong>4<br />
dialog box classes, 193<br />
dynamic allocation, 154<br />
form/application classes, 157<br />
functions, default parameters,<br />
155<br />
multiple <strong>in</strong>heritance, 155<br />
overload<strong>in</strong>g, 154-155<br />
utility classes, 161<br />
VertScrollBar property (TForm<br />
class), 194<br />
View As Form command (Code<br />
Editor speed menu), 384<br />
View as Text (Form Designer’s<br />
speed menu), 219<br />
View Form button (Project<br />
Manager speedbar), 357<br />
View Form command (Project<br />
Manager speed menu), 359<br />
View menu commands<br />
Alignment Palette, <strong>14</strong>8, 233<br />
Breakpo<strong>in</strong>ts, 398<br />
Call Stack, 413-4<strong>14</strong><br />
Component Palette, 179<br />
CPU, 415<br />
Object Inspector (F11), 9<br />
Project Manager, 354<br />
Project Source, 170<br />
Toolbar, 176<br />
Watches, 406<br />
View Project Source command<br />
(Project Manager speed<br />
menu), 359<br />
View Source command<br />
(Breakpo<strong>in</strong>t list primary<br />
speed menu), 399<br />
View Unit button (Project<br />
Manager speedbar), 357<br />
View Unit command (Project<br />
Manager speed menu), 359<br />
virtual functions, 117<br />
Visible property, 282<br />
TForm class, 196<br />
Visual Component Library, see<br />
VCL<br />
visual components, 272<br />
W-X-Y-Z<br />
WantReturns property (edit<br />
controls), 291<br />
WantTabs property (edit<br />
controls), 291<br />
WARN diagnostic macro,<br />
418-420<br />
Watch List, 402-408<br />
add<strong>in</strong>g variables, 405-406<br />
decimal/hexadecimal<br />
converter, 406<br />
enabl<strong>in</strong>g/disabl<strong>in</strong>g items, 405<br />
speed menu, 403<br />
Watch Properties dialog box,<br />
403-405<br />
Watches command (View<br />
menu), 406<br />
Web browsers, build<strong>in</strong>g,<br />
475-479<br />
attach<strong>in</strong>g code, 478-479<br />
while loops, 48<br />
WHILETST.CPP list<strong>in</strong>g, 48<br />
whitespace, 13<br />
Width property (components),<br />
282<br />
W<strong>in</strong>32 console apps, see<br />
console-mode applications<br />
w<strong>in</strong>dows<br />
Breakpo<strong>in</strong>t list, 398-399<br />
secondary, 193<br />
W<strong>in</strong>dows controls, see controls<br />
W<strong>in</strong>dowState property (TForm<br />
class), 196<br />
W<strong>in</strong>Ma<strong>in</strong>( ) function, 26<br />
Word Wrap menu item, 252<br />
WordWrap property<br />
edit controls, 291<br />
Label component, 306<br />
WRAPME.CPP list<strong>in</strong>g, 19<br />
wrapp<strong>in</strong>g, 18<br />
WRITEFIL.CPP list<strong>in</strong>g,<br />
125-126<br />
writ<strong>in</strong>g properties, 493-494<br />
wspr<strong>in</strong>tf( ) function, 34-35<br />
Z-order<strong>in</strong>g, 196
A V I A C O M S E R V I C E<br />
The Information SuperLibrary Bookstore Search What’s New Reference<br />
Desk<br />
Yellow Pages Internet<br />
Starter Kit<br />
C<br />
You’ll f<strong>in</strong>d thousands of shareware<br />
files and over 1,600 computer books<br />
designed for both technowizards<br />
and technophobes.You can browse<br />
through 700 sample chapters, get<br />
the latest news on the Net, and f<strong>in</strong>d<br />
just about anyth<strong>in</strong>g us<strong>in</strong>g our<br />
massive search directories.<br />
All Macmillan Computer Publish<strong>in</strong>g books<br />
are available at your local bookstore.<br />
HTML<br />
Workshop<br />
W<strong>in</strong> a Free<br />
T-Shirt!<br />
Software<br />
Library<br />
Macmillan<br />
Computer<br />
Publish<strong>in</strong>g<br />
Newsletter Company<br />
Overviews<br />
Site Map Talk to Us<br />
HECK OUT THE BOOKS IN THIS LIBRARY.<br />
Copyright © 1996, Macmillan Computer Publish<strong>in</strong>g USA. A Simon & Schuster Company.<br />
The Publish<strong>in</strong>g Operation of Viacom, Inc.<br />
We’re open 24 hours a day, 365 days a year.<br />
We don’t charge f<strong>in</strong>es.<br />
You don’t need a card.<br />
And you can be as LOUD as you want.<br />
The Information SuperLibrary<br />
http://www.mcp.com/mcp/ ftp.mcp.com
Technical<br />
Support:<br />
If you cannot get the CD/Disk to <strong>in</strong>stall properly,<br />
or you need assistance with a particular situation<br />
<strong>in</strong> the book, please feel free to check out<br />
the Knowledge Base on our Web site at<br />
http://www.superlibrary.com/general/support.<br />
We have answers to our most Frequently Asked<br />
Questions listed there. If you do not f<strong>in</strong>d your<br />
specific question answered, please contact<br />
Macmillan Technical Support at (317) 581-3833.<br />
We can also be reached by email at<br />
support@mcp.com.
Component Palette<br />
Quick Reference<br />
Standard<br />
Additional<br />
W<strong>in</strong>95<br />
Data Access<br />
Data Controls<br />
W<strong>in</strong> 3.1<br />
Dialogs<br />
System<br />
OCX<br />
QReport<br />
Samples
<strong>Teach</strong> <strong>Yourself</strong> <strong>Borland</strong> <strong>C++</strong>Builder <strong>in</strong> <strong>14</strong> <strong>Days</strong><br />
Day 7<br />
Day 6<br />
Day 5<br />
Day 4<br />
Day 3<br />
Day 2<br />
Day 1<br />
This day explores the<br />
form-based model <strong>in</strong><br />
much more detail,<br />
with a study of the<br />
Form Designer and<br />
the Menu Designer.<br />
To illustrate these,<br />
you will build a<br />
Notepad program.<br />
Here you start to<br />
learn about projects<br />
and how projects are<br />
used <strong>in</strong> writ<strong>in</strong>g<br />
<strong>C++</strong>Builder<br />
applications. Then<br />
come the visual<br />
aspects with the<br />
speedbar and the<br />
Component Palette.<br />
Today you beg<strong>in</strong> to<br />
learn how<br />
<strong>C++</strong>Builder makes it<br />
easy to apply all<br />
those concepts you<br />
learned earlier. First<br />
there are frameworks,<br />
then OWL, MFC,<br />
and VCL.<br />
Classes are the heart<br />
of <strong>C++</strong> and a major<br />
part of objectorientedprogramm<strong>in</strong>g.<br />
Classes are also<br />
the heart of VCL.<br />
You delve deeply <strong>in</strong>to<br />
these concepts and<br />
then get an<br />
<strong>in</strong>troduction to file<br />
<strong>in</strong>put and output.<br />
Branch<strong>in</strong>g out <strong>in</strong>to<br />
the concepts of <strong>C++</strong><br />
that most people<br />
trip over, you learn<br />
about po<strong>in</strong>ters,<br />
references, and<br />
functions. You then<br />
beg<strong>in</strong> the foundations<br />
of classes.<br />
Here you dig deeper<br />
<strong>in</strong>to the language,<br />
learn<strong>in</strong>g to control<br />
the flow of the<br />
program with<br />
conditionals and<br />
loops. Then you<br />
build complex data<br />
structures.<br />
You beg<strong>in</strong> by<br />
becom<strong>in</strong>g comfortable<br />
with <strong>Borland</strong><br />
<strong>C++</strong>Builder, just<br />
gett<strong>in</strong>g a feel for it.<br />
Then you start to<br />
learn the <strong>C++</strong><br />
language.<br />
Day <strong>14</strong><br />
Day 13<br />
Day 12<br />
Day 11<br />
Day 10<br />
Day 9<br />
Day 8<br />
It is largely the<br />
properties, methods,<br />
and events (PME)<br />
model that gives<br />
<strong>C++</strong>Builder its<br />
power. In this f<strong>in</strong>al<br />
day you learn the<br />
extensions to <strong>C++</strong><br />
that allow <strong>Borland</strong> to<br />
fully implement the<br />
PME model.<br />
Because <strong>C++</strong>Builder<br />
ships with a suite of<br />
Internet-related<br />
OCX controls, it’s<br />
ideally suited for<br />
build<strong>in</strong>g applications<br />
that access the<br />
Internet. Here you<br />
learn the purpose of<br />
the Internet controls<br />
and use them to<br />
build your very own<br />
Web browser.<br />
Here you explore the<br />
<strong>C++</strong>Builder database<br />
components and<br />
their hierarchy. You<br />
learn about the<br />
classes that make up<br />
the <strong>C++</strong>Builder<br />
database architecture<br />
and the key<br />
properties, methods,<br />
and events of each<br />
one.<br />
A good debugger is<br />
vital to efficient<br />
program development,<br />
and a major<br />
feature of the<br />
<strong>C++</strong>Builder IDE is<br />
the <strong>in</strong>tegrated<br />
debugger. Here you<br />
learn about what<br />
the debugger can do<br />
for you.<br />
To truly understand<br />
how applications are<br />
built, you learn about<br />
projects <strong>in</strong> more<br />
detail. Then you<br />
learn more about<br />
the Code Editor and<br />
the features that<br />
make work<strong>in</strong>g with<br />
code easier.<br />
<strong>C++</strong>Builder provides<br />
a variety of tools that<br />
aid you <strong>in</strong> build<strong>in</strong>g<br />
your application.<br />
Here you explore the<br />
Object Repository,<br />
Dialog Expert, and<br />
Application Expert.<br />
This week you start<br />
by study<strong>in</strong>g<br />
components, the<br />
technology that gives<br />
<strong>C++</strong>Builder much of<br />
its power. You use<br />
the Form Designer to<br />
place a component<br />
on a form and<br />
modify its properties.
Add to Your Sams Library Today with the Best Books for<br />
Programm<strong>in</strong>g, Operat<strong>in</strong>g Systems, and New Technologies<br />
The easiest way to order is to pick up the phone and call<br />
1-800-428-5331<br />
between 9:00 a.m. and 5:00 p.m. EST.<br />
For faster service please have your credit card available.<br />
ISBN Quantity Description of Item Unit Cost Total Cost<br />
0-672-309<strong>14</strong>-9 Delphi 2 Developer’s Guide, Second Editon<br />
(book/CD-ROM) $59.99<br />
0-672-30802-9 Tom Swan’s Master<strong>in</strong>g <strong>Borland</strong> <strong>C++</strong>5, Premier<br />
Edition (book/CD-ROM) $59.99<br />
0-672-30863-0 <strong>Teach</strong> <strong>Yourself</strong> Delphi 2 <strong>in</strong> 21 <strong>Days</strong> $35.00<br />
0-672-30756-1 <strong>Teach</strong> <strong>Yourself</strong> <strong>Borland</strong> <strong>C++</strong> 5 <strong>in</strong> 21 <strong>Days</strong>, Third<br />
Edition<br />
$39.99<br />
0-672-30858-4 Delphi 2 Unleashed (book/CD-ROM) $59.99<br />
0-672-30871-1 <strong>Borland</strong>’s Official No-Nonsense Guide to Delphi 2 $25.00<br />
0-672-30862-2 Database Developer’s Guide with Delphi 2<br />
(book/CD-ROM)<br />
$55.00<br />
0-672-30800-2 Database Developer’s Guide with <strong>Borland</strong> <strong>C++</strong> 5<br />
(book/CD-ROM)<br />
Shipp<strong>in</strong>g and handl<strong>in</strong>g: See <strong>in</strong>formation below.<br />
TOTAL<br />
$59.99<br />
Shipp<strong>in</strong>g and handl<strong>in</strong>g: $4.00 for the first book, and $1.75 for each additional book. If you need to have it NOW, we can ship<br />
product to you <strong>in</strong> 24 hours for an additional charge of approximately $18.00, and you will receive your item overnight or <strong>in</strong><br />
two days. Overseas shipp<strong>in</strong>g and handl<strong>in</strong>g adds $2.00. Prices subject to change. Call between 9:00 a.m. and 5:00 p.m. EST for<br />
availability and pric<strong>in</strong>g <strong>in</strong>formation on latest editions.<br />
201 W. 103rd Street, Indianapolis, Indiana 46290<br />
1-800-428-5331 — Orders 1-800-835-3202 — FAX 1-800-858-7674 — Customer Service<br />
Book ISBN 0-672-31051-1
Get seven<br />
more days<br />
of <strong>Borland</strong><br />
<strong>C++</strong>Builder!<br />
<strong>Teach</strong> <strong>Yourself</strong> <strong>Borland</strong> <strong>C++</strong>Builder<br />
<strong>in</strong> 21 <strong>Days</strong><br />
by Kent Reisdorph and Ken Henderson<br />
Get your answers straight from the source with books from <strong>Borland</strong><br />
Press. Follow<strong>in</strong>g the format of the best-sell<strong>in</strong>g <strong>Teach</strong> <strong>Yourself</strong> series,<br />
this step-by-step guide makes learn<strong>in</strong>g <strong>Borland</strong> <strong>C++</strong>Builder programm<strong>in</strong>g<br />
a breeze. It’s the perfect learn<strong>in</strong>g tool for beg<strong>in</strong>n<strong>in</strong>g<br />
programmers who want to develop their own programm<strong>in</strong>g<br />
capabilities, and for developers who want to get up-to-speed with<br />
<strong>C++</strong>Builder quickly and easily.<br />
Price: $39.99 USA/$56.95 CDN User Level: New—Casual<br />
ISBN: 0-672-31020-1 800 pages<br />
Available February 1997!
Overview<br />
Introduction<br />
Introduction xii<br />
Week 1 at a Glance 1<br />
Day 1 Gett<strong>in</strong>g Your Feet Wet 3<br />
2 Wad<strong>in</strong>g In Deeper 39<br />
3 Up to Your Neck <strong>in</strong> <strong>C++</strong> 67<br />
4 Totally Immersed: <strong>C++</strong> Classes and Object-Oriented Programm<strong>in</strong>g 95<br />
5 <strong>C++</strong> Class Frameworks and the Visual Component Model 131<br />
6 The <strong>C++</strong>Builder IDE Explored: Projects and Forms 167<br />
7 Work<strong>in</strong>g with the Form Designer and the Menu Designer 217<br />
Week 1 <strong>in</strong> Review 265<br />
Week 2 at a Glance 269<br />
Day 8 VCL Components 271<br />
9 Creat<strong>in</strong>g Applications <strong>in</strong> <strong>C++</strong>Builder 317<br />
10 More on Projects 353<br />
11 Us<strong>in</strong>g the Debugger 393<br />
12 <strong>C++</strong>Builder Database Architecture 427<br />
13 Build<strong>in</strong>g Internet Applications 473<br />
<strong>14</strong> <strong>C++</strong>Builder Extensions to <strong>C++</strong> 487<br />
Week 2 <strong>in</strong> Review 499<br />
Appendix<br />
A Answers to Quiz Questions 501<br />
Index 509<br />
v
vi <strong>Teach</strong> <strong>Yourself</strong> <strong>C++</strong>Builder <strong>in</strong> <strong>14</strong> <strong>Days</strong><br />
Contents<br />
Introduction xii<br />
Week 1 at a Glance 1<br />
Day 1 Gett<strong>in</strong>g Your Feet Wet 3<br />
What Is <strong>C++</strong>Builder? .................................................................................. 4<br />
A Quick Look at the <strong>C++</strong>Builder IDE ........................................................ 4<br />
Hello World ............................................................................................... 6<br />
Hello World, Part II—A W<strong>in</strong>32 Console Application ................................ 8<br />
<strong>C++</strong> Language Overview........................................................................... <strong>14</strong><br />
Summary .................................................................................................. 35<br />
Workshop................................................................................................. 36<br />
Day 2 Wad<strong>in</strong>g In Deeper 39<br />
If… .......................................................................................................... 40<br />
Thrown for a Loop ................................................................................... 44<br />
The switch Statement ............................................................................. 51<br />
Learn<strong>in</strong>g About Scope .............................................................................. 53<br />
Structures ................................................................................................. 56<br />
Summary .................................................................................................. 64<br />
Workshop................................................................................................. 65<br />
Day 3 Up to Your Neck <strong>in</strong> <strong>C++</strong> 67<br />
Po<strong>in</strong>ters: Welcome to My Nightmare ....................................................... 68<br />
References ................................................................................................ 76<br />
Pass<strong>in</strong>g Function Parameters by Reference and by Po<strong>in</strong>ter ........................ 79<br />
The new and delete Operators ................................................................ 81<br />
Functions <strong>in</strong> <strong>C++</strong> ..................................................................................... 86<br />
Summary .................................................................................................. 92<br />
Workshop................................................................................................. 92<br />
Day 4 Totally Immersed: <strong>C++</strong> Classes and<br />
Object-Oriented Programm<strong>in</strong>g 95<br />
So, uh…What’s a Class? ........................................................................... 96<br />
Anatomy of a Class ................................................................................... 97<br />
Inheritance ............................................................................................. 116<br />
Basic File I/O ......................................................................................... 122<br />
Summary ................................................................................................ 128<br />
Workshop............................................................................................... 129<br />
Day 5 <strong>C++</strong> Class Frameworks and the Visual Component Model 131<br />
Frameworks 101 ..................................................................................... 132<br />
The <strong>C++</strong> Framework Wars ..................................................................... 136<br />
The Visual Component Library: The New Kid on the Block .................. 139<br />
<strong>C++</strong>Builder and VCL ............................................................................. 153
Introduction<br />
VCL Explored ........................................................................................ 156<br />
Summary ................................................................................................ 162<br />
Workshop............................................................................................... 163<br />
Day 6 The <strong>C++</strong>Builder IDE Explored: Projects and Forms 167<br />
Projects <strong>in</strong> <strong>C++</strong>Builder ........................................................................... 169<br />
The <strong>C++</strong>Builder Ma<strong>in</strong> Menu and Toolbar ............................................. 175<br />
Us<strong>in</strong>g the Component Palette................................................................. 177<br />
Back on Track—A Multiple-Form Application ...................................... 180<br />
Compil<strong>in</strong>g and Build<strong>in</strong>g Other <strong>C++</strong> Programs ....................................... 185<br />
More About <strong>C++</strong>Builder Forms .............................................................. 186<br />
The Object Inspector.............................................................................. 200<br />
An MDI Sample Program....................................................................... 204<br />
Summary ................................................................................................ 213<br />
Workshop............................................................................................... 213<br />
Day 7 Work<strong>in</strong>g with the Form Designer and the Menu Designer 217<br />
Work<strong>in</strong>g with the Form Designer ........................................................... 218<br />
May I See a Menu, Please? ...................................................................... 244<br />
Summary ................................................................................................ 262<br />
Workshop............................................................................................... 262<br />
Week 1 <strong>in</strong> Review 265<br />
Week 2 at a Glance 269<br />
Day 8 VCL Components 271<br />
Review .................................................................................................... 272<br />
The Name Property.................................................................................. 273<br />
Important Common Properties .............................................................. 275<br />
Primary Methods of Components .......................................................... 282<br />
Common Events..................................................................................... 283<br />
TStr<strong>in</strong>gs .............................................................................................. 285<br />
Standard W<strong>in</strong>dows Control Components ............................................... 287<br />
The Common Dialog Boxes ................................................................... 307<br />
Summary ................................................................................................ 3<strong>14</strong><br />
Workshop............................................................................................... 3<strong>14</strong><br />
Day 9 Creat<strong>in</strong>g Applications <strong>in</strong> <strong>C++</strong>Builder 317<br />
Work<strong>in</strong>g with the Object Repository ...................................................... 318<br />
Build<strong>in</strong>g Forms and Applications with the Wizards ................................ 329<br />
Add<strong>in</strong>g Functions and Data Members to Code....................................... 336<br />
Us<strong>in</strong>g Resource Files ............................................................................... 341<br />
Summary ................................................................................................ 349<br />
Workshop............................................................................................... 349<br />
Day 10 More on Projects 353<br />
Everyone Needs a Project ....................................................................... 353<br />
Us<strong>in</strong>g the Project Manager ..................................................................... 354<br />
vii
viii <strong>Teach</strong> <strong>Yourself</strong> <strong>C++</strong>Builder <strong>in</strong> <strong>14</strong> <strong>Days</strong><br />
Explor<strong>in</strong>g Your Projects .......................................................................... 359<br />
Understand<strong>in</strong>g Project Options .............................................................. 362<br />
The <strong>C++</strong>Builder Code Editor ................................................................. 375<br />
Summary ................................................................................................ 388<br />
Workshop............................................................................................... 388<br />
Day 11 Us<strong>in</strong>g the Debugger 393<br />
Why Use the Debugger? ......................................................................... 394<br />
The Debugg<strong>in</strong>g Menu Items .................................................................. 394<br />
Breakpo<strong>in</strong>ts ............................................................................................ 396<br />
Watch<strong>in</strong>g Variables ................................................................................ 402<br />
The Debug Inspector .............................................................................. 408<br />
Other Debugg<strong>in</strong>g Tools ......................................................................... 412<br />
Stepp<strong>in</strong>g Through Your Code ................................................................ 416<br />
Debugg<strong>in</strong>g Techniques ........................................................................... 418<br />
Summary ................................................................................................ 423<br />
Workshop............................................................................................... 423<br />
Day 12 <strong>C++</strong>Builder Database Architecture 427<br />
Some Terms You’ll Need to Know ......................................................... 428<br />
An Overview of the Architecture ............................................................ 430<br />
A Tour of the <strong>C++</strong>Builder Database Components .................................. 433<br />
Summary ................................................................................................ 471<br />
Workshop............................................................................................... 471<br />
Day 13 Build<strong>in</strong>g Internet Applications 473<br />
The Basics .............................................................................................. 474<br />
A Tour of the Internet Component Palette Page..................................... 474<br />
Build<strong>in</strong>g Your Web Browser ................................................................... 475<br />
Giv<strong>in</strong>g the New Form Life ..................................................................... 478<br />
Summary ................................................................................................ 484<br />
Workshop............................................................................................... 484<br />
Day <strong>14</strong> <strong>C++</strong>Builder Extensions to <strong>C++</strong> 487<br />
What Brought Us Here? ......................................................................... 488<br />
Language Extensions: The Great Debate ................................................ 489<br />
New <strong>C++</strong> Keywords <strong>in</strong> <strong>C++</strong>Builder ........................................................ 491<br />
Summary ................................................................................................ 496<br />
Workshop............................................................................................... 497<br />
Week 2 <strong>in</strong> Review 499<br />
Appendix<br />
A Answers to Quiz Questions 501<br />
Index 509