locker skull wicked.cdr - Airbrush Megastore
locker skull wicked.cdr - Airbrush Megastore
locker skull wicked.cdr - Airbrush Megastore

You also want an ePaper? Increase the reach of your titles
YUMPU automatically turns print PDFs into web optimized ePapers that Google loves.
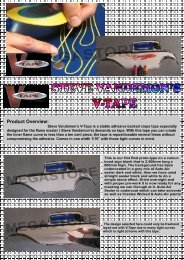
Preparation:<br />
Foreword On Createx Wicked:<br />
This water-based paint is at the cutting<br />
edge of paint technology, pigments milled fine enough to be confidently<br />
sprayed thru as lower nozzle size as .18 Custom Micron and as large<br />
a nozzle as a 1.2ml spray gun.<br />
Applications are unique in that the same paint may be used on, Fabric,<br />
Automotive applications ( Two Pack Clear Is Required for Sealing ),<br />
Illustration, Wood, Metal, Plastic, Lexan, Shoes, Leather etc:<br />
Proper preparation for hard surfaces is to sand with 600 grit and<br />
degrease your surface, apply where required Auto-Air Sealer White or<br />
Dark which is now manufactured only in the Wicked Formula for a total<br />
system, for raw Automotive surfaces you are still required to Two Pack<br />
Under-coat first.<br />
Reduce Wicked paints by 10% with Wicked reducer for sprayguns to<br />
1.2ml and 30% for airbrush applications as a guide line. Further<br />
reduction creates a more transparent value of the colors.<br />
Achieve fine lines, virtually no tip dry and no grainy dot pattern or<br />
overspray with this revolutionary paint system.<br />
Eddie Davis;<br />
I started with a pencil sketch that originally began as a<br />
doodle, and refined it just enough to like the overall look and to be<br />
projectable on my opaque projector. I had an idea of where I wanted to<br />
end up with this painting; being underwater and having a dynamic<br />
light source. So, where do you get light at 10,000 feet ? I did a bit of<br />
research and came up with a composite drawing of three different<br />
types of fish that inhabit the bathypelagic zone ( depths to 13,000 feet )<br />
Basicallt, I made up this fish using the head os a viperfish, or Sloan’s<br />
viperfish, the thoracic lighting of a lantern-fish, and the body of a deep<br />
sea dragon fish.<br />
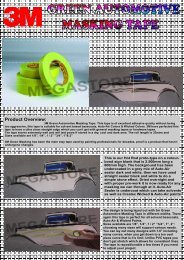
Step 2:<br />
After stretching the T-shirt onto the board I sprayed the shirt liberally with<br />
Wicked Extender from top to bottom. I let this air dry for about 5 to 10<br />
minutes and then I heat pressed it in a HIX premiere N840 heat press,<br />
a heat gun or hot iron with the t-shirt inside out would also do the trick<br />
section by section. Heat setting flattens any of the fuzz the T-shirt may<br />
have and also provides a nice flat surface for drawing on and painting.<br />
For me, there’s nothing more frustrating than drawing while projecting<br />
and snagging the shirt. I used a sharpie marker to draw the image onto<br />
the T-shirt, and while this might seem like a caveman approach, it’s a<br />
non-issue because I knew I’d use a lot of Wicked Black to model and<br />
establish texture. You won’t even see it at completion stage.
Step 3:<br />
Using Wicked Black reduced 3:1 ( three parts Black to one part Wicked<br />
Reducer ) for super smooth performance, an Iwata Eclipse CS operating<br />
at 60psi and a Artool freehand shield, I began around the cheekbone<br />
and established how the bone will look, trying to get a good growth<br />
plate texture.I used the freehand shield liberally around the edges and<br />
to define depth in concert with the freehand work.<br />
Step 4:<br />
At this point I’m happy with the detail in the jewelry and other textures<br />
and began airbrushing some shadows. Because I rely heavily on<br />
imagination, I do bend some rules about reflectivity and how light<br />
interacts with certain surfaces. The blade is an approximation of a<br />
Damascus Blade and the jewelry is going to reflect a lot of ambient<br />
light. Because of the amount of light Im going to use in concert with the<br />
details of this piece, I started dark and built my white to establish how<br />
the light hits the <strong>skull</strong> and other elements. This is where the Wicked<br />
White comes in.<br />
Step 5:<br />
Using straight Wicked White and a blow dryer, I elected to start at the<br />
nose because of its closeness to the light source of the viperfish. At this<br />
point I can really define bright and dark areas and compliment the<br />
structure I laid out with the Wicked Black. In addition, Wicked White<br />
provides and excellent base on which I can lay down vibrant color later.<br />
Working from the centre outward, always mindful of my light source, I<br />
brought everything up to value and added detail as needed. The detail<br />
really shows here, and by having a good foundation, The <strong>wicked</strong> White<br />
really shines.
Step 6:<br />
Switching to Wicked Pthalo Green, I began dusting color in the darker,<br />
more shadowed sections to tint the affected area. Then, I dusted the<br />
more lighted areas with Createx Fluorescent Green. These two colors on<br />
top of the Wicked White really have a nice sinister glow, which is what I<br />
wanted since the setting for this painting is deep in the ocean.<br />
Step 7:<br />
Using Wicked Laguna Blue, I dusted over the greens where needed to<br />
get a nice teal patina. Here is where I started to think about the warmer<br />
colors that I’ll use. With Wicked Violet, I started to build the bandana and<br />
by gradually building up color I can get a nice graduation of light and<br />
shadow. Using Wicked Violet & Laguna Blue I shaped and shadowed<br />
the eye and set values to give it a wet look. Wicked Red and Orange<br />
defined the eye color, and will also be used later as ambient light all<br />
over this piece.<br />
Step 8:<br />
Continuing with the Wicked Orange I added more tone to areas that<br />
will reflect that color, and I made the transition to darker color areas<br />
with the <strong>wicked</strong> Red.
Step 9:<br />
Wicked Orange was used to enhance and shape areas that will pick up<br />
light under the nose and cheek. I used a blow dryer throughout for<br />
quick drying and at arrive at a nice vibrant orange on the blue-green<br />
areas. When satisfied with the orange glow, I used Wicked White again<br />
to define the high areas that will pick up and reflect Wicked Golden<br />
Yellow in the next step.<br />
Step 10:<br />
Here I strove to really get a hot glow from the Wicked Golden Yellow by<br />
going slow and achieving a good build. Because of the intensity of the<br />
light coming from the viperfish, I really slowed down here to get it just<br />
right.<br />
Step 11:<br />
Using the method I mentioned in steps 8 through 10, I colored the<br />
remainder of the foreground subject trying to maintain continuity in my<br />
color triad-which is carried out through the jewelry, the sword handle,<br />
and the background jewelry which will ultimately be part of the glow from<br />
the viperfish. Notice that I used Wicked Orange over the blue-green<br />
from Step 6 to really give it an unearthly look. However, be careful that<br />
you slow down here because blue and orange can turn brown, I can get<br />
away with this because I dried the Wicked Orange as I painted it on the<br />
shirt.
Step 12:<br />
I heat-pressed the shirt again in preparation for the masking of the foreground<br />
subjects to paint the background. Then, I sprayed sheets of wax<br />
paper with 3M Super 77 spray adhesive and applied them, sticky-side<br />
down, while the shirt board was still warm this helps with adhesion.<br />
Using a new X-Acto knife, I carefully-repeat, carefully-cut around my<br />
foreground subject, never pressing the blade down and harder than I<br />
must to cut the wax-paper. I’ve ruined other projects at this stage by<br />
cutting through to the fabric. I break off the very tip of the #11 blades I<br />
use for this method.<br />
Step 13:<br />
To paint the background on this, I used a Kobalt Detailing Gun. This gun<br />
is built fairly well, you may also use a mini-jet of.1mm to give you the<br />
same results.<br />
Step 14:<br />
In reality the background would be black, but I deemed it cooler to use<br />
color; Wicked Blue, Wicked deep Blue , and Createx Opaque Aqua to<br />
achieve a deep water sunray background, while still being dark enough<br />
for light to really do some dynamic things. Starting with Wicked Deep<br />
Blue, I gradually built the dep dark blue and gradient upward. I then<br />
used a long straight edge with Opaque aqua to draw long, shimmering<br />
rays in the Wicked Deep Blue. The blow dryer was used here so that I<br />
could build the Opaque Aqua toward the surface. Next, I switched to<br />
Wicked Blue and tinted the Aqua at the deepest parts and added some<br />
shape. Coming back with the Opaque Aqua over the blue and building<br />
the most sunlit part at the top of the painting, I got it as even as I could.
Step 15:<br />
I personally enjoy the moment when you can peel the masking away<br />
and inspect how it’s coming together. After removing the wax paper, I<br />
pressed the shirt again and used Createx Opaque Blue and detailed<br />
the top side surfaces that will be lit by dim sunlight. Opaque Blue here<br />
works really well against the warmer colors that make up the shine from<br />
the viperfish.<br />
Step 16:<br />
Using Wicked Black, again reduced 3:1 I moved on to the face and<br />
mouth with the goat to make it look like semi-opaque gray jelly.To this<br />
end I used the structures here to airbrush a back-lit light behind the gills<br />
and a glow from the mouth. With the fins and scales, I roughed in the<br />
shape of the body first to look like a flat whip-like tail, approximated the<br />
shadows and bright areas, and slowly and meticulously rendered each<br />
course of scales.<br />
Step 17:<br />
To make the viperfish bioluminescent, I used Wcked White again, and<br />
painted the highlights on the scales and directional light. I freehanded<br />
the photophores, or lights, in the body and also detailed the fins. I used<br />
the blow dryer again for high build because almost all of the white will<br />
be tinted. Using the shadow on the <strong>skull</strong>’s jaw, I established light on the<br />
tail and began to paint the illicium and esca, or the fishing pole and<br />
lure. I made certain to really brighten up the water around the tip of the<br />
lure and added a light silhouette of white for a glow.
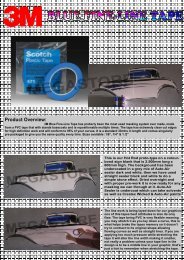
Step 18:<br />
Afterbegan coloring the viperfish with<br />
Wicked Red and used concentrated strokes<br />
to build vibrant color. I followed this<br />
with a combination of Wicked Orange,<br />
Pthalo Green and Golden Yellow. Once I<br />
established the desired glow, I came back<br />
with Wicked White for final highlights and<br />
fine tuned everything.<br />
Available At<br />
www.airbrushmegastore.com<br />
( Australian Importer )