Surrey Homes | SH37 | November 2017 | Gift supplement inside
The lifestyle magazine for Surrey - Inspirational Interiors, Fabulous Fashion, Delicious Dishes
The lifestyle magazine for Surrey - Inspirational Interiors, Fabulous Fashion, Delicious Dishes

Create successful ePaper yourself
Turn your PDF publications into a flip-book with our unique Google optimized e-Paper software.
Food<br />
Classic pizza dough<br />
Makes enough for 2 x 25cm (10 in) pizzas<br />
I like to use half ‘00’ flour and half strong white flour, but<br />
you can use all of one or the other. Be warned, though, that<br />
if you use all ‘00’ flour you will probably need to add a little<br />
extra, as otherwise it will be a very wet dough that might be<br />
hard to work with. I always make this dough at least 24 hours<br />
in advance of using it.<br />
200ml (¾ cup + 4 tsp<br />
cold water<br />
300g (2 cups) ‘00’ flour<br />
or strong white flour, plus<br />
extra for dusting<br />
½ x 7g (¼ oz) sachet of<br />
fast action dried yeast<br />
1tsp fine sea salt<br />
1. Pour the water into the bowl of a stand mixer fitted with<br />
a dough hook, then add the flour on top of the water and<br />
add the yeast and salt in separate piles. Mix for 10 minutes<br />
on a medium–low speed. For the first few minutes it will<br />
look shaggy and you might be worried that it won’t come<br />
together, but leave it be and by the end of the 10 minutes<br />
the dough should be smooth, springy and slightly sticky.<br />
Check the dough after a couple of minutes, though, to see<br />
how it’s coming along. If it’s really dry and isn’t coming<br />
together, add another tablespoon of water. If it looks really<br />
wet, add another tablespoon of flour. Alternatively, if you<br />
don’t have a mixer, you can knead the dough by hand.<br />
2. Sprinkle your work surface with a little flour and tip<br />
the dough out onto it. Knead it by hand a few times to<br />
bring it together into a smooth, round ball that holds<br />
its shape well and springs back when you poke it. If it<br />
doesn’t pass those tests, knead it for 1-2 minutes more.<br />
3. Using a dough cutter or a sharp knife, cut the dough in<br />
half. Pressing it firmly into the work surface, roll each piece<br />
into a smooth round, like a tennis ball. Put the dough<br />
balls on two side plates or a baking tray dusted with flour.<br />
Cover tightly with clingfilm/plastic wrap or soak a clean<br />
tea towel in cold running water from the tap and wring it<br />
out really well, then cover the dough with the damp cloth.<br />
Place the covered plates or tray in the fridge for at least 6<br />
hours, but ideally overnight or even up to 48 hours to let it<br />
have a long fermentation and a slow rise. The longer you let<br />
the dough sit in the fridge, the more flavour it will have.<br />
4. Take the dough out of the fridge 1 hour before you want to<br />
cook the pizzas, making sure you keep it covered with the<br />
clingfilm/ plastic wrap or damp cloth so it doesn’t dry out.<br />
When you’re ready to shape the dough, dust a pizza peel<br />
or a thin wooden chopping board generously with flour.<br />
You can either stretch the dough by hand or use a rolling<br />
pin. If you’re using a rolling pin, dust that with flour too.<br />
5. Take the rested dough ball off the plate or tray using a<br />
dough cutter or a bowl scraper, making sure the dough ball<br />
stays round at this point. Place the dough ball onto the<br />
floured peel or board and dust some flour on top of the<br />
dough too. Press down the middle of the dough with your<br />
fingers, but don’t press the edge of the dough ball, as that<br />
will be the crust later. It should already look like a little pizza.<br />
6. The dough is now ready to be stretched<br />
by hand or rolled out.<br />
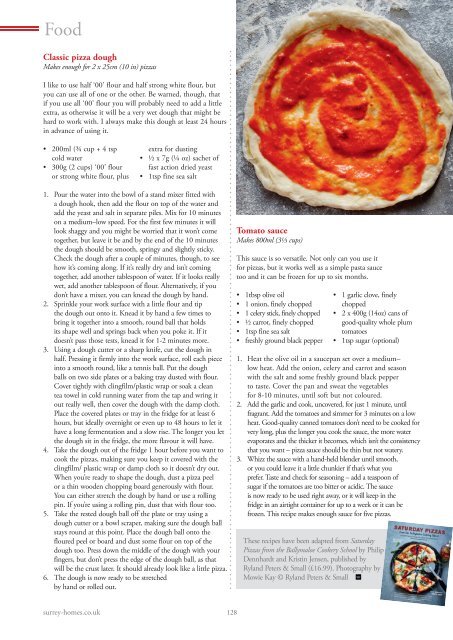
Tomato sauce<br />
Makes 800ml (3⅓ cups)<br />
This sauce is so versatile. Not only can you use it<br />
for pizzas, but it works well as a simple pasta sauce<br />
too and it can be frozen for up to six months.<br />
1tbsp olive oil<br />
1 onion, finely chopped<br />
1 celery stick, finely chopped<br />
½ carrot, finely chopped<br />
1tsp fine sea salt<br />
freshly ground black pepper<br />
1 garlic clove, finely<br />
chopped<br />
2 x 400g (14oz) cans of<br />
good-quality whole plum<br />
tomatoes<br />
1tsp sugar (optional)<br />
1. Heat the olive oil in a saucepan set over a medium–<br />
low heat. Add the onion, celery and carrot and season<br />
with the salt and some freshly ground black pepper<br />
to taste. Cover the pan and sweat the vegetables<br />
for 8-10 minutes, until soft but not coloured.<br />
2. Add the garlic and cook, uncovered, for just 1 minute, until<br />
fragrant. Add the tomatoes and simmer for 3 minutes on a low<br />
heat. Good-quality canned tomatoes don’t need to be cooked for<br />
very long, plus the longer you cook the sauce, the more water<br />
evaporates and the thicker it becomes, which isn’t the consistency<br />
that you want – pizza sauce should be thin but not watery.<br />
3. Whizz the sauce with a hand-held blender until smooth,<br />
or you could leave it a little chunkier if that’s what you<br />
prefer. Taste and check for seasoning – add a teaspoon of<br />
sugar if the tomatoes are too bitter or acidic. The sauce<br />
is now ready to be used right away, or it will keep in the<br />
fridge in an airtight container for up to a week or it can be<br />
frozen. This recipe makes enough sauce for five pizzas.<br />
These recipes have been adapted from Saturday<br />
Pizzas from the Ballymaloe Cookery School by Philip<br />
Dennhardt and Kristin Jensen, published by<br />
Ryland Peters & Small (£16.99). Photography by<br />
Mowie Kay © Ryland Peters & Small<br />
surrey-homes.co.uk<br />
128