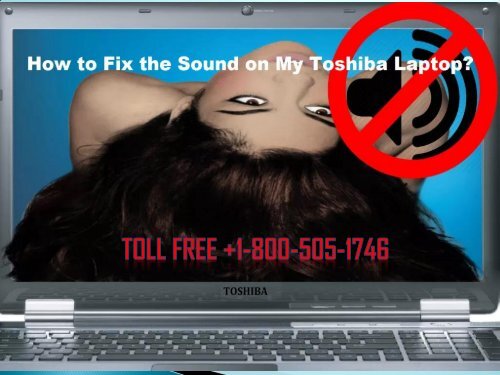
Fix the Sound in Toshiba Laptop Dial +1-800-505-1746 Helpline

Create successful ePaper yourself
Turn your PDF publications into a flip-book with our unique Google optimized e-Paper software.
<strong>Toshiba</strong> <strong>Sound</strong> Error <strong>in</strong> general appears due to several system malfunctions.<br />
<strong>Dial</strong> <strong>Toshiba</strong> Customer Support Number to resolve sound error under<br />
professional guidance. Here you can have suitable solution to <strong>Fix</strong> sound <strong>in</strong> <strong>Toshiba</strong><br />
<strong>Laptop</strong>. A sound error <strong>in</strong> <strong>Toshiba</strong> <strong>Laptop</strong> may arise due to several reasons. One of<br />
<strong>the</strong> prime reasons is corruption <strong>in</strong> Audio Driver files. Misconfiguration of sound<br />
sett<strong>in</strong>gs also boosts such errors. Sometime when <strong>the</strong>re is a corruption <strong>in</strong> your<br />
w<strong>in</strong>dows files, you may get sound from your <strong>Toshiba</strong> laptop. Miss<strong>in</strong>g important<br />
system files also cause sound failure <strong>in</strong> your <strong>Toshiba</strong> system.<br />
<strong>Toshiba</strong> <strong>Laptop</strong>s are designed with two <strong>in</strong>ternal speakers. Those speakers help<br />
you to listen to music and also hear audio. But several issues cause sound drop<br />
out on your computer.<br />
<strong>Dial</strong> <strong>+1</strong>-<strong>800</strong>-<strong>505</strong>-<strong>1746</strong>
Effective Solutions to Troubleshoot <strong>the</strong> <strong>Sound</strong> Issue<br />
<strong>in</strong> Your <strong>Toshiba</strong> <strong>Laptop</strong>:<br />
Solution 1: Restart<strong>in</strong>g of W<strong>in</strong>dows Audio Service<br />
First of all, you need to press W<strong>in</strong>dows and <strong>the</strong> R Key toge<strong>the</strong>r to<br />
open up a <strong>Dial</strong>og Box.<br />
Next command services.msc <strong>in</strong> <strong>the</strong> dialog box w<strong>in</strong>dow.<br />
Now click on <strong>the</strong> OK button.<br />
Now look for W<strong>in</strong>dows Audio under Right Service W<strong>in</strong>dow from <strong>the</strong><br />
Name list.<br />
Now right click on it followed by tapp<strong>in</strong>g on Restart option.<br />
F<strong>in</strong>ally <strong>the</strong> audio service will restart.
Solution 2: Repair<strong>in</strong>g of Corrupted W<strong>in</strong>dows Files<br />
Press and hold <strong>the</strong> W<strong>in</strong>dows and R Key toge<strong>the</strong>r to open <strong>the</strong> Run dialog box.<br />
Next type cmd followed by click<strong>in</strong>g on Ok button.<br />
It will open a Command Prompt w<strong>in</strong>dow.<br />
Type sfc/scannow on that w<strong>in</strong>dow followed by hitt<strong>in</strong>g <strong>the</strong> Enter button.<br />
It will take several m<strong>in</strong>utes to complete <strong>the</strong> process. Wait until <strong>the</strong> verification is 100%<br />
completed.<br />
Solution 3: Chang<strong>in</strong>g of <strong>the</strong> Sample rate<br />
First of all, you need to right click on <strong>the</strong> <strong>Sound</strong> Icon followed by select<strong>in</strong>g <strong>the</strong> Playback<br />
devices.<br />
Now <strong>in</strong> <strong>the</strong> playback option, you need to choose your sound card. And thus click on<br />
Properties.<br />
Now click on “Advanced” tab and change <strong>the</strong> sample rate. The default sample rate is 16 bit,<br />
44100 Hz. Make it 16 bit, 4<strong>800</strong>0 Hz.<br />
F<strong>in</strong>ally click on Apply button to check if <strong>the</strong> error still persists or not.<br />
Click on Restore Defaults if <strong>the</strong> sample rate is not set <strong>in</strong> default.<br />
Now test whe<strong>the</strong>r <strong>the</strong> sound is back or not.
Solution 4: Disabl<strong>in</strong>g of Audio Enhancement<br />
Right click on <strong>the</strong> <strong>Sound</strong> icon and select Playback Devices.<br />
Now click on Properties after choos<strong>in</strong>g Speakers.<br />
Next you need to click on Enhancement and check <strong>the</strong> box<br />
“Disable all <strong>Sound</strong> Effects”.<br />
Now click on Apply button to complete <strong>the</strong> process.<br />
<strong>Dial</strong> <strong>+1</strong>-<strong>800</strong>-<strong>505</strong>-<strong>1746</strong>
CONTACT US<br />
TOSHIBA SUPPORT PHONE NUMBERS<br />
TOLL-FREE: USA: <strong>+1</strong>-<strong>800</strong>-<strong>505</strong>-<strong>1746</strong><br />
TOLL-FREE UK: +44-<strong>800</strong>-046-5216<br />
TOLL-FREE AU: +61-180-095-4262<br />
MAIL : <strong>in</strong>fo@toshibasupportphonenumber.com<br />
24 X 7 TECHNICAL SUPPORT<br />
VISIT-:<br />
https://www.toshibasupportphonenumber.com/blog/fixsound-<strong>in</strong>-toshiba-laptop/