
You also want an ePaper? Increase the reach of your titles
YUMPU automatically turns print PDFs into web optimized ePapers that Google loves.
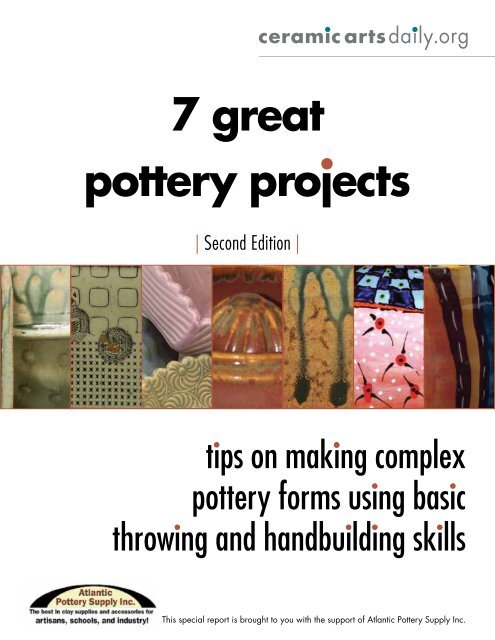
ceramic artsdaily.org<br />
7 great<br />
pottery projects<br />
| Second Edition |<br />
tips on making complex<br />
pottery forms using basic<br />
throwing and handbuilding skills<br />
This special report is brought to you with the support of Atlantic Pottery Supply Inc.
7 Great Pottery Projects<br />
Tips on Making Complex Pottery Forms<br />
Using Basic Throwing and Handbuilding Skills<br />
There’s nothing more fun than putting your hands in clay, but when you get into the studio do you know what you want<br />
to make? With clay, there are so many projects to do, it’s hard to focus on which ones to do first. So, for those who may<br />
wany some step-by-step direction, here are 7 great pottery projects you can take on.<br />
The projects selected here are easy even though some may look complicated. But with our easy-to-follow format, you’ll<br />
be able to duplicate what some of these talented potters have described. These projects can be made with almost any<br />
type of ceramic clay and fired at the recommended temperature for that clay.<br />
You can also decorate the surfaces of these projects in any style you choose—just be sure to use food-safe glazes for any<br />
pots that will be used for food. Need some variation? Just combine different ideas with those of your own and create allnew<br />
projects. With the pottery techniques in this book, there are enough possibilities to last a lifetime!<br />
The Stilted Bucket<br />
by Jake Allee<br />
As a college ceramics instructor, Jake enjoys a good<br />
time just like anybody else and it shows with this bucket<br />
project. Easy to carry and set down on a party table, this<br />
snack bowl is a comfortable one-handed fit while you’re<br />
holding a six-pack in the other hand.<br />
Got Juice?<br />
By Dannon Rhudy<br />
Dannon has been a potter for many years and enjoys<br />
her fresh-squeezed juice when she wakes up. Her juicer<br />
is easy to make and is a great gift idea for family and<br />
friends.<br />
Pinched Teapots<br />
by Ron Korcynzyski<br />
Teapots are one of the greatest challenges for any potter,<br />
but Ron took the challenge and developed this great<br />
project for his high school students. The construction is<br />
basic utilizing two pinched pots, the fun begins with your<br />
own variations!<br />
Covered Jar Set<br />
by Steve Davis-Rosenbaum<br />
The next time you make jars, why not make two and<br />
connect them. Steve figured out a process for his double<br />
jar set through a series of creative accidents and brilliant<br />
insights and he shows you how to do it yourself.<br />
Making a Tall Vase<br />
by Andrea Perisho<br />
Veteran potter Mark Issenberg from Georgia creates his<br />
beautiful signature vases in three parts. When breaking<br />
down a big project into smaller pieces, the impossible<br />
becomes possible. Astonish your friends and loved ones<br />
with an impressive large piece.<br />
Nesting Bowls<br />
by Annie Chrietzberg<br />
Annie shows you how to create great looking nesting<br />
bowls beginning with a set of tart pans from a kitchen<br />
store. To add even more variety, she adds texture to both<br />
sides of the slabs opening up the project to endless<br />
combinations.<br />
Lana Wilson’s Textured<br />
Platters<br />
by Annie Chrietzberg<br />
Lana has a knack for creating wonderful loose forms<br />
that brings out a bit of envy in all of us. But, like all the<br />
projects in this book, her seemingly difficult platters are<br />
constructed and decorated one step at a time.<br />
www.ceramicartsdaily.org | Copyright © 2013, Ceramic Publications Company | 7 Great Pottery Projects | 1
Stilted Bucket<br />
by Jake Allee<br />
Stilted Bucket, 9 in. (23 cm) in height, thrown and altered composite form, oxidation<br />
fired to cone 9.<br />
Presentation is everything! Imagine yourself<br />
arriving at a party with a six pack of your<br />
favorite Mexican beverage hanging from one<br />
hand and the belly of a stilted bucket loaded<br />
with limes in the palm of the other. Grasping the ceramic<br />
piece on the underside enables you to give your<br />
host a hearty hug with hands full!<br />
The Stilted Bucket is a product of several elements<br />
within my creative process. One of the primary elements<br />
is historical inspiration, and, after looking at<br />
many examples of Chinese Chou period bronzes, I<br />
began to think about how I could change the orientation<br />
of my forms to construct new work. Many<br />
bronze pieces have a combination of geometric and<br />
organic elements with an angular quality that creates<br />
interest within the form, and I wanted to inject this<br />
into my repertoire.<br />
Deconstructing Chinese forms in my sketch book,<br />
I realized that many of these pieces stand on tripods<br />
that lift the forms in a manner that makes me want<br />
to put my hand under them and lift them up. I also<br />
realized that most of the textures created from altering<br />
clay appear on the sides of my pieces, and the<br />
light bulb in my head turned on. How could I create<br />
a form that would make the viewer want to interact<br />
with it in the same way that I wanted to handle an<br />
ancient Chinese bronze on a tripod?<br />
The Stilted Bucket is composed of three basic<br />
thrown forms. The first is a bulbous cylinder that<br />
is marked, altered, and sprigged. The second is a<br />
thick disk stretched into an oval. The last is a bottomless,<br />
wide cylinder with a clean lip and attention<br />
given to the base. After creating these pieces,<br />
they’re cut apart and reassembled. Do all the<br />
throwing at the same time to ensure even moisture<br />
content in the components.<br />
www.ceramicartsdaily.org | Copyright © 2013, Ceramic Publications Company | 7 Great Pottery Projects | 2
1 2 3<br />
Throw a basic cylinder without a<br />
bottom.<br />
Mark an evenly spaced grid around<br />
the exterior.<br />
Press out the form with your finger.<br />
4<br />
Press in balls of clay at the intersections<br />
of the grid.<br />
5<br />
Throw a disk and compress it.<br />
6<br />
Stretch the disk into an oval.<br />
Process<br />
Throw a basic cylinder without a bottom (figure 1). Pay<br />
extra attention to centering because any flaw is reflected<br />
in the final form. After creating the profile, carefully<br />
mark an evenly spaced grid around the exterior (figure<br />
2). The next step exaggerates the form and the end result<br />
is larger in volume.<br />
Starting from the bottom and working to the top,<br />
press out the form with your finger using the marks as a<br />
guideline (figure 3). Make small balls of clay and press<br />
them into the clay at the intersections of the grid (figure<br />
4). This pushes back in and emphasizes the alteration.<br />
Trim excess clay from the bottom. Set aside and allow it<br />
to become leather hard.<br />
Throw a 1-inch-thick disk and compress it, but end<br />
the compression about ¾ inches from the edge (figure 5).<br />
This creates a line that later relates to the pot’s design<br />
elements. Keep the outer edge profile smooth then undercut<br />
the disk (inset).<br />
Immediately remove the disk from the wheel and<br />
stretch it into an oval by throwing it onto a canvas<br />
surface (figure 6). Make sure the piece hits the table at<br />
an angle so the disk stretches. The clay should make a<br />
“wisp” sound instead of a “WHAM!” when it hits the<br />
table. Repeat until you reach a desired shape.<br />
After stretching the disk, roll the edges over to eliminate<br />
any sharpness (figure 7). This also creates a relationship<br />
between the curled area and the handles that will be<br />
attached later.<br />
Throw a wide bottomless cylinder (figure 8). Mimic the<br />
curve created by the side of the bulbous altered cylinder.<br />
Shape and compress the lip. Finish the base with an old<br />
credit card with a curved notch cut into it. This creates a<br />
line that relates to the profile of the other edges. Set the<br />
piece aside to stiffen up.<br />
Trim excess clay from the bottom of the bulbous form<br />
(figure 9). The piece should be symmetrical top to bottom<br />
and left to right. Cut the leather-hard bulbous form<br />
and stretched disk in half (figure 10). These become the<br />
belly and the stilts respectively. Prepare for assembly by<br />
scoring the pieces.<br />
www.ceramicartsdaily.org | Copyright © 2013, Ceramic Publications Company | 7 Great Pottery Projects | 3
7 8<br />
Roll the edges over and curve the ends<br />
in to eliminate any sharpness.<br />
Throw a wide bottomless cylinder.<br />
9<br />
Trim excess clay from the bottom of the<br />
bulbous form.<br />
10 11 12<br />
Cut the bulbous form and stretched<br />
disk in half.<br />
While resting on foam, attach the bulbous<br />
underbelly to the stilts.<br />
Cut away a section of the wide cylinder,<br />
and attach it.<br />
13 14 15<br />
Blend in small coils to reinforce all joints. Cut a curve in the base of each stilt. Attach handles to the top of the stilts.<br />
Place the bulbous underbelly on a piece of foam and<br />
attach it to the stilts (figure 11). Reinforce the connection<br />
on the interior with a small coil that is blended in. Attach<br />
the other stilt. Cut away a section of the wide cylinder,<br />
and attach it to the rim of the bowl (figure 12). Remember<br />
to always leave more clay than you think you will<br />
need when cutting this piece.<br />
Blend in small coils to reinforce all joints on both the<br />
inside and outside of the piece (figure 13). Continue to<br />
rest the piece on a block of foam to protect the stilts and<br />
bowl. Cut a curve in the base of each stilt (figure 14),<br />
but pay attention to the relationship of these curves to<br />
the established composite form.<br />
After addressing the details on the underside, pull two<br />
short handles and attach them to the top of the stilts<br />
(figure 15). Curl the handles to mimic the top of the<br />
stilt. Dry the piece under plastic for several days before<br />
bisque firing.<br />
www.ceramicartsdaily.org | Copyright © 2013, Ceramic Publications Company | 7 Great Pottery Projects | 4
Triple Stilted Bucket, 6½ in. (17 cm) in height, thrown and altered composite form, soda fired to cone 10.<br />
An architectural piece designed to elevate food in the extravagance of the standard smorgasbord spread.<br />
This piece operates under the assumption that not everyone likes chocolate pudding mixed in with their<br />
creamed corn.<br />
Sketching it out<br />
I always begin a new piece by sketching because<br />
it allows me to change and rearrange proportions<br />
within the form before I produce the actual clay<br />
piece. This is an important step because time making<br />
clay objects is very valuable to me and I want<br />
to be as effi cient as possible with this time. A composite<br />
form relies on all the parts fi tting correctly,<br />
and, although clay can be quite forgiving at times,<br />
too many components in the fi nal piece can open<br />
up the possibility of a piece looking over worked.<br />
After several sketches, I’m mentally clear on how to<br />
approach the piece and I can then take to the clay.<br />
www.ceramicartsdaily.org | Copyright © 2013, Ceramic Publications Company | 7 Great Pottery Projects | 5
Citrus Juicer<br />
by Dannon Rhudy<br />
Juicer, 6 in. (15 cm)<br />
in diameter, fired<br />
to cone 6 with<br />
iron red glaze.<br />
Citrus juicers are quick and simple items to make.<br />
They’re constructed like double-walled bowls,<br />
and are both easy and fun to make.<br />
To make a finished juicer approximately 6<br />
inches in diameter, start with about 1½ pounds of clay, or<br />
a bit more. Center the clay and flatten to approximately a<br />
7- to 8-inch circle on a bat (figure 1). Next, open the center<br />
to the bat, making the opening 2–2½ inches wide at the<br />
bottom (figure 2). Raise the wall of the opening slightly (an<br />
inch or two) and use your needle tool to trim the inside of<br />
the opening (figure 3). Bevel the opening about 45º, leaving<br />
the trimmed part in place. (It will pop off later when the<br />
piece is removed from the bat.) Finish pulling up the center<br />
wall (figure 4) and completely close it. Leave a barely<br />
blunted point on the tip of the closed part (figure 5). The<br />
walls of this closed form will be slightly thick; but you will<br />
need this thickness later.<br />
Move to the outside edge of the piece. Pull up the outside<br />
wall to a height of about 3 inches (figure 6). Keep the space<br />
between the inner closed portion and the outer wall flat<br />
and smooth. Using a 45° stick or metal tool, trim the outer<br />
bottom edge of the form (figure 7). Trimming the inside of<br />
the closed form and the outside of the piece while it is still<br />
on the wheel prevents having to invert the form later for<br />
trimming—a great time savings—plus, it’s also much easier<br />
to trim this way.<br />
www.ceramicartsdaily.org | Copyright © 2013, Ceramic Publications Company | 7 Great Pottery Projects | 6
1 2 3<br />
Throw a 7-inch disk of clay. Open center of clay to wheel head. Trim inside opening with a needle tool.<br />
4<br />
Pull up wall of center opening.<br />
5<br />
Close opening completely, leaving a<br />
slightly blunted point.<br />
6<br />
Throw outside wall, leaving a flat<br />
inside bottom.<br />
Next, set the rim of the outer wall. I often indent this edge because it<br />
makes a great place for glazes to pool, which can give a more interesting<br />
finished surface (figure 8). However, a simple curved edge also works well.<br />
Be sure to make a good thick rim, no matter the shape. Thin rims chip,<br />
and items such as juicers get a lot of use and are prone to getting banged<br />
around in the kitchen. Once your rim is set, pull a nice spout, just as you<br />
might pull a spout on a pitcher (figure 9). It can be simple or elaborate.<br />
Whatever spout type you like is the one that will work on your piece, but<br />
keep in mind the end use of the juicer.<br />
Now you need to flute the closed form in the center of your juicer. The<br />
rounded end of a small loop tool is ideal. Start at the bottom of the closed<br />
center form and pull up steadily (figure 10). Go all the way around the<br />
form, spacing the grooves evenly. When you reach the top of each groove,<br />
the loop tool will naturally end the groove. Practice a couple of times. It is<br />
not difficult.<br />
www.ceramicartsdaily.org | Copyright © 2013, Ceramic Publications Company | 7 Great Pottery Projects | 7
7 8 9<br />
Trim outer bottom edge with a stick or<br />
metal tool.<br />
Finish rim of piece with an indent<br />
or curve.<br />
Form a simple or complex spout.<br />
10 11<br />
Flute center with small loop tool.<br />
Attach desired handle, let dry, and sand<br />
lightly if needed.<br />
When you have fluted the entire closed portion, pull a wire under the<br />
whole piece. Lift the bat off the wheel. Set aside to reach a soft-leather-hard<br />
stage. When the piece is stiff enough, attach any handle you like, opposite<br />
the spout (figure 11). If the handle is made of thin clay, you might want to<br />
brush it with wax to keep it from drying faster than the body of the piece.<br />
After the whole piece has dried enough to handle without distorting,<br />
remove it from the bat. Extract any bits of clay remaining on the inside<br />
bottom edge and on the outer edge. Smooth with a damp sponge. Use a<br />
plastic kitchen scrubber to remove any bits stuck to the fluted part of the<br />
piece. Do not round the edges of the fluting because those edges are what<br />
make the juicer work.<br />
Choose glazes that break well over edges, and avoid thick glazes that<br />
might dull the edges of the fluting and the tip too much.<br />
Keep in mind that juicers are mainly used for juicing citrus and other<br />
acidic foods. Choose stable glazes for this project, and your juicer will both<br />
work well and look good for a long time to come.<br />
www.ceramicartsdaily.org | Copyright © 2013, Ceramic Publications Company | 7 Great Pottery Projects | 8
Handbuilt<br />
Spherical Teapots<br />
by Ron Korczynski<br />
Spherical teapot,<br />
9 in. (23 cm) in height,<br />
underglaze decoration<br />
with clear overglaze<br />
fired to cone 04,<br />
by Ron Korcyznski.<br />
Teapots are one of the greatest challenges for any<br />
studio potter. Many elements go into their production<br />
and all the parts—the body, lid, handle,<br />
and spout—need to fit together into a cohesive<br />
whole. For centuries, teapots have been produced in myriad<br />
ways and forms, and like many potters, I initially began<br />
making teapots on the wheel. But throwing and putting the<br />
parts together was a challenge for me because the forms<br />
were too mechanical so I began to experiment with handbuilding.<br />
Since I’ve done a lot of handbuilding using hump<br />
molds, this seemed the logical path to take. While the process<br />
here uses a spherical form, you’ll soon recognize the<br />
endless possibilities with other shapes. The teapot form<br />
easily lends itself to a wide range of creative expression, and<br />
handbuilding a round teapot frees you from the symmetrical<br />
mechanized look of the wheel.<br />
Getting Started<br />
Each teapot begins with a slab draped over a plaster<br />
hump mold. I make these round plaster hump molds<br />
by taking a Styrofoam ball and cutting it in half. Styrofoam<br />
spheres are available in a variety of sizes from<br />
craft supply stores, and you’ll need a 6-inch ball for a<br />
modest-sized teapot. Other forms can also work and I<br />
use the blue extruded Styrofoam board found at home<br />
centers to build up and carve molds. Once the shape is<br />
finalized, I glue it to a piece of wood or tempered hardboard<br />
that’s been cut to shape (figure 1). Tip: You can<br />
finish the mold by propping it up and pouring plaster<br />
over the top. This gives you a thin, durable, absorbent<br />
layer that can be smoothed out when dry and makes a<br />
great lightweight mold.<br />
www.ceramicartsdaily.org | Copyright © 2013, Ceramic Publications Company | 7 Great Pottery Projects | 9
1 2 3<br />
4<br />
5<br />
6<br />
The Sphere<br />
Roll out a slab that’s about ¼ to 5 /16 inches thick. Apply toilet paper to the<br />
mold as a release and place the slab over the mold.<br />
Trim the bottom, remove and repeat for the second hemisphere (figure 2).<br />
Set the hemispheres aside and allow them to dry to the leather-hard stage.<br />
Roll out a coil and attach it to the edge of one hemisphere (figure 3), then<br />
attach the other hemisphere using your finger or tool to work the seam<br />
(figure 4).<br />
Use a Surform tool to refine the shape (figure 5). Since I do a lot of painting<br />
on my surfaces, I use a metal rib to smooth the sphere (figure 6), but you<br />
can add different textures at this stage.<br />
Base and Lid<br />
To create a base, one method I like is to use a triangular trimming tool to<br />
cut a strip from a block of clay (figure 7). With the sphere resting on an<br />
empty plastic container, attach the base and add decorative elements according<br />
to your style (figure 8). Of course, design opportunities abound here but<br />
bear in mind that all parts on a teapot work to form the whole work.<br />
www.ceramicartsdaily.org | Copyright © 2013, Ceramic Publications Company | 7 Great Pottery Projects | 10
7 8 9<br />
10<br />
11<br />
12<br />
For the lid, cut a round opening in the top of the sphere and set it aside.<br />
In order to have the lid fit only one way, make a small notch in the opening<br />
(figure 9). Place toilet paper around the edge of the opening as a separator.<br />
To construct the lid, first place a small ball of clay in the notch (figure<br />
10), then add a coil of soft clay to fit into the lid opening (figure 11) so it<br />
slightly overlaps the opening. Take the clay piece you removed to make the<br />
opening and attach it to the coil (figure 12). Flip the lid over and add a ball<br />
of clay to the underside of the lid (figure 13). This will add some weight<br />
and balance to the lid to help hold it in place when pouring tea.<br />
Spout and Handle<br />
To form the spout, flatten a cone of clay (figure 14) and form a spout<br />
around a brush handle (figure 15). Trim the spout and attach it along with<br />
decorative elements to the teapot. To create the handle, I create two “dog<br />
bone” shapes and flatten them, leaving some thickness at each end (figure<br />
17). Assemble the handle and add a decorative element if desired. Add a<br />
handle to the lid following the same style (figure 18).<br />
www.ceramicartsdaily.org | Copyright © 2013, Ceramic Publications Company | 7 Great Pottery Projects | 11
13<br />
14 15<br />
16 17 18<br />
Many teapots can be made using this technique, and the handbuilt sphere can<br />
form the basis for a variety of vessels or sculptures. The possibilities are endless.<br />
www.ceramicartsdaily.org | Copyright © 2013, Ceramic Publications Company | 7 Great Pottery Projects | 12
Lana Wilson’s<br />
Textured Platter<br />
by Annie Chrietzberg<br />
Detail of one of Lana Wilson’s richly textured platters.<br />
Lana Wilson’s career spans more than 40 years and includes a vast repertoire<br />
of pieces and surface considerations, which she regularly shares with students.<br />
She teaches, on average, a workshop a month, and loves to do so. “It’s so easy,<br />
really. The people are always interesting; you are instantly submerged in a milieu<br />
of like-minded people. I love the humor, and people are so kind.”<br />
What Lana really appreciates about teaching workshops is how much diverse experience<br />
there is in the audience. “At any given time, your audience might include a<br />
nurse, a kiln builder or a cook, and when people open up about those things, I learn<br />
so much,” she said. “And, if I come across something in ceramics that I don’t know<br />
about, I’ll ask the audience, and more times than not, I’ll learn the answer.”<br />
Lana worked with functional stoneware for the first seventeen years of her life in<br />
ceramics. And then, a job at a community college caught her eye, so, at age 43, she<br />
went back to school to get her master’s degree. For Lana, graduate school completely<br />
changed the course of her work. “Number one, it opened up the way to lots of exploring<br />
and experimenting, which has never ended,” she said. “Number two, I started<br />
making non-functional work and using the electric kiln exclusively, neither of which<br />
I’d ever done before.” Now, Lana’s focus has returned to functional pieces. She told<br />
me one reason: “I want my grandchildren to eat off of things that I have made.”<br />
www.ceramicartsdaily.org | Copyright © 2013, Ceramic Publications Company | 7 Great Pottery Projects | 13
1 2 3<br />
Smooth out a slab, layer, and press in<br />
objects then texture the surface.<br />
Use hand tools, stamps, and found objects<br />
to embellish the slab.<br />
Roll over the texture with a rolling pin,<br />
to soften and tuck in the marks.<br />
4 5 6<br />
Use a handmade viewfinder to select<br />
an interesting area.<br />
Cut out a dart then use it as a pattern to<br />
cut the remaining darts.<br />
Lift and connect the edges where the<br />
darts have been removed.<br />
Texture Throughout<br />
Lana applies texture in layers, and does so throughout her making process. During my<br />
visit, she made a serving platter to demonstrate how she works.<br />
After using a slab roller to make a large slab, she lays out some fruit netting on the<br />
table, and sets the slab on top of it. This netting forms the basis of the texture composition<br />
on the back of the piece, though Lana will embellish it more at later stages. After<br />
smoothing the front of the slab with a small squeegee, Lana uses a wooden rolling pin<br />
from a pastry store to lay down some waffle texture, which created impressed squares,<br />
then in an adjacent area, she lay down and rolled over plastic sink mats that left larger,<br />
high-relief squares (figure 1). I watched her then target and go after some of the high<br />
relief squares with her small hand-held stamps, and some found objects, inverting them<br />
with embellishment (figure 2).<br />
I was surprised when she picked up her rolling pin and rolled over the work she had<br />
just done (figure 3), but she explained to me, “You see, this softens it and makes it more<br />
interesting. I don’t want it to look like plastic surgery. I don’t like the whole Southern<br />
California glitzy sequin scene, I like old, worn friends. I like layers; I walk regularly in<br />
the Torrey Pines State Reserve when I’m home in San Diego. I love those layers of information<br />
around me.”<br />
I looked, and the effect she had created by rolling over existing texture was to ‘tuck<br />
in’ all the little marks she had made, like treasures in lockets. After tucking in her preliminary<br />
and secondary texture with a rolling pin, Lana embellished further with one<br />
of her new favorite items, the red scrubby applicator from a Shout bottle, and an old<br />
favorite, a seamstress’ marking tool.<br />
www.ceramicartsdaily.org | Copyright © 2013, Ceramic Publications Company | 7 Great Pottery Projects | 14
7 8 9<br />
Prop the piece up, level the sides, and<br />
adjust as needed.<br />
For handles, shape cones from large<br />
triangles cut from a textured slab.<br />
Lift and drop the cone two or three times<br />
to get an organic shape.<br />
10 11 12<br />
Slip and score the handle in place, then<br />
support it with foam.<br />
Turn piece over on foam supports, fill<br />
seams and adorn the repair.<br />
Make a foot from a long, thin piece cut<br />
from a textured slab.<br />
Forming the Platter<br />
Lana had created a slab much larger than what she actually needed for the piece she had in mind.<br />
She cut a framing device out of a piece of paper roughly the proportions of her intended serving<br />
dish (figure 4). She used this viewfinder to locate the best part of her texture drawing, marked the<br />
boundaries by laying down a straight edge then, using the straight edge again, cut out the shape.<br />
Lana needed to take two darts out of each end to have the flat shape rise up into the form she<br />
wanted. “Oh, I suppose I should use a template, but I never do,” she quipped, knowing that I<br />
am a template fiend. “I can never find the one I need when I need it, besides, I know what shape<br />
I need to cut out, and after I cut the first one, I’ll use it to cut the other three,“ she explained, as<br />
she cut out and removed the first dart.<br />
She took the triangular piece of clay she removed, turned it over, and set it gently down to<br />
trace it where she wanted the second dart. She then took those two cut-out and placed them on<br />
the other end, and traced and cut out the remaining two darts (figure 5). The size of the dart determines<br />
the shape of the final form. After slipping and scoring, she simply lifted and butted the<br />
joining edges together (figure 6), and then used small pieces of foam to prop up the ends of the<br />
serving dish which allows them to firm up while supported. She fills in gaps in the texture where<br />
the darts were removed with paper clay to prevent cracks from forming along the seam.<br />
To address the sides, Lana grabbed a couple of paint stirring sticks, which she used to lift the<br />
sides and then shoved pieces of foam beneath to hold them in place. She filled in gaps that had<br />
been made by cutting through existing texture on the edges, and then compressed and beveled<br />
those edges with a pony roller. Then, she used a spirit level to make sure the edges, were, um,<br />
level (figure 7). “I don’t know a gallery who would take a piece that’s not level,” she murmured<br />
as she made slight adjustments. “There we go!”<br />
www.ceramicartsdaily.org | Copyright © 2013, Ceramic Publications Company | 7 Great Pottery Projects | 15
13 14<br />
Smooth the foot with a roller and cut decorative<br />
arches through it.<br />
Use a pony roller to bevel and finish both<br />
sides of the platter’s edge.<br />
Making Handles<br />
The next task was to make the handles. First, she textures a slab and cuts out large triangles, then<br />
she rolls them into a cone (figure 8), seals them using a pony roller, and drops them on her workbench<br />
(figure 9). They magically gain character with each whump. Once she is satisfied with the<br />
result, she cuts away excess clay with a fettling knife, scores and slips the end of the serving dish, as<br />
well as the inside of a handle, and then attaches it, stacking foam beneath it for support (figure 10).<br />
Lana constantly manipulates the surface of her pieces as she is making, adding texture as she<br />
goes. After attaching the handles, she grabbed a wooden dowel with sharpened ends (a pencil<br />
would work, too) to both re-draw and enhance existing lines. After the piece had dried to leather<br />
hard, she removed the bolsters and turned it over on a large piece of foam to access the bottom. She<br />
filled the gaps in the seams with paper clay, again to strengthen them and prevent cracking (figure<br />
11). When she makes a repair like this, she adorns it. “I could teach a whole course on cheating,”<br />
she joked, while rolling a seamstress’ marking tool over the filled-in seam.<br />
Adding a Foot<br />
The last part of the serving dish project was to make and attach a foot. Before she had turned the<br />
piece over, she had taken an approximate measurement with a seamstress’ measuring tape, and had<br />
created a long slab to texture. She played around a bit with some scrap clay to determine the appropriate<br />
height, textured the slab, and used a straight edge to cut a long strip of clay for the foot.<br />
She picked up the long strip in loose folds and dropped it a few times on the table. “This makes an<br />
undulating line I just love,” she told me as she worked.<br />
She placed the foot on the bottom of the pot, shaped it how she wanted it, and cut the excess<br />
away, then joined the foot into a ring. After scoring and slipping the areas that need to be joined,<br />
she attached the foot ring to the bottom of the serving dish and used a dry soft brush to remove excess<br />
slip and blend the seam (figure 12). She then used a common loop tool to create a little looped<br />
arch on each side of the foot (figure 13). She rolled the edge with a pony roller, used a ware board<br />
to flip the piece right side up, and used the spirit level again to make adjustments (figure 14).<br />
Lana has a delightfully free, direct, and easy way of making, but don’t let that fool you into<br />
thinking she doesn’t take her time in the studio seriously. “I’ve changed my style of work about<br />
six times through out my career., and each time it takes me about six months to a year to figure it<br />
out,” she told me. “People don’t realize that being an artist is really about daily discipline; when<br />
I’m working, I want my time to work. I’m not one of those ladies who does lunch. Ceramics is far<br />
too expansive for that.”<br />
www.ceramicartsdaily.org | Copyright © 2013, Ceramic Publications Company | 7 Great Pottery Projects | 16
CAUTION<br />
You must wear a dust<br />
mask during these<br />
last steps. To finish<br />
the piece, she dips it<br />
in a clear glaze, and<br />
then fires to cone<br />
6. Through lots of<br />
experimenting, Lana<br />
has found that ending<br />
with a dark color on<br />
top works best for her.<br />
Finishing<br />
Lana Wilson’s work is mostly black and white with bits of vibrant color<br />
splashed about. She says, “I have a background in painting, and this technique<br />
really appeals to the painter in me.” She gleaned this current surface<br />
treatment from two artists, Denise Smith of Ann Arbor, Michigan, and<br />
Claudia Reese, a potter from Texas.<br />
Simple Slip<br />
To prepare the slip, Lana takes 100 grams of small pieces of bone dry clay<br />
and adds 10–50 grams of a stain. The percentages of stains varies according<br />
to the intensity of color she is trying to achieve.<br />
The clay Lana uses is Half & Half from Laguna, formulated for firing at<br />
cone 5, though she fires it to cone 6. This clay body is half porcelain and<br />
half white stoneware. It’s not as white as porcelain, but it does fire white<br />
rather than yellow in oxidation, isn’t as finicky as porcelain, and works well<br />
with Lana’s making methods. If you’re buying clay from the East Coast, she<br />
suggests a clay body called Little Loafers from Highwater Clays.<br />
1 2<br />
3 4<br />
www.ceramicartsdaily.org | Copyright © 2013, Ceramic Publications Company | 7 Great Pottery Projects | 17
NOTE<br />
Stain-bearing slips<br />
applied to surfaces<br />
that come into<br />
contact with food<br />
need to be covered<br />
with a food-safe,<br />
properly fired,<br />
clear glaze.<br />
Easy Application<br />
The technique is simple. On a piece of<br />
bisqueware, first brush on black slip or one<br />
of the base colors (figure 1) then sponge it<br />
off, leaving slip in the crevices (figure 2).<br />
Then, using colored slips dab on bits of color<br />
here and there (figure 3). Remove some of<br />
that with steel wool (figure 4). “I can’t use<br />
water for this step or it will muddy the colors,”<br />
Lana explains.<br />
Recipes<br />
There are two groups of colored slips. The<br />
first group Lana uses for the base coat<br />
that she washes off, leaving color in all the<br />
recesses. The accent slips are more intense<br />
and removed with steel wool. All stains are<br />
Mason stains except for 27496 Persimmon<br />
Red, which is from Cerdec. Add the stains<br />
and bone dry clay to water and allow to sit<br />
for 30–60 minutes so it will mix easier.<br />
Recipes<br />
Base Coat or Wash Colors<br />
6600 Best Black . . . . . . . . . . . . . 10 %<br />
6339 Royal Blue . . . . . . . . . . . . . 5–10 %<br />
6069 Dark Coral . . . . . . . . . . . . . 35 %<br />
Accent Slips<br />
6129 Golden Ambrosia . . . . . . . . 30 %<br />
6485 Titanium Yellow . . . . . . . . . 20 %<br />
6024 Orange . . . . . . . . . . . . . . . . 30 %<br />
6236 Chartreuse . . . . . . . . . . . . . 50 %<br />
6027 Tangerine . . . . . . . . . . . . . . 15 %<br />
6211 Pea Green . . . . . . . . . . . . . . 50 %<br />
6288 Turquoise . . . . . . . . . . . . . . 50 %<br />
6242 Bermuda . . . . . . . . . . . . . . . 10 %<br />
6069 Dark Coral . . . . . . . . . . . . . 35 %<br />
6122 Cedar . . . . . . . . . . . . . . . . . 25 %<br />
6304 Violet . . . . . . . . . . . . . . . . . 60 %<br />
K5997 Cherry Red* . . . . . . . . . . . 30 %<br />
27496 Persimmon Red (Cerdec)* . . . 30 %<br />
* inclusion pigments<br />
Kate the Younger Clear Glaze<br />
Cone 6<br />
Ferro Frit 3195 . . . . . . . . . . . . . . . 70 %<br />
Wollastonite . . . . . . . . . . . . . . . . . 10<br />
EPK Kaolin . . . . . . . . . . . . . . . . . . 8<br />
Silica . . . . . . . . . . . . . . . . . . . . . . 12<br />
100 %<br />
Add: Bentonite . . . . . . . . . . . . . . . 2 %<br />
From Richard Burkett. Use over colored slips.<br />
Shiny, resistant to crazing, cool slowly.<br />
Texture and isolated areas of bright color<br />
make Lana Wilson’s work really pop.<br />
www.ceramicartsdaily.org | Copyright © 2013, Ceramic Publications Company | 7 Great Pottery Projects | 18
Covered Jar Set<br />
by Steve Davis-Rosenbaum<br />
Photo by Joe Molinaro<br />
This covered jar set illustrates the fluid lines obtained by joining two forms. The form is enhanced by the shape of the handle,<br />
the lugs on the sides and the surface decoration.<br />
While working as a resident potter at Berea<br />
College, in 1998, I produced utilitarian pottery<br />
for the college’s retail and wholesale<br />
outlets. My throwing list included small<br />
covered jars, usually for creamer and sugar sets, which<br />
were thrown in series of fifteen to twenty. As my second<br />
ware board of covered jars was filling up, I glanced over<br />
at a grouping of previously thrown jars. From the vantage<br />
point of sitting on my treadle wheel, two of the jars were<br />
“visually” connected. My eyes kept returning to this view<br />
on the ware board and my thoughts turned to questions:<br />
• “Why not connect these jars together?”<br />
• “What will happen to the form and function?”<br />
• “What will I do about the lids and knobs?”<br />
These questions lead me to actually connect the jars<br />
and to continue developing the form.<br />
This moment of listening to my “inner potter” brought<br />
an opportunity for change. Moments like these are when<br />
ideas are filtered from the subconscious. They’re always<br />
with us but all too often we choose to not listen. However,<br />
this time, I took the opportunity to leave my scheduled<br />
work and developed what I saw while working at my<br />
wheel. After completing a series of ten double-jar sets, I<br />
began to reflect on the resulting series:<br />
“Where did this idea come from?”<br />
“Where else had I seen combined vessels?”<br />
The Search Begins<br />
In my search for images of combined vessels through<br />
some of my favorite books, I found a little black and<br />
white photograph of a double jam jar with horizontal<br />
straps around the belly made by Michael Cardew. The<br />
www.ceramicartsdaily.org | Copyright © 2013, Ceramic Publications Company | 7 Great Pottery Projects | 19
1<br />
Throw two identical jars. It is easier to<br />
match jars when you make a lot.<br />
2<br />
Create a gallery for the lid to sit in.<br />
3<br />
Make lids with a slight inward bevel on<br />
the rim.<br />
4<br />
After trimming, attach the forms by<br />
adding a coil between them.<br />
5<br />
Push the two forms together and<br />
smooth the seam.<br />
6<br />
Turn the joined forms over and finish<br />
working the seam.<br />
caption read “modeled after Jam-Jar Set by Hamada.” Though I was unable<br />
to find an example of Hamada’s combined vessels, I discovered a wealth of<br />
historical examples from around the world.<br />
Through the years, I’ve continued to study combined vessel forms and<br />
their function. What I’ve observed is the overwhelming number of examples<br />
found in all cultures and continents where potters found the need, or impulse,<br />
to place two or more vessels together creating a new form. These<br />
types of pots occur very early in ceramics history and reoccur throughout<br />
time. One unifying element found in these combined vessels is the desire of<br />
the potter to retain the essence of the individual vessel within the new form.<br />
Creative Accidents<br />
I realized something about the creative process and how subconscious<br />
influences impact my work. Previous to making my first combined vessel, I<br />
believe that through reading and studying images, I had stored information<br />
in my mind and allowed it to “incubate” over time. These subconscious influences<br />
filter into my work when I least expect it, and when I am least conscious<br />
of “the act of making”—the act of being in the here and now. Some<br />
refer to this as “creative accidents” that happen just by being in the studio.<br />
www.ceramicartsdaily.org | Copyright © 2013, Ceramic Publications Company | 7 Great Pottery Projects | 20
7<br />
Pull a handle or roll out a coil for the<br />
handle and allow to set up.<br />
8<br />
Fit the handle across the lids and secure<br />
with slip.<br />
9<br />
Work the handle until the desired shape<br />
is achieved.<br />
10<br />
Add small coils to complete the join<br />
between lid and handle.<br />
11<br />
Add lugs then cover lightly so the moisture<br />
can even out.<br />
12<br />
Stretch the handle over the next few<br />
days to avoid cracking.<br />
Making the Connection<br />
Typically, my work is first inspired by a utilitarian need followed by the development<br />
of the form—but the double jars sets were different. The jam jar<br />
sets became sugar and Cremora® sets. One of my interests in this form was<br />
the problem of how to unite the lids to parallel the joining of the form. The<br />
idea of connecting the lids with one handle allows the user to remove both<br />
lids with one hand, using the other hand to serve condiments on their plate.<br />
As I developed the covered jar sets, the functional aspects of the pots<br />
became secondary to form due to increase in scale or an increase in the<br />
number of vessels combined. As the jar sets became larger in scale they became<br />
less functional and their intimacy decreased. Not being able to easily<br />
handle or pass them around a table resulted in a distance between the pot<br />
and the user. My interest in making pottery is its use in the kitchen or at<br />
the table. Visualizing the table as my pedestal (rather than the mantel), I<br />
returned to making intimate combined vessels.<br />
In many ways, building multiple pots is like a puzzle. When you begin,<br />
there’s a variety of individual pieces. When assembled, the resulting form<br />
connects in a way that preserves form and maximizes function.<br />
www.ceramicartsdaily.org | Copyright © 2013, Ceramic Publications Company | 7 Great Pottery Projects | 21
Photo by Joe Molinaro<br />
This covered jar set fired in a salt kiln reveals some of the variation possible with just two forms attached.<br />
Beyond the Double Jar<br />
In addition to the double jar sets, I developed other combined condiment<br />
servers, usually combining two or three vessels. The idea of placing and<br />
connecting pots in relation to the shapes being created or eliminated, presents<br />
the potter with limitless alternatives.<br />
Working within the boundaries of utilitarian pottery and being open to<br />
what I see and what unexpectedly happens in the studio allows openness<br />
to experimenting with form. The ability to say “what if” while throwing,<br />
finishing or decorating is where many ideas are discovered and developed.<br />
Thinking about function in my daily life has guided my desire to create<br />
new forms.<br />
My guiding creative boundary is function. Having function as a central<br />
focus requires an understanding of how food, kitchen objects and other<br />
items relate visually and functionally to the ritual of eating. This knowledge<br />
informs my understanding of how to develop forms to accommodate complex<br />
utilitarian needs. The desire to put individual forms together to create<br />
combination vessels is to move my work beyond basic forms created on the<br />
wheel. This broadening perspective on my work constantly challenges my<br />
views on form and function.<br />
www.ceramicartsdaily.org | Copyright © 2013, Ceramic Publications Company | 7 Great Pottery Projects | 22
Mark Issenberg’s<br />
Three Piece Vase<br />
by Andrea Perisho<br />
While attending a workshop at<br />
the Art League of Marco Island<br />
in Florida, I watched Mark Issenberg<br />
create his signature<br />
piece: a vase, thrown in three pieces, embellished<br />
with decorative handles and ash fired.<br />
The making of the vase is described in the following<br />
process.<br />
Throwing the Parts<br />
First, throw four pounds of clay into a bulbous<br />
shape about 9 inches tall with a bowlshaped<br />
bottom (figure 1). Leave enough room<br />
to comfortably get your hand inside the pot.<br />
Measure the opening of the top (figure 2).<br />
Leave the piece attached to the bat and set<br />
aside to stiffen to soft leather hard. The piece<br />
should be dry enough to support the top<br />
section, but still soft enough to manipulate.<br />
Monitor the drying carefully (avoid areas<br />
with drafts to prevent uneven drying).<br />
When the body section of the vase is appropriately<br />
stiff, open a 1½-pound ball of clay all<br />
the way down to the surface of the bat (figure<br />
3), moving outward to form a solid ring.<br />
This piece will form the top of the vase and<br />
is thrown upside down. Use a rib to scrape<br />
away any excess clay that remains on the bat<br />
inside the ring. Bring up the wall, but leave<br />
the base (which becomes the top) fairly thick<br />
to strengthen and emphasize the top rim.<br />
Use calipers to measure the top of this piece,<br />
which will be turned upside down over the<br />
body of the vase. This measurement should<br />
be slightly larger than the opening in the top<br />
of the vase body previously thrown (figure 4).<br />
Cut off the piece with a braided cut-off wire,<br />
but leave on the bat (figure 5).<br />
TIP<br />
Mark works with two buckets of throwing<br />
water, one bucket for each hand on<br />
either side of the wheel head. This prevents<br />
bumping the thrown form.<br />
www.ceramicartsdaily.org | Copyright © 2013, Ceramic Publications Company | 7 Great Pottery Projects | 23
1 2 3<br />
Throw the main body. Measure the opening. Throw the top upside down.<br />
4 5 6<br />
The top should be slightly wider than<br />
the opening of the body.<br />
Carefully move the top to the body.<br />
Secure the top to the body.<br />
Place the body of the vase and its still attached bat onto the wheel head.<br />
Adjust if the piece has moved off center. Score and moisten the rim using<br />
slip. Turn the second bat, with the top section on it, upside down, and very<br />
carefully (since it has already been cut loose from the bat) place onto the<br />
top of the body. Remove the bat from the top section. Adjust the alignment<br />
between the two sections, carefully moving the top piece as close to center<br />
as possible.<br />
Use your fingers both inside and outside the vase and, with the wheel<br />
turning very slowly, pull the top section downward onto the rim of the<br />
body, smoothing the join between the two pieces both inside and outside<br />
the piece (figure 6). Be careful not to touch the top rim, so there is no damage<br />
to the design from the braided cutting wire. The body and top section<br />
are now joined together. Cut the piece off the bat, cover in plastic and set<br />
aside to dry to medium leather hard—generally overnight. The piece should<br />
be dry enough to be turned upside down without damaging the design on<br />
the top rim, but moist enough to trim the bottom of the vase.<br />
www.ceramicartsdaily.org | Copyright © 2013, Ceramic Publications Company | 7 Great Pottery Projects | 24
7 8 9<br />
Trim the bottom to match the curve. Place a slug of clay on the bottom. Throw the foot.<br />
10 11 12<br />
Use a drill to apply texture. Apply the handles. Enhance the handles with stamps.<br />
Center, fasten securely, and trim the bottom of the pot to match the<br />
bowl-shaped interior (figure 7). Score a 2–3-inch circle at the center of the<br />
bottom of the piece and wet with slip. Place a ¾-pound ball of clay onto<br />
the center of the bottom of the piece and carefully press into place (figure<br />
8). With the wheel turning very slowly, center the clay using as little water<br />
as possible so you do not soften the pot’s base. This step takes concentration,<br />
skill and practice.<br />
After centering, open the clay in the same manner as if you are throwing a<br />
new pot. Pull up a wall and shape into the foot (figure 9). Again, don’t use a<br />
lot of water or the surface of the pot will be damaged from the excess moisture.<br />
Set aside and allow this area to become leather hard. After the foot has<br />
stiffened, turn the piece right side up.<br />
www.ceramicartsdaily.org | Copyright © 2013, Ceramic Publications Company | 7 Great Pottery Projects | 25
Handles<br />
You can now add the decorative handles. One<br />
way to do this is to roll out a 3×4-inch slab of<br />
clay. Roll a drill bit over the clay to create texture<br />
(figure 10). Then roll the clay around a pencil or<br />
small dowel rod with the texture on the outside.<br />
Slide the clay off the pencil and attach the handle<br />
to the vase by scoring and using slip (figure 11).<br />
You also can add more texture around the shoulder<br />
of the vase, using stamps and/or a sewing<br />
tracing wheel (figure 12). Clean up any unwanted<br />
marks or bits of clay with a sponge.<br />
Wrap each vase in several layers of plastic and<br />
set aside for several days to allow the moisture<br />
content of each section to equalize. Then remove<br />
the plastic and allow the piece to dry completely.<br />
Recipes<br />
Marco Island Floating Blue<br />
Cone 5–6 Oxidation<br />
Gerstley Borate ................ 27 %<br />
Nepheline Syenite .............. 48<br />
EPK Kaolin. ................... 5<br />
Silica ........................ 20<br />
100 %<br />
Add:<br />
Red Iron Oxide<br />
(don’t use dark red). ........ 2 %<br />
Cobalt Carbonate .............. 1 %<br />
Rutile. ....................... 4 %<br />
When this floating blue is fired in an electric<br />
kiln to cone 5 with a fast cool down (12–15<br />
hours), a blue color is the result. Firing to cone<br />
6 with a slow cool down (over 24 hours) yields<br />
a sage green with dark flecks.<br />
Issenberg’s Ash Glaze<br />
Cone 10 Reduction<br />
Wood Ash. ................... 50 %<br />
Cedar Heights Redart Clay. ....... 50<br />
100 %<br />
Issenberg’s Blue Ash Glaze<br />
Cone 10 Reduction<br />
Wood Ash. ................... 50 %<br />
Plastic Vitrox Clay. .............. 50<br />
100 %<br />
Add: Cobalt Carbonate .......... 2 %<br />
www.ceramicartsdaily.org | Copyright © 2013, Ceramic Publications Company | 7 Great Pottery Projects | 26
Nesting Bowls<br />
by Annie Chrietzberg<br />
I<br />
know I’m not the only overly-involved-with-clay-person out there<br />
who brings more things home from a kitchen store for the studio<br />
than for the kitchen. So, as I was browsing through a kitchen store,<br />
I came across tart tins with scalloped edges and removable bottoms<br />
(figure 1), and knew I’d found something that would be fun and easy to<br />
use. I bought four of them in graduated sizes thinking: nesting bowls!<br />
To get a square-ish form from a round slab requires removing darts<br />
of clay. After experimenting with different dart ratios, I settled on<br />
somewhere between a third and a half of the radius. To make the darts<br />
template, I traced around the scallops on the cutting edge of the tart tin<br />
(figure 2). Ignoring the low points of the scallops, I cut out a circle and<br />
folded it along two perpendicular diameters, so that the folds made a<br />
perfect cross. I then found a point somewhere between third and a half<br />
way along the radius to cut the darts to. I folded the template in half<br />
and cut out a wedge, then used that wedge to cut identical darts all the<br />
way around (figure 3). Explore the possibilities of different sized darts<br />
different numbers of darts, and different placement of darts. As long as<br />
you keep ratios similar from one template to the next, the bowls should<br />
nest.<br />
Clean texture tools (figure 4) before using to avoid crumbs of clay<br />
that can mar the texture, then dust clean texture tools with cornstarch<br />
so that they’ll release. Smooth the slab with a soft rib. Leave an inch or<br />
so leeway to maneuver if there are flaws in the texture (figure 5).<br />
Place the slab onto the first texture tool (figure 6), gently roll from<br />
the center towards the edge in a radial pattern, pushing down just<br />
www.ceramicartsdaily.org | Copyright © 2013, Ceramic Publications Company | 7 Great Pottery Projects | 27
1 2 3<br />
Tart tins with removable bottoms.<br />
Create a darts template by tracing<br />
around the edge. Ignore the scallops<br />
when cutting the circle.<br />
To make sure your bowls nest, use<br />
the same dart proportions on each<br />
template.<br />
Process photos by Shannon Waxman, Finished photos by JC Bourque<br />
4 5 6<br />
Clean tools before using to avoid<br />
crumbs of clay that can mar the texture,<br />
then dust with cornstarch.<br />
Smooth the slab with a soft rib.<br />
Leave an inch or so to maneuver<br />
if there are flaws in the texture.<br />
Press the clay into the texture, but<br />
not so hard that you move the clay<br />
and thin the slab.<br />
enough to press the clay into the texture, but not so hard that you<br />
move the clay and thin the slab.<br />
Flatten the surface with a big rolling pin (figure 7) then carefully<br />
place a prepared texture tool on top of the slab and roll using just<br />
enough pressure to transfer the texture, but not so much that you thin<br />
or move the slab. Move to a wareboard and remove the texture tools,<br />
then flip the slab so the interior face of the bowl is facing up. Use the<br />
tart tin to cut through the slab (figure 8).<br />
Slip your hand underneath the rim and place your fingertips at the<br />
edge of the slab, gently press the slab free of the cutter. Align the darts<br />
and then cut the darts with the tip of the knife angled toward the center<br />
of the dart on both sides (figure 9).<br />
Bevel the darts by pointing the knife point towards the center on<br />
each side so you’ll be switching the angle of the knife for each side of<br />
the dart. As always with slab work, score, then slip, then score again<br />
to create an interface so the seam stays together (figure 10). You may<br />
also want to add a small coil along the seams (figure 11), since you’re<br />
changing the orientation of the slab. Use sponges or small pieces of<br />
www.ceramicartsdaily.org | Copyright © 2013, Ceramic Publications Company | 7 Great Pottery Projects | 28
7 8 9<br />
Place a prepared texture tool on<br />
the slab and roll using just enough<br />
pressure to transfer the texture.<br />
With the interior face of the bowl<br />
facing up, use the tart tin to cut<br />
through the slab.<br />
Cut the darts with the tip of the<br />
knife angled toward the center of<br />
the dart on both sides.<br />
10<br />
Score and slip the cut edges of<br />
darts. Carefully lift slab to join both<br />
sides of the dart cuts.<br />
11 12<br />
Remove the rough edges with a<br />
damp sponge, then lay a small coil<br />
in the corner.<br />
Place a piece of foam on the rim of<br />
the bowl and flip it over. Work the<br />
seams on the bottom down with a<br />
damp sponge.<br />
13<br />
Adjust shape and then let dry!<br />
Nesting bowls provide an opportunity for<br />
using a variety of textures and glazes.<br />
www.ceramicartsdaily.org | Copyright © 2013, Ceramic Publications Company | 7 Great Pottery Projects | 29
foam to keep the sides of the bowl just where you want them while<br />
you work on the join.<br />
After all four corners are well joined, turn the piece over. Anytime<br />
you need to turn a piece over, find foam if needed, and wareboards or<br />
bats, and find a way to flip the piece without touching it. Run a finger<br />
or a well-wrung-out sponge over the backside of the seam (figure 12),<br />
eliminating any sharpness and sealing it. Repeat these directions with<br />
every size tart tin and template that you have, and you will have a lovely<br />
little set of nesting bowls.<br />
With four nesting bowls, you’ll want to explore the potential using<br />
eight different textures—match textures from the top of one bowl to<br />
the bottom of the next, let the textures cycle through the set—there are<br />
so many possibilities!<br />
The ABC’s of Double-sided Slabs<br />
I’ve been working with textured slabs for a while now, but only<br />
recently got around to eliminating the back, or blank side of<br />
the slab. I don’t know why it took me so long—but I do find<br />
working with slabs with textures on both sides to be very exciting!<br />
Here’s how you make and use double-sided slabs, along<br />
with a few tips to help get you started.<br />
If you have two flexible texture tools, like plastic or rubber<br />
mats, pick one and lay it down, texture side up. Dust it with<br />
cornstarch (figure A), carefully set your nicely rolled blank slab<br />
on top, then roll with the curved end of a pony roller, which<br />
seems to push the clay down into the texture rather than enlarging<br />
the slab. Then flatten the top with a nice big rolling pin.<br />
Dust your second texture mat with cornstarch, lay it on top<br />
(texture side down) and carefully roll the back of it (figure B).<br />
If you’re using a corduroy texture, roll with the lines, not across<br />
them. The trick is to apply just enough even pressure to get the<br />
texture to print. Rolling carelessly enlarges the slab and leaves<br />
‘tracers’ of the texture as the slab moves out across it.<br />
When using a brittle texture tool—like a piece of old rusty<br />
tin, a bisque or plaster plate, or even a piece of old French patterned<br />
glass, you’ll need to take more care. I only use those on<br />
the bottom, as I don’t want to apply my rolling pin to the back<br />
of one, because that could mar the surface of my rolling pin or<br />
break the tool.<br />
Place a towel beneath the hard texture tool to absorb some<br />
of the pressure from rolling so as to keep it from breaking (figure<br />
C). If you’re using something nonabsorbent, like old patterned<br />
French glass, dust it with cornstarch, then lay down your<br />
prepared slab, roll, then apply your flexible mat on top of the<br />
clay, and roll again.<br />
To remove your slab, peel away the top mat, carefully set a<br />
clean wareboard on the slab and flip (figure D). Remove the<br />
other texture tool. If your slab is bottom-side up, use another<br />
wareboard to flip it again.<br />
A B C D<br />
www.ceramicartsdaily.org | Copyright © 2013, Ceramic Publications Company | 7 Great Pottery Projects | 30
www.ceramicartsdaily.org | Copyright © 2013, Ceramic Publications Company | 7 Great Pottery Projects | 31