Create successful ePaper yourself
Turn your PDF publications into a flip-book with our unique Google optimized e-Paper software.
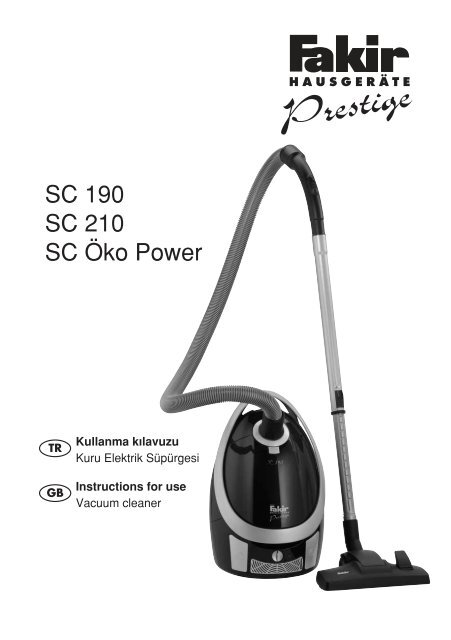
<strong>SC</strong> <strong>190</strong><br />
<strong>SC</strong> <strong>210</strong><br />
<strong>SC</strong> <strong>Öko</strong> <strong>Power</strong><br />
TR<br />
GB<br />
Kullanma k›lavuzu<br />
Kuru Elektrik Süpürgesi<br />
Instructions for use<br />
Vacuum cleaner
‹Ç‹NDEK‹LER<br />
TR<br />
Genel ......................................................................... 4<br />
Kullanma talimatlar› hakk›nda bilgi ............................ 4<br />
Sorumluluk ................................................................. 4<br />
Kullanma talimatlar› hakk›nda uyar›lar ...................... 4<br />
Güvenlik ................................................................... 5<br />
CE Uygunluk deklerasyonu ....................................... 5<br />
Kullan›m alan› ........................................................... 5<br />
Yetkisiz kullan›m ....................................................... 5<br />
Güvenlik Önemlidir .............................................. 6<br />
Güvenlik Uyar›lar› ................................................ 6<br />
Genel Bak›fl ............................................................. 9<br />
Cihaz aç›klamalar› .................................................... 9<br />
Kutu içindekiler ......................................................... 10<br />
Teknik bilgiler ........................................................... 10<br />
Kutuyu Açma ........................................................... 10<br />
Filtre sistemi ............................................................. 11<br />
Cihaz›n Birlefltirilmesi ........................................... 12<br />
Birlefltirme ................................................................ 12<br />
Teleskopik borunun uzunlu¤unun ayarlanmas› ....... 12<br />
Aparatlar ................................................................. 13<br />
Aksesuar kompart›man› ........................................... 13<br />
Aksesuar kullan›m› ................................................... 13<br />
Yer aparat›, Sert Zemin aparat›, Tekstil aparat› ....... 14<br />
Küçük Turbo F›rça, Turbo F›rça ............................... 15<br />
Elektrikli Süpürge Kullan›m› ................................. 16<br />
Süpürme ................................................................... 16<br />
Filtre De¤iflim Göstergesi.......................................... 17<br />
Süpürmeye ara verme .............................................. 17<br />
Süpürme sonras› ...................................................... 18<br />
Kullan›m sonras› .................................................. 18<br />
Toz torbas›n›n de¤ifltirilmesi .................................... 19<br />
Filtre kapa¤› güvenlik dü¤mesi ................................ 19<br />
Ana mikro filtrenin de¤ifltirilmesi .............................. 20<br />
HEPA-filtrenin de¤ifltirilmesi .................................... 20<br />
Hava ç›k›fl mikro filtresinin de¤ifltirilmesi ................. 21<br />
Temizlik ................................................................... 21<br />
Cihaz›n geri dönüflüm noktalar›na b›rak›lmas› ........ 22<br />
Sorun giderme ....................................................... 23<br />
3
4<br />
TR<br />
Kullanma talimatlar›<br />
hakk›nda bilgi<br />
Sorumluluk<br />
Kullanma talimatlar›<br />
hakk›nda uyar›lar<br />
GENEL<br />
Tercihinizi FAK‹R <strong>SC</strong>-Model elektrikli süpürgeden yana<br />
kulland›¤›n›z için teflekkür ederiz. Ürünümüz size uzun<br />
süre sorunsuz hizmet vermek için tasarlan›p üretilmifltir.<br />
Bu kullanma talimatlar› cihaz›n düzgün ve güvenli bir flekilde<br />
kullan›labilmesi için düzenlenmifltir.<br />
Kendi güvenli¤iniz ve di¤erlerinin güvenli¤i için ürünü<br />
çal›flt›rmadan önce kullanma k›lavuzunu okuyunuz.<br />
Bu k›lavuzu ilerideki kullan›mlar için güvenli bir yerde saklay›n›z.<br />
Bu kullan›m k›lavuzundaki talimatlara uygun olmayacak<br />
flekilde kullan›m sonucunca ortaya ç›kabilecek bir hasar<br />
oluflmas› durumunda <strong>Fakir</strong>, sorumluluk kabul etmez.<br />
Cihaz›n, kendi alan› d›fl›nda bir yerde kullan›lmas›, <strong>Fakir</strong><br />
yetkili servislerinden baflka bir yerde tamir ettirilmesi<br />
durumunda <strong>Fakir</strong>, sorumluluk kabul etmez.<br />
UYARI!<br />
Bu iflaret yaralanma ya da ölümle sonuçlanabilecek tehlikeleri<br />
belirtir.<br />
D‹KKAT!<br />
Bu iflaret ürününüzün zarar görmesi ya da bozulmas›na<br />
yol açabilecek tehlikeleri belirtir.<br />
NOT!<br />
Kullan›m k›lavuzunda önemli ve faydal› bilgileri belirtir.
CE Uygunluk deklerasyonu<br />
Kullan›m alan›<br />
Yetkisiz kullan›m<br />
GÜVENL‹K<br />
Bu cihaz Avrupa Birli¤inin 2004/108/EC Elektromanyetik<br />
Uyumluluk ve 2006/95/EC Gerilim Direktifleri’nin talimatlar›na<br />
tamamen uygundur. Bu ürün cihaz tip etiketinde CE iflaretine<br />
sahiptir.<br />
Bu cihaz, sadece hafif ev ve ofis kullan›m› için tasarlanm›flt›r.<br />
Cihaz› farkl› bir amaç için kullanmak, cihaza zarar verecektir.<br />
Cihaz, sert zeminlerin, hal›lar›n, döflenmifl mobilyalar›n, yataklar›n,<br />
mobilyalar›n, kalorifer peteklerinin ve perdelerin temizli¤inde<br />
kullan›l›r.<br />
Cihaz›n kusursuz çal›flmas› için tüm filtrelerinin tak›lm›fl olmas›<br />
gerekir.<br />
Cihaz› sadece <strong>Fakir</strong>’in orijinal aksesuarlar› ile kullan›n›z.<br />
Cihaz bunlar›n d›fl›ndaki amaçlar için kesinlikle kullan›lmamal›d›r.<br />
Afla¤›da belirtilen yetkisiz kullan›m durumlar›nda, cihaz zarar<br />
görebilir ya da yaralanmaya yol açabilir;<br />
•<br />
•<br />
TR<br />
Bu cihaz akli dengesi yerinde olmayan kiflilerin ya da bu<br />
tip cihazlar› kullanmak için yeterli bilgisi olmayan kiflilerin<br />
kullanmas› için uygun de¤ildir. Bu tip kiflilerin cihaz› kullanmas›na<br />
kesinlikle izin vermeyiniz.<br />
Cihaz bir oyuncak de¤ildir. Bundan dolay› çocuklar›n bu<br />
cihaz› kullanmalar›na izin vermeyiniz ve cihaz› çocuklar›n<br />
yan›nda kullan›rken daha dikkatli olunuz.<br />
•<br />
Paketin içinden ç›kan, poflet ve karton gibi maddeleri çocuklardan<br />
uzak tutunuz. Aksi takdirde çocuklar bu maddeleri<br />
yutmak suretiyle kendilerine zarar verebilirler!<br />
5
6<br />
TR<br />
Güvenlik Önemlidir<br />
Güvenlik Uyar›lar›<br />
GÜVENL‹K<br />
Kendi güvenli¤iniz ve di¤erlerinin güvenli¤i için ürünü<br />
çal›flt›rmadan önce kullanma k›lavuzunu okuyunuz.<br />
Bu k›lavuzu ilerideki kullan›mlar için güvenli bir yerde<br />
saklay›n›z.<br />
Elektrikli bir cihaz kullan›l›rken, afla¤›daki önlemler her<br />
zaman al›nmal›d›r. Yang›n, elektrik çarpmas› ve kiflisel<br />
yaralanmalar› engellemek için;<br />
• Bu cihaz sadece hafif ev ve ofis kullan›m› için<br />
tasarlanm›flt›r. Cihaz› farkl› bir amaç için kullanmak,<br />
cihaza zarar verecektir.<br />
• Cihaz› kullanmadan önce, flebeke voltaj›n›z ile cihaz›n<br />
voltaj›n›n uyumlu oldu¤undan emin olunuz.<br />
• Cihaz bir oyuncak de¤ildir. Bundan dolay› çocuklar›n<br />
cihaz› kullanmalar›na izin vermeyiniz ve cihaz› çocuklar›n<br />
yan›nda kullan›rken daha dikkatli olunuz.<br />
• Ilk kullan›mdan önce cihaz› hasar ve ar›zalara karfl›<br />
kontrol ediniz. Cihazda herhangi bir ar›za ya da hasar<br />
var ise, cihaz› kullanmay›n›z ve <strong>Fakir</strong> Yetkili Servisi’ne<br />
baflvurunuz.<br />
• Cihaz› aç›k alanda kullanmay›n›z.<br />
• Cihaz ile yan›c› s›v›lar›, yanan maddeleri (sigara, kül<br />
vb.) süpürmeyiniz.<br />
• Süpürgeyi hiçbir zaman do¤rudan insanlara ve<br />
hayvanlara tutmay›n›z.<br />
• Cihaz› sadece kendi aksesuarlar› ile kullan›n›z.<br />
• Bu kullanma k›lavuzunu ilerideki kullan›mlar için<br />
saklay›n›z.<br />
• Prizdeki tozlar› düzenli olarak temizleyiniz.<br />
• Cihaz› hava ç›k›fl kanal› ya da çekifl k›sm› kapal›yken<br />
kesinlikle kullanmay›n›z.
Güvenlik Uyar›lar›<br />
GÜVENL‹K TR<br />
• <strong>Fakir</strong> cihazlar› bilinen teknik kurallara ve güncel cihaz<br />
güvenlik yasalar›na uygundur.<br />
• Bu cihazlar Avrupa Birli¤inin 2004/108/EC<br />
elektromanyetik Uyumluluk ve 2006/95/EC Gerilim<br />
Direktifleri’nin talimatlar›na tamamen uygundur. Bu<br />
ürün cihaz tip etiketinde CE iflaretine sahiptir.<br />
• <strong>Fakir</strong>, dizayn ve donan›m de¤iflikli¤i hakk›na sahiptir.<br />
• Cihaz› duvara ya da mobilyan›za sert bir flekilde<br />
vurmay›n›z.<br />
• Cihaz kapal› durumdayken fiflini prizde b›rakmay›n›z.<br />
• Hasar gören cihazlar çal›flt›r›lmamal›d›r. E¤er<br />
ba¤lant›da eksiklikler varsa derhal giderilmelidir.<br />
• Cihaz ancak tip etiketinde belirtilen gerilim flebekeye<br />
uygunsa çal›flt›r›lmal›d›r.<br />
• Cihaz farkl› bir amaç için ya da hatal› bir flekilde<br />
kullan›l›rsa veya bak›m› ya da tamir ifllemleri yetkili<br />
olmayan kifliler taraf›ndan yap›l›rsa ç›kabilecek<br />
istenmeyen sonuçlardan <strong>Fakir</strong> sorumlu de¤ildir.<br />
• Cihaz›n kusursuz çal›flmas› için ka¤›t filtrelerin ve de<br />
mikro-hava filtresinin tak›lm›fl olmas› gerekir.<br />
• Filtre de¤iflim göstergesine dikkat edilmeli, bütün filtreler<br />
kontrol edilmeli, kullan›m k›lavuzuna göre temizlenmeli<br />
ve de¤ifltirilmelidir.<br />
• Aksesuar parçalar› tak›l›rken, cihaz temizlenirken, tamir<br />
veya bakim çal›flmalar›ndan önce fifli prizden çekilmelidir.<br />
Lüzumu halinde flebeke ba¤lant› kablosu sadece kablo<br />
sarma tertibat›yla birlikte yetkili bir kifli taraf›ndan<br />
de¤ifltirilebilir.<br />
• Ba¤lant› kablosu de¤ifltirilirken, üreticinin belirtti¤i tipten<br />
farkl› kablo kullan›lmamal›d›r. fiebeke ba¤lant› kablosu,<br />
sadece yetkili <strong>Fakir</strong> servislerince de¤ifltirilebilir.
8<br />
TR<br />
Güvenlik Uyar›lar›<br />
GÜVENL‹K<br />
• Cihaz›n tamiri ancak yetkili <strong>Fakir</strong> servislerince<br />
yap›lmal›d›r(yetkili servis listesine bakınız). Yanl›fl tamir<br />
ifllemleri kullan›c› için tehlike oluflturabilir.<br />
• Ba¤lant› kablosunu asla keskin kenarlara sürtmeyiniz<br />
veya ba¤lamay›n›z.<br />
• Hasar görmüfl uzatma kablolar›n› kullanmay›n›z.<br />
• A¤›zlar ve boru uçlar› asla göz ve kulaklara<br />
yaklaflt›r›lmamal›d›r.<br />
• Alet sadece kuru temizlik için kullan›labilir.<br />
• S›cak veya yanan maddeler, patlay›c› s›v›lar ve gazlar<br />
vakumlanmamalıdır.<br />
• Turbo elektrikli f›rça kullan›rken, ba¤lant› kablosunun<br />
ezilmemesine dikkat ediniz.<br />
• Cihaz nemli bir ortamda ve yüksek s›cakl›k alt›nda<br />
b›rak›lmamal›d›r.<br />
• Cihaz sadece kuru veya hafif ›slak bezle<br />
temizlenmelidir. Bunu yaparken ak›m geçen yerler<br />
(anahtar, fifl, elektronik, vb.) suyla temas etmemelidir.
J<br />
I<br />
H<br />
G<br />
F<br />
<strong>SC</strong> <strong>190</strong><br />
k›rm›z›<br />
GENEL BAKIfi TR<br />
A<br />
B<br />
C<br />
D<br />
E<br />
<strong>SC</strong> <strong>210</strong><br />
nero metallic<br />
Cihaz aç›klamalar›<br />
A<br />
B<br />
C<br />
D<br />
E<br />
F<br />
G<br />
H<br />
I<br />
J<br />
Vakum kontrollü tutma sap›<br />
Teleskopik vakum boru<br />
Tutma sap›<br />
Kablo sar›c› pedal›<br />
Hal› ve sert zeminlerde kullan›lmak<br />
üzere ayarlanabilen pedall› yer aparat›<br />
Hava ç›k›fl kanal›<br />
AÇMA/ KAPATMA Pedal›<br />
Vakum Güç kontrolü<br />
Filtre ve Aksesuar kompart›man›<br />
kapa¤›<br />
Vakum Hortumu Bak›fl<br />
<strong>SC</strong> <strong>Öko</strong> <strong>Power</strong><br />
crema<br />
9
10<br />
TR<br />
Elektrik Süpürgesi<br />
Kutu içindekiler<br />
Pedall› yer aparat›<br />
Sert zemin aparat›<br />
Tutma sapl› vakum hortumu<br />
Teleskopik vakum borusu<br />
Döfleme f›rças›<br />
(aksesuar kompart›man› içinde)<br />
Kenar köfle aparat›<br />
(aksesuar kompart›man› içinde)<br />
Kenar köfle aparat› 62 cm<br />
Turbo vakum f›rças›<br />
HEPA-filtre (filtre bölmesi içinde)<br />
Ana mikro filtre<br />
(filtre bölmesi içinde)<br />
Hava ç›k›fl filtresi<br />
(Hava ç›k›fl ›zgaras› alt›nda)<br />
Toz torbas›<br />
Kullanma k›lavuzu<br />
Teknik bilgiler<br />
Voltaj<br />
Frekans<br />
Güç Nominal / max<br />
Ses düzeyi max<br />
Düflük hava bas›nc› max<br />
Hava ak›m› c›k›fl› max<br />
Boyutlar<br />
A¤›rl›k<br />
Kutuyu Açma<br />
GENEL BAKIfi<br />
1<br />
1<br />
1<br />
1<br />
1<br />
1<br />
-<br />
-<br />
1<br />
1<br />
1<br />
2<br />
1<br />
230 V~<br />
50 Hz<br />
1700 / <strong>190</strong>0 W<br />
70 dB(A)<br />
28kPa<br />
36 l/s<br />
47,5x30,5x25 cm<br />
6,5 kg<br />
<strong>SC</strong> <strong>190</strong> <strong>SC</strong> <strong>210</strong> <strong>SC</strong> ÖKO POWER<br />
1<br />
1<br />
1<br />
1<br />
1<br />
1<br />
-<br />
-<br />
1<br />
1<br />
1<br />
2<br />
1<br />
230 V~<br />
50 Hz<br />
<strong>190</strong>0 / <strong>210</strong>0 W<br />
70 dB(A)<br />
30 kPa<br />
38 l/s<br />
47,5x30,5x25 cm<br />
6,5 kg<br />
1<br />
1<br />
1<br />
1<br />
1<br />
1<br />
-<br />
-<br />
1<br />
1<br />
1<br />
2<br />
1<br />
230 V~<br />
50 Hz<br />
1200 / 1400 W<br />
70 dB(A)<br />
30 kPa<br />
38 l/s<br />
47,5x30,5x25 cm<br />
6,5 kg<br />
Ilk kullan›mdan önce cihaz› ve aksesuarlar› kutusundan<br />
ç›kar›n›z hasar ve ar›zalara karfl› kontrol ediniz. Cihazda<br />
herhangi bir ar›za ya da hasar var ise, cihaz› kullanmay›n›z<br />
ve <strong>Fakir</strong> Yetkili Servisi’ne baflvurunuz.<br />
UYARI!<br />
Kesinlikle hatal› bir aleti kullanmay›n›z.<br />
NOT!<br />
Kutu ve paketleme elemanlar›n› ileride tafl›ma ihtimaline<br />
karfl› saklay›n›z.
GENEL BAKIfi TR<br />
Filtre Sistemi <strong>Fakir</strong>-Vario filtre sistemi ile toz filtreleme kalitesini kendi gereksinimlerinize<br />
adapte edebilirsiniz. Bu mükemmel filtre sistemi<br />
özellikle alerjisi olan kifliler için oldukça faydal›d›r. Bu<br />
sis-tem havada bulunabilecek 0,1 μ boyutundaki polen, mite<br />
ve çok ince tozlar› hapseder ve neredeyse yok eder. Filtre<br />
o kadar etkilidir ki, ç›k›fl kanal›ndan ç›kan havadaki toz miktar›,<br />
odan›zda bulunan havadaki toz miktar›ndan daha azd›r.<br />
<strong>Fakir</strong>-Vario filtre Sistemi’nin çal›flma sistemi afla¤›daki gibidir:<br />
a) Toz parçac›kl› hava, vakum hortumu vas›tas›yla emilir.<br />
b)<br />
c)<br />
d)<br />
e)<br />
Emilen hava içinde toz parçac›klar›, 5 katmanl› mikroban<br />
toz torbas› içinde hapsedilir.<br />
Ana mikro filtre, bir sonraki filtre için hem ön bir filtre hem<br />
de bir koruma görevi yapar.<br />
Vario-kombi mikro-filtre, aktif bir koku filtresi olarak görev<br />
yapar, kokuyu tozun içinden al›r ve aktive edilmifl kömür<br />
sayesinde kiri içine hapseder. Buna ek olarak, kalan en<br />
küçük toz parçac›klar› da, HEPA filtre içine hapsolur.<br />
* HEPA = HIGH EFFICIENCY PARTICUL ATEAIRFILTER<br />
Hava motor içine do¤ru çekilir. Tüm toz parçac›klar› buraya<br />
gelene kadar ortadan kald›r›ld›¤›ndan, buraya herhangi<br />
bir toz parças› ulaflamaz.<br />
f) Temizlenmifl hava, ç›k›fl kanallar› yoluyla odan›za ulafl›r.<br />
11
TR<br />
Birlefltirme<br />
B<br />
5<br />
Teleskopik borunun<br />
uzunlu¤unun ayarlanmas›<br />
B<br />
A<br />
6<br />
E<br />
7<br />
B<br />
C‹HAZIN B‹RLEfiT‹R‹LMES‹<br />
•<br />
•<br />
•<br />
•<br />
•<br />
UYARI!<br />
Cihaz›n›z› birlefltirmeye bafllamadan önce herhangi bir<br />
yaralanmaya sebep olmamak için, fiflinin prize tak›l› olmad›¤›ndan<br />
emin olunuz.<br />
Vakum hortumunu vakum soketinin içine kilitlenene kadar<br />
itiniz [5]. Hortumu sökmek için vakum hortumunun<br />
yan›nda bulunan dü¤melerine bas›n›z [6].<br />
NOT!<br />
Hortumu sökmek için hortum bafl›ndaki iki dü¤meye<br />
bas›n›z. [6]<br />
Vakum hortumunun tutma sap›n› [A] teleskopik borunun<br />
[B] içine do¤ru yavaflça itiniz.<br />
Telesopik boruyu [B] yer aparat›n›n [E] içine do¤ru yavaflça<br />
itiniz.<br />
Elinizle teleskopik boru’nun üst k›sm›n› tutunuz, ayar<br />
dü¤mesini [7] bafl parma¤›n›zla afla¤›ya do¤ru itiniz.<br />
Elinizle teleskopik boru’nun alt k›sm›n› tutunuz [B],<br />
ard›ndan teleskopik borunun orta k›sm›n› istedi¤iniz<br />
uzunlu¤a gelene kadar çekiniz.<br />
• Süpürgeniz art›k kullan›ma haz›r.
Aksesuar Kompartman›<br />
8<br />
9<br />
Aksesuar Kullan›m›<br />
10<br />
12<br />
11<br />
APARATLAR TR<br />
UYARI!<br />
F›rçalar› de¤ifltirmeden önce mutlaka cihaz› kapat›n›z.<br />
Kenar köfle aparat› ve döfleme f›rças› aksesuar kompartman›<br />
içinde bulunur.<br />
•<br />
•<br />
•<br />
Aksesuar kompart›man›n› açmak için kapak açma dü¤mesine<br />
bas›n›z [8]. Ard›ndan kapa¤› [9] aç›p istedi¤iniz aparat›<br />
alabilirsiniz.<br />
Ard›ndan kapa¤› [9] kapat›n›z.<br />
Kullanmak istedi¤iniz aparat›, vakum hortumu tutma sap›na<br />
ya da teleskopik boruya yavaflça yerlefltiriniz.<br />
Kenar köfle aparat› [10]<br />
Döflemelerinin derin yerlerinin, köflelerin, ç›k›nt›lar›n ve süpürgeliklerin<br />
temizli¤inde kullan›l›r.<br />
Döfleme F›rças› [11]<br />
Döflemelik kumafllar›n, perdelerin temizli¤inde kullan›l›r.<br />
Kenar köfle aparat› [12] > ‹ste¤e ba¤l› Aksesuar<br />
Yaklafl›k 60 cm uzunlu¤undaki döfleme f›rças› ile zor<br />
döflemelerinin, derin yerlerinin, köflelerin, ç›k›nt›lar›n ve süpürgeliklerin<br />
temizli¤inde kullan›l›r.<br />
NOT!<br />
Emifl gücünü düflük ya da orta h›za ayarlay›n›z.<br />
13
14<br />
TR<br />
15<br />
E<br />
14<br />
APARATLAR<br />
Pedall› Yer Aparat› [E]<br />
28 cm süpürme eni olan yer aparat›n›z› üzerindeki pedal›[14]<br />
kullanarak sert zeminleri ya da hal›lar› temizlerken kullanabilirsiniz.<br />
‹plik toplay›c›lar› [15] iplik, saç, tüy vb. maddeleri hal›n›zdan<br />
almaya yarar. E¤er gerekirse, bu toplay›c›lar›, yenileriyle<br />
de¤ifltirebilirsiniz.<br />
NOT!<br />
Emifl gücünü orta ya da yüksek h›za ayarlay›n›z.<br />
Sert Zemin Aparat› [16]<br />
Parke, fayans benzeri sert zeminlerin temizli¤i için kullan›l›r.<br />
Yumuflak f›rças› sayesinde zemin üzerinde rahat hareket<br />
eder ve zemin üzerindeki kirleri temizlemeye yard›mc› olur.<br />
NOT!<br />
Emifl gücünü düflük ya da orta h›za ayarlay›n›z.<br />
Tekstil Aparat› [17] >‹ste¤e Ba¤l› Aksesuar<br />
Özellikle döflenmifl mobilyalar, perdeler ya da elbiselerin temizli¤i<br />
için kullan›l›r. Ekstra büyük tiftik ve iplik toplay›c›lar›<br />
sayesinde, statik elektriklenmeden dolay› yap›flkan tüy ve<br />
k›llar› mükemmel bir flekilde temizler.<br />
NOT!<br />
Emifl gücünü orta ya da yüksek h›za ayarlay›n›z.
APARATLAR TR<br />
Küçük Turbo F›rça [18] > ‹ste¤e Ba¤l› Aksesuar<br />
Süpürgenizin vakum gücüyle çal›flan yüksek performansl›<br />
döner f›rçaya sahip olan aparat, yataklar›n, döflenmifl<br />
mobilyalar›n ya da araç koltuklar›n›n temizli¤inde kullan›l›r.<br />
Saç, k›l gibi parçalar turbo f›rçan›z› t›kayabilir. Bunlar› temiz<br />
lemek için, turbo f›rçan›z›n içini açman›z gerekebilir:<br />
•<br />
•<br />
•<br />
•<br />
Turbo f›rçan›z› resimdeki [19] flekle getiriniz.<br />
Dü¤mesine basarak [20] turbo f›rçan›z› resimdeki gibi çekiniz.<br />
F›rçan›z›n üst taraf›n› yukar›ya do¤ru çekerek aç›n›z [21].<br />
‹çini temizledikten sonra, yukar›daki ifllemleri tersine<br />
do¤ru tekrar ediniz.<br />
Turbo F›rça[22] > ‹ste¤e Ba¤l› Aksesuar<br />
Süpürgenizin vakum gücüyle çal›flan yüksek performansl›<br />
döner f›rçaya sahip olan aparat, hal›n›z›n içine ifllemifl toz<br />
ve kirleri daha güçlü bir flekilde temizler.<br />
F›rça, t›kanmas› halinde, temizlenmeli ve ondan sonra kullan›lmal›d›r.<br />
NOT!<br />
Emifl gücünü düflük ya da yüksek h›za ayarlay›n›z.<br />
UYARI!<br />
Turbo f›rçay› kullan›rken, elinizi kesinlikle f›rçaya yaklaflt›rmay›n›z.<br />
15
16<br />
TR<br />
Süpürme<br />
G<br />
H<br />
23<br />
ELEKT‹R‹KL‹ SÜPÜRGE KULLANIMI<br />
Elektrikli Süpürge Kullan›m›<br />
Cihaz›n›z› çal›flt›rmadan önce, tüm filtrelerinin düzgünce<br />
tak›l› oldu¤undan emin olunuz. Özellikle alerjik kiflilerin sa¤l›¤›<br />
için, tüm filtrelerin eksiksiz ve düzgün bir biçimde tak›l› olmas›<br />
önemlidir.<br />
UYARI!<br />
Her kullan›mdan önce, cihaz›n›z› ve kablosunu herhangi<br />
bir hasara karfl› kontrol ediniz.<br />
• ‹stedi¤iniz f›rçay› tak›n›z.<br />
•<br />
•<br />
Kabloyu diledi¤iniz uzunlu¤a kadar çekiniz ve prize<br />
tak›n›z.<br />
Aç›p Kapatma “ON/OFF” [G] dü¤mesine barsak süpürgeyi<br />
cal›flt›r›n.<br />
•<br />
‹stedi¤iniz vakum gücünü ayarlay›n›z [H].<br />
Vakum kontrolü ayn› zamanda, tutma sap› üzerindeki vakum<br />
kontrol dü¤mesi [23] arac›l›¤›yla da ayarlanabilir.<br />
Bu kontrolü sadece k›sa zamanl› olarak vakum gücünü azaltmak<br />
istedi¤iniz zamanlarda kullan›n›z. Normal vakum gücü<br />
için, bu kontrolü kapal› tutunuz.<br />
Cihaz›n›z üzerindeki bulunan Vakum kontrolünü [H] vakum<br />
gücünü azaltmak için kullanabilirsiniz. Bu flekilde enerjiden<br />
de tasarruf edebilirsiniz.
Filtre De¤iflim Göstergesi<br />
H<br />
Süpürmeye ara verme<br />
Kullan›m sonras›<br />
G<br />
D<br />
24<br />
ELEKT‹R‹KL‹ SÜPÜRGE KULLANIMI TR<br />
25<br />
Elektrikli Süpürge Kullan›m›<br />
Filtre De¤iflim Göstergesi; Toz torbas›n›n dolmas›, filtrelerin<br />
t›kanmas› ya da vakumun bir flekilde yap›lamamas› durumlar›nda<br />
bu göstergenin ›fl›¤› yanacakt›r [24]. Do¤ru teflhis<br />
için, Vakum Kontrolü [H] en son ayara getirilip pedall› yer<br />
aparat› kald›r›lmal›d›r.<br />
Bu durumda, toz torbas›n›, filtreleri de¤ifltirin ya da vakum<br />
gücünü t›kayan etkeni giderin.<br />
NOT!<br />
Toz torbas›n›n dolmas›, filtrelerin t›kanmas› ya da vakumun<br />
bir flekilde yap›lamamas› durumlar›nda bu göstergenin<br />
›fl›¤› yanacakt›r. Bu durumda, toz torbas›n›, filtreleri<br />
de¤ifltirin ya da vakum gücünü t›kayan etkeni giderin.<br />
Süpürmeye ara verme<br />
Süpürmeye ara vermek için, süpürgenizin yer aparat›n› arkas›nda<br />
bulunan park pozisyonuna yerlefltiriniz, cihaz otomatik<br />
olarak çal›flmay› durduracakt›r. Bunu yapmak için, yer<br />
aparat›n› [25], süpürgenin arka k›sm›ndaki park pozisyonu<br />
aparat›na yerlefltiriniz, bu durumda motor otomatik olarak<br />
elektri¤i kesecektir.<br />
UYARI!<br />
Süpürme iflleminizi bitirmenizin hemen ard›ndan afla¤›daki<br />
ifllemleri uygulay›n›z. Cihaz›n›z› asla ortada b›rakmay›n›z.<br />
•<br />
Kontrol panelindeki On/Off [G] tuflunu kullanarak cihaz›n›z›<br />
kapat›n›z.<br />
• Ard›ndan cihaz›n fiflini prizden çekiniz.<br />
•<br />
Kontrol panelindeki kablo sar›c› tufla [D] bast›¤›n›zda,<br />
kablo otomatik olarak sar›lacakt›r. Kablo tümüyle sar›lana<br />
kadar, fiflini elinizle tutunuz böylece fiflin herhangi bir yere<br />
çarp›p zarar vermesini önlersiniz.<br />
17
TR<br />
Kullan›m Sonras›<br />
18<br />
C<br />
ELEKT‹R‹KL‹ SÜPÜRGE KULLANIMI<br />
29<br />
•<br />
Ergonomik olarak dizayn edilmifl olan tutma sap› [C] ile<br />
cihaz› tüm aksesuarlar› üzerindeyken rahatça tafl›yabilirsiniz.<br />
Saklamak<br />
•<br />
•<br />
Cihaz› bu flekilde tafl›yabilmek için, yer aparat›n› süpürgenizin<br />
alt k›sm›nda bulunan park pozisyonu aparat›na<br />
[29] yerlefltiriniz.<br />
Ard›nan süpürgenizi çocuklar›n ulaflamayaca¤› bir yere<br />
kald›r›n›z.<br />
D‹KKAT!<br />
Süpürgenizi kesinlikle, ›s› yayan, radyatör, soba gibi cihazlar›n<br />
yak›n›nda, direkt günefl ›fl›¤› alan yerlerde b›rakmay›n›z.
Toz torbas›n›n de¤ifltirilmesi<br />
30<br />
H<br />
Filtre Kapa¤› Güvenlik<br />
Dü¤mesi<br />
32<br />
S<br />
I<br />
31<br />
KULLANIM SONRASI TR<br />
UYARI!<br />
F›rçalar› de¤ifltirmeden önce mutlaka cihaz› kapat›n›z ve<br />
fiflini prizden çekiniz.<br />
•<br />
•<br />
•<br />
NOT!<br />
Sadece <strong>Fakir</strong> taraf›ndan sa¤lanan orijinal filtreleri kullan›n›z.<br />
Ancak böylelikle mükemmel filtrelemeyi sa¤layabilirsiniz.<br />
Filtre kapa¤›n› [ I ] açmak için, filtre kapa¤› açma dü¤mesine<br />
[30] bas›n›z.<br />
Ka¤›t plakal› ve hijyenik boflaltma kapakl› toz torbas›; Toz<br />
torbas› kab›n› [31] boflaltma kapa¤›n› kullanarak gösterilen<br />
yönde çekerek ç›kart›n›z. Bu flekilde toz torbas›n›n<br />
kapa¤› kapal› olacakt›r.<br />
Ka¤›t plakal› ve hijyenik boflaltma kapakl› toz torbas›; Toz<br />
torbas› kab›n› (31) boflaltma kapa¤›n› kullanarak gösterilen<br />
yönde çekerek ç›kart›n›z.<br />
• Bu flekilde toz torbas›n›n kapa¤› kapal› olacakt›r.<br />
• Toz torbas›n› ve tor torbas› kab›n› birlikte kapat›n›z.<br />
•<br />
Filtre kapa¤›n› kapat›n›z.<br />
Alternatif olarak, toz torbas› kab›n› da c›kararak toz torbas›n›<br />
de¤ifltirebilirsiniz. Bunu mentefleleri [S] sa¤a ve<br />
sola bast›rarak yapabilirsiniz.<br />
NOT!<br />
Filtre Kapa¤› Kapatma Güvenlik Dü¤mesi [32], filtrenin<br />
yanl›fl tak›lmas› ya da tak›lmamas› halinde cihaz› kilitleyerek<br />
çal›flmas›n› önler.<br />
19
Ana mikro filtrenin<br />
de¤ifltirilmesi<br />
HEPA-filtrenin<br />
de¤ifltirilmesi<br />
20<br />
TR<br />
a<br />
b<br />
34<br />
KULLANIM SONRASI<br />
Filtre kapa¤›n› aç›n›z, toz torbas›n› ç›kar›n›z ve toz torbas›<br />
kab›n› kald›r›n›z.<br />
• Mikro Vario filtre kasetinin ç›karmak için:<br />
a) önce yana çekerek kald›r›n ve sonra<br />
b) ç›kar›n›z<br />
• Filtre kasetinin ›zgaras›n› [33] ç›kar›n›z.<br />
• Ana mikro filtreyi [34] yenisiyle de¤ifltiriniz ve ›zgaray›<br />
tekrar kapay›n›z.<br />
• Toz torbas›n› tekrar yerine yerlefltiriniz ve kapa¤›n›<br />
kapay›n›z.<br />
NOT!<br />
Ana mikro filtreyi, her 5 toz torbas› kullan›m›ndan sonra<br />
de¤ifltiriniz.<br />
Filtre kapa¤›n› aç›n›z, toz torbas›n› ç›kar›n›z ve toz torbas›<br />
kab›n› kald›r›n›z. Mikro Vario filtre kasetini yukar›da tarif edildi¤i<br />
gibi ç›kar›n›z.<br />
•<br />
•<br />
HEPA filtreyi [35], filtre kasetinden ç›kar›n›z ve yenisiyle<br />
de¤ifltiriniz.<br />
Mikro-Vario filtre kasetini, yeni HEPA filtre ile beraber tek<br />
rar yerine tak›n›z. Toz torbas›n› tekrar yerine yerlefltiriniz<br />
ve kapa¤›n› kapay›n›z.<br />
NOT!<br />
Vario-Kombi Mikro filtreyi en az her 6-12 ayda bir<br />
de¤ifltiriniz.<br />
Alternatif olarak, afla¤›da bulunan iste¤e ba¤l› filtreleri siparifl<br />
edebilirsiniz:<br />
HEPA filtre<br />
Aktif Odor (kötü koku) filtresi
Hava ç›k›fl Mikro<br />
filtresinin de¤ifltirilmesi<br />
Temizlik<br />
F<br />
36<br />
KULLANIM SONRASI<br />
1. Filtre kapa¤›n› [F] açmak için kapa¤›n yan›ndaki açma<br />
dü¤mesine [36] bas›n›z.<br />
2. Kullan›lm›fl hava ç›k›fl mikro filtresini yenisiyle de¤ifltiriniz.<br />
3. Filtre kapa¤›n› [F] tam olarak yerine oturacak flekilde kapay›n›z.<br />
NOT!<br />
Hava ç›k›fl Mikro filtresini düzenli olarak de¤ifltiriniz yada<br />
y›kay›n›z.<br />
UYARI!<br />
Süpürgenizi temizlemeden ya da bak›m yapmadan önce<br />
mutlaka kapat›n›z ve fiflini prizden çekiniz.<br />
D‹KKAT!<br />
Kesinlikle alkol ve solvent bazl› temizleyiciler kullanmay›n›z.<br />
Aksi takdirde cihaz›n›za zarar verebilirsiniz.<br />
TR<br />
Cihaz›n›z› yumuflak ve hafif bir nemli bezle temizleyiniz.<br />
Ayn› flekilde gerekti¤inde toz torbas› haznesinide temizleyebilirsiniz.<br />
Hortum, f›rça vb. aksesuarlar belirli aral›klarda t›kan›kl›¤a<br />
karfl› kontrol edilip temizlenmelidir.<br />
21
Cihaz›n geri dönüflüm<br />
noktalar›na b›rak›lmas›<br />
22<br />
TR<br />
KULLANIM SONRASI<br />
Cihaz›n kullan›m ömrünün bitmesi halinde, elektrik kablosunu<br />
keserek kullan›lamayacak hale getiriniz.<br />
Ülkenizde mevcut bulunan yasalara göre, bu tür cihazlar için<br />
özel olarak belirlenmifl çöp kutular›na cihaz› b›rak›n›z.<br />
Elektriksel at›klar, normal çöplerle birlikte at›lmamal›d›r.<br />
Cihaz› elektriksel at›klar için belirlenmifl çöp kutular›na at›n›z.<br />
Cihaz›n paketleme elemanlar› geri dönüflüme uygun maddelerden<br />
üretilmifltir. Bunlar› geri dönüflüm çöp kutular›na<br />
at›n›z. Kullan›lm›fl toz torbas› ve filtreleri genel çöp kutular›na<br />
atabilirsiniz.
Sorun Muhtemel<br />
Neden Çözüm<br />
Hata<br />
Cihaz Çal›flm›yor<br />
Cihaz vakumlam›yor<br />
Cihaz normalden<br />
yüksek sesle çal›fl›yor<br />
SORUN G‹DERME TR<br />
Cihaz›n›z herhangi bir ar›zaya karfl› kalite kontrolden geçirilmifltir.<br />
Ancak yine de, herhangi bir nedenden dolay› çal›flmaz ise,<br />
<strong>Fakir</strong> Yetkili Servisi’ne baflvurmadan önce afla¤›daki tabloda<br />
yer alan çözüm yollar›n› deneyiniz.<br />
Muhtemel Sebebi Cözüm<br />
Fifl prize tak›l› de¤il<br />
Cihaz aç›k de¤il<br />
Prizden elektrik gelmiyor<br />
Elektrik kablosu zarar görmüfl<br />
Toz torbas› / Filtreler dolu<br />
ya da t›kal›<br />
Hortum boru yada<br />
aparatlar t›kal›<br />
Vakum k›s›mlar›na<br />
parçalar s›k›flm›fl<br />
Fifli prize tak›n›z<br />
Cihaz aç›n›z<br />
Farkl› bir priz deneyiniz<br />
Cihaz› tamire götürünüz<br />
Toz torbas› /<br />
Filtreleri De¤ifltiriniz<br />
T›kal› k›sm› temizleyiniz<br />
S›k›flan parçalar› ç›kar›n›z<br />
23
24<br />
GB<br />
TABLE OF CONTENS<br />
General ............................................................................. 25<br />
Information about the operating instructions .................... 25<br />
Liability............................................................................... 25<br />
Notices in the operating instructions................................. 25<br />
Safety ............................................................................... 26<br />
CE Declaration of Conformity ........................................... 26<br />
Intended use ..................................................................... 26<br />
Unauthorized use .............................................................. 26<br />
Important Safeguards .................................................... 27<br />
Important Safeguards .................................................... 27<br />
Overview ..................................................................... 30<br />
Device description ......................................................... 30<br />
Scope of delivery ........................................................... 31<br />
Technical data ............................................................... 31<br />
Unpacking .................................................................... 31<br />
The filter system ........................................................... 32<br />
Assembly .................................................................... 33<br />
Assembling ................................................................... 33<br />
Setting the length of the suction tube ........................... 33<br />
Nozzles ......................................................................... 34<br />
Accessories compartment ............................................. 34<br />
Utilization ..................................................................... 34<br />
Floor suction nozzle, Hard florr nozzle, Textile nozzle .. 35<br />
Manual turbo brush, Turbo suction brush ...................... 36<br />
Operation ..................................................................... 37<br />
Vacuum cleaning ........................................................... 37<br />
Filter change indication .................................................. 38<br />
Work breaks ................................................................... 38<br />
After vacuuming ............................................................. 39<br />
After use ....................................................................... 40<br />
Changing dust bug ......................................................... 40<br />
Filter enclosure cover close-off ...................................... 40<br />
Changing main micro filter ............................................. 41<br />
Changing HEPA-filter ..................................................... 41<br />
Changing exhaust air filter ............................................. 42<br />
Cleaning ......................................................................... 42<br />
Waste disposal ............................................................... 43<br />
If at once you don't succeed ....................................... 44
Information about the<br />
operating instructions<br />
Liability<br />
Notices in the operating<br />
instructions<br />
GENERAL<br />
Thank you for purchasing a floor vacuum cleaner of the<br />
<strong>Fakir</strong> <strong>SC</strong> series. It was developed and manufactured to<br />
work reliably for many years.<br />
These operating instructions are intended to enable the safe<br />
and proper handling and operation of the appliance.<br />
Read these operating instructions carefully before using the<br />
appliance for the first time.<br />
Keep the operating instructions in a safe place. Include the-<br />
se operating instructions when passing the appliance on to<br />
another user.<br />
We will accept no liability for damages resulting from failure<br />
to comply with the operating instructions.<br />
We cannot assume any liability in case the appliance is used<br />
for other purposes than its intended use or handled, repaired<br />
or serviced improperly.<br />
WARNING!<br />
Indicates notices which, if ignored, can result in risk of in<br />
jury or death.<br />
ATTENTION!<br />
Indicates notices of risks that can result in damage to the<br />
appliance.<br />
NOTICE!<br />
Emphasizes tips and other useful information in the<br />
operating instructions.<br />
GB<br />
25
CE Declaration of<br />
Conformity<br />
Intended use<br />
Unauthorized use<br />
26<br />
GB<br />
SAFETY<br />
This appliance fulfills the requirements of the Appliance and<br />
Product Safety Law (GPSG) and the EU Directives<br />
2004/108/EC “Electromagnetic Compatibility” and<br />
2006/95/EC “Low-Voltage Directive.”<br />
The appliance bears the CE mark on the rating plate.<br />
The appliance may only be used in private homes and<br />
auxiliary rooms to vacuum clean dry dust material.<br />
It may be used only for cleaning hard floors and textile floor<br />
coverings, carpets, upholstered furniture, mattresses, furniture,<br />
heating radiators and curtains.<br />
Check if all filters have been inserted properly before using<br />
the appliance. The appliance must not be used without filters.<br />
Use only original <strong>Fakir</strong> filters and accessories.<br />
Any other use is considered unauthorized and is prohibited.<br />
The examples of unauthorized use listed here can result in<br />
malfunctions, damage to the appliance or personal injury:<br />
•<br />
•<br />
•<br />
This appliance is not designed to be used by persons<br />
(including children) with limited physical, sensory or mental<br />
capacities or by persons lacking in experience and/or<br />
knowledge, unless they are supervised by someone who<br />
is responsible for their safety or have received instructions<br />
on how to use the appliance. Children should be supervised<br />
to ensure that they do not play with the appliance.<br />
Childrenshould be supervised to ensure that they do not<br />
play with the appliance. Electric appliances are not toys<br />
for children! Therefore, use and store the appliance away<br />
from the reach of children. Children do not recognize the<br />
danger involved with handling an electric appliance. Do<br />
not let the power cord dangle from the appliance..<br />
Keep packaging films away from children - danger of suffocation!
Safety is Important<br />
Imported Safeguards<br />
SAFETY<br />
To ensure your safety and the safety of others, please<br />
ensure you read the Safety Instructions before you<br />
operate this product.<br />
Keep this information in a safe place for future reference.<br />
When using an electric appliance, basic precautions<br />
should always be followed, including the following:<br />
To reduce the risk of fire, electric shock, or injury:<br />
• The device is only authorized for private, domestic use<br />
only. Using it for any other purposes will harm the device.<br />
• Before using the device, check that your local mains<br />
voltage coincides with the voltage of the mains adapter.<br />
• The devices is not a toy, therefore please be particularly<br />
careful when children are around.<br />
• Check the device and connections regularly for visible<br />
damage. The device must not be used if the housing is<br />
damaged or other damage is present. In case of a<br />
damage please contact with Authorized <strong>Fakir</strong> Service.<br />
• Do not use the unit outside.<br />
• Do not use the device to pick up inflammable fluids (e.g.<br />
Fuel or solvent) or burning objects (e.g. ash cigarettes).<br />
• Do not point the vacuum cleaner at persons or animals<br />
when in operation.<br />
• Only use the device with the accessories supplied.<br />
• Please keep these instructions in a safe place for future<br />
references.<br />
• Clean any dust on the power plug regularly.<br />
• When servicing the unit, never put fingers or other<br />
objects into any rotating unit, the device would<br />
accidentally be turned on.<br />
GB
Imported Safeguards<br />
28<br />
GB<br />
SAFETY<br />
• Do not operate the product covering the suction or<br />
exhaust ports. Do not strike the suction head hard<br />
against the wall or furniture. Disconnect the power<br />
plug from the power outlet when not in use.<br />
• <strong>Fakir</strong> appliances comply with recognized technological<br />
standards and the current safety regulations for<br />
electrical appliances.<br />
• These appliances fulfill the requirements of EU<br />
Guidelines “2004/108/EC Electro magnetic<br />
compatibility” and “2006/95/EC Low voltage guideline”.<br />
The appliance is marked with the CE symbol on the<br />
rating plate.<br />
• <strong>Fakir</strong> reserves the right to modify designs and<br />
specifications without notice.<br />
• Appliance only to be connected to voltage indicated<br />
on the rating plate.<br />
• <strong>Fakir</strong> will not accept any liability for damage or injury<br />
if the appliance is used other than for its intended<br />
purpose or is improperly operated or inexpertly repaired<br />
and maintained.<br />
• Before use, check to ensure that all the filters are<br />
correctly installed. The appliance must not be used<br />
without filters.<br />
• Use only genuine <strong>Fakir</strong> filters and accessories.<br />
• The appropriate filters (paper filter or micro power<br />
filter, micro main filter, motor protection filter or activated<br />
carbon filter or high efficiency submicron particulate<br />
airfilter or micro vario combination filter and micro<br />
exhaust filter) must be installed at all times to ensure<br />
the efficient operation of the appliance.<br />
• lf the filter indicator lamp lights up, inspect all the<br />
filters and clean or replace in accordance with the<br />
Instructions for Use.<br />
• When connecting accessories, cleaning, repairing or<br />
servicing the unit, unplug the unit.<br />
• Do not let children use electrical appliances<br />
unsupervised.
Imported Safeguards<br />
SAFETY<br />
• This appliance is not suitable to be used to pick up<br />
substances constituting a health hazard.<br />
• Repairs should be carried out by an authorized <strong>Fakir</strong><br />
service center (see enclosed list of adresses). Incorrect<br />
repairs may the user to electrical danger.<br />
• Do not pull out the plug from power supply socket by<br />
pulling on the connecting lead.<br />
• Do not pull the connecting lead over sharp edges or<br />
allow it to become jammed. Do not use damaged<br />
extension leads.<br />
• lf required, the connecting lead has to be replaced<br />
together with the cable rewind by an autorized <strong>Fakir</strong><br />
After-Sales-Service only.<br />
• Before any maintenance operation or replacing a filter,<br />
and after use, switch off the appliance and pull out the<br />
mains plug.<br />
• Keep the nozzles and ends of tubes well away from<br />
the eyes and ears.<br />
• The appliance must only be used for dry vacuum<br />
cleaning. lt is not a dual-purpose (wet/dry) vacuum<br />
cleaner.<br />
• Do not use the appliance to pick up hot or glowing<br />
substances.<br />
GB<br />
• Do not use the appliance to pick up coarse slivers of<br />
glass. Do not use the appliance to pick up any solvents,<br />
explosive liquids or gases. When using the turbo suction<br />
brush resp. the electric suction brush, keep the hands<br />
clear of the rotating brush roller and take care not to<br />
run over the connecting lead.<br />
• Do not store the appliance in the open air. Do not<br />
exposure the machine to weather, humidity nor<br />
excessive heat. Clean the appliance only with a dry or<br />
slightly moist cloth. Do not allow any of the electrical<br />
components (switches, plug, socket, electronics etc.)<br />
to come into contact with water.
J<br />
I<br />
H<br />
G<br />
F<br />
GB<br />
OVERVIEW<br />
A<br />
B<br />
C<br />
D<br />
E<br />
Device description<br />
A<br />
B<br />
C<br />
D<br />
E<br />
F<br />
G<br />
H<br />
I<br />
J<br />
Handle with suction controller<br />
Telescopic suction tube<br />
Handle<br />
Foot button cable rewind<br />
Floor suction nozzle,<br />
adjustable for hard floors and<br />
textile-covered floors<br />
Exhaust air grating<br />
Foot button ON-OFF<br />
Suction power control<br />
Filter enclosure cover with<br />
accessories compartment<br />
Suction hose<br />
<strong>SC</strong> <strong>190</strong> red <strong>SC</strong> <strong>210</strong> nero metallic <strong>SC</strong> <strong>Öko</strong> <strong>Power</strong> crema<br />
30
Floor vaccum cleaner<br />
Scope of delivery<br />
Floor suction nozzle, adjustable<br />
Hard-floor nozzle<br />
Suction hose with handle<br />
Telescopic suction tube<br />
Upholstery nozzle<br />
(in accessories compartment)<br />
Crevice nozzle<br />
(in the accessories compartment)<br />
Crevice nozzle62 cm<br />
Turbo suction brush<br />
HEPA-Filter (in filter enclosure)<br />
Main micro-filter<br />
(in filter enclosure)<br />
Exhaust air micro-filter<br />
(under the exhaust air grating)<br />
Dust bag (one in the filter enclosure)<br />
Operating manual<br />
Technical data<br />
Mains voltage<br />
Nominal frequency<br />
<strong>Power</strong> IEC / max<br />
Acoustic pressure level max<br />
Low air pressure max<br />
Airflow throughput max<br />
Dimensions L*B*H approx<br />
Weight approx<br />
Unpacking<br />
OVERVIEW<br />
1<br />
1<br />
1<br />
1<br />
1<br />
1<br />
-<br />
-<br />
1<br />
1<br />
1<br />
2<br />
1<br />
230 V~<br />
50 Hz<br />
1700 / <strong>190</strong>0 W<br />
70 dB(A)<br />
28kPa<br />
36 l/s<br />
47,5x30,5x25 cm<br />
6,5 kg<br />
<strong>SC</strong> <strong>190</strong> <strong>SC</strong> <strong>210</strong> <strong>SC</strong> ÖKO POWER<br />
1<br />
1<br />
1<br />
1<br />
1<br />
1<br />
-<br />
-<br />
1<br />
1<br />
1<br />
2<br />
1<br />
230 V~<br />
50 Hz<br />
<strong>190</strong>0 / <strong>210</strong>0 W<br />
70 dB(A)<br />
30 kPa<br />
38 l/s<br />
47,5x30,5x25 cm<br />
6,5 kg<br />
1<br />
1<br />
1<br />
1<br />
1<br />
1<br />
-<br />
-<br />
1<br />
1<br />
1<br />
2<br />
1<br />
230 V~<br />
50 Hz<br />
1200 / 1400 W<br />
70 dB(A)<br />
30 kPa<br />
38 l/s<br />
47,5x30,5x25 cm<br />
6,5 kg<br />
Unpack the device and check the content of the packaging<br />
for completeness (see scope of supply). Should you note<br />
any damage incurred during transit, please contact your<br />
dealer immediately.<br />
WARNING!<br />
Never use a defective appliance.<br />
NOTICE!<br />
Keep the packaging for storage and future transports<br />
(e.g. for moves, service).<br />
GB
a)<br />
b)<br />
c)<br />
d)<br />
e)<br />
f)<br />
OVERVIEW<br />
The filter system The <strong>Fakir</strong> Vario-Filter-System allows you to adjust the quality<br />
of the dust filtration to meet your needs. The vacuum<br />
cleaner will only display its filter properties that are so important<br />
to allergy sufferers when all the filters are used.<br />
32<br />
GB<br />
Almost all pollen, mites and fine dust from a size of 0.1 ?m<br />
will be filtered out. The filtering process is so good that the<br />
waste air coming from the appliance has a lower dust value<br />
than that of the ambient air.<br />
The air is cleaned as follows:<br />
The air with the dirt particles is suctioned in via the<br />
suction hose.<br />
The dirt is retained in the dust bag, which closes on removal,<br />
in a 5-layer fleece filter.<br />
The micro main filter serves as a pre-filter and protective<br />
element for the following filter inserts.<br />
The particulate (HEPA*) filter almost completely filters<br />
out the finest particles (particulate) from a size of<br />
0,1?m.<br />
* HEPA= HIGH EFFICIENCY PARTICUL ATEAIRFILTER<br />
The air is suctioned in by means of the motor. As all<br />
particulate has been previously filtered out, no deposits<br />
of dust can form here.<br />
The clean air is released back into the room via the<br />
waste air filter.
Assembling<br />
B<br />
5<br />
6<br />
Setting the length of<br />
the suction tube<br />
B<br />
A<br />
E<br />
7<br />
B<br />
ASSEMBLY<br />
WARNINIG!<br />
Please ensure that the mains plug is disconnected<br />
before assembling the parts otherwise the appliance<br />
might start up unintentionally and cause injury.<br />
•<br />
•<br />
•<br />
•<br />
•<br />
Insert the end of the suction hose into the suction pipe<br />
[5]. You will hear the two locking parts [6] on the left and<br />
right click into place.<br />
NOTICE!<br />
To release the suction hose, squeeze both locking<br />
parts [6].<br />
Insert the handle [A] of the suction hose and twist<br />
slightly to make sure it sits tightly in the telescopic<br />
suction tube [B].<br />
Insert the telescopic suction tube [B] and twist slightly to<br />
ensure it sits tightly in the floor suction nozzle [E].<br />
Use your thumb to press the slide element [7] in the direction<br />
of the arrow.<br />
Hold the lower part of the pipe [G] in your other hand.<br />
Now pull or push the suction tube to the required length.<br />
• The vacuum cleaner is now ready for use.<br />
GB
Accessories compartment<br />
8<br />
9<br />
Utilization<br />
34<br />
GB<br />
10<br />
12<br />
11<br />
NOZZLES<br />
WARNING!<br />
Switch off the device before changing the nozzles.<br />
Crevice nozzle, furniture brush and upholstery nozzle are<br />
stored in the accessories compartment.<br />
•<br />
Press the release button [8] to open the accessories<br />
compartment. The cover [9] opens and you can take out<br />
the required nozzle.<br />
• Then press down the cover [9] again until it engages.<br />
•<br />
Insert the corresponding nozzle securely with a slight turn<br />
onto the handle of the suction hose, or onto the telescopic<br />
suction tube.<br />
Crevice nozzle [10]<br />
The crevice nozzle allows dirt from deep cracks in upholstered<br />
furniture, corners, skirting boards etc. to be suctioned off.<br />
Upholstery nozzle [11]<br />
The upholstery nozzle can be used to vacuum clean curtains,<br />
upholstered furniture etc. It has a thread pick-up to collect<br />
fluff and threads from textiles.<br />
Crevice nozzle, flexible[12] > Optional accessory<br />
With the approx. 60 cm long flexible crevice nozzle, you can<br />
remove dirt even from the most difficult to access cracks,<br />
corners etc.<br />
NOTICE!<br />
Set suction capacity low to medium.
15<br />
E<br />
14<br />
NOZZLES<br />
Floor suction nozzle[E]<br />
You can adjust the floor suction nozzle with a working width<br />
of approx. 28 cm by using the change-over switch [14] for<br />
the vacuuming of carpets (bristle collar retracted), or hard<br />
floors (bristle collar extended).<br />
The two thread receptacles [15] remove threads, hairs, fluff<br />
etc. from the carpet. If required, they can be replaced without<br />
problem since they are only inserted into the base plate to<br />
the left and right of the suction opening in each case.<br />
NOTICE!<br />
Set suction capacity medium to high.<br />
Hard-floor nozzle[16]<br />
Used especially for hard-floors such as tiles, parquet or<br />
laminate. Soft brush hairs allow the nozzle to glide easily<br />
over the floor and it picks up even the finest dirt free of<br />
residue.<br />
NOTICE!<br />
Set suction capacity low to medium.<br />
Textile nozzle[17] > Optional accessory<br />
Used especially for upholstered furniture, curtains or garments.<br />
Perfect dust removal through extra-large lint and thread<br />
receptacle, which removes statically-clinging lint and hair.<br />
NOTICE!<br />
Set suction capacity medium to high.<br />
GB<br />
35
36<br />
GB<br />
NOTICE!<br />
Set suction capacity low to high.<br />
Manual turbo brush [18] > Optional accessory<br />
The manual turbo brush has a high-performance brush roller<br />
which is driven by the air stream of the vacuum cleaner.<br />
Use this for thorough cleaning of mattresses, upholstered<br />
furniture or automobile seats.<br />
If long threads, hair or similar should have become wound<br />
around the brush roller, you can remove these after opening<br />
the manual turbo brush:<br />
•<br />
•<br />
•<br />
•<br />
NOZZLES<br />
Adjust the rotating nozzle setting to the middle marker [19].<br />
Press stop knob [20] and pull out the nozzle.<br />
Fold up the housing part [21].<br />
After cleaning of brush-roller, turbine wheel and belt,<br />
close the turbo brush again in reverse order.<br />
Turbo suction brush[22] > Optional accessory<br />
The turbo suction brush has a high-performance brush roller<br />
which is driven by the air stream of the vacuum cleaner. It<br />
brushes up the dirt from the carpet pile and simultaneously<br />
vacuums it off.<br />
If the brush roller is blocked by coarse dirt, this must be<br />
cleaned.<br />
WARNING! Danger of injury!<br />
Never reach into the rotating brush roller when working with the turbo suction brush.
Vacuum cleaning<br />
G<br />
H<br />
23<br />
OPERATION<br />
Before use, ensure that all filters and the right dust bag have<br />
been inserted and that these are not damaged. The optimum<br />
filtering level, which is so important for allergy sufferers, is<br />
only reached when intact filters are used that are inserted<br />
correctly.<br />
WARNING!<br />
Check the appliance and the power cable before use.<br />
Faulty appliances may cause injury and should not be used.<br />
• Attach the required nozzle.<br />
•<br />
•<br />
Pull out the power supply cable by means of the plug until<br />
the required length is reached and insert the plug into a<br />
mains socket.<br />
Press the foot button "On/Off" [G] to switch on the vacuum<br />
cleaner.<br />
•<br />
Set the required suction level [H]:<br />
GB<br />
You can also regulate the suction level by means of the<br />
suction control [23] on the handle of the suction hose.<br />
Use this control (slide valve) to reduce the suction level for<br />
brief periods of time. During normal vacuum cleaning, this<br />
slide valve should remain closed.<br />
Use the section level control [H] for permanent reduction of<br />
the suction level to save energy.<br />
37
Filter change indicator<br />
H<br />
Work breaks<br />
After vacuum cleaning<br />
G<br />
38<br />
GB<br />
D<br />
24<br />
25<br />
Filter change indicator<br />
When the dust bag or filters are full or if the accessories are<br />
blocked (hose, pipe, nozzle), the filter change indicator will<br />
shine [24]. To ensure correct analysis, the maximum suction<br />
level [H] needs to be set and the floor nozzle lifted from the<br />
floor.<br />
In this case, change the dust bag or blocked filter or remedy<br />
the blockage.<br />
NOTICE!<br />
When using the turbo mattress brush or the crevice<br />
nozzle,it is possible that the filter change indicator may<br />
shine before the dust bag or filter is full. This is due to<br />
technical reasons and does not mean that the appliance<br />
is faulty.<br />
Suction pipe park position with automatic suction cut-off<br />
Use the park holder to hold the suction tube safely in<br />
position when the cleaner is not being used. To do this,<br />
insert the park holder [25] of the floor nozzle into the nozzle<br />
holder on the reverse of the appliance; the motor is<br />
automatically switched off.<br />
•<br />
•<br />
•<br />
OPERATION<br />
WARNING!<br />
Follow the steps below as soon as you stop vacuum<br />
cleaning. Never leave the appliance unattended.<br />
Press the foot button "On/Off" [G] to switch off the vacuum<br />
cleaner.<br />
Remove the plug from the mains socket.<br />
Press the foot button "cable rewind” [D] to reel in the cable.<br />
Gently guide the cable with your hand until the cable has<br />
been completely wound in and the plug rests snugly<br />
against the opening.
After vacuum cleaning<br />
C<br />
29<br />
•<br />
Ergonomically shaped carrying handle [C] for safe<br />
transportation of the appliance with all accessories such<br />
as suction hose, telescopic pipe and nozzles.<br />
Storage<br />
•<br />
•<br />
OPERATION<br />
Insert the park holder [29] of the floor nozzle into the<br />
nozz-le holder on the underneath of the appliance.<br />
Store the vacuum cleaner in a place that is out of the<br />
reach of children.<br />
CAUTION!<br />
Never place the appliance next to heat sources and<br />
avoid direct sunlight, as the heat may damage the<br />
vacuum cleaner.<br />
GB<br />
39
GB<br />
Changing the dust bag<br />
30<br />
H<br />
Filter enclosure cover<br />
close-off<br />
32<br />
S<br />
I<br />
31<br />
AFTER USE<br />
WARNING!<br />
Before servicing or cleaning, switch off the appliance and<br />
remove the mains plug otherwise the appliance could be<br />
accidently switched on and cause injury.<br />
•<br />
•<br />
NOTICE!<br />
Only use original <strong>Fakir</strong> filters.<br />
This is the only way to ensure that the excellent filter<br />
properties of the vacuum cleaner are utilised.<br />
Lift the catch [30] of the filter chamber lid [I] and open the<br />
lid-you will hear it click into place.<br />
Lift the dust bag holder [31] and remove the dust bag by<br />
means of the hygiene closure part (pull out in the direction<br />
shown by the arrow) – the opening on the bag is<br />
automatically closed.<br />
• Insert the new bag in fully and close the filter chamber.<br />
•<br />
•<br />
Then fold the dust bag holder [31] together with the dust<br />
bag back down again.<br />
Press down the filter chamber lid [I] again until it clicks<br />
into place.<br />
Alternatively, the dust bag holder can also be removed<br />
to change the filter. This is only inserted in the two hinges<br />
[S] on the left and right.<br />
NOTICE!<br />
The filter enclosure cover-off [32] ensures that the<br />
appliance cannot be used (vacuum cleaning) when there<br />
is no dust bag or when the dust bag is inserted incorrectly.
Change the micro main<br />
filter<br />
Change the HEPA filter<br />
a<br />
b<br />
34<br />
Open the filter chamber as described in the section<br />
“Changing the dust bag”.<br />
•<br />
•<br />
•<br />
•<br />
Remove the filter cassette MICRO VARIO:<br />
a) first tilt slightly to the front and then<br />
b) lift out<br />
Lift up the grille [33] of the filter cassette.<br />
Replace the micro main filter [34] and then press the<br />
grille down again firmly.<br />
Put the filter cassette back in and close the filter<br />
chamber.<br />
NOTICE!<br />
Change the micro main filter at the latest after 5 dust<br />
bags have been used.<br />
Open the filter chamber and remove the filter cassette<br />
MICRO VARIO as described above.<br />
•<br />
•<br />
AFTER USE<br />
Remove the old HEPA-filter [35] from the filter cassette<br />
and put in the new one.<br />
Re-insert the filter cassette MICRO VARIO together<br />
with the HEPA filter and close the filter chamber.<br />
NOTICE!<br />
Change the HEPA filter every 12 - 18 months.<br />
GB<br />
Alternatively, you can also use the following filters that are<br />
available as accessories:<br />
HMicro Vario Combifilter<br />
(= HEPA + odour filter)<br />
Active odour filter<br />
41
Change the<br />
exhaust-air filter<br />
Cleaning<br />
42<br />
GB<br />
F<br />
36<br />
AFTER USE<br />
1. Squeeze the side locking part [36] and open the filter lid<br />
[F].<br />
2. Remove the waste air filter below and insert a new one.<br />
3. Put back the filter lid [F] in the right position and close until<br />
it clicks into place.<br />
NOTICE!<br />
Regularly clean or replace the washable waste air filter.<br />
WARNING!<br />
Switch off the vacuum cleaner and disconnect the plug<br />
from the mains socket before cleaning the appliance.<br />
This ensutres that the appliance is not switched on<br />
unintentionally.<br />
CAUTION!<br />
Do not use cleaning detergents, abrasive agents or<br />
alcohol as these will damage the casing.<br />
Only dry-wipe the appliance or clean with a damp cloth.<br />
You can also clean the filter chamber with a damp cloth<br />
if necessary.<br />
Suction accessories such as the hose, pipes or nozzles<br />
should be regularly checked for blockages, cleaned and,<br />
washed and dried.
Waste disposal<br />
AFTER USE<br />
GB<br />
If the service life of the device has ended, in particular if<br />
functional disturbances occur, make the worn-out device<br />
unusable by cutting through the power cable.<br />
Dispose of the device according to the environmental regulations<br />
applicable in your country.<br />
Electrical waste must not be disposed of together with household<br />
waste. Bring the worn-out device to a collection center.<br />
The packaging of the device consists of recycling-capable<br />
materials. Place these, sorted out according to material, in<br />
the collectors provided, so that recycling can be carried out<br />
on them.<br />
For advice on recycling, refer to your local authority or your<br />
dealer<br />
Dispose of used dust bag and filters in domestic waste.<br />
43
If at once you<br />
don't succeed<br />
Fault<br />
Device does not run<br />
Device does not vacuum<br />
Device runs<br />
unusually loud.<br />
44<br />
GB<br />
IF AT ONCE YOU DON’T SUCCEED<br />
Dear customer,<br />
Our products are subject to strict quality control. If this device<br />
should not function trouble-free in spite of that, we regret<br />
this very much.<br />
Before you contact our Customer Service, check whether<br />
you can correct the fault yourself.<br />
WARNING!<br />
Switch off the device and pull the power plug before you<br />
begin with any fault location. This prevents the device<br />
being switched on by mistake.<br />
Possible cause Remedy<br />
Plug is not insertedt.<br />
Device is not switched on<br />
<strong>Power</strong> outlet does not carry<br />
any power.<br />
<strong>Power</strong> cable is damaged.<br />
Dust bag / filter are full<br />
and/or clogged<br />
Hose, pipes, nozzles are<br />
clogged up<br />
Sucked in particles have<br />
become jammed<br />
Insert plug.<br />
Switch on device.<br />
Use another power outlet<br />
Bring device in for repair<br />
Change dust bag / filters<br />
Eliminate clogging<br />
Remove particles
NOT / NOTES
NOT / NOTES


