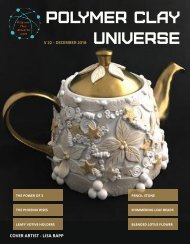
PCUmay2018V15

You also want an ePaper? Increase the reach of your titles
YUMPU automatically turns print PDFs into web optimized ePapers that Google loves.
MAY 1, 2018<br />
WWW.POLYMERCLAYUNIVERSE.COM<br />
Use a<br />
rhinestone<br />
pencil<br />
p i c k e r ( i f<br />
you have one) or a tweezers to put them<br />
on.<br />
With your paintbrush apply on the shapes a thin layer<br />
of clear liquid clay. This layer will help you not only stick<br />
on the clay the hot fix rhinestones<br />
but will protect your glitter as well.<br />
Put some rhinestones on the<br />
butterfly to decorate it according to<br />
your taste.<br />
Decorate all the butterflies you are planning to<br />
use for your wreath. I used a small piece of a<br />
veneer I had from another project, you can<br />
notice that the smaller ones as well as a<br />
couple of the bigger are made from it. Do the<br />
same if you have leftover veneers, butterflies<br />
have all kinds of colors and patterns, no<br />
problem!<br />
Don’t apply too much liquid clay, just enough to<br />
keep rhinestones in place. If you apply thick<br />
layer, the most possible is that it will cause a<br />
dull surface and you need the glitter<br />
to be visible and shiny.<br />
Using a tool, just press a bit the central part of the butterfly, to make it looking<br />
more “alive”.<br />
You may notice in several pictures that my butterflies have a second layer<br />
and are quite thick. Depending on the use you are planning for the wreath,<br />
you can cut equal number of<br />
shapes for each size you cut glittered<br />
butterflies and just stick it at the back<br />
side of the glittered piece. This will<br />
make stronger your butterflies in case<br />
you want to use them outside of the<br />
house, in open air. If the project is<br />
planned to remain indoors, there is no<br />
need to back them with a second layer.<br />
!16