
You also want an ePaper? Increase the reach of your titles
YUMPU automatically turns print PDFs into web optimized ePapers that Google loves.
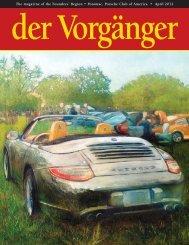
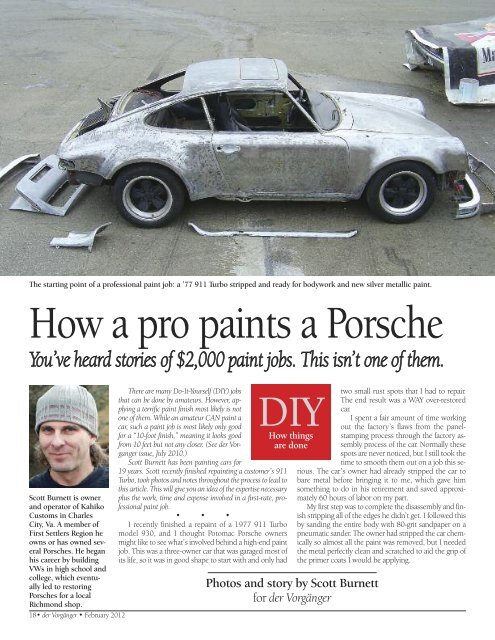
The starting point <strong>of</strong> a pr<strong>of</strong>essional paint job: a ’77 911 Turbo stripped and ready for bodywork and new silver metallic paint.<br />
How a pro paints a <strong>Porsche</strong><br />
You’ve heard stories <strong>of</strong> $2,000 paint jobs. This isn’t one <strong>of</strong> them.<br />
Scott Burnett is owner<br />
and operator <strong>of</strong> Kahiko<br />
Customs in Charles<br />
City, Va. A member <strong>of</strong><br />
First Settlers Region he<br />
owns or has owned several<br />
<strong>Porsche</strong>s. He began<br />
his career by building<br />
VWs in high school and<br />
college, which eventually<br />
led to restoring<br />
<strong>Porsche</strong>s for a local<br />
Richmond shop.<br />
18• der Vorgänger • February 2012<br />
There are many Do-It-Yourself (<strong>DIY</strong>) jobs<br />
that can be done by amateurs. However, applying<br />
a terrific paint finish most likely is not<br />
one <strong>of</strong> them. While an amateur CAN paint a<br />
car, such a paint job is most likely only good<br />
for a “10-foot finish,” meaning it looks good<br />
from 10 feet but not any closer. (See der Vorganger<br />
issue, July 2010.)<br />
Scott Burnett has been painting cars for<br />
19 years. Scott recently finished repainting a customer’s 911<br />
Turbo, took photos and notes throughout the process to lead to<br />
this article. This will give you an idea <strong>of</strong> the expertise necessary<br />
plus the work, time and expense involved in a first-rate, pr<strong>of</strong>essional<br />
paint job.<br />
• • •<br />
I recently finished a repaint <strong>of</strong> a 1977 911 Turbo<br />
model 930, and I thought Potomac <strong>Porsche</strong> owners<br />
might like to see what’s involved behind a high-end paint<br />
job. This was a three-owner car that was garaged most <strong>of</strong><br />
its life, so it was in good shape to start with and only had<br />
<strong>DIY</strong><br />
How things<br />
are done<br />
Photos and story by Scott Burnett<br />
for der Vorgänger<br />
two small rust spots that I had to repair.<br />
The end result was a WAY over-restored<br />
car.<br />
I spent a fair amount <strong>of</strong> time working<br />
out the factory’s flaws from the panelstamping<br />
process through the factory assembly<br />
process <strong>of</strong> the car. Normally these<br />
spots are never noticed, but I still took the<br />
time to smooth them out on a job this serious.<br />
The car’s owner had already stripped the car to<br />
bare metal before bringing it to me, which gave him<br />
something to do in his retirement and saved approximately<br />
60 hours <strong>of</strong> labor on my part.<br />
My first step was to complete the disassembly and finish<br />
stripping all <strong>of</strong> the edges he didn’t get. I followed this<br />
by sanding the entire body with 80-grit sandpaper on a<br />
pneumatic sander. The owner had stripped the car chemically<br />
so almost all the paint was removed, but I needed<br />
the metal perfectly clean and scratched to aid the grip <strong>of</strong><br />
the primer coats I would be applying.