SmartNode™ SN4552 QUICK START GUIDE - Patton
SmartNode™ SN4552 QUICK START GUIDE - Patton
SmartNode™ SN4552 QUICK START GUIDE - Patton

Create successful ePaper yourself
Turn your PDF publications into a flip-book with our unique Google optimized e-Paper software.
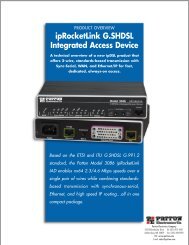
SmartNode 4552<br />
ISDN SoHo VoIP Gateway Router<br />
Quick Start Guide<br />
Approval<br />
This device is approved for connection to the public ISDN telecommunication network. over a BRI/So-ISDN interfaces.<br />
Zulassung<br />
Zugelassen fur die Anshaltung an da offentliche ISDN Telekommunikatinosnetz an BRI/So- ISDN Schnittstellen.<br />
Approbation<br />
Cet appareil est approuve pour la connexion au reseau ISDN public avec les interfaces BRI/So.<br />
Approbacion<br />
Este aparato esta aprobado para conexion a red publica ISDN sobre interfaz BRI/So.<br />
Sales Office: +1 (301) 975-1000<br />
Technical Support: +1 (301) 975-1007<br />
E-mail: support@patton.com<br />
WWW: www.patton.com<br />
Document Number: 13216U7-001 Rev. B<br />
Part Number: 07M<strong>SN4552</strong>-QS<br />
Revised: February 25, 2005
<strong>Patton</strong> Electronics Company, Inc.<br />
7622 Rickenbacker Drive<br />
Gaithersburg, MD 20879 USA<br />
Tel: +1 (301) 975-1000<br />
Fax: +1 (301) 869-9293<br />
Support: +1 (301) 975-1007<br />
Web: www.patton.com<br />
E-mail: support@patton.com<br />
Trademark Statement<br />
The terms SmartNode, SmartWare and SmartView are trademarks of <strong>Patton</strong><br />
Electronics Company. All other trademarks presented in this document are the<br />
property of their respective owners.<br />
Copyright © 2004–2005, <strong>Patton</strong> Electronics Company. All rights<br />
reserved.<br />
The information in this document is subject to change without notice. <strong>Patton</strong><br />
Electronics assumes no liability for errors that may appear in this document.<br />
Important Information<br />
To use virtual private network (VPN) and/or AES/DES/3DES encryption<br />
capabilities with the SmartNode 4552, you may need to purchase additional<br />
licenses, hardware, software, network connection, and/or service. Contact<br />
sales@patton.com or +1 (301) 975-1000 for assistance.<br />
ii
<strong>SN4552</strong> <strong>QUICK</strong> <strong>START</strong> <strong>GUIDE</strong><br />
SmartNode<br />
This Quick Start Guide leads you through the basic steps to set up a new SmartNode and to download a<br />
configuration. Please note that this guide does not replace the detailed Software Configuration Guide and the<br />
Getting Started Guide available on the CD-ROM and online at www.patton.com/voip.<br />
Your SmartNodes can be used for a wide variety of IP and voice over IP applications. To support and ease the<br />
configuration of the SmartNodes configuration templates for the most important applications are available<br />
online at http://www.patton.com/voip/appnotes.shtml .<br />
Tthe main steps to set up a new SmartNode are shown below.<br />
Connect a PC, login and configure the IP address<br />
Connect the SmartNode to the Network<br />
Download a configuration example, adapt to your network and load<br />
onto the SmartNode<br />
1
Connect a PC, login and configure the IP address<br />
Power Connection and Default IP Configuration<br />
SmartNode<br />
First the SmartNode must be connected to the mains power supply using the included power supply. Wait<br />
until the ‘PWR' LED stops blinking and lights constantly. Now the SmartNode is ready.<br />
The factory default IP settings are as follows:<br />
LAN ports (green, ETH 0/1): IP Address: 192.168.1.1 Network Mask: 255.255.255.0<br />
WAN port (red, ETH 0/0): IP Address: 172.16.40.1 Network Mask: 255.255.0.0<br />
A DHCP Server with address space 192.168.1.10 – 192.168.1.19 is running on the LAN ports<br />
Both Ethernet ports are pre-configured and active.<br />
If these addresses conflict or do not match with your network they must be changed. Contact your network<br />
administrator if you are not sure what IP address to use in your installation.<br />
PC connection and Login<br />
To access the SmartNode configuration connect a PC with Ethernet port to one of the LAN ports (green) of the<br />
<strong>SN4552</strong>. Use the included black Ethernet cable for this purpose. Set your PCs TCP/IP configuration to DHCP<br />
to automatically receive an IP address from the SmartNode.<br />
Open a Telnet connection to the default LAN IP address of the SmartNode (192.168.1.1). Use the Terminal<br />
program included with most PC operating systems (e.g. Hyper Terminal on Windows). The CD-ROM also<br />
includes some recommended terminal programs.<br />
The factory default login is<br />
Login name: administrator<br />
Password: <br />
So use the name administrator after the login prompt and simply press the Enter key after the password<br />
prompt.<br />
login:administrator<br />
password:<br />
172.16.40.1><br />
2
SmartNode<br />
After you have successfully logged in you are in the operator execution mode, indicated by '>' as command<br />
line prompt. With the commands enable and configure you enter the configuration mode.<br />
172.16.40.1>enable<br />
172.16.40.1#configure<br />
172.16.40.1(cfg)#<br />
Changing the IP Address<br />
Select the context IP mode to configure an IP interface.<br />
172.16.40.1(cfg)#context ip router<br />
172.16.40.1(ctx-ip)[router]#<br />
Now you can set your IP address and network mask for the WAN IP interface eth0. Contact your network<br />
administrator if you are not sure what IP address to set. Within this example a private network (172.16.1.0) is<br />
assumed. The IP address is set to 172.16.1.100.<br />
172.16.40.1(ctx-ip)[router]#interface eth0<br />
172.16.40.1(if-ip)[eth0]#ipaddress 172.16.1.100 255.255.255.0<br />
2002-10-29T00:09:40 : LOGINFO : Link down on interface eth0.<br />
2002-10-29T00:09:40 : LOGINFO : Link up on interface eth0.<br />
172.16.1.100(if-ip)[eth0]#<br />
Store this modified configuration and make it your new start-up configuration. On the next start-up the system<br />
will come up using the modified configuration.<br />
172.16.1.100(if-ip)[eth0]#copy running-config startup-config<br />
172.16.1.100(if-ip)[eth0]#<br />
Now the SmartNode can be connected to your IP network.<br />
Connect the SmartNode to the Network<br />
You now can connect the SmartNode to the IP Network and do any remaining configuration from any PC<br />
connected to the same Ethernet segment.<br />
3
SmartNode<br />
You can check the connection with the ping command. For the example above ping 172.16.1.100 from a PC on<br />
the IP network.<br />
You may now start to configure the SmartNode from scratch using the CLI commands. For a detailed<br />
description of the CLI refer to the SmartWare software configuration guide (SCG) available on the CD-ROM<br />
and online at: www.patton.com/voip.<br />
We recommend however that you start your configuration from a template. See step three for further details.<br />
Download a configuration example, adapt to your network and load<br />
onto the SmartNode<br />
We recommend that you use an application specific configuration template called “Application Note” to start<br />
your SmartNode configuration. A selection of Application Notes is available on the CD-ROM and online from<br />
http://www.patton.com/voip/appnotes.shtml. Select an Application Note which matches your requirements.<br />
Adapt the configuration as described in the Application Note to your network (do not forget to modify the IP<br />
address) and copy the modified configuration to a TFTP server. The SmartNode can now load its configuration<br />
from this server.<br />
In this example we assume the TFTP server is running on the PC with the IP address 172.16.1.10 and the<br />
configuration named SN.cfg in the root directory of the TFTP server.<br />
172.16.1.100(cfg)#copy tftp://172.16.1.10/SN.cfg startup-config<br />
Download...100%<br />
172.16.1.100(cfg)#<br />
You now need to reload the SmartNode to activate the downloaded startup configuration. Type in the<br />
following commands.<br />
Note that you MUST answer NO when asked to overwrite the startup configuration.<br />
172.16.1.100(cfg)#reload<br />
Running configuration has been changed.<br />
Do you want to copy the 'running-config' to the 'startup-config'?<br />
Press 'yes' to store, 'no' to drop changes : no<br />
Press 'yes' to restart, 'no' to cancel : yes<br />
The system is going down<br />
Additional Information<br />
For detailed information about configuring and operating guidance, set up procedures and trouble shooting,<br />
refer to the SmartNode Series SmartWare Software Configuration Guide and the SmartNode Hardware Installation<br />
Guide on the enclosed <strong>Patton</strong> VoIP CD-ROM or at http://www.patton.com/voip/. On the CD-ROM you will<br />
also find numerous freeware and shareware tools, including TFTP servers, Telnet clients, etc.<br />
4
EC Declaration of Conformity<br />
(German version see below)<br />
Product Description: SmartNode 1200 *)<br />
SmartNode 1400 *)<br />
SmartNode 2300 incl. Interface Cards IC-4BRV and IC-E1V<br />
SmartNode 2400 incl. Interface Cards IC-4BRV and IC-E1V<br />
SmartNode<br />
The products described above in the form as delivered are in conformity with the provisions of the following<br />
European Directive:<br />
R&TTE 1999/5/EC<br />
Guideline of the European Parliament and the Committee for the Harmonisation of the Legal<br />
Regulations of the Member States concerning radio equipment and telecommunications terminal<br />
equipment and the mutual recognition of their conformity.<br />
The safety advices in the documentation accompanying the products shall be obeyed. The conformity<br />
to the above directive is indicated by the CE sign on the device.<br />
*) SmartNodes 1200 Version 5 and SmartNodes 1400 Version 1 (Model No. SN1200 0005-0001 resp. SN1400<br />
0001-0001) must use at least the following Builds of SmartWare: Build 21211 for Release 2.01, Build 21209 for<br />
Release 2.02, Build 21182 for Release, or any Build for all subsequent Releases.<br />
The signed Declaration of Conformity can be downloaded from<br />
http://www.patton.com/certifications/<br />
Approval<br />
The SmartNode is approved for connection to the public ISDN telecommunication network. Anybody may<br />
connect the SmartNode to a BRI/S0- ISDN interface and put it into operation.<br />
EG-Konformitätserklärung<br />
(English version see above)<br />
Produktbezeichnung: SmartNode 1200 *)<br />
SmartNode 1400 *)<br />
SmartNode 2300 inkl. Interface Cards IC-4BRV und IC-E1V<br />
SmartNode 2400 inkl. Interface Cards IC-4BRV und IC-E1V<br />
Die bezeichneten Produkte stimmen in der von uns in Verkehr gebrachten Ausführung mit den Vorschriften<br />
folgender Richtlinie überein:<br />
R&TTE 1999/5/EG<br />
Richtlinie des europäischen Parlaments und des Rates zur Angleichung der Rechtsvorschriften der<br />
Mitgliedstaaten über Funkanlagen und Telekommunikations-Endeinrichtungen und die gegenseitige<br />
Anerkennung ihrer Konformität.<br />
5
6<br />
SmartNode<br />
Die Sicherheitshinweise in der mitgelieferten Produktdokumentation sind zu beachten. Die<br />
Konformität mit der oben erwähnten Richtlinie wird durch das CE-Zeichen auf dem Gerät bestätigt.<br />
*) SmartNodes 1200 Version 5 und SmartNodes 1400 Version 1 (Model No. SN1200 0005-0001 bzw. SN1400<br />
0001-0001) müssen mindestens folgende SmartWare-Builds verwenden: Build 21211 für Release 2.01, Build<br />
21209 für Release 2.02, Build 21182 für Release, oder irgendeinen Build für alle nachfolgenden Releases.<br />
Die unterzeichnete Konformitätserklärung kann heruntergeladen werden von:<br />
http://www.patton.com/certifications/<br />
Zulassung<br />
Der SmartNode ist für die Anschaltung an das öffentliche ISDN Telekommunikationsnetz zugelassen. Er darf<br />
durch jedermann an eine BRI/S0- Schnittstelle angeschlossen und in Betrieb genommen werden.<br />
Legal Notice<br />
Copyright © 2005 <strong>Patton</strong> Electronics Co<br />
All rights reserved. No part of this publication may be reproduced without prior written permission from Inalp Networks AG. dba <strong>Patton</strong>-<br />
Inalp AG.<br />
<strong>Patton</strong> -Inalp AG reserves the right to make changes in specifications and other information contained in this document without prior<br />
notice. The information provided is subject to change without notice.<br />
In no event shall <strong>Patton</strong> Inalp AG or its employees and associated companies be liable for any incidental, special, indirect or consequential<br />
damages whatsoever, including but not limited to lost profits, arising out of or related to this manual or the information contained within<br />
it, even if <strong>Patton</strong> -Inalp AG has been advised of, known, or should have known, the possibility of such damages.<br />
<strong>Patton</strong>, the <strong>Patton</strong> logo, and Inalp SmartNode are trademarks of <strong>Patton</strong> Electronics Company and Inalp Networks AG. SmartWare and<br />
SmartView Management Center are trademarks of Inalp Networks AG. All other trademarks mentioned in this document are property of<br />
their respective owners.<br />
Document Number: 13216U7-001 Rev. B<br />
Part Number: 07M<strong>SN4552</strong>-QS<br />
Revised: February 25, 2005