SOFTWARE LICENSE AGREEMENT_4 - Heyden Securit
SOFTWARE LICENSE AGREEMENT_4 - Heyden Securit
SOFTWARE LICENSE AGREEMENT_4 - Heyden Securit

Create successful ePaper yourself
Turn your PDF publications into a flip-book with our unique Google optimized e-Paper software.
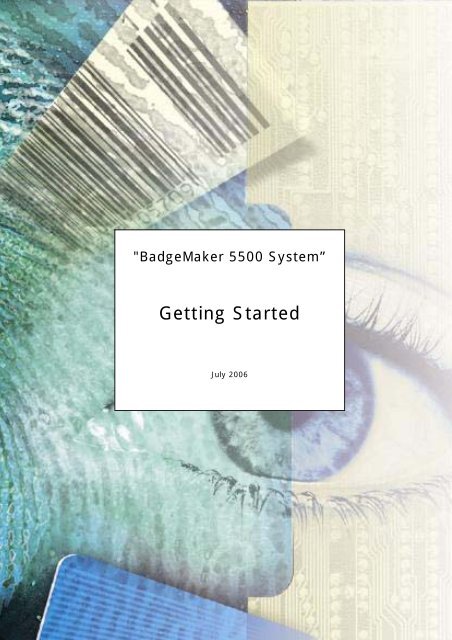
"BadgeMaker 5500 System”<br />
Getting Started<br />
July 2006
1. <strong>SOFTWARE</strong> <strong>LICENSE</strong> <strong>AGREEMENT</strong> 2<br />
1.1 Acknowledgement 2<br />
1.2 Copyright 2<br />
1.3 Trademarks 2<br />
1.4 System requirements 2<br />
1.5 Release notes 2<br />
2. INSTALLATION 3<br />
3. INTRODUCTION 4<br />
4. STEP 1: CREATE A PROJECT FILE AND DEFINE THE SETTINGS 5<br />
4.1 Create a project file 5<br />
4.2 Defining the settings 12<br />
5. STEP 2, CREATING BADGE LAYOUTS. 14<br />
5.1 Add items to the layout 17<br />
5.2 Editing existing items 25<br />
5.3 Often used tools in BadgeCreator 26<br />
5.4 Working with the mouse and cursor keys 27<br />
5.5 Button bar 29<br />
6. STEP 3, PRODUCING CARDS WITH BADGEMAKER. 32<br />
6.1 Starting BM5500 32<br />
6.2 Adding and editing data 35<br />
6.3 Adding images 36<br />
6.4 Printing cards 38<br />
6.5 Often used functions in BadgeMaker 39<br />
1
1. Software License Agreement<br />
1.1 Acknowledgement<br />
BM 5500<br />
Version 6.1 SP2<br />
July 2006<br />
At ScreenCheck we are committed to design and develop the highest quality<br />
software and service.<br />
We would like to thank all the people who have contributed their talent, intellect<br />
and heart to produce this product.<br />
1.2 Copyright<br />
Information in this document is subject to change without prior notice and does<br />
not represent a commitment on the part of ScreenCheck. The software, which<br />
includes information contained in any databases, described in this document is<br />
furnished under a license agreement or nondisclosure agreement and may be<br />
used or copied only in accordance with the terms of that agreement. It is against<br />
the law to copy the software except as specifically allowed in the license or<br />
nondisclosure agreement. No part of this manual may be reproduced in any form<br />
by any means, electronically or mechanical, including photocopying and<br />
recording, for any purpose without the written permission of ScreenCheck B.V..<br />
© 1993-2006 ScreenCheck B.V., All rights reserved.<br />
Printed in the Netherlands, Europe.<br />
1.3 Trademarks<br />
Badgemaker, BM3400, BM4400, BM5400, BM5500, BM6000, DBLC, BC and<br />
Visipass are trademarks of ScreenCheck B.V., The Netherlands.<br />
Windows is a trademark of Microsoft Corporation.<br />
All other trademarks are the property of their respective holders and are hereby<br />
acknowledged.<br />
1.4 System requirements<br />
System requirements BadgeMaker systems<br />
BM requires Microsoft Windows 2000 or XP to run and can be used on any IBM<br />
compatible computer that meets the following minimum requirements:<br />
• Pentium III 1 GHz Processor or better.<br />
• 4GB hard disk space recommended, actual size depending on number of<br />
records and images in the database.<br />
• 256Mb or more internal memory.<br />
• Colour monitor and graphics card with support of at least SVGA resolution<br />
of 1024x768 pixels and 24 bit (true) colours.<br />
1.5 Release notes<br />
In the release notes the latest modifications are described grouped by version<br />
number. You can find the release notes in the BM5500 program folder.<br />
2
2. Installation<br />
BM 5500<br />
Version 6.1 SP2<br />
July 2006<br />
The BM5500 software can be installed from the ScreenCheck BadgeMaker CD.<br />
This CD will run automatically (if it does not, start the ‘autorun.exe’ in the root<br />
directory of the CD) and will come up with a menu.<br />
Select BadgeMaker software from the menu and then BM5500 32 bit software<br />
from the next menu.<br />
The installation program will be started. The information in the installation<br />
dialogues will guide you through the installation. Make sure to install the other<br />
components as well (camera software and/or printer driver) when applicable.<br />
Restart your PC after the installation. Now your system will be ready to use.<br />
BadgeMaker will also install an MSAccess demo database. If you select ‘Demo<br />
Data Source’ from the program folder, the ODBC registration for this database<br />
will be done automatically. When that is finished, you can work with the demo<br />
database right away.<br />
� Make sure you have administrator rights when you install on a Windows 2000<br />
or Windows XP workstation.<br />
3
3. Introduction<br />
BM 5500<br />
Version 6.1 SP2<br />
July 2006<br />
This manual is intended to guide the beginning user of BadgeMaker through the<br />
process of producing basic cards. The necessary steps are described in the order<br />
as they have to be followed to produce cards. The more advanced options of<br />
BM5500 can be found in the reference manual and the help file.<br />
The BadgeMaker software consists of three components integrated in one<br />
package. Each component has its own functionality.<br />
DBLC: This module is used to create a project file with database and image<br />
settings and references to all the files used by BadgeMaker.<br />
BC: This module is used to create badge layouts, with static text, fields from the<br />
database (normal as well as bar-coded), logos, photos, signatures, magstripe<br />
information and chip encode information (Badge Creator).<br />
BM: This module is used to produce badges with the dynamic, static or encoded<br />
data according to the settings defined in DBLC and layouts created with BC<br />
(Badge Maker).<br />
The system administrator uses DBLC to set up the system, he/she can also define<br />
the layouts or this can be done by the user. Once the settings are made and the<br />
layouts are created the only thing the user needs is the BM module to produce<br />
the cards.<br />
With BM5500 an MSAccess demo database is included that shows most features<br />
of the software. The installation program will install the demo files and will<br />
register the ODBC data source, so it will be ready to run. You can use the demo<br />
database as a reference when you create your own BadgeMaker project or you<br />
can test different features you would like to integrate in your own project.<br />
When you create a new project there are three steps to make in order to produce<br />
cards:<br />
• Step one: create a project file (chapter 4).<br />
• Step two: create one or more layouts (chapter 5).<br />
• Step three: manage your card data and produce cards (chapter6).<br />
In the following chapters the three steps to set up your project will be described.<br />
� If the system supervisor already has set up a<br />
BadgeMaker project and if the card layouts are already<br />
made, you can skip chapter 4 and 5 and start directly at<br />
chapter 6 for the production of cards.<br />
4
4. Step 1: Create a project file and define the<br />
settings<br />
BM 5500<br />
Version 6.1 SP2<br />
July 2006<br />
For Microsoft databases (e.g. MSAccess, SQL server) and some other popular<br />
databases an ODBC driver is already available in Windows. For other databases<br />
like Oracle and Pervasive a client with ODBC driver should be installed on the<br />
workstation in order to be able to make an ODBC connection. If you are unsure if<br />
the correct software is installed, consult your database administrator about this<br />
issue.<br />
When you wish to connect to a database on your PC or on your network, you<br />
should first register this database with the ODBC data source administrator<br />
(control panel or DBLC).<br />
4.1 Create a project file<br />
Start BadgeMaker and click the ‘Login’ button or select ‘Login’ from the<br />
‘User’ menu. The login dialogue will come up:<br />
Give in your user name and password.<br />
After the first time installation of BadgeMaker, you can login with the user name<br />
‘SUPERVISOR’ and password ‘SUPERVISOR’. This user has administration rights.<br />
Select ‘New’ from the ‘File’ menu. The DBLC module will be started. to create a<br />
project file with the settings for BadgeMaker by selecting Database Layout<br />
Creator from the program folder.<br />
The ‘Select data source’ dialogue will be displayed. Click on the ‘Machine data<br />
source’ tab:<br />
5
BM 5500<br />
Version 6.1 SP2<br />
July 2006<br />
Select the DSN name if the database is already registered in ODBC or click ‘New’<br />
to register a new database.<br />
Select ‘User Data Source’ and click ‘Next’.<br />
Select the name of the database driver and click ‘Next’.<br />
Read the information in the window and click ‘Finish’.<br />
Now the ODBC setup dialogue will be displayed. This dialogue will differ<br />
depending on the selected ODBC driver.<br />
Although the dialogues are different for the various ODBC drivers a data source<br />
name must always be entered (a description is optional). In the sample for the<br />
Microsoft Access database a database (.mdb) file can be selected. For an Oracle<br />
database installed on a server however a user and server have to be entered:<br />
6
BM 5500<br />
Version 6.1 SP2<br />
July 2006<br />
Create a new project file:<br />
Once the connection is made, a new project file can be created. Select ‘New’ from<br />
the file menu or click the button. After selecting this option the ‘Tables’<br />
dialogue will come up:<br />
In this dialogue the available tables, queries and views from the connected<br />
database will be presented. Select the table, query or view where the data can be<br />
found for creating the badges and then click ‘OK’. Since BM5500 connects to only<br />
one table, query or view for retrieving the card data, make sure that all necessary<br />
information for creating your ID cards is available.<br />
Make sure in advance that this table has a unique field that also can be used as<br />
an ID for the images in the picture table.<br />
After clicking OK the fields from this table will be read and filled in the main<br />
dialogue, at the same time a new dialogue, ‘Step 1: General settings’, will come<br />
up. When a new BM file is created, the environment settings have to be made in<br />
four steps. The first step is to fill in the project name and make the settings for<br />
the image quality, thumbnail and ldap support.<br />
• Project name: Fill in a name for the project.<br />
• Image quality: The ‘Default Image quality’ results in a good quality picture<br />
and a moderate image size. Refer to the help file or full BM5500 manual<br />
for more detailed information.<br />
• Thumbnail image: Check this option to create a 256 colours bitmap image<br />
with reduced resolution apart from the standard generated jpeg image<br />
(use this option only if you would like to show images with an application<br />
that cannot display jpeg images). This option can only be used to create a<br />
bitmap copy of the photo and signature.<br />
• Ldap support: Check this option if you use an ldap database (this option is<br />
necessary since the ldap ODBC driver is not completely compliant with the<br />
ODBC standards).<br />
Click next to go to the ‘Step 2: Image types’ dialogue.<br />
By default BM5500 reserves 4 images types: photo (type 1), signature (type 2),<br />
photo thumbnail (type 3), signature thumbnail (type 4).<br />
Use this dialogue to add if you wish additional images types to your project (e.g.<br />
fingerprint image). Apart from the four existing types, you can add 16 extra<br />
image types. In this way you can use BadgeMaker also to create a database of<br />
objects (e.g. real estate) with multiple images.<br />
7
BM 5500<br />
Version 6.1 SP2<br />
July 2006<br />
� The image types 1 – 4 cannot be removed from the system. If you select one<br />
of them the ‘Remove’ button will not be accessible.<br />
Use custom size thumb nails<br />
If you use the thumb nail option, thumb nails of the photo and signature can be<br />
stored. For more details refer to the full version of the manual.<br />
Click ‘Next’ to go to Step 3, the ‘Special tables’ settings where you can select the<br />
image table and select a logging table (if required).<br />
Step 3: Special tables<br />
Store images in this table: Select here the table that will be used to store the<br />
images in. This table has to have a fixed structure. Refer to ‘Structure of the<br />
image table’ on the next page for a description how to set up this table in your<br />
database.<br />
Log mutations in this table: If you want to keep track of the mutations made<br />
in BadgeMaker a logging table can be kept. Select here the table to log the<br />
mutations in. Refer to the full version of the manual for details on logging.<br />
Structure of the image table:<br />
BM5500 stores images as BLOBs (binary large objects) in a table in the database.<br />
This has the advantage that you only have to backup your database, alpha<br />
numeric fields can be used as photo and signature ID and you have the option of<br />
storing thumbnail pictures and signatures. If you select this option, a table must<br />
be selected by clicking the ‘Select Table’ button. If a table is selected without the<br />
appropriate structure an error message will be displayed.<br />
The picture table must be created using the database management system of<br />
your existing database (e.g. MSAccess, Oracle, SQL Server, Sybase etc.). The<br />
name of the table is free to select (e.g. Pictures, Images or else), but the table<br />
8
BM 5500<br />
Version 6.1 SP2<br />
July 2006<br />
must consist of 4 fields with fixed names and fixed types in a fixed order. See<br />
table below:<br />
Picture Table :<br />
Field Name type length<br />
ID : Alpha numeric 8 or more<br />
Length : Numeric 8 or more<br />
Picture : Long Binary<br />
Type : Numeric 2 or more<br />
The type can be different depending on the database used. In MSAccess the<br />
numeric fields can be Long Integers, the pictures must be of the type ‘OLE<br />
object’. In Oracle the type for the pictures is ‘Long Raw’.<br />
� Note: The ID field in the Picture table is not unique; the same ID can be<br />
used with up to 20 types of pictures (photo, thumbnail photo, signature and<br />
thumbnail signature). ID and Type fields together are unique (a combined index<br />
can be made). Don’t create a relationship between the tables.<br />
Below the link between the database table and the picture table is displayed.<br />
BadgeMaker will take care of the link between the photo or signature ID in the<br />
database table and the ID field in the picture table.<br />
Click ‘Next’ to go to the ‘Step 4 dialogue’ (special fields) or click ‘Back’ to change<br />
the ‘General Settings’.<br />
Step 4: Special Fields<br />
Specify a unique field: Select a unique field from the database (by clicking the<br />
drop down list). When an image is stored in BadgeMaker, BM will copy this value<br />
in the field ‘ID’ of the images table. Together with the field ‘type’ this will identify<br />
the images stored in the database (images table).<br />
Register tagged records in this field: If you would like to use the option ‘tag<br />
records’. A field has to be selected to register the tagged records. An unused<br />
numeric field in the database can be used for this purpose. If this is not available<br />
a field has to be added to the database. This field is not mandatory, but if it is not<br />
defined the option to tag records cannot be used. For an explanation of the option<br />
‘tag records’ refer to the BM5500 part of the manual.<br />
Store layout description in this field: If the ‘Automatic layout’ option is used a<br />
field has to be selected where to read the layout description from (the layout<br />
9
BM 5500<br />
Version 6.1 SP2<br />
July 2006<br />
descriptions as displayed in BM in the layout selection dropdown list should match<br />
the values filled in this field). You only need to select a field if you intend to use<br />
the automatic layout option.<br />
Now click ‘Next’ to go to step five.<br />
Step 5: Image files<br />
BM5500 stores images in an image table, but it can read image files from the<br />
hard disk or from a CD Rom. Check this option if you have ready made image<br />
files. The name of these image files must correspond with the value in the field<br />
specified in step 4 under ‘Specify unique field’.<br />
Read images from folder<br />
In case you already have ready made image files on CD-Rom or hard disk, you<br />
can use the option ‘read images from folder’ to access them. This option is readonly,<br />
so new captured images cannot be stored as files, but will be saved in the<br />
image table of the database. If an image with the same name exists as well in the<br />
image table as image file, the image in the image table will have priority over the<br />
image file.<br />
After checking the option ‘read images from folder’ you have to select the image<br />
file folder. Note that the different types of images must be stored in the folder<br />
according to their image type number:<br />
The image folders 3 and 4 will not be used (since these are thumbnail images of<br />
the types 1 and 2). If you add new image types, the first new image type is type<br />
‘5’, the second will be type ‘6’ and so on.<br />
10
BM 5500<br />
Version 6.1 SP2<br />
July 2006<br />
If the images come from a 16 bit BM5000 or BM5500 system, images were stored<br />
in a number of sub folders. In that case specify also the number of sub folders.<br />
Since BadgeMaker used a special algorithm to calculate the sub folder, this option<br />
will probably not work with files in subfolders created by other systems.<br />
If the image files are divided over a number of sub folders, fill in the number of<br />
folders in the box ‘number of sub folders’.<br />
In case the image file has a number, the sub folder will be determined as follows:<br />
Remaining value of: (image file number)/(number of sub folders).<br />
In case the image file name is 56784234.JPG (or 56784234.JIF) and the number<br />
of sub folders is 10, the image file must be placed in the sub folder 4.<br />
This is the same way as the files were handled in the 16 bit versions of<br />
BadgeMaker 5000 and 5500.<br />
In case the image files have a name in letters, BadgeMaker will search all sub<br />
folders. However note that this will result in a longer retrieving time.<br />
Step 6: MM integration (optional).<br />
Fill in the parameters for MM integration if applicable or just click ‘Next’ to skip<br />
this step.<br />
Step 7: Folders<br />
BM file folder Location of the BM-file.<br />
Card layout folder Location of the badge layouts files.<br />
Encode layout folder Location of the encode files for magstripe and chip<br />
encoding.<br />
Logos folder Advised location of the logos used on badge layouts.<br />
You can change the location of the files by:<br />
1. Clicking on the button of the subject you want to change. A directory<br />
structure will be shown:<br />
11
BM 5500<br />
Version 6.1 SP2<br />
July 2006<br />
Selection of the desired folder can be done in the same way as in<br />
the Windows Explorer, then click OK.<br />
2. Or fill in the path directly.<br />
After the selection of the folders, click ‘Finish’ to close the dialogue and save the<br />
settings.<br />
4.2 Defining the settings<br />
When a new BM-file is created or an existing BM-file is opened the field<br />
information of the ‘main’ table will be displayed in this dialogue:<br />
By default all fields are ‘view only’ for BM5500 if a new BM-file is created. By<br />
double clicking on a field some properties for use in BadgeMaker can be changed.<br />
The same can be done by selecting ‘properties’ from the edit menu.<br />
The properties dialogue consists of three tabs where for every field a number of<br />
properties can be set:<br />
Miscellaneous tab<br />
Field description: The field description is displayed in BM on top of the field<br />
columns (in the multi record view) and in the edit box. It can be edited by filling<br />
in another description in the input box. The actual field name cannot be changed<br />
in DBLC, this can only be done with the database management system of the<br />
used database (MSAccess, Oracle, SQL Server etc.).<br />
12
BM 5500<br />
Version 6.1 SP2<br />
July 2006<br />
Restrict input: This option is only available if a field is a text field. Input<br />
restrictions are used for magstripe encoding to prevent that data is inserted (in<br />
BadgeMaker) that is not allowed on the magnetic stripe.<br />
Log this field: Check this option if the contents of this field has to be stored in<br />
the log table.<br />
Field style: Select whether the field must be invisible, view only or editable in<br />
BM5500.<br />
Pick list tab<br />
Has pick list: This option can be activated only when a field is ‘editable’. If this<br />
option is active a list of items can be created to select from in BM5500. For<br />
example a list of all available departments can be created to fill in in the field<br />
‘Department’.<br />
Has logo: This option can be activated only when the option ‘Has pick list’ is<br />
checked. It can be used to link a logo to an item in the pick list. Refer to the full<br />
manual version for more details.<br />
Default value: In this input box a default value can be filled in that will be used<br />
in BM5500 when a new record is created. When a pick list is used an item from<br />
the list has to be selected as default value with the ‘Default’ button.<br />
New item: Type in a new item for the list in this input box.<br />
Add to list: Use this button to add the new item to the list.<br />
List of items: In this dropdown list the already available items can be displayed.<br />
Drop: Use this button to remove a selected item from the list.<br />
Default: Use this button to make the selected item the default value for this<br />
field.<br />
Edit: Use this button to edit the selected item from the list.<br />
Auto update tab<br />
Use this option to let BadgeMaker fill field values automatically triggered by an<br />
event.<br />
This option can only be enabled when the field style ‘View only’. For more details<br />
refer to the full version of the manual.<br />
Once the settings for each field are defined, you can save the project by selecting<br />
‘Save’ from the file menu. You can also click the ‘save button’ .<br />
If you were editing a new BM-file, you will see the same dialogue as in Save As.<br />
Save<br />
With the ‘Save as’ option you can save either a newly entered file or an existing<br />
file using another name. You are prompted to enter the name of the BM-file.<br />
If the name you selected already exists, you will get a warning. Click ‘Yes’ to<br />
replace the existing file or click ‘No’ and select another name.<br />
Exit<br />
After saving the project file you can exit DBLC.<br />
Mouse: Click the close button in the right top corner.<br />
Key: ALT+F4<br />
Menu: File menu|Exit<br />
13
5. Step 2, creating badge layouts.<br />
BM 5500<br />
Version 6.1 SP2<br />
July 2006<br />
In the previous chapter was described how to create a project (BM) file with the<br />
necessary settings for BadgeMaker. In this chapter will be explained how to<br />
create badge (card) layouts.<br />
It is not possible to create a card layout before a project file was created (see<br />
step 1).<br />
In BadgeCreator different kinds of layouts can be created :<br />
1. Badge layouts (in Badge Layout Mode) Graphic design of the badge<br />
2. Magstripe layouts (in Magnetic Layout Mode) Definition of information to encode on<br />
the magstripe.<br />
3. Chip layouts (in Chip Layout Mode) Definition of information to<br />
encode on the chip.<br />
4. Contactless chip layouts Definition of Mifare and Legic<br />
chip layouts.<br />
5. OMC layouts Definition of information for<br />
optical memory card.<br />
NB: In this manual only the badge layout mode will be described! For other<br />
layout types see the reference manual.<br />
Select ‘New badge’ from the ‘File’ menu in BadgeMaker to start the BC<br />
component. The ‘Layout wizard’ will come up:<br />
Select the layout type you wish to create and click ‘Next’. The following screens<br />
are depending on the layout type you selected. Follow the instructions in the<br />
screens and fill in the required options. After running the layout wizard, you can<br />
add items to your layout.<br />
14
BM 5500<br />
Version 6.1 SP2<br />
July 2006<br />
If you click cancel, you will see the empty BC screen. BC has its own menus and<br />
buttons.<br />
Select ‘New Layout’ from the ‘File’ menu to start creating a new layout.<br />
The ‘New Badge Layout’ dialogue will be displayed.<br />
Layout tab:<br />
Name Type the description of the layout, as you want it to<br />
appear in the layout selection box in BadgeMaker, for<br />
example: “Employee badge”<br />
The name can be up to 30 positions, however not all<br />
positions can be displayed in the layout selection list<br />
in BM.<br />
Include Back<br />
Check this option if you want to create a layout for<br />
both the front and the back of the card (this is only<br />
useful when your printer supports dual side<br />
printing).<br />
Background Color Front/Back<br />
With these options the background color for the front and the back<br />
(if the option ‘Include back side’ is checked) of the card can be<br />
selected. By default no background color (white) is selected.<br />
Magnetic Stripe Positioning<br />
If an ISO card format is selected, the position of the<br />
magstripe can be displayed on the back of the card.<br />
This can be helpful to prevent that items will be<br />
printed on top of the magstripe. Use this option to<br />
select if the magstripe is on top or on the bottom<br />
(for landscape printing) or on the left or right side of<br />
the card (for portrait printing) or that no cards with<br />
magstripe will be used.<br />
NB: For other sizes than the ISO card format, no<br />
magstripe indication can be displayed.<br />
Chip Positioning<br />
This option can give an indication where the chip will<br />
be positioned on the card. There are three options:<br />
front, back or no chip. Keep in mind that the<br />
positioning is just meant as an indication and only<br />
applicable for the selectable chip types.<br />
Paper tab:<br />
Type The dropdown list box includes all layout<br />
types that are supported.<br />
ISO-Card 86/54.5Select this if you want to design an ISO standard card<br />
and you use a full size printer (edge to edge).<br />
ISO-Card DNP Select this if you want to design an ISO standard card<br />
15
BM 5500<br />
Version 6.1 SP2<br />
July 2006<br />
and you use a Dai Nippon CP410 or CP510 printer.<br />
ISO-Card Fargo Select this if you want to design an ISO standard card<br />
and you use an older model Fargo printer.<br />
ISO-Magicard Select this if you want to design an ISO standard card<br />
and use an older model Magicard printer.<br />
A4 Select this if you want to design a layout for A4 paper<br />
(if you print the layout on A4 paper it is possible to print<br />
six or more records on one sheet).<br />
Mitsubishi 150/100 Select this if you have a Mitsubishi CP100 with<br />
sheets of 150x100 mm.<br />
Mitsubishi 110/110 Select this if you have a Mitsubishi CP100 with<br />
sheets of 110x110 mm.<br />
Manual Size If you have selected ISO-card, you can define your own<br />
badge size. The badge dimensions can now be filled in in the<br />
dialogue.<br />
Portrait Define if the layout is in portrait.<br />
Landscape Define if the layout is in landscape<br />
Size The size is fixed for every card (or form) type, except for<br />
the manual size. If the type is ‘Manual Size’ the size can be filled<br />
in here.<br />
Badges per page The number of badges per page can be selected for the<br />
types A4 and Manual Size. Fill in the number of badges per row and per<br />
column, if you multiply these numbers, you will get the number of badges per<br />
page.<br />
Margins Margins can be set only if the type is A4. Left, right, top and<br />
bottom margins can be set.<br />
16
Top margin<br />
Header<br />
Left margin<br />
Space between rows<br />
BM 5500<br />
Version 6.1 SP2<br />
July 2006<br />
Space between columns<br />
Right margin<br />
Footer<br />
Bottom margin<br />
Space between The space between the badges can only be set if the type is<br />
A4. In that case the space between rows and the space between columns can be<br />
set (in millimeters).<br />
After clicking ‘OK’ the dialogue will be closed and the main dialogue will come up<br />
with an empty badge layout.<br />
Now you will be ready to add the different items to the badge layout.<br />
5.1 Add items to the layout<br />
Under Add Item in the ‘Edit menu’, the following options can be found:<br />
17
Image<br />
BM 5500<br />
Version 6.1 SP2<br />
July 2006<br />
Image Field<br />
Select one of the available image types (photo, signature, etc.) to add to the<br />
layout.<br />
Image Format<br />
Select the required image format. The following options are available:<br />
3*4 (image is scaleable in 3 to 4 ratio)<br />
4*1 (image is scaleable in 4 to 1 ratio)<br />
Custom format (image is scaleable in selected ratio)<br />
Free (image is free scaleable)<br />
Scale Type<br />
Allows you to define how the image is drawn in the rectangle defined by X start, Y<br />
start, Width and Height.<br />
Clip Destination On Source: The rectangle is fully covered by the image by<br />
enlarging the image so that the image width or height fits exactly in the frame<br />
width or height. The parts which are outside the rectangle are clipped. (No image<br />
distortion)<br />
Fit Source In Destination: The image size is reduced so that the width or<br />
height fits on the width or height of the rectangle. (No image distortion)<br />
Scale Source To Destination: The rectangle is filled with the image by resizing<br />
the image width and height to the width and height of the rectangle. (Image<br />
distortion)<br />
� Note: Choose the same value here as in the camera settings to get the<br />
best results.<br />
18
BM 5500<br />
Version 6.1 SP2<br />
July 2006<br />
X start<br />
Enter a value in millimeters for the starting point of this item in X direction.<br />
Y start<br />
Enter a value in millimeters for the starting point of this item in Y direction.<br />
Width<br />
Enter a value in millimeters for the item with.<br />
Height<br />
Enter a value in millimeters for the item height.<br />
Layer<br />
Select a layer for this item (ranging from layer 0 till 9)..<br />
Items with a high layer value will be placed on top of items with a low value.<br />
Static Text<br />
When you use this option you can add static text to the current badge layout.<br />
After selecting this option you see the following dialogue box:<br />
Data tab<br />
Type in the static data to put in the static text box. At the bottom of the dialogue<br />
in the preview box this text will be displayed with the selected font and color.<br />
Use the ‘Word wrap’ option if the text you entered is too long for one line. Note<br />
that the preview is not suitable to determine how the lines will be wrapped. This<br />
19
BM 5500<br />
Version 6.1 SP2<br />
July 2006<br />
depends on the selected layout size and the width you reserve for the string.<br />
Finish the settings in the other tabs and click ‘OK’.<br />
When word wrap is used, the options ‘clipping’ and ‘automatic sizing’ (see<br />
position tab) will be disabled. The ‘textbox’ on the layout will only have two<br />
handles when the option ‘word wrap’ is enabled. Only the width can be changed,<br />
the height will be adjusted automatically to make the text fit into the box.<br />
Position Tab<br />
Position The position and the size of the text block on the badge layout. The<br />
text is positioned within a rectangle (text box).<br />
X start = Start position on the X-(Horizontal) Bar<br />
Y start = Start position on the Y-(Vertical) Bar<br />
Width = Width of the text block to a 10 th of a mm on the layout.<br />
Height = Height of the text block to a 10 th of a mm on the layout.<br />
Clipping When checked, text outside the rectangle is clipped.<br />
20
Without clipping (off), With clipping (on),<br />
text inside and outside only the text inside the box is visible.<br />
the box is visible.<br />
Use clipping to make sure that no other items will be covered with text.<br />
BM 5500<br />
Version 6.1 SP2<br />
July 2006<br />
� Note: Do not use clipping with Arabic text (right aligned) and italics (a part<br />
of the first character can be clipped).<br />
Automatic sizing When checked, the box around text will be sized to fit<br />
exactly around the text in it.<br />
Without automatical sizing (off). With automatical sizing (on).<br />
Layer Value 0 to 9.<br />
Items can be placed on several transparent layers,<br />
Items created with a high value will be placed on top of items with<br />
a low value.<br />
Orientation Enables the user to rotate text in steps of 90 degrees.<br />
� Note: When using special characters like Arabic text, don’t forget to use the<br />
corresponding character set (e.g. Arabic) instead of the default one,<br />
otherwise the characters will not be displayed correctly.<br />
Font tab<br />
Define the font in which the text will be displayed on the badge layout.<br />
Font The name of the font to be used.<br />
Size The size of the font.<br />
Character set Select the which character set from the used font should be used.<br />
Alignment Defines how the text is positioned within the text box, left, right or<br />
centered.<br />
Effects Determine with which effects the text is placed on the<br />
badge.<br />
Underline = puts a line under the text<br />
Strike Out = puts a line through the text<br />
Font Base = The base line on which a font rests<br />
21
Color<br />
Click this button to get the Windows color dialogue.<br />
Dynamic Text<br />
BM 5500<br />
Version 6.1 SP2<br />
July 2006<br />
Use this option to add dynamic text to the layout (text from a database field).<br />
The ‘Position’, ‘Font’ and ‘Color’ tab in the dialogue are identical to the ones in the<br />
‘Static Text’ dialogue (refer to the previous paragraph for a description of these<br />
items).<br />
Select the ‘Data’ tab to select a field (or a combination of fields) from the<br />
database.<br />
Click the ‘Select Field’ button to get a list of the available fields.<br />
Select a field and click ‘OK’ to confirm. If you click ‘Cancel’ no field will be<br />
selected. You can also type a string that can be built of one or more database<br />
fields in combination with constants. The “+” operator is allowed:<br />
Add a database field to constant text:<br />
Logo<br />
“Company:”+COMPANY<br />
Or to another database field,<br />
ZIPCODE+CITY<br />
Add a database field to another database field or to constant text,<br />
spaces between the fields will not be displayed*.<br />
Use this option to add a logo to the layout:<br />
FIRSTNAME + “ “ + LASTNAME<br />
22
BM 5500<br />
Version 6.1 SP2<br />
July 2006<br />
Position The position and the size of the text block on the badge layout. The<br />
text is positioned within a rectangle (text box).<br />
X start = Start position on the X-(Horizontal) Bar<br />
Y start = Start position on the Y-(Vertical) Bar<br />
Width = Width of the text block to a 10 th of a mm on the layout.<br />
Height = Height of the text block to a 10 th of a mm on the layout.<br />
Layer Value 0 to 9.<br />
Items can be placed on several transparent layers,<br />
Items created with a high value will be placed on top of items with<br />
a low value.<br />
Scale Type Three options are available: free, actual size, keep aspect ratio.<br />
Free: logo is free scaleable. Actual size: logo will be displayed on<br />
layout in the actual size. Keep aspect ratio: size of logo can be<br />
scaled, but only within the original width/height ratio. These<br />
options are available as soon as a logo file has been selected.<br />
Locate Logo tab<br />
Click the ‘Get Logo File’ button to select a logo file (in BMP format). It is advisable<br />
to store the logos for BadgeCreator in the logos directory in the BM5500 folder to<br />
prevent that the logo file will be deleted by accident.<br />
If a dynamic logo is used (refer to description of DBLC module), select the<br />
dynamic logo field from the dropdown list. The fields marked in DBLC as dynamic<br />
logo fields (options ‘has pick list’ and ‘has logo’ enabled) can be selected from this<br />
list. Make sure the logos corresponding with the logo names in DBLC are available<br />
in Logos directory.<br />
Transparent Under the ‘locate logo’ tab the option transparent can be found. If<br />
this option is selected, the logo will be made transparent. Note that the<br />
transparent option will work best with black and white logos. Colored logos will<br />
mingle with the background when they are made transparent.<br />
Barcode<br />
Adds a barcode that is dependent on the contents of a database field (depending<br />
on the barcode type, numeric, date or character fields can be used).<br />
23
BM 5500<br />
Version 6.1 SP2<br />
July 2006<br />
Use the ‘data’ tab to select a database field where the barcode will be based<br />
upon. This works in the same way as for ‘dynamic text’(see previous paragraphs).<br />
Use this tab also to indicate if the barcode has to be transparent or not.<br />
Click the settings under the ‘position’ tab to position the barcode on the layout.<br />
This works in the same way as the position of fixed and variable data (see<br />
previous paragraphs). The transparent option can be used to put a transparent<br />
barcode on top of a dark colored rectangle. In this way the barcode will be<br />
infrared readable, but cannot be copied.<br />
Type tab<br />
Barcode This list specifies the available barcode types. Most of the general<br />
used barcodes are available, including the 2 dimension PDF417 barcode.<br />
Bar code text Place (human readable text) below the bar code, above the bar<br />
code or use no text.<br />
BCT Font Define the font in which the human readable text will be displayed.<br />
Density Determines the width off the thinnest bar code stripe.<br />
Height Determines the height of the barcode layout in mm’s.<br />
Supplement Add a supplementary bar code.<br />
Stretch factor Determines the longitudinal length of the barcode as an addition<br />
to the density setting. Note that the result of this setting is visible<br />
in the Preview of BadgeMaker and on the printed<br />
cards, but not in the ‘Add Barcode dialogue.<br />
Checksum In order to increase the reading accuracy, some barcode types can<br />
use checksums. The availability of a checksum is dependent on the<br />
barcode type. The calculated value is added to the barcode.<br />
24
Line<br />
Position:<br />
With the X start and end value, the length of the line will be determined.<br />
With the Y start and end value, the angle of the line will be determined.<br />
BM 5500<br />
Version 6.1 SP2<br />
July 2006<br />
Color:<br />
Use the ‘Color’ button to select a color to display the line. The line thickness can<br />
be adjusted in 10ths of a millimeter.<br />
Rectangle<br />
Use the ‘position’ tab to position the rectangle and to define the dimensions.<br />
Use the ‘color’ tab to define the color, the line thickness and if the rectangle<br />
should be solid or not.<br />
Circle<br />
Use the ‘position’ tab to position the circle by giving the coordinates for the center<br />
and the size of the radius.<br />
Use the ‘color’ tab to define the color, the line thickness and if the circle should be<br />
solid or not.<br />
Delete Item<br />
Use this option to delete the selected item from the layout. Before deleting the<br />
item, BC will ask for a confirmation (do you really want to delete this item?).<br />
Click ‘Yes’ if you are sure to delete the item.<br />
5.2 Editing existing items<br />
Click on an item to select it and then select Item from the Edit menu or double<br />
click on an item. The dialogue will look the same as when a new item is added.<br />
Now you can make the necessary adjustments.<br />
Select item from list<br />
Select item (Edit menu) enables the user to select and edit specific items (per<br />
layer) A screen appears, with the used layers marked. This option is particularly<br />
handy if items are positioned close together on the badge. In that case they are<br />
difficult to select by mouse.<br />
Clicking on one of the “+” marks will show the items associated with this layer<br />
and allow you to edit these particular items. If no “+” mark is displayed, no items<br />
are available on this layer.<br />
25
Badge Layout<br />
BM 5500<br />
Version 6.1 SP2<br />
July 2006<br />
Use this option from the ‘Edit menu’ to adjust the layout settings of the currently<br />
opened layout. The ‘Edit Badge Layout’ dialogue is similar to the ‘New Badge<br />
Layout’ dialogue.<br />
5.3 Often used tools in BadgeCreator<br />
In this chapter some tools are described that can help you to make the design of<br />
your badge easier.<br />
Snap to reference line<br />
In the ‘Options’ menu a reference lines can be set. Depending on the settings<br />
(left alignment, center alignment, right alignment etc.), items will be aligned to<br />
the horizontal or vertical reference line.<br />
View Menu<br />
The ‘View’ menu contains five options:<br />
Zoom in: Use this option to zoom in on the layout (details).<br />
Zoom out: Use this option to zoom out from the layout (overview).<br />
Center On Screen: Use this option to center the layout on the screen.<br />
Show Whole Badge: Use this option to fit the layout into the window. Use this<br />
option again (or press F11) if the window is resized. The size of the layout will be<br />
adjusted to the new size of the window.<br />
Layout side: Use this option to switch between the front and back of the card<br />
layout (only available for double sided badge layouts).<br />
Options menu, system settings:<br />
Default Font tab<br />
Use the ‘Select New Font’ button to select a default font, a default font size,<br />
default font style and default color for the static text and database fields. Also<br />
26
BM 5500<br />
Version 6.1 SP2<br />
July 2006<br />
defaults can be selected for the alignment and effects. When you click the ‘Select<br />
New Font’ button the Windows font selection dialogue will be opened.<br />
This option makes it possible to choose a default font, font style and font size.<br />
Zoom and Grid<br />
In the ‘Zoom and Grid’ dialogue the options zoom factor, grid resolution, snap to<br />
grid and show grid can be set.<br />
Reference Line<br />
There are three reference line options:<br />
Help<br />
No Reference Line<br />
No reference line will be drawn to align to.<br />
Vertical<br />
A vertical reference line will be displayed, starting at the X position as<br />
given in. There are three ways to align: Left (the left side of the item<br />
aligns with reference line), Center (the center of the item aligns with the<br />
reference line) or Right (the right side of the item aligns with the reference<br />
line).<br />
Horizontal<br />
A horizontal reference line will be displayed, starting at the X position as<br />
given in. There are three ways to align: Top (the top of the item aligns<br />
with reference line), Center (the center of the item aligns with the<br />
reference line) or Bottom (the bottom of the item aligns with the reference<br />
line).<br />
Press the F1 button or select ‘Help Index’ from the ‘Help menu’ to open the<br />
BadgeCreator help file. Help can be found based on the option in the menu or on<br />
keyword.<br />
About BadgeCreator<br />
If you select this option from the menu, the about box will be displayed.<br />
The about box gives information about the version number and the license. The<br />
serial number displayed is read from the security dongle. This information is<br />
useful if you would need to contact the helpdesk.<br />
5.4 Working with the mouse and cursor keys<br />
Apart from the normal mouse functions, in BadgeCreator the mouse is used to<br />
position and resize items and to select items by double clicking them.<br />
A new feature is that more than one item can be selected with the mouse by<br />
using . The selected items can be moved, copied or deleted.<br />
The right mouse button is used to open the mouse menu. The following items will<br />
be available:<br />
27
These items are also available in the regular menus.<br />
BM 5500<br />
Version 6.1 SP2<br />
July 2006<br />
Cursor keys:<br />
It is possible now to move items on the layout by using the cursor keys (←↑↓→).<br />
28
5.5 Button bar<br />
BM 5500<br />
Version 6.1 SP2<br />
July 2006<br />
The button bar can be used to easily start a function, by simply clicking on the<br />
corresponding button. In general, the most frequently used options can be found<br />
here.<br />
Login Click on this button, to login to BM5500 and get<br />
access to the BM functions<br />
Logout Click on this button, to logout of BadgeMaker and<br />
disable all other functions. After logging out, all BM<br />
files will be closed. You have no access to BadgeMaker<br />
data until you login again with a valid user name and<br />
password.<br />
Open Layout Click on this button, to open an layout file that is linked<br />
to the currently opened BM file.<br />
Send data Click on this button to send card data by email to a<br />
central office.<br />
Preview Click on this button, to preview the current record in<br />
the current layout on the screen.(front, back,<br />
encoding etc.)<br />
Print Click on this button, to print the selection using the<br />
current layout to a Windows supported printer.<br />
Copy Click on this button, to copy the active image of the<br />
current record to the clipboard.<br />
Paste Click on this button, to paste the image from the<br />
clipboard to the active image of your current record.<br />
Photo Click on this button, to add an image of the selected<br />
image type.<br />
Bulk Input Click on this button to activate the bulk input module.<br />
Import data<br />
Add Record Click on this button to add a record to the database.<br />
29
BM 5500<br />
Version 6.1 SP2<br />
July 2006<br />
First Button Click on this button, to go to the first record in the<br />
database.<br />
Previous Button Click on this button, to go to the previous record in<br />
the database.<br />
Next Button Click on this button, to go to the next record in the<br />
database.<br />
Last Button Click on this button, to go to the last record in the<br />
database.<br />
Find Button Click on this button to activate the find function.<br />
SQL Select Button Click on this button to open the selection dialogue.<br />
Chip encoding Click on this button to create a chip info file to do chip<br />
encoding with separate encode unit.<br />
OMC encoding Click on this button to create an OMC info file to do<br />
OMC encoding with a separate OMC encode unit<br />
(special option).<br />
About BM Click on this button, to display the About box.<br />
Help Click on this button to activate the help option.<br />
Layout selection Click on this box to select one of the available layouts.<br />
New badge Click this button to start the BC module to create a<br />
new badge.<br />
Edit badge Click this button to start the BC module to edit the<br />
current badge layout.<br />
Toggle card Click here to show or hide the card preview in the<br />
main dialogue.<br />
Toggle front Click to show or hide preview of the front of the card<br />
30
BM 5500<br />
Version 6.1 SP2<br />
July 2006<br />
Toggle reverse Click to show or hide preview of the reverse side of<br />
the card.<br />
Toggle encode Click this button to show or hide the preview of the<br />
encode information<br />
Show magnetic encode info<br />
Show chip encode info<br />
Click this button to show the magstripe encode<br />
information.<br />
Click this button to show the chip encode information.<br />
Scan single form Click this button to scan a single form with the<br />
automatic scan option.<br />
Scan multiple forms Click this button to scan multiple forms with the<br />
automatic scan option.<br />
Scan image only Click this button to scan an image from a form with<br />
the automatic scan option without recognizing the<br />
barcode.<br />
31
6. Step 3, producing cards with BadgeMaker.<br />
BM 5500<br />
Version 6.1 SP2<br />
July 2006<br />
When step 1 and step 2 are finished, the settings are made and layouts have<br />
been created. Now you are ready to produce cards.<br />
Advanced options like encoding, import and export, security settings and special<br />
print options will not be described. If you miss certain options, refer to the<br />
reference manual.<br />
6.1 Starting BM5500<br />
Select BadgeMaker from the “BM5500 32 bit edition” program folder.<br />
When you have started BM5500 click the ‘Login’ button, or select ‘Login’ from the<br />
‘User’ menu. The following dialogue will come up:<br />
To be able to open a project (BM file), you have to login first. The login dialogue<br />
will also come up, when you try to open a project (BM file) before logging in.<br />
Each user is a member of a group. The group determines the authorization level.<br />
If you stop working at the end of a day, you have to logout.<br />
User Type your user name followed by or <br />
Password Type your password followed by <br />
When using BadgeMaker for the first time : SUPERVISOR as user name and<br />
SUPERVISOR as PASSWORD will provide access to the system. It is advisable<br />
that the supervisor changes the password directly after login and create new<br />
users for the other levels.<br />
Now you can open a BM (project) file to get access to a database.<br />
If you typed in the wrong password, select ‘Retry’ to return to the ‘User Login’<br />
window, to try again.<br />
When the database is secured, you will be requested a second time for a user<br />
name and password after opening a BM file, to get access to the database.<br />
Open a project file<br />
When you select open, the open BM file dialogue will be displayed.<br />
Select a valid BM file and click the ‘Open’ button. If you did not login yet, the<br />
login dialogue will come up. In that case you first have to log in before the BM file<br />
32
BM 5500<br />
Version 6.1 SP2<br />
July 2006<br />
will be opened. When you are logged in, the Select data window will be displayed.<br />
With the options in this window all data or part of the database can be selected.<br />
A field name can be selected from the dropdown list, then an operator has to be<br />
selected from the next dropdown list (=, , =, , LIKE) and a value<br />
has to be filled in the ‘field value’ box. Select the type of selection AND or OR (for<br />
the first selection statement this does not matter yet) and click the ‘Add’ button<br />
to add the selection statement. This procedure can be repeated to add more<br />
selection statements.<br />
OK Select the records on specified criteria.<br />
Select all Selects all the records (can take some time when working with a<br />
very large database).<br />
Reset Removes the current selection.<br />
Cancel Closes the select dialogue, no selection will be made.<br />
Note: Click on SELECT ALL if you want to work with the entire database. In some<br />
cases opening a large database entirely may take a while, do not reset your<br />
system or the database may be damaged.<br />
After selecting the entire database or part of it, within the specified criteria, the<br />
main screen will be displayed.<br />
33
BM 5500<br />
Version 6.1 SP2<br />
July 2006<br />
The main screen can display the selected records, the different image types and<br />
the card preview.<br />
The first time you open a new project in BM5500 it might be necessary to select a<br />
layout first in order to see a layout preview.<br />
toggle card<br />
toggle front/back<br />
Click on the layout selection box to select one of the available layouts.<br />
BM5500 offers the possibility to display a constant preview on the right of the<br />
database window or a full screen print preview.<br />
To display the full size print preview, select ‘print preview’ from the ‘File’ menu or<br />
click the ‘print preview’ button.<br />
To display a constant layout click on the ‘toggle card’ button on the right of the<br />
layout selection box. Next to this button you can find the buttons to toggle the<br />
display of the front and the back of the card.<br />
For more information on the encode options refer to the full version of the<br />
manual.<br />
34
BM 5500<br />
Version 6.1 SP2<br />
July 2006<br />
Adjusting the database window<br />
You can adjust the size of the database window, the preview pane and the image<br />
window pane by moving your cursor to the vertical or horizontal separation bar.<br />
The arrow will change as indicated below. Hold the left mouse button down and<br />
move to the right, left, top or bottom to adjust the borders.<br />
6.2 Adding and editing data<br />
Add Record<br />
Depending on the use you make of the database, you will add records in<br />
BadgeMaker or will read only existing data. If you wish to add a new record click<br />
the ‘+ button’. Note: The add record option can be disabled by the administrator.<br />
The field edit dialogue will come up, where you can insert the new data.<br />
Edit Record<br />
When you double click on a record the field edit dialogue will also be displayed.<br />
This time the fields will be filled. Depending on the settings made in de database<br />
management system and in DBLC fields can be edited, will be read only or will be<br />
invisible. Read only fields will be marked gray.<br />
35
6.3 Adding images<br />
BM 5500<br />
Version 6.1 SP2<br />
July 2006<br />
When the data has been entered, it is time to add photos and/or other images. To<br />
acquire an image you will need a capturing device. This can be a digital photo<br />
camera, a video camera in combination wih a capture board or a scanner. Most of<br />
these devices can be controlled with a TWAIN driver or a direct driver. Use the<br />
‘select source’ option from the ‘image’ menu to select a driver.<br />
Select source<br />
Use this option to select a driver for your image capture device. First select the<br />
image type from the list for which you wish to select the driver. Then select a<br />
direct driver from the dropdown list or click the ‘Twain’ button to display a list<br />
with the installed Twain drivers. Select a driver and click ‘OK’.<br />
Acquire...<br />
Use this function to add an image to the image database. The image type that<br />
will be acquired is equal to the type of the active image window. Click on the<br />
window of the desired image type to make it active. The input source to acquire<br />
an image, can be selected under ‘Select Source’ (also in the Image menu).<br />
If ‘Image File’ is selected (default) as image source, the following dialogue will<br />
come up when acquiring an image:<br />
36
BM 5500<br />
Version 6.1 SP2<br />
July 2006<br />
In this way graphic files of different formats can be selected and linked directly to<br />
the current record. Keep in mind that the graphic files already must have the<br />
correct height/width ratio to show on the Badge Layout (to prevent parts will be<br />
cut of).<br />
Use the ScreenCheck Image File grabber (optionally available) if your graphic files<br />
should be cropped and/or rotated. The ScreeenCheck Image File grabber supports<br />
various height/width ratios.<br />
37
6.4 Printing cards<br />
Print preview<br />
BM 5500<br />
Version 6.1 SP2<br />
July 2006<br />
When a layout is selected and the database is filled a card can be printed. To<br />
check the result in advance you can use the ‘print preview’ command to switch<br />
from the active file to a print preview.<br />
With Print Preview, you can see how the current (or the first selected) badge will<br />
look like when you print it. From the preview dropdown menu you can choose a<br />
view of ..<br />
the front of the badge and the back ..<br />
Select ‘Close’ from the Window menu to close the preview window.<br />
Print<br />
Use this command to print badges from the selected records, current record or all<br />
records.<br />
Shortcut: CTRL P<br />
If you choose this option you will see the following dialog box (normally a direct<br />
card printer will be selected):<br />
38
BM 5500<br />
Version 6.1 SP2<br />
July 2006<br />
Select the print range and click ‘OK’. You can change the properties of the printer<br />
driver by clicking the properties button.<br />
Print Setup<br />
Enables the user to setup the printer for printing in BM5500:<br />
List setup<br />
Use the left mouse button to select the fields to be printed. The selected fields will<br />
be printed in columns next to each other in the order as they appear in the list.<br />
.<br />
Print List<br />
Use this function to print a list of the selected records. Make sure you selected<br />
the correct fields to be printed in ‘List setup’. If many fields are selected, print in<br />
landscape, otherwise the other columns will be printed on a next page. To print a<br />
badge use the ‘Print... ‘ option.<br />
6.5 Often used functions in BadgeMaker<br />
File menu<br />
• Recent Files: The four last opened project files will be displayed for easy<br />
opening.<br />
• Close: Use this option to close the current project file. BM5500 will not be<br />
closed, the current user is still logged in.<br />
• Exit: Select this option to exit BM5500.<br />
Record menu<br />
• First, Next, Previous, Last:<br />
Use this command to go to the first, next, previous or last record of the<br />
selection, as displayed in the grid.<br />
• Find:<br />
39
BM 5500<br />
Version 6.1 SP2<br />
July 2006<br />
Use this option to search one or more records from the current database<br />
that matches the find statement. After finding these records only these<br />
records will be displayed. To return to the initial selection click the ‘Sort<br />
button’.<br />
You can also search on the contents of a field by pressing the ‘F3’ key on<br />
your keyboard or clicking on the search line.<br />
The find option will search in the selected record set. However if the =<br />
(equal sign) is used, the find option will search in the whole database. This<br />
enables the user to work with a predefined record set, but adds the<br />
flexibility to search for a particular record in case of an urgency (a new<br />
card has to be issued at once).<br />
Field name<br />
The dropdown menu enables the user to select a field name on which the<br />
sorting is based.<br />
Operator<br />
The =, , >=,
BM 5500<br />
Version 6.1 SP2<br />
July 2006<br />
You can also start SELECT window by clicking the right mouse button on<br />
the grid , and choose select from the dialog window (or the F7 function<br />
key).<br />
A field name can be selected from the dropdown list, then an operator has<br />
to be selected from the next dropdown list (=, , =, , LIKE)<br />
and a value has to be filled in the ‘field value’ box. Select the type of<br />
selection AND or OR (for the first selection statement this does not matter<br />
yet) and click the ‘Add’ button to add the selection statement. This<br />
procedure can be repeated to add more selection statements.<br />
It is also possible to select a predefined selection (four presets are<br />
available). Refer to ‘Predefined conditions’ for an explanation how to<br />
define the presets.<br />
OK Select the records on specified criteria.<br />
Select all Selects all the records (can take some time when working<br />
with a very large database). A confirmation will be asked if you<br />
are sure you want to select all records.<br />
Reset Removes the current selection.<br />
Cancel Closes the select dialogue, no selection will be made.<br />
• Tag all:<br />
Use this option to tag all records in the selection. Tagged records can be<br />
used to print cards, export or to print a list from.<br />
• Remove tags:<br />
Use this option to remove all tags from the records.<br />
41
Image Menu<br />
• Activate<br />
BM 5500<br />
Version 6.1 SP2<br />
July 2006<br />
Select this option to make one of the available images the active image.<br />
When selecting ‘Acquire’ or clicking the ‘photo button’, the acquired image<br />
will be stored under the active image type.<br />
• Copy<br />
Use this command to copy the current photo onto the Clipboard. Copying<br />
photos to the Clipboard replaces the contents previously stored there.<br />
You can use this function to import pictures from your database into a<br />
Word document or another database.<br />
• Paste<br />
Use this command to insert a copy of the Clipboard contents at the<br />
insertion point. This command is not available if the Clipboard is empty.<br />
You can use this option to copy a photo from another database.<br />
System menu<br />
• Setup<br />
Use the setup (system menu) to specify the workstation settings, Int2of5<br />
barcode settings, auto import settings and the mail settings. When you<br />
start with BadgeMaker, normally you can use the default settings. For<br />
more information on the settings refer to the full version of the manual.<br />
42