
Create successful ePaper yourself
Turn your PDF publications into a flip-book with our unique Google optimized e-Paper software.
Euroheat Distributors (H.B.S.) Ltd.,<br />
Unit 2, Court Farm Business Park,<br />
Bishops Frome,<br />
Worcestershire,<br />
WR6 5AY.<br />
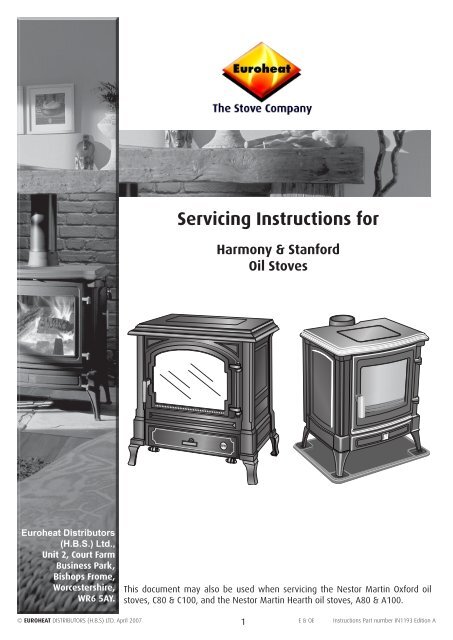
<strong>Servicing</strong> Instructions for<br />
Harmony & Stanford<br />
<strong>Oil</strong> <strong>Stoves</strong><br />
EFEL<br />
Euroheat Distributors<br />
(H.B.S.) Ltd.,<br />
Unit 2, Court Farm<br />
Business Park,<br />
Bishops Frome,<br />
Worcestershire,<br />
WR6 5AY.<br />
This document may also be used when servicing the Nestor Martin Oxford oil<br />
stoves, C80 & C100, and the Nestor Martin Hearth oil stoves, A80 & A100.<br />
© EUROHEAT DISTRIBUTORS (H.B.S) LTD. April 2007 1<br />
E & OE Instructions Part number <strong>IN1193</strong> Edition A
INTRODUCTION<br />
<strong>Servicing</strong> your stove should not be seen as a chore but rather the means to getting the most efficient use and<br />
increasing the life of the stove. A badly maintained stove will run inefficiently, so you will burn more fuel, and<br />
if left unmaintained for a period could seriously damage the component parts within the stove which will then<br />
need replacing.<br />
This booklet details the aspects of servicing and routine maintenance required.<br />
Other documents obtainable on request from Euroheat<br />
IN1023 Operating Instructions <strong>Oil</strong> <strong>Stoves</strong>.<br />
IN1026 Installation Instructions <strong>Oil</strong> <strong>Stoves</strong>.<br />
IN1087 Technical Guide. The Flue.<br />
TB179 Technical Bulletin Transformer Identification and Fitting Instructions.<br />
TB115 Technical Bulletin Toby <strong>Oil</strong> valves.<br />
TB138 Technical Bulletin BM <strong>Oil</strong> valves.<br />
TB137 Technical Bulletin CI <strong>Oil</strong> valves.<br />
These guides are available by post by from Euroheat or our web site<br />
www.euroheat.co.uk<br />
Spares may be purchased from:<br />
Your local Euroheat supplier<br />
The Euroheat web site: www.euroheat.co.uk<br />
The service engineer is responsible under the health and safety at work act 1974 vi the caustic nature of fire<br />
cement and the possibility of disturbing asbestos and other materials such as ceramic in existing installations<br />
and to suggest appropriate protection to be given to the person (s) carrying out the servicing. The complete<br />
servicing must be carried out with due reference to the British Standards, Codes of Practice and Building<br />
Regulations relevant to the fuel type installed, and the manufacturers installation instructions.<br />
This document is a General Service Guide only. It does not replace the installation instructions or building<br />
regulations. No servicing should be undertaken unless the engineer is suitably qualified.<br />
© EUROHEAT DISTRIBUTORS (H.B.S) LTD. April 2007 2<br />
E & OE Instructions Part number <strong>IN1193</strong> Edition A
Maintenance Schedule<br />
1. Monthly<br />
Every 2 weeks or monthly depending on how cleanly the stove is burning the decoke tool should be used to<br />
stop carbon building up in the oil inlet port. See pages 13 to 15.<br />
2. Every 3 Months<br />
Turn off the stove and remove the coal effect kit if fitted. Examine the catalyser, support rings and the burner<br />
for any build up of carbon and remove if necessary. See pages 16 and 17.<br />
3. At the End of the Heating Season (Summer Shut Down)<br />
A) Do all the above in the monthly and 3 monthly procedure.<br />
B) Turn off the oil line isolation valve which should be at the rear of the stove. See page 23.<br />
C) Lubricate all the handle shafts and latch blades with a lubricant such as WD40.<br />
D) Arrange with your local engineer to have the stove serviced during the quieter summer period when the<br />
demand for the engineers time is less.<br />
4. At the Start of the Heating Season<br />
A) Check the door rope seals so as to ensure an airtight seal. See page 9.<br />
B) Turn on the oil line isolation valve which should be at the rear of the stove. See page 23.<br />
C) Remove the coal effect kit, if fitted, and ensure that there is no oil in the burner pot. If there is, remove this<br />
before lighting the stove.<br />
D) Ensure that the metering stem remote arm is moving up and down when the oil control knob is turned up<br />
and down. See page 18 to 21.<br />
D) Light the stove as shown in the stove’s operating instructions.<br />
© EUROHEAT DISTRIBUTORS (H.B.S) LTD. April 2007 3<br />
E & OE Instructions Part number <strong>IN1193</strong> Edition A
The Main Components of the Harmony and Stanford <strong>Oil</strong> <strong>Stoves</strong><br />
© EUROHEAT DISTRIBUTORS (H.B.S) LTD. April 2007 4<br />
E & OE Instructions Part number <strong>IN1193</strong> Edition A
Cleaning the Stove<br />
Cleaning the Glass<br />
Properly operated, with the correct fuel, your glass will remain clean. Slight staining may appear when the<br />
stove is lit and below its operating temperature. This will normally clear as the stove’s temperature rises.<br />
If it becomes necessary to clean the glass by hand do not attempt to do so unless the stove is cold. Proprietary<br />
glass cleaning agents are available but they must specifically state its suitability for ceramic stove glass before<br />
being used because the glass in your stove is not ordinary glass and may be damaged with an unsuitable<br />
cleaner.<br />
Newspaper moistened with water to which a little vinegar has been added will normally remove most staining,<br />
but for really stubborn marks, gentle polishing with fine steel wool lubricated with a few drops of dish washing<br />
detergent will need to be employed. Great care must be taken not to clean the glass too vigorously as particles<br />
of grit may have adhered with the stain and these could cause scratching if dragged across the glass. However<br />
well the stove burns it will eventually become necessary to clean the glass, but if cleaning becomes necessary<br />
too often we advise you to review your operating procedures to determine whether cleaner and more efficient<br />
combustion can be achieved (only burn dry seasoned wood).<br />
The Stove Body<br />
Dusting the stove may be carried out when the stove is at its minimum heat output temperature, using light<br />
strokes of a real bristle paint brush. Thorough cleaning, or any attempt to remove marks on the stove body must<br />
only be done when the stove is cold. <strong>Stoves</strong> with an enamel finish should be cleaned with a damp cloth, or very<br />
gentle use of a cleaner recommended for enamel finishes. It should be noted that even approved cleaners will<br />
damage the highly polished finish of the stove if used too vigorously. All traces of the cleaner must be removed<br />
before the stove is lit and no finishing polishes must ever be used as these will leave unsightly streaks on the<br />
stove when it becomes hot.<br />
<strong>Stoves</strong> with a cast black finish should never be cleaned with a cloth as the texture of the paint will abrade and<br />
collect lint from the cloth which will be almost impossible to remove. Vigorous brushing with a stiff real bristle<br />
paint brush will remove all dust, but where the paint is marked, the stains are better obliterated with a spray<br />
of suitable stove paint rather than attempts made to clean them off. Suitable paint may be purchased from a<br />
stove shop or direct from Euroheat.<br />
Respraying the Stove Surface<br />
Remove any dust and dirt with a stiff brush or vacuum with a brush attachment. Mask off any<br />
areas of the stove you do not wish to re-spray and the area surrounding the stove. The door<br />
handles and doors can be removed if required; see the section on hinge pin removal and door<br />
handle adjustment, page 6 and 9.<br />
Shake the can vigorously for a minute to mix the contents and apply the paint thinly and evenly<br />
over the surface, avoid over application as this will produce unsightly runs on the surface. It is<br />
better to use a few thin coats than one thick one.<br />
Order numbers for spray paint<br />
Surface to be Sprayed Part Number Size of Can<br />
Cast iron body 40785 200ml<br />
Rear heat shield 60429 400ml<br />
© EUROHEAT DISTRIBUTORS (H.B.S) LTD. April 2007 5<br />
E & OE Instructions Part number <strong>IN1193</strong> Edition A
Repair of the Enamel Surface<br />
The enamel surface of the stove may become chipped if it is hit with a<br />
hard object such as a coal shovel or operating tool. Suitable cold enamel<br />
touch up paint may be purchased.<br />
To prepare the surface remove any loose or flaking enamel finish and<br />
brush or vacuum the area to remove any dust and dirt. If the touch up is<br />
supplied in a bottle shake vigorously for a minute to mix the contents. If<br />
supplied in a tube squeeze out some of the contents onto a clean sheet of<br />
paper and mix with a match stick as it may have become separated in the<br />
tube. Apply a thin layer of touch up to the surface allowing it to dry before<br />
applying further layers to build the surface up to the surrounding enamels<br />
height. Leave to dry before firing the stove.<br />
If your stove has an enamel finish you will notice, after the stove has been used several times, it develops<br />
what is called a “crackle” pattern in the enamelling. This is caused by the different expansion rates between<br />
the enamel and the cast iron, it is normal and should not be regarded as a fault or indicating that the stove is<br />
beginning to shed its finish.<br />
Order Numbers for Touch up Paint<br />
Enamel colour<br />
Part Number<br />
Satin Black Enamel 27440<br />
Bottle Green Enamel 27437<br />
Majolica Brown Enamel 27441<br />
Blue enamel 31272<br />
Brass Fittings<br />
Any proprietary brass cleaner may be used to clean the brass on the stove, but care must be taken to ensure<br />
the polish does not come into contact with the stove enamel or the black cast finish, where it will leave a<br />
stain.<br />
Nickel and Black Haematite Fittings<br />
Any proprietary chrome or aluminium cleaner may be used to clean the decorative fittings on the stove, but<br />
care must be taken to ensure the polish does not come into contact with the stove enamel or the black cast<br />
finish, where it will leave a stain.<br />
The Flue<br />
Even if your flue is correctly lined it is advisable to run your stove at a high setting to thoroughly warm the flue<br />
periodically and ensure it is swept regularly. If the stove has not been used for some time it will be necessary<br />
to ensure the flue has not been blocked with twigs from home building birds or blocked with other obstructions<br />
before the stove is lit. Lighting a small piece of paper within the stove will determine the flue’s ability to<br />
remove any products of combustion.<br />
National Chimney Sweeps Association<br />
Telephone: 01785 811732<br />
OFTEC<br />
Foxwood House, Dobbs Lane, Kesgrave, Ipswich, IP5 2QQ.<br />
Tel: 0845 65 85 080 Fax: 0845 65 85 181<br />
Email: enquiries@oftec.org<br />
© EUROHEAT DISTRIBUTORS (H.B.S) LTD. April 2007 6<br />
E & OE Instructions Part number <strong>IN1193</strong> Edition A
Front Door Removal<br />
Door Removal with Brass Hinge Tube<br />
Upper Hinge Pin Removal<br />
Open the door to the stove. To remove the top hinge pin lift it upwards, if it is found to be tight undo the brass<br />
nut and fit a spacer between the nut and the brass washer, if it has an enamel finish protect the door with a<br />
peice of cloth below the washer. Tighten the nut back down and in so doing this will lift the pin upwards. NEVER<br />
KNOCK THE HINGE PIN DOWN as this will force it into the casting and make its removal very difficult and result<br />
in the brass tube becoming damaged. If this has occurred the brass tube must be cut and removed and the pin<br />
tapped upwards, a new hinge pin and brass tube will be required.<br />
LIFT TOP HINGE<br />
PIN UPWARDS<br />
Spacer<br />
To remove the<br />
brass tube pull<br />
to one side and<br />
lift it off the<br />
lower hinge pin.<br />
Undo brass nut and put a<br />
spacer between the nut and<br />
the washer and then tighten<br />
the brass nut so lifting the<br />
hinge pin.<br />
Lower Hinge Pin Removal<br />
If the lower pin needs to be removed, which is not necessary if you are only removing the door, undo the brass<br />
nut and lift up the pin.<br />
Order Numbers for Brass Hinge Assembly<br />
Description Harmony 1 Harmony 2 Harmony 3 Coachman<br />
Domed brass nut 12430 12430 12430 12430<br />
Brass washer 17496 17496 17496 17496<br />
Brass hinge tube 28285 28285 29351 29351<br />
Upper hinge pin 26291 26291 18839 18839<br />
Lower hinge pin 12427 12427 13219 13219<br />
© EUROHEAT DISTRIBUTORS (H.B.S) LTD. April 2007 7<br />
E & OE Instructions Part number <strong>IN1193</strong> Edition A
Door Removal without Brass Tube<br />
To remove the door undo the handle and open the door.<br />
Lift the door and hinge pins straight up holding the hinge side of the door and the handle.<br />
Reverse the procedure to refit ensuring that if there were any washers fitted they are also fitted.<br />
Open door and lift<br />
upwards holding<br />
hinge side of door<br />
and the handle.<br />
Order numbers for Harmony 5,8,10,11,21,31,41 hinge pins<br />
Description Harmony<br />
5 & 11<br />
Harmony<br />
21<br />
Harmony<br />
8 & 31<br />
Harmony<br />
10 & 41<br />
Upper door 19915 18906 18906 18906<br />
Domed brass nut 12430 12430 12430 12430<br />
Brass washer 17496 17496 17496 17496<br />
Order Numbers for Stanford Hinge Pins<br />
Description Stanford 50 Stanford 80<br />
Upper door 31848 31848<br />
Hinge Pins.<br />
The hinge pins on the Stanford stoves may, over time, ride up with the opening and closing of the door. It is<br />
essential that you knock these back down so that they do not fall out. If one does fall out then there is a danger<br />
that the door will drop down and snap off the hinge still attached with a hinge pin. This would then require a<br />
new front panel fitting to the stove.<br />
Using a dot punch on the side of the hinge pin in two places may help stop the hinge pins from riding up.<br />
© EUROHEAT DISTRIBUTORS (H.B.S) LTD. April 2007 8<br />
E & OE Instructions Part number <strong>IN1193</strong> Edition A
Glass and Glass Seal Set Replacement<br />
When replacing the glass on any of the stove models supplied by Euroheat the glass seal should also be<br />
replaced. Failure to do so could cause damage to the glass or allow air into the stove in an uncontrolled manner<br />
which may be detrimental to the performance of the stove.<br />
The seals should be checked annually and replaced if they have become damaged or show signs of leakage.<br />
The seals may be either a rope seal or a ceramic fibre gasket. In all cases these are interchangeable.<br />
It may be easier to replace the glass by removal of the door and lying it down on a stable flat surface.<br />
Glass and Seal Set Removal Single Panel Glass<br />
Undo the four glass clip screws and carefully lift off the glass panel from the door frame. With a blunt instrument<br />
such as a screwdriver scrape away the old ceramic glass seal from the door frame. If it has a rope seal which<br />
needs to be renewed pull out the old rope seal and with a blunt instrument such as a screwdriver scrape away<br />
the old rope glue and any dirt. Clean away any remaining residue with a wire brush.<br />
Ceramic fibre gasket<br />
The ceramic fibre gasket set<br />
This comprises of precut shaped ceramic<br />
fibre strips which fit the shape of the glass<br />
and pads which fit behind the glass retaining<br />
clips.<br />
Ceramic rope gasket<br />
Join rope centre top.<br />
The ceramic rope gasket set<br />
This comprises of a length of self adhesive<br />
ceramic rope which fits into the groove on<br />
the door frame, the shape of the glass, and<br />
pads which fit behind the glass retaining<br />
clips.<br />
© EUROHEAT DISTRIBUTORS (H.B.S) LTD. April 2007 9<br />
E & OE Instructions Part number <strong>IN1193</strong> Edition A
Order Numbers for Glass and Glass Seal Sets<br />
Stove Model Seal Set Glass<br />
Harmony 1 MS078 30730<br />
Harmony 2 MS078 30732<br />
Harmony 3 & Coachman 30729 31589<br />
Stanford 50 MS078 MS0774 Flat glass/ 37941 Bowed glass<br />
Stanford 80 MS078 37942<br />
Replacement of Ceramic Strip Gaskets and Glass<br />
Lay the ceramic strips around the door frame in the shape of the door. Lay the glass panel onto the ceramic<br />
strips. Push the screws through the glass clips and glass clip seals and then screw into the threaded holes in<br />
the door frame.<br />
It is very important that although the glass clips should hold the glass panel in place there should be some<br />
movement when the glass is pushed down onto the ceramic seal. This will allow for expansion and contraction<br />
of the glass and the door frame when the stove heats and cools, which could cause the glass to break.<br />
Replacement of Ceramic Rope Gasket and Glass<br />
Remove the adhesive strip cover paper from the ceramic rope and place this side downwards into the groove<br />
around the window in the door, cut off any excess rope. Push the ceramic rope down into the groove to ensure<br />
that the adhesive comes into contact with the door frame, the rope starting and finishing top centre. Lay the<br />
glass panel onto the ceramic rope seal. Push the screws through the glass clips and glass clip seals and then<br />
screw into the threaded holes in the door frame.<br />
It is very important that although the glass clips should hold the glass panel in place there should be some<br />
movement when the glass is pushed down onto the ceramic rope seal. This will allow for expansion and<br />
contraction of the glass and the door frame when the stove heats and cools, which could cause the glass to<br />
break.<br />
NEVER CLAMP THE GLASS CLIPS DOWN TIGHT ONTO THE GLASS OR FIT THE GLASS CLIPS WITHOUT<br />
THE CERAMIC PADS UNDERNEATH AS THIS MAY LEAD TO THE GLASS BREAKING.<br />
Rope Seal Replacement Kits<br />
The ceramic rope seals on the three doors need inspecting regularly and replacing when they become damaged<br />
or when the adjustment of the door handles will not maintain an air tight seal. To check if the seals are tight is<br />
to get a piece of standard A4 copier paper, cut it in half and then fold it in half. Shut it into the door in various<br />
places with the door handle closed. If the seal holds the paper tight and it is difficult to withdraw it then the<br />
seal is good. If when it is pulled it slides out easily then the door handles will need adjustment or the rope<br />
seal will require replacement.<br />
Failure to maintain a good seal will allow uncontrolled air enter the stove. This can cause over firing, excess heat,<br />
which can damage the internal components of the stove. Symptoms of this are a stove burning uncontrollably<br />
even when the air inlets are shut down.<br />
Order Numbers for Door Rope Seal Kits<br />
Stove Model Seal Set Stove Model Seal Set<br />
Harmony 5 RO141 Harmony 8 RO138<br />
Harmony 1 RO135 Harmony 10 RO138<br />
Harmony 2 RO136 Harmony 11 RO141<br />
Harmony 3 & Coachman RO138 Harmony 21 RO138<br />
Stanford 50 RO141 Harmony 31 RO138<br />
Stanford 80 RO138 Harmony 41 RO138<br />
10<br />
© EUROHEAT DISTRIBUTORS (H.B.S) LTD. April 2007 E & OE Instructions Part number <strong>IN1193</strong> Edition A
Removal of Old Seal<br />
Pull the old rope seal from the rope groove, it may require a flat bladed screw driver to lift it from the groove.<br />
Clean the groove of all accumulated dirt and old rope glue, a flat bladed screw driver and wire brush are<br />
recommended to clean the groove.<br />
Rope seal groove<br />
Rope joint top<br />
centre of door<br />
Ceramic rope seal<br />
Fitting New Seal<br />
The ceramic rope in the seal set kits it cut to an approximate length, as the kits fit various stoves. Run the rope<br />
around the rope groove and cut it to the required length. Remove it from the groove and apply a bead of rope<br />
glue into the rope groove. Push the rope back into the groove ensuring that the joint is at the top and fitting<br />
tightly together. Close the door and adjust the handle latch accordingly.<br />
Door Handle Adjustment<br />
It is very important for correct operation that all the doors (glass<br />
door, side door and ash pan door) when closed are air tight. Your<br />
stove is provided with an adjustable door latch.<br />
The flat latch blades can be bent using an adjustable spanner.<br />
Bent towards the handle to tighten and away from the handle to<br />
loosen.<br />
To loosen<br />
To tighten<br />
To loosen<br />
To tighten<br />
© EUROHEAT DISTRIBUTORS (H.B.S) LTD. April 2007 11<br />
E & OE Instructions Part number <strong>IN1193</strong> Edition A
Handle latch with adjusting bolt<br />
Locking nut<br />
To adjust the furnace door handle latch, loosen the locking nut<br />
and adjust the bolt as required. Retighten the locking nut. The<br />
adjustment should be made so that when the handle is in its<br />
closed position the door is air tight.<br />
Door Handle Replacement<br />
The door handles are supplied in a complete kit form, with handle washers, spacers and<br />
latching blade. The most common reason for a handle to be replace is when the stove<br />
has stood idle over the summer and not been lubricated with WD40 or a similar product prior<br />
to the summer shut down period. The latch becomes very stiff to move and the excess force<br />
needed to move the latch breaks the roll pin which holds the handle shaft in place.<br />
If this has broken the whole handle assembly will need replacing.<br />
Order Numbers for Handles<br />
Model Furnace Door Lower Door Model Furnace Door<br />
Harmony 5 &11 32828 No handle Harmony 21 44227<br />
Harmony 1 19917 28130 Harmony 31 43812<br />
Harmony 2 19924 19925 Harmony 41 43812<br />
Harmony 3 28999 No handle Stanford 50 39649<br />
Coachman 28999 No handle Stanford 80 39654<br />
If the handle shaft has seized into the door frame, and the door is closed, then the shaft will have to be sprayed<br />
with WD40 or a similar penetrating oil. Leave this to soak for some time. Then with a pair of mole grips or<br />
similar type of spanner turn the shaft to open the door. Once the door is open, spray the inside of the shaft and<br />
the outside again with WD40 and leave to soak. The shaft can then be gently knocked through the frame of<br />
the door, taking care as the door frame is cast iron and can crack.<br />
Examples of Handle Kits<br />
Harmony 1 Firebox Door Handle<br />
Brass handle<br />
assembly<br />
Spacer<br />
Locking washer<br />
Harmony 1 & 2 Lower Door Handle<br />
Sprung washer<br />
Securing nut<br />
Washer<br />
Securing nut<br />
Sprung washer<br />
Latch blade<br />
Latch blade<br />
Brass handle<br />
assembly<br />
© EUROHEAT DISTRIBUTORS (H.B.S) LTD. April 2007 12<br />
E & OE Instructions Part number <strong>IN1193</strong> Edition A
De-coke Procedure for <strong>Oil</strong> <strong>Stoves</strong><br />
To ensure the burner is operating efficiently and capable of its maximum output the fuel inlet to the burner<br />
will need to be kept free of carbon deposits by operating the decoking lever at least monthly. Use the glove<br />
supplied with the stove and take great care if this procedure is to be undertaken with the stove running.<br />
Accessing the De-coking Assembly<br />
On most Harmony and Stanford stoves the decoking assembly can be accessed by opening the lower door, the<br />
example above shows the Harmony 5 and Stanford 50 where it can be accessed from the side. The Harmony 3<br />
and Harmony Coachman stoves; the access is through the side door of the stove.<br />
Mark 1: De-coking Assembly<br />
This is accomplished by slackening the knurled brass nut a half-a-turn and withdrawing the rod no more than<br />
35mm (1½inches). Then while rotating the rod, insert it fully, repeat until there is no grinding felt when it is<br />
rotated, then retighten the brass knurled nut.<br />
De-coking Assembly<br />
<br />
<br />
<br />
<br />
<br />
<br />
<br />
On stoves over 4 to 5 years old carbon deposits may have built up higher up the de-coking tube than the<br />
de-coking blade can reach, thus restricting the oil flow to the burner. This requires the de-coking assembly<br />
and oil inlet pipe being removed from the de-coking tube. Unscrew the oil feed pipe from the de-coking tube<br />
with a 10mm spanner and pull the pipe out of the de-coking tube. To remove the 22mm brass nut hold the<br />
de-coking tube with an adjustable spanner, so it does not turn and unscrew the de-coking tube from the body<br />
of the burner pot. Unscrew the whole assembly and remove from the end of the de-coking tube. Clear out<br />
any carbon which has built up within the de-coking tube. Replace both the oil feed pipe and the de-coking<br />
assembly.<br />
© EUROHEAT DISTRIBUTORS (H.B.S) LTD. April 2007 13<br />
E & OE Instructions Part number <strong>IN1193</strong> Edition A
Mark 2: De-coking using the Allen Key Tool<br />
This operation must only be carried out with the stove TURNED OFF and COLD. The de-coking and inlet pipe are<br />
located behind the lower door and to the right hand or left hand side of the burner pot. Remove the end cap<br />
with the tool supplied with the stove, making sure not to loose the sealing gasket from within the cap. The tool<br />
is then inserted into the inlet pipe rotating it as it is pushed in towards the burner, until the cardon deposits<br />
have been scraped clear of the inlet.<br />
Unscrew the de-coke port end cap with the<br />
tool supplied with the stove.<br />
<br />
Insert the tool into the inlet pipe and rotate the<br />
tool whilst pushing in towards the burner, until<br />
the carbon has been scraped clear.<br />
Replacement gasket seal Part No: MS1029<br />
© EUROHEAT DISTRIBUTORS (H.B.S) LTD. April 2007 14<br />
E & OE Instructions Part number <strong>IN1193</strong> Edition A
De-coking using the De-coking Tool<br />
This operation must only be carried out with the stove TURNED OFF and COLD. The decoking and inlet pipe are<br />
located behind the lower door and to the right hand or left hand side of the burner pot. Unscrew the end cap<br />
of the inlet pipe, making sure not to loose the sealing gasket from within the cap. The tool is then inserted into<br />
the inlet pipe and is pushed in towards the burner, until the cardon deposits have been scraped clear of the<br />
inner surfaces of the inlet pipe.<br />
Remove the cap from the inlet pipe.<br />
Push the tool into the pipe.<br />
Scrape the cardon deposits from the inner surfaces.<br />
Replace the tool onto the outside of the de-coke tube and replace the end cap.<br />
Replacement gasket seal Part No: MS1029<br />
© EUROHEAT DISTRIBUTORS (H.B.S) LTD. April 2007 15<br />
E & OE Instructions Part number <strong>IN1193</strong> Edition A
Catalyser Identification.<br />
<br />
<br />
<br />
Catalyser Mk1<br />
Burner Size B C Part No.<br />
6” 130mm 105mm 337<br />
8” 170mm 135mm 339<br />
10” 170mm 135mm 339<br />
<br />
<br />
Catalyser Support Ring Mk1<br />
Burner Size A Part No.<br />
6” 142mm 3113<br />
8” 171mm 3112<br />
10” 206mm 3111<br />
<br />
<br />
<br />
<br />
<br />
<br />
<br />
Catalyser Mk11<br />
Burner Size B C Part No.<br />
6” 125mm 130mm 32824<br />
8” 150mm 146mm 26428<br />
10” 155mm 181mm 26429<br />
<br />
<br />
<br />
<br />
<br />
Catalyser Support Ring Mk11<br />
Burner Size A Part No.<br />
6” 172mm<br />
32822<br />
2 required per stove<br />
8” 195mm<br />
23908<br />
2 required per stove<br />
10” 225mm<br />
23920<br />
2 required per stove<br />
<br />
Position within the Burner.<br />
The catalyser support ring or two half rings sit on pegs halfway down inside the burner. The catalyser then sits<br />
centrally on the support ring.<br />
© EUROHEAT DISTRIBUTORS (H.B.S) LTD. April 2007 16<br />
E & OE Instructions Part number <strong>IN1193</strong> Edition A
Burner Identification.<br />
Mk1 Burner<br />
The Mk1 burner comprises of a twin skin with<br />
smaller holes on the outer surface and larger<br />
holes on the inner surface. There is also no<br />
entry port (swan neck) for an igniter to be<br />
fitted.<br />
<strong>Oil</strong> Burner Mk1<br />
Burner Size Part No.<br />
6” 199<br />
8” 201<br />
10” 192<br />
Mk2 Burner with fitted Swan Neck<br />
The Mk2 burner is only a single skin and<br />
the entry port (swan neck) for an igniter is<br />
attached to the side of the burner by four<br />
small nuts and bolts.<br />
<strong>Oil</strong> Burner Mk1<br />
Burner Size Part No.<br />
6” 33522<br />
8” 33523<br />
10” 33524<br />
Mk2 Burner with Braised Swan Neck<br />
The Mk2 burner is only a single skin and the<br />
entry port (swan neck) for an igniter is braised<br />
to the side of the burner.<br />
<strong>Oil</strong> Burner Mk1<br />
Burner Size Part No.<br />
6” 39672<br />
8” 38685<br />
10” 46261<br />
© EUROHEAT DISTRIBUTORS (H.B.S) LTD. April 2007 17<br />
E & OE Instructions Part number <strong>IN1193</strong> Edition A
<strong>Oil</strong> Valve Identification - CI <strong>Oil</strong> Control Valve<br />
For more detailed fitting instructions down load Technical Bulletin TB137 from our web site.It will also be<br />
supplied with the oil valve you order.<br />
Low fire adjustment<br />
screw<br />
_<br />
+<br />
Control knob<br />
High fire adjustment<br />
screw<br />
+<br />
_<br />
Data plate<br />
Actuator Pin<br />
Used to control<br />
the flow rate by<br />
remotely operated<br />
devices such as a<br />
Flexitemp.<br />
Arming lever<br />
Filter access<br />
plate<br />
<strong>Oil</strong> level fill line<br />
Flexitemp<br />
Flow Rate Part No.<br />
4 to 12cc 26452<br />
5.5 to 17.5cc 18995<br />
7.5 to 24cc 18745<br />
Flexitemp<br />
MS9036<br />
© EUROHEAT DISTRIBUTORS (H.B.S) LTD. April 2007 18<br />
E & OE Instructions Part number <strong>IN1193</strong> Edition A
<strong>Oil</strong> Valve Identification - BM <strong>Oil</strong> Control Valve<br />
For more detailed fitting instructions download Technical Bulletin TB138 from our web site.It will also be<br />
supplied with the oil valve you order.<br />
Position of the adjustment screw<br />
when the control knob is turned to<br />
maximum or minimum<br />
Data plate<br />
Control knob<br />
Actuator Pin<br />
used to control<br />
the flow rate by<br />
remotely operated<br />
devices such as a<br />
Flexitemp.<br />
Arming lever<br />
<strong>Oil</strong> level<br />
indicator mark<br />
Filter access plate<br />
Flexitemp<br />
Flow Rate Part No.<br />
4 to 12cc 26449<br />
5.5 to 17.5cc 29927<br />
7.5 to 24cc 29928<br />
Flexitemp<br />
MS9036<br />
<br />
<br />
<br />
<br />
<br />
Low Flow Rate Adjustment<br />
<br />
<br />
<br />
<br />
<br />
<br />
<br />
<br />
<br />
<br />
<br />
<br />
<br />
<br />
<br />
<br />
<br />
<br />
<br />
High Flow Rate Adjustment<br />
<br />
<br />
<br />
<br />
<br />
<br />
<br />
<br />
<br />
<br />
<br />
<br />
<br />
<br />
© EUROHEAT DISTRIBUTORS (H.B.S) LTD. April 2007 19<br />
E & OE Instructions Part number <strong>IN1193</strong> Edition A
<strong>Oil</strong> Valve Identification - Toby <strong>Oil</strong> Control Valve<br />
For more detailed fitting instructions download Technical Bulletin TB115 from our web site.It will also be<br />
supplied with the oil valve you order.<br />
Low fire flow<br />
adjustment screw<br />
+<br />
_<br />
+<br />
_<br />
High fire flow<br />
adjustment screw<br />
Top plate fixing screw<br />
Top plate fixing screw<br />
Arming Lever (lift up to arm)<br />
Once armed cannot<br />
be de-armed<br />
Metering Stem remote lever.<br />
Used for clearing contaminates<br />
obstructing the metering<br />
slot; turn oil control to six<br />
then tap lever sharply<br />
5-10 times.<br />
Actuator Pin<br />
Used to control the flow<br />
rate by remotely operated<br />
devices such as the Flexitemp.<br />
Reservoir level height<br />
Reservoir drain screw<br />
<strong>Oil</strong> filter access plate.<br />
Flow Rate Part No.<br />
3 to 11cc 32807<br />
5.5 to 15cc 46204<br />
5.5 to 17.5cc 18995<br />
6.8 to 20.5cc 46205<br />
7.5 to 24cc 32327<br />
Flexitemp MS10040<br />
Flexitemp<br />
© EUROHEAT DISTRIBUTORS (H.B.S) LTD. April 2007 20<br />
E & OE Instructions Part number <strong>IN1193</strong> Edition A
<strong>Oil</strong> Valve Identification - CI Twin Top <strong>Oil</strong> Control Valve<br />
Fitted to the Harmony 3 and Coachman Thermical twin burner stoves.<br />
For more detailed fitting instructions download Technical Bulletin TB139 from our web site.It will also be<br />
supplied with the oil valve you order.<br />
Low fire adjustment screws<br />
_<br />
+<br />
Control knob<br />
High fire adjustment screws<br />
(hidden by control knob)<br />
_<br />
+<br />
Data plate<br />
Arming lever<br />
Filter access plate<br />
Flow Rate Part No.<br />
5.5 to 17.5cc 18805<br />
Flexitemp<br />
MS9036<br />
Aquastat 29761<br />
<strong>Oil</strong> level indicator mark<br />
Actuator Pin (located between<br />
the control knobs)<br />
Used to control the flow rate by<br />
remotely operated devices such<br />
as a Flexitemp or Aquastat.<br />
Aquastat<br />
Flexitemp<br />
© EUROHEAT DISTRIBUTORS (H.B.S) LTD. April 2007 21<br />
E & OE Instructions Part number <strong>IN1193</strong> Edition A
<strong>Oil</strong> Filter Replacement<br />
Filter bleed screws<br />
CROSSLAND 489<br />
CROSSLAND 489<br />
When replacing the oil filter, which should be done annually, the new “O” rings supplied with the replacement<br />
filter must be used.<br />
Failure to do so can cause oil leaks and may allow air into the oil line which can affect the function of the oil<br />
control valve.<br />
The filter must then be bled of air by first loosening the inlet bleed screw and then the outlet bleed screw.<br />
Description<br />
<strong>Oil</strong> filter kit<br />
Replacement cartridge<br />
Pressure reducing valve<br />
Part No.<br />
MS9195<br />
MS9166<br />
MS10041<br />
For more detailed fitting instructions download<br />
Technical Bulletin TB177 from our web site.It will<br />
also be supplied with the oil filter kit you order.<br />
<strong>Oil</strong> Pressure Reducing Valve<br />
<strong>Oil</strong> Pressure Reducing Valve.<br />
Used on installations where the oil tank outlet<br />
is situated more than 3m above the top of the<br />
stove’s oil control valve inlet.<br />
Inlet pressure 0.5bar to 6bar, Outlet 100mb.<br />
© EUROHEAT DISTRIBUTORS (H.B.S) LTD. April 2007 22<br />
E & OE Instructions Part number <strong>IN1193</strong> Edition A
Typical <strong>Oil</strong> Tank Installations<br />
Gravity fed to the stove<br />
Remote acting Fire<br />
Valve Sensor located<br />
behind appliance close<br />
to oil metering valve<br />
Level<br />
Indicator<br />
Maximum 3meters<br />
Filter<br />
Minimum 300mm<br />
Manual<br />
Stop Cock<br />
Isolation tap<br />
by applaince<br />
Using an oil lifter pump where tank level is below the height of the stoves oil inlet<br />
Capacity of<br />
lifter pump<br />
Part No.<br />
3 Litre MS042<br />
12 Litre MS9025<br />
<br />
<br />
<br />
<br />
<br />
© EUROHEAT DISTRIBUTORS (H.B.S) LTD. April 2007 23<br />
E & OE Instructions Part number <strong>IN1193</strong> Edition A
Igniter Identification.<br />
Short Igniter<br />
The short igniter is fitted to stoves in which the igniter mounting tube (swan neck) is braised to the burner. The<br />
length of the igniter body is 52mm.<br />
Part No. 38500C<br />
Swan neck braised<br />
to the burner pot<br />
52mm<br />
Long Igniter<br />
The long igniter is fitted to stoves in which the igniter mounting tube (swan neck) is fixed in position by four<br />
nuts and bolts.<br />
The length of the igniter body is 92mm.<br />
Part No. 26796C<br />
Swan neck<br />
secured to the<br />
burner pot<br />
with 4 nuts<br />
and bolts.<br />
92mm<br />
For more detailed fitting instructions down load Technical Bulletin TB072 for the long igniter and TB188<br />
for the short igniter from our web site.It will also be supplied with the igniter kit you order.<br />
© EUROHEAT DISTRIBUTORS (H.B.S) LTD. April 2007 24<br />
E & OE Instructions Part number <strong>IN1193</strong> Edition A
Short Igniter Kit Components 38500C<br />
Igniter<br />
Bullet<br />
connectors<br />
Igniter seal<br />
Retaining<br />
To Remove the Old Igniter:<br />
screw<br />
Remove the power cord from the power supply to the transformer and remove the two wires from the<br />
transformer, which is fitted to the rear heat shield of the stove.<br />
If there is limited access to the transformer the wires may be cut at a convenient point near to the igniter and<br />
the bullet connectors, supplied with the kit, used when fitting the new igniter.<br />
Open the lower door of the stove to access the burner.<br />
Unscrew the retaining screw on the side of the swan neck and withdraw the igniter.<br />
Remove the retaining screw<br />
and withdraw the igniter<br />
To Fit the New Igniter:<br />
from the swan kneck.<br />
Using emery board, clean any lacquer from the ends of the wires of the new igniter, to ensure a good contact<br />
at the transformer or bullet connectors.<br />
Slide the ceramic igniter seal down the wires to the body of the igniter and if there is a fibre gasket on the body<br />
of the igniter this must be removed.<br />
Fit the two wires to the transformer, if you have cut the wires, because access to the transformer is difficult, the<br />
bullet connectors need crimping onto the wires using a crimping tool and the two ends joining.<br />
Insert the igniter into the swan neck, line up the holes and refit the retaining screw.<br />
For clean and rapid ignition to be achieved the tip of the igniter’s stainless steel<br />
gauze must rest on the pot bottom to allow oil to be attracted towards the<br />
ignition coil by capillary action with the minimum amount of oil having entered<br />
the burner.<br />
Push the igniter seal into the top of the sawn neck to form a seal. Failure to do<br />
this will allow air to leak past the igniter and cause poor combustion to occur.<br />
Once fitted light the stove and check the flame pattern to ensure that the seal<br />
is not letting air past which would cause a yellow flame to appear in the area of<br />
the igniter port.<br />
25<br />
<br />
<br />
<br />
© EUROHEAT DISTRIBUTORS (H.B.S) LTD. April 2007 E & OE Instructions Part number <strong>IN1193</strong> Edition A
Igniter seal which should be<br />
slid over the igniters wires<br />
and pushed into the top of the<br />
swan neck to form a seal.<br />
Long Igniter Kit Components 26796C<br />
Tools required<br />
Small screw driver, 7mm socket (1/4 inch drive) and 7mm spanner. (Electricians pliers if required to cut<br />
cables).<br />
Gasket<br />
Igniter<br />
4 x Nut & Bolts<br />
Bullet Connectors<br />
To Remove the Old Igniter:<br />
Turn off the electrical supply to the stove and remove the power cord before any work is undertaken on the<br />
electric ignition.<br />
Remove the coal kit from the stove carefully, it is fragile.<br />
Remove the catalyser and 2 support rings.<br />
Undo the 4 nuts and bolts that hold the swan neck to the burner and remove, withdrawing the igniter from the<br />
burner at the same time. Undo the screw retaining the igniter in the swan neck and withdraw.<br />
Undo the 2 leads at the transformer and withdraw the whole igniter. If this is not possible due to the stoves<br />
installation the cables may be cut and bullet connectors (supplied) used to join to the new igniter cables.<br />
To Fit the New Igniter:<br />
Feed the new igniter cables through the stove back up to the transformer and reconnect to either terminal,<br />
the cables are not polarised. Or join to original cables using bullet connectors.<br />
Insert the igniter into the swan neck and secure with the retaining screw.<br />
Using the new gasket insert the igniter attached to the swan neck back into the<br />
burner and refit using the 4<br />
new nuts and bolts supplied.<br />
Check that the metal gauze is touching the bottom of the burner.<br />
Reconnect power cord and test (it will be seen to glow red after a few<br />
seconds).<br />
Replace catalyser support rings, catalyser and coal kit.<br />
Light the stove.<br />
© EUROHEAT DISTRIBUTORS (H.B.S) LTD. April 2007 E & OE Instructions Part number <strong>IN1193</strong> Edition A<br />
26
Transformer Identification<br />
Since the introduction of electric ignition to the Efel Harmony and Nestor Martin Range of vaporising oil burning<br />
stoves there have been three types of transformers used. They are now no longer available and have been<br />
replaced by two transformer kits, dependant on the original transformer or the stove model. These kits have a<br />
new transformer and the relevant brackets, leads and connecters to enable them to be fitted.<br />
EUROHEAT 26955<br />
INPUT: 230V 50/60Hz<br />
OUTPUT: 2.9V @ 36A INT.<br />
RATING: 104VA INT.<br />
PART No: 33378<br />
INPUT: 230V 50/60Hz<br />
OUTPUT: 2.6V @45A INT<br />
RATING: 117VA INT<br />
CE<br />
Transformer: Mark 1<br />
Part No:<br />
MS0115<br />
Replacement Kit: MS1120<br />
Transformer: Mark 2<br />
Part No: 30721<br />
Replacement Kit: MS1121<br />
Transformer: Mark 3<br />
Part No: 38759<br />
Replacement Kit: MS1121<br />
Replacement Kit<br />
Transformer<br />
Kettle Lead Power Cord<br />
Transformer<br />
mounting bracket<br />
Bullet Connecters<br />
& Screws<br />
WARNING: The stove must be disconnected from any power supply before any work is undertaken on<br />
the appliance. Any work should only be undertaken by a suitably qualified engineer.<br />
For more detailed fitting instructions down load Technical Bulletin TB179 from our web site. It will also be<br />
supplied with the transformer kit you order.<br />
© EUROHEAT DISTRIBUTORS (H.B.S) LTD. April 2007 27<br />
E & OE Instructions Part number <strong>IN1193</strong> Edition A
<strong>Servicing</strong> of the Stove<br />
1) Check you have oil in the tank and that any in line filters are clean, replace cartridge type annually. If one is<br />
not fitted it would be advisable to recommend to the customer that one should be fitted. See Pages 22<br />
2) Remove the coal kit from the stove carefully and put it somewhere safe. Replace if neseccary.<br />
3) Remove the catalyser and support ring, or half rings. Inspect and replace if necessary. See pages 16<br />
4) Clean the glass if sooted up and check that there is no oil in the pot. If there is clean it out with absorbent<br />
paper towel.<br />
5) Remove any hard carbon from within the burner using a blunt scraper or screwdriver and the burner inlet<br />
port using the decoking tool. See pages 13 and 14.<br />
6) Replace and check that the catalyser and support rings are<br />
correctly positioned in the burner pot. The 2 half rings supported<br />
by the pins inside the pot and the catalyser sitting centrally to<br />
the rings.<br />
7) Attach the draught gauge to the draught test point, found on<br />
most stoves hidden behind the front left leg when the lower<br />
door is opened.<br />
5) Turn the oil control to the lighting setting, or number 2<br />
position, check that oil is entering the burner pot, and press<br />
the igniter button until oil ignites.<br />
6) Leave the stove and flue to warm up. Anything from 20 mins<br />
to 2 hours dependant upon the type of flue and when the stove<br />
was last used.<br />
7) Turn the stove down to its minimum, this is the point where you feel resistance just before the oil valve<br />
goes “click” off.<br />
8) Open the door and clean the glass again if dirty.<br />
Low fire maximum setting<br />
9) Take a flue draught reading. Compare this with the graphs on pages 32 and 33,<br />
dependant upon the burner size of the stove.<br />
a) If the reading is too high then the draught stabilizer will need to be altered to<br />
reduce the air flow through the burner. By winding the counter balanced nut out,<br />
anti clockwise, until it the draught drops to the required reading for the size of<br />
burner.<br />
b) If the flue draught is too low close the stabiliser by winding the counter balanced<br />
nut in, clockwise, until the air flow rises to the required reading for the size of<br />
burner.<br />
Low fire minimum setting<br />
10) Look at the flame pattern through the glass, it should be blue flames flickering<br />
around the burner somewhere between the catalyser support ring and the ring of<br />
holes at the top of the pot.<br />
© EUROHEAT DISTRIBUTORS (H.B.S) LTD. April 2007 28<br />
E & OE Instructions Part number <strong>IN1193</strong> Edition A
Low Fire Candling by Inlet Port<br />
11) If you have yellow flames candling from the bottom of the<br />
pot then the flow rate will need increasing, by turning the low fire<br />
screw 1/4 of a turn at a time until it reaches the correct height<br />
within the burner pot, see installation instructions for correct<br />
position. Once this is achieved check that the flue draught is still<br />
correct, if not alter stabilizer to return it to the correct setting.<br />
13) Check the flue draught against the graph in the graphs on pages<br />
32 and 33, if a progressive draught stabilizer is fitted this cannot be<br />
altered. If it is below the ideal, adjust the oil flow to give the flame<br />
pattern, see 14 a) and b)<br />
14) Check the flame pattern. It should be to the height of the top of the<br />
curve on the door. With only the very odd flame just touching the top<br />
of the stove.<br />
a) If it is touching the top of the stove this is too high and should be<br />
reduced by lowering the oil flow on high fire. This is done by turning<br />
the high fire screw 1/4 of a turn at a time until it reaches the desired<br />
height.<br />
b) If it is too low then adjust the high fire screw 1/4 of a turn at a time<br />
until the desired flame height is reached.<br />
12) Turn the stove up gradually over a period of 5 minutes to<br />
number the maximum, or number 6, setting. Then wait for the<br />
flue to heat up for 15 minutes.<br />
15) Return the fire to its low setting and leave to settle for<br />
about 5 mins.<br />
16) Check the flue draught and flame pattern to ensure<br />
any alterations have not effected this setting.<br />
17) Replace the coal effect kit, if it comprises of loose coals,<br />
check the layout to ensure there are no long lazy flames,<br />
flames touching the sides of the stove or impinging on the<br />
glass. Reposition the coals if necessary.<br />
© EUROHEAT DISTRIBUTORS (H.B.S) LTD. April 2007 29<br />
E & OE Instructions Part number <strong>IN1193</strong> Edition A
Correct Procedure for the use of a Dwyer Flue Draught Gauge<br />
The Dwyer flue draught gauge is a very simple yet accurate method of measuring the flue draught passing<br />
through a stove, however, there are certain rules for the correct use of the draught gauge.<br />
1. The gauge should be clean and dry inside or the ball will not float in the tube accurately. It is not a water<br />
gauge and should not be filled with water.<br />
2. The ball should be undamaged as damage will cause the ball not to float accurately. Never touch the<br />
replacement ball with your fingers, pour it directly in from its protective tube.<br />
3. The silicon tube should be undamaged and of the correct length, 360 mm, as this will affect the accuracy. It<br />
should be fitted to the nipple directly above the ball.<br />
4. The flue should be allowed to reach its normal operating temperature, this may take, in some instances, a<br />
few hours especially if the stove has not been used for a time.<br />
.09<br />
.08<br />
IN. OF WATER DRAFT OR PRESSURE - LOW RANGE<br />
.07<br />
.06<br />
.05<br />
.04<br />
.03<br />
.02<br />
.01<br />
1.0<br />
.9<br />
.8<br />
.7<br />
.6<br />
.5<br />
.4<br />
.3<br />
.2<br />
.1<br />
.05<br />
IN. OF WATER DRAFT OR PRESSURE - HIGH RANGE<br />
Steel<br />
Tube<br />
Silicon Tube<br />
Draught<br />
guage<br />
5. The draught guage should be held upright when the readings are taken. Taking the reading on the black side<br />
using the left hand side scale, 0.01 in to 0.09 in water guage.<br />
An oil stove will have a test point tube or hole dependant upon the model and age of the stove, the position of<br />
which will be found in the installation instructions for the stove. If no test point can be found then a 7mm hole<br />
should be drilled into the combustion chamber of the stove. If there is a test point tube the silicon tube should<br />
be attached to this and with the guage held vertically the readings taken at both high and low fire settings.<br />
If a hole has been drilled into the combustion chamber then the steel pipe should be attached to the other<br />
end of the silicon tube and this inserted into the hole. The readings then taken with the gauge held vertically.<br />
These should be then compared to the requirements set out in the installation instructions and the required<br />
adjustements made.<br />
Caution:<br />
When using a flue draught gauge extreme care should be exercised to prevent contact<br />
with hot surfaces and flue gasses.<br />
© EUROHEAT DISTRIBUTORS (H.B.S) LTD. April 2007 30<br />
E & OE Instructions Part number <strong>IN1193</strong> Edition A
Progressive Draught Stabilizer<br />
Fitted to Harmony and Stanford oil stoves with the Toby oil control valve from March 2000. Prior to that<br />
the stabilizer could only be set at one setting and only consisted of the stabilizer flap and counter balanced<br />
weight.<br />
For more detailed fitting instructions download Technical Bulletin TB90 from our web site.<br />
Magnet guide<br />
Magnet<br />
Adjustment weight<br />
Wind weight in,clockwise,<br />
to increase the flue draught<br />
and out, anti clockwise, to<br />
reduce the flue draught.<br />
Cable adjustment<br />
Stabilizer flap<br />
Return spring<br />
Cable operating bar<br />
Cable<br />
Actuating cam<br />
Toby oil control valve<br />
© EUROHEAT DISTRIBUTORS (H.B.S) LTD. April 2007 31<br />
E & OE Instructions Part number <strong>IN1193</strong> Edition A
Ideal Flue Draught Readings for 6 inch Burner Models<br />
1<br />
6<br />
6<br />
1<br />
0.065<br />
0.035<br />
.09<br />
.08<br />
.07<br />
.06<br />
.05<br />
.04<br />
.03<br />
1.0<br />
.9<br />
.8<br />
.7<br />
.6<br />
.5<br />
.4<br />
.3<br />
.02<br />
.2<br />
Measurements<br />
in Inches W.G.<br />
.01<br />
.1<br />
.05<br />
Smokey Flame<br />
4<br />
5<br />
6<br />
0.07<br />
0.065<br />
0.06<br />
3<br />
2<br />
1<br />
0.045<br />
0.035<br />
1<br />
6<br />
Inches water gauge<br />
© EUROHEAT DISTRIBUTORS (H.B.S) LTD. April 2007 32<br />
E & OE Instructions Part number <strong>IN1193</strong> Edition A
Ideal Flue Draught Readings for 8 and 10 inch Burner Models<br />
6<br />
1<br />
6<br />
1<br />
0.085<br />
0.035<br />
.09<br />
.08<br />
.07<br />
.06<br />
.05<br />
.04<br />
.03<br />
1.0<br />
.9<br />
.8<br />
.7<br />
.6<br />
.5<br />
.4<br />
.3<br />
.02<br />
.2<br />
Measurements<br />
in Inches W.G.<br />
.01<br />
.1<br />
.05<br />
Smokey flame<br />
4<br />
5<br />
6<br />
0.095<br />
0.085<br />
0.08<br />
3<br />
2<br />
1<br />
Good 6<br />
1<br />
0.045<br />
0.035<br />
0.03<br />
Inches water gauge<br />
© EUROHEAT DISTRIBUTORS (H.B.S) LTD. April 2007 33<br />
E & OE Instructions Part number <strong>IN1193</strong> Edition A
© EUROHEAT DISTRIBUTORS (H.B.S) LTD. April 2007 34<br />
E & OE Instructions Part number <strong>IN1193</strong> Edition A
© EUROHEAT DISTRIBUTORS (H.B.S) LTD. April 2007 35<br />
E & OE Instructions Part number <strong>IN1193</strong> Edition A
© EUROHEAT DISTRIBUTORS (H.B.S) LTD. April 2007 36<br />
E & OE Instructions Part number <strong>IN1193</strong> Edition A
© EUROHEAT DISTRIBUTORS (H.B.S) LTD. April 2007 37<br />
E & OE Instructions Part number <strong>IN1193</strong> Edition A
© EUROHEAT DISTRIBUTORS (H.B.S) LTD. April 2007 38<br />
E & OE Instructions Part number <strong>IN1193</strong> Edition A
Spare Parts on the web.<br />
Below is an example of one the pages of spare parts diagrams you will find on our web site. These detailed<br />
drawings allow you to identify all the component parts of the stove. If you follow the instructions on the web<br />
site it will give you the part number and the price of each item. These can then be ordered through your<br />
nearest retail outlet or online.<br />
Euroheat Spare Parts System<br />
Harmony 8” & 10” <strong>Oil</strong> 194 96, 186 68, 186 69<br />
8<br />
9<br />
4<br />
15<br />
3<br />
2<br />
1<br />
6<br />
23<br />
24<br />
55<br />
81<br />
45<br />
12<br />
32<br />
29<br />
17<br />
16<br />
28<br />
40<br />
41<br />
26<br />
42<br />
112<br />
53<br />
44<br />
45 30<br />
50<br />
54<br />
113<br />
114<br />
10<br />
11<br />
29 58<br />
111<br />
61<br />
5<br />
70<br />
62<br />
63 64<br />
29 65 7 67 68<br />
72<br />
71<br />
98<br />
43<br />
96<br />
115<br />
97<br />
46<br />
49<br />
103<br />
Euroheat Distributors (HBS) Ltd., Unit 2, Court Farm Business Park, Bishops Frome, Worcestershire, WR6 5AY United Kingdom<br />
Telephone Technical Support 01885 491117 Facsimile 01885 491101 Reception 01885 490100 Email tech@euroheat.co.uk<br />
Latest Technical Information www.euroheat.co.uk<br />
www.euroheat.co.uk<br />
© EUROHEAT DISTRIBUTORS (H.B.S) LTD. April 2007 39<br />
E & OE Instructions Part number <strong>IN1193</strong> Edition A
Euroheat and Nestor Martin have a policy of continual research and development and reserve the right to<br />
modify its appliances without prior notice.<br />
We make every effort to ensure that the information provided in this document is correct and accurate at<br />
the time of printing. Continued updates occur to adapt documents to customer requirements and appliance<br />
changes. For the latest editions of all Euroheat documentation visit our web site<br />
www.euroheat.co.uk.<br />
We would request that you inform Euroheat of information which you feel is not provided in this document<br />
which would assist other users in the future.<br />
The Euroheat Technical Team<br />
© EUROHEAT DISTRIBUTORS (H.B.S) LTD. April 2007 40<br />
E & OE Instructions Part number <strong>IN1193</strong> Edition A