photographingartwork
Create successful ePaper yourself
Turn your PDF publications into a flip-book with our unique Google optimized e-Paper software.
Photographing your artwork<br />
Session 1: Taking the photograph<br />
*The artwork<br />
With 2D artwork, decide whether to photograph just the image<br />
or the framed image. For the framed option, remove the glass<br />
before photography as reflections can be a problem.<br />
With 3D artwork, use a plain background which contrasts with<br />
the artwork. Try several viewpoints to find the best possible.<br />
*The device<br />
Use camera, smart phone or tablet.<br />
Setting up the camera:<br />
Use the highest possible resolution ... this can be reduced later in<br />
a photo-editing app for putting your photographs on the internet.<br />
You’ll need a high resolution photograph for prints or cards.<br />
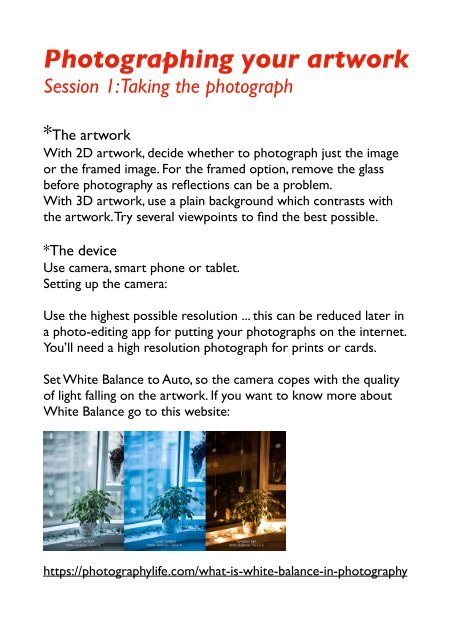
Set White Balance to Auto, so the camera copes with the quality<br />
of light falling on the artwork. If you want to know more about<br />
White Balance go to this website:<br />
https://photographylife.com/what-is-white-balance-in-photography
Look through the camera’s menu and turn on Grid. This will help<br />
to photograph the artwork level and without perspective effects.<br />
Most cameras also have a "steady camera" option, which lessens<br />
any chance of blurring.<br />
If you use your camera on the Auto setting, the camera makes all<br />
the decisions when you press the shutter button. Why not try the<br />
A option ... Aperture Priority. You can control the aperture and<br />
ISO setting, and the camera chooses the appropriate shutter<br />
speed. The aperture is the size of the hole that opens up behind<br />
the lens when the shutter button is pressed. Oddly enough, the<br />
larger the aperture number the smaller the hole ... and the<br />
smaller the aperture number the larger the hole. Larger aperture<br />
holes let more light into the camera and the shutter speed will be<br />
faster. Also, as aperture holes get larger, the depth of focus<br />
becomes narrower. This is not a problem with 2D artwork but<br />
with 3D artwork it might mean that not all your artwork is in<br />
focus. If you want to know more about aperture go to:<br />
https://photographylife.com/lens-aperture-chart
ISO value determines the sensitivity of the camera’s sensor. By<br />
raising the ISO, you can make the shutter speed faster and reduce<br />
the possibility of a blurry photograph. But be aware of increasing<br />
the ISO too much, as the photograph will appear grainy. If you<br />
want to know more about ISO, this website gives a clear<br />
explanation:<br />
https://photographylife.com/what-is-iso-in-photography<br />
The artwork should be well lit ... try to avoid using flash as the<br />
lighting can be very harsh. The best option is to photograph<br />
outside on a bright, overcast day, obviously avoiding shadows.<br />
Don’t get too close to the artwork ... maybe using the zoom to<br />
get the artwork to fill most of the camera screen.<br />
Put a piece of white card behind the artwork, so it appears in<br />
your photograph. This will help later, to adjust the White Balance<br />
setting.<br />
Ensure that the artwork is level on the screen and you are not<br />
looking up or down at the artwork ... if you are, then the artwork<br />
will appear skewed. To reduce the chances of blurring, use a<br />
tripod, monopod (or a pole, such as a walking pole or<br />
broomstick) or rely on the camera-steady setting. Half-press the<br />
shutter button to focus ... then gently push the button all the way.<br />
Use the image replay to check your photograph. Why not retake<br />
the photograph several times, maybe adjusting the settings to get<br />
the best effect.
*Transferring the photograph<br />
If you have photographed your artwork on a standard camera,<br />
you now have to transfer the file to your computer, smart phone<br />
or tablet. There are 3 ways of doing this: cable, card reader or by<br />
WiFi.<br />
The cable links your camera to the computer, where a window<br />
will appear allowing you to select photographs to be saved in a<br />
folder. Tablets and smart phones might need a special connector.<br />
The camera card containing the photographs can be removed and<br />
inserted into a card reader linked to your computer or mobile<br />
device. Most computers and android devices have their own card<br />
reader slots. iPads and iPhones need a connector called Camera<br />
Kit.<br />
Most cameras bought recently will have WiFi. From the camera<br />
menu select the WiFi transfer option. The camera’s handbook will<br />
explain what to do. You will also need an app for your type of<br />
camera ... the photographs will be transferred by WiFi into this<br />
app. You can then select which photographs you want to save on<br />
your computer or mobile device.
*Editing the photograph<br />
Photographs can be significantly improved by using an editing app.<br />
The photograph might not be a completely accurate capture of<br />
your artwork. A good editing app is Snapseed ... and it’s free.<br />
iPad and iPhone:<br />
https://itunes.apple.com/gb/app/snapseed/id439438619?mt=8<br />
Android devices:<br />
https://play.google.com/store/apps/details?<br />
id=com.niksoftware.snapseed<br />
You can also download a version of Snapseed on your computer.<br />
This website tells you how:<br />
http://prodomainblog.com/android-apps/now-can-use-photoediting-app-snapseed-pc-mac-computers<br />
With this app you can straighten, crop and get rid of perspective<br />
effects. Also, the photograph can be "tuned" for Brightness,<br />
Contrast, White Balance and so much more. A useful thing is that<br />
you can specify what resolution is needed ... lower for adding to<br />
the internet or higher for printing.
*Saving the photograph<br />
Always remember to save your precious photographs in at<br />
least two places ... on a backup hard drive or on cloud<br />
storage such as that provided by Apple, Google or<br />
Dropbox.<br />
Session 2: Using the digital photograph<br />
*Just storing the photograph<br />
Some artists store photographs of their artwork as a<br />
record, with no link to the internet at all. They can present<br />
their work as a slideshow on computer or mobile device<br />
or on a linked television screen.<br />
*Sharing by email<br />
Artwork photographs can be selectively shared with<br />
friends by email. Bear in mind that some email accounts<br />
will reject photograph attachments that are high resolution.<br />
Use the Snapseed app or email app to reduce the<br />
resolution.<br />
*Sharing by social media<br />
Facebook, Twitter and Instagram are very good ways of<br />
sharing your artwork photographs. It’s probably a good<br />
idea to have a separate artworks account from your<br />
personal one. Be certain that you go into the settings to<br />
restrict who sees your postings.
A good thing about social media postings is that your<br />
artwork will pop up in front of your friends. They don’t<br />
have to go searching, as is the case with your website!<br />
There are many Facebook groups where you can join and<br />
post photographs of your artwork. Two are - Dorset<br />
Artists and Wessex Artists:<br />
https://www.facebook.com/groups/dorsetart/<br />
https://www.facebook.com/groups/wessexartists/<br />
*Sharing by hosted websites<br />
If you want to display your artwork on the internet, but<br />
don’t want the bother of creating your own website, their<br />
are organisations which allow you to register and have a<br />
gallery within their site. Probably the best is:<br />
http://www.painters-online.co.uk
This is a free service, but you are limited to the number of<br />
artworks posted each day. Here is a link to my gallery on<br />
the site:<br />
http://www.painters-online.co.uk/artist/dorseteye<br />
Your gallery has its own URL which takes people straight<br />
there.<br />
*Sharing by your own website<br />
Finally, you can have your own website. There are free<br />
websites hosted by, for example, Weebly<br />
https://www.weebly.com/uk<br />
Or you can pay for your hosted website with your own<br />
domain name ... but that is for another time!


