20391_Science_with_STEM_Year_5_Physical_Sciences_Enlighten_me

Create successful ePaper yourself
Turn your PDF publications into a flip-book with our unique Google optimized e-Paper software.
©R.I.C. Publications<br />
Low Resolution Images<br />
Display Copy
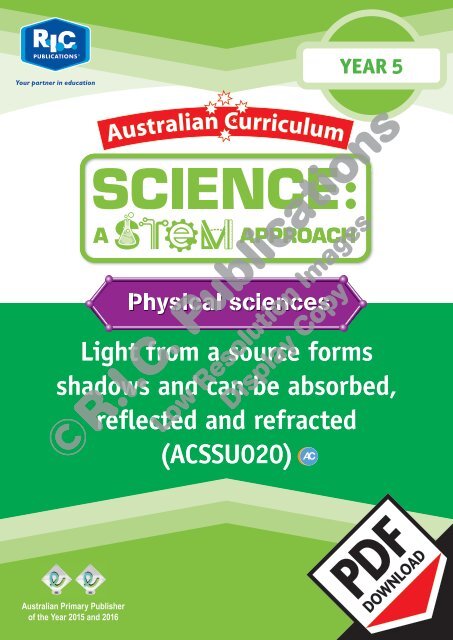
<strong>Science</strong>: A <strong>STEM</strong> approach (<strong>Year</strong> 5)<br />
Published by R.I.C. Publications ® 2017<br />
Copyright © R.I.C. Publications ® 2017<br />
RIC–<strong>20391</strong><br />
All material identified by is material subject to copyright<br />
under the Copyright Act 1968 (Cth) and is owned by the Australian<br />
Curriculum, Assess<strong>me</strong>nt and Reporting Authority 2017.<br />
For all Australian Curriculum material except elaborations: This is<br />
an extract from the Australian Curriculum.<br />
Elaborations: This may be a modified extract from the Australian<br />
Curriculum and may include the work of other authors.<br />
Disclai<strong>me</strong>r: ACARA neither endorses nor verifies the accuracy of the<br />
information provided and accepts no responsibility for incomplete or<br />
inaccurate information.<br />
In particular, ACARA does not endorse or verify that:<br />
• The content descriptions are solely for a particular year and<br />
subject;<br />
• All the content descriptions for that year and subject have been<br />
used; and<br />
• The author’s material aligns <strong>with</strong> the Australian Curriculum content<br />
descriptions for the relevant year and subject.<br />
You can find the unaltered and most up to date version of this<br />
material at http://www.australiancurriculum.edu.au/<br />
This material is reproduced <strong>with</strong> the permission of ACARA.<br />
Copyright Notice<br />
A number of pages in this book are worksheets.<br />
The publisher licenses the individual teacher<br />
who purchased this book to photocopy these<br />
pages to hand out to students in their own<br />
classes.<br />
Except as allowed under the Copyright Act 1968,<br />
any other use (including digital and online uses<br />
and the creation of overhead transparencies<br />
or posters) or any use by or for other people<br />
(including by or for other teachers, students or<br />
institutions) is prohibited. If you want a licence<br />
to do anything outside the scope of the BLM<br />
licence above, please contact the Publisher.<br />
This information is provided to clarify the limits<br />
of this licence and its interaction <strong>with</strong> the<br />
Copyright Act.<br />
For your added protection in the case of<br />
copyright inspection, please complete the form<br />
below. Retain this form, the complete original<br />
docu<strong>me</strong>nt and the invoice or receipt as proof<br />
of purchase.<br />
Na<strong>me</strong> of Purchaser:<br />
Date of Purchase:<br />
Supplier:<br />
School Order# (if applicable):<br />
Signature of Purchaser:<br />
©R.I.C. Publications<br />
Low Resolution Images<br />
Display Copy<br />
Internet websites<br />
In so<strong>me</strong> instances, websites or specific URLs may be recom<strong>me</strong>nded. While these are checked and rechecked at the ti<strong>me</strong> of<br />
publication, the publisher has no control over any subsequent changes which may be made to webpages. It is strongly recom<strong>me</strong>nded<br />
that the class teacher checks all URLs before allowing students to access them.<br />
View all pages online<br />
PO Box 332 Greenwood Western Australia 6924<br />
Website: www.ricpublications.com.au<br />
Email: mail@ricpublications.com.au
Foreword<br />
<strong>Science</strong>: A <strong>STEM</strong> approach (Foundation to <strong>Year</strong> 6) is a series of books written <strong>with</strong> the intent to support<br />
Australian Curriculum <strong>Science</strong> while offering a way to introduce a <strong>STEM</strong> project based on the science<br />
concepts taught.<br />
All <strong>Science</strong> Understanding and <strong>Science</strong> Inquiry Skills for each unit are included, and any connecting<br />
Technologies or Mathematics curriculum concepts are also incorporated.<br />
The <strong>STEM</strong> project allows students to apply the science knowledge and understanding, and includes<br />
any curriculum links to Technologies and Mathematics curriculum.<br />
If you would like us to feature your completed <strong>STEM</strong> projects on our website, please<br />
email a photograph, video or audio of the project to<br />
.<br />
If you would like to view completed <strong>STEM</strong> projects and get so<strong>me</strong> inspiration, please<br />
go to .<br />
Introduction.............................................................. iv<br />
Unit description ...................................................iv–vi<br />
Biological sciences:<br />
Surviving in tough ti<strong>me</strong>s................................ 1–38<br />
Overview...........................................................2–3<br />
Lesson 1............................................................4–7<br />
Lesson 2..........................................................8–13<br />
Lesson 3....................................................... 14–17<br />
Lesson 4....................................................... 18–21<br />
Lesson 5....................................................... 22–25<br />
Lesson 6....................................................... 26–28<br />
Assess<strong>me</strong>nt................................................. 29–30<br />
<strong>STEM</strong> project............................................... 31–38<br />
Chemical sciences:<br />
It’s a matter of state......................................39–74<br />
Overview...................................................... 40–41<br />
Lesson 1....................................................... 42–45<br />
Lesson 2....................................................... 46–47<br />
Lesson 3....................................................... 48–51<br />
Lesson 4....................................................... 52–55<br />
Lesson 5....................................................... 56–59<br />
Lesson 6....................................................... 60–63<br />
Assess<strong>me</strong>nt................................................. 64–66<br />
<strong>STEM</strong> project............................................... 67–74<br />
Contents<br />
Earth and space sciences:<br />
We are all spinning in circles.....................75–112<br />
Overview...................................................... 76–77<br />
Lesson 1....................................................... 78–81<br />
Lesson 2....................................................... 82–87<br />
Lesson 3....................................................... 88–90<br />
Lesson 4....................................................... 91–93<br />
Lesson 5....................................................... 94–97<br />
Lesson 6..................................................... 98–101<br />
Assess<strong>me</strong>nt.............................................102–104<br />
<strong>STEM</strong> project...........................................105–112<br />
©R.I.C. Publications<br />
Low Resolution Images<br />
Display Copy<br />
<strong>Physical</strong> sciences:<br />
<strong>Enlighten</strong> <strong>me</strong>!........................................... 113–146<br />
Overview..................................................114–115<br />
Lesson 1...................................................116–117<br />
Lesson 2...................................................118–121<br />
Lesson 3...................................................122–123<br />
Lesson 4...................................................124–127<br />
Lesson 5...................................................128–131<br />
Lesson 6...................................................132–135<br />
Assess<strong>me</strong>nt.............................................136–138<br />
<strong>STEM</strong> project...........................................139–146<br />
R.I.C. Publications® – www.ricpublications.com.au<br />
YEAR<br />
5<br />
<strong>Science</strong>:<br />
A <strong>STEM</strong> APPROACH<br />
iii
Introduction<br />
What is <strong>STEM</strong>?<br />
In a nutshell, <strong>STEM</strong> is the integration of science,<br />
technologies, engineering and mathematics<br />
concepts using project-based and cooperative<br />
learning. Educators have been integrating learning<br />
areas since the beginning of ti<strong>me</strong>, so although the<br />
idea behind <strong>STEM</strong> is not new, this series hopes<br />
to make it easier for you to execute learning<br />
integration in the classroom.<br />
The Australian Govern<strong>me</strong>nt, and govern<strong>me</strong>nts around the world, have placed a high priority on<br />
<strong>STEM</strong> skills. The future workforce will require current students to be creative and critical thinkers who<br />
can collaborate and design solutions to problems. The skills utilised in <strong>STEM</strong> have never been more<br />
valued.<br />
<strong>STEM</strong> education aims to prepare students for the roles of the future <strong>with</strong> skills such as innovation,<br />
creativity, reasoning, problem-solving, and technical science skills such as questioning, observing,<br />
systematic experi<strong>me</strong>ntation, and analysis and interpretation of data.<br />
Format of this book<br />
This series focuses on delivering a comprehensive and contemporary science program, culminating in<br />
a <strong>STEM</strong> project which applies the scientific knowledge acquired during the science lessons. The series<br />
incorporates the use of online resources, digital devices and iPad® applications where appropriate, in<br />
order to enhance the use of technology in the classroom.<br />
The units<br />
The science units are organised by sub-strand—Biological sciences, Chemical sciences, Earth and<br />
space sciences and <strong>Physical</strong> sciences. At the start of each sub-strand unit, keywords, a unit overview<br />
and curriculum scope and sequence are provided, as shown below.<br />
Each unit contains a term’s worth of work <strong>with</strong> 5–7 lessons, a summative assess<strong>me</strong>nt of the science<br />
knowledge <strong>with</strong> teacher notes, and a <strong>STEM</strong> project.<br />
Unit overview<br />
Biological sciences<br />
SURVIVING IN TOUGH TIMES<br />
©R.I.C. Publications<br />
Low Resolution Images<br />
Display Copy<br />
Keywords<br />
adaptation<br />
behaviour<br />
burrow/burrowing<br />
camouflage<br />
characteristic<br />
deserts<br />
ecosystem<br />
environ<strong>me</strong>nt<br />
environ<strong>me</strong>ntal<br />
conditions<br />
follicles<br />
foraging<br />
function<br />
habitat<br />
hibernate<br />
mangrove forests<br />
nocturnal<br />
nutrients<br />
organisms<br />
pollination<br />
predator<br />
protection<br />
reproduction<br />
root systems<br />
stability<br />
structural features<br />
support<br />
survive<br />
threatened<br />
tropical rainforests<br />
venomous<br />
sclerophyll forests<br />
(optional)<br />
R.I.C. Publications® – www.ricpublications.com.au 978-1-925431-98-8 YEAR <strong>Science</strong>:<br />
5 A <strong>STEM</strong> APPROACH 1<br />
Title page Unit overview Curriculum scope and<br />
sequence<br />
iv<br />
<strong>Science</strong>:<br />
A <strong>STEM</strong> APPROACH<br />
YEAR<br />
5<br />
R.I.C. Publications® – www.ricpublications.com.au
Unit description<br />
Lessons<br />
The lessons are based on science knowledge and skills. The lessons contain a page of teachers<br />
notes, outlining the inquiry questions, science strands and any links to technologies and mathematics<br />
concepts, followed by a suggested lesson plan. Any resource sheets required for the lesson follow on.<br />
Assess<strong>me</strong>nt<br />
Teacher notes Lesson plan Resource sheets<br />
A teacher page is provided outlining the assess<strong>me</strong>nt indicators and answers for the following<br />
assess<strong>me</strong>nt page(s). The assess<strong>me</strong>nt page(s) covers the science knowledge explored in the previous<br />
lessons.<br />
©R.I.C. Publications<br />
Low Resolution Images<br />
Display Copy<br />
Teacher notes<br />
Assess<strong>me</strong>nt page(s)<br />
R.I.C. Publications® – www.ricpublications.com.au<br />
YEAR<br />
5<br />
<strong>Science</strong>:<br />
A <strong>STEM</strong> APPROACH<br />
v
Unit description<br />
<strong>STEM</strong> project<br />
The <strong>STEM</strong> project provides students <strong>with</strong> the opportunity to apply what they have learned in the<br />
previous science lessons while incorporating technologies, engineering and mathematics concepts<br />
where possible. The project entails group collaboration and an extended learning period of<br />
3–4 weeks. This gives students a real-life experience of working <strong>with</strong> ‘colleagues’ to share ideas<br />
and test designed solutions. Each <strong>STEM</strong> project contains an overview listing <strong>STEM</strong> concepts and<br />
alternative project ideas, curriculum links, teacher notes and a group assess<strong>me</strong>nt rubric, and a project<br />
brief and checklist for students. Any resource sheets required are also provided, as well as a selfassess<strong>me</strong>nt<br />
sheet.<br />
<strong>STEM</strong> project overview and<br />
<strong>STEM</strong> curriculum links<br />
Teacher notes<br />
Project brief<br />
©R.I.C. Publications<br />
Low Resolution Images<br />
Display Copy<br />
Project steps<br />
Resource sheets<br />
Self-assess<strong>me</strong>nt and<br />
Group assess<strong>me</strong>nt rubric<br />
vi<br />
<strong>Science</strong>:<br />
A <strong>STEM</strong> APPROACH<br />
YEAR<br />
5<br />
R.I.C. Publications® – www.ricpublications.com.au
<strong>Physical</strong> sciences<br />
ENLIGHTEN ME!<br />
light source<br />
light energy<br />
light waves<br />
light rays<br />
Keywords<br />
refract/refraction<br />
reflect/reflection<br />
absorb/absorption<br />
transmit/transmission<br />
shadows<br />
©R.I.C. Publications<br />
Low Resolution Images<br />
Display Copy<br />
electromagnetic<br />
radiation<br />
electromagnetic<br />
spectrum<br />
particles<br />
scattered<br />
white light<br />
transparent<br />
translucent<br />
opaque<br />
visible light<br />
R.I.C. Publications® – www.ricpublications.com.au YEAR <strong>Science</strong>:<br />
5 A <strong>STEM</strong> APPROACH 113
Unit overview<br />
<strong>Physical</strong> sciences<br />
ENLIGHTEN ME!<br />
Light from a source forms shadows and can be absorbed, reflected and refracted<br />
(ACSSU020)<br />
Lesson 1<br />
What is light and<br />
how does it help our<br />
eyes to see?<br />
Lesson 2<br />
Why are so<strong>me</strong> objects<br />
coloured and so<strong>me</strong><br />
objects see-through?<br />
Why can we only<br />
partially see through<br />
so<strong>me</strong> objects?<br />
Lesson 3<br />
What is white light<br />
and how does it<br />
refract through<br />
transparent objects<br />
to form rainbows?<br />
Lesson 4<br />
Why do we see<br />
objects in colour?<br />
Lesson 5<br />
How do shadows<br />
form and why are<br />
they not always the<br />
sa<strong>me</strong> size or shape?<br />
Lesson 6<br />
How do coloured<br />
shadows form? Are<br />
they always the sa<strong>me</strong><br />
colour as the object<br />
or the light source?<br />
Summative<br />
assess<strong>me</strong>nt<br />
<strong>STEM</strong> project<br />
Cellophane<br />
sunglasses<br />
Students investigate how light travels in straight paths and<br />
reflects or bounces off objects into the path of our eyes,<br />
where our brain interprets the light waves to see the object(s)<br />
illuminated. Students then experi<strong>me</strong>nt <strong>with</strong> using a mirror to<br />
reflect light from the sun onto objects in the playground.<br />
Students conduct online research to learn the difference between<br />
the appearance of transparent, translucent and opaque objects;<br />
and how light behaves when it contacts each type of object.<br />
Students then take a digital photograph of each type of object<br />
and create a digital presentation based on their research, using<br />
labels on the photographs and audio recordings.<br />
Students predict how rainbows are for<strong>me</strong>d by sunlight and<br />
raindrops and then experi<strong>me</strong>nt to create a rainbow by shining<br />
a torch onto a cup of water. Students discover how light refracts<br />
or bends when it contacts a transparent object at an angle, and<br />
separates into different wave lengths which our eyes perceive as<br />
a rainbow.<br />
Students explore how our eyes see objects in colour or in black<br />
and white, depending on how light is transmitted, reflected or<br />
absorbed by an object. They conduct an online colour-mixing<br />
interactive ga<strong>me</strong> to explore how different combinations of red,<br />
green and blue light waves reflected by an object, affect the<br />
colour we perceive the object to be.<br />
Students watch a hand-shadow puppet video then predict how<br />
shadows are for<strong>me</strong>d, and the types of objects that cast shadows,<br />
using their understanding of the behaviour of light. Students<br />
conduct an experi<strong>me</strong>nt to compare the shadows cast by a<br />
translucent and an opaque object when the light source is held<br />
at different distances and positions from the object.<br />
Students predict how coloured shadows are for<strong>me</strong>d, then<br />
conduct an online interactive activity to compare the shadows<br />
cast by red, green and blue light bulbs, when two or three light<br />
bulbs are turned on. Students discover how yellow, cyan and<br />
magenta shadows are for<strong>me</strong>d when red, green and blue lights<br />
shine on an object at the sa<strong>me</strong> ti<strong>me</strong>.<br />
©R.I.C. Publications<br />
Low Resolution Images<br />
Display Copy<br />
Students reflect on their understanding of the behaviour of light,<br />
how our eyes see objects, and how shadows are for<strong>me</strong>d.<br />
Students design and create a pair of temporary sunglasses using<br />
craft materials, <strong>with</strong> lenses made from a combination of differentcoloured<br />
cellophane layers, that block out sunlight <strong>with</strong>out<br />
changing the colour an object appears. Students create a simple<br />
budget to plan how long it will take to save enough pocket<br />
money to buy new sunglasses.<br />
Pages<br />
116–117<br />
118–121<br />
122–123<br />
124–127<br />
128–131<br />
132–135<br />
136–138<br />
139–146<br />
114 <strong>Science</strong>:<br />
A <strong>STEM</strong> APPROACH<br />
YEAR<br />
5<br />
R.I.C. Publications® – www.ricpublications.com.au
<strong>Physical</strong> sciences<br />
ENLIGHTEN ME!<br />
Unit overview<br />
Curriculum scope and sequence<br />
SCIENCE UNDERSTANDING<br />
Light from a source forms shadows and can be absorbed,<br />
reflected and refracted (ACSSU080)<br />
SCIENCE AS A HUMAN ENDEAVOUR<br />
<strong>Science</strong> involves testing predictions by gathering data and using<br />
evidence to develop explanations of events and pheno<strong>me</strong>na and<br />
reflects historical and cultural contributions (ACSHE081)<br />
Scientific knowledge is used to solve problems and inform<br />
personal and community decisions (ACSHE083)<br />
SCIENCE INQUIRY SKILLS<br />
Questioning and predicting<br />
With guidance, pose clarifying questions and make predictions<br />
about scientific investigations (ACSIS231)<br />
Planning and conducting<br />
Identify, plan and apply the ele<strong>me</strong>nts of scientific investigations<br />
to answer questions and solve problems using equip<strong>me</strong>nt and<br />
materials safely and identifying potential risks (ACSIS086)<br />
Decide variables to be changed and <strong>me</strong>asured in fair tests, and<br />
observe <strong>me</strong>asure and record data <strong>with</strong> accuracy using digital<br />
technologies as appropriate (ACSIS087)<br />
Processing and analysing data and information<br />
Construct and use a range of representations, including tables<br />
and graphs, to represent and describe observations, patterns or<br />
relationships in data using digital technologies as appropriate<br />
(ACSIS090)<br />
Compare data <strong>with</strong> predictions and use as evidence in<br />
developing explanations (ACSIS218)<br />
Evaluating<br />
Reflect on and suggest improve<strong>me</strong>nts to scientific investigations<br />
(ACSIS091)<br />
Communicating<br />
Communicate ideas, explanations and processes using scientific<br />
representations in a variety of ways, including multi-modal texts<br />
(ACSIS093)<br />
Lesson<br />
1 2 3 4 5 6 Assess<strong>me</strong>nt<br />
<strong>STEM</strong><br />
project<br />
3 3 3 3 3 3 3 3<br />
3 3 3 3 3 3<br />
3 3 3 3 3 3 3<br />
3 3 3 3 3 3<br />
3 3 3 3 3 3 3<br />
3 3 3 3<br />
3 3 3 3 3 3 3 3<br />
©R.I.C. Publications<br />
Low Resolution Images<br />
Display Copy<br />
3 3 3 3<br />
3 3<br />
3 3 3 3 3 3 3 3<br />
R.I.C. Publications® – www.ricpublications.com.au YEAR <strong>Science</strong>:<br />
5 A <strong>STEM</strong> APPROACH 115
Lesson 1<br />
<strong>Physical</strong> sciences<br />
ENLIGHTEN ME!<br />
Teacher notes<br />
<strong>Science</strong> inquiry focus:<br />
What is light and how does it help our eyes to see?<br />
<strong>Science</strong> Inquiry Skills:<br />
• Questioning and predicting QP<br />
• Planning and conducting PC<br />
• Processing and analysing data and information PA<br />
• Communicating<br />
<strong>Science</strong> as a Human Endeavour:<br />
C<br />
• Students examine the behaviour of light to see how<br />
light energy travels from a source and bounces (reflects)<br />
off an object and into our eyes to allow us to see.<br />
Technology/Engineering/Mathematics link:<br />
• participating in an online interactive activity as a class<br />
• using a presentation application on an iPad ® , such as<br />
Seesaw, to create a labelled diagram and explain how<br />
light energy travels from a source to an object and then<br />
reflects into our eyes so we can see<br />
• typing a URL into a search engine to see an online<br />
image<br />
Background information<br />
• Light is the only form of energy that we can see. It is<br />
defined as a form of electromagnetic radiation that<br />
is emitted by hot objects, such as the sun, a bulb or a<br />
fla<strong>me</strong>. Light allows us to see.<br />
• Only a small portion of the electromagnetic<br />
spectrum (EM) is visible to the human eye. These<br />
light waves have a wave length and frequency which<br />
can be processed by our eyes and brain. To see the<br />
full range of light energy in the EM spectrum, go to<br />
.<br />
• Light energy always travels in straight lines. When<br />
light energy co<strong>me</strong>s into contact <strong>with</strong> scattered<br />
particles, such as dust, or particles grouped together<br />
to form a surface, such as a plank of wood, the light<br />
energy can pass through the particles (transmission),<br />
can be absorbed by the object (absorption) or can<br />
be reflected by the particles in a straight or scattered<br />
path (reflection). The light energy that bounces<br />
back into the path of our eyes, allows us to see the<br />
size, shape, colour and features of an object. These<br />
concepts will be explored in future lessons.<br />
Assess<strong>me</strong>nt focus:<br />
• Use the student’s saved digital<br />
presentation and the information in<br />
their science journal, to assess their<br />
understanding of how light travels to<br />
our eyes, when looking at objects.<br />
Resources<br />
• Online video—Sources of light at<br />
<br />
• Website—How we see things at<br />
<br />
• Individual science journals<br />
• A mirror for each pair<br />
• An iPad ® for each student, <strong>with</strong> a<br />
presentation application, such as<br />
Seesaw<br />
• Online image of a labelled light<br />
ray diagram at <br />
• Online interactive activity—Light<br />
at <br />
to download a .swf file. This<br />
activity requires Flash ® player<br />
and therefore will not work on<br />
an iPad ® . Other online interactive<br />
activities are available at <br />
©R.I.C. Publications<br />
Low Resolution Images<br />
Display Copy<br />
116 <strong>Science</strong>:<br />
A <strong>STEM</strong> APPROACH<br />
YEAR<br />
5<br />
R.I.C. Publications® – www.ricpublications.com.au
<strong>Physical</strong> sciences<br />
ENLIGHTEN ME!<br />
Lesson 1<br />
Lesson plan<br />
Introduction:<br />
1. Watch the video Sources of light at . Using their science journal<br />
or an iPad ® , students write a definition for light source and list examples. Students then predict how<br />
light helps us to see in our daily lives. QP<br />
Develop<strong>me</strong>nt:<br />
2. Using an interactive whiteboard, display the website at . Read and<br />
click through the information about light and how we see things around us. Click the ‘play’ tab to<br />
demonstrate a mirror reflecting ga<strong>me</strong>. Select so<strong>me</strong> students to participate in the ga<strong>me</strong>. Note: This<br />
activity is Flash ® player based and therefore will not work on an iPad ® . Computers may be used so<br />
that students can participate in this activity individually, if resources allow. PC<br />
3. In pairs, students use a mirror to practise reflecting sunlight onto an object that is shaded, such as a<br />
footpath or wall shaded by a verandah, a tree trunk shaded by the branches of the tree, or one side<br />
of a clipboard that is shaded from the sun. PC PA<br />
4. Reinforce that light energy always travels in straight lines. When light energy co<strong>me</strong>s into contact<br />
<strong>with</strong> scattered particles, such as dust, or particles grouped together to form a surface, such as a<br />
plank of wood, the light energy can pass through in a straight line (transmission), be absorbed<br />
by the object (absorption) or reflect off the particles (reflection), in a straight line or in different<br />
directions. The light energy that bounces back into the path of our eyes allows us to see the size,<br />
shape, colour and features of an object.<br />
5. Using a presentation application on an iPad ® , such as Seesaw, students photograph a light source<br />
shining onto an object. On the photograph, students draw lines <strong>with</strong> arrows to show how light<br />
energy flows from a light source to an object, and is reflected off the surface of the object and into<br />
our eyes. Students then create an audio recording of the order in which light travels from a source<br />
to our eyes, reflecting off objects so we can see them. QP PC PA<br />
Differentiation<br />
• Less capable students can work <strong>with</strong> a partner to create their labelled diagram or may work in a<br />
small group <strong>with</strong> adult assistance.<br />
• More capable students can be encouraged to draw multiple lines on their diagram to show how<br />
light reflects off the corners and edges of an object to allow our eyes to interpret the size, shape<br />
and features.<br />
6. Display the online image of a labelled light ray diagram at or ask<br />
students to type the URL into a search engine, using an iPad ® . Students compare their labelled<br />
diagrams to the image to see if their diagram was correct, and make any changes necessary.<br />
Students can then save their Seesaw presentations for assess<strong>me</strong>nt or future reference. PA<br />
Reflection:<br />
©R.I.C. Publications<br />
Low Resolution Images<br />
Display Copy<br />
7. Using an interactive whiteboard, download the interactive activity that shows a light bulb shining<br />
light onto a mirror, and then into the boy’s eyes, from . Students<br />
reflect on their understanding of the behaviour of light, by reading the information presented.<br />
They then sequence the four steps to show how light travels from a source to an object, and is then<br />
reflected back into our eyes so we can see objects. Students record the four steps in order in their<br />
science journals for future reference in Lesson 4. PA C<br />
R.I.C. Publications® – www.ricpublications.com.au YEAR <strong>Science</strong>:<br />
5 A <strong>STEM</strong> APPROACH 117
Lesson 2<br />
<strong>Physical</strong> sciences<br />
ENLIGHTEN ME!<br />
Teacher notes<br />
<strong>Science</strong> inquiry focus:<br />
Why are so<strong>me</strong> objects coloured and so<strong>me</strong> objects see-through?<br />
Why can we only partially see through so<strong>me</strong> objects?<br />
<strong>Science</strong> Inquiry Skills:<br />
• Questioning and predicting QP<br />
• Planning and conducting PC<br />
• Processing and analysing data and information PA<br />
• Communicating C<br />
<strong>Science</strong> as a Human Endeavour:<br />
• Students identify how light behaves differently when it contacts<br />
transparent, translucent or opaque objects in our world, and how<br />
this determines how we see objects around us.<br />
Technology/Engineering/Mathematics links:<br />
• using a digital note-taking application on an iPad ® , such as Notes,<br />
to record information<br />
• scanning QR codes using an iPad ® or typing URLs into a web<br />
browser to conduct online research<br />
• using a digital presentation application on an iPad ® , such as<br />
ShowMe, to present information<br />
Background information<br />
• Light behaves differently when it contacts different surfaces,<br />
depending on whether it passes through, is reflected by or is<br />
absorbed by the object. This is how we perceive objects as<br />
transparent, translucent or opaque.<br />
• When light waves pass through an object in a straight line,<br />
the object appears to be transparent or see-through. This is<br />
because all the light rays in the visible spectrum travel at the<br />
sa<strong>me</strong> speed through the object.<br />
• When light waves partially pass through an object, the object<br />
appears transparent. The light waves that pass through the<br />
object allow our eyes to partially see through the object,<br />
while the light waves that are absorbed or reflected by the<br />
object, allow us to see a slight colour.<br />
• When light waves are absorbed or reflected by an object, the<br />
object appears opaque. The light waves do not pass through<br />
the object and therefore we cannot see through any part of<br />
the object.<br />
• To see a visual representation of the behaviour of light when<br />
it contacts different objects, go to .<br />
Assess<strong>me</strong>nt focus:<br />
• Use page 120 and students’<br />
digital presentations to<br />
assess their understanding of<br />
how light behaves differently<br />
when it contacts different<br />
objects and how this affects<br />
how we perceive objects.<br />
Resources<br />
• Three similar-sized<br />
plastic cups—one<br />
transparent, one<br />
translucent and one<br />
opaque<br />
• An iPad ® for each<br />
student, <strong>with</strong> a<br />
QR scanner and a<br />
presentation application,<br />
such as ShowMe<br />
• Torch for each pair<br />
• A copy of page 120 for<br />
each student<br />
©R.I.C. Publications<br />
Low Resolution Images<br />
Display Copy<br />
118 <strong>Science</strong>:<br />
A <strong>STEM</strong> APPROACH<br />
YEAR<br />
5<br />
R.I.C. Publications® – www.ricpublications.com.au
<strong>Physical</strong> sciences<br />
ENLIGHTEN ME!<br />
Lesson 2<br />
Lesson plan<br />
Introduction:<br />
1. Display three similar-sized plastic cups at the front of the classroom—one transparent, one<br />
translucent, and one opaque. Individually, students look at the differences between each cup and<br />
record their observations in their science journal or using a note-taking application on a computer<br />
or iPad ® . As the teacher shines a torch onto each cup, students predict how light behaves when it<br />
co<strong>me</strong>s into contact <strong>with</strong> each object. QP<br />
Develop<strong>me</strong>nt<br />
2. Using an iPad ® and page 120, students scan QR codes or type URLs into a web browser to research<br />
how light behaves differently when it co<strong>me</strong>s into contact <strong>with</strong> different objects. Students predict,<br />
then write a definition for the words transparent, translucent and opaque and describe how light<br />
behaves differently when it contacts each type of object, based on the information contained in the<br />
online video. PC PA<br />
Differentiation<br />
• Less capable students can work <strong>with</strong> a partner to research how light behaves differently when<br />
contacting transparent, translucent and opaque objects and can use a torch to test how light<br />
passes through objects.<br />
• More capable students can be encouraged to research the types of objects made from<br />
transparent, translucent and opaque materials, and the types of objects we create to help us see<br />
things more clearly in our everyday lives.<br />
3. In pairs, students share their explanation of how light behaves differently when it passes through<br />
transparent, translucent and opaque objects and refine their explanation if necessary. PA<br />
4. In pairs, students find and collect one transparent, one translucent and one opaque object, a torch<br />
and an iPad ® . Students shine their torch onto the objects and take a digital photograph of each<br />
individually, using a digital presentation application, such as ShowMe. Students then draw lines<br />
<strong>with</strong> arrows to show how light transmits through, reflects off or is absorbed by the object, in each<br />
photograph. Students explain how light behaves when contacting the surface of a transparent,<br />
translucent and opaque object, using text or audio, and then save each labelled diagram.<br />
Alternatively, they can draw a diagram of a transparent, translucent and opaque object in the centre<br />
of the rectangles on page 121 and draw lines to show how light passes through or is reflected<br />
by each. Students can also write a sentence at the bottom of each rectangle to explain how light<br />
behaves when contacting each type of object. PC PA C<br />
Reflection<br />
©R.I.C. Publications<br />
Low Resolution Images<br />
Display Copy<br />
5. Students place their iPad ® or their completed copy of page 121 on a table and rotate around the<br />
classroom observing other students’ diagrams. C<br />
R.I.C. Publications® – www.ricpublications.com.au YEAR <strong>Science</strong>:<br />
5 A <strong>STEM</strong> APPROACH 119
Lesson 2<br />
<strong>Physical</strong> sciences<br />
ENLIGHTEN ME!<br />
Light up the objects<br />
1. Scan the QR code or type in the URL to see a transparent, translucent and<br />
opaque section of an image. Compare the three sections to predict what each<br />
word <strong>me</strong>ans.<br />
https://tinyurl.com/ybjts9xf<br />
Predicted definition<br />
Transparent<br />
Translucent<br />
Opaque<br />
2. Scan the QR code or type in the URL to find a definition of each word.<br />
Record each definition in the table, then compare each <strong>me</strong>aning to your<br />
predictions.<br />
https://tinyurl.com/nywhkgl<br />
Transparent<br />
Translucent<br />
Opaque<br />
Actual definition<br />
©R.I.C. Publications<br />
Low Resolution Images<br />
Display Copy<br />
3. Watch the video Light – The Dr Binocs show at to find out<br />
how light’s behaviour changes when it contacts different surfaces. How does light behave<br />
differently when it passes through transparent, translucent and opaque objects?<br />
120 <strong>Science</strong>:<br />
A <strong>STEM</strong> APPROACH<br />
YEAR<br />
5<br />
R.I.C. Publications® – www.ricpublications.com.au
<strong>Physical</strong> sciences<br />
ENLIGHTEN ME!<br />
Lesson 2<br />
The behaviour of light<br />
Transparent objects<br />
Translucent objects<br />
©R.I.C. Publications<br />
Low Resolution Images<br />
Display Copy<br />
Opaque objects<br />
R.I.C. Publications® – www.ricpublications.com.au YEAR <strong>Science</strong>:<br />
5 A <strong>STEM</strong> APPROACH 121
Lesson 3<br />
<strong>Physical</strong> sciences<br />
ENLIGHTEN ME!<br />
Teacher notes<br />
<strong>Science</strong> inquiry focus:<br />
What is white light and how does it refract through transparent<br />
objects to form rainbows?<br />
<strong>Science</strong> Inquiry Skills:<br />
• Questioning and predicting QP<br />
• Planning and conducting PC<br />
• Processing and analysing data and information PA<br />
• Evaluating E<br />
• Communicating C<br />
<strong>Science</strong> as a Human Endeavour:<br />
• Students identify how light from a source bends and refracts<br />
when it contacts transparent object, such as glass or water,<br />
and how this refraction allows white light to separate<br />
into the colours of the visible spectrum, which we see as<br />
‘rainbow colours’.<br />
Background information<br />
• When our eyes see all the colours of the visible<br />
spectrum moving at a constant speed, our brain<br />
interprets the incoming light waves as the colour white.<br />
This is why our eyes perceive light as white light.<br />
• When white light travels in a straight line and contacts an<br />
object it behaves in different ways. It can pass through<br />
the object (transmission), be absorbed (absorption)<br />
or be reflected (reflection). This affects whether we<br />
perceive the object as transparent, translucent or<br />
opaque.<br />
• When white light contacts a transparent surface at an<br />
angle, the light waves bend as they slow down to pass<br />
through the object. The light waves bend again as they<br />
increase speed upon exiting the object. This is known as<br />
refraction.<br />
• When white light refracts, the speed of each coloured<br />
light wave alters the angle at which it travels. As the<br />
light waves exit the object at different speeds, our<br />
eyes perceive each coloured light wave in the form of<br />
a rainbow. For more information, watch the video at<br />
.<br />
Technology/Engineering/<br />
Mathematics links:<br />
• using a digital presentation<br />
application on an iPad ® , such<br />
as ShowMe, to draw labelled<br />
diagrams and create text or audio<br />
recordings<br />
• using a flashlight application on<br />
an iPad ®<br />
• using an online dictionary to<br />
define the refraction<br />
Assess<strong>me</strong>nt focus:<br />
• Use students’ digital<br />
presentations to assess their<br />
understanding of white light and<br />
how it separates into the colours<br />
of a rainbow when it contacts a<br />
transparent surface at an angle,<br />
through the process of refraction.<br />
Resources<br />
• An iPad ® for each student,<br />
<strong>with</strong> applications including<br />
ShowMe and a flashlight<br />
• A plastic cup and water<br />
access for each pair<br />
• Individual science journals<br />
• Online image—Rainbow<br />
at <br />
• Online video—How do prisms<br />
create rainbows? at <br />
• Online image—Rainbow<br />
formation at <br />
©R.I.C. Publications<br />
Low Resolution Images<br />
Display Copy<br />
122 <strong>Science</strong>:<br />
A <strong>STEM</strong> APPROACH<br />
YEAR<br />
5<br />
R.I.C. Publications® – www.ricpublications.com.au
<strong>Physical</strong> sciences<br />
ENLIGHTEN ME!<br />
Lesson 3<br />
Lesson plan<br />
Introduction:<br />
1. In pairs, students draw a rainbow using a presentation application on an iPad ® , such as Seesaw, and<br />
draw the weather conditions needed to form a rainbow. Students record audio explaining how<br />
they think rainbows are made. What are the colours of the rainbow? In which order do the colours<br />
appear? What weather conditions are needed to make rainbows? Why do the colours appear in the<br />
sa<strong>me</strong> order each ti<strong>me</strong>? Alternatively, students can complete this activity in their science journal.<br />
QP<br />
Develop<strong>me</strong>nt:<br />
2. Divide the class into pairs and give each pair a plastic cup, access to water and one iPad ® <strong>with</strong> a<br />
flashlight application installed. One student finds a position outside on the footpath, underneath<br />
a verandah, and places their piece of white paper on the ground. The other student fills the cup<br />
to the top <strong>with</strong> water and carries it carefully to their partner, placing it onto the piece of paper.<br />
Students use the iPad ® flashlight to shine white light onto the surface of the water, to form a<br />
rainbow on the piece of paper. If a rainbow does not appear, move the light around until the<br />
colours of a rainbow beco<strong>me</strong> visible. Students record the colours of the rainbow created in their<br />
science journal in the correct order, then compare this order to their prediction. PC PA<br />
3. Display the online image of a rainbow, such as the one at , to see the<br />
colours in order. Students compare the image to their prediction and their water experi<strong>me</strong>nt to see<br />
if the order is the sa<strong>me</strong>. PA<br />
4. Introduce the word refraction. In pairs, students use an online dictionary to find the definition in<br />
relation to light energy, and record it in their science journals.<br />
PC PA<br />
5. Watch the online video How do prisms create rainbows? at .<br />
This video explains how white light refracts when it contacts a transparent surface at an angle,<br />
separating into coloured light waves that travel at different speeds. This video also explains how the<br />
angle of refraction of the sunlight, and the speed of the light waves upon entering and exiting rain<br />
droplets, causes the colours of a rainbow to appear in the sa<strong>me</strong> order.<br />
6. Students reflect on their experi<strong>me</strong>nt and suggest how they could create more of a rainbow by<br />
altering the angle at which the light hits the surface of the water. Students can also discuss how<br />
they could conduct the prism experi<strong>me</strong>nt shown in the video in step 5. E<br />
Reflection:<br />
©R.I.C. Publications<br />
Low Resolution Images<br />
Display Copy<br />
7. Display the diagram at which shows white light separating into the<br />
colours of a rainbow when it enters and exits a water droplet. Students use their understanding of<br />
light refraction to explain how sunlight passing through rain droplets forms a rainbow. They record<br />
their explanation using the digital application used in step 1, using labelled diagrams and audio<br />
recordings. C<br />
Differentiation<br />
• Less capable students can go to the website at to see a<br />
diagram of white light entering into a rainbow and separating into different colours and<br />
refracting into a person’s line of sight. Students then explain how light enters raindrops and<br />
separates into colours that we see.<br />
• More capable students can be encouraged to explain why they think the secondary rainbow is<br />
lighter in colour than the initial rainbow, using the diagram to aid their explanation.<br />
R.I.C. Publications® – www.ricpublications.com.au YEAR <strong>Science</strong>:<br />
5 A <strong>STEM</strong> APPROACH 123
Lesson 4<br />
<strong>Physical</strong> sciences<br />
ENLIGHTEN ME!<br />
Teacher notes<br />
<strong>Science</strong> inquiry focus:<br />
Why do we see objects in colour?<br />
<strong>Science</strong> Inquiry Skills:<br />
• Questioning and predicting QP<br />
• Planning and conducting PC<br />
• Processing and analysing data and information<br />
PA<br />
• Communicating<br />
<strong>Science</strong> as a Human Endeavour:<br />
C<br />
• Students identify how light from a source is<br />
absorbed or reflected by an object when it<br />
contacts translucent or opaque object, and how<br />
this absorption and reflection of light allows us to<br />
see objects in our daily lives in colour.<br />
Background information<br />
• Black—When white light contacts the surface of<br />
an object and all the light waves are completely<br />
absorbed by the object, the object appears<br />
black.<br />
• White—When white light contacts the surface of<br />
an object and all the light waves are completely<br />
reflected by the object, the object appears<br />
white.<br />
• Grey—When white light contacts the surface<br />
of an object and equal amounts of each light<br />
wave are absorbed and reflected by the object<br />
at the sa<strong>me</strong> ti<strong>me</strong>, the object appears grey.<br />
• Colours—When specific coloured light waves<br />
are reflected by an object, the object appears<br />
to be coloured. The colour depends on the<br />
combination of light waves that are being<br />
reflected. All the colours of the visible spectrum<br />
can be created using red, green and blue<br />
light waves. Experi<strong>me</strong>nt <strong>with</strong> creating different<br />
colours using the RGB bulbs at .<br />
• Shades of colour—Darker shades of colour<br />
occur when more light waves are absorbed by<br />
an object than those reflected or transmitted.<br />
Lighter shades of colour occur when more light<br />
waves are reflected by an object than those<br />
absorbed or transmitted.<br />
Technology/Engineering/Mathematics links:<br />
• opening saved ShowMe presentations<br />
(optional)<br />
• using an online dictionary to define<br />
reflect/reflection and absorb/absorption<br />
• scanning QR codes using an iPad ® or<br />
typing URLs into a web browser to<br />
conduct online research<br />
• creating, saving and editing information,<br />
using an application on an iPad ® , such as<br />
Chatterbox<br />
Assess<strong>me</strong>nt focus:<br />
• Use completed copies of page 127 and<br />
students’ digital presentations to assess<br />
their understanding of how we perceive<br />
objects to be coloured, through the<br />
absorption or reflection of light waves,<br />
and how our eyes and brain interpret<br />
these light waves as colour.<br />
Resources<br />
• Saved digital presentations from<br />
Lesson 1 (optional)<br />
• Online image—Light ray diagram at<br />
<br />
• An iPad ® for each student, <strong>with</strong> a<br />
presentation application such as<br />
Chatterbox<br />
• Individual science journals<br />
• A digital copy of the concept cartoon<br />
on page 126<br />
• A copy of page 127 for each student<br />
• Online video—How do your eyes<br />
see colour? at <br />
©R.I.C. Publications<br />
Low Resolution Images<br />
Display Copy<br />
124 <strong>Science</strong>:<br />
A <strong>STEM</strong> APPROACH<br />
YEAR<br />
5<br />
R.I.C. Publications® – www.ricpublications.com.au
<strong>Physical</strong> sciences<br />
ENLIGHTEN ME!<br />
Lesson 4<br />
Lesson plan<br />
Introduction:<br />
1. Individually, students review their digital presentations created in Lesson 1 or view the image at<br />
to revise how our eyes see objects. Reinforce that light energy<br />
travels in straight lines until it contacts a surface. C<br />
2. Write the words ‘reflect/reflection’ and ‘absorb/absorption’ on a whiteboard. Students use an<br />
online dictionary to find a definition for each word and record these in their science journals. PC<br />
C<br />
Develop<strong>me</strong>nt:<br />
3. Using an interactive whiteboard, display the concept cartoon on page 126, which shows different<br />
explanations of how light allows us to see coloured objects. Students think about the explanations<br />
presented and formulate their own prediction to answer the question, How does light allow us<br />
to see objects in colour? Students record their prediction using a digital application, such as<br />
Chatterbox on an iPad ® , or in their science journal. Note: Encourage students to include the words<br />
absorb and reflect, when referring to light energy in their predictions. QP PA<br />
4. Individually, students scan a QR code using an iPad ® or type the URL on page 127 into a web<br />
browser to link to a colour-mixing interactive ga<strong>me</strong>. They follow the instructions on page 127<br />
to adjust the amount of red, green and blue light waves that are travelling to the man’s eyes,<br />
and record the colour perceived by the man next to each image. Students experi<strong>me</strong>nt to create<br />
colours that are not in the visible spectrum, such as brown, peach and mustard, and record the<br />
position of the switches when creating each colour. They then explore how objects appear white,<br />
grey and black through the reflection and absorption of all visible light waves. Students use their<br />
understanding of light to determine the position of the switches, when all of the light waves are<br />
being reflected and when all light rays are being absorbed. PC PA<br />
5. Students share their results <strong>with</strong> a partner and discuss any differences between them, using the<br />
interactive ga<strong>me</strong> to reflect on the colours they each created. Students discuss how they could<br />
create light and dark shades of each colour in the visible spectrum. PA<br />
6. As a class, watch the online video How do your eyes see colour? at .<br />
This video explains how light waves are absorbed or reflected by an object and how this<br />
determines the colour we perceive the object to be. It also explains the three primary colours of<br />
light and how different combinations of these three additive colours allow us to see all the colours<br />
of the visible spectrum and more. PC<br />
Differentiation<br />
• Less capable students can work <strong>with</strong> a partner to complete the worksheet on page 127.<br />
• More capable students can watch the video Disappearing colour wheel at . This video explains how to create a Newton disc and shows it in action. Students<br />
explain how the colours blended together to appear white when the disc was spun at a fast<br />
speed.<br />
Reflection<br />
©R.I.C. Publications<br />
Low Resolution Images<br />
Display Copy<br />
7. Students review their predictions from Step 3 about how light allows us to see coloured objects,<br />
and add any further information they have learnt throughout the lesson. PA C<br />
R.I.C. Publications® – www.ricpublications.com.au YEAR <strong>Science</strong>:<br />
5 A <strong>STEM</strong> APPROACH 125
Lesson 4<br />
<strong>Physical</strong> sciences<br />
ENLIGHTEN ME!<br />
Concept cartoon<br />
How does light allow us to see objects in colour?<br />
Objects are not coloured. When<br />
white light co<strong>me</strong>s into contact <strong>with</strong><br />
an object, the object reflects all the<br />
colours of white light and absorbs<br />
only one colour. This is the colour that<br />
is visible to us.<br />
Objects are coloured. When white light<br />
co<strong>me</strong>s into contact <strong>with</strong> an object, the<br />
object’s colour shows. This is the colour<br />
that is visible to us.<br />
©R.I.C. Publications<br />
Low Resolution Images<br />
Display Copy<br />
Objects are not coloured. When<br />
white light co<strong>me</strong>s into contact <strong>with</strong><br />
an object, the object absorbs all the<br />
colours of white light and reflects only<br />
one colour. This is the colour that is<br />
visible to us.<br />
126 <strong>Science</strong>:<br />
A <strong>STEM</strong> APPROACH<br />
YEAR<br />
5<br />
R.I.C. Publications® – www.ricpublications.com.au
<strong>Physical</strong> sciences<br />
ENLIGHTEN ME!<br />
Lesson 4<br />
Colour perception<br />
Using an iPad®, scan the QR code or type the URL <br />
into a web browser and click on the RGB bulbs.<br />
1. Move the switches to the positions shown in each question and record which<br />
colour of the visible spectrum is being perceived by the human.<br />
(a)<br />
(c)<br />
(e)<br />
(g)<br />
R G B<br />
R G B<br />
R G B<br />
R G B<br />
(b)<br />
(d)<br />
(f)<br />
R G B<br />
R G B<br />
R G B<br />
2. How do different combinations of light energy allow us to see colours not on the visible<br />
spectrum? Experi<strong>me</strong>nt to make each colour then draw where the switches are positioned<br />
to show how much of each coloured light is needed.<br />
Brown Cyan (light blue) Magenta (pink)<br />
R G B R G B R G B<br />
3. Objects that are white, grey or black absorb or reflect all the colours of the visible<br />
spectrum. They are not colours <strong>with</strong> their own light waves. Experi<strong>me</strong>nt to make the man<br />
see each colour, then draw where the switches are positioned.<br />
©R.I.C. Publications<br />
Low Resolution Images<br />
Display Copy<br />
White Grey Black<br />
R G B R G B R G B<br />
4. The switches show the reflection and/or absorption of coloured light rays.<br />
(a) If the switch is at the top, the coloured light rays are being by the<br />
object.<br />
(b) If the switch is at the bottom, the coloured light rays are being by<br />
the object.<br />
R.I.C. Publications® – www.ricpublications.com.au YEAR <strong>Science</strong>:<br />
5 A <strong>STEM</strong> APPROACH 127
Lesson 5<br />
<strong>Physical</strong> sciences<br />
ENLIGHTEN ME!<br />
Teacher notes<br />
<strong>Science</strong> inquiry focus:<br />
How do shadows form and why are they not always the<br />
sa<strong>me</strong> size or shape?<br />
<strong>Science</strong> Inquiry Skills:<br />
• Questioning and predicting QP<br />
• Planning and conducting PC<br />
• Processing and analysing data and information PA<br />
• Evaluating E<br />
• Communicating C<br />
<strong>Science</strong> as a Human Endeavour:<br />
• Students identify how objects cast shadows when<br />
light waves cannot pass through the object. They<br />
also identify how the size and shape of an object’s<br />
shadow changes when the position and direction of<br />
the light source changes.<br />
Background information<br />
• Light waves travel in a straight line. When light<br />
waves contact an object, they pass through the<br />
object or are absorbed, reflected or refracted by<br />
the object.<br />
• An object is transparent or see-through if<br />
light passes straight through it. Completely<br />
transparent objects do not cast shadows, as the<br />
light continues in a straight path through the<br />
object.<br />
• An object is opaque if no light passes through<br />
it. The light rays are either absorbed or reflected<br />
by the object. This creates a darkened space on<br />
the opposite side of the object, where the light<br />
waves cannot reach. This darkened space is<br />
referred to as a shadow.<br />
• An object is translucent if it allows so<strong>me</strong> light<br />
to pass through and so<strong>me</strong> light to be absorbed<br />
or reflected. Translucent objects cast lighter or<br />
different coloured shadows compared to those<br />
of an opaque object and can range from a faint<br />
to a dark shadow.<br />
• The position and direction of the light source<br />
affects the size and shape of the shadow. For<br />
more information about light and shadows go to<br />
.<br />
Technology/Engineering/Mathematics links:<br />
• using an application on iPad ® , such as<br />
Chatterbox or ShowMe, to record and<br />
organise information<br />
• typing in URL and completing an online<br />
interactive quiz<br />
• <strong>me</strong>asuring the distance from an<br />
object to a light source using formal<br />
<strong>me</strong>asure<strong>me</strong>nts<br />
Assess<strong>me</strong>nt focus:<br />
• Use pages 130 and 131 or students’<br />
digital presentations and quiz results,<br />
to assess their understanding of how<br />
light that does not pass through objects,<br />
causes shadows and how these shadows<br />
change depending on the position and<br />
direction of the light source.<br />
Resources<br />
• Online video—Shadow hands at<br />
<br />
• A copy of page 130 for each student<br />
• An iPad ® for each student, <strong>with</strong> a<br />
presentation application, such as<br />
Chatterbox<br />
• A copy of page 131 for each pair<br />
• A torch<br />
• A 10 cm × 10 cm piece of white<br />
tissue paper or similar white<br />
translucent paper<br />
• A 10 cm × 10 cm piece of white<br />
paper or white card<br />
• A digital ca<strong>me</strong>ra (optional)<br />
• A science journal for each student<br />
• Online video—Shadows—The Dr<br />
Binocs show at <br />
• Online quiz—Shadows at <br />
©R.I.C. Publications<br />
Low Resolution Images<br />
Display Copy<br />
128 <strong>Science</strong>:<br />
A <strong>STEM</strong> APPROACH<br />
YEAR<br />
5<br />
R.I.C. Publications® – www.ricpublications.com.au
<strong>Physical</strong> sciences<br />
ENLIGHTEN ME!<br />
Lesson 5<br />
Lesson plan<br />
Introduction:<br />
1. As a class, watch the brief hand puppet show Shadow hands at .<br />
This demonstrates how artists use their hands to create shadows that look like different animals and<br />
landscapes to tell a story.<br />
Develop<strong>me</strong>nt<br />
2. Give each student a copy of page 130. Students read and write a prediction for each question<br />
based on their prior knowledge of how light travels. Alternatively, students can record their<br />
predictions using an iPad ® application, such as Chatterbox. QP<br />
3. In pairs, students read the shadow experi<strong>me</strong>nt on page 131 and discuss how they will conduct<br />
each test. Before starting, students answer the questions about controlled variables and then<br />
prepare the materials for their experi<strong>me</strong>nt. Students conduct and take digital photographs of<br />
each test to determine if transparent, translucent and opaque materials cast shadows and how the<br />
position and angle of the light source changes the size and shape of the shadow. Using an iPad ®<br />
application such as ShowMe, students create a presentation to show how transparent, translucent<br />
and opaque objects cast different shadows by inserting their digital photographs into their<br />
presentation and adding text or audio to explain the size and shape of each shadow. PC PA<br />
4. In their pairs, students discuss how the type of material and the position and direction of the torch<br />
changes the size and shape of the shadow produced. They then reflect on their experi<strong>me</strong>nt and<br />
discuss what improve<strong>me</strong>nts could be made to produce more accurate results. PA E<br />
5. Watch the video Shadows—The Dr Binocs show at . This provides a<br />
good explanation of the afore<strong>me</strong>ntioned concepts. PA<br />
6. Students use their understanding of how shadows are for<strong>me</strong>d to answer the questions on<br />
page 130, then compare each answer to their prediction. PA C<br />
Differentiation<br />
• Less capable students can answer the questions on page 130 using a digital presentation<br />
application on an iPad ® , such as ShowMe. Students can record their predictions and their actual<br />
answers using an audio recorder or diagrams to explain their answer.<br />
• More capable students can write more information for each question on page 130, using their<br />
science journal to copy and answer the questions. Alternatively, students can write a paragraph<br />
to explain how they think the shadow will change if a dim<strong>me</strong>r light, such as a candle, or an<br />
extended light source, such as a lantern or a fluorescent light, is used instead of a point light<br />
source, such as a torch.<br />
Reflection<br />
©R.I.C. Publications<br />
Low Resolution Images<br />
Display Copy<br />
7. Using an iPad ® , students complete the interactive shadows quiz at .<br />
C<br />
R.I.C. Publications® – www.ricpublications.com.au YEAR <strong>Science</strong>:<br />
5 A <strong>STEM</strong> APPROACH 129
Lesson 5<br />
<strong>Physical</strong> sciences<br />
ENLIGHTEN ME!<br />
Light’s behaviour research<br />
How do light rays form shadows when they<br />
contact an object?<br />
Prediction:<br />
Actual answer:<br />
Do translucent objects cast shadows?<br />
Justify your answer.<br />
Prediction:<br />
Actual answer:<br />
Does the position of the light source change<br />
the size or shape of a shadow? Justify your<br />
answer.<br />
Prediction:<br />
Do transparent objects cast shadows?<br />
Justify your answer.<br />
Prediction:<br />
Actual answer:<br />
Do opaque objects cast shadows? Justify<br />
your answer.<br />
Prediction:<br />
Actual answer:<br />
©R.I.C. Publications<br />
Low Resolution Images<br />
Display Copy<br />
Does the angle of the light source change<br />
the size or shape of a shadow? Justify your<br />
answer.<br />
Prediction:<br />
Actual answer:<br />
Actual answer:<br />
130 <strong>Science</strong>:<br />
A <strong>STEM</strong> APPROACH<br />
YEAR<br />
5<br />
R.I.C. Publications® – www.ricpublications.com.au
<strong>Physical</strong> sciences<br />
ENLIGHTEN ME!<br />
Lesson 5<br />
Shadow experi<strong>me</strong>nt<br />
Investigation questions:<br />
Do transparent, translucent and opaque objects cast shadows?<br />
Does the position and angle of the light source change the size and shape of the shadow?<br />
Materials:<br />
• A torch<br />
• A square of paper<br />
(10 cm × 10 cm)<br />
• A square of tissue<br />
paper<br />
(10 cm × 10 cm)<br />
• A square of clear<br />
cellophane<br />
(10 cm × 10 cm)<br />
Procedure:<br />
For each test, take a digital photograph of the position and<br />
direction of the torch, the material used and the shadow created.<br />
• Hold the piece of paper/cellophane upright so that the<br />
bottom edge is touching the table.<br />
• Test 1–Hold the torch to the side of each material and shine<br />
it horizontally towards the face of the paper, tissue paper or<br />
cellophane.<br />
• Test 2–Hold the torch directly above each material and shine<br />
it vertically down onto the top edge of the paper, tissue<br />
paper or cellophane.<br />
• Test 3–Hold the torch to the side of each material and tilt it<br />
downwards so that it shines towards the bottom edge.<br />
• Test 4–Hold the torch to the side of each material and tilt it<br />
upwards so that it shines towards the top edge.<br />
Variables:<br />
1. How will you control the distance between the torch and the paper in each test? What<br />
distance will you hold the torch from the paper/cellophane?<br />
©R.I.C. Publications<br />
Low Resolution Images<br />
Display Copy<br />
2. How will you control where to position the paper/cellophane in each test?<br />
3. How will you control the angle of the torch shining on the paper/cellophane in each<br />
test?<br />
R.I.C. Publications® – www.ricpublications.com.au YEAR <strong>Science</strong>:<br />
5 A <strong>STEM</strong> APPROACH 131
Lesson 6<br />
<strong>Physical</strong> sciences<br />
ENLIGHTEN ME!<br />
Teacher notes<br />
<strong>Science</strong> inquiry focus:<br />
How do coloured shadows form? Are they always the<br />
sa<strong>me</strong> colour as the object or the light source?<br />
<strong>Science</strong> Inquiry Skills:<br />
• Questioning and predicting QP<br />
• Planning and conducting PC<br />
• Processing and analysing data and information<br />
PA<br />
• Communicating C<br />
<strong>Science</strong> as a Human Endeavour:<br />
• Students explore how light energy from multiple<br />
coloured light bulbs is reflected or absorbed by<br />
objects, to produce different-coloured shadows,<br />
which do not always reflect the colour of the<br />
object.<br />
Background information<br />
• Light energy travels in straight lines. When<br />
an opaque object blocks the path of the light<br />
energy, a shadow is for<strong>me</strong>d on the opposite<br />
side of the object from the light source.<br />
• If one light source shines onto an opaque<br />
object, the shadow appears black or a dark<br />
shade of grey.<br />
• If two light sources, positioned along a straight<br />
line, shine onto an opaque object, the object<br />
will cast two coloured shadows (the sa<strong>me</strong><br />
colours as the lights). The background will<br />
change from white to the colour of both lights<br />
added together; e.g. red and blue bulbs will<br />
create red and blue shadows <strong>with</strong> a magenta<br />
background.<br />
• If three light sources, positioned along a<br />
straight line, shine onto an opaque object, the<br />
object will cast three shadows. These shadows<br />
are the addition of the two coloured bulbs that<br />
do not block the path of the light energy. When<br />
red, green and blue bulbs are used, yellow,<br />
cyan and magenta shadows are for<strong>me</strong>d.<br />
• For more information, use the interactive<br />
activity or the videos listed in Resources.<br />
Technology/Engineering/Mathematics links:<br />
• using an application on an iPad ® , such<br />
as Chatterbox or ShowMe, to record<br />
predictions and information<br />
• scanning a QR code using an iPad ® or<br />
typing a URL into a search engine to link<br />
to a website<br />
• using an online interactive ga<strong>me</strong> to<br />
conduct an experi<strong>me</strong>nt<br />
Assess<strong>me</strong>nt focus:<br />
• Use the worksheet on page 134 and<br />
student predictions and explanations<br />
to assess their science inquiry skills and<br />
understanding of how light behaves.<br />
Resources<br />
• Online image—Coloured shadows at<br />
<br />
• An iPad ® for each student, <strong>with</strong><br />
presentation applications such as<br />
ShowMe or Chatterbox, and a QR<br />
scanner application<br />
• Individual science journals<br />
• One copy of page 134 for each<br />
student<br />
• One copy of page 135 for more<br />
capable students<br />
• Online interactive activity—’Coloured<br />
shadows interactive’ at <br />
• Online video—Colored shadows:<br />
What’s going on? at <br />
• Online video—Colored shadows:<br />
More experi<strong>me</strong>nts to try at <br />
©R.I.C. Publications<br />
Low Resolution Images<br />
Display Copy<br />
132 <strong>Science</strong>:<br />
A <strong>STEM</strong> APPROACH<br />
YEAR<br />
5<br />
R.I.C. Publications® – www.ricpublications.com.au
<strong>Physical</strong> sciences<br />
ENLIGHTEN ME!<br />
Lesson 6<br />
Lesson plan<br />
Introduction:<br />
1. Display the image at , which shows a man using his body to cast<br />
multiple coloured shadows of himself. In their science journals, or using a digital application on an<br />
iPad ® , such as Chatterbox, students predict how many lights they think have been used to cast the<br />
shadows, what colours the lights might be, and how the light energy produces coloured shadows<br />
instead of black shadows. QP<br />
Develop<strong>me</strong>nt<br />
2. Give each student an iPad ® and a copy of page 134. Students scan the QR code or type the<br />
URL into a web browser and follow the instructions listed in the table on page 134, to compare<br />
shadows from one or more coloured light bulbs. Students begin by exploring the shadows and<br />
the background colours created by one bulb, then explore shadows cast by two or three coloured<br />
bulbs—red, blue and/or green—recording their observations in the table. Individually, students<br />
reflect on their results to determine patterns in the data, such as comparing the number of bulbs<br />
to the number of shadows. In pairs, students share their results, including any patterns they<br />
discovered. PC PA<br />
3. Watch the video at . This video demonstrates how two bulbs, red and<br />
blue, shine onto a pencil and cast two shadows, which are also red and blue, onto a board that<br />
appears magenta. It explains how these shadows appear coloured because of the light energy<br />
produced by each bulb, which travels in straight lines towards the board.<br />
4. Students work together to think about why three bulbs create three different-coloured shadows—<br />
cyan, magenta and yellow. Using a digital application, such as ShowMe, or their science journals,<br />
they draw an image of the three light bulbs, the shadows of a pencil cast by the three bulbs and the<br />
colours of each shadow. Students then draw lines to show the direction of light energy from each<br />
bulb. QP PC PA<br />
Differentiation<br />
• Less capable students can return to the website on page 134 and experi<strong>me</strong>nt <strong>with</strong> the red<br />
and blue bulbs to reinforce the information in the video. Students can then discuss the colours<br />
produced by the three bulbs, <strong>with</strong> teacher assistance.<br />
• More capable students can return to the website on page 134, and turn all light bulbs on.<br />
Using page 135, students colour the bulbs and the shadows shown on the website and write a<br />
paragraph to explain how light energy can produce coloured shadows.<br />
5. Watch the online video Colored shadows: More experi<strong>me</strong>nts to try at . This video demonstrates how the cyan and yellow shadows are created by the blue,<br />
green and red bulbs. It then shows how changing the size or position of the object changes the<br />
colours of the shadows to create cyan, blue, magenta, black, red and yellow shadows all from one<br />
object.<br />
Reflection<br />
©R.I.C. Publications<br />
Low Resolution Images<br />
Display Copy<br />
6. Display the image Coloured shadows from the Introduction. Students reflect on their predictions<br />
and record their new understanding in their science journal or using the digital application used<br />
previously. How many lights have been used to create the coloured shadows in the image? In which<br />
order do you think the lights are placed to create the coloured shadows shown? PA C<br />
R.I.C. Publications® – www.ricpublications.com.au YEAR <strong>Science</strong>:<br />
5 A <strong>STEM</strong> APPROACH 133
Lesson 6<br />
<strong>Physical</strong> sciences<br />
ENLIGHTEN ME!<br />
Coloured shadows<br />
Scan the QR code or type the URL into a web<br />
browser. Click on the arrows in the top-left corner of the ga<strong>me</strong> screen to make the<br />
ga<strong>me</strong> full size. Follow each instruction and record your observations.<br />
Instructions<br />
Red: on<br />
Green: off<br />
Blue: off<br />
Red: off<br />
Green: on<br />
Blue: off<br />
Red: off<br />
Green: off<br />
Blue: on<br />
Red: on<br />
Green: on<br />
Blue: off<br />
Red: off<br />
Green: on<br />
Blue: on<br />
Red: on<br />
Green: off<br />
Blue: on<br />
How many<br />
shadows are<br />
there?<br />
How many<br />
lights are<br />
on?<br />
What colour<br />
is each<br />
shadow?<br />
What colour<br />
is each<br />
background?<br />
Draw a picture<br />
©R.I.C. Publications<br />
Low Resolution Images<br />
Display Copy<br />
Red: on<br />
Green: on<br />
Blue: on<br />
134 <strong>Science</strong>:<br />
A <strong>STEM</strong> APPROACH<br />
YEAR<br />
5<br />
R.I.C. Publications® – www.ricpublications.com.au
<strong>Physical</strong> sciences<br />
ENLIGHTEN ME!<br />
Lesson 6<br />
Coloured shadows<br />
1. Colour the picture to show the correct light and shadow colours, when all three bulbs are<br />
turned on.<br />
Red light Green light Blue light<br />
2. How does light energy produce coloured shadows?<br />
©R.I.C. Publications<br />
Low Resolution Images<br />
Display Copy<br />
R.I.C. Publications® – www.ricpublications.com.au YEAR <strong>Science</strong>:<br />
5 A <strong>STEM</strong> APPROACH 135
Assess<strong>me</strong>nt<br />
<strong>Physical</strong> sciences<br />
ENLIGHTEN ME!<br />
Teacher notes<br />
<strong>Science</strong> knowledge<br />
Light from a source forms shadows and can be absorbed, reflected and refracted (ACSSU080)<br />
Indicators<br />
• Identifies true and false facts about the behaviour of light.<br />
• Identifies the colours that are visible to our eyes when white light refracts through a rain droplet.<br />
• Describes how light behaves when it contacts transparent, translucent and opaque objects and the<br />
appearance of these objects to our eyes.<br />
• Identifies how shadows are for<strong>me</strong>d.<br />
• Identifies the number and colour of shadows when one white light bulb, or two or three coloured<br />
light bulbs, shine on an opaque object.<br />
• Explains how light energy from three light bulbs (red, green and blue), casts three shadows that are<br />
yellow, cyan and magenta, using their knowledge of the behaviour of light.<br />
Assess<strong>me</strong>nt answers<br />
Pages 137 and 138<br />
1. (a) True (b) False (c) True<br />
(d) False (e) False (f) True<br />
2. ‘Rainbow colours’—red, orange, yellow, green,<br />
blue, indigo and violet<br />
3. Teacher check<br />
Object<br />
A glass<br />
panel in a<br />
window<br />
Blue<br />
cellophane<br />
How does white<br />
light behave when it<br />
contacts the object?<br />
How do our eyes perceive<br />
the colour of the object? Is<br />
it transparent, translucent or<br />
opaque?<br />
Our eyes see the window as<br />
All light waves pass or<br />
clear or having no colour. It is a<br />
transmit through the<br />
transparent object, <strong>me</strong>aning we<br />
window.<br />
can see through it.<br />
All light waves<br />
Our eyes see the cellophane<br />
except blue pass or<br />
as being blue in colour. It is a<br />
transmit through the<br />
transparent object <strong>me</strong>aning<br />
cellophane, <strong>with</strong> the<br />
we can partially see through it,<br />
blue light waves being<br />
however it changes the colour<br />
reflected into the path<br />
we perceive objects to be.<br />
of our eyes.<br />
All light waves are Our eyes see the road as being<br />
absorbed by the road, black in colour. It is an opaque<br />
A black road<br />
causing no light waves object, <strong>me</strong>aning we cannot see<br />
to enter our eyes. through it.<br />
4. Teacher check—Answer should reflect:<br />
A shadow is for<strong>me</strong>d by the absence of light<br />
energy on the opposite side of an object to<br />
the light source shining on it.<br />
5. One shadow will be cast and it will be black.<br />
6. Teacher check<br />
(a) Shadow on the left—red<br />
Shadow on the right—blue<br />
Overlapping shadow—none<br />
Background colour—magenta<br />
(b) Shadow on the left—red<br />
Shadow on the right—green<br />
Overlapping shadow—black<br />
Background colour—yellow<br />
(c) Shadow on the left—green<br />
Shadow on the right—blue<br />
Overlapping shadow—black<br />
Background colour—cyan<br />
7. You will see three shadows—yellow, cyan and<br />
magenta<br />
8. Teacher check—Both answers may be<br />
accepted.<br />
Answer 1—Light travels in straight lines. When<br />
light from one of the coloured light bulbs is<br />
blocked, the shadow cast by that light bulb is<br />
filled in <strong>with</strong> the light from the other two light<br />
bulbs. The colour of the shadow appears as a<br />
combination of the two coloured light bulbs<br />
that are not blocked by the object.<br />
©R.I.C. Publications<br />
Low Resolution Images<br />
Display Copy<br />
Answer 2—When light from the red bulb is<br />
blocked, the green and blue lights fill in the<br />
shadow, which appears cyan; when light<br />
from the green light is blocked, the red and<br />
blue lights fill in the shadow, which appears<br />
magenta; and when the blue light is blocked,<br />
the green and red lights fill in the shadow,<br />
which appears yellow.<br />
136 <strong>Science</strong>:<br />
A <strong>STEM</strong> APPROACH<br />
YEAR<br />
5<br />
R.I.C. Publications® – www.ricpublications.com.au
<strong>Physical</strong> sciences<br />
ENLIGHTEN ME!<br />
Assess<strong>me</strong>nt<br />
1. True or False?<br />
(a)<br />
(b)<br />
(c)<br />
White light is actually made up of<br />
many colours.<br />
Light energy travels in straight or<br />
curved lines depending on the<br />
object it contacts.<br />
Only a small portion of the<br />
electromagnetic spectrum can be<br />
seen by humans.<br />
(d)<br />
(e)<br />
(f)<br />
Shadows are created when all light<br />
waves pass through an object.<br />
Objects appear coloured when<br />
the object absorbs a particular<br />
coloured light wave.<br />
All colours in the visible spectrum<br />
can be created using red, green<br />
and blue light waves.<br />
2. What colours are visible to our eyes when white light refracts through a rain droplet?<br />
3. Write a description of how white light is transmitted, reflected or absorbed when it<br />
contacts each object and how our eyes interpret the look of the object.<br />
Object<br />
A glass panel<br />
in a window<br />
Blue<br />
cellophane<br />
How does white light behave when<br />
it contacts the object?<br />
How do our eyes perceive the colour<br />
of the object? Is it transparent,<br />
translucent or opaque?<br />
©R.I.C. Publications<br />
Low Resolution Images<br />
Display Copy<br />
A black road<br />
R.I.C. Publications® – www.ricpublications.com.au YEAR <strong>Science</strong>:<br />
5 A <strong>STEM</strong> APPROACH 137
Assess<strong>me</strong>nt<br />
<strong>STEM</strong> project<br />
<strong>Physical</strong> sciences<br />
ENLIGHTEN ME!<br />
4. How are shadows for<strong>me</strong>d?<br />
5. If one white light bulb is shining onto a white opaque object, how many shadows will be<br />
cast and what colour will they be?<br />
6. Colour each picture to show the colours of the shadows, the overlapping shadows, and<br />
the background that would be created by the two shining coloured light bulbs.<br />
(a) (b) (c)<br />
Red light Green light Blue light Red light Green light Blue light<br />
Red light Green light Blue light<br />
7. Imagine you are shining a red, green and blue light onto an opaque object. How many<br />
shadows will you see and what colour will each shadow be?<br />
8. Red, green and blue lights shining onto an opaque object cast shadows that are yellow,<br />
cyan and magenta. Explain how light behaves to form these shadows.<br />
©R.I.C. Publications<br />
Low Resolution Images<br />
Display Copy<br />
138 <strong>Science</strong>:<br />
A <strong>STEM</strong> APPROACH<br />
YEAR<br />
5<br />
R.I.C. Publications® – www.ricpublications.com.au
<strong>Physical</strong> sciences<br />
ENLIGHTEN ME!<br />
<strong>STEM</strong> project<br />
Cellophane sunglasses<br />
<strong>STEM</strong> project overview<br />
Students design and create a pair of sunglasses, <strong>with</strong> lenses that consist of a combination of<br />
different-coloured cellophane layers, which will block out sunlight <strong>with</strong>out changing the colour of<br />
objects viewed. Students then create a simple budget to show Jordan, a fictional character, how<br />
long it will take to save his pocket money so he can buy new sunglasses.<br />
Concepts overview:<br />
<strong>Science</strong><br />
• Apply knowledge of how red, green and blue cellophane can absorb all the different light waves<br />
that create visible light, making objects appear darker.<br />
• Use science inquiry skills to plan and conduct an experi<strong>me</strong>nt to test which combinations of<br />
red, green and blue cellophane are required to create lenses that make objects appear darker,<br />
<strong>with</strong>out changing the colour the object appears and record the results.<br />
• Communicate how layers of coloured cellophane can make objects appear darker when light<br />
passes through them.<br />
Technology/Engineering<br />
• Apply the design process to plan, create and evaluate sunglasses using red, blue and green<br />
cellophane for the lenses and thick card for the fra<strong>me</strong>s.<br />
• Use a spreadsheet program on a computer, such as Microsoft ® Excel ® , or a spreadsheet<br />
application on an iPad ® , such as Numbers, to input data and format cells to create a budget.<br />
• While working collaboratively, use project manage<strong>me</strong>nt processes to ensure accountability of<br />
both group <strong>me</strong>mbers when planning, organising, controlling resources, monitoring ti<strong>me</strong> lines<br />
and <strong>me</strong>eting design criteria.<br />
Mathematics<br />
• Create a simple budget and present it using digital technologies.<br />
• Solve addition and subtraction problems, involving money, <strong>with</strong> accuracy.<br />
Alternative project ideas:<br />
©R.I.C. Publications<br />
Low Resolution Images<br />
Display Copy<br />
• Design and create transparent, translucent and opaque props to use in a shadow puppet show.<br />
Film a three-minute puppet show using only the props created, and a torch <strong>with</strong> a white bulb.<br />
See the image at for an example of wooden blocks that have<br />
been used to create a scene for a shadow puppet show. Students must position the torch to<br />
create shadows which are an enlarge<strong>me</strong>nt of their actual props.<br />
• Design and create a light box using a cardboard box that has a given peri<strong>me</strong>ter or area. Precut<br />
a hole at one end of the box, large enough to place the head of a torch into. Students paint<br />
the inside and outside of the cardboard box in black paint and allow it to dry. They then create<br />
2D and 3D shapes using craft sticks as the edges and coloured cellophane as the surfaces, and<br />
collect mirrors and other translucent or reflective objects. Students place all the objects in the<br />
light box and turn the torch on, then have fun exploring how light behaves when it contacts<br />
different objects.<br />
R.I.C. Publications® – www.ricpublications.com.au YEAR <strong>Science</strong>:<br />
5 A <strong>STEM</strong> APPROACH 139
<strong>STEM</strong> project<br />
<strong>Physical</strong> sciences<br />
ENLIGHTEN ME!<br />
<strong>Science</strong> Understanding<br />
<strong>STEM</strong> curriculum links<br />
SCIENCE CURRICULUM<br />
• Light from a source forms shadows and can be absorbed, reflected and refracted (ACSSU080)<br />
<strong>Science</strong> as a Human Endeavour<br />
• Scientific knowledge is used to solve problems and inform personal and community decisions (ACSHE083)<br />
<strong>Science</strong> Inquiry Skills<br />
Planning and conducting<br />
• Identify, plan and apply the ele<strong>me</strong>nts of scientific investigations to answer questions and solve problems using<br />
equip<strong>me</strong>nt and materials safely and identifying potential risks (ACSIS086)<br />
Processing and analysing data and information<br />
• Construct and use a range of representations, including tables and graphs, to represent and describe observations,<br />
patterns or relationships in data using digital technologies as appropriate (ACSIS090)<br />
Communicating<br />
• Communicate ideas, explanations and processes using scientific representations in a variety of ways, including multimodal<br />
texts (ACSIS093)<br />
TECHNOLOGIES CURRICULUM<br />
Design and Technologies Knowledge and Understanding<br />
• Investigate characteristics and properties of a range of materials, systems, components, tools and equip<strong>me</strong>nt and<br />
evaluate the impact of their use (ACTDEK023)<br />
Design and Technologies Processes and Production Skills<br />
• Critique needs or opportunities for designing, and investigate materials, components, tools, equip<strong>me</strong>nt and processes to<br />
achieve intended designed solutions (ACTDEP024)<br />
• Generate, develop and communicate design ideas and processes for audiences using appropriate technical terms and<br />
graphical representation techniques (ACTDEP025)<br />
• Select appropriate materials, components, tools, equip<strong>me</strong>nt and techniques and apply safe procedures to make<br />
designed solutions (ACTDEP026)<br />
• Negotiate criteria for success that include sustainability to evaluate design ideas, processes and solutions (ACTDEP027)<br />
• Develop project plans that include consideration of resources when making designed solutions individually and<br />
collaboratively (ACTDEP028)<br />
Digital Technologies Knowledge and Understanding<br />
• Examine the main components of common digital systems and how they may connect together to form networks to<br />
transmit data (ACTDIK014)<br />
Digital Technologies Processes and Production skills<br />
• Acquire, store and validate different types of data, and use a range of software to interpret and visualise data to create<br />
information (ACTDIP016)<br />
Number and Algebra<br />
©R.I.C. Publications<br />
Low Resolution Images<br />
Display Copy<br />
MATHEMATICS CURRICULUM<br />
• Use efficient <strong>me</strong>ntal and written strategies and apply appropriate digital technologies to solve problems (ACMNA291)<br />
• Use estimation and rounding to check the reasonableness of answers to calculations (ACMNA099)<br />
• Create simple financial plans (ACMNA106)<br />
140 <strong>Science</strong>:<br />
A <strong>STEM</strong> APPROACH<br />
YEAR<br />
5<br />
R.I.C. Publications® – www.ricpublications.com.au
<strong>Physical</strong> sciences<br />
ENLIGHTEN ME!<br />
<strong>STEM</strong> project<br />
<strong>STEM</strong> project:<br />
Teacher notes<br />
Students design and create a pair of temporary sunglasses using craft materials, <strong>with</strong> lenses<br />
made from a combination of different-coloured cellophane layers, that block out sunlight <strong>with</strong>out<br />
changing the colour of objects viewed. Create a simple budget to plan how long it will take to<br />
save enough pocket money to buy new sunglasses.<br />
Estimated duration: 4–6 weeks<br />
1. Introduce the project<br />
• Give pairs of students a copy of page 142.<br />
Read through the problem, the task, the<br />
warning and the criteria, and clarify any<br />
queries students have.<br />
• Give each pair a copy page 143, so<br />
students can manage and assess their<br />
progress, and a copy of page 144 for them<br />
to complete during the planning stage.<br />
• Remind students about resource<br />
manage<strong>me</strong>nt and safety.<br />
2. Investigate<br />
• Students revise or research the behaviour of<br />
white light and how sunglasses protect our<br />
eyes from the sun, using page 143 to guide<br />
their research.<br />
• Students experi<strong>me</strong>nt <strong>with</strong> different colour<br />
combinations of cellophane that block out<br />
sunlight, <strong>with</strong>out changing the colour an<br />
object appears.<br />
• As a class, discuss what a budget is and how<br />
to create one. Lessons 1–3 of the interactive<br />
video, Budgeting at may be useful. Students should<br />
practise completing simple budgets.<br />
• Provide ti<strong>me</strong> for students to familiarise<br />
themselves <strong>with</strong> how to use a spreadsheet<br />
program on a computer, such as Microsoft ®<br />
Excel ® , or a spreadsheet application on an<br />
iPad ® , such as Numbers, to input data and<br />
format cells.<br />
3. Design, plan and manage resources<br />
• Students complete page 144 using the<br />
information in the problem on page 142,<br />
then write a draft budget in their science<br />
journals.<br />
• Students draw the style of sunglasses they<br />
want to create or find a template online and<br />
trace it onto thick card.<br />
• Students collect or locate the materials<br />
needed to create the sunglasses and the<br />
budget, and make a final decision on the<br />
coloured cellophane layers they will use.<br />
4. Create<br />
• Students create the budget using an<br />
appropriate tool.<br />
• Students create the sunglasses by cutting<br />
out and decorating the fra<strong>me</strong>s, attaching<br />
the coloured cellophane layers to make<br />
the lenses, and folding the sunglasses into<br />
shape.<br />
5. Evaluate and refine<br />
• Students evaluate the budget and the<br />
sunglasses to ensure they <strong>me</strong>et the criteria<br />
listed on page 142 and all calculations are<br />
accurate.<br />
6. Communicate<br />
• Students email their project to the teacher,<br />
including a digital photograph of the<br />
temporary sunglasses, the digital file of the<br />
budget, an explanation of how sunglasses<br />
protect our eyes from the sun and an<br />
explanation of how they created the lenses<br />
to block out white light, <strong>with</strong>out changing<br />
the colour an object appears.<br />
• Individually, students complete page 145<br />
to evaluate how well they worked <strong>with</strong> their<br />
partner to produce the sunglasses and the<br />
budget.<br />
©R.I.C. Publications<br />
Low Resolution Images<br />
Display Copy<br />
R.I.C. Publications® – www.ricpublications.com.au YEAR <strong>Science</strong>:<br />
5 A <strong>STEM</strong> APPROACH 141
<strong>STEM</strong> project<br />
<strong>Physical</strong> sciences<br />
ENLIGHTEN ME!<br />
The problem<br />
Jordan spends a lot of ti<strong>me</strong> exploring in the bush outside and<br />
often gets a headache when the sun is shining brightly. He<br />
decides he should save his pocket money to buy a pair of<br />
sunglasses. Jordan wonders if, in the <strong>me</strong>anti<strong>me</strong>, he could<br />
create a pair of temporary sunglasses using craft materials,<br />
that would block out the sunlight <strong>with</strong>out affecting the colour<br />
an object appears.<br />
The task<br />
Jordan currently has $14 in savings and earns $7 every<br />
Saturday for doing chores around the house. Create<br />
a simple budget that shows how many more weeks of<br />
pocket money Jordan will need to save to purchase a<br />
pair of sunglasses worth $49.95; and how much he will<br />
have left over, if any.<br />
Design and create a pair of temporary sunglasses that<br />
Jordan can wear while he saves.<br />
Things to consider<br />
• You must work in pairs.<br />
Project brief<br />
CELLOPHANE SUNGLASSES<br />
WARNING!<br />
Cellophane sunglasses<br />
will not protect your eyes<br />
from UV radiation. It is<br />
important to wear correct<br />
sunglasses that protect<br />
against UV and high<br />
energy visible light waves.<br />
• The budget must be created using a spreadsheet program on a computer, such<br />
as Microsoft ® Excel ® , or a spreadsheet application on an iPad ® , such as Numbers;<br />
and must include the opening balance, the inco<strong>me</strong> for the number of weeks<br />
Jordan will need to save for, the expense of the sunglasses and the closing<br />
balance.<br />
• The temporary sunglasses must be made using layers of three different<br />
cellophane colours. They need to block out the sunlight <strong>with</strong>out changing the<br />
colour an object appears. The sunglasses should make objects appear darker,<br />
but not so dark that it will be hazardous to go exploring.<br />
• Draw or use the internet to find a template to create the fra<strong>me</strong>s of the<br />
temporary sunglasses. The fra<strong>me</strong>s must be made using thick card so they don’t<br />
fall apart while Jordan is exploring.<br />
• You must email your project to your teacher, including a digital photograph of<br />
the temporary sunglasses, the digital file of the budget, an explanation of how<br />
sunglasses protect our eyes from the sun and an explanation of the cellophane<br />
colours you used to create the lenses.<br />
©R.I.C. Publications<br />
Low Resolution Images<br />
Display Copy<br />
142 <strong>Science</strong>:<br />
A <strong>STEM</strong> APPROACH<br />
YEAR<br />
5<br />
R.I.C. Publications® – www.ricpublications.com.au
<strong>Physical</strong> sciences<br />
ENLIGHTEN ME!<br />
<strong>STEM</strong> project<br />
Investigate<br />
Project steps<br />
Revise how we see objects as transparent, translucent or opaque depending on how light<br />
is transmitted, reflected or absorbed by the object.<br />
Revise how we perceive objects to be different colours through the reflection or<br />
absorption of different light waves.<br />
Research how sunglasses protect our eyes from high energy visible light and UV radiation.<br />
Experi<strong>me</strong>nt to find a combination of three different colours of cellophane that can be<br />
used to create a black tint to objects, <strong>with</strong>out changing the colour that the object appears.<br />
In your science journal, record each combination of coloured cellophane that you tested<br />
and your observations of each.<br />
Find out the <strong>me</strong>aning of the terms opening balance, inco<strong>me</strong>, expenses and closing<br />
balance; and research different layouts for budgets.<br />
Learn how to use a spreadsheet program on a computer such as Microsoft ® Excel ® , or a<br />
spreadsheet application on an iPad ® , such as Numbers.<br />
Design, plan and manage resources<br />
Complete page 144 then write a draft budget in your science journal, including the<br />
opening balance, the inco<strong>me</strong> for the number of weeks Jordan will need to save, the one<br />
expense and the closing balance.<br />
Decide how many layers of each coloured cellophane you will use.<br />
Draw the style of sunglasses you want to create, or find a template online to trace onto<br />
thick card.<br />
Collect or locate all the materials you will need to create the sunglasses and the budget.<br />
Create<br />
Create the budget using an appropriate tool.<br />
Create and decorate the fra<strong>me</strong>s of the sunglasses and fold them into shape.<br />
Attach the layers of coloured cellophane to the eye holes to create the lenses.<br />
Evaluate and refine<br />
Ensure the budget <strong>me</strong>ets the criteria and the calculations are correct.<br />
Ensure the temporary sunglasses <strong>me</strong>et the criteria and make any changes necessary.<br />
Communicate<br />
©R.I.C. Publications<br />
Low Resolution Images<br />
Display Copy<br />
Take a digital photograph of the temporary sunglasses using an iPad ® or a digital ca<strong>me</strong>ra.<br />
Email your project to your teacher, including all the criteria listed in the last bullet point on<br />
page 142.<br />
R.I.C. Publications® – www.ricpublications.com.au YEAR <strong>Science</strong>:<br />
5 A <strong>STEM</strong> APPROACH 143
<strong>STEM</strong> project<br />
<strong>Physical</strong> sciences<br />
ENLIGHTEN ME!<br />
Jordan’s budget<br />
1. The opening balance is the amount of money that Jordan currently has. How much money is<br />
in Jordan’s money box?<br />
Jordan’s opening balance is .<br />
2. The inco<strong>me</strong> is the amount of money that Jordan will earn. How much pocket money does<br />
Jordan earn and how often does he get paid?<br />
Jordan earns .<br />
3. Complete the table to find out how much money Jordan will earn in total after eight weeks.<br />
Week<br />
How much will Jordan<br />
earn this week?<br />
What is the total of Jordan’s<br />
savings each week?<br />
0 – 14<br />
1<br />
2<br />
3<br />
4<br />
5<br />
6<br />
7<br />
8<br />
4. How long will it take Jordan to save the money needed to purchase a pair of sunglasses<br />
worth $49.95?<br />
5. How much change will Jordan receive if he<br />
purchases the sunglasses <strong>with</strong> all his money:<br />
©R.I.C. Publications<br />
Low Resolution Images<br />
Display Copy<br />
Working out space<br />
(a)<br />
after six weeks of saving?<br />
(b)<br />
after eight weeks of saving?<br />
144 <strong>Science</strong>:<br />
A <strong>STEM</strong> APPROACH<br />
YEAR<br />
5<br />
R.I.C. Publications® – www.ricpublications.com.au
<strong>Physical</strong> sciences<br />
ENLIGHTEN ME!<br />
<strong>STEM</strong> project<br />
Self-assess<strong>me</strong>nt<br />
Student na<strong>me</strong>:<br />
Date:<br />
<strong>STEM</strong> project:<br />
Cellophane sunglasses<br />
1. Colour a face to rate how cooperatively your team worked.<br />
All group <strong>me</strong>mbers contributed ideas to the team.<br />
All group <strong>me</strong>mbers listened carefully to the ideas<br />
of others.<br />
All group <strong>me</strong>mbers encouraged others to<br />
contribute their thoughts and opinions.<br />
All group <strong>me</strong>mbers spoke respectfully to other<br />
group <strong>me</strong>mbers.<br />
All group <strong>me</strong>mbers compromised (when needed)<br />
to create the best possible product.<br />
2. List three ways the team helped each other to create the product.<br />
3. List one difficulty the group encountered when working as a team.<br />
©R.I.C. Publications<br />
Low Resolution Images<br />
Display Copy<br />
4. How could a similar issue be resolved in future projects?<br />
5. What was the most enjoyable part of the project?<br />
6. What was the least enjoyable part of the project?<br />
R.I.C. Publications® – www.ricpublications.com.au YEAR <strong>Science</strong>:<br />
5 A <strong>STEM</strong> APPROACH 145
<strong>STEM</strong> project<br />
<strong>Physical</strong> sciences<br />
ENLIGHTEN ME!<br />
Group assess<strong>me</strong>nt rubric<br />
CRITERIA<br />
Group <strong>me</strong>mbers:<br />
Project task:<br />
Design and create a pair of temporary sunglasses using craft materials, <strong>with</strong> lenses made<br />
from a combination of different-coloured cellophane layers, that block out sunlight<br />
<strong>with</strong>out changing the colour an object appears. Create a simple budget to plan how long<br />
it will take to save enough pocket money to buy new sunglasses.<br />
<strong>Science</strong> knowledge<br />
Applies knowledge of how layers of different-coloured cellophane can absorb all the<br />
different light waves of white light, making objects appear darker <strong>with</strong>out changing the<br />
colour an object appears.<br />
<strong>Science</strong> as a Human Endeavour<br />
Identifies how sunglasses can protect our eyes from high energy visible light and UV<br />
radiation emitted by the sun.<br />
<strong>Science</strong> skills<br />
Plans and conducts an experi<strong>me</strong>nt to test different combinations of coloured cellophane<br />
to create lenses that block out sunglight, <strong>with</strong>out changing the colour an object appears.<br />
Records each experi<strong>me</strong>nt and their observations accurately.<br />
Communicates science understanding correctly, clearly and concisely, using scientific<br />
terminology.<br />
Technology/Engineering skills<br />
Plans and designs a pair of sunglasses, using layers of different-coloured cellophane for<br />
the lenses and thick card for the fra<strong>me</strong>s.<br />
Uses resources safely and sustainably, when creating the sunglasses.<br />
Evaluates designed products to ensure they <strong>me</strong>et the criteria and makes any necessary<br />
changes.<br />
Uses a spreadsheet program on a computer or a spreadsheet application on an iPad ® to<br />
input data and format cells in a budget.<br />
Takes a digital photograph of the temporary sunglasses using an iPad ® or a digital ca<strong>me</strong>ra.<br />
Types and sends an email, <strong>with</strong> a range of attach<strong>me</strong>nts.<br />
Mathematics skills<br />
Creates a simple budget and presents it using digital technologies.<br />
Solves addition and subtraction problems involving money <strong>with</strong> accuracy.<br />
Group skills<br />
All group <strong>me</strong>mbers contributed fairly and appropriately.<br />
All group <strong>me</strong>mbers collaborated and communicated effectively.<br />
Group <strong>me</strong>mbers were able to resolve conflicts independently.<br />
1 = Below expectations<br />
2 = Meeting expectations<br />
3 = Above expectations<br />
©R.I.C. Publications<br />
Low Resolution Images<br />
Display Copy<br />
146 <strong>Science</strong>:<br />
A <strong>STEM</strong> APPROACH<br />
YEAR<br />
5<br />
R.I.C. Publications® – www.ricpublications.com.au