

EMCP-4.2-GUIDE

Create successful ePaper yourself
Turn your PDF publications into a flip-book with our unique Google optimized e-Paper software.
APPLICATION AND INSTALLATION <strong>GUIDE</strong><br />
<strong>EMCP</strong> 4.1, <strong>4.2</strong><br />
GENERATOR SET CONTROL
Contents<br />
1 GENERAL INFORMATION................................................................................ 1<br />
1.1 INTRODUCTION ................................................................................................................................1<br />
1.2 APPLICATIONS.................................................................................................................................1<br />
1.3 REFERENCES ..................................................................................................................................1<br />
2 SAFETY INFORMATION................................................................................... 2<br />
2.1 ELECTRICAL SAFETY .......................................................................................................................2<br />
2.2 ELECTROSTATIC DISCHARGE AWARENESS ........................................................................................2<br />
3 INSTALLATION ................................................................................................. 3<br />
3.1 MOUNTING LOCATION ......................................................................................................................3<br />
3.2 OPERATING TEMPERATURE RANGE ..................................................................................................3<br />
3.3 POWER REQUIREMENTS...................................................................................................................3<br />
3.4 BATTERY CHARGER.........................................................................................................................4<br />
3.5 ELECTRICAL CONNECTIONS .............................................................................................................5<br />
3.6 EUI ENGINES ..................................................................................................................................5<br />
3.7 <strong>EMCP</strong> 4.1 AND <strong>4.2</strong> ELECTRICAL DIAGRAMS.....................................................................................6<br />
3.8 WINDING CONNECTIONS ..................................................................................................................8<br />
3.9 TRANSFORMER CONNECTIONS .......................................................................................................10<br />
3.10 WIRING REQUIREMENTS.................................................................................................................13<br />
3.11 SHIELDED AND COMMUNICATION WIRING........................................................................................14<br />
4 INITIAL OPERATION AND USER ORIENTATION ......................................... 15<br />
4.1 TYPES OF <strong>EMCP</strong> 4 EVENTS ...........................................................................................................15<br />
<strong>4.2</strong> USING THE CAT SERVICE TOOL......................................................................................................15<br />
Connecting to the <strong>EMCP</strong> 4 to Configure Setpoints .....................................................................................16<br />
4.3 VIEWING SYSTEM PARAMETERS .....................................................................................................17<br />
Supported Parameters................................................................................................................................18<br />
Engine Overview.........................................................................................................................................18<br />
AC Overview...............................................................................................................................................22<br />
4.4 VIEWING AND ADJUSTING PREFERENCES........................................................................................23<br />
Setting The Preferences Using The <strong>EMCP</strong> 4 Display .................................................................................24<br />
Changing The <strong>EMCP</strong> 4 Contrast When the Display is Unreadable.............................................................26<br />
Changing The <strong>EMCP</strong> 4 Display to Technician English ...............................................................................26<br />
Changing The <strong>EMCP</strong> 4 Display to the Primary Language ..........................................................................27<br />
Setting the Preferences Using the Service Tool..........................................................................................27<br />
4.5 CONFIGURING TIME/DATE (<strong>EMCP</strong> <strong>4.2</strong> ONLY) .................................................................................28<br />
Changing The Time/Date............................................................................................................................28<br />
Changing Date Format................................................................................................................................30<br />
4.6 ADJUSTING GENERATOR SET PARAMETERS ...................................................................................31<br />
Generator Output Voltage...........................................................................................................................31<br />
Engine Speed .............................................................................................................................................31<br />
Idle/Rated....................................................................................................................................................32<br />
Engine Sensor Versus Data link .................................................................................................................33<br />
Engine Oil Pressure ....................................................................................................................................35<br />
Engine Coolant Temperature......................................................................................................................38<br />
4.7 STARTING AND STOPPING THE GENERATOR SET.............................................................................40<br />
Starting The Engine ....................................................................................................................................40<br />
<strong>EMCP</strong> 4 Remote Start ................................................................................................................................41<br />
Stopping The Engine ..................................................................................................................................41
Emergency Stop .........................................................................................................................................43<br />
4.8 ENGINE SETPOINT VERIFICATION....................................................................................................44<br />
Procedure For Overspeed Verification........................................................................................................45<br />
Procedure For Low Oil Pressure Verification ..............................................................................................45<br />
Procedure For High Coolant Temperature Verification ...............................................................................46<br />
4.9 ENGINE OPERATING HOURS...........................................................................................................47<br />
Updating Engine Operating Hours ..............................................................................................................47<br />
5 HANDLING EVENTS ....................................................................................... 49<br />
5.1 CONFIGURING EVENT RESPONSES FOR <strong>EMCP</strong> 4 GENERATED EVENTS ...........................................50<br />
5.2 CHANGING AN EVENT RESPONSE CONFIGURATION.........................................................................52<br />
5.3 RESETTING INDIVIDUAL ACTIVE EVENTS FOR THE <strong>EMCP</strong> 4..............................................................55<br />
5.4 RESETTING ALL ACTIVE EVENTS FOR A SINGLE MODULE ................................................................56<br />
5.5 RESETTING ALL ACTIVE EVENTS FOR ALL MODULES ......................................................................57<br />
5.6 RESETTING EVENTS FOR ENGINE ECMS WITHOUT PRIMARY CAN DATA LINK SUPPORT...................58<br />
5.7 TROUBLESHOOTING RESETTING EVENTS ........................................................................................58<br />
Not in Auto Warning....................................................................................................................................58<br />
Service Maintenance Interval (<strong>EMCP</strong> <strong>4.2</strong> Only)..........................................................................................58<br />
6 SECURITY ....................................................................................................... 63<br />
7 SETPOINTS ..................................................................................................... 67<br />
7.1 CONFIGURING SETPOINTS..............................................................................................................67<br />
7.2 SETPOINTS ON THE <strong>EMCP</strong> 4 DISPLAY............................................................................................69<br />
7.3 SETPOINTS ON THE CAT SERVICE TOOL..........................................................................................69<br />
Setpoint Categories ....................................................................................................................................70<br />
8 DIGITAL INPUTS............................................................................................. 73<br />
8.1 PROGRAMMING DIGITAL INPUTS USING THE DISPLAY ......................................................................74<br />
Viewing the Current Digital Input Status .....................................................................................................75<br />
Configuring Digital Inputs for Status Parameters ........................................................................................76<br />
Digital Input Command/STatus Descriptions...............................................................................................78<br />
Configuring Digital Inputs for System Events..............................................................................................81<br />
Configuring Digital Inputs for SCADA Data link...........................................................................................84<br />
Disabling Digital Inputs ...............................................................................................................................85<br />
8.2 PROGRAMMING DIGITAL INPUTS USING THE CAT SERVICE TOOL .....................................................86<br />
Configuring Digital Inputs for Status Parameter..........................................................................................87<br />
Configuring Digital Inputs for System Events..............................................................................................88<br />
Configuring Digital Inputs for SCADA Data link...........................................................................................92<br />
Disabling Digital Inputs ...............................................................................................................................92<br />
9 ANALOG INPUTS............................................................................................ 93<br />
9.1 PROGRAMMING ANALOG INPUTS USING THE DISPLAY .....................................................................95<br />
Viewing the Current Analog Input Status ....................................................................................................95<br />
Configuring Analog Inputs for Resistive Mode ............................................................................................96<br />
Configuring Analog Inputs for Voltage Mode...............................................................................................98<br />
Disabling Analog Inputs ............................................................................................................................100<br />
9.2 PROGRAMMING ANALOG INPUTS USING THE CAT SERVICE TOOL ..................................................101<br />
Configuring Analog Inputs for Resistive Mode ..........................................................................................102<br />
Configuring Analog Inputs for Voltage Mode.............................................................................................105<br />
Disabling Analog Inputs ............................................................................................................................108<br />
9.3 ANALOG INPUT MAPS ..................................................................................................................109<br />
Warnings and Shutdowns .........................................................................................................................119<br />
Unsupported Analog Input Sensor Ranges...............................................................................................119<br />
Sensor Range is Smaller than Setpoint Options.......................................................................................119<br />
Sensor Range is Larger than Setpoint Options, But Usable Range is Not...............................................121
Sensor Range is Larger than Setpoint Options, And Usable Range is Larger Than Setpoint Options ....122<br />
10 OUTPUTS ...................................................................................................... 123<br />
10.1 PROGRAMMING OUTPUTS USING THE DISPLAY .............................................................................124<br />
Viewing the Current Output Status............................................................................................................124<br />
Configuring Outputs for Status Parameters ..............................................................................................125<br />
Digital/relay Output Command/STatus Descriptions .................................................................................127<br />
Configuring Outputs for System Events ....................................................................................................130<br />
Digital/relay Output SYSTEM EVENT DESCRIPTIONS ...........................................................................134<br />
Configuring Outputs for SCADA Data link.................................................................................................137<br />
Disabling Outputs......................................................................................................................................138<br />
10.2 PROGRAMMING OUTPUTS USING THE CAT SERVICE TOOL ............................................................139<br />
Configuring Outputs for Status Parameters ..............................................................................................139<br />
Configuring Outputs for System Events ....................................................................................................141<br />
Configuring Outputs for SCADA Data link.................................................................................................142<br />
Disabling Outputs......................................................................................................................................143<br />
11 MODIFIABLE TEXT STRINGS ...................................................................... 144<br />
11.1 LANGUAGE SUPPORT ..................................................................................................................145<br />
11.2 PROGRAMMING MODIFIABLE TEXT STRINGS USING THE CAT SERVICE TOOL ..................................145<br />
12 SAVING AND RESTORING SETPOINTS ..................................................... 149<br />
12.1 SAVING <strong>EMCP</strong> 4 CONFIGURATION DATA.............................................................................149<br />
Fleet Configuration Option ........................................................................................................................150<br />
ECM Replacement Option ........................................................................................................................150<br />
12.2 LOADING <strong>EMCP</strong> 4 CONFIGURATION DATA....................................................................................152<br />
13 PROGRAMMABLE CYCLE TIMER (<strong>EMCP</strong> <strong>4.2</strong> ONLY) ................................ 155<br />
13.1 CONFIGURING THE PROGRAMMABLE CYCLE TIMER USING THE DISPLAY........................................157<br />
13.2 CONFIGURING THE PROGRAMMABLE CYCLE TIMER USING THE CAT SERVICE TOOL .......................159<br />
14 REDUCED POWER MODE ........................................................................... 162<br />
15 PROGRAMMABLE KW RELAY FUNCTION (<strong>EMCP</strong> <strong>4.2</strong> ONLY)................. 164<br />
15.1 CONFIGURING THE PROGRAMMABLE KW RELAY FROM THE DISPLAY.............................................165<br />
15.2 CONFIGURING THE PROGRAMMABLE KW RELAYS USING THE CAT SERVICE TOOL ........................167<br />
16 CAN DATA LINKS......................................................................................... 170<br />
16.1 PRIMARY CAN DATA LINK (CAN 1) .............................................................................................170<br />
Primary CAN Wiring..................................................................................................................................170<br />
Network Topology .....................................................................................................................................170<br />
16.2 ACCESSORY CAN DATA LINK (CAN 2) (<strong>EMCP</strong> <strong>4.2</strong> ONLY) ...........................................................172<br />
Accessory CAN Wiring..............................................................................................................................172<br />
Network Topology .....................................................................................................................................172<br />
17 OPTIONAL MODULES.................................................................................. 174<br />
17.1 CAN ANNUNCIATOR ....................................................................................................................175<br />
CAN Annunciator Features .......................................................................................................................176<br />
Annunciator Specifications........................................................................................................................176<br />
Annunciator Wiring....................................................................................................................................177<br />
LED Colors................................................................................................................................................178<br />
CAN Annunciator Software Configuration.................................................................................................179<br />
Global Acknowledge .................................................................................................................................179<br />
ECU Instance Number ..............................................................................................................................179<br />
Configuring Annunciator LED Behavior ....................................................................................................179<br />
Trigger Condition ......................................................................................................................................182<br />
Severity Level ...........................................................................................................................................183<br />
Suspect Parameter Number......................................................................................................................184
17.2 RS-485 ANNUNCIATOR (<strong>EMCP</strong> <strong>4.2</strong> ONLY)...................................................................................184<br />
Annunciator Features................................................................................................................................185<br />
Annunciator Specifications........................................................................................................................185<br />
RS-485 Annunciator Wiring.......................................................................................................................186<br />
LED Colors................................................................................................................................................187<br />
Lamp Test Function ..................................................................................................................................188<br />
Alarm Acknowledge ..................................................................................................................................188<br />
RS-485 ANNUNCIATOR ALARM GROUPS.............................................................................................189<br />
Alarm Group Selection Mode (AGSM) ......................................................................................................189<br />
Entering AGSM .........................................................................................................................................190<br />
Re-configuring/Selecting Alarm Group Address........................................................................................190<br />
Exiting AGSM............................................................................................................................................191<br />
RS-485 Annunciator Custom Alarm Group Configuration.........................................................................191<br />
CUSTOM ALARM GROUP SELECTION..................................................................................................191<br />
Severity Level ...........................................................................................................................................192<br />
Suspect Parameter Number......................................................................................................................192<br />
Alarm Groups............................................................................................................................................194<br />
Configuring Custom Alarm Groups using Cat Service Tool ......................................................................198<br />
17.3 THERMOCOUPLE MODULE (<strong>EMCP</strong> <strong>4.2</strong> ONLY)...............................................................................205<br />
Thermocouple Features............................................................................................................................205<br />
Thermocouple Specifications ....................................................................................................................206<br />
Thermocouple Wiring................................................................................................................................207<br />
Thermocouple Physical Layout .................................................................................................................208<br />
Thermocouple Module – Configuration .....................................................................................................208<br />
Configuring Thermocouple Inputs .............................................................................................................210<br />
17.4 RTD MODULE (<strong>EMCP</strong> <strong>4.2</strong> ONLY) ................................................................................................211<br />
RTD Features ...........................................................................................................................................211<br />
RTD Specifications ...................................................................................................................................212<br />
RTD Wiring ...............................................................................................................................................213<br />
RTD Physical Layout ................................................................................................................................214<br />
RTD Module – Configuration.....................................................................................................................214<br />
Configuring RTD Inputs ............................................................................................................................215<br />
17.5 DISCRETE I/O MODULE (<strong>EMCP</strong> <strong>4.2</strong> ONLY) ...................................................................................216<br />
Discrete I/O Features................................................................................................................................216<br />
Discrete I/O Specifications........................................................................................................................217<br />
Discrete I/O Wiring....................................................................................................................................218<br />
Discrete I/O Physical Layout .....................................................................................................................219<br />
Discrete I/O Software Configuration..........................................................................................................219<br />
Configuring Digital Inputs..........................................................................................................................221<br />
Configuring Relay Outputs........................................................................................................................222<br />
18 SCADA (MODBUS) DATA LINK (<strong>EMCP</strong> <strong>4.2</strong> ONLY) .................................... 223<br />
18.1 WIRING .......................................................................................................................................223<br />
18.2 LINE TERMINATION AND POLARIZATION.........................................................................................225<br />
18.3 SOFTWARE CONFIGURATION........................................................................................................225<br />
Configuring The SCADA Data Link Using The Display .............................................................................225<br />
Configuring The SCADA Data Link Using The Cat Service Tool...................................................................227<br />
19 INTEGRATED VOLTAGE REGULATOR ...................................................... 230<br />
19.1 IVR FEATURES............................................................................................................................230<br />
19.2 HARDWARE INSTALLATION...........................................................................................................231<br />
<strong>EMCP</strong> IVR Connections............................................................................................................................231<br />
IVR Excitation Module...............................................................................................................................231<br />
IVR Excitation Module Physical Layout.....................................................................................................232<br />
IVR Excitation Module Connections..........................................................................................................233<br />
IVR Excitation Module Over-Excitation Protection ....................................................................................234<br />
IVR Excitation Module Fusing...................................................................................................................235<br />
19.3 IVR SOFTWARE CONFIGURATION .................................................................................................236<br />
Voltage Regulator Control Source Configuration ......................................................................................237
Starting Profile ..........................................................................................................................................238<br />
IVR PID Gain Setpoints ............................................................................................................................241<br />
Under-Frequency Roll-Off (Loading) Profile..............................................................................................242<br />
Voltage Regulator Load Compensation Type Configuration .....................................................................243<br />
Line Loss (IR) Compensation....................................................................................................................243<br />
Reactive Droop Compensation .................................................................................................................244<br />
Voltage Regulator Lockout Configuration .................................................................................................246<br />
Loss of Sensing Shutdown Event .............................................................................................................246<br />
Over Excitation Shutdown Event...............................................................................................................247<br />
19.4 IVR VOLTAGE ADJUSTMENT ........................................................................................................247<br />
Digital Inputs .............................................................................................................................................248<br />
Voltage/Hz Control (<strong>EMCP</strong> Display) .........................................................................................................248<br />
SCADA Modbus (<strong>EMCP</strong> <strong>4.2</strong> Only)............................................................................................................248<br />
Analog Inputs............................................................................................................................................249<br />
19.5 IVR DISPLAY SCREENS................................................................................................................249<br />
20 INSTALLING & UPGRADING SOFTWARE .................................................. 252<br />
APPENDIX A MENU STRUCTURES ......................................................................... 256<br />
APPENDIX B <strong>EMCP</strong> 4 FRONT VIEW & NAVIGATION KEYS................................... 258<br />
APPENDIX C IVR EXCITATION MODULE CONNECTION DIAGRAMS................... 261
Foreword<br />
This Application and Installation Guide describes the <strong>EMCP</strong> 4.1 and <strong>4.2</strong> series electric<br />
power generator set controls.<br />
Some data used in this guide is generalized and is provided only for the purpose of<br />
comparison or illustration. Also, PC application screenshots and <strong>EMCP</strong> 4 screen images<br />
may be actual screens or simulated and are shown for illustrative purposes only. These<br />
images may not be identical to those seen by the user. Screen images of the <strong>EMCP</strong> 4<br />
may differ from the actual screens depending on flash file language, flash file version,<br />
setpoint configuration, engine interface, or series of the <strong>EMCP</strong> (4.1 versus <strong>4.2</strong>).<br />
In various places throughout this document, reference is made to the release date of the<br />
<strong>EMCP</strong> 4 software. This information can be found by connecting to the subject module<br />
using the Cat Service Tool, and viewing the ECM Summary (this is the default startup<br />
screen). The release date is found in the field entitled Software Group Release Date.<br />
See Figure 1, showing the release date for an <strong>EMCP</strong> <strong>4.2</strong> flash file.<br />
Figure 1: <strong>EMCP</strong> Software Release Date<br />
Other product specific information and data is available from a variety of sources. For<br />
more information, contact the Cat dealer or dealer TC nearest you.<br />
The information in this document is the property of Caterpillar Inc. and/or its subsidiaries.<br />
Any copying, distribution, transmission to others, and any use except that for which it is<br />
loaned is prohibited without written permission.<br />
CAT, CATERPILLAR, ADEM, their respective logos, “Caterpillar Yellow”, the “Power<br />
Edge” trade dress as well as corporate and product identity used herein, are trademarks<br />
of Caterpillar and may not be used without permission.
Application and Installation Guide<br />
<strong>EMCP</strong> 4.1, <strong>4.2</strong> Generator Set Control<br />
1 GENERAL INFORMATION<br />
1.1 INTRODUCTION<br />
Caterpillar has developed a product line of Generator Set Controls for use in the<br />
Electronic Modular Control Panel 4 (<strong>EMCP</strong> 4). They are available in four versions based<br />
on Generator Set Control feature sets.<br />
The <strong>EMCP</strong> 4 Generator Set Control, or GSC, is the primary controller within the<br />
Generator Set Control system. The <strong>EMCP</strong> 4 line of Generator Set Controllers includes<br />
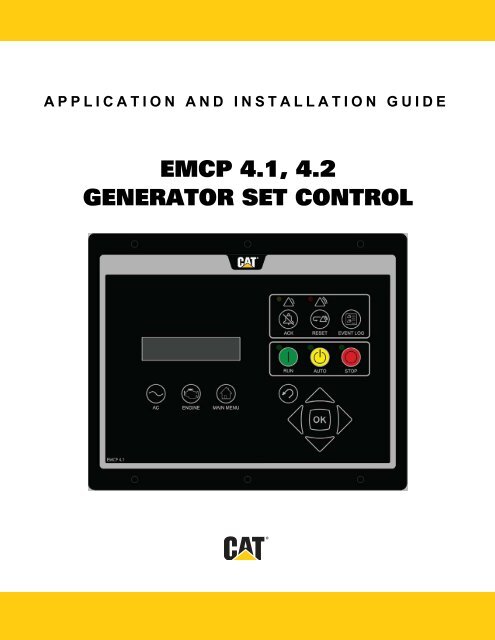
<strong>EMCP</strong> 4.1, <strong>4.2</strong>, 4.3, and 4.4. Appendix B shows a front view of the <strong>EMCP</strong> 4.1 and <strong>4.2</strong>.<br />
This Application and Installation Guide is intended to cover the <strong>EMCP</strong> 4.1 and <strong>4.2</strong><br />
Generator Set Control and its application in generator set systems. It also includes<br />
information on optional add-on modules. The intended audience for this guide includes<br />
Cat generator set system designers, Caterpillar service support personnel, Cat Dealers<br />
and Service Technicians, contractors, and customers.<br />
1.2 APPLICATIONS<br />
The <strong>EMCP</strong> 4 product line of generator set controllers is designed for use in a wide range<br />
of applications. They can be used on standby and prime Cat brand power generator<br />
sets. The configurability of the controllers allows them to be used, in some cases, on<br />
other applications such as Marine auxiliary generators, switchgear applications, and<br />
industrial engines and generator sets.<br />
Most of the information in this document applies to all applications. However, the<br />
document was written with Cat brand generator sets in mind. Please contact your<br />
Caterpillar support representative for questions regarding different applications.<br />
1.3 REFERENCES<br />
The System Operation Testing, Troubleshooting, and Adjusting manual (UENR 1209)<br />
is also available for <strong>EMCP</strong> 4.1 and <strong>4.2</strong> Generator Set Controls. The genset Operations<br />
and Maintenance manual contains details for specific products.<br />
©2013 Caterpillar<br />
All rights reserved. Page 1
<strong>EMCP</strong> 4.1, <strong>4.2</strong> Generator Set Control<br />
Application and Installation Guide<br />
2 SAFETY INFORMATION<br />
2.1 ELECTRICAL SAFETY<br />
DO NOT operate or work on a generator set unless you<br />
have read and understand the instructions and warnings in<br />
the Operation and Maintenance Manual. Failure to follow the<br />
instructions or heed the warnings could result in injury<br />
or death. Contact any Cat dealer for replacement manuals.<br />
Proper care is your responsibility.<br />
2.2 ELECTROSTATIC DISCHARGE AWARENESS<br />
<strong>EMCP</strong> 4 control contains components that are sensitive to<br />
ELECTROSTATIC DISCHARGE (ESD). An electrostatic charge can<br />
damage the control resulting in <strong>EMCP</strong> 4 breakdown or<br />
improper operation.<br />
Take the following precautions while<br />
installing/removing/handling the control:<br />
<br />
<br />
<br />
<br />
<br />
Handle equipment correctly. Use ESD protective packaging and material<br />
handling containers that are anti-static and provide discharge protection<br />
and electric field suppression.<br />
Use protective devices: ESD-protective workstations and/or work<br />
surfaces (grounding mat, anti-static wrist strap, etc).<br />
Keep all plastic items away from the devices. Any plastic item is a<br />
potential static generator. This includes candy wrappers, foam cups,<br />
synthetic carpet, foam cushions, etc.<br />
The anti-static bag cannot function as a static dissipating mat.<br />
DO NOT use an anti-static bag for any other purpose than to enclose<br />
a product.<br />
Caution: The 70-pin connector on the back of the control is the most vulnerable area<br />
to ELECTROSTATIC DISCHARGE (ESD). While handling the <strong>EMCP</strong> 4, extra attention is<br />
required to the back of the control. The control may become damaged or inoperable<br />
if extra care is not taken.<br />
Consult the Electrostatic Discharge Association for proper procedure during particular<br />
situations: http://www.esda.org<br />
Page 2<br />
©2013 Caterpillar<br />
All rights reserved.
Application and Installation Guide<br />
<strong>EMCP</strong> 4.1, <strong>4.2</strong> Generator Set Control<br />
3 INSTALLATION<br />
3.1 MOUNTING LOCATION<br />
When selecting a mounting location for the <strong>EMCP</strong> 4, consider the following:<br />
Protection from high-voltage and high-current devices.<br />
<br />
<br />
Protection from devices which may produce electromagnetic interference.<br />
Protection from excessive vibration. The <strong>EMCP</strong> 4 controls are designed<br />
to withstand normal generator set vibrations. They should not be<br />
mounted directly to the engine block.<br />
Protection from direct exposure to water. Once installed with gasket, the<br />
<strong>EMCP</strong> 4 controllers are sealed to a level of IP Level 56 for resistance to<br />
moisture.<br />
Suitable for Flat Surface Mounting in a Type 1 Enclosure only.<br />
3.2 OPERATING TEMPERATURE RANGE<br />
<strong>EMCP</strong> 4 has a continuous operating temperature range of -20C (-4F) to +70C<br />
(158F) ambient.<br />
3.3 POWER REQUIREMENTS<br />
The <strong>EMCP</strong> 4.1 and <strong>4.2</strong> require a nominal voltage of 12 VDC or 24 VDC. If batteries are<br />
used for operating power, a charging source such as an alternator or dual-mode battery<br />
charger is necessary to maintain a stable supply voltage. The maximum power<br />
consumption of the <strong>EMCP</strong> 4.1 and <strong>4.2</strong> with all I/O at maximum power drain will not<br />
exceed 5A at 12VDC, or 3.5A at 24VDC.<br />
Regional electrical codes must be followed. In the case of standby operation, follow the<br />
regional requirements for installing standby power systems. An example of this is the<br />
National Fire Protection Association (NFPA) guidelines for emergency power systems.<br />
When connecting the <strong>EMCP</strong> 4 to the DC power source, make sure that there is only one<br />
common connection to the negative potential of the power source. Make extra effort to<br />
avoid any ground loops in the DC electrical system. A single point common ground for<br />
sensitive electronics is recommended at the negative battery terminal or Power<br />
Distribution Box.<br />
Avoid daisy-chaining power supply connections from one device to another. This builds<br />
resistance from one Battery (-) point to the next, effectively building a potential difference<br />
between two different reference points. Each electronics subsystem and major engine<br />
subsystem should have its own DC network so that they do not interfere with each other<br />
(see Figure 2).<br />
As shown in Figure 2, all sensitive electronics are electrically isolated from higher current<br />
loads, such as the starter motor. All electronics have a COMMON POWER BUS and SINGLE<br />
POINT REFERENCE. This point is the genset customer ground connection. The CHASSIS<br />
GROUND should be bonded separately to the customer ground connection and not be<br />
used as the electronics reference.<br />
©2013 Caterpillar<br />
All rights reserved. Page 3
<strong>EMCP</strong> 4.1, <strong>4.2</strong> Generator Set Control<br />
Application and Installation Guide<br />
The sensitive electronics, such as sensors and control modules, have isolated power<br />
source paths. High current loads such as starters and solenoids can cause interference<br />
and possibly damage to low current loads, such as controllers and sensors.<br />
Caution: Extra effort must be made to keep the high current and low current loads<br />
electrically separated.<br />
Figure 2: Generator Set Network Isolation<br />
The two types of loads may share common Battery (+) and Battery (–) connections but,<br />
they should not be electrically connected at any other point. This strategy ensures<br />
maximum isolation between high current and low current loads.<br />
The battery DISCONNECT SWITCH is usually located on the negative side of the battery<br />
supply.<br />
3.4 BATTERY CHARGER<br />
If a battery charger is to be used, it should be connected on the battery side of the<br />
disconnect switch. Most battery chargers are not to be used as power supplies. Proper<br />
battery charger operation requires that the actual battery load be present.<br />
If battery charger fault condition wiring is connected to the <strong>EMCP</strong> Digital Inputs and<br />
these Digital Inputs are set to DISABLED, then any battery charger faults or events will<br />
not be broadcast or annunciated on the network. See Chapter 8.<br />
Page 4<br />
©2013 Caterpillar<br />
All rights reserved.
Application and Installation Guide<br />
<strong>EMCP</strong> 4.1, <strong>4.2</strong> Generator Set Control<br />
3.5 ELECTRICAL CONNECTIONS<br />
The <strong>EMCP</strong> 4.1 and <strong>4.2</strong> share the same 70-pin connector on the back of the controller<br />
(not all of the 70 pins are used). The 70-pin connector on the <strong>EMCP</strong> 4.4 is not the same<br />
as the 70-pin connector on the <strong>EMCP</strong> 4.1 and <strong>4.2</strong>.<br />
Figure 3 and Figure 4 show:<br />
<br />
<br />
<br />
All possible connections<br />
What pins are used for connections<br />
How each pin is connected for each controller version<br />
3.6 EUI ENGINES<br />
For EUI engines, the Oil Pressure and Coolant Temperature sensors will typically be<br />
wired to the engine ECM and the <strong>EMCP</strong> 4 will get that information from the engine ECM<br />
via the Primary CAN Data Link. Ensure the <strong>EMCP</strong> 4 Oil Pressure and Coolant<br />
Temperature setpoints are configured for Data Link.<br />
In order for the genset to function properly in Cooldown mode, some setpoints in the<br />
<strong>EMCP</strong> 4 must be coordinated with some engine ECM setpoints. For gensets where the<br />
engine ECM controls cooldown, the cooldown time should be set to 0 seconds in the<br />
<strong>EMCP</strong>. For gensets where the engine ECM does not control cooldown, the cooldown<br />
time should be set to 0 seconds in the engine ECM.<br />
©2013 Caterpillar<br />
All rights reserved. Page 5
<strong>EMCP</strong> 4.1, <strong>4.2</strong> Generator Set Control<br />
Application and Installation Guide<br />
3.7 <strong>EMCP</strong> 4.1 AND <strong>4.2</strong> ELECTRICAL DIAGRAMS<br />
Figure 3: <strong>EMCP</strong> 4.1 Wiring Diagram<br />
Page 6<br />
©2013 Caterpillar<br />
All rights reserved.
Application and Installation Guide<br />
<strong>EMCP</strong> 4.1, <strong>4.2</strong> Generator Set Control<br />
Figure 4: <strong>EMCP</strong> <strong>4.2</strong> Wiring Diagram<br />
©2013 Caterpillar<br />
All rights reserved. Page 7
<strong>EMCP</strong> 4.1, <strong>4.2</strong> Generator Set Control<br />
Application and Installation Guide<br />
3.8 WINDING CONNECTIONS<br />
The connections between the generator and the <strong>EMCP</strong> 4 depend on the winding<br />
configuration as shown in the connection diagrams below.<br />
Figure 5: Three Phase Four Wire (Series or Parallel) Wye (Star)<br />
Figure 6: Three Phase Four Wire Delta (L2-N-L3)<br />
Figure 7: Three Phase Three Wire Delta<br />
Page 8<br />
©2013 Caterpillar<br />
All rights reserved.
Application and Installation Guide<br />
<strong>EMCP</strong> 4.1, <strong>4.2</strong> Generator Set Control<br />
Figure 8: Single Phase Three Wire (L1-N-L2), Double Delta<br />
Figure 9: Single Phase Two Wire (L1-L2), Double Delta<br />
Figure 10: Single Phase Three Wire (L2-N-L3), Zig-<br />
Figure 11: Single Phase Two Wire (L2-L3), Zig-Zag<br />
©2013 Caterpillar<br />
All rights reserved. Page 9
<strong>EMCP</strong> 4.1, <strong>4.2</strong> Generator Set Control<br />
Application and Installation Guide<br />
Figure 12: Three Phase Four Wire Delta(B-C-N-A) FIX PICTURE<br />
3.9 TRANSFORMER CONNECTIONS<br />
In order to monitor generator output voltages greater than 600 Volts nominal (grounded<br />
wye (star)), external potential transformers must be used.<br />
Note: The <strong>EMCP</strong> 4 must be programmed for the correct winding ratios when connecting<br />
external potential transformers. See Chapter 7, Setpoints for more information on how to<br />
program the winding ratios. If delta potential transformers are used on a wye (star)<br />
generator, the <strong>EMCP</strong> must be programmed for a delta generator.<br />
Caution: The WYE (STAR) configuration of external potential transformers is<br />
preferred for 4-wire wye (star) generators because of the greater accuracy when<br />
loads are unbalanced. With the open delta configuration, some power<br />
parameters cannot be determined. These parameters are power phase A, B, C<br />
and power factor phase A, B, C. For maximum accuracy, the open delta<br />
configuration of external potential transformers should be used only for 3-wire<br />
delta generators. See Table 1: Power Values Available by Generator<br />
Configuration.<br />
(PT) on the 4-Wire Wye (Star) Connected Generator<br />
Figure 13: Wye (Star) Configuration of External Potential Transformers<br />
Page 10<br />
©2013 Caterpillar<br />
All rights reserved.
Application and Installation Guide<br />
<strong>EMCP</strong> 4.1, <strong>4.2</strong> Generator Set Control<br />
(PT) on the 3-Wire Delta Connected Generator<br />
Figure 14: Open Delta Configuration of External Potential Transformers<br />
(PT) on the 4-Wire Wye (Star) Connected Generator<br />
Figure 15: Open Delta Configuration of External Potential Transformers<br />
©2013 Caterpillar<br />
All rights reserved. Page 11
<strong>EMCP</strong> 4.1, <strong>4.2</strong> Generator Set Control<br />
Application and Installation Guide<br />
Parameter<br />
WYE<br />
(STAR)<br />
Power Values Available by Generator Configuration<br />
3-WIRE<br />
DELTA<br />
4-WIRE<br />
DELTA<br />
2-WIRE<br />
1-PHASE<br />
(L1-L2)<br />
2-WIRE<br />
1-PHASE<br />
(L2-L3)<br />
3-WIRE<br />
1-PHASE<br />
(L1-N-L2)<br />
3-WIRE<br />
1-PHASE<br />
(L2-N-L3)<br />
Gen Freq Available Available Available Available Available Available Available<br />
V L-L AVG Available Available Available Available Available Available Available<br />
V A-B Available Available Available Available Not Available Available Not Available<br />
V B-C Available Available Available Not Available Available Not Available Available<br />
V C-A Available Available Available Not Available Not Available Not Available Not Available<br />
V L-N AVG Available Available Available Not Available Not Available Available Available<br />
V A Available Not Available Available Not Available Not Available Available Not Available<br />
V B Available Not Available Available Not Available Not Available Available Available<br />
V C Available Not Available Available Not Available Not Available Not Available Available<br />
I AVG Available Available Available Available Available Available Available<br />
I A Available Available Available Available Not Available Available Not Available<br />
I B Available Available Available Available Available Available Available<br />
I C Available Available Available Not Available Available Not Available Available<br />
Table 1: Power Values Available by Generator Configuration<br />
Note: Accuracy of the potential and current transformers will affect the accuracy of the<br />
voltage and current readings.<br />
Page 12<br />
©2013 Caterpillar<br />
All rights reserved.
Application and Installation Guide<br />
<strong>EMCP</strong> 4.1, <strong>4.2</strong> Generator Set Control<br />
3.10 WIRING REQUIREMENTS<br />
When selecting the type of wire to use, consideration must be given to the wire voltage<br />
drop, (line loss), accuracy, communication error, and other requirements. See Table 2.<br />
Min<br />
Component<br />
Wire<br />
Size<br />
(AWG)<br />
Type of Wire Connections (1)<br />
Three-Wire<br />
Sensors<br />
(When applicable.<br />
Not used on all<br />
systems)<br />
Two-Wire<br />
Components<br />
(Magnetic Speed<br />
Sensors)<br />
CAN (J1939) Data<br />
Link cable<br />
Engine Solenoids<br />
(Air Shutoff)<br />
Power<br />
RS-485<br />
Annunciator<br />
16<br />
16<br />
or<br />
18<br />
16<br />
or<br />
18<br />
14<br />
14<br />
or<br />
16<br />
Or<br />
18<br />
(1) The number of connections must be kept to a minimum.<br />
Table 2: Wiring Requirements<br />
Shielded twisted triad cable is recommended.<br />
For conduits inside facilities, use Belden 8618.<br />
For the engine harness, use the 4G-2556<br />
Shielded Cable. The cable must be resistant to<br />
fuel and oil. The cable must have a<br />
temperature range from -40ºC (-40ºF) to plus<br />
125ºC (257ºF).<br />
Shielded twisted pair cable is recommended.<br />
For conduits inside facilities, use the 123-2376<br />
Electrical Cable or the 3E-4594 Electrical Cable.<br />
For the engine harness, use the 6V-2744 Wire.<br />
The cable must be resistant to fuel and oil. The<br />
cable must have a temperature range of -40ºC<br />
(-40ºF) to plus 125ºC (257ºF).<br />
Part number 153-2707 is available for lengths<br />
of up to 200ft. The cable has a temperature<br />
range of -40ºC (-40ºF) to plus 125ºC (257ºF).<br />
For longer runs, select a cable that meets SAE<br />
J1939-11 requirements.<br />
Stranded wire normally used on engine<br />
harnesses. The cable must be resistant to fuel<br />
and oil. The cable must have a temperature<br />
range of -40ºC (-40ºF) to plus 125ºC (257ºF).<br />
Shielded twisted triad cable is recommended.<br />
Stranded wire normally used on engine<br />
harnesses. The cable must be resistant to fuel<br />
and oil. The cable must have a temperature<br />
range of -40ºC (-40ºF) to plus 125ºC (257ºF).<br />
Deutsch DT type<br />
of connectors are<br />
recommended. If<br />
Spring Spade or<br />
Ring Terminals are used,<br />
the connection<br />
between the terminals<br />
and the wire should be<br />
crimped and soldered.<br />
Deutsch DT type of<br />
connectors are<br />
recommended. If<br />
Spring Spade or<br />
Ring Terminals are used,<br />
the connection between<br />
the terminals and the<br />
wire should be crimped<br />
and soldered.<br />
The leads of the cable<br />
should have Spring<br />
Spade Terminals or Ring<br />
Terminals. The<br />
Connection between the<br />
wire and the terminal<br />
should be crimped and<br />
soldered.<br />
Deutsch DT type of<br />
connectors are<br />
recommended.<br />
©2013 Caterpillar<br />
All rights reserved. Page 13
<strong>EMCP</strong> 4.1, <strong>4.2</strong> Generator Set Control<br />
Application and Installation Guide<br />
3.11 SHIELDED AND COMMUNICATION WIRING<br />
Shielded twisted pair cable is required for the magnetic speed sensor. CAN cable is<br />
required for Primary and Accessory CAN Data Links. This cable is used for maximum<br />
protection against inductive noise, electromagnetic interference, and radio frequency<br />
interference. The shield greatly reduces the amplitude of any unwanted voltages on the<br />
signal wire. The shields should not be connected to the sheet metal. If the shields are<br />
connected to sheet metal, the connections are susceptible to loose bolts, corrosion, etc.<br />
The faulty connections increase the resistance of the shield. Faulty connections also<br />
reduce the effectiveness of the shield.<br />
When the cable terminates at junction boxes, the shields must be connected to each<br />
other in order to maintain a continuous path. A continuous path must be maintained in<br />
the shield wire for sensors, whenever possible. Wire exposed beyond the shield should<br />
be as short as possible. The shield must be connected to battery negative as close to<br />
the controller as possible. Shields should be drained at one point only. When possible,<br />
this should be done at, or close to, the <strong>EMCP</strong> 4.<br />
To avoid electromagnetic interference, do not run shielded signal wires near<br />
other wires carrying large currents. In installations with unavoidable risk of<br />
electromagnetic interference (EMI), shielded wire run in conduit, extra shielding,<br />
or other precautions may be necessary.<br />
Page 14<br />
©2013 Caterpillar<br />
All rights reserved.
Application and Installation Guide<br />
<strong>EMCP</strong> 4.1, <strong>4.2</strong> Generator Set Control<br />
4 INITIAL OPERATION AND USER ORIENTATION<br />
4.1 TYPES OF <strong>EMCP</strong> 4 EVENTS<br />
The <strong>EMCP</strong> 4 has two lamps to annunciate events. The amber lamp indicates warningtype<br />
events, while the red lamp indicates shutdown-type events. The amber lamp also<br />
lights if a “Protect” lamp is being sent by a different module. ET2013B and later can be<br />
used to help identify what modules are sending different lamp statuses. The lamps flash<br />
when new events arrive, and remain flashing (often accompanied by an audible horn)<br />
until acknowledged by pressing the acknowledge button locally or remotely. Shutdowntype<br />
events do not clear until the user fixes the condition(s) that caused the shut down<br />
and “resets” the events. The <strong>EMCP</strong> 4 supports a very large number of events, and most<br />
events generated by the <strong>EMCP</strong> can be configured based on application needs. For<br />
information on viewing, resetting, and configuring events, see Chapter 5.<br />
Note: The <strong>EMCP</strong> 4 will annunciate and display events from other modules, even if<br />
these events are not generated by the <strong>EMCP</strong> 4. These events are not logged in the<br />
<strong>EMCP</strong> itself, but are viewable from the individual module log located in the <strong>EMCP</strong> 4.<br />
<strong>4.2</strong> USING THE CAT SERVICE TOOL<br />
Many of the features of the <strong>EMCP</strong> 4 system can be accessed via the Cat Service Tool.<br />
These features include viewing status data, monitoring optional modules, viewing and<br />
resetting events, and configuring setpoints.<br />
Note: A minimum of the Cat ET Service Tool version 2010C is required to communicate<br />
properly with the <strong>EMCP</strong> 4. If an earlier version is used, the <strong>EMCP</strong> 4 will be grayed out. In<br />
order to have access to the latest setpoints, the latest version of the Cat ET service tool<br />
should always be used.<br />
Throughout this document, instructions for accessing a feature both via the <strong>EMCP</strong> 4<br />
display and via the Cat Service Tool will be given. However, the Cat Service Tool also<br />
offers other unique features that are useful for site commissioning, ECM retrofitting, or<br />
troubleshooting, such as the ability to log data to a file or graph data in real-time. Such<br />
features are not in the scope of this document. For more information on the Cat Service<br />
Tool, refer to the Cat Service Tool documentation and training.<br />
Figure 16 outlines the available <strong>EMCP</strong> 4 features that are available within the Electronic<br />
Technician software.<br />
Figure 16: Electronic Technician <strong>EMCP</strong> 4 Features<br />
1. Status Tool<br />
2. Active Diagnostic Codes<br />
3. Logged Diagnostic Codes<br />
4. Active Event Codes<br />
5. Logged Event Codes<br />
6. ECM Summary<br />
7. Configuration Tool<br />
8. Connect/Disconnect<br />
9. Winflash<br />
©2013 Caterpillar<br />
All rights reserved. Page 15
<strong>EMCP</strong> 4.1, <strong>4.2</strong> Generator Set Control<br />
Application and Installation Guide<br />
When in the Status tool, buttons to Active Codes and Events are provided at the bottom<br />
of the screen.<br />
CONNECTING TO THE <strong>EMCP</strong> 4 TO CONFIGURE SETPOINTS<br />
In order to use the Cat Service Tool with the <strong>EMCP</strong> and configure setpoints, do the<br />
following:<br />
1. Connect the Service Tool to the PC and configure the port settings as appropriate.<br />
2. Ensure the Service Tool is connected to the Primary Data Link (CAN 1).<br />
3. Start the Electronic Technician software.<br />
4. The software will search the data links.<br />
5. When the software finds the <strong>EMCP</strong> and connects to it, The ECM Summary<br />
screen will appear. If multiple devices are detected, always select the <strong>EMCP</strong><br />
before continuing to be able to access special <strong>EMCP</strong> features with ET such as<br />
annunciator configuration and device lamp status.<br />
Page 16<br />
©2013 Caterpillar<br />
All rights reserved.
Application and Installation Guide<br />
<strong>EMCP</strong> 4.1, <strong>4.2</strong> Generator Set Control<br />
6. To view configurable parameters within the <strong>EMCP</strong> 4, press the Configuration<br />
button.<br />
7. The parameter groups will appear.<br />
8. Selecting a group in the left pane will show all the parameters within that group<br />
in the right pane.<br />
4.3 VIEWING SYSTEM PARAMETERS<br />
Many generator and engine parameters are viewable in real time from both the Cat<br />
Service Tool, and the <strong>EMCP</strong> 4 display.<br />
FROM THE CAT SERVICE TOOL<br />
Parameters are accessed by selecting Information > Status from the menu, or by clicking<br />
on the STATUS TOOL icon in the toolbar. Refer to the Cat Service Tool help from the<br />
Help > Contents menu for more information on the Status Tool.<br />
FROM THE <strong>EMCP</strong> 4 DISPLAY<br />
Parameters are accessed (irrespective of the current screen position) by pressing the AC<br />
OVERVIEW , ENGINE OVERVIEW , or Main Menu buttons located below<br />
the screen. Detailed screens provide even more information by pressing the SCROLL<br />
DOWN button from each of the overview screens. For a description of the front<br />
view and navigation keys, refer to Appendix B.<br />
The <strong>EMCP</strong> 4 parameters are organized with different levels of users in mind. These<br />
levels are as follows: View, Control, and Configure. Some of the parameters are<br />
accessible from multiple paths. For a complete menu structure, refer to Appendix A.<br />
©2013 Caterpillar<br />
All rights reserved. Page 17
<strong>EMCP</strong> 4.1, <strong>4.2</strong> Generator Set Control<br />
Application and Installation Guide<br />
SUPPORTED PARAMETERS<br />
Different versions of the <strong>EMCP</strong> 4 support different numbers of parameters. <strong>EMCP</strong> <strong>4.2</strong><br />
supports multiple parameters not supported on the <strong>EMCP</strong> 4.1. Some parameters are<br />
only available in certain configurations, for example, electronic engine ECMs provide<br />
more engine data than what is available from mechanical engines. The sections below<br />
list all of the parameters available, and on which level of <strong>EMCP</strong> 4 they may be available.<br />
Parameters are displayed with units, some of which are configurable. For changing units<br />
or setting other user preferences see Chapter 4.4, Viewing and Adjusting Preferences.<br />
Parameters that are not available to the <strong>EMCP</strong> 4 are shown as (four asterisks).<br />
This may indicate an incorrect software configuration, a wiring problem, or a problem with<br />
the sensor.<br />
ENGINE OVERVIEW<br />
The Engine Overview screens display various engine parameters. The following<br />
parameters are displayed on the Engine Overview screens:<br />
ENGINE OVERVIEW SCREEN<br />
Engine Oil Pressure<br />
Engine Coolant Temperature<br />
<br />
<br />
<br />
<br />
Battery Voltage, as measured at the<br />
connector entering the <strong>EMCP</strong> 4<br />
Engine Speed<br />
Engine Operating Hours<br />
Engine Operating State (Initialization,<br />
Pre-Crank, Starting, Running, Pre-<br />
Cooldown, Cooldown, Stopping,<br />
Stopped, Idling; many states are transient<br />
and only briefly active, and some states<br />
may not occur in some configurations)<br />
ENGINE SCREEN 1<br />
Engine Oil Pressure<br />
Engine Coolant Temperature<br />
Engine Speed<br />
ENGINE SCREEN 2<br />
Battery Voltage, as measured at the<br />
connector entering the <strong>EMCP</strong> 4<br />
Engine Hours<br />
Engine Fuel Level or Engine Oil<br />
Temperature via Analog input #3<br />
Page 18<br />
©2013 Caterpillar<br />
All rights reserved.
Application and Installation Guide<br />
<strong>EMCP</strong> 4.1, <strong>4.2</strong> Generator Set Control<br />
ENGINE SCREEN 3 (<strong>EMCP</strong> <strong>4.2</strong> ONLY)<br />
Engine Hours remaining until Service<br />
Maintenance Interval expires, or<br />
Calendar Days remaining until Service<br />
Maintenance Interval expires<br />
ENGINE SCREEN 4<br />
Total engine Cranks since last reset<br />
(a crank is defined as the number of<br />
times the starter motor switches on)<br />
Total engine Starts since last reset<br />
(a start is defined as the number of<br />
times the engine transitions from below<br />
the Crank Terminate speed setpoint to<br />
above it)<br />
ENGINE SCREEN 5 (<strong>EMCP</strong> <strong>4.2</strong> ONLY)<br />
Cylinder #N Temperature<br />
(if temperature module is installed)<br />
Press the DOWN arrow to view the<br />
remaining cylinder temperatures.<br />
ENGINE SCREEN 6 (<strong>EMCP</strong> <strong>4.2</strong> ONLY)<br />
(if temperature module is installed)<br />
Temperature<br />
Left Exhaust Manifold<br />
Right Exhaust Manifold<br />
Intake Manifold<br />
Exhaust Temp<br />
Turbo 1 Compressor Inlet<br />
Turbo 2 Compressor Inlet<br />
Turbo 3 Compressor Inlet<br />
Turbo 4 Compressor Inlet<br />
Turbine 1 Inlet<br />
Turbine 1 Outlet<br />
Turbine 2 Inlet<br />
Turbine 2 Outlet<br />
Turbine 3 Inlet<br />
Turbine 3 Outlet<br />
Turbine 4 Inlet<br />
Turbine 4 Outlet<br />
Press the DOWN arrow to view the<br />
remaining temperatures.<br />
©2013 Caterpillar<br />
All rights reserved. Page 19
<strong>EMCP</strong> 4.1, <strong>4.2</strong> Generator Set Control<br />
Application and Installation Guide<br />
ENGINE SCREEN 7 (<strong>EMCP</strong> <strong>4.2</strong> ONLY)<br />
(if supported by Engine ECM)<br />
<br />
<br />
Engine Oil Temperature<br />
Engine Fuel Temperature<br />
ENGINE SCREEN 8 (<strong>EMCP</strong> <strong>4.2</strong> ONLY)<br />
(if supported by Engine ECM)<br />
<br />
<br />
<br />
Engine Fuel Pressure<br />
Engine Crankcase Pressure<br />
Boost Pressure<br />
ENGINE SCREEN 9 (<strong>EMCP</strong> <strong>4.2</strong> ONLY)<br />
(if supported by Engine ECM)<br />
<br />
<br />
Oil Filter Differential Pressure<br />
Fuel Filter Differential Pressure<br />
ENGINE SCREEN 10 (<strong>EMCP</strong> <strong>4.2</strong> ONLY)<br />
(if supported by Engine ECM)<br />
<br />
Air Filter Differential Pressure<br />
ENGINE SCREEN 11 (<strong>EMCP</strong> <strong>4.2</strong> ONLY)<br />
(if supported by Engine ECM)<br />
<br />
<br />
Total Fuel Consumption<br />
Instantaneous Fuel Consumption Rate<br />
ENGINE SCREEN 12<br />
(if supported by SCR or Engine ECM)<br />
<br />
SCR Tank Level Status<br />
ENGINE SCREEN 13<br />
(if supported by SCR or Engine ECM)<br />
<br />
SCR Tank Temperature<br />
ENGINE SCREEN 14<br />
(if supported by SCR or Engine ECM)<br />
<br />
SCR Air Assist Pressure<br />
Page 20<br />
©2013 Caterpillar<br />
All rights reserved.
Application and Installation Guide<br />
<strong>EMCP</strong> 4.1, <strong>4.2</strong> Generator Set Control<br />
ENGINE SCREEN 15<br />
(if supported by SCR or Engine ECM)<br />
<br />
Catalyst Temperature<br />
ENGINE SCREEN 16<br />
(if supported by SCR or Engine ECM)<br />
<br />
SCR Exhaust Gas Differential<br />
Pressure<br />
ENGINE SCREEN 17<br />
(if supported by SCR or Engine<br />
ECM)SCR System Status<br />
Engine Screen 18<br />
(if supported by SCR or Engine ECM)<br />
Diesel Exhaust Fluid Dosing<br />
Temperature<br />
ENGINE SCREEN 19<br />
(if supported by SCR or Engine<br />
ECM)Total Diesel Exhaust Fluid Used<br />
ENGINE SCREEN 20<br />
(if supported by SCR or Engine ECM)<br />
<br />
Time Since Last Inducement<br />
ENGINE SCREEN 21<br />
(if supported by SCR or Engine ECM)<br />
<br />
Time Remaining Until Inducement<br />
©2013 Caterpillar<br />
All rights reserved. Page 21
<strong>EMCP</strong> 4.1, <strong>4.2</strong> Generator Set Control<br />
Application and Installation Guide<br />
AC OVERVIEW<br />
The AC Overview screens display various generator parameters. The following parameters are<br />
displayed on the AC Overview screens:<br />
AC OVERVIEW SCREEN<br />
Average Line-Line AC Voltage<br />
Average Current<br />
AC Frequency<br />
Power Factor (<strong>EMCP</strong> <strong>4.2</strong> Only)<br />
Power Factor Lead/Lag status<br />
(<strong>EMCP</strong> <strong>4.2</strong> Only)<br />
Total Generator Real Power – kW<br />
(<strong>EMCP</strong> <strong>4.2</strong> Only)<br />
Percent Real Power as a percentage of<br />
Generator Rated Power (<strong>EMCP</strong> <strong>4.2</strong> Only)<br />
GENERATOR SCREEN 1<br />
Line-Line Voltages: A-B, B-C, C-A<br />
Phase Currents: A, B, C<br />
AC Frequency<br />
GENERATOR SCREEN 2<br />
Line-Neutral Voltages: A-N, B-N, C-N<br />
Phase Currents: A, B, C<br />
AC Frequency<br />
GENERATOR SCREEN 3 (<strong>EMCP</strong> <strong>4.2</strong> ONLY)<br />
Phase Generator Real Power – kW<br />
Phase Generator Apparent Power – kVA<br />
Phase Generator Reactive Power – kVAr<br />
GENERATOR SCREEN 4 (<strong>EMCP</strong> <strong>4.2</strong> ONLY)<br />
Phase Generator Real Power – kW<br />
Phase Generator Apparent Power – kVA<br />
Power Factor<br />
GENERATOR SCREEN 5 (<strong>EMCP</strong> <strong>4.2</strong> ONLY)<br />
Total Generator Real Power – kW<br />
Total Generator Apparent Power – kVA<br />
Total Generator Reactive Power – kVAr<br />
GENERATOR SCREEN 6 (<strong>EMCP</strong> <strong>4.2</strong> ONLY)<br />
Generator Real Energy produced since last<br />
meter reset<br />
Generator Reactive Energy produced since<br />
last meter reset<br />
Page 22<br />
©2013 Caterpillar<br />
All rights reserved.
Application and Installation Guide<br />
<strong>EMCP</strong> 4.1, <strong>4.2</strong> Generator Set Control<br />
GENERATOR SCREEN 7<br />
Average Line-Line AC Voltage<br />
Average Line-Neutral AC Voltage<br />
Power Factor (<strong>EMCP</strong> <strong>4.2</strong> Only)<br />
<br />
Power Factor Lead/Lag status<br />
(<strong>EMCP</strong> <strong>4.2</strong> Only)<br />
GENERATOR SCREEN 8 (<strong>EMCP</strong> <strong>4.2</strong> ONLY)<br />
Rear Bearing Temperature<br />
(if temperature module is installed)<br />
Front Bearing Temperature<br />
(if temperature module is installed)<br />
GENERATOR SCREEN 9 (<strong>EMCP</strong> <strong>4.2</strong> ONLY)<br />
Generator Phase A Winding Temperature<br />
(if temperature module is installed)<br />
Generator Phase B Winding Temperature<br />
(if temperature module is installed)<br />
Generator Phase C Winding Temperature<br />
(if temperature module is installed)<br />
GENERATOR SCREEN 10 (<strong>EMCP</strong> <strong>4.2</strong> WITH CDVR ONLY)<br />
Generator Excitation Field Voltage<br />
Generator Excitation Field Current<br />
4.4 VIEWING AND ADJUSTING PREFERENCES<br />
The <strong>EMCP</strong> 4 display can be used for monitoring the generator status, viewing and<br />
resetting events, and configuring setpoints. There are several preferences to alter how<br />
you view the data on the display. These include: display contrast, units used to display<br />
pressure, units used to display temperature, units used to display volume (<strong>EMCP</strong> <strong>4.2</strong><br />
only), and displayed language (to select between the customer language and Technician<br />
English).<br />
Note: These preferences do not affect operation of the <strong>EMCP</strong> 4, the values in the<br />
SCADA Communications (Modbus) or the data as viewed in the Cat Service Tool. They<br />
only affect how the text and data is converted and displayed on the <strong>EMCP</strong> 4 display.<br />
©2013 Caterpillar<br />
All rights reserved. Page 23
<strong>EMCP</strong> 4.1, <strong>4.2</strong> Generator Set Control<br />
Application and Installation Guide<br />
SETTING THE PREFERENCES USING THE <strong>EMCP</strong> 4 DISPLAY<br />
On the <strong>EMCP</strong> 4 display, the Preferences menu is<br />
located at the bottom of the Main Menu.<br />
Scroll DOWN<br />
to the desired Preference.<br />
Press the OK KEY .<br />
Use the Arrow keys to adjust the Preference as<br />
described below.<br />
For any preference, press the OK KEY<br />
to<br />
accept the change (or ESCAPE KEY to reject<br />
the change) and return to the Preferences menu.<br />
Page 24<br />
©2013 Caterpillar<br />
All rights reserved.
Application and Installation Guide<br />
<strong>EMCP</strong> 4.1, <strong>4.2</strong> Generator Set Control<br />
PREFERENCES<br />
CONTRAST<br />
PRESSURE<br />
TEMPERATURE<br />
VOLUME<br />
(<strong>EMCP</strong> <strong>4.2</strong> only)<br />
This determines the darkness of the pixels on the display. A minimum<br />
contrast setting (reached by pressing and holding the down or left arrow)<br />
effectively blanks the screen, and a maximum contrast setting (reached by<br />
pressing and holding the up or right arrow) effectively darkens the entire<br />
screen. To change the contrast if the screen is unreadable due to a<br />
misconfiguration or ambient conditions, see CHANGING THE <strong>EMCP</strong> 4<br />
CONTRAST WHEN THE DISPLAY IS UNREADABLE.<br />
This allows pressure parameters (such as Engine Oil Pressure) and setpoints<br />
(such as Low Engine Oil Pressure Event Threshold) to be shown in either kPa,<br />
psi, or bar. Select the desired unit with the up or down arrows, or the Function<br />
keys.<br />
This allows temperature parameters (such as Engine Coolant Temperature)<br />
and setpoints (such High Engine Coolant Temperature Event Threshold) to<br />
be shown in either Celsius (Centigrade) or degrees Fahrenheit. Select the<br />
desired unit with the up or down arrows.<br />
This allows volume parameters (such as Fuel Volume) to be shown in Liters,<br />
Imperial Gallons, or US Gallons. Select the desired unit with the up or down<br />
arrows.<br />
LAMP TEST<br />
LANGUAGE<br />
When this selection is highlighted, pressing and holding the OK KEY<br />
will darken all pixels on the screen and illuminate all LED’s on the face<br />
of the controller.<br />
This allows the display to be switched between Technician English (always<br />
listed first) and the customer language (always listed second, and written in<br />
the font of the customer language). Select the desired language with the up<br />
or down arrows. To change the language to Technician English, regardless<br />
of the current screen, and without needing to read the text, see CHANGING<br />
THE <strong>EMCP</strong> 4 DISPLAY TO TECHNICIAN ENGLISH.<br />
The LANGUAGE setting has been conveniently located at the bottom of the Preferences menu,<br />
which is at the bottom of the Main Menu.<br />
©2013 Caterpillar<br />
All rights reserved. Page 25
<strong>EMCP</strong> 4.1, <strong>4.2</strong> Generator Set Control<br />
Application and Installation Guide<br />
CHANGING THE <strong>EMCP</strong> 4 CONTRAST WHEN THE DISPLAY IS UNREADABLE<br />
1. Press the MAIN MENU key<br />
2. Scroll DOWN until scrolling stops<br />
3. Press the OK KEY (this will take you into the Preferences Menu)<br />
4. Press the OK KEY again (this will take you into the Contrast selection)<br />
5. Press and hold either LEFT ARROW or RIGHT ARROW until the text<br />
and graphics become visible<br />
6. Press the OK KEY to accept the adjustment<br />
CHANGING THE <strong>EMCP</strong> 4 DISPLAY TO TECHNICIAN ENGLISH<br />
1. Press the MAIN MENU key<br />
2. Scroll DOWN until the scrolling stops<br />
3. Press the OK KEY (this will take you into the Preferences Menu)<br />
4. Press the DOWN ARROW key until scrolling stops<br />
5. Press the OK KEY (this will take you into the Language selection)<br />
6. Press the UP ARROW key until the scrolling stops<br />
7. Press the OK KEY to select TECHNICIAN ENGLISH<br />
The <strong>EMCP</strong> 4 language setting is changed back to TECHNICIAN ENGLISH.<br />
Page 26<br />
©2013 Caterpillar<br />
All rights reserved.
Application and Installation Guide<br />
<strong>EMCP</strong> 4.1, <strong>4.2</strong> Generator Set Control<br />
Similar steps can be followed by a customer who is unfamiliar with English, to change<br />
the language setting back to their primary language:<br />
CHANGING THE <strong>EMCP</strong> 4 DISPLAY TO THE PRIMARY LANGUAGE<br />
1. Press the MAIN MENU key<br />
2. Scroll DOWN until the scrolling stops<br />
3. Press the OK KEY (this will take you into the Preferences Menu)<br />
4. Press the DOWN ARROW until the scrolling stops<br />
5. Press the OK KEY (this will take you into the language selection)<br />
6. Press the DOWN arrow to select the customer language<br />
7. Press the OK KEY to change to the customer language<br />
The <strong>EMCP</strong> 4 language setting is changed back to the customer language.<br />
SETTING THE PREFERENCES USING THE SERVICE TOOL<br />
Only the preferences for units can be configured using the Cat Service Tool. They are<br />
located in the Configuration Tool. Select Display Preferences from the left panel.<br />
Figure 17: Display Preferences<br />
©2013 Caterpillar<br />
All rights reserved. Page 27
<strong>EMCP</strong> 4.1, <strong>4.2</strong> Generator Set Control<br />
Application and Installation Guide<br />
The display units can be changed the same way other setpoints are changed with the<br />
Service Tool.<br />
PRESSURE<br />
TEMPERATURE<br />
VOLUME<br />
(<strong>EMCP</strong> <strong>4.2</strong><br />
ONLY)<br />
This allows pressure parameters (such as Engine Oil Pressure) and<br />
some setpoints (such as Low Engine Oil Pressure Event Threshold via<br />
Datalink) to be shown in either kPa, psi, or bar.<br />
This allows temperature parameters (such as Engine Coolant<br />
Temperature) and setpoints (such High Engine Coolant Temperature<br />
Event Threshold) to be shown in either Celsius (Centigrade) or degrees<br />
Fahrenheit.<br />
This allows volume parameters (such as Fuel Volume) to be shown in<br />
Liters, Imperial Gallons, or US Gallons.<br />
4.5 CONFIGURING TIME/DATE (<strong>EMCP</strong> <strong>4.2</strong> ONLY)<br />
The <strong>EMCP</strong> <strong>4.2</strong> has an internal Real Time clock that is used for time-stamping events<br />
and Programmable Cycle Timer (Chapter 13). The timestamps for the last date and time<br />
an event has occurred and the first date and time the event has occurred are viewed by<br />
selecting a module in the Event Log and pressing the OK key, followed by the DOWN<br />
ARROW key. See Figure 18.<br />
Figure 18: Event Details Screens<br />
CHANGING THE TIME/DATE<br />
The <strong>EMCP</strong> <strong>4.2</strong> clock allows the time/date to be modified. Changing the time/date will<br />
change the timestamp on all future events, but not for existing events. (For example,<br />
an event that has occurred previously will still show the same FIRST time/date, but if<br />
it occurs again after the time/date has been adjusted, the LAST time/date will reflect<br />
the change.)<br />
This procedure must be performed on the <strong>EMCP</strong> 4 display; it cannot be done using the<br />
Cat Service Tool. In order to update time/date, LEVEL 1 ACCESS is required. Refer to<br />
Chapter 6.<br />
Security for information on obtaining LEVEL 1 ACCESS.<br />
Page 28<br />
©2013 Caterpillar<br />
All rights reserved.
Application and Installation Guide<br />
<strong>EMCP</strong> 4.1, <strong>4.2</strong> Generator Set Control<br />
To change the time/date, do the following:<br />
At MAIN MENU scroll DOWN<br />
to CONFIGURE.<br />
Press the OK KEY .<br />
Scroll DOWN<br />
to TIME/DATE.<br />
Press the OK KEY .<br />
To begin editing the time, press the OK KEY<br />
while the current time is selected.<br />
Press the OK KEY<br />
again to enter the editor.<br />
Select a digit using the LEFT ARROW or RIGHT ARROW .<br />
To change the selected digit use the UP ARROW or DOWN ARROW .<br />
To accept changes, press the OK KEY . To reject changes, press the ESCAPE KEY .<br />
©2013 Caterpillar<br />
All rights reserved. Page 29
<strong>EMCP</strong> 4.1, <strong>4.2</strong> Generator Set Control<br />
Application and Installation Guide<br />
TO CHANGE THE DATE FROM THIS POINT<br />
Press the ESCAPE KEY<br />
SET TIME/DATE screen.<br />
again to return to the<br />
Press the RIGHT ARROW<br />
around the date.<br />
key to put the box<br />
Press the OK KEY<br />
again to enter the editor.<br />
Select a digit using the LEFT ARROW or RIGHT ARROW .<br />
To change the selected digit use the UP ARROW or DOWN ARROW .<br />
To accept changes, press the OK KEY . To reject changes, press the ESCAPE KEY .<br />
CHANGING DATE FORMAT<br />
The data format can be set to either display in the form Month/Day/Year or the form<br />
Day/Month/Year. This procedure must be performed on the <strong>EMCP</strong> <strong>4.2</strong> display; it cannot<br />
be done using the Cat Service Tool.<br />
Note: This preference does not affect operation of the <strong>EMCP</strong> 4 or the data as viewed in<br />
the Cat Service Tool. It only affects how the date is displayed on the <strong>EMCP</strong> 4 display<br />
and the format of the event time stamps.<br />
Page 30<br />
©2013 Caterpillar<br />
All rights reserved.
Application and Installation Guide<br />
<strong>EMCP</strong> 4.1, <strong>4.2</strong> Generator Set Control<br />
To change the date format, do the following:<br />
At MAIN MENU scroll DOWN<br />
to CONFIGURE.<br />
Press the OK KEY .<br />
SCROLL DOWN<br />
to TIME/DATE.<br />
Press the OK KEY .<br />
To begin editing the date, press the OK KEY<br />
while the current date is selected.<br />
Select the format using the<br />
LEFT ARROW or RIGHT ARROW , then press<br />
the OK KEY<br />
to accept, or the ESCAPE KEY<br />
to reject, the change.<br />
4.6 ADJUSTING GENERATOR SET PARAMETERS<br />
On many gensets, the engine speed, generator output voltage, and idle/rated status can<br />
be adjusted from the display of the <strong>EMCP</strong> 4. This ability is dependent upon the engine<br />
interface strategy and input/output configuration.<br />
GENERATOR OUTPUT VOLTAGE<br />
If the genset is equipped with a Cat Digital Voltage Regulator (Cat DVR) or the<br />
Integrated Voltage Regulator (IVR), then the generator output voltage setpoint can be<br />
adjusted from the display of the <strong>EMCP</strong> 4. When using the CDVR, the CDVR must be<br />
programmed to allow this control. In order for the VOLTAGE ADJUST to work via CAN, the<br />
AVR VOLTAGE CONTROL DESIRED INPUT CONFIGURATION setpoint in the CDVR must be<br />
programmed for CAN INPUT. If that setpoint is set to SWITCH, the VOLTAGE CONTROL from<br />
the <strong>EMCP</strong> 4 will NOT WORK.<br />
ENGINE SPEED<br />
If the genset is equipped with an ADEM A3 or A4 governor, then the engine speed<br />
setpoint can be adjusted from the display of the <strong>EMCP</strong> 4, provided the A3 or A4 is<br />
programmed to allow this control. In order for the SPEED ADJUST to work via CAN, the<br />
DESIRED THROTTLE INPUT CONFIGURATION setpoint in the A3 or A4 must be programmed<br />
for CAN INPUT. If that setpoint is set to PWM, the SPEED CONTROL from the <strong>EMCP</strong> 4 will<br />
NOT WORK.<br />
©2013 Caterpillar<br />
All rights reserved. Page 31
<strong>EMCP</strong> 4.1, <strong>4.2</strong> Generator Set Control<br />
Application and Installation Guide<br />
PROGRAMMING THE GENERATOR OUTPUT VOLTAGE AND ENGINE SPEED<br />
From the MAIN MENU select CONTROL.<br />
Press the OK KEY .<br />
From the CONTROL MENU, select VOLT/HZ CONTROL.<br />
Press the OK KEY .<br />
The speed and voltage adjust screen will be<br />
displayed.<br />
To adjust the generator voltage from this screen:<br />
Press the DOWN ARROW KEY<br />
to DECREASE the generator voltage.<br />
Press the UP ARROW KEY to INCREASE the generator voltage.<br />
To adjust the engine speed from this screen:<br />
Press the LEFT ARROW KEY<br />
to DECREASE the engine speed.<br />
Press the RIGHT ARROW KEY<br />
to INCREASE the engine speed.<br />
The <strong>EMCP</strong> 4 will broadcast a desired engine speed bias based on the adjustment that<br />
is made. When the engine speed is adjusted, then that value will remain until either it is<br />
adjusted again or until the control is power-cycled. Unlike the setpoints or preferences<br />
(i.e. contrast), any changes to this screen take effect immediately. The OK KEY<br />
and ESCAPE KEY<br />
do not serve to accept or cancel changes.<br />
IDLE/RATED<br />
The <strong>EMCP</strong> 4.1 and <strong>EMCP</strong> <strong>4.2</strong> both have the ability to be placed into Idle mode via the<br />
display, a Discrete Input, or through the SCADA Data Link. With some genset systems,<br />
the engine ECM may also send the <strong>EMCP</strong> into Idle mode when the engine ECM is<br />
operating in Idle mode. Idle mode will disable Under Speed, Under Voltage, and Under<br />
Frequency protections in the <strong>EMCP</strong> 4. It will also use a different set of oil pressure<br />
thresholds.<br />
Page 32<br />
©2013 Caterpillar<br />
All rights reserved.
Application and Installation Guide<br />
<strong>EMCP</strong> 4.1, <strong>4.2</strong> Generator Set Control<br />
Note: The Engine Forced Idle Feature Enable Status parameter must be set to<br />
“Enabled” within Cat ET prior to seeing this menu option on the display. This setpoint is<br />
under the Automatic Start/Stop submenu in Cat ET.<br />
When the <strong>EMCP</strong> 4 is placed in Idle mode, a programmable output may be programmed<br />
and wired to signal that it is operating in Idle. In some wiring configurations, the <strong>EMCP</strong><br />
will also send a signal via the Primary CAN Data Link to the ADEM.<br />
The engine speed can be toggled between LOW IDLE and RATED SPEED from the display<br />
of the control as follows:<br />
From the MAIN MENU select CONTROL.<br />
Press the OK KEY .<br />
From the CONTROL MENU select IDLE/RATED.<br />
Press the OK KEY .<br />
The IDLE/RATED screen will be displayed and the<br />
current state will be shown.<br />
Press the OK KEY .<br />
Press the UP ARROW<br />
or DOWN ARROW<br />
to change the state.<br />
Press the OK KEY .<br />
ENGINE SENSOR VERSUS DATA LINK<br />
The Engine Oil Pressure and Engine Coolant Temperature setpoints need special care<br />
when programming. These can be configured as either SENSOR or DATA LINK.<br />
When SENSOR is configured, the physical sensor is connected directly to the <strong>EMCP</strong> 4.<br />
In this configuration, Analog Inputs are configured with the desired setpoints for the rated<br />
speed warnings and shutdowns. The idle setpoints are still configured under the Engine<br />
Oil Pressure Monitor.<br />
When DATA LINK is configured, the physical sensors are connected to the engine ECM.<br />
The engine ECM is configured with setpoints to protect the engine. Sensor values may<br />
also be communicated to the <strong>EMCP</strong> over the data link. The <strong>EMCP</strong> allows for redundant<br />
setpoints to be assigned based on this information seen from the engine.<br />
©2013 Caterpillar<br />
All rights reserved. Page 33
<strong>EMCP</strong> 4.1, <strong>4.2</strong> Generator Set Control<br />
Application and Installation Guide<br />
TO CONFIGURE THE CONTROLLER AS SENSOR OR DATA LINK USING THE DISPLAY:<br />
At MAIN MENU scroll DOWN<br />
to CONFIGURE.<br />
Press the OK KEY .<br />
SCROLL DOWN<br />
to ALL SETPOINTS.<br />
Press the OK KEY .<br />
SCROLL DOWN to ENG<br />
MONITOR/PROTECT.<br />
Press the OK KEY .<br />
SCROLL DOWN to ENG COOL TEMP MON<br />
OR ENG OIL PRES MON.<br />
Press the OK KEY .<br />
Note: Level 3 password is required.<br />
Press the OK KEY<br />
To change the selection use the UP ARROW<br />
or DOWN ARROW .<br />
Press the OK KEY .<br />
TO CONFIGURE THE CONTROLLER AS SENSOR OR DATA LINK USING CAT ET:<br />
1. Connect to the <strong>EMCP</strong> 4 using the Cat Service Tool as stated in Chapter <strong>4.2</strong>.<br />
2. Select Automatic Start/Stop on the left.<br />
Page 34<br />
©2013 Caterpillar<br />
All rights reserved.
Application and Installation Guide<br />
<strong>EMCP</strong> 4.1, <strong>4.2</strong> Generator Set Control<br />
3. Double click the Engine Coolant Temperature Sensor Configuration setpoint to<br />
change this value from the drop down menu. Click the OK button to program.<br />
4. Double click the Engine Oil Pressure Sensor Configuration setpoint to<br />
change this value from the drop down menu. Click the OK button to program.<br />
ENGINE OIL PRESSURE<br />
The Engine Oil Pressure setpoints need special care when programming. The first step<br />
is to set the configuration as either SENSOR or DATA LINK.<br />
When SENSOR is configured, the physical sensor is connected directly to the <strong>EMCP</strong> 4.<br />
In this configuration, Analog Input #1 (normally used for Oil Pressure Sensor) is<br />
configured with the desired setpoints for the rated speed Oil Pressure warnings and<br />
shutdowns. The idle speed step and idle oil pressure setpoints are still configured under<br />
the Engine Oil Pressure Monitor.<br />
When DATA LINK is configured, the physical sensor is connected to the engine ECM.<br />
The engine ECM is configured with setpoints to protect the engine. Sensor values may<br />
also be communicated to the <strong>EMCP</strong> over the data link. The <strong>EMCP</strong> allows for redundant<br />
setpoints to be assigned based on this information seen from the engine.<br />
©2013 Caterpillar<br />
All rights reserved. Page 35
<strong>EMCP</strong> 4.1, <strong>4.2</strong> Generator Set Control<br />
Application and Installation Guide<br />
SENSOR CONFIGURATION<br />
In SENSOR configuration, Analog Input #1 contains the parameters for warnings and<br />
shutdowns for High and Low OIL PRESSURE. Security Level 3 is required to program<br />
Analog Input #1.<br />
TO CONFIGURE ANALOG INPUT #1 FOR ENGINE OIL PRESSURE:<br />
AT THE MAIN MENU, scroll down<br />
to CONFIGURE.<br />
Press the OK KEY .<br />
SCROLL DOWN<br />
to INPUTS & OUTPUTS.<br />
Press the OK KEY .<br />
SCROLL DOWN<br />
to ANALOG INPUTS.<br />
Press the OK KEY .<br />
Alternately, access to THE INPUTS & OUTPUTS<br />
submenu is accessible from ALL SETPOINTS.<br />
Select the ANALOG INPUT #1.<br />
Press the OK KEY .<br />
Press the OK KEY to highlight the current<br />
configuration (DISABLED, RESISTIVE, OR VOLTAGE).<br />
Scroll DOWN to RESISTIVE .<br />
Press the OK KEY .<br />
Scroll DOWN<br />
to DATA IDENTIFICATION<br />
Press the OK KEY<br />
to change the current DATA<br />
IDENTIFICATION.<br />
Select the DATA IDENTIFICATION to ENG OIL PRES.<br />
Press the OK KEY .<br />
Page 36<br />
©2013 Caterpillar<br />
All rights reserved.
Application and Installation Guide<br />
<strong>EMCP</strong> 4.1, <strong>4.2</strong> Generator Set Control<br />
Scroll DOWN to configure the remaining setpoints for Analog Input #1:<br />
Map Selection Number<br />
Low Warning Threshold<br />
Low Warning Delay<br />
Low Warning Event Response<br />
Low S/D Threshold<br />
Low S/D Delay<br />
Low S/D Event Response<br />
Shared Supply Voltage<br />
In addition to the setpoints for high and low Oil Pressure available in Analog Input #1,<br />
setpoints for LOW IDLE LOW OIL PRESSURE and STEP SPEED are also available in<br />
the ENG MONITOR/PROTECT menu.<br />
TO CONFIGURE THESE SETPOINTS:<br />
At MAIN MENU scroll DOWN<br />
to CONFIGURE.<br />
Press the OK KEY .<br />
SCROLL DOWN<br />
to ALL SETPOINTS.<br />
Press the OK KEY .<br />
SCROLL DOWN<br />
to ENG MONITOR/PROTECT.<br />
Press the OK KEY .<br />
SCROLL DOWN<br />
to ENG OIL PRES MON.<br />
Press the OK KEY .<br />
Note: Level 3 password is required.<br />
Scroll DOWN to configure the remaining setpoints for Engine Oil Pressure Monitor:<br />
Low Eng Oil Pressure Warning Threshold<br />
Low Idle Low Eng Oil Pres Warn Threshold<br />
Low Eng Oil Pressure Warning Delay Time<br />
Low Eng Oil Pressure Shutdown Threshold<br />
Low Idle Low Eng Oil Pres S/D Threshold<br />
Low Eng Oil Pressure Shutdown Delay Time<br />
Low Engine Oil Pressure Step Speed<br />
©2013 Caterpillar<br />
All rights reserved. Page 37
<strong>EMCP</strong> 4.1, <strong>4.2</strong> Generator Set Control<br />
Application and Installation Guide<br />
Note: All DATA LINK OIL PRESSURE setpoints in this menu are inactive when in<br />
SENSOR configuration. The Low Idle setpoints are still active regardless of SENSOR<br />
or DATA LINK. Setpoints labeled as DATA LINK to refer to the fact they are only active<br />
when the DATA LINK configuration is chosen.<br />
DATA LINK<br />
The OIL PRESSURE setpoints when in the DATA LINK configuration are redundant<br />
to the primary protection provided by the engine ECM. If these protections are not<br />
programmed to match those in the ADEM and an event occurs, check the Event Logs<br />
to determine which module generated the event.<br />
ENGINE COOLANT TEMPERATURE<br />
The Engine Coolant Temperature setpoints need special care when programming.<br />
The first step is to set the configuration as either SENSOR or DATA LINK.<br />
When SENSOR is configured, the physical sensor is connected directly to the <strong>EMCP</strong>.<br />
In this configuration, Analog Input #2 (normally used for Coolant Temperature) is<br />
configured with the desired setpoints for Coolant Temperature warnings and shutdowns.<br />
When DATA LINK is configured, the physical sensor is connected to the engine ECM.<br />
The engine ECM is configured with setpoints to protect the engine. Sensor values may<br />
also be communicated to the <strong>EMCP</strong> over the data link. The <strong>EMCP</strong> allows for redundant<br />
setpoints to be assigned based on this information seen from the engine.<br />
SENSOR CONFIGURATION<br />
In SENSOR configuration, Analog Input #2 contains the configurations for alarms and<br />
shutdowns for High and Low COOLANT TEMPERATURE. Security Level 3 is required<br />
to program Analog Input #2.<br />
TO CONFIGURE ANALOG INPUT #2 FOR ENGINE COOLANT TEMPERATURE:<br />
AT THE MAIN MENU, scroll down<br />
to CONFIGURE<br />
Press the OK KEY .<br />
SCROLL DOWN<br />
to INPUTS & OUTPUTS<br />
Press the OK KEY .<br />
SCROLL DOWN<br />
to ANALOG INPUTS<br />
Press the OK KEY .<br />
Alternately, access to THE INPUTS & OUTPUTS<br />
submenu is accessible from ALL SETPOINTS.<br />
Select the ANALOG INPUT #2<br />
Press the OK KEY .<br />
Page 38<br />
©2013 Caterpillar<br />
All rights reserved.
Application and Installation Guide<br />
<strong>EMCP</strong> 4.1, <strong>4.2</strong> Generator Set Control<br />
Press the OK KEY to highlight the current<br />
configuration (DISABLED, RESISTIVE, OR VOLTAGE).<br />
Scroll DOWN<br />
sensor<br />
to select the appropriate<br />
Press the OK KEY .<br />
Scroll DOWN<br />
to DATA IDENTIFICATION<br />
Press the OK KEY<br />
Select the ENG COOLANT TEMP<br />
to change the current<br />
DATA IDENTIFICATION.<br />
Press the OK KEY .<br />
Scroll DOWN to configure the remaining setpoints for Analog Input #2:<br />
Map Selection Number<br />
High Warning Threshold<br />
High Warning Delay<br />
High Warning Event Response<br />
High Warning Threshold<br />
Low Warning Delay<br />
Low Warning Event Response<br />
High S/D Threshold<br />
High S/D Delay<br />
High S/D Event Response<br />
Shared Supply Voltage<br />
Note: All COOLANT TEMP setpoints in the ENG MONITOR/PROTECT menu are<br />
inactive when in SENSOR configuration. They are labeled as DATA LINK to refer to<br />
the fact they are only active when the DATA LINK configuration is chosen.<br />
DATA LINK<br />
The COOLANT TEMPERATURE setpoints when in the DATA LINK configuration are<br />
redundant to the primary protection provided by the engine ECM. If these protections<br />
are not programmed to match those in the ADEM and an event occurs, check the Event<br />
Logs to determine which module generated the event.<br />
©2013 Caterpillar<br />
All rights reserved. Page 39
<strong>EMCP</strong> 4.1, <strong>4.2</strong> Generator Set Control<br />
Application and Installation Guide<br />
4.7 STARTING AND STOPPING THE GENERATOR SET<br />
STARTING THE ENGINE<br />
Once the control is configured correctly, the control panel is powered up, and the<br />
generator set is ready to be operated, the generator set can be started. Refer to Figure<br />
19, Stopping The Engine. There are several ways the generator set can be started from<br />
the control panel.<br />
To START the engine:<br />
1. In MANUAL OPERATION, press the RUN KEY<br />
or<br />
2. Activate a Digital Input programmed for ECS in Run<br />
or<br />
3. Place the control in AUTO mode then,<br />
4. The engine can be started THREE DIFFERENT WAYS:<br />
a: Activate the REMOTE START INPUT<br />
b: Activate a REMOTE INITIATE over the MODBUS data link (<strong>EMCP</strong> <strong>4.2</strong> only)<br />
c: Configure a PROGRAMMABLE CYCLE TIMER (<strong>EMCP</strong> <strong>4.2</strong> only). See Chapter 13.<br />
When the control panel initiates a start command on an engine, the <strong>EMCP</strong> checks to<br />
make sure there are no SHUTDOWN EVENTS present (labeled PRESENT) or that there are<br />
no latched SHUTDOWN EVENTS (labeled ACTIVE).<br />
If there are no shutdown events that are active or present, and after any pre-crank or<br />
start-aid activities have completed, the starter motor and fuel control will be activated.<br />
The <strong>EMCP</strong> 4 will activate the Relay Output programmed to activate the starter motor<br />
magnetic switch, and the Relay Output programmed to activate the fuel enable circuit.<br />
On electronic engines with ADEM A3 or newer engine ECMs using Common Engine<br />
Interface, the start command and fuel enable signals may be sent from the <strong>EMCP</strong> 4 to<br />
the engine ECM via the PRIMARY CAN data link. After receiving the signals, the engine<br />
ECM will operate the fuel control relay and starter motor magnetic switch. Relay Outputs<br />
#1 and #2 are not needed on those engines and can be configured for other uses.<br />
The Starter Motor Relay will remain active until the programmed ENGINE CRANK TIME<br />
has been reached, or until the engine speed has reached the programmed CRANK<br />
TERMINATE SPEED setpoint value.<br />
Note: The <strong>EMCP</strong> 4 Crank setpoints number of cranks, crank duration, and crank<br />
terminate speed are not used on engines with the Common Engine Interface option<br />
or newer engine ECM. These values must be adjusted in the engine ECM.<br />
Caution: To determine the exact starting sequence for your engine, consult your<br />
engine’s Operation and Maintenance Manual.<br />
Page 40<br />
©2013 Caterpillar<br />
All rights reserved.
Application and Installation Guide<br />
<strong>EMCP</strong> 4.1, <strong>4.2</strong> Generator Set Control<br />
Note: If a Digital Input is programmed for ECS in Auto, or Run, or Stop, and a<br />
maintained switch latches that input to make it active, the front panel buttons will<br />
not have any effect.<br />
<strong>EMCP</strong> 4 REMOTE START<br />
The <strong>EMCP</strong> 4 has the ability to accept a remote start signal. If this signal is activated,<br />
the <strong>EMCP</strong> will send an Engine Start request to the engine controller. If the Remote Start<br />
signal is removed, the <strong>EMCP</strong> will send a Stop request signal to the engine controller.<br />
A momentary signal will not keep the engine running.<br />
This signal should be wired into pin 55. This input will be logically active when pulled<br />
down to battery negative.<br />
STOPPING THE ENGINE<br />
Once the engine is started, the engine can be stopped by pressing the STOP KEY<br />
on the control panel, or activating a Digital Input programmed for ECS in Stop. If the<br />
control is in AUTO, the engine can also be stopped by DEACTIVATING all of the remote<br />
initiate commands. There are three possible sources for this command:<br />
1. The REMOTE START INPUT<br />
2. The REMOTE START COMMAND over the Modbus data link (<strong>EMCP</strong> <strong>4.2</strong> only).<br />
3. The PROGRAMMABLE CYCLE TIMER (<strong>EMCP</strong> <strong>4.2</strong> only). See Chapter 13<br />
Once the STOP command is issued, the control will go into COOLDOWN MODE. Cooldown<br />
mode will run for the duration of time that it is programmed in the COOLDOWN DURATION<br />
setpoint. If the cooldown time is set for zero minutes, the engine will stop immediately.<br />
On engines with ADEM A4 or newer engine ECMs using Common Engine<br />
Interface(CEI), the cooldown timer in the <strong>EMCP</strong> 4 should be set to 0 (Zero) minutes<br />
because the cooldown time is controlled from the engine ECM (if this is not done, both<br />
cooldown timers will run in sequence). Also, the ENGINE OPERATING STATE INPUT<br />
CONFIGURATION parameter must be set to CAN INPUT.<br />
The cooldown timer on the <strong>EMCP</strong> can be overridden by pressing and holding the STOP<br />
KEY for approximately 5 seconds. The display will show a splash screen that will<br />
ask if you want to BYPASS COOLDOWN? or continue with the cooldown cycle.<br />
If the OK KEY<br />
bypassed.<br />
is pressed from the splash screen, the cooldown timer will be<br />
If the ESCAPE KEY is pressed from the splash screen, the cooldown cycle<br />
will continue until the programmed cooldown time has elapsed.<br />
©2013 Caterpillar<br />
All rights reserved. Page 41
<strong>EMCP</strong> 4.1, <strong>4.2</strong> Generator Set Control<br />
Application and Installation Guide<br />
When the cooldown timer has elapsed or has been bypassed, the Discrete or Relay<br />
Output programmed for fuel injection will be deactivated (by default, Relay Output #2 will<br />
deactivate, but this may be programmed differently). The STOP command will also be<br />
sent over the PRIMARY CAN data link for those engines that require it. The engine will<br />
come to a stop.<br />
Any time, while the engine is RUNNING:<br />
If the <strong>EMCP</strong> 4 detects a condition where an engine or generator parameter<br />
exceeds programmed event thresholds for a programmed amount of time, or<br />
another SHUTDOWN EVENT occurs, then the <strong>EMCP</strong> 4 will attempt to shut the<br />
engine down.<br />
Note: Event behavior is determined by setpoints called EVENT RESPONSE<br />
CONFIGURATIONS. If a shutdown-type event’s EVENT RESPONSE<br />
CONFIGURATION is disabled or not set to shutdown, it may not shut the engine down.<br />
Appropriate default values are pre-configured in the factory. Modify EVENT RESPONSE<br />
CONFIGURATIONS at your own risk! See Chapter 5.<br />
Note: If a Digital Input is programmed for ECS in Auto, or Run, or Stop, and a<br />
maintaining switch latches that input to make it active, the front panel buttons will not<br />
have any effect.<br />
Depending on how a specific EVENT RESPONSE CONFIGURATION is programmed,<br />
the <strong>EMCP</strong> 4 will either put the engine in COOLDOWN, followed by a shutdown (SOFT<br />
SHUTDOWN) or shut the engine down immediately (HARD SHUTDOWN). See Figure 19.<br />
Figure 19: Stopping the Engine<br />
Page 42<br />
©2013 Caterpillar<br />
All rights reserved.
Application and Installation Guide<br />
<strong>EMCP</strong> 4.1, <strong>4.2</strong> Generator Set Control<br />
EMERGENCY STOP<br />
The <strong>EMCP</strong> 4 Emergency Stop input is configurable as Active High, or Active Low. The<br />
active state may be configured within the <strong>EMCP</strong> 4 display or within Cat ET.<br />
TO CONFIGURE THE E-STOP ACTIVE STATE CONFIGURATION FROM THE DISPLAY, DO THE<br />
FOLLOWING:<br />
At MAIN MENU scroll DOWN<br />
to CONFIGURE.<br />
Press the OK KEY .<br />
SCROLL DOWN<br />
to ALL SETPOINTS.<br />
Press the OK KEY .<br />
SCROLL DOWN<br />
to CONTROL.<br />
Press the OK KEY .<br />
SCROLL DOWN<br />
to AUTO START/STOP.<br />
Press the OK KEY .<br />
SCROLL DOWN to EMERGENCY STOP INPUT<br />
ACTIVE STATE CONFIG.<br />
©2013 Caterpillar<br />
All rights reserved. Page 43
<strong>EMCP</strong> 4.1, <strong>4.2</strong> Generator Set Control<br />
Application and Installation Guide<br />
TO CHANGE THE E-STOP ACTIVE STATE CONFIGURATION WITH ET, DO THE FOLLOWING:<br />
1. Connect to the <strong>EMCP</strong> 4 using the Cat Service Tool as stated in Chapter <strong>4.2</strong>.<br />
2. Select Automatic Start/Stop on the left.<br />
3. Double click Emergency Stop Switch Input Configuration on the right to select<br />
a new value.<br />
4.8 ENGINE SETPOINT VERIFICATION<br />
The engine setpoint verification procedure verifies that the <strong>EMCP</strong> 4 operates correctly<br />
when a LOW OIL PRESSURE or HIGH COOLANT TEMPERATURE event occurs. The engine<br />
setpoint verification procedure also verifies that the <strong>EMCP</strong> 4 operates correctly when an<br />
ENGINE OVERSPEED event occurs.<br />
On an ENGINE OVERSPEED event, the <strong>EMCP</strong> 4 will shut the engine down.<br />
LOW OIL PRESSURE and HIGH COOLANT TEMPERATURE each have two events, WARNING<br />
and SHUTDOWN. The <strong>EMCP</strong> 4 will issue a WARNING whenever the warning threshold is<br />
reached and a SHUTDOWN whenever the shutdown threshold is reached. This verification<br />
procedure will modify configuration setpoints used in normal operation. The steps below<br />
outline how to perform the LOW OIL PRESSURE SHUTDOWN and HIGH COOLANT<br />
TEMPERATURE SHUTDOWN PROCEDURE. A similar process can be used for LOW<br />
OIL PRESSURE WARNING and HIGH COOLANT TEMPERATURE WARNING, along<br />
with LOW IDLE LOW OIL PRESSURE.<br />
Page 44<br />
©2013 Caterpillar<br />
All rights reserved.
Application and Installation Guide<br />
<strong>EMCP</strong> 4.1, <strong>4.2</strong> Generator Set Control<br />
During this procedure<br />
Each configuration setpoint should be recorded prior to adjustment.<br />
Returned back to the original setting after the setpoint has been verified.<br />
The following conditions are required before the ENGINE SETPOINTS are verified:<br />
REQUIRED CONDITIONS<br />
<br />
<br />
The setpoints must be correct for the engine application.<br />
No shutdown events should be present. If necessary, troubleshoot,<br />
correct, and reset any and all shutdown events.<br />
PROCEDURE FOR OVERSPEED VERIFICATION<br />
Note: Adjustment of ENGINE OVER SPEED SHUTDOWN THRESHOLD setpoint<br />
from the display requires a level 3 password. For details on changing security<br />
levels refer to Chapter 6.<br />
The Security Level only affects changing parameters from the <strong>EMCP</strong> 4. Changing<br />
parameters with the Cat Service Tool does not require passwords.<br />
1. Start the engine and run the engine at rated speed.<br />
2. Adjust the setpoint value for Engine Over Speed Shutdown Threshold to a value<br />
that is below the speed that the engine is running at. An Engine Overspeed<br />
Shutdown event will occur immediately after the setpoint is changed, and the<br />
engine will shut down.<br />
3. View the event by going to the Genset Control event log. Reset the event.<br />
For more information about how to view and reset the event, refer to Chapter 5,<br />
Handling Events.<br />
4. Return the setpoint value for Engine Over Speed Shutdown Threshold to the<br />
original value.<br />
PROCEDURE FOR LOW OIL PRESSURE VERIFICATION<br />
Note: Low Oil Pressure Shutdown is disabled during start-up and while the engine is not<br />
running by the Fault Protection Timer (FPT). The fault protection timer starts timing when<br />
crank terminate rpm is reached during the starting sequence. The fault protection timer<br />
will then run for a programmed time which is determined by the Engine Start Fault<br />
Protection Activation Delay Time setpoint. Make sure the fault protection timer has<br />
elapsed before starting the Low Oil Pressure Verification.<br />
1. Start the engine and run the engine at rated speed.<br />
2. Determine whether the controller is set for SENSOR or DATA LINK, refer to<br />
Chapter 4.6.<br />
If SENSOR is selected, perform steps 3-5 in the CONFIGUREINPUTS &<br />
OUTPUTSANALOG INPUTS configuration for ANALOG INPUT#1 setpoints.<br />
If DATA LINK is selected, perform steps 3-5 in the CONFIGUREALL<br />
SETPOINTSENG MONITOR/PROTECTENG OIL PRES MON setpoints.<br />
©2013 Caterpillar<br />
All rights reserved. Page 45
<strong>EMCP</strong> 4.1, <strong>4.2</strong> Generator Set Control<br />
Application and Installation Guide<br />
3. Adjust the setpoint value for Low Engine Oil Pressure Shutdown Event Threshold<br />
to a value that is above the oil pressure that the engine is operating at. The<br />
shutdown event will occur after the programmable time delay (the Low Engine<br />
Oil Pressure Shutdown Delay Time setpoint).<br />
4. View the event by going to the Genset Control event log. Reset the event. For<br />
more information about how to view and reset the event, refer to Chapter 5,<br />
Handling Events.<br />
5. Return setpoint value for Low Engine Oil Pressure Shutdown Event Threshold<br />
to the original value.<br />
PROCEDURE FOR HIGH COOLANT TEMPERATURE VERIFICATION<br />
Note: High Coolant Temperature shutdown is disabled during start-up and while the<br />
engine is not running by the Fault Protection Timer (FPT). The fault protection timer<br />
starts timing when the crank terminate rpm is reached during the starting sequence. The<br />
fault protection timer will then run for a programmed time (the Engine Start Fault<br />
Protection Activation Delay Time setpoint). Make sure the fault protection timer has<br />
elapsed before starting the High Coolant Temperature Verification.<br />
1. Start the engine and run the engine at rated speed.<br />
2. Determine whether the controller is set for SENSOR or DATA LINK, refer to<br />
Chapter 4.6.<br />
If SENSOR is selected, perform steps 3-5 in the CONFIGUREINPUTS &<br />
OUTPUTSANALOG INPUTS configuration for ANALOG INPUT#2 setpoints.<br />
If DATA LINK is selected, perform steps 3-5 in the CONFIGUREALL<br />
SETPOINTSENG MONITOR/PROTECTENG COOL TEMP MON setpoints.<br />
3. Adjust setpoint value for High Engine Coolant Temperature Shutdown Event<br />
Threshold to a value that is below the engine coolant temperature that the engine is<br />
operating at. The minimum value for this setpoint is 49ºC (120ºF), so you may have<br />
to run the engine for a few minutes to get the temperature above the minimum<br />
value. The shutdown event will occur after the programmable time delay (the High<br />
Engine Coolant Temperature Shutdown Event Notification Delay Time setpoint).<br />
4. View the event by going to the Genset Control event log.<br />
5. Reset the event. Refer to Handling Events for more information about how to<br />
view and reset the event.<br />
6. Return setpoint value for High Engine Coolant Temperature Shutdown Event<br />
Threshold to the original value.<br />
Page 46<br />
©2013 Caterpillar<br />
All rights reserved.
Application and Installation Guide<br />
<strong>EMCP</strong> 4.1, <strong>4.2</strong> Generator Set Control<br />
4.9 ENGINE OPERATING HOURS<br />
One of the features of the <strong>EMCP</strong> 4 is the ability to maintain the ENGINE OPERATING HOURS,<br />
which is the cumulative amount of time that the engine has run above the Crank Terminate<br />
speed. This time is displayed on the Engine Overview screen, just below Battery Voltage.<br />
UPDATING ENGINE OPERATING HOURS<br />
For applications where a new <strong>EMCP</strong> 4 is fitted to a generator set that was previously in<br />
operation, the <strong>EMCP</strong> 4 allows the user to increment the engine hours to match the engine.<br />
Note: Engine Hours can only be increased. They cannot be decreased.<br />
This procedure must be performed on the <strong>EMCP</strong> 4 display; it cannot be done using the<br />
Cat Service Tool. In order to update engine hours, LEVEL 3 ACCESS is required. Refer to<br />
Chapter 6, Security.<br />
©2013 Caterpillar<br />
All rights reserved. Page 47
<strong>EMCP</strong> 4.1, <strong>4.2</strong> Generator Set Control<br />
Application and Installation Guide<br />
UPDATING ENGINE HOURS<br />
At MAIN MENU SCROLL<br />
SCROLL DOWN<br />
to CONFIGURE<br />
Press the OK KEY .<br />
Scroll DOWN<br />
to ENGINE OPERATING HOURS<br />
Press OK KEY .<br />
(if pressing OK has no effect, then Level 3 access<br />
has not been obtained)<br />
Current ENGINE HOURS are displayed.<br />
Press the OK KEY<br />
to change the hours.<br />
To edit the ENGINE HOURS, Select a digit using the<br />
LEFT ARROW<br />
or RIGHT ARROW<br />
To change the selected digit use the UP ARROW<br />
or DOWN ARROW .<br />
To accept changes, press the OK KEY . To reject changes, press the ESCAPE KEY .<br />
Again, press the OK KEY<br />
to confirm, or the<br />
ESCAPE KEY<br />
to reject the changes.<br />
Page 48<br />
©2013 Caterpillar<br />
All rights reserved.
Application and Installation Guide<br />
<strong>EMCP</strong> 4.1, <strong>4.2</strong> Generator Set Control<br />
5 HANDLING EVENTS<br />
The <strong>EMCP</strong> 4 shows previous and current events from both the <strong>EMCP</strong> and external<br />
modules. These events are organized into logs for each physical module the <strong>EMCP</strong> 4 is<br />
receiving EVENT messages from.<br />
The logs include:<br />
GENSET CONTROL Events for the <strong>EMCP</strong> 4 GSC<br />
ENGINE CONTROL Events for a Primary CAN Data Link-compatible engine ECM<br />
DIGITAL AVR Events for the Cat Digital Voltage Regulator (Cat DVR)<br />
THERMOCOUPLE Events for the Thermocouple Module<br />
EXTERNAL I/O Events for the Discrete Input/Output (DIO) module<br />
RTD MODULE Events for the Resistive Temperature Device (RTD) module<br />
SCR MODULE Events for Engine Aftertreatment systems<br />
The Genset Control Log stores events generated by the <strong>EMCP</strong> 4. Any other event is<br />
stored within the module that generated the event. Even if the <strong>EMCP</strong> annunciates an<br />
event, it does not mean that the <strong>EMCP</strong> logs that event. It may be within another<br />
module’s log.<br />
Each log is visible only if the module is connected to the appropriate data link, either the<br />
Primary data link or the Accessory data link, and is communicating with the <strong>EMCP</strong> 4.<br />
The list of Event Logs can be viewed by pressing the Event Log hotkey or via the<br />
View Submenu. Select the log you wish to view and press OK to view the events.<br />
The <strong>EMCP</strong> 4 supports more than one instance of some of the above modules. (See<br />
Chapter 17, for the number of modules supported by each of the <strong>EMCP</strong> models). Those<br />
modules are uniquely identified with a number at the end of the log name.<br />
The module number is software-configured, and is called the module’s ECU INSTANCE<br />
NUMBER. The ECU Instance Number can be viewed and modified by the Cat Service<br />
Tool. See the appropriate sub section of Chapter 17, for the expansion module in<br />
question, to see how to program the Instance Number.<br />
An event in the <strong>EMCP</strong> 4 Genset Control Log can be in one of three states; PRESENT,<br />
ACTIVE, or INACTIVE.<br />
©2013 Caterpillar<br />
All rights reserved. Page 49
<strong>EMCP</strong> 4.1, <strong>4.2</strong> Generator Set Control<br />
Application and Installation Guide<br />
PRESENT<br />
This state is only applicable to the Genset Control Log. PRESENT<br />
means that the condition that caused the event is still present. The<br />
condition needs to be addressed before the event can be reset.<br />
Note: This state only applies to Genset Control events. Other<br />
modules will not have Present in logs.<br />
ACTIVE<br />
The event was previously in a “Present” state, but it is no longer<br />
present. It has been latched by the event system and needs to be<br />
reset before the engine can be restarted.<br />
Within the Genset Control Log, the condition that caused the event is<br />
still affecting the system, but may be reset. (See Chapter 5.3 through<br />
5.6 on how to Reset Events). Warning type events automatically reset<br />
when the condition that caused the event is resolved and will never be<br />
Active.<br />
Within any log other than the Genset Control Log, the condition that<br />
caused the event is affecting the system. The event may, or may not,<br />
be resettable. If the Reset All command fails to reset the event, then<br />
this event is still occurring and must be resolved before the event can<br />
be reset.<br />
Note: Many events go from Present to Active when the engine is<br />
shutdown and may reoccur once the engine starts running again.<br />
Further action may be required to resolve the issue.<br />
INACTIVE<br />
The event has happened at some time in the past but is no longer<br />
affecting the system. Inactive events are stored for historical purposes<br />
only.<br />
5.1 CONFIGURING EVENT RESPONSES FOR <strong>EMCP</strong> 4 GENERATED<br />
EVENTS<br />
The category of event, as well as other behavior when an event occurs, can be<br />
configured via a group of <strong>EMCP</strong> 4 setpoints called EVENT RESPONSE CONFIGURATIONS.<br />
An example of an event response configuration is LOW ENGINE LOW OIL PRESSURE<br />
WARNING EVENT RESPONSE CONFIGURATION. This setpoint determines what actions the<br />
<strong>EMCP</strong> 4 takes when it receives an event.<br />
Note: Event Response Configuration is only valid for the <strong>EMCP</strong> 4, not any other<br />
modules.<br />
Each EVENT RESPONSE CONFIGURATION type setpoint can either be viewed or edited. By<br />
default, VIEW is highlighted. These setpoints can only be edited when the ECS (Engine<br />
Control Switch) is in the Stop mode.<br />
Page 50<br />
©2013 Caterpillar<br />
All rights reserved.
Application and Installation Guide<br />
<strong>EMCP</strong> 4.1, <strong>4.2</strong> Generator Set Control<br />
The following is a list of all the possible options for an event response configuration:<br />
WARNING<br />
AUDIBLE ALERT<br />
SOFT SHUTDOWN<br />
HARD SHUTDOWN<br />
BREAKER #1 TRIP<br />
BREAKER #2 TRIP<br />
Creates a Warning event in the event log and lights the amber LED.<br />
The engine will not shut down. A Warning event will reset by itself<br />
(i.e. it will go from the “Present” state to the “Inactive” state) as soon<br />
as the condition that caused it goes away.<br />
Determines whether this event will also trigger an audible horn. If so,<br />
the event activates any relays that are programmed for Horn Control<br />
(see Chapter 10 Relay Outputs or Chapter 10 Digital Outputs). If no<br />
relay is programmed for Horn Control, no action will be taken; the<br />
<strong>EMCP</strong> 4 does not have an internal horn. Audible Alert can only be<br />
programmed if either a Warning or Shutdown is also programmed.<br />
Creates a Shutdown event in the event log, lights the red LED, and<br />
shuts the engine down after the cooldown period has expired (see<br />
Chapter 4.5, Starting and Stopping the Engine).<br />
Creates a Shutdown event in the event log, shuts the engine down<br />
immediately and lights the red LED.<br />
Activates a Breaker #1 Trip, which can be programmed for a Relay<br />
Output or Digital Output for external use. Breaker #1 usually refers<br />
to the Generator circuit breaker.<br />
Activates a Breaker #2 Trip, which can be programmed for a Digital<br />
Output or Relay Output for external use. Breaker #2 may refer to a<br />
second circuit breaker.<br />
FAULT PROTECTION<br />
TIMER ENABLED<br />
Suppresses the event unless the engine is running and the Fault<br />
Protection Timer has expired (this prevents nuisance events during<br />
startup, or ones that are not relevant when the engine is stopped).<br />
ACTIVE ONLY<br />
Creates an Active Only event in the event log. Active Only events<br />
are for informational purposes only. They typically do not light the<br />
Amber LED or behave like a Warning (although many events can<br />
be configured to do so). When the condition goes away, the event<br />
disappears from the event log.<br />
Note: Not all options are available for all setpoints. For example, the Engine Low<br />
Oil Pressure Warning event cannot be configured as a shutdown, because there<br />
is a separate event (Engine Low Oil Pressure Shutdown) dedicated for that purpose.<br />
Likewise, events cannot be generated for any and all conditions. For example, a Low<br />
Engine Coolant Temperature Shutdown is meaningless and cannot be generated.<br />
©2013 Caterpillar<br />
All rights reserved. Page 51
<strong>EMCP</strong> 4.1, <strong>4.2</strong> Generator Set Control<br />
Application and Installation Guide<br />
5.2 CHANGING AN EVENT RESPONSE CONFIGURATION<br />
To change an event response configuration, the control must be in STOP mode.<br />
Here are the steps to access event response configurations on the <strong>EMCP</strong> 4 display.<br />
At MAIN MENU, scroll DOWN<br />
to CONFIGURE<br />
Press the OK KEY .<br />
Scroll DOWN<br />
to ALL SETPOINTS<br />
Press the OK KEY .<br />
Scroll DOWN<br />
to EVENTS<br />
Press the OK KEY .<br />
Scroll DOWN<br />
to EVENT RESPONSE CFG<br />
Press the OK KEY .<br />
Scroll DOWN<br />
event to configure.<br />
to choose the group for the<br />
Press the OK KEY .<br />
Page 52<br />
©2013 Caterpillar<br />
All rights reserved.
Application and Installation Guide<br />
<strong>EMCP</strong> 4.1, <strong>4.2</strong> Generator Set Control<br />
The group name should help find the setpoint. However, a list of setpoints in each group,<br />
or submenu is given in Table 3.<br />
<br />
<br />
<br />
<br />
<br />
<br />
<br />
<br />
Diagnostics<br />
Config<br />
Accessory<br />
Data Link*<br />
Engine Speed<br />
Primary Data<br />
Link<br />
SCADA Data<br />
Link*<br />
Battery<br />
Charger Fail<br />
Eng Cont Not<br />
Responding<br />
RS485-<br />
Annunciator<br />
Data Link*<br />
Analog Inputs<br />
*<strong>EMCP</strong> <strong>4.2</strong> only<br />
Engine Protection<br />
Config<br />
Pressures<br />
Engine Oil<br />
Gas Pressure<br />
Temperatures<br />
Engine Coolant<br />
Engine Oil<br />
Exhaust<br />
Levels<br />
Engine Coolant<br />
Engine Oil<br />
Fuel<br />
Ext Fuel Tank<br />
Others<br />
Air Damper<br />
Closed<br />
Unexpected<br />
Engine<br />
Shutdown<br />
Overspeed<br />
Underspeed<br />
Emergency<br />
Stop<br />
Fail to Start<br />
Fuel Leak<br />
Service<br />
Maintenance<br />
Interval<br />
Engine Inlet<br />
Manifold<br />
Charge<br />
Combustion<br />
Remote E-Stop<br />
Table 3: Event Response Configuration Setpoints<br />
<br />
<br />
<br />
<br />
<br />
<br />
<br />
<br />
<br />
<br />
<br />
<br />
<br />
Generator<br />
Protection<br />
Config<br />
Generator<br />
Rear Bearing<br />
Temperature<br />
Generator<br />
Overcurrent<br />
Generator<br />
Over<br />
Frequency<br />
Generator<br />
Under<br />
Frequency<br />
Reverse<br />
Power<br />
Generator<br />
Over Voltage<br />
Generator<br />
Under<br />
Voltage<br />
Earth Fault<br />
Generator<br />
Winding<br />
Temperature<br />
#1<br />
Generator<br />
High Power<br />
Reverse<br />
Reactive<br />
Power<br />
kW Relay<br />
Trip #1<br />
kW Relay<br />
Trip # 2<br />
<br />
Custom<br />
Event<br />
Config<br />
Digital<br />
Input<br />
Custom<br />
Events<br />
Analog<br />
Input<br />
Custom<br />
Events<br />
Aux #1<br />
Event<br />
Inputs<br />
Aux #2<br />
Event<br />
Inputs<br />
<br />
<br />
<br />
<br />
<br />
<br />
<br />
<br />
<br />
<br />
Other System<br />
Config<br />
Battery Voltage<br />
Battery<br />
Charging<br />
System Voltage<br />
Generator<br />
Breaker Open<br />
Generator<br />
Breaker Closed<br />
Engine in<br />
Cooldown<br />
Speed-<br />
Frequency<br />
Mismatch<br />
Not in Auto<br />
Earth Leakage<br />
EPS Supplying<br />
Load<br />
Battery<br />
Cranking<br />
Voltage<br />
Event System<br />
Engine Running<br />
Lamp<br />
Conditions*<br />
©2013 Caterpillar<br />
All rights reserved. Page 53
<strong>EMCP</strong> 4.1, <strong>4.2</strong> Generator Set Control<br />
Application and Installation Guide<br />
EXAMPLE:<br />
Select ENGINE PROTECTION CONFIG<br />
Press the OK KEY .<br />
In this group of event response<br />
configurations, there are four types of<br />
events, grouped by the type of data:<br />
Pressures, Temperatures, Levels,<br />
and Others (such as status).<br />
Select PRESSURES<br />
Press the OK KEY .<br />
To edit a setpoint, press the RIGHT ARROW key<br />
to highlight EDIT.<br />
This brings up a list of event response configuration<br />
setpoints. Use the Up or Down arrows to scroll<br />
though the list.<br />
Note: This will only work if the control is in STOP<br />
mode. Some setpoints cannot be configured, or<br />
require a minimum security level. Those setpoints<br />
will display a lock icon to the right of the EDIT text.<br />
Then, press the OK KEY<br />
to edit the setpoint.<br />
Here you can edit individual<br />
responses, as described above.<br />
Use the LEFT ARROW and RIGHT ARROW to<br />
toggle between checked and unchecked, and use<br />
the UP ARROW and DOWN ARROW to<br />
move between the responses.<br />
Some responses are fixed and<br />
cannot be disabled. For those<br />
responses, a lock will be displayed<br />
instead of a checkbox.<br />
Page 54<br />
©2013 Caterpillar<br />
All rights reserved.
Application and Installation Guide<br />
<strong>EMCP</strong> 4.1, <strong>4.2</strong> Generator Set Control<br />
5.3 RESETTING INDIVIDUAL ACTIVE EVENTS FOR THE <strong>EMCP</strong> 4<br />
There are three ways to reset events. One way, described in this chapter, which applies<br />
to the <strong>EMCP</strong> 4 GSC only (the “Genset Control” log), is to reset individual Active events<br />
by navigating to the desired event in the event log, described below.<br />
The second way, which applies to all modules other than the <strong>EMCP</strong> 4, is to reset all<br />
Active events in that module’s event log by navigating to one of the Active events in that<br />
event log (see Chapter 5.4).<br />
The third way is an approach that resets all Active events for all modules (see Chapter 5.5).<br />
With any of these methods, you must be in STOP mode.<br />
To reset individual events on the <strong>EMCP</strong> 4, start by navigating to the event log:<br />
At MAIN MENU Select VIEW by pressing the<br />
OK KEY .<br />
Alternately, press the EVENT LOG BUTTON to<br />
access the EVENT LOG.<br />
Select EVENT LOGS by pressing the OK KEY<br />
.<br />
Scroll up or down to select<br />
the GENSET CONTROL LOG<br />
Press the OK KEY .<br />
In this example image, there is one PRESENT<br />
or ACTIVE event under Genset Control #1.<br />
Scroll up or down through<br />
the list of events and find the ACTIVE event<br />
that requires resetting.<br />
Generally, events are ordered by the status<br />
of the event; PRESENT events are listed first,<br />
followed by ACTIVE events, and finally the<br />
INACTIVE events. Within each status, the<br />
events are listed with the most recent first.<br />
Press the OK KEY<br />
feature.<br />
to enable the reset<br />
Press the OK KEY to reset the event.<br />
Notice that the event changes from Active to<br />
Inactive.<br />
©2013 Caterpillar<br />
All rights reserved. Page 55
<strong>EMCP</strong> 4.1, <strong>4.2</strong> Generator Set Control<br />
Application and Installation Guide<br />
5.4 RESETTING ALL ACTIVE EVENTS FOR A SINGLE MODULE<br />
The second way to reset events, described in this chapter, which applies to all modules<br />
other than the <strong>EMCP</strong> 4, is to reset all of the module’s Active events by navigating to one of<br />
the Active events in the event log. This method doesn’t apply to the <strong>EMCP</strong> 4 GENSET<br />
CONTROL log. For information on resetting events on the <strong>EMCP</strong> 4, see chapters 5.3 or 5.5.<br />
With any method, you must be in STOP mode. A key difference between the <strong>EMCP</strong> 4 and<br />
all other modules is that the other modules don’t display a PRESENT status for events.<br />
Events are shown as ACTIVE if they are currently affecting the system, or as INACTIVE<br />
if they are not.<br />
To reset all of a modules Active events on any individual module except the <strong>EMCP</strong> 4<br />
(listed as GENSET CONTROL in the event log), start by navigating to the event log.<br />
At MAIN MENU scroll DOWN<br />
to VIEW by<br />
pressing the OK KEY .<br />
Select EVENT LOGS by pressing the OK KEY<br />
.<br />
Scroll UP or DOWN to select<br />
the desired log and<br />
Press OK KEY .<br />
Press OK KEY<br />
details.<br />
to view the first event<br />
Pressing the OK KEY will allow an<br />
option to RESET all events in the selected<br />
module.<br />
Pressing the OK key will reset all of the<br />
ACTIVE events in that module’s event log that<br />
can be reset.<br />
Page 56<br />
©2013 Caterpillar<br />
All rights reserved.
Application and Installation Guide<br />
<strong>EMCP</strong> 4.1, <strong>4.2</strong> Generator Set Control<br />
Note: Modules other than the <strong>EMCP</strong> 4 cannot display events as PRESENT.<br />
If pressing OK KEY at RESET ALL doesn’t reset all of the events, the<br />
condition causing the event being viewed may still be present. For example, if the<br />
engine shut down on high coolant temperature, then the events will not reset until<br />
the coolant temperature drops below the shutdown threshold.<br />
5.5 RESETTING ALL ACTIVE EVENTS FOR ALL MODULES<br />
The third way to reset events, described in this chapter, is a shortcut that resets all<br />
Active events for all modules. With any method, you must be in STOP mode.<br />
Once all of the condition(s) that are causing the events have been corrected, all Active<br />
events (those for which the condition is not present) on all modules can be reset using<br />
the RESET ALL EVENTS feature.<br />
In order to do this, the control must be in STOP mode and engine speed should be zero.<br />
FROM ANY SCREEN:<br />
Press the RESET KEY .<br />
A confirmation prompt will appear.<br />
Pressing the OK KEY<br />
will continue and RESET all events on all modules.<br />
Pressing the ESCAPE KEY<br />
will CANCEL the reset operation.<br />
The controller will display which events were reset, and which ones were not.<br />
Note: Reset All Events will not reset Present events! For example, if the E-Stop switch<br />
is pressed and an EMERGENCY STOP SHUTDOWN is present, it cannot be reset until<br />
the E-Stop is pulled out and the event status changes from PRESENT to ACTIVE.<br />
©2013 Caterpillar<br />
All rights reserved. Page 57
<strong>EMCP</strong> 4.1, <strong>4.2</strong> Generator Set Control<br />
Application and Installation Guide<br />
5.6 RESETTING EVENTS FOR ENGINE ECMS WITHOUT PRIMARY CAN<br />
DATA LINK SUPPORT<br />
The <strong>EMCP</strong> 4 has the ability to reset all events for electronic engines with no PRIMARY<br />
CAN support by means of a Relay Output. A number of conditions must be satisfied in<br />
order for this to work.<br />
FIRST:<br />
SECOND:<br />
THIRD:<br />
One of the Outputs must be configured as a Command/Status for ECU FAULT<br />
RESET. See Chapter 10.<br />
The corresponding output must be wired to a corresponding Fault Reset I/O pin<br />
on the engine ECM or it must be setup to power cycle the ECM.<br />
Pressing the RESET ALL KEY with this option selected will activate the<br />
ECU FAULT RESET, which will activate the corresponding Relay Output and<br />
trigger the engine ECU to reset its faults or will power cycle the ECU. This will<br />
only active the ECU FAULT RESET OUTPUT if the <strong>EMCP</strong> has a warning or<br />
fault. This warning or fault can be triggered by using a custom event on a<br />
digital input that is wired to the fault alarm of the ECU.<br />
5.7 TROUBLESHOOTING RESETTING EVENTS<br />
There are common reasons for the <strong>EMCP</strong> 4 not allowing events to be reset. First of all,<br />
in order to reset any event, the <strong>EMCP</strong> 4 must be in STOP mode. In order to reset engine<br />
ECM events, the engine speed must also be zero.<br />
SERVICE MAINTENANCE INTERVAL WARNING and NOT IN AUTO WARNING are<br />
explained more fully below.<br />
NOT IN AUTO WARNING<br />
This event is Present whenever the control is in either RUN or STOP. As a result, it<br />
cannot be reset in STOP (since the event is present). The event will reset when the<br />
control is returned to AUTO . This event can be disabled by modifying the<br />
GENERATOR CONTROL NOT IN AUTOMATIC WARNING EVENT RESPONSE<br />
CONFIGURATION setpoint. See Chapter 7 for instructions on editing that setpoint.<br />
SERVICE MAINTENANCE INTERVAL (<strong>EMCP</strong> <strong>4.2</strong> ONLY)<br />
If a SERVICE MAINTENANCE INTERVAL WARNING is PRESENT, it cannot be reset.<br />
The warning is PRESENT because one of the countdown timers has reached zero. To clear<br />
the warning, the timer must be reset, rather than the event. When the timer is reset, it<br />
returns to the programmed interval (typical is 180 calendar days and 500 engine hours).<br />
This timer must be reset from the display; it cannot be reset by using the Service Tool<br />
alone. This warning can only be disabled by using the Event Response Configuration. See<br />
Chapter 5.2.<br />
Note: This warning does not appear on the face of the <strong>EMCP</strong> 4 as a flashing LED<br />
unless configured to do so within Cat ET under Event Response Configuration – Engine<br />
Protection Events.<br />
Page 58<br />
©2013 Caterpillar<br />
All rights reserved.
Application and Installation Guide<br />
<strong>EMCP</strong> 4.1, <strong>4.2</strong> Generator Set Control<br />
TO VIEW THE TIMER SETTINGS ON THE DISPLAY:<br />
At MAIN MENU scroll DOWN<br />
to CONFIGURE<br />
Press the OK KEY .<br />
Scroll DOWN<br />
to RESET COUNTER<br />
Press the OK KEY .<br />
Scroll DOWN<br />
until you reach<br />
SERVICE MAINTENANCE INTERVAL<br />
Press the OK KEY .<br />
The SERVICE MAINTENANCE INTERVAL HOURS is<br />
displayed.<br />
Scroll DOWN<br />
to view the<br />
SERVICE MAINTENANCE INTERVAL DAYS<br />
Press the OK KEY .<br />
Scroll DOWN<br />
to view the<br />
PASSWORD REQUIRED TO RESET THE SERVICE<br />
MAINTENANCE INTERVAL.<br />
The security level required to reset the service<br />
maintenance level is shown as a level 2, but the<br />
security level required to change the level is level<br />
3. The required security level can be changed by<br />
using the Service Tool.<br />
©2013 Caterpillar<br />
All rights reserved. Page 59
<strong>EMCP</strong> 4.1, <strong>4.2</strong> Generator Set Control<br />
Application and Installation Guide<br />
TO RESET THE TIMER ON THE DISPLAY:<br />
At MAIN MENU scroll DOWN<br />
to CONFIGURE<br />
Press the OK KEY .<br />
Scroll DOWN<br />
to RESET COUNTERS<br />
Press the OK KEY .<br />
Scroll DOWN<br />
to SERV MAINT INTERVAL<br />
Press the OK KEY .<br />
RESET SERV INTVL? is highlighted. To RESET the<br />
service interval press the OK KEY .<br />
A confirmation prompt will appear. Pressing the<br />
OK KEY will continue and RESET the service<br />
maintenance interval. Pressing the ESCAPE KEY<br />
will CANCEL the reset operation.<br />
The new Service intervals will be displayed.<br />
Page 60<br />
©2013 Caterpillar<br />
All rights reserved.
Application and Installation Guide<br />
<strong>EMCP</strong> 4.1, <strong>4.2</strong> Generator Set Control<br />
TO ADJUST THE TIMER SETTINGS FROM CAT ET, DO THE FOLLOWING:<br />
1. Connect to the <strong>EMCP</strong> 4 using the Cat Service Tool as stated in Chapter <strong>4.2</strong>.<br />
2. Select Service Maintenance Interval on the left.<br />
3. Double click Maintenance Level 1 Cycle Interval Hours on the right to enter<br />
a new interval.<br />
4. Double click Maintenance Level 1 Cycle Interval Days on the right to enter<br />
a new interval.<br />
©2013 Caterpillar<br />
All rights reserved. Page 61
<strong>EMCP</strong> 4.1, <strong>4.2</strong> Generator Set Control<br />
Application and Installation Guide<br />
5. Double click Customer Password Security Level to Reset Service Maintenance<br />
Interval on the right to enter a new security level.<br />
Caution: Be sure to change the password level back to LEVEL 3 after the reset,<br />
to prevent inadvertently resetting the timer at other times!<br />
Page 62<br />
©2013 Caterpillar<br />
All rights reserved.
Application and Installation Guide<br />
<strong>EMCP</strong> 4.1, <strong>4.2</strong> Generator Set Control<br />
6 SECURITY<br />
There are five levels of security access on <strong>EMCP</strong> 4: LEVEL 0, LEVEL 1, LEVEL 2, LEVEL<br />
3, and SERVICE TOOL. Any configurable parameter or function that is set to Level 0 can<br />
be accessed by anyone at any time, and there will never be any security information on<br />
the display screen.<br />
LEVEL 1 ACCESS and LEVEL 2 ACCESS represent increasing levels of access to the<br />
setpoints and functions of the controller. Both levels 1 and 2 can be password protected<br />
with separate user-defined passwords.<br />
Note: These are optional levels of security; by default these passwords are disabled,<br />
and the default access level is LEVEL 2 from Parts Service.<br />
LEVEL 3 ACCESS is password protected at the factory, and requires contacting the Cat<br />
DEALER TC to obtain a password.<br />
If the present security level of the controller is below the level needed to perform<br />
a desired function, a padlock and a number will be displayed at the bottom right<br />
hand corner of the display. The number represents the level of security that is<br />
required in order to perform the desired function; 1, 2, or 3.<br />
If there is a padlock but no number, then the Cat Service Tool is required in order<br />
to perform the desired function; or the setpoint may be read only and cannot be<br />
changed.<br />
All of the adjustable parameters are associated with a specific level of security required<br />
to make an adjustment to the parameter. Certain functions, such as resetting the number<br />
of crank attempts, are also associated with a specific level of security. The passwords<br />
only affect actions taken at the <strong>EMCP</strong> 4. Access of the <strong>EMCP</strong> 4 remotely via the Cat<br />
Service Tool or via the SCADA data link is not affected by the security level on the<br />
<strong>EMCP</strong> 4 display.<br />
Changing parameters with the Cat Service Tool does not require passwords, since the<br />
Service Tool already has the highest level of access.<br />
When connecting via the SCADA DATA LINK, passwords can also be used. The levels of<br />
access granted via SCADA are identical to the levels of access granted at the <strong>EMCP</strong> 4.<br />
However, the passwords themselves may differ. Furthermore, the <strong>EMCP</strong> 4 and the<br />
SCADA data link may be at different levels of access at any given time. For more<br />
information about SCADA security see Chapter 18.<br />
Level 1 and Level 2 passwords are usually DISABLED when shipped from the factory.<br />
Level 1 and Level 2 passwords can be user defined if desired. If the Level 1 and Level 2<br />
passwords are not user defined, the Level 2 will be the MINIMUM LEVEL. All parameters<br />
that require Level 0, Level 1, or Level 2 security will be able to be changed by anyone at<br />
any time.<br />
Note: The <strong>EMCP</strong> 4 will always move up in security level to the highest level of access<br />
that is not password protected when a certain level of access is requested. For example,<br />
if a Level 1 password has been defined, but a Level 2 password has not, the <strong>EMCP</strong> 4<br />
will start at Level 0 on power up. When the Level 1 password is entered, the <strong>EMCP</strong> 4 will<br />
move up to Level 2 access. If neither a level 1, nor a level 2 password has been defined,<br />
the <strong>EMCP</strong> 4 will always be at least at a Level 2 access.<br />
©2013 Caterpillar<br />
All rights reserved. Page 63
<strong>EMCP</strong> 4.1, <strong>4.2</strong> Generator Set Control<br />
Application and Installation Guide<br />
THE SECURITY MENU<br />
To get to the security menu:<br />
At MAIN MENU scroll DOWN<br />
to Configure<br />
Press the OK KEY .<br />
At SECURITY, press the OK KEY .<br />
The SECURITY MENU will show the current level of<br />
security at the top of the screen.<br />
There are six options on the security menu:<br />
DROP TO MIN LEVEL<br />
ENTER LEVEL 1 or 2<br />
ENTER LEVEL 3<br />
CHANGE LVL 1 PSWD<br />
CHANGE LVL 2 PSWD<br />
CHANGE SCADA PSWD<br />
Selecting DROP TO MIN LEVEL will make the control go to the minimum level of<br />
security. As previously discussed, if the level 1 and level 2 passwords are not defined by<br />
the user, the minimum level of security will be level 2. If a level 2 password is defined by<br />
the user, but not a level 1 password, then the minimum level of security will be level 1.<br />
In contrast, if a level 1 password is defined by the user, but not a level 2 password, then<br />
the minimum level of security will be level 0.<br />
Page 64<br />
©2013 Caterpillar<br />
All rights reserved.
Application and Installation Guide<br />
<strong>EMCP</strong> 4.1, <strong>4.2</strong> Generator Set Control<br />
Selecting ENTER LEVEL 1 OR 2 will open up a<br />
password entry screen.<br />
The password entry screen will have 4 spaces. In each space a numbers from 0 through 9 can<br />
be entered. The password can be from 1 to 4 digits and is entirely user defined. Enter the<br />
password for either level 1 or level 2 if either of those passwords have been defined. Use the UP<br />
ARROW or DOWN ARROW to change the value of any highlighted digit. Use the<br />
LEFT ARROW or RIGHT ARROW to navigate between digits.<br />
Selecting ENTER LEVEL 3 will cause the display to<br />
say “PHONE IN WITH” and a 16 digit number will be<br />
displayed. Under that, ENTER RESPONSE will be<br />
highlighted. Record the 16 digit number and call the<br />
Cat Dealer TC with this number. The TC will reply<br />
with another 16 digit number. Note: Level 3 seed<br />
key and response will change based on various<br />
pieces of information. It is valid only when<br />
generated, and will be different in the future for that<br />
specific controller.<br />
Press the OK KEY from the PHONE IN WITH<br />
screen, and a password entry screen will be<br />
displayed. Enter the password that was supplied by<br />
the TC in the same manner as the other types of<br />
passwords.<br />
Press the OK KEY to confirm, or ESCAPE KEY to reject the change. Pressing the OK<br />
KEY after entering the number will set the current level to 3. The control will remain in<br />
level 3 security level until no key presses have been made for 10 minutes. After 10 minutes of<br />
inactivity the control will revert back to the minimum level of security.<br />
Note: To change a level 3 parameter requires either a level 3 password from the TC or a<br />
PC connection using a Service Tool. Therefore, if you have a Service Tool, try to change<br />
the parameter using the Service Tool rather than calling the TC.<br />
Selecting CHANGE LVL 1 PSWD will allow for the level 1 password to be changed. The<br />
control must be at level 1 security in order to select CHANGE LVL 1 PSWD. The CHANGE<br />
LVL 1 PSWD screen looks just like the password entry screen. It has 4 blank spaces that<br />
can each be set to a number from 0 to 9. The password can use as few as one digit and<br />
can use as many as 4 digits. It is entirely up to the user. If a password has been set but,<br />
it is now desired to not have level 1 password protection, the level 1 password can be<br />
disabled by setting the password to be a single 0.<br />
©2013 Caterpillar<br />
All rights reserved. Page 65
<strong>EMCP</strong> 4.1, <strong>4.2</strong> Generator Set Control<br />
Application and Installation Guide<br />
Once the desired password is entered, press the OK KEY and the control will go<br />
back to the security screen and the level 1 password will be set.<br />
Selecting CHANGE LVL 2 PSWD will allow for the level 2 password to be changed.<br />
The control must be at level 2 security in order to select CHANGE LVL 2 PSWD. The<br />
CHANGE LVL 2 PSWD screen looks just like the password entry screen. It has 4 blank<br />
spaces that can each be set to a number from 0 to 9. Selecting a password is entirely<br />
up to the user and can use as few as one digit or as many as 4 digits.<br />
The level 2 password can be disabled by setting the password to be a single 0.<br />
Once the desired password is entered, press the OK KEY and the control will go<br />
back to the SECURITY SCREEN and the level 2 password will be set.<br />
Selecting CHANGE SCADA PSWD will allow for the SCADA password to be changed.<br />
This password, if ENABLED, will require a SCADA system to first enter the password into<br />
the WRITE ACCESS PASSWORD register prior to conducting any other reads and writes.<br />
The control must be at level 2 security in order to select CHANGE SCADA PSWD. The<br />
CHANGE SCADA PSWD screen looks just like the password entry screen. It has 8 blank<br />
spaces that can each be set to a number from 0 to 9. The password can use as few as<br />
one digit and can use as many as 8 digits.<br />
Just as with level 1 and level 2 passwords, entering a single 0 will DISABLE the SCADA<br />
password.<br />
Page 66<br />
©2013 Caterpillar<br />
All rights reserved.
Application and Installation Guide<br />
<strong>EMCP</strong> 4.1, <strong>4.2</strong> Generator Set Control<br />
7 SETPOINTS<br />
The <strong>EMCP</strong> 4.1 and <strong>4.2</strong> have a variety of setpoints that can be programmed or adjusted.<br />
These setpoints can be adjusted via the display, or via the Cat Service Tool. In order to<br />
program the setpoints via the display, go through the following menu options:<br />
At MAIN MENU scroll DOWN<br />
to CONFIGURE<br />
Press the OK KEY .<br />
Scroll DOWN<br />
to ALL SETPOINTS<br />
Press the OK KEY .<br />
All of the setpoints on <strong>EMCP</strong> 4 can be accessed through this menu. However, setpoints<br />
related to input and output configuration can also be accessed through the INPUTS AND<br />
OUTPUTS menu under CONFIGURE. It is recommended to use the latter to configure<br />
inputs and outputs. For more information on configuring inputs and outputs, see<br />
Chapter 8 through 10.<br />
7.1 CONFIGURING SETPOINTS<br />
Setpoints can be one of four different types: NUMERICAL ENTRY, SELECTION, SUSPECT<br />
PARAMETER NUMBER, or EVENT RESPONSE. Each type is configured differently. For<br />
configuring any setpoint via the display, the user must first have the proper security<br />
access. See Chapter 6 for more information on security.<br />
NUMERICAL ENTRY setpoints are parameters like time delays, thresholds, etc. For these<br />
setpoints the display will show the current value.<br />
To change the value of a NUMERICAL ENTRY type setpoint:<br />
1. Press the OK KEY when the setpoint is highlighted. The current value of the<br />
setpoint will be shown with the rightmost digit highlighted.<br />
2. Use the UP and DOWN arrow keys to adjust that digit to the desired<br />
value. Digits will wrap around. Therefore, pressing up when 9 is shown will change<br />
it to 0, or pressing down when 0 is shown will change it to 9.<br />
3. Once that digit is set to the desired value, use the LEFT arrow key to move the<br />
cursor to the next digit.<br />
4. Then use the UP and DOWN arrow keys to adjust that digit to the<br />
desired value.<br />
5. Continue this process until the desired value for the setpoint is set.<br />
©2013 Caterpillar<br />
All rights reserved. Page 67
<strong>EMCP</strong> 4.1, <strong>4.2</strong> Generator Set Control<br />
Application and Installation Guide<br />
6. Then press the OK KEY to save the value.<br />
Tip: You can quickly select the largest possible value for the setpoint by pressing the<br />
LEFT arrow key until the leftmost digit is shown, and then pressing the UP<br />
arrow key until the value stops changing. Similarly you can select the smallest possible<br />
value by pressing the LEFT<br />
pressing and holding DOWN<br />
arrow key until the leftmost digit is shown, and then<br />
arrow key until the value stops changing.<br />
SELECTION type setpoints, such as Generator Configuration, or Active State, have<br />
options that are not numerical. For these setpoints, the display will show the current<br />
setting.<br />
To change the value of a SELECTION type setpoint:<br />
1. Press the OK KEY when the setpoint is highlighted. The current setting of the<br />
setpoint will be shown.<br />
2. Use the UP or DOWN arrow keys to scroll through the options that<br />
are available for that setpoint. Scroll quickly by holding the key.<br />
3. When the desired option is displayed, press the OK KEY to save the setting.<br />
SUSPECT PARAMETER NUMBER type setpoints are similar to SELECTION type setpoints,<br />
but the selections are grouped into four groups:<br />
1. Pressures<br />
2. Temperatures<br />
3. Levels<br />
4. Others<br />
Any selection with units that are not pressure, temperature, or percent will be in the<br />
“Others” group. This group also contains Custom Parameters and Custom Events.<br />
Suspect parameter numbers indicating status (like Gen Breaker Open) will also be here.<br />
Page 68<br />
©2013 Caterpillar<br />
All rights reserved.
Application and Installation Guide<br />
<strong>EMCP</strong> 4.1, <strong>4.2</strong> Generator Set Control<br />
To change the value of a SUSPECT PARAMETER NUMBER type setpoint:<br />
1. Press the OK KEY when the setpoint is highlighted. Notice here that the<br />
setpoint value is not shown. Instead, the first group name, PRESSURE, is shown.<br />
2. Use the UP or DOWN arrow keys to scroll through the four groups:<br />
PRESSURE, TEMPERATURE, LEVEL, OTHERS.<br />
3. When the desired option is displayed, press the OK KEY to see the suspect<br />
parameter numbers (by name) in that group.<br />
4. Use the UP or DOWN arrow keys to scroll through the suspect<br />
parameter numbers (by name) until the desired one is selected.<br />
5. Press the OK KEY to save the setting. Alternately, press the BACK key<br />
to return to the group selection: PRESSURE, TEMPERATURE, LEVEL, OTHERS.<br />
EVENT RESPONSE CONFIGURATION type setpoints are a little different from the previously<br />
discussed setpoints. Each setpoint configures one or more actions that occur when the<br />
event occurs. See Chapter 5.1 for more information.<br />
7.2 SETPOINTS ON THE <strong>EMCP</strong> 4 DISPLAY<br />
The setpoints in the <strong>EMCP</strong> 4 are organized into multiple submenus. See Appendix A<br />
and the appropriate sections of this document for more information.<br />
7.3 SETPOINTS ON THE CAT SERVICE TOOL<br />
<strong>EMCP</strong> 4 setpoints can be configured using the Cat Service Tool (ET). To access<br />
setpoints, see Chapter <strong>4.2</strong>.<br />
If a value is changed from the <strong>EMCP</strong> display, Cat ET will not refresh the setpoint<br />
automatically. Press the “Config Tool” icon to refresh the list.<br />
Categories of setpoints are listed along the left pane, and clicking on one of them will<br />
bring up that list in the right pane.<br />
The <strong>EMCP</strong> 4.1 and <strong>4.2</strong> have different numbers of setpoints. The categories shown here<br />
match those in ET version 2013B. Older versions may have less, and newer versions<br />
may have more.<br />
Note: Any setpoint with a value given as Unavailable is not applicable to that level of<br />
<strong>EMCP</strong> 4.<br />
©2013 Caterpillar<br />
All rights reserved. Page 69
<strong>EMCP</strong> 4.1, <strong>4.2</strong> Generator Set Control<br />
Application and Installation Guide<br />
SETPOINT CATEGORIES<br />
Here are the categories of setpoints as found in the left pane of the ET Configuration Tool:<br />
ANALOG INPUTS<br />
Setpoints related to Analog Inputs. See Chapter 9.<br />
AUTOMATIC START/STOP<br />
Setpoints related to starting and stopping the generator set, as well as engine configuration.<br />
BATTERY VOLTAGE MONITOR<br />
Setpoints related to monitoring battery voltage from the battery power input to the <strong>EMCP</strong> 4.<br />
CRANK ATTEMPT/SUCCESSFUL START COUNTER<br />
Setpoint related to crank/start counters.<br />
DATA LINK: RS-485 SCADA (<strong>EMCP</strong> <strong>4.2</strong> ONLY)<br />
Setpoints related to SCADA (Modbus) data link communications. See Chapter 18.<br />
DIGITAL INPUTS<br />
Setpoints related to Digital Inputs. See Chapter 8.<br />
DIGITAL OUTPUTS<br />
Setpoints related to the polarity of Digital Outputs. See Chapter 10.<br />
ENGINE COOLANT TEMPERATURE MONITOR<br />
Setpoints related to monitoring engine coolant temperature.<br />
ENGINE OIL PRESSURE MONITOR<br />
Setpoints related to monitoring engine oil pressure.<br />
ENGINE SPEED MONITOR<br />
Setpoints related to monitoring engine speed using the Magnetic Pick-Up (MPU) input.<br />
ENHANCED ENGINE MONITOR<br />
Setpoints related engine cylinder temperature monitoring via the optional Thermocouple<br />
module. Applies to <strong>EMCP</strong> <strong>4.2</strong> only.<br />
ENHANCED GENERATOR MONITOR<br />
Setpoints related to generator bearing and winding temperature monitoring via the optional<br />
RTD module. Applies to <strong>EMCP</strong> <strong>4.2</strong> only.<br />
EVENT RESPONSE CONFIGURATION - DIAGNOSTIC EVENTS<br />
Setpoints used to configure the <strong>EMCP</strong> 4 response to diagnostic events. See Chapter 5.7.<br />
EVENT RESPONSE CONFIGURATION - ENGINE PROTECTION EVENTS<br />
Setpoints used to configure the <strong>EMCP</strong> 4 response to engine protection events.<br />
See Chapter 5.<br />
EVENT RESPONSE CONFIGURATION - GENERATOR PROTECTION EVENTS<br />
Setpoints used to configure the <strong>EMCP</strong> 4 response to generator protection events.<br />
See Chapter 5.<br />
Page 70<br />
©2013 Caterpillar<br />
All rights reserved.
Application and Installation Guide<br />
<strong>EMCP</strong> 4.1, <strong>4.2</strong> Generator Set Control<br />
EVENT RESPONSE CONFIGURATION - OTHER SYSTEM EVENTS<br />
Setpoints used to configure the <strong>EMCP</strong> 4 response to events that do not fit into the category<br />
of diagnostics, engine protection, or generator protection. See Chapter 5.<br />
EVENT RESPONSE CONFIGURATION – CUSTOM EVENTS<br />
Setpoints used to configure the <strong>EMCP</strong> 4 response to custom events. See Chapter 5.<br />
EVENT SYSTEM (<strong>EMCP</strong> <strong>4.2</strong> ONLY)<br />
Setpoints used to configure the Engine Running Conditions for the Engine Run Lamp on the<br />
RS-485 Annunciator. See Chapter 17.<br />
FUEL TRANSFER<br />
Setpoints related to fuel transfer feature.<br />
GENERATOR AC MONITOR<br />
Setpoints related to generator configuration (for <strong>EMCP</strong> 4 calculation and reporting).<br />
GENERATOR AC POWER MONITOR (<strong>EMCP</strong> <strong>4.2</strong> ONLY)<br />
Setpoints related to generator power monitoring.<br />
GENERATOR CURRENT MONITORING (<strong>EMCP</strong> <strong>4.2</strong> ONLY)<br />
Setpoints related to generator AC overcurrent monitoring.<br />
GENERATOR OVER/UNDER FREQUENCY<br />
Setpoints related to generator overfrequency and underfrequency monitoring.<br />
GENERATOR OVER/UNDER VOLTAGE<br />
Setpoints related to generator AC overvoltage and undervoltage monitoring.<br />
GENERATOR REVERSE POWER (<strong>EMCP</strong> <strong>4.2</strong> ONLY)<br />
Setpoints related to generator AC reverse power monitoring.<br />
INTEGRATED VOLTAGE REGULATOR<br />
Setpoints related to configuring the Integrated Voltage Regulator (if installed). See Chapter 19.<br />
PROGRAMMABLE CYCLE TIMER (<strong>EMCP</strong> <strong>4.2</strong> ONLY)<br />
Setpoints related to configuring Programmable Cycle Timers. See Chapter 13.<br />
ELECTRONIC CONTROL MODULE REDUCED POWER MODE<br />
Setpoints related to a power-saving mode of the <strong>EMCP</strong> 4 called Reduced Power Mode.<br />
See Chapter 14.<br />
RELAY OUTPUTS<br />
Setpoints related to Relay Outputs. See Chapter 10.<br />
SERVICE MAINTENANCE INTERVAL<br />
Setpoints related to configuring and resetting the timers used to indicate a service needed<br />
warning. See Chapter 5.7.<br />
KW RELAY SETPOINTS<br />
Setpoints related to configuring the behavior of the Trip Point function, which is used to<br />
indicate that the generator is approaching overload.<br />
©2013 Caterpillar<br />
All rights reserved. Page 71
<strong>EMCP</strong> 4.1, <strong>4.2</strong> Generator Set Control<br />
Application and Installation Guide<br />
CONFIGURATION DATA<br />
Contains the Engine Serial Number setpoint, which is read-only.<br />
DISPLAY PREFERENCES<br />
Setpoints determining the units used on the <strong>EMCP</strong> 4 display. Note that this does not affect<br />
the data as viewed on the Cat Service Tool. See Chapter 4.4.<br />
Page 72<br />
©2013 Caterpillar<br />
All rights reserved.
Application and Installation Guide<br />
<strong>EMCP</strong> 4.1, <strong>4.2</strong> Generator Set Control<br />
8 DIGITAL INPUTS<br />
The <strong>EMCP</strong> 4.1 and <strong>4.2</strong> have six user-programmable Digital Inputs. The user<br />
programmable Digital Inputs are referenced to Battery (-) and will see a change in state<br />
at ~3VDC with a 1VDC hysteresis. The Digital Inputs seen on the display that are<br />
labeled “A” and “B” are reserved for E-Stop and Remote Start.<br />
The programming of the Digital Inputs starts by selecting a “Usage Type“. The rest of the<br />
programming is dependent upon what Usage Type is selected. Programming Digital<br />
Inputs from the <strong>EMCP</strong> display requires Level 2 security access. Figure 20 summarizes<br />
the paths possible for Programming a Digital Input.<br />
Disabled<br />
Command/Status<br />
System Event<br />
SCADA Data Link<br />
Status Parameter<br />
Active State<br />
Event Parameter<br />
Failure Type<br />
Event Delay<br />
Active State<br />
List of Choices<br />
List of Choices<br />
List of Choices<br />
Figure 20: Digital Input Programming Paths<br />
The Usage Type of DISABLED is used to completely disable the input. No status will be<br />
shown, and no action will be taken by the <strong>EMCP</strong> 4.<br />
The Usage Type of COMMAND/STATUS is used to make certain system conditions be<br />
known by the <strong>EMCP</strong> 4; an example of a Command/Status parameter is the Idle Mode<br />
command.<br />
The Usage Type of SYSTEM EVENT is used to inform the <strong>EMCP</strong> 4 of system conditions<br />
that require the <strong>EMCP</strong> 4 to trigger an event.<br />
The Usage Type of SCADA DATA LINK is used to bring in digital input to the <strong>EMCP</strong> 4<br />
specifically for use by the SCADA data link. <strong>EMCP</strong> 4 will not take any action or trigger<br />
any events on such an input.<br />
The Digital Inputs of the <strong>EMCP</strong> 4 are tied to an internal pull-up resistor inside the<br />
controller. Therefore, if a Digital Input is UNCONNECTED, the Digital Input will sit at a<br />
PHYSICAL HIGH state. See Figure 21. Note that a Digital Input wired to battery positive will<br />
always remain Active if programmed for Active High, and will always remain Inactive if<br />
programmed for Active Low.<br />
A battery negative input should be switched to each <strong>EMCP</strong> 4 Digital Input for proper<br />
operation.<br />
If an ACTIVE HIGH configuration is desired, the battery negative input should be<br />
wired through a normally-closed switch.<br />
If an ACTIVE LOW configuration is desired, the battery negative input should be<br />
wired through a normally-open switch.<br />
©2013 Caterpillar<br />
All rights reserved. Page 73
<strong>EMCP</strong> 4.1, <strong>4.2</strong> Generator Set Control<br />
Application and Installation Guide<br />
Figure 20: Valid States of Digital Input Wiring and Configuration<br />
Note: Improper configuration of these inputs can cause a false event to be triggered,<br />
or cause an event to not be triggered when desired.<br />
Note: If more than one Digital Input is configured for the same physical quantity<br />
(i.e. the setpoint Digital Input Data Identification matches between two Digital Inputs),<br />
then the higher numbered Digital Input value will be have priority. For example, if both<br />
Digital Input #4 and Digital Input #5 are configured for ECS in Run but Digital Input #4<br />
is activated with Digital Input #5 left inactive, then Digital Input #4 will be ignored.<br />
8.1 PROGRAMMING DIGITAL INPUTS USING THE DISPLAY<br />
The steps to configure the Digital Inputs for each of the Usage Types are described<br />
below.<br />
Page 74<br />
©2013 Caterpillar<br />
All rights reserved.
Application and Installation Guide<br />
<strong>EMCP</strong> 4.1, <strong>4.2</strong> Generator Set Control<br />
VIEWING THE CURRENT DIGITAL INPUT STATUS<br />
To view the current status of a Digital Input, go through the following menu options:<br />
AT THE MAIN MENU, scroll DOWN<br />
TO VIEW<br />
Press the OK KEY .<br />
Scroll DOWN<br />
to I/O STATUS<br />
Press the OK KEY .<br />
Press the OK KEY<br />
to access DIGITAL INPUTS.<br />
The status of all Digital Inputs is shown.<br />
A dash under an input number (or letter) indicates<br />
an input that is programmed, but inactive. A large<br />
“X” under an input number (or letter) indicates an<br />
input that is disabled. A number (or letter) under an<br />
input number (or letter) indicates an input that is<br />
programmed and active.<br />
With the LEFT ARROW or RIGHT ARROW , select the DIGITAL INPUT that you want to<br />
view, then press the OK KEY .<br />
The programmed Usage Type of the selected Digital<br />
Input is shown.<br />
Scroll DOWN to view the remaining<br />
parameters for this input:<br />
Event Name<br />
Usage Type<br />
Delay Time (System Event only)<br />
Physical State<br />
Logical State<br />
Active State<br />
©2013 Caterpillar<br />
All rights reserved. Page 75
<strong>EMCP</strong> 4.1, <strong>4.2</strong> Generator Set Control<br />
Application and Installation Guide<br />
CONFIGURING DIGITAL INPUTS FOR STATUS PARAMETERS<br />
Command or Status parameters are used to control specific functions within the control<br />
system or to make certain conditions within the system be known. To configure a Digital<br />
Input as a Command or Status Parameter, go through the following menu options:<br />
AT THE MAIN MENU, scroll DOWN<br />
CONFIGURE<br />
TO<br />
Press the OK KEY .<br />
Scroll DOWN<br />
to INPUTS & OUTPUTS<br />
Press the OK KEY .<br />
Alternately, access to the INPUTS & OUTPUTS<br />
submenu is accessible from ALL SETPOINTS.<br />
Press the OK KEY<br />
to access DIGITAL INPUTS.<br />
Select the DIGITAL INPUT that you want to program<br />
Press the OK KEY .<br />
Press the OK KEY to highlight the current<br />
configuration (DISABLED, COMMAND/STATUS,<br />
SYSTEM EVENT, OR SCADA).<br />
Scroll DOWN<br />
to STATUS<br />
Press the OK KEY .<br />
Scroll DOWN<br />
to STATUS PARAMETER<br />
Press the OK KEY<br />
to highlight the current<br />
STATUS PARAMETER.<br />
Page 76<br />
©2013 Caterpillar<br />
All rights reserved.
Application and Installation Guide<br />
<strong>EMCP</strong> 4.1, <strong>4.2</strong> Generator Set Control<br />
Select the STATUS PARAMETER that you want to<br />
program<br />
Press the OK KEY .<br />
Scroll DOWN<br />
to ACTIVE STATE<br />
Press the OK KEY<br />
to highlight the current<br />
ACTIVE STATE.<br />
Select the ACTIVE STATE that you want to program<br />
and<br />
Press the OK KEY .<br />
Any Digital Input can be configured for any one of the Command/Status parameters in<br />
Table 4:<br />
ECS in Run*<br />
Nominal Voltage Selection is Low***<br />
ECS in Auto*<br />
Auto Load Fuel<br />
ECS in Stop*<br />
Auto Unload Fuel***<br />
Idle Mode Command<br />
Start Aid Timer Bypass<br />
Inhibit Cooldown<br />
Fuel Priming Command<br />
Raise Voltage<br />
Inhibit Reactive Droop Compensation**<br />
Lower Voltage<br />
Raise Speed<br />
Lower Speed<br />
Nominal Frequency Selection is Low***<br />
Inhibit Line Drop Compensation**<br />
Enable Power Factor Control Command**<br />
Disable Generator Excitation**<br />
*If a Digital Input is programmed for ECS in Auto, or Run, or Stop, and a<br />
maintained switch latches that input to make it active, the front panel buttons<br />
will not have any effect.<br />
** Only available with Integrated Voltage Regulator<br />
*** Not available with Standard software<br />
Table 4: Digital Input Command/Status Options<br />
©2013 Caterpillar<br />
All rights reserved. Page 77
<strong>EMCP</strong> 4.1, <strong>4.2</strong> Generator Set Control<br />
Application and Installation Guide<br />
DIGITAL INPUT COMMAND/STATUS DESCRIPTIONS<br />
Below is a brief description of the purpose of each command/status digital input option:<br />
ECS IN RUN<br />
When activated, has the same effect as pressing the “Run” button (puts<br />
the <strong>EMCP</strong> in RUN mode and runs the generator at rated voltage and<br />
speed). While this input is Logically Active, the ECS can’t be changed<br />
from RUN.<br />
ECS IN AUTO<br />
When activated, has the same effect as pressing the “Auto” button (puts<br />
the <strong>EMCP</strong> in AUTO mode). While this input is Logically Active, the ECS<br />
can’t be changed from AUTO.<br />
ECS IN STOP<br />
When activated, has the same effect as pressing the “Stop” button (puts<br />
the <strong>EMCP</strong> in STOP mode). While this input is Logically Active, the ECS<br />
can’t be changed from STOP.<br />
IDLE MODE COMMAND<br />
When activated, attempts to force the engine to run at idle speed when<br />
the engine is running. This action will also disable various protective<br />
functions including functions such as underspeed, undervoltage and<br />
under-frequency<br />
INHIBIT COOLDOWN<br />
While activated, prevents the engine from entering cooldown and keeps<br />
the <strong>EMCP</strong> in pre-cooldown state. Must be de-activated before the<br />
engine will completely stop. A hard shutdown will still stop the engine<br />
even if Inhibit Cooldown is in place.<br />
RAISE VOLTAGE<br />
When activated, raises generator voltage level by 0.5% of rated. If the<br />
input is maintained, after 0.5 seconds generator voltage level increases<br />
by 0.5% every 400ms (approximate). Typically used for external voltage<br />
biasing and/or external paralleling control.<br />
LOWER VOLTAGE<br />
When activated, lowers generator voltage level by 0.5% of rated. If the<br />
input is maintained, after 0.5 seconds generator voltage level decreases<br />
by 0.5% every 400ms (approximate). Typically used for external voltage<br />
biasing and/or external paralleling control.<br />
RAISE SPEED<br />
When activated, raises engine speed by 0.5% of rated. If the input is<br />
maintained, after 0.5 seconds engine speed increases by 0.5% every<br />
400ms (approximate). Typically used for external speed biasing and/or<br />
external paralleling control.<br />
LOWER SPEED<br />
When activated, lowers engine speed by 0.5% of rated. If the input is<br />
maintained, after 0.5 seconds engine speed decreases by 0.5% every<br />
400ms (approximate). Typically used for external speed biasing and/or<br />
external paralleling control.<br />
Page 78<br />
©2013 Caterpillar<br />
All rights reserved.
Application and Installation Guide<br />
<strong>EMCP</strong> 4.1, <strong>4.2</strong> Generator Set Control<br />
NOMINAL FREQUENCY SELECTION IS LOW<br />
When activated, selects low frequency ratings group #3 or #4. If an input<br />
is not mapped to a digital input, it is assumed to be a logical “0”. When<br />
used in conjunction with Nominal Voltage Selection is Low the following<br />
ratings groups can be selected:<br />
Programmable Digital Input<br />
“Nominal Frequency is Low”<br />
Logical Status<br />
Programmable Digital Input<br />
“Nominal Voltage is Low”<br />
Logical Status<br />
Ratings Group<br />
Selected<br />
0 (high frequency) 0 (high voltage) Group #1<br />
0 (high frequency) 1 (low voltage) Group #2<br />
1 (low frequency) 0 (high voltage) Group #3<br />
1 (low frequency) 1 (low voltage) Group #4<br />
(Not available on standard software)<br />
NOMINAL VOLTAGE SELECTION IS LOW<br />
<br />
When activated, selects low voltage ratings group #2 or #4. If an input is<br />
not mapped to a digital input, it is assumed to be a logical “0”. When<br />
used in conjunction with Nominal Frequency Selection is Low the<br />
following ratings groups can be selected:<br />
Programmable Digital Input<br />
“Nominal Frequency is Low”<br />
Logical Status<br />
Programmable Digital Input<br />
“Nominal Voltage is Low”<br />
Logical Status<br />
Ratings<br />
Group<br />
Selected<br />
0 (high frequency) 0 (high voltage) Group #1<br />
0 (high frequency) 1 (low voltage) Group #2<br />
1 (low frequency) 0 (high voltage) Group #3<br />
1 (low frequency) 1 (low voltage) Group #4<br />
(Not available on standard software)<br />
AUTO LOAD FUEL<br />
When activated, initiates the automatic fuel transfer in feature (if<br />
enabled). Typically used in conjunction with programmable digital<br />
outputs and analog input to control loading fuel.<br />
AUTO UNLOAD FUEL<br />
When activated, initiates the automatic fuel transfer out feature (if<br />
enabled). Typically used in conjunction with programmable digital<br />
outputs and analog input to control unloading fuel. (Not available on<br />
standard software)<br />
START AID TIMER BYPASS<br />
When activated, bypasses any remaining Start Aid Activation time and<br />
allows the set to proceed directly to cranking.<br />
FUEL PRIMING COMMAND<br />
When activated, initiates fuel priming pump (if enabled). If Engine<br />
Operating State is configured for Hardwired, <strong>EMCP</strong> controls the fuel<br />
priming pump using fuel control relay output. If Engine Operating State<br />
is configured for CAN Input, <strong>EMCP</strong> communicates fuel priming<br />
command to engine ECM.<br />
©2013 Caterpillar<br />
All rights reserved. Page 79
<strong>EMCP</strong> 4.1, <strong>4.2</strong> Generator Set Control<br />
Application and Installation Guide<br />
INHIBIT REACTIVE DROOP COMPENSATION<br />
When activated, reactive droop compensation bias (if configured) is<br />
removed from generator voltage output. (Only available with Integrated<br />
Voltage Regulator).<br />
INHIBIT LINE DROP COMPENSATION<br />
<br />
When activated, line drop compensation bias (if configured) is removed<br />
from generator voltage output. (Only available with Integrated Voltage<br />
Regulator).<br />
ENABLE POWER FACTOR CONTROL COMMAND<br />
When activated, voltage regulator control is performed in order to control<br />
power factor to a desired level. (Only available with Integrated Voltage<br />
Regulator).<br />
DISABLE GENERATOR EXCITATION COMMAND<br />
When activated, generator excitation command is forced to zero and<br />
generator voltage output will only consist of residual voltage. (Only<br />
available with Integrated Voltage Regulator).<br />
Page 80<br />
©2013 Caterpillar<br />
All rights reserved.
Application and Installation Guide<br />
<strong>EMCP</strong> 4.1, <strong>4.2</strong> Generator Set Control<br />
CONFIGURING DIGITAL INPUTS FOR SYSTEM EVENTS<br />
System Events are used to know when specific conditions are reached and to alert the<br />
control system of warning or shutdown conditions. To configure a Digital Input as a<br />
System Event, go through the following menu options:<br />
AT THE MAIN MENU, scroll down<br />
to CONFIGURE<br />
Press the OK KEY .<br />
SCROLL DOWN<br />
to INPUTS & OUTPUTS<br />
Press the OK KEY .<br />
Alternately, access to THE INPUTS & OUTPUTS<br />
submenu is accessible from ALL SETPOINTS.<br />
Press the OK KEY<br />
to access DIGITAL INPUTS.<br />
Select the DIGITAL INPUT that you want to program and<br />
Press the OK KEY .<br />
Press the OK KEY to highlight the current<br />
configuration (DISABLED, STATUS, SYSTEM EVENT,<br />
OR SCADA).<br />
Scroll DOWN<br />
to SYSTEM EVENT<br />
Press the OK KEY .<br />
Scroll DOWN<br />
to EVENT PARAMETER<br />
Press the OK KEY<br />
to edit the current STATUS<br />
PARAMETER.<br />
Select the type of EVENT PARAMETER that you want to<br />
program (Pressures, Temperatures, Levels, or Others)<br />
Press the OK KEY .<br />
©2013 Caterpillar<br />
All rights reserved. Page 81
<strong>EMCP</strong> 4.1, <strong>4.2</strong> Generator Set Control<br />
Application and Installation Guide<br />
Select the EVENT PARAMETER that you want to<br />
program<br />
Press the OK KEY .<br />
Scroll DOWN<br />
to FAILURE TYPE<br />
Press the OK KEY<br />
to edit the current FAILURE<br />
TYPE.<br />
Select the FAILURE TYPE that you want to program<br />
Press the OK KEY .<br />
Scroll DOWN<br />
to EVENT DELAY<br />
Press the OK KEY<br />
EVENT DELAY.<br />
to highlight the current<br />
Select the EVENT DELAY that you want<br />
Press the OK KEY .<br />
Scroll DOWN<br />
to ACTIVE STATE<br />
Press the OK KEY to highlight the current<br />
ACTIVE STATE.<br />
Select the ACTIVE STATE that you want to program<br />
and<br />
Press the OK KEY .<br />
Page 82<br />
©2013 Caterpillar<br />
All rights reserved.
Application and Installation Guide<br />
<strong>EMCP</strong> 4.1, <strong>4.2</strong> Generator Set Control<br />
Any Digital Input can be configured for any one of the System Event parameters in Table 5:<br />
Pressures<br />
Engine Oil Pressure<br />
Gas Pressure<br />
Temperatures<br />
Engine Coolant Temperature<br />
Engine Oil Temperature<br />
Exhaust Temp<br />
Generator Rear Bearing Temperature<br />
Generator Winding #1 Temperature<br />
Levels<br />
Engine Coolant Level<br />
Engine Oil Level<br />
Fuel Level<br />
External Tank Fuel Level<br />
Table 5: Digital Input System Events<br />
Others<br />
Custom Event*<br />
Air Damper Closed<br />
Battery Charger Failure<br />
Fuel Leak<br />
Earth Fault<br />
Earth Leakage<br />
Battery Charging System Voltage<br />
Generator Breaker Closed<br />
Generator Breaker Open<br />
Generator Current<br />
Generator Real Power<br />
Inlet Manifold Charge Combustion<br />
EPS Supply Load (<strong>EMCP</strong> <strong>4.2</strong> only)<br />
Emergency Stop Switch (Remote)<br />
*Note: Digital Input s configured for Custom Event SPNs (701-718) are shared between<br />
the <strong>EMCP</strong> and DIO Modules. Therefore ONLY one Custom Event SPN-FMI can be used<br />
between the two modules. SPN701 (Digital Input #1 Custom Event) may also be used in<br />
the Configuration of “Engine Running”.<br />
©2013 Caterpillar<br />
All rights reserved. Page 83
<strong>EMCP</strong> 4.1, <strong>4.2</strong> Generator Set Control<br />
Application and Installation Guide<br />
CONFIGURING DIGITAL INPUTS FOR SCADA DATA LINK<br />
When a Digital Input is configured for SCADA Data Link, the state of the input will be placed into<br />
the appropriate MODBUS register only. No alarms or warnings will be generated by the <strong>EMCP</strong>.<br />
To configure a Digital Input for SCADA Data Link, go through the following menu options:<br />
AT THE MAIN MENU, scroll down<br />
TO CONFIGURE<br />
Press OK KEY<br />
SCROLL DOWN<br />
to inputs & outputs<br />
Press OK KEY<br />
Alternately, access to THE INPUTS & OUTPUTS<br />
submenu is accessible from ALL SETPOINTS.<br />
Press OK KEY<br />
to access DIGITAL INPUTS<br />
Select the DIGITAL INPUT that you want to program<br />
Press the OK KEY .<br />
Press the OK KEY to highlight the current<br />
configuration (DISABLED, STATUS, SYSTEM EVENT,<br />
OR SCADA).<br />
Scroll DOWN<br />
to SCADA DATA LINK<br />
Press the OK KEY .<br />
Scroll DOWN<br />
to ACTIVE STATE<br />
Press the OK KEY to highlight the current<br />
ACTIVE STATE.<br />
Select the ACTIVE STATE that you want to program<br />
Press the OK KEY .<br />
For information on reading the status of Digital Inputs via MODBUS, please refer to the<br />
SCADA documentation.<br />
Page 84<br />
©2013 Caterpillar<br />
All rights reserved.
Application and Installation Guide<br />
<strong>EMCP</strong> 4.1, <strong>4.2</strong> Generator Set Control<br />
DISABLING DIGITAL INPUTS<br />
To disable a Digital Input, go through the following menu options:<br />
AT THE MAIN MENU, scroll down<br />
CONFIGURE<br />
TO<br />
Press the OK KEY .<br />
SCROLL DOWN<br />
to INPUTS & OUTPUTS<br />
Press the OK KEY .<br />
Alternately, access to THE INPUTS & OUTPUTS<br />
submenu is accessible from ALL SETPOINTS.<br />
Press the OK KEY<br />
to access DIGITAL INPUTS.<br />
Select the DIGITAL INPUT that you want to program<br />
Press the OK KEY .<br />
Press the OK KEY to highlight the current<br />
configuration (DISABLED, STATUS, SYSTEM EVENT,<br />
OR SCADA).<br />
Scroll DOWN<br />
to DISABLED<br />
Press the OK KEY .<br />
Note: If a Digital Input is set to Disabled, then any faults or events on that input will not<br />
be broadcast or annunciated on the network.<br />
©2013 Caterpillar<br />
All rights reserved. Page 85
<strong>EMCP</strong> 4.1, <strong>4.2</strong> Generator Set Control<br />
Application and Installation Guide<br />
8.2 PROGRAMMING DIGITAL INPUTS USING THE CAT SERVICE TOOL<br />
The <strong>EMCP</strong> 4 Digital Inputs can be configured using the Cat Service Tool. The key to<br />
programming them is to program the setpoints related to each input in order from top to<br />
bottom. To program an input, do the following steps:<br />
1. Connect to the <strong>EMCP</strong> 4 using the Cat Service Tool as stated in Chapter <strong>4.2</strong>.<br />
2. Select Digital Inputs on the left.<br />
3. Determine which input is to be configured. For example, all of the setpoints for<br />
Digital Input #1 have the text “#1” in their name.<br />
4. Next follow the steps below according to which Usage Type is desired.<br />
Page 86<br />
©2013 Caterpillar<br />
All rights reserved.
Application and Installation Guide<br />
<strong>EMCP</strong> 4.1, <strong>4.2</strong> Generator Set Control<br />
CONFIGURING DIGITAL INPUTS FOR STATUS PARAMETER<br />
1. Double click the Digital Input #N Usage type to change this value to Command/<br />
Status Parameter from the drop down menu. Click the OK button to program.<br />
2. The Digital Input #N Command/Status Parameter Data Identification and Active<br />
State Configuration parameters will now be visible in the right pane.<br />
3. Configure the Active State Configuration setpoint according to your wiring –<br />
either active High or active Low. Click the OK button to program.<br />
©2013 Caterpillar<br />
All rights reserved. Page 87
<strong>EMCP</strong> 4.1, <strong>4.2</strong> Generator Set Control<br />
Application and Installation Guide<br />
4. Double click the Configure the Command/Status Parameter Data Identification<br />
setpoint to change this value from the drop down menu. Click the OK button to<br />
program.<br />
See Table 4 in Chapter 8.1 for a complete list of possible Status Parameter Data<br />
Identifications.<br />
CONFIGURING DIGITAL INPUTS FOR SYSTEM EVENTS<br />
1. Double click the Digital Input #N Usage type to change this value to System<br />
Event from the drop down menu. Click the OK button to program.<br />
Page 88<br />
©2013 Caterpillar<br />
All rights reserved.
Application and Installation Guide<br />
<strong>EMCP</strong> 4.1, <strong>4.2</strong> Generator Set Control<br />
2. The Event Input Function #N Event Notification Delay Time, Suspect Parameter<br />
Number (SPN), Failure Mode Identifier (FMI) and Active State Configuration<br />
parameters will now be visible in the right pane.<br />
3. Double click the Event Input Function #N Event Notification Delay Time setpoint<br />
to change this value. Click the OK button to program.<br />
4. Double click the Event Input Function #N Suspect Parameter Number (SPN)<br />
setpoint to change this value from the drop down menu. Click the OK button<br />
to program.<br />
©2013 Caterpillar<br />
All rights reserved. Page 89
<strong>EMCP</strong> 4.1, <strong>4.2</strong> Generator Set Control<br />
Application and Installation Guide<br />
5. Double click the Event Input Function #N Failure Mode Identifier (FMI) setpoint<br />
to change this value from the drop down menu. Click the OK button to program.<br />
6. Configure the Active State Configuration setpoint according to your wiring –<br />
either active High or active Low. Click the OK button to program.<br />
7. Once the input is set with an SPN and FMI, the Event Response Configuration<br />
may have to be checked. For information on Event Response Configurations<br />
and how to program them, see Chapter 5.2.<br />
Not all SPN and FMI combinations are valid. Table 6 indicates which FMIs are valid for<br />
which SPNs. If a combination other than one indicated with a “y” in the table above is<br />
configured, the event will not trigger any response by the <strong>EMCP</strong> 4. The <strong>EMCP</strong> 4 may not<br />
give the option of an invalid FMI for a given SPN. In Cat ET, there is no restriction on the<br />
SPN/FMI combination. An invalid combination in Cat ET will result in an “Out of Range”<br />
error.<br />
Page 90<br />
©2013 Caterpillar<br />
All rights reserved.
Application and Installation Guide<br />
<strong>EMCP</strong> 4.1, <strong>4.2</strong> Generator Set Control<br />
Category<br />
Pressures<br />
Temperatures<br />
Levels<br />
Others<br />
Suspect Parameter Number<br />
High<br />
Shutdown<br />
Failure Mode Identifier Valid Options<br />
Low<br />
Shutdown<br />
High<br />
Warning<br />
Low<br />
Warning<br />
Engine Oil Pressure y y y*<br />
Gas Pressure y y y y<br />
Engine Coolant Temperature y y y<br />
Engine Oil Temperature y y y y y*<br />
Exhaust Temperature y y y<br />
Generator Rear Bearing<br />
Temperature<br />
Generator Winding #1<br />
Temperature<br />
y y y y<br />
Engine Coolant Level y y y y<br />
Engine Oil Level y y y y<br />
Fuel Level y y y y<br />
External Tank Fuel Level y y y y<br />
Air Damper Closed<br />
Battery Charging System Voltage<br />
Battery Charger Failure<br />
Custom Event (see note below)<br />
Earth Fault<br />
Earth Leakage<br />
Emergency Stop Switch<br />
EPS Supply Load<br />
Fuel Leak<br />
Gen Breaker Closed<br />
Gen Breaker Open<br />
Generator Current y y y y<br />
Generator Real Power y y y<br />
Inlet Manifold Charge<br />
Combustion<br />
y<br />
y<br />
y<br />
Status<br />
y<br />
y<br />
y<br />
y<br />
y<br />
y**<br />
y<br />
y<br />
y<br />
y<br />
y<br />
Table 6: Event Input Function SPN and FMI Options<br />
*This status is FMI 14 (Special Instruction), not FMI 31 (Condition Exists).<br />
** This status is FMI 14(Special Instruction), not FMI 31 (Condition Exists). This gives a<br />
means to differentiate between a Remote Emergency Stop and Emergency Stop.<br />
Note: For Custom Events, each input can only trigger the custom event number that<br />
matches the Digital Input number (Digital Input #1 can only activate Custom Event #1, etc).<br />
©2013 Caterpillar<br />
All rights reserved. Page 91
<strong>EMCP</strong> 4.1, <strong>4.2</strong> Generator Set Control<br />
Application and Installation Guide<br />
CONFIGURING DIGITAL INPUTS FOR SCADA DATA LINK<br />
1. Double click the Digital Input #N Usage type to change this value to Data Link<br />
from the drop down menu. Click the OK button to program.<br />
DISABLING DIGITAL INPUTS<br />
1. Double click the Digital Input #N Usage type to change this value to Disabled<br />
from the drop down menu. Click the OK button to program.<br />
Page 92<br />
©2013 Caterpillar<br />
All rights reserved.
Application and Installation Guide<br />
<strong>EMCP</strong> 4.1, <strong>4.2</strong> Generator Set Control<br />
9 ANALOG INPUTS<br />
The <strong>EMCP</strong> 4.1 and <strong>4.2</strong> support three 2-wire (plus shield) Analog Inputs. None of these<br />
inputs are dedicated to specific functions. These are individually selectable as either<br />
Voltage or Resistive Sender inputs for interface to senders, customer signals, etc. The<br />
modes of operation are described below:<br />
Voltage mode: 0-5 Volts with software-selectable sub-ranges (see Table 9 in<br />
Chapter 9.3). The input impedance is a minimum of 10k Ohms and a maximum<br />
of 1M Ohms. The Analog Input return signals must be tied to battery negative<br />
external to the controller.<br />
Resistive Sender (VDO typemtr) Mode: 5-2000 Ohms with software-selectable<br />
nonlinear maps. Accuracy is 1% or 0.5 Ohms accuracy, whichever is worse. The<br />
Analog Input return signals must be tied to battery negative external to the controller.<br />
The Analog Inputs have a 5V common non-isolated power supply capable of supplying<br />
up to 100mA of current, and has overload protection. This supply is to be used to<br />
provide power to sensors if required by the source power pin and Analog Input returns.<br />
The negative side of this supply is battery negative.<br />
See Electrical Connections Chapter 3.5 for illustrations on how to connect the sensors to<br />
the control.<br />
Analog Inputs programmed to monitor pressures should be wired to sensors that read<br />
gauge, not absolute pressure, unless absolute pressure is desired.<br />
For Analog Inputs, the data range can be positive or negative, but Event thresholds are<br />
only positive. Therefore, to prevent nuisance alarms for low warnings, disable the Event<br />
Response Configuration if data is acceptable to be negative (see Chapter 5.2).<br />
The first and second Analog Inputs are configured by default for non-electronic engines to<br />
monitor engine oil pressure and engine coolant temperature, respectively, and are protected<br />
by Level 3 security. The third Analog Input is protected at Level 2 security. For help on<br />
programming the Level 3 password prior to running this procedure, see Chapter 6, Security.<br />
Alternately, the Cat Service Tool can be used to program these setpoints.<br />
Note: If the Analog Inputs are set to DISABLED, then any sensor faults or events will not<br />
be broadcast or annunciated on the network.<br />
Note: If more than one Analog Input is configured for the same physical quantity (i.e. the<br />
setpoint Analog Input Data Identification matches between two Analog Inputs), then the<br />
higher numbered Analog Input value will be displayed on the Engine Overview screen.<br />
For example, if both Analog Input #2 and Analog Input #3 are configured for oil<br />
temperature, but the sensor is connected only to Analog Input #2 (and Analog Input #3 is<br />
left open), a display of **** diagnostic will result. The Engine Overview screen will display<br />
the value from Analog Input #3. Warnings and Shutdowns will be monitored for both<br />
Analog Inputs. When troubleshooting inputs, always make sure to check for<br />
configuration conflicts!<br />
The Analog Inputs are often not used for electronic engines that use ADEM A3, A4 or<br />
newer, engine ECM. On these engines, the engine oil pressure sensor and the engine<br />
coolant temperature sensors may be wired to the engine ECM and not to the generator<br />
set control. In order to receive the sensor information from the data link instead of from<br />
sensors wired into the <strong>EMCP</strong> 4, the setpoints Engine Oil Pressure Sensor Configuration<br />
and Engine Coolant Temperature Sensor Configuration must be set to Data Link. If they<br />
are not set this way, the sensor values on the Engine Overview screen on the <strong>EMCP</strong> 4<br />
display will show (asterisks).<br />
©2013 Caterpillar<br />
All rights reserved. Page 93
<strong>EMCP</strong> 4.1, <strong>4.2</strong> Generator Set Control<br />
Application and Installation Guide<br />
Note: Improper configuration of these inputs can cause a false event to be triggered,<br />
or cause an event to not be triggered when desired. If a user disables an input without<br />
including other external protection, or disables the annunciation of an enabled input,<br />
detection will not be available. If a spare input is enabled, but not wired to a sensor,<br />
a false event may occur.<br />
The programming of the Analog Inputs starts by selecting a “Usage Type”. The rest<br />
of the programming is dependent upon what Usage Type is selected. Figure 22<br />
summarizes the paths possible for Programming an Analog Input.<br />
Figure 22: Analog Input Programming Paths<br />
Page 94<br />
©2013 Caterpillar<br />
All rights reserved.
Application and Installation Guide<br />
<strong>EMCP</strong> 4.1, <strong>4.2</strong> Generator Set Control<br />
9.1 PROGRAMMING ANALOG INPUTS USING THE DISPLAY<br />
The steps to configure the Analog Inputs for each of the Usage Types are described<br />
below. Level 3 security is required for Analog Inputs #1 and #2. Level 2 security is<br />
required for Analog Input #3.<br />
VIEWING THE CURRENT ANALOG INPUT STATUS<br />
To view the current status of an Analog Input, go through the following menu options:<br />
AT THE MAIN MENU, scroll DOWN<br />
TO VIEW<br />
Press the OK KEY .<br />
Scroll DOWN<br />
to I/O STATUS<br />
Press the OK KEY .<br />
Scroll DOWN<br />
to ANALOG INPUTS<br />
Press the OK KEY .<br />
Scroll DOWN<br />
desired.<br />
to choose the ANALOG INPUT<br />
Press the OK KEY .<br />
The programmed Data Identification of the selected<br />
Analog Input is shown.<br />
Scroll DOWN<br />
seen on the input).<br />
to view the remaining parameters for this input (including the actual value<br />
©2013 Caterpillar<br />
All rights reserved. Page 95
<strong>EMCP</strong> 4.1, <strong>4.2</strong> Generator Set Control<br />
Application and Installation Guide<br />
CONFIGURING ANALOG INPUTS FOR RESISTIVE MODE<br />
To configure an Analog Input for Resistive Mode, go through the following menu options:<br />
AT THE MAIN MENU, scroll down<br />
to CONFIGURE<br />
Press the OK KEY .<br />
SCROLL DOWN<br />
to INPUTS & OUTPUTS<br />
Press the OK KEY .<br />
SCROLL DOWN<br />
to ANALOG INPUTS<br />
Press the OK KEY .<br />
Alternately, access to THE INPUTS & OUTPUTS<br />
submenu is accessible from ALL SETPOINTS.<br />
Select the ANALOG INPUT that you want to program<br />
Press the OK KEY .<br />
Press the OK KEY to highlight the current<br />
configuration (DISABLED, RESISTIVE, OR VOLTAGE).<br />
Scroll DOWN<br />
to RESISTIVE<br />
Press the OK KEY .<br />
Scroll DOWN<br />
to DATA IDENTIFICATION<br />
Press the OK KEY<br />
to change the current DATA<br />
IDENTIFICATION.<br />
Select the DATA IDENTIFICATION that you want to<br />
program<br />
Press the OK KEY .<br />
Page 96<br />
©2013 Caterpillar<br />
All rights reserved.
Application and Installation Guide<br />
<strong>EMCP</strong> 4.1, <strong>4.2</strong> Generator Set Control<br />
Scroll DOWN<br />
to MAP SELECTION NUMBER<br />
Press the OK KEY to change<br />
the current MAP SELECTION NUMBER.<br />
Select the MAP SELECTION NUMBER that you want to<br />
program<br />
Press the OK KEY .<br />
The Data Identification will remain the same when switching between Resistive or<br />
Voltage.<br />
Any Analog Input can be configured for any one of the Data Identification parameters in<br />
Table 7:<br />
Engine Oil Pres<br />
Custom Parameters<br />
Eng Coolant Temp<br />
Data Link – SCADA (<strong>EMCP</strong> <strong>4.2</strong> only)<br />
Engine Oil Temp<br />
Engine Speed Control<br />
Engine Fuel Level<br />
Generator Voltage Control<br />
Ext Tank Fuel Level<br />
Table 7: Analog Input Data Identifications<br />
The Sensor Codes correspond to sensor maps as defined in Chapter 9.3.<br />
©2013 Caterpillar<br />
All rights reserved. Page 97
<strong>EMCP</strong> 4.1, <strong>4.2</strong> Generator Set Control<br />
Application and Installation Guide<br />
CONFIGURING ANALOG INPUTS FOR VOLTAGE MODE<br />
To configure an Analog Input for Voltage Mode, go through the following menu options:<br />
AT THE MAIN MENU, scroll down<br />
to CONFIGURE<br />
Press the OK KEY .<br />
SCROLL DOWN<br />
to INPUTS & OUTPUTS<br />
Press the OK KEY .<br />
SCROLL DOWN<br />
to ANALOG INPUTS<br />
Press the OK KEY .<br />
Alternately, access to THE INPUTS & OUTPUTS<br />
submenu is accessible from ALL SETPOINTS.<br />
Select the ANALOG INPUT that you want to program<br />
Press the OK KEY .<br />
Press the OK KEY to highlight the current<br />
configuration (DISABLED, RESISTIVE, OR VOLTAGE).<br />
Scroll DOWN<br />
to VOLTAGE<br />
Press the OK KEY .<br />
Scroll DOWN<br />
to SENSOR RANGE<br />
Press the OK KEY<br />
to change the current<br />
SENSOR RANGE.<br />
Select the SENSOR RANGE that you want to program<br />
Press the OK KEY .<br />
Page 98<br />
©2013 Caterpillar<br />
All rights reserved.
Application and Installation Guide<br />
<strong>EMCP</strong> 4.1, <strong>4.2</strong> Generator Set Control<br />
Scroll DOWN<br />
to DATA IDENTIFICATION<br />
Press the OK KEY<br />
to change the current DATA<br />
IDENTIFICATION.<br />
Select the STATUS PARAMETER that you want to<br />
program<br />
Press the OK KEY .<br />
Scroll DOWN<br />
to DATA RANGE MIN<br />
Press the OK KEY<br />
to change the current DATA<br />
RANGE MIN.<br />
Select the DATA RANGE MIN that you want to<br />
program<br />
Press the OK KEY .<br />
For Analog Inputs, the data range can be positive or<br />
negative, but Event thresholds are only positive.<br />
Therefore, to prevent nuisance alarms for low<br />
warnings, disable the Event Response Configuration<br />
if data is acceptable to be negative (see Chapter 5.2).<br />
Scroll DOWN<br />
to DATA RANGE MAX<br />
Press the OK KEY<br />
to change the current DATA<br />
RANGE MAX.<br />
Select the DATA RANGE MAX that you want to<br />
program<br />
Press the OK KEY .<br />
The Data Identification list is the same whether Signal Type is Resistive or Voltage.<br />
Any Analog Input can be configured for any one of the Data Identification parameters in<br />
Table 7.<br />
©2013 Caterpillar<br />
All rights reserved. Page 99
<strong>EMCP</strong> 4.1, <strong>4.2</strong> Generator Set Control<br />
Application and Installation Guide<br />
DISABLING ANALOG INPUTS<br />
To Disable an Analog Input, go through the following menu options:<br />
AT THE MAIN MENU, scroll down<br />
to CONFIGURE<br />
Press the OK KEY .<br />
SCROLL DOWN<br />
to INPUTS & OUTPUTS<br />
Press the OK KEY .<br />
SCROLL DOWN<br />
to ANALOG INPUTS<br />
Press the OK KEY .<br />
Alternately, access to THE INPUTS & OUTPUTS<br />
submenu is accessible from ALL SETPOINTS.<br />
Select the ANALOG INPUT that you want to program<br />
Press the OK KEY .<br />
Press the OK KEY to highlight the current<br />
configuration (DISABLED, RESISTIVE, OR VOLTAGE).<br />
Scroll DOWN<br />
to DISABLED<br />
Press the OK KEY .<br />
Page 100<br />
©2013 Caterpillar<br />
All rights reserved.
Application and Installation Guide<br />
<strong>EMCP</strong> 4.1, <strong>4.2</strong> Generator Set Control<br />
9.2 PROGRAMMING ANALOG INPUTS USING THE CAT SERVICE TOOL<br />
The <strong>EMCP</strong> 4 Analog Inputs can be configured using the Cat Service Tool. The key to<br />
programming them is to program the setpoints related to each input in order from top to<br />
bottom. To program an Analog Input, do the following steps:<br />
1. Connect to the <strong>EMCP</strong> 4 using the Cat Service Tool as stated in Chapter <strong>4.2</strong>.<br />
2. Select Analog Inputs on the left.<br />
3. Determine which input is to be configured. For example, all of the setpoints for<br />
Analog Input #1 have the text “#1” in their name.<br />
4. Next follow the steps below according to which Usage Type is desired.<br />
©2013 Caterpillar<br />
All rights reserved. Page 101
<strong>EMCP</strong> 4.1, <strong>4.2</strong> Generator Set Control<br />
Application and Installation Guide<br />
CONFIGURING ANALOG INPUTS FOR RESISTIVE MODE<br />
The <strong>EMCP</strong> 4 supports resistive sender maps, which are nonlinear maps representing<br />
the transfer function of the resistive sender. Once an Analog Input is configured as a<br />
Resistive input type, a map must be selected.<br />
1. Double click the Analog Input #N Usage type to change this value to Resistive<br />
Sender from the drop down menu. Click the OK button to program.<br />
2. The Analog Input #N Configuration Code and Data Identification parameters will<br />
now be visible in the right pane.<br />
3. Double click the Configuration Code setpoint to change this value from the drop<br />
down menu. Click the OK button to program.<br />
Page 102<br />
©2013 Caterpillar<br />
All rights reserved.
Application and Installation Guide<br />
<strong>EMCP</strong> 4.1, <strong>4.2</strong> Generator Set Control<br />
4. Double click the Data Identification setpoint to change this value from the drop<br />
down menu. Click the OK button to program.<br />
Based on whether or not the selected option supports events, the list of setpoints<br />
shown will adjust accordingly. If the selected option does not support events,<br />
then the configuration is complete.<br />
5. If the selected option does support events, then continue and configure the event<br />
thresholds and delays. The Analog Input #N Threshold and Delay Time<br />
parameters will now be visible in the right pane.<br />
©2013 Caterpillar<br />
All rights reserved. Page 103
<strong>EMCP</strong> 4.1, <strong>4.2</strong> Generator Set Control<br />
Application and Installation Guide<br />
Table 8 lists the options and which, if any, events they support. Not all SPN and<br />
FMI combinations are valid. Table 8 indicates which FMIs are valid for which<br />
SPNs. If a combination other than one indicated with a “y” in the table above is<br />
configured, the event will not trigger any response by the <strong>EMCP</strong> 4. The <strong>EMCP</strong> 4<br />
may not give the option of an invalid FMI for a given SPN. In Cat ET, there is no<br />
restriction on the SPN/FMI combination. An invalid combination in Cat ET will<br />
result in an “Out of Range” error.<br />
Suspect Parameter Number<br />
Failure Mode Identifier Valid Options<br />
High<br />
Shutdown<br />
Low<br />
Shutdown<br />
High<br />
Warning<br />
Low<br />
Warning<br />
Engine Oil Pressure y y<br />
Engine Coolant Temperature y y y<br />
Engine Oil Temperature y y y y<br />
Fuel Level y y y y<br />
External Tank Fuel Level y y y y<br />
Gen Volt Control<br />
Custom Event (see note below) y y y y<br />
Data Link Only<br />
Desired Engine Speed Command<br />
Table 8: Event Input Function SPN and FMI Options<br />
Note: For Custom Events, each input can only trigger the custom event number that<br />
matches the Analog Input number (Analog Input #1 can only activate Custom Event #1,<br />
etc.).<br />
6. Configure each of these setpoints by double clicking each one and typing a new<br />
value. Click the OK button to program.<br />
Note: The units for the event thresholds are not shown. For pressures, the units are<br />
always kPa. For temperatures, they are always degrees Celsius. For levels, they are<br />
always percent. For the custom parameter type, they are unitless. The range for custom<br />
parameters is defined by the selected sensor map if programmed for resistive.<br />
Page 104<br />
©2013 Caterpillar<br />
All rights reserved.
Application and Installation Guide<br />
<strong>EMCP</strong> 4.1, <strong>4.2</strong> Generator Set Control<br />
CONFIGURING ANALOG INPUTS FOR VOLTAGE MODE<br />
The <strong>EMCP</strong> 4 supports linear voltage senders, which are senders whose output voltage<br />
varies linearly with the change in a physical measurement. Once the Analog Input is<br />
configured as a Voltage Input type, the linear mapping must be defined by entering the<br />
sensor voltage range and the corresponding minimum and maximum physical<br />
measurement range.<br />
1. Double click the Analog Input #N Usage type to change this value to Voltage<br />
from the drop down menu. Click the OK button to program.<br />
2. The Analog Input #N Signal Range, Data Identification, and Minimum and<br />
Maximum Data Range parameters will now be visible in the right pane.<br />
©2013 Caterpillar<br />
All rights reserved. Page 105
<strong>EMCP</strong> 4.1, <strong>4.2</strong> Generator Set Control<br />
Application and Installation Guide<br />
3. Double click the Signal Range setpoint to change this value from the drop down<br />
menu to match the range supported by your sensor (or the next larger range).<br />
See Chapter 9.3 for what to do if the desired sensor’s range is not supported.<br />
Click the OK button to program.<br />
4. Double click the Data Identification setpoint to change this value from the drop<br />
down menu. Click the OK button to program.<br />
5. Based on whether or not the selected option supports events, the list of setpoints<br />
shown will adjust accordingly. Table 8 lists the options and which, if any, events<br />
they support.<br />
Page 106<br />
©2013 Caterpillar<br />
All rights reserved.
Application and Installation Guide<br />
<strong>EMCP</strong> 4.1, <strong>4.2</strong> Generator Set Control<br />
6. Configure each of the Minimum and Maximum Data Range setpoints by double<br />
clicking each setpoint and typing a new value. Click the OK button to program.<br />
For Analog Inputs, the data range can be positive or negative, but Event thresholds are<br />
only positive. Therefore, to prevent nuisance alarms for low warnings, disable the Event<br />
Response Configuration if data is acceptable to be negative (see Chapter 5.2).<br />
7. If the selected Data Identification does support events, then continue and<br />
configure the event thresholds and delays. The Analog Input #N Threshold and<br />
Delay Time parameters will be visible in the right pane.<br />
©2013 Caterpillar<br />
All rights reserved. Page 107
<strong>EMCP</strong> 4.1, <strong>4.2</strong> Generator Set Control<br />
Application and Installation Guide<br />
8. Configure each of these setpoints by double clicking each one and typing a new<br />
value. Click the OK button to program.<br />
Note: The units for the event thresholds are not shown. For pressures, the units are<br />
always kPa. For temperatures, they are always degrees Celsius. For levels, they are<br />
always percent. For the custom parameter type, they are unitless. The range for custom<br />
parameters is defined by the selected sensor map.<br />
DISABLING ANALOG INPUTS<br />
1. Double click the Analog Input #N Usage type to change this value to Disabled<br />
from the drop down menu. Click the OK button to program.<br />
Note: If the Analog Inputs are set to Disabled, then any sensor faults or events will not<br />
be broadcast or annunciated on the network.<br />
Page 108<br />
©2013 Caterpillar<br />
All rights reserved.
Application and Installation Guide<br />
<strong>EMCP</strong> 4.1, <strong>4.2</strong> Generator Set Control<br />
9.3 ANALOG INPUT MAPS<br />
Resistive senders can use nonlinear sensor maps. These maps are not available for<br />
Voltage or Current modes. Maps are predefined in the software flash file, and can be<br />
selected by the customer. The Analog Inputs are capable of reading resistance from<br />
~5 ohms.<br />
The following maps are predefined:<br />
Analog Input Map #1<br />
Engine Oil Pressure<br />
Map #1<br />
Ohms kPa<br />
5.1 0<br />
10.2 0<br />
20.9 50<br />
31.3 100<br />
41.6 150<br />
51.6 200<br />
61.3 250<br />
70.9 300<br />
80.4 350<br />
89.5 400<br />
98.6 450<br />
107.3 500<br />
115.9 550<br />
124.3 600<br />
132.5 650<br />
140.5 700<br />
148.2 750<br />
155.8 800<br />
163.1 850<br />
170.2 900<br />
177.2 950<br />
183.9 1000<br />
kPa<br />
Engine Oil Pressure Map #1<br />
1000<br />
800<br />
600<br />
400<br />
200<br />
0<br />
0 50 100 150 200<br />
Ohms<br />
©2013 Caterpillar<br />
All rights reserved. Page 109
<strong>EMCP</strong> 4.1, <strong>4.2</strong> Generator Set Control<br />
Application and Installation Guide<br />
Analog Input Map #2<br />
Engine Oil Pressure<br />
Engine Oil Pressure<br />
Ohms kPa<br />
0 0<br />
8 0<br />
9 45<br />
9.8 50<br />
97.5 1000<br />
kPa<br />
1000<br />
800<br />
600<br />
400<br />
200<br />
0<br />
0 25 50 75 100<br />
Ohms<br />
Page 110<br />
©2013 Caterpillar<br />
All rights reserved.
Application and Installation Guide<br />
<strong>EMCP</strong> 4.1, <strong>4.2</strong> Generator Set Control<br />
Analog Input Map #3<br />
Engine Coolant Temp.<br />
Map #1<br />
Engine Coolant Temp<br />
(<strong>EMCP</strong> 3 Engine Coolant Temp Map #1)<br />
Ohms Degrees C<br />
11.0 150<br />
12.8 143<br />
15.0 136<br />
17.9 129<br />
20.8 123<br />
2<strong>4.2</strong> 117<br />
28.4 111<br />
33.4 105<br />
39.6 99<br />
46.9 93<br />
56.1 87<br />
67.9 81<br />
82.4 75<br />
103.6 68<br />
129. 6 61<br />
168.0 54<br />
221.9 47<br />
291.5 40<br />
387.5 33<br />
520.6 26<br />
677.0 20<br />
890.6 14<br />
1182.9 8<br />
1575.6 2<br />
2249.4 -5<br />
Degrees C<br />
130<br />
105<br />
80<br />
55<br />
30<br />
5<br />
-20<br />
0 500 1000 1500 2000<br />
Ohms<br />
©2013 Caterpillar<br />
All rights reserved. Page 111
<strong>EMCP</strong> 4.1, <strong>4.2</strong> Generator Set Control<br />
Application and Installation Guide<br />
Analog Input Map #4<br />
Engine Coolant Temp.<br />
Map #2<br />
Ohms Degrees C<br />
2442 -48<br />
1518 -39<br />
968.9 -30<br />
633.6 -21<br />
423.9 -12<br />
289.7 -3<br />
201.9 6<br />
148.8 14<br />
111.2 22<br />
8<strong>4.2</strong> 30<br />
64.5 38<br />
50 46<br />
39.2 54<br />
31 62<br />
24.8 70<br />
20 78<br />
16.3 86<br />
13.3 94<br />
11.0 102<br />
9.18 110<br />
7.7 118<br />
6.5 126<br />
5.5 134<br />
4.7 142<br />
4.1 150<br />
Degrees C<br />
Engine Coolant Temp<br />
150<br />
130<br />
110<br />
90<br />
70<br />
50<br />
30<br />
10<br />
-10<br />
0 500 1000 1500 2000 2500<br />
-30<br />
-50<br />
Ohms<br />
Page 112<br />
©2013 Caterpillar<br />
All rights reserved.
Application and Installation Guide<br />
<strong>EMCP</strong> 4.1, <strong>4.2</strong> Generator Set Control<br />
Analog Input Map #5<br />
Oil Temp<br />
Ohms Degrees C<br />
10.2 180<br />
11.9 172<br />
13.9 164<br />
16. 4 156<br />
19.0 149<br />
22.0 142<br />
25.7 135<br />
30.2 128<br />
35.6 121<br />
42.5 114<br />
51.2 107<br />
61.9 100<br />
75.8 93<br />
93.6 86<br />
115.6 79<br />
145.2 72<br />
184.7 65<br />
238.0 58<br />
309.9 51<br />
408.7 44<br />
546. 6 37<br />
773.7 29<br />
1114.9 21<br />
1640.3 13<br />
2473.6 5<br />
Degrees C<br />
Oil Temp<br />
200<br />
180<br />
160<br />
140<br />
120<br />
100<br />
80<br />
60<br />
40<br />
20<br />
0<br />
0 500 1000 1500 2000 2500<br />
Ohms<br />
©2013 Caterpillar<br />
All rights reserved. Page 113
<strong>EMCP</strong> 4.1, <strong>4.2</strong> Generator Set Control<br />
Application and Installation Guide<br />
Analog Input Map #6<br />
Engine Coolant Temp<br />
Map #3<br />
Lean2B Temp<br />
Ohms Degrees C<br />
6.9 150<br />
8.2 142<br />
9.8 134<br />
11.6 127<br />
13.8 120<br />
16.3 113<br />
19.6 106<br />
23.8 99<br />
28.8 92<br />
35.4 85<br />
43.7 78<br />
54. 5 71<br />
68.5 64<br />
87.1 57<br />
111.8 50<br />
145.1 43<br />
190.5 36<br />
253.4 29<br />
341. 5 22<br />
467.0 15<br />
648.8 8<br />
916.6 1<br />
1318.5 -6<br />
2046.6 -14<br />
Degrees C<br />
140<br />
120<br />
100<br />
80<br />
60<br />
40<br />
20<br />
0<br />
0<br />
-20<br />
500 1000 1500 2000<br />
Ohms<br />
Page 114<br />
©2013 Caterpillar<br />
All rights reserved.
Application and Installation Guide<br />
<strong>EMCP</strong> 4.1, <strong>4.2</strong> Generator Set Control<br />
Analog Input Map #7<br />
Fozmula Fuel Level<br />
Ohms %<br />
10.5 0<br />
35.6 25<br />
60.2 50<br />
85.2 75<br />
103.2 100<br />
% Fuel Level<br />
100<br />
75<br />
50<br />
25<br />
Fozmula Fuel Level<br />
0<br />
0 25 50 75 100<br />
Ohms<br />
Analog Input Map #8<br />
Linear Level<br />
Ohms %<br />
0 0<br />
2000 100<br />
100<br />
75<br />
Linear Level<br />
% Level<br />
50<br />
25<br />
0<br />
0 500 1000 1500 2000<br />
Ohms<br />
©2013 Caterpillar<br />
All rights reserved. Page 115
<strong>EMCP</strong> 4.1, <strong>4.2</strong> Generator Set Control<br />
Application and Installation Guide<br />
Analog Input Map #9<br />
Power Module Tank<br />
Level #1<br />
Ohms %<br />
10. 5 0<br />
35.6 25<br />
60.2 50<br />
85.2 75<br />
103.2 100<br />
% Level<br />
100<br />
75<br />
50<br />
Power Module Tank Level #1<br />
25<br />
0<br />
0 20 40 60 80 100<br />
Ohms<br />
Analog Input Map #10<br />
Power Module Tank<br />
Level #2<br />
Ohms %<br />
10 100<br />
135 100<br />
348.2 0<br />
500 0<br />
% Level<br />
120<br />
100<br />
80<br />
60<br />
40<br />
Power Module Tank Level #2<br />
20<br />
0<br />
0 100 200 300 400 500<br />
Ohms<br />
Page 116<br />
©2013 Caterpillar<br />
All rights reserved.
Application and Installation Guide<br />
<strong>EMCP</strong> 4.1, <strong>4.2</strong> Generator Set Control<br />
Analog Input Map #11<br />
Fuel Level<br />
Ohms %<br />
255 0<br />
240 0<br />
30 100<br />
15 100<br />
% Fuel Level<br />
100<br />
80<br />
60<br />
40<br />
Fuel Level<br />
20<br />
0<br />
255 240 30 15<br />
Ohms<br />
©2013 Caterpillar<br />
All rights reserved. Page 117
<strong>EMCP</strong> 4.1, <strong>4.2</strong> Generator Set Control<br />
Application and Installation Guide<br />
Analog Input Map #12<br />
Temperature<br />
Temperature<br />
Useful for temperatures<br />
based on CAT sensor part<br />
number 256-6453. (<strong>EMCP</strong><br />
Only supports down to 10<br />
degrees C).<br />
Ohms Degrees C<br />
2541.5 5<br />
1991.4 10<br />
1249.5 20<br />
1000 25<br />
805.5 30<br />
652.8 35<br />
532.3 40<br />
436.6 45<br />
360 50<br />
298.4 55<br />
248.7 60<br />
208.2 65<br />
175.2 70<br />
148.1 75<br />
125.7 80<br />
107.2 85<br />
91.7 90<br />
78.8 95<br />
68 100<br />
58.9 105<br />
51.2 110<br />
44.6 115<br />
39 120<br />
30.1 130<br />
23.6 140<br />
18.6 150<br />
Degrees C<br />
140<br />
120<br />
100<br />
80<br />
60<br />
40<br />
20<br />
0<br />
2541.5 652.8 248.7 107.2 51.2 18.6<br />
Ohms<br />
For <strong>EMCP</strong> 4.1 and <strong>4.2</strong>, voltage senders can be configured within the ranges in Table 9:<br />
Page 118<br />
©2013 Caterpillar<br />
All rights reserved.
Application and Installation Guide<br />
<strong>EMCP</strong> 4.1, <strong>4.2</strong> Generator Set Control<br />
Voltage Sender Ranges<br />
0 to 5V<br />
1 to 5V<br />
0.5 to 4.5V<br />
Table 9: Analog Input Ranges<br />
Analog Input data ranges can be defined with positive and negative values, but Event<br />
thresholds are only programmable as positive values. Therefore, to prevent nuisance<br />
alarms for low warnings when using negative numbers for data ranges, the Event<br />
Response Configuration can be disabled, if input data is acceptable to be negative.<br />
WARNINGS AND SHUTDOWNS<br />
Each of these inputs can be configured to have HIGH WARNINGS, LOW WARNINGS, HIGH<br />
SHUTDOWNS and LOW SHUTDOWNS with configurable thresholds. Any value below the<br />
bottom point on the map or above the highest point on the map will raise a<br />
corresponding diagnostic event. Also, all of the events associated with the Analog Inputs<br />
have programmable time delays. Low Idle Oil Pressure setpoints are also available<br />
under the Engine Oil Monitor area. Information on how to program these thresholds and<br />
time delays can be found in Chapter 7, Setpoints.<br />
UNSUPPORTED ANALOG INPUT SENSOR RANGES<br />
There may be Voltage sensors available that use ranges not explicitly supported by the<br />
<strong>EMCP</strong> 4. Depending on the situation, there may be different ways to handle this. The<br />
following sections give options on how to handle these situations.<br />
SENSOR RANGE IS SMALLER THAN SETPOINT OPTIONS<br />
If the desired sensor range is smaller than one of the available setpoint options, then<br />
extrapolation may be used to support the desired sensor. For example, for a 0-3V<br />
temperature sensor reads -30C to 120C, the only range that includes all of 0-3V is 0-<br />
5V. The 0-5V range should be used. The range between 3V and 5V will simply never be<br />
used. To make the data accurate, set the Minimum Data Range to -30C, and determine<br />
the Maximum Data Range mathematically. See Figure 23.<br />
©2013 Caterpillar<br />
All rights reserved. Page 119
<strong>EMCP</strong> 4.1, <strong>4.2</strong> Generator Set Control<br />
Application and Installation Guide<br />
Figure 23: Mathematical Extrapolation of Maximum Data Range<br />
The Maximum Data Range can be found graphically or algebraically. In this example,<br />
the Maximum Data Range would be defined by the equation of the line after the slope is<br />
determined. Since the data rises by 50 degrees for every volt, increasing two volts above<br />
the three volt limit requires the maximum range to be 100 degrees above the sensor limit<br />
of 120 degrees, or 220 degrees total. See Figure 24.<br />
Figure 24: Example Calculation for Extrapolation of Maximum Data Range<br />
Page 120<br />
©2013 Caterpillar<br />
All rights reserved.
Application and Installation Guide<br />
<strong>EMCP</strong> 4.1, <strong>4.2</strong> Generator Set Control<br />
SENSOR RANGE IS LARGER THAN SETPOINT OPTIONS,<br />
BUT USABLE RANGE IS NOT<br />
If the desired sensor range is larger than one of the available setpoint options, but the<br />
useful range for the sensor is within the supported ranges, then interpolation may be<br />
used to support the desired sensor. For example, for a 0-6V temperature sensor that<br />
reads -40C to 500C, the <strong>EMCP</strong> 4 will not support the analog voltages higher than 5V.<br />
However, as long as the sensor will not exceed 5V, the 0-5V range may be used. To<br />
make the data accurate, set the Minimum Data Range to -40C, and determine the<br />
Maximum Data Range mathematically. See Figure 25.<br />
Figure 25: Mathematical Interpolation of Maximum Data Range<br />
The Maximum Data Range can be found graphically or algebraically. In this example,<br />
the Maximum Data Range would be defined by the equation of the line after the slope is<br />
determined. Since the data rises by 90 degrees for every volt, decreasing one volt below<br />
the six volt limit requires the maximum range to be 90 degrees below the sensor limit of<br />
500 degrees, or 410 degrees total. See Figure 26.<br />
Figure 26: Example Calculation for Interpolation of Maximum Data Range<br />
©2013 Caterpillar<br />
All rights reserved. Page 121
<strong>EMCP</strong> 4.1, <strong>4.2</strong> Generator Set Control<br />
Application and Installation Guide<br />
SENSOR RANGE IS LARGER THAN SETPOINT OPTIONS, AND USABLE RANGE<br />
IS LARGER THAN SETPOINT OPTIONS<br />
If the desired sensor range is larger than one of the available setpoint options, and the<br />
useful range for the sensor is outside of the supported ranges, a third party device is<br />
required to convert the signal range into a supported range. See Figure 27.<br />
Figure 27: Signal Conversion of Sensor Range<br />
Page 122<br />
©2013 Caterpillar<br />
All rights reserved.
Application and Installation Guide<br />
<strong>EMCP</strong> 4.1, <strong>4.2</strong> Generator Set Control<br />
10 OUTPUTS<br />
The <strong>EMCP</strong> 4.1 and <strong>4.2</strong> support Relay Outputs capable of 2A resistive at 30V DC. The<br />
<strong>EMCP</strong> 4.1 has six Form A Relay Outputs (normally open) while the <strong>EMCP</strong> <strong>4.2</strong> has six<br />
Form A Relay Outputs and two Form C Relay Outputs (both normally open and normally<br />
closed).<br />
The <strong>EMCP</strong> <strong>4.2</strong> also supports two programmable discrete outputs capable of sinking<br />
300mA per input. These outputs will sink a current to draw down a voltage of up to 30V<br />
DC down to Battery (-).<br />
Outputs can be configured by using the <strong>EMCP</strong> 4 display. For some of the setpoints,<br />
LEVEL 2 OR LEVEL 3 ACCESS is required. For information on obtaining Level 2 or Level 3<br />
Access refer to Chapter 6, Security.<br />
Security. This chapter will assume that the correct Level 2 or Level 3 Access has already<br />
been obtained. Alternately, the Cat Service Tool can be used to configure these outputs.<br />
The programming of the Digital and Relay Outputs starts by selecting a “Usage Type”.<br />
The rest of the programming is dependent upon what Usage Type is selected. Figure 28<br />
summarizes the paths possible for Programming Digital and Relay Outputs.<br />
Note: If the Engine Operating State is configured as Hardwired, then Relay Output #1<br />
must be programmed to Starter Motor Relay.<br />
Figure 28: Digital and Relay Output Programming Paths<br />
©2013 Caterpillar<br />
All rights reserved. Page 123
<strong>EMCP</strong> 4.1, <strong>4.2</strong> Generator Set Control<br />
Application and Installation Guide<br />
10.1 PROGRAMMING OUTPUTS USING THE DISPLAY<br />
For some of the setpoints, LEVEL 2 OR LEVEL 3 ACCESS is required. For information on<br />
obtaining Level 2 Access refer to Chapter 6, Security.<br />
This section will assume that Level 2 or Level 3 Access has already been obtained.<br />
VIEWING THE CURRENT OUTPUT STATUS<br />
To view the current status of an Output, go through the following menu options:<br />
AT THE MAIN MENU, scroll DOWN<br />
TO VIEW<br />
Press the OK KEY .<br />
Scroll DOWN<br />
to I/O STATUS<br />
Press the OK KEY .<br />
Scroll DOWN<br />
OUTPUTS<br />
to access RELAY OR DIGITAL<br />
Press the OK KEY .<br />
The status of all Relay or Digital Outputs is shown.<br />
A dash under an output number indicates an output<br />
that is programmed, but inactive. A large “X” under<br />
an output number indicates an output that is<br />
disabled. A number under an output number<br />
indicates an output that is programmed and active.<br />
With the LEFT ARROW or RIGHT ARROW , select the RELAY OR DIGITAL OUTPUT that you<br />
want to view, then press the OK KEY .<br />
The programmed Usage Type of the selected relay<br />
or Digital Output is shown.<br />
Scroll DOWN<br />
logical state).<br />
to view the remaining parameters for this output (including physical and<br />
Page 124<br />
©2013 Caterpillar<br />
All rights reserved.
Application and Installation Guide<br />
<strong>EMCP</strong> 4.1, <strong>4.2</strong> Generator Set Control<br />
CONFIGURING OUTPUTS FOR STATUS PARAMETERS<br />
Command or Status parameters are used to control specific functions within the control<br />
system or to make certain conditions within the system be known.<br />
Note: The Fuel Control Relay does not pickup when the Engine Operating State is set to<br />
CAN. Engine Start Initiated can be used in Lieu of the Fuel Control Relay for most purposes.<br />
To configure a Digital Output or Relay Output as a Status Parameter, go through the<br />
following menu options (substitute Digital Output for Relay Output in the following steps,<br />
as needed):<br />
AT THE MAIN MENU, scroll down<br />
CONFIGURE<br />
TO<br />
Press the OK KEY .<br />
SCROLL DOWN<br />
to INPUTS & OUTPUTS<br />
Press the OK KEY .<br />
Alternately, access to THE INPUTS & OUTPUTS<br />
submenu is accessible from ALL SETPOINTS.<br />
SCROLL DOWN<br />
to RELAY OUTPUTS<br />
Press the OK KEY .<br />
Select the RELAY OUTPUT that you want to program<br />
Press the OK KEY .<br />
Press the OK KEY to highlight the current<br />
configuration (DISABLED, COMMAND/STATUS,<br />
SYSTEM EVENT, OR SCADA DATA LINK).<br />
Scroll DOWN<br />
to COMMAND/STATUS<br />
Press the OK KEY .<br />
Scroll DOWN<br />
to STATUS PARAMETER<br />
Press the OK KEY<br />
to highlight the current<br />
STATUS PARAMETER.<br />
©2013 Caterpillar<br />
All rights reserved. Page 125
<strong>EMCP</strong> 4.1, <strong>4.2</strong> Generator Set Control<br />
Application and Installation Guide<br />
Select the STATUS PARAMETER that you want to<br />
program<br />
Press the OK KEY .<br />
Any Output can be configured for any one of the Command/Status parameters in Table 10:<br />
Run Mode<br />
Air Shutoff<br />
Auto Mode<br />
Progamable Cycle Time #2 (<strong>EMCP</strong> <strong>4.2</strong> only)<br />
Stop Mode<br />
kW Relay Trip #1 (<strong>EMCP</strong> <strong>4.2</strong> only)<br />
Package Not in Auto<br />
kW Relay Trip #2 (<strong>EMCP</strong> <strong>4.2</strong> only)<br />
Fuel Control Relay*<br />
Common Alarm<br />
Starter Motor Relay<br />
Breaker #1 Trip<br />
Start Aid<br />
Breaker #2 Trip<br />
Disable Auxiliary AC<br />
Reduced Power Off<br />
Crank Alert<br />
Transfer Fuel In<br />
Engine Start Initiated<br />
Transfer Fuel Out*<br />
Engine Started<br />
Volt Lower Command<br />
Rated Speed<br />
Volt Raise Command<br />
V/Hz Within Limits<br />
Speed Raise Command<br />
Engine in Cooldown<br />
Speed Lower Command<br />
Wait Delay Stop<br />
Nominal Frequency Selection is Low**<br />
Horn Control<br />
Nominal Voltage Selection is Low**<br />
Common Warning<br />
Ignition Shutoff Relay<br />
Common Shutdown<br />
Governor ECM Power Relay<br />
ECU Fault Reset<br />
*The Fuel Control Relay does not pickup when the Engine Operating<br />
State is set to CAN. Engine Start Initiated can be used in lieu of the Fuel<br />
Control Relay for most purposes.<br />
** Not available with Standard software<br />
Table 10: Output Command/Status List<br />
Note: If the Engine State Configuration is configured for Hard Wired, then Relay Output<br />
#1 must be programmed for the Status Parameter of Starter Motor Relay. As of version<br />
<strong>4.2</strong>.2 PROD software, Relay Output #2 is no longer required to be programmed for Fuel<br />
Control Relay.<br />
Page 126<br />
©2013 Caterpillar<br />
All rights reserved.
Application and Installation Guide<br />
<strong>EMCP</strong> 4.1, <strong>4.2</strong> Generator Set Control<br />
DIGITAL/RELAY OUTPUT COMMAND/STATUS DESCRIPTIONS<br />
Below is a brief description of the purpose of each command/status digital/relay output<br />
option:<br />
RUN MODE<br />
Activates when the <strong>EMCP</strong> is placed in RUN mode (such as when the<br />
‘Run’ button is pressed). Matches the state of ECS LED on the <strong>EMCP</strong>.<br />
AUTO MODE<br />
Activates when the <strong>EMCP</strong> is placed in AUTO mode (such as when the<br />
‘Auto’ button is pressed). Matches the state of ECS LED on the <strong>EMCP</strong>.<br />
STOP MODE<br />
Activates when the <strong>EMCP</strong> is placed in STOP mode (such as when the<br />
‘Stop’ button is pressed). Matches the state of ECS LED on the <strong>EMCP</strong>.<br />
PACKAGE NOT IN AUTO<br />
Activates when conditions are present that prevent the <strong>EMCP</strong> from<br />
operating in AUTO mode (such as engine control switch not in auto,<br />
engine not in Rated mode, shutdown red lamp is active).<br />
FUEL CONTROL RELAY<br />
Activates when the engine pre-crank timing delay expires during the<br />
engine start sequence and the while the engine is running, along with<br />
during fuel priming when engine operating state is configured for<br />
Hardwired Input.<br />
STARTER MOTOR RELAY<br />
Activates during the Crank Duration time during the starting state of the<br />
engine starting sequence when the engine operating state setpoint is<br />
configured for Hardwired Input.<br />
START AID<br />
Activates during the Start Aid Activation Time during the pre-crank state<br />
of the engine starting sequence.<br />
DISABLE AUX AC<br />
Activates when the generator set enters the Pre-Crank State. This output<br />
will be deactivated during Crank Alert, Start Aid, Cranking, Running,<br />
Cooldown, etc, but will stay activated if the generator set is unable to start<br />
due to a shutdown fault. Typically used to turn off equipment such as<br />
static battery chargers and water heaters when the engine is running.<br />
CRANK ALERT<br />
Activates during the Crank Alert Activation Time during the pre-crank<br />
state of the engine starting sequence.<br />
ENGINE START INITIATED<br />
Activates when the engine has been commanded to start and remains<br />
active until the end of cooldown.<br />
ENGINE STARTED<br />
Activates when the engine has been commanded to start and the engine<br />
speed is greater than Crank Terminate rpm and remains active until<br />
engine speed drops below Crank Terminate rpm.<br />
©2013 Caterpillar<br />
All rights reserved. Page 127
<strong>EMCP</strong> 4.1, <strong>4.2</strong> Generator Set Control<br />
Application and Installation Guide<br />
RATED SPEED<br />
Activates when the engine is configured to run at rated speed<br />
(regardless of actual engine speed). Useful to determine when the<br />
engine is commanded to run at idle speed. Note: This is NOT an<br />
indication that the set is at rated speed. It is an indication that the set<br />
has not been requested to run at Idle.<br />
V/HZ WITHIN LIMITS<br />
Activates if voltage and frequency are within the Over/Under Voltage<br />
and Over/Under Frequency protection limits (typically 90% to 110% of<br />
rated).<br />
ENGINE IN COOLDOWN<br />
Activates when the engine is running in cooldown mode.<br />
WAIT DELAY STOP<br />
Activates when the engine is running in the pre-cooldown state.<br />
Typically a stop signal has been received, but an inhibit cooldown<br />
command is preventing the unit from entering cooldown.<br />
HORN CONTROL<br />
Activates when a horn alert is sounding. Typically occurs when any<br />
event configured with an audible alert event response is PRESENT or<br />
ACTIVE and unacknowledged.<br />
COMMON WARNING<br />
Activates when any warning is PRESENT in the event log (regardless of<br />
source).<br />
COMMON SHUTDOWN<br />
Activates when any shutdown is PRESENT or ACTIVE in the event log<br />
(regardless of source).<br />
ECU FAULT RESET<br />
Activates for a specified period of time when a Reset All Events<br />
command is issued. Typically only used to interface to legacy engines.<br />
AIR SHUTOFF<br />
Activates based on engine shutdown conditions such as engine<br />
overspeed, engine speed sensor diagnostic, emergency stop, and<br />
engine speed failure to decrease. When activated this output will remain<br />
active for 15 seconds.<br />
PROGRAMMABLE CYCLE TIMER OUTPUT #2 (<strong>EMCP</strong> <strong>4.2</strong> ONLY)<br />
Activates for the duration of the Programmable Cycle Timer #N Active<br />
Time as configured in the Programmable Cycle Timer feature (refer to<br />
Chapter 13)<br />
KW RELAY TRIP #1 (<strong>EMCP</strong> <strong>4.2</strong> ONLY)<br />
Activates based on the programmable trip point trigger conditions of the<br />
Programmable kW Relay Function (refer to Chapter 15)<br />
KW RELAY TRIP #2 (<strong>EMCP</strong> <strong>4.2</strong> ONLY)<br />
Activates based on the programmable trip point trigger conditions of the<br />
Programmable kW Relay Function (refer to Chapter 15)<br />
Page 128<br />
©2013 Caterpillar<br />
All rights reserved.
Application and Installation Guide<br />
<strong>EMCP</strong> 4.1, <strong>4.2</strong> Generator Set Control<br />
COMMON ALARM<br />
Activates when any shutdown is PRESENT or ACTIVE in the event log<br />
or any warning is PRESENT in the event log (regardless of source).<br />
BREAKER #1 TRIP<br />
Activates when any event configured with a Breaker #1 Trip event<br />
response is PRESENT or ACTIVE.<br />
BREAKER #2 TRIP<br />
Activates when any event configured with a Breaker #2 Trip event<br />
response is PRESENT or ACTIVE.<br />
REDUCED POWER OFF<br />
Activates when the <strong>EMCP</strong> is NOT in reduced power mode (Useful for<br />
placing other controls in a reduced power mode when the <strong>EMCP</strong> is in<br />
Reduced Power Mode).<br />
TRANSFER FUEL IN<br />
Activates when manual or automatic fuel loading is initiated.<br />
TRANSFER FUEL OUT<br />
Activates when manual or automatic fuel unloading is initiated. (Not<br />
available on standard software)<br />
VOLTAGE RAISE COMMAND<br />
Activates when a command to raise voltage is received.<br />
VOLTAGE LOWER COMMAND<br />
Activates when a command to lower voltage is received.<br />
SPEED RAISE COMMAND<br />
Activates when a command to raise speed is received.<br />
SPEED LOWER COMMAND<br />
Activates when a command to lower speed is received.<br />
NOMINAL FREQUENCY SELECTION IS LOW<br />
<br />
Activates when a digital input configured for “Nominal Frequency<br />
Selection is Low” is active.<br />
Programmable Digital Input<br />
“Nominal Frequency is Low”<br />
Logical Status<br />
Programmable Digital Input<br />
“Nominal Voltage is Low”<br />
Logical Status<br />
Ratings<br />
Group<br />
Selected<br />
0 (high frequency) 0 (high voltage) Group #1<br />
0 (high frequency) 1 (low voltage) Group #2<br />
1 (low frequency) 0 (high voltage) Group #3<br />
1 (low frequency) 1 (low voltage) Group #4<br />
(Not available on standard software)<br />
©2013 Caterpillar<br />
All rights reserved. Page 129
<strong>EMCP</strong> 4.1, <strong>4.2</strong> Generator Set Control<br />
Application and Installation Guide<br />
NOMINAL VOLTAGE SELECTION IS LOW<br />
Activates when a digital input configured for “Nominal Voltage Selection<br />
is Low” is active.<br />
Programmable Digital Input<br />
“Nominal Frequency is Low”<br />
Logical Status<br />
Programmable Digital Input<br />
“Nominal Voltage is Low”<br />
Logical Status<br />
Ratings<br />
Group<br />
Selected<br />
0 (high frequency) 0 (high voltage) Group #1<br />
0 (high frequency) 1 (low voltage) Group #2<br />
1 (low frequency) 0 (high voltage) Group #3<br />
1 (low frequency) 1 (low voltage) Group #4<br />
(Not available on standard software)<br />
IGNITION SHUTOFF RELAY<br />
Note: this is a shutoff relay so the output is active when ignition is NOT<br />
desired. Deactivates during the Engine Purge Cycle with Ignition time<br />
and while engine is starting and running. Typically used for gas engine<br />
starting/stopping sequence.<br />
GOVERNOR ECM POWER RELAY<br />
<br />
Activates at the start of the “Engine Start Sequence Delay Time” prior to<br />
engine cranking and deactivates 15 seconds after engine speed has<br />
reached zero rpm.<br />
CONFIGURING OUTPUTS FOR SYSTEM EVENTS<br />
System Events are used to know when specific conditions are reached and to alert the<br />
control system of warning or shutdown conditions. To configure a Relay or Digital Output<br />
as a System Event, go through the following menu options (substitute Digital Output for<br />
Relay Output in the following steps, as needed):<br />
AT THE MAIN MENU, scroll down<br />
TO CONFIGURE<br />
Press the OK KEY .<br />
SCROLL DOWN<br />
to INPUTS & OUTPUTS<br />
Press the OK KEY .<br />
Alternately, access to THE INPUTS & OUTPUTS<br />
submenu is accessible from ALL SETPOINTS.<br />
SCROLL DOWN<br />
to RELAY OUTPUTS<br />
Press the OK KEY .<br />
Page 130<br />
©2013 Caterpillar<br />
All rights reserved.
Application and Installation Guide<br />
<strong>EMCP</strong> 4.1, <strong>4.2</strong> Generator Set Control<br />
Select the RELAY OUTPUT that you want to program<br />
Press the OK KEY .<br />
Press the OK KEY to highlight the current<br />
configuration (DISABLED, COMMAND/STATUS,<br />
SYSTEM EVENT, OR SCADA DATA LINK).<br />
Scroll DOWN<br />
to SYSTEM EVENT<br />
Press the OK KEY .<br />
Scroll DOWN<br />
to EVENT PARAMETER<br />
Press the OK KEY<br />
to edit the current STATUS<br />
PARAMETER.<br />
Select the type of EVENT PARAMETER that you want to<br />
program (Pressures, Temperatures, Levels, or Others)<br />
Press the OK KEY .<br />
Select the EVENT PARAMETER that you want to<br />
program<br />
Press the OK KEY .<br />
Scroll DOWN<br />
to EVENT TRIGGER<br />
Press the OK KEY<br />
to edit the current EVENT<br />
TRIGGER.<br />
Select the EVENT TRIGGER that you want to program<br />
Press the OK KEY .<br />
©2013 Caterpillar<br />
All rights reserved. Page 131
<strong>EMCP</strong> 4.1, <strong>4.2</strong> Generator Set Control<br />
Application and Installation Guide<br />
Any Output can be configured for any one of the System Events in Table 11:<br />
Pressures Others Custom Events<br />
Engine Oil Pressure<br />
Gas Pressure<br />
Temperatures<br />
Engine Coolant<br />
Temperature<br />
Engine Oil Temperature<br />
Exhaust Temperature<br />
Generator Rear Bearing<br />
Temperature<br />
Generator Winding #1<br />
Temperature<br />
Any SPN<br />
Accessory Datalink (<strong>4.2</strong> only)<br />
Battery Charging System Voltage<br />
Battery Voltage<br />
Emergency Stop Switch<br />
Engine in Cooldown<br />
Engine Fail to Start<br />
Engine Speed<br />
Controls Not in Auto<br />
Generator Current<br />
Generator Frequency<br />
Generator Real Power<br />
Generator Voltage<br />
Digital Input #1 Custom<br />
Digital Input #2 Custom<br />
Digital Input #3 Custom<br />
Digital Input #4 Custom<br />
Digital Input #5 Custom<br />
Digital Input #6 Custom<br />
Analog Input #1 Custom<br />
Analog Input #2 Custom<br />
Analog Input #3 Custom<br />
Primary Data Link<br />
SCADA Data Link (<strong>4.2</strong> only)<br />
Levels<br />
Engine Coolant Level<br />
Engine Oil Level<br />
Fuel Level<br />
External Tank Fuel Level<br />
Service Interval Expired<br />
Unexpected Engine Shutdown<br />
Earth Fault<br />
Earth Leakage<br />
Engine Control<br />
Fuel Leak<br />
Air Damper Closed<br />
Battery Charger Failure<br />
Generator Breaker Open<br />
Generator Breaker Closed<br />
Table 11: Output System Events<br />
Page 132<br />
©2013 Caterpillar<br />
All rights reserved.
Application and Installation Guide<br />
<strong>EMCP</strong> 4.1, <strong>4.2</strong> Generator Set Control<br />
Care must be taken in configuring the correct triggers. Only some of these parameters<br />
can be configured for a specific System Event and even if it can be configured, it may<br />
not be representative of the system requirements. Output system event trigger<br />
conditions are listed in Table 12 below.<br />
Category SPN Suspect Parameter<br />
Supported FMI Trigger<br />
Conditions<br />
Pressures<br />
100 Engine Oil Pressure 1, 3, 4, 14, 17<br />
1390 Gas Pressure 0, 1, 15, 17<br />
Temperatures<br />
Levels<br />
Others<br />
110 Engine Coolant Temperature 0, 3, 4, 14, 15, 17<br />
175 Engine Oil Temperature 0, 1, 15, 17<br />
173 Exhaust Temperature 0, 1,15, 17<br />
1122 Generator Rear Bearing Temperature 0, 1, 15, 17<br />
1124 Generator Winding #1 Temperature 0, 15<br />
111 Engine Coolant Level 0, 1, 15, 17<br />
98 Engine Oil Level 0, 1, 15, 17<br />
96 Fuel Level 0, 1, 15, 17<br />
38 External Tank Fuel Level 0, 1, 15, 17<br />
n/a Any Suspect Parameter Number n/a<br />
1231 Accessory Data Link 11<br />
167 Battery Charging System Voltage 17<br />
168 Battery Voltage 0, 15, 17<br />
970 Auxiliary Engine Shutdown Switch 14, 31<br />
4006 Engine in Cooldown 31<br />
1664 Engine Failure to Start 31<br />
190 Engine Speed 0, 1, 2, 5, 17<br />
4007 Generator Control Not in Automatic 31<br />
2448 Generator Current (Amps) 0,1,15, 17<br />
2436 Generator Output Frequency 0, 1, 2, 12, 15, 17<br />
2452 Generator Output Power 1, 15, 17<br />
2440 Generator Output Voltage 0, 1, 15, 17<br />
639 Primary Data Link 11<br />
3581 SCADA Data Link 11<br />
2648 Service Maintenance Interval Expired 31<br />
1383 Unexpected Engine Shutdown 11<br />
4028 Earth Fault 31<br />
4029 Earth Leakage 31<br />
3543 Engine Controller 9<br />
1239 Fuel Leak 31<br />
4000 Air Damper Closed 31<br />
4003 Battery Charger Failure 31<br />
4013 Generator Circuit Breaker Open 6, 31<br />
4004 Generator Circuit Breaker Closed 6, 31<br />
©2013 Caterpillar<br />
All rights reserved. Page 133
<strong>EMCP</strong> 4.1, <strong>4.2</strong> Generator Set Control<br />
Application and Installation Guide<br />
Category SPN Suspect Parameter<br />
Supported FMI Trigger<br />
Conditions<br />
701 Digital Input #1 Custom Event 31<br />
702 Digital Input #2 Custom Event 31<br />
703 Digital Input #3 Custom Event 31<br />
704 Digital Input #4 Custom Event 31<br />
705 Digital Input #5 Custom Event 31<br />
Custom Events 706 Digital Input #6 Custom Event 31<br />
707 Digital Input #7 Custom Event 31<br />
708 Digital Input #8 Custom Event 31<br />
1083 Analog Input #1 Custom Parameter 0, 1, 6, 15, 17<br />
1084 Analog Input #2 Custom Parameter 0, 1, 6, 15, 17<br />
4158 Analog Input #3 Custom Parameter 0, 1, 6, 15, 17<br />
Table 12: Supported Output System Event SPN and FMI Trigger Conditions<br />
DIGITAL/RELAY OUTPUT SYSTEM EVENT DESCRIPTIONS<br />
Below is a brief description of the purpose of each system event digital/relay output option:<br />
ENGINE OIL PRESSURE<br />
Activates when an engine oil pressure event (SPN 100) is triggered in<br />
the <strong>EMCP</strong> event log.<br />
GAS PRESSURE<br />
Activates when a gas pressure event (SPN 1390) is triggered in the<br />
<strong>EMCP</strong> event log.<br />
ENGINE COOLANT TEMPERATURE<br />
Activates when an engine coolant temperature event (SPN 110) is<br />
triggered in the <strong>EMCP</strong> event log.<br />
ENGINE OIL TEMPERATURE<br />
Activates when an engine oil temperature event (SPN 175) is triggered<br />
in the <strong>EMCP</strong> event log.<br />
EXHAUST TEMPERATURE<br />
Activates when an exhaust temperature event (SPN 173) is triggered in<br />
the <strong>EMCP</strong> event log.<br />
GENERATOR REAR BEARING TEMPERATURE<br />
Activates when a generator rear bearing temperature event (SPN 1122)<br />
is triggered in the <strong>EMCP</strong> event log.<br />
GENERATOR WINDING #1 TEMPERATURE<br />
Activates when a generator winding #1 temperature event (SPN 1124) is<br />
triggered in the <strong>EMCP</strong> event log.<br />
ENGINE COOLANT LEVEL<br />
Activates when an engine coolant level event (SPN 111) is triggered in<br />
the <strong>EMCP</strong> event log.<br />
Page 134<br />
©2013 Caterpillar<br />
All rights reserved.
Application and Installation Guide<br />
<strong>EMCP</strong> 4.1, <strong>4.2</strong> Generator Set Control<br />
ENGINE OIL LEVEL<br />
Activates when an engine oil level event (SPN 98) is triggered in the<br />
<strong>EMCP</strong> event log.<br />
FUEL LEVEL<br />
Activates when a fuel level event (SPN 96) is triggered in the <strong>EMCP</strong><br />
event log.<br />
EXTERNAL FUEL LEVEL<br />
Activates when an external fuel level event (SPN 38) is triggered in the<br />
<strong>EMCP</strong> event log.<br />
ANY SUSPECT PARAMETER NUMBER<br />
Activates when any suspect parameter number is triggered in the <strong>EMCP</strong><br />
event log.<br />
ACCESSORY DATA LINK<br />
Activates when an accessory data link diagnostic (SPN-FMI: 1231-11)<br />
is triggered in the <strong>EMCP</strong> event log.<br />
BATTERY CHARGING SYSTEM VOLTAGE<br />
Activates when a battery charging system voltage event<br />
(SPN-FMI: 167-17) is triggered in the <strong>EMCP</strong> event log.<br />
BATTERY VOLTAGE<br />
Activates when a battery voltage event (SPN 168) is triggered in the<br />
<strong>EMCP</strong> event log.<br />
AUXILLARY ENGINE SHUTDOWN SWITCH<br />
Activates when an auxiliary engine shutdown switch event (SPN 970) is<br />
triggered in the <strong>EMCP</strong> event log.<br />
ENGINE IN COOLDOWN<br />
Activates when an engine in cooldown event (SPN 4006) is triggered in<br />
the <strong>EMCP</strong> event log.<br />
ENGINE FAILURE TO START<br />
Activates when an engine fail to start event (SPN 1664) is triggered in<br />
the <strong>EMCP</strong> event log.<br />
ENGINE SPEED<br />
Activates when an engine speed event (SPN 190) is triggered in the<br />
<strong>EMCP</strong> event log.<br />
GENERATOR CONTROL NOT IN AUTOMATIC<br />
Activates when a generator control not in auto event (SPN 4007) is<br />
triggered in the <strong>EMCP</strong> event log.<br />
GENERATOR CURRENT (AMP)<br />
Activates when a generator current event (SPN 2448) is triggered in the<br />
<strong>EMCP</strong> event log.<br />
GENERATOR OUTPUT FREQUENCY<br />
Activates when a generator output frequency event (SPN 2436) is<br />
triggered in the <strong>EMCP</strong> event log.<br />
©2013 Caterpillar<br />
All rights reserved. Page 135
<strong>EMCP</strong> 4.1, <strong>4.2</strong> Generator Set Control<br />
Application and Installation Guide<br />
GENERATOR OUTPUT POWER(KW)<br />
Activates when a generator output power(kW) event (SPN 2452) is<br />
triggered in the <strong>EMCP</strong> event log.<br />
GENERATOR OUTPUT VOLTAGE<br />
Activates when a generator output voltage event (SPN 2440) is<br />
triggered in the <strong>EMCP</strong> event log.<br />
PRIMARY DATA LINK<br />
Activates when a primary data link diagnostic (SPN 639) is triggered in<br />
the <strong>EMCP</strong> event log.<br />
SCADA DATA LINK<br />
Activates when a SCADA data link diagnostic (SPN 3581) is triggered in<br />
the <strong>EMCP</strong> event log.<br />
SERVICE MAINTENANCE INTERVAL EXPIRED<br />
Activates when a service maintenance interval expired event (SPN<br />
2648) is triggered in the <strong>EMCP</strong> event log.<br />
UNEXPECTED ENGINE SHUTDOWN<br />
Activates when an unexpected engine shutdown event (SPN 1383) is<br />
triggered in the <strong>EMCP</strong> event log.<br />
EARTH FAULT<br />
Activates when an earth fault event (SPN 4028) is triggered in the<br />
<strong>EMCP</strong> event log.<br />
EARTH LEAKAGE<br />
Activates when an earth leakage event (SPN 4029) is triggered in the<br />
<strong>EMCP</strong> event log.<br />
ENGINE CONTROLLER<br />
Activates when an engine controller diagnostic (SPN 3543) is triggered<br />
in the <strong>EMCP</strong> event log.<br />
FUEL LEAK<br />
Activates when a fuel leak event (SPN 1239) is triggered in the <strong>EMCP</strong><br />
event log.<br />
AIR DAMPER CLOSED<br />
Activates when an air damper closed event (SPN 4000) is triggered in<br />
the <strong>EMCP</strong> event log.<br />
BATTERY CHARGER FAILURE<br />
Activates when a battery charger failure event (SPN 4003) is triggered in<br />
the <strong>EMCP</strong> event log.<br />
GENERATOR CIRCUIT BREAKER OPEN<br />
Activates when a generator circuit breaker open event (SPN 4013) is<br />
triggered in the <strong>EMCP</strong> event log.<br />
GENERATOR CIRCUIT BREAKER CLOSED<br />
Activates when a generator circuit breaker closed event (SPN 4004) is<br />
triggered in the <strong>EMCP</strong> event log.<br />
Page 136<br />
©2013 Caterpillar<br />
All rights reserved.
Application and Installation Guide<br />
<strong>EMCP</strong> 4.1, <strong>4.2</strong> Generator Set Control<br />
DIGITAL INPUT #N CUSTOM EVENT<br />
Activates when a digital input #N custom event (SPN 701 to 708) is<br />
triggered in the <strong>EMCP</strong> event log.<br />
ANALOG INPUT #N CUSTOM EVENT<br />
Activates when an analog input #N custom event (SPN 1083, 1084,<br />
4158) is triggered in the <strong>EMCP</strong> event log.<br />
CONFIGURING OUTPUTS FOR SCADA DATA LINK<br />
When an Output is configured for SCADA Data Link, an active state will be sent over<br />
MODBUS. No alarms or warnings will be generated by the <strong>EMCP</strong>. To configure a Relay<br />
Digital Output for SCADA Data Link, go through the following menu options (substitute<br />
Digital Output for Relay Output in the following steps, as needed):<br />
AT THE MAIN MENU, scroll down<br />
CONFIGURE<br />
TO<br />
Press the OK KEY .<br />
SCROLL DOWN<br />
to INPUTS & OUTPUTS<br />
Press the OK KEY .<br />
Alternately, access to THE INPUTS & OUTPUTS<br />
submenu is accessible from ALL SETPOINTS.<br />
SCROLL DOWN<br />
to RELAY OUTPUTS<br />
Press the OK KEY .<br />
Select the RELAY OUTPUT that you want to program<br />
Press the OK KEY .<br />
Press the OK KEY to highlight the current<br />
configuration (DISABLED, COMMAND/STATUS,<br />
SYSTEM EVENT, OR SCADA DATA LINK).<br />
Scroll DOWN<br />
to SCADA DATA LINK<br />
Press the OK KEY .<br />
©2013 Caterpillar<br />
All rights reserved. Page 137
<strong>EMCP</strong> 4.1, <strong>4.2</strong> Generator Set Control<br />
Application and Installation Guide<br />
DISABLING OUTPUTS<br />
To disable an Output, go through the following menu options (substitute Digital Output<br />
for Relay Output in the following steps, as needed):<br />
AT THE MAIN MENU, scroll down<br />
TO CONFIGURE<br />
Press the OK KEY .<br />
SCROLL DOWN<br />
to INPUTS & OUTPUTS<br />
Press the OK KEY .<br />
Alternately, access to THE INPUTS & OUTPUTS<br />
submenu is accessible from ALL SETPOINTS.<br />
SCROLL DOWN<br />
to RELAY OUTPUTS<br />
Press the OK KEY .<br />
Select the RELAY OUTPUT that you want to program<br />
Press the OK KEY .<br />
Press the OK KEY to highlight the current<br />
configuration (DISABLED, COMMAND/STATUS,<br />
SYSTEM EVENT, OR SCADA DATA LINK).<br />
Scroll DOWN<br />
to DISABLED<br />
Press the OK KEY .<br />
Page 138<br />
©2013 Caterpillar<br />
All rights reserved.
Application and Installation Guide<br />
<strong>EMCP</strong> 4.1, <strong>4.2</strong> Generator Set Control<br />
10.2 PROGRAMMING OUTPUTS USING THE CAT SERVICE TOOL<br />
The <strong>EMCP</strong> 4 Outputs can be configured by using the Cat Service Tool. The key to<br />
programming them is to program the setpoints related to each input in order from top to<br />
bottom. Relay and Digital Outputs follow the same steps. For simplicity, the examples<br />
below show Relay Outputs. For Digital Outputs, just substitute Digital Output for Relay<br />
Output. To program an Output, do the following steps:<br />
1. Connect to the <strong>EMCP</strong> 4 using the Cat Service Tool as stated in Chapter <strong>4.2</strong>.<br />
2. Select Relay (or Digital Outputs) on the left.<br />
3. Determine which output is to be configured. For example, all of the setpoints<br />
for Relay Output #1 have the text “#1” in their name.<br />
4. Next follow the steps below according to which Usage Type is desired.<br />
CONFIGURING OUTPUTS FOR STATUS PARAMETERS<br />
Command or Status parameters are used to control specific functions within the control<br />
system or to make certain conditions within the system be known.<br />
Note: The Fuel Control Relay does not pickup when the Engine Operating State is set<br />
to CAN. Engine Start Initiated can be used in Lieu of the Fuel Control Relay for most<br />
purposes.<br />
©2013 Caterpillar<br />
All rights reserved. Page 139
<strong>EMCP</strong> 4.1, <strong>4.2</strong> Generator Set Control<br />
Application and Installation Guide<br />
To configure an Output as a Command or Status Parameter, go through the following<br />
menu options:<br />
1. Double click the Output #N Usage type to change this value to Command/Status<br />
Parameter from the drop down menu. Click the OK button to program.<br />
2. The Output #N Command/Status Parameter Data Identification parameter will<br />
now be visible in the right pane.<br />
3. Double click the Configure the Command/Status Parameter Data Identification<br />
setpoint to change this value from the drop down menu. Click the OK button to<br />
program.<br />
See Table 10 in Chapter 10.1 for a complete list of possible Status Parameter Data<br />
Identifications.<br />
Page 140<br />
©2013 Caterpillar<br />
All rights reserved.
Application and Installation Guide<br />
<strong>EMCP</strong> 4.1, <strong>4.2</strong> Generator Set Control<br />
CONFIGURING OUTPUTS FOR SYSTEM EVENTS<br />
System Events are used to know when specific conditions are reached and to alert the<br />
control system of warning or shutdown conditions. To configure an Output as a System<br />
Event, go through the following menu options:<br />
1. Double click the Output #N Usage type to change this value to System Event<br />
from the drop down menu. Click the OK button to program.<br />
2. The Output #N Suspect Parameter Number (SPN) and Event Trigger Condition<br />
parameters will now be visible in the right pane.<br />
3. Double click the Output #N Suspect Parameter Number (SPN) setpoint to<br />
change this value from the drop down menu. Click the OK button to program.<br />
©2013 Caterpillar<br />
All rights reserved. Page 141
<strong>EMCP</strong> 4.1, <strong>4.2</strong> Generator Set Control<br />
Application and Installation Guide<br />
4. Double click the Output #N Event Trigger Condition setpoint to change this value<br />
from the drop down menu. Click the OK button to program.<br />
See Table 11 in Chapter 10.1 for a complete list of possible System Events.<br />
CONFIGURING OUTPUTS FOR SCADA DATA LINK<br />
When an Output is configured for SCADA Data Link, an active state will be sent over<br />
MODBUS. No alarms or warnings will be generated by the <strong>EMCP</strong>. To configure an<br />
Output for SCADA Data Link, go through the following menu options:<br />
1. Double click the Output #N Usage type to change this value to Data Link from<br />
the drop down menu. Click the OK button to program.<br />
Page 142<br />
©2013 Caterpillar<br />
All rights reserved.
Application and Installation Guide<br />
<strong>EMCP</strong> 4.1, <strong>4.2</strong> Generator Set Control<br />
DISABLING OUTPUTS<br />
To disable an Output, go through the following menu options:<br />
1. Double click the Relay Output #N Usage type to change this value to Disabled<br />
from the drop down menu. Click the OK button to program.<br />
©2013 Caterpillar<br />
All rights reserved. Page 143
<strong>EMCP</strong> 4.1, <strong>4.2</strong> Generator Set Control<br />
Application and Installation Guide<br />
11 MODIFIABLE TEXT STRINGS<br />
The <strong>EMCP</strong> 4 supports the renaming of Custom Events for the event log. This feature is<br />
called MODIFIABLE TEXT STRINGS. This is useful when an existing SPN and text string do<br />
not exist for the required event. These events can be configured and triggered similar to<br />
other events. However, these events are unique in that their displayed text strings can<br />
be customized via the Cat Service Tool using any character in the supported character<br />
set of the <strong>EMCP</strong> 4 software flash file. Furthermore, the Cat Service Tool has the<br />
capability to upload a Modifiable Text Strings configuration file (containing previously<br />
saved custom event text strings) from the computer, or download a configuration from<br />
the <strong>EMCP</strong> 4 to the computer.<br />
In order to display a custom text string for an event, the following steps must be taken:<br />
1. One of the Digital Inputs must be configured as a Custom Event with a Failure<br />
Mode Identifier of Status (or Condition Exists). For more information on<br />
configuring Digital Inputs, see Chapter 8.1.<br />
2. A custom string must be entered, using the Modifiable Text Strings tool in the<br />
Cat Service Tool, as described in Chapter 11.2.<br />
3. The language must be set to the customer language, not to Technician English.<br />
An example of entering a modifiable text string for Custom Event #1 is given in Figure 29.<br />
Figure 29: Customizing A Text String With the Cat Service Tool<br />
The <strong>EMCP</strong> 4 supports one Modifiable text string per Custom Event on each<br />
programmable Digital Input.<br />
Page 144<br />
©2013 Caterpillar<br />
All rights reserved.
Application and Installation Guide<br />
<strong>EMCP</strong> 4.1, <strong>4.2</strong> Generator Set Control<br />
11.1 LANGUAGE SUPPORT<br />
The primary language for the <strong>EMCP</strong> 4 control will always be Technician English. The<br />
user will always be able to revert back to Technician English from the selected language<br />
that is supported by the flash file. However, when the <strong>EMCP</strong> 4 display is viewed in<br />
Technician English, the user will not be able to view the custom text strings and will only<br />
be able to view the default strings (Custom Event #N) for a given input.<br />
The <strong>EMCP</strong> 4 has the capability of supporting one flash file containing one secondary<br />
language at any particular time. If the user is interested in having a new secondary<br />
language, a new flash file to configure the new language must be installed. Therefore,<br />
the user is not able to install multiple flash files supporting different languages<br />
simultaneously.<br />
The <strong>EMCP</strong> 4 supports Unicode characters from the English character set, as well as the<br />
character set from the local language supported by the file. It is the user’s responsibility<br />
to install the preferred flash file with the correct language support that will allow the<br />
modification of text strings.<br />
The user is also responsible for choosing the appropriate operating system or Unicode<br />
text entry system for the chosen language. The Cat Service Tool software accepts input<br />
from the PC keyboard settings. If, for example, the PC keyboard setting is for U.S.<br />
English, it may be difficult to enter Russian (or other non-English) characters.<br />
Different language software supports different sets of characters. Therefore, Modifiable<br />
Text String configuration files created in one language will not become translated if new<br />
language software is flashed into the <strong>EMCP</strong> 4. The original text string will still show as<br />
originally entered, or it may not show correctly if the new software language does not<br />
support all the characters in the original language.<br />
11.2 PROGRAMMING MODIFIABLE TEXT STRINGS USING THE CAT<br />
SERVICE TOOL<br />
To configure a Modifiable Text String using the Cat Service Tool, go through<br />
the following menu options:<br />
1. Connect the <strong>EMCP</strong> to the Cat Electronic Technician as described in Chapter <strong>4.2</strong>.<br />
Note: The Service Tool must be connected to CAN 1 and the <strong>EMCP</strong> must be selected<br />
during the connection if multiple ECMs are present.<br />
2. Select “Modifiable Strings” under “Service” from the choices at the top<br />
of the software screen.<br />
©2013 Caterpillar<br />
All rights reserved. Page 145
<strong>EMCP</strong> 4.1, <strong>4.2</strong> Generator Set Control<br />
Application and Installation Guide<br />
3. The “Modifiable Strings” screen will appear.<br />
4. In order to load the existing text string file from the ECM, click the “Load From<br />
ECM” button on the bottom of the screen.<br />
5. The stored strings, if any, will appear. For first time configuration, the strings will<br />
be blank.<br />
Page 146<br />
©2013 Caterpillar<br />
All rights reserved.
Application and Installation Guide<br />
<strong>EMCP</strong> 4.1, <strong>4.2</strong> Generator Set Control<br />
6. Click in the Value column next to the event to be modified. Type the desired text<br />
string. The Modifiable Text String is considered a pair of text strings, and the user<br />
has the option of customizing the pair of text strings. The second line has less<br />
available space, because the event log index is also displayed on that line.<br />
7. Once all text strings are entered for all events desired, click on the “Save<br />
to ECM” button on the bottom of the screen.<br />
8. To then save the same file to the hard disk, click on the “Save to File...” and<br />
browse to the appropriate folder.<br />
©2013 Caterpillar<br />
All rights reserved. Page 147
<strong>EMCP</strong> 4.1, <strong>4.2</strong> Generator Set Control<br />
Application and Installation Guide<br />
9. Once the file destination is found, click “Save”.<br />
10. To edit a saved text string in ET while not connected to the ECM, navigate to<br />
File>Open>Modifiable String Data File. This is equivalent to clicking on the “Load<br />
From File...” button on the bottom left side of the “Modifiable Strings” screen.<br />
11. Select the desired string data and click “Open”. This opens the “Modifiable<br />
Strings” screen again.<br />
12. Edit as desired, then save to ECM, or save to a file.<br />
Note: The Modifiable Text String parameter value’s field is initially blank until it is<br />
replaced with a custom text string parameter value. The custom text string parameter<br />
value entered will replace the default strings.<br />
The user’s Custom Text Strings are displayed in the user’s preferred language. If the<br />
service tool doesn’t support the user’s preferred language, US English will be used.<br />
It is advisable to split the text across both lines even if it can fit on a single line since the<br />
default terms will show if text has not been entered.<br />
Note: The user must save any offline changes before attempting to connect the Service<br />
Tool to the <strong>EMCP</strong> 4, or the changes will not be saved.<br />
Page 148<br />
©2013 Caterpillar<br />
All rights reserved.
Application and Installation Guide<br />
<strong>EMCP</strong> 4.1, <strong>4.2</strong> Generator Set Control<br />
12 SAVING AND RESTORING SETPOINTS<br />
The <strong>EMCP</strong> 4 supports the saving and uploading of the <strong>EMCP</strong> 4 setpoints through a<br />
setpoint configuration file. This file, called the ECM Replacement File, or Fleet<br />
Replacement File, is accessible via the ECM Replacement tool of the Cat Service Tool<br />
software. The file contains information specific to the <strong>EMCP</strong> 4, and includes the setpoint<br />
values that are specific to a given <strong>EMCP</strong> 4 module. The user has the option of saving<br />
the data to an ECM Replacement File from an <strong>EMCP</strong> 4 module or uploading the data<br />
from the ECM Replacement File to another <strong>EMCP</strong> 4 module. The user also has the<br />
option of uploading general configuration data to several <strong>EMCP</strong> 4 modules by means of<br />
a similar tool called Fleet Configuration. Both of these options are accomplished through<br />
the Cat Service Tool software.<br />
Note: This chapter only addresses setpoints residing in the <strong>EMCP</strong> 4. To save and<br />
restore setpoints for other (optional) modules on the <strong>EMCP</strong> 4 CAN data links, a similar<br />
procedure must be followed for each individual module.<br />
12.1 SAVING <strong>EMCP</strong> 4 CONFIGURATION DATA<br />
The Cat Service Tool is used to save an <strong>EMCP</strong> 4 configuration.<br />
The <strong>EMCP</strong> 4 configuration should be saved upon initial access or after any configuration<br />
change. This will be required for future accessibility when exchanging or replacing the<br />
<strong>EMCP</strong> 4 module.<br />
After connecting to the <strong>EMCP</strong> 4, navigate to Service > Copy Configuration (see Figure 30).<br />
There are two options:<br />
<br />
<br />
Fleet Configuration<br />
ECM Replacement<br />
Figure 30: Cat Service Tool <strong>EMCP</strong> 4 GSC Summary Screen<br />
The loading of <strong>EMCP</strong> 4 configuration data is very similar between ECM REPLACEMENT<br />
and FLEET CONFIGURATION. For illustration purposes, the ECM REPLACEMENT option will<br />
be described here.<br />
©2013 Caterpillar<br />
All rights reserved. Page 149
<strong>EMCP</strong> 4.1, <strong>4.2</strong> Generator Set Control<br />
Application and Installation Guide<br />
FLEET CONFIGURATION OPTION<br />
Select the FLEET CONFIGURATION option when there is a need to save and copy<br />
GENERAL DATA to several ECMs (non-module-specific).<br />
The FLEET CONFIGURATION tool works very similar to the ECM Replacement tool, with<br />
the exception of ignoring module-specific data such as ENGINE SERIAL NUMBER and<br />
ENGINE OPERATING HOURS.<br />
ECM REPLACEMENT OPTION<br />
To save <strong>EMCP</strong> 4 configuration data to an ECM Replacement file:<br />
1. From the Service Tool menu, select the following: Service > Copy Configuration<br />
> ECM Replacement. See Figure 30.<br />
2. The software will prompt the user to open a previously saved ECM Replacement<br />
file. Click “Cancel”.<br />
3. The following message is displayed: “No Data Is Available. Load From ECM<br />
Now?” Press “No”.<br />
4. Click “Load from ECM” from the bottom left of the ECM Replacement screen to<br />
upload the setpoints. See Figure 31.<br />
Figure 31: Load from ECM<br />
Page 150<br />
©2013 Caterpillar<br />
All rights reserved.
Application and Installation Guide<br />
<strong>EMCP</strong> 4.1, <strong>4.2</strong> Generator Set Control<br />
5. After the software loads the data, the replacement file parameters will be shown.<br />
See Figure 32.<br />
Figure 32: ECM Replacement File Parameters<br />
6. Select which ECM’s configuration data is to be viewed and/or saved for future<br />
use by adding, or removing check boxes from the side of the parameters.<br />
7. After any selection changes are completed, click “Save to File” from the bottom<br />
of the ECM Replacement screen to save the file. See Figure 33. Make sure to<br />
note where the file is stored.<br />
Figure 33: Save to File<br />
Note: The configuration data must be saved to a file before disconnecting from the<br />
service tool or the data WILL BE LOST and must be re-loaded from the source module<br />
again.<br />
©2013 Caterpillar<br />
All rights reserved. Page 151
<strong>EMCP</strong> 4.1, <strong>4.2</strong> Generator Set Control<br />
Application and Installation Guide<br />
12.2 LOADING <strong>EMCP</strong> 4 CONFIGURATION DATA<br />
The loading of <strong>EMCP</strong> 4 configuration data is very similar between ECM REPLACEMENT<br />
and FLEET CONFIGURATION. For illustration purposes, the ECM REPLACEMENT option will<br />
be described here.<br />
Warning: When loading an ECM Replacement File, the engine operating hours will<br />
increase to the newly loaded value (if larger than the old value). To avoid this, deselect<br />
the Engine Operating Hours setting.<br />
To load an ECM Replacement file to an <strong>EMCP</strong> 4:<br />
1. From the Service Tool menu, select the following: Service > Copy Configuration<br />
> ECM Replacement. See Figure 30.<br />
2. The software will prompt the user to open a previously saved ECM Replacement<br />
file.<br />
3. Navigate to the location where the file is stored and click “Open”.<br />
4. The software will confirm opening the file. See Figure 34. Click “OK”.<br />
Figure 34: Load from File<br />
Page 152<br />
©2013 Caterpillar<br />
All rights reserved.
Application and Installation Guide<br />
<strong>EMCP</strong> 4.1, <strong>4.2</strong> Generator Set Control<br />
5. The replacement file parameters will be shown. See Figure 35.<br />
Figure 35: ECM Replacement File Parameters<br />
6. Select which ECM’s configuration data is to be programmed into the <strong>EMCP</strong> 4<br />
by adding, or removing check boxes from the side of the parameters.<br />
7. After any selection changes are completed, click “Program ECM” from the<br />
bottom of the ECM Replacement screen to load the file into the <strong>EMCP</strong> 4.<br />
See Figure 36.<br />
Figure 36: Program ECM<br />
©2013 Caterpillar<br />
All rights reserved. Page 153
<strong>EMCP</strong> 4.1, <strong>4.2</strong> Generator Set Control<br />
Application and Installation Guide<br />
8. If another replacement file is to be programmed or if the user is already at the<br />
ECM Replacement screen prior to opening a replacement file, press the “Load<br />
from File” button at the bottom of the screen and follow steps 3 through 7 above.<br />
See Figure 37.<br />
Figure 37: Load ECM Replacement File<br />
Note: By default, ECM Replacement files are stored in the ECM Replacement folder,<br />
while Fleet Configuration files are stored in the Fleet Configuration folder.<br />
The above steps, for uploading saved configuration data, will need to be repeated for<br />
each <strong>EMCP</strong> 4 module needing same or similar setpoint configurations. For programming<br />
multiple units with the same setpoints, it is recommended to use Fleet Configuration<br />
files.<br />
Note: When programming EVENT RESPONSE CONFIGURATION setpoints, the<br />
control must be in STOP mode. If the control is not in STOP, there will be a message after<br />
the programming is complete. The message will show that none of the Event Response<br />
Configuration setpoints were changed.<br />
Page 154<br />
©2013 Caterpillar<br />
All rights reserved.
Application and Installation Guide<br />
<strong>EMCP</strong> 4.1, <strong>4.2</strong> Generator Set Control<br />
13 PROGRAMMABLE CYCLE TIMER (<strong>EMCP</strong> <strong>4.2</strong> ONLY)<br />
The Programmable Cycle Timer (PCT) feature allows the operator to program seven<br />
independent times, when tasks (called PCT Outputs), will be activated or deactivated<br />
automatically during the week. This is useful for exercising gensets, or cases where<br />
two or more generators are required to automatically share the duty of supplying a load<br />
throughout the week.<br />
Using the PCT, each genset can be programmed to start and stop at pre-set times.<br />
The PCT is capable of handling a seven day sequence with seven independent starts<br />
happening one or more times each week. The timing of these start/stop cycles may be<br />
programmed in advance, either locally or via the service tool.<br />
For example, if a standby set does not have access to a utility supply to power a trickle<br />
charger, the PCT can be set for an hour a week to run the genset to have the charging<br />
alternator help keep the battery charged.<br />
Caution: External equipment such as a transfer switch is required to ensure that the<br />
gensets are not stopped on load.<br />
The PCT FEATURE consists of seven independent timers; each timer has the following<br />
setpoints (setpoints shown are for PCT #1):<br />
PROGRAMMABLE CYCLE TIMER #1: Activation Day of the Week:<br />
This permits independent selection of each day (Sun -> Sat) that the timer<br />
will activate. All seven days can be selected, if desired.<br />
PROGRAMMABLE CYCLE TIMER #1: Activation Start Time<br />
The time of day (in hours and minutes) that the timer will activate. The time<br />
must be programmed using a 24-hour clock.<br />
PROGRAMMABLE CYCLE TIMER #1: Active Time<br />
The duration (in hours and minutes) for which the timer will be active (up to<br />
24 hours).<br />
PROGRAMMABLE CYCLE TIMER #1: Output #1 Activation Configuration<br />
The Programmable Cycle Timer’s first output will be activated when this timer<br />
is active and will allow the genset to start if in Auto.<br />
PROGRAMMABLE CYCLE TIMER #1: Output #2 Activation Configuration<br />
The Programmable Cycle Timer’s second output will be activated when this<br />
timer is active. Output # 2 can be assigned to a programmable output for<br />
connection to an external device. This external device can be used to control<br />
a load bank, transfer switch or other device.<br />
The PCT has two internal outputs; these should not be confused with the physical<br />
outputs of the control. The outputs are connected internally to the control module. In<br />
the standard configuration, PCT OUTPUT #1 is connected to an internal Remote Initiate<br />
command. OUTPUT #2 is customer configurable via a discrete output. This allows the<br />
operator to configure a timed relay, for external connectivity.<br />
Note: The outputs of all seven timers are tied together in an “OR” fashion. This means<br />
that if any one, or more, timer is activated, then any output will activate (depending on<br />
programming).<br />
©2013 Caterpillar<br />
All rights reserved. Page 155
<strong>EMCP</strong> 4.1, <strong>4.2</strong> Generator Set Control<br />
Application and Installation Guide<br />
The status of each output is indicated by a 1, 0, or - in the PROG CYCLE column under #1<br />
through #7. See Figure 38.<br />
A number ONE (1) means that this PCT is driving that output to be TRUE<br />
A number ZERO (0) means that this PCT is NOT driving this output true now, but,<br />
this output is programmed to be TRUE at another time.<br />
A DASH (-) means that this PCT is NOT programmed to activate this output.<br />
Figure 38: PCT Main Screen<br />
In Figure 38, PCT #1 is INACTIVE on Output #1. Output #2 is NOT enabled and will never<br />
activate, as programmed.<br />
PCT #3 is ACTIVE on Output #1, and NOT enabled on Output #2.<br />
PCT #5 is NOT enabled and will never activate, as programmed, on Output #1. Output #2<br />
is ACTIVE.<br />
PCT #2, PCT #4, PCT #6, and PCT #7 are DISABLED. They NEVER activate Output #1 or<br />
Output #2, as programmed.<br />
To select a specific Programmable Cycle Timer, use the LEFT and RIGHT<br />
buttons until the desired PCT is within the selection box and then press the OK KEY<br />
.<br />
Page 156<br />
©2013 Caterpillar<br />
All rights reserved.
Application and Installation Guide<br />
<strong>EMCP</strong> 4.1, <strong>4.2</strong> Generator Set Control<br />
13.1 CONFIGURING THE PROGRAMMABLE CYCLE TIMER USING THE<br />
DISPLAY<br />
To configure a Programmable Cycle Timer with the display, go through the following<br />
menu options:<br />
At MAIN MENU, scroll down<br />
to CONTROL<br />
Press the OK KEY .<br />
Scroll DOWN<br />
to PROG CYCLE TIMER<br />
Press the OK KEY .<br />
The box surrounding the first column outlines the<br />
first of seven timers.<br />
Press the OK KEY to program this timer.<br />
The box surrounding the first row outlines the day<br />
selection.<br />
Press the OK KEY<br />
to select the day(s) for this<br />
timer.<br />
Use the UP and DOWN arrow keys<br />
along with the LEFT and RIGHT arrow keys<br />
to select the days that this timer will activate.<br />
Press the OK KEY<br />
when done.<br />
Scroll DOWN<br />
to select the START TIME<br />
Press the OK KEY .<br />
Use the arrow keys to enter the START TIME<br />
Press the OK KEY<br />
when done.<br />
©2013 Caterpillar<br />
All rights reserved. Page 157
<strong>EMCP</strong> 4.1, <strong>4.2</strong> Generator Set Control<br />
Application and Installation Guide<br />
Scroll DOWN<br />
to select the RUN FOR time<br />
Press the OK KEY .<br />
Use the arrow keys to enter the RUN FOR time<br />
Press the OK KEY<br />
when done.<br />
Scroll DOWN<br />
Output #1<br />
to select the OUTPUT STATE for<br />
Press the OK KEY .<br />
Select the OUTPUT STATE that you want to program<br />
Press the OK KEY<br />
when done.<br />
Scroll DOWN<br />
Output #2<br />
to select the OUTPUT STATE for<br />
Press the OK KEY .<br />
Select the OUTPUT STATE that you want to program<br />
Press the OK KEY<br />
when done.<br />
Press the ESCAPE KEY<br />
to return to the Programmable Cycle Timer main screen. Use the<br />
LEFT and RIGHT buttons to select the other timers and repeat the above steps.<br />
Page 158<br />
©2013 Caterpillar<br />
All rights reserved.
Application and Installation Guide<br />
<strong>EMCP</strong> 4.1, <strong>4.2</strong> Generator Set Control<br />
13.2 CONFIGURING THE PROGRAMMABLE CYCLE TIMER USING THE<br />
CAT SERVICE TOOL<br />
To configure a Programmable Cycle Timer with the Cat Service Tool, go through the<br />
following menu options:<br />
1. Connect to the <strong>EMCP</strong> 4 using the Cat Service Tool as stated in Chapter <strong>4.2</strong>.<br />
2. Select Programmable Cycle Timer on the left.<br />
3. Double click the Programmable Cycle Timer #N Activation Day setpoint for a<br />
given day to change this value from the drop down menu. Click the OK button<br />
to program.<br />
4. Double click the Programmable Cycle Timer #N Activation Start Time setpoint<br />
to change this value. Click the OK button to program.<br />
©2013 Caterpillar<br />
All rights reserved. Page 159
<strong>EMCP</strong> 4.1, <strong>4.2</strong> Generator Set Control<br />
Application and Installation Guide<br />
5. Double click the Programmable Cycle Timer #N Active Time setpoint to change<br />
this value. Click the OK button to program.<br />
6. Double click the Programmable Cycle Timer #N Output #1 Active Configuration<br />
setpoint to change this value from the drop down menu. Click the OK button to<br />
program.<br />
Page 160<br />
©2013 Caterpillar<br />
All rights reserved.
Application and Installation Guide<br />
<strong>EMCP</strong> 4.1, <strong>4.2</strong> Generator Set Control<br />
7. Double click the Programmable Cycle Timer #N Output #2 Active Configuration<br />
setpoint to change this value from the drop down menu. Click the OK button to<br />
program.<br />
8. Repeat the above steps to program additional timers.<br />
©2013 Caterpillar<br />
All rights reserved. Page 161
<strong>EMCP</strong> 4.1, <strong>4.2</strong> Generator Set Control<br />
Application and Installation Guide<br />
14 REDUCED POWER MODE<br />
REDUCED POWER MODE (RPM) is a feature that puts the control into a state where the<br />
power consumption is reduced. RPM is intended to extend the amount of time the<br />
generator can sit between runs before the control drains the batteries too low to crank<br />
the generator in cases where a battery trickle charger is not fitted.<br />
In order to reduce the power consumed when in RPM, many functions within the control<br />
are turned OFF.<br />
TURNED OFF DURING RPM<br />
The display<br />
The communication lines, including Annunciator communication<br />
All inputs except Remote Initiate<br />
All outputs<br />
LED’s (lamps) on the front of the control blink briefly every second (rather<br />
than being on continuously).<br />
When RPM is enabled, the control will only enter RPM after a programmable time delay<br />
provided the generator is stopped and no keys have been pressed during the delay time.<br />
The control will wake from RPM on any one of the following conditions:<br />
WAKE FROM RPM<br />
Sending a hardwired remote start signal to the controller<br />
Cycling power to the controller<br />
A key on the keypad is pressed<br />
The Programmable Cycle Timer is about to enter a period when it will activate<br />
an output.<br />
ACTIONS TO ENABLE RPM<br />
1. Change the setpoint Reduced Power Mode Enable Status to ENABLED. This can<br />
be done with either ET or using a level 3 password to navigate to Configure -> All<br />
Setpoints -> Reduced Power Mode.<br />
2. The setpoint Reduced Power Mode Delay Time should be checked. It should be<br />
at a desirable value. This value is the amount of time (once the generator is at<br />
rest and after the last key-press) before the control will go into Reduced Power<br />
Mode.<br />
The following conditions must be met in order for the <strong>EMCP</strong> 4 to enter Reduced Power<br />
Mode:<br />
1. Engine speed must be 0<br />
2. Remote Initiate signal cannot be active<br />
3. Must not be close to the starting time of a Programmed Cycle Timer<br />
Page 162<br />
©2013 Caterpillar<br />
All rights reserved.
Application and Installation Guide<br />
<strong>EMCP</strong> 4.1, <strong>4.2</strong> Generator Set Control<br />
SEMI-AWAKE<br />
The <strong>EMCP</strong> 4 becomes SEMI-AWAKE when in Reduced Power Mode. Approximately<br />
every 30 minutes it will do status checks of the control for about 40 seconds. During<br />
SEMI-AWAKE the display remains off and the LED’s (lamps) continue to blink. The <strong>EMCP</strong><br />
will start up to check for Analog Input faults, engine speed sensor diagnostics, and AC<br />
faults. If any of these faults become active at this time, the system will respond<br />
accordingly (warning or shutdown LED indicators may turn on). During the semi-awake<br />
time any active relays (such as common alarm) will energize.<br />
Once the SEMI-AWAKE time is completed the control will return to full RPM (deactivating<br />
any relays that are active). An active event will not prevent the control from entering<br />
reduced power mode. If a programmable cycle timer is set to become active in the near<br />
future, the timer before waking will be adjusted to ensure the controller wakes in time to<br />
process the programmable cycler timer.<br />
©2013 Caterpillar<br />
All rights reserved. Page 163
<strong>EMCP</strong> 4.1, <strong>4.2</strong> Generator Set Control<br />
Application and Installation Guide<br />
15 PROGRAMMABLE KW RELAY FUNCTION<br />
(<strong>EMCP</strong> <strong>4.2</strong> ONLY)<br />
The <strong>EMCP</strong> <strong>4.2</strong> has two Programmable kW Relay functions configured to respond<br />
to the %kW of the genset. These functions can be mapped to the <strong>EMCP</strong> Outputs. In<br />
addition, these functions can be used to trigger events using an event response<br />
configuration located under Events/Generator Protection Configuration. These events<br />
will then be recorded within the Event Log, and may be sent back if remote monitoring of<br />
events is being performed.<br />
The setpoints within the Programmable kW Relay functions can be changed from the<br />
display, and are as follows:<br />
PROGRAMMABLE TRIP POINT #N TRIGGER CONDITION<br />
Choices: Disabled, Trip Above Threshold, Trip Below Threshold<br />
This selects whether the output will be active if the value is above or below the<br />
threshold.<br />
PROGRAMMABLE TRIP POINT #N PERCENTAGE THRESHOLD<br />
Range: -100-120%<br />
This is the threshold of rated kW that the function must pass in order to change the state<br />
of the output.<br />
PROGRAMMABLE TRIP POINT #N HYSTERESIS PERCENTAGE<br />
Range: -100-100%<br />
Once the output is on, the value must return by this much past the Threshold before the<br />
output turns off again. For example, if this value is 5% and the Percentage Threshold<br />
is 90%, then the relay will activate at 90% but not turn off again until 85% of rated<br />
kW (90-5). This hysteresis is used to ensure that a value close to the threshold does<br />
not cause the output to oscillate.<br />
PROGRAMMABLE TRIP POINT #N TRIP ACTIVATION DELAY TIME<br />
Range: 0-999 seconds<br />
This is the time that the value must exceed the threshold before the relay becomes<br />
active. It is used to ensure that the momentary transients are ignored.<br />
PROGRAMMABLE TRIP POINT #N TRIP DEACTIVATION DELAY TIME<br />
Range: 0-999 seconds<br />
This is the time that the value must return past the threshold before the relay becomes<br />
inactive again. It is used to ensure that the momentary transients are ignored.<br />
Page 164<br />
©2013 Caterpillar<br />
All rights reserved.
Application and Installation Guide<br />
<strong>EMCP</strong> 4.1, <strong>4.2</strong> Generator Set Control<br />
15.1 CONFIGURING THE PROGRAMMABLE KW RELAY FROM THE<br />
DISPLAY<br />
To configure a Programmable kW Relay with the display, go through the following menu<br />
options:<br />
AT THE MAIN MENU, scroll down<br />
CONFIGURE<br />
to<br />
Press the OK KEY .<br />
SCROLL DOWN<br />
to ALL SETPOINTS<br />
Press the OK KEY .<br />
SCROLL DOWN<br />
to PROG KW RELAY TRIP<br />
Press the OK KEY .<br />
Select the PROG KW RELAY TRIP that you want to<br />
program<br />
Press the OK KEY .<br />
Press the OK KEY<br />
configuration.<br />
to highlight the current<br />
Select the type of PROG KW RELAY TRIP #N TRIGGER<br />
CONDITION that you want to program (DISABLED,TRIP<br />
BELOW THRESH, TRIP ABOVE THRESH).<br />
Press the OK KEY .<br />
Scroll DOWN to PROG KW RELAY TRIP #N<br />
PERCENTAGE THRESHOLD<br />
Press the OK KEY to edit the current PROG<br />
KW RELAY TRIP #N PERCENTAGE THRESHOLD.<br />
©2013 Caterpillar<br />
All rights reserved. Page 165
<strong>EMCP</strong> 4.1, <strong>4.2</strong> Generator Set Control<br />
Application and Installation Guide<br />
Select the PROG KW RELAY TRIP #N PERCENTAGE<br />
THRESHOLD that you want to program<br />
Press the OK KEY .<br />
Scroll DOWN to PROG KW RELAY TRIP #N<br />
HYSTERESIS PERCENTAGE<br />
Press the OK KEY to edit the current<br />
PROGRAMMABLE TRIP POINT FUNCTION #N<br />
HYSTERESIS PERCENTAGE.<br />
Select the PROG KW RELAY TRIP #N HYSTERESIS<br />
PERCENTAGE that you want to program<br />
Press the OK KEY .<br />
Scroll DOWN to PROG KW RELAY TRIP #N<br />
TRIP ACTIVATION DELAY TIME<br />
Press the OK KEY to edit the current<br />
PROGRAMMABLE TRIP POINT FUNCTION #N TRIP<br />
ACTIVATION DELAY TIME.<br />
Select the PROG KW RELAY TRIP #N TRIP<br />
ACTIVATION DELAY TIME that you want to program<br />
Press the OK KEY .<br />
Scroll DOWN to PROG KW RELAY TRIP #N<br />
TRIP DEACTIVATION DELAY TIME<br />
Press the OK KEY to edit the current PROG<br />
KW RELAY TRIP #N TRIP DEACTIVATION DELAY TIME.<br />
Select the PROG KW RELAY TRIP #N TRIP<br />
DEACTIVATION DELAY TIME that you want to<br />
program<br />
Press the OK KEY .<br />
Page 166<br />
©2013 Caterpillar<br />
All rights reserved.
Application and Installation Guide<br />
<strong>EMCP</strong> 4.1, <strong>4.2</strong> Generator Set Control<br />
15.2 CONFIGURING THE PROGRAMMABLE KW RELAYS USING<br />
THE CAT SERVICE TOOL<br />
To configure a Programmable kW Relay with the Cat Service Tool, go through the<br />
following menu options:<br />
1. Connect to the <strong>EMCP</strong> 4 using the Cat Service Tool as stated in Chapter <strong>4.2</strong>.<br />
2. Select kW Relay Setpoints on the left.<br />
3. Double click the Programmable Trip Point #N Trigger Condition setpoint to<br />
change this value from the drop down menu. Click the OK button to program.<br />
©2013 Caterpillar<br />
All rights reserved. Page 167
<strong>EMCP</strong> 4.1, <strong>4.2</strong> Generator Set Control<br />
Application and Installation Guide<br />
4. Double click the Programmable Trip Point #N Percentage Threshold setpoint<br />
to change this value. Click the OK button to program.<br />
5. Double click the Programmable Trip Point #N Hysteresis Percentage setpoint<br />
to change this value. Click the OK button to program.<br />
6. Double click the Programmable Trip Point #N Output #1 Trip Activation Delay<br />
Time setpoint to change this value from the drop down menu. Click the OK<br />
button to program.<br />
Page 168<br />
©2013 Caterpillar<br />
All rights reserved.
Application and Installation Guide<br />
<strong>EMCP</strong> 4.1, <strong>4.2</strong> Generator Set Control<br />
7. Double click the Programmable Trip Point #N Output #12 Trip Deactivation Delay<br />
Time setpoint to change this value from the drop down menu. Click the OK<br />
button to program.<br />
8. Repeat the above steps to program an additional timer.<br />
©2013 Caterpillar<br />
All rights reserved. Page 169
<strong>EMCP</strong> 4.1, <strong>4.2</strong> Generator Set Control<br />
Application and Installation Guide<br />
16 CAN DATA LINKS<br />
16.1 PRIMARY CAN DATA LINK (CAN 1)<br />
The Primary CAN Data Link is supported by all levels of the <strong>EMCP</strong> 4.<br />
The Primary CAN Data Link is used for local communication among modules associated<br />
with a single genset. These include one or two engine Electronic Control Modules<br />
(ECM), the Cat Digital Voltage Regulator (Cat DVR), a Thermocouple Module, and the<br />
Cat Clean Emissions Module System.<br />
For the other modules, logs are not kept in the <strong>EMCP</strong> if power is cycled to the <strong>EMCP</strong>.<br />
Other modules may log the events and repopulate the <strong>EMCP</strong> with the logged events.<br />
PRIMARY CAN WIRING<br />
The Primary CAN communication wires are brought out of the <strong>EMCP</strong> 4 as part of the 70-pin<br />
connector. The pins, as designated on the <strong>EMCP</strong> 4 connector, are shown in Table 13.<br />
PRIMARY CAN COMMUNICATION WIRES<br />
Pin # Name Description<br />
34 CAN 1 - Differential (-) for CAN<br />
42 CAN 1 SH Shield for CAN<br />
50 CAN 1 + Differential (+) for CAN<br />
Table 13: Primary CAN Data Link on the 70-pin <strong>EMCP</strong> 4 connector<br />
NETWORK TOPOLOGY<br />
The physical topology of the CAN network used in the Primary CAN Data Link is a bus<br />
topology, consisting of a main trunk and small drops.<br />
<br />
<br />
The maximum allowable trunk length is 130 ft (40 m), and the maximum<br />
drop length is 3 ft (1 m).<br />
The CAN network requires a 120 ohm termination resistor on the<br />
extreme ends of the main trunk.<br />
An example of the topology for the <strong>EMCP</strong> 4.1 and <strong>4.2</strong> is illustrated in Figure 39.<br />
Page 170<br />
©2013 Caterpillar<br />
All rights reserved.
Application and Installation Guide<br />
<strong>EMCP</strong> 4.1, <strong>4.2</strong> Generator Set Control<br />
Figure 39: <strong>EMCP</strong> 4.1 CAN 1 Wiring Diagram<br />
©2013 Caterpillar<br />
All rights reserved. Page 171
<strong>EMCP</strong> 4.1, <strong>4.2</strong> Generator Set Control<br />
Application and Installation Guide<br />
16.2 ACCESSORY CAN DATA LINK (CAN 2) (<strong>EMCP</strong> <strong>4.2</strong> ONLY)<br />
The Accessory CAN Data Link is not supported by the <strong>EMCP</strong> 4.1.<br />
The Accessory Data Link (CAN 2) is used for local or remote communication among<br />
modules associated with a single genset. These include a Resistance Temperature<br />
Device (RTD) Module, a Thermocouple Module, up to four Digital Input/Output Modules,<br />
and up to four Annunciators.<br />
ACCESSORY CAN WIRING<br />
The Accessory CAN communication wires are brought out of the <strong>EMCP</strong> <strong>4.2</strong> as part of<br />
the 70-pin connector. The pins, as designated on the <strong>EMCP</strong> 4 connector, are shown in<br />
Table 14.<br />
ACCESSORY CAN COMMUNICATION WIRES<br />
Pin # Name Description<br />
62 CAN 2 + Differential (+) for CAN<br />
63 CAN 2 SH Shield for CAN<br />
64 CAN 2 - Differential (-) for CAN<br />
Table 14: <strong>EMCP</strong> <strong>4.2</strong> Accessory CAN Data Link on 70-pin <strong>EMCP</strong> 4 connector<br />
NETWORK TOPOLOGY<br />
The physical topology of the CAN network used in the Accessory CAN Data Link<br />
is a bus topology, consisting of a main trunk and small drops.<br />
<br />
<br />
The maximum allowable trunk length is 800 ft (250 m), and the maximum<br />
drop length is 9 ft (3 m).<br />
The CAN network requires a 120 ohm termination resistor on the<br />
extreme ends of the main trunk.<br />
The topology for the <strong>EMCP</strong> <strong>4.2</strong> in the default configuration, with no remote devices<br />
connected, is illustrated in Figure 39.<br />
The topology for the <strong>EMCP</strong> <strong>4.2</strong> with some remote devices connected is illustrated<br />
in Figure 40.<br />
Note: The devices shown in Figure 40 are only representative; more remote devices<br />
can be connected, as long as the proper lengths are maintained, and the termination<br />
resistor is placed at the end of the trunk. Refer to Chapter 17 for the maximum number<br />
of devices supported on each level.<br />
Page 172<br />
©2013 Caterpillar<br />
All rights reserved.
Application and Installation Guide<br />
<strong>EMCP</strong> 4.1, <strong>4.2</strong> Generator Set Control<br />
Figure 40: <strong>EMCP</strong> <strong>4.2</strong> CAN 1 and CAN 2 Wiring Diagram (With Optional Modules)<br />
©2013 Caterpillar<br />
All rights reserved. Page 173
<strong>EMCP</strong> 4.1, <strong>4.2</strong> Generator Set Control<br />
Application and Installation Guide<br />
17 OPTIONAL MODULES<br />
The <strong>EMCP</strong> 4 consists of the <strong>EMCP</strong> 4 Genset Controller, as well as some optional<br />
auxiliary modules. These modules connect to the <strong>EMCP</strong> 4 via either the Primary or<br />
Accessory CAN Data Link, or an RS-485 SCADA Data Link (Modbus RTU, Half Duplex).<br />
The <strong>EMCP</strong> 4 can also communicate with a Cat engine ECM on the CAN network<br />
(though this is not considered an optional module for those engines).<br />
Different numbers of modules are supported for different levels of <strong>EMCP</strong> 4. The<br />
maximum numbers of modules supported on the CAN networks are given in Table 15.<br />
<strong>EMCP</strong> 4.1 <strong>EMCP</strong> <strong>4.2</strong><br />
MODULE<br />
Primary<br />
CAN 1<br />
Primary<br />
CAN 1<br />
Accessory<br />
CAN 2<br />
Engine ECM 1 or 2 1 or 2 0<br />
CDVR 1 1 0<br />
CAN Annunciator 0 0 4<br />
Thermocouple 0 1 1<br />
RTD 0 0 1<br />
DIO 0 0 4<br />
Table 15: Number of Optional Modules Supported on CAN Networks<br />
Note: The number of RS-485 Annunciators is only limited by the RS-485 standard<br />
impedance for wiring and devices. (<strong>EMCP</strong> 4.1 does not support the RS-485 annunciator.)<br />
For more information about connecting modules to the CAN data links, refer to Chapter<br />
16.2, Accessory CAN Data Link.<br />
THE ANNUNCIATORS<br />
The CAN Annunciator module is an auxiliary alarm indication device, consisting of 16<br />
pairs of indicator LED’s, and an audible horn. Each pair can be individually configured<br />
based for an application, and a custom film kit is available to customize the graphic/text<br />
indication. For further information see Chapter 17.1.<br />
The RS-485 Annunciator module is an auxiliary alarm indication device, consisting of 16<br />
pairs of indicator LED’s, and an audible horn. Each annunciator can be mapped to one<br />
of four predefined group of alarms (including custom groups) based on application<br />
needs. A custom film kit is available to customize the graphic/text indication. For further<br />
information see Chapter 17.2.<br />
Page 174<br />
©2013 Caterpillar<br />
All rights reserved.
Application and Installation Guide<br />
<strong>EMCP</strong> 4.1, <strong>4.2</strong> Generator Set Control<br />
THE THERMOCOUPLE, RTD, & DIO<br />
<strong>EMCP</strong> 4 uses a common form factor for the three modules known as the Thermocouple,<br />
RTD (Resistance Temperature Detector) and DIO (Discrete I/O) modules. The same<br />
case design is used for all three.<br />
The Thermocouple module, RTD module and DIO module feature identical rugged<br />
packaging and Deutsch IPD connectors. The only physical difference in packages<br />
between these three optional modules is that the DIO module has an LED to indicate<br />
communication network status.<br />
Applications can include networked power generator set control systems.<br />
For further information on the Thermocouple module see Chapter 17.23, for the RTD<br />
module see Chapter 17.4, and for the DIO module see Chapter 17.5.<br />
THE CAT DIGITAL VOLTAGE REGULATOR<br />
The Cat Digital Voltage Regulator (Cat DVR) module is an auxiliary voltage regulator<br />
device, regulating the generator voltage to provide optimal response to various load<br />
types and changes in load. It is connected to the generator exciter and field, and<br />
communicates with the <strong>EMCP</strong> 4 for monitoring purposes. For further information see<br />
RENR7941 Cat Digital Voltage Regulator.<br />
17.1 CAN ANNUNCIATOR<br />
The <strong>EMCP</strong> CAN Annunciator serves to display<br />
system alarm conditions and status indications. The<br />
CAN Annunciator has been designed for use on the<br />
<strong>EMCP</strong> 4 Accessory CAN Data Link and may be used<br />
in either Local or Remote applications, providing<br />
customers with enhanced site flexibility.<br />
In Local application, the CAN Annunciator may be<br />
mounted on the Package generator set with the<br />
<strong>EMCP</strong> 4 to provide a complete package-mounted<br />
monitoring solution.<br />
The Annunciator may also be mounted separately<br />
from the generator set to provide Remote indication<br />
of system operating and alarm conditions.<br />
A maximum of four CAN Annunciators can be<br />
mounted locally or remotely and connected to the<br />
Accessory CAN 2 data link.<br />
©2013 Caterpillar<br />
All rights reserved. Page 175
<strong>EMCP</strong> 4.1, <strong>4.2</strong> Generator Set Control<br />
Application and Installation Guide<br />
CAN ANNUNCIATOR FEATURES<br />
The Annunciator includes:<br />
Sixteen (16) LED pairs for annunciation of up to 32 system events<br />
An additional pair of LED’s provides status indication of the CAN data link connection<br />
Annunciation of alarm conditions received from any module on the CAN data link<br />
Alarm Horn with Lamp Test and Alarm Acknowledge pushbuttons<br />
Configurable to NFPA 99/110 requirements for local and remote annunciation on<br />
Emergency Standby Generator Systems<br />
Provides a simple means to change the labels for the annunciation LED’s for site<br />
specific requirements (Custom Label Kit purchased separately)<br />
Superior visibility of the LED’s in direct sunlight<br />
Graphic symbols along with text labels are provided next to each LED pair to<br />
indicate various alarms and events<br />
Can be Mounted either locally on the package generator set or remotely (up to<br />
800 feet) on the Accessory CAN Data Link<br />
Designed and tested to meet stringent Impulse Shock and Operating Vibration<br />
requirements<br />
288 mm (11.34 in) High x 158 mm (6.22 in) Wide x 66 mm (2.37 in) Deep<br />
ANNUNCIATOR SPECIFICATIONS<br />
ELECTRICAL SPECIFICATIONS<br />
Control Power 12 VDC & 24 VDC nominal (9 – 32 VDC acceptable)<br />
Over voltage capability is 80 VDC for 2 minutes @ 70C<br />
Reverse voltage capability is –32 VDC for 1 hour @ 70C<br />
Single, 6-pin connector provides both power and communication<br />
Designed to meet relevant European standards for EMI/RFI/Immunity without the<br />
use of external filtering (UL Listed).<br />
ENVIRONMENTAL SPECIFICATIONS<br />
Operating Temperature -40C to 70C<br />
Storage Temperature -50C to +85C<br />
Relative Humidity 90%, non-condensing, 30C to 60C.<br />
Can be mounted directly on the generator set panel or remotely<br />
NETWORK COMMUNICATIONS INTERFACE<br />
Incorporates a communications port, able to operate on the <strong>EMCP</strong> 4 Accessory<br />
CAN Data Link<br />
Node address is auto configurable<br />
Optical isolation is provided for the CAN line<br />
Module retains configured setpoints in non-volatile memory with loss of<br />
communications and power<br />
Configuration is accomplished with the Cat Service Tool over the CAN 2 network<br />
Page 176<br />
©2013 Caterpillar<br />
All rights reserved.
Application and Installation Guide<br />
<strong>EMCP</strong> 4.1, <strong>4.2</strong> Generator Set Control<br />
ANNUNCIATOR WIRING<br />
The back of the CAN Annunciator module contains an 8-terminal screw terminal block.<br />
Attached to the block is a 6-pin Deutsch adapter. The pin outs for both are shown in<br />
Figure 41 and Table 16.<br />
Figure 41: Annunciator Deutsch Connector Pin Configuration and Terminal Block<br />
ANNUNCIATOR TERMINAL BLOCK PIN CONFIGURATION<br />
Terminal # Function Description<br />
1 PWR- - Battery Input<br />
2 PWR+ + Battery Input, also connects to Horn(+)<br />
3 N/C Not Connected<br />
4 CAN2-L CAN Data link LOW<br />
5 CAN2-H CAN Data link HIGH<br />
6 Lamp Test Lamp Test<br />
7 Alarm Ack Alarm Acknowledge<br />
8 Horn Driver Connects to negative terminal of Horn<br />
Table 16: Annunciator Terminal Block Pin Configuration<br />
©2013 Caterpillar<br />
All rights reserved. Page 177
<strong>EMCP</strong> 4.1, <strong>4.2</strong> Generator Set Control<br />
Application and Installation Guide<br />
LED COLORS<br />
Each pair of LED’s on the Annunciator consists of two of the following three colors:<br />
Green, Amber, and Red, which allows for custom configuration of STATUS, WARNING and<br />
SHUTDOWN conditions. The available colors and combinations are listed in Table 17 LED<br />
Colors:<br />
LED COLORS<br />
ROW LED 1 LED 2 ROW LED 1 LED 2<br />
1 Red Amber 9 Red Amber<br />
2 Red Amber 10 Red Amber<br />
3 Red Amber 11 Red Amber<br />
4 Red Amber 12 Red Amber<br />
5 Red Amber 13 Green Amber<br />
6 Red Amber 14 Green Amber<br />
7 Red Amber 15 Red Green<br />
8 Red Amber 16 Red Green<br />
Table 17: LED Colors<br />
MODULE STATUS LED<br />
A red/green pair located at the bottom of the CAN Annunciator, is used to report<br />
Module/Network Status. The various states indicated are explained in Table 18.<br />
BEHAVIOR<br />
Red solid<br />
Green solid<br />
Green<br />
flashing<br />
Red/Green<br />
alternating<br />
EXPLANATION<br />
CAN 2 data link diagnostic. For<br />
example: the module is wired<br />
wrong (Data Link), wrong cable,<br />
or no terminating resistor.<br />
CAN 2 data link OK<br />
No CAN 2 data link diagnostic,<br />
but no communication detected.<br />
Hooking the Annunciator up with<br />
the power on.<br />
No application software loaded<br />
Table 18: CAN Annunciator Module / Network Status LED Behavior<br />
Page 178<br />
©2013 Caterpillar<br />
All rights reserved.
Application and Installation Guide<br />
<strong>EMCP</strong> 4.1, <strong>4.2</strong> Generator Set Control<br />
CAN ANNUNCIATOR SOFTWARE CONFIGURATION<br />
The CAN Annunciator is field-programmable using the Cat Service Tool. It is also flash<br />
programmable to update software using the Cat Service Tool.<br />
The service tool software must be installed on a Windows PC. The Cat communication<br />
adapter must be connected between the PC and the CAN 2 Accessory data link on<br />
which the target CAN 2 Annunciator is connected.<br />
GLOBAL ACKNOWLEDGE<br />
The CAN Annunciator can be configured to both initiate and respond to an Event<br />
Acknowledge message over the CAN Accessory data link. If this setpoint is enabled,<br />
the CAN Annunciator events may be acknowledged locally on the CAN Annunciator by<br />
pressing the Alarm Acknowledge button or remotely by pressing the Alarm Acknowledge<br />
button on the <strong>EMCP</strong> 4 or by pressing the Acknowledge button on another CAN<br />
Annunciator configured for Global Acknowledge that is on the same data link.<br />
Acknowledging events also silences the horn.<br />
The default setting for this setpoint is DISABLED, but it can be enabled from the<br />
Configuration tool within Cat Electronic Technician.<br />
ECU INSTANCE NUMBER<br />
The Module Description will also indicate a number that identifies the CAN Annunciator<br />
uniquely from any other CAN Annunciator modules on the Accessory CAN Data Link.<br />
This number is called the ECU INSTANCE and it is programmable.<br />
The service tool configuration screen identifies the serial number of the CAN<br />
Annunciator that is connected. This is important in matching the desired ECU Instance<br />
to the actual hardware.<br />
Note: If two CAN Annunciators on the same communications network are programmed<br />
for the same ECU Instance number, neither will communicate.<br />
CONFIGURING ANNUNCIATOR LED BEHAVIOR<br />
1. Connect to the Annunciator using the Cat Service Tool as stated in Chapter <strong>4.2</strong>.<br />
2. Select Configuration Group #N from the left pane.<br />
©2013 Caterpillar<br />
All rights reserved. Page 179
<strong>EMCP</strong> 4.1, <strong>4.2</strong> Generator Set Control<br />
Application and Installation Guide<br />
3. Double click ECU Instance Number to enter a new ECU Instance Number.<br />
4. Double click Annunciator Data Link Global Acknowledge Enable Status<br />
to change this value from the drop down menu.<br />
5. Select Service > LED Pair Configuration.<br />
Page 180<br />
©2013 Caterpillar<br />
All rights reserved.
Application and Installation Guide<br />
<strong>EMCP</strong> 4.1, <strong>4.2</strong> Generator Set Control<br />
6. The LED pairs will become visible in a new window.<br />
7. Double click on an LED pair to configure the pair.<br />
8. Select the Trigger condition for the pair in the drop down menu.<br />
©2013 Caterpillar<br />
All rights reserved. Page 181
<strong>EMCP</strong> 4.1, <strong>4.2</strong> Generator Set Control<br />
Application and Installation Guide<br />
9. Select the Severity Level for the pair in the drop down menu.<br />
10. Select the Suspect Parameter Number for the pair in the drop down menu.<br />
11. The Failure Mode Identifier does not normally need to be programmed since<br />
the Severity Level typically has this information embedded.<br />
To configure the behavior of the LED pairs, enter the LED Pair Configuration screen<br />
by selecting Service LED Pair Configuration.<br />
Each LED pair has four parameters associated with it. Each parameter is dependent<br />
on the parameter(s) preceding it (to the left); first Trigger Condition, next Severity Level,<br />
then Suspect Parameter Number, and finally Failure Mode Identifier (if required).<br />
TRIGGER CONDITION<br />
There are three possible selections for Trigger Condition: SPECIFIC EVENT, GENERAL<br />
EVENT, and DISABLED.<br />
SPECIFIC EVENT is used to assign an LED pair to a specific data link parameter, such<br />
as Oil Pressure, Engine Speed, Coolant Temperature, etc. The desired parameter must<br />
be chosen in the Suspect Parameter Number column.<br />
GENERAL EVENT is used to assign an LED pair as a general alarm or shutdown indicator.<br />
When configured as General Event, the LED will not be assigned to a particular<br />
parameter. It will respond to any event with a severity level chosen in the Severity Level<br />
column, regardless of the Suspect Parameter Number.<br />
For this reason, when General Event is selected, the Suspect Parameter Number cannot<br />
be changed.<br />
Page 182<br />
©2013 Caterpillar<br />
All rights reserved.
Application and Installation Guide<br />
<strong>EMCP</strong> 4.1, <strong>4.2</strong> Generator Set Control<br />
Figure 42: Cat Service Tool CAN 2 Annunciator Led Configuration Screen<br />
DISABLED is used to disable the LED pair. When Disabled is selected, the other three<br />
parameters cannot be changed.<br />
SEVERITY LEVEL<br />
Severity Level defines which types of events the LED pair will react to. Selections that<br />
begin with Condition Exists will respond to CAN Event messages for Failure Mode<br />
Identifier (FMI) 31 Condition Exists.<br />
For example, LED pair #2 is configured for Condition Exists, Red On, Other Not Used,<br />
Horn On with SPN 190 (Emergency Stop Active). This means that when the Annunciator<br />
received a CAN message indicating Emergency Stop with FMI 31, the Red LED will turn<br />
on and the Horn will also turn on.<br />
Other Not Used indicates that the other LED color in the pair is never used.<br />
Green Off (for example) indicates that the green LED lights when the condition<br />
chosen for this LED pair is NOT active.<br />
©2013 Caterpillar<br />
All rights reserved. Page 183
<strong>EMCP</strong> 4.1, <strong>4.2</strong> Generator Set Control<br />
Application and Installation Guide<br />
Most Severity Level selections imply (a) CAN Failure Mode Identifier (FMI) code(s):<br />
CONDITION EXISTS is equivalent to FMI 31<br />
HIGH WARNING can be FMI 15 or FMI 16<br />
LOW WARNING can be FMI 17 or FMI 18<br />
HIGH SHUTDOWN is equivalent to FMI 0<br />
LOW SHUTDOWN is equivalent to FMI 1<br />
HIGH OR LOW SHUTDOWN is equivalent to FMI 0 or FMI 1<br />
Since the FMI codes are implied by this column, the FMI column is grayed out for any<br />
of these selections.<br />
The only option that will allow an FMI to be configured is SPECIFIC DIAGNOSTIC.<br />
SUSPECT PARAMETER NUMBER<br />
The Suspect Parameter Number column is used to select or type in the SPN for the<br />
parameter assigned to the LED pair. Most supported SPNs can be selected from the list.<br />
Refer to the UENR1209 Systems Operation Testing and Adjusting Manual for a<br />
complete list of supported SPNs.<br />
17.2 RS-485 ANNUNCIATOR (<strong>EMCP</strong> <strong>4.2</strong> ONLY)<br />
The <strong>EMCP</strong> RS-485 Annunciator serves to display<br />
system alarm conditions and status indications.<br />
The RS-485 Annunciator has been designed for<br />
use on a dedicated <strong>EMCP</strong> 4 fully isolated two wire RS-<br />
485 SCADA Data Link (Half Duplex), and may<br />
be used in either Local or Remote applications,<br />
providing customers with enhanced site flexibility. The<br />
RS-485 Annunciator uses a custom master-slave<br />
communication protocol. The <strong>EMCP</strong> <strong>4.2</strong> controller will<br />
be the Master, and the RS-485 Annunciator(s) will be<br />
the slave(s). Configuration takes place within the<br />
<strong>EMCP</strong> 4.<br />
In Local application, the RS-485 Annunciator may<br />
be mounted on the Package generator set with the<br />
<strong>EMCP</strong> 4 to provide a complete package-mounted<br />
monitoring solution.<br />
The RS-485 Annunciator may also be mounted<br />
separately from the generator set to provide Remote<br />
indication of system operating and alarm conditions.<br />
The number of RS-485 Annunciators is limited by<br />
the RS-485 standard.<br />
Page 184<br />
©2013 Caterpillar<br />
All rights reserved.
Application and Installation Guide<br />
<strong>EMCP</strong> 4.1, <strong>4.2</strong> Generator Set Control<br />
ANNUNCIATOR FEATURES<br />
The Annunciator includes:<br />
Sixteen (16) LED pairs for annunciation of up to 32 system events<br />
An additional pair of LED’s provides status indication of the dedicated RS-485<br />
Annunciator Network communication connection<br />
Ability to annunciate alarm conditions sent from the <strong>EMCP</strong> 4 within preconfigured<br />
alarm groups<br />
Alarm Horn with Lamp Test and Alarm Acknowledge pushbuttons<br />
Configurable to NFPA 99/110 requirements for local and remote annunciation on<br />
Emergency Standby Generator Systems<br />
Provides a simple means to change the labels for the annunciation LED’s for site<br />
specific requirements (Custom Label provided with Custom Alarm Group #1 and<br />
#2 RS-485 Annunciator)<br />
Superior visibility of the LED’s in direct sunlight<br />
Graphic symbols along with text labels are provided next to each LED pair to<br />
indicate various alarms and events<br />
Configurable with Cat ET via settings within the <strong>EMCP</strong> 4<br />
Can be mounted either locally on the package generator set or remotely (up to<br />
4000 feet)<br />
Designed and tested to meet stringent Impulse Shock and Operating Vibration<br />
requirements<br />
286 mm (11.26 in) High x 157 mm (6.18 in) Wide x 68 mm (2.67 in) Deep<br />
ANNUNCIATOR SPECIFICATIONS<br />
ELECTRICAL SPECIFICATIONS<br />
Control Power 12 VDC & 24 VDC nominal (9 – 32 VDC acceptable)<br />
Reverse voltage capability is -32 VDC for 1 hour @ 70C<br />
Over voltage capability is 80 VDC for 2 minutes @ 70C<br />
Single, 8-pin connector provides both power and communication<br />
Designed to meet relevant European standards for EMI/RFI/Immunity<br />
without the use of external filtering<br />
ENVIRONMENTAL SPECIFICATIONS<br />
Operating Temperature -40 to 70C<br />
Storage Temperature -50C to +85C<br />
Relative Humidity 90%, non-condensing, 30C to 60C.<br />
Failure Point 85C. If the ambient temperature were to exceed 85C,<br />
the device would NOT be expected to return to proper operation.<br />
Can be mounted directly on the generator set panel or remotely<br />
©2013 Caterpillar<br />
All rights reserved. Page 185
<strong>EMCP</strong> 4.1, <strong>4.2</strong> Generator Set Control<br />
Application and Installation Guide<br />
NETWORK COMMUNICATIONS INTERFACE<br />
<strong>EMCP</strong> 4 provides a dedicated, fully isolated RS-485 SCADA Data Link (Half<br />
Duplex) separate from the RS-485 (MODBUS) port used on the <strong>EMCP</strong> 4<br />
Operates at 19200 bits per second<br />
Configuration is accomplished with the Cat Service Tool by connecting<br />
to the <strong>EMCP</strong> 4<br />
RS-485 Annunciator communication is not compatible with third party devices.<br />
RS-485 ANNUNCIATOR WIRING<br />
The back of the RS-485 Annunciator module contains an 8-terminal screw terminal<br />
block. Attached to the block is an 8-pin Deutsch receptacle, Cat part number 3E-3388<br />
(Deutsch DT04-08PA-E005). The mating plug is Cat part number 155-2264 (Deutsch<br />
DT06-08SA-EP08, or equivalent). The pin outs for both the receptacle and terminal<br />
block are shown in Figure 42 and Table 19 and 20.<br />
Figure 43: RS-485 Annunciator Deutsch Connector Pin Configuration and Terminal Block<br />
RS-485 ANNUNCIATOR DEUTSCH CONNECTOR PIN CONFIGURATION<br />
Pin # Function Comments<br />
1 BATT + + Battery input<br />
2 BATT - - Battery input<br />
3 NOT USED NOT USED<br />
4 RS-485 B (+) + Non-Inverting Positive RS-485 input signal<br />
5 RS-485 A (-) - Inverting Negative RS-485 input signal<br />
6 RS-485 R RS-485 Reference<br />
7 NOT USED NOT USED<br />
8 NOT USED NOT USED<br />
Table 19: RS-485 Annunciator Deutsch Connector Pin Configuration<br />
Page 186<br />
©2013 Caterpillar<br />
All rights reserved.
Application and Installation Guide<br />
<strong>EMCP</strong> 4.1, <strong>4.2</strong> Generator Set Control<br />
RS-485 ANNUNCIATOR TERMINAL BLOCK PIN CONFIGURATION<br />
Terminal # Function Description<br />
1 BATT - - Battery input<br />
2 BATT + + Battery input<br />
3 RS-485 R RS-485 Reference<br />
4 RS-485 A (-) - Inverting Negative RS-485 input signal<br />
5 RS-485 B (+) + Non- Inverting Positive RS-485 input signal<br />
6 Lamp Test SW Lamp Test<br />
7 Alarm ACK Alarm Acknowledge<br />
8 Horn Drive Connects to negative terminal on Horn<br />
Table 20: RS-485 Annunciator Terminal Block Pin Configuration<br />
LED COLORS<br />
Each pair of LED’s on the RS-485 Annunciator consists of two of the following three<br />
colors: Green, Amber, and Red, which allows for custom configuration of STATUS,<br />
WARNING and SHUTDOWN conditions. The available colors and combinations are listed<br />
in Table 21 LED Colors:<br />
LED COLORS<br />
ROW LED 1 LED 2 ROW LED 1 LED 2<br />
1 Red Amber 9 Red Amber<br />
2 Red Amber 10 Red Amber<br />
3 Red Amber 11 Red Amber<br />
4 Red Amber 12 Red Amber<br />
5 Red Amber 13 Green Amber<br />
6 Red Green 14 Green Amber<br />
7 Red Amber 15 Red Green<br />
8 Red Amber 16 Red Amber<br />
Table 21: LED Colors<br />
MODULE STATUS LED<br />
A red/green pair located at the bottom of the RS-485 Annunciator, is used to report<br />
Module/Network Status. The various states indicated are explained in Table 22.<br />
BEHAVIOR<br />
EXPLANATION<br />
Red solid Data link diagnostic. For example: the<br />
module is wired wrong (Data Link), or no<br />
terminating resistor.<br />
Green solid Data is being received from the <strong>EMCP</strong> 4<br />
Green Loss of communication<br />
flashing<br />
Red/Green<br />
flashing<br />
No application software loaded, or Alarm<br />
Group Selection Mode is active<br />
Table 22: Annunciator Module / Network Status LED Behavior<br />
©2013 Caterpillar<br />
All rights reserved. Page 187
<strong>EMCP</strong> 4.1, <strong>4.2</strong> Generator Set Control<br />
Application and Installation Guide<br />
LAMP TEST FUNCTION<br />
The Annunciator supports a lamp test function from a button press on the <strong>EMCP</strong> 4.<br />
The lamp test function cycles continuously through two test modes while pressing and<br />
holding in the Lamp Test button. The first mode is a column test mode. The left column<br />
of LED’s will be lit for one second while the right column is off. Then the right column<br />
of LED’s will be lit for one second, while the left column is off. This will occur twice.<br />
During the second run of this test mode (during the first cycle only), the horn will be on.<br />
The second test mode is an individual LED test mode. In this mode, the LED’s will light<br />
one at a time, starting from the top left LED, down to the left hand module status LED,<br />
then over to the right hand module status LED, then up to the top right LED. Each LED<br />
will be lit for 1/2 second, after which it will turn off and the next LED will be lit. At the<br />
completion of this test mode, the cycle will restart with the first test mode. However, on<br />
subsequent runs of the first test mode, the horn will not turn on.<br />
The RS-485 Annunciator returns to normal operation once the lamp test button is<br />
released.<br />
ALARM ACKNOWLEDGE<br />
The RS-485 Annunciator supports an acknowledge event/silence horn function from a<br />
button press on the RS-485 Annunciator or from the <strong>EMCP</strong> 4. Both cases have different<br />
behavior and are outlined below.<br />
When an active event is received from the <strong>EMCP</strong> 4 and is acknowledged locally with<br />
a button press on the RS-485 Annunciator module, any flashing LED tied to that event<br />
will stop flashing and maintain a steady illumination and the horn will be silenced.<br />
Note: Only the local RS-485 Annunciator module that acknowledges the active event will<br />
change the state of its flashing LED(s) and silence the horn. The acknowledge signal of the<br />
annunciation is not broadcast to any other units on the RS-485 Annunciator Data Link.<br />
When an active event is received from the <strong>EMCP</strong> 4 and is acknowledged globally with<br />
a button press on the <strong>EMCP</strong> 4 controller, it is transmitted to the RS-485 Annunciator(s)<br />
module(s). Any flashing LED tied to that event will stop flashing and maintain a steady<br />
illumination and the horn will be silenced.<br />
Note: In this case, the <strong>EMCP</strong> 4 may acknowledge active events on multiple RS-485<br />
Annunciators simultaneously.<br />
The horn silence/acknowledge function will cause the local horn to be silenced until<br />
another event causes an LED to be activated.<br />
Page 188<br />
©2013 Caterpillar<br />
All rights reserved.
Application and Installation Guide<br />
<strong>EMCP</strong> 4.1, <strong>4.2</strong> Generator Set Control<br />
RS-485 ANNUNCIATOR ALARM GROUPS<br />
The RS-485 Annunciator supports four different Alarm Groups. Alarm Group 01, 02, 03,<br />
and Alarm Group 04. Two of these Alarm Groups, 03 and 04, are fixed and are not<br />
configurable and two Alarm Groups, 01 and 02, are reserved for custom event settings<br />
and are fully configurable.<br />
Selecting which of the four Alarm Groups to configure the RS-485 Annunciator is<br />
determined by the film that is placed on the front left panel. The Alarm Groups and the<br />
events that make up the films for each of the Alarm Groups are detailed below in Tables<br />
24, 25 and 26. Configuring the RS-485 Annunciator to one of the four Alarm Groups is<br />
accomplished through the front panel of the RS-485 Annunciator and is described further<br />
in Alarm Group Selection Mode below.<br />
ALARM GROUP SELECTION MODE (AGSM)<br />
The RS-485 Annunciator supports an Alarm Group Selection Mode (AGSM) that<br />
provides the ability to configure the RS-485 Annunciator to monitor a predetermined set<br />
of 32 events communicated by the <strong>EMCP</strong> 4 through the dedicated RS-485 Annunciator<br />
Data Link.<br />
Alarm Group selection and assignment are determined by the desired functions of the<br />
RS-485 Annunciator (Custom or non-configurable) and the film that is placed on the<br />
front left panel that reflects the predefined events monitored by the RS-485 Annunciator.<br />
When in AGSM, the top first four rows of LED’s will indicate which Alarm Group the<br />
RS-485 Annunciator has been assigned to by powering ‘on’ both LED’s in each row, i.e.<br />
row 1 for Alarm Group 01, row 2 for Alarm Group 02, row 3 for Alarm Group 03, and row<br />
4 for Alarm Group 04. (Note: The RS-485 Annunciator will be preprogrammed to Alarm<br />
Group 04.)<br />
The RS-485 Annunciator will continue to communicate to the <strong>EMCP</strong> 4 while in AGSM.<br />
Events received from the <strong>EMCP</strong> 4 while in AGSM will not be annunciated until AGSM has<br />
been exited only if the event that is received is an event in the selected Alarm Group.<br />
Once the RS-485 Annunciator has successfully been assigned to an Alarm Group,<br />
it shall receive and process any Event transmitted from the <strong>EMCP</strong> 4 to the assigned<br />
Alarm Group without power cycling the module.<br />
The Network Status LED’s will alternate flashing at a 2Hz rate at all times while in<br />
AGSM.<br />
©2013 Caterpillar<br />
All rights reserved. Page 189
<strong>EMCP</strong> 4.1, <strong>4.2</strong> Generator Set Control<br />
Application and Installation Guide<br />
ENTERING AGSM<br />
The RS-485 Annunciator shall enter AGSM by depressing the two buttons on the<br />
front panel of the RS-485 Annunciator (Lamp Test and Alarm ACK) for 3 seconds.<br />
The RS-485 Annunciator shall acknowledge entrance of AGSM by flashing the top<br />
4 rows of LED’s 4 times at a 1 second rate.<br />
After the 3 second period has timed out, the row representing the currently assigned<br />
alarm group address will be powered on, the remaining 11 rows of LED’s will not be<br />
powered on. See Table 23 AGSM LED Behavior below.<br />
Row Column 1 Column 2<br />
1 Solid if Assigned to Alarm Group 01, else off Solid if Selected to Alarm Group 01, else off<br />
2 Solid if Assigned to Alarm Group 02, else off Solid if Selected to Alarm Group 02, else off<br />
3 Solid if Assigned to Alarm Group 03, else off Solid if Selected to Alarm Group 03, else off<br />
4 Solid if Assigned to Alarm Group 04, else off Solid if Selected to Alarm Group 04, else off<br />
5 Off Off<br />
6 Off Off<br />
7 Off Off<br />
8 Off Off<br />
9 Off Off<br />
10 Off Off<br />
11 Off Off<br />
12 Off Off<br />
13 Off Off<br />
14 Off Off<br />
15 Off Off<br />
16 Off Off<br />
Table 23: AGSM LED Behavior<br />
RE-CONFIGURING/SELECTING ALARM GROUP ADDRESS<br />
While the RS-485 Annunciator is still in AGSM it will cycle through the four Alarm Groups<br />
by pressing one of the two buttons on the front panel. Pressing the Lamp Test button will<br />
cycle up through the 4 Alarm Groups and pressing the Alarm ACK button will cycle down<br />
through the 4 Alarm Groups.<br />
Upon reaching Alarm Group 04 (row 4) while cycling down through the Alarm Groups<br />
with the Alarm ACK button, an additional Alarm ACK button press will bring the selection<br />
to Alarm Group 01 (row 1). Upon reaching the Alarm Group 01 (row 1) while cycling up<br />
through the Alarm Groups with the Lamp Test button, an additional Lamp Test button<br />
press will bring the selection to Alarm Group 04 (row 4).<br />
When selecting a new Alarm Group address, the left column (red LED) will represent the<br />
previously configured Alarm Group selection. The right column (amber LED) will<br />
represent the currently selected Alarm Group. When AGSM is exited, the currently<br />
selected register address will be configured as the new Alarm Group.<br />
Page 190<br />
©2013 Caterpillar<br />
All rights reserved.
Application and Installation Guide<br />
<strong>EMCP</strong> 4.1, <strong>4.2</strong> Generator Set Control<br />
EXITING AGSM<br />
The Annunciator will exit AGSM under two possible conditions:<br />
• A time out period without any button presses<br />
• Pressing and holding the two buttons (ACK and Horn buttons) for 3 seconds<br />
After a period of 15 seconds without any button presses, the RS-485 Annunciator will<br />
automatically exit AGSM and disregard any changes made to the Alarm Group selection<br />
and remain configured to the Alarm Group prior to entering AGSM.<br />
When an Alarm Group selection has been made and the two buttons are pressed (Lamp<br />
Test and Alarm ACK) and held in continuously for 3 seconds, the RS-485 Annunciator<br />
will update the current configured Alarm Group to the current selected Alarm Group<br />
and then exit AGSM. Be sure to pay attention to confirm that the group being saved is<br />
the correct Alarm Group.<br />
After exiting AGSM under either one of the two exit conditions listed, the RS-485<br />
Annunciator will flash all 16 rows of LED’s for 3 seconds at which time the RS-485<br />
Annunciator will enter regular annunciation mode.<br />
RS-485 ANNUNCIATOR CUSTOM ALARM GROUP CONFIGURATION<br />
The RS-485 Annunciator is field-programmable by the <strong>EMCP</strong> 4 via the Cat Service Tool<br />
when configured for Alarm Group’s 01 and 02. Alarm Group’s 01 and 02 support<br />
customization of the 32 events for the 16 LED’s.<br />
The service tool software must be installed on a Windows PC. The Cat communication<br />
adapter must be connected between the PC and the CAN Primary data link on which the<br />
target <strong>EMCP</strong> 4 is connected.<br />
CUSTOM ALARM GROUP SELECTION<br />
When the Cat Service Tool is communicating, the <strong>EMCP</strong> 4 shall be selected as the<br />
target module. Located at the top of the Cat Service Tool screen is the tool bar, select<br />
Service RS-485 Annunciator. The RS-485 Annunciator configuration screen will be<br />
displayed with the Alarm Group Select at the top left of the screen. There are two<br />
possible selections for Alarm Groups: #1 and #2.<br />
To configure the RS-485 Annunciator LED’s, select each of the LED’s individually.<br />
With the selected LED window displayed the initial selection is for Trigger Condition.<br />
There are three possible selections for Trigger Condition: SPECIFIC EVENT, GENERAL<br />
EVENT, and Disabled.<br />
SPECIFIC EVENT is used to assign an LED pair to a specific data link parameter, such<br />
as Oil Pressure, Engine Speed, Coolant Temperature, etc. The desired parameter must<br />
be chosen in the Suspect Parameter Number column.<br />
GENERAL EVENT is used to assign an LED pair as a general alarm or shutdown indicator.<br />
When configured as General Event, the LED will not be assigned to a particular<br />
parameter. It will respond to any event with a severity level chosen in the Severity Level<br />
column, regardless of the Suspect Parameter Number.<br />
For this reason, when General Event is selected, the Suspect Parameter Number cannot<br />
be changed.<br />
DISABLED is used to disable the LED pair. When Disabled option is selected, the other<br />
three parameters cannot be changed.<br />
©2013 Caterpillar<br />
All rights reserved. Page 191
<strong>EMCP</strong> 4.1, <strong>4.2</strong> Generator Set Control<br />
Application and Installation Guide<br />
SEVERITY LEVEL<br />
Severity Level defines which types of events the LED pair will react to. Selections that<br />
begin with Condition Exists will respond to CAN Event messages for Failure Mode<br />
Identifier (FMI) 31 Condition Exists.<br />
For example, LED pair #1 is configured for Condition Exists, Red On, Other Not Used,<br />
Horn On with SPN 970 (Emergency Stop Active). This means that when the RS-485<br />
Annunciator receives data from the <strong>EMCP</strong> 4 over the RS-485 Annunciator Data Link<br />
indicating Emergency Stop with FMI 31, the Red LED will turn on and the Horn will also<br />
turn on.<br />
Other Not Used indicates that the other LED color in the pair is never used.<br />
Green Off (for example) indicates that the green LED lights when the condition<br />
chosen for this LED pair is NOT active.<br />
Most Severity Level selections imply (a) Failure Mode Identifier (FMI) code(s):<br />
CONDITION EXISTS is equivalent to FMI 31<br />
HIGH WARNING can be FMI 15 or FMI 16<br />
LOW WARNING can be FMI 17 or FMI 18<br />
HIGH SHUTDOWN is equivalent to FMI 0<br />
LOW SHUTDOWN is equivalent to FMI 1<br />
HIGH OR LOW SHUTDOWN is equivalent to FMI 0 or FMI 1<br />
Since the FMI codes are implied by the choice made in the Severity Level column,<br />
the FMI column is grayed out for any of these selections.<br />
The only option that will allow a specific FMI to be configured is SPECIFIC DIAGNOSTIC.<br />
SUSPECT PARAMETER NUMBER<br />
The Suspect Parameter Number column is used to select one of the listed SPN’s in the<br />
drop down menu or type in a specific SPN number for an SPN that may not be listed in<br />
the drop down menu for the parameter assigned to the LED pair. Most supported SPNs<br />
can be selected from the list.<br />
ENGINE RUNNING<br />
When configuring the RS-485 Annunciator for ENGINE RUNNING, special consideration<br />
must be taken to trigger the event. The event can be triggered in a variety of ways. A<br />
selection of Engine Running trigger conditions is provided in ET and on the <strong>EMCP</strong><br />
display.<br />
Figure 44: Cat Service Tool Engine Running Conditions Configuration Screen<br />
Page 192<br />
©2013 Caterpillar<br />
All rights reserved.
Application and Installation Guide<br />
<strong>EMCP</strong> 4.1, <strong>4.2</strong> Generator Set Control<br />
Figure 45: <strong>EMCP</strong> <strong>4.2</strong> Display Engine Running Conditions Configuration Screen<br />
The Engine Running Conditions are logically combined together such that any selection<br />
will activate the condition and consist of the following options:<br />
Custom Event Digital Input (SPN 701)<br />
Engine Running (based on Engine Overview state with non-zero engine speed)<br />
V/Hz Within Limits (unit is close to rated voltage and rated frequency)<br />
Engine Running at Rated Speed (Engine Running, not in Idle, not in Cooldown)<br />
For using the Custom Event Digital Input trigger condition, the SPN shall be configured<br />
for Auxiliary I/O #1 (SPN 701) and it shall have a Severity Level configured for any one<br />
of the Condition Met setpoints. Digital Input #1 shall be physically wired to the active<br />
status signal that is to be used to trigger this programmed LED. If it is only to be based<br />
upon the status of the generator set controlled by the <strong>EMCP</strong>, then an output such as<br />
Relay Output #2, Fuel Control Relay, or Engine Start Initiated for Common Engine<br />
Interface generator sets on the <strong>EMCP</strong> 4 can be used. The Fuel Control Relay or Engine<br />
Start Initiated active status signal is continually active only while the engine is in running.<br />
Alarm Group #3 has LED #15 pre-configured for Engine Running and requires selecting<br />
one or multiple Engine Running Conditions to trigger an Engine Running event on the<br />
RS-485 Annunciator. If using a custom Alarm Group, use SPN 4244 and Severity Level<br />
of Condition Met.<br />
©2013 Caterpillar<br />
All rights reserved. Page 193
<strong>EMCP</strong> 4.1, <strong>4.2</strong> Generator Set Control<br />
Application and Installation Guide<br />
Figure 46: RS-485 Annunciator Custom Alarm Group Engine Running LED Configuration<br />
ALARM GROUPS<br />
The RS-485 Annunciator is capable of being configured for one of four Alarm Groups.<br />
Two of these Alarm Groups are fixed, two are configurable. Selection of the Alarm Group<br />
to be used is accomplished by using the front panel of the RS-485 Annunciator module<br />
as explained above in Alarm Group Selection Mode (AGSM).<br />
The assignment of films for each of the Alarm Groups is outlined below:<br />
Alarm Group # 1 (Custom Configurable 1) - Film #1 (see Table 24) and custom film<br />
Alarm Group # 2 (Custom Configurable 2) - Film #1 (see Table 24) and custom film<br />
Alarm Group # 3 (Fixed) - Film #1 (see Table 24)<br />
Alarm Group # 4 (Fixed) - Film #2, or Film #3 (see Tables 25 and 26)<br />
Note: Alarm Groups #1 and #2 are blank until configured.<br />
Page 194<br />
©2013 Caterpillar<br />
All rights reserved.
Application and Installation Guide<br />
<strong>EMCP</strong> 4.1, <strong>4.2</strong> Generator Set Control<br />
Row LED Default LED and Setpoint<br />
Horn<br />
Colors<br />
Assignments<br />
1 Red E-Stop Shutdown Y<br />
Amber Not Used NA<br />
2 Red Overcrank Y<br />
Amber Not Used NA<br />
3 Red High Coolant Temp Shutdown Y<br />
Amber High Coolant Temp Warning Y<br />
4 Red Not Used NA<br />
Amber Low Coolant Temp Warning Y<br />
5 Red Low Oil Pressure Shutdown Y<br />
Amber Low Oil Pressure Warning Y<br />
6 Red Overspeed Shutdown Y<br />
Green Not Used NA<br />
7 Red Low Coolant Level Shutdown Y<br />
Amber Low Coolant Level Warning Y<br />
8 Red Low Fuel Level Shutdown Y<br />
Amber Low Fuel Level Warning Y<br />
9 Red Not Used NA<br />
Amber Generator Not in Auto Warning Y<br />
10 Red High Battery Voltage Shutdown Y<br />
Amber High Battery Shutdown Warning Y<br />
11 Red Not Used NA<br />
Amber Low Battery Voltage Warning Y<br />
12 Red Not Used NA<br />
Amber Low Cranking Voltage Warning Y<br />
13 Green Not Used NA<br />
Amber Battery Charger AC Failure Y<br />
14 Green Not Used NA<br />
Amber EPS Supplying Load N<br />
15 Red Not Used NA<br />
Green Engine Running N<br />
16 Red SCR – Tier 4 Y<br />
Amber SCR – Tier 4 Y<br />
Table 24: Film #1. Alarm Group 01 & 02 default film and Alarm Group 03 film assignments.<br />
NFPA 99/110 events. Includes Fuel Level, Engine Running, and Tier 4 SCR events<br />
©2013 Caterpillar<br />
All rights reserved. Page 195
<strong>EMCP</strong> 4.1, <strong>4.2</strong> Generator Set Control<br />
Application and Installation Guide<br />
Row LED Default LED and Setpoint<br />
Horn<br />
Colors<br />
Assignments<br />
1 Red E-Stop Shutdown Y<br />
Amber Not Used NA<br />
2 Red Overcrank Y<br />
Amber Not Used NA<br />
3 Red High Coolant Temp Shutdown Y<br />
Amber High Coolant Temp Warning Y<br />
4 Red Not Used NA<br />
Amber Low Coolant Temp Warning Y<br />
5 Red Low Oil Pressure Shutdown Y<br />
Amber Low Oil Pressure Warning Y<br />
6 Red Overspeed Shutdown Y<br />
Green Not Used NA<br />
7 Red Low Coolant Level Shutdown Y<br />
Amber Low Coolant Level Warning Y<br />
8 Red Low Fuel Level Shutdown Y<br />
Amber Low Fuel Level Warning Y<br />
9 Red Not Used NA<br />
Amber Generator Not in Auto Warning Y<br />
10 Red High Battery Voltage Shutdown Y<br />
Amber High Battery Shutdown Warning Y<br />
11 Red Not Used NA<br />
Amber Low Battery Voltage Warning Y<br />
12 Red Not Used NA<br />
Amber Low Cranking Voltage Warning Y<br />
13 Green Not Used NA<br />
Amber Battery Charger AC Failure Y<br />
14 Green Not Used NA<br />
Amber EPS Supplying Load N<br />
15 Red Air Damper Shutdown Y<br />
Green Not Used NA<br />
16 Red SCR – Tier 4 Y<br />
Amber SCR – Tier 4 Y<br />
Table 25: Film #2. Alarm Group 04. NFPA 99/110 events.<br />
Includes Fuel Level, Air Damper Shutdown, and Tier 4 SCR events.<br />
Page 196<br />
©2013 Caterpillar<br />
All rights reserved.
Application and Installation Guide<br />
<strong>EMCP</strong> 4.1, <strong>4.2</strong> Generator Set Control<br />
Row LED Default LED and Setpoint<br />
Horn<br />
Colors<br />
Assignments<br />
1 Red E-Stop Shutdown Y<br />
Amber Not Used NA<br />
2 Red Overcrank Y<br />
Amber Not Used NA<br />
3 Red High Coolant Temp Shutdown Y<br />
Amber High Coolant Temp Warning Y<br />
4 Red Not Used NA<br />
Amber Low Coolant Temp Warning Y<br />
5 Red Low Oil Pressure Shutdown Y<br />
Amber Low Oil Pressure Warning Y<br />
6 Red Overspeed Shutdown Y<br />
Green Not Used NA<br />
7 Red Low Coolant Level Shutdown Y<br />
Amber Low Coolant Level Warning Y<br />
8 Red Low Fuel Level Shutdown Y<br />
Amber Low Fuel Level Warning Y<br />
9 Red Not Used NA<br />
Amber Generator Not in Auto Warning Y<br />
10 Red High Battery Voltage Shutdown Y<br />
Amber High Battery Shutdown Warning Y<br />
11 Red Not Used NA<br />
Amber Low Battery Voltage Warning Y<br />
12 Red Not Used NA<br />
Amber Low Cranking Voltage Warning Y<br />
13 Green Not Used NA<br />
Amber Battery Charger AC Failure Y<br />
14 Green Not Used NA<br />
Amber EPS Supplying Load N<br />
15 Red Air Damper Shutdown Y<br />
Green Not Used NA<br />
16 Red Not Used NA<br />
Amber Not Used NA<br />
Table 26: Film #3. Alarm Group 04 film assignments. NFPA 99/110 events.<br />
Includes Fuel Level and Air Damper Shutdown. Does not include Tier 4 SCR<br />
©2013 Caterpillar<br />
All rights reserved. Page 197
<strong>EMCP</strong> 4.1, <strong>4.2</strong> Generator Set Control<br />
Application and Installation Guide<br />
CONFIGURING CUSTOM ALARM GROUPS USING CAT SERVICE TOOL<br />
1. Connect to the <strong>EMCP</strong> 4 using the Cat Service Tool as stated in Chapter <strong>4.2</strong>.<br />
2. Select Service > RS-485 Annunciator Configuration.<br />
Note: This option will not appear if the <strong>EMCP</strong> 4 was not selected in the ECM Summary<br />
Screen when connecting to Cat ET.<br />
3. The LED pairs will become visible in a new window.<br />
4. Select the Alarm Group for the Annunciator by choosing from the drop down menu.<br />
Page 198<br />
©2013 Caterpillar<br />
All rights reserved.
Application and Installation Guide<br />
<strong>EMCP</strong> 4.1, <strong>4.2</strong> Generator Set Control<br />
5. Double click on an LED pair to configure the pair.<br />
6. Select the Trigger condition for the pair in the drop down menu.<br />
7. Select the Severity Level for the pair in the drop down menu.<br />
For a complete list of choices for Severity Level, see the tables below.<br />
©2013 Caterpillar<br />
All rights reserved. Page 199
<strong>EMCP</strong> 4.1, <strong>4.2</strong> Generator Set Control<br />
Application and Installation Guide<br />
8. Select the Suspect Parameter Number for the pair in the drop down menu.<br />
For a complete list of choices for Suspect Parameter Number, see the tables below.<br />
9. The Failure Mode Identifier does not normally need to be programmed since the<br />
Severity Level typically has this information embedded. See information below for<br />
a Diagnostic SPN.<br />
If the LED Trigger Condition is configured as General Event, the Severity Level can be<br />
configured according to Table 27.<br />
Allowed for LED Pairs…<br />
Trigger Condition Severity Level<br />
1-5, 7-12, 16 13-14 6, 15<br />
Low Warning √ √<br />
Low Shutdown √ √<br />
High Warning √ √<br />
High Shutdown √ √<br />
High or Low Warning √ √<br />
High or Low Shutdown √ √<br />
Low Warning or Low Shutdown<br />
High Warning or High Shutdown<br />
High or Low Warning, High or Low Shutdown<br />
High or Low Warning, High or Low Shutdown or<br />
Diagnostic<br />
Diagnostic Other Than Warning/Shutdown/Condition<br />
Exists<br />
Table 27: General Event Severity Levels<br />
√<br />
√<br />
√<br />
√ √ √<br />
√<br />
√<br />
Page 200<br />
©2013 Caterpillar<br />
All rights reserved.
Application and Installation Guide<br />
<strong>EMCP</strong> 4.1, <strong>4.2</strong> Generator Set Control<br />
If the LED Trigger Condition is configured as Specific Event, the Severity Level can be<br />
configured according to Table 28.<br />
Allowed for LED Pairs…<br />
Trigger Condition Severity Level<br />
1-5, 7-12, 16 13-14 6, 15<br />
Low Warning √ √<br />
Low Shutdown √ √<br />
High Warning √ √<br />
High Shutdown √ √<br />
High or Low Warning √ √<br />
High or Low Shutdown √ √<br />
Low Warning or Low Shutdown<br />
High Warning or High Shutdown<br />
High or Low Warning, High or Low Shutdown<br />
High or Low Warning, High or Low Shutdown or Diagnostic √ √ √<br />
Diagnostic Other Than Warning/Shutdown/Condition Exists √ √<br />
Specific Diagnostic √ √ √<br />
Condition Exists, Red On, Other Not Used √ √<br />
Condition Exists, Amber On, Other Not Used √ √<br />
Condition Exists, Green On, Other Not Used √ √<br />
Condition Exists, Red On, Amber Off<br />
Condition Exists, Red On, Green Off<br />
Condition Exists, Amber On, Red Off<br />
Condition Exists, Amber On, Green Off<br />
Condition Exists, Green On, Red Off<br />
Condition Exists, Green On, Amber Off<br />
Condition Does Not Exist, Red On, Other Not Used √ √<br />
Condition Does Not Exist, Amber On, Other Not Used √ √<br />
Condition Does Not Exist, Green On, Other Not Used √ √<br />
Condition Exists, Red On, Other Not Used, Horn On √ √<br />
Condition Exists, Amber On, Other Not Used, Horn On √ √<br />
Condition Exists, Green On, Other Not Used, Horn On √ √<br />
Condition Does Not Exist, Red On, Other Not Used, Horn On √ √<br />
Condition Does Not Exist, Amber On, Other Not Used, Horn On √ √<br />
Condition Does Not Exist, Green On, Other Not Used, Horn On √ √<br />
Table 28: Specific Event Severity Levels<br />
√<br />
√<br />
√<br />
√<br />
√<br />
√<br />
√<br />
√<br />
√<br />
©2013 Caterpillar<br />
All rights reserved. Page 201
<strong>EMCP</strong> 4.1, <strong>4.2</strong> Generator Set Control<br />
Application and Installation Guide<br />
For Trigger Condition Severity Level listed in the table above from ‘Low Warning’<br />
to ‘Specific Diagnostic the following Suspect Parameter Number options can be us:<br />
Suspect Parameter Number Text<br />
Value<br />
Fuel Level (External Tank) 38<br />
Aftercooler Temperature 52<br />
Starting Air Pressure 82<br />
Fuel Filter Differential Pressure 95<br />
Fuel Level (Local Tank) 96<br />
Engine Oil Level 98<br />
Oil Filter Differential Pressure 99<br />
Engine Oil Pressure 100<br />
Crankcase Pressure 101<br />
Air Filter Differential Pressure 107<br />
Barometric Pressure 108<br />
Engine Coolant Temperature 110<br />
Engine Coolant Level 111<br />
Battery Voltage (switched) 158<br />
Battery Charging System Voltage 167<br />
Battery Voltage 168<br />
Ambient Air Temperature 171<br />
Inlet Air Temperature 172<br />
Exhaust Temperature 173<br />
Engine Oil Temperature 175<br />
Engine Speed 190<br />
Long Distance Annunciator Data Link Fault<br />
(Root Cause Not Known) 625<br />
Primary Data Link Fault 639<br />
Emergency Stop Shutdown 970<br />
Analog Input #1 Custom Parameter 1083<br />
Analog Input #2 Custom Parameter 1084<br />
Generator Rear Bearing Temperature 1122<br />
Generator Front Bearing Temperature 1123<br />
Generator Winding Temperature #1 1124<br />
Generator Winding Temperature #2 1125<br />
Generator Winding Temperature #3 1126<br />
Accessory Data Link Fault 1231<br />
Unexpected Engine Shutdown 1383<br />
Right Exhaust Temperature 2433<br />
Left Exhaust Temperature 2434<br />
Generator Frequency 2436<br />
Generator AC Voltage 2440<br />
Page 202<br />
©2013 Caterpillar<br />
All rights reserved.
Application and Installation Guide<br />
<strong>EMCP</strong> 4.1, <strong>4.2</strong> Generator Set Control<br />
Suspect Parameter Number Text<br />
Value<br />
Generator AC Current 2448<br />
Generator Real Power (kW) 2452<br />
Generator Reactive Power (kVAr) 2456<br />
Generator to Bus Synchronization Failure (Low) 2529<br />
Dead Bus Arbitration Failure (Low) 2530<br />
Engine Controller (Abnormal Update Rate) 3543<br />
Modbus Data Link 3581<br />
Generator Breaker Closed 4004<br />
Generator Breaker Open 4013<br />
Utility to Generator Transfer Failure (High) 4015<br />
Analog Input #4 Custom Parameter 4157<br />
Analog Input #3 Custom Parameter 4158<br />
Cranking Voltage 4256<br />
©2013 Caterpillar<br />
All rights reserved. Page 203
<strong>EMCP</strong> 4.1, <strong>4.2</strong> Generator Set Control<br />
Application and Installation Guide<br />
For the Trigger Condition Severity Levels listed in the table above from ‘Condition Exists,<br />
Red On, other Not Used’ to ‘Condition Does Not Exists, Green On, other Not used, Horn<br />
On’ the following Suspect Parameter Number options can be used:<br />
Suspect Parameter Number Text<br />
Value<br />
Digital Input # 1 Custom Event 701<br />
Digital Input # 2 Custom Event 702<br />
Digital Input # 3 Custom Event 703<br />
Digital Input # 4 Custom Event 704<br />
Digital Input # 5 Custom Event 705<br />
Digital Input # 6 Custom Event 706<br />
Digital Input # 7 Custom Event 707<br />
Digital Input # 8 Custom Event 708<br />
Isolated Digital Input #1 Custom Event 3920<br />
Isolated Digital Input #2 Custom Event 3921<br />
Isolated Digital Input #3 Custom Event 3922<br />
Isolated Digital Input #4 Custom Event 3923<br />
Emergency Stop Shutdown 970<br />
Emergency Shutdown Override Mode Active 1237<br />
Fuel Tank Leak 1239<br />
Engine Failure to Start 1664<br />
Service Interval Warning 2648<br />
Generator Unavailable to Start/Run 3677<br />
EPS Supplying Load 3829<br />
Air Damper Closed 4000<br />
ATS in Normal Position 4001<br />
ATS in Emergency Position 4002<br />
Battery Charger Failure 4003<br />
Generator Breaker Closed 4004<br />
Utility Breaker Closed 4005<br />
Engine in Cooldown 4006<br />
Generator Control Not in Automatic Warning 4007<br />
Generator Breaker Failure to Open 4009<br />
Generator Breaker Failure to Close 4011<br />
Generator Breaker Open 4013<br />
Loss of Utility 4017<br />
Generator Breaker Locked Out 4018<br />
Utility Breaker Locked Out 4019<br />
Bus Phase Sequence Incorrect 4024<br />
Generator Phase Sequence Incorrect 4025<br />
Earth Fault 4028<br />
Earth Leakage 4029<br />
Engine Running 4244<br />
Page 204<br />
©2013 Caterpillar<br />
All rights reserved.
Application and Installation Guide<br />
<strong>EMCP</strong> 4.1, <strong>4.2</strong> Generator Set Control<br />
If the Trigger Condition Severity Level is programmed for Diagnostic, then the Failure<br />
Mode Identifier for any pair of LED’s can be configured as any of the following:<br />
Data Erratic, Intermittent, or Incorrect<br />
Voltage Above Normal, or Shorted to High<br />
Source<br />
Voltage Below Normal, or Shorted to Low<br />
Source<br />
Current Below Normal or Open Circuit<br />
Current Above Normal or Grounded Circuit<br />
Mechanical System Not Responding or Out of<br />
Adjustment<br />
Abnormal Frequency or Pulse Width or Period<br />
Abnormal Update Rate<br />
Abnormal Rate of Change<br />
Root Cause Not Known<br />
Bad Intelligent Device or Component<br />
Out Of Calibration<br />
Special Instructions<br />
Received Network Data In Error<br />
Data Drifted High<br />
Data Drifted Low<br />
17.3 THERMOCOUPLE MODULE (<strong>EMCP</strong> <strong>4.2</strong> ONLY)<br />
THERMOCOUPLE FEATURES<br />
Reads up to 20 Type J or K thermocouple inputs<br />
Temperatures are configured to indicate the SAE<br />
CAN J1939 SPN to be transmitted by that<br />
temperature input. Suspect Parameter Numbers<br />
(SPNs) for configuration of temperature inputs are<br />
customer specific. Resolution: One byte<br />
parameters have a resolution of 1 C / bit and a<br />
range of -40 C to 210 C. Two byte parameters<br />
have resolution of 0.03125 C / bit and a range of -<br />
273 C to 1735 C<br />
Cold junction compensation is provided<br />
System throughput has all 20 channels scanned in 2 seconds (100 ms/channel)<br />
Overall drift with temperature is 0.015% / C of span (maximum)<br />
Module is fully functional during configuration and communications<br />
Parameter values and diagnostic error codes are retained when the modules<br />
are de-energized<br />
Open-circuit and short-circuit diagnostics are supported<br />
Can be mounted directly on the generator set panel or remotely<br />
Suitable for moist, high shock and vibration environments<br />
Compact size (see mechanical drawing, Figure 47).<br />
©2013 Caterpillar<br />
All rights reserved. Page 205
<strong>EMCP</strong> 4.1, <strong>4.2</strong> Generator Set Control<br />
Application and Installation Guide<br />
THERMOCOUPLE SPECIFICATIONS<br />
ELECTRICAL SPECIFICATIONS<br />
Accept 5-32 VDC power (12 or 24 VDC nominal)<br />
Over voltage capability is 32 VDC for 1 hour @ 85C<br />
Power supply inputs are protected against transient surges and short circuits<br />
and are isolated from I/O<br />
Three way isolation is provided for the CAN line, inputs and power supply<br />
Burden is limited to less than 200 mA; inrush not to exceed 800 mA<br />
Common mode rejection is -80 db@ 5V p-p (50-60 Hz)<br />
Common mode input range is +/- 4 V minimum<br />
Designed to meet relevant European standards for EMI/RFI/Immunity without<br />
the use of external filtering<br />
ENVIRONMENTAL SPECIFICATIONS<br />
Encapsulated in a rugged aluminum housing with watertight Deutsch connectors<br />
(IP65 rating)<br />
Operating temperature range -40C to 85C (-40F to 185F)<br />
The ambient storage temperature range is -50C to +120C<br />
It is protected against 95% humidity non-condensing, 30C to 60C<br />
NETWORK COMMUNICATIONS INTERFACE<br />
Capable of operating on the <strong>EMCP</strong> 4 Accessory CAN (2) data link<br />
Optical isolation is provided for the CAN line<br />
Retains current date and time relative to synchronization every 24 hours (or upon<br />
boot up) with equipment system time via an explicit command from the <strong>EMCP</strong> 4<br />
or Service Tool when the <strong>EMCP</strong> 4 is not available; synchronization time is<br />
accurate to within 1 second<br />
Includes a watchdog timer to atomically reboot should the microprocessor lock<br />
Module operates normally with loss of communication link, retaining configured<br />
values and error codes in non-volatile memory<br />
Configuration and firmware updates are accomplished with the Cat Service Tool<br />
over the CAN network<br />
Page 206<br />
©2013 Caterpillar<br />
All rights reserved.
Application and Installation Guide<br />
<strong>EMCP</strong> 4.1, <strong>4.2</strong> Generator Set Control<br />
THERMOCOUPLE WIRING<br />
POWER AND CAN BUS WIRING<br />
THERMOCOUPLE SENSOR WIRING<br />
©2013 Caterpillar<br />
All rights reserved. Page 207
<strong>EMCP</strong> 4.1, <strong>4.2</strong> Generator Set Control<br />
Application and Installation Guide<br />
THERMOCOUPLE PHYSICAL LAYOUT<br />
Figure 47: Thermocouple, RTD, And Discrete I/O Module Physical Layout<br />
THERMOCOUPLE MODULE – CONFIGURATION<br />
The Thermocouple module is field programmable using the Cat Service Tool. It is also<br />
flash programmable to update software using the Cat Service Tool.<br />
The service tool software must be installed on a Windows PC. The Cat communication<br />
adapter must be connected between the PC and the CAN data link on which the target<br />
Thermocouple module is connected. When connecting the Thermocouple module, the<br />
user will first see the Module Summary screen shown in Figure 48.<br />
Figure 48: Cat Service Tool Thermocouple Module Summary Screen<br />
Page 208<br />
©2013 Caterpillar<br />
All rights reserved.
Application and Installation Guide<br />
<strong>EMCP</strong> 4.1, <strong>4.2</strong> Generator Set Control<br />
The service tool configuration tool contains setpoints for configuring the Thermocouple<br />
module identification, as well as the thermocouple inputs.<br />
Figure 49 shows the ECM Identification Parameters list. This list shows the ECM serial<br />
number (read-only) of the module that is connected, and allows for configuration of the<br />
ECU instance. Each thermocouple module on the data link must have a unique ECU<br />
instance. If ECU instances are duplicated, one of the modules must be disconnected<br />
and the other reconfigured to a different ECU instance.<br />
Note: ECU Instance #1 is reserved for the Accessory Data Link (CAN 2), while ECU<br />
Instance #2 is reserved for the Primary Data Link (CAN 1).<br />
Figure 49: Cat Service Tool Thermocouple Module Identification Parameters<br />
Upon changing the ECU instance, the Cat Service Tool will automatically reconnect to<br />
the data link, and the Thermocouple module name should reflect the<br />
new ECU instance. In this example, as shown in Figure 50, the module was previously<br />
named Thermocouple Module #1, and after the ECU instance is changed to 2 and the<br />
service tool reconnects, the name reads Thermocouple Module #2.<br />
Figure 50: Cat Service Tool Thermocouple Module After ECU Instance Change<br />
©2013 Caterpillar<br />
All rights reserved. Page 209
<strong>EMCP</strong> 4.1, <strong>4.2</strong> Generator Set Control<br />
Application and Installation Guide<br />
CONFIGURING THERMOCOUPLE INPUTS<br />
Figure 51 shows the THERMOCOUPLE INPUT #1 Configuration list, when using the Cat<br />
Service Tool. All twenty thermocouple inputs have identical parameters and options.<br />
Figure 51: Cat Service Tool Thermocouple Input Configuration<br />
The SENSOR TYPE CONFIGURATION selects either a J or K type configuration. Select the<br />
appropriate configuration based on the type of thermocouple installed. Reference the<br />
TC Module specification sheet (LEHE0126) for available Temperature Inputs.<br />
The SUSPECT PARAMETER NUMBER (SPN) is a numerical entry between a predetermined<br />
list of SPNs that are supported by the Thermocouple module. All of the thermocouple<br />
inputs support the same list of SPNs. To change the SPN, type in the number that<br />
corresponds with the desired parameter as shown in Figure 52. See UENR1209 for<br />
specific information on what possible SPN values can be used.<br />
The HIGH TEMPERATURE SHUTDOWN EVENT THRESHOLD sets the temperature at which a<br />
high shutdown event will occur.<br />
The HIGH TEMPERATURE WARNING EVENT THRESHOLD sets the temperature at which a<br />
high warning event will occur.<br />
Figure 52: Cat Service Tool Thermocouple Module Suspect Parameter Number<br />
Page 210<br />
©2013 Caterpillar<br />
All rights reserved.
Application and Installation Guide<br />
<strong>EMCP</strong> 4.1, <strong>4.2</strong> Generator Set Control<br />
The LOW TEMPERATURE WARNING EVENT THRESHOLD sets the temperature at which<br />
a low warning event will occur.<br />
The EVENT NOTIFICATION DELAY TIME sets the amount of time the threshold must be<br />
exceeded until the Thermocouple module triggers that particular event on the data link.<br />
Each of the delay time options corresponds with a particular event type.<br />
17.4 RTD MODULE (<strong>EMCP</strong> <strong>4.2</strong> ONLY)<br />
RTD FEATURES<br />
Reads up to eight (8) Platinum RTD inputs with 2, 3,<br />
and 4 wire configurations<br />
System throughput has all 8 channels scanned in<br />
2 seconds (250 ms/channel)<br />
Overall drift with temperature is 15M Ohm/C<br />
(maximum)<br />
Module is fully functional during configuration and<br />
communications<br />
Parameter values and diagnostic error codes are<br />
retained when the modules are de-energized<br />
Suitable for moist, high shock and vibration<br />
environments<br />
Compact size (see mechanical drawing, Figure 53)<br />
©2013 Caterpillar<br />
All rights reserved. Page 211
<strong>EMCP</strong> 4.1, <strong>4.2</strong> Generator Set Control<br />
Application and Installation Guide<br />
RTD SPECIFICATIONS<br />
ELECTRICAL SPECIFICATIONS<br />
Accept 5-32 VDC power (12 or 24 VDC nominal)<br />
Over voltage capability is 32 VDC for 1 hour @ 85C<br />
Power supply inputs are protected against transient surges and short circuits and<br />
are isolated from I/O<br />
Optical isolation is 500 VDC from input to ground (three way isolation is provided<br />
for the CAN line, inputs and power supply)<br />
Burden is limited to less than 200 mA; inrush not to exceed 800 mA<br />
Designed to meet relevant European standards for EMI/RFI/Immunity without the<br />
use of external filtering<br />
ENVIRONMENTAL SPECIFICATIONS<br />
Encapsulated in a rugged aluminum housing with watertight Deutsch connectors<br />
(IP65 rating)<br />
Operating temperature range -40C to 85C (-40F to 185F)<br />
The ambient storage temperature range is -50C to +120C<br />
Protected against 95% humidity non-condensing, 30C to 60C<br />
NETWORK COMMUNICATIONS INTERFACE<br />
Operates on the <strong>EMCP</strong> 4 Accessory CAN Data Links<br />
Optical isolation is provided for the CAN line<br />
Retains current date and time relative to synchronization every 24 hours (or upon<br />
boot up) with equipment system time via an explicit command from the <strong>EMCP</strong> 4<br />
or Service Tool when the GSC is not available; synchronization time is accurate<br />
to within 1 second<br />
Includes a watchdog timer<br />
Module operates normally with loss of communication link, retaining configured<br />
values and error codes in non-volatile memory<br />
Configuration and firmware updates are accomplished with the Cat Service Tool<br />
over the CAN network<br />
Page 212<br />
©2013 Caterpillar<br />
All rights reserved.
Application and Installation Guide<br />
<strong>EMCP</strong> 4.1, <strong>4.2</strong> Generator Set Control<br />
RTD WIRING<br />
POWER AND CAN BUS WIRING<br />
RTD SENSOR WIRING<br />
RTD WIRING TYPICAL CONNECTIONS<br />
©2013 Caterpillar<br />
All rights reserved. Page 213
<strong>EMCP</strong> 4.1, <strong>4.2</strong> Generator Set Control<br />
Application and Installation Guide<br />
RTD PHYSICAL LAYOUT<br />
Figure 53: Thermocouple, RTD, And Discrete I/O Module Physical Layout<br />
RTD MODULE – CONFIGURATION<br />
The RTD (Resistance Temperature Detector) module is field programmable using the<br />
Cat Service Tool. It is also flash programmable to update software using the Cat Service<br />
Tool.<br />
The service tool software must be installed on a Windows PC.<br />
The Cat communication adapter must be connected between the PC and the CAN data<br />
link on which the target RTD module is connected.<br />
When connecting to the RTD module, the user will first see the Module Summary screen<br />
shown in Figure 54.<br />
Figure 54: Cat Service Tool RTD Module Summary Screen<br />
Page 214<br />
©2013 Caterpillar<br />
All rights reserved.
Application and Installation Guide<br />
<strong>EMCP</strong> 4.1, <strong>4.2</strong> Generator Set Control<br />
The service tool configuration tool, accessed by pressing F5 or clicking the configuration<br />
tool icon on the toolbar, contains setpoints for configuring the RTD module identification,<br />
as well as the RTD inputs.<br />
CONFIGURING RTD INPUTS<br />
The RTD Input #1 Configuration list of the service tool configuration tool is shown<br />
in Figure 55. All eight RTD inputs have identical parameters and options.<br />
Figure 55: Cat Service Tool RTD Module Digital Input Configuration<br />
The SENSOR TYPE CONFIGURATION selects between a 2, 3, or 4 wire configuration. Select<br />
the appropriate configuration based on the type of RTD sensor installed. Reference the<br />
RTD Module specification sheet (LEHE0124) for available Temperature Inputs.<br />
The TEMPERATURE COEFFICIENT CONFIGURATION selects between an IEC Platinum, JIS<br />
Platinum, Legacy US Platinum, SA MA Platinum or US Platinum type of RTD sensor.<br />
Select the appropriate configuration based on the type of RTD sensor installed.<br />
The SUSPECT PARAMETER NUMBER (SPN) is a choice between a predetermined list of<br />
SPNs that are supported by the RTD module. All of the RTD inputs support the same<br />
list of SPNs. To change the SPN, type in the number that corresponds to the desired<br />
parameter as shown in Figure 56. See UENR1209 for specific information on what<br />
possible SPN values can be used.<br />
The HIGH TEMPERATURE SHUTDOWN EVENT THRESHOLD sets the high temperature at<br />
which a shutdown event will occur.<br />
The HIGH TEMPERATURE WARNING EVENT THRESHOLD sets the high temperature at which<br />
a high warning event will occur.<br />
The LOW TEMPERATURE WARNING EVENT THRESHOLD sets the low temperature at which<br />
a low warning event will occur.<br />
The EVENT NOTIFICATION DELAY TIME sets the amount of time the threshold must be<br />
reached until the RTD module triggers that particular event on the data link. Each of<br />
the delay time options corresponds with a particular event type.<br />
©2013 Caterpillar<br />
All rights reserved. Page 215
<strong>EMCP</strong> 4.1, <strong>4.2</strong> Generator Set Control<br />
Application and Installation Guide<br />
Figure 56: Cat Service Tool RTD Module Suspect Parameter Number<br />
17.5 DISCRETE I/O MODULE (<strong>EMCP</strong> <strong>4.2</strong> ONLY)<br />
The <strong>EMCP</strong> Discrete I/O (DIO) module is designed for<br />
mounting on generator sets or remotely, to provide<br />
auxiliary switch inputs or relay contact outputs. Up to 4<br />
DIO modules can be used on the <strong>EMCP</strong> <strong>4.2</strong> Accessory<br />
CAN Data Link, given that they are programmed to<br />
unique ECU Instance numbers.<br />
DISCRETE I/O FEATURES<br />
Reads twelve (12) discrete inputs and sets eight<br />
(8) Form C Relay Outputs<br />
Converts between physical I/O and CAN data link<br />
commands<br />
System throughput: All channels are scanned<br />
in 100 ms<br />
Low-Level input voltage range: 0 to 0.8 V<br />
High-Level input voltage range: 3.75 to 24V<br />
Inputs have internal pull-up resistors<br />
LED to indicate communication network status<br />
Compact size (see mechanical drawing, Figure 57)<br />
Page 216<br />
©2013 Caterpillar<br />
All rights reserved.
Application and Installation Guide<br />
<strong>EMCP</strong> 4.1, <strong>4.2</strong> Generator Set Control<br />
DISCRETE I/O SPECIFICATIONS<br />
ELECTRICAL SPECIFICATIONS<br />
Accept 5-32 VDC power (12 or 24VDC nominal)<br />
Over voltage capability is 32 VDC for 1 hour @ 85C<br />
Resistive Loads rated for 3A@30 VDC<br />
Normally Closed (NC) relay contacts rated for 2A@125 V AC / 2A@30 VDC<br />
Normally Open (NO) relay contacts rated for 2A@125 V AC / 2A@30 VDC<br />
Maximum current draw of 400mA + 50mA per energized relay @ 12VDC/24VDC<br />
Power supply inputs are protected against transient surges and short circuits<br />
and are isolated from I/O<br />
ENVIRONMENTAL SPECIFICATIONS<br />
Encapsulated in a rugged aluminum housing with Deutsch connectors<br />
(IP65 rating)<br />
Operating temperature range -40C to 85C (-40F to 185F)<br />
The ambient storage temperature range is -50C to +120C<br />
It is protected against 95% humidity non-condensing, 30C to 60C<br />
Designed to meet relevant European standards for EMI/RFI/Immunity without<br />
the use of external filtering<br />
NETWORK COMMUNICATIONS INTERFACE<br />
Operates on the <strong>EMCP</strong> <strong>4.2</strong> Accessory CAN Data Link<br />
Node address is auto configurable<br />
Optical isolation is provided for the CAN line<br />
Retains current date and time relative to synchronization every 24 hours (or upon<br />
boot up) with equipment system time via an explicit command from the <strong>EMCP</strong> 4<br />
or Service Tool when the GSC is not available; synchronization time is accurate<br />
to within 1 second<br />
Includes a watchdog timer to automatically reboot should the microprocessor<br />
lock<br />
Module operates normally with loss of communication link, retaining configured<br />
values and error codes in non-volatile memory<br />
Configuration and firmware updates are accomplished with the Cat Service Tool<br />
over the CAN network<br />
Monitored parameters and alarms are read-only over the network<br />
©2013 Caterpillar<br />
All rights reserved. Page 217
<strong>EMCP</strong> 4.1, <strong>4.2</strong> Generator Set Control<br />
Application and Installation Guide<br />
DISCRETE I/O WIRING<br />
POWER AND CAN BUS WIRING<br />
I/O WIRING TYPICAL CONNECTIONS<br />
INPUT<br />
OUTPUT<br />
LOAD - LOAD<br />
DIN<br />
GND<br />
NO NC C<br />
Table 29: Discrete I/O<br />
INPUTS PIN OUTPUTS PIN OUTPUTS PIN<br />
DIN1 1 NC_1 5 C_6 19<br />
DIN2 11 C_1 6 NO_6 20<br />
DIN3 21 NO_1 7 NC_7 28<br />
DIN4 31 NC_2 15 C_8 29<br />
DIN5 2 C_2 16 NO_7 30<br />
DIN6 12 NO_2 17 NC_8 38<br />
DIN7 22 NC_3 25 C_8 39<br />
DIN8 32 C_3 26 NO_8 40<br />
DIN9 3 NO_3 27<br />
DIN10 13 NC_4 35<br />
DIN11 23 C_4 36<br />
DIN12 33 NO_4 37<br />
GND 4 NC_5 8<br />
GND 14 C_5 9<br />
GND 24 NO_5 10<br />
GND 34 NC_6 18<br />
NO = Normally Open<br />
NC = Normally Closed<br />
C = Common<br />
Note: The GND pin is not the package ground, but the Isolated Reference for the module.<br />
Page 218<br />
©2013 Caterpillar<br />
All rights reserved.
Application and Installation Guide<br />
<strong>EMCP</strong> 4.1, <strong>4.2</strong> Generator Set Control<br />
DISCRETE I/O PHYSICAL LAYOUT<br />
Figure 57: Thermocouple, RTD, And Discrete I/O Module Physical Layout<br />
DISCRETE I/O SOFTWARE CONFIGURATION<br />
The DIO module is field-programmable using the Cat Service Tool. It is also flash<br />
programmable to update software using the Cat Service Tool.<br />
The service tool software must be installed on a Windows PC. The Cat communication<br />
adapter must be connected between the PC and the CAN data link on which the target<br />
DIO module is connected. (The service tool may be connected to the <strong>EMCP</strong> 4<br />
Accessory Data Link service connector).<br />
Figure 58: Cat Service Tool DIO Summary Screen<br />
When connecting to the DIO, the user will first see the Module Summary screen shown<br />
in Figure 58. The service tool configuration tool, accessed by pressing F5 or clicking the<br />
configuration tool icon on the toolbar, contains setpoints for configuring the DIO<br />
identification, as well as the inputs and outputs.<br />
©2013 Caterpillar<br />
All rights reserved. Page 219
<strong>EMCP</strong> 4.1, <strong>4.2</strong> Generator Set Control<br />
Application and Installation Guide<br />
Figure 59: Cat Service Tool DIO Identification Parameters<br />
Figure 59 shows the ECM Identification Parameters list. This list shows the ECM serial<br />
number (read-only) of the module that is connected, and allows for configuration of the<br />
ECU instance.<br />
Note: It is important to match a specific module to a certain ECU Instance. The system<br />
will not function properly if ECU instances are duplicated.<br />
Upon changing the ECU instance, the Cat Service Tool will automatically disconnect and<br />
reconnect to the data link, and the DIO module name should reflect the new ECU instance.<br />
In the example shown in Figure 60, the module was previously named Discrete I/O<br />
Module #1, and after the ECU instance is changed to 2 and the service tool reconnects,<br />
the name reads Discrete I/O Module #2.<br />
Figure 60: Cat Service Tool DIO After ECU Instance Change<br />
Page 220<br />
©2013 Caterpillar<br />
All rights reserved.
Application and Installation Guide<br />
<strong>EMCP</strong> 4.1, <strong>4.2</strong> Generator Set Control<br />
CONFIGURING DIGITAL INPUTS<br />
Figure 61 shows the Discrete Input #1 Configuration list using the service tool<br />
configuration tool. All twelve discrete inputs have identical parameters and options.<br />
Figure 61: Cat Service Tool DIO Digital Input Configuration<br />
The active state configuration determines which state (high or low) triggers the event,<br />
and depends on the sensor/switch wiring configuration.<br />
The event notification delay time sets the amount of time the input must remain active<br />
until the DIO module triggers an event on the data link.<br />
©2013 Caterpillar<br />
All rights reserved. Page 221
<strong>EMCP</strong> 4.1, <strong>4.2</strong> Generator Set Control<br />
Application and Installation Guide<br />
SUSPECT PARAMETER NUMBER (SPN)<br />
The suspect parameter number (SPN) is a choice from a predetermined list of SPNs<br />
that are supported by the DIO module. All of the discrete inputs support the same list of<br />
SPNs, except Custom Event.<br />
Discrete Input #1, when set to Custom Event, will trigger an event for Custom Event #1.<br />
Discrete Input #2, when set to Custom Event, will trigger an event for Custom Event #2;<br />
likewise for all twelve discrete inputs.<br />
Note: Discrete Inputs configured for Custom Event SPNs (701-718) are shared between<br />
the <strong>EMCP</strong> and DIO Modules. Therefore ONLY one Custom Event SPN-FMI can be used<br />
between the two modules for each Input #.<br />
FAILURE MODE IDENTIFIER (FMI)<br />
The FAILURE MODE IDENTIFIER (FMI) configures what type of failure this event will<br />
represent. The technician is free to configure any FMI for any SPN, but discretion must<br />
be used. Certain combinations may not be meaningful (i.e. the <strong>EMCP</strong> 4 may not be<br />
configurable to display or trigger a response for certain combinations of SPN and FMI).<br />
For example, a Fuel Level SPN with a Condition Exists FMI is not meaningful; the <strong>EMCP</strong> 4<br />
can be configured to display or react to only fuel level low or high warnings or shutdowns.<br />
CONFIGURING RELAY OUTPUTS<br />
The Relay Output #1 Configuration list of the service tool configuration tool is shown<br />
in Figure 62. All eight Relay Outputs have identical parameters and options.<br />
The suspect parameter number (SPN) is a choice from a predetermined list of SPNs<br />
that are supported by the DIO module. If you wish to configure the DIO to trigger an<br />
output based on an event on the data link related to a specific SPN, the SPN must be<br />
selected here.<br />
Figure 62: Cat Service Tool DIO Relay Output Configuration<br />
The trigger condition is a list of conditions that will trigger this output. For the<br />
conditions labeled specific event, the relay will be activated upon receiving a category of<br />
events (either a single FMI or a set of FMIs) for the SPN selected in the suspect<br />
parameter number parameter. For the conditions labeled general event, the relay will<br />
be activated upon receiving a category of events (either a single FMI or a set of FMIs)<br />
for any SPN.<br />
In this case, the DIO module will ignore the entry in the suspect parameter number<br />
parameter. If the disabled condition is chosen, the Relay Output will not activate on<br />
any condition.<br />
Page 222<br />
©2013 Caterpillar<br />
All rights reserved.
Application and Installation Guide<br />
<strong>EMCP</strong> 4.1, <strong>4.2</strong> Generator Set Control<br />
18 SCADA (MODBUS) DATA LINK (<strong>EMCP</strong> <strong>4.2</strong> ONLY)<br />
The SCADA DATA LINK or MODBUS is supported on the <strong>EMCP</strong> <strong>4.2</strong>.<br />
The <strong>EMCP</strong> <strong>4.2</strong> has a SUPERVISORY CONTROL AND DATA ACQUISITION (SCADA)<br />
communications link between the controller and a host device using the MODBUS<br />
protocol. The host device is able to remotely monitor or control the genset package<br />
equipped with the <strong>EMCP</strong> 4 in much the same way an operator does from the panel.<br />
<br />
<br />
<br />
<br />
The host device connects to the <strong>EMCP</strong> GSC through an RS-485 SCADA<br />
Data Link (Modbus RTU, Half Duplex).<br />
The data is transmitted in a binary format over the serial connection.<br />
The host device acts as Modbus Master, and the <strong>EMCP</strong> 4 acts as the<br />
Modbus Slave, also called a REMOTE TRANSMITTER UNIT (RTU).<br />
The host device initiates all communication, sending commands or<br />
requests for information to the <strong>EMCP</strong> 4.<br />
The <strong>EMCP</strong> 4 then takes action based on the query and/or sends a<br />
response to the query over Modbus.<br />
Baud rates can be configured on the <strong>EMCP</strong> 4. Various data rates between 9600<br />
bits/second (baud) and 57,600 bits/second are available. See the SOFTWARE<br />
CONFIGURATION Chapter 18.3 for instructions.<br />
For more information on the SCADA Data Link, refer to the <strong>EMCP</strong> 4 SCADA DATA<br />
LINKS A & I <strong>GUIDE</strong> (LEBE0010).<br />
Note: The <strong>EMCP</strong> 4 controller defaults to NOT allowing Remote Genset Control via<br />
SCADA communications. This setting can be changed from the display under MAIN<br />
MENU/CONFIGURE/ALL SETPOINTS/CONTROL/AUTO START/STOP/REMOTE<br />
GENSET CONTROL ENABLE STATUS.<br />
Note: This port may be required to be used to communicate to switchgear or other<br />
monitoring device. Only a single host device can be used with this port.<br />
18.1 WIRING<br />
SCADA COMMUNICATION wires are brought out of the <strong>EMCP</strong> <strong>4.2</strong> as part of the 70-pin<br />
connector. The pins, as designated on the <strong>EMCP</strong> connector, are shown in Table 30.<br />
SCADA COMMUNICATION WIRES<br />
Pin # Name Description<br />
3 MODBUS – Optically isolated half-duplex differential (-) for Modbus<br />
4 MODBUS Reference Half-duplex RS-485 Reference for Modbus<br />
5 MODBUS + Optically isolated half-duplex differential (+) for Modbus<br />
Table 30: SCADA Pins on <strong>EMCP</strong> 70 Pin Connector<br />
©2013 Caterpillar<br />
All rights reserved. Page 223
<strong>EMCP</strong> 4.1, <strong>4.2</strong> Generator Set Control<br />
Application and Installation Guide<br />
MODBUS DATA TRANSMISSION over RS-485 is accomplished over a single shielded<br />
twisted pair for differential signaling with transmit and receive alternating over the same<br />
wire pair (MODBUS+ and MODBUS-). The Reference (MODBUS REF) should be<br />
connected to the shield, to prevent ground loop currents.<br />
<br />
<br />
Figure 63 shows a possible wiring configuration to a RS-485 device.<br />
Figure 64 shows a possible wiring configuration to a RS-485 to RS-232<br />
converter.<br />
Note: See documentation of connected device to verify wiring configuration.<br />
Figure 63: Possible Wiring Configuration To An RS-485 Device<br />
Figure 64: Possible Wiring Configuration To An RS-485 To RS-232 Converter<br />
Page 224<br />
©2013 Caterpillar<br />
All rights reserved.
Application and Installation Guide<br />
<strong>EMCP</strong> 4.1, <strong>4.2</strong> Generator Set Control<br />
18.2 LINE TERMINATION AND POLARIZATION<br />
Both ends of the Modbus lines (or the extreme ends of the trunk, for a multipoint<br />
network) should have termination between MODBUS+ (B) and MODBUS- (A).<br />
A 0.5W 150Ω resistor may be adequate.<br />
If line polarization is implemented (see Software Configuration, Chapter 18.3), a better<br />
choice is a 10 µF capacitor (10V minimum) in series with a 0.25W 120Ω resistor.<br />
A bias resistor may be used for Line Polarization. Line Polarization is used to keep the<br />
network voltages at well-defined levels during silent times to prevent potential false<br />
diagnostics and communication failures. This bias resistor is unique from a termination<br />
resistor. There should only be one device on the network with bias resistors enabled to<br />
polarize the network.<br />
Note: For more details on setting up a Modbus network over a serial line, please refer to<br />
RS-485 specifications or Modbus specifications. See the Software Configuration Chapter<br />
18.3 for instructions on enabling line polarization.<br />
18.3 SOFTWARE CONFIGURATION<br />
CONFIGURING THE SCADA DATA LINK USING THE DISPLAY<br />
The SCADA DATA LINK may require software configuration. The configuration<br />
parameters are accessible on the <strong>EMCP</strong> 4 via the following menu options:<br />
At MAIN MENU, scroll DOWN<br />
to CONFIGURE<br />
Press the OK KEY .<br />
Scroll DOWN<br />
to ALL SETPOINTS<br />
Press the OK KEY .<br />
Scroll DOWN<br />
to NETWORK<br />
Press the OK KEY .<br />
Scroll DOWN<br />
to DATA LINK - SCADA<br />
Press the OK KEY .<br />
©2013 Caterpillar<br />
All rights reserved. Page 225
<strong>EMCP</strong> 4.1, <strong>4.2</strong> Generator Set Control<br />
Application and Installation Guide<br />
Press the OK KEY<br />
DATA LINK BAUD RATE.<br />
to edit the current SCADA<br />
Select the SCADA DATA LINK BAUD RATE that you<br />
want to program<br />
Press the OK KEY .<br />
Scroll DOWN<br />
to SCADA DATA LINK PARITY<br />
Press the OK KEY<br />
to edit the current SCADA<br />
DATA LINK PARITY.<br />
Select the SCADA DATA LINK PARITY that you want<br />
to program<br />
Press the OK KEY .<br />
Scroll DOWN<br />
ADDRESS<br />
to SCADA DATA LINK SLAVE<br />
Press the OK KEY to highlight the current<br />
SCADA DATA LINK SLAVE ADDRESS. Select the<br />
SCADA DATA LINK SLAVE ADDRESS that you want.<br />
Press the OK KEY .<br />
Scroll DOWN<br />
ENABLE STATUS<br />
to RS-485 BIAS RESISTOR<br />
Press the OK KEY to edit the current RS-485<br />
BIAS RESISTOR ENABLE STATUS.<br />
Select the RS-485 BIAS RESISTOR ENABLE STATUS<br />
that you want to program<br />
Press the OK KEY .<br />
Page 226<br />
©2013 Caterpillar<br />
All rights reserved.
Application and Installation Guide<br />
<strong>EMCP</strong> 4.1, <strong>4.2</strong> Generator Set Control<br />
CONFIGURING THE SCADA DATA LINK USING THE CAT SERVICE TOOL<br />
The <strong>EMCP</strong> 4 SCADA Data Link can be configured using the Cat Service Tool. To<br />
program this Data Link, do the following steps:<br />
1. Connect to the <strong>EMCP</strong> 4 using the Cat Service Tool as stated in Chapter <strong>4.2</strong>.<br />
2. Select Data Link – SCADA on the left.<br />
3. Double click SCADA Data Link Baud Rate to change this to the desired value<br />
from the drop down menu. Click the OK button to program.<br />
©2013 Caterpillar<br />
All rights reserved. Page 227
<strong>EMCP</strong> 4.1, <strong>4.2</strong> Generator Set Control<br />
Application and Installation Guide<br />
4. Double click SCADA Data Link Parity to change this value from the drop down<br />
menu. Click the OK button to program.<br />
5. Double click SCADA Data Link Slave Address. Change this value by typing<br />
a new value. Click the OK button to program.<br />
6. Double click SCADA Data Link Access Password. Change this value by typing<br />
a new value. Click the OK button to program.<br />
Page 228<br />
©2013 Caterpillar<br />
All rights reserved.
Application and Installation Guide<br />
<strong>EMCP</strong> 4.1, <strong>4.2</strong> Generator Set Control<br />
7. Double click RS-485 Bias Resistor Enable Status to change this value from<br />
the drop down menu. Keep in mind that the Bias Resistor is not a termination<br />
resistor, but polarizes the RS-485 line. Click the OK button to program.<br />
©2013 Caterpillar<br />
All rights reserved. Page 229
<strong>EMCP</strong> 4.1, <strong>4.2</strong> Generator Set Control<br />
Application and Installation Guide<br />
19 INTEGRATED VOLTAGE REGULATOR<br />
The <strong>EMCP</strong> Integrated Voltage Regulator (IVR) feature is a substitute for a traditional<br />
voltage regulator topology consisting of a dedicated controller (CDVR, VR6…etc) for<br />
regulating voltage. The <strong>EMCP</strong> 4 internal controller regulates generator output voltage by<br />
sending a command to the Excitation Module (EM10/EM15) that controls generator<br />
excitation and therefore generator output voltage.<br />
This feature is available with revised <strong>EMCP</strong> 4.1 (CAT part number: 435-7931) and<br />
<strong>EMCP</strong> <strong>4.2</strong> (CAT part number 431-1966) controllers with software version 4.3PROD and<br />
above. This capability does NOT exist in original <strong>EMCP</strong> 4.1 and <strong>EMCP</strong> <strong>4.2</strong> controllers,<br />
regardless of software version.<br />
Figure 65: <strong>EMCP</strong> Integrated Voltage Regulator System<br />
19.1 IVR FEATURES<br />
When used with an Excitation Module the revised <strong>EMCP</strong> 4.1 and <strong>EMCP</strong> <strong>4.2</strong> controllers<br />
with Integrated Voltage Regulator logic provide:<br />
Automatic Voltage Regulation (AVR)<br />
Programmable stability settings<br />
Soft start control with an adjustable time setting in AVR control mode<br />
Dual Slope, Configurable Under Frequency (Volts/Hz) regulation<br />
<br />
<br />
<br />
Three-phase or single-phase generator voltage (RMS) sensing/regulation in AVR<br />
mode<br />
Setpoint configuration adjustment from the <strong>EMCP</strong> display or CAT ET Service Tool<br />
Voltage Output Adjustment via Display, Analog Input, Digital Input, or SCADA<br />
(Modbus)<br />
IVR Operating Status and Voltage Bias Overview screens to provide an<br />
enhanced level of user interface<br />
Integrated Voltage Regulator event monitoring<br />
The revised <strong>EMCP</strong> <strong>4.2</strong> controllers also offer:<br />
Power Factor Regulation (PF)<br />
Reactive Droop compensation<br />
Line drop compensation<br />
Page 230<br />
©2013 Caterpillar<br />
All rights reserved.
Application and Installation Guide<br />
<strong>EMCP</strong> 4.1, <strong>4.2</strong> Generator Set Control<br />
19.2 HARDWARE INSTALLATION<br />
<strong>EMCP</strong> IVR CONNECTIONS<br />
To regulate the generator terminal voltage the <strong>EMCP</strong> communicates the desired<br />
excitation command to the Excitation Module via a PWM signal. It is recommended that<br />
twisted pair shielded cable is used for this communication link. Table 31 details the<br />
connections to be made between the <strong>EMCP</strong> and Excitation Module.<br />
<strong>EMCP</strong> 4.1, <strong>EMCP</strong> <strong>4.2</strong><br />
70-Pin Connector<br />
Excitation Module<br />
3-Pin Connector<br />
Digital Output #2 / IVR CS+ 68 CS+ P3-2<br />
Battery Negative Splice 60 or 65 CS- P3-3<br />
Battery Negative Splice 60 or 65 Shield P3-1<br />
Table 31: <strong>EMCP</strong> 4.1 & <strong>EMCP</strong> <strong>4.2</strong> Connections to Excitation Module<br />
IVR EXCITATION MODULE<br />
The Integrated Voltage Regulator consists of an <strong>EMCP</strong> 4 interfacing with an Excitation<br />
Module. There is a range of Excitation Modules available to cover the full range of CAT<br />
generator sets.<br />
Figure 66: EM10 Excitation Module & EM15 Excitation Module<br />
Table 32 provides information on the technical specification of the EM10 and EM15<br />
modules. Selection of the appropriate module should be determined by the nominal and<br />
maximum generator excitation current at full load (standby, 0.8PF), and the maximum<br />
AC voltage Input.<br />
Details on nominal field current are available in TMI (Technical Marketing Information) or<br />
from the generator datasheet. Care must be taken on Self-Excited (shunt) generators to<br />
understand how the connections are being made from the winding to the excitation<br />
module in order to understand the maximum AC voltage input. It is recommended that<br />
an intermediate, half-phase to Neutral connection is used for Self-Excited generators.<br />
©2013 Caterpillar<br />
All rights reserved. Page 231
<strong>EMCP</strong> 4.1, <strong>4.2</strong> Generator Set Control<br />
Application and Installation Guide<br />
EM10<br />
EM15<br />
CAT Part Number 398-7247 398-7248<br />
Permanent Magnet (PM)<br />
Compatible Generator Excitation Types<br />
Self-Excitation (SE)<br />
Internal Excitation (AREP)<br />
Nominal Field Current Output 6 Amps 7 Amps<br />
Maximum (forcing) Field Current Output 10 Amps 15 Amps<br />
Maximum AC Voltage Input 180 Vrms 240 Vrms<br />
Exciter Field Resistance (recommended)<br />
6 to 16 ohms<br />
Table 32: EM10 & EM15 Technical Specifications<br />
IVR EXCITATION MODULE PHYSICAL LAYOUT<br />
It is recommended that the Excitation Module should be mounted within the genset<br />
control panel or the generator terminal box in landscape orientation in order to achieve<br />
optimum cooling from the module heat sink. The module should be fixed in place using<br />
4 M6 x 30mm mounting bolts. The torque applied to the mounting bolts should be<br />
5 N.m ± 1 N.m. It is recommended that an M6 washer (external diameter 12mm) is<br />
used with the mounting bolts to protect the module. A dimensioned diagram of the EM10<br />
module is presented in Figure 67. Note that the same dimensions also apply for the<br />
EM15 module.<br />
Page 232<br />
©2013 Caterpillar<br />
All rights reserved.
Application and Installation Guide<br />
<strong>EMCP</strong> 4.1, <strong>4.2</strong> Generator Set Control<br />
Connector<br />
“P3”<br />
Connector<br />
“P2”<br />
Connector<br />
“P4”<br />
Figure 67: EM10 Excitation Module Dimensions (in millimeters)<br />
IVR EXCITATION MODULE CONNECTIONS<br />
The EM10 and EM15 Excitation Modules have three multiple-pin, Mate-n-Lok plug type<br />
connectors. These connectors are labeled “P2”, “P3” and “P4” as shown in Figure 67.<br />
Table 33 describes the signal and function of each connector pin.<br />
Terminal Label Signal/Function<br />
P2-1 F+ Exciter Field Positive<br />
P2-2 F- Exciter Field Negative<br />
P3-1 Shield Excitation Command Control Signal Shield<br />
P3-2 CS+ Excitation Command Control Signal Positive<br />
P3-3 CS- Excitation Command Control Signal Negative<br />
P4-1 X2 Excitation Power Supply Input X2<br />
P4-2 Z1 Excitation Power Supply Input Z1<br />
P4-3 X1 Excitation Power Supply Input X1<br />
P4-4 Z2 Excitation Power Supply Input Z2<br />
Table 33: Excitation Module Connector Pins<br />
©2013 Caterpillar<br />
All rights reserved. Page 233
<strong>EMCP</strong> 4.1, <strong>4.2</strong> Generator Set Control<br />
Application and Installation Guide<br />
Note that connections X2 and Z1 are internally linked within the Excitation Module,<br />
providing a point of common connection for the auxiliary windings where an AREP/IE<br />
excitation supply is available. Alternatively, connections X2 and Z1 may be linked<br />
external to the Excitation Module, and only three connections made to the device (X1,<br />
X2 and Z2). Fully detailed Excitation Module connection diagrams for self-excitation<br />
(shunt), auxiliary windings (AREP/IE) and permanent magnet (PM) are provided in<br />
Appendix C.<br />
IVR EXCITATION MODULE OVER-EXCITATION PROTECTION<br />
The Excitation Module has a built-in over-excitation protection strategy that is designed<br />
to protect the generator from thermal damage. The protection strategy employed is<br />
illustrated in Figure 68.<br />
Under normal conditions the excitation current will remain well below the upper limit and<br />
the GREEN LED on the Excitation Module will be lit continuously.<br />
In the event of a fault condition, for example during a short-circuit on the generator<br />
terminals, the excitation current will increase rapidly, known as ‘field forcing’. The<br />
Excitation Module will limit the forcing current to the defined upper limit for a fixed period<br />
of 10 seconds.<br />
When the Excitation Module is actively limiting the field current a RED LED will flash<br />
indicating a fault condition. After the fixed delay time has expired, the Excitation Module<br />
will ‘limit’ the excitation current to a safer level that is 10% of the upper limit.<br />
When the Excitation Module has shut down the excitation current, the RED LED is lit<br />
continuously and the GREEN LED is not lit. The RED LED will be lit only while voltage is<br />
being supplied to the Excitation Module. In order to reset the excitation current limiting<br />
the excitation current, the power supply must be removed from the Excitation Module by<br />
shutting down the genset.<br />
Page 234<br />
©2013 Caterpillar<br />
All rights reserved.
Application and Installation Guide<br />
<strong>EMCP</strong> 4.1, <strong>4.2</strong> Generator Set Control<br />
Figure 68: Excitation Module Over- Excitation Protection Strategy<br />
The Excitation Limit Potentiometer on the Excitation Module has 270 degrees of rotation<br />
and is used to configure the Excitation Current Upper Limit as shown in Figure 69. Keep<br />
in mind that this must be set for maximum forcing current, and not nominal excitation<br />
current.<br />
EM10 EM15<br />
Minimum Position 4 Amps 6 Amps<br />
Maximum Position 10 Amps 15 Amps<br />
Figure 69: Maximum and Minimum Limits of Excitation Current Limit Potentiometer<br />
IVR EXCITATION MODULE FUSING<br />
The EM10 has internal fusing, therefore it is not necessary to fit external fuses on the<br />
excitation power supply inputs.<br />
The EM15 requires external fusing to be fitted on inputs X1 and Z2. The recommended<br />
fuse for UL listed gensets is a Bussman KTK-10 (Cat part number 6V7802). For non-UL<br />
listed gensets an alternative fuse of Bussman AGC-10RX (Cat part number 3K8782)<br />
may also be used.<br />
Connection diagrams showing the location of external fusing on the EM15 are provided<br />
in Appendix C.<br />
©2013 Caterpillar<br />
All rights reserved. Page 235
<strong>EMCP</strong> 4.1, <strong>4.2</strong> Generator Set Control<br />
Application and Installation Guide<br />
19.3 IVR SOFTWARE CONFIGURATION<br />
The Integrated Voltage Regulator parameters can be accessed using either the CAT ET<br />
Service tool, or directly through the <strong>EMCP</strong> display. Some setpoints are locked at ET only<br />
or at Security Level 3 and cannot be changed from the <strong>EMCP</strong> display or will require a<br />
level 3 password. Please note that ET Service Tool version 2012C or later is<br />
recommended for accessing and adjusting IVR parameters.<br />
To access the Integrated Voltage Regulator setpoints using the ET Service Tool,<br />
connect to the <strong>EMCP</strong> Genset Control and click on the ‘Configuration Tool’ button<br />
(alternatively press F5) to enter the configuration menu. Select ‘Integrated Voltage<br />
Regulator’ from the menu on the left and set Voltage Regulator Control Source<br />
Configuration equal to ‘Genset Control’ to display the following default settings:<br />
To access the Integrated Voltage Regulator setpoints through the <strong>EMCP</strong> display,<br />
navigate to the following sub-menu:<br />
MAIN MENU<br />
CONFIGURE<br />
ALL SETPOINTS<br />
VOLTAGE REGULATOR<br />
If replacing a CDVR with IVR, the parameters can be programmed the same as the<br />
CDVR (using ET scaling) in order to achieve similar performance. If the IVR is a<br />
new installation, or a R450 or VR6 voltage regulator is being replaced, the parameters<br />
can be programmed to the default values with a low loop gain starting in the region<br />
1.0%-5.0%. Note that the default parameters should provide stable voltage control for<br />
most generator sets, however some optimization and tuning may be required to achieve<br />
the desired performance. The following subsections provide further detail on each<br />
individual setpoint, including range, resolution and default values.<br />
Page 236<br />
©2013 Caterpillar<br />
All rights reserved.
Application and Installation Guide<br />
<strong>EMCP</strong> 4.1, <strong>4.2</strong> Generator Set Control<br />
VOLTAGE REGULATOR CONTROL SOURCE CONFIGURATION<br />
Name Options Default Value Access<br />
Voltage Regulator Control 0 = External Control<br />
0 (External Control) ET Service Tool Only<br />
Source Configuration 1 = Genset Control<br />
The Voltage Regulator Control Source Configuration parameter is used to enable or<br />
disable the Integrated Voltage Regulator feature.<br />
<br />
If set to ‘External’ the Integrated Voltage Regulator feature of the <strong>EMCP</strong><br />
is disabled and the genset can run with an external voltage regulator, for<br />
example, CDVR, R450, VR6, etc.<br />
If set to ‘Genset Control’ the Integrated Voltage Regulator feature of the<br />
<strong>EMCP</strong> is enabled and the genset will run using an Excitation Module.<br />
Note that this parameter will only change state if the genset is stopped (stop button<br />
pressed and engine speed 0 rpm), and can only be changed via ET, and not directly<br />
through the <strong>EMCP</strong> display.<br />
It is important that the Voltage Regulator Control Source<br />
Configuration is correctly programmed BEFORE starting<br />
the genset.<br />
In the case where an external voltage regulator is used, if<br />
Voltage Regulator Control Source Configuration is set to<br />
‘Genset Control’, there is a risk of nuisance triggering of<br />
IVR-related warning and shutdown events.<br />
In the case where IVR is to be used but the Voltage<br />
Regulator Control Source Configuration is set to<br />
‘External’, there is a risk that the PWM (DO#2) output may<br />
float high causing the Excitation Module to force the<br />
excitation current to the upper limit and risking damage to<br />
the generator set and/or load.<br />
©2013 Caterpillar<br />
All rights reserved. Page 237
<strong>EMCP</strong> 4.1, <strong>4.2</strong> Generator Set Control<br />
Application and Installation Guide<br />
STARTING PROFILE<br />
Name Min Max Resolution Units Default<br />
Value<br />
Voltage Regulator<br />
Starting Voltage Percent<br />
0.0 90.0 0.1 % 10.0<br />
Voltage Regulator<br />
Starting Time<br />
0.0 60.0 0.1 seconds 3.0<br />
Access<br />
ET Service<br />
Tool or<br />
<strong>EMCP</strong><br />
Display<br />
The starting profile setpoints defined above are used to determine the slope of the<br />
voltage ramp when starting the genset.<br />
If the Voltage Regulator Starting Voltage Percent is zero, the Voltage Regulator Starting<br />
Time defines the time to reach the rated voltage setpoint from the point that the<br />
frequency exceeds the Voltage Regulator Minimum Frequency Threshold. An example<br />
Starting Profile with Voltage Regulator Starting Voltage Percentage set to 0% and<br />
Voltage Regulator Starting Time set to 5 seconds is illustrated in Figure 70.<br />
Figure 70: Starting Profile with Voltage Regulator Starting Voltage set to 0% and Voltage<br />
Regulator Staring Time set to 5 seconds<br />
Page 238<br />
©2013 Caterpillar<br />
All rights reserved.
Application and Installation Guide<br />
<strong>EMCP</strong> 4.1, <strong>4.2</strong> Generator Set Control<br />
If the Voltage Regulator Starting Voltage Percent is non-zero, the Voltage Regulator<br />
Starting Time defines the time to get to the rated voltage setpoint from the point that the<br />
Voltage Regulator Starting Voltage Percent is reached by following the programmed<br />
Volts/Hz slope. An example Starting Profile with Voltage Regulator Starting Voltage<br />
Percentage set to 10% and Voltage Regulator Starting Time set to 3 seconds is<br />
illustrated in Figure 71.<br />
Figure 71: Starting Profile with Voltage Regulator Starting Voltage set to 10% and Voltage<br />
Regulator Staring Time set to 3 seconds<br />
©2013 Caterpillar<br />
All rights reserved. Page 239
<strong>EMCP</strong> 4.1, <strong>4.2</strong> Generator Set Control<br />
Application and Installation Guide<br />
A further example with Voltage Regulator Starting Voltage Percentage set to 90% and<br />
Voltage Regulator Starting Time set to 3 seconds is illustrated in Figure 72.<br />
Figure 72: Starting Profile with Voltage Regulator Starting Voltage set to 90% and Voltage<br />
Regulator Staring Time set to 5 seconds<br />
If the Voltage Regulator Starting Time is set to zero, or the engine has a slow starting<br />
ramp, the Integrated Voltage Regulator will follow the programmed Volts/Hz slopes. The<br />
voltage setpoint during starting is therefore the minimum of the Starting Profile setpoint<br />
and the Under-Frequency Roll-Off (Loading) Profile setpoint.<br />
In order to avoid a large voltage overshoot during starting, particularly on generators with<br />
Shunt or AREP excitation systems, the Excitation Command output from the <strong>EMCP</strong> is<br />
limited to a maximum value of 20% during starting. This prevents integral windup within<br />
the PID controller in the case where, during starting, there is insufficient residual voltage<br />
at the generator output to build excitation.<br />
Once the frequency exceeds the Voltage Regulator Corner Frequency threshold<br />
and the nominal voltage setpoint has been reached, the Integrated Voltage Regulator<br />
will follow the Under-Frequency Roll-Off (Loading) Profile. The Starting Profile will not be<br />
initiated again until the frequency drops below the Voltage Regulator Minimum<br />
Frequency Threshold.<br />
Page 240<br />
©2013 Caterpillar<br />
All rights reserved.
Application and Installation Guide<br />
<strong>EMCP</strong> 4.1, <strong>4.2</strong> Generator Set Control<br />
IVR PID GAIN SETPOINTS<br />
Name Min Max Resolution Units Default<br />
Value<br />
Voltage Regulator Loop Gain<br />
Percentage<br />
Voltage Regulator<br />
Proportional Gain Percentage<br />
Voltage Regulator Integral<br />
Gain Percentage<br />
Voltage Regulator Derivative<br />
Gain Percentage<br />
Voltage Regulator Noise<br />
Filter Time Constant<br />
0.00 100.00 0.01 % 5.00<br />
0.00 100.00 0.01 % 20.00<br />
0.00 100.00 0.01 % 60.00<br />
0.00 100.00 0.01 % 3.00<br />
0.00 1.00 0.01 seconds 0.00<br />
Access<br />
ET<br />
Service<br />
Tool or<br />
<strong>EMCP</strong><br />
Display<br />
ET<br />
Service<br />
Tool Only<br />
(Level 3<br />
Password)<br />
The PID gain setpoints can be tuned to achieve the desired voltage response depending<br />
on the application and genset configuration. The default parameters have been selected<br />
to provide stable voltage control on most generators, however some optimization may be<br />
required.<br />
If the voltage regulation appears unstable, it may be necessary to reduce the Voltage<br />
Regulator Loop Gain Percentage to achieve stability. As a guideline, decreasing in steps<br />
of 0.5-1.0% is generally sufficient to observe a noticeable improvement.<br />
If the voltage response appears sluggish, it is recommended to increase the Voltage<br />
Regulator Loop Gain Percentage to achieve the desired response. Increasing in steps of<br />
0.5-1.0% is generally sufficient to observe a noticeable improvement.<br />
©2013 Caterpillar<br />
All rights reserved. Page 241
<strong>EMCP</strong> 4.1, <strong>4.2</strong> Generator Set Control<br />
Application and Installation Guide<br />
UNDER-FREQUENCY ROLL-OFF (LOADING) PROFILE<br />
Name Min Max Resolution Units Default<br />
Value<br />
Voltage Regulator Corner<br />
Frequency<br />
45.0 65.0 0.1 Hz 48.0<br />
Voltage Regulator Deviation<br />
From Corner <br />
Frequency<br />
Voltage Regulator Volts/Hz<br />
Slope 1<br />
Voltage Regulator Volts/Hz<br />
Slope 2<br />
Voltage Regulator Minimum<br />
Voltage <br />
Percentage<br />
Voltage Regulator Minimum<br />
Frequency Threshold<br />
0.0 10.0 0.1 Hz 5.0<br />
0.0 10.0 0.1 Volts/Hz 2.0<br />
0.0 10.0 0.1 Volts/Hz 2.0<br />
30 100 1 % 50<br />
20 40 1 Hz 20<br />
Access<br />
ET Service Tool<br />
or <strong>EMCP</strong><br />
Display<br />
The “Voltage Regulator Knee Frequency” needs to be configured for your specific<br />
package requirements. The Knee Frequency for 50Hz operation will usually be between<br />
48.0 and 49.8Hz, whereas for 60Hz operation this parameter should be set between<br />
58.0 to 59.8 Hz.<br />
An example Under-Frequency Roll-Off (Loading) Profile is illustrated in Figure 73.<br />
Figure 73: Example Under-Frequency (Loading) Profile, Slope1 = 1.0 V/Hz, Slope2 = 2.0 V/Hz<br />
Page 242<br />
©2013 Caterpillar<br />
All rights reserved.
Application and Installation Guide<br />
<strong>EMCP</strong> 4.1, <strong>4.2</strong> Generator Set Control<br />
VOLTAGE REGULATOR LOAD COMPENSATION TYPE CONFIGURATION<br />
Name Options Default Value Access<br />
Voltage Regulator Load<br />
Compensation Type Configuration<br />
0 = OFF<br />
1 = IR Compensation<br />
2 = Voltage Droop<br />
0<br />
ET Service Tool<br />
or <strong>EMCP</strong><br />
Display<br />
The load compensation features of IR Compensation and Voltage Droop are explained<br />
in sections below.<br />
Note: IR Compensation and Voltage Droop are mutually exclusive features designed for<br />
different applications; therefore it is not possible to enable both compensation types at<br />
the same time.<br />
LINE LOSS (IR) COMPENSATION<br />
Name Min Max Resolution Units Default Value Access<br />
Voltage Regulator Voltage<br />
(IR) Compensation<br />
Percentage<br />
0.0 10.0 0.1 % 0.0<br />
ET Service Tool<br />
or <strong>EMCP</strong><br />
Display<br />
In some installations where a single generator is used with long feeder lines to the load,<br />
it may be advantageous to provide line loss compensation. Line loss compensation is<br />
commonly referred to as IR compensation.<br />
Current flowing through a long conductor causes a voltage drop due to the resistance of<br />
the wire. Therefore, the voltage at the load end of the conductor will be lower than the<br />
voltage at the generator end due to the voltage drop along the conductor. This condition<br />
is commonly referred to as line loss. In order to improve the power quality the IVR can<br />
compensate for this phenomenon. As generator load increases, the IVR will increase the<br />
output voltage at the generator terminals in order to compensate for line losses. The<br />
Voltage Regulator Voltage (IR) Compensation Percentage setpoint controls the quantity<br />
of voltage compensation at the rated kVA load. It should be adjusted to yield a constant<br />
voltage at the location of the load.<br />
For example, if it is observed that the voltage at the load side of the feeder line has<br />
decreased by 5% from rated voltage when the generator is supplying rated kVA load, the<br />
Voltage Regulator (IR) Compensation Percentage should be set to 5.0%. In this case,<br />
the output voltage measured at the generator terminals will increase from 100% to 105%<br />
of rated voltage as the generator load increases from 0% to 100% of rated kVA, as<br />
illustrated in Figure 74.<br />
If a bias is applied to the voltage setpoint from an external source, the IR compensation<br />
percentage is applied to the nominal setpoint plus the bias percentage. For example, if a<br />
+10% or -10% bias were applied to the nominal voltage, the voltage setpoint would<br />
increase linearly as shown by the Upper and Lower Bias Limit dashed lines indicated on<br />
the diagram presented in Figure 74.<br />
©2013 Caterpillar<br />
All rights reserved. Page 243
<strong>EMCP</strong> 4.1, <strong>4.2</strong> Generator Set Control<br />
Application and Installation Guide<br />
Figure 74: Line Loss voltage setpoint change based on total (kVA) load<br />
Note: It is important that the capability of the machine is not exceeded during operation.<br />
REACTIVE DROOP COMPENSATION<br />
Name Min Max Resolution Units Default Value Access<br />
Voltage Regulator Maximum<br />
Droop Percentage<br />
0.0 10.0 0.1 % 0.0<br />
ET Service Tool<br />
or <strong>EMCP</strong><br />
Display<br />
When generators operate in parallel, two primary objectives are for the generators to<br />
share both the real power requirements and the reactive power requirements of the<br />
system electrical load. The engine governors will control sharing of the real power<br />
requirements (kW) and the voltage regulators will control sharing of the reactive power<br />
requirements (kVAr) of the total system load. When one or more generators are<br />
connected in parallel, the voltage measured at the output terminals of each generator<br />
will be the same. However, if the voltage setpoint of one generator is slightly higher than<br />
the other generators, it will increase excitation in an attempt to raise the system voltage<br />
and in doing so will supply lagging reactive current to the other generators connected in<br />
the group. This current will circulate between generators, causing excessive heating of<br />
the generator windings and an increased risk of thermal damage.<br />
Page 244<br />
©2013 Caterpillar<br />
All rights reserved.
Application and Installation Guide<br />
<strong>EMCP</strong> 4.1, <strong>4.2</strong> Generator Set Control<br />
One method of minimizing this effect is to cause an individual generator's voltage<br />
setpoint to sag, or “droop”, in proportion to its’ reactive power output. For proper reactive<br />
load sharing, the regulator must know the rated generator reactive power (kVAr), which<br />
is calculated from the genset rated kVA and kW, and the desired percentage of output<br />
voltage droop when the generator is supplying rated reactive power.<br />
As the reactive power output increases, the IVR will cause the output voltage to droop<br />
(reduce the voltage) proportionally. If the measured reactive power output is leading, the<br />
output voltage will rise in the same linear fashion. In either case, this action will tend to<br />
support better kVAr sharing with other generators. Note that it is important that the<br />
generator operation remains within its capability.<br />
The Voltage Regulator Maximum Droop Percentage setpoint controls how much the<br />
generator output voltage will vary for a given amount of reactive power output. For<br />
example, if the Maximum Droop Percentage is set to 5.0%, the voltage setpoint will drop<br />
from 100% to 95% of rated voltage as the reactive power output increases from 0% to<br />
100% of rated kVAr (lagging). This is illustrated in the diagram presented in Figure 75.<br />
If a bias is applied to the voltage setpoint from an external source, the reactive droop<br />
percentage is applied to the nominal setpoint plus the bias percentage. For example, if a<br />
+10% or -10% bias were applied to the nominal voltage, the voltage setpoint would<br />
droop as shown by the Upper and Lower Bias Limit dashed lines indicated on the<br />
diagram presented in Figure 75.<br />
Figure 75: Reactive Droop voltage setpoint change based on reactive (kVAr) load<br />
Note: It is important that the capability of the machine is not exceeded during operation.<br />
©2013 Caterpillar<br />
All rights reserved. Page 245
<strong>EMCP</strong> 4.1, <strong>4.2</strong> Generator Set Control<br />
Application and Installation Guide<br />
VOLTAGE REGULATOR LOCKOUT CONFIGURATION<br />
Name Options Default Value Access<br />
Voltage Regulator Lockout<br />
Configuration<br />
0 = Not Locked Out<br />
1 = Locked Out<br />
0.0<br />
ET Service Tool<br />
Only<br />
When Voltage Regulator Lockout Configuration is set to ‘Not Locked Out’, the Integrated<br />
Voltage Regulator will operate normally and control the generator voltage output to the<br />
reference setpoint.<br />
When Voltage Regulator Lockout Configuration is set to ‘Locked Out’, the Integrated<br />
Voltage Regulator will be prevented from controlling the generator voltage output and<br />
the Excitation Command output will remain at zero. Excitation is therefore disabled in<br />
this scenario, and the generator will only produce residual voltage.<br />
The Voltage Regulator Lockout Configuration setpoint can only be changed when the<br />
genset is STOPPED (<strong>EMCP</strong> stop button pressed) and engine speed equals zero.<br />
LOSS OF SENSING SHUTDOWN EVENT<br />
Name Min Max Resolution Units Default Value Access<br />
Voltage Regulator Loss Of<br />
Sensing Shutdown Event<br />
Notification Delay Time<br />
0.0 25.0 0.1 Seconds 2.0<br />
The Voltage Regulator Loss Of Sensing Shutdown Event Notification Delay Time<br />
determines the time delay between when a loss of sensing voltage is recognized and<br />
when a Loss of Sensing Shutdown event (SPN-FMI: 611-0) is generated. Based on<br />
average line-to-line voltage monitoring, loss of sensing is triggered under the following<br />
conditions:<br />
For Single Phase configuration: Average line-to-line voltage < 8% of rated<br />
For Three Phase configuration:<br />
Balanced three phase average < 8% of rated OR<br />
Imbalance between a line quantity and three phase average > 20% of rated OR<br />
Loss of a phase (line-to-neutral voltage < 8% of rated).<br />
The Loss of Sensing Shutdown event is inhibited when a generator short circuit<br />
condition is detected (any phase current exceeds 300% of rated) during voltage starting<br />
profile (IVR operating mode equals SOFT START) for 5 seconds after frequency<br />
increases above the Voltage Regulator Minimum Frequency Threshold setpoint when<br />
excitation is disabled (Voltage Regulator Lockout Configuration is set to ‘Locked Out’)<br />
ET Service Tool<br />
or <strong>EMCP</strong><br />
Display<br />
Page 246<br />
©2013 Caterpillar<br />
All rights reserved.
Application and Installation Guide<br />
<strong>EMCP</strong> 4.1, <strong>4.2</strong> Generator Set Control<br />
OVER EXCITATION SHUTDOWN EVENT<br />
Name Min Max Resolution Units Default Value Access<br />
Voltage Regulator Over<br />
Excitation Shutdown Event<br />
Threshold<br />
Voltage Regulator Over<br />
Excitation Shutdown Event<br />
Notification Delay Time<br />
10 100 1 % 100.0<br />
0.1 20.0 0.1 Seconds 10.0<br />
ET Service Tool<br />
or <strong>EMCP</strong><br />
Display<br />
The Over Excitation Shutdown Event Threshold configuration determines the percentage<br />
of excitation command that will cause an Over Excitation Shutdown event. If the<br />
excitation command percentage exceeds the Over Excitation Shutdown Event Threshold<br />
for longer than the Over Excitation Shutdown Event Notification Delay Time an Over<br />
Excitation Shutdown event (SPN-FMI: 3381-0) will be generated.<br />
Note: The Over Excitation Shutdown event monitors and triggers an event based on<br />
Excitation Command Percentage and does NOT trigger based on measured excitation<br />
current. See the section on Excitation Module Over-Excitation Protection for a<br />
description of the Excitation Module over-excitation protection feature that is based on<br />
measured excitation current.<br />
19.4 IVR VOLTAGE ADJUSTMENT<br />
Voltage adjustments are categorized into two types: Manual biasing and Analog biasing.<br />
Manual voltage adjustment includes fine tuning the generator output voltage via digital<br />
input, <strong>EMCP</strong> display or SCADA (Modbus). Analog voltage adjustment is performed via<br />
programmable analog inputs to the <strong>EMCP</strong> and provide a voltage control interface for<br />
external potentiometers or external control systems (such as switchgear).<br />
It is important to note that the setpoint Gen Maximum Voltage Bias Percentage must be<br />
correctly configured to be greater than the expected bias range, otherwise it may not be<br />
possible to achieve the required voltage bias. The parameter Gen Maximum Voltage Bias<br />
Percentage is accessed within the CAT ET Service Tool configuration menu under<br />
Generator AC Monitor, or can be accessed from the <strong>EMCP</strong> display by navigating to the<br />
following sub-menu:<br />
MAIN MENU<br />
CONFIGURE<br />
ALL SETPOINTS<br />
GEN AC MONITOR<br />
Note: All manual voltage biasing is removed and reset to zero when the engine is<br />
stopped. Manual voltage bias levels are not carried over to the next start up after an<br />
engine shutdown.<br />
©2013 Caterpillar<br />
All rights reserved. Page 247
<strong>EMCP</strong> 4.1, <strong>4.2</strong> Generator Set Control<br />
Application and Installation Guide<br />
DIGITAL INPUTS<br />
Remote voltage adjustment toggle switches may be used to fine tune the generator<br />
output voltage by programming an <strong>EMCP</strong> digital input for Raise Voltage and Lower<br />
Voltage. Each activation of the digital input raises or lowers the voltage by 0.2% of rated.<br />
When the digital input is activated continuously, the voltage bias is raised or lowered by<br />
0.2% of rated approximately every 400ms.<br />
Refer to Chapter 8 for further details on programming digital inputs on <strong>EMCP</strong> 4<br />
controllers.<br />
VOLTAGE/HZ CONTROL (<strong>EMCP</strong> DISPLAY)<br />
The <strong>EMCP</strong> display may be used to fine tune the generator output voltage. Each press of<br />
the voltage raise or voltage lower key raises or lowers the voltage by 0.2% of rated<br />
voltage. When the voltage raise or voltage lower key is pressed and held continuously,<br />
the voltage bias is raised or lowered by 0.2% of rated approximately every 400ms.<br />
The Voltage/Hz Control screen can be found on the <strong>EMCP</strong> display by navigating to the<br />
following sub-menu:<br />
MAIN MENU<br />
CONTROL<br />
VOLTAGE/Hz CONTROL<br />
Figure 76: <strong>EMCP</strong> 4.1 & <strong>EMCP</strong> <strong>4.2</strong> Volts/Hz Control Screen<br />
SCADA MODBUS (<strong>EMCP</strong> <strong>4.2</strong> ONLY)<br />
<strong>EMCP</strong> <strong>4.2</strong> SCADA data link also provides a means for adjusting voltage remotely.<br />
<strong>EMCP</strong> <strong>4.2</strong> Modbus registers are defined for reading and controlling the target output<br />
voltage of the generator. Refer to <strong>EMCP</strong> 4 SCADA Data Links Application and<br />
Installation Guide (LEBE0010) for more details on <strong>EMCP</strong> <strong>4.2</strong> dedicated SCADA data<br />
links.<br />
Page 248<br />
©2013 Caterpillar<br />
All rights reserved.
Application and Installation Guide<br />
<strong>EMCP</strong> 4.1, <strong>4.2</strong> Generator Set Control<br />
ANALOG INPUTS<br />
Analog voltage adjustment is done via a programmable analog input to the <strong>EMCP</strong><br />
configured for Generator Voltage Control. Analog inputs provide a voltage control<br />
interface for external potentiometers or external control systems (such as switchgear).<br />
The following analog input types can be configured on an <strong>EMCP</strong> 4.1 or <strong>EMCP</strong> <strong>4.2</strong> to<br />
adjust the generator voltage setpoint:<br />
Resistive (a range of input maps are available depending on the potentiometer<br />
size)<br />
Voltage<br />
o 0 to 5 V<br />
o 1 to 5 V<br />
o 0.5 to 4.5 V<br />
The Generator Voltage Control analog input signal is interpreted and converted by the<br />
<strong>EMCP</strong> into a voltage bias percentage of (nominal) rated voltage. For example, consider<br />
an analog input configured for a signal range of -10 to +10 V and a data range of -10%<br />
to 10%. When this analog input signal value equals +2 V, a voltage bias percentage of<br />
+2.0 % of rated will be applied to the generator output voltage.<br />
Refer to Chapter 9 for further details on programming analog inputs on <strong>EMCP</strong> 4<br />
controllers.<br />
19.5 IVR DISPLAY SCREENS<br />
The Integrated Voltage Regulator Overview and Voltage Bias Overview can be<br />
accessed directly through the <strong>EMCP</strong> display. To access the IVR Overview and Voltage<br />
Bias Overview through the <strong>EMCP</strong> display, navigate to the following sub-menus:<br />
MAIN MENU<br />
VIEW<br />
IVR OVERVIEW<br />
VOLTAGE BIAS OVERVIEW<br />
The IVR Overview screen provides IVR operating mode, target voltage, excitation<br />
command and voltage compensation information. The Voltage Bias Overview screen<br />
provides information on all active voltage biasing on the generator system.<br />
Note: Excitation command percentage is NOT a measurement of excitation current, but<br />
rather a commanded excitation operating point. A non-zero excitation command<br />
percentage MAY be displayed on screen during a fault scenario even though zero<br />
excitation current output is present.<br />
©2013 Caterpillar<br />
All rights reserved. Page 249
<strong>EMCP</strong> 4.1, <strong>4.2</strong> Generator Set Control<br />
Application and Installation Guide<br />
Figure 77: <strong>EMCP</strong> 4.1 & <strong>EMCP</strong> <strong>4.2</strong> IVR Overview Screens<br />
The IVR operating modes for <strong>EMCP</strong> 4.1 and <strong>EMCP</strong> <strong>4.2</strong> are described below:<br />
<br />
<br />
<br />
<br />
<br />
<br />
<br />
VOLTS/Hz – voltage is regulated according to the under frequency roll<br />
off (Volts/Hz) profile.<br />
V/Hz + DROOP – voltage is regulated according to the under frequency<br />
roll off (Volts/Hz) profile .<br />
V/Hz + LINE LOSS - voltage is regulated according to the under<br />
frequency roll off (Volts/Hz) profile in addition to any line loss (IR)<br />
compensation bias.<br />
SOFT START – voltage is ramped during start up from 0 voltage to rated<br />
voltage according to the starting profile.<br />
IVR LOCKED OUT – voltage regulation is locked out and the excitation<br />
command is disabled (forced to 0 %). Generator output voltage will not<br />
build beyond residual voltage.<br />
PF CONTROL – voltage regulation is performed in order to control<br />
power factor to a desired level (<strong>EMCP</strong> <strong>4.2</strong> only)<br />
STOPPING – voltage is ramped down in proportion to engine speed<br />
during shutdown.<br />
The Voltage Bias Overview screen on the <strong>EMCP</strong> 4.1 and <strong>EMCP</strong> <strong>4.2</strong> displays manual,<br />
analog, load compensation and total voltage bias percentages applied to the generator<br />
output.<br />
Page 250<br />
©2013 Caterpillar<br />
All rights reserved.
Application and Installation Guide<br />
<strong>EMCP</strong> 4.1, <strong>4.2</strong> Generator Set Control<br />
Figure 78: <strong>EMCP</strong> 4.1 & <strong>EMCP</strong> <strong>4.2</strong> Voltage Bias Overview Screens<br />
The voltage biasing information for <strong>EMCP</strong> 4.1 and <strong>EMCP</strong> <strong>4.2</strong> is described below:<br />
<br />
<br />
<br />
<br />
MANUAL – summation of any voltage bias applied via programmable<br />
digital input, Voltage/Hz Control screen on the <strong>EMCP</strong> display or SCADA<br />
(Modbus) voltage bias.<br />
ANALOG – any voltage bias applied via a programmable analog input<br />
described in Chapter 9.<br />
DROOP or LINE LOSS – any voltage bias applied as a result of reactive<br />
droop or line loss load compensation. (<strong>EMCP</strong> <strong>4.2</strong> only)<br />
TOTAL – total voltage bias applied to the generator system. This total<br />
percentage bias is the summation of any manual, analog, or<br />
compensation (droop or line loss) biasing in the system.<br />
Note: The total percentage bias that can be applied to the generator system is limited<br />
by the Maximum Generator Voltage Output Bias Percentage setpoint configured in the<br />
<strong>EMCP</strong>.<br />
©2013 Caterpillar<br />
All rights reserved. Page 251
<strong>EMCP</strong> 4.1, <strong>4.2</strong> Generator Set Control<br />
Application and Installation Guide<br />
20 INSTALLING & UPGRADING SOFTWARE<br />
The <strong>EMCP</strong> 4 supports field-programming (called flashing) of software for all of the<br />
modules. This is done by using the Cat Service Tool software and a Cat Communication<br />
Adapter. The Primary Data Link (CAN 1) service connector must be used for modules<br />
connected to the Primary Data Link. The Accessory Data Link (CAN 2) service<br />
connector must be used for modules connected to the Accessory Data Link. Refer to<br />
your generator set package documentation for the location of the service connectors.<br />
To flash the <strong>EMCP</strong> 4 requires the following hardware and software:<br />
SOFTWARE AND HARDWARE REQUIRED<br />
The Cat Service Tool software installed and licensed on a PC<br />
A Cat Communication Adapter<br />
A 9-pin Deutsch service connection to the Primary Data Link (CAN 1)<br />
The new application software flash file for the <strong>EMCP</strong> 4<br />
In order to install software into the <strong>EMCP</strong> 4, the genset must be stopped. If upgrading<br />
software, it may be important to back up the current configuration (see Chapter <strong>4.2</strong>).<br />
Flashing application software does not affect the setpoints. However, if a problem occurs<br />
during flashing, this backup can be used to quickly configure a replacement module.<br />
Record the current software version information. This is seen in the ECM Summary<br />
screen. See Figure 79. This is information is useful to obtain the correct flash file<br />
if it is desired to return to the previous version of software after flashing.<br />
Figure 79: ECM Summary Information<br />
Page 252<br />
©2013 Caterpillar<br />
All rights reserved.
Application and Installation Guide<br />
<strong>EMCP</strong> 4.1, <strong>4.2</strong> Generator Set Control<br />
Flashing of modules other than the <strong>EMCP</strong> 4 follow similar steps as the ones outlined<br />
below.<br />
In order to flash an <strong>EMCP</strong> 4 module, do the following steps:<br />
1. Connect to the <strong>EMCP</strong> 4 using the Cat Service Tool as stated in Chapter <strong>4.2</strong>.<br />
2. Enter the WinFlash Utility by selecting Utilities > WinFlash,<br />
or by clicking the WinFlash Icon.<br />
3. The WinFlash screen will appear.<br />
Note: If WinFlash does not find all of the modules on the CAN J1939 data link to which<br />
it is connected, re-scan the data link by pressing F8 (or selecting File > Update ECM<br />
List).<br />
4. Select the Genset Control if multiple modules are listed, then click the “Browse<br />
for a File” button on the right hand side.<br />
©2013 Caterpillar<br />
All rights reserved. Page 253
<strong>EMCP</strong> 4.1, <strong>4.2</strong> Generator Set Control<br />
Application and Installation Guide<br />
5. Browse to the appropriate file and click “Open”.<br />
6. The new file information will be displayed.<br />
7. Click “Begin Flash” in the lower left corner.<br />
Page 254<br />
©2013 Caterpillar<br />
All rights reserved.
Application and Installation Guide<br />
<strong>EMCP</strong> 4.1, <strong>4.2</strong> Generator Set Control<br />
8. A confirmation screen will appear. Click “OK”.<br />
9. A progress meter will show the status of the flash and the <strong>EMCP</strong> display will<br />
show that software installation is occurring.<br />
10. When the flashing process is complete, the ECM that was flashed will reboot.<br />
Also, WinFlash will bring up a window giving options for what to do next. This<br />
indicates that the software has finished flashing, and is ready to use.<br />
11. On startup, the <strong>EMCP</strong> 4 shows the software part number. Verify the software part<br />
number matches the new application software that was flashed.<br />
©2013 Caterpillar<br />
All rights reserved. Page 255
<strong>EMCP</strong> 4.1, <strong>4.2</strong> Generator Set Control<br />
Application and Installation Guide<br />
APPENDIX A MENU STRUCTURES<br />
For details on the setpoints available within each submenu, refer to the appropriate<br />
section above.<br />
Main Menu<br />
View<br />
Control<br />
Configure<br />
Software Info<br />
Preferences<br />
I/O Status<br />
Event Logs<br />
Engine Overview<br />
AC Overview<br />
IVR Overview*<br />
Network Status<br />
Analog Inputs<br />
Digital Inputs<br />
Relay Outputs<br />
Digital Outputs<br />
Primary Data Link<br />
<strong>EMCP</strong> 4.1<br />
Menu Structure<br />
Volt/Hz Control<br />
Idle/Rated*<br />
Fuel Transfer<br />
Engine Fuel Priming*<br />
*When enabled<br />
Security<br />
Inputs & Outputs<br />
All Setpoints<br />
Engine Operating Hrs<br />
Reset Counters<br />
Time/Date<br />
Digital Inputs<br />
Relay Outputs<br />
Digital Outputs<br />
Analog Inputs<br />
Control<br />
Eng Monitor/Protection<br />
Events<br />
Gen Monitor/Protection<br />
Voltage Regulator*<br />
Reduced Power Mode<br />
Inputs & Outputs<br />
Automatic Start/Stop<br />
Fuel Transfer<br />
Battery Voltage Monitor<br />
Crank/Start Counters<br />
Engine Speed Monitor<br />
Crank Counter<br />
Start Counter<br />
Diagnostic Resp Config<br />
Eng Protect Resp Config<br />
Gen Protect Resp Config<br />
Custom Event Resp Config<br />
Other System Resp Config<br />
Contrast<br />
Pressure<br />
Temperature<br />
Volume<br />
Lamp Test<br />
Language<br />
Generator AC Monitor<br />
Gen Over/Under Frequency<br />
Gen Over/Under Voltage<br />
Digital Inputs<br />
Relay Outputs<br />
Digital Outputs<br />
Analog Inputs<br />
©2013 Caterpillar<br />
Page 256<br />
All rights reserved.
Application and Installation Guide<br />
<strong>EMCP</strong> 4.1, <strong>4.2</strong> Generator Set Control<br />
Main Menu<br />
View<br />
Control<br />
Configure<br />
Software Info<br />
Preferences<br />
I/O Status<br />
Event Logs<br />
Engine Overview<br />
AC Overview<br />
IVR Overview*<br />
Network Status<br />
Analog Inputs<br />
Digital Inputs<br />
Relay Outputs<br />
Digital Outputs<br />
Primary Data Link<br />
Accessory Data Link<br />
RS-485 SCADA Data Link<br />
RS-485 Annunciator Data Link<br />
<strong>EMCP</strong> <strong>4.2</strong><br />
Menu Structure<br />
Volt/Hz Control<br />
Idle/Rated*<br />
Programmable Cycle Timer<br />
Fuel Transfer<br />
Engine Fuel Priming*<br />
*When enabled<br />
Security<br />
Inputs & Outputs<br />
All Setpoints<br />
Engine Operating Hrs<br />
Reset Counters<br />
Time/Date<br />
Digital Inputs<br />
Relay Outputs<br />
Digital Outputs<br />
Analog Inputs<br />
Control<br />
Eng Monitor/Protection<br />
Events<br />
Gen Monitor/Protection<br />
Voltage Regulator*<br />
Network<br />
Reduced Power Mode<br />
Prog kW Relay Trip<br />
Inputs & Outputs<br />
Crank Counter<br />
Start Counter<br />
Serv Maint Interval<br />
kWh Meter<br />
kVArh Meter<br />
Automatic Start/Stop<br />
Fuel Transfer<br />
Battery Voltage Monitor<br />
Crank/Start Counters<br />
Engine Coolant Temp Monitor<br />
Engine Oil Pres Monitor<br />
Engine Speed Monitor<br />
Enhanced Engine Monitor<br />
Service Maintenance Interval<br />
Diagnostic Resp Config<br />
Eng Protect Resp Config<br />
Gen Protect Resp Config<br />
Custom Event Resp Config<br />
Other System Resp Config<br />
Event System<br />
Enhanced Gen Monitor<br />
Generator AC Monitor<br />
Gen AC Power Monitor<br />
Generator Over Current<br />
Gen Over/Under Frequency<br />
Gen Over/Under Voltage<br />
Generator Reverse Power<br />
Contrast<br />
Pressure<br />
Temperature<br />
Volume<br />
Lamp Test<br />
Language<br />
RS-485 SCADA<br />
Digital Inputs<br />
Relay Outputs<br />
Digital Outputs<br />
Analog Inputs<br />
©2013 Caterpillar<br />
All rights reserved. Page 257
<strong>EMCP</strong> 4.1, <strong>4.2</strong> Generator Set Control<br />
Application and Installation Guide<br />
APPENDIX B <strong>EMCP</strong> 4 FRONT VIEW & NAVIGATION KEYS<br />
<strong>EMCP</strong> 4.1 AND <strong>4.2</strong><br />
(1) Display Screen (9) Auto Key<br />
(2) AC Overview Key (10) Stop Key<br />
(3) Engine Overview Key (11) Escape Key<br />
(4) Main Menu Key (12) Scroll Up Key<br />
(5) Alarm Acknowledge/Silence Key with (13) Scroll Right Key<br />
Amber Warning Lamp<br />
(6) Event Reset Key with Red Shutdown Lamp (14) OK Key<br />
(7) Event Log Key (15) Scroll Down Key<br />
(8) Run Key (16) Scroll Left Key<br />
(1) SCREEN Displays various genset information and parameters.<br />
(2) AC<br />
OVERVIEW<br />
(3) ENGINE<br />
OVERVIEW<br />
The AC Overview Key will navigate the display to the first screen of<br />
AC information. The AC Overview Key information contains various<br />
AC parameters that summarize the electrical operation of the<br />
generator set.<br />
The Engine Overview Key will navigate the display to the first<br />
screen of engine information. The Engine Overview information<br />
contains various engine parameters that summarize the operation<br />
of the generator set.<br />
Page 258<br />
©2013 Caterpillar<br />
All rights reserved.
Application and Installation Guide<br />
<strong>EMCP</strong> 4.1, <strong>4.2</strong> Generator Set Control<br />
(4) MAIN MENU The Main Menu key will navigate the display to the main menu<br />
directly without having to navigate out of menus.<br />
(5) ALARM<br />
ACKNOWLEDGE/<br />
SILENCE<br />
Pressing the Alarm Acknowledge/Silence Key will cause the horn<br />
Relay Output to turn off and silence the horn. Pressing the key will<br />
also cause any amber or red flashing lights to turn off or to become<br />
solid depending on the active status of the alarms. The Alarm<br />
Acknowledge/Silence Key may also be configured to send out a<br />
global alarm silence on the CAN Data Link which will silence horns<br />
on Annunciators, if the CAN Annunciator is configured to respond.<br />
(6) EVENT RESET The Event Reset button will clear all inactive fault conditions.<br />
(7) EVENT LOG The Event Log button will navigate the display to the list of event logs.<br />
(8) RUN Pressing the RUN Key will cause the <strong>EMCP</strong> to enter the RUN mode.<br />
Note: If a Digital Input is programmed for ECS in Auto, or Stop,<br />
and a maintained switch latches that input to make it active, the<br />
front panel RUN key will not have any effect.<br />
(9) AUTO Pressing the AUTO Key will cause the <strong>EMCP</strong> to enter the AUTO mode.<br />
Note: If a Digital Input is programmed for ECS in RUN, or Stop,<br />
and a maintained switch latches that input to make it active, the<br />
front panel AUTO key will not have any effect.<br />
(10) STOP Pressing the STOP Key will cause the <strong>EMCP</strong> to enter the STOP mode.<br />
Note: If a Digital Input is programmed for ECS in Auto, or RUN,<br />
and a maintained switch latches that input to make it active, the<br />
front panel STOP key will not have any effect.<br />
(11) ESCAPE The Escape Key is used during menu navigation in order to navigate up<br />
through the menu/sub-menu structure. Each key press causes the user<br />
to move backwards/upwards through the navigation menus. The<br />
Escape Key is also used to cancel out of data entry screens during<br />
setpoint programming. If the Escape Key is pressed during setpoint<br />
programming, none of the changes made on screen will be saved to<br />
memory. Pressing this key will bring the user back one menu/submenu.<br />
(12) SCROLL UP The Scroll Up Key is used to navigate up through the various menus<br />
or monitoring screens. The Scroll Up Key is also used during setpoint<br />
entry. During numeric data entry the Scroll Up Key is used in order to<br />
increment the digits (0-9). If the setpoint requires selection from a list,<br />
the Scroll Up Key is used to navigate through the list.<br />
(13) SCROLL<br />
RIGHT<br />
The Scroll Right Key is used during setpoint adjustment. During<br />
numeric data entry, the Scroll Right Key is used to choose which<br />
digit is being edited. The Scroll Right Key is also used during<br />
certain setpoint adjustments to select or deselect a check box. If a<br />
box has a check mark inside the box, pressing the Scroll Right Key<br />
will cause the check mark to disappear, disabling the function. If the<br />
box does not have a check mark inside the box, pressing the Scroll<br />
Right Key will cause a check mark to appear, enabling the function.<br />
©2013 Caterpillar<br />
All rights reserved. Page 259
<strong>EMCP</strong> 4.1, <strong>4.2</strong> Generator Set Control<br />
Application and Installation Guide<br />
(14) OK The OK Key is used during menu navigation to select menu items in<br />
order to navigate forward/downward in the menu/sub-menu structure.<br />
The OK Key is also used during setpoint programming in order to save<br />
setpoints changes. Pressing the OK Key during setpoint programming<br />
causes setpoint changes to be saved to memory.<br />
(15) SCROLL<br />
DOWN<br />
(16) SCROLL<br />
LEFT<br />
The Down Key is used to navigate down through the various menus<br />
or monitoring screens. The Down Key is also used during setpoint<br />
entry. During numeric data entry the Down Key is used in order to<br />
decrement the digits (0-9). If the setpoint requires selection from a<br />
list, the Down Key is used to navigate down through the list.<br />
The Scroll Left Key is used during setpoint adjustment. During<br />
numeric data entry, the Scroll Left Key is used to choose which digit<br />
is being edited. The Scroll Left Key is also used during certain<br />
setpoint adjustments to select or deselect a check box. If a box has<br />
a check mark inside the box, pressing the Scroll Left Key will cause<br />
the check mark to disappear, disabling the function. If the box does<br />
not have a check mark inside the box, pressing the Scroll Left Key<br />
will cause a check mark to appear, enabling the function.<br />
ALARM INDICATORS<br />
AMBER<br />
WARNING<br />
LIGHT<br />
The Amber Warning Light is located directly above the Alarm<br />
Acknowledge/Silence Key (5). A flashing amber light indicates that<br />
there are unacknowledged active warnings. A solid amber light<br />
indicates that there are acknowledged warnings active. If there are<br />
any active warnings, the amber light will change from flashing yellow<br />
to solid amber after the Alarm Acknowledge/Silence Key (5) is<br />
pressed. If there are no longer any active warnings, the amber light<br />
will turn off after the Alarm Acknowledge/Silence Key (5) is pressed.<br />
RED<br />
SHUTDOWN<br />
LIGHT<br />
The Red Shutdown Light is located directly above the Event Reset<br />
Key (6). A flashing red light indicates that there are unacknowledged<br />
active shutdown events. A solid red light indicates that there are<br />
acknowledged shutdown events active. If there are any active<br />
shutdown events the red light will change from flashing red to solid<br />
red after the Alarm Acknowledge/Silence Key (5) is pressed. Any<br />
condition that has caused an <strong>EMCP</strong> shutdown event must be<br />
manually reset. If there are no longer any active shutdown events,<br />
the red light will turn off.<br />
Page 260<br />
©2013 Caterpillar<br />
All rights reserved.
Application and Installation Guide<br />
<strong>EMCP</strong> 4.1, <strong>4.2</strong> Generator Set Control<br />
APPENDIX C IVR EXCITATION MODULE CONNECTION DIAGRAMS<br />
EM10 – Self-Excitation (SHUNT)<br />
©2013 Caterpillar<br />
All rights reserved. Page 261
<strong>EMCP</strong> 4.1, <strong>4.2</strong> Generator Set Control<br />
Application and Installation Guide<br />
EM10 – Auxiliary Winding (Internal) Excitation (AREP / IE), 4-wire<br />
Page 262<br />
©2013 Caterpillar<br />
All rights reserved.
Application and Installation Guide<br />
<strong>EMCP</strong> 4.1, <strong>4.2</strong> Generator Set Control<br />
EM10 – Auxiliary Winding (Internal) Excitation (AREP / IE), 3-wire<br />
©2013 Caterpillar<br />
All rights reserved. Page 263
<strong>EMCP</strong> 4.1, <strong>4.2</strong> Generator Set Control<br />
Application and Installation Guide<br />
EM10 – Permanent Magnet Excitation (PM)<br />
Page 264<br />
©2013 Caterpillar<br />
All rights reserved.
Application and Installation Guide<br />
<strong>EMCP</strong> 4.1, <strong>4.2</strong> Generator Set Control<br />
EM15 – Self Excitation (SHUNT)<br />
©2013 Caterpillar<br />
All rights reserved. Page 265
<strong>EMCP</strong> 4.1, <strong>4.2</strong> Generator Set Control<br />
Application and Installation Guide<br />
EM15 – Auxiliary Winding (Internal) Excitation (AREP / IE), 4-wire<br />
Page 266<br />
©2013 Caterpillar<br />
All rights reserved.
Application and Installation Guide<br />
<strong>EMCP</strong> 4.1, <strong>4.2</strong> Generator Set Control<br />
EM15 – Auxiliary Winding (Internal) Excitation (AREP / IE), 3-wire<br />
©2013 Caterpillar<br />
All rights reserved. Page 267
<strong>EMCP</strong> 4.1, <strong>4.2</strong> Generator Set Control<br />
Application and Installation Guide<br />
EM15 – Permanent Magnet Excitation (PM)<br />
Page 268<br />
©2013 Caterpillar<br />
All rights reserved.
Application and Installation Guide<br />
<strong>EMCP</strong> 4.1, <strong>4.2</strong> Generator Set Control<br />
Glossary of Terms<br />
ACK<br />
AGSM<br />
CAN<br />
CDVR<br />
DIO<br />
<strong>EMCP</strong> 4<br />
ECM<br />
ECS<br />
ECU<br />
EM<br />
EUI<br />
FMI<br />
FPT<br />
GSC<br />
IVR<br />
MUI<br />
NFPA<br />
PCT<br />
Acknowledge<br />
Alarm Group Selection Mode. The mode in which group of alarms the<br />
RS-485 annunciator will respond is selected in.<br />
Controller Area Network. This will often refer to our CAN J1939<br />
Communications between ECMs.<br />
Cat Digital Voltage Regulator. A microprocessor based digital voltage<br />
regulator which communicates with the <strong>EMCP</strong> and controls excitation<br />
current to control generator voltage.<br />
Discrete Input/Output Module<br />
Electronic Modular Control Panel 4. This is the Cat generator set control<br />
panel, consisting of a generator set control (GSC).<br />
Electronic Control Module. This is a general term and can refer to any<br />
microprocessor-based module that is part of a control system. The<br />
engine ECM is an ECM dedicated to the task of engine timing and<br />
air/fuel control.<br />
Engine Control Switch<br />
Engine Control Unit. Another name for an ECM (Electronic Control<br />
Module).<br />
Excitation Module. This is the excitation power converter component<br />
required for use with the Integrated Voltage Regulator (IVR).<br />
Electronic Unit Injector. A type of Fuel Injector.<br />
Failure Mode Indicator. The CAN term for a failure code associated with<br />
a particular Suspect Parameter Number. For a complete list of FMI<br />
codes, refer to the Systems Operation Troubleshooting Testing and<br />
Adjusting guide.<br />
Fault Protection Timer. A time delay that suppresses some events for a<br />
configurable amount of time after the generator set starts to allow values<br />
to settle before taking action on the event.<br />
Generator Set Controller. This is the module responsible for the overall<br />
generator protection and control functions. It is the master module on the<br />
generator set, interfacing with the user as well as the engine ECM and<br />
any other accessory modules.<br />
Integrated Voltage Regulator. This is a voltage regulating system integrated<br />
into <strong>EMCP</strong> controls. Requires an Excitation Module component.<br />
Mechanical Unit Injector. A type of fuel injector.<br />
National Fire Protection Association. A n American standards body<br />
responsible for creation of various codes.<br />
Programmable Cycle Timer. A timer which supports starting a generator<br />
set for exercise on a 7 day basis.<br />
©2013 Caterpillar<br />
All rights reserved. Page 269
Glossary of Terms<br />
RMS<br />
RPM<br />
RPM<br />
RS-232<br />
RS-485<br />
RTD<br />
RTU<br />
SCR<br />
SCADA<br />
SPN<br />
A mathematical approach of representing a useful average for varying<br />
quantities; this is useful to indicate AC quantities.<br />
Revolutions per minute<br />
Reduced Power Mode. A mode to reduce the power consumption of an<br />
<strong>EMCP</strong> controller when a battery charger is not fitted to the generator set.<br />
Recommended Standard 232, maintained by the Electronics Industries<br />
Alliance (EIA). Also known as EIA-232.<br />
Recommended Standard 485, maintained by the Electronics Industries<br />
Alliance (EIA). Also known as EIA-485.<br />
Resistive Temperature Device. A temperature sensor that changes<br />
resistance based on temperature.<br />
Remote Transmitter Unit. This term refers to a Slave device in a<br />
MODBUS network that merely responds to requests from the Master.<br />
The <strong>EMCP</strong> <strong>4.2</strong> can function as an RTU on a SCADA system via the RS-<br />
485 SCADA port.<br />
Selective Catalyst Reduction. This is a form of emission treatment.<br />
Supervisory Control And Data Acquisition. This term represents any<br />
computing system designed to perform high-level control and monitoring<br />
over various subsystems. On the <strong>EMCP</strong> 4, we provide a MODBUS<br />
interface to allow any SCADA systems to connect and collect data about<br />
the operations of the control and the generator set(s).<br />
Suspect Parameter Number. The CAN term for any parameter whose<br />
data is transmitted over a CAN network, such as the <strong>EMCP</strong> 4 primary or<br />
accessory data link. For a complete list of SPNs supported by the <strong>EMCP</strong><br />
4, refer to the Diagnostic Trouble Code List in the Systems Operation<br />
Troubleshooting Testing and Adjusting guide.<br />
Page 270<br />
©2013 Caterpillar<br />
All rights reserved.
LEBE0006-02 ©2013 Caterpillar Printed in U.S.A.<br />
All rights reserved.
