NZPhotographer Issue 23, September 2019
As of December 2022, NZPhotographer magazine is only available when you purchase an annual or monthly subscription via the NZP website. Find out more: www.nzphotographer.nz
As of December 2022, NZPhotographer magazine is only available when you purchase an annual or monthly subscription via the NZP website. Find out more: www.nzphotographer.nz

Create successful ePaper yourself
Turn your PDF publications into a flip-book with our unique Google optimized e-Paper software.
Brought to you by<br />
ISSUE <strong>23</strong>, <strong>September</strong> <strong>2019</strong><br />
INTERVIEW WITH<br />
FAIRLIE ATKINSON<br />
SHOOTING SHARP<br />
LANDSCAPES<br />
BY RICHARD YOUNG<br />
HOW TO CRITIQUE<br />
YOUR OWN PHOTOS<br />
BY SAMUEL OGUNLAJA<br />
IMAGINE AUCKLAND PEOPLE’S<br />
CHOICE AWARD WINNER<br />
<strong>September</strong> <strong>2019</strong><br />
1
WELCOME TO ISSUE <strong>23</strong> OF<br />
NZ PHOTOGRAPHER MAGAZINE<br />
HELLO EVERYONE,<br />
This edition of NZP puts the focus<br />
on learning, experimenting, and<br />
growing as a photographer whilst<br />
also introducing the topic of why<br />
and how photography should<br />
be encouraged in the younger<br />
generation.<br />
In our interview, photography<br />
teacher Fairlie Atkinson takes us<br />
under her wing to share her bird<br />
photography and also explains<br />
her teaching methods and the<br />
importance of the Arts in education.<br />
We also get to see what some of<br />
her photography students at Kapiti<br />
College have been working on and<br />
how photography is showing up in<br />
their everyday lives.<br />
From young adults to young kids,<br />
Ana shares her thoughts and tips on<br />
introducing photography to kids at a<br />
young age, as soon as they're able<br />
to hold a phone or camera. She<br />
explains how photography can help<br />
children improve their concentration<br />
whilst also developing a skill that is often overlooked; the art of seeing.<br />
Don't have kids or maybe they've already flown the nest? Don't worry, we have<br />
plenty of articles to teach and inspire your photographic journey too! Richard's<br />
article gives in-depth detail on shooting sharp landscapes and, instead of an<br />
Expert Critique session this month, Sam is going to teach you how to critique your<br />
own photos – A vital step that must be completed before sending your images out<br />
into the big wide world to be critiqued by others.<br />
Last but never least, we've greatly enjoyed looking through your own<br />
experimentations in readers' submissions learning how you've been pushing out of<br />
your own comfort zones with long exposures, double exposures, and more.<br />
Emily Goodwin<br />
Editor NZ Photographer<br />
General Info:<br />
<strong>NZPhotographer</strong> <strong>Issue</strong> <strong>23</strong><br />
<strong>September</strong> <strong>2019</strong><br />
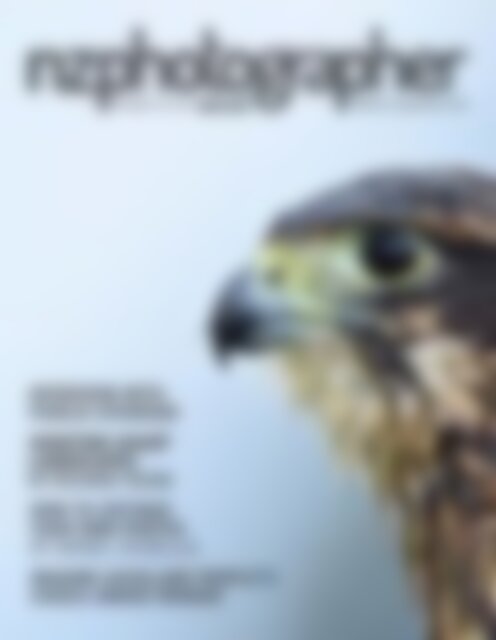
Cover Photo<br />
Falcon Profile taken at Wingspan<br />
National Bird of Prey Centre<br />
by Fairlie Atkinson<br />
Publisher:<br />
Excio Group<br />
Website:<br />
www.excio.io/nzphotographer<br />
Group Director:<br />
Ana Lyubich<br />
Editor:<br />
Emily Goodwin<br />
Graphic Design:<br />
Maksim Topyrkin<br />
Advertising Enquiries:<br />
Email hello@excio.io<br />
2 <strong>NZPhotographer</strong>
REGULAR CONTRIBUTORS<br />
Brendon Gilchrist<br />
Brendon is the man<br />
behind ESB Photography.<br />
He is an avid tramper<br />
who treks from sea to<br />
mountain, and back<br />
again, capturing the<br />
uniqueness of New<br />
Zealand’s unforgiving<br />
landscape.<br />
Ana Lyubich<br />
Co-founder of Excio, Ana's<br />
photography journey<br />
started many years ago<br />
with one of the first Kodak<br />
film cameras. She loves<br />
exploring the unseen<br />
macro world and capturing<br />
genuine people's emotions.<br />
Richard Young<br />
Richard is an awardwinning<br />
landscape and<br />
wildlife photographer who<br />
teaches photography<br />
workshops and runs<br />
photography tours. He<br />
is the founder of New<br />
Zealand Photography<br />
Workshops.<br />
nzphotographer nzp_magazine nzp@excio.io<br />
© <strong>2019</strong> <strong>NZPhotographer</strong> Magazine<br />
All rights reserved. Reproduction of any material appearing in this magazine in<br />
any form is forbidden without prior consent of the publisher.<br />
Disclaimer:<br />
Opinions of contributing authors do not necessarily reflect the<br />
opinion of the magazine.<br />
<strong>September</strong> <strong>2019</strong><br />
3
CONTENTS<br />
IMAGINE AUCKLAND PEOPLE’S CHOICE<br />
AWARD WINNER: TINA MACRAE<br />
6<br />
INTERVIEW<br />
WITH FAIRLIE ATKINSON<br />
6<br />
8<br />
12<br />
22<br />
BEHIND THE SHOT<br />
with Kelly Vivian<br />
INTERVIEW WITH FAIRLIE ATKINSON<br />
THE UP AND COMING TALENT<br />
FROM KAPITI COLLEGE<br />
30 #WOMENINPHOTOGRAPHY<br />
GETTING TO KNOW CHARLOTTE E JOHNSON<br />
38<br />
42<br />
48<br />
55<br />
IMAGINE AUCKLAND PEOPLE’S CHOICE<br />
AWARD WINNER: TINA MACRAE<br />
THE ROUTEBURN TRACK<br />
by Brendon Gilchrist<br />
ENCOURAGING OUR CHILDREN TO BECOME<br />
PHOTOGRAPHERS FROM A YOUNG AGE<br />
by Ana Lyubich<br />
SHOOTING SHARP LANDSCAPES<br />
by Richard Young<br />
HOW TO CRITIQUE YOUR OWN PHOTOS<br />
by Samuel Ogunlaja<br />
12<br />
SHOOTING SHARP LANDSCAPES<br />
BY RICHARD YOUNG<br />
8<br />
BEHIND THE SHOT<br />
WITH KELLY VIVIAN<br />
48
Imagine Auckland People’s Choice<br />
Award Winner: Tina Macrae<br />
MURIWAI GOLD<br />
F10, 1/125s, ISO125<br />
HI TINA, TELL US ABOUT YOU…<br />
I have been very fortunate to live in the<br />
beautiful Whitianga on the Coromandel<br />
Peninsula for the last 22years with my partner<br />
Mark and our two gorgeous boys (or I should<br />
say young men) plus two cats, and Badger<br />
our Lab/foxy cross rescue dog. I’m passionate<br />
about native plants and gardening, food,<br />
travel, and photography.<br />
WHAT’S YOUR CONNECTION WITH<br />
AUCKLAND?<br />
I was raised in West Auckland and lived in Te<br />
Atatu South. I attended the local school’s,<br />
finishing my education at Rutherford High so<br />
west coast beaches were my local stomping<br />
ground.
HOW AND WHEN DID YOU GET STARTED<br />
WITH PHOTOGRAPHY?<br />
My Grandfather and Aunty have always been<br />
avid photographers and my Mum was always<br />
taking family snaps but it was my art teacher<br />
(Gary Shuker at Rutherford High) who taught<br />
me the fundamentals of photography like<br />
form, composition, lighting, and developing<br />
black and white film.<br />
Later on, when I had a family of my own,<br />
I was always taking family snaps but started<br />
stretching my skills by taking landscape and<br />
macro shots.<br />
Wanting to improve and learn, I joined a local<br />
camera group called Focus Photography in<br />
2016 which then merged with the Whitianga<br />
Camera Club in 2018. We have some amazing<br />
accomplished photographers within the club<br />
who are happy and willing to share their<br />
time and knowledge with monthly workshops<br />
covering topics includiing astro, portraits, and<br />
long exposure.<br />
HOW DO YOU PUSH YOURSELF TO<br />
IMPROVE AND TRY NEW THINGS?<br />
With the monthly challenges from the<br />
Whitianga Camera Club, I have been pushed<br />
outside of my comfort zone, exploring new<br />
techniques and styles of photography. Who<br />
knew that I would enjoy astrophotography<br />
and wandering around at 4am trying to take<br />
photos of the Eta Aquarids meteor shower<br />
back in May (and yes did manage to capture<br />
a couple)!<br />
WHAT CAMERA DO YOU HAVE?<br />
Currently, I’m shooting with a Canon<br />
Powershot G3 x which is a bridge style<br />
camera. While it does have some restrictions,<br />
at the moment it suits me fine as it’s ideal for<br />
travelling – I don’t have to worry about having<br />
the right lens with me (it has an incredible long<br />
range zoom) and it’s able to perform most<br />
tasks a DSLR can.<br />
DO YOU HAVE A FAVOURITE GENRE OR<br />
PREFER A CERTAIN STYLE?<br />
As yet I don’t have a preferred genre as such<br />
but I do tend to take more landscape and<br />
nature photographs. However, I am interested<br />
in developing my skills in street photography.<br />
TELL US ABOUT THE DAY YOU TOOK THIS<br />
WINNING SHOT…<br />
We were fortunate enough to be staying<br />
at the family bach at Muriwai which is<br />
a quintessential kiwi bach from the 60’s.<br />
I decided to hit the beach for a long walk<br />
with my camera on a stunning June afternoon<br />
as the tide was dropping. My idea was to<br />
work on capturing people on the beach in a<br />
more abstract way. The light was incredibly<br />
beautiful. As I was leaving the beach<br />
I climbed the sand dunes behind the surf<br />
club watchtower to capture the sunset and<br />
silhouette of the tower and was rewarded<br />
with a glorious golden sunset where the sky,<br />
sea, and sand were ablaze. It wasn’t really a<br />
planned shot but one I thought summarized<br />
Auckland’s west coast.<br />
ARE YOU HAPPY WITH THE PHOTO? IS<br />
THERE ANYTHING YOU WOULD HAVE<br />
LIKED TO HAVE DONE DIFFERENTLY?<br />
I like the effect and colour of the image as it<br />
was on the day but I should have used a filter<br />
so the sun wasn’t as glaring but alas, I didn’t<br />
have them with me.<br />
HOW DID IT FEEL FINDING OUT THAT<br />
YOUR PHOTO HAD WON THE PEOPLE’S<br />
CHOICE AWARD?<br />
To be honest I was surprised but totally thrilled<br />
at the same time as there were some amazing<br />
images in the competition.<br />
HAS WINNING PEOPLE’S CHOICE<br />
GIVEN YOU A SENSE OF NEW FOUND<br />
CONFIDENCE?<br />
Actually, it really has. I guess I have always<br />
been my own worst enemy with self doubt but<br />
this is my second win of the year as I also had<br />
a photo shortlisted in the still life category of<br />
the Sigma amateur photographer of the year<br />
competition.<br />
DO YOU HAVE ANY TIPS OR ADVICE FOR<br />
FELLOW PHOTOGRAPHERS WHO MAY<br />
BE HESITANT ABOUT SUBMITTING THEIR<br />
WORK TO COMPETITIONS?<br />
Don’t stop learning and keep trying and<br />
experimenting with different genres, ideas, and<br />
techniques. For those just starting out, get off<br />
Auto mode and start using Manual – Have fun!<br />
WHERE CAN WE FIND YOU ONLINE?<br />
Nowhere yet as my photography has just been<br />
for me up until this point but who knows what<br />
the future may hold!<br />
<strong>September</strong> <strong>2019</strong><br />
7
Behind The Shot<br />
with Kelly Vivian<br />
8 <strong>NZPhotographer</strong>
O’HARE AIRPORT<br />
F5.6, 1/1200s, 18mm<br />
<strong>September</strong> <strong>2019</strong> 9
KELLY, PLEASE INTRODUCE YOURSELF TO US...<br />
I live on Auckland’s North Shore with my 17 year old<br />
son, Sebastian. I have a 19 year long history working<br />
within the hospitality and customer service industries<br />
and began my amateur photography journey in 2015<br />
when I bought my first DSLR, a Nikon D3300.<br />
I primarily bought a camera to take shots of my son<br />
on the basketball court and ended up doing multiple<br />
contracts for Basketball NZ after they saw some of<br />
my shots. I then diversified and began taking shots of<br />
almost everything I could to practice and get better<br />
at other styles of photography.<br />
Landscapes, wildlife, travel and long exposure<br />
photography are my favourites now. I still take sports<br />
photography shots, but they aren’t so much my focus<br />
anymore.<br />
WHAT ARE YOU SHOOTING WITH?<br />
My current weapon of choice is the Nikon D500. I love<br />
the functionality and speed of the body, it’s not too<br />
heavy when shooting handheld and I find it produces<br />
such high-quality RAW images.<br />
I have three lenses, the first is a Tokina AT-X Pro,<br />
11-16mm, f/2.8 which I love for landscapes and, with<br />
my Hoya 10 stop ND filter and remote shutter control,<br />
long exposures. Then I have my Nikkor FS kit set lenses,<br />
18-55mm & 70-200mm which are great multi use lenses<br />
and finally my Tamron SP 70-300mm, f/4-5.6 which I use<br />
for wildlife photography.<br />
I use an extreme pro 256GB SanDisk memory card<br />
because of the super-fast processing, a Godox<br />
speedlight flash and a Joby Gorillapod as my tripod<br />
but am looking to get a larger tripod as a more stable<br />
base for my long exposures. I shoot exclusively in<br />
manual mode, but rarely do I take the ISO off auto, I<br />
just adjust the f stop and shutter speed.<br />
TELL US ABOUT YOUR O’HARE AIRPORT<br />
PHOTO...<br />
My son and I were travelling to North Carolina for him<br />
to trial for a college basketball team and we had to<br />
go from LAX to O’Hare then onto Greensboro in NC.<br />
This photo was taken during our stopover in O’Hare<br />
Airport in Chicago.<br />
Upon leaving the plane, we needed to move from<br />
one terminal to another and to get to the second<br />
terminal, we needed to go down a large steep<br />
staircase and along the travelator shown in the<br />
image.<br />
The lights along the roof changed colour and I was<br />
mesmerised by the sight. It was spectacular, and I<br />
couldn’t help myself but to get my camera out of my<br />
hand luggage and take a couple of shots.<br />
I opted to go down the most central lane heading<br />
the right way and take the shot, so the lines of the<br />
10 <strong>NZPhotographer</strong><br />
handrails were as centred as possible. I had to avoid<br />
people coming up behind me and didn’t want to<br />
get in the way, so it was a super quick few shots fired,<br />
hoping that I’d got the shot.<br />
WHAT WAS HAPPENING BEHIND THE CAMERA?<br />
My son was super tired and less than impressed<br />
that I was holding him up from getting his breakfast<br />
because I was ‘taking more photos’ haha.<br />
ARE YOU HAPPY WITH THE PHOTO, WHAT DO<br />
YOU LIKE/DISLIKE ABOUT IT?<br />
I always liked this image, especially as it was taken on<br />
the fly, with no real planning or time to perfect it. The<br />
fact that the passengers in the photo are somewhat<br />
blurry initially annoyed me, but now I feel they tell<br />
a story of how rushed people can be at one of the<br />
largest airports in the United States and how they<br />
don’t take the time to stop and look around in such a<br />
busy place.<br />
I like to take photos free of people so I tried to take<br />
this with the least amount of people in the frame,<br />
but in retrospect, I quite like the silhouettes of weary<br />
travellers in the image and I think it adds to the<br />
aesthetic of the image as a whole.<br />
I don’t know if there is anything I could have done<br />
better, maybe got a different angle of the space<br />
from off the travelator with a more stable non-moving<br />
spot, but it just wasn’t going to happen with a hungry<br />
teenager hounding me haha.<br />
WHAT DID YOU LEARN FROM TAKING THIS<br />
PHOTO?<br />
The main thing I learned from taking this image is to<br />
take chances, take opportunities to get the shot,<br />
regardless of what is happening around you, what<br />
people may think of you or where you are. The most<br />
challenging shot can often be the most rewarding.<br />
WHERE CAN WE FIND YOU ONLINE?<br />
www.instagram.com/kells1photography<br />
www.facebook.com/kells1photography<br />
albums.excio.io/profile/KellsPhotography<br />
BEHIND THE SHOT IS PROUDLY<br />
SUPPORTED BY
FRESH SHOOTS<br />
PHOTO COMPETITION<br />
We’re inviting photographers to highlight all the wonderful things that make the Wellington<br />
Botanic Garden much more than a garden, while encouraging photographers to focus on<br />
the garden season by season.<br />
For prizes and full Terms & Conditions see: www.excio.io/freshshoots<br />
The last season of the competition is now open:<br />
Winter<br />
22 June - 20 <strong>September</strong> <strong>2019</strong><br />
CATEGORIES<br />
NATURE<br />
PEOPLE &<br />
EVENTS<br />
CREATIVE<br />
PARTNERS<br />
<strong>September</strong> <strong>2019</strong><br />
11
Interview with<br />
Fairlie Atkinson<br />
HI FAIRLIE, ALTHOUGH READERS WILL KNOW<br />
YOU FROM OUR BLOG INTERVIEW, WHY DON’T<br />
YOU GIVE US A RECAP?!<br />
I live in Kapiti and teach Photography and Design at<br />
Kapiti College. My partner Peter and I have four children<br />
(2 each) and we also have two exchange students<br />
living with us long term while they study at Kapiti College.<br />
Our life is pretty busy as we are doing up our home. That<br />
being said it is perfect for our large eclectic family.<br />
Since I teach photography, I am immersed in it all day<br />
with my students, time for my own photography during<br />
the school term is rare so I tend to do my own creative<br />
work on the weekends if it is a project I can involve my<br />
kids in, and during school holidays.<br />
My own photography passion is creating bird portraiture<br />
as a way of fundraising for local wildlife reserves and<br />
I donate my images of native New Zealand birds to<br />
wildlife and conservation organisations to use in their<br />
advertising and marketing to avoid them having to use<br />
their budgets to pay for this service.<br />
Aside from photography I love horse riding and teach<br />
horse riding after school one day a week. I enjoy<br />
reading crime novels, visiting nature reserves, bush<br />
walks, and travelling to new places. I love foreign food,<br />
learning languages and last but not least spending time<br />
with my eclectic family.<br />
TELL US MORE ABOUT HELPING CHARITIES<br />
WITH YOUR PHOTOGRAPHY, WHAT HAVE<br />
YOU DONE MOST RECENTLY?<br />
Most recently I was in Turangi and captured<br />
images of whio in the wild that I have donated to<br />
an organisation called Whio Forever. They partner<br />
with DoC to protect the whio, and photos of whio<br />
in their natural habitat are a wonderful indicator<br />
of their success. They can use my photos (if they<br />
wish) to showcase this success on social media<br />
or anywhere that might raise their profile. I also<br />
donate my images to Staglands and Nga Manu<br />
whenever I visit, and I have a series of images taken<br />
at Nga Manu, when I sell prints of these I donate a<br />
percentage to the Reserve. They do incredible work<br />
rehabilitating our native birds and I believe it is only<br />
fair to give back to the community that supports my<br />
photography.<br />
HOW AND WHEN DID YOU DECIDE TO<br />
BECOME A PHOTOGRAPHY TEACHER?<br />
I have spent most of my career teaching at universities<br />
in Asia and the Middle East. My children were born<br />
in the Middle East but I wanted to raise them in New<br />
Zealand. Therefore, I returned to high school teaching<br />
in New Zealand in 2015 where I taught English and<br />
Technology.<br />
I had been given a DSLR camera that same year<br />
and started playing with it so by the time I moved to<br />
Kapiti in 2017 I had decided photography was what<br />
I wanted to teach. I enrolled in a level 5 diploma of<br />
photography with the Southern Institute of Technology<br />
and realised very quickly that I wanted to teach<br />
a creative subject that students took as an option<br />
rather than a core subject that students had to take.<br />
I was lucky that Tony Kane, the principal had faith<br />
that I could do this and I am in a supportive working<br />
environment. The Visual Arts teaching community<br />
is incredibly caring and share many resources and<br />
support new teachers to the subject very well.<br />
HOW DO YOU APPROACH THE TEACHING OF<br />
PHOTOGRAPHY?<br />
My approach is two-fold. First, I believe students need<br />
to experiment. The first thing I do for new students is<br />
to run a camera boot camp which is two weeks long.<br />
Each day we focus on something different like shutter<br />
speed or aperture etc. I give them challenges related<br />
to this, like take a photo that shows someone jumping<br />
in the air, with no blur.<br />
12 <strong>NZPhotographer</strong>
<strong>September</strong> <strong>2019</strong> 13
I also do things like getting them to build their own<br />
lightbox from white cardboard and photographing<br />
a cicada shell placed in the centre. In order to<br />
photograph the cicada well, they need to use their<br />
camera on manual. Once they have the camera<br />
basics right and know how to manipulate studio<br />
lighting, I encourage as much experimentation as<br />
possible. My catchphrase is “go play!” What I mean<br />
by this is go and play with the settings, lighting, subject<br />
matter, location. Experiment and see what evolves.<br />
Secondly, I believe ‘creative conversation’ is essential<br />
(either one on one with me or peer feedback) to the<br />
creative process for a student operating within the<br />
confines of NCEA. Asking the hard questions such as<br />
‘how much time did you devote to this? How does this<br />
image relate to your theme or the images around it?<br />
Who is your artist model? Where are you going with<br />
this and what’s next?’ gets students to look with a<br />
critical eye at their images.<br />
However, I very much believe that students need<br />
to follow their own creative journey so I tend to give<br />
them very loose themes like ‘Turangawaewae’,<br />
which they can interpret very literally or in an abstract<br />
manner. Many students create a photographic series<br />
based on their identity, or something they identify with.<br />
And because I am careful to work within their interests<br />
they tend to be more engaged in the process.<br />
WHAT’S YOUR FAVOURITE THING TO TEACH IN<br />
THE CLASSROOM?<br />
The first couple of lessons in Photoshop! Students<br />
think they can magically transform a terrible photo<br />
in Photoshop but they find out very quickly that this<br />
isn’t the case at all. They also discover that a well shot<br />
image just needs some tweaking in Photoshop to look<br />
absolutely fantastic. Once they have mastered the<br />
tools, I love to see them getting creative and trying<br />
things like surrealism and pop art using their own<br />
photos. Some of their creations are weird, wonderful,<br />
and bizarre, but all of them are a creative journey.<br />
WHAT’S THE BEST PART OF BEING A<br />
PHOTOGRAPHY TEACHER? AND THE WORST?!<br />
The very best thing about this job is the immense<br />
satisfaction that comes when a student’s work is<br />
recognised or exhibited. To know that I was a small<br />
part of that creative journey is very satisfying and to<br />
have others appreciate the innovation and creativity<br />
of the teenage mind is wonderful. I also derive a great<br />
deal of personal inspiration from my students and from<br />
the creative conversations we have. They push me<br />
to get out of my comfort zone as a photographer. A<br />
direct result of this is that I have started dabbling in<br />
some surrealist photography of my own which you<br />
can see on the next page. My picture of the baby<br />
ruru was taken at Wingspan and then I went online<br />
and found a copyright free image of an eye and<br />
one of a steampunk style clock face. I then blended,<br />
painted, coloured, and smudged until I got an image<br />
I was happy with. It was my first attempt at surrealism<br />
and I still like it.<br />
The worst thing is that photography is underfunded,<br />
underappreciated, and undervalued in every high<br />
school. Therefore, we struggle to find funds for<br />
equipment and resources. It is also a subject that is not<br />
viewed as particularly academically rigorous by many<br />
in the community. This perception is completely false,<br />
and students have to work extremely hard to pass,<br />
and standards are very high. This is an issue for many<br />
optional subjects and subjects in the Arts and not just<br />
photography.<br />
WHAT CHALLENGES DO YOUR STUDENTS FACE<br />
AND HOW DO YOU/THEY OVERCOME THEM?<br />
The biggest challenge is coming up with an idea that<br />
will run across 2–3 NCEA boards. That’s anywhere<br />
between 40–60 photos that connect to each other,<br />
are based on various artist models, that fit into a<br />
theme, and that can provide enough variety to keep<br />
the marker interested.<br />
Students often say, “but Miss I don’t have any ideas.”<br />
That’s where the Internet, this magazine, Excio,<br />
Instagram, Pinterest, and the library come in! I ask<br />
students to explore photography by other people<br />
based on themes of interest to them. Once I know<br />
what they are interested in and what creative style<br />
they like I can recommend photographers that can<br />
be used as artist models so that students can learn<br />
from established practitioners. They can then develop<br />
their own interpretation of that style and work towards<br />
developing their own approach to their photography.<br />
Artist models are established practitioners in their<br />
field of art, whether that be painting, sculpture,<br />
photography etc. Our students are required to<br />
reference more than one artist and their style or<br />
techniques somewhere in their work. For example, if<br />
a student wants to shoot a photographic series and<br />
incorporate type into it they might use Barbara Kruger<br />
as an artist model and shoot their images in black and<br />
white and use red and black type. The images and<br />
message will be unique to them but will be influenced<br />
by the artist model's style.<br />
WHAT ARE YOUR THOUGHTS ON<br />
PHOTOGRAPHY (AND THE ARTS AS A WHOLE)<br />
IN THE SCHOOL CURRICULUM?<br />
They are absolutely necessary. Not every kid can<br />
read and write well, and not every kid is musical,<br />
mathematical, or sporty. Not every child likes science.<br />
So what’s left? We as a society need to nurture<br />
creative pursuits. They inspire others, and push us to try<br />
new things. When a student leaves school, employers<br />
are increasingly looking for adaptable, creative, and<br />
conscientious people. The Arts does a very good job<br />
of preparing our young people to think creatively and<br />
solve problems with the tools in front of them. If the<br />
Arts are removed from a curriculum, so is creativity in<br />
its purest form.
<strong>September</strong> <strong>2019</strong> 15
16 <strong>NZPhotographer</strong>
<strong>September</strong> <strong>2019</strong> 17
18 <strong>NZPhotographer</strong>
HOW DO YOU EDUCATE YOURSELF SO YOU<br />
CAN BETTER HELP YOUR STUDENTS?<br />
I look a lot at student work and talk to them about their<br />
interests. I then go online and see what other artists and<br />
photographers may have done in that field and how<br />
they have done it. I spend a lot of time on online forums,<br />
watching tutorials, or exploring different genres in order<br />
to better help my students. Essentially, I am constantly<br />
learning alongside them.<br />
I find it pointless to teach the same thing to everyone.<br />
Last year a student said she loved the work of Prue<br />
Stent and Masie Cousins so I went online and explored<br />
their work and their techniques with that student. We<br />
experimented making coloured cornflour paste, and<br />
Googled the ingredients for a milk bath so she could do<br />
a shoot at home. We bought glitter, and slime and found<br />
out how hard it is to clean it up after you have taken<br />
photos with it and that the glitter keeps reappearing<br />
weeks, even months later. It’s about learning, and<br />
experimenting together. This year when a student asked<br />
me about those two photographers, I was ready with<br />
answers!<br />
When you train to be a teacher, or train within your<br />
subject matter, it doesn’t mean you now know<br />
everything. You can learn as much from your students as<br />
they can learn from you if you choose to.<br />
TELL US HOW YOUR SCHOOL HAS TEAMED UP<br />
WITH EXCIO TO SHOWCASE STUDENTS’ WORK…<br />
It started with me leaving a comment on one of the<br />
<strong>NZPhotographer</strong> Magazine posts on Facebook that<br />
asked what we, as a community, wanted to see<br />
in the magazine. I was tired of seeing all the posts<br />
of landscapes and what I felt was the same style<br />
of photography again and again posted by the<br />
photographic community. I felt that it excluded the<br />
creativity and talent of our younger generation.<br />
I use this magazine as a teaching tool, and I wanted<br />
to see the magazine evolve and attract a younger<br />
generation of reader – I think this is definitely happening<br />
lately, which is awesome. Ana and I began talking<br />
about my feature on the Excio blog and I asked her<br />
if we could have an Excio account for the school as<br />
the photography the students do is fantastic, and a<br />
bit different from what we normally see showcased in<br />
photography magazines and in social media.<br />
She was immediately supportive and when she came<br />
to talk to our students she was so inspirational. She<br />
essentially voiced the message that I have been trying to<br />
get across to our students about photography telling the<br />
students that photography does not have to be about<br />
the ‘likes’, the ‘followers’ and the ‘influencers’, but it can<br />
be about doing good and communicating a message<br />
for change or just sharing a beautiful moment. I feel very<br />
grateful to have had someone like Ana in my classroom<br />
living those words with her work with Excio and NZP as<br />
an example of how a photographic community can be<br />
based on something other than the pursuit of fame and<br />
money.<br />
At the moment we have around 8 students on Excio with<br />
1–3 photos per student, but are in the process of adding<br />
more. What we are trying to do is showcase a variety of<br />
images from our students so users of the app can see<br />
how varied our students’ talents and interests are. I have<br />
put together a student team to help me administer the<br />
school collections so we can showcase as many as<br />
120 photos at a time. It’s very exciting for us, and gives<br />
students the motivation to strive hard to be innovative<br />
and creative because, in the end, it is those images that<br />
have the most impact and those are the ones we want<br />
to show. Photography as a subject is only growing at<br />
Kapiti College, and with our partnership with Excio it will<br />
only attract more students keen to be appreciated for<br />
the innovators and artists that they are.<br />
HOW DO YOU THINK PHOTOGRAPHY BENEFITS<br />
KIDS AS A WHOLE?<br />
Photography has something for kids who think and see<br />
things differently. Maybe they can’t draw or play a<br />
musical instrument but are still creative. Imagine a world<br />
without creative people, without photography, art and<br />
music, it would be a very grey world. Children paint, sing,<br />
and dance before they read, write, and calculate. It’s<br />
their way of communicating, and essentially that is what<br />
art is in its purest form; a vehicle for personal expression.<br />
Photography facilitates creativity, personal expression,<br />
communication, and changes the way kids look at the<br />
world. Once you begin to be able to communicate a<br />
message with an image, you start seeing the potential for<br />
photos, and for communication everywhere. Remember,<br />
we are a society made of kids whose first instinct is to<br />
imagine, create and explore. Why can’t we continue this<br />
into adulthood?<br />
<strong>September</strong> <strong>2019</strong><br />
19
20 <strong>NZPhotographer</strong>
WHAT ADVICE DO YOU GIVE YOUR STUDENTS<br />
WHO WANT TO MAKE A CAREER OUT OF<br />
PHOTOGRAPHY?<br />
If this is your dream then go for it. If it’s the only thing they<br />
want to do then why not? Photographers are employed<br />
by the Armed Forces, the police, hospitals, regional<br />
councils, real-estate firms, government departments and<br />
by publishing groups.<br />
Many students talk to me about their fear of financial<br />
insecurity that comes with choosing a job in the Arts. This<br />
is indeed valid, as photography has become very much<br />
a contract business. I think there are ways and means of<br />
making money from doing what you love though, without<br />
money being the primary objective.<br />
WHAT ARE YOUR THOUGHTS ON GETTING A<br />
FORMAL EDUCATION IN PHOTOGRAPHY VERSUS<br />
TEACHING YOURSELF WHEN THE AIM IS TO MAKE<br />
PHOTOGRAPHY INTO A CAREER?<br />
I taught myself everything from Youtube, the Internet and<br />
by just playing with my camera. I think a formal education<br />
will help you if your employer is one that requires it and<br />
that’s the direction you want to go in but honestly, what<br />
I gained from a formal education in photography is the<br />
qualification, not the skills themselves.<br />
Saying that, not everyone learns the same way and many<br />
people like the structure of lessons and being told what<br />
to try and in what direction to move before they try the<br />
practical skills out. I prefer to learn by doing. I see in my<br />
classroom kids who want me to actively show them every<br />
tool and how it works in Photoshop and other kids who just<br />
want to dive in and click everything and see how it works.<br />
To be honest, the kids who dive in seem to learn the tools<br />
more quickly because they are not afraid of making a<br />
mistake but that’s not to say that one approach is better<br />
than the other.<br />
WHAT ADVICE WOULD YOU GIVE OUR READERS<br />
FOR CHOOSING A PHOTOGRAPHY COURSE?<br />
Consider what purpose it will serve. If you need a<br />
qualification for a job then by all means go and get it.<br />
Remember, at its core, photography is a practical art form<br />
so make sure you choose a course where there is room to<br />
practice and hone your practical skills, and not just write,<br />
or reflect on, or critique work.<br />
Critique is valuable, but courses seem to want to add a<br />
fair amount of peer critique in them to make them feel<br />
more ‘academic.’ I, myself, found little value in mandatory<br />
critique. Voluntary, on the other hand, has a great deal of<br />
value and leads to a more authentic learning experience.<br />
I actually love the photo critique section in the magazine<br />
and on the blog but what we have to keep in mind is that<br />
one person’s idea of a good photo is not someone else’s.<br />
ANY WORDS OF WISDOM TO LEAVE US WITH?<br />
Learning is a lifelong pursuit. Art is personal and art<br />
critique is subjective. In a nutshell, do what you love, keep<br />
learning, and trying new things. Go and play with your<br />
camera as often as you can!<br />
WHERE CAN WE FIND YOU ONLINE?<br />
albums.excio.io/profile/Fairlie Atkinson<br />
facebook.com/kapitiphotography<br />
<strong>September</strong> <strong>2019</strong><br />
21
The Up and Coming Talent from Kapiti College<br />
We’ve heard Fairlie talk about teaching, now let’s switch sides and hear about<br />
the creative/photographic journey that some of her students are on as we see the<br />
projects they’ve completed.<br />
aesthetic. My style of photography is quirky, girly<br />
aesthetics. I love both trying to communicate a<br />
message through photography in a creative way,<br />
and also just experimenting with random meaningless<br />
ideas. I find photography a way to express my<br />
creativity and art, using props and settings to create<br />
an image no one else will have seen.<br />
CAN YOU CHOOSE A FAVOURITE PHOTO OR<br />
PROJECT?<br />
These photos are a series of four demonstrating a<br />
progressing heart. The first photo is just a sparkler by<br />
itself, the second a 1/4 heart, the third a 3/4 heart,<br />
and the fourth a full heart. I created these images by<br />
using sparklers to draw a heart shape. I adjusted the<br />
settings manually to a low shutter speed, the lowest<br />
for the full heart as it took the longest to draw, and a<br />
short shutter speed for the still sparkler. The low shutter<br />
speed meant that I could draw the heart shape with<br />
the sparkler and the camera would capture the light<br />
trail, and dismiss the wire stick of the sparkler so that a<br />
heart outline was created with sparks flying off it. I also<br />
put a piece of pink cellophane over one studio light,<br />
and a blue piece to cover the other, this created an<br />
ombre background.<br />
NAME: MIETTA<br />
AGE: 17<br />
TELL US ABOUT YOUR JOURNEY WITH<br />
PHOTOGRAPHY SO FAR…<br />
I have always had a passion for taking aesthetic<br />
images, and an appreciation for beauty – Trying to<br />
capture the good in things or bring out the beauty.<br />
I have always loved taking photos however had never<br />
used a proper camera before, only using my phone.<br />
So this year is the first year I have actually taken<br />
photos on a DSLR. I struggled at the beginning to<br />
figure out how to adjust and manipulate the settings<br />
however, for every photo shoot I did, I played around<br />
with the manual settings a lot until I got it right.<br />
WHAT’S YOUR PHOTOGRAPHIC STYLE?<br />
I just love experimenting with props and camera<br />
settings to create images that hold a beautiful<br />
WHAT CHALLENGES YOU MOST IN CLASS?<br />
HOW DO YOU/DID YOU OVERCOME THAT?<br />
I sometimes struggle to come up with ideas, or plan<br />
a series of shoots. I usually overcome this by finding<br />
inspiration from Pinterest, or just coming up with a<br />
simple idea. I then experiment a lot, so the basic idea<br />
expands and more ideas come flowing until I finally<br />
get the photo or idea I want. My best photos are the<br />
ones where I had no plan or a very rough plan, the<br />
photo created purely from experimentation. That is<br />
what I find fun in photography: experimenting heaps<br />
to get my creativity flowing.<br />
HOW DO YOU FEEL ABOUT YOUR<br />
PHOTOGRAPHY BEING CHOSEN TO FEATURE<br />
ON THE KAPITI COLLEGE EXCIO ACCOUNT?<br />
When I heard that, I was really excited and proud! To<br />
be honest, when I first started the subject at school,<br />
I didn’t think I would be good at photography, I was<br />
kind of just messing around with some ideas and never<br />
really thought they would go anywhere.
<strong>September</strong> <strong>2019</strong> <strong>23</strong>
NAME: CHARLISE SEFO<br />
AGE: 16<br />
WHY DID YOU CHOOSE TO STUDY<br />
PHOTOGRAPHY?<br />
I’ve been interested in taking photos since I was<br />
younger. My cousin is a photographer and has<br />
travelled to Switzerland, his photos were a big<br />
inspiration for my love of photography and an<br />
introduction to quality photography. Watching the<br />
process of him taking the photos always looked like<br />
the hardest part but seeing the final outcome was<br />
always inspiring to me. My favourite thing about his<br />
photography was how he would always perfectly<br />
match the colours together, perfectly balancing the<br />
photo. This pushed me to study photography.<br />
WHY/HOW IS PHOTOGRAPHY IMPORTANT TO<br />
YOU?<br />
Photography is a way of expressing myself. A photo<br />
means a thousand words and tells a story or journey.<br />
It’s important to me because it’s my own way of<br />
writing a story, without the words.<br />
CAN YOU CHOOSE A FAVOURITE PHOTO? TELL<br />
US ABOUT IT…<br />
My favourite photo is what I call “Dream State”. The<br />
flower is a symbol of love with the blur on the side to<br />
hint that it’s a dream. With the blue overall, the neon<br />
colours pop more which allows specific things, the<br />
important hints, to be seen. I let the viewer wonder<br />
what it means. Is it a dream? Or a distant memory of<br />
what once was? That’s why it’s my favourite image,<br />
the wonder of the story behind it, is it an untold story or<br />
fearful dream?<br />
WHAT CHALLENGES YOU MOST IN CLASS?<br />
HOW DO YOU/DID YOU OVERCOME THAT?<br />
Having to use artist models can be very restrictive. My<br />
ideas are inspired by images that may not necessarily<br />
be done by famous photographers while the NCEA<br />
says we have to use them. I overcome this by looking
up a certain image or photographer and putting<br />
my own twist on it. I used Jochim Froese as one of<br />
my artist models on my first NCEA level 2 board and<br />
changed a few things to fit my aesthetic and the<br />
energy of my board.<br />
DO YOU HAVE PLANS TO PURSUE<br />
PHOTOGRAPHY AS A CAREER OPTION?<br />
I didn’t think that photography could be a career<br />
option for me till I was recognised – I have realized<br />
now that it could hopefully be a career path for me<br />
one day. It’s something I really enjoy and something<br />
I love to do. I love to show people what I see through<br />
my photos. To capture quality moments with friends<br />
and family.<br />
HOW DO YOU FEEL ABOUT YOUR<br />
PHOTOGRAPHY BEING CHOSEN TO FEATURE<br />
ON THE KAPITI COLLEGE EXCIO ACCOUNT?<br />
When I first heard I was being featured I was over the<br />
moon excited and told all my family and friends. It’s a<br />
massive honour and has made me more focused and<br />
given me the drive to try harder, to experiment more<br />
with the lights and the camera to create awesome<br />
and unique photos.
NAME: LUCAS REID<br />
AGE: 18<br />
WHY DID YOU CHOOSE TO STUDY<br />
PHOTOGRAPHY?<br />
I wanted to do a fun and creative subject. I didn’t<br />
want to choose a subject where you are restricted<br />
to exams and study – I wanted to do something<br />
more relaxed and be creative in a fun classroom<br />
atmosphere. I enjoyed the class in year 12 so I ended<br />
up taking a double line of it in year 13.<br />
WHY/HOW IS PHOTOGRAPHY IMPORTANT TO<br />
YOU?<br />
To be honest, photography is not part of my career<br />
plan, but it is part of my creative outlet. Life is busy<br />
with work and school, and there is not much time to<br />
just take time to enjoy creating something – This is my<br />
space to do that.<br />
CAN YOU CHOOSE A FAVOURITE PHOTO?<br />
The reason I have chosen this photo as my favourite<br />
is because it shows all the elements from my level 3<br />
NCEA board. It shows all the bright colours and all the<br />
objects in one photo as well as a clear photo of my<br />
model. I started my board by creating photo art in<br />
the style of Emily Blincoe but I used everyday NZ food<br />
like hundreds and thousands biscuits and Liquorice<br />
Allsorts. I then introduced my model, who I have<br />
dressed as a colourful, yet grungy drag queen. He<br />
is shown with these other elements to try and make<br />
an extraordinary picture out of an ordinary boy and<br />
ordinary objects.<br />
WHAT CHALLENGES YOU MOST IN CLASS?<br />
HOW ARE YOU OVERCOMING THAT?<br />
The challenges I face are following the NCQA rules<br />
for the external photography boards as well as being
creative and having my own ideas. Because I need<br />
to pass the boards I need to follow the rules that<br />
NZQA have put out for me, and this can sometimes<br />
restrict how creative I can be with my photos. For<br />
example, I would quite like to do photos in my own<br />
style, or in the style of influencers on social media but<br />
I have to use artist models that NZQA and the teacher<br />
approves.<br />
HOW DO YOU FEEL ABOUT YOUR<br />
PHOTOGRAPHY BEING CHOSEN TO FEATURE<br />
ON THE KAPITI COLLEGE EXCIO ACCOUNT?<br />
I’m amazed! It feels great to know that my photos will<br />
be featured on the Excio account, my teacher has<br />
more faith in my work than I do!<br />
<strong>September</strong> <strong>2019</strong><br />
27
Want your photography<br />
to have impact?<br />
Join Excio today for global reach<br />
and showcase your message.<br />
We’re different from magazines and social media.<br />
Take a look<br />
www.excio.io<br />
28 <strong>NZPhotographer</strong>
excio.io<br />
#photographyforgood<br />
<strong>September</strong> <strong>2019</strong><br />
29
#WomenInPhotography<br />
Getting To Know Charlotte E Johnson<br />
ASCENSION: MICROSCOPE CAPTURE<br />
OF A PINE CONE SECTION<br />
30 <strong>NZPhotographer</strong>
DO YOU HAVE A CERTAIN STYLE OR A<br />
PREFERRED GENRE?<br />
I adore fine art portraiture – this is the area I’m<br />
working towards with my own work. Our modern<br />
world is filled with amazing photos but the ones that<br />
make me stop scrolling are the ones that engage<br />
me and make me feel something. It’s the same<br />
feeling you might get when you view a beautiful<br />
painting in an art gallery or come across an image<br />
that makes you think ‘wow’.<br />
CHARLOTTE, LET US KNOW WHERE YOU’RE<br />
FROM AND WHAT YOU DO!<br />
I’m a photographer and microscopist for the<br />
University of Auckland. I spend my working hours<br />
taking photos (either on a camera or through a<br />
microscope) and editing them in Photoshop – it’s a<br />
pretty great job. I moved here from the UK almost<br />
2 years ago where I did my Ph.D and subsequent<br />
postdoc researching cancer biology. Quite a jump<br />
in career and geographical location!<br />
HOW AND WHEN DID YOU GET INTERESTED<br />
IN PHOTOGRAPHY?<br />
I bought my first DSLR (a Sony a200) about 8 years<br />
ago. After about a year of casually playing around<br />
with it, I wanted to do more but I had no idea<br />
how to take it off auto mode so I took an evening<br />
course in photography for beginners. That sparked<br />
my interest which led to a second and a third<br />
course, plus an obsession with film photography.<br />
I was greatly inspired by the classic abstract works<br />
of photographers like Minor White and Edward<br />
Weston. At the time I couldn’t understand my<br />
classmates’ interest in taking photos of people –<br />
now portraiture is my favourite genre!<br />
WHAT ARE YOU SHOOTING WITH?<br />
For my digital work, a Sony A7Riii with a selection of<br />
Sony or Zeiss prime lenses and a Minolta Dynax7 for<br />
35mm and Hasselblad 500C for medium format film.<br />
TELL US MORE ABOUT THE CREATIVE<br />
PROCESS BEHIND YOUR ‘PAINTERLY<br />
PORTRAITS’…<br />
I want to create art which is beautiful to me, that<br />
has depth and feeling. I sometimes start off with<br />
a prop or accessory and the idea builds around<br />
that, or other times I take inspiration from artwork or<br />
techniques I’ve seen elsewhere and want to put my<br />
own spin on. I’m very lucky to have several creative<br />
contacts who share my passion and am often<br />
asked to take part in their projects.<br />
For my painterly style portraits, my keyword is usually<br />
‘soft’; soft lighting, soft hands, soft textures. I will<br />
often make a Pinterest board which helps keep me<br />
on track leading up to and during the photoshoot<br />
as I tend to get carried away in the moment.<br />
For me, the real magic happens during the postprocessing<br />
stage, for which I use Photoshop.<br />
I employ several techniques to most of my images<br />
which I’ve picked up from workshops, but every<br />
image is uniquely processed – I almost feel each<br />
one pulling me towards a certain look.<br />
DO YOU HAVE A FAVOURITE IMAGE?<br />
My favourite image is the one I’m going to take<br />
tomorrow!<br />
But if I must choose, one of my favourite images is<br />
my Curious Kea. Taken on a trip to Wellington not<br />
long after we moved to New Zealand, it was the<br />
closest I’d ever been to a kea – I’d only brought my<br />
35mm prime lens so didn’t have much choice.<br />
I was cautious about putting the camera (and<br />
my fingers) so close to the bird as I’d heard<br />
about their penchant for ripping things to bits but<br />
I approached slowly and calmly, speaking to the<br />
kea in a soft voice so as not to scare it. As you can<br />
see from the image on the next page, it was dimly<br />
lit so my shutter speed was quite slow. As you can<br />
see from the image on the next page, it came out<br />
so sharp as I was hand-holding. When I look at this<br />
photo, I see the curiosity and intelligence of the<br />
kea and I am very happy to have captured this<br />
intimate moment.<br />
<strong>September</strong> <strong>2019</strong><br />
31
CURIOUS KEA<br />
F5, 1/1000s, ISO1000<br />
32 <strong>NZPhotographer</strong>
<strong>September</strong> <strong>2019</strong> 33
ELLE<br />
Collaboration with makeup<br />
artist HollyB and model Elle<br />
Alexeenco<br />
F2.8, 1/125s, ISO250<br />
34 <strong>NZPhotographer</strong>
VOODOO QUEEN<br />
Collaboration with designer/<br />
stylist The Baroness Creates<br />
and model Suzan Tibane<br />
F4, 1/125s, ISO100<br />
<strong>September</strong> <strong>2019</strong><br />
35
WHAT CHALLENGES HAVE YOU OVERCOME<br />
IN PHOTOGRAPHY AND HOW DID YOU DO<br />
THAT?<br />
I came from an amateur background with a foundation<br />
study in photography and jumped straight into a fulltime<br />
photography job where I was asked to take photos<br />
of anything and everything at publication quality using<br />
unfamiliar equipment. I didn’t sign up for a 365 project but<br />
I most certainly did take photos every single day, learning<br />
the equipment and techniques as I went.<br />
I used online workshops and YouTube tutorials,<br />
joined the Photographic Society of New Zealand<br />
and went to my first photography convention,<br />
joined a local camera club where I received image<br />
critique, and practised, practised, practised.<br />
A lot of my work involves taking portraits but I had<br />
no experience in portraiture, so I put up a sign on<br />
a notice board asking for students to model for<br />
me in exchange for photos. Often they had never<br />
modelled before and we learnt together from the<br />
experience.<br />
HOW DO YOU PUSH YOURSELF TO IMPROVE<br />
AND WHAT DO YOU DO TO GET OUT OF A<br />
CREATIVE SLUMP?<br />
When I first started taking photos, I was of the firm<br />
belief that post-processing was not necessary if you<br />
got everything right in camera – I even thought it<br />
was cheating!<br />
I was introduced to editing during my photography<br />
evening courses. The idea of using a complicated<br />
software scared me but I was intrigued by the<br />
creative possibilities, so I took an online course<br />
thinking nothing much would come from it. Some<br />
years on, I am now an Adobe certified expert in<br />
Photoshop. My happy place is sat at my desktop<br />
with a cuppa, listening to music and editing<br />
images.<br />
HOW HAVE YOU BENEFITED FROM BEING<br />
PART OF LESLEY WHYTE’S WOMEN IN<br />
PHOTOGRAPHY, WHY IS BEING PART OF AN<br />
ALL-FEMALE GROUP IMPORTANT TO YOU?<br />
There is an under representation of women in<br />
photography, especially at a professional level.<br />
Lesley is doing her part to encourage women<br />
photographers and it’s important to me to be able<br />
to support that by being a member of her group. It<br />
also offers many opportunities, including attending<br />
talks by female photographers who you would be<br />
unlikely to otherwise meet. For instance, I attended<br />
a recent talk by Marina de Wit who I had previously<br />
read about in a British photography magazine and<br />
had been inspired by her work – I had no idea she<br />
was living in Auckland! I’m so pleased to have had<br />
the chance to connect with her.<br />
WHAT DO YOU THINK THE ADVANTAGES ARE<br />
OF BEING A FEMALE PHOTOGRAPHER?<br />
I think it’s easier to approach female models and<br />
connect with them plus female models can feel<br />
more at ease during a shoot.<br />
ANYTHING ELSE YOU’D LIKE TO ADD?<br />
I’m open to collaboration and am always on the<br />
lookout to challenge myself. I am available for<br />
Photoshop tutoring/workshops too.<br />
WHERE CAN WE FIND YOU ONLINE?<br />
albums.excio.io/profile/cejphoto<br />
www.instagram.com/cej.photo<br />
www.facebook.com/cej.pp<br />
PROUDLY BROUGHT TO YOU BY:<br />
I don’t get in creative slumps but I do get very<br />
downhearted when my images don’t do well in<br />
competitions. I’m so grateful to the people I have<br />
in my life who help remind me that if what I’m<br />
creating makes me happy, then that’s really all that<br />
matters.<br />
36 <strong>NZPhotographer</strong>
<strong>September</strong> <strong>2019</strong><br />
YURI<br />
Collaboration with makeup<br />
artist Kaith Fainsan and<br />
model Yuri Chetty<br />
F4, 1/200s, ISO100<br />
37
The Routeburn Track<br />
by Brendon Gilchrist<br />
EARLAND FALLS<br />
F9, 1/160s, ISO100<br />
38 <strong>NZPhotographer</strong>
Come on a written journey with me as<br />
I venture onto the Routeburn, one of the<br />
greatest walks in New Zealand covering<br />
32km of tramping track from Glenorchy to The<br />
Divide or vise versa.<br />
This is a walk that many people do during the<br />
official season which runs from from 29th October<br />
to 30th April. Last year a total of 6,606 Kiwi’s and<br />
8,536 international visitors walked the Routeburn<br />
Track. Myself and my Dad can't be included in<br />
those figures though as we're walking it in the off<br />
season, a time when the track is walked by very<br />
few.<br />
DAY 1 – FROM THE DIVIDE TO LAKE<br />
MACKENZIE HUT<br />
Driving up to The Divide which is where the track<br />
begins, there was a lot of snow banked up at the<br />
side of the road which seemed to get deeper the<br />
further we drove but the road itself was thankfully<br />
clear.<br />
Arriving at The Divide around 9.30am we got kitted<br />
up with our boots, hats, and gloves and headed off<br />
into the bush.<br />
The track started slowly, winding uphill towards Key<br />
Summit turn off but this was a detour that we didn’t<br />
take as the clouds were low and the view wouldn’t<br />
have been very good so we continued on the main<br />
Routeburn track, making it to Lake Howden Hut<br />
after about an hour 20 minutes. Considering the<br />
track was covered in snow, we were doing well.<br />
As we carried on there were many streams and<br />
bridges to cross, some with icicles hanging by the<br />
water.<br />
I should have stopped and taken some photos of<br />
these icicles when I saw them but I didn’t and I am<br />
a little gutted because on the return trip they were<br />
gone.<br />
At approximately 1,000 metres above sea level,<br />
the snow was deep in patches which was tough<br />
going. We could hear the 174 metre high Earland<br />
Falls before we could see them but when our eyes<br />
did catch up with our ears it was a spectacular<br />
sight with snow and ice hanging on to the sides and<br />
water pouring over the top. Standing at the base<br />
we could see large chunks of snow falling off the<br />
side of the waterfall – I took a few photos but was<br />
wary of hanging around too long incase something<br />
bigger fell down!<br />
I thought that once we reached this point,<br />
roughly half way with no long hard climbs ahead,<br />
just a consistent altitude until we reached Lake<br />
Mackenzie, that the going would get easier.<br />
My thoughts were a little bit wrong! Over this<br />
next section, we made good time crossing a few<br />
avalanche paths (one of which was signposted<br />
400 meters long) but it was not easy and the snow<br />
never stopped, it was as if it snowed more the<br />
further we went in! It was around 4pm now with<br />
a little bit of daylight left and I had a great idea<br />
to go ahead of Dad and light a fire to warm the<br />
hut up, but now there was no dry firewood. I tried<br />
anyway but failed and although we had some<br />
success later, we spent two nights in a hut that was<br />
warmer outside then it was inside, how is that even<br />
possible?!<br />
Given the amount of snow we had walked through,<br />
there was no way we were going to even attempt<br />
to go up the Harris Saddle as it was bound to be<br />
neck-deep! So our plans for the next day were to<br />
relax and hope the weather would clear for a little<br />
bit.<br />
Night fell and we had nothing else to do but sleep<br />
by the fire in hope that it would be slightly warmer<br />
here than in the bunk bedroom.<br />
DAY 2 – IN AND AROUND THE HUT<br />
The next morning we collected what wood we<br />
could find, it wasn’t much, but it had to do – a lot of<br />
the good stuff was buried under the snow.<br />
I went for a walk to the campsite which is 10<br />
minutes from Lake Mackenzie Hut hoping that the<br />
view of the mountain with the frozen lake below<br />
(the shot I came for which is just 2 minutes from<br />
the hut) would be visible but the mountain was still<br />
hidden by clouds.<br />
It would have been such a stunning shot but this is<br />
the way of photography, it’s not always a success<br />
but you go and try anyway as you never know<br />
when you might get a lucky break.<br />
At sunset I headed out with my camera and<br />
tripod again but there were no colours at all, a<br />
very blue evening. I managed to get a few good<br />
compositions of the lake and the mountain but not<br />
that stunner I’d been hoping for.<br />
Our last night in the hut was an interesting one, the<br />
rain poured down and the ice on the roof came<br />
crashing down, waking us up now and then.<br />
DAY 3 – FROM LAKE MACKENZIE VIA LAKE<br />
HOWDEN BACK TO THE DIVIDE<br />
Morning came and we had to pack up and clean<br />
the hut. I was hoping the rain would stop by the<br />
time we were ready to walk out but no, it poured all<br />
day long.<br />
I put on my over pants and my rain jacket and I was<br />
ready. I didn’t think about the 12km we had to walk<br />
but just stepped out of the hut and started walking.<br />
The only good thing with the rain was that a lot<br />
of the snow had melted so the track was mostly<br />
visible.<br />
<strong>September</strong> <strong>2019</strong><br />
39
We arrived at Lake Howden hut<br />
looking like drowned rats. We stepped<br />
inside for a rest, put on some dry<br />
clothes and warmed up a bit before<br />
walking the last hour back to the car<br />
knowing that the hardest part was<br />
over.<br />
The rain continued to fall on the last<br />
stretch back to the car. We turned<br />
the engine on so as to have the<br />
heater going and got changed inside,<br />
shedding more soaking clothes. It<br />
was a good feeling getting the heavy<br />
pack off my back and into some<br />
normal (dry!) clothes again.<br />
On the drive out, looking forward to a<br />
warm drink and a nice hot meal, we<br />
saw people again, the first in 48 hours.<br />
The further away we drove from The<br />
Divide the less it rained until our arrival<br />
back in Te Anau where it was mostly<br />
dry!<br />
LOOKING BACK<br />
Despite the weather this trip was<br />
beautiful in every way – time in the<br />
bush is some of the best time ever<br />
spent and I enjoyed good company,<br />
refreshing views, fresh clean pure<br />
drinking water and came back with a<br />
few hundred photos to go through.<br />
I will be back again soon, the summer<br />
tramping season is almost upon us<br />
and I have some cool plans of places<br />
to visit!<br />
3 TIPS FOR WINTER<br />
PHOTOGRAPHY<br />
• At night in the huts, keep all your<br />
camera batteries in your sleeping bag<br />
with you so as to keep them warm.<br />
They can lose power even when not<br />
in use.<br />
• Chemical heat packs can be great<br />
for Astrophotography when moisture<br />
can become a problem on your lens.<br />
Wrap the heat pack/s around your<br />
lens and it will keep it warm for hours.<br />
• If the weather is not as great as<br />
what you had hoped for, know<br />
that there are always other options.<br />
Telephoto lenses can give you a very<br />
moody mountainscape and a part<br />
of a tree and a mountain top can<br />
look just as dramatic as the entire<br />
landscape.<br />
40 <strong>NZPhotographer</strong>
FROZEN MACKENZIE<br />
F8, 1/25s, ISO1600<br />
<strong>September</strong> <strong>2019</strong><br />
41
Encouraging Our Children To Become<br />
Photographers From a Young Age<br />
by Ana Lyubich<br />
“Children see magic because they look for it.”<br />
Christopher Moore<br />
42 <strong>NZPhotographer</strong>
<strong>September</strong> <strong>2019</strong> 43
How young should you be when you pick up your<br />
first camera and become a photographer?<br />
Although old dogs can most definitely learn new<br />
tricks, the answer is, the younger the better!<br />
In this article, I’m going to talk about involving young<br />
kids in photography. I believe that children need to<br />
start taking photos as early as possible, as soon as they<br />
are able to hold a phone or a small camera without<br />
dropping it repeatedly. Here’s why…<br />
DEVELOPING THE ART OF SEEING<br />
One of the most important parts of a child’s<br />
development is their imagination. Reading and<br />
playing helps them to develop their creative<br />
thinking and broadens their horizons immensely<br />
but photography goes further, teaching “the art of<br />
seeing” which can often be overlooked.<br />
It is not so much about developing creativity, it is about<br />
‘seeing beyond seeing’. Everything around us can be<br />
seen from a different angle if we try hard enough but<br />
believe me, the angle that children see the world at is<br />
completely different from how we see it as adults.<br />
Since kids are much closer to the ground (both in<br />
height but also because they tend to spend more<br />
time on the ground playing), they see a lot of things<br />
that we, as adults, just don’t tend to notice.<br />
It’s vitally important to support this ‘special sight’ in<br />
children, motivating them to find and capture the<br />
moments or things that are important to them. If ignored<br />
or dismissed, the natural way of paying attention to<br />
different things will very soon disappear in the big<br />
grownup world of noise, busyness, and daily routines.<br />
Supporting the ability to see things that other people<br />
don’t notice will go a long way in helping your kids<br />
grow up to be confident and creative individuals in<br />
the future. From stopping to appreciate the bright<br />
Taken on a Samsung Galaxy A10<br />
by a 12 year old photographer<br />
blue sky to noticing the contrasts, colours, shapes, patterns, interesting views, places, and tiny details –<br />
all of these seemingly small things are actually a huge<br />
gift.<br />
Taken on a Canon Powershot<br />
by a 9 year old photographer.<br />
44 <strong>NZPhotographer</strong><br />
IMPROVING FOCUS AND CONCENTRATION<br />
Giving a camera to your kids is not only great for<br />
improving their concentration and focus but also<br />
boosts their mental well being. It is no secret that<br />
photography is associated with meditation and<br />
mindfulness as are many other art forms.<br />
As an adult, you yourself know that photography<br />
motivates you to go outside and explore the real<br />
world beyond tablets and computers. While taking a<br />
photograph, be it on your phone or with a DSLR, you<br />
might find yourself in a state of meditation even if it<br />
wasn’t intentional and lasted a few minutes. Being<br />
able to focus and concentrate on something with<br />
the end goal in mind of achieving (or capturing)<br />
something interesting, meaningful, and beautiful<br />
can help our kids perform better throughout school,<br />
college, university, and throughout their adult life.
<strong>September</strong> <strong>2019</strong> 45
Aside from focus and concentration, photography<br />
non-intrusively allows children to learn a lot about<br />
other disciplines. Photographing flowers? They will<br />
inevitably learn about the different plants, their<br />
blooming and growing behavior and the insects and<br />
wildlife that surround those flowers. Photographing<br />
animals and pets? They will soon become a pro in<br />
knowing how they behave and how to take the best<br />
shot.<br />
DEVELOPING SELF-EXPRESSION<br />
Last but not least, photography help kids express<br />
themselves in ways they can’t do otherwise. Notice<br />
how the camera becomes the window into their<br />
minds and souls and consequently helps you connect<br />
more closely with them throughout their life.<br />
If I were involved in developing the modules for<br />
schools and educational institutions I would make<br />
photography mandatory from the very first year<br />
because no matter what language your kids speak,<br />
how many friends they have, whether they’re part<br />
of a large or small family, or if they have any health<br />
or developmental issues, capturing objects and<br />
moments around them will help showcase their inner<br />
world. It can connect them with others, kick start<br />
a passion for creative writing (if they are asked to<br />
write a short paragraph to go with their photo) and<br />
most importantly it helps them share their journey so<br />
they know they are not alone; being seen, heard,<br />
understood, and appreciated.<br />
HOW TO INTRODUCE PHOTOGRAPHY TO<br />
YOUR KIDS<br />
Make it Enjoyable and Exciting<br />
First of all, your child must find photography to be an<br />
enjoyable and exciting exercise – Don’t push them<br />
into taking photos! The best way to start is to let them<br />
use your camera or your phone (with one swipe most<br />
smartphones now allow the use of the camera without<br />
unlocking the phone itself) and just see what they do.<br />
It doesn’t matter what they photograph, what matters<br />
at the very first stage is the process itself. At the very<br />
early stage they will probably start with self-exploration<br />
and will take photos of themselves, hands, feet, smiles,<br />
cheeky eyes, then they will switch to taking photos<br />
of family members and friends. From there they are<br />
likely to progress to capturing their bedroom, toys, and<br />
other surroundings. From the inner world to the outer<br />
world this process is very important, there’s no need to<br />
guide it.<br />
SET CHALLENGES<br />
Once your child’s interest in photography has gone<br />
beyond the initial capturing process, give them some<br />
easy but exciting challenges in the way of a game<br />
e. g. “Let’s find 10 red/orange/blue etc things in the<br />
back yard and photograph them!” Grab your phone<br />
or camera and join in the game yourself!<br />
When they show you what they have captured,<br />
you will gradually get an idea of what it is they like<br />
to photograph – small details? the bigger picture?<br />
flowers? nature? pets? people? This is the point where<br />
you can start helping them develop their own style.<br />
When they are not in the mood to pick up a camera<br />
on their own, ask them to take a photo of something<br />
to help you out. Find an excuse and say “Sweetie,<br />
I can’t come and look right now as I’m very busy, can<br />
you please take a photo of it and show me? We can<br />
also show it to Daddy/Nana etc when he/she comes<br />
home too as they’d like to see it I’m sure.”<br />
Reward Them<br />
Of course, all efforts must also be rewarded and all<br />
achievements made to feel important to help them<br />
keep their motivation and excitement alive – Don’t<br />
allow disappointments to get in the way.<br />
Depending on how excited your kid is about running<br />
around with a camera, find some of their best shots<br />
and print them even if it is a batch of small 5’x7’<br />
photos (many online services offer these for free if you<br />
are subscribed to their mailing list). You can then hang<br />
these photos on the fridge just as you do with their<br />
precious masterpieces created in art class.<br />
A few things to keep in mind…<br />
Having your kids running around with a camera (and<br />
we don’t necessarily mean literally running!) doesn’t<br />
mean the only career path they can look forward to<br />
is becoming a professional photographer. Not at all.<br />
However, photography allows them to keep an open<br />
mind and sooner rather than later they (and you too)<br />
will realise that what they see is so much more than<br />
what other people around them see! So don’t be<br />
afraid that your plan of seeing your child become<br />
a lawyer, doctor, or accountant in the future will be<br />
ruined if you introduce them to photography – it will<br />
only make them more creative in their career.<br />
You don’t need to start your kids off with a big or<br />
expensive camera, a small point and shoot can cost<br />
about $100-$150 nowadays and is a great starting<br />
point. However, if a point and shoot is “not enough”<br />
and stopping your kids from taking full creative control<br />
in capturing the world as they see it, don’t put off<br />
getting them a second hand DSLR just because you<br />
think that DSLR’s aren’t play things meant for children –<br />
You might be in the process of nurturing the next Ansel<br />
Adams!<br />
46 <strong>NZPhotographer</strong>
<strong>September</strong> <strong>2019</strong> 47
y Richar<br />
Shooting Shar<br />
The importance of proper shooting techniq<br />
MT NGAURUHOE<br />
F11, 1/20s, ISO 100<br />
48 <strong>NZPhotographer</strong>
p Landscapes<br />
ues to capture sharp landscapes images.<br />
d Young<br />
<strong>September</strong> <strong>2019</strong><br />
49
SUMMIT OF MT NGAURUHOE<br />
F8, 1/30s, ISO 100<br />
How important is sharpness? Well, that<br />
depends on the end-use of your image.<br />
If you are only ever going to display your<br />
image at a maximum size of 1200 pixels on<br />
Instagram, Facebook or a website, I would say not<br />
very. If however, you intend to make large scale<br />
prints of an image, sharpness can make or break<br />
the end quality of that print.<br />
As a landscape photographer that often<br />
produces prints as large as 1.2 meters wide,<br />
sharpness in my original files is paramount for<br />
me. I would not consider myself a “pixel peeper”<br />
though and I am not interested in spending all my<br />
time testing the latest sharpness lens at a different<br />
setting (there are websites to use for that!).<br />
Where having the right equipment for the job and<br />
some knowledge of its limitations are important,<br />
I feel that equipment is not the main reason<br />
that people don’t get sharp shots. The one thing<br />
I consistently see when teaching on workshops is<br />
bad shooting techniques, and I would say this is<br />
the biggest reason for ending up with soft images.<br />
Let’s consider some of the things that can lead to<br />
a soft image and how to minimise these.<br />
EQUIPMENT QUALITY & KNOWLEDGE<br />
I see people blaming the quality of their shots on<br />
the quality of their equipment all the time. Though<br />
gear can make a difference, I feel that this is not<br />
the main reason people don’t get sharp images.<br />
If used correctly any camera setup can capture a<br />
reasonably sharp image.<br />
Camera – I think we have all been sold on the<br />
“megapixel dream” by camera (& phone)<br />
manufacturers. My current phone even has a 40MP<br />
sensor in it! In reality, this whole megapixel race has<br />
become a joke, as the files from my 40MP phone<br />
would never withstand the enlargement needed to<br />
print to the size that I do from my “real” camera due<br />
to other factors like the quality of these pixels and the<br />
optics in front of them.<br />
For my landscape photography, I shoot with a<br />
Nikon D850. One of the reasons I use this camera<br />
is its resolution of 45MP which helps me to make<br />
large scale prints of my images. However, most<br />
photographers do not print to this scale, if they even<br />
print their work at all, so do not require this sort of<br />
file size. Anything over 14MP produces an image of<br />
about the quality of traditional 35mm film. So for most<br />
photographers, if left uncropped this would be more<br />
50 <strong>NZPhotographer</strong>
SUNSET OVER MT NGAURUHOE<br />
F11, 1/6s, ISO 64<br />
than enough for everything they would ever use it for,<br />
including A3+ prints. The number of megapixels your<br />
camera has, only impacts sharpness if you intend to<br />
make huge prints of your photographs.<br />
Lens – I think lens quality is a more important factor<br />
to consider when it comes to image sharpness. A<br />
camera body only records light; it is the lens that<br />
controls the quality (sharpness) of this light and<br />
focuses it onto the sensor. There is no point owning<br />
a camera with a 45MP sensor and using a cheap<br />
lens that is only capable of 12MP sharpness, and<br />
some low-quality lenses would not even be capable<br />
of rendering this sharpness. Even the very best fullframe<br />
lenses available today are still not capable of<br />
resolving 45MP in terms of sharpness, but some do a<br />
much better job than others.<br />
The DXOMARK website is an excellent resource for<br />
lens tests and saves the work of testing them yourself.<br />
Coming back to my earlier point about the 40MP<br />
phone and why this is a bit of a joke, I doubt the tiny<br />
optics on its lens would be able to resolve much of this<br />
resolution sharply.<br />
Sharpest Aperture / Diffraction – All lenses have a<br />
sweet spot, and you need to test your lens or use a<br />
website like DXOMARK to find out this information.<br />
This will differ from lens to lens. As a go to for most<br />
full-frame camera lenses, your sharpest aperture<br />
will be around f8, with f11 only having very minimal<br />
diffraction. With each aperture narrower than this<br />
(e. g. f16, f22) you will lose noticeable sharpness in your<br />
image due to diffraction.<br />
CORRECT FOCUSING TECHNIQUES<br />
Focusing in the right place and obtaining enough<br />
depth of field to get both your foreground and<br />
background in sharp focus is critical for most<br />
landscape images. A slightly out of focus image<br />
on your camera will be extremely noticeable when<br />
viewed at 1:1 zoom later on your computer and even<br />
more in a large scale print.<br />
AF Point – People tend to rely on their camera’s Auto<br />
AF point selection mode. While using AF is not a<br />
problem we need to take control of the AF system<br />
and where it focuses; by using the Auto AF point<br />
selection, the camera would focus on the closest<br />
subject it can find, and this would likely leave the<br />
background out of focus. By manually selecting our<br />
AF point, we can still utilise the AF system but decide<br />
where we wish the camera to focus within the image<br />
to obtain the best depth of field.<br />
<strong>September</strong> <strong>2019</strong><br />
51
EVENING LIGHT ON MT RUAPEHU<br />
F11, 30s, ISO 64<br />
Hyperfocal Distance – If we were to focus on the<br />
closest subject in the landscape (e. g. the rock at our<br />
feet), then the background (e. g. the distant mountain<br />
peaks) would be out of focus. Likewise, if we were to<br />
focus on the distant mountain peaks, the rocks in the<br />
foreground would be out of focus. Therefore we need<br />
to focus on a midpoint within the landscape to obtain<br />
focus throughout; this point is called the hyperfocal<br />
distance. Hyperfocal distance is a complicated<br />
subject, as it depends on many factors. A good rule<br />
of thumb is to focus at a third of the way through the<br />
landscape.<br />
Depth of Field – Depth of field extends in both<br />
directions from our focus point, but not in equal<br />
amounts. It is also dependent on lots of factors such<br />
as our choice of lens focal length and distance to our<br />
closest subject, but we also need to select the correct<br />
aperture to obtain enough depth of field. When<br />
shooting landscape photographs, this will generally<br />
lead us to use a narrow aperture (e. g. from f11 to f22)<br />
to get everything in sharp focus, but we also need<br />
to be mindful of diffraction when using these narrow<br />
apertures.<br />
CAMERA MOVEMENT<br />
Tripod – When shooting landscapes, you often end<br />
up using longer shutter speeds, which require the use<br />
of a tripod. Tripods also have the added benefit of<br />
allowing us to slow down to master the composition,<br />
along with your focus and depth of field. A sturdy<br />
tripod is a must for landscape photography, all too<br />
often I see people with a lightweight flimsy tripod<br />
which cannot hold the weight of the camera on a fine<br />
day, let alone when shooting outside in the elements<br />
like a strong wind!<br />
Cable Release – There is little point using a tripod then<br />
wobbling the camera by pressing the shutter button,<br />
which happens on even the sturdiest of tripods. So<br />
make sure you use a cable release to allow you to<br />
take your hands away from the camera, preventing<br />
you from shaking it when you press the shutter button.<br />
Mirror Lock-Up – On high-end full-frame DSLRs the<br />
vibrations caused by the mirror slap can be enough<br />
to cause a slight blur to your image. To prevent<br />
this, shoot with the “mirror up” feature. Likewise, the<br />
movement of the mechanical shutter curtain on DSLR<br />
and Mirrorless cameras can also cause vibration.<br />
Some cameras now feature an “electronic first curtain<br />
shutter” to also eliminate this.<br />
Vibration Reduction – A lot of lenses or camera bodies<br />
feature a “Vibration Reduction” system (also called<br />
Image Stabilisation, Optical Stabilizer, Vibration<br />
Compensation), which is designed to reduce vibration<br />
for handheld shooting. Vibration Reduction should<br />
be turned off when on a tripod as it leads to softer<br />
images due to the movement of the lens elements or<br />
the camera sensor.<br />
RICHARD YOUNG IS A FULL-TIME LANDSCAPE PHOTOGRAPHER BASED IN WELLINGTON AND<br />
TEACHES ON WORKSHOPS THROUGHOUT NEW ZEALAND WITH NEW ZEALAND PHOTOGRAPHY<br />
WORKSHOPS
Discover a<br />
deeper black<br />
THE NEW EPSON SURECOLOR SC-P800 A2+<br />
• Unprecedented black density for superior black & white and deeper colour<br />
• Greater productivity with high-capacity cartridges (80mls)<br />
• Optional roll support for panoramic prints – up to 1.1m in length<br />
• Professional control – downloadable Epson Print Layout Software<br />
• Multimedia support<br />
• High Speed – Produce an A3+ print in only 147 seconds<br />
• WiFi Direct and Ethernet connectivity<br />
• Large colour 2.7 inch touch screen<br />
Learn more,<br />
visit www.epson.co.nz/P800<br />
Photo© Darran Leal www.worldphotoadventures.com.au
How To Critique Your Own Photos<br />
by Samuel Ogunlaja
I’m a Conceptual Portrait and Commercial<br />
Photographer with a passion for art and<br />
everything beautiful. I started photography<br />
in 2011 and experimented in various genres of<br />
photography before finding my niche.<br />
Alongside some other reviewers, you’ll have<br />
seen my name on the Expert Critique columns<br />
here in the magazine as well as on the Excio<br />
blog photo critiques – Perhaps I’ve critiqued<br />
one of your photos?<br />
I want to take the time to give you some<br />
guidance and remind you of the importance of<br />
being able to critique your own photos. All of<br />
the tips below are based on my own personal<br />
experience and are what I use when critiquing<br />
my own work, as well as photos from the Excio<br />
and NZP community, I hope you will find it<br />
useful.<br />
THE FIRST PERSON TO CRITIQUE YOUR<br />
WORK AS A PHOTOGRAPHER SHOULD BE<br />
YOU.<br />
Always remember this. It is vitally important<br />
that you have reviewed and know the exact<br />
narrative of your work before allowing another<br />
person to step in and offer their thoughts<br />
because when you allow another artist to<br />
critique your work first, you run the risk of<br />
devaluing it.<br />
To properly critique your own work, you must<br />
first cultivate the right attitude.<br />
BE UNFORGIVING<br />
Remove every trace of emotion you have<br />
about your photograph. Remember that the<br />
people who will be seeing your work will not see<br />
the stress, effort, time, and trouble it cost you to<br />
create the photo and will not be judging you<br />
from an emotional standpoint. Thus, you have<br />
to be firm and unforgiving about this process<br />
to ensure your judgment is based on deductive<br />
points and not on emotions.<br />
BE OBJECTIVE<br />
You must stick to the exact reason of why you<br />
took the photo in the first place. It is highly<br />
possible that despite the effort you put into<br />
the process of taking the photo, the end result<br />
is not how you envisioned it. You have to be<br />
able to admit to yourself when the result didn’t<br />
work out quite right or fit your objective so that<br />
you can try to plan better for the next time;<br />
highlight errors and learn from them. Don’t try<br />
to console yourself by saying you have a great<br />
photo, ‘a second best’ or a ‘happy accident’ if<br />
it does not fit your original objective.<br />
DELETE THE PHOTOS THAT DIDN’T WORK<br />
Delete the photos that didn’t turn out great no<br />
matter how much time and effort you invested<br />
in getting them. Keeping poor quality shots is<br />
a phase you must outgrow. It is probable that<br />
while trying to get that perfect photo, you took<br />
several photos in the process; this leaves you to<br />
choose the best from a large number of similar<br />
photos. You have to be bold enough to delete<br />
all the photos that didn’t work out. The reason<br />
is so that you don’t become bias and lose<br />
the objective by considering too many similar<br />
options.<br />
Now that you have cultivated the right attitude,<br />
let us dive into the things to look out for when<br />
doing a personal photo critique.<br />
THE REASON FOR THE PHOTO<br />
You can also call this “The Why of the Photo”.<br />
Ask yourself Why did I take this photo? Am I<br />
expressing the things conceived before<br />
creating the photo? Is there any major element<br />
driving the message?<br />
I realize there are some photographers who<br />
capture random moments and tend not to see<br />
themselves as story teller but in opposition to<br />
that, I say “every photographer is a narrator”.<br />
There is always something that interests<br />
the photographer in a scene that spurs the<br />
shutter release; a memory you want to keep<br />
or a fascinating story you want others to<br />
see. The message of the photo determines<br />
every other thing you see in and about the<br />
photo and answers the questions of What is<br />
the best angle? What artistic element should<br />
be prominent in the photo? How much post<br />
production work should be done? and more.<br />
The message, the ‘why’ should be the driving<br />
force for decision making in the whole process<br />
of capturing and showcasing an image and<br />
should take most of the photographer’s<br />
attention.<br />
TECHNICAL JUDGMENT<br />
This term encompasses everything that has to<br />
do with the technicality of creating an image<br />
and includes exposure (lightning), composition,<br />
visual weight, depth of field, distance (focal<br />
length), the angle, stability, and so on. Let’s talk<br />
about a few of these things in more detail…<br />
<strong>September</strong> <strong>2019</strong><br />
55
EXPOSURE<br />
This has to be in accordance with the message of the<br />
photo; it should compliment your imagination and<br />
intention for the shoot. Ask yourself Did I adopt the best<br />
exposure or lighting for this photo? Does the lighting or<br />
exposure compliment the context of this photo?<br />
For example, in the image below, the idea of the photo<br />
shoot was to lay emphasis on the model’s skin and<br />
body structure so I needed to use a moderately harsh<br />
light to create specular highlights on the model’s dark<br />
skin.<br />
apportioning enough space to the main elements in<br />
the picture, it is about allowing the viewer to capture<br />
the most important element in the picture at a glance.<br />
This can be done through the use of colour, (using a<br />
particular colour for that element to ensure it catches<br />
attention), focusing, lightning etc. It can also be<br />
achieved by intensifying the artistic element that drives<br />
the message for example, the texture.<br />
An example of visual weight misappropriation is an<br />
image that has the subject in front while putting the<br />
complementary element at the back but adjusting<br />
the focus so that that the element in the background<br />
is sharper than the main subject. The element that<br />
catches the most attention in the picture has the most<br />
visual weight so make sure you know where the visual<br />
weight is, and should be, if there’s a difference.<br />
COMPOSITION<br />
This has to do with how the elements in the photo are<br />
arranged in order of importance or in sequence. There<br />
could be as many as 5 elements or more. Ask yourself<br />
the questions; Did I properly arrange the elements?<br />
Did I make the most important element conspicuous?<br />
For example, in a photo that has elements that look<br />
similar on both sides, using a symmetry composition<br />
(so that when split into two halves the elements on<br />
both sides are similar) can be very accurate like in the<br />
picture below.<br />
VISUAL WEIGHT<br />
Another thing that falls under technical judgment is the<br />
visual weight of the photo which is often overlooked<br />
and underrated. Visual weight is about more than<br />
SHARPNESS AND DEPTH OF FIELD<br />
It is important to review if you have used the right depth<br />
of field for the image. For instance, in a landscape<br />
photo where there are mountains and several other<br />
natural elements, if the photo is taken so that just a few<br />
elements are sharp versus having every element sharp<br />
by using a wide depth of field, it would defeat the<br />
purpose of that particular photo. On the other hand,<br />
newborn photography essentially requires shallow<br />
depth of field to be used so as to express the tender<br />
nature of the subject.<br />
56 <strong>NZPhotographer</strong>
<strong>September</strong> <strong>2019</strong> 57
ARTISTIC JUDGMENT<br />
What element of art is used to drive the message<br />
in the picture? There are basically 7 elements: line,<br />
shape, form, colour, space, texture and value. To stick<br />
to the objective of this article, I will not go too deep<br />
discussing these elements since art is so subjective but<br />
we can discuss a little.<br />
Each of the elements is unique in its own way and is<br />
used to drive different kinds of messages. The more<br />
of these elements you are able to incorporate, the<br />
better your photo will be. However, not every good<br />
picture has all of these elements in it, sometimes you<br />
just need one dominant element.<br />
LINES<br />
The use of lines (leading lines) is important when you<br />
take a picture with your subject in the far distance. An<br />
example of using lines is a trail or road leading towards<br />
your subject. You could take the picture from where you<br />
are standing tracing the line until its end point to help<br />
the viewer follow the line towards the main subject whilst<br />
helping them see everything around that same subject.<br />
SHAPES<br />
Shapes work well with a two-dimensional and/or<br />
enclosed area. If the picture you are taking is more shape<br />
oriented you might want to incorporate a number of<br />
shapes into the picture to portray the message well. Or<br />
you may even introduce shapes into the picture just to<br />
make your work more artistic. For example, in the picture<br />
on the previous page, the model was asked to pose<br />
in a certain way that expresses various shapes just to<br />
incorporate that element in the work.<br />
FORM<br />
This has to do with the shape of a particular object<br />
along its volume or perceived volume. It’s about<br />
creating an image from a perspective where you can<br />
give the viewer a sense of size. For instance, a picture<br />
of a building taken from the front allows people to<br />
see the rectangular shape but it can also be taken<br />
from a 45% side angle to give a 3D overview with the<br />
viewer able to see the front and side to get a sense of<br />
volume to show it isn’t just a flat building.<br />
COLOUR<br />
Another popular element is the use of striking colours<br />
to drive home your message. However, in instances<br />
where the scene is overflowing with many colours,<br />
such as at a carnival, you have to concentrate on<br />
a particular colour scheme to get the right result.<br />
For example, at a carnival, you can effectively use<br />
complementary colours from a scheme to single out<br />
your focus.<br />
SPACE<br />
This deals with how you are able to incorporate<br />
space so that the elements are not choked up. More<br />
often than not, a picture may not incorporate this<br />
element as it depends on the subject and the scene<br />
being shot. For instance, thinking of a carnival, space<br />
might not be that evident owing to the nature of<br />
the activities. However, the more you are able to<br />
incorporate space, the better your picture looks,<br />
especially when you need to single out a particular<br />
activity in the midst of all that is going on.<br />
TEXTURE<br />
This helps in creating a perception of how something<br />
feels or looks. For instance, a picture of a table with a<br />
rough surface and one with a smooth surface will give<br />
you different feelings. One might give the sense of<br />
luxury and the other of durability.<br />
VALUE<br />
This is the degree of lightness or darkness in a<br />
particular image. It deals with the relationship<br />
between highlights and shadows. Value helps to<br />
express a form or create an illusion of it in a picture.<br />
For example, if you take a photo of a white ball<br />
against a white background; if the picture is overly<br />
exposed, we may not be able to differentiate the ball<br />
and the background but if the photo is moderately<br />
exposed, there will be some level of shadow<br />
(darkness) in the picture which will help to differentiate<br />
between the ball and the background.<br />
NARRATIVE JUDGMENT<br />
After considering all the points above so that you are<br />
able to interpret your photo well yourself, you need to<br />
consider if the layman (the person viewing your work)<br />
will be able to recognise and see the same things.<br />
This determines how much post production work is<br />
necessary.<br />
Consider how much post production work the<br />
photo needs. Ask yourself if the exposure should<br />
be increased or reduced? Are there distractions to<br />
remove? Does it need to cropping?<br />
It is important to note that post production is usually<br />
one of the last things to consider and saying “I will<br />
fix things in Photoshop” is the statement of a poor<br />
photographer. Know that you are a photographer<br />
before you are an editor and post production is used<br />
to enhance a photo, not recreate it.<br />
CONCLUSION<br />
After you have considered all of these points<br />
individually you can put your picture out into the<br />
world for others to critique and give feedback on.<br />
Remember that no one can narrate your work as best<br />
as you can and you need to gain the confidence<br />
and ability to defend your work regardless of people’s<br />
opinion. Their feedback should only strive to make you<br />
a better photographer because at the end of it the<br />
day, everything is art.
THE GALLERY IS PROUDLY SUPPORTED BY<br />
PORTFOLIO<br />
BEST READERS' SUBMISSIONS THIS MONTH<br />
<strong>September</strong> <strong>2019</strong><br />
59
DEVOTION<br />
F6.3, 1/500s, ISO320<br />
ASSAM, INDIA<br />
The devotion of Indian Sadhus at<br />
Kamkya Temple in Gwahati.<br />
Amol Nakve<br />
60 <strong>NZPhotographer</strong>
<strong>September</strong> <strong>2019</strong> 61
62 <strong>NZPhotographer</strong>
LIGHTHOUSE<br />
F22, 1/60s, ISO64, 29mm<br />
I went exploring from the Wairarapa, visiting Castlepoint and<br />
Riversdale Beach for the first time. The walk up to the lighthouse was<br />
comfortable and easy and the view from the top was worth it.<br />
Ann Kilpatrick<br />
<strong>September</strong> <strong>2019</strong><br />
63
64 <strong>NZPhotographer</strong>
CASTLEPOINT VIEW<br />
F8, 1/250s, ISO64<br />
A nice long weekend in the Wairarapa provided<br />
the opportunity to visit some new places and I got this<br />
Castlepoint pano landscape - a few photos stitched together.<br />
Ann Kilpatrick<br />
<strong>September</strong> <strong>2019</strong><br />
65
FREE-WHEELIN'<br />
F8, 1/3s, ISO100<br />
I had an idea for a photo that showed these toys in action, but I had to figure out how to<br />
capture it. After trying many different ways which weren't successful, I tried taking two<br />
photos, one sharp and one panning the camera while the photo was being taken. I then<br />
merged parts of both of these photos to create the image that I was imagining. This was<br />
definitely the result of experimenting and learning!<br />
Tanya Rowe<br />
66 <strong>NZPhotographer</strong>
<strong>September</strong> <strong>2019</strong> 67
68 <strong>NZPhotographer</strong>
CAMELS AT CABLE BAY<br />
F8, 1/200s, ISO400, 32mm<br />
BROOME, AUSTRALIA<br />
We had been 4 wheel driving in the outback around the Broome area. On our return back<br />
to Broome we drove down on to the beach to watch the sunset over the sea along with<br />
100's of other vehicles and two trains of camels. I had to run alongside and catch up in<br />
order to capture the sun behind the train with the long shadows.<br />
Carole Garside<br />
<strong>September</strong> <strong>2019</strong><br />
69
70 <strong>NZPhotographer</strong>
PAPAMOA DAWN<br />
F13, 1/6s, ISO800<br />
Papamoa in the Bay of Plenty is my local beach.<br />
Forever changing, it's always a lucky dip as to what<br />
one will find. This shot was a learning in how far I could<br />
push the ISO instead of the go to graduated filter.<br />
Graham Jones<br />
<strong>September</strong> <strong>2019</strong><br />
71
72 <strong>NZPhotographer</strong>
SYDNEY VIVID LIGHT FESTIVAL<br />
F5, 0.6s, ISO1250<br />
The Vivid Light Festival in Sydney was way out of my comfort<br />
zone due to shooting at night. This was a learning on ISO settings<br />
and how far I could push my Nikon D750.<br />
Graham Jones<br />
<strong>September</strong> <strong>2019</strong><br />
73
74 <strong>NZPhotographer</strong>
WHIRITOA DAWN<br />
A mid-winter journey to Whiritoa on the Coromandel. The thoughts<br />
behind the composition were to capture the feeling of desolation<br />
and tranquillity which were with me just prior to the sunrise.<br />
Graham Jones<br />
<strong>September</strong> <strong>2019</strong><br />
75
76 <strong>NZPhotographer</strong>
FOREST OF TREES<br />
I had seen a few double exposure images but I had not tried this technique myself, until<br />
now. My previous camera didn't have a double exposure setting but my current one<br />
does, so I played around for a day or two and here is the result!<br />
Jan Abernethy<br />
<strong>September</strong> <strong>2019</strong> 77
78 <strong>NZPhotographer</strong>
MAGIC AT THE LAKE<br />
I took my crystal ball to the lake to see if I<br />
could create a double exposure with it. I<br />
could, this is one of my favourites!<br />
Jan Abernethy<br />
<strong>September</strong> <strong>2019</strong> 79
80 <strong>NZPhotographer</strong>
WINTER TREES<br />
This is one of my first double exposures of<br />
a silver birch tree against a corrugated<br />
fence. I like the abstract form and colours.<br />
Jan Abernethy<br />
<strong>September</strong> <strong>2019</strong> 81
82 <strong>NZPhotographer</strong>
THE TOPAZ RING<br />
F25, 1/500s, ISO51200<br />
I was experimenting for my digital photography course<br />
for the subject of product photography, and chose this<br />
piece of jewellery as my subject. I placed it in a black<br />
box on top of a mirror board and lit it with a small study<br />
lamp. In Photoshop, I upped the contrast and the black<br />
in the image and was left with this.<br />
Kelly Vivian<br />
<strong>September</strong> <strong>2019</strong><br />
83
84 <strong>NZPhotographer</strong>
THE DOGS SILHOUETTE<br />
F14, 1/1600s, ISO200, 30mm<br />
I was out on Auckland's Karekare Beach with my little Maltese dog,<br />
Pebbles taking photos of the beach. Late on in the shoot, I was lying<br />
on the sand to get the sunset when Pebbles kept getting in my shot so<br />
I took some images of her back-lit by the sunset. I didn't realise what I<br />
had captured until I was downloading the images when I got home.<br />
Kelly Vivian<br />
<strong>September</strong> <strong>2019</strong> 85
DAWN OVER THE BAY<br />
F8, 6s, ISO 200<br />
ORIENTAL BAY, WELLINGTON<br />
I've been trying to build my skill of long exposure photography since a workshop I did last year.<br />
On this occasion I wanted to try and combine the sunrise with the city lights, the light trails from<br />
the cars were a bonus! There were showers as I was setting up my tripod and I had to shield the<br />
camera to protect it from the strong wind, but the fast moving clouds and choppy seas were<br />
perfect for a long exposure shot and I was rewarded for the early start.<br />
Laura Pascall<br />
86 <strong>NZPhotographer</strong>
<strong>September</strong> <strong>2019</strong> 87
88 <strong>NZPhotographer</strong>
SOUTHERLY STORM<br />
F16, 25s, ISO100<br />
ISLAND BAY, WELLINGTON<br />
I've been trying to build my skills with long exposures. A strong southerly<br />
wind had got up while I was out for a walk with my camera but it created<br />
good movement in the clouds and sea for me to practice. I set up the<br />
tripod and took some shots with my ND filter on, the wind whipping the<br />
sand up around me. This was the last shot I got before I had to abandon<br />
the beach due to the rain setting in.<br />
Laura Pascall<br />
<strong>September</strong> <strong>2019</strong><br />
89
90 <strong>NZPhotographer</strong>
HANDBAG HEAVEN<br />
F8, 1/200s, ISO400, 32mm<br />
A stall at St Georges Market in Belfast. The<br />
choice was huge, the colors and designs<br />
oustanding, and I can't resist a photo.<br />
Mark Davey<br />
<strong>September</strong> <strong>2019</strong><br />
91
BENMORE SUNSET<br />
F11, 1/125s, ISO200<br />
After spending several weeks closely watching weather websites, I finally saw my chance<br />
to capture a sunset at Lake Benmore. I haven't seen so many photos of this lake and despite<br />
only living an hour away I had never tried to photograph it myself. I arrived a couple of hours<br />
before sunset to figure out a composition from the lookout point, I was set up for a wide angle<br />
shot overlooking the lake but as the sun started to set I noticed a more intimate shot further in<br />
the distance.<br />
Matthew Davey<br />
92 <strong>NZPhotographer</strong>
ONE LIGHT<br />
F5.6, 1/6s, ISO3200, 55mm<br />
I generally focus on landscape photos<br />
but I've been wanting to develop<br />
my skills with urban/architecture<br />
photography too. I was out for sunrise<br />
on a cold winter morning and as I was<br />
walking to location I noticed this building<br />
and the one light that was different - It<br />
seemed a good opportunity to try some<br />
different shots out.<br />
Laura Pascall<br />
<strong>September</strong> <strong>2019</strong><br />
93
94 <strong>NZPhotographer</strong>
FINAL PITCH<br />
F8, 1/800s, ISO125<br />
A view from my belay stance 30 metres away from the top of Mount<br />
Brewster (2,515m) in Mt Aspiring National Park. My climbing buddy Piotr,<br />
now safe on top, savoured his achievement before building an anchor<br />
to belay me up to join him. With this perspective I wanted to convey the<br />
feeling of being up high. The image is actually 3 stitched. Being very<br />
limited to my seated spot I used 3 portrait shots to catch myself as well<br />
as the scene ahead. My camera was a Lumix TZ220 - very compact -<br />
far better for mountaineering than a DSLR if you want to actually take<br />
any pictures in exposed situations like this.<br />
Peter Laurenson<br />
<strong>September</strong> <strong>2019</strong><br />
95
96 <strong>NZPhotographer</strong>
TROUBLED WATERS<br />
F8, 1/40s, ISO100<br />
Dawn view south east to Mt Taranaki, across the icy wind churned surface of the Pouakai Track tarn, New<br />
Zealand. This tarn is normally shot when the weather is very calm and the mountain is a mirror image<br />
reflected in it. But the tarn itself has something to offer as well I think. These days it has become difficult to<br />
enjoy the seclusion I did on this morning. International tourism has well and truly found this place, changing it<br />
from what those visiting are looking for. This image is a stitch of 3 landscape shots, taken on my Nikon D750,<br />
Camera Raw, spot meter, manual settings.<br />
Peter Laurenson<br />
<strong>September</strong> <strong>2019</strong><br />
97
98 <strong>NZPhotographer</strong>
SHADOWS AND LIGHT<br />
F8, 1/160s, ISO125<br />
A dawn view of the top 600 metres of Mt Taranaki, taken from the southern rim of Fantham's<br />
Peak. Syme Hut sits to the left of the summit cone, which has projected a shadow out to the<br />
far left. Mounts Tongariro, Ngauruhoe and Ruapehu are silhouetted on the right skyline. It<br />
was my fifth trip up this route and the best light so far. This image is a stitch of 8 portrait shots<br />
taken on my Lumix TZ 220, shot in Camera Raw, spot meter, manual settings.<br />
Peter Laurensony<br />
<strong>September</strong> <strong>2019</strong><br />
99
100 <strong>NZPhotographer</strong>
MOODY SUNSET<br />
F7, 1/30s, ISO450<br />
BUFFALO BEACH, WHITIANGA<br />
The clouds out East often look quite moody as the sun sets in<br />
the West so I experimented with zooming in on the 'moodier'<br />
clouds. The resulting image accentuated the mood of the<br />
clouds with the last of the days sun shining on the houses<br />
on the ridge top adding another dimension.<br />
Peter Maiden<br />
<strong>September</strong> <strong>2019</strong>101
102 <strong>NZPhotographer</strong>
CAPE GOOSEBERRIES<br />
F7, 3.1s, ISO200<br />
Experimenting with high key and over exposure, I<br />
photographed this inside on white paper with window light<br />
using a macro lens with 2.33/100 exposure bias. I further<br />
increased the exposure in Lightroom using +1.10 with<br />
blacks increased to 100 and subtle texture added.<br />
Shona Jaray<br />
<strong>September</strong> <strong>2019</strong>103
“KNOW THE RULES<br />
WELL, SO YOU<br />
CAN BREAK THEM<br />
EFFECTIVELY.”<br />
DALAI LAMA XIV<br />
104 <strong>NZPhotographer</strong>