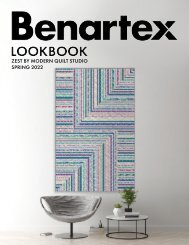
MBTY #6
This modern quilting e-zine showcases projects and fabric from Benartex.
This modern quilting e-zine showcases projects and fabric from Benartex.

Create successful ePaper yourself
Turn your PDF publications into a flip-book with our unique Google optimized e-Paper software.
D<br />
B<br />
D<br />
B<br />
the bottom left corner. Draw a line from C to the top<br />
Diagram 1<br />
left corner. Draw a line from D to the top right corner.<br />
C<br />
the rows into the block. Trim to measure 9" square.<br />
C<br />
Diagram 4<br />
D<br />
A<br />
A<br />
Diagram 2<br />
Diagram 3<br />
D<br />
B D<br />
B<br />
C<br />
C<br />
Diagram 1<br />
Diagram 2<br />
Diagram 1<br />
Diagram 3<br />
2. Iron the marked square to right side of (1) 10-1/2"<br />
fabric square. Stack (8) different color squares<br />
3<br />
underneath, right sides D up. This will be 2 your B Dcutting<br />
9<br />
guide. Cut from A to the bottom right corner. 4Cut<br />
1<br />
from B to the bottom left corner. Cut from C to the<br />
Diagram 4<br />
8<br />
C<br />
top left corner, and cut from D<br />
C<br />
to the top right 5 corner.<br />
6<br />
Move stacks away from each other; 7you’ll have<br />
(9) piles of patches.<br />
Diagram 2<br />
A<br />
A<br />
Diagram 3<br />
B<br />
9<br />
8<br />
2<br />
1<br />
3<br />
Diagram 4<br />
5. Repeat to make (4) additional<br />
6<br />
left-tilting blocks.<br />
7<br />
Note: You have fabric cut to make (4) more.<br />
4<br />
5<br />
6. Mark a second freezer paper square as shown in the<br />
Mirror Image diagram below. Use this for the second<br />
stack of 9 squares and repeat steps 2-5, making (4) right<br />
tilting blocks. (You’ll have Diagram fabric 5 cut to make (5) more.)<br />
Diagram 4<br />
9<br />
Diagram 5<br />
8<br />
2<br />
7<br />
1<br />
3<br />
6<br />
4<br />
Assembly<br />
5<br />
Diagram 5<br />
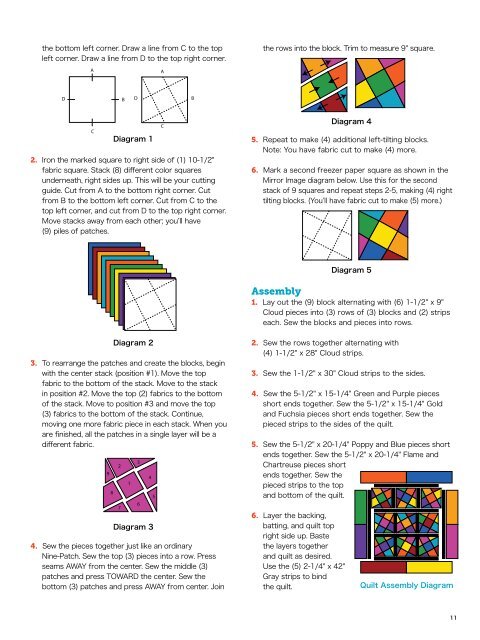
1. Lay out the (9) block alternating with (6) 1-1/2" x 9"<br />
Cloud pieces into (3) rows of (3) blocks and (2) strips<br />
each. Sew the blocks and pieces into rows.<br />
D<br />
Diagram 2<br />
gram 4<br />
A<br />
Diagram 1<br />
Diagram 2<br />
A<br />
3. To rearrange the Diagram patches 4 and create the blocks, begin<br />
with the center stack (position #1). Move the top<br />
fabric to the B bottom D of the stack. B Move to the stack<br />
in position #2. Move the top (2) fabrics to the bottom<br />
of the stack. Move to position #3 and move the top<br />
C<br />
(3) C fabrics to the bottom of the stack. Continue,<br />
moving one more fabric piece in each stack. When you<br />
are finished, all the patches in a single layer will be a<br />
Diagram 3<br />
different fabric.<br />
9<br />
8<br />
2<br />
7<br />
1<br />
Diagram 3<br />
4. Sew the pieces together just like an ordinary<br />
Nine-Patch. Sew the top (3) pieces into a row. Press<br />
Diagram 5<br />
seams AWAY from the center. Sew the middle (3)<br />
patches and press TOWARD the center. Sew the<br />
bottom (3) patches and press AWAY from center. Join<br />
3<br />
6<br />
4<br />
5<br />
2. Sew the rows together alternating with<br />
(4) 1-1/2" x 28" Cloud strips.<br />
Diagram 5<br />
3. Sew the 1-1/2" x 30" Cloud strips to the sides.<br />
4. Sew the 5-1/2" x 15-1/4" Green and Purple pieces<br />
short ends together. Sew the 5-1/2" x 15-1/4" Gold<br />
and Fuchsia pieces short ends together. Sew the<br />
pieced strips to the sides of the quilt.<br />
5. Sew the 5-1/2" x 20-1/4" Poppy and Blue pieces short<br />
ends together. Sew the 5-1/2" x 20-1/4" Flame and<br />
Quilt Assembl Diagram<br />
Chartreuse pieces short<br />
ends together. Sew the<br />
pieced strips to the top<br />
and bottom of the quilt.<br />
6. Layer the backing,<br />
batting, and quilt top<br />
right side up. Baste<br />
the layers together<br />
and quilt as desired.<br />
Use the (5) 2-1/4" x 42"<br />
Gray strips to bind<br />
the quilt.<br />
Quilt Assembly Diagram<br />
11