IsoTop Mounting Instructions - Schletter Inc.
IsoTop Mounting Instructions - Schletter Inc.
IsoTop Mounting Instructions - Schletter Inc.

Create successful ePaper yourself
Turn your PDF publications into a flip-book with our unique Google optimized e-Paper software.
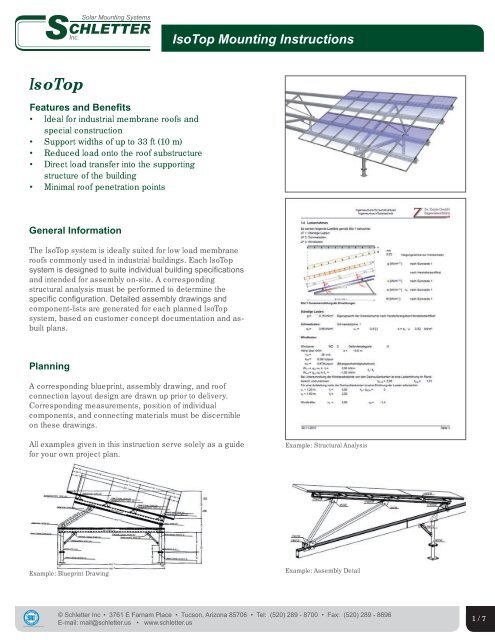
<strong>IsoTop</strong><br />
Features and Benefits<br />
• Ideal for industrial membrane roofs and<br />
special construction<br />
• Support widths of up to 33 ft (10 m)<br />
• Reduced load onto the roof substructure<br />
• Direct load transfer into the supporting<br />
structure of the building<br />
• Minimal roof penetration points<br />
General Information<br />
The <strong>IsoTop</strong> system is ideally suited for low load membrane<br />
roofs commonly used in industrial buildings. Each <strong>IsoTop</strong><br />
system is designed to suite individual building specifications<br />
and intended for assembly on-site. A corresponding<br />
structural analysis must be performed to determine the<br />
specific configuration. Detailed assembly drawings and<br />
component-lists are generated for each planned <strong>IsoTop</strong><br />
system, based on customer concept documentation and asbuilt<br />
plans.<br />
Planning<br />
A corresponding blueprint, assembly drawing, and roof<br />
connection layout design are drawn up prior to delivery.<br />
Corresponding measurements, position of individual<br />
components, and connecting materials must be discernible<br />
on these drawings.<br />
All examples given in this instruction serve solely as a guide<br />
for your own project plan.<br />
Example: Blueprint Drawing<br />
ISO9001:2008 Registered by SRI Quality System Registrar<br />
<strong>IsoTop</strong> <strong>Mounting</strong> <strong>Instructions</strong><br />
Example: Structural Analysis<br />
Example: Assembly Detail<br />
© <strong>Schletter</strong> <strong>Inc</strong> • 3761 E Farnam Place • Tucson, Arizona 85706 • Tel: (520) 289 - 8700 • Fax: (520) 289 - 8696<br />
E-mail: mail@schletter.us • www.schletter.us<br />
1 / 7
2 / 7<br />
Support Installation<br />
� Mark positions according to<br />
overview plan<br />
� Open roof membrane<br />
� Mount supports<br />
Ensure compatible design. Though<br />
the structural information should be<br />
evaluated prior to system production,<br />
always check for design compatibility<br />
and structural integrity before<br />
disturbing roof membrane.<br />
� Re-lay the insulation<br />
� Seal the opening<br />
Placing proper roofing material in<br />
and around the support location<br />
will ensure water tightness. Roofing<br />
should always be sealed according<br />
to national building code standards.<br />
Note: The <strong>Schletter</strong> warranty only<br />
applies to the solar mounting<br />
system and material which we<br />
produce. Consultation with a roofing<br />
professional may be recommended.<br />
ISO9001:2008 Registered by SRI Quality System Registrar<br />
<strong>IsoTop</strong> <strong>Mounting</strong> <strong>Instructions</strong><br />
�-� �<br />
�<br />
Opened roof covering with mounted<br />
supports<br />
Opening is sealed<br />
�<br />
Insulation re-layed<br />
Example: Thermally Supported<br />
© <strong>Schletter</strong> <strong>Inc</strong> • 3761 E Farnam Place • Tucson, Arizona 85706 • Tel: (520) 289 - 8700 • Fax: (520) 289 - 8696<br />
E-mail: mail@schletter.us • www.schletter.us
Rack <strong>Mounting</strong><br />
Guidelines<br />
Depending on the complexity of the<br />
design, some component groups are<br />
produced pre-assembled. However, for<br />
a more detailed assembly overview, the<br />
following outlines each step.<br />
� Install BF-Rail<br />
Assemble with Klickin components<br />
and square nuts M10 at the<br />
required distances, position on<br />
the supports then secure using<br />
M10x25 screws. The BF-Rail<br />
length can be extended with<br />
compatible connectors.<br />
� Mount Struts<br />
Secure T-piece in the same way<br />
as with Klick system and M10x25<br />
screw. Secure struts (in each case<br />
2 U-profiles) between support<br />
and T-piece with M10x25 screws or<br />
M10x35 and serrated nuts M10.<br />
ISO9001:2008 Registered by SRI Quality System Registrar<br />
<strong>IsoTop</strong> <strong>Mounting</strong> <strong>Instructions</strong><br />
Klickin<br />
© <strong>Schletter</strong> <strong>Inc</strong> • 3761 E Farnam Place • Tucson, Arizona 85706 • Tel: (520) 289 - 8700 • Fax: (520) 289 - 8696<br />
E-mail: mail@schletter.us • www.schletter.us<br />
�<br />
�<br />
3 / 7
4 / 7<br />
� Mount Hinges<br />
Use Klick components and M10x25<br />
screws to attach the BF-Rail<br />
according to specifications provided<br />
in drawings.<br />
� Mount BF Girder<br />
Fasten hinges to the BF girder in the<br />
same way. Connect the front hinge<br />
(tip) with screws M10x25 or M10x35<br />
and serrated nuts M10.<br />
ISO9001:2008 Registered by SRI Quality System Registrar<br />
<strong>IsoTop</strong> <strong>Mounting</strong> <strong>Instructions</strong><br />
© <strong>Schletter</strong> <strong>Inc</strong> • 3761 E Farnam Place • Tucson, Arizona 85706 • Tel: (520) 289 - 8700 • Fax: (520) 289 - 8696<br />
E-mail: mail@schletter.us • www.schletter.us
� Connection of the Struts<br />
ISO9001:2008 Registered by SRI Quality System Registrar<br />
Secure struts (two U profiles or<br />
tubular section) between the hinges<br />
with M10x25 or M10x35 screws and<br />
serrated nuts M10.<br />
� Mount the S-Rail<br />
Fasten the module-bearing S-Rail to<br />
the BF girder with the mounting claw,<br />
M10x25 screws and and Klick system.<br />
�<br />
<strong>IsoTop</strong> <strong>Mounting</strong> <strong>Instructions</strong><br />
�<br />
© <strong>Schletter</strong> <strong>Inc</strong> • 3761 E Farnam Place • Tucson, Arizona 85706 • Tel: (520) 289 - 8700 • Fax: (520) 289 - 8696<br />
E-mail: mail@schletter.us • www.schletter.us<br />
5 / 7
6 / 7<br />
� Mount Connector<br />
Position the connector for<br />
the S-Rail. Secure each S-<br />
Rail with two (2) self-drilling<br />
screws per rail.<br />
Module <strong>Mounting</strong><br />
Mount the modules to the S-Rails and<br />
fasten with end- and middle clamps.<br />
ISO9001:2008 Registered by SRI Quality System Registrar<br />
<strong>IsoTop</strong> <strong>Mounting</strong> <strong>Instructions</strong><br />
© <strong>Schletter</strong> <strong>Inc</strong> • 3761 E Farnam Place • Tucson, Arizona 85706 • Tel: (520) 289 - 8700 • Fax: (520) 289 - 8696<br />
E-mail: mail@schletter.us • www.schletter.us
ISO9001:2008 Registered by SRI Quality System Registrar<br />
<strong>IsoTop</strong> <strong>Mounting</strong> <strong>Instructions</strong><br />
More information on the <strong>IsoTop</strong> System, please visit www.schletter.us and click on the brochure section in the<br />
page header.<br />
© <strong>Schletter</strong> <strong>Inc</strong> • 3761 E Farnam Place • Tucson, Arizona 85706 • Tel: (520) 289 - 8700 • Fax: (520) 289 - 8696<br />
E-mail: mail@schletter.us • www.schletter.us<br />
© <strong>Schletter</strong> <strong>Inc</strong>., 2011, I400205CA<br />
7 / 7