

Restaurant Management System - EasyPOS
Restaurant Management System - EasyPOS
Restaurant Management System - EasyPOS

Create successful ePaper yourself
Turn your PDF publications into a flip-book with our unique Google optimized e-Paper software.
1<br />
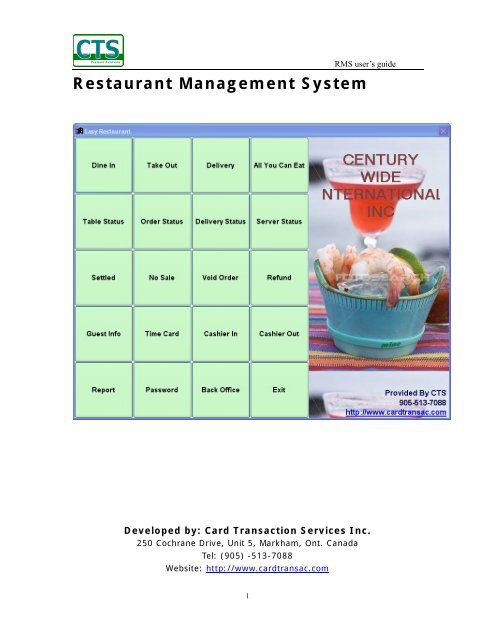
RMS user’s guide<br />
<strong>Restaurant</strong> <strong>Management</strong> <strong>System</strong><br />
Developed by: Card Transaction Services Inc.<br />
250 Cochrane Drive, Unit 5, Markham, Ont. Canada<br />
Tel: (905) -513-7088<br />
Website: http://www.cardtransac.com
1. Install the software<br />
2<br />
RMS user’s guide<br />
1) Where to get the software<br />
We provide a free demo version of RMS.<br />
Go to http://www.easypos.ca/rms/rmssetup.exe download it. Or contact us to<br />
ask for an installation CD. Log on to http://www.easypos.ca to get more<br />
information.<br />
2) Installation<br />
We provide two methods to install RMS, a) installation through a CD; b)<br />
installation through a downloaded program RMSsetup.EXE. Either method a) or<br />
b), it will take two steps to complete the installation.<br />
First, install the demo version.<br />
Second, run the RMS, and click [Activate] button in [Backoffice] to activate it to<br />
become a full version.<br />
• If you install RMS from the installation CD, please follow the installation guide<br />
README.TXT in the CD.<br />
• If you download the software from our website, you can just simply double click<br />
the RMSsetup.EXE you downloaded, and then follow the instruction to install it. An<br />
installation window appears as below:
3<br />
RMS user’s guide<br />
3) How to get the activation code<br />
Contact us to buy an Activation Code or buy it online at:<br />
http://www.easypos.ca/rms.htm or click the [Register] button in the demo<br />
version of RMS as below:<br />
[Register] button [Activate] button<br />
4) Activate the software<br />
After you have bought an Activation Code, you will receive an email that<br />
includes a file like activexxxx.zip (xxxx should be 4 digits) or an activation key.<br />
To activate the software RMS, run the RMS demo version and simply click<br />
[Activate] button, and then activate over Internet or provide where the<br />
activexxxx.zip stored path. Click [ok], everything will have been done. When<br />
you restart RMS, a new full version will appear in front of you.<br />
5) Set up a remote environment<br />
The RMS is designed for not only running in a single computer, but also with<br />
multi store and multi cashier networking via Internet/Intranet. If you want RMS
RMS user’s guide<br />
to run on Internet, you have to set up a remote environment. That includes the<br />
conditions,<br />
a) A server connecting to Internet with a static IP address or a domain name<br />
which can be accessed over Internet, or have a hosting of SQL server.<br />
b) Install a Database in the server, such as MySQL, MS SQL Server, Oracle, or<br />
etc. and its ODBC interface in your client computer. For the detail of<br />
Database server installation, please consult for the Database administrator.<br />
c) Have a database account with the privilege to access a created database and<br />
set up an ODBC DSN in your client computer.<br />
(Ask the Database Administrator to prepare for all these things)<br />
4
2. <strong>System</strong> Functions Overview<br />
<strong>System</strong> Menu<br />
Dine In<br />
Take Out<br />
Delivery<br />
AllYouCanEat<br />
Table Status<br />
Order Status<br />
Delivery Status<br />
Server Status<br />
Settled<br />
No Sale<br />
Void Bill<br />
Refund<br />
Password<br />
Guest Info<br />
Cashier In<br />
Cashier Out<br />
Time Card<br />
Report<br />
Back Office<br />
Menu Setup<br />
Table Setup<br />
Printer Setup<br />
Modifier Setup<br />
Return to POS<br />
Report<br />
Items Sales Report<br />
Cashier Sales Report<br />
Location Sales Report<br />
Period Sales Report<br />
Sales/Purchase Report<br />
Category Sales Report<br />
Cashier Closing Report<br />
Cashier Current Report<br />
Inventory<br />
Inventory Items Check-in<br />
Items Check-in Revise<br />
5<br />
RMS user’s guide
Show Inventory Status<br />
Print Inventory Status<br />
Items Coding<br />
Items Pricing<br />
Modify Items<br />
Modify Category<br />
Customers<br />
New Customers<br />
Display Customers<br />
Search Customers<br />
Suppliers<br />
New Suppliers<br />
Display Suppliers<br />
Search Suppliers<br />
Accounting<br />
Account Receivable<br />
Account Payable<br />
Cust. Pymy Pending Lists<br />
Invo. Pymt Pending Lists<br />
Cancel Invoice<br />
Tools<br />
New/Edit Connection<br />
Switch <strong>System</strong><br />
<strong>System</strong> Synchronizing<br />
User <strong>Management</strong><br />
Backup Database<br />
Restore Database<br />
Export to Excel<br />
Menu Items<br />
Item Codes<br />
Customers<br />
Suppliers<br />
Invoices<br />
Sales<br />
Check for Update<br />
Configuration<br />
Global Parameters<br />
Local Parameters<br />
Return<br />
Exit<br />
6<br />
RMS user’s guide
Place Order<br />
Select Item<br />
Guest Name<br />
Number of Guest<br />
Change Table<br />
Half<br />
Modifier<br />
Split Merge<br />
Void Items<br />
Void Order<br />
More Order<br />
Re-send Item<br />
Quantity<br />
Discount<br />
Print Bill<br />
SEND<br />
PAY<br />
Revise<br />
Code<br />
Return<br />
7<br />
RMS user’s guide
3. Operation guide<br />
• Getting start<br />
This is the main screen of the system.<br />
8<br />
RMS user’s guide<br />
Every time touch the button on the main screen, you will be asked for<br />
entering a access code unless you save the access code last time,
1) , <br />
A table layout will appear as below,<br />
Table layout Zone name<br />
9<br />
RMS user’s guide<br />
Select a table, system then asks the guest number, enter the number, the<br />
place-order screen appears.<br />
2) <br />
The place-order screen appears.<br />
3) <br />
You will be asked for entering the customer information. Whatever enter the<br />
customer’s name or phone#, or address. If the customer exists in database, the<br />
place-order screen appears. Otherwise ask you enter the customer information as<br />
below,
10<br />
RMS user’s guide<br />
After completing the customer’s information, the place-order screen appears,
Place-order Screen:<br />
Menu items<br />
11<br />
RMS user’s guide<br />
Menu category Items order lists<br />
. Description of the buttons:<br />
Enter or change a guest name<br />
Enter or change the number of guest<br />
Change table<br />
Revise the quantity, description, price, tax, and discount
Find the menu item by code<br />
12<br />
RMS user’s guide<br />
Return to Main screen<br />
Change the item to half size<br />
Add materials to the menu item<br />
Split or merge order(s)<br />
Delete an item<br />
Delete the order<br />
Display another order. Right click or hold, the order lists<br />
will pop up for choosing,
Send the item to print again<br />
Decrease the quantity<br />
Reset the quantity to 1<br />
Increase the quantity<br />
Subtract 5% of discount<br />
Reset discount to 0<br />
Add 5% of discount<br />
Print the bill<br />
Send all items to printer<br />
13<br />
RMS user’s guide
14<br />
RMS user’s guide<br />
Make the payment<br />
If the cashier hasn’t entered the opening amount, a message box pops up:<br />
* Usually click [Yes] at the beginning of a shift for the cashier<br />
Click [Yes] to enter the open amount. And then a payment method window<br />
pops up,<br />
Choose a payment method, and then pay,
Click [Multipay], you can choose paying by multiple methods.<br />
15<br />
RMS user’s guide
16<br />
RMS user’s guide<br />
Click [OK] to complete. The receipt is printed out and the cash drawer<br />
opened.<br />
4) <br />
Display the table layout with the status.<br />
5) <br />
Display the active order lists.<br />
6) <br />
Display the on-going delivery orders.<br />
7) <br />
Display the on-duty server lists.<br />
8) <br />
Display the payment history.<br />
9) <br />
Open the Cash Drawer without payment.<br />
10) <br />
Display the active orders to be voided.<br />
11) <br />
Make a refund.<br />
12) <br />
Display the customers information.<br />
13) <br />
Print the time card of clock-in/clock-out for the server.
14) <br />
17<br />
RMS user’s guide<br />
At the beginning of day, the cashier must open the drawer and enter the<br />
amount of opening balance.
18<br />
RMS user’s guide<br />
15) <br />
At the end of day, the cashier must enter the amount of closing balance.<br />
16) <br />
Print the summary report in a specific period.<br />
17) <br />
Change the access code and password.
18) <br />
Back office management.<br />
19<br />
RMS user’s guide<br />
<strong>Restaurant</strong> information <strong>Management</strong> functions<br />
<strong>System</strong> information<br />
Check update
20<br />
RMS user’s guide<br />
Menu Categories Menu Items<br />
(Hold or right click to pop up menu) (Hold or right click to pop up menu)<br />
Click the category button to select.<br />
Hold or right click the category button, a pop-up menu appears, [EDIT] button to<br />
edit the category information.<br />
Double click to select a<br />
background picture.<br />
Stretch the picture.<br />
Remove the picture.<br />
Set the font color.<br />
Set the background color
Click the item button to edit the item information,<br />
Printers to be sent to<br />
Double click to set the picture, color, and etc. of the button.<br />
21<br />
RMS user’s guide
22<br />
RMS user’s guide<br />
Click to edit a table Hold or right click to pop up menu<br />
Double click to edit the<br />
picture, color, and etc.
23<br />
RMS user’s guide<br />
Double click to select a printer<br />
1 – First language, 0 – one ticket with one item<br />
2 – Second language 1 – on ticket with more items
Click to edit.<br />
24<br />
RMS user’s guide
25<br />
RMS user’s guide<br />
Comments page can input the comments that will be printed on the invoice and<br />
receipt over company-wide.
26<br />
RMS user’s guide<br />
Comments page can input the comments that will be printed on the invoice and<br />
receipt only in that specific location.<br />
Pull down menu<br />
[Report]<br />
Request for a period to print the reports.<br />
Enter a period to report
27<br />
RMS user’s guide<br />
Items Sales Report – report the sales volumes sort by items<br />
Cashier Sales Report – report the sales volumes sort by cashier<br />
Location Sales Report - report the sales volumes sort by location<br />
Period Sales Report – report the sales volumes ort by date<br />
Sales/Purchase Report – report the Purchase vs Sales net income and tax<br />
Category Sales Report – report the sales volumes sort by category<br />
Cashier Closing Report – report the Cashier sales history<br />
Cashier Current Report – report the cashier current status<br />
[Inventory]<br />
• Inventory Items Check-in<br />
Enter data directly or double click to select a value from<br />
the pop-up window<br />
Double click if it is a new item, then the more products’ information can be input.
• Items Check-in Revising<br />
You may high light a record to display detail, edit, or delete.<br />
28<br />
RMS user’s guide
• Show Inventory Status<br />
Choose a location of the inventory from the box as below<br />
And then it will show you the in-stock situation as below<br />
29<br />
RMS user’s guide
• Print Inventory Status<br />
Print out the in stock situation in report format<br />
30<br />
RMS user’s guide<br />
• Items Coding<br />
Code for each item which can be entered directly or by barcode scanner<br />
Note: In case of the prefix of Product ID is $ sign, that means this product’s<br />
quantity is countless, for example, services, installation fee, unlimited copy of<br />
software, and etc. Once you code it, no need to check in the product any more.
31<br />
RMS user’s guide<br />
• Items Pricing<br />
You can set a unit price and PST/GST rate for each item. Also you can set them in<br />
batch depends on you assign the rules such as setting a relation between unit price<br />
and capital.
32<br />
RMS user’s guide<br />
• Modify Items<br />
Input the barcode, product ID, and any information of an item, and find out and<br />
display the detail.<br />
• Modify Category<br />
Double to modify<br />
the picture
[Customers]<br />
• New Customers<br />
33<br />
RMS user’s guide
34<br />
RMS user’s guide<br />
• Display Customers<br />
You may high light a customer record to display detail, edit, or delete.<br />
• Search Customers<br />
Search a keyword from the customer database and display the details<br />
Show more<br />
information about the<br />
customer as below<br />
Show the purchase<br />
record<br />
customer<br />
of the
. More customer information<br />
35<br />
RMS user’s guide<br />
Attachment can be any type of file, such as PDF, DOC, JPG and etc. Double click to<br />
open it.
[Suppliers]<br />
• New Suppliers<br />
36<br />
RMS user’s guide
37<br />
RMS user’s guide<br />
• Display Supplier<br />
You may high light a customer record to display detail, edit, or delete.<br />
• Search Suppliers<br />
Search a keyword from the supplier database and display the detail
[Account]<br />
• Accounts Receivable<br />
38<br />
RMS user’s guide<br />
Double click to pop up a window in which Double click to pop up a window<br />
displays all the customers who still have in which display the unpaid invoices<br />
unpaid bill.<br />
Collection of credit card information Here displays the unpaid invoices relevant<br />
if the customer pays by credit card to the customer to be selected.<br />
• Accounts Payable<br />
Print out all invoices we have to pay for<br />
• Cust. Pymt. Pending Lists<br />
Print out all customers who still have unpaid bill<br />
• Invo. Pymt. Pending Lists<br />
Print out all unpaid invoices from customers<br />
• Cancel Invoice<br />
Delete an existing invoice
[Tools]<br />
• New/Edit Connection<br />
39<br />
RMS user’s guide<br />
The default value is the last<br />
switching name. If empty this<br />
field, the operation system box<br />
will appear to ask the DSN.<br />
After click the Enter button, a box pops up as blow:<br />
The database server’s IP/Domain<br />
Default value of UserID, Password,<br />
and Database is the last remote<br />
connection, those are issued by the<br />
database administrator.<br />
• Switch <strong>System</strong><br />
Switch the system between Multi-user version and Stand-alone version.<br />
• <strong>System</strong> Synchronizing<br />
Transfer all data between SQL Server database and File database. The box will<br />
appear as below.
• User <strong>Management</strong><br />
Double click to lead a function box pops up as below,<br />
40<br />
RMS user’s guide<br />
Click [+] to expand the subfunctions<br />
and click the check box to select the<br />
function. The menu code may be<br />
generated.
41<br />
RMS user’s guide<br />
• Backup Database<br />
Back the data from the computer. If the data is in the remote server, you must<br />
synchronize from the server in advance, and then do backup.<br />
• Restore Database<br />
Restore the data to the computer<br />
• Export Data to Excel<br />
Export Items, Customers, Suppliers, and Invoices information to an Excel file.<br />
• Check for updates<br />
Check the updates from the website. It will show you the current version and the<br />
latest version. You can download the latest one to update the application.<br />
• Configuration<br />
Set up the basic parameter including Global Parameters and Local Parameters.<br />
Global Parameters<br />
Set up the parameters apply to the whole system.<br />
Local Parameters<br />
Set up the parameters apply to the current station.<br />
• Return<br />
19) Exit<br />
Exit the system