VW Golf & Jetta Service and Repair Manual - back home
VW Golf & Jetta Service and Repair Manual - back home
VW Golf & Jetta Service and Repair Manual - back home

You also want an ePaper? Increase the reach of your titles
YUMPU automatically turns print PDFs into web optimized ePapers that Google loves.
<strong>VW</strong> <strong>Golf</strong> & <strong>Jetta</strong><br />
<strong>Service</strong> <strong>and</strong> <strong>Repair</strong> <strong>Manual</strong><br />
I M Coomber <strong>and</strong> Christopher Rogers<br />
Models covered<br />
<strong>VW</strong> <strong>Golf</strong> & <strong>Jetta</strong> Mk 2 models with petrol engines, including fuel injection, catalytic converter,<br />
Formel E, 16-valve <strong>and</strong> special/limited edition models 1043 cc, 1272 cc, 1595 cc & 1781 cc<br />
Covers mechanical features of Van. Does not cover Convertible, Rallye, Caddy, diesel engine, 4 -wheel drive, Mk 1 models<br />
or new <strong>Golf</strong> range introduced in February 1992<br />
© Haynes Publishing 1997<br />
A book in the Haynes <strong>Service</strong> <strong>and</strong> <strong>Repair</strong> <strong>Manual</strong> Series<br />
All rights reserved. No part of this book may be reproduced or<br />
transmitted in any form or by any means, electronic or<br />
mechanical, including photocopying, recording or by any<br />
information storage or retrieval system, without permission in<br />
writing from the copyright holder.<br />
ISBN 1 85960 282 7<br />
ABCDE<br />
FGHIJ<br />
KLMNO<br />
PQRST<br />
1 2 3<br />
British Library Cataloguing in Publication Data<br />
A catalogue record for this book is available from the British Library<br />
Printed by J H Haynes & Co. Ltd, Sparkford, Nr Yeovil, Somerset<br />
BA22 7JJ, Engl<strong>and</strong><br />
Haynes Publishing<br />
Sparkford Nr Yeovil<br />
Somerset BA22 7JJ Engl<strong>and</strong><br />
Haynes North America, Inc<br />
861 Lawrence Drive<br />
Newbury Park<br />
California 91320 USA<br />
Editions Haynes S.A.<br />
147/149, rue Saint Honoré, 75001 PARIS, France<br />
Haynes Publishing Nordiska AB<br />
Fyrisborgsgatan 5, 754 50 Uppsala, Sverige<br />
(1081 - 344 - 1AA11)
Contents<br />
LIVING WITH YOUR VOLKSWAGEN GOLF OR JETTA<br />
Introduction Page 0•4<br />
Safety First! Page 0•5<br />
Roadside <strong>Repair</strong>s<br />
Introduction Page 0•6<br />
If your car won’t start Page 0•6<br />
Jump starting Page 0•7<br />
Wheel changing Page 0•8<br />
Identifying leaks Page 0•9<br />
Towing Page 0•9<br />
Weekly Checks<br />
Introduction Page 0•10<br />
Underbonnet check points Page 0•10<br />
Engine oil level Page 0•11<br />
Coolant level Page 0•11<br />
Brake fluid level Page 0•12<br />
Power steering fluid level Page 0•12<br />
Screen/headlamp washer fluid level Page 0•13<br />
Wiper blades Page 0•13<br />
Tyre condition <strong>and</strong> pressure Page 0•14<br />
Battery Page 0•15<br />
Electrical systems Page 0•15<br />
Lubricants <strong>and</strong> fluids Page 0•16<br />
Capacities <strong>and</strong> tyre pressures Page 0•17<br />
MAINTENANCE<br />
Routine Maintenance <strong>and</strong> Servicing<br />
Servicing specifications Page 1•2<br />
Maintenance schedule:<br />
Vehicles manufactured before August 1985 Page 1•5<br />
Vehicles manufactured after August 1985 Page 1•6<br />
Maintenance - component location Page 1•7<br />
Maintenance procedures Page 1•10
REPAIRS & OVERHAUL<br />
Contents<br />
Engine <strong>and</strong> Associated Systems<br />
Engine repair procedures - 1.05 <strong>and</strong> 1.3 litre - pre August 1985 Page 2A•1<br />
Engine repair procedures - 1.05 <strong>and</strong> 1.3 litre - post August 1985 Page 2B•1<br />
Engine repair procedures - 1.6 <strong>and</strong> 1.8 litre 8 valve Page 2C•1<br />
Engine repair procedures - 1.8 litre 16 valve Page 2D•1<br />
Cooling, heating <strong>and</strong> air conditioning systems Page 3•1<br />
Fuel <strong>and</strong> exhaust systems - carburettor models Page 4A•1<br />
Fuel <strong>and</strong> exhaust systems - K-Jetronic fuel injection - 8 valve engines Page 4B•1<br />
Fuel <strong>and</strong> exhaust systems - K-Jetronic fuel injection - 16 valve engines Page 4C•1<br />
Fuel <strong>and</strong> exhaust systems - Mono Jetronic fuel injection Page 4D•1<br />
Fuel <strong>and</strong> exhaust systems - Digijet fuel injection Page 4E•1<br />
Fuel <strong>and</strong> exhaust systems - Digifant fuel injection Page 4F•1<br />
Ignition system - contact breaker type Page 5A•1<br />
Ignition system - transistorised type Page 5B•1<br />
Ignition system - fully electronic type Page 5C•1<br />
Starting <strong>and</strong> charging systems Page 5D•1<br />
Transmission<br />
Clutch Page 6•1<br />
<strong>Manual</strong> gearbox Page 7A•1<br />
Automatic transmission Page 7B•1<br />
Driveshafts Page 8•1<br />
Brakes <strong>and</strong> Suspension<br />
Braking system Page 9•1<br />
Suspension <strong>and</strong> steering Page 10•1<br />
Body Equipment<br />
Bodywork <strong>and</strong> fittings Page 11•1<br />
Body electrical systems Page 12•1<br />
Wiring Diagrams Page 12•17<br />
REFERENCE<br />
Dimensions <strong>and</strong> Weights Page REF•1<br />
Conversion Factors Page REF•2<br />
Buying Spare Parts <strong>and</strong> Vehicle Identification Page REF•3<br />
General <strong>Repair</strong> Procedures Page REF•4<br />
Jacking <strong>and</strong> Vehicle Support Page REF•5<br />
Tools <strong>and</strong> Working Facilities Page REF•6<br />
MOT test checks Page REF•8<br />
Fault Finding Page REF•12<br />
Glossary of Technical Terms Page REF•20<br />
Index Page REF•25
0•4 Introduction<br />
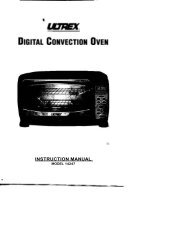
The Mk. II Volkswagen <strong>Golf</strong> <strong>and</strong> <strong>Jetta</strong> range of models was<br />
introduced in March 1984, revised body <strong>and</strong> trim features being the<br />
main visual difference to the earlier range of models.<br />
The engine/transmission is mounted transversely at the front of the<br />
vehicle, drive being to the front wheels. Detailed improvements have<br />
been made throughout the years of manufacture to improve power<br />
output <strong>and</strong> economy. These include the introduction of hydraulic<br />
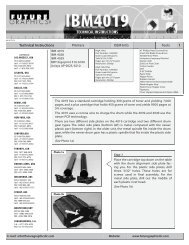
<strong>VW</strong> <strong>Golf</strong><br />
The <strong>VW</strong> <strong>Golf</strong> & <strong>Jetta</strong> Team<br />
Haynes manuals are produced by dedicated <strong>and</strong><br />
enthusiastic people working in close co-operation. The<br />
team responsible for the creation of this book included:<br />
Authors Ian Coomber<br />
Cristopher Rogers<br />
Sub-editors Carole Turk<br />
Sophie Yar<br />
Editor & Page Make-up Steve Churchill<br />
Workshop manager Paul Buckl<strong>and</strong><br />
Photo Scans John Martin<br />
Paul Tanswell<br />
Steve Tanswell<br />
Cover illustration & Line Art Roger Healing<br />
We hope the book will help you to get the maximum<br />
enjoyment from your car. By carrying out routine<br />
maintenance as described you will ensure your car’s<br />
reliability <strong>and</strong> preserve its resale value.<br />
bucket tappets, the Digifant, Digijet <strong>and</strong> Mono-Jetronic fuel injection<br />
systems, the 16-valve engine fitted to the GTi variant, the fully<br />
electronic ignition system (FEI), the 085 5-speed gearbox <strong>and</strong> several<br />
other minor modifications <strong>and</strong> revisions.<br />
As with earlier models the new range is proving popular, giving<br />
economy, reliability, comfort <strong>and</strong>, if previous models can be used as a<br />
yardstick, long life.<br />
<strong>VW</strong> <strong>Jetta</strong><br />
Your Volkswagen <strong>Golf</strong> <strong>and</strong><br />
<strong>Jetta</strong> <strong>Manual</strong><br />
The aim of this <strong>Manual</strong> is to help you get the best value from your<br />
vehicle. It can do so in several ways. It can help you decide what work<br />
must be done (even should you choose to get it done by a garage),<br />
provide information on routine maintenance <strong>and</strong> servicing, <strong>and</strong> give a<br />
logical course of action <strong>and</strong> diagnosis when r<strong>and</strong>om faults occur.<br />
However, it is hoped that you will use the <strong>Manual</strong> by tackling the work<br />
yourself. On simpler jobs it may even be quicker than booking the car<br />
into a garage <strong>and</strong> going there twice, to leave <strong>and</strong> collect it. Perhaps<br />
most important, a lot of money can be saved by avoiding the costs a<br />
garage must charge to cover its labour <strong>and</strong> overheads.<br />
The <strong>Manual</strong> has drawings <strong>and</strong> descriptions to show the function of<br />
the various components so that their layout can be understood. Then<br />
the tasks are described <strong>and</strong> photographed in a clear step-by-step<br />
sequence.<br />
Acknowledgements<br />
Thanks are due to Champion Spark Plug who supplied the<br />
illustrations showing spark plug conditions, to Duckhams Oils, who<br />
provided lubrication data <strong>and</strong> also to Sykes-Pickavant Limited, who<br />
supplied some of the workshop tools, <strong>and</strong> to all those people at<br />
Sparkford who helped in the production of this <strong>Manual</strong>.<br />
We take great pride in the accuracy of information given in this<br />
<strong>Manual</strong>, but vehicle manufacturers make alterations <strong>and</strong> design<br />
changes during the production run of a particular vehicle of which<br />
they do not inform us. No liability can be accepted by the authors<br />
or publishers for loss, damage or injury caused by any errors in, or<br />
omissions from the information given.
Working on your car can be dangerous.<br />
This page shows just some of the potential<br />
risks <strong>and</strong> hazards, with the aim of creating a<br />
safety-conscious attitude.<br />
General hazards<br />
Scalding<br />
• Don’t remove the radiator or expansion<br />
tank cap while the engine is hot.<br />
• Engine oil, automatic transmission fluid or<br />
power steering fluid may also be dangerously<br />
hot if the engine has recently been running.<br />
Burning<br />
• Beware of burns from the exhaust system<br />
<strong>and</strong> from any part of the engine. Brake discs<br />
<strong>and</strong> drums can also be extremely hot<br />
immediately after use.<br />
Crushing<br />
• When working under or near<br />
a raised vehicle,<br />
always<br />
supplement the<br />
jack with axle<br />
st<strong>and</strong>s, or use<br />
drive-on<br />
ramps.<br />
Never<br />
venture<br />
under a car which<br />
is only supported by a jack.<br />
• Take care if loosening or tightening hightorque<br />
nuts when the vehicle is on st<strong>and</strong>s.<br />
Initial loosening <strong>and</strong> final tightening should<br />
be done with the wheels on the ground.<br />
Fire<br />
• Fuel is highly flammable; fuel vapour is<br />
explosive.<br />
• Don’t let fuel spill onto a hot engine.<br />
• Do not smoke or allow naked lights<br />
(including pilot lights) anywhere near a<br />
vehicle being worked on. Also beware of<br />
creating sparks<br />
(electrically or by use of tools).<br />
• Fuel vapour is heavier than air, so don’t<br />
work on the fuel system with the vehicle over<br />
an inspection pit.<br />
• Another cause of fire is an electrical<br />
overload or short-circuit. Take care when<br />
repairing or modifying the vehicle wiring.<br />
• Keep a fire extinguisher h<strong>and</strong>y, of a type<br />
suitable for use on fuel <strong>and</strong> electrical fires.<br />
Electric shock<br />
• Ignition HT<br />
voltage can be<br />
dangerous,<br />
especially to<br />
people with heart<br />
problems or a<br />
pacemaker. Don’t<br />
work on or near the<br />
ignition system with<br />
the engine running or<br />
the ignition switched on.<br />
• Mains voltage is also dangerous. Make<br />
sure that any mains-operated equipment is<br />
correctly earthed. Mains power points should<br />
be protected by a residual current device<br />
(RCD) circuit breaker.<br />
Fume or gas intoxication<br />
• Exhaust fumes are<br />
poisonous; they often<br />
contain carbon<br />
monoxide, which is<br />
rapidly fatal if inhaled.<br />
Never run the<br />
engine in a<br />
confined space<br />
such as a garage<br />
with the doors shut.<br />
• Fuel vapour is also<br />
poisonous, as are the vapours from some<br />
cleaning solvents <strong>and</strong> paint thinners.<br />
Poisonous or irritant substances<br />
• Avoid skin contact with battery acid <strong>and</strong><br />
with any fuel, fluid or lubricant, especially<br />
antifreeze, brake hydraulic fluid <strong>and</strong> Diesel<br />
fuel. Don’t syphon them by mouth. If such a<br />
substance is swallowed or gets into the eyes,<br />
seek medical advice.<br />
• Prolonged contact with used engine oil can<br />
cause skin cancer. Wear gloves or use a<br />
barrier cream if necessary. Change out of oilsoaked<br />
clothes <strong>and</strong> do not keep oily rags in<br />
your pocket.<br />
• Air conditioning refrigerant forms a<br />
poisonous gas if exposed to a naked flame<br />
(including a cigarette). It can also cause skin<br />
burns on contact.<br />
Asbestos<br />
• Asbestos dust can cause cancer if inhaled<br />
or swallowed. Asbestos may be found in<br />
gaskets <strong>and</strong> in brake <strong>and</strong> clutch linings.<br />
When dealing with such components it is<br />
safest to assume that they contain asbestos.<br />
Remember...<br />
DO<br />
• Do use eye protection when using power<br />
tools, <strong>and</strong> when working under the vehicle.<br />
• Do wear gloves or use barrier cream to<br />
protect your h<strong>and</strong>s when necessary.<br />
• Do get someone to check periodically<br />
that all is well when working alone on the<br />
vehicle.<br />
• Do keep loose clothing <strong>and</strong> long hair well<br />
out of the way of moving mechanical parts.<br />
• Do remove rings, wristwatch etc, before<br />
working on the vehicle – especially the<br />
electrical system.<br />
• Do ensure that any lifting or jacking<br />
equipment has a safe working load rating<br />
adequate for the job.<br />
Safety first! 0•5<br />
Special hazards<br />
Hydrofluoric acid<br />
• This extremely corrosive acid is formed<br />
when certain types of synthetic rubber, found<br />
in some O-rings, oil seals, fuel hoses etc, are<br />
exposed to temperatures above 4000C. The<br />
rubber changes into a charred or sticky<br />
substance containing the acid. Once formed,<br />
the acid remains dangerous for years. If it<br />
gets onto the skin, it may be necessary to<br />
amputate the limb concerned.<br />
• When dealing with a vehicle which has<br />
suffered a fire, or with components salvaged<br />
from such a vehicle, wear protective gloves<br />
<strong>and</strong> discard them after use.<br />
The battery<br />
• Batteries contain sulphuric acid, which<br />
attacks clothing, eyes <strong>and</strong> skin. Take care<br />
when topping-up or carrying the battery.<br />
• The hydrogen gas given off by the battery<br />
is highly explosive. Never cause a spark or<br />
allow a naked light nearby. Be careful when<br />
connecting <strong>and</strong> disconnecting battery<br />
chargers or jump leads.<br />
Air bags<br />
• Air bags can cause injury if they go off<br />
accidentally. Take care when removing the<br />
steering wheel <strong>and</strong>/or facia. Special storage<br />
instructions may apply.<br />
Diesel injection equipment<br />
• Diesel injection pumps supply fuel at very<br />
high pressure. Take care when working on<br />
the fuel injectors <strong>and</strong> fuel pipes.<br />
Warning: Never expose the h<strong>and</strong>s,<br />
face or any other part of the body<br />
to injector spray; the fuel can<br />
penetrate the skin with potentially fatal<br />
results.<br />
A few tips<br />
DON’T<br />
• Don’t attempt to lift a heavy component<br />
which may be beyond your capability – get<br />
assistance.<br />
• Don’t rush to finish a job, or take<br />
unverified short cuts.<br />
• Don’t use ill-fitting tools which may slip<br />
<strong>and</strong> cause injury.<br />
• Don’t leave tools or parts lying around<br />
where someone can trip over them. Mop<br />
up oil <strong>and</strong> fuel spills at once.<br />
• Don’t allow children or pets to play in or<br />
near a vehicle being worked on.
0•6 Roadside repairs<br />
The following pages are intended to help in dealing with<br />
common roadside emergencies <strong>and</strong> breakdowns. You will find<br />
more detailed fault finding information at the <strong>back</strong> of the<br />
manual, <strong>and</strong> repair information in the main chapters.<br />
If your car won’t start<br />
<strong>and</strong> the starter motor<br />
doesn’t turn<br />
� If it’s a model with automatic transmission, make sure the<br />
selector is in ‘P’ or ‘N’.<br />
� Open the bonnet <strong>and</strong> make sure that the battery terminals<br />
are clean <strong>and</strong> tight.<br />
� Switch on the headlights <strong>and</strong> try to start the engine. If the<br />
headlights go very dim when you’re trying to start, the<br />
battery is probably flat. Get out of trouble by jump starting<br />
(see next page) using a friend’s car.<br />
Check that the HT lead connections at<br />
A the distributor are clean <strong>and</strong> make sure<br />
they are secure by pushing them onto<br />
the cap.<br />
Check that the HT lead connections at<br />
B the spark plugs are secure by pushing<br />
them onto the plugs.<br />
Check that electrical connections are secure (with the ignition switched off) <strong>and</strong> spray them<br />
with a water dispersant spray like WD40 if you suspect a problem due to damp<br />
If your car won’t start<br />
even though the starter<br />
motor turns as normal<br />
� Is there fuel in the tank?<br />
� Is there moisture on electrical components under the<br />
bonnet? Switch off the ignition, then wipe off any obvious<br />
dampness with a dry cloth. Spray a water-repellent aerosol<br />
product (WD-40 or equivalent) on ignition <strong>and</strong> fuel system<br />
electrical connectors like those shown in the photos.<br />
Pay special attention to the ignition coil wiring connector<br />
<strong>and</strong> HT leads.<br />
Check that the LT lead connections are<br />
C clean <strong>and</strong> secure.<br />
Check the security <strong>and</strong> condition of the<br />
D battery connections.<br />
E<br />
Wiring plugs may cause problems if dirty<br />
or not connected properly.
Jump starting will get you out<br />
of trouble, but you must correct<br />
whatever made the battery go<br />
flat in the first place. There are<br />
three possibilities:<br />
1The battery has been drained by<br />
repeated attempts to start, or by<br />
leaving the lights on.<br />
2 The<br />
charging system is not working<br />
properly (alternator drivebelt slack<br />
or broken, alternator wiring fault or<br />
alternator itself faulty).<br />
3 The<br />
battery itself is at fault<br />
(electrolyte low, or battery worn out).<br />
When jump-starting a car using a<br />
booster battery, observe the following<br />
precautions:<br />
4 Before connecting the booster<br />
battery, make sure that the ignition is<br />
switched off.<br />
4 Ensure that all electrical equipment<br />
(lights, heater, wipers, etc) is<br />
switched off.<br />
1 2 3<br />
Connect one end of the red jump lead to<br />
the positive (+) terminal of the flat<br />
battery<br />
Connect the other end of the red lead to<br />
the positive (+) terminal of the booster<br />
battery.<br />
Roadside repairs 0•7<br />
4 Make sure that the booster battery is<br />
the same voltage as the discharged<br />
one in the vehicle.<br />
4 If the battery is being jump-started<br />
from the battery in another vehicle,<br />
the two vehcles MUST NOT TOUCH<br />
each other.<br />
4 Make sure that the transmission is in<br />
neutral (or PARK, in the case of<br />
automatic transmission).<br />
4<br />
5<br />
6<br />
Jump starting<br />
Connect one end of the black jump lead<br />
to the negative (-) terminal of the<br />
booster battery<br />
Connect the other end of the black<br />
jump lead to a bolt or bracket on the<br />
engine block, well away from the<br />
battery, on the vehicle to be started.<br />
Make sure that the jump leads will not<br />
come into contact with the fan, drivebelts<br />
or other moving parts of the<br />
engine.<br />
Start the engine using the booster<br />
battery, then with the engine running at<br />
idle speed, disconnect the jump leads in<br />
the reverse order of connection.
0•8 Roadside repairs<br />
Wheel changing<br />
Some of the details shown here will vary<br />
according to model. For instance, the location<br />
of the spare wheel <strong>and</strong> jack is not the same on<br />
all cars. However, the basic principles apply<br />
to all vehicles.<br />
Preparation<br />
� When a puncture occurs, stop as soon as<br />
it is safe to do so.<br />
� Park on firm level ground, if possible,<br />
<strong>and</strong> well out of the way of other traffic.<br />
� Use hazard warning lights if necessary.<br />
Changing the wheel<br />
The spare wheels <strong>and</strong> tools are stored in<br />
1 the luggage compartment. Release the<br />
Unscrew the retaining nut <strong>and</strong> lift the<br />
2 wheel out of the vehicle.<br />
Remove the wheel trim/hub cap from the<br />
3 wheel (some trims have retaining screws<br />
retaining strap <strong>and</strong> lift out the jack <strong>and</strong><br />
which must be undone first). Slacken<br />
tools from the centre of the wheel.<br />
each wheel bolt by half a turn.<br />
4 5 6<br />
Locate the jack below the reinforced<br />
point on the sill <strong>and</strong> on firm ground. Turn<br />
the jack h<strong>and</strong>le to raise the car until the<br />
wheel is clear of the ground.<br />
Finally...<br />
� Remove the wheel chocks.<br />
� Stow the jack <strong>and</strong> tools in the correct locations in the car.<br />
� Check the tyre pressure on the wheel just fitted. If it is low, or if you don’t have a pressure<br />
gauge with you, drive slowly to the nearest garage <strong>and</strong> inflate the tyre to the right pressure.<br />
� Have the damaged tyre or wheel repaired as soon as possible.<br />
Warning: Do not change a wheel in a situation where you risk being hit by<br />
another vehicle. On busy roads, try to stop in a lay-by or a gateway. Be wary of<br />
passing traffic while changing the wheel - it is easy to become distracted by<br />
the job in h<strong>and</strong>.<br />
� If you have one, use a warning triangle to<br />
alert other drivers of your presence.<br />
� Apply the h<strong>and</strong>brake <strong>and</strong> engage first or<br />
reverse gear (or Park on models with<br />
automatic transmission.<br />
Unscrew the wheel bolts <strong>and</strong> remove the<br />
wheel. Fit the spare wheel <strong>and</strong> screw in<br />
the wheel bolts. Lightly tighten them<br />
using the wheelbrace, then lower the car to<br />
the ground.<br />
� Chock the wheel diagonally opposite the<br />
one being removed – a couple of large<br />
stones will do for this.<br />
� If the ground is soft, use a flat piece of<br />
wood to spread the load under the jack.<br />
Once the car is on the ground, tighten the<br />
wheel bolts securely in a diagonal pattern<br />
using the wheelbrace. At the earliest<br />
possible opportunity, have the wheel bolts<br />
slackened <strong>and</strong> then tightened to the correct<br />
torque wrench setting.
Puddles on the garage floor or drive, or<br />
obvious wetness under the bonnet or<br />
underneath the car, suggest a leak that needs<br />
investigating. It can sometimes be difficult to<br />
decide where the leak is coming from,<br />
especially if the engine bay is very dirty<br />
already. Leaking oil or fluid can also be blown<br />
rearwards by the passage of air under the car,<br />
giving a false impression of where the<br />
problem lies.<br />
When all else fails, you may find yourself<br />
having to get a tow <strong>home</strong> – or of course you<br />
may be helping somebody else. Long-distance<br />
recovery should only be done by a garage or<br />
breakdown service. For shorter distances, DIY<br />
towing using another car is easy enough, but<br />
observe the following points:<br />
� Use a proper tow-rope – they are not<br />
expensive. The vehicle being towed must<br />
display an ‘ON TOW’ sign in its rear window.<br />
� Always turn the ignition key to the ‘on’<br />
position when the vehicle is being towed, so<br />
Warning: Most automotive oils<br />
<strong>and</strong> fluids are poisonous. Wash<br />
them off skin, <strong>and</strong> change out of<br />
contaminated clothing, without<br />
delay.<br />
that the steering lock is released, <strong>and</strong> that the<br />
direction indicator <strong>and</strong> brake lights will work.<br />
� Only attach the tow-rope to the towing<br />
eyes provided.<br />
� Before being towed, release the h<strong>and</strong>brake<br />
<strong>and</strong> select neutral on the transmission.<br />
� Note that greater-than-usual pedal<br />
pressure will be required to operate the<br />
brakes, since the vacuum servo unit is only<br />
operational with the engine running.<br />
� On models with power steering, greaterthan-usual<br />
steering effort will also be required.<br />
Roadside repairs 0•9<br />
Identifying leaks<br />
The smell of a fluid leaking<br />
from the car may provide a<br />
clue to what’s leaking. Some<br />
fluids are distinctively<br />
coloured. It may help to clean the car<br />
carefully <strong>and</strong> to park it over some clean<br />
paper overnight as an aid to locating the<br />
source of the leak.<br />
Remember that some leaks may only<br />
occur while the engine is running.<br />
Sump oil Oil from filter<br />
Gearbox oil<br />
Engine oil may leak from the drain plug... ...or from the base of the oil filter.<br />
Antifreeze<br />
Leaking antifreeze often leaves a crystalline<br />
deposit like this.<br />
Brake fluid Power steering fluid<br />
A leak occurring at a wheel is almost<br />
certainly brake fluid.<br />
Gearbox oil can leak from the seals at the<br />
inboard ends of the driveshafts.<br />
Power steering fluid may leak from the pipe<br />
connectors on the steering rack.<br />
Towing<br />
� The driver of the car being towed must<br />
keep the tow-rope taut at all times to avoid<br />
snatching.<br />
� Make sure that both drivers know the route<br />
before setting off.<br />
� Only drive at moderate speeds <strong>and</strong> keep<br />
the distance towed to a minimum. Drive<br />
smoothly <strong>and</strong> allow plenty of time for slowing<br />
down at junctions.<br />
� On models with automatic transmission,<br />
special precautions apply. If in doubt, do not<br />
tow, or transmission damage may result.
0•10 Weekly checks<br />
Introduction<br />
There are some very simple checks which<br />
need only take a few minutes to carry out, but<br />
which could save you a lot of inconvenience<br />
<strong>and</strong> expense.<br />
These "Weekly checks" require no great skill<br />
or special tools, <strong>and</strong> the small amount of time<br />
they take to perform could prove to be very<br />
well spent, for example;<br />
Underbonnet check points<br />
� Keeping an eye on tyre condition <strong>and</strong><br />
pressures, will not only help to stop them<br />
wearing out prematurely, but could also save<br />
your life.<br />
� Many breakdowns are caused by electrical<br />
problems. Battery-related faults are particularly<br />
common, <strong>and</strong> a quick check on a regular basis<br />
will often prevent the majority of these.<br />
� If your car develops a brake fluid leak, the<br />
first time you might know about it is when<br />
your brakes don't work properly. Checking<br />
the level regularly will give advance warning of<br />
this kind of problem.<br />
� If the oil or coolant levels run low, the cost<br />
of repairing any engine damage will be far<br />
greater than fixing the leak, for example.<br />
� All models<br />
A<br />
B<br />
C<br />
D<br />
E<br />
F<br />
(typical)<br />
Engine oil level<br />
dipstick<br />
Engine oil filler cap<br />
Coolant expansion<br />
tank<br />
Brake fluid reservoir<br />
Power steering fluid<br />
reservoir<br />
Screen washer fluid<br />
reservoir<br />
G Battery
Engine oil level<br />
Before you start<br />
4 Make sure that your car is on level ground.<br />
4 Check the oil level before the car is driven,<br />
or at least 5 minutes after the engine has been<br />
switched off.<br />
If the oil is checked immediately<br />
after driving the<br />
vehicle, some of the oil will<br />
remain in the upper engine<br />
components, resulting in an inaccurate<br />
reading on the dipstick!<br />
The correct oil<br />
Modern engines place great dem<strong>and</strong>s on their<br />
oil. It is very important that the correct oil for<br />
your car is used (See “Lubricants, fluids <strong>and</strong><br />
capacities”).<br />
Car Care<br />
l If you have to add oil frequently, you should<br />
check whether you have any oil leaks. Place<br />
some clean paper under the car overnight,<br />
<strong>and</strong> check for stains in the morning. If there<br />
are no leaks, the engine may be burning oil<br />
(see “Fault Finding”).<br />
l Always maintain the level between the<br />
upper <strong>and</strong> lower dipstick marks (see photo 3).<br />
If the level is too low severe engine damage<br />
may occur. Oil seal failure may result if the<br />
engine is overfilled by adding too much oil.<br />
Coolant level<br />
Warning: DO NOT attempt to<br />
remove the expansion tank<br />
pressure cap when the engine<br />
is hot, as there is a very great<br />
risk of scalding. Do not leave<br />
open containers of coolant<br />
about, as it is poisonous.<br />
The coolant level varies with the<br />
temperature of the engine. When the<br />
engine is cold, the coolant level should<br />
be between the MAX <strong>and</strong> MIN marks on the<br />
side of the expansion tank. When the engine<br />
is hot, the level may rise slightly.<br />
1 2<br />
The dipstick is located at the right-h<strong>and</strong><br />
end of the engine (see “Underbonnet<br />
check points” on page 0•10 for exact<br />
location). Withdraw the dipstick.<br />
3 4<br />
Note the oil level on the end of the<br />
dipstick, which should be between the<br />
upper ("MAX") mark <strong>and</strong> lower ("MIN")<br />
mark. Approximately 1.0 litre of oil will raise<br />
the level from the lower mark to the upper<br />
mark.<br />
Car Care<br />
l With a sealed-type cooling system, adding<br />
coolant should not be necessary on a regular<br />
basis. If frequent topping-up is required, it is<br />
likely there is a leak. Check the radiator, all<br />
hoses <strong>and</strong> joint faces for signs of staining or<br />
wetness, <strong>and</strong> rectify as necessary.<br />
1 2 3<br />
If topping up is necessary, wait until the<br />
engine is cold. Slowly unscrew the<br />
expansion tank cap, to release any<br />
pressure present in the cooling system, <strong>and</strong><br />
remove it.<br />
Weekly checks 0•11<br />
Using a clean rag or paper towel remove<br />
all oil from the dipstick. Insert the clean<br />
dipstick into the tube as far as it will go,<br />
then withdraw it again.<br />
Oil is added through the filler cap.<br />
Unscrew the cap <strong>and</strong> top-up the level; a<br />
funnel may help to reduce spillage. Add<br />
the oil slowly, checking the level on the dipstick<br />
often. Don’t overfill (see “Car Care” left).<br />
l It is important that antifreeze is used in the<br />
cooling system all year round, not just during<br />
the winter months. Don’t top-up with water<br />
alone, as the antifreeze will become too<br />
diluted.<br />
Add the recommended mixture of water<br />
<strong>and</strong> antifreeze through the expansion<br />
tank filler neck, until the coolant is up to<br />
the MAX level mark. Refit the cap, turning it<br />
clockwise as far as it will go until it is secure.
0•12 Weekly checks<br />
Brake fluid level<br />
Warning:<br />
l Brake fluid can harm your<br />
eyes <strong>and</strong> damage painted<br />
surfaces, so use extreme<br />
caution when h<strong>and</strong>ling <strong>and</strong><br />
pouring it.<br />
l Do not use fluid that has<br />
been st<strong>and</strong>ing open for some<br />
time, as it absorbs moisture<br />
from the air, which can cause a<br />
dangerous loss of braking<br />
effectiveness.<br />
• Make sure that your car is<br />
on level ground.<br />
• The fluid level in the<br />
reservoir will drop slightly as<br />
the brake pads wear down, but the fluid<br />
level must never be allowed to drop<br />
below the “MIN” mark.<br />
Safety First!<br />
l If the reservoir requires repeated toppingup<br />
this is an indication of a fluid leak<br />
somewhere in the system, which should be<br />
investigated immediately.<br />
l If a leak is suspected, the car should not be<br />
driven until the braking system has been<br />
checked. Never take any risks where brakes<br />
are concerned.<br />
1<br />
Power steering fluid level<br />
Before you start:<br />
4 Park the vehicle on level ground.<br />
4 Set the steering wheel straight-ahead.<br />
4 The engine should be turned off.<br />
The fluid reservoir is mounted next to the<br />
1 battery in the engine compartment.<br />
“MAX” <strong>and</strong> “MIN” level marks are<br />
indicated on the side of the reservoir. The fluid<br />
level should be maintained between these<br />
marks at all times.<br />
The “MAX” <strong>and</strong> “MIN” marks are<br />
indicated on the front of the reservoir.<br />
The fluid level must be kept between the<br />
marks at all times.<br />
Unscrew the reservoir cap <strong>and</strong> carefully<br />
3 lift it out of position, taking care not to<br />
damage the level switch float. Inspect the<br />
reservoir, if the fluid is dirty the hydraulic<br />
system should be drained <strong>and</strong> refilled (see<br />
Chapter 1).<br />
For the check to be<br />
accurate, the steering must<br />
not be turned once the<br />
engine has been stopped.<br />
If topping-up is necessary, first wipe the<br />
2 area around the filler cap with a clean rag<br />
before removing the cap. When adding<br />
fluid, pour it carefully into the reservoir to<br />
avoid spillage. Be sure to use only the<br />
specified fluid.<br />
2<br />
If topping-up is necessary, first wipe<br />
clean the area around the filler cap to<br />
prevent dirt entering the hydraulic<br />
system.<br />
Carefully add fluid, taking care not to spill<br />
4 it onto the surrounding components. Use<br />
only the specified fluid; mixing different<br />
types can cause damage to the system. After<br />
topping-up to the correct level, securely refit<br />
the cap <strong>and</strong> wipe off any spilt fluid.<br />
Safety First!<br />
l The need for frequent topping-up indicates<br />
a leak, which should be investigated<br />
immediately.<br />
3<br />
After filling the reservoir to the proper<br />
level, make sure that the cap is refitted<br />
securely to avoid leaks <strong>and</strong> the entry of<br />
foreign matter into the reservoir.
Screen/headlamp washer fluid level<br />
Screenwash additives not only keep the<br />
winscreen clean during foul weather, they also<br />
prevent the washer system freezing in cold<br />
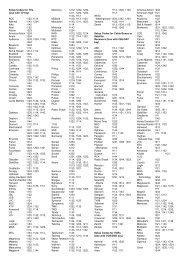
Wiper blades<br />
The reservoir for the windscreen <strong>and</strong><br />
1 headlamp washer systems is located on the<br />
left-h<strong>and</strong> side of the engine compartment,<br />
forward of the suspension turret. The rear screen<br />
washer system reservoir is located on the<br />
right-h<strong>and</strong> side rear corner of the luggage<br />
compartment. Later systems have a single<br />
reservoir located in the engine compartment.<br />
Check the condition of the wiper blades;<br />
1 if they are cracked or show any signs of<br />
deterioration, or if the glass swept area is<br />
smeared, renew them. Wiper blades should<br />
be renewed annually.<br />
weather - which is when you are likely to need it<br />
most. Don’t top up using plain water as the<br />
screenwash will become too diluted, <strong>and</strong> will<br />
When topping-up the reservoir(s) a<br />
2 screenwash additive should be added in<br />
the quantities recommended on the<br />
bottle.<br />
Check the operation of both screen <strong>and</strong> headlamp washers. Adjust<br />
3 the nozzles using a pin if necessary, aiming the spray to a point<br />
slightly above the centre of the swept area.<br />
a = 345 mm b = 420 mm c = 320 mm d = 300 mm<br />
To remove a windscreen wiper blade, pull<br />
2 the arm fully away from the screen until it<br />
locks. Swivel the blade through 90°,<br />
press the locking tab with your fingers <strong>and</strong><br />
slide the blade out of the arm’s hooked end.<br />
Weekly checks 0•13<br />
freeze during cold weather. On no account use<br />
coolant antifreeze in the washer system -<br />
this could discolour or damage paintwork.<br />
Don’t forget to check the tailgate wiper<br />
3<br />
blade as well. To remove the blade,<br />
depress the retaining tab <strong>and</strong> slide the<br />
blade out of the hooked end of the arm.
0•14 Weekly checks<br />
Tyre condition <strong>and</strong> pressure<br />
It is very important that tyres are in good<br />
condition, <strong>and</strong> at the correct pressure - having<br />
a tyre failure at any speed is highly dangerous.<br />
Tyre wear is influenced by driving style - harsh<br />
braking <strong>and</strong> acceleration, or fast cornering,<br />
will all produce more rapid tyre wear. As a<br />
general rule, the front tyres wear out faster<br />
than the rears. Interchanging the tyres from<br />
front to rear ("rotating" the tyres) may result in<br />
more even wear. However, if this is<br />
completely effective, you may have the<br />
expense of replacing all four tyres at once!<br />
Remove any nails or stones embedded in the<br />
tread before they penetrate the tyre to cause<br />
deflation. If removal of a nail does reveal that<br />
1<br />
Tread Depth - visual check<br />
The original tyres have tread wear safety<br />
b<strong>and</strong>s (B), which will appear when the tread<br />
depth reaches approximately 1.6 mm. The<br />
b<strong>and</strong> positions are indicated by a triangular<br />
mark on the tyre sidewall (A).<br />
the tyre has been punctured, refit the nail so<br />
that its point of penetration is marked. Then<br />
immediately change the wheel, <strong>and</strong> have the<br />
tyre repaired by a tyre dealer.<br />
Regularly check the tyres for damage in the<br />
form of cuts or bulges, especially in the<br />
sidewalls. Periodically remove the wheels,<br />
<strong>and</strong> clean any dirt or mud from the inside <strong>and</strong><br />
outside surfaces. Examine the wheel rims for<br />
signs of rusting, corrosion or other damage.<br />
Light alloy wheels are easily damaged by<br />
"kerbing" whilst parking; steel wheels may<br />
also become dented or buckled. A new wheel<br />
is very often the only way to overcome severe<br />
damage.<br />
2<br />
Tyre tread wear patterns<br />
Shoulder Wear<br />
Underinflation (wear on both sides)<br />
Under-inflation will cause overheating of the<br />
tyre, because the tyre will flex too much, <strong>and</strong><br />
the tread will not sit correctly on the road<br />
surface. This will cause a loss of grip <strong>and</strong><br />
excessive wear, not to mention the danger of<br />
sudden tyre failure due to heat build-up.<br />
Check <strong>and</strong> adjust pressures<br />
Incorrect wheel camber (wear on one side)<br />
<strong>Repair</strong> or renew suspension parts<br />
Hard cornering<br />
Reduce speed!<br />
Tread Depth - manual check<br />
Alternatively, tread wear can be<br />
monitored with a simple, inexpensive device<br />
known as a tread depth indicator gauge.<br />
Centre Wear<br />
Overinflation<br />
Over-inflation will cause rapid wear of the<br />
centre part of the tyre tread, coupled with<br />
reduced grip, harsher ride, <strong>and</strong> the danger of<br />
shock damage occurring in the tyre casing.<br />
Check <strong>and</strong> adjust pressures<br />
If you sometimes have to inflate your car’s<br />
tyres to the higher pressures specified for<br />
maximum load or sustained high speed, don’t<br />
forget to reduce the pressures to normal<br />
afterwards.<br />
New tyres should be balanced when they are<br />
fitted, but it may become necessary to rebalance<br />
them as they wear, or if the balance<br />
weights fitted to the wheel rim should fall off.<br />
Unbalanced tyres will wear more quickly, as<br />
will the steering <strong>and</strong> suspension components.<br />
Wheel imbalance is normally signified by<br />
vibration, particularly at a certain speed<br />
(typically around 50 mph). If this vibration is<br />
felt only through the steering, then it is likely<br />
that just the front wheels need balancing. If,<br />
however, the vibration is felt through the<br />
whole car, the rear wheels could be out of<br />
balance. Wheel balancing should be carried<br />
out by a tyre dealer or garage.<br />
3<br />
Tyre Pressure Check<br />
Check the tyre pressures regularly with<br />
the tyres cold. Do not adjust the tyre<br />
pressures immediately after the vehicle has<br />
been used, or an inaccurate setting will result.<br />
Uneven Wear<br />
Front tyres may wear unevenly as a result of<br />
wheel misalignment. Most tyre dealers <strong>and</strong><br />
garages can check <strong>and</strong> adjust the wheel<br />
alignment (or "tracking") for a modest charge.<br />
Incorrect camber or castor<br />
<strong>Repair</strong> or renew suspension parts<br />
Malfunctioning suspension<br />
<strong>Repair</strong> or renew suspension parts<br />
Unbalanced wheel<br />
Balance tyres<br />
Incorrect toe setting<br />
Adjust front wheel alignment<br />
Note: The feathered edge of the tread which<br />
typifies toe wear is best checked by feel.
Battery<br />
Caution: Before carrying out any work on the<br />
vehicle battery, read the precautions given in<br />
"Safety first" at the start of this manual.<br />
4 Make sure that the battery tray is in good<br />
condition, <strong>and</strong> that the clamp is tight.<br />
Corrosion on the tray, retaining clamp <strong>and</strong> the<br />
battery itself can be removed with a solution<br />
of water <strong>and</strong> baking soda. Thoroughly rinse all<br />
cleaned areas with water. Any metal parts<br />
damaged by corrosion should be covered<br />
with a zinc-based primer, then painted.<br />
4 Periodically (approximately every three<br />
months), check the charge condition of the<br />
battery as described in Chapter 5A.<br />
4 If the battery is flat, <strong>and</strong> you need to jump<br />
start your vehicle, see Roadside <strong>Repair</strong>s.<br />
Battery corrosion can be kept to a<br />
minimum by applying a layer of<br />
petroleum jelly to the clamps <strong>and</strong><br />
terminals after they are reconnected.<br />
Electrical systems<br />
4 Check all external lights <strong>and</strong> the horn.<br />
Refer to the appropriate Sections of Chapter<br />
12 for details if any of the circuits are<br />
found to be inoperative.<br />
1<br />
If a single indicator light, stop-light or<br />
headlight has failed, it is likely that a bulb<br />
has blown <strong>and</strong> will need to be replaced.<br />
Refer to Chapter 12 for details. If both stoplights<br />
have failed, it is possible that the switch<br />
has failed.<br />
The battery is located on the left-h<strong>and</strong><br />
1 side of the engine compartment. The<br />
exterior of the battery should be<br />
inspected periodically for damage such as a<br />
cracked case or cover.<br />
If corrosion (white, fluffy deposits) is<br />
3 evident, remove the cables from the<br />
battery terminals, clean them with a small<br />
wire brush, then refit them. Automotive stores<br />
sell a tool for cleaning the battery post . . .<br />
4 Visually check all accessible wiring<br />
connectors, harnesses <strong>and</strong> retaining clips for<br />
security, <strong>and</strong> for signs of chafing or damage.<br />
If more than one indicator light or tail light<br />
2 has failed it is likely that either a fuse has<br />
blown or that there is a fault in the circuit<br />
(see Chapter 12). The fuses are located under<br />
the facia panel, on the right-h<strong>and</strong> side, behind<br />
a removable cover.<br />
Weekly checks 0•15<br />
Check the tightness of battery clamps (A)<br />
2 to ensure good electrical connections.<br />
You should not be able to move them.<br />
Also check each cable (B) for cracks <strong>and</strong><br />
frayed conductors.<br />
4<br />
. . . as well as the battery cable clamps<br />
If you need to check your<br />
brake lights <strong>and</strong> indicators<br />
unaided, <strong>back</strong> up to a wall or<br />
garage door <strong>and</strong> operate the<br />
lights. The reflected light should show if<br />
they are working properly.<br />
To replace a blown fuse, simply pull it out<br />
3 <strong>and</strong> fit a new fuse of the correct rating<br />
(see Chapter 12). If the fuse blows again,<br />
it is important that you find out why - a<br />
complete checking procedure is given in<br />
Chapter 12.
0•16 Lubricants <strong>and</strong> fluids<br />
Lubricants <strong>and</strong> fluids<br />
Component or system Lubricant or fluid<br />
Engine . . . . . . . . . . . . . . . . . . . . . . . . . . . . . . Multigrade engine oil to viscosity SAE 15W/50 or 20W/50<br />
Duckhams QXR, QS, Hypergrade Plus or Hypergrade<br />
Cooling system . . . . . . . . . . . . . . . . . . . . . . Ethylene-glycol based antifreeze with corrosion inhibitors.<br />
Duckhams Antifreeze & Summer Coolant. Mixture 50% by volume<br />
<strong>Manual</strong> gearbox . . . . . . . . . . . . . . . . . . . . . Gear oil, viscosity SAE 80<br />
Duckhams Hypoid 80 or Hypoid 75W/90S<br />
Automatic transmission . . . . . . . . . . . . . . Dexron type ATF<br />
Duckhams Uni-Matic<br />
Final drive:<br />
<strong>Manual</strong> gearbox . . . . . . . . . . . . . . . . . . . . . . Gear oil, viscosity SAE 80<br />
Duckhams Hypoid 80 or Hypoid 75W/90S<br />
Automatic transmission . . . . . . . . . . . . . . . . Gear oil, viscosity SAE 90EP<br />
Duckhams Hypoid 90S or Hypoid 75W/90S<br />
Brake hydraulic system . . . . . . . . . . . . . . Hydraulic fluid to FMVSS 11 6 DOT 4<br />
Duckhams Universal Brake <strong>and</strong> Clutch Fluid<br />
Power steering system:<br />
pre-April 1989 . . . . . . . . . . . . . . . . . . . . . . . Dexron type ATF<br />
Duckhams Uni-Matic<br />
post-April 1989 . . . . . . . . . . . . . . . . . . . . . . <strong>VW</strong> oil G 002 000<br />
No Duckhams equivalent<br />
Choosing your engine oil<br />
Oils perform vital tasks in all engines. The<br />
higher the engine’s performance, the greater<br />
the dem<strong>and</strong> on lubricants to minimise wear as<br />
well as optimise power <strong>and</strong> economy.<br />
Duckhams tailors lubricants to the highest<br />
technical st<strong>and</strong>ards, meeting <strong>and</strong> exceeding<br />
the dem<strong>and</strong>s of all modern engines.<br />
HOW ENGINE OIL WORKS<br />
• Beating friction<br />
Without oil, the surfaces inside your engine<br />
which rub together will heat, fuse <strong>and</strong> quickly<br />
cause engine seizure. Oil, <strong>and</strong> its special<br />
additives, forms a molecular barrier between<br />
moving parts, to stop wear <strong>and</strong> minimise heat<br />
build-up.<br />
• Cooling hot spots<br />
Oil cools parts that the engine’s water-based<br />
coolant cannot reach, bathing the combustion<br />
chamber <strong>and</strong> pistons, where temperatures<br />
may exceed 1000°C. The oil assists in<br />
transferring the heat to the engine cooling<br />
system. Heat in the oil is also lost by air flow<br />
over the sump, <strong>and</strong> via any auxiliary oil cooler.<br />
• Cleaning the inner engine<br />
Oil washes away combustion by-products<br />
(mainly carbon) on pistons <strong>and</strong> cylinders,<br />
transporting them to the oil filter, <strong>and</strong> holding<br />
the smallest particles in suspension until they<br />
are flushed out by an oil change. Duckhams<br />
oils undergo extensive tests in the laboratory,<br />
<strong>and</strong> on the road.<br />
Note: It is<br />
antisocial <strong>and</strong><br />
illegal to dump oil<br />
down the drain.<br />
To find the<br />
location of your<br />
local oil recycling<br />
bank, call this<br />
number free.<br />
Engine oil types<br />
Mineral oils are the “traditional” oils,<br />
generally suited to older engines <strong>and</strong> cars not<br />
used in harsh conditions. Duckhams<br />
Hypergrade Plus <strong>and</strong> Hypergrade are well<br />
suited for use in most popular family cars.<br />
Diesel oils such as Duckhams Diesel are<br />
specially formulated for Diesel engines,<br />
including turbocharged models <strong>and</strong> 4x4s.<br />
Synthetic oils are the state-of-the-art in<br />
lubricants, offering ultimate protection, but at<br />
a fairly high price. One such is Duckhams QS,<br />
for use in ultra-high performance engines.<br />
Semi-synthetic oils offer high performance<br />
engine protection, but at less cost than full<br />
synthetic oils. Duckhams QXR is an ideal choice<br />
for hot hatches <strong>and</strong> hard-driven cars.<br />
For help with technical<br />
queries on lubricants,<br />
call Duckhams Oils<br />
on 0181 290 8207
Capacities<br />
Capacities <strong>and</strong> tyre pressures 0•17<br />
Component or system Capacity<br />
Engine:<br />
1.05 & 1.3 litre:<br />
rocker-finger type . . . . . . . . . . . . . . . . . . . . . . . . . . . . . . . . . . . . 3.0 litres with filter change<br />
2.5 litres without filter change<br />
hydraulic tappet type . . . . . . . . . . . . . . . . . . . . . . . . . . . . . . . . . . 3.5 litres with filter change<br />
3.0 litres without filter change<br />
1.6 & 1.8 litre:<br />
pre-August 1985 . . . . . . . . . . . . . . . . . . . . . . . . . . . . . . . . . . . 3.5 litres with filter change<br />
3.0 litres without filter change<br />
post-August 1985 . . . . . . . . . . . . . . . . . . . . . . . . . . . . . . . . . . 4.0 litres with filter change<br />
3.5 litres without filter change<br />
Cooling system . . . . . . . . . . . . . . . . . . . . . . . . . . . . . . . . . . . . 6.3 litres<br />
<strong>Manual</strong> gearbox:<br />
084 type . . . . . . . . . . . . . . . . . . . . . . . . . . . . . . . . . . . . . . . . . . 2.2 litres<br />
085 type . . . . . . . . . . . . . . . . . . . . . . . . . . . . . . . . . . . . . . . . . . 3.1 litres<br />
020 4-speed . . . . . . . . . . . . . . . . . . . . . . . . . . . . . . . . . . . . . . . 1.5 litres<br />
020 5-speed . . . . . . . . . . . . . . . . . . . . . . . . . . . . . . . . . . . . . . . 2.0 litres<br />
Automatic transmission . . . . . . . . . . . . . . . . . . . . . . . . . . . . 6.0 litres from dry<br />
3.0 litres service drain & fill<br />
Final drive:<br />
<strong>Manual</strong> gearbox . . . . . . . . . . . . . . . . . . . . . . . . . . . . . . . . . . . . Included in gearbox capacity<br />
Automatic . . . . . . . . . . . . . . . . . . . . . . . . . . . . . . . . . . . . . . . . . 0.75 litre<br />
Fuel tank . . . . . . . . . . . . . . . . . . . . . . . . . . . . . . . . . . . . . . . . . . 55.0 litres<br />
Tyre pressures (tyres cold)<br />
Front Rear<br />
1.05 & 1.3 litre models:<br />
Half load . . . . . . . . . . . . . . . . . . . . . . . . . . 1.8 bar (26 lbf/in2 ) 1.8 bar (26 lbf/in2 )<br />
Full load . . . . . . . . . . . . . . . . . . . . . . . . . . 1.8 bar (26 lbf/in2 ) 2.4 bar (35 lbf/in2 )<br />
1.6 & 1.8 litre models:<br />
Half load . . . . . . . . . . . . . . . . . . . . . . . . . . 2.0 bar (29 lbf/in 2 ) 1.8 bar (26 lbf/in 2 )<br />
Full load . . . . . . . . . . . . . . . . . . . . . . . . . . 2.0 bar (29 lbf/in 2 ) 2.4 bar (35 lbf/in 2 )
0•18<br />
Notes