Ektasound 235 vintage projector - back home
Ektasound 235 vintage projector - back home
Ektasound 235 vintage projector - back home

You also want an ePaper? Increase the reach of your titles
YUMPU automatically turns print PDFs into web optimized ePapers that Google loves.
KODAK EKTASOUND Projector Case<br />
To close the case, be^ sure that -<br />
1. Power cord is removed from Projector<br />
and stored in storage compartment.<br />
2. Takeup reel is removed From Projector<br />
and placed on reel retainer in case to<br />
prevent scratching the dust cover.<br />
3. The holding tabs for the lamp and<br />
the microphone are extended across<br />
the openings.<br />
4. The elevation wheel on the <strong>projector</strong><br />
is fully retracted.<br />
5. Small objects aren't placed in the<br />
opening for the microphone cord be-<br />
cause they might slip down into the<br />
case and be difficult to retrieve<br />
easily.<br />
J~ ..j([(:;
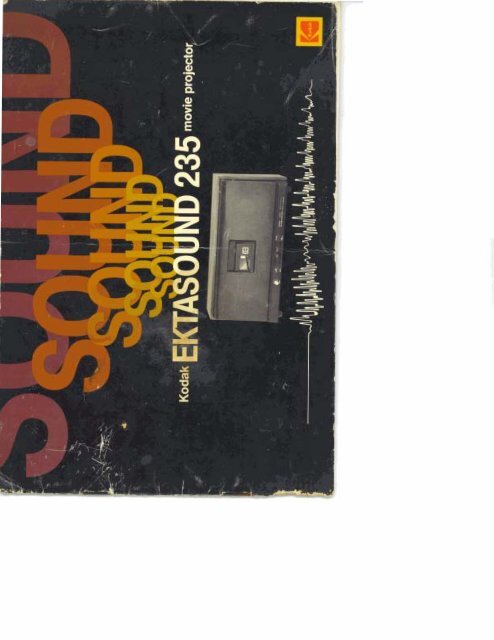
I KODAK<br />
welcome to the world of super 8 sound movies! As a<br />
companiou to the KODAK EKTASOUND Movie Cameras,.<br />
your <strong>projector</strong> brings new enjoyment to <strong>home</strong> movies.<br />
Relive the excitement of a birthday party, concert, graduation,<br />
or other event just as it occurred-the <strong>projector</strong><br />
plays <strong>back</strong> ~nllnt-1 "in sync" with the screen image.<br />
EKTASOUND -<strong>235</strong>1<br />
ha rn<br />
movie <strong>projector</strong> t<br />
'34 .<br />
Equipment subject ta minor appearance changes.<br />
your <strong>projector</strong><br />
the shelf. Or with<br />
g the <strong>projector</strong> controls<br />
the rear of the pro<br />
reading the KODAK Photo Book listed d e r Auxiliary,<br />
Equipment.<br />
' L ' .<br />
1 1
If you need help or advice on using your <strong>projector</strong>,<br />
please write to our staff of photographic experts' at<br />
Eastman Kodak Company, Photo Information, Depart-<br />
ment 841, Rochester, New York 14650. (Should your<br />
<strong>projector</strong> ever require service, the warranty and in-<br />
structions for obtaining service are printed at the <strong>back</strong><br />
of this manual.)
1 Place<br />
9 the projection screen in the best location for your Remove the DUST COVER by grasping it at the lower coraudience<br />
and for the size and shape of the room. Posi- ners and p&ng it away from the <strong>projector</strong>.<br />
tion the <strong>projector</strong> on a table or other firm support I<br />
(such as a bookshelf or mantle) at a distance from the<br />
screen that allows you to project an image to fill the<br />
screen. If convenient, use a support that is about as<br />
high as the center of the screen.<br />
(By moving the PROJECTION -OR 90°, YOU can pro- PROJECTION MIRROR<br />
ject in the opposite direction.)<br />
To Fill 40-inch Wide Projection Screen<br />
Lens<br />
Approximate<br />
Projector-to-Screen Distance<br />
22mm f 11.5 14 feet<br />
15-30mm f 11.3 Zoom 9.5 to 18.5 feet<br />
NOTE: If you have a zoom lens, slowly turn the front<br />
silver portion of the lens until the image fills the screen.<br />
PROJECTION MIRROR I<br />
!<br />
- DUST<br />
COVER
7"--7 --<br />
Set the PROJECTION CONTROL at OFF'/'EEXCAD and the Remove the POWER CORD from its storage area in the<br />
VOLUME CONTROL fully counterclockwise. <strong>back</strong> of the <strong>projector</strong>. Insert one end into the POWER<br />
RECEPTACLE on the <strong>back</strong> of the <strong>projector</strong> and the other<br />
end into a 120-volt, 60 Hz power outlet only. If you plug<br />
your <strong>projector</strong> into a different electrical source, you<br />
may damage the <strong>projector</strong>.<br />
PROJECT~N CONTROL I VOLUME CONTROL<br />
' 1<br />
ELEVATION WHEEL<br />
POWER<br />
RECEPTACLE<br />
SPEAKER/HEADPHONE<br />
:
threading<br />
The TAKE-UP REEL has been placed on the <strong>projector</strong> at<br />
the factory. Be sure this reel is seated securely on the<br />
TAKE-UP SPINDLE.<br />
NOTE: The REEL BRAKE prevents film from "spilling" by<br />
pressing against the flat edge of the supplied take-up<br />
reel. Since other take-up reels may not operate as<br />
well, be sure to use only the KQDAK 400 Movie Reel<br />
supplied.<br />
(400-foot maximum) of film, perforated . '<br />
you, onto the S ~PLY SPINDLE<br />
TAKE-UP REEL TAKE-UP SPINDLE SUPPLY SPINDLE
Draw off approximately 2 feet of LE~ER. With $he right<br />
hand, grasp the leader near the supply reel. Sweep the<br />
a film into and through the THREADING CHANNEL, as shown.<br />
THREADING CHANNEL LEADER<br />
THREADING CHANNEL<br />
3 Insert<br />
the end of the leader securely into the s-shapea<br />
SLOT in the take-up reel. Rotate the take-up reel clock- h<br />
wise to remove any slack.<br />
SLOT
#<br />
> Your <strong>projector</strong> can project sound and silent films at 18 or 24 fps (frames-per-second).<br />
Films made with KODAK EKTASOUND Movie Cameras are 18 fps. Commercial sound films are<br />
usually 24 fps. The <strong>projector</strong>'s dust cover can be installed and the <strong>projector</strong> operated with the<br />
. . * cover in position. Replace the dust cover by guiding its top edge under the top edge of the<br />
. <strong>projector</strong> and pushing in at the bottom.<br />
I<br />
I<br />
forward projection<br />
2<br />
Move the projection control from OFF/THREAD to<br />
Adjust the VOLUME CONTROL to the desired listening<br />
PROJECT. Rotate the FOCUS WHEEL uxitil the screen level. (For silent movies turn the volume control fully<br />
image is sharp. counterclockwise.)<br />
Use the FRAME WHEEL to center one complete picture<br />
on the screen. Turn the ELEVATION WHEEL, located at the FOCUS WHEEL<br />
rear of the <strong>projector</strong>, to raise or lower the image on the<br />
screen. While the <strong>projector</strong> is running, move the FILM-<br />
SPEED CONTROL to the required speed (18 or 24 fps).<br />
(Moving the lever to the left changes the speed to 24<br />
fps; to the right changes the speed to 18 fps.)<br />
VOLUME CONTROL FRAM EEL FILM-SPEED CONTROL
ill projd~i<br />
luring proj~_--~n you wish to show a single frame of film,<br />
we the projection control to STILL. (A special heat shield<br />
moves into the light path between the projection lamp and<br />
the film to protect your film from heat whiie you show a<br />
single frame. The screen image will be slightly darker than<br />
normal.)<br />
After you make all adjustments (film speed, volume, focus,<br />
frame), move the projection control to REWIND to return<br />
the film to the supply reel, stopping before the leader comes<br />
off the take-up reel.<br />
I<br />
STILL<br />
during b- -,ecti---, -- want to get to a certain scene quick-<br />
, move the projection control to FAST FORWARD.<br />
To go <strong>back</strong> quickly to a certain scene, s<br />
jection control to REWIND.<br />
REWIND<br />
FAST FORWARD<br />
ly move the pro-
A<br />
8<br />
Attach the end of the<br />
When all the film has film to the supply reel<br />
reached the take-up by guiding it over the<br />
3 4<br />
After the film is com-<br />
reel, move the projec- LENS COVER. Rotate the pletely rewound, move<br />
1 tion control to OFF/ supply reel a few turns Slide the projection con- the control to OFF'/<br />
-L<br />
THREAD or STILL. counterclockwise. trol to REWIND. THREAD.<br />
LENS COVER<br />
after the show<br />
When you have shown and rewound all the reels of film,<br />
move the projection control to OFFITHREAD, unplug<br />
both ends of the power cord, and put it in the storage area.<br />
Replace the dust cover by guiding its top edge under the<br />
top edge of the <strong>projector</strong> and pushing in at the bottom.<br />
6<br />
\<br />
REWIND<br />
&<br />
NOTE: You can also re-<br />
wind the film onto the<br />
supply reel through the<br />
threading channel. To A<br />
eliminate rethreading<br />
film to the supply reel,<br />
attach a section of the<br />
leader to the film end.<br />
Move the projection con-<br />
trol to REWIND just be-<br />
fore you reach the end of<br />
the film on the supply<br />
reel.
operating tips<br />
The perforations in the film should be toward you as the<br />
film comes off the supply reel clockwise. If they are not, the<br />
fXm has not been rewound or was twisted while being re-<br />
wound.<br />
If the picture is unsteady, it can be due to torn perforations<br />
in the film.<br />
If you are not getting any sound while projecting a<br />
magnetic-striped sound film, check to make sure:<br />
Film is wound correctly on supply reel.<br />
Volume control is set at a listening level.<br />
If the sound is distorted, check to make sure:<br />
Speed control is set at the proper film speed (18 or 24<br />
ames per second).<br />
Volume is not too high.<br />
The PLAYBACK HEAD is self-cleaning (see illustration under<br />
"Cleaning Projection Lens," page 10). The movement of film<br />
across the head is sacient to keep it clean.<br />
1 Also, your <strong>projector</strong> mechanism has bearings that require<br />
no oiling.<br />
replacing lamp<br />
Your <strong>projector</strong> is equipped with an 80-watt, 30-volt, code<br />
DFE projection lamp with a rated life of 15 hours. It's a good<br />
idea to keep a spare projection lamp on hand. You can pur-<br />
chase lamps from your photo dealer.<br />
If the lamp should burn out during projection, accelerate<br />
lamp cooling by running the <strong>projector</strong> in the .STILL position.<br />
After cooling, turn off the <strong>projector</strong> and proceed as follows:<br />
1. Disconnect the power plug from the wall outlet.<br />
2. Grasp the top edge of the LAMP WOR, located at the rear<br />
of the <strong>projector</strong>, and pull it away from the <strong>projector</strong>.<br />
3. Pull the LAPKP-RELEASE LEVER toward you. (This releases<br />
the PROJECTION LAMP from the socket.) Lift out the lamp.<br />
4. Install a new lamp (80-watt, 30-volt, code DFE) by hold-<br />
ing it so that the shiny side of the reflector in the lamp is<br />
toward the lens (away from you). Place the center post of<br />
the lamp in the center hole of the socket. Rotate the lamp<br />
slightly until the key on the lamp center post drops in the<br />
socket slot.<br />
5. Press the lamp down all the way.<br />
LAMPRELEASE<br />
LAMP POOR (see page 3) PROJECTION LAMP LEVER
6. Replace the lamp door by first resting its bottom edge on<br />
the LAMP-ACCESS OPENING; then push the top of the door to-<br />
ward the <strong>projector</strong> until it snaps in place.<br />
cleaning outside of <strong>projector</strong><br />
You can maintain the h e appearance of your <strong>projector</strong> by<br />
proper care.<br />
Clean the wooden parts of your <strong>projector</strong> with a goodquality<br />
furniture polish. Wipe the black areas and the dust<br />
cover with a soft, damp, lintless cloth.<br />
cleaning projection mirror<br />
For the brightest, clearest pictures keep the PROJECTION<br />
MIRROR free of dust, dirt, and fingerprints. Clean the mirror<br />
with a soft, lintless cloth or KODAK Lens Cleaning Paper. If<br />
PROJECTION MIRROR<br />
you need moisture, breathe on the mirror surface or use a<br />
drop of KODAK Lens Cleaner on the paper or cloth.<br />
cleaning projection lens<br />
To project a bright, clear picture, keep the PROJECTION LENS<br />
free of dust, dirt, and fingerprints.<br />
If you need to clean the lens, proceed as follows:<br />
1. Remove the take-up reel.<br />
2. Move the mirror to the position shown.<br />
3. Slide the LENS COVER toward the TAKE-UP SPINDLE and<br />
remove the cover.<br />
4. Carefully lift out the PROJECTION LENS. Blow any dust and<br />
dirt from the lens surfaces.<br />
With KODAK Lens Cleaning Paper or a soft, lintless cloth,<br />
gently wipe the front and rear surfaces or use a drop of<br />
KODAK Lens Cleaner on the paper or cloth.<br />
5. Replace the lens by setting it in its housing, moving the<br />
lens all the way to the right; make sure the smaller end of<br />
the lens barrel is facing the supply reel.<br />
6. Grasp the lens cover and place it so that the SPRING CLIPS<br />
on the <strong>back</strong> of the lens cover line up with the GUIDES on the<br />
lens housing. Then press the lens cover against the lens hous-<br />
ing and at the same time slide the cover toward the supply<br />
spindle. You will hear a "click," indicating that the lens<br />
cover is in place.<br />
NOTE: The zoom lens is removed the same way. To install the<br />
lens, set it in the lens housing as shown, with its front flange<br />
against the housing. Refer to the two illustrations showing<br />
the zoom lens.
i<br />
1<br />
PROJECTION MIRROR<br />
LENS COVER<br />
LENS COVER<br />
TAKE-UP (moved toward<br />
SPINDLE take-UD soindle)<br />
&l&" , ?* 4<br />
f/1.5 22mm<br />
SERIAL NUMBER PROJECTION LENS<br />
PLAYBACK HEAD<br />
-<br />
f/1.3 15-30mm f/1.3 15-3omm<br />
cleaning pressure pad<br />
and aperture<br />
SPRING<br />
ZOOM PROJECTION LENS ZOOM PROJECTION LENS<br />
The PRESSURE PAD and APERTURE<br />
are not removable. To clean<br />
them, first move projection<br />
control to OFF/THREAD,<br />
then remove the lens cover<br />
and the projection lens as described<br />
under "Cleaning Projection<br />
Lens," page 10. Then<br />
remove any foreign particles<br />
from the pressure pad and<br />
LENS COVER aperture by blowing lightly in<br />
the area, or by dusting the<br />
area with a small, soft brush.
specifications auxiliary equipment<br />
Dimensions-10 x 21% x 6% inches You can extend your movie enjoyment with the projection aids<br />
Reel Size-accepts 50- through 400-foot super 8 reels<br />
described below. See your photo dealer for these and others.<br />
Weight-14 Ibs<br />
KODAK EKTASOUND<br />
Projector Case<br />
KODAK PRESSTAPE<br />
Universal Splicer<br />
Power Service Required-120 volts, 60 Hz<br />
Brown molded-plastic carry<br />
case. Will accommodate projec-<br />
Easy-to-use dry splicer for super<br />
8, 8mm, and 16mm films. Uses<br />
Projection Lamp-ANSI Code DFE 80-watt, 30-volt with integral<br />
reflector, 15-hour rating<br />
tor, spare lamp, and two individually<br />
retained reels.<br />
pressure-sensitive tape to make<br />
film splices.<br />
KODAK PRESSTAPES<br />
L~~S~S-KODAK Projection Lens, 22mm f11.5 or Vario-<br />
Kiptagon Zoom Lens, 15 to 30mm f 11.3<br />
Projection Speeds-18 or 24 frames per second plus still projection<br />
for either sound or silent film<br />
Sound-Picture Separation-18 frames (ANSI Standard<br />
PH22.164)<br />
Auxiliary SpeakerIHeadphone Jack-Switches sound from<br />
built-in speaker to an 8- to 16-ohm auxiliary speaker or<br />
headphones having a %-inch phone plug<br />
Ko~~~Auxiliary Speaker<br />
Matching wood speaker cabinet<br />
(10 x 6 x 3% inches) with 8-ohm<br />
speaker.<br />
KODAK 400 Movie Reel<br />
(super 8,8mm)<br />
Makes possible long, uninterrupted<br />
showings. The reel features<br />
an "easy-load" slot. A storage<br />
box protects your film from<br />
dust, and the box can be marked<br />
for ready identification and<br />
stored neatly.<br />
Thin, durable, pressure-sensitive<br />
tapes for easy dry splices.<br />
KODAK Photo Book<br />
To help you make movies you<br />
and your friends will enjoy seeing<br />
over and over again, Kodak<br />
publishes many fascinating idea<br />
books, such as the one described<br />
here. See your photo dealer for<br />
other Kodak publications.<br />
How to Make Good<br />
Sound Movies, AD-2<br />
The book has 100 pages, with<br />
Amplifier-Transistorized 2-watt power output<br />
KODAK Projection Screen<br />
(40 x 40 inches)<br />
A high-quality beaded screen for<br />
more than 165 color pictures to<br />
illustrate such topics as: Equipment,<br />
Films, Sound-Recording<br />
Techniques for Movies, and Edit<strong>home</strong><br />
movie showings. It's easy ing and Splicing Your Sound<br />
to set up and easy to store. Movies.<br />
Serial Number-The serial number for your <strong>projector</strong> is lo-<br />
cated just above the lens housing. You can see it by remov-<br />
ing the lens cover (see "Cleaning Projection Lens," page 10).<br />
Make a record of this number and keep it in a safe place.<br />
The serial number and exact name of your <strong>projector</strong> should<br />
be included in any correspondence about the <strong>projector</strong>.
-<br />
uo lu!p~oDaa e seq leql wry padpp<br />
-a!lau%eur e lu!paFoad aae no6 aans ayeEy<br />
I -yae.q punos ON 1<br />
'PUnOfiW 7OU ur[!d I 'UMOP apjsdn uaaaas uo saanlau<br />
wogsanb xnod 0% JaMSUE arfl St?y d~qt?qold<br />
1~01q vqa aq yaay;, 'uaddeq ppoqs s!q $1 'xnaao saqamos swa~qoxd Bqexado pus 'asn o$ ds~a s! ~o$oa[oxd xnod qnorfl~ s~u!y ~ n~dly
I<br />
L<br />
I<br />
specifications<br />
Dimensions-10 x 21% x 6% inches You can extend your movie enjoyment with the projection aids<br />
Reel Size-accepts 50- through 400-foot super 8 reels<br />
described below. See your photo dealer for these and others.<br />
Weight-14 lbs<br />
Power Service Required-120 volts, 60 Hz<br />
KODAK EKTASOUND<br />
Projector Case<br />
KODAK PRESSTAPE<br />
Universal Splicer<br />
Projection Lamp-ANSI Code DFE 80-watt, 30-volt with integral<br />
reflector, 15-hour rating<br />
vidually retained reels. film splices.<br />
KODAK PRESSTAPES<br />
Lenses-KODAK Projection Lens, 22mm f11.5 or Vario- Koo~~Auxiliary Speaker Thin, durable, pressure-sensitive<br />
Kiptagon Zoom Lens, 15 to 30mm f 11.3 Matching wood speaker cabinet tapes for easy dry splices.<br />
(10 x 6 x 3% inches) with 8-ohm<br />
Projection Speeds-18 or 24 frames per second plus still pro- speaker. KODAK Photo Book "<br />
jection for either sound or silent film To help you make movies you<br />
KODAK 400 Movie Reel and your friends will enjoy see-<br />
Sound-Picture Separation-18 frames (ANSI Standard (super<br />
PH22.164)<br />
headphones having a %-inch phone plug<br />
RoDlr~ Projection Screen<br />
Amplifier-'I'ransistorized 2-watt power output (40 x 40 inches)<br />
Sound Movies, AD-2 &- - -<br />
The book has 100 pages, with
service facilities<br />
Kodrkhrtghm.rknthrslanmdrtknHMlhrpmdud~<br />
aU ttp(ll1I*tfUCfkns h thkwmWCIpt thbastnrwhmd<br />
t@PlJWWltda~to:yb~lrq~~I~lfywshwtdmOLdtcbl(<br />
W S @ W ~ , ~ C I W I , ~ * R ~ ~ ~ # ~ T C ~ ) ~ .<br />
W.wMI~irpwPPOJK;tDfatmdk~~nomyw<br />
twawm4utpm/rdknErmpwld '<br />
drw ~u#d by brn w CJnum- byond Kadrk'r<br />
mtd, Thls wsmrdyapgdfblOlZly tD Zlw pftW%rh and' Kodrk<br />
can- b nrpondh tbr other bmmf dimw at ry ldnd .<br />
nrum@ faom aqulpmm trihm.<br />
Exmptornrcnt~rbwn,m,othe~nramnly.~or<br />
hnplkd, lpplkr to thh proirsbot.<br />
-<br />
FW mtttw~~m~~g ~ p mttcr , b~ Eutmtn ~#dlk ~kpny,<br />
PhoM InformWn, Dlpt. 841, Roo)nstrr, MCw York LMW.<br />
~ar .rrvfcr on pur pmMr during or rPkj ~ wr warnutty<br />
p.rrkd,aantKtywrdsrkrinKodrkpmductswcmsofthe<br />
lkdrk~o~urnar~lr~t*nfor lid#ama;eirmdpwpmja3<br />
wbauolth.~adrk~i~*-~**r.thtdhrr<br />
hnakmdwdWbthth~pmont@~drtrlls8ndddh<br />
afpurcSIIIlwlllhslpurgetitbrck20yw~-<br />
-