Programming Tips and Tools - ACDelco TechConnect
Programming Tips and Tools - ACDelco TechConnect
Programming Tips and Tools - ACDelco TechConnect

You also want an ePaper? Increase the reach of your titles
YUMPU automatically turns print PDFs into web optimized ePapers that Google loves.
<strong>Programming</strong> <strong>Tips</strong> <strong>and</strong> <strong>Tools</strong> -<br />
continued from page 1<br />
Chrysler<br />
The DRBIII supports vehicle programming but does not<br />
work on CAN data vehicles.<br />
The StarSCAN works on Chrysler’s CAN data vehicles. The<br />
StarMOBILE adds wireless support, a custom data recorder,<br />
<strong>and</strong> pass-through diagnostics, freeing up the StarSCAN for<br />
more extensive diagnostic tasks.<br />
Ford<br />
The New Generation Star (NGS) Tester combined with<br />
the NGS Web Flash Kit provides the ability to download Ford<br />
calibration files <strong>and</strong> reprogram modules.<br />
Integrated Diagnostic Software <strong>and</strong> the Vehicle<br />
Communication Module are used to interface with st<strong>and</strong>ard<br />
computer platforms (PCs, laptops) on CAN data vehicles.<br />
Toyota<br />
The Mastertech scan tool can be used on non-CAN data<br />
vehicles.<br />
The TIS techstream offers full support <strong>and</strong> reprogramming<br />
for current CAN data Toyota/Scion/Lexus vehicles.<br />
For more information about scan tools <strong>and</strong> other programming<br />
tools available from vehicle manufacturers, refer to the<br />
following websites.<br />
Audi www.equipmentsolutions.com<br />
BMW www.centrallettershop.com<br />
Chrysler<br />
(Chrysler/Dodge/Jeep)<br />
Ford<br />
(Ford/Lincoln/Mercury)<br />
GM<br />
(Buick/Cadillac/Chevrolet/<br />
GMC/HUMMER/<br />
Oldsmobile/Saturn)<br />
Honda<br />
(Honda/Acura)<br />
www.techauthority.com<br />
www.motorcraft.com<br />
www.acdelcotechconnect.com<br />
www.serviceexpress.honda.com<br />
Hyundai www.dealerequipment.com<br />
Kia www.kiatechinfo.com<br />
Mazda www.mazdatechinfo.com<br />
Mercedes-Benz www.startekinfo.com<br />
Mitsubishi www.mitsubishitechinfo.com<br />
Nissan<br />
(Nissan/Infiniti)<br />
www.nissantechinfo.com<br />
Porsche www.techinfo.porsche.com<br />
Saab www.saabtechinfo.com<br />
Subaru www.techinfo.subaru.com<br />
Toyota<br />
(Toyota/Lexus/Scion)<br />
www.techinfo.toyota.com<br />
Volkswagen erwin.volkswagen.com<br />
Volvo www.volvotechinfo.com<br />
Reputable aftermarket tool manufacturers, such as<br />
EASE Diagnostics, Snap-On <strong>Tools</strong>, SPX/OTC, <strong>and</strong> Bosch/<br />
Vetronix, also offer various scan tools <strong>and</strong> pass-through<br />
programming tools.<br />
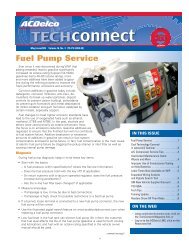
Proper <strong>Programming</strong><br />
Before programming a control module, there are several<br />
important practices to follow to ensure that successful<br />
programming occurs.<br />
Vehicle system voltage – The<br />
vehicle’s battery voltage should be<br />
greater than 12 volts but less than<br />
16 volts. The battery should be<br />
charged before a programming<br />
event. A battery charger should<br />
NOT be connected to the battery<br />
during programming unless it is a<br />
Midtronics PSC charger validated<br />
for use during programming.<br />
Also turn off or disable any system<br />
or accessories that may put a<br />
load on the battery, such as engine<br />
cooling fans, the radio, Daytime<br />
Running Lamps, etc.<br />
Ignition switch – The ignition switch must be in the On<br />
position. Do not begin programming right away. It’s critical to<br />
wait until all modules on the vehicle have “awakened” before<br />
beginning. A good rule of thumb is to not plug in any tools<br />
until the instrument panel lights <strong>and</strong> tones stop after the<br />
initial key-on.<br />
Do not change the position of the ignition switch during<br />
programming unless instructed to do so, such as after a<br />
successful programming. Do not turn off the ignition switch if<br />
the programming procedure is interrupted or is unsuccessful.<br />
Attempt to reprogram the control module.<br />
Connections – Make sure all tool connections are secure.<br />
Do not disturb the tool harness while programming. If an<br />
interruption occurs during programming, a programming<br />
failure or control module damage may occur.<br />
After programming, check for the success of the<br />
programming by:<br />
1. Turning off the vehicle ignition for 30 seconds to allow<br />
the module to power down <strong>and</strong> reset.<br />
2. Start the engine.<br />
3. Check for Diagnostic Trouble Codes (DTCs) in all modules.<br />
In addition to following the proper programming procedures,<br />
successful programming also depends on a few other key<br />
factors. These include:<br />
High-speed Internet access in the shop<br />
A high-quality J2534 pass-through tool<br />
A subscription to the manufacturer’s website<br />
Carefully reading all directions before <strong>and</strong> during the<br />
downloading of the flash files or programming of the<br />
control module<br />
Performing any necessary vehicle setup after programming.<br />
Refer to the appropriate Service Information<br />
– Thanks to Mike Militello<br />
3<br />
Maintain battery voltage<br />
during programming.