MultiNet Installation and Administrator's Guide - Process Software
MultiNet Installation and Administrator's Guide - Process Software
MultiNet Installation and Administrator's Guide - Process Software

Create successful ePaper yourself
Turn your PDF publications into a flip-book with our unique Google optimized e-Paper software.
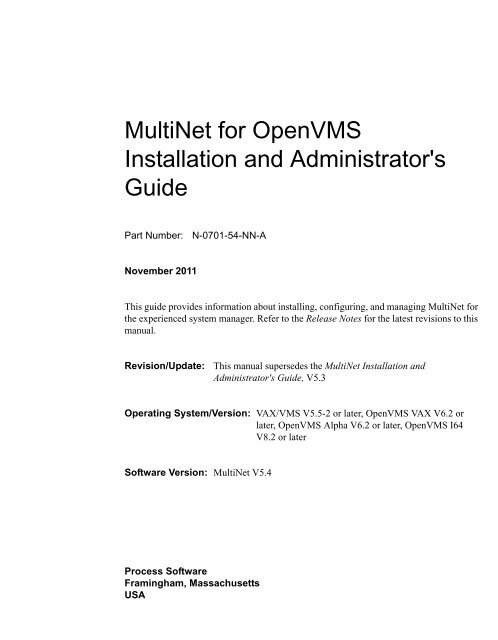
<strong>MultiNet</strong> for OpenVMS<br />
<strong>Installation</strong> <strong>and</strong> <strong>Administrator's</strong><br />
<strong>Guide</strong><br />
Part Number: N-0701-54-NN-A<br />
November 2011<br />
This guide provides information about installing, configuring, <strong>and</strong> managing <strong>MultiNet</strong> for<br />
the experienced system manager. Refer to the Release Notes for the latest revisions to this<br />
manual.<br />
Revision/Update: This manual supersedes the <strong>MultiNet</strong> <strong>Installation</strong> <strong>and</strong><br />
<strong>Administrator's</strong> <strong>Guide</strong>, V5.3<br />
Operating System/Version: VAX/VMS V5.5-2 or later, OpenVMS VAX V6.2 or<br />
later, OpenVMS Alpha V6.2 or later, OpenVMS I64<br />
V8.2 or later<br />
<strong>Software</strong> Version: <strong>MultiNet</strong> V5.4<br />
<strong>Process</strong> <strong>Software</strong><br />
Framingham, Massachusetts<br />
USA
The material in this document is for informational purposes only <strong>and</strong> is subject to change without notice. It<br />
should not be construed as a commitment by <strong>Process</strong> <strong>Software</strong>. <strong>Process</strong> <strong>Software</strong> assumes no responsibility for<br />
any errors that may appear in this document.<br />
Use, duplication, or disclosure by the U.S. Government is subject to restrictions as set forth in subparagraph<br />
(c)(1)(ii) of the Rights in Technical Data <strong>and</strong> Computer <strong>Software</strong> clause at DFARS 252.227-7013.<br />
The following third-party software may be included with your product <strong>and</strong> will be subject to the software license<br />
agreement.<br />
Network Time Protocol (NTP). Copyright © 1992-2004 by David L. Mills. The University of Delaware makes<br />
no representations about the suitability of this software for any purpose.<br />
Point-to-Point Protocol. Copyright © 1989 by Carnegie-Mellon University. All rights reserved. The name of the<br />
University may not be used to endorse or promote products derived from this software without specific prior<br />
written permission. Redistribution <strong>and</strong> use in source <strong>and</strong> binary forms are permitted provided that the above<br />
copyright notice <strong>and</strong> this paragraph are duplicated in all such forms <strong>and</strong> that any documentation, advertising<br />
materials, <strong>and</strong> other materials related to such distribution <strong>and</strong> use acknowledge that the software was developed<br />
by Carnegie Mellon University. The name of the University may not be used to endorse or promote products<br />
derived from this software without specific prior written permission. THIS SOFTWARE IS PROVIDED ``AS<br />
IS'' AND WITHOUT ANY EXPRESS OR IMPLIED WARRANTIES, INCLUDING, WITHOUT<br />
LIMITATION, THE IMPLIED WARRANTIES OF MERCHANTIBILITY AND FITNESS FOR A<br />
PARTICULAR PURPOSE.<br />
RES_RANDOM.C. Copyright © 1997 by Niels Provos All rights reserved.<br />
Redistribution <strong>and</strong> use in source <strong>and</strong> binary forms, with or without modification, are permitted provided that the<br />
following conditions are met:<br />
1. Redistributions of source code must retain the above copyright notice, this list of conditions <strong>and</strong> the following<br />
disclaimer.<br />
2. Redistributions in binary form must reproduce the above copyright notice, this list of conditions <strong>and</strong> the<br />
following disclaimer in the documentation <strong>and</strong>/or other materials provided with the distribution.<br />
3. All advertising materials mentioning features or use of this software must display the following<br />
acknowledgement: This product includes software developed by Niels Provos.<br />
4. The name of the author may not be used to endorse or promote products derived from this software without<br />
specific prior written permission.<br />
Copyright © 1990 by John Robert LoVerso. All rights reserved. Redistribution <strong>and</strong> use in source <strong>and</strong> binary<br />
forms are permitted provided that the above copyright notice <strong>and</strong> this paragraph are duplicated in all such forms<br />
<strong>and</strong> that any documentation, advertising materials, <strong>and</strong> other materials related to such distribution <strong>and</strong> use<br />
acknowledge that the software was developed by John Robert LoVerso.<br />
Kerberos. Copyright © 1989, DES.C <strong>and</strong> PCBC_ENCRYPT.C Copyright © 1985, 1986, 1987, 1988 by<br />
Massachusetts Institute of Technology. Export of this software from the United States of America is assumed to<br />
require a specific license from the United States Government. It is the responsibility of any person or<br />
organization contemplating export to obtain such a license before exporting. WITHIN THAT CONSTRAINT,<br />
permission to use, copy, modify, <strong>and</strong> distribute this software <strong>and</strong> its documentation for any purpose <strong>and</strong> without<br />
fee is hereby granted, provided that the above copyright notice appear in all copies <strong>and</strong> that both that copyright<br />
notice <strong>and</strong> this permission notice appear in supporting documentation, <strong>and</strong> that the name of M.I.T. not be used in<br />
advertising or publicity pertaining to distribution of the software without specific, written prior permission.<br />
M.I.T. makes no representations about the suitability of this software for any purpose. It is provided "as is"<br />
without express or implied warranty.<br />
DNSSIGNER (from BIND distribution) Portions Copyright (c) 1995-1998 by Trusted Information Systems, Inc.<br />
Portions Copyright (c) 1998-1999 Network Associates, Inc.<br />
Permission to use, copy, modify, <strong>and</strong> distribute this software for any purpose with or without fee is hereby<br />
granted, provided that the above copyright notice <strong>and</strong> this permission notice appear in all copies. THE
SOFTWARE IS PROVIDED "AS IS" AND TRUSTED INFORMATION SYSTEMS DISCLAIMS<br />
ALL WARRANTIES WITH REGARD TO THIS SOFTWARE INCLUDING ALL IMPLIED WARRANTIES<br />
OF MERCHANTABILITY AND FITNESS. IN NO EVENT SHALL TRUSTED INFORMATION SYSTEMS<br />
BE LIABLE FOR ANY SPECIAL, DIRECT, INDIRECT, OR CONSEQUENTIAL DAMAGES OR ANY<br />
DAMAGES WHATSOEVER RESULTING FROM LOSS OF USE, DATA OR PROFITS, WHETHER IN AN<br />
ACTION OF CONTRACT, NEGLIGENCE OR OTHER TORTIOUS ACTION, ARISING OUT OF OR IN<br />
CONNECTION WITH THE USE OR PERFORMANCE OF THIS SOFTWARE.<br />
ERRWARN.C. Copyright © 1995 by RadioMail Corporation. All rights reserved. Redistribution <strong>and</strong> use in<br />
source <strong>and</strong> binary forms, with or without modification, are permitted provided that the following conditions are<br />
met:<br />
1. Redistributions of source code must retain the above copyright notice, this list of conditions <strong>and</strong> the following<br />
disclaimer.<br />
2. Redistributions in binary form must reproduce the above copyright notice, this list of conditions <strong>and</strong> the<br />
following disclaimer in the documentation <strong>and</strong>/or other materials provided with the distribution.<br />
3. Neither the name of RadioMail Corporation, the Internet <strong>Software</strong> Consortium nor the names of its<br />
contributors may be used to endorse or promote products derived from this software without specific prior<br />
written permission. THIS SOFTWARE IS PROVIDED BY RADIOMAIL CORPORATION, THE INTERNET<br />
SOFTWARE CONSORTIUM AND CONTRIBUTORS ``AS IS’’ AND ANY EXPRESS OR IMPLIED<br />
WARRANTIES, INCLUDING, BUT NOT LIMITED TO, THE IMPLIED WARRANTIES OF<br />
MERCHANTABILITY AND FITNESS FOR A PARTICULAR PURPOSE ARE DISCLAIMED. IN NO<br />
EVENT SHALL RADIOMAIL CORPORATION OR CONTRIBUTORS BE LIABLE FOR ANY DIRECT,<br />
INDIRECT, INCIDENTAL, SPECIAL, EXEMPLARY, OR CONSEQUENTIAL DAMAGES (INCLUDING,<br />
BUT NOT LIMITED TO, PROCUREMENT OF SUBSTITUTE GOODS OR SERVICES; LOSS OF USE,<br />
DATA, OR PROFITS; OR BUSINESS INTERRUPTION) HOWEVER CAUSED AND ON ANY THEORY OF<br />
LIABILITY, WHETHER IN CONTRACT, STRICT LIABILITY, OR TORT (INCLUDING NEGLIGENCE OR<br />
OTHERWISE) ARISING IN ANY WAY OUT OF THE USE OF THIS SOFTWARE, EVEN IF ADVISED OF<br />
THE POSSIBILITY OF SUCH DAMAGE. This software was written for RadioMail Corporation by Ted Lemon<br />
under a contract with Vixie Enterprises. Further modifications have been made for the Internet <strong>Software</strong><br />
Consortium under a contract with Vixie Laboratories.<br />
IMAP4R1.C, MISC.C, RFC822.C, SMTP.C Original version Copyright © 1988 by The Lel<strong>and</strong> Stanford Junior<br />
University<br />
ACCPORNAM technology Copyright (c) 1999 by Brian Schenkenberger - TMESIS SOFTWARE<br />
NS_PARSER.C Copyright © 1984, 1989, 1990 by Bob Corbett <strong>and</strong> Richard Stallman<br />
This program is free software. You can redistribute it <strong>and</strong>/or modify it under the terms of the GNU General<br />
Public License as published by the Free <strong>Software</strong> Foundation, either version 1, or (at your option) any later<br />
version. This program is distributed in the hope that it will be useful, but WITHOUT ANY WARRANTY;<br />
without even the implied warranty of MERCHANTABILITY or FITNESS FOR A PARTICULAR PURPOSE.<br />
See the GNU General Public License for more details. You should have received a copy of the GNU General<br />
Public License along with this program; if not, write to the Free <strong>Software</strong> Foundation, Inc., 675 Mass Ave,<br />
Cambridge, MA 02139 USA<br />
IF_ACP.C Copyright © 1985 <strong>and</strong> IF_DDA.C Copyright © 1986 by Advanced Computer Communications<br />
IF_PPP.C Copyright © 1993 by Drew D. Perkins<br />
ASCII_ADDR.C Copyright © 1994 Bell Communications Research, Inc. (Bellcore)<br />
DEBUG.C Copyright © 1998 by Lou Berg<strong>and</strong>i. All Rights Reserved.<br />
NTP_FILEGEN.C Copyright © 1992 by Rainer Pruy Friedrich-Alex<strong>and</strong>er Universitaet Erlangen-Nuernberg<br />
RANNY.C Copyright © 1988 by Rayan S. Zachariassen. All Rights Reserved.
MD5.C Copyright © 1990 by RSA Data Security, Inc. All Rights Reserved.<br />
Portions Copyright © 1981, 1982, 1983, 1984, 1985, 1986, 1987, 1988, 1989 by SRI International<br />
Portions Copyright © 1984, 1989 by Free <strong>Software</strong> Foundation<br />
Portions Copyright © 1993, 1994, 1995, 1996, 1997, 1998 by the University of Washington. Permission to use,<br />
copy, modify, <strong>and</strong> distribute this software <strong>and</strong> its documentation for any purpose <strong>and</strong> without fee is hereby<br />
granted, provided that the above copyright notices appear in all copies <strong>and</strong> that both the above copyright notices<br />
<strong>and</strong> this permission notice appear in supporting documentation, <strong>and</strong> that the name of the University of<br />
Washington or The Lel<strong>and</strong> Stanford Junior University not be used in advertising or publicity pertaining to<br />
distribution of the software without specific, written prior permission. This software is made available "as is",<br />
<strong>and</strong> THE UNIVERSITY OF WASHINGTON AND THE LELAND STANFORD JUNIOR UNIVERSITY<br />
DISCLAIM ALL WARRANTIES, EXPRESS OR IMPLIED, WITH REGARD TO THIS SOFTWARE,<br />
INCLUDING WITHOUT LIMITATION ALL IMPLIED WARRANTIES OF MERCHANTABILITY AND<br />
FITNESS FOR A PARTICULAR PURPOSE, AND IN NO EVENT SHALL THE UNIVERSITY OF<br />
WASHINGTON OR THE LELAND STANFORD JUNIOR UNIVERSITY BE LIABLE FOR ANY SPECIAL,<br />
INDIRECT OR CONSEQUENTIAL DAMAGES OR ANY DAMAGES WHATSOEVER RESULTING FROM<br />
LOSS OF USE, DATA OR PROFITS, WHETHER IN AN ACTION OF CONTRACT, TORT (INCLUDING<br />
NEGLIGENCE) OR STRICT LIABILITY, ARISING OUT OF OR IN CONNECTION WITH THE USE OR<br />
PERFORMANCE OF THIS SOFTWARE.<br />
Portions Copyright © 1980, 1982, 1985, 1986, 1988, 1989, 1990, 1993 by The Regents of the University of<br />
California. All rights reserved.<br />
Redistribution <strong>and</strong> use in source <strong>and</strong> binary forms, with or without modification, are permitted provided that the<br />
following conditions are met:<br />
1. Redistributions of source code must retain the above copyright notice, this list of conditions <strong>and</strong> the following<br />
disclaimer.<br />
2. Redistributions in binary form must reproduce the above copyright notice, this list of conditions <strong>and</strong> the<br />
following disclaimer in the documentation <strong>and</strong>/or other materials provided with the distribution.<br />
3. All advertising materials mentioning features or use of this software must display the following<br />
acknowledgement:<br />
This product includes software developed by the University of California, Berkeley <strong>and</strong> its contributors.<br />
4. Neither the name of the University nor the names of its contributors may be used to endorse or promote<br />
products derived from this software without specific prior written permission.<br />
THIS SOFTWARE IS PROVIDED BY THE REGENTS AND CONTRIBUTORS ``AS IS'' AND ANY<br />
EXPRESS OR IMPLIED WARRANTIES, INCLUDING, BUT NOT LIMITED TO, THE IMPLIED<br />
WARRANTIES OF MERCHANTABILITY AND FITNESS FOR A PARTICULAR PURPOSE ARE<br />
DISCLAIMED. IN NO EVENT SHALL THE REGENTS OR CONTRIBUTORS BE LIABLE FOR ANY<br />
DIRECT, INDIRECT, INCIDENTAL, SPECIAL, EXEMPLARY, OR CONSEQUENTIAL DAMAGES<br />
(INCLUDING, BUT NOT LIMITED TO, PROCUREMENT OF SUBSTITUTE GOODS OR SERVICES;<br />
LOSS OF USE, DATA, OR PROFITS; OR BUSINESS INTERRUPTION) HOWEVER CAUSED AND ON<br />
ANY THEORY OF LIABILITY, WHETHER IN CONTRACT, STRICT LIABILITY, OR TORT (INCLUDING<br />
NEGLIGENCE OR OTHERWISE) ARISING IN ANY WAY OUT OF THE USE OF THIS SOFTWARE,<br />
EVEN IF ADVISED OF THE POSSIBILITY OF SUCH DAMAGE.<br />
Portions Copyright © 1993 by Hewlett-Packard Corporation.<br />
Permission to use, copy, modify, <strong>and</strong> distribute this software for any purpose with or without fee is hereby<br />
granted, provided that the above copyright notice <strong>and</strong> this permission notice appear in all copies, <strong>and</strong> that the<br />
name of Hewlett-Packard Corporation not be used in advertising or publicity pertaining to distribution of the<br />
document or software without specific, written prior permission. THE SOFTWARE IS PROVIDED "AS IS"<br />
AND HEWLETT-PACKARD CORP. DISCLAIMS ALL WARRANTIES WITH REGARD TO THIS<br />
SOFTWARE, INCLUDING ALL IMPLIED WARRANTIES OF MERCHANTABILITY AND FITNESS. IN<br />
NO EVENT SHALL HEWLETT-PACKARD CORPORATION BE LIABLE FOR ANY SPECIAL, DIRECT,<br />
INDIRECT, OR CONSEQUENTIAL DAMAGES OR ANY DAMAGES WHATSOEVER RESULTING
FROM LOSS OF USE, DATA OR PROFITS, WHETHER IN AN ACTION OF CONTRACT, NEGLIGENCE<br />
OR OTHER TORTIOUS ACTION, ARISING OUT OF OR IN CONNECTION WITH THE USE OR<br />
PERFORMANCE OF THIS SOFTWARE.<br />
Portions Copyright © 1995 by International Business Machines, Inc.<br />
International Business Machines, Inc. (hereinafter called IBM) grants permission under its copyrights to use,<br />
copy, modify, <strong>and</strong> distribute this <strong>Software</strong> with or without fee, provided that the above copyright notice <strong>and</strong> all<br />
paragraphs of this notice appear in all copies, <strong>and</strong> that the name of IBM not be used in connection with the<br />
marketing of any product incorporating the <strong>Software</strong> or modifications thereof, without specific, written prior<br />
permission. To the extent it has a right to do so, IBM grants an immunity from suit under its patents, if any, for<br />
the use, sale or manufacture of products to the extent that such products are used for performing Domain Name<br />
System dynamic updates in TCP/IP networks by means of the <strong>Software</strong>. No immunity is granted for any product<br />
per se or for any other function of any product. THE SOFTWARE IS PROVIDED "AS IS", AND IBM<br />
DISCLAIMS ALL WARRANTIES, INCLUDING ALL IMPLIED WARRANTIES OF MERCHANTABILITY<br />
AND FITNESS FOR A PARTICULAR PURPOSE. IN NO EVENT SHALL IBM BE LIABLE FOR ANY<br />
SPECIAL, DIRECT, INDIRECT, OR CONSEQUENTIAL DAMAGES OR ANY DAMAGES WHATSOEVER<br />
ARISING OUT OF OR IN CONNECTION WITH THE USE OR PERFORMANCE OF THIS SOFTWARE,<br />
EVEN IF IBM IS APPRISED OF THE POSSIBILITY OF SUCH DAMAGES.<br />
Portions Copyright © 1995, 1996, 1997, 1998, 1999, 2000 by Internet <strong>Software</strong> Consortium. All Rights<br />
Reserved. Permission to use, copy, modify, <strong>and</strong> distribute this software for any purpose with or without fee is<br />
hereby granted, provided that the above copyright notice <strong>and</strong> this permission notice appear in all copies. THE<br />
SOFTWARE IS PROVIDED "AS IS" AND INTERNET SOFTWARE CONSORTIUM DISCLAIMS ALL<br />
WARRANTIES WITH REGARD TO THIS SOFTWARE INCLUDING ALL IMPLIED WARRANTIES OF<br />
MERCHANTABILITY AND FITNESS. IN NO EVENT SHALL INTERNET SOFTWARE CONSORTIUM<br />
BE LIABLE FOR ANY SPECIAL, DIRECT, INDIRECT, OR CONSEQUENTIAL DAMAGES OR ANY<br />
DAMAGES WHATSOEVER RESULTING FROM LOSS OF USE, DATA OR PROFITS, WHETHER IN AN<br />
ACTION OF CONTRACT, NEGLIGENCE OR OTHER TORTIOUS ACTION, ARISING OUT OF OR IN<br />
CONNECTION WITH THE USE OR PERFORMANCE OF THIS SOFTWARE.<br />
Copyright (c) 1996-2000 Internet <strong>Software</strong> Consortium.<br />
Use is subject to license terms which appear in the file named ISC-LICENSE that should have accompanied this<br />
file when you received it. If a file named ISC-LICENSE did not accompany this file, or you are not sure the one<br />
you have is correct, you may obtain an applicable copy of the license at: http://www.isc.org/isc-license-1.0.html.<br />
This file is part of the ISC DHCP distribution. The documentation associated with this file is listed in the file<br />
DOCUMENTATION, included in the top-level directory of this release. Support <strong>and</strong> other services are available<br />
for ISC products - see http://www.isc.org for more information.<br />
ISC LICENSE, Version 1.0<br />
1. This license covers any file containing a statement following its copyright message indicating that it is<br />
covered by this license. It also covers any text or binary file, executable, electronic or printed image that is<br />
derived from a file that is covered by this license, or is a modified version of a file covered by this license,<br />
whether such works exist now or in the future. Hereafter, such works will be referred to as "works covered by<br />
this license," or "covered works."<br />
2. Each source file covered by this license contains a sequence of text starting with the copyright message <strong>and</strong><br />
ending with "Support <strong>and</strong> other services are available for ISC products - see http://www.isc.org for more<br />
information." This will hereafter be referred to as the file's Bootstrap License.<br />
3. If you take significant portions of any source file covered by this license <strong>and</strong> include those portions in some<br />
other file, then you must also copy the Bootstrap License into that other file, <strong>and</strong> that file becomes a covered file.<br />
You may make a good-faith judgement as to where in this file the bootstrap license should appear.<br />
4. The acronym "ISC", when used in this license or generally in the context of works covered by this license, is<br />
an abbreviation for the words "Internet <strong>Software</strong> Consortium."<br />
5. A distribution, as referred to hereafter, is any file, collection of printed text, CD ROM, boxed set, or other<br />
collection, physical or electronic, which can be distributed as a single object <strong>and</strong> which contains one or more<br />
works covered by this license.<br />
6. You may make distributions containing covered files <strong>and</strong> provide copies of such distributions to whomever<br />
you choose, with or without charge, as long as you obey the other terms of this license. Except as stated in (9),<br />
you may include as many or as few covered files as you choose in such distributions.
7. When making copies of covered works to distribute to others, you must not remove or alter the Bootstrap<br />
License. You may not place your own copyright message, license, or similar statements in the file prior to the<br />
original copyright message or anywhere within the Bootstrap License. Object files <strong>and</strong> executable files are<br />
exempt from the restrictions specified in this clause.<br />
8. If the version of a covered source file as you received it, when compiled, would normally produce executable<br />
code that would print a copyright message followed by a message referring to an ISC web page or other ISC<br />
documentation, you may not modify the file in such a way that, when compiled, it no longer produces executable<br />
code to print such a message.<br />
9. Any source file covered by this license will specify within the Bootstrap License the name of the ISC<br />
distribution from which it came, as well as a list of associated documentation files. The associated<br />
documentation for a binary file is the same as the associated documentation for the source file or files from<br />
which it was derived. Associated documentation files contain human-readable documentation which the ISC<br />
intends to accompany any distribution.<br />
If you produce a distribution, then for every covered file in that distribution, you must include all of the<br />
associated documentation files for that file. You need only include one copy of each such documentation file in<br />
such distributions.<br />
Absence of required documentation files from a distribution you receive or absence of the list of documentation<br />
files from a source file covered by this license does not excuse you from this from this requirement. If the<br />
distribution you receive does not contain these files, you must obtain them from the ISC <strong>and</strong> include them in any<br />
redistribution of any work covered by this license. For information on how to obtain required documentation not<br />
included with your distribution, see: http://www.isc.org/getting-documentation.html.<br />
If the list of documentation files was removed from your copy of a covered work, you must obtain such a list<br />
from the ISC. The web page at http://www.isc.org/getting-documentation.html contains pointers to lists of files<br />
for each ISC distribution covered by this license.<br />
It is permissible in a source or binary distribution containing covered works to include reformatted versions of<br />
the documentation files. It is also permissible to add to or modify the documentation files, as long as the<br />
formatting is similar in legibility, readability, font, <strong>and</strong> font size to other documentation in the derived product, as<br />
long as any sections labeled CONTRIBUTIONS in these files are unchanged except with respect to formatting,<br />
as long as the order in which the CONTRIBUTIONS section appears in these files is not changed, <strong>and</strong> as long as<br />
the manual page which describes how to contribute to the Internet <strong>Software</strong> Consortium (hereafter referred to as<br />
the Contributions Manual Page) is unchanged except with respect to formatting.<br />
Documentation that has been translated into another natural language may be included in place of or in addition<br />
to the required documentation, so long as the CONTRIBUTIONS section <strong>and</strong> the Contributions Manual Page are<br />
either left in their original language or translated into the new language with such care <strong>and</strong> diligence as is<br />
required to preserve the original meaning.<br />
10. You must include this license with any distribution that you make, in such a way that it is clearly associated<br />
with such covered works as are present in that distribution. In any electronic distribution, the license must be in<br />
a file called "ISC-LICENSE".<br />
If you make a distribution that contains works from more than one ISC distribution, you may either include a<br />
copy of the ISC-LICENSE file that accompanied each such ISC distribution in such a way that works covered by<br />
each license are all clearly grouped with that license, or you may include the single copy of the ISC-LICENSE<br />
that has the highest version number of all the ISC-LICENSE files included with such distributions, in which case<br />
all covered works will be covered by that single license file. The version number of a license appears at the top of<br />
the file containing the text of that license, or if in printed form, at the top of the first page of that license.<br />
11. If the list of associated documentation is in a separated file, you must include that file with any distribution<br />
you make, in such a way that the relationship between that file <strong>and</strong> the files that refer to it is clear. It is not<br />
permissible to merge such files in the event that you make a distribution including files from more than one ISC<br />
distribution, unless all the Bootstrap Licenses refer to files for their lists of associated documentation, <strong>and</strong> those
eferences all list the same filename.<br />
12. If a distribution that includes covered works includes a mechanism for automatically installing covered<br />
works, following that installation process must not cause the person following that process to violate this license,<br />
knowingly or unknowingly. In the event that the producer of a distribution containing covered files accidentally<br />
or wilfully violates this clause, persons other than the producer of such a distribution shall not be held liable for<br />
such violations, but are not otherwise excused from any requirement of this license.<br />
13. COVERED WORKS ARE PROVIDED "AS IS". ISC DISCLAIMS ALL WARRANTIES WITH REGARD<br />
TO COVERED WORKS INCLUDING THE IMPLIED WARRANTIES OF MERCHANTABILITY AND<br />
FITNESS FOR A PARTICULAR PURPOSE.<br />
14. IN NO EVENT SHALL ISC BE LIABLE FOR ANY SPECIAL, INDIRECT, OR CONSEQUENTIAL<br />
DAMAGES OR ANY DAMAGES WHATSOEVER RESULTING FROM LOSS OF USE, DATA OR<br />
PROFITS, WHETHER IN AN ACTION OF CONTRACT, NEGLIGENCE OR OTHER TORTIOUS ACTION,<br />
ARISING OUT OF OR IN CONNECTION WITH THE USE OF COVERED WORKS.<br />
Use of covered works under different terms is prohibited unless you have first obtained a license from ISC<br />
granting use pursuant to different terms. Such terms may be negotiated by contacting ISC as follows:<br />
Internet <strong>Software</strong> Consortium<br />
950 Charter Street<br />
Redwood City, CA 94063<br />
Tel: 1-888-868-1001 (toll free in U.S.)<br />
Tel: 1-650-779-7091<br />
Fax: 1-650-779-7055<br />
Email: info@isc.org<br />
Email: licensing@isc.org<br />
DNSSAFE LICENSE TERMS<br />
This BIND software includes the DNSsafe software from RSA Data Security, Inc., which is copyrighted<br />
software that can only be distributed under the terms of this license agreement.<br />
The DNSsafe software cannot be used or distributed separately from the BIND software. You only have the right<br />
to use it or distribute it as a bundled, integrated product.<br />
The DNSsafe software can ONLY be used to provide authentication for resource records in the Domain Name<br />
System, as specified in RFC 2065 <strong>and</strong> successors. You cannot modify the BIND software to use the<br />
DNSsafe software for other purposes, or to make its cryptographic functions available to end-users for other<br />
uses.<br />
If you modify the DNSsafe software itself, you cannot modify its documented API, <strong>and</strong> you must grant RSA<br />
Data Security the right to use, modify, <strong>and</strong> distribute your modifications, including the right to use<br />
any patents or other intellectual property that your modifications depend upon.<br />
You must not remove, alter, or destroy any of RSA's copyright notices or license information. When distributing<br />
the software to the Federal Government, it must be licensed to them as "commercial computer software"<br />
protected under 48 CFR 12.212 of the FAR, or 48 CFR 227.7202.1 of the DFARS.<br />
You must not violate United States export control laws by distributing the DNSsafe software or information<br />
about it, when such distribution is prohibited by law.<br />
THE DNSSAFE SOFTWARE IS PROVIDED "AS IS" WITHOUT ANY WARRANTY WHATSOEVER. RSA<br />
HAS NO OBLIGATION TO SUPPORT, CORRECT, UPDATE OR MAINTAIN THE RSA SOFTWARE. RSA<br />
DISCLAIMS ALL WARRANTIES, EXPRESS, IMPLIED OR STATUTORY, AS TO ANY MATTER<br />
WHATSOEVER, INCLUDING ALL IMPLIED WARRANTIES OF MERCHANTABILITY, FITNESS FOR A
PARTICULAR PURPOSE AND NON-INFRINGEMENT OF THIRD PARTY RIGHTS.<br />
If you desire to use DNSsafe in ways that these terms do not permit, please contact:<br />
RSA Data Security, Inc.<br />
100 Marine Parkway<br />
Redwood City, California 94065, USA<br />
to discuss alternate licensing arrangements.<br />
Secure Shell (SSH). Copyright © 2000. This License agreement, including the Exhibits (“Agreement”),<br />
effective as of the latter date of execution (“Effective Date”), is hereby made by <strong>and</strong> between Data Fellows, Inc.,<br />
a California corporation, having principal offices at 675 N. First Street, 8th floor, San Jose, CA 95112170 (“Data<br />
Fellows”) <strong>and</strong> <strong>Process</strong> <strong>Software</strong>, Inc., a Massachusetts corporation, having a place of business at 959 Concord<br />
Street, Framingham, MA 01701 (“OEM”).<br />
Racoon, Racoon2. Copyright (C) 1995, 1996, 1997, 1998, 2004, 2005 WIDE Project. All rights reserved.<br />
Redistribution <strong>and</strong> use in source <strong>and</strong> binary forms, with or without modification, are permitted provided that the<br />
following conditions are met: 1. Redistributions of source code must retain the above copyright notice, this list<br />
of conditions <strong>and</strong> the following disclaimer. 2. Redistributions in binary form must reproduce the above<br />
copyright notice, this list of conditions <strong>and</strong> the following disclaimer in the documentation <strong>and</strong>/or other materials<br />
provided with the distribution. 3. Neither the name of the project nor the names of its contributors may be used<br />
to endorse or promote products derived from this software without specific prior written permission. THIS<br />
SOFTWARE IS PROVIDED BY THE PROJECT AND CONTRIBUTORS ``AS IS'' AND ANY EXPRESS OR<br />
IMPLIED WARRANTIES, INCLUDING, BUT NOT LIMITED TO, THE IMPLIED WARRANTIES OF<br />
MERCHANTABILITY AND FITNESS FOR A PARTICULAR PURPOSE ARE DISCLAIMED. IN NO<br />
EVENT SHALL THE PROJECT OR CONTRIBUTORS BE LIABLE FOR ANY DIRECT, INDIRECT,<br />
INCIDENTAL, SPECIAL, EXEMPLARY, OR CONSEQUENTIAL DAMAGES (INCLUDING, BUT NOT<br />
LIMITED TO, PROCUREMENT OF SUBSTITUTE GOODS OR SERVICES; LOSS OF USE, DATA, OR<br />
PROFITS; OR BUSINESS INTERRUPTION) HOWEVER CAUSED AND ON ANY THEORY OF<br />
LIABILITY, WHETHER IN CONTRACT, STRICT LIABILITY, OR TORT (INCLUDING NEGLIGENCE OR<br />
OTHERWISE) ARISING IN ANY WAY OUT OF THE USE OF THIS SOFTWARE, EVEN IF ADVISED OF<br />
THE POSSIBILITY OF SUCH DAMAGE.<br />
All other trademarks, service marks, registered trademarks, or registered service marks mentioned in this<br />
document are the property of their respective holders.<br />
<strong>MultiNet</strong> is a registered trademark <strong>and</strong> <strong>Process</strong> <strong>Software</strong> <strong>and</strong> the <strong>Process</strong> <strong>Software</strong> logo are trademarks of<br />
<strong>Process</strong> <strong>Software</strong>.<br />
Copyright ©1997, 1998, 1999, 2000 <strong>Process</strong> <strong>Software</strong> Corporation. All rights reserved. Printed in USA.<br />
Copyright ©2000, 2001, 2004, 2005, 2007, 2008 <strong>Process</strong> <strong>Software</strong>, LLC. All rights reserved. Printed in USA.<br />
If the examples of URLs, domain names, internet addresses, <strong>and</strong> web sites we use in this documentation reflect<br />
any that actually exist, it is not intentional <strong>and</strong> should not to be considered an endorsement, approval, or<br />
recommendation of the actual site, or any products or services located at any such site by <strong>Process</strong> <strong>Software</strong>. Any<br />
resemblance or duplication is strictly coincidental.
Contents<br />
Preface<br />
Contents<br />
Contents of this <strong>Guide</strong> ................................................................................................................xxxiii<br />
Typographical Conventions ...................................................................................................... xxxv<br />
Obtaining Technical Support .................................................................................................... xxxv<br />
Before Contacting Technical Support...................................................................................... xxxvi<br />
Sending Electronic Mail .........................................................................................................xxxvii<br />
Calling Technical Support.......................................................................................................xxxvii<br />
Contacting Technical Support by Fax....................................................................................xxxviii<br />
Obtaining Online Help...........................................................................................................xxxviii<br />
<strong>MultiNet</strong> Frequently Asked Questions List ...........................................................................xxxviii<br />
Accessing the <strong>MultiNet</strong> Public Mailing List .........................................................................xxxviii<br />
<strong>Process</strong> <strong>Software</strong> World Wide Web Server.............................................................................. xxxix<br />
Obtaining <strong>Software</strong> Patches Over the Internet ........................................................................ xxxix<br />
Documentation Comments ............................................................................................................ xl<br />
PART I <strong>MultiNet</strong> <strong>Installation</strong> <strong>and</strong> Introduction<br />
Chapter 1 Installing <strong>and</strong> Upgrading <strong>MultiNet</strong> for OpenVMS<br />
Step 1: Gather Information for the <strong>Installation</strong>...........................................................................1-2<br />
Step 2: Read the Release Notes ..................................................................................................1-4<br />
Step 3: Check OpenVMS <strong>and</strong> Versions ......................................................................................1-4<br />
Step 4: Use the Correct Media ....................................................................................................1-5<br />
Step 5: Back up Your System Disk.............................................................................................1-5<br />
Step 6: Reserve Sufficient Disk Space........................................................................................1-5<br />
ix
Contents<br />
x<br />
Step 7: Log on as SYSTEM .......................................................................................................1-5<br />
Step 8: Ask Other Users to Log Off ........................................................................................... 1-5<br />
Step 9: Update System Parameters.............................................................................................. 1-5<br />
Step 10: Check the Location of the DCLTABLES.EXE File...................................................... 1-6<br />
Step 11: Review the <strong>MultiNet</strong> Directory Layout......................................................................... 1-6<br />
Step 12: Load the PAK (Product Authorization Key) ................................................................. 1-8<br />
Step 13: Run VMSINSTAL......................................................................................................... 1-9<br />
Step 14: Establish an Initial Configuration ............................................................................... 1-13<br />
Step 15: Configure the IP Transport Over the St<strong>and</strong>ard Network Interface.............................. 1-14<br />
Step 16: Start the New Version of <strong>MultiNet</strong>.............................................................................. 1-14<br />
Step 17: Modify the System Startup Comm<strong>and</strong> Procedure....................................................... 1-15<br />
Step 18: Configure Services ...................................................................................................... 1-16<br />
Step 19: Add <strong>and</strong> Update User Exits......................................................................................... 1-17<br />
Step 20: Install <strong>MultiNet</strong> Comm<strong>and</strong>s in the DCLTABLES.EXE File....................................... 1-17<br />
Step 21: Set Up the Online Documentation............................................................................... 1-17<br />
1.9.1.1 PDF Format ............................................................................................................... 1-17<br />
Using Acrobat Reader ...........................................................................................................1-18<br />
Using XPDF .......................................................................................................................... 1-18<br />
HTML Format ....................................................................................................................... 1-18<br />
Chapter 2 Example Procedures<br />
Installing a License PAK ............................................................................................................. 2-1<br />
Printing the Consolidated Release Notes .................................................................................... 2-3<br />
Sample <strong>Installation</strong> Dialog .......................................................................................................... 2-4<br />
Chapter 3 Files That May be Added to Your System Disk<br />
Chapter 4 Removing <strong>MultiNet</strong> for OpenVMS<br />
Chapter 5 <strong>MultiNet</strong> Documentation <strong>and</strong> Online Help<br />
The <strong>MultiNet</strong> Documentation Set ............................................................................................... 5-1<br />
<strong>Installation</strong> <strong>and</strong> <strong>Administrator's</strong> <strong>Guide</strong> .................................................................................... 5-2<br />
<strong>Administrator's</strong> Reference ....................................................................................................... 5-3<br />
Messages, Logicals, <strong>and</strong> TCP/IP Services for DECnet Applications ...................................... 5-3<br />
Programmer's Reference .......................................................................................................... 5-3<br />
User's <strong>Guide</strong> ............................................................................................................................. 5-4<br />
<strong>MultiNet</strong> Online Help.................................................................................................................. 5-4
Contents<br />
Chapter 6 Introduction to <strong>MultiNet</strong> <strong>and</strong> TCP/IP Concepts<br />
What is <strong>MultiNet</strong>?........................................................................................................................6-1<br />
<strong>MultiNet</strong> for Users ...................................................................................................................6-2<br />
<strong>MultiNet</strong> for System Managers ................................................................................................6-2<br />
<strong>MultiNet</strong> for Programmers .......................................................................................................6-3<br />
TCP/IP Concepts..........................................................................................................................6-3<br />
Physical Networks ...................................................................................................................6-3<br />
LAN (Local Area Network) Hardware Addresses ...................................................................6-3<br />
IP Addresses .............................................................................................................................6-3<br />
Subnet Masks ...........................................................................................................................6-4<br />
Broadcast Addresses ................................................................................................................6-5<br />
Host Names ..............................................................................................................................6-5<br />
TCP/IP Operation .....................................................................................................................6-5<br />
Basic TCP/IP Protocols ...............................................................................................................6-6<br />
IP (Internet Protocol) ...............................................................................................................6-6<br />
IPv6 (Internet Protocol Version 6) ...........................................................................................6-7<br />
TCP (Transmission Control Protocol) .....................................................................................6-7<br />
UDP (User Datagram Protocol) ...............................................................................................6-7<br />
SLIP (Serial Line Internet Protocol) ........................................................................................6-8<br />
PPP (Point-to-Point Protocol) ..................................................................................................6-8<br />
Dynamic Configuration Protocols ...............................................................................................6-8<br />
RARP (Reverse Address Resolution Protocol) ........................................................................6-8<br />
BOOTP (Bootstrap Protocol) ...................................................................................................6-9<br />
DHCP (Dynamic Host Configuration Protocol) ......................................................................6-9<br />
Routing.........................................................................................................................................6-9<br />
The Routing Table .................................................................................................................6-10<br />
Router Discovery ...................................................................................................................6-10<br />
GATED ..................................................................................................................................6-10<br />
DNS (Domain Name System) <strong>and</strong> Host Tables.........................................................................6-10<br />
DNS (Domain Name System) ................................................................................................6-11<br />
Host Tables ............................................................................................................................6-12<br />
Using DNS <strong>and</strong> Host Tables Together ...................................................................................6-12<br />
ARP (Address Resolution Protocol) ..........................................................................................6-13<br />
Neighbor Discovery...................................................................................................................6-13<br />
SNMP (Simple Network Management Protocol) ......................................................................6-13<br />
SNMP Traps ...........................................................................................................................6-13<br />
SNMP Communities ..............................................................................................................6-14<br />
Chapter 7 Devices, Protocols, <strong>and</strong> <strong>MultiNet</strong> Internals<br />
Devices Supported by <strong>MultiNet</strong> ..................................................................................................7-1<br />
Protocols Supported by <strong>MultiNet</strong> ................................................................................................7-2<br />
Underst<strong>and</strong>ing <strong>MultiNet</strong> Internals ...............................................................................................7-4<br />
The $QIO Interface ..................................................................................................................7-4<br />
Network Interface Device Drivers ...........................................................................................7-5<br />
xi
Contents<br />
xii<br />
Custom Applications ............................................................................................................... 7-5<br />
Chapter 8 Getting Additional Information<br />
RFCs (Requests for Comment) ................................................................................................... 8-1<br />
Other Documentation .................................................................................................................. 8-1<br />
PART II <strong>MultiNet</strong> Administrator’s <strong>Guide</strong><br />
Chapter 9 Configuration Overview<br />
Configuration Tasks ....................................................................................................................... 9-1<br />
Configuration Utilities Overview................................................................................................9-1<br />
Starting <strong>MultiNet</strong>......................................................................................................................... 9-2<br />
Restarting <strong>MultiNet</strong> ................................................................................................................. 9-2<br />
Modifying Configuration Files.................................................................................................... 9-2<br />
Using the Comm<strong>and</strong>-Line Interface Utilities .......................................................................... 9-3<br />
Step 1: Checking Logicals ....................................................................................................... 9-3<br />
Step 2: Starting MULTINET CONFIGURE ........................................................................... 9-3<br />
Step 3: Loading Configuration Files ....................................................................................... 9-4<br />
Step 4: Modifying the Configuration ....................................................................................... 9-7<br />
Step 5: Verifying the Configuration ........................................................................................ 9-8<br />
Step 6: Saving the Modified Configuration ............................................................................. 9-9<br />
Step 7: Exiting MULTINET CONFIGURE ............................................................................ 9-9<br />
Using MENU-CONFIG ......................................................................................................... 9-10<br />
Step 1: Starting MENU-CONFIG ......................................................................................... 9-10<br />
Step 2: Selecting Basic or Extended Mode ........................................................................... 9-11<br />
Step 3: Modifying the Configuration ..................................................................................... 9-11<br />
Step 4: Saving the Configuration ........................................................................................... 9-12<br />
Step 5: Quitting MENU-CONFIG ......................................................................................... 9-12<br />
Putting Configuration File Changes into Effect .................................................................... 9-13<br />
Modifying the Current Configuration ....................................................................................... 9-13<br />
Chapter 10 Host Tables <strong>and</strong> DNS<br />
Methods of Associating IP Addresses <strong>and</strong> Host Names .............................................................. 10-1<br />
Creating the Host Table Source Files .................................................................................... 10-2<br />
Host Table Source Files ......................................................................................................... 10-2<br />
Configuring the Host Table ................................................................................................... 10-3<br />
Host Name Conformance ...................................................................................................... 10-5<br />
Converting a UNIX /etc/hosts File ........................................................................................ 10-6
Contents<br />
Compiling the Host Table ......................................................................................................10-6<br />
Installing a Compiled Host Table as a Global Section ..........................................................10-7<br />
Using the Domain Name System (DNS) ...................................................................................10-8<br />
DNS Resolvers <strong>and</strong> Servers ...................................................................................................10-8<br />
Enabling a Caching-Only Name Server.....................................................................................10-9<br />
Caching-Only Name Server Configuration with Forwarders ..............................................10-10<br />
Using a Search List to Resolve Host Names .......................................................................10-11<br />
Setting Up a Master Name Server .......................................................................................10-12<br />
Domain Name versus Host Name ........................................................................................10-13<br />
The MULTINET:NAMED.CONF File ...............................................................................10-13<br />
Zone .........................................................................................................................................10-14<br />
Options.....................................................................................................................................10-18<br />
Address_match_list ..............................................................................................................10-24<br />
Logging....................................................................................................................................10-26<br />
Resource Record Sorting .........................................................................................................10-27<br />
Incremental Zone Transfer.......................................................................................................10-29<br />
DNS Zone Information Files ...................................................................................................10-29<br />
Reloading the Name Server .................................................................................................10-33<br />
Controlling the <strong>MultiNet</strong> DNS Server .................................................................................10-33<br />
Using NSLOOKUP <strong>and</strong> DIG to Debug DNS ......................................................................10-33<br />
DNS Load Balancing ...............................................................................................................10-35<br />
Setting Up a Cluster Service ................................................................................................10-35<br />
Advertised Cluster Service Addresses on Multi-Homed Hosts ...........................................10-36<br />
Setting Service Ratings ........................................................................................................10-36<br />
Adding Cluster Services to Your Domain's DNS Zone File ................................................10-37<br />
Monitoring Cluster Service Names ......................................................................................10-37<br />
DNS Security ...........................................................................................................................10-38<br />
Multicast Name Resolution .....................................................................................................10-41<br />
Chapter 11 Establishing IP Connectivity<br />
About IP Connectivity ..................................................................................................................11-2<br />
Network Interface Configuration Overview.................................................................................11-2<br />
Supported Network Interface Devices.......................................................................................11-2<br />
Viewing Interface Configuration ...............................................................................................11-3<br />
Viewing Interface Configuration with NET-CONFIG ..........................................................11-3<br />
Viewing the Maximum Configuration ...................................................................................11-3<br />
Viewing the Current Configuration .......................................................................................11-4<br />
Viewing Interface Configuration with MENU-CONFIG ......................................................11-5<br />
Adding Network Interfaces........................................................................................................11-5<br />
Network Interface Parameters ................................................................................................11-6<br />
Displaying Interrupt Vectors ................................................................................................11-13<br />
Adding Network Interfaces with NET-CONFIG.....................................................................11-13<br />
Adding Network Interfaces with MENU-CONFIG .............................................................11-14<br />
xiii
Contents<br />
xiv<br />
Creating a Custom Interface Initialization Procedure ......................................................... 11-15<br />
Modifying Network Interfaces ................................................................................................ 11-15<br />
Modifying Network Interfaces with NET-CONFIG ........................................................... 11-16<br />
Modifying Network Interfaces with MENU-CONFIG ....................................................... 11-16<br />
Deleting Network Interfaces.................................................................................................... 11-17<br />
Deleting Network Interfaces with NET-CONFIG ............................................................... 11-17<br />
Deleting Network Interfaces with MENU-CONFIG ........................................................... 11-18<br />
Enabling <strong>and</strong> Disabling Interfaces ....................................................................................... 11-19<br />
Assigning Multiple Addresses to a Network Interface ........................................................ 11-19<br />
Using Packet Filtering for Security ......................................................................................... 11-20<br />
Cautions When Creating Packet Filters................................................................................... 11-21<br />
Packet Filter File...................................................................................................................... 11-21<br />
Configuration Recommendations ........................................................................................ 11-24<br />
Filtering by Time ................................................................................................................. 11-26<br />
Filter Logging ...................................................................................................................... 11-26<br />
Setting the Filter List at Startup ........................................................................................... 11-28<br />
Converting an Old-Format Filter File .................................................................................. 11-28<br />
Configuring Transport over Serial Lines with SLIP <strong>and</strong> PPP ................................................. 11-28<br />
Underst<strong>and</strong>ing SLIP <strong>and</strong> PPP .............................................................................................. 11-28<br />
Dynamic Interfaces-Defined ................................................................................................ 11-29<br />
Static Interfaces-Defined ..................................................................................................... 11-29<br />
Configuring Static SLIP Interfaces ...................................................................................... 11-30<br />
Configuring Dynamic SLIP Interfaces ................................................................................ 11-30<br />
SLIP Configuration Parameters ........................................................................................... 11-30<br />
Configuring Static PPP Interfaces ....................................................................................... 11-32<br />
Configuring Dynamic PPP Interfaces .................................................................................. 11-32<br />
PPP Configuration Parameters ............................................................................................ 11-33<br />
Configuring Permanent SLIP <strong>and</strong> PPP Interfaces ............................................................... 11-35<br />
Attaching Dynamic SLIP or PPP Interfaces to VMS Devices ............................................ 11-36<br />
Shutting Down a PPP or SLIP Interface .............................................................................. 11-37<br />
Modifying Global Parameters ............................................................................................. 11-37<br />
Using the HP TCP/IP Transport Over UCX ........................................................................ 11-38<br />
Configuring VMScluster Aliasing ....................................................................................... 11-39<br />
Ensuring PATHWORKS Support is Enabled ..................................................................... 11-39<br />
Multicast Support ................................................................................................................ 11-40<br />
Enabling <strong>and</strong> Disabling MTU Discovery ............................................................................ 11-41<br />
Manipulating the ARP Table ............................................................................................... 11-41<br />
GIF (generic/gateway) interface Usage ............................................................................... 11-42<br />
Chapter 12 Configuring <strong>MultiNet</strong> Services<br />
Introducing Service Configuration............................................................................................... 12-1<br />
Using SERVER-CONFIG to Configure Services ..................................................................... 12-2<br />
Invoking SERVER_CONFIG ................................................................................................ 12-2<br />
SERVER-CONFIG Comm<strong>and</strong>s ............................................................................................ 12-3
Contents<br />
Using MENU-CONFIG to Configure Services .........................................................................12-6<br />
Adding Your Own Services .......................................................................................................12-7<br />
Disabling, Enabling, <strong>and</strong> Deleting Services ..............................................................................12-7<br />
Disabling or Enabling Services on a Per-Cluster-Node Basis ...............................................12-8<br />
Restricting Access to Servers ....................................................................................................12-8<br />
Auditing Access to Servers......................................................................................................12-10<br />
Writing an Auditing Dispatcher ...........................................................................................12-11<br />
Detecting Intruders ..................................................................................................................12-11<br />
Detecting Intruders on an FTP Server .................................................................................12-12<br />
Detecting Intruders with NETCONTROL Accounting .......................................................12-14<br />
Using UCX-Compatible Services under <strong>MultiNet</strong> ..................................................................12-15<br />
Associating Comm<strong>and</strong> Procedures with Services ...................................................................12-16<br />
Setting Keepalive Timers.........................................................................................................12-16<br />
Configuring TFTP (Trivial File Transfer Protocol).................................................................12-17<br />
TFTP File Name Translations ..............................................................................................12-18<br />
Configuring "R" Services .....................................................................................................12-19<br />
Disabling the St<strong>and</strong>ard Error RSHELL Connection ............................................................12-20<br />
RLOGIN <strong>and</strong> RSHELL Authentication Cache ....................................................................12-21<br />
Controlling RSHELL <strong>and</strong> REXEC <strong>Process</strong> Deletion ..............................................................12-21<br />
Controlling Automatic WSA Device Creation ....................................................................12-22<br />
Inhibiting Output in Comm<strong>and</strong> Procedures for "R" Services ..............................................12-22<br />
Permitting "R" Service Access to Captive or Restricted Accounts .....................................12-22<br />
Configuring the TELNET Server for Kerberos V5 .............................................................12-23<br />
Configuring the TELNET Server for NTY Devices ............................................................12-23<br />
Configuring SYSLOG .........................................................................................................12-25<br />
Enabling SYSLOG ...............................................................................................................12-26<br />
SYSLOG Configuration File Examples ...............................................................................12-27<br />
Chapter 13 Configuring Network Routing<br />
Routing Methods Overview..........................................................................................................13-1<br />
Configuring Static IP Routes .....................................................................................................13-1<br />
Adding Static Routes .............................................................................................................13-2<br />
Changing the Default Route ...................................................................................................13-2<br />
Using GateD ..........................................................................................................................13-2<br />
GateD Configuration File ..........................................................................................................13-2<br />
GateD Route Selection...............................................................................................................13-3<br />
Starting <strong>and</strong> Stopping GateD ........................................................................................................13-4<br />
Configuring GATED.....................................................................................................................13-4<br />
GateD Configuration Statements..................................................................................................13-6<br />
Interface Clause .......................................................................................................................13-12<br />
Sample GateD Configurations....................................................................................................13-73<br />
RTSOLD .....................................................................................................................................13-77<br />
xv
Contents<br />
xvi<br />
Usage:...................................................................................................................................... 13-77<br />
Chapter 14 Network Time Protocol (NTP)<br />
Converting from earlier versions of NTP..................................................................................... 14-1<br />
Overview of NTP ......................................................................................................................... 14-1<br />
Programs <strong>and</strong> Files ....................................................................................................................... 14-2<br />
Program Files............................................................................................................................. 14-2<br />
Configuration Files.................................................................................................................... 14-3<br />
Other Files ................................................................................................................................. 14-3<br />
Configuration................................................................................................................................ 14-4<br />
NTP Network Design ................................................................................................................ 14-4<br />
Authentication ....................................................................................................................... 14-5<br />
Finding Servers ...................................................................................................................... 14-6<br />
NTP.CONF ................................................................................................................................ 14-6<br />
Timezone Configuration <strong>and</strong> Hardware Clock Overview....................................................... 14-15<br />
Timezone Support.................................................................................................................... 14-15<br />
Loadable Timezone Rules ....................................................................................................... 14-16<br />
Format of COUNTRY Specification ................................................................................... 14-17<br />
Format of ZONE Specification ............................................................................................ 14-17<br />
Format of a RULE Specification ......................................................................................... 14-18<br />
Loadable Timezone Rules Provided with <strong>MultiNet</strong> ............................................................ 14-19<br />
Selecting Timezone Rules ................................................................................................... 14-22<br />
Using the call_dst_proc option ............................................................................................ 14-22<br />
Access Control Comm<strong>and</strong>s ..................................................................................................... 14-24<br />
Authentication Using a Keys File............................................................................................ 14-24<br />
NTP Utilities............................................................................................................................ 14-25<br />
Comm<strong>and</strong> Line Format............................................................................................................ 14-37<br />
NTP Management....................................................................................................................... 14-42<br />
Master Server........................................................................................................................... 14-42<br />
Netcontrol................................................................................................................................ 14-43<br />
Monitoring............................................................................................................................... 14-44<br />
Troubleshooting Tips............................................................................................................... 14-44<br />
Troubleshooting Using NTPQ................................................................................................. 14-45<br />
Configuration Example .............................................................................................................. 14-45<br />
Converting to the NTP.CONF File............................................................................................. 14-47<br />
Chapter 15 Configuring Electronic Mail<br />
Modifying the <strong>MultiNet</strong> SMTP Configuration File ..................................................................... 15-1<br />
Pipelining <strong>and</strong> Extended SMTP ................................................................................................ 15-1<br />
Delivering Mail to Specific Folders .......................................................................................... 15-2
Contents<br />
Using the Mail Delivery Mechanisms .......................................................................................15-2<br />
Rejecting Mail Messages ...........................................................................................................15-2<br />
SMTP Statistics <strong>and</strong> Accounting ..................................................................................................15-6<br />
Network Service Monitoring .....................................................................................................15-6<br />
Mail Monitoring.........................................................................................................................15-8<br />
Session Accounting....................................................................................................................15-9<br />
Configuring Session Accounting ...............................................................................................15-9<br />
Configuration File.........................................................................................................................15-9<br />
File Format...............................................................................................................................15-10<br />
Displaying the Contents of the Logging File...........................................................................15-10<br />
Accounting File Record Format ...........................................................................................15-11<br />
Configuring SMTP for Accounting .........................................................................................15-12<br />
Configuring Mail Parameters...................................................................................................15-12<br />
Configuring Mail Parameters with MAIL-CONFIG ...........................................................15-12<br />
Mail Parameters ...................................................................................................................15-13<br />
SMTP Configuration Using Logicals ......................................................................................15-14<br />
SMTP SYMBIONT LOGICAL...............................................................................................15-14<br />
MIME processing ....................................................................................................................15-15<br />
Mail Outbound Sanity Checking .............................................................................................15-15<br />
Configuring the SMTP Server for Inbound Mail.....................................................................15-15<br />
Translating UNIX-Style Linefeeds to SMTP-Compliant End-of-Line Character Sequences 15-15<br />
Configuring the SMTP Server to Limit System/Vendor Information......................................15-16<br />
Configuring the SMTP Symbiont <strong>and</strong> Mail Queues for Outbound Mail ................................15-16<br />
Specifying the REPLY_TO Header .....................................................................................15-16<br />
Disabling VRFY <strong>and</strong> EXPN ................................................................................................15-17<br />
Configuring Mail Queues ....................................................................................................15-17<br />
Configuring Multiple Queues ..............................................................................................15-18<br />
Configuring Queue Groups ..................................................................................................15-18<br />
Forwarding Mail through a Mail Hub ..................................................................................15-18<br />
Specifying a Mail Hub .........................................................................................................15-18<br />
Forwarding Mail Addressed to Remote Hosts .....................................................................15-19<br />
Excluding Hosts in Specific Domains From Mail Forwarding ...........................................15-19<br />
Forwarding Local Mail ........................................................................................................15-20<br />
Excluding Specific Local Users from Mail Forwarding ......................................................15-21<br />
Configuring Mail Gateways .................................................................................................15-21<br />
Specifying SMTP Host Aliases ...........................................................................................15-21<br />
Setting Host Aliases .............................................................................................................15-21<br />
Specifying Host Aliases for Individual Users ......................................................................15-22<br />
Configuring Mail Aliases .....................................................................................................15-22<br />
Mailing Lists ........................................................................................................................15-23<br />
Specifying the System-Wide Mail Alias File ......................................................................15-23<br />
Using Mail Aliases <strong>and</strong> Mailing Lists From VMS MAIL ...................................................15-23<br />
IMAP Server ............................................................................................................................15-24<br />
Inhibiting Output in Comm<strong>and</strong> Procedures for the IMAP Service ......................................15-25<br />
xvii
Contents<br />
xviii<br />
IMAP Mail Folders ..............................................................................................................15-25<br />
IMAP Directives File ...........................................................................................................15-26<br />
IMAP Options in the Global IMAPD.CONF file ................................................................ 15-27<br />
IMAP State Information Files ............................................................................................. 15-28<br />
IMAP Logicals .................................................................................................................... 15-28<br />
MULTINET_IMAPD_MESSAGE_ONE ........................................................................... 15-28<br />
MULTINET_IMAPD_MESSAGE_SIZE_LIMIT .............................................................. 15-29<br />
MULTINET_IMAPD_LOGLEVEL n ................................................................................ 15-29<br />
MULTINET_IMAP_UPDATE_LOGIN_TIME ................................................................. 15-29<br />
Post Office Protocol (POP) Versions 2 <strong>and</strong> 3.......................................................................... 15-29<br />
POP Logical Names ............................................................................................................. 15-30<br />
Specifying POP Functions Using the MULTINET_POPx_FLAGS Logical ...................... 15-30<br />
Setting the MULTINET_POPx_DEST_FOLDER <strong>and</strong> MULTINET_POPx_SOURCE_FOLDER<br />
Logicals ............................................................................................................................... 15-31<br />
Defining the Logicals System-Wide .................................................................................... 15-32<br />
Configuring SMTP Service for ALL-IN-1 Users.................................................................... 15-32<br />
Before Configuration ...........................................................................................................15-33<br />
Configuring SMTP/MR ....................................................................................................... 15-33<br />
Configuring SMTP/MR Document Conversion .................................................................. 15-36<br />
Completing SMTP/MR Configuration ................................................................................ 15-37<br />
Enhanced MAILbus Support ............................................................................................... 15-39<br />
Configuring the SMTP-DECnet Mail Gateway ...................................................................... 15-39<br />
Chapter 16 Printer Configuration<br />
Configuring the LPD/LPR Server ................................................................................................ 16-1<br />
Setting a Default LPD User Name ........................................................................................ 16-3<br />
Changing the LPD Spool Directory ....................................................................................... 16-4<br />
Cancelling LPD Print Jobs .................................................................................................... 16-4<br />
Controlling host name lookup ............................................................................................... 16-4<br />
Configuring Printers on Remote Systems ............................................................................. 16-4<br />
Checking Remote Printer Queues .......................................................................................... 16-5<br />
LPD Jobs (Inbound) ............................................................................................................... 16-5<br />
lpr -v Support ......................................................................................................................... 16-8<br />
Troubleshooting the LPD Server ........................................................................................... 16-8<br />
Configuring Print Queues............................................................................................................. 16-9<br />
Configuring an LPD Protocol Queue ...................................................................................... 16-10<br />
Input Record Modification .................................................................................................. 16-11<br />
Logicals used in controlling EMBED_CC <strong>and</strong>/or ADD_EOR operations: ........................ 16-12<br />
Print parameters used in controlling EMBED_CC <strong>and</strong>/or ADD_EOR operations: ............ 16-13<br />
Logical Names Provided for Controlling LPD Print <strong>Process</strong>ing............................................. 16-13<br />
Using Retry Timers .............................................................................................................16-15<br />
Adding Print Queue Parameters .......................................................................................... 16-16<br />
Starting Multiple Print Queues ............................................................................................ 16-16<br />
Using User-Specified Print Destinations ............................................................................. 16-17
Contents<br />
Customizing Printer Queues ................................................................................................16-19<br />
Configuring a STREAM Protocol Queue...................................................................................16-20<br />
Troubleshooting a STREAM Protocol Queue .....................................................................16-21<br />
Logical Names Provided for Controlling STREAM <strong>Process</strong>ing .........................................16-21<br />
LPD <strong>and</strong> Stream Symbiont User Exit Support ...........................................................................16-22<br />
Using the NTYSMB Symbiont for Remote,<br />
TCP-Connected Printers .............................................................................................................16-24<br />
NTYSMB Advantages Over STREAM Queues ..................................................................16-25<br />
Setting Up a Print Queue with MULTINET_NTYSMB .....................................................16-26<br />
Troubleshooting the MULTINET_NTYSMB .....................................................................16-26<br />
Troubleshooting the Print Queue................................................................................................16-27<br />
Internet Printing Protocol (IPP) ..................................................................................................16-29<br />
IPP Protocol Background.........................................................................................................16-29<br />
Relevant RFCs .....................................................................................................................16-30<br />
Limitations of this Implementation ......................................................................................16-30<br />
Configuration..............................................................................................................................16-30<br />
Global Settings .....................................................................................................................16-31<br />
Queue-specific Settings .......................................................................................................16-33<br />
Order of <strong>Process</strong>ing ..............................................................................................................16-39<br />
Print Comm<strong>and</strong> Options .............................................................................................................16-39<br />
Allowable Values ........................................................................................................................16-42<br />
OPCOM Terminal Names ....................................................................................................16-42<br />
Logging Levels ....................................................................................................................16-43<br />
Using Logicals to Define Queue Configurations........................................................................16-43<br />
Setting Up IPP Symbiont Queues ........................................................................................16-43<br />
Setting up IPP Symbiont Queues Using Queue-Specific Logicals ......................................16-43<br />
Setting Up an IPP Symbiont Queue to Print Only to a Specific Printer ..............................16-44<br />
Setting Up to Print to Multiple Printers Using Wildcards ...................................................16-44<br />
Setting Up Two Queues Using a Disk File for Queue Settings ...........................................16-44<br />
Setting Up Two Queues with no Configuration Values in the INITIALIZE Comm<strong>and</strong> .....16-45<br />
Submitting Jobs to IPP Symbiont Print Queues ......................................................................16-45<br />
Printing a Single Text File to an IPP Queue ........................................................................16-45<br />
Specifying the Destination Printer on the Print Comm<strong>and</strong> ..................................................16-45<br />
Using Other Print Qualifiers ................................................................................................16-45<br />
MULTINET IPP SHOW Comm<strong>and</strong> ...........................................................................................16-46<br />
Chapter 17 RMT Server <strong>and</strong> Client Configuration<br />
Configuring the Remote Magnetic Tape Server ...........................................................................17-1<br />
About the RMT Client ...............................................................................................................17-4<br />
Limitations of UNIX Devices <strong>and</strong> <strong>Software</strong> ..........................................................................17-4<br />
Using RMTALLOC ...................................................................................................................17-5<br />
RMTALLOC Tape Drive Access Example ...........................................................................17-5<br />
xix
Contents<br />
xx<br />
RMTALLOC CD-ROM Access Examples ........................................................................... 17-6<br />
Using RMTALLOC Qualifiers.................................................................................................. 17-7<br />
VMS-to-VMS Negotiation .................................................................................................... 17-7<br />
Suppressing Messages ........................................................................................................... 17-7<br />
Controlling Remote Login ..................................................................................................... 17-7<br />
Interacting with the Remote Operator ................................................................................... 17-8<br />
Write Protection ..................................................................................................................... 17-8<br />
Chapter 18 Configuring <strong>and</strong> Managing FTP<br />
Configuring the FTP Client.......................................................................................................... 18-1<br />
Managing an FTP Server.............................................................................................................. 18-2<br />
Configuring Anonymous FTP ............................................................................................... 18-2<br />
Specifying a Range of FTP Server Port Numbers ................................................................. 18-4<br />
Creating an FTP Server Login Comm<strong>and</strong> Procedure ............................................................ 18-4<br />
Using FTP Log Files .............................................................................................................. 18-5<br />
Managing FTP Security ......................................................................................................... 18-6<br />
Accepting Wildcards Upon Delete ........................................................................................ 18-7<br />
Specifying a Message at Connect Time ................................................................................ 18-7<br />
Specifying UNIX-Style Listings ........................................................................................... 18-7<br />
UNIX File Names .................................................................................................................. 18-9<br />
Specifying the Maximum Idle Time .................................................................................... 18-10<br />
Using FTP Site Comm<strong>and</strong>s ................................................................................................. 18-10<br />
Defining FTP Messages ....................................................................................................... 18-11<br />
Specifying the Name of a Log File ...................................................................................... 18-12<br />
Defining a File Name .......................................................................................................... 18-13<br />
Password Lifetime Warnings................................................................................................... 18-13<br />
Defining Password Messages .............................................................................................. 18-13<br />
Checking IP Address ........................................................................................................... 18-14<br />
Configuring the FTP server for TLS (FTPS) .......................................................................... 18-14<br />
FTP server parameters for TLS ........................................................................................... 18-14<br />
Network Service Monitoring......................................................................................................18-15<br />
Session Accounting .................................................................................................................... 18-16<br />
Configuration File ................................................................................................................... 18-17<br />
File Format .............................................................................................................................. 18-17<br />
Enabling the Accounting Logger............................................................................................. 18-17<br />
Displaying the Contents of the Logging File .......................................................................... 18-18<br />
Accounting File Record Format .............................................................................................. 18-18<br />
FTP <strong>and</strong> IPv6.............................................................................................................................. 18-19<br />
Chapter 19 DHCP Client<br />
Introduction .................................................................................................................................. 19-1
Contents<br />
General Description ...................................................................................................................19-1<br />
Setting DHCP Client Parameters..................................................................................................19-2<br />
Setting Up the DHCP Client.........................................................................................................19-3<br />
Disabling the DHCP Client........................................................................................................19-4<br />
DHCP Client Functions <strong>and</strong> Logicals........................................................................................19-5<br />
DHCP Client Configuration .........................................................................................................19-6<br />
Protocol Timing .........................................................................................................................19-6<br />
Lease Requirements <strong>and</strong> Requests.............................................................................................19-8<br />
Option Modifiers........................................................................................................................19-9<br />
Lease Declarations...................................................................................................................19-10<br />
Other Declarations ...................................................................................................................19-12<br />
Example ...................................................................................................................................19-12<br />
Troubleshooting the DHCP Client..............................................................................................19-12<br />
How do I know the DHCP client has configured my network successfully? ......................19-12<br />
What if I cannot ping an IP address on the internet? ...........................................................19-13<br />
What if I can ping a host by its IP address but not by its name? .........................................19-13<br />
Why is the local address "0.0.0.0" when I use "$ multinet configure /interface" <strong>and</strong> then use<br />
“show”? ................................................................................................................................19-14<br />
Where can I find the status information of the DHCP client? .............................................19-14<br />
Chapter 20 Configuring the Font Server<br />
Underst<strong>and</strong>ing the Font Server .....................................................................................................20-1<br />
The Font Server Configuration File...........................................................................................20-2<br />
Specifying Font Servers.............................................................................................................20-3<br />
Supported Font Types ................................................................................................................20-3<br />
Enabling the Font Server ...........................................................................................................20-4<br />
Getting Information About the Font Server...............................................................................20-4<br />
Checking the Font Server Configuration ...............................................................................20-4<br />
Listing Available Fonts ..........................................................................................................20-5<br />
Viewing Font Data .................................................................................................................20-6<br />
Controlling the <strong>MultiNet</strong> Font Server........................................................................................20-7<br />
Starting the Font Server .........................................................................................................20-7<br />
Stopping the FS Server ..........................................................................................................20-8<br />
Restarting the Font Server .....................................................................................................20-8<br />
Reloading the Font Server Configuration ..............................................................................20-8<br />
Flushing the Font Server Cache .............................................................................................20-9<br />
Resetting the Font Server .......................................................................................................20-9<br />
Defining Font Catalogues ..........................................................................................................20-9<br />
Adding Fonts to the Font Server................................................................................................20-9<br />
Chapter 21 Configuring Remote Systems with RARP, BOOTP, <strong>and</strong> DHCP<br />
xxi
Contents<br />
Server<br />
Choosing a Network Configuration Server ............................................................................... 21-2<br />
RARP (Reverse Address Resolution Protocol) ......................................................................... 21-2<br />
BOOTP (Bootstrap Protocol) .................................................................................................... 21-2<br />
DHCP (Dynamic Host Configuration Protocol)........................................................................ 21-2<br />
Using RARP .............................................................................................................................. 21-3<br />
Obtaining Data for RARP Clients ......................................................................................... 21-3<br />
Enabling RARP Packet Reception on HP Ethernet Interfaces .............................................. 21-3<br />
Enabling <strong>and</strong> Starting RARP Service .................................................................................... 21-4<br />
Adding Clients to the RARP Configuration File ................................................................... 21-4<br />
Reloading RARP Configuration ............................................................................................ 21-5<br />
Using BOOTP ........................................................................................................................... 21-5<br />
Obtaining Data for BOOTP Clients ....................................................................................... 21-5<br />
Enabling <strong>and</strong> Starting BOOTP .............................................................................................. 21-6<br />
Modifying the BOOTP Configuration File ........................................................................... 21-6<br />
BOOTP Options for the BOOTP Server ............................................................................... 21-7<br />
<strong>Guide</strong>lines for the BOOTP Configuration File .................................................................... 21-10<br />
Using a UNIX bootptab File ................................................................................................ 21-11<br />
Reloading the BOOTP Configuration ................................................................................. 21-11<br />
Disabling BOOTP OPCOM Messages ................................................................................ 21-11<br />
Using DHCP............................................................................................................................ 21-12<br />
DHCP <strong>Process</strong> ..................................................................................................................... 21-12<br />
Obtaining Data for DHCP Clients ....................................................................................... 21-14<br />
Enabling <strong>and</strong> Starting DHCP ............................................................................................... 21-14<br />
Checking the DHCP Configuration......................................................................................... 21-14<br />
Reloading the DHCP Configuration........................................................................................ 21-15<br />
DHCP Conversion Tool........................................................................................................... 21-15<br />
Introducing the Configuration File.......................................................................................... 21-16<br />
Address Allocation .............................................................................................................. 21-19<br />
Address Pools ...................................................................................................................... 21-20<br />
Pool Permit Lists ................................................................................................................. 21-20<br />
Client Classing......................................................................................................................... 21-21<br />
Subclasses ............................................................................................................................ 21-22<br />
Per-Class Limits on Dynamic Address Allocation .............................................................. 21-23<br />
Conditional Behavior............................................................................................................... 21-24<br />
DNS Dynamic Updates Within DHCP.................................................................................... 21-25<br />
Transaction Signatures (TSIG) ............................................................................................ 21-26<br />
Host Name Generation ............................................................................................................21-27<br />
Configuration File Declarations <strong>and</strong> Parameters..................................................................... 21-29<br />
Expressions.............................................................................................................................. 21-50<br />
BOOLEAN EXPRESSIONS ............................................................................................... 21-50<br />
DATA EXPRESSIONS ....................................................................................................... 21-51<br />
NUMERIC EXPRESSIONS ............................................................................................... 21-53<br />
DHCP Options......................................................................................................................... 21-54<br />
St<strong>and</strong>ard DHCP Options ...................................................................................................... 21-55<br />
xxii
Contents<br />
Relay Agent Information Option .........................................................................................21-62<br />
Defining New Options .........................................................................................................21-63<br />
Vendor Encapsulated Options ..............................................................................................21-65<br />
DHCP Lease Format................................................................................................................21-66<br />
Working with DHCP Leases ................................................................................................21-68<br />
Ab<strong>and</strong>oned Leases ...............................................................................................................21-68<br />
Static Leases .........................................................................................................................21-68<br />
Registering Clients While the DHCP Server is Running ........................................................21-69<br />
Update File Statements ........................................................................................................21-70<br />
Examples:.................................................................................................................................21-70<br />
DHCP Safe-failover Introduction ...............................................................................................21-71<br />
Configuring DHCP Safe-failover ............................................................................................21-72<br />
Boot File for DHCP Safe-failover ...........................................................................................21-73<br />
State File for DHCP Safe-failover ...........................................................................................21-74<br />
DHCP Safe-failover Configuration File Statements................................................................21-75<br />
DHCP Safe-failover Lease File Statements.............................................................................21-76<br />
Transitioning to DHCP Safe-failover Partner Down State ......................................................21-77<br />
Setting DHCP Parameters........................................................................................................21-78<br />
Viewing DHCP Information ....................................................................................................21-80<br />
NETCONTROL SHOW Comm<strong>and</strong> ....................................................................................21-80<br />
NETCONTROL STATISTICS Comm<strong>and</strong> ..........................................................................21-84<br />
Address Lease States in DHCP Dump Files............................................................................21-84<br />
Sample DHCPD.CONF File ................................................................................................21-85<br />
Chapter 22 Managing the XDM Server<br />
Underst<strong>and</strong>ing X Display Management........................................................................................22-1<br />
Accessing the XDM Server .......................................................................................................22-2<br />
Special Features of the <strong>MultiNet</strong> XDM Server ......................................................................22-3<br />
XDM Administrative Tasks .......................................................................................................22-3<br />
Enabling <strong>and</strong> Starting the XDM Server .....................................................................................22-3<br />
Modifying the XDM Server Configuration ...............................................................................22-4<br />
Controlling the XDM Server .....................................................................................................22-6<br />
Checking the Status of the XDM Server ................................................................................22-6<br />
Starting the XDM Server .......................................................................................................22-7<br />
Stopping the XDM Server .....................................................................................................22-7<br />
Restarting the XDM Server ...................................................................................................22-8<br />
Reloading the XDM Configuration .......................................................................................22-8<br />
Controlling Access to the XDM Server.....................................................................................22-8<br />
H<strong>and</strong>ling Direct <strong>and</strong> Broadcast Requests ..............................................................................22-9<br />
Managing X11R3 Displays........................................................................................................22-9<br />
Specifying X11R3 Displays ...................................................................................................22-9<br />
Setting Up Host Access on the Display ...............................................................................22-10<br />
Ensuring No Other Host Is Managing the Display ..............................................................22-10<br />
xxiii
Contents<br />
xxiv<br />
Reloading the XDM.SERVERS File ................................................................................... 22-11<br />
Chapter 23 Configuring <strong>MultiNet</strong> SNMP Services<br />
Underst<strong>and</strong>ing SNMP................................................................................................................... 23-1<br />
SNMP Managers, Agents, <strong>and</strong> Traps .................................................................................... 23-1<br />
Configuring <strong>MultiNet</strong> SNMP Services ........................................................................................ 23-2<br />
Enabling the SNMP Service .................................................................................................. 23-3<br />
Private MIB Application Program Interface ................................................................................ 23-3<br />
Configuring SNMP Subagents (except AgentX) ...................................................................... 23-4<br />
SNMP Multiplexing Peers............................................................................................................ 23-4<br />
SNMP Agent Extensibility (AgentX) Peers................................................................................. 23-5<br />
Setting Up <strong>MultiNet</strong> to Use HP Insight Manager .................................................................. 23-5<br />
Configuration File ........................................................................................................................ 23-6<br />
File Format ............................................................................................................................ 23-7<br />
Values for MIB Objects ......................................................................................................... 23-7<br />
Community Parameters ......................................................................................................... 23-9<br />
Template Configuration File ................................................................................................. 23-9<br />
Sending SNMP Traps from <strong>MultiNet</strong>...................................................................................... 23-12<br />
Disabling Traps........................................................................................................................ 23-12<br />
Generating Traps ..................................................................................................................... 23-13<br />
SNMP Log File .......................................................................................................................... 23-13<br />
Start, Shutdown, or Reload the SNMP Configuration Without Rebooting............................. 23-13<br />
Performing SNMP Functions with <strong>MultiNet</strong> .......................................................................... 23-14<br />
Chapter 24 Configuring <strong>MultiNet</strong> Kerberos Authentication Service<br />
Underst<strong>and</strong>ing Kerberos............................................................................................................... 24-1<br />
Kerberos Tickets .................................................................................................................... 24-2<br />
Kerberos Database Overview ................................................................................................ 24-3<br />
Hardware Requirements ............................................................................................................ 24-3<br />
Configuring Kerberos................................................................................................................ 24-3<br />
Step 1: Creating the Kerberos Configuration File ................................................................. 24-3<br />
Step 2: Creating the MULTINET:KERBEROS.REALMS File ........................................... 24-4<br />
Step 3: Initializing the Kerberos Database ............................................................................ 24-5<br />
Step 4: Storing the Master Key .............................................................................................. 24-5<br />
Step 5: Adding Users <strong>and</strong> Servers to the Principal Database ................................................ 24-6<br />
KERBEROS DATABASE EDIT Prompts ................................................................................ 24-7<br />
Step 6: Creating Protected Key Files ..................................................................................... 24-8<br />
Step 7: Moving the Protected Key Files ................................................................................ 24-9<br />
Step 8: Changing the Kerberos Port Designation .................................................................. 24-9<br />
............................................................................................................................................... 24-9
Contents<br />
Step 9: Enabling the Kerberos Server ..................................................................................24-10<br />
Testing Your Configuration .....................................................................................................24-10<br />
Copying the Database to Other Hosts......................................................................................24-11<br />
Administering Kerberos...........................................................................................................24-11<br />
Obtaining Tickets from Alternate Realms ...........................................................................24-12<br />
Deleting <strong>and</strong> Editing Principal Entries ................................................................................24-12<br />
Adding Entries for Application Servers ...............................................................................24-12<br />
Backing Up the Database .....................................................................................................24-13<br />
Using Cross-Realm Authentication .....................................................................................24-13<br />
Configuring Cross-Realm Authentication ...........................................................................24-13<br />
Configuring Secondary KDCs .................................................................................................24-14<br />
Determining How a User Has Logged In ................................................................................24-15<br />
Chapter 25 X11-Gateway Configuration<br />
Concepts .......................................................................................................................................25-1<br />
Allowing an IP Client Access to a DECnet Server....................................................................25-2<br />
Running an IP Client on a DECnet Server .............................................................................25-3<br />
Allowing a DECnet Client Access to an IP Server....................................................................25-4<br />
Running the DECnet Client on the IP Server ........................................................................25-5<br />
X11-Gateway Security...............................................................................................................25-5<br />
X11-Gateway Debugging ..........................................................................................................25-5<br />
Selected Error Numbers from ERRNO.H ..............................................................................25-6<br />
X11-Gateway Error Messages ...............................................................................................25-6<br />
Chapter 26 Configuring DECnet-over-IP Circuits<br />
Using the Configuration Tools......................................................................................................26-1<br />
Examples of Connecting Two Systems......................................................................................26-2<br />
DECnet Encapsulation Over Unreliable Networks ...................................................................26-3<br />
Using MULTINET SET /DECNET...........................................................................................26-3<br />
Chapter 27 Configuring the <strong>MultiNet</strong> NFSV2 Server<br />
Underst<strong>and</strong>ing the <strong>MultiNet</strong> NFS Server .....................................................................................27-2<br />
Servers <strong>and</strong> Clients ....................................................................................................................27-2<br />
Security ..................................................................................................................................27-3<br />
Mapping Between Users' OpenVMS <strong>and</strong> Client Identifiers ..................................................27-4<br />
Grouping NFS Client Systems for UID/GID Mappings ........................................................27-4<br />
H<strong>and</strong>ling Incomplete Mappings .............................................................................................27-5<br />
UNIX File System Semantics ................................................................................................27-5<br />
Mapping UNIX File Links .....................................................................................................27-6<br />
Mapping UNIX Device Special Files ....................................................................................27-6<br />
xxv
Contents<br />
xxvi<br />
Mapping UNIX setuid, setgid, <strong>and</strong> "sticky" File Modes ....................................................... 27-6<br />
Mapping UNIX File Names .................................................................................................. 27-6<br />
Mapping OpenVMS Text Files to UNIX Text Files ............................................................. 27-8<br />
NFS Server Architecture ....................................................................................................... 27-9<br />
NFS Server Configuration Overview ........................................................................................ 27-9<br />
Enabling the <strong>MultiNet</strong> NFS Server ......................................................................................... 27-10<br />
Creating OpenVMS User Accounts for Client Users.............................................................. 27-11<br />
Invoking the NFS Configuration Utility (NFS-CONFIG) <strong>and</strong> Displaying Configuration<br />
Information.............................................................................................................................. 27-11<br />
Creating UID/GID Mappings.................................................................................................. 27-13<br />
Adding <strong>and</strong> Deleting Mappings ........................................................................................... 27-13<br />
Adding <strong>and</strong> Deleting Individual Mappings ......................................................................... 27-13<br />
Adding <strong>and</strong> Deleting NFS Groups ....................................................................................... 27-13<br />
Adding Multiple Mappings ................................................................................................. 27-14<br />
Exporting File Systems............................................................................................................ 27-15<br />
Naming Mount Points .......................................................................................................... 27-15<br />
Adding File Systems to the Export List ............................................................................... 27-16<br />
Removing File Systems from the Export List ..................................................................... 27-16<br />
Establishing Cluster-wide Aliases ....................................................................................... 27-16<br />
Reloading the <strong>MultiNet</strong> NFS Server Configuration <strong>and</strong> Restarting the Server ...................... 27-17<br />
Shutting Down the NFS Server ............................................................................................... 27-17<br />
Testing the System Configuration ........................................................................................... 27-17<br />
Checking for Errors ............................................................................................................. 27-18<br />
Configuring Clients ................................................................................................................. 27-18<br />
Configuring Sun Host Clients .............................................................................................. 27-19<br />
Mounting File Systems on Sun Hosts .................................................................................. 27-19<br />
Explicitly Specifying Mount Parameter Settings ................................................................ 27-19<br />
Restricting Access to a Mount Point ....................................................................................... 27-20<br />
Controlling NFS File Access with OpenVMS Access Control Lists (ACLs) ..................... 27-21<br />
Idiosyncrasies of ACL Support over NFS ........................................................................... 27-22<br />
How the <strong>MultiNet</strong> NFS Server Interprets ACL <strong>and</strong> UIC Protection ................................... 27-23<br />
How the <strong>MultiNet</strong> NFS Server H<strong>and</strong>les ACLs ................................................................... 27-24<br />
H<strong>and</strong>ling ACLs with Unmappable ACEs ............................................................................ 27-25<br />
Disabling the NFS Server's ACL Support ........................................................................... 27-26<br />
/VMS_STYLE_CREATE Mount Point Option .................................................................. 27-26<br />
Limitations <strong>and</strong> Restrictions ................................................................................................ 27-26<br />
Configuring PC-NFSD Remote Printing Service.................................................................... 27-26<br />
Booting Diskless Hosts Using NFS......................................................................................... 27-29<br />
Moving Files to OpenVMS ................................................................................................. 27-29<br />
Booting Diskless DECstation Systems ................................................................................ 27-29<br />
Configuring MOP ................................................................................................................27-30<br />
Specifying the DECstation Mount Points ............................................................................ 27-30<br />
Booting Diskless Sun Microsystems Hosts ......................................................................... 27-31<br />
Modifying NFS Server Mount Point Options ......................................................................... 27-31<br />
Mount Point Option Summary ............................................................................................ 27-32
Contents<br />
Examples of Mount Point Option Usage .............................................................................27-33<br />
Modifying NFS Server Global Parameters..............................................................................27-33<br />
NFS Mode of Operation ..........................................................................................................27-34<br />
NFS Server Memory Considerations.......................................................................................27-35<br />
<strong>Process</strong> Memory ......................................................................................................................27-35<br />
Virtual <strong>and</strong> Physical Memory ..............................................................................................27-36<br />
OpenVMS Channels ............................................................................................................27-36<br />
Directory <strong>and</strong> File Cache Parameters ......................................................................................27-37<br />
Channels, File Headers, <strong>and</strong> Data Buffers ...........................................................................27-37<br />
Directory <strong>and</strong> File Times .....................................................................................................27-37<br />
Concurrency Parameters ......................................................................................................27-37<br />
Cache Interrupt Parameters ..................................................................................................27-37<br />
Cache-Timing Parameters ....................................................................................................27-38<br />
Cache Maintenance Interval Parameters ..............................................................................27-38<br />
Channel Deassignment Parameters ......................................................................................27-38<br />
Cache Refresh Parameters ...................................................................................................27-38<br />
Cache Size Parameters .........................................................................................................27-39<br />
OpenVMS Channel Usage Parameters ................................................................................27-39<br />
Cache Memory Requirements Parameters ...........................................................................27-40<br />
Auto Server Cache Sizing ....................................................................................................27-40<br />
Writeback Cache Parameters ...............................................................................................27-41<br />
Duplicate Request Detection Cache Parameters ..................................................................27-42<br />
Delete-Behind Cache Parameters .........................................................................................27-42<br />
Timezone Parameters...............................................................................................................27-43<br />
Special Debugging Parameters ................................................................................................27-43<br />
NFS Troubleshooting Tips.......................................................................................................27-43<br />
Approximate Text Size Threshold .......................................................................................27-43<br />
NFS Stream_LF File Conversion .........................................................................................27-44<br />
Performance Problems with Large Directories ....................................................................27-44<br />
Chapter 28 Configuring the <strong>MultiNet</strong> NFS V3 Server<br />
Introduction...................................................................................................................................28-1<br />
Server Security & Initial Configuration .......................................................................................28-1<br />
Mounting Client Directories .........................................................................................................28-2<br />
File Formats ..................................................................................................................................28-2<br />
Reading Files .............................................................................................................................28-3<br />
Writing Files ..............................................................................................................................28-3<br />
Implementation .............................................................................................................................28-3<br />
Restrictions ................................................................................................................................28-4<br />
NFS Protocol Procedures...........................................................................................................28-4<br />
Troubleshooting ............................................................................................................................28-8<br />
xxvii
Contents<br />
Chapter 29 Using the NFS Client<br />
xxviii<br />
Underst<strong>and</strong>ing the NFS Client ..................................................................................................... 29-1<br />
Servers <strong>and</strong> Clients .................................................................................................................... 29-1<br />
<strong>MultiNet</strong> NFS Client Use of User IDs ................................................................................... 29-2<br />
Grouping NFS Client Systems for UID/GID Mappings ....................................................... 29-2<br />
Mapping Example .................................................................................................................. 29-3<br />
Effects of Incomplete Mappings ............................................................................................ 29-3<br />
File System Limitations ......................................................................................................... 29-3<br />
DISKQUOTA Limitations .................................................................................................... 29-4<br />
Security <strong>and</strong> File Protections ................................................................................................. 29-4<br />
Storing OpenVMS File Attributes on an NFS Server ........................................................... 29-4<br />
Storing OpenVMS File Names on an NFS Server ................................................................ 29-5<br />
NFS Client Architecture ........................................................................................................ 29-7<br />
NFS Client Setup Overview ...................................................................................................... 29-8<br />
Creating UID/GID Mappings.................................................................................................... 29-8<br />
Invoking the NFS-CONFIG Utility ....................................................................................... 29-9<br />
Displaying the Current Mapping List .................................................................................... 29-9<br />
Adding <strong>and</strong> Deleting Mappings ............................................................................................. 29-9<br />
Adding <strong>and</strong> Deleting Individual Mappings ........................................................................... 29-9<br />
Adding <strong>and</strong> Deleting NFS Groups ....................................................................................... 29-10<br />
Adding <strong>and</strong> Deleting Multiple Mappings ............................................................................ 29-10<br />
Mounting <strong>and</strong> Dismounting File Systems ............................................................................... 29-11<br />
Mounting a File System ....................................................................................................... 29-11<br />
Dismounting a File System .................................................................................................. 29-12<br />
Reloading the NFS Client........................................................................................................29-12<br />
Mounting File Systems During <strong>MultiNet</strong> Startup ................................................................... 29-12<br />
Creating ACPs (Ancillary Control <strong>Process</strong>es) for NFS Mounts ............................................. 29-13<br />
NFS Clients Using BACKUP.................................................................................................. 29-14<br />
Advanced NFS Client Mount Options .................................................................................... 29-15<br />
Chapter 30 Configuring the Secure Shell (SSH) v1 Server<br />
SSH1 <strong>and</strong> SSH2 Differences........................................................................................................ 30-1<br />
Restrictions:............................................................................................................................... 30-1<br />
Underst<strong>and</strong>ing the <strong>MultiNet</strong> Secure Shell Server ..................................................................... 30-2<br />
Servers <strong>and</strong> Clients .................................................................................................................... 30-2<br />
Security...................................................................................................................................... 30-2<br />
Break-in <strong>and</strong> Intrusion Detection .......................................................................................... 30-3<br />
Configuring SSHD Master for SSH1 ........................................................................................... 30-5<br />
OPTIONS .................................................................................................................................. 30-6<br />
Configuration File ..................................................................................................................... 30-7<br />
Starting the SSH Server for the First Time................................................................................... 30-9<br />
Configuring the SSH1 Server on a VMScluster with a Common System Disk...................... 30-11
Contents<br />
Changing SSH1 Configuration File After Enabling SSH1......................................................30-11<br />
Connection <strong>and</strong> Login <strong>Process</strong> ................................................................................................30-11<br />
FILES ...................................................................................................................................30-12<br />
AUTHORIZED_KEYS File Format .......................................................................................30-14<br />
RSA Key File Examples ......................................................................................................30-16<br />
SSH_KNOWN_HOSTS File Format ......................................................................................30-17<br />
Example ...............................................................................................................................30-17<br />
SSH Logicals ...........................................................................................................................30-17<br />
Chapter 31 Configuring the Secure Shell (SSH) Server v2<br />
SSH1 <strong>and</strong> SSH2 Differences ........................................................................................................31-1<br />
Restrictions: ...............................................................................................................................31-1<br />
Underst<strong>and</strong>ing the <strong>MultiNet</strong> Secure Shell Server......................................................................31-2<br />
Servers <strong>and</strong> Clients ....................................................................................................................31-2<br />
Expired Password H<strong>and</strong>ling.......................................................................................................31-3<br />
Break-In <strong>and</strong> Intrusion Detection ..............................................................................................31-4<br />
Configuring SSHD Master ...........................................................................................................31-6<br />
SSH2 Configuration File ...........................................................................................................31-7<br />
HostSpecificConfig Notes: ..................................................................................................31-22<br />
UserSpecificConfig Notes: ..................................................................................................31-23<br />
KEYBOARD-INTERACTIVE Notes: ................................................................................31-23<br />
ForwardACL Notes ..............................................................................................................31-24<br />
MappingFileFormat .............................................................................................................31-24<br />
Starting the SSH Server for the First Time.................................................................................31-27<br />
Configuring the SSH2 Server on a VMScluster with a Common System Disk ......................31-29<br />
Changing SSH2 Configuration File After Enabling SSH2......................................................31-29<br />
Connection <strong>and</strong> Login <strong>Process</strong> ................................................................................................31-29<br />
FILES ...................................................................................................................................31-30<br />
SSH2 AUTHORIZATION File Format...................................................................................31-32<br />
SSH2 Logicals .........................................................................................................................31-32<br />
SSH daemon Files....................................................................................................................31-34<br />
Chapter 32 Configuring IPSEC <strong>and</strong> SETKEY<br />
About the IP Security (IPSEC) Protocol ......................................................................................32-1<br />
Security Associations <strong>and</strong> Security Policies..............................................................................32-2<br />
IPSEC Configuration File..........................................................................................................32-3<br />
Configuration File Options ....................................................................................................32-3<br />
Configuration File Operation Arguments ..............................................................................32-3<br />
Algorithm ...............................................................................................................................32-5<br />
Configuration Encryption Algorithms ...................................................................................32-6<br />
Simple Configuration Example ..............................................................................................32-7<br />
xxix
Contents<br />
xxx<br />
The SETKEY Program.............................................................................................................. 32-8<br />
SETKEY Usage Examples .................................................................................................... 32-9<br />
IPSEC Configuration File Examples....................................................................................... 32-11<br />
Configuration Example: Host-to-Host Encryption .............................................................. 32-11<br />
Configuration Example: Host-to-Host Authentication ........................................................ 32-12<br />
Configuration Example: Host-to-Host Encryption+Authentication .................................... 32-13<br />
Conformance to St<strong>and</strong>ards <strong>and</strong> Interoperability...................................................................... 32-13<br />
Racoon Internet Key Exchange Daemon ................................................................................ 32-13<br />
Meta Syntax ......................................................................................................................... 32-14<br />
Example RACOON configuration file: ............................................................................... 32-22<br />
Example pre-shared key file: ............................................................................................... 32-22<br />
Restrictions.............................................................................................................................. 32-22<br />
Chapter 33 Intrusion Prevention System (IPS)<br />
IPS Operation ........................................................................................................................ 33-1<br />
Configuring IPS......................................................................................................................... 33-2<br />
Configuring <strong>Process</strong>-Specific Parameters ............................................................................. 33-2<br />
Determining the Correct FILTER_SERVER <strong>Process</strong> Quotas ............................................... 33-2<br />
Determining the Correct FILTER_SEVER Mailbox Size .................................................... 33-3<br />
Filter Server Main Configuration .......................................................................................... 33-3<br />
Filter Server Per-Component Configuration File .................................................................. 33-5<br />
Sample Main Configuration File ........................................................................................... 33-7<br />
Sample Component Configuration File ................................................................................. 33-9<br />
Configuring IPS for Paired Network Interfaces .................................................................. 33-12<br />
Filter Reporting via OPCOM <strong>and</strong> Log File ......................................................................... 33-13<br />
Filter Reporting via SNMP .................................................................................................. 33-14<br />
Correcting a Filter List ........................................................................................................ 33-15<br />
Configuring PMDF to use IPS on <strong>MultiNet</strong> ........................................................................ 33-16<br />
Controlling the Filter Server ................................................................................................ 33-16<br />
Filter Server Files ................................................................................................................ 33-18<br />
Instrumenting a User-Written Application with IPS ........................................................... 33-19<br />
Filter Server API .................................................................................................................. 33-20<br />
Chapter 34 Using <strong>MultiNet</strong> for an OpenVMS Cluster Interconnect<br />
Troubleshooting ..................................................................................................................... 34-2<br />
Appendix A Server Configuration Parameters<br />
SERVER-CONFIG Service Parameters........................................................................................ A-1<br />
Services Provided with <strong>MultiNet</strong> .................................................................................................. A-4<br />
Default Server Values.................................................................................................................... A-6
Appendix B DNSSEC<br />
Contents<br />
DNSSEC ........................................................................................................................................ B-1<br />
Generating Keys ......................................................................................................................... B-1<br />
Signing the Zone......................................................................................................................... B-2<br />
Configuring Servers.................................................................................................................... B-4<br />
DNSSEC, DYNAMIC ZONES, AND AUTOMATIC SIGNING.............................................. B-6<br />
Converting from insecure to secure ........................................................................................ B-6<br />
Dynamic DNS update method ................................................................................................ B-6<br />
Fully automatic zone signing .................................................................................................. B-7<br />
Private-type records ................................................................................................................ B-8<br />
DNSKEY rollovers ................................................................................................................. B-8<br />
Dynamic DNS update method ............................................................................................... B-8<br />
Automatic key rollovers .......................................................................................................... B-9<br />
NSEC3PARAM rollovers via UPDATE ................................................................................ B-9<br />
Converting from NSEC to NSEC3 ......................................................................................... B-9<br />
Converting from NSEC3 to NSEC ......................................................................................... B-9<br />
Converting from secure to insecure ........................................................................................ B-9<br />
Periodic re-signing .................................................................................................................. B-9<br />
NSEC3 <strong>and</strong> OPTOUT .......................................................................................................... B-10<br />
Dynamic Trust Anchor Management........................................................................................ B-10<br />
Validating Resolver .............................................................................................................. B-10<br />
Authoritative Server .............................................................................................................. B-10<br />
Reader’s Comments<br />
Index<br />
xxxi
Contents<br />
xxxii
Preface<br />
This guide is intended for OpenVMS system managers who need to configure <strong>MultiNet</strong>.<br />
To configure TCP/IP Services for DECnet Applications (formerly known as Phase/IP), refer to the<br />
TCP/IP Services for DECnet Applications <strong>Guide</strong> section of the <strong>MultiNet</strong> for OpenVMS Message,<br />
Logicals, <strong>and</strong> DECnet Applications book in this <strong>MultiNet</strong> documentation set.<br />
For information about basic TCP/IP concepts, see the <strong>Installation</strong> <strong>and</strong> Introduction section of this<br />
guide.<br />
Contents of this <strong>Guide</strong><br />
This guide covers the following topics:<br />
Chapter Contains Information About...<br />
Part I <strong>MultiNet</strong> for OpenVMS <strong>Installation</strong> <strong>and</strong> Introduction<br />
1 Installing <strong>and</strong> Upgrading <strong>MultiNet</strong> for OpenVMS<br />
2 Example Procedures<br />
3 Files That May be Added to Your System Disk<br />
4 Removing <strong>MultiNet</strong> from OpenVMS<br />
5 <strong>MultiNet</strong> Documentation <strong>and</strong> Online Help<br />
6 Introduction to <strong>MultiNet</strong> <strong>and</strong> TCP/IP Concepts<br />
7 Devices, Protocols, <strong>and</strong> <strong>MultiNet</strong> Internals<br />
8 Getting Additional Information<br />
Part II <strong>MultiNet</strong> for OpenVMS Administrator’s <strong>Guide</strong><br />
xxxiii
Preface<br />
xxxiv<br />
Chapter Contains Information About...<br />
9 Configuration Overview<br />
10 Host Table <strong>and</strong> DNS<br />
11 Establishing IP Connectivity<br />
12 Configuring <strong>MultiNet</strong> Services<br />
13 Configuring Network Routing<br />
14 Network Time Protocol (NTP)<br />
15 Configuring Electronic Mail<br />
16 Printer Configuration<br />
17 RMT Server <strong>and</strong> Client Configuration<br />
18 Configuring <strong>and</strong> Managing FTP<br />
19 DHCP Client<br />
20 Configuring the Font Server<br />
21 Configuring Remote Systems with RARP, BOOTP, <strong>and</strong> DHCP<br />
22 Managing the XDM Server<br />
23 Configuring the <strong>MultiNet</strong> SNMP Services<br />
24 Configuring <strong>MultiNet</strong> Kerberos Authentication Service<br />
25 X11-Gateway Configuration<br />
26 Configuring DECnet-over-IP Circuits<br />
27 Configuring the MultNet NFS Server<br />
28 Configuring the <strong>MultiNet</strong> NFS v3 Server<br />
29 Using the NFS Client<br />
30 Configuring the Secure Shell (SSH) v1 Server<br />
31 Configuring the Secure Shell (SSH) v2 Server<br />
32 Configuring IPSEC <strong>and</strong> SETKEY<br />
33 Intrusion Prevention System (IPS)<br />
Appendix A Server Configuration Parameters
Chapter Contains Information About...<br />
Appendix B DNSSEC<br />
Typographical Conventions<br />
Examples in this guide use the following conventions:<br />
Convention Example Meaning<br />
Bold text YES Represents user input in instructions or<br />
examples.<br />
Bold, uppercase Courier text RETURN Represents a key on your keyboard.<br />
Obtaining Technical Support<br />
Preface<br />
Bold, Courier text with a slash Ctrl/A Indicates you hold down the key labeled<br />
Control or Ctrl while simultaneously<br />
pressing another key; in this example, the "A"<br />
key.<br />
A vertical bar within braces { ON | OFF } Indicates a list of values permitted in<br />
comm<strong>and</strong>s. The vertical bar separates<br />
alternatives; do not type the vertical bar in the<br />
actual comm<strong>and</strong>.<br />
Italicized text file_name Represents a variable or placeholder;<br />
introduces new terminology or concepts;<br />
emphasizes something important; represents<br />
the title of a book or publication.<br />
Square brackets [FULL] Indicates optional choices; you can enter none<br />
of the choices, or as many as you like. When<br />
shown as part of an example, square brackets<br />
are actual characters you should type.<br />
Underscore or hyphen file_name or<br />
file-name<br />
Between words in comm<strong>and</strong>s, indicates the<br />
item is a single element.<br />
<strong>Process</strong> <strong>Software</strong> provides technical support if you have a current Maintenance Service Agreement.<br />
If you obtained <strong>MultiNet</strong> from an authorized distributor or partner, you receive your technical<br />
support directly from them.<br />
You can contact Technical Support by:<br />
• Sending electronic mail (see the section Sending Electronic Mail).<br />
• Calling the Technical Support Specialist (see the section Calling Technical Support).<br />
xxxv
Preface<br />
xxxvi<br />
• Fax a description of your problem to the Technical Support Group (see the section Contacting<br />
Technical Support by Fax).<br />
Before Contacting Technical Support<br />
Before you call, or send e-mail or a fax, please:<br />
1 Verify that your Maintenance Service Agreement is current.<br />
2 Read the online Release Notes, available either in BookReader format or in<br />
SYS$HELP:MULTINETnnn. RELEASE_NOTES (nnn) is the current <strong>MultiNet</strong> software<br />
version installed on your system.<br />
3 Have the following information available:<br />
• Your name<br />
• Your company name<br />
• Your e-mail address<br />
• Your voice <strong>and</strong> fax telephone numbers<br />
• Your Maintenance Agreement Number<br />
• OpenVMS architecture<br />
• OpenVMS version<br />
• <strong>MultiNet</strong> layered products <strong>and</strong> versions<br />
4 Have complete information about your configuration, error messages that appeared, <strong>and</strong> problem<br />
specifics.<br />
5 Be prepared to let an engineer connect to your system either with TELNET or by dialing in using<br />
a modem. Be prepared to give the engineer access to a privileged account to diagnose your<br />
problem.<br />
You can obtain information about your OpenVMS architecture, OpenVMS version, <strong>MultiNet</strong><br />
version, <strong>and</strong> layered products with the MULTINET SHOW /LICENSE comm<strong>and</strong>. For example:<br />
$ MULTINET SHOW /LICENSE<br />
<strong>Process</strong> <strong>Software</strong> <strong>MultiNet</strong> V5.4, VAXstation 4000-90, OpenVMS VAX V7.1<br />
In this example:<br />
• The machine or system architecture is VAX.<br />
• The OpenVMS version is V7.1.<br />
• The <strong>MultiNet</strong> version is V5.4.<br />
You can use the following table as a template to record the relevant information about your system.<br />
System Information<br />
Required Information<br />
Your name<br />
System Information<br />
Required Information
System Information<br />
Required Information<br />
Company name<br />
Your e-mail address<br />
Your voice <strong>and</strong> fax telephone numbers<br />
System architecture VAX | Alpha<br />
OpenVMS Version<br />
<strong>MultiNet</strong> optional software components:<br />
Sending Electronic Mail<br />
System Information<br />
Required Information<br />
- <strong>MultiNet</strong> NFS Client Installed? Yes | No<br />
- <strong>MultiNet</strong> NFS Server Installed? Yes | No<br />
- TCP/IP applications Installed? Yes | No<br />
- Online documentation Installed? Yes | No<br />
- <strong>MultiNet</strong> Programmer’s Kit Installed? Yes | No<br />
Preface<br />
For many questions, electronic mail is the preferred communication method. Technical support via<br />
electronic mail is available to customers with a current support. At the beginning of your mail<br />
message, include the information listed in the section Before Contacting Technical Support.<br />
Continue with the description of your situation <strong>and</strong> problem specifics. Include all relevant<br />
information to help your Technical Support Specialist process <strong>and</strong> track your electronic support<br />
request. Send electronic mail to support@process.com<br />
Electronic mail is answered Monday through Thursday from 8:30 a.m. to 7:00 p.m., <strong>and</strong> on Friday<br />
from 8:30 a.m. to 5:00 p.m. United States Eastern Time.<br />
Calling Technical Support<br />
For regular support issues, call 800-394-8700 or 508-628-5074 for support Monday through<br />
Thursday from 8:30 a.m. to 7:00 p.m., <strong>and</strong> on Friday from 8:30 a.m. to 5:00 p.m. United States<br />
Eastern Time.<br />
For our customers in North America with critical problems, an option for support 7 days per week,<br />
24 hours per day is available at an additional charge. Please contact your account representative for<br />
further details.<br />
Before calling, have available the information described in Before Contacting Technical Support.<br />
When you call, you will be connected to a Technical Support Specialist.<br />
Be prepared to discuss problem specifics with your Technical Support Specialist <strong>and</strong> to let that<br />
xxxvii
Preface<br />
xxxviii<br />
person connect to your system.<br />
If a Specialist is not immediately available, your call will be returned as soon as possible.<br />
Contacting Technical Support by Fax<br />
You can send fax transmissions directly to Technical Support at 508-879-0042.<br />
Before faxing comments or questions, complete the steps in Before Contacting Technical Support<br />
<strong>and</strong> include all your system information at the beginning of your fax message. Continue with the<br />
description of your situation <strong>and</strong> problem specifics. Include all relevant information to help your<br />
Technical Support Specialist process <strong>and</strong> track your fax support request.<br />
Faxed questions are answered Monday through Thursday from 8:30 a.m. to 7:00 p.m., <strong>and</strong> on<br />
Friday from 8:30 a.m. to 5:00 p.m. United States Eastern Time.<br />
Obtaining Online Help<br />
Extensive information about <strong>MultiNet</strong> is provided in the <strong>MultiNet</strong> help library. For more<br />
information, use the following comm<strong>and</strong>:<br />
$ HELP MULTINET<br />
<strong>MultiNet</strong> Frequently Asked Questions List<br />
You can obtain an updated list of frequently asked questions (FAQs) <strong>and</strong> answers about <strong>MultiNet</strong><br />
products from the <strong>Process</strong> <strong>Software</strong> home page located at http://www.process.com/techsupport/<br />
multinet.html.<br />
Accessing the <strong>MultiNet</strong> Public Mailing List<br />
<strong>Process</strong> <strong>Software</strong> maintains two public mailing lists for <strong>MultiNet</strong> customers:<br />
• Info-<strong>MultiNet</strong>@process.com<br />
• <strong>MultiNet</strong>-Announce@process.com<br />
The Info-<strong>MultiNet</strong>@process.com mailing list is a forum for discussion among <strong>MultiNet</strong> system<br />
managers <strong>and</strong> programmers. Questions <strong>and</strong> problems regarding <strong>MultiNet</strong> can be posted for a<br />
response by any of the subscribers. To subscribe to Info-<strong>MultiNet</strong>, send a mail message with the<br />
word “SUBSCRIBE” in the body to Info-<strong>MultiNet</strong>-request@process.com. The information<br />
exchanged over Info-<strong>MultiNet</strong> is also available via the USENET newsgroup vmsnet.networks.tcpip.multinet.<br />
You can retrieve the Info-<strong>MultiNet</strong> archives by anonymous FTP to ftp.multinet.process.com. The<br />
archives are located in the directory [.MAIL_ARCHIVES.INFO-MULTINET].<br />
You can also find the Info-<strong>MultiNet</strong> archives on the <strong>MultiNet</strong> consolidated CD-ROM in the<br />
directory: [.INFO-MULTINET]<br />
The <strong>MultiNet</strong>-Announce@process.com mailing list is a one-way communication (from <strong>Process</strong><br />
<strong>Software</strong> to you) used for the posting of announcements relating to <strong>MultiNet</strong> (patch releases,
product releases, etc.). To subscribe to <strong>MultiNet</strong>-Announce, send a mail message with the word<br />
“SUBSCRIBE” in the body to <strong>MultiNet</strong>-Announce-request@process.com.<br />
<strong>Process</strong> <strong>Software</strong> World Wide Web Server<br />
Preface<br />
Electronic support is provided through the <strong>Process</strong> <strong>Software</strong> World Wide Web server, which you<br />
can access with any World Wide Web browser; the URL is http://www.process.com (select<br />
Customer Support).<br />
Obtaining <strong>Software</strong> Patches Over the Internet<br />
<strong>Process</strong> <strong>Software</strong> provides software patches in save set <strong>and</strong> ZIP format on its anonymous FTP<br />
server, ftp.multinet.process.com. For the location of software patches, read the WELCOME file in<br />
the top-level anonymous directory. This file refers you to the directories containing software<br />
patches.<br />
To retrieve a software patch, enter the following comm<strong>and</strong>s:<br />
$ MULTINET FTP /USERNAME=ANONYMOUS/PASSWORD="emailaddress"<br />
FTP.MULTINET.PROCESS.COM<br />
A message welcoming you to the <strong>Process</strong> <strong>Software</strong> FTP directory appears next followed by the<br />
FTP prompt. Enter the following at the prompts:<br />
FTP>CD [PATCHES.MULTINETnnn]<br />
FTP>GET update_filename<br />
emailaddress is your e-mail address in the st<strong>and</strong>ard user@host format.<br />
nn is the version of <strong>MultiNet</strong> you want to transfer.<br />
update_filename is the name of the file you want to transfer.<br />
To transfer files from <strong>Process</strong> <strong>Software</strong> directly to an OpenVMS system, you can use the GET<br />
comm<strong>and</strong> without any other FTP comm<strong>and</strong>s. However, if you need to transfer a software patch<br />
through an intermediate non-OpenVMS system, use BINARY mode to transfer the files to <strong>and</strong><br />
from that system.<br />
In addition, if you are fetching the software patch in save set format, make sure the save set record<br />
size is 2048 bytes when you transfer the file from the intermediate system to your OpenVMS<br />
system:<br />
• If you use the GET comm<strong>and</strong> to download the file from the intermediate system, use the FTP<br />
RECORD-SIZE 2048 comm<strong>and</strong> before transferring the file.<br />
• If you use the PUT comm<strong>and</strong> to upload the file to your OpenVMS system, log into the<br />
intermediate system <strong>and</strong> use the FTP quote site rms recsize 2048 comm<strong>and</strong> before transferring<br />
the file.<br />
<strong>Process</strong> <strong>Software</strong> also supplies UNZIP utilities for OpenVMS VAX <strong>and</strong> Alpha for decompressing<br />
ZIP archives in the [CONTRIBUTED-SOFTWARE.APPLICATIONS.ZIP] directory. To use ZIP<br />
xxxix
Preface<br />
xl<br />
format kits, you need a copy of the UNZIP utility. The following example shows how to use the<br />
UNZIP utility, assuming you have copied the appropriate version of UNZIP.EXE to your current<br />
default directory.<br />
$ UNZIP := $SYS$DISK:[]UNZIP.EXE<br />
$ UNZIP filename.ZIP<br />
Use VMSINSTAL to upgrade your <strong>MultiNet</strong> system with the software patch.<br />
Documentation Comments<br />
Your comments about the information in this guide can help us improve the documentation. If you<br />
have corrections or suggestions for improvement, please let us know.<br />
Be as specific as possible about your comments: include the exact title of the document, version,<br />
date, <strong>and</strong> page references as appropriate.<br />
You can send your comments by e-mail to: techpubs@process.com or mail the completed form to:<br />
<strong>Process</strong> <strong>Software</strong><br />
959 Concord Street<br />
Framingham, MA 01701-4682<br />
Attention: Technical Publications<br />
You can also fax the form to us at 508-879-0042.<br />
Your comments about our documentation are very much appreciated.
PART I <strong>MultiNet</strong> <strong>Installation</strong> <strong>and</strong> Introduction<br />
Chapter 1 Installing <strong>and</strong> Upgrading <strong>MultiNet</strong> for OpenVMS<br />
Chapter 2 Example Procedures<br />
Chapter 3 Files That May be Added to Your System Disk<br />
Chapter 4 Removing <strong>MultiNet</strong> for OpenVMS<br />
Chapter 5 <strong>MultiNet</strong> Documentation <strong>and</strong> Online Help<br />
Chapter 6 Introduction to <strong>MultiNet</strong> <strong>and</strong> TCP/IP Concepts<br />
Chapter 7 Devices, Protocols, <strong>and</strong> <strong>MultiNet</strong> Internals<br />
Chapter 8 Getting Additional Information<br />
Part I Managing Hosts
Part I Managing Hosts
Chapter 1<br />
Installing <strong>and</strong> Upgrading <strong>MultiNet</strong> for OpenVMS<br />
Table 1-1 lists the steps required to install <strong>MultiNet</strong>. As indicated by the footnotes, you need only<br />
perform some of the steps if you are installing this version of <strong>MultiNet</strong> for the first time; you can<br />
skip some steps if you have already installed this version of <strong>MultiNet</strong> on one VMScluster node of<br />
the same architecture (VAX, Alpha or I64). The sections in this chapter provide detailed<br />
information about each step.<br />
Table 1-1 <strong>Installation</strong> Steps<br />
Step Read the Section...<br />
1 Step 1: Gather Information for the <strong>Installation</strong><br />
2 Step 2: Read the Release Notes<br />
3 Step 3: Check OpenVMS <strong>and</strong> Versions<br />
4 Step 4: Use the Correct Media<br />
5 Step 5: Back up Your System Disk<br />
6 Step 6: Reserve Sufficient Disk Space<br />
7 Step 7: Log on as SYSTEM<br />
8 Step 8: Ask Other Users to Log Off<br />
9 Step 9: Update System Parameters<br />
10 Step 10: Check the Location of the DCLTABLES.EXE File<br />
11 Step 11: Review the <strong>MultiNet</strong> Directory Layout<br />
12 Step 12: Load the PAK (Product Authorization Key)<br />
13 Step 13: Run VMSINSTAL<br />
14 Step 14: Establish an Initial Configuration<br />
1-1
Installing <strong>and</strong> Upgrading <strong>MultiNet</strong> for OpenVMS<br />
1-2<br />
Table 1-1 <strong>Installation</strong> Steps (Continued)<br />
Step Read the Section...<br />
15 Step 15: Configure the IP Transport Over the St<strong>and</strong>ard Network Interface<br />
16 Step 16: Start the New Version of <strong>MultiNet</strong><br />
17 Step 17: Modify the System Startup Comm<strong>and</strong> Procedure<br />
18 Step 18: Configure Services<br />
19 Step 19: Add <strong>and</strong> Update User Exits<br />
20 Step 20: Install <strong>MultiNet</strong> Comm<strong>and</strong>s in the DCLTABLES.EXE File<br />
21 Step 21: Set Up the Online Documentation<br />
Configuration procedures allow you to configure IP connectivity using one HP LAN interface.<br />
However, you can upgrade <strong>MultiNet</strong> without changing your existing configuration. As a result, if<br />
you upgrade <strong>MultiNet</strong> on one node in a VMScluster environment, you only need to reboot other<br />
nodes of the same architecture to have the upgrade take effect.<br />
Step 1: Gather Information for the <strong>Installation</strong><br />
During installation, you have the option of configuring IP connectivity for the first network device<br />
the configuration procedure finds. If you plan to perform this initial configuration, gather the<br />
required information before running VMSINSTALL. Table 1-2 lists the information you must<br />
gather. (The table also provides a convenient place for you to record this information so you may<br />
refer to it later during the installation.)<br />
If the default configuration is not appropriate for your system, you can configure <strong>MultiNet</strong> after<br />
completing the installation.<br />
Note! If you are upgrading a system already running <strong>MultiNet</strong>, you do not have to configure anything
unless you want to change the existing configuration.<br />
Table 1-2 IP Transport Parameter Checklist<br />
Installing <strong>and</strong> Upgrading <strong>MultiNet</strong> for OpenVMS<br />
Parameter<br />
Name Description Your Value<br />
Internet<br />
host name<br />
The name by which your system will be known. If you plan<br />
to use DNS to resolve host names, you must use the fully<br />
qualified host name supplied by your network administrator<br />
or Internet access provider (for example,<br />
BIGBOOTE.FLOWERS.COM). Note: It is generally a good<br />
idea to use the well-known name for this host; other systems<br />
will rely on DNS or host tables to resolve your host name to<br />
the appropriate IP address.<br />
IP address The dotted-decimal representation of your system’s IP<br />
address. For example, the address 191.87.34.22 is a class B<br />
IP address in which 191.87 is the network number <strong>and</strong> 34.22<br />
is the host number. Obtain your IP address from your<br />
network administrator or Internet access provider.<br />
Subnet<br />
mask<br />
Default<br />
route<br />
The dotted-decimal representation of a 32-bit mask that<br />
determines the network portion of your IP address to allow<br />
your network to be subdivided into multiple network<br />
segments.<br />
For example: If your IP address is 191.87.34.22, <strong>and</strong> your<br />
subnet mask is 255.255.255.0, your network number is<br />
191.87.34 instead of 191.87 (the network number implied by<br />
the class B IP address), <strong>and</strong> your host number is 22 instead<br />
of 34.22. Obtain your subnet mask from your network<br />
administrator or Internet access provider.<br />
The dotted-decimal representation of the IP address of the<br />
router to which IP packets are sent when there is no route to<br />
the destination host or network in your system’s routing<br />
table. The default route must have the same network number<br />
as your system. For example: If your IP address is<br />
191.87.34.22, <strong>and</strong> your subnet mask is 255.255.255.0,<br />
191.87.34.15 can be a valid default route, but 191.87.57.15<br />
(on a different subnet) cannot be. Obtain the default route<br />
from your network administrator or Internet access provider.<br />
1-3
Installing <strong>and</strong> Upgrading <strong>MultiNet</strong> for OpenVMS<br />
Step 2: Read the Release Notes<br />
1-4<br />
Table 1-2 IP Transport Parameter Checklist (Continued)<br />
Parameter<br />
Name Description Your Value<br />
Use DNS The answer to the question, "Does your system have access<br />
to the Internet to take advantage of DNS (Domain Name<br />
System) to resolve host names to IP addresses?". Ask your<br />
network administrator or Internet access provider. If your<br />
system does not have access to the Internet, you will not be<br />
able to resolve host names after completing the installation<br />
until you configure the DNS server or host tables on your<br />
system.<br />
Timezone The st<strong>and</strong>ard abbreviation for your local timezone (For<br />
example: EST, CST, MST, or PST). Enter your local<br />
timezone, or, if your system clock is not in the local<br />
timezone, enter the timezone your system clock uses. When<br />
prompted for your timezone, type a question mark (?) to see<br />
a list of valid timezone abbreviations. Switching between<br />
St<strong>and</strong>ard Time <strong>and</strong> Daylight Savings Time occurs<br />
automatically.<br />
The Release Notes contain important information about this release that may not be published in<br />
this guide or in the other publications in the <strong>MultiNet</strong> documentation set. You can display or print<br />
the Release Notes during the installation.<br />
After the installation, you can find the Release Notes in the file<br />
SYS$HELP:MULTINET054.RELEASE_NOTES.<br />
The same information is also available on CD-ROM distributions:<br />
([MULTINET054]MULTINET_RELEASE_NOTES.TXT).<br />
Step 3: Check OpenVMS <strong>and</strong> Versions<br />
Ensure your system is running VAX/VMS V5.5-2 or later, OpenVMS VAX V6.1 or later,<br />
OpenVMS Alpha V6.2 or later, or OpenVMS I64 V8.2 or later. If you are not running one of these<br />
operating system versions, you must upgrade before installing <strong>MultiNet</strong>.<br />
If you are upgrading from an earlier release of <strong>MultiNet</strong>, ensure the existing version of <strong>MultiNet</strong> is<br />
V3.1 or later; you cannot upgrade <strong>MultiNet</strong> directly from V3.0 or earlier versions.<br />
To check your current <strong>MultiNet</strong> version:<br />
$ TYPE MULTINET:MULTINET_VERSION.<br />
Yes | No<br />
If you are running a version of <strong>MultiNet</strong> earlier than V3.1, refer to your old <strong>MultiNet</strong> for OpenVMS<br />
<strong>Installation</strong> <strong>and</strong> Administrator’s <strong>Guide</strong>s for instructions on removing <strong>MultiNet</strong> from your system.
Then, install this release of <strong>MultiNet</strong> as a new installation, not an upgrade.<br />
Step 4: Use the Correct Media<br />
Installing <strong>and</strong> Upgrading <strong>MultiNet</strong> for OpenVMS<br />
Ensure you have the proper distribution medium: <strong>MultiNet</strong> is distributed on two CD-ROMs: one<br />
that contains the distribution for VAX <strong>and</strong> Alpha, <strong>and</strong> one that contains the distribution for I64.<br />
All magnetic tape media contain only the OpenVMS/VAX savesets.<br />
Note! If you have already installed on another VMScluster node of the same architecture, you do not<br />
need to install from the distribution medium again.<br />
Step 5: Back up Your System Disk<br />
Make a backup copy of your system disk using the OpenVMS BACKUP (or st<strong>and</strong>alone BACKUP)<br />
utility.<br />
Step 6: Reserve Sufficient Disk Space<br />
If you are installing <strong>MultiNet</strong> for the first time, ensure you have sufficient disk space.<br />
To find out how much free space is available on your system disk, use the following DCL<br />
comm<strong>and</strong>:<br />
$ SHOW DEVICE SYS$SYSDEVICE<br />
The information displayed includes the number of free blocks on the disk. The disk space<br />
requirements for VAX, Alpha <strong>and</strong> I64 versions of <strong>MultiNet</strong> have been moved to the <strong>MultiNet</strong> V5.4<br />
Release Notes.<br />
Step 7: Log on as SYSTEM<br />
The installation procedure copies files onto the system disk (or another disk you specify). You must<br />
be logged in as user name SYSTEM (or as another fully privileged user) to perform the installation.<br />
Step 8: Ask Other Users to Log Off<br />
Make sure other users log off the system before you start the installation or before you modify any<br />
system parameters. You may need to reboot.<br />
Step 9: Update System Parameters<br />
Before installing <strong>MultiNet</strong>, you may need to update various system parameters.. 1<br />
1 If you are installing <strong>MultiNet</strong> on your system for the first time, modify<br />
SYS$SYSTEM:MODPARAMS.DAT as follows:<br />
1. If you are using host tables instead of DNS, to ensure they load properly, check the size of the<br />
NETWORK_DATABASE. <strong>and</strong> HOSTTBLUK.DAT files, <strong>and</strong> increase the ADD_GBLPAGES statement value by<br />
1 for each disk block used by these files, <strong>and</strong> increase the ADD_GBLSECTIONS value by 2, one for each file.<br />
1-5
Installing <strong>and</strong> Upgrading <strong>MultiNet</strong> for OpenVMS<br />
1-6<br />
• On VAX systems, add the following lines to SYS$SYSTEM:MODPARAMS.DAT:<br />
MIN_INTSTKPAGES = 10<br />
MIN_CHANNELCNT = 200<br />
ADD_SPTREQ = 1700<br />
ADD_GBLSECTIONS = 20<br />
ADD_GBLPAGES = 340<br />
• On OpenVMS Alpha systems, add the following lines to<br />
SYS$SYSTEM:MODPARAMS.DAT:<br />
MIN_CHANNELCNT = 200<br />
ADD_GBLSECTIONS = 20<br />
ADD_GBLPAGES = 1550<br />
• On OpenVMS on Integrity systems, add the following lines to<br />
SYS$SYSTEM:MODPARAMS.DAT:<br />
MIN_GH_EXEC_DATA = 1496<br />
MIN_GH_EXEC_CODE = 4183<br />
2 Execute SYS$UPDATE:AUTOGEN.COM to generate a new system parameter file, <strong>and</strong> reboot<br />
your system to activate the new values. Refer to your OpenVMS system management<br />
documentation for information about AUTOGEN.<br />
$ MCR SYSMAN<br />
SYSMAN>SET ENVIRONMENT /CLUSTER<br />
SYSMAN>SET PROFILE /PRIVILEGE-CMKRNL<br />
SYSMAN>PARAMETER USE ACTIVE<br />
SYSMAN>PARAMETER SET LGI_CALLOUTS 0<br />
SYSMAN>PARAMETER WRITE ACTIVE<br />
SYSMAN>EXIT<br />
Step 10: Check the Location of the DCLTABLES.EXE File<br />
Before installing <strong>MultiNet</strong>, ensure the DCLTABLES.EXE file to which you want the MULTINET<br />
verb added resides in the SYS$COMMON:[SYSLIB] directory. VMSINSTAL requires you to do<br />
this because it will not update copies of DCLTABLES.EXE in a system-specific directory.<br />
Step 11: Review the <strong>MultiNet</strong> Directory Layout<br />
Unless you specify otherwise, the <strong>MultiNet</strong> installation procedure creates a top-level [MULTINET]<br />
directory on your system disk to hold all the <strong>MultiNet</strong> files. Depending on the platform on which<br />
you are installing, a [.AXP_COMMON], [.VAX_COMMON] or [.I64_COMMON] subdirectory is<br />
created in the [MULTINET] directory. As <strong>MultiNet</strong> is installed on each node, a node- or systemspecific<br />
directory is also created in the [MULTINET] directory. System-specific <strong>MultiNet</strong> files are<br />
stored in the node-specific directories, <strong>and</strong> architecture-common files are stored in either the<br />
[.AXP_COMMON], [.VAX_COMMON] or [.I64_COMMON] subdirectory.
Installing <strong>and</strong> Upgrading <strong>MultiNet</strong> for OpenVMS<br />
Note! If you are upgrading from <strong>MultiNet</strong> V4.0 or earlier, you can choose to upgrade in the old<br />
location, or install in a new location.<br />
If you are upgrading an existing directory structure, that structure is retained.<br />
While each of [MULTINET.AXP_COMMON], [MULTINET.VAX_COMMON] <strong>and</strong><br />
[MULTINET.I64_COMMON] can exist in a multi-architecture cluster in the same directory<br />
structure, common configuration files will only be shared by similar architecture nodes.<br />
Unless you specify otherwise, the system-specific directory name is determined by the first of the<br />
following values that exist:<br />
• The SYSGEN parameter SCSNODE<br />
• The logical name SYS$NODE<br />
• The logical name SYS$TOPSYS<br />
The system-specific directory is created in the [MULTINET] top-level directory.<br />
Two directories are created under each system-specific directory (as shown in Figure 1-1):<br />
MULTINET.DIR Contains node-specific files.<br />
SYSCOMMON.DIR A file entry that points to the architecture-specific common directory.<br />
(Subsequent node-specific directories are created similarly.)<br />
<strong>MultiNet</strong> relies on the logical name MULTINET_COMMON_ROOT to locate shared files, <strong>and</strong> on<br />
the logical name MULTINET_ROOT to locate system-specific files. MULTINET_ROOT is a<br />
search list of the system-specific directory <strong>and</strong> the MULTINET_COMMON_ROOT directory. The<br />
<strong>MultiNet</strong> startup comm<strong>and</strong> procedure, START_MULTINET.COM, automatically defines these<br />
logical names.<br />
1-7
Installing <strong>and</strong> Upgrading <strong>MultiNet</strong> for OpenVMS<br />
1-8<br />
Figure 1-1 The <strong>MultiNet</strong> Directory Structure<br />
[MULTINET]<br />
[.AXP_COMMON]
$ @MULTINET:PAK-DELETE<br />
Installing <strong>and</strong> Upgrading <strong>MultiNet</strong> for OpenVMS<br />
Note! Delete only PAKs for versions issued by TGV or Cisco, or for Version 3.5 issued by <strong>Process</strong><br />
<strong>Software</strong>.<br />
To register your new PAK:<br />
1 Start the VMSLICENSE utility with the comm<strong>and</strong>:<br />
$ @SYS$UPDATE:VMSLICENSE<br />
2 Delete any existing PAKs, if you need to do so. See the section Step 12: Load the PAK (Product<br />
Authorization Key) for guidelines about deleting PAKs.<br />
If you are upgrading from a previous version of <strong>MultiNet</strong>, be sure to complete the upgrade<br />
before you reboot your system.<br />
Note! The LMF AMEND option does not work properly <strong>and</strong> should not be used to alter the state of the<br />
<strong>MultiNet</strong> PAK.<br />
3 Register your new PAK. Answer YES when prompted whether you want it loaded.<br />
4 Exit the VMSLICENSE utility when you have registered your new PAK.<br />
Step 13: Run VMSINSTAL<br />
Before beginning the installation, gather the information described in the section Step 1: Gather<br />
Information for the <strong>Installation</strong><br />
When you install the <strong>MultiNet</strong> Consolidated Distribution, you have the option of installing all<br />
included components.<br />
Note! If you are installing <strong>MultiNet</strong> on one node in a homogeneous VMScluster environment, <strong>and</strong><br />
have already installed <strong>MultiNet</strong> on another node of the same architecture, you do not need to<br />
run VMSINSTAL; all required files are already in place.<br />
In this procedure, default values appear in square brackets ([default]). To accept the default value,<br />
press RETURN. To abort the installation at any time, press Ctrl/Y.<br />
1 Load your distribution media.<br />
2 Start the VMSINSTAL utility:<br />
$ @SYS$UPDATE:VMSINSTAL product -<br />
_$ loc [OPTIONS N,AWD=device:[directory]]<br />
product is the name of the <strong>MultiNet</strong> product:<br />
• For VAX <strong>and</strong> Alpha, the name is MULTINET054.<br />
• For I64, the name is MULTINET_I64054<br />
loc is the device/directory where the installation kit is stored. If you are installing <strong>MultiNet</strong> from:<br />
• CD-ROM, then mount the CD <strong>and</strong> specify the full path name of the installation save set<br />
directory (such as DKB0:[MULTINET054]).<br />
1-9
Installing <strong>and</strong> Upgrading <strong>MultiNet</strong> for OpenVMS<br />
1-10<br />
• Your login directory, use the logical name SYS$LOGIN:.<br />
• TK50 tape, specify the tape device name (for example, MUA0:).<br />
Use the OPTIONS N parameters if you want to be prompted to view or print the Release Notes.<br />
Use the OPTIONS AWD parameters if there is insufficient space on your system disk to<br />
accommodate the temporary files created during installation. See the Hewlett-Packard VMS<br />
System Manager's Manual for more details about AWD.<br />
Messages similar to the following will appear. The exact wording depends on your system's<br />
operating system <strong>and</strong> architecture:<br />
OpenVMS AXP <strong>Software</strong> Product <strong>Installation</strong> Procedure V8.2<br />
It is 08-MAY-2005 at 11:10.<br />
Enter a question mark (?) at any time for help.<br />
3 Ensure your system is in the proper state. If you are not logged in as SYSTEM (or as another<br />
fully privileged user), or if any user processes are still running, you are alerted before being<br />
asked if you want to continue.<br />
Note! Do not continue the installation until you are logged in using a fully-privileged user name such<br />
as SYSTEM, <strong>and</strong> all other users have logged off. You do not, however, need to disable DECnet<br />
to install <strong>MultiNet</strong>.<br />
Any such messages are followed by the prompt:<br />
* Do you want to continue anyway [NO]?<br />
When you are ready, enter YES. If you enter NO, VMSINSTAL stops <strong>and</strong> control returns to<br />
DCL.<br />
4 Make sure you have a reliable copy of your system disk. The installation copies files onto your<br />
system disk. The following prompt appears:<br />
* Are you satisfied with the backup of your system disk [YES]?<br />
If your system disk has not been backed up <strong>and</strong> you would like to back it up now, enter NO. The<br />
installation procedure terminates <strong>and</strong> the DCL prompt appears. After you have made a backup<br />
copy of your system disk, restart the installation procedure.<br />
If your system disk is already backed-up, press RETURN or enter YES.<br />
5 Indicate whether the media is ready, if necessary.<br />
If you are installing from CD-ROM, the installation begins immediately. If you are installing<br />
<strong>MultiNet</strong> from a TK50 cartridge, you are prompted to load the first volume.<br />
Load the distribution media into the drive, <strong>and</strong> enter YES when you are ready to continue. The<br />
following message appears:<br />
%MOUNT-I-MOUNTED, MLTNET mounted on _location:<br />
VMSINSTAL then begins the <strong>MultiNet</strong> installation.
Installing <strong>and</strong> Upgrading <strong>MultiNet</strong> for OpenVMS<br />
6 <strong>Process</strong> the Consolidated Release Notes, if necessary. If you specified the parameters<br />
OPTIONS N when you started VMSINSTAL in Step 2, you are asked if you want to print or<br />
display the Release Notes. Respond as desired. For an example of printing the Release Notes, see<br />
the section Step 2: Read the Release Notes "Sample <strong>Installation</strong> Dialog".<br />
7 Read the Terms <strong>and</strong> Conditions displayed in the <strong>MultiNet</strong> Restricted Rights notice.<br />
8 Ensure proper specification of the <strong>MultiNet</strong> directory structure. If you are upgrading a running<br />
version of <strong>MultiNet</strong>, the logical names MULTINET_ROOT <strong>and</strong> MULTINET_COMMON_ROOT<br />
will be displayed for verification. If you are upgrading from a version of <strong>MultiNet</strong> prior to V4.0,<br />
the display will have the following form:<br />
The logicals MULTINET_ROOT <strong>and</strong> MULTINET_COMMON_ROOT are already defined,<br />
with the following values:<br />
disk:[SYSn.][MULTINET]<br />
disk:[SYSn.SYSCOMMON.][MULTINET]<br />
If you are upgrading <strong>MultiNet</strong> V4.0 or later, the display may be of this form:<br />
The logicals MULTINET_ROOT <strong>and</strong> MULTINET_COMMON_ROOT are already defined,<br />
with the following values:<br />
disk:[MULTINET.nodename.][MULTINET]<br />
disk:[MULTINET.nodename.SYSCOMMON][MULTINET]<br />
You are then asked whether you want to upgrade:<br />
You may either upgrade the version of <strong>MultiNet</strong> installed in this<br />
location, or install a fresh copy of <strong>MultiNet</strong> in another location.<br />
* Do you want to upgrade your <strong>MultiNet</strong> installation [YES] ?<br />
If you reply NO, or if this is a new installation, you are prompted for an installation location <strong>and</strong><br />
a name for the system-specific directory:<br />
* Where do you want to install <strong>MultiNet</strong> [SYS$SYSDEVICE:[MULTINET]]:<br />
* What do you want to call the system-specific directory [AXP01]:<br />
CAUTION! If you respond NO in Step 8, <strong>and</strong> install <strong>MultiNet</strong> in a new location, your new installation<br />
will not contain any of your original <strong>MultiNet</strong> configuration files.<br />
Several lines of copyright notices appear, then you are prompted for each component<br />
installation.<br />
9 Specify the software components you want to install.<br />
Enter YES for each software component you want to install, <strong>and</strong> NO for each one you do not<br />
want on your system (previously installed components will be removed). Include all <strong>MultiNet</strong><br />
products you want to run on any node in your VMScluster environment.<br />
1-11
Installing <strong>and</strong> Upgrading <strong>MultiNet</strong> for OpenVMS<br />
1-12<br />
10Verify your selections. VMSINSTAL next lists the components to be installed <strong>and</strong> the software<br />
components, if any, to be removed from your system during installation. You are asked if you<br />
want to revise the list of software components to be installed or removed:<br />
* Would you like to change your selections [NO]?<br />
To change the list of software components to install, enter YES, <strong>and</strong> repeat Step 9. To accept the<br />
list, enter NO.<br />
11 Decide whether to install user comm<strong>and</strong>s:<br />
* Do you want to install the user comm<strong>and</strong>s in DCLTABLES [YES]?<br />
This prompt lets you choose whether or not to install additional <strong>MultiNet</strong> DCL comm<strong>and</strong>s in the<br />
DCLTABLES.EXE file. Doing this allows you to issue the following comm<strong>and</strong>s without the<br />
"MULTINET" prefix:<br />
If you are installing <strong>MultiNet</strong> for evaluation, or if you have comm<strong>and</strong>s with these same names<br />
from another vendor, enter NO. You can still access the <strong>MultiNet</strong> utilities by preceding the<br />
comm<strong>and</strong> with the keyword MULTINET, or by creating symbols such as:<br />
$ TELNET :== MULTINET TELNET<br />
Otherwise, enter YES to install the user comm<strong>and</strong>s in the DCLTABLES.EXE file.<br />
Note! You can install the <strong>MultiNet</strong> user comm<strong>and</strong>s in the DCLTABLES.EXE file after completing the<br />
installation.<br />
If you have not installed your <strong>MultiNet</strong> license PAK, you are warned that you do not have the<br />
required license. You can still continue to install <strong>MultiNet</strong>. To continue the process, enter YES<br />
at the following prompt:<br />
* Do you want to continue the installation anyway [NO]?<br />
You must register the PAK before you can start <strong>and</strong> use <strong>MultiNet</strong>. When you finish the<br />
installation <strong>and</strong> configuration, run VMSLICENSE to register the PAK as shown in the section<br />
Load the PAK.<br />
12Decide whether to purge files:<br />
* Do you want to purge files replaced by this installation [YES]?<br />
If you want VMSINSTAL to purge files replaced by this version of the software, press RETURN<br />
or enter YES. If you do not want the replaced files to be purged, enter NO.<br />
Note! Even if you choose to purge files, the installation procedure does not purge configuration files.<br />
CAUTION! If you upgrade <strong>MultiNet</strong> in a VMScluster environment, do not purge the old files during<br />
installation. Instead, wait until you have rebooted each node in the cluster.<br />
13Decide whether to configure software components. If you are installing the TCP/IP applications,<br />
you are asked if you want to configure those software components after installation. Enter YES<br />
if you are installing <strong>MultiNet</strong> for the first time, or if you need to reconfigure.
Installing <strong>and</strong> Upgrading <strong>MultiNet</strong> for OpenVMS<br />
The installation continues with no additional prompts.<br />
If this is the first time you have installed <strong>MultiNet</strong>, the installation procedure creates the<br />
<strong>MultiNet</strong> directories <strong>and</strong> copies the files from the distribution kit into those directories.<br />
VMSINSTAL also optionally installs the <strong>MultiNet</strong> user comm<strong>and</strong>s in<br />
SYS$LIBRARY:DCLTABLES.EXE. The MULTINET verb is always installed in your<br />
DCLTABLES.EXE file.<br />
If you have previously installed <strong>MultiNet</strong> on your system, the installation procedure deletes old<br />
copies of files replaced during this installation. A series of %VMSINSTAL-I- <strong>and</strong><br />
%MULTINET-I- informational messages appear during these operations to indicate which files<br />
are being installed, merged, or removed, <strong>and</strong> the save sets from which they came.<br />
If you chose to configure the TCP/IP applications, respond to the prompts with the information<br />
you gathered in the section Step 1: Gather Information for the <strong>Installation</strong>.<br />
The configuration procedure then compiles the ASCII network, host, <strong>and</strong> service configuration<br />
files into binary format <strong>and</strong> creates or updates various configuration files. As it performs these<br />
operations, it prints a number of informational messages.<br />
Upon completion, the installation procedure print messages similar to the following (the<br />
messages may vary with the operating system version running on your system):<br />
<strong>Installation</strong> of MULTINET V5.4 completed at 12:15<br />
Adding history entry in VMI$ROOT:[SYSUPD]VMSINSTAL.HISTORY<br />
Creating installation data file: VMI$ROOT:[SYSUPD]MULTINET054.VMI_DATA<br />
VMSINSTAL procedure done at 12:15<br />
$<br />
<strong>MultiNet</strong> is now installed.<br />
Step 14: Establish an Initial Configuration<br />
When you upgrade from an earlier version of <strong>MultiNet</strong>, all existing configuration settings are<br />
preserved unless you intentionally change them during installation.<br />
If you are installing <strong>MultiNet</strong> for the first time, however, you have the opportunity during<br />
installation to configure the <strong>MultiNet</strong> IP transport over one st<strong>and</strong>ard network interface simply by<br />
responding to a series of prompts.<br />
If you have already installed <strong>MultiNet</strong> on one VMScluster node <strong>and</strong> are now installing <strong>MultiNet</strong> on<br />
another VMScluster node of the same architecture <strong>and</strong> operating system, or if you chose not to<br />
configure <strong>MultiNet</strong> during the installation, you can configure the <strong>MultiNet</strong> IP transport over the<br />
st<strong>and</strong>ard interface using the CONFIGURE.COM comm<strong>and</strong> procedure. Gather the required<br />
configuration information before configuring. See the section Step 1: Gather Information for the<br />
<strong>Installation</strong>.<br />
CAUTION! If your system does not have one of the st<strong>and</strong>ard network interfaces, do not use<br />
CONFIGURE.COM to establish connectivity. If you do not use the comm<strong>and</strong> procedure,<br />
you will need to manually enter configuration information. For details on establishing<br />
connectivity with all supported network interfaces, refer to the <strong>MultiNet</strong> for OpenVMS<br />
<strong>Installation</strong> <strong>and</strong> <strong>Administrator's</strong> <strong>Guide</strong>.<br />
1-13
Installing <strong>and</strong> Upgrading <strong>MultiNet</strong> for OpenVMS<br />
Step 15: Configure the IP Transport Over the St<strong>and</strong>ard Network Interface<br />
1-14<br />
Follow these steps to configure the <strong>MultiNet</strong> IP transport over the st<strong>and</strong>ard network interface:<br />
1 Set your default directory to the architecture-specific common directory,<br />
device:[MULTINET.arch_COMMON.MULTINET], device is the device you chose in Step 8 of<br />
the installation procedure, <strong>and</strong> arch is the architecture (either VAX, AXP, or I64).<br />
2 The <strong>MultiNet</strong> configuration comm<strong>and</strong> procedure CONFIGURE.COM provides a default<br />
location for the new node-specific directories <strong>and</strong> prompts you for correction. It will create the<br />
new directories <strong>and</strong> logical names to get your system up <strong>and</strong> running on the local subnet by<br />
prompting you for the information in your configuration checklist (see the section Step 1: Gather<br />
Information for the <strong>Installation</strong>). To run the comm<strong>and</strong> procedure, type:<br />
$ @CONFIGURE<br />
Step 16: Start the New Version of <strong>MultiNet</strong><br />
If you installed <strong>MultiNet</strong> on a system already running <strong>MultiNet</strong>, perform these four steps after<br />
completing the installation to ensure its success; <strong>MultiNet</strong> then starts automatically:<br />
1 Recompile the host lookup table: 1<br />
$ MULTINET HOST_TABLE COMPILE<br />
2 Reboot your system to load the new kernel.<br />
3 Run the <strong>MultiNet</strong> CheckOut Utility.<br />
$ MULTINET CHECK<br />
4 Rectify any problems found.<br />
If you have successfully installed <strong>and</strong> configured <strong>MultiNet</strong> for the first time on your system, as<br />
described in the previous sections, you are ready to start <strong>MultiNet</strong>. You do not have to reboot if<br />
your system has never run any TCP/IP stack; however, you may need to reboot after running<br />
AUTOGEN to activate any system parameter changes you made.<br />
Successful configuration of <strong>MultiNet</strong> defines the logical name MULTINET <strong>and</strong> creates the file<br />
MULTINET:START_MULTINET.COM. However, if you have rebooted, the MULTINET logical<br />
may not be defined. Ensure the logical name is defined. Enter:<br />
$ SHOW LOGICAL MULTINET<br />
Also ensure the file exists. Enter:<br />
$ DIRECTORY MULTINET:START_MULTINET.COM<br />
If the logical name <strong>and</strong> the file are not present, check for installation errors <strong>and</strong> configuration<br />
problems, <strong>and</strong> correct them before proceeding. If they are not present because you rebooted, then<br />
1. Recompiling the host lookup table is only necessary on the first node of a given architecture in a VMScluster<br />
environment.
add the following line to your system startup comm<strong>and</strong> procedure:<br />
Installing <strong>and</strong> Upgrading <strong>MultiNet</strong> for OpenVMS<br />
$ @SYS$SYSDEVICE:[MULTINET.HYDRA.MULTINET]START_MULTINET<br />
To locate the startup comm<strong>and</strong> procedure, enter the following:<br />
$ DIR SYS$SYSDEVICE:[000000...]START_MULTINET.COM<br />
Directory SYS$SYSDEVICE:MULTINET.HYDRA.MULTINET]<br />
START_MULTINET.COM;1<br />
Use the following comm<strong>and</strong>s to start <strong>MultiNet</strong>:<br />
$ REPLY/ENABLE=NETWORK/TEMPORARY<br />
$ @MULTINET:START_MULTINET<br />
You may use the MULTINET logical name here, as it is defined by the configuration procedures.<br />
Be sure your system startup comm<strong>and</strong> procedure refers to the disk <strong>and</strong> directory where you<br />
installed <strong>MultiNet</strong>.<br />
Note! Regardless of where you installed <strong>MultiNet</strong>, you do not have to define the MULTINET logical<br />
name — this is done automatically in the first lines of the START_MULTINET.COM comm<strong>and</strong><br />
procedure.<br />
Step 17: Modify the System Startup Comm<strong>and</strong> Procedure<br />
If you are upgrading from <strong>MultiNet</strong> V3.n to V5.4, but want to retain the old directory structure —<br />
or you are upgrading a <strong>MultiNet</strong> V4.n system that is already using the new directory structure<br />
introduced with <strong>MultiNet</strong> V4.0 Rev A — you do not need to make any changes to your system<br />
startup comm<strong>and</strong> procedure.<br />
If you are upgrading from <strong>MultiNet</strong> V3.n to V5.4, <strong>and</strong> chose to adopt the new directory structure,<br />
modify the existing START_MULTINET.COM call in your system startup comm<strong>and</strong> procedure.<br />
Edit the procedure as follows:<br />
$ @device:[directory.nodename.MULTINET]START_MULTINET.COM<br />
device, directory, <strong>and</strong> nodename correspond to those you chose in Step 8 of the installation<br />
procedure.<br />
If you are installing <strong>MultiNet</strong> for the first time, add the following line to your system startup<br />
comm<strong>and</strong> procedure:<br />
$ @device:[directory.nodename.MULTINET]START_MULTINET.COM<br />
device, directory, <strong>and</strong> nodename correspond to those you chose in Step 8 of the installation<br />
procedure. 1<br />
Note! The START_MULTINET.COM file will not exist until you configure <strong>MultiNet</strong><br />
1. If the name of your system is HOBBES, <strong>and</strong> you chose the default values for your V4.0 directory structure, the<br />
startup comm<strong>and</strong> will read<br />
$ @SYS$SYSDEVICE:[MULTINET.HOBBES.MULTINET]START_MULTINET.COM<br />
1-15
Installing <strong>and</strong> Upgrading <strong>MultiNet</strong> for OpenVMS<br />
1-16<br />
If you are also running DECnet, ensure the call to the <strong>MultiNet</strong> startup procedure is placed after the<br />
call to SYS$MANAGER:STARTNET.COM.<br />
Step 18: Configure Services<br />
Once you have established IP, you can configure services <strong>and</strong> other components. Table 1-3<br />
indicates where to locate documentation on configuring st<strong>and</strong>ard services <strong>and</strong> the optional<br />
components you can install.<br />
Note! Additional information about these services may be found in the Release Notes.<br />
Table 1-3 Where to Find Information about Configuring Services<br />
To configure this service... See this <strong>MultiNet</strong> publication<br />
GATED (IP Routing) <strong>Installation</strong> <strong>and</strong> <strong>Administrator's</strong> <strong>Guide</strong><br />
DNS (Domain Name System) <strong>Installation</strong> <strong>and</strong> <strong>Administrator's</strong> <strong>Guide</strong><br />
DHCP (Dynamic Host Configuration Protocol) <strong>Installation</strong> <strong>and</strong> Administrator’s <strong>Guide</strong><br />
NTP (Network Time Protocol) <strong>Installation</strong> <strong>and</strong> <strong>Administrator's</strong> <strong>Guide</strong><br />
SMTP (Simple Mail Transfer Protocol) <strong>Installation</strong> <strong>and</strong> <strong>Administrator's</strong> <strong>Guide</strong><br />
LPD (Line Printer Daemon) printing services <strong>Installation</strong> <strong>and</strong> <strong>Administrator's</strong> <strong>Guide</strong><br />
RMT (Remote Tape) Services <strong>Installation</strong> <strong>and</strong> <strong>Administrator's</strong> <strong>Guide</strong><br />
FTP (File Transfer Protocol) Server <strong>Installation</strong> <strong>and</strong> <strong>Administrator's</strong> <strong>Guide</strong><br />
XDM (X Display Manager) <strong>Installation</strong> <strong>and</strong> <strong>Administrator's</strong> <strong>Guide</strong><br />
Font Server <strong>Installation</strong> <strong>and</strong> <strong>Administrator's</strong> <strong>Guide</strong><br />
SNMP (Simple Network Management Protocol) <strong>Installation</strong> <strong>and</strong> <strong>Administrator's</strong> <strong>Guide</strong><br />
Kerberos Authentication <strong>Installation</strong> <strong>and</strong> <strong>Administrator's</strong> <strong>Guide</strong><br />
NFS (Network File System) Client <strong>Installation</strong> <strong>and</strong> <strong>Administrator's</strong> <strong>Guide</strong><br />
NFS (Network File System) Server <strong>Installation</strong> <strong>and</strong> <strong>Administrator's</strong> <strong>Guide</strong><br />
X11 Gateway <strong>Installation</strong> <strong>and</strong> <strong>Administrator's</strong> <strong>Guide</strong><br />
DECnet-over-IP <strong>Installation</strong> <strong>and</strong> <strong>Administrator's</strong> <strong>Guide</strong><br />
Secure Shell (SSH) Server<br />
Secure Shell (SSH) Client<br />
<strong>Installation</strong> <strong>and</strong> Administrator’s <strong>Guide</strong><br />
User’s <strong>Guide</strong><br />
TCP/IP Services for DECnet Applications Messages, Logicals, <strong>and</strong> TCP/IP Services<br />
for DECnet Applications
Step 19: Add <strong>and</strong> Update User Exits<br />
Installing <strong>and</strong> Upgrading <strong>MultiNet</strong> for OpenVMS<br />
<strong>MultiNet</strong> allows you to customize some functions through the use of user exits. If you are<br />
upgrading <strong>MultiNet</strong> <strong>and</strong> have modified any user exits prior to this installation, merge your<br />
modifications into the user exits replaced during the installation. For more information about<br />
customizing user exits, see the <strong>MultiNet</strong> for OpenVMS <strong>Installation</strong> <strong>and</strong> Administrator’s <strong>Guide</strong>.<br />
Step 20: Install <strong>MultiNet</strong> Comm<strong>and</strong>s in the DCLTABLES.EXE File<br />
If you did not install the <strong>MultiNet</strong> user comm<strong>and</strong>s in the DCLTABLES.EXE file during<br />
installation, you can install them manually with the following comm<strong>and</strong>s:<br />
$ SET COMMAND /TABLES=SYS$COMMON:[SYSLIB]DCLTABLES -<br />
_$ /OUTPUT=SYS$COMMON:[SYSLIB]DCLTABLES MULTINET:USER.CLD<br />
$ INSTALL REPLACE SYS$COMMON:[SYSLIB]DCLTABLES<br />
Step 21: Set Up the Online Documentation<br />
The <strong>MultiNet</strong> documentation set is available on the product CD in PDF <strong>and</strong> HTML formats.<br />
1.9.1.1 PDF Format<br />
The <strong>MultiNet</strong> documentation set has the following PDF files:<br />
<strong>Installation</strong> & Administrator MULTINET_ADMIN_GUIDE.PDF<br />
Administrator Reference MULTINET_ADMIN_REFERENCE.PDF<br />
Messages, Logicals, & DECnet Apps MULTINET_MESSAGES.PDF<br />
Programmer Reference MULTINET_PROGRAMMERS_REFERENCE.PDF<br />
User <strong>Guide</strong> MULTINET_USER_GUIDE.PDF<br />
<strong>MultiNet</strong> Master Index MULTINET_MASTER_INDEX.PDF<br />
The PDF format is readable from a PC, a VAX, Alpha or I64 system. There is a PDF reader on the<br />
CD for VAX <strong>and</strong> AXP platforms.<br />
• Use Acrobat Reader to read the PDF files from a PC. Your PC must have 386 architecture or<br />
later to use Acrobat Reader. You can get Acrobat Reader from Adobe Systems website:<br />
www.adobe.com. It is free!<br />
• Use the XPDF Reader (found in the [XPDF] directory) to read the PDF files from a VAX or<br />
Alpha system. The [XPDF.AXP] directory contains the Alpha architecture reader XPDF.EXE.<br />
The [XPDF.VAX] directory contains the VAX architecture reader XPDF.EXE.<br />
Note! The XPDF Reader does not work on a PC.<br />
PCs running the Windows or NT operating system cannot read <strong>Process</strong> <strong>Software</strong>'s CD. You cannot<br />
load files from the <strong>MultiNet</strong> CD directly to a PC. Load them to your VAX, Alpha or I64 machine,<br />
1-17
Installing <strong>and</strong> Upgrading <strong>MultiNet</strong> for OpenVMS<br />
1-18<br />
then transfer them to your PC.<br />
We suggest using FTP to transfer these files. The following is an example using MS-DOS:<br />
C:> ftp node<br />
ftp> binary<br />
ftp> mget cd:*.pdf<br />
In addition, <strong>Process</strong> <strong>Software</strong> has included LYNX, the character-cell web browser for VMS. It is in<br />
the [LYNX] directory.<br />
Using Acrobat Reader<br />
To read the PDF files using Acrobat Reader:<br />
1 Double click Acrobat Exchange.<br />
2 Choose Open from the File menu.<br />
3 Select the .pdf file you want to open.<br />
4 Use the menu bar at the top of the screen to navigate the document or click a Table of Contents<br />
entry (on the left) to go directly to that information.<br />
Note! The binocular icon opens search functions. The magnifying glass icon enlarges the text <strong>and</strong><br />
illustrations.<br />
Using XPDF<br />
Thanks to Derek B. Noonburg for letting us download his XPDF application.<br />
Note! You need a three-button mouse to use XPDF.<br />
At the DCL prompt from the directory in which XPDF.EXE is stored (VAX/Alpha only), do the<br />
following:<br />
1 Type RUN XPDF. The XPDF screen appears.<br />
2 Position the arrow on any of the icons (except the ? icon) on the bottom of the screen.<br />
3 Press the right mouse button to display choices.<br />
4 Select OPEN to display the list of PDF files.<br />
5 Select the PDF file you want <strong>and</strong> click OPEN to read the file.<br />
6 Use the icons on the bottom of the screen to search for the information you want.<br />
To view the online help for XPDF:<br />
1 Position the cursor on the question mark (?) icon.<br />
2 Press the left mouse button to open the online help.<br />
HTML Format<br />
Online documentation is available as HTML files you can use either with a PC browser or with a
Installing <strong>and</strong> Upgrading <strong>MultiNet</strong> for OpenVMS<br />
character cell browser. The documentation files <strong>and</strong> their contents are listed next.<br />
Table 1-4 <strong>MultiNet</strong> HTML Documentation Files<br />
Document Directory Title<br />
<strong>Installation</strong> <strong>and</strong><br />
Administrator’s<br />
<strong>Guide</strong><br />
HTML File<br />
Names Contents<br />
ADMINISTRATOR CH1.HTM Installing <strong>and</strong> Upgrading <strong>MultiNet</strong><br />
for OpenVMS<br />
CH2.HTM Example Procedures<br />
CH3.HTM Files that may be Added to your<br />
System Disk<br />
CH4.HTM Removing <strong>MultiNet</strong> for OpenVMS<br />
CH5.HTM <strong>MultiNet</strong> Documentation <strong>and</strong><br />
Online Help<br />
CH6.HTM Introduction to <strong>MultiNet</strong> <strong>and</strong> TCP/<br />
IP Concepts<br />
CH7.HTM Devices, Protocols, <strong>and</strong> <strong>MultiNet</strong><br />
Internals<br />
CH8.HTM Getting Additional Information<br />
CH9.HTM Configuration Overview<br />
CH10.HTM Host Table <strong>and</strong> DNS<br />
CH11.HTM Establishing IP Connectivity<br />
CH12.HTM Configuring <strong>MultiNet</strong> Services<br />
CH13.HTM Configuring Network Routing<br />
CH14.HTM Network Time Protocol (NTP)<br />
CH15.HTM Configuring Electronic Mail<br />
CH16.HTM Printer Configuration<br />
CH17.HTM RMT Server <strong>and</strong> Client<br />
CH18.HTM Configuring <strong>and</strong> Managing FTP<br />
CH19.HTM DHCP Client<br />
CH20.HTM Configuring the Font Server<br />
1-19
Installing <strong>and</strong> Upgrading <strong>MultiNet</strong> for OpenVMS<br />
1-20<br />
Table 1-4 <strong>MultiNet</strong> HTML Documentation Files (Continued)<br />
Document Directory Title<br />
HTML File<br />
Names Contents<br />
CH21.HTM Remote Systems with RARP,<br />
BOOTP, <strong>and</strong> DHCP<br />
CH22.HTM Managing XDM<br />
CH23.HTM Configuring <strong>MultiNet</strong> SNMP<br />
Agents<br />
CH24.HTM Configuring <strong>MultiNet</strong> Kerberos<br />
Authentication Service<br />
CH25.HTM X11-Gateway Configuration<br />
CH26.HTM Configuring DECnet-over-IP<br />
Circuits<br />
CH27.HTM Configuring the <strong>MultiNet</strong> NFS<br />
Server<br />
CH28.HTM <strong>MultiNet</strong> NFS v3 Server<br />
CH29.HTM Using the NFS Client<br />
CH30.HTM Configuring the Secure Shell<br />
(SSH) v1 Server<br />
CH31.HTM Configuring the Secure Shell<br />
(SSH) v2 Server<br />
CH32.HTM Configuring IPSEC <strong>and</strong> SETKEY<br />
CH33.HTM Intrusion Prevention Service<br />
CH34.HTM Using <strong>MultiNet</strong> in an IP Cluster<br />
APPA.HTM Server Configuration Parameters<br />
APPB.HTM DNSSEC<br />
User's <strong>Guide</strong> USER_GUIDE CH1.HTM Exploring Your Network<br />
Environment<br />
CH2.HTM Sending <strong>and</strong> Receiving Electronic<br />
Mail<br />
CH3.HTM Using Kerberos Authentication
Table 1-4 <strong>MultiNet</strong> HTML Documentation Files (Continued)<br />
Document Directory Title<br />
<strong>Administrator's</strong><br />
Reference<br />
Installing <strong>and</strong> Upgrading <strong>MultiNet</strong> for OpenVMS<br />
HTML File<br />
Names Contents<br />
CH4.HTM Accessing Remote Systems with<br />
the RSHELL, RLOGIN, <strong>and</strong><br />
TELNET Utilities<br />
CH5.HTM Remote File Access with the RCP,<br />
FTP, <strong>and</strong> TFTP Utilities<br />
CH6.HTM Using DECwindows with <strong>MultiNet</strong><br />
CH7.HTM Accessing Remote Systems with<br />
the Secure Shell (SSH) Utilities<br />
CH8.HTM Secure File Transfer<br />
APPA.HTM DCL User Comm<strong>and</strong>s<br />
APPB.HTM FTP Comm<strong>and</strong> Reference<br />
APPC.HTM TELNET Comm<strong>and</strong> Reference<br />
APPD.HTM TFTP Comm<strong>and</strong> Reference<br />
ADMIN_REF CH1.HTM <strong>MultiNet</strong> DCL Comm<strong>and</strong><br />
Reference<br />
CH2.HTM DECNET-CONFIG Comm<strong>and</strong><br />
Reference<br />
CH3.HTM MAIL-CONFIG Comm<strong>and</strong><br />
Reference<br />
CH4.HTM NET-CONFIG Comm<strong>and</strong><br />
Reference<br />
CH5.HTM NFS-CONFIG Comm<strong>and</strong><br />
Reference<br />
CH6.HTM NTYCP Comm<strong>and</strong> Reference<br />
CH7.HTM ACCESS-CONFIG Comm<strong>and</strong><br />
Reference<br />
CH8.HTM PRINTER-CONFIG Comm<strong>and</strong><br />
Reference<br />
CH9.HTM SERVER-CONFIG Comm<strong>and</strong><br />
Reference<br />
1-21
Installing <strong>and</strong> Upgrading <strong>MultiNet</strong> for OpenVMS<br />
1-22<br />
Table 1-4 <strong>MultiNet</strong> HTML Documentation Files (Continued)<br />
Document Directory Title<br />
Programmer’s<br />
Reference<br />
Messages,<br />
Logicals, <strong>and</strong><br />
DECnet Apps<br />
HTML File<br />
Names Contents<br />
PROGRAMMER CH1.HTM <strong>MultiNet</strong> Programming Tutorial<br />
CH2.HTM Socket Library Functions<br />
CH3.HTM QIO Interface<br />
CH4.HTM SNMP Extensible Agent API<br />
Routines<br />
CH5.HTM RPC Fundamentals<br />
CH6.HTM Building Distributed Applications<br />
with RPC<br />
CH7.HTM RPCGEN Compiler<br />
CH8.HTM RPC RTL Management Routines<br />
CH9.HTM RPC RLT Client Routines<br />
CH10.HTM RPC RTL Port Mapper Routines<br />
CH11.HTM RPC RTL Server Routines<br />
CH12.HTM RPT RTL XDR Routines<br />
MESSAGES CH1.HTM Troubleshooting<br />
CH2.HTM <strong>MultiNet</strong> Messages<br />
CH3.HTM <strong>MultiNet</strong> Logicals<br />
CH4.HTM Utility Return Codes<br />
CH5.HTM Error Codes<br />
CH6.HTM What is DECnet Applications?<br />
CH7.HTM Configuring DECnet Applications<br />
CH8.HTM NOT-CONFIG Comm<strong>and</strong>s
Installing <strong>and</strong> Upgrading <strong>MultiNet</strong> for OpenVMS<br />
1-23
Installing <strong>and</strong> Upgrading <strong>MultiNet</strong> for OpenVMS<br />
1-24
Chapter 2<br />
Example Procedures<br />
This chapter contains example procedures that show the prompts you encounter when registering<br />
the PAK <strong>and</strong> during the installation procedure. The user responses, which appear in bold typeface,<br />
are provided only to illustrate how you may respond. Do not use these responses for your<br />
installation! Use the configuration information you gathered in Step 1 of Chapter 1.<br />
Installing a License PAK<br />
This section presents an example dialog showing how to use the VMSLICENSE REGISTER<br />
option with a PAK (Product Authorization Key).<br />
The values shown in Example 2-1 Registering <strong>and</strong> Loading a PAK are only examples. When you<br />
use the VMSLICENSE REGISTER option, use the actual values provided with your PAK.<br />
Note! Refer to Section 1.12, "Load the PAK (Product Authorization Key)," for the procedure to use for<br />
registering the PAK on software upgrades.<br />
Refer to the Hewlett-Packard VMS License Management Utility Manual for more information<br />
about PAKs.<br />
Example 2-1 Registering <strong>and</strong> Loading a PAK<br />
$ @SYS$UPDATE:VMSLICENSE<br />
VMS License Management Utility Options:<br />
1. REGISTER a Product Authorization Key<br />
2. AMEND an existing Product Authorization Key<br />
3. CANCEL an existing Product Authorization Key<br />
4. LIST the Product Authorization Keys<br />
5. MODIFY an existing Product Authorization Key<br />
6. DISABLE an existing Product Authorization Key<br />
7. DELETE an existing Product Authorization Key<br />
8. COPY an existing Product Authorization Key<br />
9. MOVE an existing Product Authorization Key<br />
10. ENABLE an existing Product Authorization Key<br />
2-1
Example Procedures<br />
2-2<br />
11. SHOW the licenses loaded on this node<br />
12. SHOW the unit requirements for this node<br />
99. EXIT this procedure<br />
Type '?' at any prompt for a description of the information requested.<br />
Press Ctrl/Z at any prompt to exit this procedure.<br />
Enter one of the above choices [1] 1<br />
Do you have your Product Authorization Key? [YES] RETURN<br />
Use the REGISTER option to add a new license to a license database. A<br />
Product Authorization Key (PAK) provides the product name <strong>and</strong> information<br />
you need to register the license. You must enter all the information<br />
provided by your PAK exactly as it appears.<br />
Issuer [DEC]:PROCESS SOFTWARE<br />
Authorization Number []:B-400-17904<br />
Product Name [ ]: MULTINET<br />
Producer [DEC]:PROCESS SOFTWARE<br />
Number of Units []:100<br />
Version []:<br />
Product Release Date []:23-MAR-2004<br />
Key Termination Date []RETURN<br />
Availability Table Code []F|<br />
Activity Table Code []RETURN<br />
Key Options []NO_SHARE<br />
This Product Authorization Key (PAK) has been provided with the NO_SHARE<br />
option. If it is to be used by a node in a cluster, this PAK must be<br />
restricted to a specific node.<br />
If this PAK is to be used by a st<strong>and</strong>alone system, answer NO to the<br />
following question.<br />
Is this PAK restricted to a cluster member node? [YES]: RETURN<br />
Note: For the majority of systems, the SCS node name is the same as the<br />
DECnet node name.<br />
Node this PAK is restricted to (SCS Node name) [] MIGUEL<br />
Product Token [] AB-400-17904<br />
Hardware-Id [] RETURN<br />
Checksum [] 4-IPMA-KEIL-PCOP-HNNJ<br />
Here is a list of the license information just entered:<br />
Issuer: PROCESS SOFTWARE<br />
Authorization: B-400-17904<br />
Producer: PROCESS SOFTWARE<br />
Units: 100
Release Date: 23-MAR-2004<br />
Version:<br />
Termination Date:<br />
Availability: F<br />
Activity:<br />
Options: NO_SHARE<br />
Token: AB-400-17904<br />
Hardware ID:<br />
Checksum: 4-IPMA-KEIL-PCOP-HNNJ<br />
This authorization key is restricted to: MIGUEL<br />
Is that correct? [YES] RETURN<br />
Do you want to LOAD this license on this system? [YES] RETURN<br />
VMS License Management Utility Options:<br />
1. REGISTER a Product Authorization Key<br />
2. AMEND an existing Product Authorization Key<br />
3. CANCEL an existing Product Authorization Key<br />
4. LIST the Product Authorization Keys<br />
5. MODIFY an existing Product Authorization Key<br />
6. DISABLE an existing Product Authorization Key<br />
7. DELETE an existing Product Authorization Key<br />
8. COPY an existing Product Authorization Key<br />
9. MOVE an existing Product Authorization Key<br />
10.ENABLE an existing Product Authorization Key<br />
11.SHOW the licenses loaded on this node<br />
12.SHOW the unit requirements for this node<br />
99.EXIT this procedure<br />
Example Procedures<br />
Type '?' at any prompt for a description of the information requested.<br />
Press Ctrl/Z at any prompt to exit this procedure.<br />
Enter one of the above choices [1] 99<br />
Printing the Consolidated Release Notes<br />
Example 2-2 How to Print the <strong>MultiNet</strong> Release Notes shows how to print the Release Notes.<br />
Note! The VMSINSTALL kit has first been copied to the directory DUA0:[SWDIST].<br />
Example 2-2 How to Print the <strong>MultiNet</strong> Release Notes<br />
$ @SYS$UPDATE:VMSINSTAL MULTINET054 DUA0:[SWDIST] OPTIONS N<br />
OpenVMS AXP <strong>Software</strong> Product <strong>Installation</strong> Procedure V8.2<br />
It is 08-MAR-2005 at 11:10.<br />
Enter a question mark (?) at any time for help.<br />
* Are you satisfied with the backup of your system disk [YES]? RETURN<br />
The following products will be processed:<br />
2-3
Example Procedures<br />
2-4<br />
MULTINET V5.4<br />
Beginning installation of MULTINET V5.4 at 11:10<br />
%VMSINSTAL-I-RESTORE, Restoring product save set A ...<br />
Release notes included with this kit are always copied to SYS$HELP.<br />
Additional Release Notes Options:<br />
1. Display release notes<br />
2. Print release notes<br />
3. Both 1 <strong>and</strong> 2<br />
4. None of the above<br />
* Select option [2]: RETURN<br />
* Queue name [SYS$PRINT]: SYS$PRINT<br />
Job MULTINET054 (queue SYS$PRINT, entry 1023) started on LPA0:<br />
* Do you want to continue the installation [NO] ? RETURN<br />
%VMSINSTAL-I-RELMOVED, The product’s release notes have been successfully<br />
moved to SYS$HELP.<br />
VMSINSTAL procedure done at 11:11<br />
Sample <strong>Installation</strong> Dialog<br />
This section contains two examples of <strong>MultiNet</strong> installation procedures:<br />
• Example 2-3 Sample New <strong>Installation</strong> shows a new installation from CD-ROM. (Some<br />
messages may vary with the operating system version.)<br />
• Example 2-4 Sample Upgrade <strong>Installation</strong> shows how to upgrade from an older version of<br />
<strong>MultiNet</strong> to the current release. (Some messages may vary with the operating system version.)<br />
You must reboot your system after upgrading the software.<br />
Note! The values shown in the dialogs are samples <strong>and</strong> for illustration purposes only! When you<br />
install <strong>MultiNet</strong>, use the actual values appropriate for your system.<br />
Example 2-3 Sample New <strong>Installation</strong><br />
$ @SYS$UPDATE:VMSINSTAL MULTINET054 DKB300:[MULTINET054]<br />
OpenVMS VAX <strong>Software</strong> Product <strong>Installation</strong> Procedure V7.1<br />
It is 2-NOV-2011 at 14:29<br />
Enter a question mark (?) at any time for help.<br />
* Are you satisfied with the backup of your system disk [YES] ? RETURN<br />
The following products will be processed:<br />
MULTINET V5.4<br />
Beginning installation of MULTINET V5.4 at 14:30<br />
%VMSINSTAL-I-RESTORE, Restoring product save set A ...<br />
%VMSINSTAL-I-RELMOVED, Product’s release notes have been moved to<br />
SYS$HELP.<br />
* Where do you want to install <strong>MultiNet</strong> [SYS$SYSDEVICE:[MULTINET]]:RETURN<br />
* What do you want to call the system-specific directory [HOBBES]: RETURN<br />
<strong>MultiNet</strong> (R)<br />
ALL RIGHTS RESERVED USER THE COPYRIGHT LAWS OF THE UNITED STATES
Example Procedures<br />
This licensed material is the valuable property of <strong>Process</strong> <strong>Software</strong>. Its<br />
use, duplication, or disclosure is subject to the restrictions set forth<br />
in the License Agreement.<br />
Other use, duplication or disclosure, unless expressly provided for in the<br />
license agreement, is unlawful.<br />
Installing <strong>MultiNet</strong> V5.4 Rev A<br />
* Do you want to install the TCP/IP applications [YES]? RETURN<br />
* Do you want to install the SSH software [YES]? RETURN<br />
* Do you want to install the NFS Client software [YES]? RETURN<br />
* Do you want to install the NFS Server software [YES]? RETURN<br />
* Do you want to install the online documentation [YES]? RETURN<br />
The PDF documentation requires 30,000 blocks.<br />
* Do you want to install the include <strong>and</strong> library files [YES]? RETURN<br />
The <strong>MultiNet</strong> base networking software will be installed with these<br />
selected components:<br />
* TCP/IP applications<br />
* SSH<br />
* NFS client<br />
* NFS server<br />
* Online documentation<br />
* Include <strong>and</strong> library files<br />
* Would you like to change your selection [NO]? RETURN<br />
* Do you want to install the user comm<strong>and</strong>s in DCLTABLES [YES]? RETURN<br />
* Do you want to purge files replaced by this installation [YES]? RETURN<br />
* Configure <strong>MultiNet</strong> TCP/IP after installation [NO]? YES<br />
%VMSINSTAL-I-...This product creates...MU$SPECIFIC_ROOT:[MULTINET].<br />
%VMSINSTAL-I-...This product creates...MU$SPECIFIC_ROOT:[MULTINET.SPOOL].<br />
%VMSINSTAL-I-...This product creates...MU$SPECIFIC_ROOT:[MULTINET.HELP].<br />
%VMSINSTAL-I-...This product creates...<br />
MU$SPECIFIC_ROOT:[MULTINET.LOADABLE_IMAGES].<br />
%VMSINSTAL-I-...This product creates...MU$COMMON_ROOT:[MULTINET].<br />
%VMSINSTAL-I-...This product creates...MU$COMMON_ROOT:[MULTINET.SPOOL].<br />
%VMSINSTAL-I-...This product creates...MU$COMMON_ROOT:[MULTINET.HELP].<br />
%VMSINSTAL-I-...This product creates...<br />
MU$COMMON_ROOT:[MULTINET.LOADABLE_IMAGES].<br />
The installation will now proceed with no further questions.<br />
%VMSINSTAL-I-RESTORE, Restoring product save set B...<br />
%VMSINSTAL-I-RESTORE, Restoring product save set C...<br />
%MULTINET-I-INSTALLING, Installing <strong>MultiNet</strong> base files<br />
%VMSINSTAL-I-RESTORE, Restoring product save set E...<br />
%MULTINET-I-INSTALLING, Installing <strong>MultiNet</strong> driver files<br />
%VMSINSTAL-I-RESTORE, Restoring product save set G...<br />
%VMSINSTAL-I-RESTORE, Restoring product save set H...<br />
%MULTINET-I-INSTALLING, Installing <strong>MultiNet</strong> TCP/IP application files<br />
%VMSINSTAL-I-RESTORE, Restoring product save set J...<br />
%VMSINSTAL-I-RESTORE, Restoring product save set K...<br />
%MULTINET-I-INSTALLING, Installing <strong>MultiNet</strong> NFS files<br />
2-5
Example Procedures<br />
2-6<br />
%VMSINSTAL-I-RESTORE, Restoring product save set M...<br />
%VMSINSTAL-I-RESTORE, Restoring product save set P...<br />
%MULTINET-I-INSTALLING, Installing the online documentation files<br />
%VMSINSTAL-I-...This product creates...MU$SPECIFIC_ROOT:[MULTINET.DECW$BOOK].<br />
%VMSINSTAL-I-...This product creates...MU$COMMON_ROOT:[MULTINET.DECW$BOOK].<br />
%VMSINSTAL-I-RESTORE, Restoring product save set Q...<br />
%VMSINSTAL-I-RESTORE, Restoring product save set R...<br />
%MULTINET-I-INSTALLING, Installing the include <strong>and</strong> library files<br />
%VMSINSTAL-I-...This product creates...MU$SPECIFIC_ROOT:[MULTINET.INCLUDE].<br />
%VMSINSTAL-I-...This product creates...MU$SPECIFIC_ROOT:[MULTINET.INCLUDE.ARPA].<br />
%VMSINSTAL-I-...This product creates...MU$SPECIFIC_ROOT:[MULTINET.INCLUDE.NET].<br />
%VMSINSTAL-I-...This product creates...<br />
MU$SPECIFIC_ROOT:[MULTINET.INCLUDE.NETINET].<br />
%VMSINSTAL-I-...This product creates...MU$SPECIFIC_ROOT:[MULTINET.INCLUDE.NETNS].<br />
%VMSINSTAL-I-...This product creates...<br />
MU$SPECIFIC_ROOT:[MULTINET.INCLUDE.NETWARE].<br />
%VMSINSTAL-I-...This product creates...MU$SPECIFIC_ROOT:[MULTINET.INCLUDE.NFS].<br />
%VMSINSTAL-I-...This product creates...MU$SPECIFIC_ROOT:[MULTINET.INCLUDE.RPC].<br />
%VMSINSTAL-I-...This product creates...MU$SPECIFIC_ROOT:[MULTINET.INCLUDE.SYS].<br />
%VMSINSTAL-I-...This product creates...MU$SPECIFIC_ROOT:[MULTINET.INCLUDE.VMS].<br />
%VMSINSTAL-I-...This product creates...MU$SPECIFIC_ROOT:[MULTINET.LIBRARY].<br />
%VMSINSTAL-I-...This product creates...MU$SPECIFIC_ROOT:[MULTINET.EXAMPLES].<br />
%VMSINSTAL-I-...This product creates...MU$COMMON_ROOT:[MULTINET.INCLUDE].<br />
%VMSINSTAL-I-...This product creates...MU$COMMON_ROOT:[MULTINET.INCLUDE.ARPA].<br />
%VMSINSTAL-I-...This product creates...MU$COMMON_ROOT:[MULTINET.INCLUDE.NET].<br />
%VMSINSTAL-I-...This product creates...MU$COMMON_ROOT:[MULTINET.INCLUDE.NETINET].<br />
%VMSINSTAL-I-...This product creates...MU$COMMON_ROOT:[MULTINET.INCLUDE.NETNS].<br />
%VMSINSTAL-I-...This product creates...MU$COMMON_ROOT:[MULTINET.INCLUDE.NETWARE].<br />
%VMSINSTAL-I-...This product creates...MU$COMMON_ROOT:[MULTINET.INCLUDE.NFS].<br />
%VMSINSTAL-I-...This product creates...MU$COMMON_ROOT:[MULTINET.INCLUDE.RPC].<br />
%VMSINSTAL-I-...This product creates...MU$COMMON_ROOT:[MULTINET.INCLUDE.SYS].<br />
%VMSINSTAL-I-...This product creates...MU$COMMON_ROOT:[MULTINET.INCLUDE.VMS].<br />
%VMSINSTAL-I-...This product creates...MU$COMMON_ROOT:[MULTINET.LIBRARY].<br />
%VMSINSTAL-I-...This product creates...MU$COMMON_ROOT:[MULTINET.EXAMPLES].<br />
%MULTINET-I-INSTALLING, Installing <strong>MultiNet</strong> HELP library<br />
%MULTINET-I-DELETING, Deleting obsolete <strong>MultiNet</strong> files<br />
% VMSINSTAL-I-MOVEFILES, Files will now be moved to their target<br />
directories...<br />
* System Specific directory name: [DKA500:[MULTINET.HOBBES]]: RETURN<br />
* Enter your Internet host name: HOBBES.FLOWERS.COM<br />
* Enter the Internet (IP) Address for interface EWA0: 192.87.34.22<br />
* Enter the Subnet mask for interface EWA0 (optional): 255.255.255.0<br />
Configure other network devices after installation using the $ MULTINET<br />
CONFIGURE utility.<br />
* Enter the Internet (IP) Address of your default route (optional):<br />
192.87.34.1<br />
* Use Domain Nameservice instead of host tables [YES]? RETURN<br />
* Enter your local timezone: EST<br />
To have <strong>MultiNet</strong> start automatically when your system boots, add the
following comm<strong>and</strong> to your system startup procedure:<br />
$ @DISK$HOBBES:[MULTINET.HOBBES.MULTINET]START_MULTINET.COM<br />
Example Procedures<br />
<strong>MultiNet</strong> Network Configuration Utility V5.4 (102)<br />
[Reading in MAXIMUM configuration from MULTINET:MULTINET.EXE]<br />
[Reading in configuration from MULTINET:NETWORK_DEVICES.CONFIGURATION]<br />
[Writing Startup file MULTINET:START_MULTINET.COM]<br />
<strong>Installation</strong> of <strong>MultiNet</strong> completed at 14:49<br />
Adding history entry in VMI$ROOT:[SYSUPD]MULTINET054.VMI_DATA<br />
Creating installation data file: VMI$ROOT:[SYSUPD]MULTINET054<br />
VMSINSTAL procedure done at 14:50<br />
Example 2-4 Sample Upgrade <strong>Installation</strong><br />
$ @SYS$UPDATE:VMSINSTAL MULTINET054 DKB400 OPTIONS N<br />
OpenVMS AXP <strong>Software</strong> Product <strong>Installation</strong> Procedure V7.1<br />
It is 2-NOV-2011 at 12:12.<br />
Enter a question mark (?) at any time for help.<br />
* Are you satisfied with the backup of your system disk [YES]? RETURN<br />
The following products will be processed:<br />
MULTINET V5.4<br />
Beginning installation of MULTINET V5.4 at 12:12<br />
%VMSINSTAL-I-RESTORE, Restoring product save set A ...<br />
%VMSINSTAL-I-RELMOVED, Product’s release notes have been moved to<br />
SYS$HELP.<br />
The logical names MULTINET_ROOT <strong>and</strong> MULTINET_COMMON_ROOT are already<br />
defined, with the following values:<br />
DKA100:[CALVIN.][MULTINET]<br />
DKA100:[CALVIN.SYSCOMMON.][MULTINET]<br />
You may either upgrade the version of <strong>MultiNet</strong> installed in this location,<br />
or install a fresh copy of <strong>MultiNet</strong> in another location.<br />
* Do you want to upgrade your <strong>MultiNet</strong> installation [YES] ? YES<br />
<strong>MultiNet</strong> (R)<br />
ALL RIGHTS RESERVED UNDER THE COPYRIGHT LAWS OF THE UNITED STATES<br />
This licensed material is the valuable property of <strong>Process</strong> <strong>Software</strong>. Its<br />
use, duplication, or disclosure is subject to the restrictions set forth<br />
in the License Agreement.<br />
Other use, duplication or disclosure, unless expressly provided for in the<br />
license agreement, is unlawful.<br />
Installing <strong>MultiNet</strong> V5.4<br />
* Do you want to install the TCP/IP applications [YES]? RETURN<br />
* Do you want to install the SSH software [YES]? RETURN<br />
* Do you want to install the NFS Client software [YES]? RETURN<br />
2-7
Example Procedures<br />
2-8<br />
* Do you want to install the NFS Server software [YES]? RETURN<br />
* Do you want to install the online documentation [YES]? RETURN<br />
* Do you want to install the include <strong>and</strong> library files [YES]? RETURN<br />
The <strong>MultiNet</strong> base networking software will be installed with these<br />
selected components:<br />
* TCP/IP applications<br />
* SSH<br />
* NFS Client<br />
* NFS Server<br />
* Online documentation<br />
* Include <strong>and</strong> library files<br />
* Would you like to change your selections [NO]? RETURN<br />
* Do you want to install the user comm<strong>and</strong>s in DCLTABLES [YES]? RETURN<br />
* Do you want to purge files replaced by this installation [YES]? RETURN<br />
* Configure <strong>MultiNet</strong> TCP/IP after installation [NO]? RETURN<br />
The installation will now proceed with no further questions.<br />
%VMSINSTAL-I-RESTORE, Restoring product save set B...<br />
%VMSINSTAL-I-RESTORE, Restoring product save set D...<br />
%MULTINET-I-INSTALLING, Installing <strong>MultiNet</strong> base files<br />
%VMSINSTAL-I-RESTORE, Restoring product save set F...<br />
%MULTINET-I-INSTALLING, Installing <strong>MultiNet</strong> driver files<br />
%VMSINSTAL-I-RESTORE, Restoring product save set G...<br />
%VMSINSTAL-I-RESTORE, Restoring product save set I...<br />
%MULTINET-I-INSTALLING, Installing <strong>MultiNet</strong> TCP/IP application files<br />
%VMSINSTAL-I-RESTORE, Restoring product save set J...<br />
%VMSINSTAL-I-RESTORE, Restoring product save set L...<br />
%MULTINET-I-INSTALLING, Installing <strong>MultiNet</strong> NFS files<br />
%VMSINSTAL-I-RESTORE, Restoring product save set M...<br />
%VMSINSTAL-I-RESTORE, Restoring product save set P...<br />
%MULTINET-I-INSTALLING, Installing the online documentation files<br />
%VMSINSTAL-I-RESTORE, Restoring product save set Q...<br />
%VMSINSTAL-I-RESTORE, Restoring product save set S...<br />
%MULTINET-I-INSTALLING, Installing the include <strong>and</strong> library files<br />
%MULTINET-I-INSTALLING, Installing the <strong>MultiNet</strong> HELP library<br />
%MULTINET-I-MERGING, Merging SERVICES.MASTER_SERVER file<br />
%MULTINET-I-DELETING, Deleting obsolete <strong>MultiNet</strong> files<br />
%VMSINSTALL-I-MOVEFILES, Files will now be moved to their target<br />
directories...<br />
<strong>MultiNet</strong> Network Configuration Utility V5.4 (102)<br />
[Reading in MAXIMUM configuration from MULTINET:MULTINET.EXE]<br />
[Reading in configuration from MULTINET:NETWORK_DEVICES.CONFIGURATION]<br />
[Writing Startup file MULTINET:START_MULTINET.COM]<br />
<strong>Installation</strong> of MULTINET V5.4 completed at 12:30<br />
Adding history entry in VMS$ROOT:[SYSUPD]VMSINSTAL.HISTORY<br />
Creating installation data file: VMI$ROOT:[SYSUPD]MULTINET054.VMI_DATA<br />
VMSINSTAL procedure done at 12:32
Note! Remember to reboot your system after upgrading the software.<br />
Example Procedures<br />
2-9
Chapter 3<br />
Files That May be Added to Your System Disk<br />
The installation procedure may add the following symbiont files to the SYS$SYSTEM directory:<br />
• MULTINET_IPP_SYMB.EXE<br />
• MULTINET_LPD_SYMBIONT.EXE<br />
• MULTINET_NTYSMB.EXE<br />
• MULTINET_SMTP_SYMBIONT.EXE<br />
• MULTINET_STREAM_SYMBIONT.EXE<br />
A data file for use with TCPVIEW is added as:<br />
DECW$SYSTEM_DEFAULTS:MULTINET_TCPVIEW.DAT<br />
The Release Notes are added as:<br />
SYS$HELP:MULTINET054.RELEASE_NOTES<br />
The MULTINET comm<strong>and</strong> is automatically added to:<br />
SYS$COMMON:[SYSLIB]DCLTABLES.EXE<br />
The <strong>MultiNet</strong> user comm<strong>and</strong>s may also be added to:<br />
SYS$COMMON:[SYSLIB]DCLTABLES.EXE<br />
The following shareable image may be added to SYS$LIBRARY:<br />
• MULTINET_TGVSNMPC.EXE<br />
3-1
Chapter 4<br />
Removing <strong>MultiNet</strong> for OpenVMS<br />
You can use the de-installation comm<strong>and</strong> procedure to remove the <strong>MultiNet</strong> for OpenVMS<br />
software. The procedure removes all <strong>MultiNet</strong> files from disk <strong>and</strong> all <strong>MultiNet</strong> comm<strong>and</strong>s from the<br />
DCLTABLES.EXE file. Before executing the procedure:<br />
1 Use the LICENSE DISABLE or DELETE comm<strong>and</strong>s, or the VMSLICENSE comm<strong>and</strong><br />
procedure to remove any registered <strong>MultiNet</strong> PAKs (Product Authorization Keys). If you are<br />
running <strong>MultiNet</strong> on a system running VAX/VMS V5.0 through V5.4, use the<br />
MULTINET:PAK-DELETE.COM procedure to delete the relevant PAKs. Refer to the Hewlett-<br />
Packard VMS License Management Utility Manual for more information about PAKs.<br />
2 Remove the reference to START_MULTINET.COM from your system startup comm<strong>and</strong><br />
procedure.<br />
3 Remove system parameter changes in MODPARAMS.DAT made as part of the installation;<br />
invoke the AUTOGEN utility to set the parameters back to their pre-installation values. Refer to<br />
the Hewlett-Packard manual <strong>Guide</strong> to Maintaining a VMS System for descriptions of<br />
MODPARAMS.DAT <strong>and</strong> AUTOGEN parameters.<br />
4 Reboot your system (or systems, if you installed <strong>MultiNet</strong> on more than one node in a<br />
VMScluster environment).<br />
To execute the <strong>MultiNet</strong> de-installation procedure, type this comm<strong>and</strong> if <strong>MultiNet</strong> is still running:<br />
$ @MULTINET:REMOVE<br />
Otherwise, for V4.n-style installations, type:<br />
$ @device:[directory.node.SYSCOMMON.MULTINET]REMOVE<br />
device, directory, <strong>and</strong> node are those you specified during Step 8 of the installation procedure.<br />
Or, for installations upgraded from <strong>MultiNet</strong> V3.n:<br />
$ @target_volume:[SYSn.SYSCOMMON.MULTINET]REMOVE<br />
4-1
Chapter 5<br />
<strong>MultiNet</strong> Documentation <strong>and</strong> Online Help<br />
This chapter provides information about:<br />
• The <strong>MultiNet</strong> documentation set<br />
• Available online help for <strong>MultiNet</strong><br />
The <strong>MultiNet</strong> Documentation Set<br />
The <strong>MultiNet</strong> documentation set consists of the following publications:<br />
<strong>MultiNet</strong> for OpenVMS Consolidated<br />
Release Notes<br />
Describes new features in the software, known<br />
restrictions or problems, <strong>and</strong> corrections to the<br />
published <strong>MultiNet</strong> for OpenVMS documentation.<br />
Review the file<br />
SYS$HELP:MULTINET054.RELEASE_NOTES<br />
after installing the software. The same information<br />
is also available on CD-ROM distributions in<br />
PostScript format<br />
([MULTINET054]MULTINET_RELEASE_<br />
NOTES.PS), in ASCII format<br />
([MULTINET054]MULTINET_RELEASE_<br />
NOTES.TXT)<br />
<strong>MultiNet</strong> for OpenVMS User’s <strong>Guide</strong> Explains how to explore your network, send <strong>and</strong><br />
receive electronic mail, log into a remote system,<br />
transfer files between systems, <strong>and</strong> use<br />
DECwindows with <strong>MultiNet</strong>. Includes user<br />
comm<strong>and</strong> references <strong>and</strong> the <strong>MultiNet</strong> Master<br />
Index.<br />
<strong>MultiNet</strong> for OpenVMS <strong>Installation</strong> <strong>and</strong><br />
Administrator’s <strong>Guide</strong><br />
<strong>MultiNet</strong> for OpenVMS Administrator’s<br />
Reference<br />
Explains how to install, configure, <strong>and</strong> manage<br />
<strong>MultiNet</strong>.<br />
Identifies <strong>and</strong> describes <strong>MultiNet</strong> configuration<br />
<strong>and</strong> management comm<strong>and</strong>s.<br />
5-1
<strong>MultiNet</strong> Documentation <strong>and</strong> Online Help<br />
5-2<br />
<strong>MultiNet</strong> for OpenVMS Messages,<br />
Logicals, <strong>and</strong> TCP/IP Services for<br />
DECnet Applications<br />
<strong>MultiNet</strong> for OpenVMS Programmer’s<br />
Reference<br />
The following sections describe these documents.<br />
<strong>Installation</strong> <strong>and</strong> <strong>Administrator's</strong> <strong>Guide</strong><br />
Lists <strong>MultiNet</strong> messages <strong>and</strong> provides troubleshooting<br />
information as well as <strong>MultiNet</strong> logicals.<br />
Explains how to configure TCP/IP Services for<br />
DECnet Applications.<br />
Describes the <strong>MultiNet</strong> programming interfaces.<br />
This guide provides information about installing, configuring, <strong>and</strong> managing <strong>MultiNet</strong>.<br />
Chapter 1 Installing <strong>and</strong> Upgrading <strong>MultiNet</strong> for OpenVMS<br />
Chapter 2 Example Procedures<br />
Chapter 3 Files That May be Added to Your System Disk<br />
Chapter 4 Removing <strong>MultiNet</strong> for OpenVMS<br />
Chapter 5 <strong>MultiNet</strong> Documentation <strong>and</strong> Online Help<br />
Chapter 6 Introduction to <strong>MultiNet</strong> <strong>and</strong> TCP/IP Concepts<br />
Chapter 7 Devices, Protocols, <strong>and</strong> <strong>MultiNet</strong> Internals<br />
Chapter 8 Getting Additional Information<br />
Chapter 9 Configuration Overview<br />
Chapter 10 Host Table <strong>and</strong> DNS<br />
Chapter 11 Establishing IP Connectivity<br />
Chapter 12 Configuring <strong>MultiNet</strong> Services<br />
Chapter 13 Configuring Network Routing<br />
Chapter 14 Network Time3 Protocol (NTP)<br />
Chapter 15 Configuring Electronic Mail<br />
Chapter 16 Printer Configuration<br />
Chapter 17 RMT Server <strong>and</strong> Client Configuration<br />
Chapter 18 Configuring <strong>and</strong> Managing FTP<br />
Chapter 19 DHCP Client<br />
Chapter 20 Configuring the Font Server<br />
Chapter 21 Configuring Remote Systems with RARP, BOOTP, <strong>and</strong> DHCP<br />
Chapter 22 Managing the XDM Server<br />
Chapter 23 Configuring the <strong>MultiNet</strong> SNMP Services<br />
Chapter 24 Configuring <strong>MultiNet</strong> Kerberos Authentication Service<br />
Chapter 25 X11-Gateway Configuration<br />
Chapter 26 Configuring DECnet-over-IP Circuits<br />
Chapter 27 Configuring the <strong>MultiNet</strong> NFS Server<br />
Chapter 28 <strong>MultiNet</strong> NFS v3 Servert<br />
Chapter 29 Using the NFS Client<br />
Chapter 30 Configuring the Secure Shell (SSH) v1 Server<br />
Chapter 31 Configuring the Secure Shell (SSH) v2 Server<br />
Chapter 32 Configuring IPSEC <strong>and</strong> SETKEY
Chapter 33 Intrusion Prevention System<br />
Chapter 34 Using <strong>MultiNet</strong> for an OpenVMS Cluster Interconnect<br />
Appendix A Server Configuration Parameters<br />
Appendix B DNSSEC<br />
<strong>Administrator's</strong> Reference<br />
This manual contains descriptions of all administrative comm<strong>and</strong>s.<br />
Chapter 1 <strong>MultiNet</strong> DCL Comm<strong>and</strong> Reference<br />
Chapter 2 DECNET-CONFIG Comm<strong>and</strong> Reference<br />
Chapter 3 MAIL-CONFIG Comm<strong>and</strong> Reference<br />
Chapter 4 NET-CONFIG Comm<strong>and</strong> Reference<br />
Chapter 5 NFS-CONFIG Comm<strong>and</strong> Reference<br />
Chapter 6 NTYCP Comm<strong>and</strong> Reference<br />
Chapter 7 ACCESS-CONFIG Comm<strong>and</strong>s<br />
Chapter 8 PRINTER-CONFIG Comm<strong>and</strong> Reference<br />
Chapter 9 SERVER-CONFIG Comm<strong>and</strong> Reference<br />
<strong>MultiNet</strong> Documentation <strong>and</strong> Online Help<br />
Messages, Logicals, <strong>and</strong> TCP/IP Services for DECnet Applications<br />
This manual describes common messages, logicals, <strong>and</strong> information about TCP/IP Services for<br />
DECnet applications.<br />
Chapter 1 Troubleshooting<br />
Chapter 2 <strong>MultiNet</strong> Messages<br />
Chapter 3 <strong>MultiNet</strong> Logicals<br />
Chapter 4 Utility Return Codes<br />
Chapter 5 Error Codes<br />
Chapter 6 TCP/IP Services Introduction<br />
Chapter 7 Configuring DECnet Application Services<br />
Chapter 8 NOT-CONFIG Comm<strong>and</strong>s<br />
Programmer's Reference<br />
This manual describes the <strong>MultiNet</strong> programming interfaces, <strong>and</strong> covers the following topics:<br />
Chapter 1 <strong>MultiNet</strong> Programming Tutorial<br />
Chapter 2 Socket Library Functions<br />
Chapter 3 $QIO Interface<br />
Chapter 4 SNMP Extensible Agent API Routines<br />
Chapter 5 RPC Fundamentals<br />
Chapter 6 Building Distributed Applications with RPC<br />
Chapter 7 RPCGEN Compiler<br />
Chapter 8 RPC RTL Management Routines<br />
Chapter 9 RPC RTL Client Routines<br />
Chapter 10 RPC RTL Port Mapper Routines<br />
Chapter 11 RPC RTL Server Routines<br />
Chapter 12 RPC RTL XDR Routines<br />
5-3
<strong>MultiNet</strong> Documentation <strong>and</strong> Online Help<br />
User's <strong>Guide</strong><br />
5-4<br />
Chapter 1 Exploring Your Network Environment<br />
Chapter 2 Sending <strong>and</strong> Receiving Electronic Mail<br />
Chapter 3 Using Kerberos Authentication<br />
Chapter 4 Accessing Remote System with RSHELL, RLOGIN, <strong>and</strong> TELNET Utilities<br />
Chapter 5 Remote File Access with the RCP, FTP, <strong>and</strong> TFTP Utilities<br />
Chapter 6 Using DECwindows with <strong>MultiNet</strong><br />
Chapter 7 Accessing Remote Systems with the Secure Shell (SSH1) Utilities<br />
Chapter 8 Accessing Remote Systems with the Secure Shell (SSH2) Utilities<br />
Appendix A DCL User Comm<strong>and</strong>s<br />
Appendix B FTP Comm<strong>and</strong> Reference<br />
Appendix C TELNET Comm<strong>and</strong> Reference<br />
Appendix D TFTP Comm<strong>and</strong> Reference<br />
<strong>MultiNet</strong> Master Index<br />
<strong>MultiNet</strong> Online Help<br />
<strong>MultiNet</strong> provides an extensive set of online help topics available using the DCL prompt:<br />
$ HELP MULTINET<br />
MULTINET<br />
MULTINET is a set of comm<strong>and</strong>s for maintaining the <strong>MultiNet</strong> network.<br />
Format<br />
MULTINET operation<br />
Additional information available:<br />
Parameters Books CERTTOOL CERTVIEW CHECK CMPCLIENT<br />
CONFIGURE DECODE DHCP_Info DIG DNS_Info<br />
DNSKEYGEN DNSSIGNER FINGER FONT FTP<br />
GATED_Info HOST_TABLE IPP IPSEC_Info Intrusion_P<br />
revention_S<br />
ystem<br />
KERBEROS LOAD Logical_Names LPRM NETCONTROL<br />
NFS_Info NFSDISMOUNT NFSMOUNT NSLOOKUP NSUPDATE<br />
PING PUBLICKEY_A<br />
SSISTANT<br />
RARP_Info RCP RDATE<br />
REMIND RPC_Info RLOGIN RMTALLOC RPCMOUNT_In<br />
fo<br />
RPCPORTMAP_Info RPCSTATUS_I<br />
nfo<br />
R_Services_In<br />
fo<br />
RSHELL RUSERS
<strong>MultiNet</strong> Documentation <strong>and</strong> Online Help<br />
RWALL SCP SSH_CLIENT SSHADD SSHAGENT<br />
SSHKEYGEN TALK TCPDUMP TCPVIEW TELNET<br />
TFTP TFTP_Info TRACEROUTE UCXQIO_Inf<br />
o<br />
WHOIS X11DEBUG Programming<br />
UNIX_Info<br />
5-5
<strong>MultiNet</strong> Documentation <strong>and</strong> Online Help<br />
5-6
Chapter 6<br />
Introduction to <strong>MultiNet</strong> <strong>and</strong> TCP/IP Concepts<br />
This chapter presents a brief description of <strong>MultiNet</strong> <strong>and</strong> general concepts useful for underst<strong>and</strong>ing<br />
the <strong>MultiNet</strong> software <strong>and</strong> TCP/IP networking. This chapter describes:<br />
• The <strong>MultiNet</strong> software for users, system managers, <strong>and</strong> programmers<br />
• TCP/IP concepts, operation, <strong>and</strong> protocols, including:<br />
– Dynamic configuration protocols<br />
– Routing<br />
– DNS (Domain Name System) <strong>and</strong> host tables<br />
– ARP (Address Resolution Protocol)<br />
– SNMP (Simple Network Management Protocol)<br />
Chapter 8 contains lists of books <strong>and</strong> RFCs (Requests for Comments) that provide more detailed<br />
information about TCP/IP.<br />
What is <strong>MultiNet</strong>?<br />
<strong>MultiNet</strong> is a collection of software that conforms to the set of internationally accepted st<strong>and</strong>ards<br />
for information exchange known as the TCP/IP protocol suite. The <strong>MultiNet</strong> software permits your<br />
VMS system to interact with other systems running TCP/IP software including PCs, Apple<br />
Macintosh systems, UNIX systems, <strong>and</strong> many others. Because TCP/IP is used on the Internet,<br />
using <strong>MultiNet</strong> lets you communicate locally, or globally with millions of other users <strong>and</strong><br />
information services.<br />
<strong>MultiNet</strong> provides applications, configuration tools, <strong>and</strong> programming libraries that make access to<br />
TCP/IP underst<strong>and</strong>able <strong>and</strong> straight-forward. Whether your system serves one user or thous<strong>and</strong>s of<br />
users, <strong>MultiNet</strong> gives all users access to a wide range of features that extend their use of the<br />
network <strong>and</strong> increase their productivity.<br />
<strong>MultiNet</strong> works with the OpenVMS Operating System on the Hewlett-Packard VAX <strong>and</strong> Alpha<br />
architectures. On the VAX architecture, <strong>MultiNet</strong> works with VAX/VMS V5.2-2 <strong>and</strong> later <strong>and</strong><br />
OpenVMS VAX V6.1 or later. On the Alpha architecture, <strong>MultiNet</strong> works with OpenVMS AXP<br />
V6.2 <strong>and</strong> later. On the I64 (Itanium) architecture, <strong>MultiNet</strong> works with OpenVMS I64 V8.2 <strong>and</strong><br />
later. <strong>MultiNet</strong> is distributed on CD-ROM.<br />
6-1
Introduction to <strong>MultiNet</strong> <strong>and</strong> TCP/IP Concepts<br />
Note! For I64 systems, <strong>MultiNet</strong> will only run on the officially released version of OpenVMS I64 V8.2.<br />
If you are running a prerelease version of this operating system, you must upgrade to the<br />
released version of V8.2 in order to run <strong>MultiNet</strong>.<br />
<strong>MultiNet</strong> for Users<br />
With <strong>MultiNet</strong>, users can:<br />
• Send electronic mail to <strong>and</strong> receive electronic mail from other computer systems using SMTP<br />
extensions to OpenVMS Mail <strong>and</strong> ALL-IN-1 mail.<br />
• Access the Internet <strong>and</strong> other information services.<br />
• Log into remote systems using TELNET, RLOGIN, or SSH.<br />
• Execute comm<strong>and</strong>s on remote systems using RSHELL or SSH.<br />
• Transfer files between local <strong>and</strong> remote systems with FTP, RCP, TFTP, SCP, <strong>and</strong> SFTP.<br />
• Print files <strong>and</strong> manage print jobs on remote systems with the LPD <strong>and</strong> LPRM utilities.<br />
• Talk to other users interactively with the TALK utility.<br />
• Display information about other sites <strong>and</strong> users with the FINGER, RUSERS, <strong>and</strong> WHOIS<br />
utilities.<br />
• Read online information about <strong>MultiNet</strong> using the DCL HELP facility.<br />
<strong>MultiNet</strong> for System Managers<br />
With <strong>MultiNet</strong>, system managers can:<br />
• Configure devices <strong>and</strong> services easily with comm<strong>and</strong> line-based configuration utilities, or with<br />
the menu-driven MENU-CONFIG utility (MULTINET CONFIGURE /MENU).<br />
• Provide IP connectivity for a variety of networking environments including IP-over-DECnet,<br />
Ethernet, FDDI, PPP, SLIP, <strong>and</strong> X.25.<br />
• Provide other networking connectivity over IP, including DECnet-over-IP.<br />
• Provide access to NFS-mounted file systems with the <strong>MultiNet</strong> NFS software.<br />
• Change the current configuration dynamically by modifying logical name definitions or by using<br />
the NETCONTROL utility.<br />
• Provide security for logging into systems across the network with Kerberos <strong>and</strong> SSH software.<br />
• Create <strong>and</strong> access name servers with DNS (Domain Name System) software.<br />
• Configure dynamic routing with the GATED service which supports routing protocols such as<br />
RIP, BGP, <strong>and</strong> others.<br />
• Manage remote printing to print servers or to printers connected to the network with the LPD<br />
<strong>and</strong> stream client software.<br />
• Provide remote access to local OpenVMS printers with the LPD server software.<br />
• Provide electronic mail services with the SMTP <strong>and</strong> POP protocols; <strong>MultiNet</strong> provides SMTP<br />
enhancements for Message Router (MR), OpenVMS Mail, <strong>and</strong> ALL-IN-1.<br />
• Access local <strong>and</strong> remote CD-ROMs, DATs, <strong>and</strong> conventional magnetic tape devices with the<br />
RMTALLOC utility.<br />
• Synchronize system clocks from a central time server with NTP software <strong>and</strong> provide time<br />
updates to other hosts on the network.<br />
6-2
Introduction to <strong>MultiNet</strong> <strong>and</strong> TCP/IP Concepts<br />
• Provide binary compatibility with HP TCP/IP Services for OpenVMS (formerly called UCX) to<br />
support Hewlett-Packard <strong>and</strong> third-party applications such as TeamLinks, DECmcc, <strong>and</strong><br />
applications written to use DCE for OpenVMS.<br />
• Diagnose system problems <strong>and</strong> messages with the CHECK, PING, TCPDUMP, TCPVIEW,<br />
TRACEROUTE, <strong>and</strong> X11DEBUG utilities.<br />
• View online information using either the DCL HELP facility.<br />
• Access RFCs on the <strong>MultiNet</strong> CD-ROM consolidated distribution.<br />
<strong>MultiNet</strong> for Programmers<br />
With <strong>MultiNet</strong>, programmers can:<br />
• Program with socket library routines.<br />
• Work with a $QIO interface.<br />
• Program with RPC library routines.<br />
• Access sample programs <strong>and</strong> user exits that can be used to provide additional security <strong>and</strong> to<br />
customize other services (such as printing).<br />
TCP/IP Concepts<br />
This section describes some of the basic concepts of TCP/IP networking.<br />
Physical Networks<br />
Physical networks are the cables <strong>and</strong> associated wiring components that link computers to one<br />
another for network communications. Common physical networks are Ethernet, Token Ring, FDDI<br />
(Fiber Distributed Data Interface), point-to-point links, <strong>and</strong> telephone with modems.<br />
LAN (Local Area Network) Hardware Addresses<br />
Network interface board manufacturers assign a unique hardware (physical) address to each<br />
interface board they produce. These hardware addresses are burned into the circuit at the time of<br />
manufacture, but can usually be overridden later by a network administrator, if desired.<br />
A hardware address is usually composed of six numbers, one for each octet or eight-bit byte in the<br />
address value, separated by colons, such as 00:DD:A8:13:48:C5. The first three octets identify the<br />
manufacturer, while the remaining three octets are unique to the board.<br />
Hardware addresses identify individual interfaces <strong>and</strong> aid in fast <strong>and</strong> efficient delivery of packets<br />
on the physical network.<br />
IP Addresses<br />
IP addresses identify hosts or interfaces on an IP network. An IP address consists of four numbers,<br />
one for each octet or eight-bit byte in the address value. IP addresses are written in dotted-decimal<br />
format, such as 191.87.34.22.<br />
An IP address has two basic parts:<br />
• A network number<br />
6-3
Introduction to <strong>MultiNet</strong> <strong>and</strong> TCP/IP Concepts<br />
6-4<br />
• A host number<br />
Traditionally, the portions of the address that identify the network <strong>and</strong> host were determined by the<br />
class of the network:<br />
Class A networks Class A addresses are identified by a value from 1 to 127 in the first octet,<br />
such as in 26.1.1.1. In class A addresses, the first octet identifies the<br />
network, while the three remaining octets identify the host. For example, IP<br />
address 26.1.1.1 identifies host 1.1.1 on network 26.<br />
Class B networks Class B addresses are identified by a value from 128 to 191 in the first octet,<br />
such as in 161.1.1.1. In class B addresses, the first <strong>and</strong> second octets<br />
identify the network, while the remaining two octets identify the host. For<br />
example, IP address 161.1.1.1 identifies host 1.1 on network 161.1.<br />
Class C networks Class C addresses are identified by a value from 192 to 223 in the first octet,<br />
such as in 197.1.1.1. In class C addresses, the first three octets identify the<br />
network, while the remaining octet identifies the host. For example, IP<br />
address 197.1.1.1 identifies host 1 on network 197.1.1.<br />
With the introduction of subnet masks, the division between the network <strong>and</strong> host portions of an IP<br />
address has become much more flexible. See Subnet Masks for more information.<br />
The network class determines the size of the network. A class A network can have 16,777,214<br />
hosts, while a class B network can have 65,534 hosts, <strong>and</strong> a class C network can have only 254<br />
hosts.<br />
Subnet Masks<br />
The original Internet addressing scheme made it possible for every host on a network to talk<br />
directly with every other host on the same network; other hosts were directly accessible if they used<br />
the same network number. In class A <strong>and</strong> class B networks, where very large numbers of hosts with<br />
the same network number are available, this scheme is no longer realistic because the underlying<br />
physical networks are constrained by b<strong>and</strong>width considerations. Ethernet <strong>and</strong> Token Ring networks<br />
cannot accommodate thous<strong>and</strong>s or hundreds of thous<strong>and</strong>s of hosts in a single, flat network space.<br />
Subnet masks allow you to create multiple smaller networks from host addresses. For example, a<br />
class A network can be partitioned into class C subnetworks. These smaller, internal networks are<br />
called subnets. Subnet addresses are not exposed outside of the network; all changes to<br />
accommodate the additional addresses are h<strong>and</strong>led internally. This simplifies routing information<br />
for the network <strong>and</strong> minimizes the amount of information the network must advertise externally.<br />
Inside the network, you determine how to reallocate addresses by choosing how many bits of the<br />
host portion of each address are used as the subnet address <strong>and</strong> how many bits are used as the host<br />
address. You use subnet masks to divide the existing addresses into network <strong>and</strong> host portions. The<br />
subnet mask identifies how much of the existing address can be used as the network portion. The<br />
underlying physical network must also be divided into smaller, physical subnets when using a<br />
subnet mask to create subnets.
Introduction to <strong>MultiNet</strong> <strong>and</strong> TCP/IP Concepts<br />
The following example illustrates how to create class C subnets from a class B network address:<br />
The class B network address 161.44.0.0 can be divided by reallocating the first 24 bits of the 32-bit<br />
IP address to subnet addressing using the netmask 255.255.255.0. This reallocation allows you to<br />
use 161.44.1.0, 161.44.2.0, <strong>and</strong> so forth, up to 161.44.254.0 as network addresses. All traffic bound<br />
for any IP address beginning with the 16-bit network portion 161.44 will be routed to your site<br />
where internal routers h<strong>and</strong>le subnetwork addresses. Valid addresses on the internal network, such<br />
as 161.44.4.42 <strong>and</strong> 161.44.224.12, can be reached from anywhere on the Internet; final delivery is<br />
h<strong>and</strong>led by the routers on the individual physical subnets that contain the hosts associated with<br />
those addresses.<br />
Broadcast Addresses<br />
A system uses broadcast addresses to send information to all hosts on the network. Packets<br />
addressed to the network broadcast address are transmitted to every host with the same network<br />
number as the broadcast address. Broadcast packets are routinely used by the network to share<br />
routing information, field ARP requests, <strong>and</strong> send status <strong>and</strong> informational messages.<br />
There are two common conventions used for broadcast addresses. The old convention, which older<br />
versions of SunOS <strong>and</strong> Berkeley UNIX BSD4.3 use, implements a broadcast address as the<br />
network portion of the address followed by all zeros. Using this convention, the broadcast address<br />
for the network 161.44 is 161.44.0.0. The new convention, which <strong>MultiNet</strong> <strong>and</strong> most other TCP/IP<br />
implementations use, implements a broadcast address as the network portion of the address<br />
followed by binary ones in all host portions of the address. In this scheme, the broadcast address for<br />
network 161.44 is 161.44.255.255.<br />
If the network contains subnets, the broadcast address is relative to the local subnet. For example,<br />
host 128.44.12.1 with a subnet mask of 255.255.255.0 has an IP broadcast address of<br />
128.44.12.255.<br />
Host Names<br />
Most sites assign host names to each system on the network because names are easier to remember<br />
than IP addresses. On a small, locally contained network, a host name may be only one word, such<br />
as WILLOW. However, on larger networks or on networks connected to the Internet, names are<br />
longer <strong>and</strong> denote a place in the organization <strong>and</strong> ultimately on the Internet. These longer, more<br />
detailed names are called fully qualified host names or fully qualified domain names (FQDNs). An<br />
example is WILLOW.FLOWERS.COM, where WILLOW is the individual host (or system) name,<br />
FLOWERS identifies the organization to which it belongs, <strong>and</strong> COM indicates this organization is<br />
involved in commerce on the Internet.<br />
TCP/IP Operation<br />
The following steps present a highly simplified view of the events that occur during successful<br />
network communication.<br />
1 Using the appropriate application, such as electronic mail, a user initiates communication to<br />
another system, identifying the remote system by name, such as WILLOW.FLOWERS.COM.<br />
2 The application asks for the IP address of the system identified as WILLOW.FLOWERS.COM.<br />
6-5
Introduction to <strong>MultiNet</strong> <strong>and</strong> TCP/IP Concepts<br />
6-6<br />
3 Using either DNS or host tables, the IP address of WILLOW.FLOWERS.COM is determined.<br />
4 A connection is established using a three-way h<strong>and</strong>shake.<br />
5 Application information is organized into packets for transmission across the network.<br />
6 The MTU (Maximum Transmission Unit) of the physical network is determined; if necessary,<br />
the packets are fragmented before being sent to the network interface card for delivery.<br />
7 The hardware address of the next host (or hop) in the route to the target host is determined.<br />
8 Each host along the route receives the packets <strong>and</strong> forwards them to the next hop in the route.<br />
9 Once the packets arrive at the destination, they are reassembled in the appropriate order <strong>and</strong><br />
delivered to the appropriate application. Some protocols acknowledge receipt of the packets to<br />
the sending host.<br />
Basic TCP/IP Protocols<br />
Networking protocols ensure reliable delivery of information from one host to another.<br />
This section describes several of the more important TCP/IP protocols.<br />
• IP (Internet Protocol)<br />
• IPv6 (Internet Protocol V6)<br />
• TCP (Transmission Control Protocol)<br />
• UDP (User Datagram Protocol)<br />
• SLIP (Serial Line Internet Protocol)<br />
• PPP (Point-to-Point Protocol)<br />
IP (Internet Protocol)<br />
IP (Internet Protocol) is the networking protocol used to deliver data packets from one computer to<br />
another. The computers may reside on different networks as long as information can travel between<br />
them.<br />
The IP layer in a TCP/IP stack is responsible for:<br />
Routing data packets from<br />
one system to the next until<br />
they reach their destination<br />
When a packet is received, the IP layer examines its routing <strong>and</strong><br />
interface tables to see if the IP address of the destination host is<br />
one of its own IP addresses or a broadcast address. If the<br />
destination IP address is the same as the local IP address, IP<br />
passes the packet to the TCP or UDP layer.<br />
If the IP address does not belong to this host <strong>and</strong> is not a broadcast<br />
address, the IP layer determines the next hop in the route. If this<br />
host is configured as a router, it forwards the packet to the next<br />
hop. If this host is not configured as a router, it discards the<br />
packet.
IPv6 (Internet Protocol Version 6)<br />
Introduction to <strong>MultiNet</strong> <strong>and</strong> TCP/IP Concepts<br />
Discovering the MTU The MTU (Maximum Transmission Unit) is the size of the largest<br />
packet that can be sent along the physical network. The MTU<br />
depends on the type of physical network being used. For example,<br />
a typical MTU for Ethernet networks is 1500 bytes, while a<br />
typical MTU for FDDI is 4352 bytes.<br />
When the IP layer receives a packet to send, it determines which<br />
route it will use to forward the packet <strong>and</strong> obtains that route's<br />
MTU.<br />
Fragmenting <strong>and</strong><br />
reassembling packets<br />
If a packet is larger than the MTU, the IP layer is responsible for<br />
breaking the packet into smaller pieces or fragments that travel<br />
along the network. A fragment can be further fragmented as<br />
required by the next segment of the network.<br />
All reassembly occurs at the destination, where the IP layer is<br />
responsible for putting all the fragments together in the right order<br />
before passing the packets on to the TCP or UDP layer.<br />
IPv6 is an advancement on IP (v4) which supports a larger address space <strong>and</strong> has various efficiency<br />
<strong>and</strong> security improvements. It has the same responsibilities that IPv4 does in the stack <strong>and</strong> can be<br />
used by the TCP or UDP layer.<br />
TCP (Transmission Control Protocol)<br />
TCP (Transmission Control Protocol) provides a reliable mechanism for delivery of information to<br />
remote hosts.<br />
On the sending host, the TCP layer of the TCP/IP stack is responsible for:<br />
• Organizing the information sent by the application into segments (the amount of data that will fit<br />
into an IP datagram)<br />
• Specifying the endpoints (ports) of the connection with the remote host<br />
• Establishing a connection with the remote host<br />
• Ensuring the remote host acknowledges packets that have been sent within a specified time<br />
On the receiving host, the TCP layer of the TCP/IP stack is responsible for:<br />
• Acknowledging received packets<br />
• Organizing the packets into the correct sequence upon receipt from the sending host<br />
• Forwarding the packets to the application using the specified port<br />
TCP requires more overhead than UDP but provides reliable delivery of packets to the remote host.<br />
UDP (User Datagram Protocol)<br />
Applications can also use UDP (User Datagram Protocol) to deliver information to a remote host.<br />
6-7
Introduction to <strong>MultiNet</strong> <strong>and</strong> TCP/IP Concepts<br />
6-8<br />
The UDP layer of the TCP/IP stack is responsible for:<br />
• Organizing the information to be sent into a packet called a datagram<br />
• Using a port to identify the program on the remote host to which the datagram is to be sent<br />
• Verifying that the datagram contains the correct IP source <strong>and</strong> target addresses<br />
UDP does not verify the successful delivery of packets to the target host. As a result, UDP requires<br />
less overhead than TCP. To accommodate this lack of verification, applications that use UDP often<br />
provide their own mechanisms for ensuring messages reach the target host in the correct sequence<br />
when required.<br />
SLIP (Serial Line Internet Protocol)<br />
SLIP (Serial Line Internet Protocol) allows the transmission of IP packets over serial lines. SLIP<br />
can be used over a direct connection between the serial ports of two systems, or over telephone<br />
lines with modems.<br />
PPP (Point-to-Point Protocol)<br />
Like SLIP, PPP (Point-to-Point Protocol) allows the transmission of IP packets over serial lines.<br />
PPP is a more versatile protocol than SLIP, <strong>and</strong> contains functionality that SLIP does not, such as:<br />
• The ability to share the serial line with other protocols<br />
• Error detection<br />
• Support for both synchronous <strong>and</strong> asynchronous communication<br />
• Dynamic configuration<br />
• Negotiation of parameter values<br />
• Support for different user-authentication protocols<br />
While PPP is a more versatile serial-line protocol than SLIP, it is not available with all TCP/IP<br />
implementations.<br />
Dynamic Configuration Protocols<br />
To communicate with the rest of the network, a host must have an IP address. However, some<br />
systems do not have the hardware to permanently store an IP address. In addition, computers<br />
frequently share IP addresses when there are more computers than IP addresses, or when IP<br />
addresses are used only temporarily. For these situations, there are three dynamic configuration<br />
protocols: RARP, BOOTP, <strong>and</strong> DHCP.<br />
RARP (Reverse Address Resolution Protocol)<br />
RARP (Reverse Address Resolution Protocol) sends IP addresses to workstations that broadcast<br />
RARP requests containing their hardware addresses. RARP supplies IP addresses only <strong>and</strong> is<br />
commonly used by diskless workstations to determine their Internet addresses.
BOOTP (Bootstrap Protocol)<br />
Introduction to <strong>MultiNet</strong> <strong>and</strong> TCP/IP Concepts<br />
BOOTP (Bootstrap Protocol) lets a host receive an IPv4 address <strong>and</strong> other configuration<br />
information from a BOOTP server on the network. BOOTP often specifies a bootstrap file for a<br />
client system to download, normally via TFTP (Trivial File Transfer Protocol). BOOTP lets<br />
systems that have no hard disk retrieve the information necessary to access their bootstrap file.<br />
DHCP (Dynamic Host Configuration Protocol)<br />
DHCP (Dynamic Host Configuration Protocol) builds upon the BOOTP protocol by letting a<br />
system receive all of the information necessary to function as a host on the network directly from a<br />
DHCP server. Unlike BOOTP, which only provides for permanent IPv4 addresses, DHCP supports<br />
three different mechanisms for allocating IPv4 addresses:<br />
Routing<br />
Automatic Hosts requesting an IPv4 address receive a permanent IPv4 address<br />
Dynamic Hosts requesting an IPv4 address receive a temporary IPv4 address<br />
Manual IPv4 addresses are manually configured <strong>and</strong> DHCP delivers the assigned<br />
addresses to requesting hosts<br />
Routing is the process of selecting the path that data packets take to reach their destination. Routing<br />
can be as simple as delivering packets to another host on the same network (direct routing), or it<br />
may involve forwarding packets to routers on the way to the destination network. This section<br />
explains the basics of IP routing.<br />
IP routing determines how to forward packets to a destination host. When a packet is forwarded to<br />
a local host (that is, a host on the same network), routing is direct; if the packet must be forwarded<br />
through one or more routers to reach its destination, the route is indirect.<br />
Routing information for indirect routes is stored in a table of IP <strong>and</strong> router address pairs.<br />
Information in the routing table can be specified in three ways:<br />
Static routes Static routes are used to specify routing information explicitly. They are<br />
usually easy to maintain, but they provide no mechanism to respond<br />
automatically to changing environments.<br />
Default routes Default routes are used when a host has no specific route for the destination<br />
host or network in its routing table. If data cannot be delivered directly<br />
(because the routing table has no entry for the destination host or network),<br />
the data is forwarded to the default router.<br />
Dynamic routing Dynamic routing can use a service such as GATED to exchange routing<br />
information between cooperating systems. The protocols used to exchange<br />
information are RIP (Routing Information Protocol), EGP (Exterior<br />
Gateway Protocol), HELLO (DCN Local Network Protocol), <strong>and</strong> BGP<br />
(Border Gateway Protocol).<br />
6-9
Introduction to <strong>MultiNet</strong> <strong>and</strong> TCP/IP Concepts<br />
6-10<br />
The following sections describe routing tables <strong>and</strong> GATED in more detail.<br />
The Routing Table<br />
The routing table stores information about the routes that hosts can use to reach other hosts on the<br />
network or Internet. The routing table entries can be configured statically by the system manager,<br />
or dynamically by a program such as GATED.<br />
• Static entries are established by manually entering information. Once a static routing table is<br />
established, you must update the table as changes occur.<br />
• Dynamic entries are generated from information provided by a routing protocol (such as RIP)<br />
which collects information from other routers to populate the table. Dynamic routing solutions<br />
automatically share information <strong>and</strong> update the table as routing information changes.<br />
The routing table is designed to supply the next hop address (which is always local) for data<br />
bound for other networks. The routing table never contains information about routers beyond the<br />
local network segment, nor does it contain information about how to reach individual host<br />
addresses (although it can contain host-specific entries). Routers always forward data to<br />
networks until the destination network is the local network. When the data arrives at the<br />
destination network, it is forwarded directly to the appropriate host.<br />
Host-specific routes are special routing table entries that specify which router to use when data is<br />
bound for a specific remote host. Host-specific routes are frequently used to test new routers or<br />
to implement network security procedures.<br />
Router Discovery<br />
Router discovery is a method of finding a router when no default route entry exists in the routing<br />
table. When booting, a host using router discovery broadcasts a message asking for available<br />
routers. The available routers reply with a message indicating their address. The host adds the<br />
information to its routing table <strong>and</strong> sets the default route based on advertisements from routers on<br />
the local network automatically. Local routers must also support RDISC (Router Discovery<br />
protocol).<br />
Under IPv6 Router Discovery is performed by the RTSOLD program after line initialization.<br />
GATED<br />
GATED can both learn <strong>and</strong> advertise known routes, allowing for automatic h<strong>and</strong>ling of network<br />
configuration changes <strong>and</strong> automatic selection of the best available route. Other routers on the local<br />
network must also support at least one of the protocols used by GATED (EGP, BGP, RIP, <strong>and</strong><br />
HELLO). GATED only supports IPv4 routing.<br />
DNS (Domain Name System) <strong>and</strong> Host Tables<br />
DNS (Domain Name System) <strong>and</strong> host tables are two methods of mapping between host<br />
(computer) names <strong>and</strong> their IP addresses. When you specify a host by name, DNS or host tables are<br />
used to map the host name to its IP address. The host name can be local to your organization or<br />
anywhere in the world, if your site is connected to the Internet. DNS <strong>and</strong> host tables can also be<br />
used to map IP addresses to host names.
DNS (Domain Name System)<br />
Introduction to <strong>MultiNet</strong> <strong>and</strong> TCP/IP Concepts<br />
TCP/IP applications use DNS to convert host names to IP addresses, <strong>and</strong> vice versa. This<br />
conversion is called resolving.<br />
A DNS resolver sends requests to another computer, called a DNS server, to resolve names into IP<br />
addresses. The DNS resolver can also send requests to the DNS server to resolve IP addresses to<br />
names.<br />
DNS servers store host name <strong>and</strong> IP address information. If your computer needs information that<br />
is not on one DNS server, the server automatically requests the information from other servers.<br />
Domains<br />
In DNS terminology, a domain is a group of computers. The domain administrator determines<br />
which computers are in the domain. A domain name identifies a domain <strong>and</strong> consists of words<br />
separated by dots. An example of a domain name is FLOWERS.COM.<br />
The parts of a domain name are created by the domain administrator or may be special words used<br />
on the Internet. Domain names can pertain to a site, an organization, or to types of organizations.<br />
When read right to left, the first word in the domain name is the top-level domain which identifies<br />
the function of an organization or specifies a country name code. In the name FLOWERS.COM,<br />
.COM indicates an organization engaged in commerce. The top-level domain can also indicate a<br />
country, such as .FR for France, or .IT for Italy. The name of the organization is to the left of the<br />
top-level domain, such as FLOWERS. Any words to the left of the top-level domain are called<br />
subdomains. The left-most word in the domain name is the host name. For example, in<br />
OAK.FLOWERS.COM, OAK is a host in the FLOWERS.COM organization.<br />
Domains <strong>and</strong> subdomains are organized in a hierarchical tree structure. Just as the root directory in<br />
VMS is expressed as an implicit 000000., the root directory in DNS is expressed as a dot (.).<br />
Domains are analogous to directories; subdomains are analogous to subdirectories within<br />
directories.<br />
Top-level domains such as .ORG, .COM, <strong>and</strong> .EDU exist in the United States. Other countries<br />
group their domain names below their two-letter country code. Domains grouped under country<br />
codes include domains such as .CO for commercial <strong>and</strong> .AC for academic. In the United States, .US<br />
is occasionally used instead of another top-level domain name. Subdomains may provide additional<br />
geographic information, such as .PALO-ALTO.CA.US.<br />
DNS Server<br />
A DNS server is any computer running DNS software that lets it communicate with other DNS<br />
servers <strong>and</strong> store address information for later retrieval. DNS servers are also called name servers.<br />
Name servers cache (store) domain name information in memory for faster retrieval. Your network<br />
administrator provides the IP address of the name server on your network. Hosts implementing<br />
6-11
Introduction to <strong>MultiNet</strong> <strong>and</strong> TCP/IP Concepts<br />
6-12<br />
DNS come in five varieties:<br />
Root name server A root name server provides information about the start or base of the<br />
domain name tree. A root name server delegates authority to other<br />
primary name servers for the top-level domains such as .COM, .EDU,<br />
.US, .IT, etc. A root name server usually also h<strong>and</strong>les those domains<br />
just below the root.<br />
Primary name server A primary name server has authority over one or more domains or<br />
subdomains. A primary name server reads information about the<br />
domain over which it has authority from the zone file, a special file<br />
that describes information about the domain <strong>and</strong> the hosts in that<br />
domain.<br />
Secondary name server A secondary name server for a domain receives information updates<br />
from the primary name server for that domain at regular intervals, <strong>and</strong><br />
stores this information on disk. A secondary server is also<br />
authoritative for the domain.<br />
Caching-only name<br />
server<br />
Host Tables<br />
A caching-only name server is not authoritative for any domain. If a<br />
caching-only name server cannot resolve a request, it forwards the<br />
request to an authoritative name server for that domain <strong>and</strong> caches the<br />
results for future use.<br />
Resolver A resolver sends requests for resolution to a DNS server. Any name<br />
server that can h<strong>and</strong>le the request returns the response.<br />
If DNS is not configured on your network, you can configure <strong>MultiNet</strong> host tables to resolve names<br />
<strong>and</strong> addresses. Like DNS, host tables also map between IP addresses <strong>and</strong> host names; unlike DNS,<br />
however, the information is stored locally on your computer <strong>and</strong> must be updated manually. Using<br />
host tables, you must ensure that every host name you specify while running TCP/IP applications is<br />
listed with its IP address. Whenever a change occurs on the network, such as when a new computer<br />
is added that you need to access, you must add the information to the host table. With the growth of<br />
the Internet, maintaining host tables for it has become practically impossible.<br />
When you add or modify a host table entry, you specify the host name, the IP address, an optional<br />
description, <strong>and</strong> one or more optional, alternative names (aliases) for the host.<br />
Using DNS <strong>and</strong> Host Tables Together<br />
If you are using DNS, you may also want to use host tables. This is useful for temporary situations,<br />
such as when a new computer is added to the network, but has not yet been added to DNS.<br />
The advantage of using DNS <strong>and</strong> host tables together for name resolution is that your system can<br />
access other systems even if the DNS server is not running or if the network is down. If you<br />
maintain entries in the host table for your local network, you can continue communicating with<br />
local systems until the DNS server or network is restored.
Introduction to <strong>MultiNet</strong> <strong>and</strong> TCP/IP Concepts<br />
Warning!: It is crucial to keep your host table entries synchronized with the DNS information.<br />
ARP (Address Resolution Protocol)<br />
Before hosts can communicate with each other, the sending host must discover the hardware<br />
address of the receiving host.<br />
Hardware addresses are unique numbers (for example, 00:DD:A8:13:48:C5) assigned to network<br />
interface boards by their manufacturers or by network administrators.<br />
ARP (Address Resolution Protocol) discovers the hardware address corresponding to a specific IP<br />
address <strong>and</strong> dynamically binds the hardware address to the IP address.<br />
ARP is a low-level protocol that lets network administrators assign IP addresses to hosts on a<br />
network as they see fit. There is no need to match the addresses to those on the physical network<br />
because ARP h<strong>and</strong>les this process dynamically.<br />
An ARP mapping (also called a translation) provides the correct delivery address (that is, the<br />
hardware address) on the network for data destined for an IP address. ARP mappings are stored in a<br />
table in memory known as the ARP cache.<br />
When data is to be delivered to a local IP address (an IP address on the same physical network), the<br />
TCP/IP stack broadcasts an ARP request to all hosts on the local network segment. The request<br />
message asks all hosts if the IP address belongs to them. If the IP address belongs to a host on the<br />
local network segment, that host adds its hardware address to the packet <strong>and</strong> returns it to the sender.<br />
All other hosts on the network discard the request. The ARP cache stores the address resolution<br />
information returned <strong>and</strong> makes it available each time network data is bound for that IP address.<br />
Old mappings are deleted from the ARP cache automatically after a short period of time. Old<br />
mappings are also deleted automatically when they no longer work (that is, when new, correct<br />
mappings become available).<br />
Neighbor Discovery<br />
Neighbor Discovery is the IPv6 mechanism for mapping an IPv6 address to a hardware interface<br />
address. It works in similar ways to ARP does for IPv4, though it has improvements to reduce the<br />
impact on nodes other than the one that the address is being resolved for. Neighbor Discovery is<br />
also used as part of the Duplicate Address Detection portion of the autoconfiguration of interfaces.<br />
SNMP (Simple Network Management Protocol)<br />
SNMP (Simple Network Management Protocol) allows you to manage remote hosts on a network<br />
(for example, routers, hubs, <strong>and</strong> workstations). Both the network management host <strong>and</strong> the<br />
managed hosts (called agents) must follow the SNMP rules. Because SNMP is an open st<strong>and</strong>ard,<br />
you can mix <strong>and</strong> match network management hosts <strong>and</strong> agents from different vendors.<br />
SNMP maintains information about your workstation in a management information base (MIB).<br />
SNMP Traps<br />
One of the main uses of SNMP is to make it easy to keep track of important events that occur on the<br />
6-13
Introduction to <strong>MultiNet</strong> <strong>and</strong> TCP/IP Concepts<br />
6-14<br />
managed network. To help automate network management, SNMP agents automatically send<br />
messages called traps to the network management host when certain events occur. For example,<br />
your workstation sends a trap when you reboot it.<br />
One important type of SNMP trap is the authentication failure trap. Because SNMP network<br />
management hosts have access to sensitive configuration settings for the hosts on a managed<br />
network, it is important for network administrators to guard against breaches in network security<br />
that involve illegitimate use of SNMP messages.<br />
For this reason, every SNMP message must be authenticated by network management hosts <strong>and</strong><br />
SNMP agents using passwords called communities. If your agent receives an SNMP message that<br />
contains an incorrect community name for the type of operation requested, your agent sends a<br />
message to a network management host. This message contains information about the request your<br />
agent received:<br />
• What the message requested<br />
• Why your agent would not fulfill the request<br />
SNMP Communities<br />
An SNMP community is a type of password used by the SNMP network management host <strong>and</strong><br />
SNMP agents to ensure that only known <strong>and</strong> trusted hosts can send SNMP messages to <strong>and</strong> receive<br />
SNMP messages from each other. Every SNMP message includes a community name, so every<br />
message can be validated. There are three types of community names:<br />
Read The network management host must use the correct read community name when asking<br />
your SNMP agent to send it information about your host.<br />
Write The network management host must use the correct write community name when<br />
asking your SNMP agent to change some characteristic about your configuration.<br />
Trap If certain events happen in your workstation (for example, when you reboot your host,<br />
or when a network management host sends an SNMP message that contains the wrong<br />
read or write community name), your SNMP agent sends a trap message to a network<br />
management host. If your trap message is to be h<strong>and</strong>led, the trap community name you<br />
send must match the name known to the target network management host.
Chapter 7<br />
Devices, Protocols, <strong>and</strong> <strong>MultiNet</strong> Internals<br />
This chapter lists the devices <strong>and</strong> protocols supported by <strong>MultiNet</strong> <strong>and</strong> explains how the <strong>MultiNet</strong><br />
kernel interacts with the OpenVMS Operating System.<br />
Devices Supported by <strong>MultiNet</strong><br />
<strong>MultiNet</strong> supports a variety of network topologies. Table 7-1 lists the supported network interfaces.<br />
Table 7-1 Supported Devices<br />
HP Ethernet controller (shared)<br />
HP FDDI controller (shared)<br />
IP-over-DECnet link<br />
Asynchronous PPP using any OpenVMS-supported terminal multiplexer<br />
SLIP (Serial Line IP) using any OpenVMS-supported terminal multiplexer<br />
Turbochannel <strong>and</strong> PCI Token-Ring interfaces for OpenVMS Alpha<br />
Six-To-Four IPv6 over IPv4 tunneling interface<br />
HP Token-Ring adaptors on OpenVMS Alpha<br />
7-1
Devices, Protocols, <strong>and</strong> <strong>MultiNet</strong> Internals<br />
Protocols Supported by <strong>MultiNet</strong><br />
7-2<br />
<strong>MultiNet</strong> is compatible with the current versions of the st<strong>and</strong>ard Internet networking protocol
specifications listed in Table 7-2.<br />
Table 7-2 Supported Protocols<br />
Devices, Protocols, <strong>and</strong> <strong>MultiNet</strong> Internals<br />
BGP (Border Gateway Protocol): RFC-1105, RFC-1323<br />
BOOTP (Network Bootstrap Protocol): RFC-951, RFC-1534, RFC-1542, RFC-2132<br />
DHCP (Dynamic Host Configuration Protocol):RFC-2131, RFC-2132<br />
DNS (Domain Name Service): RFC-1034, RFC-1035, RFC-1101, RFC-1348<br />
EGP (Exterior Gateway Protocol): RFC-904<br />
Ethernet ARP (Address Resolution Protocol): RFC-826<br />
Ethernet RARP (Reverse Address Resolution Protocol): RFC-903<br />
FDDI (Fiber Distributed Data Interface): RFC-1188<br />
FINGER (User Status Protocol): RFC-1288<br />
FTP (File Transfer Protocol): RFC-959, RFC-1579, RFC-2389, RFC-2428<br />
ICMP (Internet Control Message Protocol): RFC-792, RFC-1256<br />
IP (Internet Protocol): RFC-791<br />
IP-over-X.25: RFC-87<br />
IPv6:RFC-2460, RFC-4294<br />
ICMP6. RFC 2463<br />
IPP (Internet Printing Protocol): RFC-2910, RFC 2911<br />
Kerberos: RFC-1411, RFC-1510<br />
NFS (Network File System): RFC-1094<br />
NTP (Network Time Protocol): RFC-1059<br />
OSPF (Open Shortest Path First): RFC-1583, RFC-1584<br />
Path MTU (Maximum Transmission Unit) Discovery: RFC-1191<br />
POP2 (Post Office Protocol Version 2): RFC-937<br />
POP3 (Post Office Protocol Version 3): RFC-1725<br />
PPP (Point-to-Point Protocol): RFC-1332, RFC-1552, RFC-1661<br />
RIP (Routing Information Protocol): RFC-1058<br />
RPC (Remote Procedure Call Protocol): RFC-1057<br />
SLIP (Serial Line Internet Protocol): RFC-1055, RFC-1144<br />
SMTP (Simple Mail Transfer Protocol): RFC-821, RFC-822, RFC-974<br />
SNMP (Simple Network Management Protocol): RFC-1157, RFC-1213<br />
SNMP Agent eXtensibility (RFC-2741, RFC-2742)<br />
SYSTAT (Active Users Service Protocol): RFC-866<br />
TCP (Transmission Control Protocol): RFC-793<br />
TELNET (network virtual terminal protocol): RFC-854, RFC-855, RFC-856, RFC-857,<br />
RFC-2941<br />
RFC-858, RFC-859, RFC-860, RFC-885, RFC-1041, RFC-1073, RFC-1079, RFC-1091,<br />
RFC-1096, RFC-1205, RFC-1372, RFC-1411, RFC-1416<br />
TFTP (Trivial File Transfer Protocol): RFC-1350<br />
TN3270: RFC-1576<br />
UDP (User Datagram Protocol): RFC-768<br />
WHOIS (Directory Service Protocol): RFC-954<br />
XDR (eXternal Data Representation): RFC-1014<br />
7-3
Devices, Protocols, <strong>and</strong> <strong>MultiNet</strong> Internals<br />
Underst<strong>and</strong>ing <strong>MultiNet</strong> Internals<br />
7-4<br />
This section describes how the <strong>MultiNet</strong> kernel interacts with the OpenVMS Operating System. To<br />
underst<strong>and</strong> the information in this section, some background in OpenVMS internals is helpful.<br />
Figure 7-1illustrates the <strong>MultiNet</strong> protocols <strong>and</strong> the overall organization of the <strong>MultiNet</strong> kernel. 1<br />
Figure 7-1 <strong>MultiNet</strong> Organization<br />
<strong>MultiNet</strong> interacts directly with the OpenVMS Operating System. Generic sockets pass requests to<br />
the protocol switch, that differentiates between requests for IP use <strong>and</strong> for other support facilities.<br />
Requests are then sent through the network interface switch, which identifies the device for which<br />
the request is bound. When a request is received from a device, the steps occur in reverse.<br />
The $QIO Interface<br />
The programs implementing the lower layers of <strong>MultiNet</strong> — data link, network, <strong>and</strong> transport<br />
layers, with the exception of shared OpenVMS device drivers — reside in the <strong>MultiNet</strong> kernel. The<br />
<strong>MultiNet</strong> kernel is loaded into the OpenVMS S0 space (where the OpenVMS kernel is also loaded).<br />
Pages for S0 space are allocated when the OpenVMS system boots.<br />
Note! You must use the SPTREQ SYSGEN parameter on VAX systems to set aside the appropriate<br />
number of S0 pages.<br />
The <strong>MultiNet</strong> kernel accommodates multiple $QIO interfaces. Each $QIO interface is implemented<br />
by a separate OpenVMS pseudo-device driver, allowing <strong>MultiNet</strong> to simultaneously support the<br />
$QIO interfaces of several popular networking implementations. This lets you use, without<br />
modification, applications designed for these other networking implementations. The default<br />
<strong>MultiNet</strong> $QIO interface, implemented in INETDRIVER.EXE, is used by the <strong>MultiNet</strong> shareable<br />
1. Support is provided for ATM, Ethernet, FDDI, <strong>and</strong> Token Ring as well as PPP <strong>and</strong> SLIP.
Devices, Protocols, <strong>and</strong> <strong>MultiNet</strong> Internals<br />
socket library <strong>and</strong> all <strong>MultiNet</strong> applications.<br />
All <strong>MultiNet</strong> $QIO drivers communicate with the <strong>MultiNet</strong> kernel through a set of kernel transfer<br />
vectors that interface with the generic socket layer. The generic socket layer of the <strong>MultiNet</strong> kernel<br />
provides most of the facilities common to all network protocols (including reading <strong>and</strong> writing<br />
user-level data <strong>and</strong> synchronizing OpenVMS I/O request packets with network protocol events).<br />
The generic socket layer uses the protocol switch for protocol-specific operations. The protocolspecific<br />
code (which may consist of several interconnected protocol modules) calls through the<br />
network interface switch to the appropriate network device driver to encapsulate <strong>and</strong> transmit<br />
packets.<br />
The protocol-specific code can also receive timer interrupts through the protocol switch. Incoming<br />
packets are decapsulated by the network device drivers <strong>and</strong> passed to the protocol-specific code<br />
through the network interface switch.<br />
Network Interface Device Drivers<br />
The <strong>MultiNet</strong> kernel includes code allowing it to h<strong>and</strong>le I/O for most network interface devices<br />
itself, rather than using OpenVMS device drivers. However, for devices that <strong>MultiNet</strong> shares with<br />
other software (for example, a Hewlett-Packard Ethernet interface), the kernel uses st<strong>and</strong>ard<br />
OpenVMS device drivers <strong>and</strong> either VCI (VMS Communication Interface), FFI (Fast Function<br />
Interface), or ALTSTART driver interfaces.<br />
Custom Applications<br />
The include <strong>and</strong> library files (optionally installed with <strong>MultiNet</strong>) provide access to several<br />
programming interfaces for writing custom client <strong>and</strong> server applications. These interfaces include:<br />
• A 4.3BSD-compatible shareable socket library<br />
• A 4.4BSD-compatible shareable socket library<br />
• An RPC (Remote Procedure Call) library based on Sun Microsystems' public domain RPC<br />
library<br />
• The st<strong>and</strong>ard <strong>MultiNet</strong> $QIO interface<br />
• A $QIO interface compatible with the HP TCP/IP Services for OpenVMS 1<br />
Consult the Programmer's Reference for additional information about the socket library <strong>and</strong> the<br />
<strong>MultiNet</strong> $QIO programming interface. The Sun RPC library routines are documented in the Sun<br />
Microsystems guide, Networking on the Sun Workstation.<br />
1. Formerly called VMS/ULTRIX Connection or UCX (The Ultrix Connection). References in the <strong>MultiNet</strong><br />
documentation set may refer to either UCX or HP TCP/IP Services for OpenVMS.<br />
7-5
Table 7-3 shows the correspondence between the <strong>MultiNet</strong> components listed in Figure 7-1<strong>and</strong> the<br />
layers of the OSI (Open Systems Interconnection) seven-layer reference model.<br />
Table 7-3 <strong>MultiNet</strong> Correspondence with the OSI Reference Model<br />
Application, Presentation, Session<br />
Session, Transport<br />
Network<br />
Data Link<br />
Physical<br />
FTP, TELNET, FINGER, other applications<br />
TCP, UDP IP, ICMP Ethernet, ARP, X.25, IMP,<br />
802.2 Coax, Fiber, Luminiferous Ether, <strong>and</strong> so on<br />
Note! The protocol suites implemented under <strong>MultiNet</strong> do not map one-to-one onto the OSI reference<br />
model. In particular, each TCP/IP application protocol generally h<strong>and</strong>les the functions normally<br />
ascribed to the Application <strong>and</strong> Presentation layers of the OSI model.
Chapter 8<br />
Getting Additional Information<br />
This chapter describes additional sources of information about topics relevant to <strong>MultiNet</strong>.<br />
RFCs (Requests for Comment)<br />
The Defense Data Network (DDN) Network Information Center (NIC) has collected extensive<br />
online archives of information useful to TCP/IP network designers <strong>and</strong> managers. Of particular<br />
interest are the Internet RFCs (Requests For Comments) that detail the protocol st<strong>and</strong>ards for the<br />
TCP/IP protocol suite.<br />
The <strong>MultiNet</strong> consolidated distribution CD-ROM contains ZIP files with copies of the Internet<br />
RFCs in the directory [RFCS].<br />
For a list of supported RFCs <strong>and</strong> information on obtaining them, invoke the following comm<strong>and</strong>:<br />
$ HELP MULTINET RFC_INFO<br />
Other Documentation<br />
The following list describes additional documentation you can purchase about TCP/IP, UNIX, <strong>and</strong><br />
other subjects relevant to an underst<strong>and</strong>ing of <strong>MultiNet</strong>. Read the FTP chapter of the User's <strong>Guide</strong><br />
for instructions on accessing systems via anonymous FTP.<br />
• !%@:: A Directory of Electronic Mail Addressing <strong>and</strong> Networks<br />
Donnalyn Frey <strong>and</strong> Rick Adams<br />
1989, O'Reilly & Associates, Inc., 103 Morris Street, Suite A, Sebastopol, CA 95472<br />
• DNS <strong>and</strong> BIND, Fourth Edition<br />
Paul Albitz <strong>and</strong> Cricket Liu<br />
2001, O'Reilly & Associates, Inc., 103 Morris Street, Suite A, Sebastopol, CA 95472<br />
ISBN 0-59600-158-4<br />
• The DHCP H<strong>and</strong>book: Underst<strong>and</strong>ing, Deploying, <strong>and</strong> Managing Automated Configuration<br />
Services<br />
Ralph Droms <strong>and</strong> Ted Lemon<br />
1999, Macmillan Technical Publishing, 201 West 103rd Street, Indianapolis, IN 46290<br />
ISBN 1-57870-137-6<br />
• FYI on A Network Management Tool Catalog: Tools for Monitoring <strong>and</strong> Debugging TCP/IP<br />
8-1
Getting Additional Information<br />
8-2<br />
Internets <strong>and</strong> Interconnected Devices, RFC-1470<br />
IETF NOCTools Working Group<br />
• H<strong>and</strong>book of Computer Communications St<strong>and</strong>ards, Department of Defense (DOD) Protocol<br />
St<strong>and</strong>ards, Volume 3<br />
William Stallings, Paul Mockapetris, Sue McLeod, Tony Michel<br />
1988, Macmillan Publishing Co., New York, NY<br />
• Internetworking with TCP/IP, Volume I, Principles, Protocols, <strong>and</strong> Architecture,<br />
Internetworking with TCP/IP, Volume II, Design, Implementation, <strong>and</strong> Internals,<br />
Internetworking with TCP/IP, Volume III, Client - Server Programming <strong>and</strong> Applications<br />
Douglas E. Comer (Volume I); Douglas E. Comer, David L. Stevens (Volumes II <strong>and</strong> III)<br />
Prentice Hall, Englewood Cliffs, NJ, ISBN 0-13- 468505-9 (Volume I), ISBN 0-13-472242-6<br />
(Volume II), ISBN 0-13-47222-2 (Volume III)<br />
• Internet System H<strong>and</strong>book<br />
Daniel C. Lynch <strong>and</strong> Marshall T. Rose<br />
1993, Addison-Wesley Publishing Company, Inc., Reading, Massachusetts<br />
ISBN 0-201-56741-5<br />
• Site Security H<strong>and</strong>book, RFC1244<br />
P. Holbrook, J. Reynolds<br />
1991<br />
• TCP/IP <strong>and</strong> NFS, Internetworking in a UNIX Environment<br />
Michael Santifaller<br />
1991, Addison-Wesley Publishing Company, Wokingham, Engl<strong>and</strong><br />
ISBN 0-201-54432-6<br />
• TCP/IP For Dummies — A Reference for the Rest of Us!<br />
Marshall Wilensky <strong>and</strong> C<strong>and</strong>ace Leiden<br />
1995, ISBN 1-56884-241-4 IDG Books Worldwide, Inc.,<br />
An International Data Group Company,<br />
919 East Hillsdale Blvd., Suite 400, Foster City, CA 94404<br />
• TCP/IP Illustrated, Volume I: The Protocols<br />
W. Richard Stevens<br />
Addison-Wesley Publishing Company, Reading, Massachusetts,<br />
ISBN 0-201-63346-9<br />
• TCP/IP Illustrated, Volume II: The Implementation<br />
W. Richard Stevens, Gary R. Wright<br />
Addison-Wesley Publishing Company, Reading, Massachusetts,<br />
ISBN 0-201-63354-X<br />
• TCP/IP Network Administration<br />
Craig Hunt<br />
1992, O'Reilly & Associates, Inc.,<br />
103 Morris Street, Suite A, Sebastopol, CA 95472<br />
• The Hitchhiker's <strong>Guide</strong> to the Internet, RFC-1118<br />
Ed Krol
Getting Additional Information<br />
• The Internet Companion, A Beginner's <strong>Guide</strong> to Global Networking<br />
Tracy LaQuey with Jeanne C. Ryer<br />
Foreword by Vice-President Al Gore<br />
1993, Addison-Wesley Publishing Company, Inc., Reading, Massachusetts<br />
• The Matrix: Computer Networks <strong>and</strong> Conferencing Systems Worldwide<br />
John S. Quarterman<br />
1989, Digital Press, Bedford, Massachusetts<br />
• The Simple Book, An Introduction to Management of TCP/IP-Based Internets<br />
Marshall T. Rose<br />
1991, Prentice Hall, Englewood Cliffs, NJ,<br />
ISBN 0-13-812611-9.<br />
Describes SNMP (Simple Network Management Protocol)<br />
• There's Gold in Them Thar Networks! Or Searching for Treasure in all the Wrong Places,<br />
RFC-1290<br />
J. Martin<br />
• The Whole Internet User's <strong>Guide</strong> & Catalog<br />
Ed Krol<br />
1992, O'Reilly & Associates, Inc., 103 Morris Street, Suite A, Sebastopol, CA 95472<br />
• UNIX Network Programming<br />
W. Richard Stevens<br />
1990, Prentice Hall, Englewood Cliffs, NJ,<br />
ISBN 0-13-949876-1<br />
• Users' Directory of Computer Networks<br />
Tracy L. LaQuey<br />
1990, Digital Press, Bedford, Massachusetts<br />
• Writing Real Programs in DCL<br />
Paul C. Anagnostopoulos<br />
1989, Digital Press, Bedford, MA,<br />
ISBN 1-55558-023-8.<br />
This document provides information about writing VMS comm<strong>and</strong> procedures.<br />
• X Window System, The Complete Reference to Xlib, X Protocol, ICCCM, XLFD<br />
Robert W. Scheifler <strong>and</strong> James Gettys<br />
1992, Digital Press; order number EY-J802E-DP<br />
• X Window System <strong>Administrator's</strong> <strong>Guide</strong><br />
Linda Mui <strong>and</strong> Eric Pearce<br />
Volume Eight of the O'Reilly X Window System series,<br />
O'Reilly & Associates, Inc.,<br />
ISBN 0-937175-83-8<br />
• Zen <strong>and</strong> the Art of Internet, A Beginner's <strong>Guide</strong><br />
Brendan P. Kehoe<br />
1992, PTR Prentice Hall, Englewood Cliffs, New Jersey,<br />
ISBN 0-13-010778-6<br />
8-3
Getting Additional Information<br />
8-4
PART II <strong>MultiNet</strong> Administrator’s <strong>Guide</strong><br />
Chapter 9 Configuration Overview<br />
Chapter 10 Host Table <strong>and</strong> DNS<br />
Chapter 11 Establishing IP Connectivity<br />
Chapter 12 Configuring <strong>MultiNet</strong> Services<br />
Chapter 13 Configuring Network Routing<br />
Chapter 14 Network Time Protocol (NTP)<br />
Chapter 15 Configuring Electronic Mail<br />
Chapter 16 Printer Configuration<br />
Chapter 17 RMT Server <strong>and</strong> Client Configuration<br />
Chapter 18 Configuring <strong>and</strong> Managing FTP<br />
Chapter 19 DHCP Client<br />
Chapter 20 Configuring the Font Server<br />
Chapter 21 Configuring Remote Systems with RARP, BOOTP, <strong>and</strong> DHCP<br />
Chapter 22 Managing the XDM Server<br />
Chapter 23 Configuring the <strong>MultiNet</strong> SNMP Services<br />
Chapter 24 Configuring <strong>MultiNet</strong> Kerberos Authentication Service<br />
Chapter 25 X11-Gateway Configuration<br />
Chapter 26 Configuring DECnet-over-IP Circuits<br />
Chapter 27 Configuring the MultNet NFS Server<br />
Chapter 28 Configuring the <strong>MultiNet</strong> NFS v3 Server<br />
Chapter 29 Using the NFS Client<br />
Chapter 30 Configuring the Secure Shell (SSH) v1 Server<br />
Chapter 31 Configuring the Secure Shell (SSH) v2 Server<br />
Chapter 32 Configuing IPSEC <strong>and</strong> SETKEY<br />
Chapter 33 Intrusion Prevention System (IPS)<br />
Appendix A Server Configuration Parameters<br />
Appendix B DNSSEC<br />
Part II Managing Networks
Part I I Managing Networks
Chapter 9<br />
Configuration Overview<br />
This chapter presents an overview of <strong>MultiNet</strong> configuration tasks <strong>and</strong> the configuration tools that<br />
<strong>MultiNet</strong> provides.<br />
Configuration Tasks Modifying Configuration Files<br />
Configuration Utilities Overview Modifying the Current Configuration<br />
Starting <strong>MultiNet</strong><br />
Configuration Tasks<br />
<strong>MultiNet</strong> configuration consists of the following tasks:<br />
Establishing Basic<br />
IP Connectivity<br />
Configuring<br />
services<br />
Configures your system so it can reach other systems with comm<strong>and</strong>s<br />
such as FTP (for transferring files) <strong>and</strong> TELNET (for connecting to<br />
remote systems), both of which are described in the <strong>MultiNet</strong> for<br />
OpenVMS User's <strong>Guide</strong>.<br />
The configuration options offered during <strong>MultiNet</strong> installation (see the<br />
<strong>Installation</strong> <strong>and</strong> Introduction) allow you to establish basic IP connectivity<br />
over a single HP Ethernet Interface. To establish basic IP connectivity<br />
over any of the other <strong>MultiNet</strong>-supported network interfaces, see Chapter<br />
11.<br />
Allows other hosts to access resources on your <strong>MultiNet</strong> system such as<br />
OpenVMS print queues, files, <strong>and</strong> fonts for X displays.<br />
By default, installing <strong>MultiNet</strong> configures several of the most often used<br />
services.<br />
To learn about <strong>MultiNet</strong> services in general, see Chapter 12. For details<br />
on configuring specific services such as GATED (for dynamic routing),<br />
DOMAINNAME (for Domain Name System-based host name lookup<br />
service), <strong>and</strong> FTP (for file transfers), refer to the appropriate chapters<br />
(13 through 30).<br />
Configuration Utilities Overview<br />
When <strong>MultiNet</strong> starts, it obtains configuration parameter values from a set of configuration files all<br />
found in the MULTINET: directory). Once <strong>MultiNet</strong> is running, you can change the configuration<br />
in two ways:<br />
9-1
Configuration Overview<br />
9-2<br />
• Modify configuration files using the MULTINET CONFIGURE comm<strong>and</strong>, which offers<br />
comm<strong>and</strong>-line <strong>and</strong> menu-driven (MENU-CONFIG) interfaces. After modifying files, you reload<br />
the configuration, which may require restarting or rebooting your system.<br />
When you use the MENU-CONFIG interface, you can display definitions of the parameters you<br />
can set.<br />
• Modify the current configuration in memory using the MULTINET SET comm<strong>and</strong> or by<br />
defining <strong>MultiNet</strong> logicals. These methods affect the configuration immediately <strong>and</strong> are<br />
recommended for advanced system managers only.<br />
Note! Modifying the current <strong>MultiNet</strong> configuration using the MULTINET SET comm<strong>and</strong> <strong>and</strong> <strong>MultiNet</strong><br />
logicals does not affect the <strong>MultiNet</strong> configuration files. Consequently, your changes are lost the<br />
next time unless you also modify <strong>MultiNet</strong> configuration files.<br />
Starting <strong>MultiNet</strong><br />
To start <strong>MultiNet</strong>, issue the following comm<strong>and</strong>s at the DCL prompt:<br />
$ REPLY/ENABLE=NETWORK/TEMP<br />
$ @MULTINET:START_MULTINET<br />
You must add an invocation of START_MULTINET.COM to the OpenVMS SYSTARTUP<br />
procedure, so <strong>MultiNet</strong> starts automatically the next time your system reboots.<br />
To make sure <strong>MultiNet</strong> is running, use the MULTINET CHECK comm<strong>and</strong>. If the message "all<br />
tests passed" appears, <strong>MultiNet</strong> is running. If error messages appear, note the source of the errors,<br />
<strong>and</strong> refer to the corresponding chapter in this guide for details on modifying the configuration.<br />
<strong>MultiNet</strong> starts with accounting enabled by default. To disable accounting in the Master Server,<br />
define the logical name MULTINET_SERVER_NOACNT with value 1 in the SYSTEM table<br />
before the Master Server starts.<br />
Restarting <strong>MultiNet</strong><br />
There are instances when you have to restart <strong>MultiNet</strong>. You can do this without rebooting VMS by<br />
executing the START_SERVER.COM comm<strong>and</strong> procedure in the <strong>MultiNet</strong> directory. This doesn’t<br />
reinitialize any interfaces, it most likely will not affect any running processes, it will not reload the<br />
kernel.<br />
Note! FTP <strong>and</strong> many other servers (POP3, REXEC, TELNET, etc.) will be unavailable for a short<br />
period so there could be brief interruptions with services.<br />
Modifying Configuration Files<br />
<strong>MultiNet</strong> configuration utilities, which you invoke with the MULTINET CONFIGURE comm<strong>and</strong>,<br />
provide two types of interfaces:<br />
• A comm<strong>and</strong>-line interface for each <strong>MultiNet</strong> configuration function<br />
• A menu-driven interface (MENU-CONFIG), which works on character-based terminals <strong>and</strong>
Configuration Overview<br />
offers the same level of access to <strong>MultiNet</strong> configuration parameters as the comm<strong>and</strong>-line<br />
interfaces. In addition, MENU-CONFIG offers the advantages of a graphical user interface,<br />
including selecting options <strong>and</strong> parameter values from a list instead of typing them.<br />
Both interfaces are available for configuring <strong>MultiNet</strong> features such as network interfaces, remote<br />
print queues, <strong>and</strong> the NFS Server.<br />
Note! In general, you should never directly edit the configuration files. In the case of a network<br />
interface configuration, however, you may need to manually create <strong>and</strong> edit a device-specific<br />
configuration (see Chapter 11).<br />
Using the Comm<strong>and</strong>-Line Interface Utilities<br />
Modifying <strong>MultiNet</strong> configuration files with the CONFIGURE utility's comm<strong>and</strong>-line interface<br />
consists of the following steps.<br />
Step 1: Checking Logicals<br />
Before running MULTINET CONFIGURE, make sure the logical names MULTINET <strong>and</strong><br />
MULTINET_ROOT are defined. These logical names are defined during installation but can be<br />
undefined manually or by rebooting without starting <strong>MultiNet</strong> automatically. To verify these<br />
logical names are defined, issue this comm<strong>and</strong>:<br />
$ SHOW LOGICAL MULTINET*<br />
If the logical names are undefined, issue this comm<strong>and</strong>:<br />
$ @SYS$SYSDEVICE:[MULTINET.your_hostname.MULTINET]START_MULTINET LOGICALS<br />
If the logical names are already defined, executing this comm<strong>and</strong> does not cause a problem.<br />
Step 2: Starting MULTINET CONFIGURE<br />
To start the comm<strong>and</strong>-line configuration utilities, enter:<br />
$ MULTINET CONFIGURE /qualifier<br />
/qualifier specifies the <strong>MultiNet</strong> feature you want to configure.<br />
Table 9-1 lists the tools available for editing configuration files <strong>and</strong> the comm<strong>and</strong>s that invoke<br />
them.<br />
Table 9-1 <strong>MultiNet</strong> Comm<strong>and</strong>-Line Interface Configuration Tools<br />
Configuration Type<br />
Configuration<br />
Utility DCL Comm<strong>and</strong><br />
Network Interfaces NET-CONFIG $ MULTINET CONFIGURE /INTERFACE<br />
Electronic Mail MAIL-CONFIG $ MULTINET CONFIGURE /MAIL<br />
Remote Print Queues PRINTER-CONFIG $ MULTINET CONFIGURE /PRINTERS<br />
9-3
Configuration Overview<br />
9-4<br />
Table 9-1 <strong>MultiNet</strong> Comm<strong>and</strong>-Line Interface Configuration Tools (Continued)<br />
Configuration Type<br />
<strong>MultiNet</strong> Servers SERVER-CONFIG $ MULTINET CONFIGURE /SERVERS<br />
<strong>MultiNet</strong> DECnet-over-<br />
IP Circuits<br />
Once the utility is started, its name appears as a prompt (such as NET-CONFIG>) at which you can<br />
enter comm<strong>and</strong>s.<br />
Step 3: Loading Configuration Files<br />
By default, each comm<strong>and</strong>-line configuration utility modifies the configuration files that <strong>MultiNet</strong><br />
reads when it starts. Usually, you need only modify configuration information <strong>and</strong> exit from the<br />
utility to change a configuration file.<br />
To maintain multiple configuration files, however, use the configuration utility GET comm<strong>and</strong> to<br />
load <strong>and</strong> replace the configuration currently loaded. This feature is useful for ab<strong>and</strong>oning modified<br />
configurations without quitting the utility.<br />
For example, to load a test configuration file named MULTINET:TEST.CONFIGURATION into<br />
NET-CONFIG, enter:<br />
NET-CONFIG>GET MULTINET:TEST.CONFIGURATION<br />
DECNET-CONFIG $ MULTINET CONFIGURE /DECNET<br />
<strong>MultiNet</strong> NFS Server NFS-CONFIG $ MULTINET CONFIGURE /NFS<br />
After you modify the configuration, you can save the file under the same name or a different name.<br />
Note! Although all comm<strong>and</strong>-line configuration utilities allow you to maintain multiple configuration<br />
files under different names, <strong>MultiNet</strong> only reads the st<strong>and</strong>ard configuration files, all of which are<br />
in the MULTINET: directory (see Table 9-2).<br />
Table 9-2 <strong>MultiNet</strong> Configuration File Summary<br />
Feature File <strong>and</strong> Description<br />
Configuration<br />
Utility DCL Comm<strong>and</strong><br />
BOOTP BOOTP-SERVER.CONFIGURATION — Provides booting information for<br />
diskless hosts using the BOOTP protocol. This file can be edited; use a text<br />
editor to maintain this file.<br />
Configuration NETWORK_DEVICES.CONFIGURATION — Lists network devices <strong>and</strong><br />
their configurations. This file is maintained by NET-CONFIG, <strong>and</strong> is read when<br />
<strong>MultiNet</strong> starts. Do not edit this file!
Table 9-2 <strong>MultiNet</strong> Configuration File Summary (Continued)<br />
Feature File <strong>and</strong> Description<br />
Configuration Overview<br />
DHCP DHCPD.CONF — Provides booting information for diskless hosts using the<br />
DHCP or BOOTP protocol. This file can be edited; use a text editor to maintain<br />
this file.<br />
DNS NAMED.CONF — Contains configuration information for the Internet DNS<br />
(Domain Name System) <strong>and</strong> the locations of other name service database files.<br />
This file can be edited; use a text editor to maintain this file.<br />
General MULTINET_VERSION — Contains the <strong>MultiNet</strong> version <strong>and</strong> revision level.<br />
Do not edit this file!<br />
9-5
Configuration Overview<br />
9-6<br />
Table 9-2 <strong>MultiNet</strong> Configuration File Summary (Continued)<br />
Feature File <strong>and</strong> Description<br />
Host Tables HOSTS.LOCAL — Contains the local host table, with protocols <strong>and</strong> services<br />
for your local network. This file can be edited; use a text editor to maintain this<br />
file.<br />
HOSTS.SERVICES — Contains the official protocols <strong>and</strong> services supported<br />
by the local host (refer to RFC-943 for additional information). Do not edit this<br />
file!<br />
HOSTS.TXT — Contains the DDN NIC host table, which lists the host names<br />
<strong>and</strong> Internet addresses of the Internet hosts known to the NIC. Because of the<br />
large size of this file, the HOSTS.TXT file provided with the <strong>MultiNet</strong><br />
distribution includes an entry for NIC.DDN.MIL (the NIC information server<br />
system) only, rather than the entire file. You can retrieve a current copy of the<br />
NIC host table from NIC.DDN.MIL (formerly SRI-NIC.ARPA) via<br />
anonymous FTP. Do not edit this file!<br />
Note! The HOSTS.TXT file located on NIC.DDN.MIL is no longer maintained<br />
by the DDN NIC. This file contains out-of-date information, <strong>and</strong> should<br />
be used with caution. If your host is connected to the Internet, it is<br />
highly recommended that you use DNS to provide host-to-IP address<br />
mappings.<br />
HOSTTBLUK.DAT — Contains a compiled, binary version of the two host<br />
table files MULTINET:HOSTS.LOCAL <strong>and</strong> MULTINET:HOSTS.TXT. It<br />
contains the names of all hosts (in alphabetical order) in the host table files.<br />
<strong>MultiNet</strong> utilities refer to HOSTTBLUK.DAT when attempting to complete a<br />
partially specified host name. Do not edit this file!<br />
NETWORK_DATABASE — A compiled, binary version of the host, protocol,<br />
<strong>and</strong> services information contained in the files MULTINET:HOSTS.LOCAL,<br />
MULTINET:HOSTS.SERVICES, <strong>and</strong> MULTINET:HOSTS.TXT. The<br />
NETWORK_DATABASE file allows applications to quickly look up the name<br />
or address of any host known in the host table files. Do not edit this file!<br />
When DNS is disabled, the NETWORK_DATABASE file provides the sole<br />
host lookup facility. When DNS is enabled, this database is only referred to if a<br />
name service query fails.<br />
NFS NFS.CONFIGURATION — Contains configuration information for the<br />
<strong>MultiNet</strong> NFS Client <strong>and</strong> NFS Server products. Do not edit this file!<br />
NTP NTP.CONF — Contains configuration information for the Network Time<br />
Protocol (NTP) service. This file can be edited; use a text editor to maintain this<br />
file.
Table 9-2 <strong>MultiNet</strong> Configuration File Summary (Continued)<br />
Feature File <strong>and</strong> Description<br />
Step 4: Modifying the Configuration<br />
Configuration Overview<br />
Printing REMOTE-PRINTER-QUEUES.COM — Configuration file for customizing<br />
printer queues. You must use MULTINET CONFIGURE/PRINTER to modify<br />
this file. You cannot edit it directly.<br />
RARP RARP.CONFIGURATION — Used by the <strong>MultiNet</strong> RARP server to determine<br />
Ethernet-to-IP address mappings so hosts <strong>and</strong> PCs can query the server to<br />
obtain their IP address. This file can be edited; use a text editor to maintain this<br />
file.<br />
“R” services HOSTS.EQUIV — Used by BSD "R" services to perform authentication on<br />
incoming connections. This file can be edited; use a text editor to maintain this<br />
file.<br />
Routing GATED.CONF — Used by the Gateway Daemon (GATED) service to<br />
configure the RIP, EGP, HELLO, OSPF, <strong>and</strong> BGP dynamic IP routing<br />
protocols. This file can be edited; use a text editor to maintain this file.<br />
Servers SERVICES.MASTER_SERVER — Contains a list of the <strong>MultiNet</strong> servers <strong>and</strong><br />
their configurations. This file is maintained by SERVER-CONFIG <strong>and</strong> is used<br />
by the <strong>MultiNet</strong> master server process. Do not edit this file!<br />
SNMP SNMPD.CONF — Contains configuration information for the <strong>MultiNet</strong> SNMP<br />
(Single Network Management Protocol) agent. Edit this file manually.<br />
SMTP SMTP_ALIASES — Contains SMTP (Simple Mail Transfer Protocol) mail<br />
alias <strong>and</strong> mailing list expansions. This file can be edited; use a text editor to<br />
maintain this file.<br />
START_SMTP.COM <strong>and</strong> START_SMTP_LOCAL.COM — Contain SMTP<br />
configuration information. Do not edit these files.<br />
SSH SSH2_DIR:SSHD_CONFIG - Contains configuration information for the SSH<br />
server. This file can be edited; use a text editor to maintain this file.<br />
SSH2_DIR:SSHD2_CONFIG - Contains configuration information for the<br />
SSH2 server. This file can be edited; use a text editor to maintain this file.<br />
TELNET MAP3270.DAT — Contains a keymap used by the TN3270 module of the<br />
TELNET client. The keymap maps keystrokes on st<strong>and</strong>ard ASCII terminals to<br />
IBM 327x special function keys. This file can be edited; use a text editor to<br />
maintain this file.<br />
Once you have loaded a configuration file into the configuration utility, you can modify the<br />
configuration with any comm<strong>and</strong>s the utility offers. Most utilities provide an assortment of SET<br />
9-7
Configuration Overview<br />
9-8<br />
<strong>and</strong> ADD comm<strong>and</strong>s. For guidelines on configuring with each utility, refer to the corresponding<br />
chapter in this guide.<br />
For complete details on the comm<strong>and</strong>s available in each utility, refer to the corresponding chapter<br />
in the <strong>MultiNet</strong> for OpenVMS <strong>Administrator's</strong> Reference or refer to the equivalent online reference<br />
by entering:<br />
$ HELP MULTINET CONFIGURE qualifier<br />
qualifier is the qualifier corresponding to the utility (see Table 9-1).<br />
All of the TN3270 <strong>and</strong> TN5250 clients have been modified to properly h<strong>and</strong>le large key mapping<br />
files like MAP3270.DAT <strong>and</strong> MAP5250.DAT without causing any access violations.<br />
The extended TN3270 client has been modified to allow you to change its notion of the local<br />
language <strong>and</strong> Icel<strong>and</strong>ic has been added to the supported languages.<br />
To use the extended TN3270 client, do the following:<br />
$ DEFINE MULTINET_TN3270_EMULATOR DPC_EXTENDED<br />
To change the local language,<br />
$ DEFINE MULTINET_DPC_TN3270_LANGUAGE language<br />
The language parameter can be one of the following:<br />
BRAZILIAN FRENCH<br />
CANADIAN<br />
Step 5: Verifying the Configuration<br />
NEW HEBREW SPANISH<br />
BUILTIN HEBREW GERMAN OLD BELGIAN SPANISH SPEAKING<br />
DANISH ICELANDIC OLD HEBREW SWISS<br />
FINNISH ITALIAN OLD PORTUGUESE UK ENGLISH<br />
FRENCH NEW BELGIAN PORTUGUESE US ENGLISH<br />
Because modified configuration files are not read until the next time <strong>MultiNet</strong> starts, it is useful to<br />
verify the validity of your changes before restarting. The NET-CONFIG <strong>and</strong> SNMP-CONFIG<br />
configuration utilities provide a CHECK comm<strong>and</strong> specifically for verifying your configuration.<br />
To verify changes made with either of these configuration utilities, use the CHECK comm<strong>and</strong> at<br />
the configuration utility prompt.<br />
Note! All <strong>MultiNet</strong> configuration utilities automatically execute the CHECK function when you exit.<br />
If there is a problem in the configuration, CHECK issues an error or warning message describing<br />
the problem.<br />
• An ERROR message indicates a potentially fatal problem; for example, a problem that could
Configuration Overview<br />
cause network access to fail completely.<br />
• A WARNING message indicates a less serious problem; for example, a problem that could<br />
cause the network to function in an unexpected manner.<br />
If the utility displays error messages, use the SHOW comm<strong>and</strong> to view your changes <strong>and</strong> spot the<br />
error that caused the message. Correct the error using the configuration utility, then use the<br />
CHECK comm<strong>and</strong> to confirm the validity of the configuration.<br />
The following example shows the automatic operation of CHECK after a NET-CONFIG session.<br />
Because the user executed an ADD comm<strong>and</strong> but specified a nonexistent OpenVMS device,<br />
CHECK issued an ERROR message. Because the user gave no IP address, CHECK issued a<br />
WARNING message.<br />
NET-CONFIG>ADD SL1<br />
[Adding new configuration entry for device "sl1"]<br />
VMS Device [TTA0] TXA0<br />
Baud Rate: [UNSPECIFIED] RETURN<br />
Header Compression Mode: [DISABLED] RETURN<br />
IP Address: [NONE] RETURN<br />
Point-to-Point Device IP Destination Address: [NONE] RETURN<br />
IP SubNet Mask: [NONE] RETURN<br />
[add (Serial Line IP): Csr=NONE, Flags=%X0]<br />
NET-CONFIG>EXIT<br />
ERROR: sl1 can't $ASSIGN to SLIP Device:<br />
%SYSTEM-W-NOSUCHDEV, no such device available<br />
WARNING: sl1 has no protocol addresses specified<br />
This network configuration FAILED the sanity check.<br />
Write startup file anyway ? [NO] NO<br />
$<br />
Step 6: Saving the Modified Configuration<br />
After making changes to the configuration you have read in, use the configuration utility's SAVE or<br />
WRITE comm<strong>and</strong> to save the configuration either to the default or to non-st<strong>and</strong>ard files.<br />
For example, to save network interface parameters, enter the following NET-CONFIG comm<strong>and</strong>:<br />
NET-CONFIG>SAVE<br />
Note! If you use the EXIT comm<strong>and</strong> to exit a configuration utility, the corresponding configuration<br />
files <strong>and</strong> startup comm<strong>and</strong> procedures are updated automatically.<br />
If you do not want to save the edited configuration, you have two choices:<br />
• Quit the utility without saving.<br />
• Load the original configuration file back into the utility.<br />
Step 7: Exiting MULTINET CONFIGURE<br />
To quit a configuration utility without saving your changes, use the QUIT comm<strong>and</strong> <strong>and</strong> enter NO<br />
when prompted to save the configuration.<br />
9-9
Configuration Overview<br />
9-10<br />
To save the configuration <strong>and</strong> exit:<br />
• Use the EXIT comm<strong>and</strong>, which automatically saves the configuration without prompting.<br />
• Use the QUIT comm<strong>and</strong> <strong>and</strong> enter YES when prompted to save the configuration.<br />
Note! Most configuration changes take effect the next time <strong>MultiNet</strong> starts. In some cases, however,<br />
such as when you add new network interfaces <strong>and</strong> change some global parameters, the<br />
changes take effect only after the system reboots. The configuration procedures in this guide<br />
tell you when to restart <strong>MultiNet</strong> or reboot your system.<br />
Using MENU-CONFIG<br />
<strong>MultiNet</strong> MENU-CONFIG is a menu-driven utility that modifies configuration files for the same<br />
<strong>MultiNet</strong> features as the comm<strong>and</strong>-line configuration utilities. MENU-CONFIG offers the<br />
following advantages:<br />
• Menus of comm<strong>and</strong>s, parameters, <strong>and</strong> values<br />
• Context-sensitive help that describes comm<strong>and</strong>s <strong>and</strong> parameters before you choose them<br />
• Navigation prompts that explain how to move from screen to screen<br />
• Two levels of configuration access: basic <strong>and</strong> extended<br />
• Keyboard-driven interface that works over character-based terminals (DECwindows is not<br />
required)<br />
Modifying <strong>MultiNet</strong> configuration files with MENU-CONFIG utilities consists of the following<br />
steps:<br />
1 Starting MENU-CONFIG.<br />
2 Selecting Basic or Extended mode.<br />
3 Modifying the loaded configuration.<br />
4 Saving the modified configuration file.<br />
5 Quitting MENU-CONFIG.<br />
6 Putting your changes into effect.<br />
Step 1: Starting MENU-CONFIG<br />
To start MENU-CONFIG, enter:<br />
$ MULTINET CONFIGURE /MENU [/NOBOLD]<br />
Use the /NOBOLD qualifier if your terminal does not support boldface characters or you are<br />
working over a serial line <strong>and</strong> do not want to wait for the fonts to download.
When MENU-CONFIG starts, the main menu appears.<br />
The MENU-CONFIG display consists of five main parts:<br />
Configuration Overview<br />
• The menu title at the top of the display indicates which <strong>MultiNet</strong> feature you are configuring.<br />
• The menu mode indicator shows the menu comm<strong>and</strong> level: Basic or Extended.<br />
• The comm<strong>and</strong> menu area lists your current options, either as a list of comm<strong>and</strong>s or a list of<br />
parameters <strong>and</strong> corresponding values.<br />
• The navigation prompt area indicates how to exit the current menu or how to specify parameter<br />
values that have a specific format (such as a comma-delimited list of names) or that can be<br />
picked from a fixed list of values (such as ENABLE <strong>and</strong> DISABLE).<br />
• The context-sensitive help area describes the comm<strong>and</strong> or parameter currently selected.<br />
Step 2: Selecting Basic or Extended Mode<br />
For most common configuration tasks, the default basic mode is sufficient. Use extended mode to<br />
perform tasks that you do less often, such as deleting services.<br />
To switch between basic <strong>and</strong> extended mode, press PF1.<br />
Step 3: Modifying the Configuration<br />
MENU-CONFIG comm<strong>and</strong>s are arranged in a hierarchy. You traverse the hierarchy by choosing<br />
comm<strong>and</strong>s from the comm<strong>and</strong> menu area <strong>and</strong> exiting when you complete your modifications. The<br />
top-level menu lists the <strong>MultiNet</strong> features you can configure. Selecting a comm<strong>and</strong> from this menu<br />
9-11
Configuration Overview<br />
9-12<br />
loads the corresponding configuration file <strong>and</strong> displays the comm<strong>and</strong>s for modifying it.<br />
To choose a comm<strong>and</strong>:<br />
1 Select the comm<strong>and</strong> with the up or down arrow key.<br />
2 Press RETURN. The comm<strong>and</strong> menu displays your options.<br />
To modify a parameter value:<br />
1 Select the parameter with the up or down arrow key.<br />
2 Enter the desired value. Some parameters have a fixed set of values (such as ENABLED <strong>and</strong><br />
DISABLED). In those cases, you choose a value by traversing the values with SPACE.<br />
Some menus provide comm<strong>and</strong>s that allow you to ab<strong>and</strong>on or save your modifications before<br />
returning to the previous menu. When the comm<strong>and</strong> menu area lists parameter values, however,<br />
you must press Ctrl/Z to keep your changes. If you have changed any parameter values, MENU-<br />
CONFIG asks if you want to save your changes. To keep your changes, enter Y. To ab<strong>and</strong>on your<br />
changes, enter N.<br />
Note! Keeping your parameter changes does not mean they are saved in the configuration file.<br />
MENU-CONFIG only saves modified configuration files when you return to the main comm<strong>and</strong><br />
menu.<br />
Step 4: Saving the Configuration<br />
MENU-CONFIG allows you to save modified configuration files when you return to the main<br />
comm<strong>and</strong> menu. The comm<strong>and</strong> menu area includes two comm<strong>and</strong>s for returning to the main menu:<br />
• To save your configuration file changes, choose Save Changes <strong>and</strong> Return to Previous Menu.<br />
• To exit the current menu without saving your configuration file changes, choose Ab<strong>and</strong>on<br />
Changes <strong>and</strong> Return to Previous Menu.<br />
Alternatively, you can press Ctrl/Z to exit any menu. If you have changed the configuration,<br />
MENU-CONFIG asks if you want to save the changes in the configuration file.<br />
Step 5: Quitting MENU-CONFIG<br />
To quit MENU-CONFIG:<br />
1 Return to the main menu, <strong>and</strong> save or ab<strong>and</strong>on your changes as needed.
Configuration Overview<br />
2 Return to the DCL prompt by pressing Ctrl/Z or by choosing Exit Utility from the comm<strong>and</strong><br />
menu area.<br />
Putting Configuration File Changes into Effect<br />
In almost all cases, you must restart some portion of <strong>MultiNet</strong> when you change <strong>MultiNet</strong><br />
configuration files. In some cases, such as adding new network interfaces or changing some global<br />
parameters, you may have to reboot your system before the changes take effect.<br />
Certain configurations of some features, such as the SNMP agent, can be reloaded into the current<br />
configuration without restarting the <strong>MultiNet</strong> master server process (MULTINET_SERVER).<br />
The configuration procedures in this guide indicate when reloading, restarting the<br />
MULTINET_SERVER process, or rebooting your system is required.<br />
Modifying the Current Configuration<br />
The MULTINET SET comm<strong>and</strong> provides a mechanism for knowledgeable system managers to<br />
manipulate the current configuration without restarting the MULTINET_SERVER process or<br />
rebooting the system. Use MULTINET SET with caution.<br />
You can use MULTINET SET to:<br />
• Modify local timezone information<br />
• Modify DECnet-over-IP circuits<br />
• Modify network interface configuration<br />
• Manipulate the ARP table<br />
• Manipulate the routing table<br />
If you use the /SNMP_HOST qualifier, MULTINET SET can affect ARP tables, routing tables, <strong>and</strong><br />
network interface configuration of remote hosts running a MIB-II-compliant SNMP agent, such as<br />
the <strong>MultiNet</strong> SNMP agent (see Chapter 23).<br />
For a detailed description of MULTINET SET, refer to the <strong>MultiNet</strong> for OpenVMS <strong>Administrator's</strong><br />
Reference.<br />
Note! Because MULTINET SET affects only the current configuration <strong>and</strong> does not affect the<br />
configuration files, any changes made with MULTINET SET are lost the next time you start<br />
<strong>MultiNet</strong>.<br />
9-13
Chapter 10<br />
Host Tables <strong>and</strong> DNS<br />
This chapter describes host tables <strong>and</strong> the Internet Domain Name System (DNS). Both host tables<br />
<strong>and</strong> DNS provide a way of associating host IP addresses with host names.<br />
The chapter also describes how to use DNS load balancing for TCP-based services on cluster<br />
nodes. Load balancing helps to provide uninterrupted services if an individual server crashes or<br />
cannot h<strong>and</strong>le the number of users trying to access it simultaneously.<br />
Methods of Associating IP Addresses <strong>and</strong><br />
Host Names<br />
Methods of Associating IP Addresses <strong>and</strong> Host Names<br />
The two methods of associating IP addresses <strong>and</strong> host names are:<br />
Using the Domain Name System (DNS)<br />
Creating the Host Table Source Files DNS Load Balancing<br />
Multicast Name Resolution<br />
• Host tables, which offer a simplified method of translating a host name into an Internet address,<br />
can become unmanageable if there are many hosts on your network.<br />
• DNS, which is more complicated to configure, offers the advantages of a distributed database.<br />
• Multicast name resolution, which requires little configuration <strong>and</strong> is designed for small networks<br />
operating on a single logical LAN.<br />
If you are connected to the Internet, DNS gives you access to the Internet DNS.<br />
When you install <strong>MultiNet</strong>, you are asked if you want to use host tables or DNS. You can change<br />
your decision after installation using the instructions in this chapter.<br />
DNS <strong>and</strong> the host table service are completely separate entities. If DNS is enabled, <strong>MultiNet</strong> only<br />
accesses host tables if a DNS query fails. DNS, however, never contacts the host table service, <strong>and</strong><br />
no data is shared between these two services.<br />
In addition to the administrative comm<strong>and</strong>s provided for configuring host tables <strong>and</strong> DNS,<br />
10-1
Host Tables <strong>and</strong> DNS<br />
10-2<br />
<strong>MultiNet</strong> provides C language library routines that can access either host tables or DNS. (See the<br />
<strong>MultiNet</strong> for OpenVMS Programmer's Reference for more details.)<br />
Note! For illustrative purposes ONLY, the section on host tables in this chapter assumes that you<br />
are not connected to the Internet, <strong>and</strong> the section on DNS assumes that you are<br />
connected to the Internet.<br />
Host Table<br />
A host table is a file that describes network protocols, services, <strong>and</strong> host information accessed by<br />
utilities such as TELNET, RLOGIN, <strong>and</strong> TCPDUMP. To create a host table:<br />
1 Build or retrieve the host table in one of the following ways:<br />
• Add site-specific information to the HOSTS.LOCAL file to describe protocol, service, network,<br />
<strong>and</strong> host characteristics. This method is described in the Configuring the Host Table section.<br />
• If you have a UNIX-style /etc/hosts file, convert it as described in the Converting a UNIX /etc/<br />
hosts File section.<br />
2 Compile the host table file as described in the Compiling the Host Table section. The next time<br />
<strong>MultiNet</strong> starts, it installs the compiled host table as a global section.<br />
3 To use the new, compiled host table, install it as a global section (see the Installing a Compiled<br />
Host Table as a Global Section section).<br />
Once you install the compiled host table, <strong>MultiNet</strong> uses it to convert host names to IP addresses <strong>and</strong><br />
vice versa. <strong>MultiNet</strong>'s resolution of host names <strong>and</strong> addresses is invisible to users.<br />
Creating the Host Table Source Files<br />
The first step in creating a host table is to gather the appropriate source files. There are three ways<br />
to obtain source files:<br />
• Modify existing source files.<br />
• Convert source files from other systems.<br />
• Write completely new files.<br />
Host Table Source Files<br />
The compiled form of the <strong>MultiNet</strong> host table is stored in the binary file<br />
MULTINET:NETWORK_DATABASE. The following list describes the source files from which<br />
the host table is compiled.<br />
File name Description<br />
MULTINET:HOSTS.LOCAL Contains any locally defined hosts, protocols, <strong>and</strong> services.<br />
Add custom host table entries to this file. For details on the<br />
source file format, see Configuring the Host Table.
File name Description<br />
Host Tables <strong>and</strong> DNS<br />
MULTINET:HOSTS.SERVICES Contains st<strong>and</strong>ard information necessary for the operation<br />
of <strong>MultiNet</strong> <strong>and</strong> is subject to change when you upgrade<br />
<strong>MultiNet</strong>. Do not modify this file.<br />
All host table source files contain text in the form described by RFC-952, "DoD Internet Host Table<br />
Specification," with extensions provided to allow information not anticipated by the designers of<br />
RFC-952. For details, see the Configuring the Host Table section.<br />
Configuring the Host Table<br />
The <strong>MultiNet</strong> host table contains more than just host name <strong>and</strong> address information. Table 10-1<br />
shows the information stored in the <strong>MultiNet</strong> host tables <strong>and</strong> how to access the information.<br />
The protocol <strong>and</strong> service definitions in the HOSTS.LOCAL file supplied with <strong>MultiNet</strong> are usually<br />
adequate. However, if you have an application that requires additional protocol or service<br />
information, you can add definitions for them. See Adding Protocol Definitions <strong>and</strong> Adding<br />
Service Definitions later in this section.<br />
You must add information about your network <strong>and</strong> hosts to the host table. See Adding Network<br />
Definitions <strong>and</strong> Adding Host Definitions later in this section.<br />
Table 10-1 Information Stored in <strong>MultiNet</strong> Host Tables<br />
Information Keys “C” Access Routine<br />
IP Protocol Types Name (for example, TCP, UDP)<br />
IP Protocol Number<br />
Services Name (for example, TCP/TELNET)<br />
Port Number<br />
Networks Name (for example, ABC-NET)<br />
IP Network Number<br />
Hosts Name (for example, ABC.COM)<br />
IP Host Address<br />
getprotobyname( )<br />
getprotobynumber( )<br />
getservbyname( )<br />
getservbyport( )<br />
getnetbyname( )<br />
getnetbyaddr( )<br />
gethostbyname( )<br />
gethostbyaddr( )<br />
Adding Protocol Definitions<br />
Protocol definitions in the <strong>MultiNet</strong> HOSTS.LOCAL file describe the protocols that can run on top<br />
of IP. A protocol definition contains the reserved word PROTOCOL, a protocol number used in the<br />
IP protocol field (for example, 6 for TCP), <strong>and</strong> the name of the protocol (for example, TCP). Enter<br />
each protocol definition as a single line without carriage returns or continuation characters.<br />
The valid numbers <strong>and</strong> the protocol name values are defined in RFC-1060, "Assigned Numbers."<br />
10-3
Host Tables <strong>and</strong> DNS<br />
10-4<br />
Protocol numbers are 8-bit values ranging from 0 to 255. The protocol name can be up to 40<br />
characters in length, <strong>and</strong> consists of uppercase letters, digits, <strong>and</strong>, optionally, a hyphen. Spaces <strong>and</strong><br />
other special characters are not permitted in the protocol name. The format of a protocol definition<br />
is:<br />
PROTOCOL : number : name :<br />
For example:<br />
PROTOCOL : 6 : TCP :<br />
PROTOCOL : 17 : UDP :<br />
Adding Service Definitions<br />
Service definitions in the HOSTS.LOCAL file describe the various protocol services that may be<br />
invoked, <strong>and</strong> the protocol <strong>and</strong> service port to contact for these services. A service definition<br />
consists of the reserved word SERVICE, the protocol name (for example, TCP), the port number<br />
(for example, 23 for TCP/TELNET), <strong>and</strong> the service name (for example, TELNET).<br />
When specifying the service name, you may use a comma-separated list of names. The first name<br />
in the list is the official name of the service; the other names are aliases. Enter each service<br />
definition as a single line without carriage returns or continuation characters. Valid port number <strong>and</strong><br />
service names are defined in RFC-1060, "Assigned Numbers." The format of a service definition<br />
is:<br />
SERVICE : protocol : port : names :<br />
For example:<br />
SERVICE : TCP : 23 : TELNET :<br />
SERVICE : TCP : 25 : SMTP,MAIL :<br />
Adding Network Definitions<br />
Network definitions in the HOSTS.LOCAL file correlate network names to network numbers. A<br />
network definition consists of the reserved word "NET", the network number, <strong>and</strong> the network<br />
name. Network numbers are host IP addresses with the host part of the address set to zero. Enter<br />
each network definition as a single line without carriage returns or continuation characters. The<br />
format of the network definition is:<br />
NET : network-number : name :<br />
For example:<br />
NET : 0.0.0.0 : DEFAULT-GATEWAY:<br />
NET : 192.16.100.0 : LOOPBACK-NET:<br />
NET : 192.41.228.0 : ABC-NET:<br />
Adding Host Definitions
Host Tables <strong>and</strong> DNS<br />
Host definitions in the HOSTS.LOCAL file map IP addresses to host names. A host definition<br />
consists of the following:<br />
• The reserved word HOST<br />
• A comma-separated list of IP addresses by which the host may be contacted<br />
• A comma-separated list of host names. The first host name is the official host name; any other<br />
names are aliases.<br />
• The computer CPU type (used only as an informative message for users)<br />
• The operating system (used only as an informative message for users)<br />
• A comma-separated list of services provided by the host (currently ignored by all programs)<br />
Enter each host definition as a single line without carriage returns or continuation characters. The<br />
format of a host definition is:<br />
HOST : addresses : host names : CPU type : operating system : services :<br />
For example:<br />
HOST : 192.0.0.9 : FLOWERS.COM,IRIS : VAX-11/780 : VMS : TCP/TELNET,<br />
TCP/FTP,TCP/SMTP :<br />
Do not embed spaces in the CPU type, operating system, <strong>and</strong> offered-services fields. For example,<br />
"IBM-PC" is a valid CPU type <strong>and</strong> "IBM PC" is not a valid CPU type. Spaces are permitted before<br />
or after the colon separator character, but not within the field value. You may also leave these fields<br />
blank, as in the following entry:<br />
HOST : 192.116.0.1 : LOCALHOST : : : :<br />
Host Name Conformance<br />
Host names (A records) are now restricted to the following characters only:<br />
Table 10-2 Host Name Conformance<br />
Restricted Excluded<br />
A through Z (uppercase letters A through Z) _ (underscore)<br />
a through z (lowercase letters a through z) / (slash)<br />
0 through 9 (the numbers zero through nine)<br />
. (dot or period)<br />
- (hyphen or dash)<br />
If there are any records in a zone file that do not meet these new guidelines, attempts for name<br />
resolution in that zone will fail. Other zones may begin to fail resolving your host names if your<br />
zone files are not in compliance with the relevant RFCs. RFC-952 (DoD Internet Host Table<br />
Specification, October 1985) <strong>and</strong> RFC-1123 (Requirements for Internet Hosts — Application <strong>and</strong><br />
10-5
Host Tables <strong>and</strong> DNS<br />
10-6<br />
Support, October 1989) contain full descriptions of permitted host name specifications.<br />
As a security measure, the current release of the BIND nameserver (9.7.2-p3) enforces RFC-952<br />
host name conformance (as modified by RFC-1123). As a result of this change, those host names<br />
that do not conform to the new rules will be unreachable from sites running the new nameserver.<br />
<strong>MultiNet</strong> properly responds to IGMP request messages because it is compliant with RFC 1112<br />
“Host Extensions for IP Multicasting.” You can use BIND 9.7.2-p3 to work around the name<br />
checking.<br />
Converting a UNIX /etc/hosts File<br />
<strong>MultiNet</strong> provides a utility for converting a UNIX-format /etc/hosts host table file into a<br />
HOSTS.TXT file. Use the comm<strong>and</strong> procedure<br />
MULTINET:CONVERT_UNIX_HOST_TABLE.COM to make the conversion. This comm<strong>and</strong><br />
has the following syntax:<br />
$ @MULTINET:CONVERT_UNIX_HOST_TABLE infile outfile<br />
• infile defaults to HOSTS.<br />
• outfile defaults to the HOSTS.TXT file.<br />
The outfile is converted to a file compliant with RFC-952, the DoD Internet Host Table<br />
Specification used by <strong>MultiNet</strong>. If outfile already exists, the comm<strong>and</strong> procedure replaces it with a<br />
new host table source file. During the conversion:<br />
• Any comments in the input file that begin in the first column are preserved in the output file.<br />
• Extra spaces are compressed.<br />
• Blank lines are removed.<br />
• Characters are converted to uppercase.<br />
• If the host address or name cannot be found, an error is displayed <strong>and</strong> the output file is deleted.<br />
• Host definitions are created with the host address, official name, <strong>and</strong> any aliases.<br />
When the conversion completes, you may want to add the CPU type <strong>and</strong> operating system to each<br />
host entry, as described in "Adding Host Definitions" earlier in this section.<br />
Compiling the Host Table<br />
After generating, modifying, or retrieving a <strong>MultiNet</strong> host table, compile it into binary form with<br />
the following comm<strong>and</strong>:<br />
$ MULTINET HOST_TABLE COMPILE<br />
The comm<strong>and</strong> shown, the simplest form of the <strong>MultiNet</strong> host table compilation comm<strong>and</strong>, should<br />
suffice for most compilations. Additional qualifiers to this comm<strong>and</strong> are described in the<br />
HOST_TABLE COMPILE comm<strong>and</strong> page listed in the <strong>MultiNet</strong> for OpenVMS <strong>Administrator's</strong>
Reference. The comm<strong>and</strong> qualifiers are:<br />
Qualifier Purpose Default<br />
/HOST_TABLE_FILE Binary output<br />
file name<br />
/SILENTLY Suppress<br />
compilation<br />
messages<br />
Host Tables <strong>and</strong> DNS<br />
MULTINET:NETWORK_DATABASE<br />
NOSILENTLY<br />
/STARTING_HASH_VALUE Initial hash size Best value a<br />
/TBLUK_FILE Host-completion<br />
database<br />
/UNIX_HOST_FILE Produce UNIXstyle<br />
hosts file<br />
MULTINET:HOSTTBLUK.DAT<br />
NOUNIX_HOST_FILE<br />
a. The "best value" default is computed from the size of the data as the utility attempts to create<br />
512-byte units. When you run HOST_TABLE COMPILE, the hash value is listed in the displayed<br />
messages. If you only added hosts <strong>and</strong> want to select a number for this qualifier, use the value from<br />
the previous compilation as a starting point.<br />
Note! If you are running <strong>MultiNet</strong> on a VMScluster, you only need to run the MULTINET COMPILE<br />
comm<strong>and</strong> on one node of the cluster.<br />
Installing a Compiled Host Table as a Global Section<br />
When <strong>MultiNet</strong> starts, it installs the compiled host table MULTINET:NETWORK_DATABASE as<br />
a global section. The compiled host table is organized as a "perfect hash" lookup system, allowing<br />
<strong>MultiNet</strong> to answer any query in one lookup. Because the host table is installed as an OpenVMS<br />
global section, access to host table information is extremely fast. To install the compiled host table<br />
as a global section without restarting <strong>MultiNet</strong>:<br />
1 After recompiling a host table, reinstall it by rebooting or invoking<br />
@MULTINET:INSTALL_DATABASES.<br />
2 If you want the new host table to be noticed by the servers that run as part of the<br />
MULTINET_SERVER process, restart that process with @MULTINET:START_SERVER.<br />
3 If you want the new host table to be noticed by the SMTP symbiont(s), restart them with the<br />
comm<strong>and</strong> @MULTINET:START_SMTP. For more information about configuring SMTP<br />
queues, see Chapter 15.<br />
Note! You must run the @MULTINET:INSTALL_DATABASES, @MULTINET:START_SERVER, <strong>and</strong><br />
@MULTINET:START_SMTP comm<strong>and</strong>s on every VMScluster node running <strong>MultiNet</strong>.<br />
10-7
Host Tables <strong>and</strong> DNS<br />
Using the Domain Name System (DNS)<br />
10-8<br />
DNS (Domain Name System) is the preferred method of maintaining host name <strong>and</strong> address<br />
information. DNS provides a fully distributed database of host names, Internet addresses, host<br />
information, <strong>and</strong> mail forwarding information.<br />
When using DNS, a host has access to the full database, yet local information can be maintained<br />
locally <strong>and</strong> exported to the rest of the Domain Name System. DNS is fully documented in several<br />
RFCs published by the Defense Data Network Network Information Center (DDN NIC). The<br />
following RFCs describe DNS:<br />
RFC-1032 Domain Administrators Operations <strong>Guide</strong><br />
RFC-1033 Domain Administrators <strong>Guide</strong><br />
RFC-1034 Domain Names — Concepts <strong>and</strong> Facilities<br />
RFC-1035 Domain Names — Implementation <strong>and</strong> Specification<br />
The Defense Data Network Information Center (DDN NIC) publishes a softbound manual<br />
containing all RFCs pertaining to DNS. This chapter cannot describe all of the intricacies of the<br />
Domain Name System. For complete information, <strong>Process</strong> <strong>Software</strong> recommends the book DNS<br />
<strong>and</strong> BIND, Fourth Edition (ISBN 0-596-00158-4). This book provides a thorough description of<br />
DNS concepts <strong>and</strong> applications, although the emphasis is on UNIX-based DNS implementations.<br />
In particular, you should read this book if you are using <strong>MultiNet</strong> to set up an authoritative, or<br />
master, name server for your domain or part of your domain.<br />
DNS Resolvers <strong>and</strong> Servers<br />
<strong>MultiNet</strong> provides both DNS server <strong>and</strong> resolver (client) support. The server communicates with<br />
the rest of the Internet DNS <strong>and</strong> participates in distributing DNS data. The resolver receives<br />
requests from applications <strong>and</strong> queries a DNS server for the information.<br />
The DNS Resolver (Client)<br />
The DNS resolver (client) is used by applications to access the DNS database. The DNS resolver is<br />
accessed via the MULTINET_SOCKET_LIBRARY.<br />
The <strong>MultiNet</strong> DNS resolver is enabled when you use the NET-CONFIG SET DOMAIN-<br />
NAMESERVERS comm<strong>and</strong>. This comm<strong>and</strong> defines the domain name servers that your system<br />
queries to satisfy host-name-to-address translation, <strong>and</strong> is normally set to the local host. <strong>MultiNet</strong> is<br />
initially configured to provide a caching-only name server, which works with the resolver. When<br />
the resolver fetches a mapping, it is "cached" by the name server <strong>and</strong> stored for other applications<br />
that need the information.<br />
The resolver is almost always invisible to an applications programmer. When using the <strong>MultiNet</strong><br />
socket library, the normal host table access routines, such as gethostbyname( ) <strong>and</strong><br />
gethostbyaddr( ), automatically call the DNS resolver routines <strong>and</strong> only use host table access<br />
when a DNS resolver fails. For the <strong>MultiNet</strong> OpenVMS/ULTRIX Connection (UCX) $QIO Driver,<br />
the $QIO functions for translating host names <strong>and</strong> addresses are referred to as the <strong>MultiNet</strong>
Host Tables <strong>and</strong> DNS<br />
MULTINET_SERVER process, which then uses the DNS resolver routines to satisfy the UCX<br />
name translation query.<br />
The <strong>MultiNet</strong> SMTP symbiont queries the Internet DNS for mail forwarding information <strong>and</strong> calls<br />
the DNS resolver routines directly to query the DNS for Mail Exchanger (MX) resource records.<br />
DNS Server<br />
The <strong>MultiNet</strong> DNS server is based on the ISC BIND 9.7.2-p3 Nameserver. The<br />
MULTINET_SERVER process starts the NAMED_SERVER process if the nameserver process is<br />
not running. The DNS server processes queries from resolvers, then responds to the queries, or<br />
queries other DNS servers to obtain information from other parts of the DNS database.<br />
<strong>MultiNet</strong> is shipped with DNS configured to operate as a caching-only server in the Internet<br />
environment.<br />
The <strong>MultiNet</strong> DNS server uses the MULTINET:NAMED.CONF file for configuration information.<br />
The configuration file is the equivalent of the /etc/named.conf file used by UNIX-based<br />
BIND implementations.<br />
The configuration file typically contains references to other files that contain definitions for the<br />
server's contribution to the DNS database. These other files contain text in st<strong>and</strong>ard "resource<br />
record" format, as described in RFC-1035, "Domain Names — Implementation <strong>and</strong> Specification."<br />
The ISC BIND 9.7.2-p3 distributed HTML documents are on the CD-ROM in the directory named<br />
[BIND9-DOC]. Refer to the file named INDEX.HTML for a list of BIND documents.<br />
Enabling a Caching-Only Name Server<br />
A caching-only name server queries other nameservers to resolve host names to IP addresses. The<br />
answers received from the inquiry are retained <strong>and</strong> used in subsequent name resolver requests<br />
without querying the remote name server. The default DNS configuration files are shipped as a<br />
caching-only server; you only need to enable DNS.<br />
Note! Master, or authoritative, name servers also cache responses to their queries.<br />
Use a caching-only name server if your OpenVMS system is not the authoritative name server for<br />
any domain.<br />
To determine whether DNS is enabled on your system, check the MULTINET_NAMESERVERS<br />
logical name:<br />
$ SHOW LOGICAL MULTINET_NAMESERVERS<br />
If DNS is enabled, your system is already set up to use DNS to resolve host names <strong>and</strong> addresses. If<br />
the logical is set to 127.0.0.1, your system also acts as it own name server.<br />
If DNS is not enabled, you can enable it to take effect when the system is rebooted or to take effect<br />
immediately.<br />
To enable the caching-only name server to take effect when the system reboots:<br />
10-9
Host Tables <strong>and</strong> DNS<br />
10-10<br />
$ MULTINET CONFIGURE<br />
<strong>MultiNet</strong> Network Configuration Utility 5.4(nnn)<br />
[Reading in MAXIMUM configuration from MULTINET:MULTINET.EXE]<br />
[Reading in configuration from MULTINET:NETWORK_DEVICES.CONFIGURATION]<br />
NET-CONFIG>SET DOMAIN-NAMESERVERS 127.0.0.1<br />
NET-CONFIG>SET HOST-NAME fully-qualified-domain-name<br />
Also ensure the fully qualified domain name (FQDN) is included in your host table. The easiest<br />
way to do this is to modify the HOST line that describes your system in MULTINET:HOSTS.LOCAL<br />
to be of this form:<br />
HOST : address(s) : FQDN,short_name : [CPU] : [OS] : [services] :<br />
See "Adding Host Definitions" earlier in this section for more information. If you change the<br />
MULTINET:HOSTS.LOCAL file to include your FQDN, you must also recompile the table <strong>and</strong><br />
install it as a global section, as shown in this example:<br />
$ MULTINET HOST_TABLE COMPILE<br />
$ @MULTINET:INSTALL_DATABASES<br />
To make the change take effect without rebooting:<br />
1 Define the logical name MULTINET_NAMESERVERS as 127.0.0.1 to take advantage of your<br />
local name server's cache:<br />
$ DEFINE/SYSTEM/EXECUTIVE MULTINET_NAMESERVERS "127.0.0.1"<br />
2 Define the official, fully qualified domain name:<br />
$ DEFINE/SYSTEM/EXECUTIVE_MODE MULTINET_HOST_NAME "fqdn"<br />
$ DEFINE/SYSTEM/EXECUTIVE_MODE ARPANET_HOST_NAME "fqdn"<br />
$ DEFINE/SYSTEM/EXECUTIVE_MODE UCX$INET_HOST "name"<br />
$ DEFINE/SYSTEM/EXECUTIVE_MODE TCPIP$INET_HOST "name"<br />
$ DEFINE/SYSTEM/EXECUTIVE_MODE UCX$INET_DOMAIN "domain"<br />
$ DEFINE/SYSTEM/EXECUTIVE_MODE TCPIP$INET_DOMAIN "domain"<br />
3 Define the UCX equivalents:<br />
$ DEFINE/SYSTEM/EXECUTIVE_MODE UCX$BIND_DOMAIN "domain-name"<br />
$ DEFINE/SYSTEM/EXECUTIVE_MODE UCX$BIND_SERVER000 "127.0.0.1"<br />
$ DEFINE/SYSTEM/EXECUTIVE_MODE TCPIP$BIND_DOMAIN "domain-name"<br />
$ DEFINE/SYSTEM/EXECUTIVE_MODE TCPIP$BIND_SERVER000 "127.0.0.1"<br />
4 Restart the MULTINET_SERVER process:<br />
$ @MULTINET:START_SERVER<br />
5 Restart the SMTP symbiont(s):<br />
$ @MULTINET:START_SMTP<br />
Caching-Only Name Server Configuration with Forwarders<br />
A caching-only name server usually sends queries directly to the name server that contains the<br />
answer. A forwarders option can be used to redirect these queries to a central name server that
Host Tables <strong>and</strong> DNS<br />
accepts recursive queries from other servers <strong>and</strong> functions as a second-level cache. The central<br />
name server then queries the name server that contains the answer, <strong>and</strong> caches a copy.<br />
Configure caching-only name servers with forwarders in a network with multiple caching servers<br />
to:<br />
• Reduce load on your connection to the Internet.<br />
• Improve DNS response to repeated queries.<br />
Note! Although adding forwarders statements improves DNS response times, DNS does not require it.<br />
If the DNS server configuration file specifies one or more forwarders, the server sends all queries<br />
for data not in the cache to the forwarders.<br />
Use a text editor to add a forwarders statement to the options {}; section of the NAMED.CONF file<br />
to forward for all zones. Forwarding can also be specified on a per-zone basis, or turned off on a<br />
per-zone basis using forwarders { };.<br />
For example, to add two servers with these IP addresses 192.1.1.98 <strong>and</strong> 192.1.1.99, the forwarders<br />
statement would be:<br />
forwarders { 192.1.1.98; 192.1.1.99;};<br />
There is also a forward option that tells the server how to use the forwarders. The forward option is<br />
only meaningful if the forwarders list is not empty. There are two values to use with the forward<br />
option.<br />
Value Description<br />
forward first;<br />
(default)<br />
The server queries the forwarders first. If the forwarders fail to find an answer,<br />
the server queries the root servers.<br />
forward only; The server queries the forwarders only. If the forwarders fail to find an<br />
answer, the server does not query the root domain servers.<br />
For example, to use the forwarders only:<br />
options {<br />
forward only;<br />
forwarders { 192.1.1.98; 192.1.1.99;};<br />
};<br />
After adding the forwarders <strong>and</strong> forward lines, restart the nameserver.<br />
$ REPLY/ENABLE=NETWORK/TEMPORARY<br />
$ MULTINET NETCONTROL DOMAIN RESTART<br />
Using a Search List to Resolve Host Names<br />
When you specify a simple host name, the DNS resolver exp<strong>and</strong>s automatically the simple name by<br />
10-11
Host Tables <strong>and</strong> DNS<br />
10-12<br />
appending the local host's domain to it. For example, if your host is farfel.flowers.com <strong>and</strong><br />
you enter this comm<strong>and</strong>: $ TELNET kasha the DNS resolver exp<strong>and</strong>s kasha automatically into<br />
kasha.flowers.com <strong>and</strong> attempts to translate that name into an address.<br />
To have a different domain appended to host names, or to search multiple domains, define the<br />
MULTINET_SEARCHDOMAINS logical. If you specify multiple domains, separate them with<br />
blanks. For example, to have the resolver search for simple names in the domains<br />
sub1.flowers.com <strong>and</strong> sub2.flowers.com instead of the local domain, use the following<br />
logical name definition:<br />
$ DEFINE MULTINET_SEARCHDOMAINS "sub1.flowers.com sub2.flowers.com"<br />
This logical can be defined by individual users or as a system-wide logical (with the /SYSTEM<br />
qualifier). The search list can be up to 511 bytes in length. To search the local domain in addition to<br />
other domains, include the local domain in the MULTINET_SEARCHDOMAINS list. The<br />
maximum number of domains to search is 6.<br />
Setting Up a Master Name Server<br />
The following procedure sets up a master, or authoritative, name server. This type of name server<br />
gets data for its zone from files on the host where it runs. A zone is the domain, or portion of a<br />
domain, for which the master server has complete information. To set up a master server:<br />
1 Determine whether DNS is enabled on your system by checking the logical name<br />
MULTINET_NAMESERVERS:<br />
$ SHOW LOGICAL MULTINET_NAMESERVERS<br />
If MULTINET_NAMESERVERS is defined, your system uses DNS to resolve host names <strong>and</strong><br />
addresses. If MULTINET_NAMESERVERS is 127.0.0.1, your system also acts as its own DNS<br />
server.<br />
2 If it is not already enabled, enable DNS by specifying one or more DNS servers with NET-<br />
CONFIG or MENU-CONFIG:<br />
• With NET-CONFIG, use the SET DOMAIN-NAMESERVERS comm<strong>and</strong>.<br />
• With MENU-CONFIG, modify the Domain Nameservers field in the Configure Global<br />
Parameters menu.<br />
Note! The name server list can include up to three IP addresses.<br />
3 Make sure the Official Host Name configured in MULTINET CONFIGURE is the fully<br />
qualified domain name of the name server. If not, define it without rebooting using the following<br />
comm<strong>and</strong>:<br />
$ DEFINE/SYSTEM/EXECUTIVE_MODE MULTINET_HOST_NAME "fully qualified<br />
domain name"<br />
4 To specify the time between DNS name server requests to a nonresponding server <strong>and</strong> the<br />
number of attempts to make to re-establish communications, use the NET-CONFIG SET<br />
NAMESERVER-RETRANSMISSION comm<strong>and</strong>.
Host Tables <strong>and</strong> DNS<br />
5 Update the DNS configuration file, MULTINET:NAMED.CONF, to add information about your<br />
site, as described in the MULTINET:NAMED.CONF section.<br />
6 For each zone of type master, add a zone file to describe the zone characteristics. A zone is a<br />
range of authority that includes one or more fully qualified domains or part of a domain. A zone<br />
file describes the contents of a zone. Configuring a zone information file is described in the DNS<br />
Zone Information Files section.<br />
7 Reload the DNS server (see the Reloading the Name Server section).<br />
To prevent log files from being truncated when they are closed, use the logical<br />
MULTINET_SERVER_DONT_TRUNCATE_LOG. Note that the default allocation quantity for<br />
the log files is 80 blocks, so they could have a moderate amount of empty space.<br />
Domain Name versus Host Name<br />
Your domain name should not also be the primary name of a host on your network. This is because<br />
of a possible conflict between the host name LOCALHOST <strong>and</strong> a registered Internet domain.<br />
For example, if your domain name is flowers.com, <strong>and</strong> you want to have a host with the same<br />
name, give the host a different primary name, such as main.flowers.com. Create an<br />
appropriate A (address) <strong>and</strong> record <strong>and</strong> PTR (inverse lookup) entry with the name<br />
main.flowers.com. Then, add an A record for flowers.com that also points to the address<br />
for main.flowers.com.<br />
If you already have a host with the same name as your domain name <strong>and</strong> the host is running<br />
<strong>MultiNet</strong>, configure a local domain for the <strong>MultiNet</strong> resolver on that system. For example:<br />
$ MULTINET CONFIGURE<br />
NET-CONFIG>SET LOCAL-DOMAIN flowers.com<br />
NET-CONFIG>EXIT<br />
The MULTINET:NAMED.CONF File<br />
The main DNS configuration file, from which the name server gets its initial data, is<br />
MULTINET:NAMED.CONF. The equivalent of this file in UNIX-based BIND implementations is<br />
/etc/named.conf. Use this file to add information about your site when setting up a master<br />
DNS server. An example configuration file follows.<br />
/*<br />
** Sample Configuration File for DNS server<br />
*/<br />
options {<br />
directory "SYS$SYSROOT:[MULTINET]";<br />
// forward only;<br />
forwarders { 128.0.1.1; 128.0.2.10; };<br />
};<br />
zone "flowers.com" in {<br />
type master;<br />
10-13
Host Tables <strong>and</strong> DNS<br />
10-14<br />
};<br />
file "domain-name-service.iris";<br />
zone "0.128.in-addr.arpa" in {<br />
type master;<br />
file "domain-name-service.iris-net";<br />
};<br />
zone "cc.flowers.com" in {<br />
type slave;<br />
masters { 128.0.1.1; };<br />
file "domain-name-service.cc";<br />
};<br />
zone "1.0.128.in-addr.arpa" in {<br />
type slave;<br />
masters { 128.0.1.1; };<br />
file "domain-name-service.cc-net";<br />
};<br />
zone "0.0.127.in-addr.arpa" in {<br />
type master;<br />
file "domain-name-service.local";<br />
};<br />
zone "localhost" in {<br />
type master;<br />
file "domain-name-service.localhost";<br />
};<br />
zone "." in {<br />
type hint;<br />
file "domain-name-service.cache";<br />
};<br />
The following sections describe the zone, options, <strong>and</strong> logging sections.<br />
Zone<br />
A zone is that part of a name server that contains complete information about the domain name<br />
space. You specify a zone in the following way:<br />
zone “” [] {<br />
type ;<br />
[...]<br />
};
Table 10-3 defines the NAMED.CONF zone fields.<br />
Table 10-3 NAMED.CONF Zone Fields<br />
Field Description<br />
Host Tables <strong>and</strong> DNS<br />
The class to which this zone applies. If the class is not specified, the type<br />
IN is used by default. The syntax is [ ( in | hs | hesiod | chaos ) ],<br />
• in (default) — Used for objects connected to the Internet. This is the<br />
only supported type.<br />
• hs or hesiod — Confined mostly to MIT.<br />
hs is the abbreviation for hesiod.<br />
• chaos — An historic network. Not used today.<br />
“” The name of the domain for which this zone is authoritative.<br />
Table 10-4 Zone Statements<br />
Statement Description<br />
file ""; Specifies the name of the zone file.<br />
masters [ port ]<br />
{; [; ... ]};<br />
type (master | slave | stub | hint |<br />
forward);<br />
Table 10-5 Optional Zone Statements<br />
Specifies the IP address(es) <strong>and</strong> port from where the server is<br />
to transfer the zone data. This statement is meaningful only<br />
for slave or stub zones.<br />
See Table 10-6 for a description of these zones.<br />
Statement Description<br />
allow-query { ; };<br />
allow-transfer { ; };<br />
Overrides the “allow-query” <strong>and</strong> the “allowtransfer”<br />
statements in the global options<br />
section for this zone. See Table 10-7.<br />
allow-update { ; }; Specifies the addresses of hosts that are<br />
allowed to modify the zone with dynamic<br />
updates. Defaults to none.<br />
also-notify<br />
{; [; ...] };<br />
Overrides the “also-notify” statement in the<br />
global options section for this zone. See<br />
Table 10-7.<br />
10-15
Host Tables <strong>and</strong> DNS<br />
10-16<br />
Table 10-5 Optional Zone Statements (Continued)<br />
Statement Description<br />
check-names (warn | fail | ignore); Overrides the default name checking<br />
specified in the global options section. See<br />
the check-names statement in Table 10-7 for<br />
more details.<br />
forward (only | first);<br />
forwarders {[;...]};<br />
Overrides the “forward” <strong>and</strong> “forwarders”<br />
statements in the global options section for<br />
this zone. See Table 10-7.<br />
ixfr-base ; Specifies the file name used for the IXFR<br />
transaction log file.<br />
notify [(yes | no); ] Specifies if zone change notifications should<br />
be sent to the slave servers for the zone. This<br />
overrides the notify statement in the global<br />
options section. See the notify statement in<br />
Table 10-7 for more details.<br />
pubkey ; Represents a public key for this zone. The<br />
key is needed when this is the top level<br />
authoritative zone served by this server <strong>and</strong><br />
there is no chain of trust to a trusted key. The<br />
key is considered secure, so data it signs will<br />
be considered secure. The DNSSEC flags<br />
(number), protocol (number), <strong>and</strong> algorithm<br />
(number) are specified, as well as a base-64<br />
encoded string representing the key.<br />
transfer-source ; Overrides the “transfer-source” statement in<br />
the global options section for this zone. See<br />
Table 10-7.
Table 10-6 Zone Types<br />
Type Description<br />
Host Tables <strong>and</strong> DNS<br />
forward A forward zone is use to direct all queries in it to other servers. The specification of<br />
the options in such a zone overrides any global options declared in the options<br />
statement.<br />
If a forwarders statement is not present in the zone or an empty list for forwarders is<br />
given, forwarding is not done for the zone, cancelling the effects of any forwarders in<br />
the options statement. Thus, if you want to use this type of zone to change the<br />
behavior of the global forward option, <strong>and</strong> not the servers used, you need to respecify<br />
the global forwarders.<br />
hint The MULTINET:NAMED.CONF file example starting on page 10-13 specifies that<br />
data in the DOMAIN-NAME-SERVICE.CACHE file, which is in st<strong>and</strong>ard resource<br />
record format, should be placed in the bootstrap cache. The hint zone definition is<br />
used to specify locations of root domain servers. An up-to-date list of root name<br />
servers is obtained automatically <strong>and</strong> stored in memory without replacing the cache<br />
file.<br />
master Specifies data for the zone <strong>and</strong> the domain. The first master zone definition in the<br />
example on page 10-13 states that the file DOMAIN-NAME-SERVICE.IRIS<br />
contains authoritative data for the FLOWERS.COM zone, in st<strong>and</strong>ard resource<br />
record format.<br />
The second master zone definition in the example states that the file DOMAIN-<br />
NAME-SERVICE.IRIS-NET contains authoritative data for the domain 0.128.IN-<br />
ADDR.ARPA, which is used in translating addresses in network 128.0.0.0 to host<br />
names.<br />
Each zone master file should begin with an SOA (Start Of Authority) resource record<br />
for the zone, as shown in the DNS Zone Information Files section.<br />
10-17
Host Tables <strong>and</strong> DNS<br />
Options<br />
10-18<br />
Table 10-6 Zone Types (Continued)<br />
Type Description<br />
slave Specifies the zones for which this DNS server acts as a secondary name server. After<br />
this name server receives a "zone transfer," it becomes authoritative for the specified<br />
zone.<br />
The first slave zone definition in the example on page 10-13 specifies that all<br />
authoritative data under CC.FLOWERS.COM is to be transferred from the name<br />
server at 128.0.1.1.<br />
The file statement in this section is the file name in which to back up the transferred<br />
zone. When it boots, the name server loads the zone from this backup file, if it exists,<br />
providing a complete copy even if the master DNS server is unreachable. This file is<br />
updated whenever a new copy of the domain is received by automatic zone transfer<br />
from one of the master servers. The file statement is optional, but recommended to<br />
speed up server startup <strong>and</strong> eliminates needless b<strong>and</strong>width.<br />
The second slave zone definition in the example states that the address-to-hostname<br />
mapping for the subnet 128.0.1.0 should be obtained from the same list of master<br />
servers as the previous zone.<br />
stub Works like a slave zone, except it only transfers the nameserver records for the<br />
master zone rather than the full zone information.<br />
The options statement sets up global options to be used by BIND. Use this statement only once in a<br />
configuration file. If it is used more than once, the first occurrence determines what options to use,<br />
<strong>and</strong> a warning is generated. If no options statement is present, an options block is used setting each<br />
option to its default value. You specify options in the following way:<br />
Note! The following table shows some of the more commonly used option statements. For a full listing<br />
of the option comm<strong>and</strong>s that can be specified, please consult a detailed text such as O’Reilly’s<br />
“DNS <strong>and</strong> BIND”, or else consult the BIND RFC.<br />
options {<br />
<br />
};
Table 10-7 defines the NAMED.CONF options.<br />
Table 10-7 NAMED.CONF Options<br />
Option Description<br />
Host Tables <strong>and</strong> DNS<br />
allow-query {; }; See the Address_match_list section.<br />
Specifies the addresses of hosts that are allowed<br />
to query the server for information. It defaults to<br />
all.<br />
allow-recursion {; }; See the Address_match_list section.<br />
Specifies which hosts are allowed to make<br />
recursive queries through this server. If not<br />
specified, recursive queries from all hosts are<br />
allowed (default).<br />
allow-transfer {; }; See the Address_match_list section.<br />
Specifies the addresses of hosts that are allowed<br />
to perform zone transfers from the server. It<br />
defaults to all.<br />
also-notify<br />
{; [; ...] };<br />
Defines a global list of IP addresses that get sent<br />
NOTIFY messages whenever a fresh copy of the<br />
zone is loaded. This ensures that copies of the<br />
zones converge quickly on “stealth” servers. If an<br />
also-notify list is given in a zone statement, it<br />
overrides the options also-notify statement. When<br />
a zone notify statement is set to NO, the IP<br />
addresses in the global also-notify list are not sent<br />
NOTIFY messages for that zone. The default is<br />
the empty list (no global notification list).<br />
blackhole {; }; See the Address_match_list section.<br />
Specifies a list of addresses the server will not<br />
accept queries from or use to resolve a query.<br />
Queries from these addresses will not be<br />
responded to.<br />
10-19
Host Tables <strong>and</strong> DNS<br />
10-20<br />
Table 10-7 NAMED.CONF Options (Continued)<br />
Option Description<br />
check-names (master | slave | response)<br />
(warn | fail | ignore);<br />
The server checks names in three areas:<br />
—Master zone files.<br />
—Slave zone files.<br />
—Responds to queries the server has initiated.<br />
The server assumes the following defaults:<br />
options {<br />
check-names master fail;<br />
check-names slave warn;<br />
check-names response ignore;<br />
};<br />
ignore — No checking is done.<br />
warn — Names are checked against their expected<br />
client contexts. Invalid names are logged, but<br />
processing continues normally.<br />
fail — Names are checked against their expected client<br />
contexts. Invalid names are logged, <strong>and</strong> the offending<br />
data is rejected.<br />
If check-names response fail has been specified,<br />
<strong>and</strong> answering the client’s question requires<br />
sending an invalid name to the client, the server<br />
sends a REFUSED response code to the client<br />
instead.<br />
directory ""; Causes the server to change its default directory to<br />
the specified directory. This can be important for<br />
the correct processing of $INCLUDE files in<br />
primary zone files, or file statements in zone<br />
definitions.<br />
fake-iquery ( yes | no ); BIND 9 does not do IQUERY simulation.<br />
Obsolete.<br />
fetch-glue ( yes | no ); Obsolete for BIND 9.
Table 10-7 NAMED.CONF Options (Continued)<br />
Option Description<br />
Host Tables <strong>and</strong> DNS<br />
forward ( only | first ); This statement is meaningful only if there is a<br />
non-empty forwarders statement.<br />
When first (default) is used, the server queries the<br />
forwarders first before consulting the root domain<br />
servers.<br />
When only is used, the server queries the<br />
forwarders only. If the forwarders fail to find an<br />
answer, the server does not query the root domain<br />
servers. For example:<br />
forwarders<br />
{; [; ... ]};<br />
options {<br />
forward only;<br />
forwarders<br />
{ 192.1.1.98; 192.1.1.99;};<br />
};<br />
Specifies the addresses of site-wide servers that<br />
accept recursive queries from other servers. If the<br />
DNS server configuration file specifies one or<br />
more forwarders, the server sends all queries for<br />
data not in the cache to the forwarders.<br />
Central name servers designated to h<strong>and</strong>le<br />
forwarded requests can then develop a cache of<br />
answers to external queries. The central cache<br />
reduces the number of requests sent to root name<br />
servers <strong>and</strong> improves DNS performance.<br />
10-21
Host Tables <strong>and</strong> DNS<br />
10-22<br />
Table 10-7 NAMED.CONF Options (Continued)<br />
Option Description<br />
listen-on [port ]<br />
{; };<br />
also see “listen-on-v6”<br />
See the Address_match_list section.<br />
Specifies what port on what interface to listen on.<br />
The default is:<br />
listen-on port 53 { any };<br />
For example:<br />
options {<br />
// listen on port 53 for<br />
// external interfaces.<br />
listen-on { 192.42.95.0;};<br />
// listen on port 43 for<br />
// internal interfaces.<br />
listen-on port 43<br />
{ 127.0.0.1; 10.0.0.0; };<br />
};<br />
provide-ixfr (yes | no ); If yes, a transaction log is kept for incremental<br />
zone transfer of each zone. The default is yes.<br />
max-ixfr-log-size ; Obsolete for BIND 9.<br />
max-transfer-time-in Terminates the inbound zone transfers (namedxfer<br />
processes) running longer than the minutes<br />
specified. The default is 120 minutes (2 hours).<br />
min-roots ; Obsolete for BIND 9.<br />
notify ( yes | no ); If yes (default), the server notifies slave servers if<br />
there are any changes to a domain for which the<br />
server is master or slave. The server determines<br />
the slave servers by the nameserver records<br />
contained in the zones data file.<br />
For more information, see the also-notify<br />
statement.
Table 10-7 NAMED.CONF Options (Continued)<br />
Option Description<br />
query-source [address ( ip_addr | * )]<br />
[port ( ip_port | * )] ;<br />
see also “query-source-v6”<br />
Host Tables <strong>and</strong> DNS<br />
If the server does not know the answer to a<br />
question, it queries other nameservers. querysource<br />
specifies the address <strong>and</strong> port used for such<br />
queries. If address is * or is omitted, a wildcard IP<br />
address (INADDR_ANY) is used. If port is * or is<br />
omitted, a r<strong>and</strong>om unprivileged port is used. The<br />
default is<br />
query-source address * port *;<br />
Note! query-source currently applies only to<br />
UDP queries; TCP queries always use a<br />
wildcard IP address <strong>and</strong> a r<strong>and</strong>om<br />
unprivileged port.<br />
recursion ( yes | no ); If yes (default), the server attempts to do all the<br />
work required to answer a query that has<br />
requested recursion. Turning this off results in the<br />
server responding to the client with referrals.<br />
To prevent the server’s cache from growing, use<br />
recursion no in combination with fetch-glue-no.<br />
rrset-order<br />
{; [; ... ] }<br />
See the Resource Record Sorting section.<br />
sortlist {; }; See the Resource Record Sorting section.<br />
topology {; }; Not implemented for BIND 9<br />
transfer-format The server supports two zone transfer methods.<br />
one-answer uses one DNS message per<br />
resource record transferred. many-answers<br />
packs as many resource records as possible into a<br />
message. many-answers is more efficient, but<br />
is only known to be understood by BIND 8.1 <strong>and</strong><br />
higher <strong>and</strong> patched versions of BIND 4.9.5. The<br />
default is one-answer. transfer-format<br />
may be overridden on a per-server basis by using<br />
the server statement.<br />
10-23
Host Tables <strong>and</strong> DNS<br />
Address_match_list<br />
10-24<br />
Table 10-7 NAMED.CONF Options (Continued)<br />
Option Description<br />
transfer-source ;<br />
see also “transfer-source-v6”<br />
The following can be address match lists:<br />
• An IP address (in dotted-decimal notation)<br />
• Another address match list<br />
• An IP prefix (in /- notation)<br />
Determines which local address will be bound to<br />
the TCP connection used to fetch all zones<br />
transferred inbound by the server.<br />
If not set, the value defaults to a system controlled<br />
value, usually the address of the interface “closest<br />
to” the remote end. This address must appear in<br />
the remote end’s allow-transfer option for the<br />
zone being transferred, if one is specified.<br />
This statement sets the transfer-source for all<br />
zones, but can be overridden on a per-zone basis<br />
by including a transfer-source statement within<br />
the zone block in the configuration file.<br />
transfers-in The maximum number of inbound zone transfers<br />
that can be running concurrently. The default<br />
value is 10. Increasing transfers-in may<br />
speed up the convergence of slave zones, but it<br />
also may increase the load on the local system.<br />
transfers-per-ns The maximum number of inbound zone transfers<br />
(named-xfer processes) that can be<br />
concurrently transferred from a given remote<br />
nameserver. The default value is 2. Increasing<br />
transfers-per-ns may speed up the<br />
convergence of slave zones, but it also may<br />
increase the load on the remote nameserver.<br />
transfers-per-ns may be overridden on a<br />
per-server basis by using the transfers phrase<br />
of the server statement.<br />
version ; Specifies the version number the server should<br />
report via the ndc comm<strong>and</strong> or via a query of<br />
name version.bind in class chaos. The<br />
default is the real version number of the server.
• An address match list defined with the acl statement<br />
• A key ID, as defined by the key statement<br />
The following Access Control Lists (ACLs) are predefined <strong>and</strong> are not case-sensitive:<br />
• any<br />
• none<br />
• localhost<br />
• localnets<br />
Host Tables <strong>and</strong> DNS<br />
Place the ! character in front of elements you want to negate.<br />
Remember that address match lists follow the st<strong>and</strong>ard named.conf syntax <strong>and</strong> require a semi-colon<br />
(;) after each element. For example:<br />
allow-update { !192.168.0.1; 192.168.0.0/16; };<br />
When an IP address or prefix is compared to an address match list, the list is examined <strong>and</strong> the first<br />
match (regardless of its negated state) is used. The interpretation of a match depends on the<br />
conditions defined in the following table.<br />
When a list is being used... A non-negated match... A negated match...<br />
as an access control list allows access. denies access.<br />
with the listen-on option causes the DNS server to<br />
listen on matching<br />
interfaces.<br />
with the topology clause returns a distance based<br />
on its position on the list;<br />
the closer the match to the<br />
start of the list, the shorter<br />
the distance between it<br />
<strong>and</strong> the server.<br />
causes the DNS server to NOT<br />
listen on matching interfaces.<br />
is assigned the maximum distance<br />
from the server.<br />
Note! If there is no match, the<br />
address gets a distance<br />
that is further than any<br />
non-negated list element,<br />
<strong>and</strong> closer than any<br />
negated element.<br />
Since the address match list uses a first-match algorithm, care must be taken when using negation.<br />
In general, if an element is a subset of another element, the subset should be present in the list<br />
before the broader element.<br />
For example, 10.0.0/24; !10.0.0.1 will never negate to the 10.0.0.1 address because a 10.0.0.1<br />
address will match with the 10.0.0/24 element <strong>and</strong> not traverse any farther. So the 10.0.0.1 address<br />
will be accepted in the match list.<br />
Using !10.0.0.1; 10.0.0/24 will elicit the desired effect. The 10.0.0.1 will be matched against the<br />
first, negated, element. All other 10.0.0.* addresses will pass by the 10.0.0.1 element <strong>and</strong> be<br />
10-25
Host Tables <strong>and</strong> DNS<br />
10-26<br />
matched against the 10.0.0/24 subnet element.<br />
Logging<br />
The logging section configures a wide variety of logging options for the nameserver. Its channel<br />
phrase associates output methods, format options <strong>and</strong> severity levels with a name that can be used<br />
with the category phrase to select how various classes of messages are logged. The basic logging<br />
syntax is as follows:<br />
logging {<br />
channel {<br />
file [versions ] [size ];<br />
| syslog daemon;<br />
| null;<br />
severity ;<br />
print-category ;<br />
print-severity ;<br />
print-time ;<br />
};<br />
category {<br />
; [ channel_name; ...]<br />
};<br />
};<br />
Only one logging section is used to define as many channels <strong>and</strong> categories as you want. If there<br />
are multiple logging sections in a configuration, the first one defined determines the logging, <strong>and</strong><br />
warnings are issued for the others. If there is no logging section, the default logging configuration<br />
will be:<br />
logging {<br />
category default { default_syslog; default_debug; };<br />
category panic { default_syslog; default_stderr; };<br />
category packet { default_debug; };<br />
category eventlib { default_debug; };<br />
};<br />
The following is an example:<br />
logging {<br />
channel xfers {<br />
file “MULTINET:XFERS.LOG”;<br />
severity info;<br />
print-severity yes;<br />
print-time yes;<br />
};<br />
category xfer-in {<br />
xfers;<br />
};<br />
};
Table 10-8 describes the logging options.<br />
Table 10-8 Logging Options<br />
Options Description<br />
Resource Record Sorting<br />
Host Tables <strong>and</strong> DNS<br />
channel Specifies where the logging data goes: to syslog (OPCOM), to a file, to stderr<br />
(SYS$ERROR), or to null (discarded).<br />
category Specifies what data is logged. You can send a category to one channel or to<br />
many channels. These are the valid categories:<br />
cname lame-servers packet security<br />
config load panic statistics<br />
db maintenance parser update<br />
default ncache queries xfer-in<br />
eventlib notify response-checks xfer-out<br />
insist os<br />
file Specifies the path name of the file you want the message to go to, <strong>and</strong> if you<br />
want to have multiple versions of the file, <strong>and</strong> if you want to limit the size of<br />
the file.<br />
syslog daemon Specifies that the message goes to syslog (opcom) instead of to a file.<br />
severity Specifies the severity level for this channel. The severity choices are:<br />
critical, error, warning, notice, info, debug [level], <strong>and</strong> dynamic.<br />
print-category<br />
print-severity<br />
print-time<br />
Specifies whether to print the category, severity level, <strong>and</strong> time stamp of the<br />
messages. The default is NO for each item.<br />
When returning multiple resource records (RRs), the nameserver returns them by default in round<br />
robin order, that is, after each request the first RR is placed at the end of the list. You can specify in<br />
the NAMED.CONF file that the nameserver should sort the RRs based on the client's address using<br />
the sortlist option, or you can use a default other than round-robin using the rrset-order option.<br />
The sortlist option sorts the RRs based upon the address_match_list. Each top level statement in<br />
the address match list must be an address match list with one or two elements. The first element of<br />
each address match list is checked against the client's address until a match is found. When a match<br />
is found:<br />
If the top level statement contains... Then...<br />
only one element that network is moved to the front of the list.<br />
10-27
Host Tables <strong>and</strong> DNS<br />
10-28<br />
If the top level statement contains... Then...<br />
two elements the second element is treated like the address match list<br />
in the topology option (see Table 10-7).<br />
Use the following sortlist statement to have the nameserver behave like the BIND 4.9.x<br />
nameserver.<br />
Responses to...<br />
queries from the local host prefers any of the directly connected networks<br />
queries from any other hosts on a directly<br />
connected network<br />
other queries are not sorted<br />
sortlist {<br />
{ localhost; localnets; };<br />
{ localnets; };<br />
};<br />
The rrset-order option permits configuration of the ordering for the records in a multiple record<br />
response. An order_spec is defined as follows:<br />
[ class ] [ type ] [ name "" ] order<br />
;<br />
The legal values for ordering are:<br />
The following example specifies that only A, NS, <strong>and</strong> MX records are round-robined. This<br />
provides the same behavior as the <strong>MultiNet</strong> 4.2 nameserver.<br />
rrset-order {<br />
class IN type A name "*" order cyclic;<br />
class IN type NS name "*" order cyclic;<br />
class IN type MX name "*" order cyclic;<br />
order fixed;<br />
};<br />
prefers addresses on that same network<br />
fixed records are returned in the order they are defined in the zone file<br />
r<strong>and</strong>om records are returned in some r<strong>and</strong>om order<br />
cyclic records are returned in round-robin order (default)
Incremental Zone Transfer<br />
Host Tables <strong>and</strong> DNS<br />
BIND 9.7.2-p3 contains an implementation of incremental zone transfer (IXFR) -- it is on by<br />
default. If you need to turn it off for a particular slave server, use the provide-ixfr server<br />
substatement, which defaults to yes :<br />
server {<br />
provide-ixfr ( yes | no );<br />
};<br />
DNS Zone Information Files<br />
The DNS server configuration file contains references to DNS zone information files, that contain<br />
control information <strong>and</strong> a list of resource records for objects in the zone. The file format of a zone<br />
information file is:<br />
$INCLUDE filename [domain]<br />
$ORIGIN domain<br />
$TTL default-ttl<br />
$GENERATE range lhs type rhs<br />
domain [ttl] [class] record-type resource_data<br />
If the domain is specified as ".", the domain is the ROOT domain. If the domain is specified as an at<br />
sign (@), the domain is the current origin. Anything else is taken as a st<strong>and</strong>ard domain name, that if<br />
terminated by a dot (.) is used verbatim; otherwise, the current origin is appended to the specified<br />
domain name.<br />
The optional domain field in a $INCLUDE line is used to define an origin for the data in an<br />
included file. It is equivalent to placing a $ORIGIN statement before the first line of the included<br />
file. The field is optional. Neither the optional domain field in the $INCLUDE line nor $ORIGIN<br />
statements in the included file modify the current origin for this file.<br />
The $TTL statement sets the default time-to-live for records that do not have explicit ttl fields. If<br />
the zone file does not have a $TTL statement, the DNS server prints a warning on your computer<br />
screen <strong>and</strong> uses the minimum value from the SOA record.<br />
The optional ttl field is an integer value to specify in the time-to-live field in the following ways:<br />
Note! Each of these is equivalent to one week.<br />
• 604800<br />
• 1w<br />
• 7d<br />
• 168h<br />
• 10080m<br />
• or any combination<br />
For example: sigma 2h46m40s IN A 192.1.1.97<br />
10-29
Host Tables <strong>and</strong> DNS<br />
10-30<br />
Loads the TTL as: ttl = 10000 (2 hours 46 mins 40 secs)<br />
The default is to use the value specified in the $TTL directive or SOA resource record for the zone.<br />
The optional class field is the object address type; currently only one type (IN, for objects<br />
connected to the Internet) is supported.<br />
The record-type field is also known as "resource record types." Table 10-9 shows the most<br />
commonly used DNS resource record types <strong>and</strong> their uses (the data expected in the resource_data<br />
field is shown in brackets [ ]).<br />
Table 10-9 DNS Resource Record Types<br />
Record Type Use<br />
A A host address [IP-address]<br />
CNAME The canonical name for an alias [domain-name] a<br />
HINFO Host information [CPU-type OS-type]<br />
KEY The public key associated with a domain name [flags protocol algorithm key]<br />
MB A mailbox domain name [domain-name] b<br />
MG A mail group member [domain-name] b<br />
MINFO Mailbox or mail list information [request-domain error-domain] b<br />
MR A mail rename domain name [domain-name] b<br />
MX A mail exchanger [preference domain-name]<br />
NS An authoritative name server [domain-name]<br />
NULL A null resource record [none]<br />
NXT Used for secure negative responses. Tells a querier which record is<br />
lexicographically next in the zone [next-domain-name type-bitmap]<br />
PTR A domain name pointer [domain-name]<br />
SIG A security signature for an RRset [type algorithm labels ttl expiration<br />
inception tag name signature]<br />
SOA The start of a zone of authority [domain of originating host, domain address of<br />
maintainer, a serial number <strong>and</strong> the following parameters in seconds: refresh,<br />
retry, expire, <strong>and</strong> minimum time-to-live] (see RFC-1035)<br />
SRV Specifies the location of services [priority weight port target]<br />
TXT Arbitrary text [text-string]
Table 10-9 DNS Resource Record Types (Continued)<br />
Record Type Use<br />
WKS A well-known service description [address protocol service-list]<br />
a. A canonical name is an alias name for a computer.<br />
b. An experimental resource record not in common use.<br />
Host Tables <strong>and</strong> DNS<br />
Resource records are usually single-line entries, but SOA records may be continued across lines by<br />
surrounding the resource record statements with open <strong>and</strong> close parentheses. Comments begin with<br />
semicolons <strong>and</strong> continue to the end of the line. Each zone information file should begin with an<br />
SOA resource record for the zone. An example SOA resource record follows.<br />
@ IN SOA VMSITE.FLOWERS.COM. system.EMAIL.FLOWERS.COM. (<br />
2000022101 ; serial number as yyyymmddnn<br />
7200 ; refresh every 2 hours<br />
7200 ; retry every 2 hours<br />
12096000 ; expire in twenty weeks<br />
86400 ) ; minimum time-to-live<br />
The SOA resource record lists a serial number that DNS administrators should increase each time<br />
they modify the master file. Secondary servers check the serial number at intervals specified by the<br />
refresh time. If the serial number has increased since the last zone transfer, the secondary name<br />
server requests a new zone transfer <strong>and</strong> then loads the new zone data.<br />
In the preceding example, VMSITE is a host in the FLOWERS.COM domain. This should be the<br />
primary DNS server for this zone.<br />
“system.EMAIL.FLOWERS.COM" is the email address of the DNS zone administrator on the<br />
EMAIL host in the FLOWERS.COM domain.<br />
Note! Although the DNS zone administrator's email address is specified without an at sign (@), the<br />
effective email address requires changing the first period to @. For example, the email address<br />
of the DNS zone administrator in the preceding example is system@EMAIL.FLOWERS.COM.<br />
If you configure your name server as a secondary name server, it contacts the primary name server<br />
for a new zone transfer after the refresh interval expires. If the server does not receive a response<br />
after the "retry" interval, it tries repeatedly to contact the primary name server until it succeeds. If<br />
the secondary server fails to contact the primary name server before the expire interval elapses, it<br />
discards all data from the zone.<br />
The minimum value is the time-to-live value used by records in the file with no explicit value if<br />
there is no $TTL statement. It is used also as the time-to-live value for negative caching.<br />
Set the expire time to a value long enough to accommodate the retry <strong>and</strong> refresh intervals. If the<br />
refresh interval exceeds the expiration time, the data on your secondary server will expire before<br />
new data can be loaded. The following example shows a zone information file for the zone<br />
FLOWERS.COM.<br />
10-31
Host Tables <strong>and</strong> DNS<br />
10-32<br />
;<br />
; Authoritative data for FLOWERS.COM<br />
;<br />
$TTL 86400<br />
@ IN SOA VMSITE.FLOWERS.COM. system.EMAIL.FLOWERS.COM. (<br />
2000022107 ; serial number as yyyymmddss, where<br />
; ss is the zone change sequence count<br />
7200 ; refresh every 2 hours<br />
7200 ; retry every 2 hours<br />
12096000 ; expire in twenty weeks<br />
86400 ) ; minimum time-to-live<br />
IN NS VMSITE.FLOWERS.COM.<br />
IN NS SPACELY.SPROCKETS.COM.<br />
;<br />
; Information about the host FLOWERS.COM<br />
;<br />
FLOWERS.COM. IN MX 0 FLOWERS.COM.<br />
IN A 192.0.0.1<br />
IN HINFO VAXSTATION-9440 VMS<br />
;<br />
; The loopback address <strong>and</strong> host<br />
;<br />
LOCALHOST. IN A 192.0.0.1<br />
IN HINFO LOOPBACK-HOST LOOPBACK<br />
;<br />
; The remaining hosts<br />
;<br />
AARDVARK IN A 192.0.0.2<br />
IN MX 0 AARDVARK<br />
IN HINFO VAXSTATION-3200 VMS<br />
John IN A 192.0.0.3<br />
IN MX 0 John.FLOWERS.COM.<br />
IN HINFO VAXSTATION-3100 VMS<br />
The SOA resource record indicates the start of authority for the zone FLOWERS.COM. The NS<br />
resource records indicate which DNS name servers are authoritative for the zone. The remainder of<br />
the file lists each host <strong>and</strong> information about it. VMSITE is a system in the FLOWERS.COM<br />
domain. The system.EMAIL.FLOWERS.COM is the email address on the EMAIL host in the<br />
FLOWERS.COM domain.<br />
An example of a zone information file for the zone 0.128.IN-ADDR.ARPA follows. This file<br />
contains the information needed to map IP addresses in the network 128.0.0.0 into host names. This<br />
file contains an example of the PTR record type.<br />
;<br />
; Authoritative data for 0.128.IN-ADDR.ARPA<br />
;<br />
$TTL 86400<br />
@ IN SOA VMSITE.FLOWERS.COM. system.EMAIL.FLOWERS.COM. (<br />
2000022101 ; serial number as yyyymmddnn
7200 ; refresh every 2 hours<br />
7200 ; retry every 2 hours<br />
12096000 ; expire in twenty weeks<br />
86400 ) ; minimum time-to-live<br />
IN NS VMSITE.FLOWERS.COM.<br />
IN NS SPACELY.SPROCKETS.COM.<br />
;<br />
; Network database<br />
;<br />
1.0 IN PTR FLOWERS.COM.<br />
2.0 IN PTR AARDVARK.FLOWERS.COM.<br />
3.0 IN PTR JOHN.FLOWERS.COM.<br />
Reloading the Name Server<br />
To reload the running server:<br />
$ MULTINET NETCONTROL DOMAIN RELOAD<br />
To restart the name server:<br />
$ MULTINET NETCONTROL DOMAIN RESTART<br />
Host Tables <strong>and</strong> DNS<br />
Note! The master server must be restarted before the nameserver restarts to load in any net-config or<br />
server-config changes @multinet:start_server.<br />
Controlling the <strong>MultiNet</strong> DNS Server<br />
You can use the <strong>MultiNet</strong> NETCONTROL server to request that the DNS server perform specific<br />
actions. The name to specify to NETCONTROL for the DNS server is DOMAINNAME.<br />
Refer to Table 1-12 NETCONTROL DOMAINNAME Comm<strong>and</strong>s in the <strong>MultiNet</strong> for OpenVMS<br />
Administrator’s Reference.<br />
When the server is busy, NETCONTROL sends a message stating that your request has been<br />
queued, <strong>and</strong> it will be acted upon when it is the next one in the queue to be serviced. When the<br />
server is not busy, it performs your request while NETCONTROL waits (except for the case of<br />
RELOAD). For example,<br />
DOMAINNAME>stat<br />
Host Tables <strong>and</strong> DNS<br />
10-34<br />
NSLOOKUP, see Chapter 1 of the <strong>MultiNet</strong> for OpenVMS Administrator’s Reference.<br />
Table 10-10 NSLOOKUP Comm<strong>and</strong>s<br />
Comm<strong>and</strong> Description<br />
name Prints information about name using the default server.<br />
name server Prints information about name using server.<br />
exit Exits NSLOOKUP.<br />
finger [user] Finger the optional user at the current default host.<br />
help or ? Prints help information.<br />
set all Prints the current status of all options.<br />
set class=class Sets the query class to one of these: IN, CHAOS, HESIOD, or ANY.<br />
set [no]debug Prints debugging information.<br />
set [no]d2 Prints exhaustive debugging information.<br />
set [no]defname Appends the domain name to each query.<br />
set [no]recurse Asks for a recursive answer to query.<br />
set [no]vc Always uses a virtual circuit (TCP instead of UDP).<br />
set domain=name Sets the default domain name to name.<br />
set port=port Sets the port number on which to send a query.<br />
set root=name Sets the root name server to name.<br />
set retry=n Sets the number of retries to n.<br />
set srchlist=name1<br />
[/name2/.../name6]<br />
Sets the domain to name1 <strong>and</strong> the search list to name1 through<br />
name6.<br />
set timeout=n Sets the timeout interval to n.<br />
set querytype=type<br />
or<br />
set type=type<br />
Sets the resource record (RR) type to query for.<br />
server name Sets the default server to name, using the current default server.<br />
lserver name Sets the default server to name, using the original default server.<br />
root Sets the current default server to the root.
Table 10-10 NSLOOKUP Comm<strong>and</strong>s (Continued)<br />
Comm<strong>and</strong> Description<br />
DNS Load Balancing<br />
Host Tables <strong>and</strong> DNS<br />
ls [option] name [> file] Lists the domain name, with output optionally going to file.<br />
option is one of the following:<br />
-a List canonical names <strong>and</strong> aliases<br />
-h List HINFO (CPU type <strong>and</strong> operating system)<br />
-s List well-known services<br />
-d List all records<br />
-t type List records of the given type (such as A, CNAME, <strong>and</strong> MX)<br />
The <strong>MultiNet</strong> domain name server provides a feature called DNS load balancing, which is modeled<br />
after the service names available with HP's LAT terminal server support for VMScluster systems.<br />
The domain name server maintains a load rating for each node offering a particular service name<br />
<strong>and</strong>, when queried for the addresses records for that name, it orders them based on the load rating.<br />
This allows TCP-based services such as TELNET <strong>and</strong> FTP to be offered cluster-wide in a loadbalanced<br />
fashion. To configure DNS load balancing on each cluster node that will offer the service:<br />
1 Set up cluster services offered by this node with NET-CONFIG or MENU-CONFIG (see the<br />
Setting Up a Cluster Service section).<br />
2 If your host is multi-homed (one that has more than one IP network interface), specify the IP<br />
address associated with the cluster services with NET-CONFIG or MENU-CONFIG (see the<br />
Advertised Cluster Service Addresses on Multi-Homed Hosts section).<br />
3 Configure service ratings for advertised services (see the Setting Service Ratings section).<br />
4 Add the new service names to your domain's DNS zone file (see the Adding Cluster Services to<br />
Your Domain's DNS Zone File section).<br />
5 Monitor <strong>and</strong> test the status of your cluster service names with the MULTINET NETCONTROL<br />
DOMAINNAME SHOW comm<strong>and</strong> (see the Monitoring Cluster Service Names section).<br />
Setting Up a Cluster Service<br />
To configure a cluster service name with NET-CONFIG:<br />
$ MULTINET CONFIGURE<br />
NET-CONFIG>SET CLUSTER-SERVICE-NAMES name[,...]<br />
Note! Don't confuse the DNS load balancing feature <strong>and</strong> the CLUSTER-SERVICE-NAMES parameter<br />
with the cluster alias feature <strong>and</strong> IP-CLUSTER-ALIAS parameter described in Chapter 11.<br />
To configure a cluster service name with MENU-CONFIG, select Configure Global Parameters<br />
from the main menu, then select Modify Global Parameters.<br />
Each cluster service name must be a name not already in use on your network. Specify each name<br />
in its fully qualified form (for example, CLUSTER.FLOWERS.COM). If you configure more than<br />
10-35
Host Tables <strong>and</strong> DNS<br />
10-36<br />
one name, separate the names with commas when you specify them. To activate your cluster<br />
service names on the running system, use the comm<strong>and</strong>:<br />
$ DEFINE/SYSTEM/EXEC MULTINET_CLUSTER_SERVICE_NAMES "name"<br />
If you are setting up multiple service names, enclose each name in quotation marks <strong>and</strong> separate the<br />
quoted names with commas. Once the logical name has been defined, restart the nameserver:<br />
$ MULTINET NETCONTROL DOMAINNAME RESTART<br />
Advertised Cluster Service Addresses on Multi-Homed Hosts<br />
For a multi-homed host, you can control the address advertised for a cluster service with the NET-<br />
CONFIG SET CLUSTER-SERVICE-ADDRESS comm<strong>and</strong>:<br />
NET-CONFIG>SET CLUSTER-SERVICE-ADDRESS address<br />
You can also configure this setting using the MENU-CONFIG Network Parameters Configuration<br />
menu. If you do not configure a cluster service address for a host with multiple interfaces, the<br />
address advertised for the cluster service will be selected at r<strong>and</strong>om.<br />
Setting Service Ratings<br />
The load-rating algorithm used by the DNS server for cluster service names is similar to the<br />
algorithm used by LAT. It is based on the system load, the number of interactive processes on the<br />
system, <strong>and</strong> the amount of free physical memory on the system. If your VMScluster system<br />
contains CPUs of vastly different speeds <strong>and</strong>/or memory configurations, you may find that the<br />
algorithm always favors a faster or larger-memory system over a slower or smaller-memory<br />
system.<br />
In an unbalanced cluster configuration, you may need to set either a static load rating or weight the<br />
rating computation by setting a CPU rating on each node:<br />
• Static Ratings — A static rating is set by defining a logical name:<br />
$ DEFINE/SYSTEM/EXEC MULTINET_CLUSTER_SERVICE_STATIC_RATING n<br />
n is a decimal number ranging from 1 to 255.<br />
When defined, this rating will be used in all cluster service advertisements, bypassing the<br />
dynamic load rating computations. The higher the number you set, the more "available" (or less<br />
loaded) the system will be.<br />
• CPU Ratings — A CPU rating is also set by defining a logical name:<br />
$ DEFINE/SYSTEM/EXEC MULTINET_CLUSTER_SERVICE_CPU_RATING n<br />
n is a decimal number ranging from 1 to 100.<br />
This is the weight value factored into the load rating calculation. To bias load ratings so that<br />
faster CPUs service more users, set a lower CPU rating value on your slower CPUs <strong>and</strong> a higher<br />
CPU rating on your faster CPUs. After setting ratings, restart the nameserver:
$ MULTINET NETCONTROL DOMAINNAME RESTART<br />
Adding Cluster Services to Your Domain's DNS Zone File<br />
Host Tables <strong>and</strong> DNS<br />
Once you have configured a cluster service name on your cluster, update your domain's primary<br />
name server DNS zone file to delegate authority over the cluster service name to the participating<br />
cluster nodes. To do this, add NS records that map each cluster service name to the participating<br />
nodes. For example, to add the cluster service name CLUSTER.FLOWERS.COM, add the<br />
following lines to the configuration files on FLOWERS.COM's primary name server:<br />
CLUSTER.FLOWERS.COM. IN NS NODE1.FLOWERS.COM.<br />
CLUSTER.FLOWERS.COM. IN NS NODE2.FLOWERS.COM.<br />
The name on the left side is the cluster service name; the name on the right side is the domain name<br />
of a node offering the cluster service.<br />
Monitoring Cluster Service Names<br />
To check the status of your cluster service names, use the following NETCONTROL comm<strong>and</strong>:<br />
$ MULTINET NETCONTROL DOMAINNAME SHOW<br />
For each cluster service name, a listing of the nodes offering the service <strong>and</strong> their load ratings is<br />
displayed. For example:<br />
$ MULTINET NETCONTROL DOMAINNAME SHOW<br />
Connected to NETCONTROL server on "NODE1"<br />
< Node1.Flowers.COM Network Control V5.4(10) at Mon 13-Mar-2003 4:35PM-EST<br />
< Service CLUSTER.FLOWERS.COM:<br />
< Nodename Address Rating<br />
< -------- --------------- ------<br />
< NODE1 192.41.228.101 75<br />
< NODE2 192.41.228.102 83<br />
< End of line<br />
You should also test a cluster service name using NSLOOKUP:<br />
$ MULTINET NSLOOKUP CLUSTER.FLOWERS.COM<br />
Server: LOCALHOST<br />
Address: 192.0.0.1<br />
Name: CLUSTER.FLOWERS.COM<br />
Addresses:192.44.128.102, 192.44.128.101<br />
NSLOOKUP should return the addresses from highest to lowest rating, although DNS caching can<br />
cause address ordering to lag behind rating changes for short periods of time.<br />
10-37
Host Tables <strong>and</strong> DNS<br />
DNS Security<br />
10-38<br />
BIND 9.7.2-p3 includes an implementation of DNS Security (DNSSEC). A complete description of<br />
DNSSEC <strong>and</strong> its use is beyond the scope of this chapter. DNSSEC is described in RFC 2065<br />
"Domain Name System Security Extensions" <strong>and</strong> various internet drafts.<br />
<strong>MultiNet</strong> includes the following BIND tools related to DNS Security:<br />
DNSKEYGEN Used for generating <strong>and</strong> maintaining keys.<br />
DNSSIGNER Used for signing zones.<br />
For more information on these tools, see the <strong>MultiNet</strong> for OpenVMS Administrator’s Reference.<br />
This section describes a simple scenario in which DNSKEYGEN <strong>and</strong> DNSSIGNER are used.<br />
The simplest "normal" case is a zone which has no delegations, <strong>and</strong> is to be signed with a single<br />
zone key. Assume that the parent zone is secured <strong>and</strong> is able to sign the public zone key.<br />
The first step in signing a zone is to generate a private-public key pair. This is done using<br />
DNSKEYGEN. This will generate a DNS zone master file version of the public key in a file with<br />
the suffix "key".<br />
Example of key generation:<br />
$ multinet dnskeygen/dsa=768/zone/noencrypt zz.test.<br />
This result in the generation of two files, the names of which reflect the key owner, algorithm, <strong>and</strong><br />
footprint. The names end in "key" <strong>and</strong> "private". The "key" file contains the DNS RR holding the<br />
public key, the "private" file has the data defining the private key. The latter file is set to be read/<br />
write only by the file's owner.<br />
Example key file (key represented in base64 characters):<br />
zz.test. IN KEY 16641 3 3 AQPIc...<br />
Example private file:<br />
Private-key-format: v1.1<br />
Algorithm: 3 (DSA)<br />
Prime(p): base 64 characters<br />
Subprime(q): base 64 characters<br />
Base(g): base 64 characters<br />
Private_value(x): base 64 characters<br />
Public_value(y): base 64 characters<br />
Note! The two numeric fields in the key filenames will be different for each time dnskeygen is run.<br />
Also note that the "private" key's format will depend on the algorithm used to derive the key.<br />
The next step is to run DNSSIGNER over the data. To make things simple, all files involved will be<br />
considered to be in the current default directory unless otherwise stated. In the directory where the<br />
file zone.1 resides there should be a "private" file for the key used for signing.
Example zone file (zone.1):<br />
$ORIGIN zz.test.<br />
@ IN SOA a.test. a.a.test. 1 360 36 60480 12<br />
NS a.test.<br />
NS b.test.<br />
one A 10.10.10.10<br />
two A 10.10.10.100<br />
MX 10 one.zz.test.<br />
a.test. A 10.11.12.13<br />
b.test. A 10.13.12.11<br />
Host Tables <strong>and</strong> DNS<br />
The public key (from the key file) is sent two different ways. One copy of the public key is sent to<br />
the parent zone for signing with the parent's zone key. The public key is also copied (or even<br />
$INCLUDEd) into the zone.1 file. Signing may begin prior to receiving a response from the parent<br />
zone (which contains, among other things, the signed public key).<br />
Although the public key is going to arrive from the parent at some time packaged with the<br />
signature, the unsigned key must be placed into the unsigned zone master file. The presence of the<br />
public key record alerts DNSSIGNER to perform certain functions, such as generating NXT<br />
records <strong>and</strong> generating parent files for its delegation points.<br />
IMPORTANT! Although DNSSIGNER is flexible enough to withst<strong>and</strong> missing private keys, <strong>and</strong> late<br />
arriving parent files, it cannot be expected to behave correctly if the data used to derive<br />
the zone master file changes during the execution of the signing process. In<br />
accordance with this, the public key should be added to the zone even though the key<br />
will also arrive from the parent later. DNSSIGNER will remove duplicate records.<br />
Example of signing a zone:<br />
$ multinet dnssigner/zone=(inp=zone.1, out=zone.2) -<br />
/sig=key=(dom=zz.test, alg=3, key_id=6750)<br />
The result of the run will be a new zone file. The file zone.2 will appear something like the<br />
following:<br />
Example output of DNSSIGNER (zone.2):<br />
$ORIGIN zz.test.<br />
zz.test. 12 IN SOA a.test. a.a.test. 1 6M 36S 16h48m 12S<br />
SIG SOA 1 12 19980223163147 19980123163147 6750 zz.test. (...)<br />
zz.test. KEY 0x4101 3 1 (...)<br />
zz.test. NS a.test.<br />
NS b.test.<br />
SIG NS 1 12 19980223163147 19980123163147 6750 zz.test. (...)<br />
zz.test. NXT one.zz.test. NS SOA SIG KEY NXT<br />
SIG NXT 1 12 19980223163147 19980123163147 6750 zz.test. (...)<br />
one A 10.10.10.10<br />
SIG A 1 12 19980223163147 19980123163147 6750 zz.test. (...)<br />
one NXT two.zz.test. A SIG NXT<br />
10-39
Host Tables <strong>and</strong> DNS<br />
10-40<br />
SIG NXT 1 12 19980223163147 19980123163147 6750 zz.test. (...)<br />
two A 10.10.10.100<br />
SIG A 1 12 19980223163147 19980123163147 6750 zz.test. (...)<br />
two MX 10 one.zz.test.<br />
SIG MX 1 12 19980223163147 19980123163147 6750 zz.test. (...)<br />
two NXT zz.test. A MX SIG NXT<br />
SIG NXT 1 12 19980223163147 19980123163147 6750 zz.test. (...)<br />
a.test. A 10.11.12.13<br />
b.test. A 10.13.12.11<br />
All of the "(...)" fields are base64 encoded values. This file is complete except for the missing<br />
signature by test. over the zz.test. KEY record. If this file is sent to a secured name server, the zone<br />
data will be rejected unless the zone key happens to have been configured.<br />
Note! It is wise not to configure the zone key for a zone unless the parent will not be signing the zone<br />
key.<br />
Eventually, the parent file will arrive. After obtaining the file, the DNSSIGNER needs to be run<br />
again to include the new data.<br />
Example parent file (parent.1):<br />
zz.test. NXT zzz.test. NS SIG KEY NXT<br />
zz.test. SIG NXT 1 12 19980229163147 19980129163147 12345 test. (...)<br />
zz.test. KEY 0x401 3 1 (...)<br />
zz.test. SIG KEY 1 12 19980229163147 19980129163147 12345 test. (...)<br />
The final run of DNSSIGNER is:<br />
$ multinet dnssigner/zone=(in=zone.2,out=zone.3)/parent=in=parent.1<br />
Note! The specification of the key is no longer needed. However, now that the records are signed,<br />
DNSSIGNER will verify all the existing signatures.<br />
In the case that a signature fails during these checks, the action taken by DNSSIGNER depends on<br />
whether the key of the signature is specified on the DNSSIGNER comm<strong>and</strong> line during the run. In<br />
the example, failing signatures are just dropped. If the run comm<strong>and</strong> included<br />
/sig=key=(dom=zz.test.,alg=dsa,key_id=6750)<br />
then failing signatures would be replaced.<br />
The result of the second run of DNSSIGNER is zone.3, which is the final zone file <strong>and</strong> would be<br />
used by the nameserver. zone.3 is a merger of zone.2 <strong>and</strong> parent.1, minus the records which appear<br />
in both files; that is, duplicates are removed.
Multicast Name Resolution<br />
Host Tables <strong>and</strong> DNS<br />
Multicast name resolution aims to eliminate the need to maintain HOSTS files or configure a name<br />
server on networks that are contained within a single logical LAN. Systems participate by sending<br />
out a multicast request to resolve a name <strong>and</strong> any system that recognize the name responds to the<br />
request. Systems that participate in multicast name resolution use one of two protocols: LLMNR<br />
(RFC 4795), or mDNS. Both protocols use packets that are very similar to st<strong>and</strong>ard DNS packets;<br />
they operate in different multicast groups <strong>and</strong> use different port numbers.<br />
<strong>MultiNet</strong> offers a responder that participates in both protocols <strong>and</strong> the ability to configure the<br />
resolver to use one of the two protocols. Using a multicast group disables one of the resolver's<br />
checks for authenticity of the answers that it receives. The multicast name responder works for both<br />
IPv4 <strong>and</strong> IPv6 addresses. Zero configuration of systems is one of the goals for IPv6 on small<br />
networks, <strong>and</strong> multicast name resolution helps in meeting this goal. Configuring <strong>MultiNet</strong> to use<br />
multicast name resolution involves enabling the server (LLMNR) <strong>and</strong> setting the name server<br />
address <strong>and</strong> port with <strong>MultiNet</strong> CONFIGURE/NETWORK.<br />
Configuring Multicast Name Resolution<br />
$ multinet configure/server<br />
SERVER-CONFIG>ENABLE LLMNR<br />
SERVER-CONFIG>WRITE<br />
SERVER-CONFIG>EXIT<br />
$ multinet configure/network<br />
NET-CONFIG> set multicast-name-resolution {LLMNR | mDNS}<br />
NET-CONFIG>WRITE<br />
NET-CONFIG>EXIT<br />
LLMNR (port 5355 on 224.0.0.252 <strong>and</strong> FF02::1:3)<br />
mDNS (port 5353 on 224.0.0.251 <strong>and</strong> FF02::FB)<br />
$ define/system/exec/nolog multinet_nameservers 224.0.0.252<br />
$ define/system/exec/nolog multinet_dns_port 5355<br />
10-41
Chapter 11<br />
Establishing IP Connectivity<br />
This chapter explains how to establish IP connectivity between your computer <strong>and</strong> other computers<br />
on your network. Connectivity depends upon the network interfaces in your system.<br />
The configuration tools you use to accomplish<br />
the tasks described in this chapter see Chapter 2<br />
About IP Connectivity Configuring Transport over Serial Lines with<br />
SLIP <strong>and</strong> PPP<br />
Network Interface Configuration Overview Modifying Global Parameters<br />
Supported Network Interface Devices Using the HP TCP/IP Transport Over UCX<br />
Viewing Interface Configuration Configuring VMScluster Aliasing<br />
(service disabled with <strong>MultiNet</strong> v4.3)<br />
Adding Network Interfaces Ensuring PATHWORKS Support is Enabled<br />
Modifying Network Interfaces Configuring Transport over Serial Lines with<br />
SLIP <strong>and</strong> PPP<br />
Deleting Network Interfaces Multicast Support<br />
Using Packet Filtering for Security Enabling <strong>and</strong> Disabling MTU Discovery<br />
11-1
Establishing IP Connectivity<br />
About IP Connectivity<br />
11-2<br />
Establishing IP connectivity ensures that users can perform the tasks described in the <strong>MultiNet</strong> for<br />
OpenVMS User's <strong>Guide</strong>, including:<br />
• Obtaining information about remote systems <strong>and</strong> users with FINGER <strong>and</strong> WHOIS<br />
• Accessing files on other computers with the FTP, RCP, TFTP, SCP, <strong>and</strong> SFTP comm<strong>and</strong>s<br />
• Logging into other computers with the RLOGIN, TELNET, <strong>and</strong> SSH comm<strong>and</strong>s<br />
• Using remote printers<br />
Note! Establishing IP connectivity only ensures you can reach other systems if you know their IP<br />
addresses. It does not ensure you can reach other systems by name. For example, there is no<br />
guarantee you can send mail to users on remote systems without first configuring host tables or<br />
the Domain Name System (DNS) (see Chapter 10).<br />
Network Interface Configuration Overview<br />
At startup, <strong>MultiNet</strong> obtains global configuration data (such as the default route) <strong>and</strong> devicespecific<br />
network interface configuration data (such as the IP address) from the following files:<br />
• The MULTINET:NETWORK_DEVICES.CONFIGURATION network database file describes<br />
the current network configuration, including a list of the device interfaces you have specified.<br />
This file is used to determine which devices are present when the network is started.<br />
• The MULTINET:START_MULTINET.COM network initialization comm<strong>and</strong> procedure starts<br />
<strong>and</strong> configures the network, <strong>and</strong> initializes individual device interfaces <strong>and</strong> global parameters.<br />
This file is overwritten each time you use NET-CONFIG to update <strong>and</strong> save the configuration.<br />
This chapter describes how to modify the startup comm<strong>and</strong> procedure <strong>and</strong> configuration file with<br />
NET-CONFIG or MENU-CONFIG <strong>and</strong> related steps required to ensure successful configuration.<br />
For details on using these configuration utilities, see Chapter 9.<br />
Note! Network interface configuration changes take effect the next time your system reboots. In<br />
contrast, most global parameter changes do not require rebooting.<br />
Some network interfaces require configuration data that is not accessible through either NET-<br />
CONFIG or MENU-CONFIG. When configuring such interfaces, additional configuration files are<br />
required. For details, see the Creating a Custom Interface Initialization Procedure section.<br />
Supported Network Interface Devices<br />
<strong>MultiNet</strong> allows you to configure multiple interface devices on your network. Each interface is<br />
named according to its type (for example, shared Ethernet interfaces are of the type "se").
Establishing IP Connectivity<br />
In general, <strong>MultiNet</strong> accommodates a maximum of ten devices of each type. Table 11-1 lists the<br />
devices <strong>MultiNet</strong> supports <strong>and</strong> the interface names to use when specifying devices to be added or<br />
modified.<br />
Table 11-1 Supported Network Interface Devices<br />
Device Interface Name<br />
Raw packet (dbridge) rp[0...49]<br />
SLIP (Serial line IP) using any VMS-supported terminal multiplexer sl[0...49]<br />
PPP (Point-to-Point Protocol) ppp[0...49]<br />
HP VMS Ethernet, FDDI, ATM, or Alpha Token-Ring controller se[0...19]<br />
STF (IPv6 encapsulated in IPv4) stf0<br />
<strong>MultiNet</strong> contains a driver for each of these device types. The driver either accesses the device<br />
directly or is an interface to an appropriate OpenVMS device driver.<br />
Viewing Interface Configuration<br />
There are two ways to view the currently configured network interfaces:<br />
• Using the NET-CONFIG SHOW comm<strong>and</strong><br />
• Using the MENU-CONFIG Show All Network Interfaces comm<strong>and</strong><br />
Viewing Interface Configuration with NET-CONFIG<br />
You can use the NET-CONFIG SHOW comm<strong>and</strong> to display the maximum configuration or the<br />
current configuration.<br />
Viewing the Maximum Configuration<br />
Use the following comm<strong>and</strong> to display all interface types supported by <strong>MultiNet</strong> are displayed,<br />
including the default settings for the Adapter, CSR, Flags, <strong>and</strong> Vector parameters:<br />
$ MULTINET CONFIGURE /INTERFACE<br />
NET-CONFIG>SHOW MAXIMUM<br />
11-3
Establishing IP Connectivity<br />
11-4<br />
For example:<br />
NET-CONFIG>SHOW MAXIMUM<br />
Devices Adapter CSR Address FlagsVector<br />
------- ------- ----------- ----------rp[0-9]<br />
(Raw Packet) -NONE- -NONE- -NONEppp[0-49]<br />
(Point-to-Point Protocol) -NONE- -NONE- -NONEse[0-9]<br />
(Shared VMS Ethernet/FDDI) -NONE- -NONE- -NONEsl[0-49]<br />
(Serial Line IP) -NONE- -NONE- -NONE-<br />
Viewing the Current Configuration<br />
Use the following comm<strong>and</strong> to display global parameter settings <strong>and</strong> device interfaces currently in<br />
your network configuration (including the actual settings for Adapter, CSR, Flags, <strong>and</strong> Vector):<br />
NET-CONFIG>SHOW [CURRENT]<br />
For example:<br />
NET-CONFIG>SHOW<br />
Interface Adapter CSR Address Flags/Vector<br />
--------- ------- ----------- -----------se0<br />
(Shared VMS Ethernet/FDDI) -NONE- -NONE- -NONE-<br />
[TCP/IP: 192.41.228.68, IP-SubNet: 255.255.255.0]<br />
[VMS Device: EZA0, Link Level: Ethernet]<br />
ppp0 (Point-to-Point Protocol) -NONE- -NONE- -NONE-<br />
[VMS Terminal: TTA0]<br />
[ACCM: 0x0, Authentication: None]<br />
[Protocol Compression: Off, Address <strong>and</strong> Control Field<br />
Compression: Off]<br />
[Idle Timeout: 0, Configuration Timeout: 0]<br />
[MRU: 0, ICMP Allowed: Yes]<br />
[Configuration Retries: 0, Termination Retries: 0]<br />
[TCP Header Compression: Disabled]<br />
Official Host Name: BANZAI.FLOWERS.COM<br />
Default IP Route: 192.41.228.129<br />
Domain Nameserver: 127.0.0.1<br />
Timezone: EST<br />
Default TFTP Directory: MULTINET_ROOT:[MULTINET.TFTP]<br />
Anonymous FTP Directory: ANONVILLE:[ANONYMOUS]<br />
Load EXOS $QIO driver: TRUE<br />
Load UCX $QIO driver: TRUE<br />
Load PWIP (Pathworks) driver: TRUE<br />
The SHOW comm<strong>and</strong> with no parameters defaults to SHOW CURRENT.
Viewing Interface Configuration with MENU-CONFIG<br />
To view the current interface configuration with MENU-CONFIG:<br />
1 Start MENU-CONFIG:<br />
$ MULTINET CONFIGURE /MENU<br />
Establishing IP Connectivity<br />
The main MENU-CONFIG menu appears.<br />
2 Choose Configure Network Interfaces. The Network Interface Configuration Menu appears.<br />
3 To view a specific network interface configuration, choose Show an Existing Network<br />
Interface, then the name of the interface you want to view. When you are done, press Ctrl/Z to<br />
return to the Network Interface Configuration menu.<br />
4 To view all network interface configuration parameters, Choose Show All Network Interfaces.<br />
Use the up <strong>and</strong> down arrow keys to scroll through the interface configuration parameters. When<br />
you are done, press Ctrl/A to return to the Network Interface Configuration menu.<br />
5 Press Ctrl/Z to return to the main MENU-CONFIG menu.<br />
6 Quit MENU-CONFIG.<br />
Adding Network Interfaces<br />
To add a new network interface to your <strong>MultiNet</strong> configuration, you can either:<br />
• Use NET-CONFIG (see the Adding Network Interfaces with NET-CONFIG section).<br />
• Use the Configure Network Interfaces comm<strong>and</strong> in MENU-CONFIG (see the Adding Network<br />
Interfaces with NET-CONFIG section).<br />
For details about these utilities, see Chapter 9.<br />
Table 11-2 lists all network interface parameters used by <strong>MultiNet</strong>-supported interfaces. Table 11-3<br />
lists the parameters required by each type of interface.<br />
11-5
Establishing IP Connectivity<br />
Network Interface Parameters<br />
11-6<br />
The supported network devices can be classified into three categories that determine the parameters<br />
you enter when configuring the device:<br />
• Hardware devices with which <strong>MultiNet</strong> communicates directly. For each of these devices, NET-<br />
CONFIG requires that you specify the CSR <strong>and</strong> the UNIBUS adapter into which the device is<br />
plugged. Most of the devices also require you to specify device-specific parameters.<br />
Some of these devices have programmable interrupt vectors that you specify with NET-<br />
CONFIG; <strong>MultiNet</strong> programs these vectors during startup. Others have interrupt vectors that are<br />
determined by the hardware. For each of these devices, set the vector <strong>and</strong> the CSR on the<br />
hardware using the DIP switches or jumpers on the card as described in the device's manual. As<br />
described in Table 11-2, each interrupt vector must be unique.<br />
• Hardware devices through which <strong>MultiNet</strong> communicates using a VMS device driver. For these<br />
devices, NET-CONFIG requires that you identify the VMS device through which <strong>MultiNet</strong> is to<br />
communicate; for most of these devices, you must also specify device-specific parameters.<br />
• <strong>Software</strong>, or pseudo, devices whose interfaces communicate with software <strong>and</strong> for which no<br />
hardware is directly associated. These interfaces are typically used to implement special-purpose<br />
transports <strong>and</strong> deliver packets to other software. For example, the IP-over-DECnet interface<br />
encapsulates IP packets in DECnet datagrams for transmission over a DECnet network. All<br />
parameters for these devices are device-specific.<br />
Table 11-2 lists the prompts that appear when you run NET-CONFIG. Make sure you respond to at<br />
least one network address prompt so the device can be started from the boot process. Table 11-3<br />
lists the prompts displayed for each device type.<br />
Table 11-2 Network Interface Parameters<br />
Parameter Function<br />
ACCM Mask Asynchronous Control Character Map Mask. A<br />
32-bit mask that indicates the set of ASCII<br />
control characters to be mapped into twocharacter<br />
sequences for transparent transmission<br />
over the line. Default is %x00000000.<br />
Adapter Identifies the UNIBUS to which the device is<br />
connected. The setting can be the name of a<br />
UNIBUS (UBA0, UBA1, UBA2, or UBA3), or<br />
ANY, which tells <strong>MultiNet</strong> to search each<br />
UNIBUS until it finds a device at the specified<br />
CSR.<br />
Address <strong>and</strong> Control Field Compression<br />
(ACFC)<br />
When ON, PPP eliminates the address <strong>and</strong><br />
control fields when they are identical over a<br />
series of frames. Default is OFF.
Table 11-2 Network Interface Parameters (Continued)<br />
Parameter Function<br />
Establishing IP Connectivity<br />
Baud Rate Indicates the transmission baud rate. Valid<br />
settings are 110, 300, 1200, 2400, 4800, 9600,<br />
19200, <strong>and</strong> UNSPECIFIED.<br />
BSD Trailer Encapsulation For 10Mb/sec Ethernet controllers only. Can be<br />
used to enable Berkeley Trailer encapsulation of<br />
IP packets on those Ethernets. Two valid<br />
settings: NEGOTIATED or DISABLED (the<br />
default, which prevents the use of trailer<br />
encapsulation).<br />
Communications Mode For communications devices that share a dialup<br />
line with either a modem or a terminal. Use DTE<br />
(Data Transmit Enable, the default) to specify<br />
that the line can originate serial communications,<br />
or DCE (Data Carrier Enable) to specify the<br />
opposite.<br />
CSR Control Status Register. Identifies the device's<br />
octal bus address. The CSR is usually<br />
programmed by setting DIP switches or jumpers<br />
on the card as described in the device's<br />
documentation.<br />
Flags Some devices have a Flags prompt whose<br />
meaning is device-dependent.<br />
Hardware Device The name of the real Ethernet device; for<br />
example, se0.<br />
11-7
Establishing IP Connectivity<br />
11-8<br />
Table 11-2 Network Interface Parameters (Continued)<br />
Parameter Function<br />
Header Compression Mode For SLIP devices, indicates whether to use Van<br />
Jacobson's header compression algorithm. The<br />
parameter has three valid settings:<br />
• DISABLED — Indicates that headers should<br />
never be compressed (default).<br />
• ENABLED — Indicates that headers should<br />
always be compressed.<br />
• NEGOTIATED — Indicates that headers<br />
should not be compressed until a compressed<br />
header is received from the other side.<br />
At least one side of a link must be ENABLED<br />
for compression to be used; that is, both sides of<br />
a link cannot be set to NEGOTIATED.<br />
ICMP When ENABLED (the default), PPP allows<br />
ICMP packets over the PPP connection.<br />
Administrators may want to disable ICMP<br />
packets if they are concerned with "service<br />
attacks" from dial-up connections.<br />
IP Address Indicates the Internet address associated with the<br />
interface.<br />
IP Address of Remote System Indicates the Internet address of the system to<br />
which the interface will connect.<br />
IP Broadcast Address Used with devices that support broadcasts.<br />
Allows the setting of a non-st<strong>and</strong>ard IP broadcast<br />
address; defaults to an address with a host<br />
portion of all 1's.<br />
IP Over DECnet Peer Host's DECnet Name Used with IP-over-DECnet links to indicate the<br />
name of the DECnet node on the other end of the<br />
connection.<br />
IP SubNet Mask Allows setting a non-st<strong>and</strong>ard IP subnet mask.<br />
IPv6 global address Indicates the global unique address associated<br />
with this interface. The interface may also have<br />
a link-local address which will be automatically<br />
generated when the interface is started.<br />
IPv6 mask length The length of the mask for the IPv6 address.
Table 11-2 Network Interface Parameters (Continued)<br />
Parameter Function<br />
Establishing IP Connectivity<br />
Jumbo Frames Used with Ethernet devices to indicate whether<br />
to use st<strong>and</strong>ard length Ethernet packets (1500<br />
bytes) or larger (9000 bytes) Jumbo frames.<br />
Jumbo frames can provide a higher throughput<br />
rate because more data is processed on a single<br />
interrupt.<br />
Link Level Encapsulation Mode Used with Ethernet devices to indicate whether<br />
to use the st<strong>and</strong>ard Ethernet encapsulation of IP<br />
datagrams, or extended 802.2 encapsulation as<br />
specified in RFC1042. Valid settings are<br />
ETHERNET <strong>and</strong> 802.2.<br />
Maximum Receive Unit (MRU) Size Determines the maximum number of 8-bit bytes<br />
for the PPP Information field, including padding,<br />
but not including the Protocol field. Because<br />
opposite ends of a PPP connection may have<br />
different MRU values, PPP negotiates a suitable<br />
MRU for both systems. Default: 500.<br />
Point-To-Point Device IP Destination<br />
Address<br />
Used with point-to-point interfaces to indicate<br />
the IP address of the system on the other side of<br />
the line.<br />
Protocol Compression When ON, PPP negotiates with the peer to use<br />
one byte instead of two for the Protocol fields to<br />
improve transmission efficiency on low-speed<br />
lines. Default: OFF.<br />
Retry Count Determines the number of attempts PPP makes<br />
to configure a connection with "Configure-<br />
Request" packets. Default: 0.<br />
Termination Retry Count Determines the number of attempts PPP makes<br />
to terminate a connection with "Terminate-<br />
Request" packets. Default: 0.<br />
Timeout Determines the time (in seconds) between<br />
successive Configure-Request or Terminate-<br />
Request packets. Default: 0.<br />
11-9
Establishing IP Connectivity<br />
Note! If your network requires a network interface to be initialized with parameters other than those<br />
listed in Table 11-2, create a custom initialization comm<strong>and</strong> procedure as described in the<br />
11-10<br />
Table 11-2 Network Interface Parameters (Continued)<br />
Parameter Function<br />
VMS Device Used with devices that use a VMS device driver<br />
to interface to the hardware. Indicates the name<br />
of the VMS device that <strong>MultiNet</strong> is to use. This<br />
parameter is used with HP Ethernet interfaces<br />
<strong>and</strong> SLIP interfaces.<br />
Vector Used with programmable vector devices only.<br />
Identifies the interrupt vector that <strong>MultiNet</strong><br />
assigns to the device during the boot process.<br />
Each interrupt vector (both fixed <strong>and</strong><br />
programmable types) must be unique. Refer to<br />
the Displaying Interrupt Vectors section for an<br />
example of how to display the current system<br />
interrupt vectors.
Creating a Custom Interface Initialization Procedure section.<br />
Table 11-3 Interfaces <strong>and</strong> Parameters<br />
Type Description<br />
Establishing IP Connectivity<br />
se Interface name: se0, se1, se2, ... se19<br />
Device type: Any HP VMS Ethernet, FDDI, ATM, or Alpha Token-Ring controller<br />
Parameter Prompt Example Value<br />
VMS Device: XEA0<br />
Link Level Encapsulation Mode: ETHERNET<br />
BSD Trailer Encapsulation: DISABLED<br />
IP Address: 192.41.228.70<br />
IP SubNet Mask: 255.255.255.0<br />
Non-St<strong>and</strong>ard IP Broadcast Address: 192.41.228.71<br />
DHCP CLIENT [DISABLED]: DISABLED<br />
Jumbo Frames [DISABLED]: ENABLED<br />
IPv6 on this interface [DISABLED]: ENABLED<br />
IPv6 global address [NONE]: 3FFE:1200:3006::C673:8EBE<br />
IPv6 mask length: 48<br />
The se interface uses any HP Ethernet controller to provide access to a 10/100/1000<br />
Mb/s Ethernet network, any HP FDDI controller to provide access to a 100 Mb/s<br />
FDDI network, <strong>and</strong> any HP Alpha Token-Ring controller to provide access to 4 Mb/s<br />
or 16 Mb/s Token-Ring networks.<br />
The se interface uses the st<strong>and</strong>ard VMS Ethernet driver to allow <strong>MultiNet</strong> to share<br />
the Ethernet device with other protocols such as LAT, LAVC, <strong>and</strong> DECnet.<br />
sl Interface name: sl0, sl1, sl2, ...sl49<br />
Device type: Any VMS-supported terminal interface<br />
Parameter Prompt Example Value<br />
VMS Device: TTA0<br />
Baud Rate: 19200<br />
Header Compression Mode: DISABLED<br />
IP Address: 192.41.228.70<br />
Point-To-Point Device IP Destination Address: 192.41.228.71<br />
IP SubNet Mask: 255.255.255.0<br />
The <strong>MultiNet</strong> software supports SLIP with Van Jacobson's header compression<br />
algorithm, reducing the size of the headers <strong>and</strong> increasing the b<strong>and</strong>width available to<br />
data. Header compression mode is determined by what both sides can support.<br />
11-11
Establishing IP Connectivity<br />
11-12<br />
Table 11-3 Interfaces <strong>and</strong> Parameters (Continued)<br />
Type Description<br />
rp Interface name: rp0, rp1, rp2, ...rp49<br />
Device type: Raw packet<br />
Parameter Prompt Example Value<br />
IP Address: 192.41.228.70<br />
IP SubNet Mask: 255.255.255.0<br />
The rp interface allows IP packets, normally destined for transmission, to be directed<br />
instead to a user process by way of an AF_RAWPACKET socket.<br />
ppp Interface name: ppp0, ppp1, ppp2, ...ppp49<br />
Device type: Any supported PPP terminal interface<br />
Parameter Prompt Example Value<br />
VMS Device: TTA0<br />
Baud Rate: 19200<br />
PPP ACCM Mask: 0<br />
PPP Authentication Method: None<br />
PPP Protocol Compression: OFF<br />
PPP Address <strong>and</strong> Control<br />
Field Compression: OFF<br />
PPP Retry Count: 0 (If 0, defaults to the compiled-in value of 10.)<br />
PPP Idle Timeout: 0 (If 0, defaults to the compiled-in value of 300<br />
seconds.)<br />
PPP MRU Size: 0<br />
PPP ICMP: ENABLED<br />
PPP TCP Compression: OFF<br />
PPP Termination Retry Count: 0 (If 0, defaults to the compiled-in value of 10.)<br />
PPP Timeout: 0 (If 0, defaults to the compiled-in value of 30<br />
seconds.)<br />
IP Address: 0.0.0.0<br />
Point-To-Point Device 0.0.0.0<br />
IP Destination Address:<br />
IP SubNet Mask: 255.255.255.0<br />
stf Interface name: stf0 - only one six to four interface can exist on a system.<br />
Note that the CREATE comm<strong>and</strong> is used to create this interface.<br />
Parameter Prompt Example Value<br />
IPv4 address to use [NONE]: 192.168.1.2<br />
Mask length [48]: 48
Displaying Interrupt Vectors<br />
Establishing IP Connectivity<br />
You can display the current interrupt vector used by VMS by invoking the SYSGEN utility, then<br />
using the SHOW /CONFIGURATION comm<strong>and</strong>, as follows:<br />
$ MCR SYSGEN<br />
SYSGEN>SHOW/CONFIGURATION<br />
You can also display the maximum device configuration <strong>and</strong> the vectors currently used by <strong>MultiNet</strong><br />
by invoking NET-CONFIG as shown in the Viewing Interface Configuration with NET-CONFIG<br />
section.<br />
Adding Network Interfaces with NET-CONFIG<br />
To add an interface to the configuration:<br />
1 Start NET-CONFIG:<br />
$ MULTINET CONFIGURE /INTERFACES<br />
2 At the NET-CONFIG prompt, enter:<br />
NET-CONFIG>ADD interface_name<br />
interface_name is a name from Table 11-1.<br />
Do not use an interface name currently in use; to modify an existing interface, see the Modifying<br />
Network Interfaces section.<br />
For example, to add a third shared Ethernet (se) interface to your network configuration, enter:<br />
NET-CONFIG>ADD SE2<br />
NET-CONFIG prompts you for interface parameter values required by the interface_name<br />
interface.<br />
3 Enter interface configuration parameter values at each NET-CONFIG prompt. For descriptions<br />
of the required parameters for your network interface, refer to Table 11-3.<br />
4 When the NET-CONFIG prompt returns, verify the validity of the new interface configuration<br />
with the CHECK comm<strong>and</strong>.<br />
5 If the CHECK comm<strong>and</strong> produces error messages, view the configuration parameters with the<br />
SHOW comm<strong>and</strong> to determine the cause of the error. To correct the error, modify the<br />
configuration as described in the Modifying Network Interfaces section or ab<strong>and</strong>on your changes<br />
with the GET comm<strong>and</strong> (which reloads the configuration file) <strong>and</strong> repeat from Step 2.<br />
6 If the CHECK comm<strong>and</strong> produces no error messages, quit NET-CONFIG with the EXIT<br />
comm<strong>and</strong>.<br />
Your changes take effect the next time your system reboots.<br />
$ MULTINET CONFIGURE<br />
<strong>MultiNet</strong> Network Configuration Utility 5.4(nnn)<br />
[Reading in MAXIMUM configuration from MULTINET:MULTINET.EXE]<br />
[Reading in configuration from MULTINET:NETWORK_DEVICES.CONFIGURATION]<br />
NET-CONFIG>ADD SL0<br />
11-13
Establishing IP Connectivity<br />
11-14<br />
[Adding new configuration entry for device "sl0"]<br />
VMS Device [TTA0] TTA2<br />
Baud Rate: [UNSPECIFIED]<br />
Header Compression Mode: [DISABLED]<br />
IP Address: [NONE] 196.22.19.1<br />
Point-To-Point Device IP Destination Address: [NONE] 196.22.19.2<br />
IP SubNet Mask: [NONE]<br />
[sl0 (Serial Line IP): Csr=NONE, Flags=%X0]<br />
NET-CONFIG>EXIT<br />
[Writing configuration to MULTINET:NETWORK_DEVICES.CONFIGURATION]<br />
[Writing Startup file MULTINET:START_MULTINET.COM]<br />
[Changes take effect after the next VMS reboot]<br />
$<br />
Adding Network Interfaces with MENU-CONFIG<br />
To add an interface to the configuration:<br />
1 Start MENU-CONFIG. The main MENU-CONFIG menu appears.<br />
2 Choose Configure Network Interfaces. The Network Interface Configuration Menu appears.<br />
3 Choose Add a Network Interface. The Network Interfaces Types menu appears.<br />
4 Choose the network interface type you want to add.<br />
Note! If your network adapter type does not appear in this menu, switch to Extended mode by<br />
pressing PF1 <strong>and</strong> choosing an item from the extended menu.<br />
MENU-CONFIG prompts you for the unit number of the interface you chose.<br />
5 Enter the desired unit number, or press RETURN to accept the default. The default unit number is<br />
the next available number. The Add Interface screen appears.
Establishing IP Connectivity<br />
6 Enter values for the interface configuration parameter. For descriptions of the required<br />
parameters for your network interface, refer to Table 11-3.<br />
7 When done, press Ctrl/Z to return to the Network Interface Configuration menu. When<br />
MENU-CONFIG prompts you to save the configuration, enter YES or NO as needed.<br />
Responding YES at this prompt only preserves your changes in MENU-CONFIG; it does not<br />
save the configuration file.<br />
8 To save your network interface configuration changes <strong>and</strong> return to the main menu, choose Save<br />
Changes <strong>and</strong> Return to Previous Menu.<br />
To ab<strong>and</strong>on your changes, choose Ab<strong>and</strong>on Changes <strong>and</strong> Return to Previous Menu.<br />
9 Quit MENU-CONFIG.<br />
Your changes take effect the next time your system reboots.<br />
Creating a Custom Interface Initialization Procedure<br />
If your network requires that a device be initialized with parameters not supported by NET-<br />
CONFIG, you can create a custom initialization comm<strong>and</strong> procedure for the device. At network<br />
startup, <strong>MultiNet</strong> uses this file instead of the comm<strong>and</strong>s for the device in the<br />
MULTINET:START_MULTINET.COM file.<br />
The device must already be part of the network configuration, <strong>and</strong> comm<strong>and</strong>s to its interface must<br />
already exist in the MULTINET:START_MULTINET.COM file. To change the device's<br />
initialization, create a comm<strong>and</strong> file using a text editor:<br />
1 Create a file named MULTINET:interface_CONFIGURE.COM,<br />
interface is an interface in your configuration.<br />
2 Copy the section of MULTINET:START_MULTINET.COM containing the initialization<br />
comm<strong>and</strong>s into the new file.<br />
3 Edit the new file to specify the new initialization.<br />
Modifying Network Interfaces<br />
There are two ways to modify network interfaces in your <strong>MultiNet</strong> configuration:<br />
• Using NET-CONFIG (see the Modifying Network Interfaces with NET-CONFIG section)<br />
• Using the MENU-CONFIG Configure Network Interfaces comm<strong>and</strong> (see the Modifying<br />
Network Interfaces with MENU-CONFIG section)<br />
For details on using these utilities, refer to Chapter 9.<br />
Table 11-2 lists the network interface parameters used by <strong>MultiNet</strong>-supported interfaces. For the<br />
parameters required by each type of interface, refer to Table 11-3.<br />
11-15
Establishing IP Connectivity<br />
Modifying Network Interfaces with NET-CONFIG<br />
11-16<br />
To modify the configuration of an existing interface:<br />
1 Start NET-CONFIG:<br />
$ MULTINET CONFIGURE /INTERFACES<br />
2 At the NET-CONFIG prompt, enter:<br />
NET-CONFIG>MODIFY interface_name<br />
interface_name is the name of the network interface you want to modify.<br />
For example, to modify the third shared Ethernet interface in your network configuration, enter:<br />
NET-CONFIG>MODIFY SE2<br />
NET-CONFIG prompts you for interface parameter values required by the specified interface.<br />
3 Enter interface configuration parameter values at each of the NET-CONFIG prompts. For<br />
descriptions of the required parameters for your network interface, refer to Table 11-3.<br />
4 When the NET-CONFIG prompt returns, verify the validity of the new interface configuration<br />
with the CHECK comm<strong>and</strong>.<br />
5 If the CHECK comm<strong>and</strong> produces error messages, view the configuration parameters with the<br />
SHOW comm<strong>and</strong> to determine what is causing the error. Correct the error by repeating from<br />
Step 2, or ab<strong>and</strong>on your changes with the GET comm<strong>and</strong> (which reloads the configuration file)<br />
<strong>and</strong> repeat from Step 2.<br />
6 If the CHECK comm<strong>and</strong> produces no error messages, quit NET-CONFIG with the EXIT<br />
comm<strong>and</strong>.<br />
Your changes take effect the next time your system reboots.<br />
Modifying Network Interfaces with MENU-CONFIG<br />
To modify the configuration of an existing interface:<br />
1 Start MENU-CONFIG. The main MENU-CONFIG menu appears.<br />
2 Choose Configure Network Interfaces. The Network Interface Configuration Menu appears.
Establishing IP Connectivity<br />
3 Choose Modify an Existing Network Interface. The Interface Selection Menu appears, listing<br />
the names of currently configured interfaces.<br />
4 Choose the network interface type you want to modify. The Modify Interface screen appears.<br />
5 Enter values for the interface configuration parameter. For descriptions of the required<br />
parameters for your network interface, refer to Table 11-3.<br />
6 When done, press Ctrl/Z to return to the Network Interface Configuration menu. When<br />
MENU-CONFIG prompts you to save the configuration, enter YES or NO as needed.<br />
Note! Responding YES at this prompt only preserves your changes in MENU-CONFIG; it does not<br />
save the configuration file.<br />
1 To save your network interface configuration changes <strong>and</strong> return to the main menu, choose Save<br />
Changes <strong>and</strong> Return to Previous Menu.<br />
To ab<strong>and</strong>on your changes <strong>and</strong> return to the main menu, choose Ab<strong>and</strong>on Changes <strong>and</strong> Return<br />
to Previous Menu.<br />
2 Quit MENU-CONFIG.<br />
Your changes take effect the next time your system reboots.<br />
Deleting Network Interfaces<br />
There are two ways to delete network interfaces from your <strong>MultiNet</strong> configuration:<br />
• NET-CONFIG (see the Deleting Network Interfaces with NET-CONFIG section)<br />
• MENU-CONFIG Configure Network Interfaces comm<strong>and</strong> (see the Deleting Network Interfaces<br />
with MENU-CONFIG section)<br />
For details on using these utilities, refer to Chapter 9.<br />
Deleting Network Interfaces with NET-CONFIG<br />
Use NET-CONFIG to delete one or all interfaces from the current configuration:<br />
1 Start NET-CONFIG:<br />
$ MULTINET CONFIGURE /INTERFACES<br />
2 At the NET-CONFIG prompt, enter:<br />
NET-CONFIG>DELETE interface_name<br />
interface_name is the name of the existing network interface you want to delete.<br />
For example, to delete the third shared Ethernet interface in your network configuration, enter:<br />
NET-CONFIG>DELETE SE2<br />
3 When the NET-CONFIG prompt reappears, verify the validity of the new interface configuration<br />
with the CHECK comm<strong>and</strong>.<br />
11-17
Establishing IP Connectivity<br />
11-18<br />
4 If the CHECK comm<strong>and</strong> produces error messages, view the configuration parameters with the<br />
SHOW comm<strong>and</strong> to determine the cause of the error. Correct the error by repeating from Step 2,<br />
or ab<strong>and</strong>on your changes with the GET comm<strong>and</strong> (which reloads the configuration file) <strong>and</strong><br />
repeat from Step 2.<br />
5 If the CHECK comm<strong>and</strong> produces no error messages, quit NET-CONFIG with the EXIT<br />
comm<strong>and</strong>.<br />
Your changes take effect the next time your system reboots.<br />
Deleting Network Interfaces with MENU-CONFIG<br />
To delete a specific interface from your configuration:<br />
1 Start MENU-CONFIG. The main MENU-CONFIG menu appears.<br />
2 Choose Configure Network Interfaces. The Network Interface Configuration Menu appears.<br />
3 Choose Delete a Network Interface. The Interface Selection Menu appears, listing the names of<br />
currently configured interfaces.<br />
4 Choose the network interface type you want to modify. MENU-CONFIG confirms that it has<br />
deleted the interface.<br />
5 Press RETURN to return to the Network Interface Configuration menu.<br />
6 To verify that the interface has been deleted, choose Show All Network Interfaces.<br />
7 To save or ab<strong>and</strong>on your network interface configuration changes <strong>and</strong> return to the main menu,<br />
choose Save Changes <strong>and</strong> Return to Previous Menu or Ab<strong>and</strong>on Changes <strong>and</strong> Return to<br />
Previous Menu (respectively).<br />
8 Quit MENU-CONFIG.<br />
Your changes take effect the next time your system reboots.
Enabling <strong>and</strong> Disabling Interfaces<br />
Establishing IP Connectivity<br />
You can disable <strong>and</strong> re-enable interfaces individually. If you disable a device, it is not configured<br />
when the network is started.<br />
To disable a device, use the DISABLE comm<strong>and</strong>; for example:<br />
NET-CONFIG>DISABLE SE0<br />
To re-enable a device, use the ENABLE comm<strong>and</strong>; for example:<br />
NET-CONFIG>ENABLE SE0<br />
Assigning Multiple Addresses to a Network Interface<br />
Sometimes it is necessary to assign multiple IP addresses to a single physical interface; for<br />
example, when multiple subnets or networks are running on a single network segment.<br />
You do this by using a pseudo device interface (pd). Use NET-CONFIG to add the device as you do<br />
other devices (such as se devices). This <strong>MultiNet</strong> release supports up to 500 pseudo device<br />
interfaces. Instead of specifying the OpenVMS device name, however, specify the <strong>MultiNet</strong> name<br />
for the interface (for example, se0). You must reboot the system after adding the pseudo device.<br />
CAUTION! Careless assignment of a secondary address can cause network problems. In general,<br />
you should assign pseudo devices (pd) addresses on the same network or subnet as the<br />
se device to which the pd device is linked.<br />
If the pd interface is not in the same IP network as its associated se interface, some TCP/<br />
IP packages (such as early versions of SunOS) retransmit broadcast packets for the other<br />
IP network back to the network segment from which they were transmitted. This can cause<br />
network storms.<br />
Note! Some services listen to traffic on se interfaces only <strong>and</strong> ignore traffic on pd interfaces. One such<br />
service is the RIP listener in GATED.<br />
The following example shows how to add a pseudo device:<br />
$ MULTINET CONFIG<br />
<strong>MultiNet</strong> Network Configuration Utility 5.4<br />
[Reading in MAXIMUM configuration from MULTINET:MULTINET.EXE]<br />
[Reading in configuration from MULTINET:NETWORK_DEVICES.CONFIGURATION]<br />
NET-CONFIG>SHOW<br />
Interface Adapter CSR Address Flags/Vector<br />
--------- ------- ----------- -----------se0<br />
(Shared VMS Ethernet/FDDI) -NONE- -NONE- -NONE-|<br />
[TCP/IP: 161.44.128.20, IP-SubNet: 255.255.255.0]<br />
[NETWARE: A12C8000:0.0.0.0.0.0, Link Level: Ethernet]<br />
[VMS Device: ESA0, Link Level: Ethernet]<br />
|<br />
Official Host Name: lobo.process.com<br />
NETWARE Host Name: LOBO<br />
Domain Nameservers: 127.0.0.1<br />
11-19
Establishing IP Connectivity<br />
11-20<br />
Timezone: EST<br />
Timezone Rules: US/EASTERN<br />
Load EXOS $QIO driver: TRUE<br />
Load UCX $QIO driver: TRUE<br />
Load PWIP (Pathworks) driver: TRUE<br />
Nameserver Retrans Timeout: 9 (6 Retries)<br />
WHOIS Default Server: rs.internic.net<br />
NET-CONFIG>ADD PD0<br />
[Adding new configuration entry for device "pd0"]<br />
Hardware Device: [NONE] SE0<br />
IP Address: [NONE] 161.44.128.21<br />
IP SubNet Mask: [NONE] <br />
Non-St<strong>and</strong>ard IP Broadcast Address: [NONE] <br />
[pd0 (Secondary Ethernet Address): Csr=NONE, Flags=%X0]<br />
NET-CONFIG>SHOW<br />
Interface Adapter CSR Address Flags/Vector<br />
--------- ------- ----------- -----------se0<br />
(Shared VMS Ethernet/FDDI) -NONE- -NONE- -NONE-<br />
[TCP/IP: 161.44.128.20, IP-SubNet: 255.255.255.0]<br />
[NETWARE: A12C8000:0.0.0.0.0.0, Link Level: Ethernet]<br />
[VMS Device: ESA0, Link Level: Ethernet]<br />
pd0 (Secondary Ethernet Address) -NONE- -NONE- -NONE-<br />
[TCP/IP: 161.44.128.21]<br />
[Hardware-Device: se0]<br />
Official Host Name: lobo.process.com<br />
NETWARE Host Name: LOBO<br />
Domain Nameservers: 127.0.0.1<br />
Timezone: EST<br />
Timezone Rules: US/EASTERN<br />
Load EXOS $QIO driver: TRUE<br />
Load UCX $QIO driver: TRUE<br />
Load PWIP (Pathworks) driver: TRUE<br />
Nameserver Retrans Timeout: 9 (6 Retries)<br />
WHOIS Default Server: rs.internic.net<br />
NET-CONFIG>EXIT<br />
Using Packet Filtering for Security<br />
Packet filtering is used today in almost all (from basic to sophisticated) security firewalls. Packet<br />
filtering firewalls apply filtering rules to each packet received to determine whether to accept or<br />
discard it. These filtering rules specify the protocol, source <strong>and</strong> destination IP addresses, <strong>and</strong><br />
destination ports (for TCP <strong>and</strong> UDP) for accepted or discarded packets.<br />
You use packet filtering on routers between an internal network <strong>and</strong> one or more external networks<br />
(such as a connection to the Internet). Packet filter rules restrict what may come in through the<br />
interface connected to the external network.<br />
Packet filtering can also be useful on hosts. For example, you can restrict the hosts that are allowed<br />
access to services. In particular, these are UDP-based services <strong>and</strong> services that the <strong>MultiNet</strong><br />
master server does not activate, <strong>and</strong> thus cannot use incoming access restrictions.
Establishing IP Connectivity<br />
Note! When you use packet filtering, each <strong>and</strong> every datagram received on the interface is filtered.<br />
This increases processing overhead depending on the size of the filter list.<br />
Packet filtering can be an effective <strong>and</strong> useful security mechanism; however, it cannot solve all<br />
your security problems. To be effective, you must construct the filtering rules carefully.<br />
Both ipv4 <strong>and</strong> ipv6 addresses may be filtered.<br />
Cautions When Creating Packet Filters<br />
Observe the following cautions when setting up packet filtering on an interface:<br />
• Packet filtering does not use state information. Each datagram is filtered without any knowledge<br />
of packets that preceded it. This means that for UDP-based applications, it is not possible to add<br />
a rule that says to accept replies to requests. This also affects connection-oriented protocols, such<br />
as FTP, that use two connections: one for comm<strong>and</strong>s <strong>and</strong> the other for data.<br />
• Fragmented datagrams for UDP or TCP are difficult to filter, since only the first fragment has<br />
the necessary port information. <strong>MultiNet</strong> solves this problem by applying the filter rules to only<br />
the first fragment of UDP <strong>and</strong> TCP datagrams. The other fragments are accepted <strong>and</strong> processed<br />
or forwarded, but are eventually discarded because they cannot be reassembled without the first<br />
fragment. For all other IP protocols, the filter rules apply to each fragment.<br />
• To set up secure packet filtering lists, you need detailed knowledge of IP, ICMP, TCP, UDP <strong>and</strong><br />
applications protocols.<br />
Suggested reading includes the protocol RFCs (listed elsewhere in the <strong>MultiNet</strong> documentation)<br />
<strong>and</strong> books such as Cheswick, William R. & Steven M. Bellovin, Firewalls <strong>and</strong> Internet Security:<br />
Repelling the Wily Hacker.<br />
Packet Filter File<br />
Packet filtering uses a filter list to determine whether you can receive a datagram. Filter lists are in<br />
packet filter files having the .DAT extension by default. Create one of these files first <strong>and</strong> then edit<br />
the file using the formats described in the following table.<br />
Note! The format of the individual filter source address <strong>and</strong> mask, <strong>and</strong> destination address <strong>and</strong> mask,<br />
has changed. In previous releases, these were specified as an IPv4 address <strong>and</strong> IPv4 mask<br />
(e.g., “192.168.0.11 255.255.255.0”). This has been changed to use addresses <strong>and</strong> masks<br />
specified in CIDR (Classless InterDomain Routing) format (e.g., “192.168.0.11/24”). This not<br />
only makes the specification of addresses <strong>and</strong> masks clearer, it also allows for the<br />
implementation of IPv6 addresses which are substantially longer than IPv4 addresses, leading<br />
to potential problems with long filter file lines. The FILTER_CONVERT utliity is provided to<br />
change existing filter files from the old format to the new format.<br />
Table 11-4 Fields in a Packet Filter Entry<br />
Field... With valid values... Means...<br />
action protocol saddr [sport] daddr [dport [doption]]<br />
11-21
Establishing IP Connectivity<br />
11-22<br />
Table 11-4 Fields in a Packet Filter Entry (Continued)<br />
Field... With valid values... Means...<br />
action permit<br />
deny<br />
drop<br />
protocol ip ip-number<br />
tcp<br />
udp<br />
icmp<br />
saddr Example:<br />
192.168.123.123/24<br />
sport operator oper<strong>and</strong><br />
lt port<br />
le<br />
eq|<br />
ge<br />
gt<br />
ne<br />
daddr Example:<br />
192.168.123.123/240<br />
dport operator oper<strong>and</strong><br />
lt port<br />
le icmp-msg-type<br />
eq<br />
ge<br />
gt<br />
ne<br />
permit allows the datagram;<br />
deny denies the datagram <strong>and</strong> sends the ICMP;<br />
drop denies the datagram without sending an ICMP<br />
destination unreachable message to the sender.<br />
Protocol to check: the values indicated or the numeric<br />
IP protocol number. The value ip matches any IP<br />
protocol.<br />
Source IP address to check in CIDR format. This<br />
may be in ipv4 or ipv6 format.<br />
Optional source port specification to check (for TCP<br />
<strong>and</strong> UDP entries only). Consists of an operator,<br />
space, <strong>and</strong> port name or number. If port name, must<br />
be defined in the MULTINET:HOSTS.SERVICES<br />
file. If omitted, any source port is valid. Example: gt<br />
1023<br />
Destination IP address to check in CIDR format.<br />
This may be in ipv4 or ipv6 format, but must be of the<br />
same address family as saddr<br />
Optional destination port (for TCP <strong>and</strong> UDP entries)<br />
or ICMP message type specification consisting of an<br />
operator, space, <strong>and</strong> oper<strong>and</strong>. If a port name, must be<br />
in the MULTINET:HOSTS.SERVICES file. If icmpmsg-type,<br />
use:<br />
0-Echo Reply<br />
3-Destination Unreachable<br />
4-Source Quench<br />
5-Redirect<br />
8-Echo<br />
11-Time Exceeded<br />
12-Parameter Problem<br />
13-Timestamp<br />
14-Timestamp Reply<br />
15-Information Request<br />
16-Information Reply
Table 11-4 Fields in a Packet Filter Entry (Continued)<br />
Field... With valid values... Means...<br />
Establishing IP Connectivity<br />
doption established Matches only established connections (TCP segments<br />
with ACK or RST bits set).<br />
start time VMS-format absolute or delta date/time.<br />
If specified, the filter takes effect starting at the time<br />
specified.<br />
By default, a filter takes effect when loaded by<br />
<strong>MultiNet</strong> if the start time is not defined.<br />
end time Absolute or delta VMS-format date/time.<br />
If specified, the filter is ignored after the time<br />
specified is reached if an absolute time is specified, or<br />
after the time calculated by adding the end time to the<br />
start time if a delta time is specified.<br />
If no start time was specified, the delta time is added<br />
to the current time.<br />
If the end time for a non-repeating filter has already<br />
passed when the filter definition is parsed, the filter is<br />
not loaded <strong>and</strong> the user is informed of that fact.<br />
repeat If Y <strong>and</strong> start/end times are specified, this filter<br />
repeats until it is removed. Both a start <strong>and</strong> end time<br />
must be specified in order to specify a repeating filter.<br />
log Logs events from this filter.<br />
Each entry specifies a packet filtering condition for a particular protocol type, source or destination<br />
address <strong>and</strong> mask, <strong>and</strong> destination port <strong>and</strong> mask specification, with certain additional options. The<br />
system looks at each condition in sequence, looks for a match, <strong>and</strong> takes a permit (accept) or deny<br />
(reject) action. The system stops testing conditions after the first match. This means that the order<br />
of the entries in the file is important; if the file lists a subsequent condition for an address, the<br />
system ignores it.<br />
An implicit deny terminates the list of entries in the packet filter file. This means that if no<br />
condition matches, the system rejects the datagram. To use packet filtering:<br />
1 Create address list entries in the packet filter file.<br />
2 Apply the list to interfaces on your system by using packet filtering comm<strong>and</strong>s.<br />
To create a packet filter file, edit a file <strong>and</strong> add address list entries in the format described.<br />
Any number of spaces or tabs can separate each entity. Lines beginning with an exclamation point<br />
(!) are comment lines. You can use the dash (-) continuation character at the end of a line that needs<br />
11-23
Establishing IP Connectivity<br />
11-24<br />
to continue onto the next.<br />
To apply the list to a particular network interface or interfaces on your system, use the MULTINET<br />
SET/INTERFACE/FILTER comm<strong>and</strong>, as described in <strong>MultiNet</strong> for OpenVMS <strong>Administrator's</strong><br />
Reference.<br />
Configuration Recommendations<br />
Constructing an address filter list requires care in that you want to allow only the packets you need.<br />
Here are some recommendations in setting up an address filter list for an interface:<br />
• Add an entry to prevent IP "spoofing"-having an external host send a datagram as if it came from<br />
a local machine. For a router, this makes sense because no datagram received from an external<br />
network should ever have a local source address. Add the following entry to the filter list for the<br />
external interface:<br />
deny ip local-network<br />
• Be careful with services that use "unprotected" port numbers (greater than 1024). Some<br />
examples are NFS (port 2049) <strong>and</strong> X Windows (port 6000 <strong>and</strong> higher). Explicitly denying these<br />
services is a good idea:<br />
deny udp 0/0 0/0 eq 2049<br />
deny tcp 0/0 0/0 eq 2049<br />
deny tcp 0/0 0/0 eq 6000<br />
deny tcp 0/0 0/0 eq 6001<br />
• Prevent broadcast <strong>and</strong> loopback packets from entering your network. It is best to restrict the<br />
broadcast (the first two of the following entries) to an external interface; apply the loopback<br />
restriction (the last entry) to any interface:<br />
drop ip 0.0.0.0/32<br />
drop ip 255.255.255.255/32<br />
drop ip 127.0.0.0/8<br />
• Guard against datagrams from invalid source addresses when connected to the Internet (provided<br />
you are not using these network numbers for internal-only traffic purposes). Add the following<br />
to the filter list for the external interface:<br />
drop ip 10.0.0.0/8<br />
drop ip 172.16.0.0/12<br />
drop ip 192.168.0.0/16<br />
• You generally need to allow domain name (DNS) requests using:<br />
permit udp 0/32 eq 53 0 0<br />
Whether to allow TCP DNS traffic (usually used for zone transfers) is also something to<br />
consider. To disallow TCP DNS traffic, add:
deny tcp 0/32 eq 53 0 0<br />
Establishing IP Connectivity<br />
• You should not be concerned with what services local users use in the external world. You<br />
would want to add:<br />
permit tcp 0/32 0/32 gt 1023 established<br />
This allows all TCP datagrams in to ports greater than 1023 that have either the ACK or RST<br />
bits set in the TCP flags. Connection establishment requests have just the SYN bit set, so they<br />
are not allowed by this entry.<br />
You might want to drop the established option if you want to allow incoming connections to<br />
unprotected ports. This would allow use of the FTP PASV capability.<br />
• You may offer services to the external world such as a World Wide Web or anonymous FTP<br />
server. Add the following entries:<br />
permit tcp 0/32 web-server-address/32 eq 80<br />
permit tcp 0/32 ftp-server-address/32 eq 21<br />
If you have several hosts for each service, add an entry for each.<br />
Note! For the FTP Server, the data connections are normally outgoing <strong>and</strong> thus the earlier permit tcp<br />
0 0 0 0 gt 1023 established configuration works to allow these. However, if users switch to<br />
PASV mode, the connections will be incoming (to unprotected port numbers) <strong>and</strong> therefore the<br />
permit tcp 0 0 0 0 gt 1023 configuration (without the established option) might be more effective.<br />
• Allow all ICMPs except ICMP redirects:<br />
deny icmp 0/32 0/32 eq 5<br />
permit icmp<br />
This is useful for informing hosts about problems. But it can open up denial of service attacks,<br />
especially if hosts are not careful about the ICMP redirects they accept. That is why discarding<br />
them is recommended.<br />
• Watch the order of the entries in the table carefully.<br />
permit tcp 0/32 0/32 gt 1023<br />
deny tcp 0/32 0/32 eq 2049<br />
This entry would not work since the permit entry allows the datagram <strong>and</strong> processing stops as<br />
soon as a match is found. <strong>MultiNet</strong> processes the entries in the order in which you specify them.<br />
• Remember that an implicit "deny everything" is added to the end of the filtering list. This means<br />
that to permit a datagram, you need to have a permit entry in the list.<br />
• Once you applied your filter list, test it first. Get an account on a host on an outside network that<br />
you can use to connect to your local hosts. Check that you are not allowing any access you do<br />
not want, <strong>and</strong> that you are allowing access that you do want. If something is not right, modify the<br />
filter list, reload it, <strong>and</strong> retest.<br />
11-25
Establishing IP Connectivity<br />
11-26<br />
While packet filtering is very useful, it is by no means the only step you should take to secure<br />
your network. You must take special care to secure the system to assure that it cannot be<br />
compromised. One way to do this is to greatly limit the services it offers.<br />
Filtering by Time<br />
Filters may be set to be active only during a specified time period. These filters may be specified as<br />
a one-time filter or as a filter that repeats. For example, a filter may be set up to filter all traffic from<br />
a specific address during the hours of 5am to 5pm each day, or a filter may be specified that filters<br />
traffic starting from the time the filter is loaded <strong>and</strong> for the next 3 hours.<br />
Time-based filtering is done by specifying a start time, an end time, or both start <strong>and</strong> end times for<br />
a filter in the filter definition file. For repeating filters, both start <strong>and</strong> end times must be specified.<br />
Note that all time values for start <strong>and</strong> end times must be specified in VMS absolute or delta time<br />
format. For example, the following are all valid:<br />
“29-DEC-2003” would be interpreted as "29-DEC-2003 <br />
“29-DEC-2003 18:03” would be interpreted as "29-DEC-2003 18:03:00.00"<br />
18:03:00 would be interpreted as " 18:03:00.00"<br />
“1 15:00” would be interpreted as a delta time of 1 day, 15 hours<br />
Note that if an absolute time is specified that contains both a date <strong>and</strong> time (example 2 above), it<br />
MUST be enclosed by double quotes. For example:<br />
deny icmp 0 0 eq 5 start 17:00:00 end "29-Sep-2003 6:00:00"<br />
Given the following filter file:<br />
deny tcp 15.1.94.2/32 2.22.2.5 255/32 start 15:20 end 18:30 repeat<br />
deny tcp 1.1.94.2/32 207.225.29.51/32 end "1-JAN-2004 18:30"<br />
deny tcp 195.101.94.209/32 207.225.29.51/32 start 18:00 end "1 00:30" repeat<br />
deny tcp 195.101.94.209/32 207.225.29.51/32<br />
deny tcp 195.101.94.209/32 207.225.29.51/32 start 17:00 end 18:30<br />
deny tcp 15.1.94.2/32 2.22.2.5/32 start "2 00:00" end 3 00:00"<br />
Line 1 will filter from 15:20 to 18:30 each day.<br />
Line 2 will filter from the time the filter is loaded through 18:30 on January 1, 2004<br />
with no logging. After that time, if the filters are reloaded, this filter will not be loaded.<br />
Line 3 will filter from 18:00 to 19:30 each day.<br />
Line 4 has no time limits on it.<br />
Line 5 will log from 17:00 through 18:30 today.<br />
Line 6 will filter starting 2 days from the time the filter is loaded, through 3 days after that.<br />
Filter Logging<br />
Filter "hits" may be logged, either to OPCOM or to a file defined by the user. Logging is enabled<br />
on a filter-by-filter basis, by using the "log" keyword on the end of a filter definition line. For<br />
example:<br />
deny tcp 192.10.9.209/32 207.225.29.51/32 log<br />
Logging for the interface is controlled via the MULTINET SET/INTERFACE comm<strong>and</strong>. The
Establishing IP Connectivity<br />
actual logging is performed by the MULTINET_FLOG process, which is started the first time a<br />
MULTINET SET/INTERFACE /LOG comm<strong>and</strong> is issued (a single MULTINET_FLOG process<br />
h<strong>and</strong>les logging for all interfaces defined on the system).<br />
The MULTINET SET/INTERFACE comm<strong>and</strong> switches used to support logging are<br />
Qualifier Values Default Description<br />
/[NO]LOGGING OPCOM or a valid<br />
filename<br />
/FORMAT COMMA or<br />
NORMAL<br />
/INTERVAL Number of<br />
seconds, between<br />
5 <strong>and</strong> 2^31<br />
None Used to turn logging on or off.<br />
Filter events may be logged to<br />
OPCOM or to a specified file. Only<br />
those events with the LOG qualifier<br />
in their definition are affected by<br />
this qualifier.<br />
NORMAL If NORMAL, then the normal<br />
formatting as seen by<br />
MU SHOW/INTERFACE/FILTER<br />
will be used. If COMMA, then a<br />
comma-delimited file will be<br />
created that can be, for example,<br />
loaded into a spreadsheet.<br />
5 seconds Reporting interval. The minimum<br />
reporting interval is 5 seconds, so<br />
that a flood of filter events doesn’t<br />
drag the system down. When<br />
reporting events, a count of missed<br />
events will be included for each<br />
event where the event couldn’t be<br />
reported before the next event<br />
occurred.<br />
When filter logging is enabled, the MULTINET_FLOG process will be started. This process<br />
checks each interface at the interval defined by the /INTERVAL qualifier for the MULTINET<br />
SET/INTERFACE comm<strong>and</strong>. As unlogged filter hits are found, it will log them to OPCOM or to a<br />
file, according on the parameters set by the /LOG <strong>and</strong> /FORMAT qualifiers for the MULTINET<br />
SET/INTERFACE comm<strong>and</strong>.<br />
When logging to OPCOM, only NORMAL formatting is allowed. An OPCOM message, formatted<br />
as the filter output from MULTINET SHOW/INTERFACE /FILTER, will be displayed for each<br />
filter with unlogged hits on it.<br />
When logging to a file, the output will be identical to that of the filter displays from MULTINET<br />
SHOW/INTERFACE /FILTER comm<strong>and</strong>, if /FORMAT=NORMAL is specified. If<br />
/FORMAT=COMMA is specified, the data will be recorded as comma-delimited fields, one line<br />
per filter, to the file. The first line of this file will contain the field names (comma-delimited) to aid<br />
11-27
Establishing IP Connectivity<br />
11-28<br />
in interpreting the contents of the file.<br />
Examples:<br />
MULTINET SET /INTERFACE SE0 /LOG=OPCOM/INTERVAL=10<br />
enables logging to OPCOM, with a reporting interval of 10 seconds.<br />
MULTINET SET /INTERFACE SE0 /LOG=FOO.DAT/FORMAT=COMMA<br />
enables logging to the file FOO.DAT in comma-delimited format, <strong>and</strong> a reporting interval of 5<br />
seconds (the default).<br />
MULTINET SET /INTERFACE SE0 /NOLOG<br />
This disables all logging for the interface, closing all open log files.<br />
Setting the Filter List at Startup<br />
When you start <strong>MultiNet</strong>, the START_MULTINET procedure looks for a MULTINET:FILTERinterface.DAT<br />
file for each interface it starts. If the file exists, START_MULTINET issues the<br />
following comm<strong>and</strong> to set the filter list for the interface:<br />
$ MULTINET SET/INTERFACE interface /FILTER=MULTINET:FILTER-line-id.DAT<br />
You can also add the necessary MULTINET comm<strong>and</strong>s to the<br />
MULTINET:LOCAL_ROUTES.COM file.<br />
If you want to know if filtering is enabled <strong>and</strong> what the settings are, use the MULTINET SHOW<br />
/INTERFACE/FILTER SE0 comm<strong>and</strong>.<br />
<strong>MultiNet</strong> also supports the use of a LOCAL_INITIALIZATION comm<strong>and</strong> procedure during<br />
startup. As with the MULTINET:LOCAL_ROUTES.COM file, you can put the necessary<br />
<strong>MultiNet</strong> filter comm<strong>and</strong>s in the MULTINET:LOCAL_INITIALIZATION.COM file to have them<br />
executed as <strong>MultiNet</strong> starts.<br />
Converting an Old-Format Filter File<br />
The FILTER_CONVERT utility is provided to convert from the old-format filter file (one which<br />
uses separate adress/mask fields) to the new-format filter file (one which uses CIDR format address<br />
specification). To use this:<br />
$ FILTER_CONVERT :== $MULTINET:FILTER_CONVERT<br />
$ FILTER_CONVERT <br />
When a filter file has been converted, the resulting output file should be checked for correctness<br />
prior to using it.<br />
Configuring Transport over Serial Lines with SLIP <strong>and</strong> PPP<br />
<strong>MultiNet</strong> supports remote IP transport over serial lines with SLIP (Serial Line IP) or PPP (Point-to-<br />
Point Protocol).<br />
Underst<strong>and</strong>ing SLIP <strong>and</strong> PPP
Establishing IP Connectivity<br />
Both SLIP <strong>and</strong> PPP use a simple framing protocol to transfer datagrams over a terminal line. Both<br />
require an RS232-C serial line, or one that looks like an asynchronous line to VMS.<br />
<strong>MultiNet</strong> SLIP interfaces (identified by the name sl) <strong>and</strong> PPP interfaces (identified by the name<br />
ppp) can send <strong>and</strong> receive packets over any asynchronous terminal line (OpenVMS device of types<br />
TTcn or TXcn) connected to other systems that support the SLIP <strong>and</strong> PPP protocols, respectively.<br />
As a result, <strong>MultiNet</strong> systems can communicate asynchronously with other <strong>MultiNet</strong> systems (or<br />
UNIX <strong>and</strong> other systems) that support SLIP or PPP.<br />
With SLIP or PPP, users on one system can connect with another system using modems over<br />
telephone lines or over hardwired connections. To use SLIP or PPP over modems, the modems<br />
must be 8-bit transparent so all 256 ASCII codes can be sent <strong>and</strong> received.<br />
If the remote system is configured as a gateway to a network, local users can also reach other<br />
systems on that network. <strong>MultiNet</strong> supports SLIP <strong>and</strong> PPP running over any VMS-supported<br />
terminal multiplexer. <strong>MultiNet</strong> does not support SLIP or PPP over LAT.<br />
You must know the IP address of the serial interface on every remote host with which you establish<br />
serial communications. If you configure <strong>MultiNet</strong> with PPP interfaces for multiple remote hosts,<br />
the remote hosts can obtain their IP addresses when they connect. Similarly, you can configure a<br />
PPP interface on <strong>MultiNet</strong> without knowing your own IP address, <strong>and</strong> obtain it when you connect<br />
to a remote system.<br />
The two methods of connecting hosts via PPP or SLIP are dynamic <strong>and</strong> static. The following<br />
sections explain these methods.<br />
Dynamic Interfaces-Defined<br />
The usual SLIP or PPP configuration consists of two systems connected by serial line only when<br />
needed. For these situations, configure a dynamic SLIP or PPP interface. Dynamic interfaces are<br />
not associated with a specific OpenVMS device until the remote host connects to a device.<br />
For a dynamic interface, you do not specify an OpenVMS device name when configuring the<br />
interface. When <strong>MultiNet</strong> starts, new dynamic interfaces are available for serial communication;<br />
however, an administrator must attach the interfaces to VMS devices.<br />
Static Interfaces-Defined<br />
Large organizations often use SLIP <strong>and</strong> PPP to connect separate LANs into a single wide area<br />
network (WAN) with dedicated serial lines. The host at each end of the serial connection is always<br />
the same, <strong>and</strong> no other hosts are allowed to connect to either serial device. In these situations,<br />
configure a static SLIP or PPP interface. Static interfaces are attached to a specific OpenVMS<br />
device, which prevents the serial device from being used for any other purpose.<br />
For a static interface, you specify an OpenVMS device name when configuring the interface.<br />
As soon as you connect two static interfaces via modem or hardwired connection, they can<br />
communicate over the chosen serial protocol; no user authentication is required.<br />
Note! Because IP connectivity is established as soon as the two serial interfaces connect, do not<br />
configure static interfaces for public dial-in access.<br />
11-29
Establishing IP Connectivity<br />
Configuring Static SLIP Interfaces<br />
11-30<br />
To configure a static SLIP interface:<br />
1 Use NET-CONFIG or MENU-CONFIG to add the SLIP interface as described in the Adding<br />
Network Interfaces section.<br />
Table 11-5 describes the interface parameters you must define for basic SLIP operation. Space is<br />
provided in the table so you can write down the values appropriate for your configuration.<br />
Be sure to specify an OpenVMS device name.<br />
2 If desired, create a custom startup comm<strong>and</strong> procedure for the new interface. For details, see<br />
theConfiguring Permanent SLIP <strong>and</strong> PPP Interfaces section.<br />
3 Reboot your system.<br />
When <strong>MultiNet</strong> starts, you can connect your serial device to a remote system.<br />
Configuring Dynamic SLIP Interfaces<br />
To configure a dynamic SLIP interface:<br />
1 Use NET-CONFIG or MENU-CONFIG to add the SLIP interface as described in the Adding<br />
Network Interfaces section.<br />
Table 11-5 describes the interface parameters you must define for basic SLIP operation. Space is<br />
provided in the table so you can write down the values appropriate for your configuration.<br />
Do not specify an OpenVMS device name.<br />
2 If desired, create a custom startup comm<strong>and</strong> procedure for the new interface as described in the<br />
Configuring Permanent SLIP <strong>and</strong> PPP Interfaces section.<br />
3 Reboot your system.<br />
4 The new dynamic interfaces are created when <strong>MultiNet</strong> starts, but they are not yet connected to a<br />
VMS device. See the Attaching Dynamic SLIP or PPP Interfaces to VMS Devices section for<br />
instructions.<br />
SLIP Configuration Parameters<br />
Table 11-5 lists the configuration parameters for configuring static <strong>and</strong> dynamic SLIP interfaces.<br />
Table 11-5 SLIP Configuration Parameters<br />
Parameter Description Your Value<br />
SLIP interface name Determines the interface name. Must be of the<br />
form sln,<br />
• n is a positive integer.<br />
• "sl0" is a suitable interface name for the first<br />
SLIP interface.<br />
• "sl1" is a suitable interface name for the second<br />
one.
Table 11-5 SLIP Configuration Parameters (Continued)<br />
OpenVMS device name For a static SLIP interface (one that uses a<br />
hardwired terminal line or dedicated modem <strong>and</strong><br />
telephone line), specify a device name.<br />
For a dynamic SLIP interface (one to which you<br />
assign a device name when the connection is<br />
made, for example, by modem dial-up), do not<br />
specify a name. When a modem hangs up on a<br />
dynamic SLIP interface, each end of the SLIP<br />
interface automatically reverts to a normal<br />
terminal line.<br />
Use a value of "none" to override any specified<br />
device name. Doing so might be useful to make a<br />
previously configured interface dynamic.<br />
Baud rate Data transfer baud rate (110, 300, 1200, 2400,<br />
4800, 9600, 19200, or UNSPECIFIED) of the<br />
SLIP interface.<br />
SLIP compression mode <strong>MultiNet</strong> SLIP supports the Van Jacobson header<br />
compression algorithm to reduce the b<strong>and</strong>width<br />
required for the TCP <strong>and</strong> IP headers. If both sides<br />
of a SLIP interface support compression,<br />
turnaround improves significantly.<br />
Compression modes are:<br />
• ENABLED — Headers should always be<br />
compressed.<br />
• DISABLED — Headers should never be<br />
compressed.<br />
• NEGOTIATED — Headers should not be<br />
compressed until a compressed header is<br />
received from the other side. Negotiated<br />
compression is useful on dialup gateways that<br />
do not know if the other side of SLIP interfaces<br />
support compression.<br />
Note! Compression must be enabled (not just<br />
negotiated) on at least one side of a SLIP<br />
interface. Disable SLIP compression for<br />
compatibility with SLIP interfaces, such as<br />
previous releases of <strong>MultiNet</strong>, that do not<br />
support it.<br />
Establishing IP Connectivity<br />
Parameter Description Your Value<br />
11-31
Establishing IP Connectivity<br />
Configuring Static PPP Interfaces<br />
11-32<br />
Table 11-5 SLIP Configuration Parameters (Continued)<br />
Parameter Description Your Value<br />
IP address IP address associated with the SLIP interface on<br />
the local system.<br />
Point-to-point IP<br />
destination address<br />
To define a static PPP interface:<br />
1 Use NET-CONFIG or MENU-CONFIG to add a PPP interface to your network configuration as<br />
described in the Adding Network Interfaces section.<br />
Table 11-6 describes the interface parameters you must define for basic PPP operation. Space is<br />
provided in the table so you can write down the values appropriate for your configuration.<br />
Be sure to define an OpenVMS device for the interface.<br />
2 If desired, create a custom startup comm<strong>and</strong> procedure for the new interface. For details, see the<br />
Configuring Permanent SLIP <strong>and</strong> PPP Interfaces section.<br />
3 Reboot your system.<br />
After rebooting, the interfaces are attached to VMS terminal lines.<br />
Configuring Dynamic PPP Interfaces<br />
IP address associated with the SLIP interface on<br />
the target system.<br />
To define a dynamic PPP interface:<br />
1 Use NET-CONFIG or MENU-CONFIG to add a PPP interface to your network configuration as<br />
described in the Adding Network Interfaces section.<br />
Table 11-6 describes the interface parameters you must define for basic PPP operation. Space is<br />
provided in the table so you can write down the values appropriate for your configuration.<br />
Do not define an OpenVMS device for the interface.<br />
2 Enable virtual terminal (VTA) devices for your dynamic PPP interfaces. For information on<br />
configuring virtual terminals, see your OpenVMS system management documentation.<br />
Note! Dynamic PPP interfaces require CMKRNL, LOG_IO, <strong>and</strong> SYSPRV privileges. Because these<br />
privileges are potentially dangerous, login name <strong>and</strong> password information should be<br />
safeguarded carefully.<br />
3 If desired, create a custom startup comm<strong>and</strong> procedure for the new interface. For details, see the<br />
Configuring Permanent SLIP <strong>and</strong> PPP Interfaces section.<br />
4 Reboot your system.<br />
The dynamic interfaces are created when <strong>MultiNet</strong> starts, but they are not associated with a VMS<br />
terminal line. The interfaces must now be attached to terminal lines; see the Attaching Dynamic<br />
SLIP or PPP Interfaces to VMS Devices section.
PPP Configuration Parameters<br />
Table 11-6 lists the configuration parameters for static <strong>and</strong> dynamic PPP interfaces.<br />
Table 11-6 PPP Configuration Parameters<br />
Establishing IP Connectivity<br />
Parameter Description Your Value<br />
PPP interface name Determines the interface name. Must be of the form<br />
pppn,<br />
• n is a positive integer.<br />
• "ppp0" is a suitable interface name for a first PPP<br />
interface.<br />
OpenVMS device name Dedicates the device name to a static PPP interface<br />
(one that uses a hardwired terminal line or dedicated<br />
modem <strong>and</strong> telephone line).<br />
To configure a dynamic PPP interface (one to which<br />
you assign a device name when a connection is<br />
made-for example, by modem dial-up), do not<br />
specify a name. When a modem hangs up on a<br />
dynamic PPP interface, each end of the PPP<br />
connection automatically reverts to a normal terminal<br />
line.<br />
Use a value of "none" to override any specified<br />
device name. Doing so might be useful to make a<br />
previously configured interface dynamic.<br />
Baud rate Determines the data transfer baud rate (110, 300,<br />
1200, 2400, 4800, 9600, 19200, or UNSPECIFIED)<br />
of the PPP interface.<br />
11-33
Establishing IP Connectivity<br />
11-34<br />
Table 11-6 PPP Configuration Parameters (Continued)<br />
Parameter Description Your Value<br />
Asynchronous Control<br />
Character Map<br />
(ACCM) Mask<br />
A 32-bit mask that indicates the set of ASCII control<br />
characters to be mapped into two-character<br />
sequences for transparent transmission over the line.<br />
Default: %x00000000.<br />
The map is sent the most significant 8 bits first. Each<br />
numbered bit corresponds to the ASCII control<br />
character of the same value. If the bit is cleared to<br />
zero, the corresponding ASCII control character need<br />
not be mapped. If the bit is set to one, the<br />
corresponding ASCII control character must remain<br />
mapped.<br />
For example, if bit 19 is set to zero, the ASCII<br />
control character 19 (DC3, Control-S) can be sent in<br />
the clear.<br />
The least significant bit of the least significant 8 bits<br />
(the final 8 bits transmitted) is numbered bit 0, <strong>and</strong><br />
corresponds to the ASCII control character "NUL."<br />
Protocol Compression When ON, PPP negotiates with the peer to use one<br />
byte instead of two for the Protocol fields to improve<br />
transmission efficiency on low-speed lines. Default:<br />
OFF.<br />
Address <strong>and</strong> Control<br />
Field Compression<br />
(ACFC)<br />
When ON, PPP eliminates the address <strong>and</strong> control<br />
fields when they are identical over a series of frames.<br />
Default: OFF.<br />
Retry Count Determines the number of attempts PPP makes to<br />
configure a connection with "Configure-Request"<br />
packets. Default: 10.<br />
Idle Timeout Determines how long (in seconds) the connection<br />
must remain idle before PPP attempts to close the<br />
connection with "Terminate-Request" packets.<br />
Default: 300.<br />
Maximum Receive<br />
Unit (MRU) Size<br />
Determines the maximum number of 8-bit bytes for<br />
the PPP Information field, including padding, but not<br />
including the Protocol field. Because opposite ends<br />
of a PPP connection may have different MRU values,<br />
PPP negotiates a suitable MRU for both systems.<br />
Default: 1500.
Table 11-6 PPP Configuration Parameters (Continued)<br />
Configuring Permanent SLIP <strong>and</strong> PPP Interfaces<br />
Establishing IP Connectivity<br />
Parameter Description Your Value<br />
ICMP When ENABLED, PPP allows ICMP packets over<br />
the PPP connection. Administrators may want to<br />
disable ICMP packets if they are concerned with<br />
"service attacks" from dial-up connections. Default:<br />
ENABLED.<br />
TCP Header<br />
Compression<br />
Termination Retry<br />
Count<br />
When ENABLED, requests the IPCP driver to<br />
employ Van Jacobson TCP header compression to<br />
improve performance. Default: DISABLED.<br />
Determines the number of attempts PPP makes to<br />
terminate a connection with "Terminate-Request"<br />
packets. Default: 10.<br />
Timeout Determines the time (in seconds) between successive<br />
Configure-Request or Terminate-Request packets.<br />
Default: 30.<br />
IP Address The IP address of the local PPP interface in dotteddecimal<br />
format. You may also specify 0.0.0.0 (the<br />
default) to indicate that the local IP address will be<br />
specified by the remote peer when the serial<br />
connection is established.<br />
Point-To-Point Device<br />
IP Destination Address<br />
The IP address of the peer PPP interface in dotteddecimal<br />
format. Default: 0.0.0.0.<br />
SubNet Mask The subnet mask of the local PPP interface in dotteddecimal<br />
format. The default depends on the local<br />
PPP interface IP address. For example, a class A<br />
address results in a default subnet mask of 255.0.0.0.<br />
When you configure an interface, the following line is added to your START_MULTINET.COM<br />
file to initialize the device:<br />
$ SET TERM/PERM/NOTYPE_AHEAD/NOAUTOBAUD/SPEED=config_speed dev_name<br />
• config_speed is the baud rate for transmitting <strong>and</strong> receiving data.<br />
• dev_name specifies a SLIP or PPP interface such as TTA1:.<br />
This setting is used for permanent interfaces to prevent LOGINOUT from gaining control of the<br />
device because of extraneous noise on the line.<br />
If you want to override this behavior, create a custom comm<strong>and</strong> procedure,<br />
11-35
Establishing IP Connectivity<br />
11-36<br />
MULTINET:dev_name_CONFIGURE.COM, for that interface. If you have an IP address assigned<br />
to the device, you custom comm<strong>and</strong> procedure is invoked at startup instead of the comm<strong>and</strong> line<br />
described previously.<br />
Attaching Dynamic SLIP or PPP Interfaces to VMS Devices<br />
After a remote host connects to a <strong>MultiNet</strong> system over a serial line, the remote system<br />
administrator must log into the <strong>MultiNet</strong> system <strong>and</strong> attach the appropriate <strong>MultiNet</strong> dynamic<br />
interface to the VMS terminal line to which the remote host is connected.<br />
For example, if your system provides serial access via two modems, but you need to provide access<br />
to three or more hosts, configure a dynamic interface for each host you plan to accommodate. Then<br />
make sure the administrator on each remote host knows the name of the serial interface you have<br />
configured <strong>and</strong> the comm<strong>and</strong>s to execute to attach SLIP or PPP interfaces to the appropriate<br />
terminal lines.<br />
To convert a terminal line into a SLIP or PPP interface:<br />
1 Log into an account with CMKRNL, LOG_IO, <strong>and</strong> SYSPRV privileges.<br />
2 Determine the name of the serial interface corresponding to the remote host. If the administrator<br />
knows the remote IP address or host name, the corresponding serial interface name can be<br />
determined from the MULTINET SHOW comm<strong>and</strong> output. For example:<br />
$ MULTINET SHOW /STATISTICS<br />
<strong>MultiNet</strong> Network Interface statistics:<br />
Name Mtu Network Address Ipkts Ierrs Opkts Oerrs Collis<br />
---- --- ------- ------- ----- ----- ----- ----- ----se0<br />
1500 ABC-NET FOO.BAR.COM 120360 0 143384 1 4<br />
sl0 296 ABC-NET FOO.BAR.COM 0 0 1 0 0<br />
lo0 1536 LOOPBACK-NET LOCALHOST 917 0 917 0 0<br />
$ MULTINET SHOW /INTERFACE<br />
_Network Device: SL0<br />
Device sl0: flags=71<br />
IP Address = 192.41.228.78<br />
IP Sub-Net Mask = 255.255.255.192<br />
IP Point to Point Destination = 192.41.228.80<br />
3 Attach the serial interface to the VMS device with the following DCL comm<strong>and</strong>:<br />
$ MULTINET SET /INTERFACE interface_name -<br />
_$ /DYNAMIC/VMS_DEVICE/LINK_LEVEL=protocol<br />
protocol is SLIP or PPP, according to the type of serial interface.<br />
Note! If the remote host is also a <strong>MultiNet</strong> system, the remote administrator must also attach the<br />
remote serial interface to the remote VMS device.<br />
The following example illustrates how to establish connectivity between two <strong>MultiNet</strong> systems<br />
over dynamic SLIP interfaces. The first MULTINET SET /INTERFACE comm<strong>and</strong> converts the<br />
remote host's dial-in port into a SLIP interface. After the user types the control-backslash
Establishing IP Connectivity<br />
Ctrl/\ escape key sequence to return to a local DCL comm<strong>and</strong> line, the second MULTINET SET<br />
/INTERFACE comm<strong>and</strong> converts the local terminal line into a SLIP interface. The MULTINET<br />
PING comm<strong>and</strong> confirms IP connectivity.<br />
WHARFIN$ ALLOCATE TTA1:<br />
%DCL-I-ALLOC, _WHARFIN$TTA1: allocated<br />
WHARFIN$ SET TERMINAL/SPEED=2400 TTA1:<br />
WHARFIN$ SET HOST/DTE TTA1:<br />
%REM-I-TOEXIT, connection established, type ^\ to exit<br />
ATDT1415555-1212<br />
RRING<br />
CONNECT 2400<br />
BIGBOOTE SLIP Gateway — VAX/VMS V5.5-2<br />
Username: SYSTEM<br />
Password:<br />
Welcome to the BIGBOOTE SLIP Gateway<br />
Last interactive login on Monday, 28-FEB-2003 14:47<br />
Last non-interactive login on Monday, 28-FEB-2003 13:16<br />
BIGBOOTE$ MULTINET SET/INTERFACE SL1/DYNAMIC/LINK_LEVEL=SLIP/VMS_DEVICE<br />
The line you are logged in over is now a SLIP line.<br />
[You now type the Ctrl/\escape sequence to return to WHARFIN.]<br />
%REM-S-END, control returned to node _WHARFIN::<br />
WHARFIN$ MULTINET SET/INTERFACE SL1/DYNAMIC/LINK_LEVEL=SLIP/<br />
VMS_DEVICE=TTA1:<br />
WHARFIN$ MULTINET PING 192.0.0.3<br />
PING 192.0.0.3 (192.0.0.3): 56 data bytes<br />
64 bytes from 192.0.0.3: icmp_seq=0 time=860 ms<br />
64 bytes from 192.0.0.3: icmp_seq=1 time=860 ms<br />
64 bytes from 192.0.0.3: icmp_seq=2 time=860 ms<br />
Ctrl/C<br />
----192.0.0.3 PING Statistics----<br />
4 packets transmitted, 3 packets received, 25% packet loss<br />
round-trip (ms) min/avg/max = 860/860/860<br />
WHARFIN$<br />
Shutting Down a PPP or SLIP Interface<br />
To bring down an interface, issue the following comm<strong>and</strong>:<br />
$ MULTINET SET /INTERFACE interface_name -<br />
_$ /LINK_LEVEL=protocol/VMS_DEVICE=device/DOWN<br />
Modifying Global Parameters<br />
<strong>MultiNet</strong> maintains a set of global parameters that affect the behavior of all network interfaces. For<br />
example, your system's default route (see Chapter 13) is specified as a global parameter <strong>and</strong> affects<br />
how all network interfaces direct data packets over the network.<br />
There are two ways to configure global parameters:<br />
11-37
Establishing IP Connectivity<br />
11-38<br />
• NET-CONFIG, using the SET parameter_name comm<strong>and</strong>. See the <strong>MultiNet</strong> for OpenVMS<br />
<strong>Administrator's</strong> Reference for a complete list of SET comm<strong>and</strong>s.<br />
• MENU-CONFIG, using the Configure Global Parameters comm<strong>and</strong>. For each NET-CONFIG<br />
SET comm<strong>and</strong>, there is a corresponding field you can edit using MENU-CONFIG.<br />
You can modify all global parameters without rebooting your system with the following<br />
exceptions:<br />
• LOAD-EXOS-DRIVER<br />
• LOAD-UCX-DRIVER<br />
• WINS-COMPATIBILITY<br />
Changes to these parameters take effect after you reboot the system.<br />
The following subsections describe how to modify global parameters to perform the following<br />
tasks:<br />
• Configuring DECwindows support (see the Using the HP TCP/IP Transport Over UCX section)<br />
• Configuring the cluster alias feature, which permits another VMScluster node to continue to<br />
provide some connectionless network services if the primary node that provides those services<br />
fails (see the Configuring VMScluster Aliasing section)<br />
• Ensuring PATHWORKS 5.0 support is enabled (see the Ensuring PATHWORKS Support is<br />
Enabled section)<br />
Using the HP TCP/IP Transport Over UCX<br />
You can configure the DECwindows server <strong>and</strong> X clients to use the HP TCP/IP Transport over<br />
<strong>MultiNet</strong>'s UCX driver. <strong>MultiNet</strong> supports DECwindows over TCP/IP under VMS V5.5-2 <strong>and</strong> later<br />
versions by emulating the HP TCP/IP Services for the VMS $QIO interface.<br />
The <strong>MultiNet</strong> UCX driver is enabled by default.<br />
1 Edit your system startup comm<strong>and</strong> procedure to invoke <strong>MultiNet</strong> before starting DECwindows.<br />
2 Reboot your system to start <strong>MultiNet</strong> with the UCX $QIO driver loaded.<br />
3 To create a display, issue the following comm<strong>and</strong>:<br />
$ SET DISPLAY/CREATE/NODE=ip-node-name /TRANSPORT=TCPIP<br />
For complete information on the SET DISPLAY comm<strong>and</strong> <strong>and</strong> running remote DECwindows<br />
applications, see the VMS DECwindows User's <strong>Guide</strong>.<br />
Each user must enable TCP/IP access on a host-by-host basis using the DECwindows Session<br />
Manager Customize Security menu so they can run applications over the TCP/IP transport.<br />
From that menu, specify:<br />
• TCP/IP as the Transport<br />
• The remote host's Internet host name as the Node<br />
• A question mark (?) for the Username<br />
The DECwindows chapter of the <strong>MultiNet</strong> for OpenVMS User's <strong>Guide</strong> contains information about
unning DECwindows applications over <strong>MultiNet</strong>.<br />
Configuring VMScluster Aliasing<br />
Establishing IP Connectivity<br />
If you have the cluster alias feature 1 configured on more than one node in a VMScluster, the nodes<br />
negotiate among themselves so that only one node at a time answers requests to the cluster alias.<br />
If the node serving the cluster alias fails <strong>and</strong> more than one node has the cluster alias configured,<br />
the service provided by the failed node is provided by another node in the cluster. Without the<br />
cluster alias feature, the services provided by the failed node are not available.<br />
To use cluster aliasing, you provide a list of addresses to which each node will answer. If the node<br />
currently serving the cluster alias fails, one of the other nodes takes over the connectionless<br />
services for that address.<br />
This feature lets you specify one or more nodes in the cluster as having an additional IP address, so<br />
only one of the nodes will use that additional IP address at any one time.<br />
Enable cluster aliases with the NET-CONFIG SET IP-CLUSTER-ALIASES comm<strong>and</strong>. Specify<br />
the extra IP addresses for which this node should also answer requests. Disable cluster aliases by<br />
invoking the comm<strong>and</strong> without addresses. You can change the value of IP-CLUSTER-ALIASES<br />
without rebooting by also defining or redefining the system-wide logical name MULTINET_IP_<br />
CLUSTER_ALIASES <strong>and</strong> restarting the MULTINET_SERVER process.<br />
Since this service is disabled by default, you must enable it in this way:<br />
$ MULTINET CONFIGURE /SERVER<br />
SERVER-CONFIG>ENABLE CLUSTERALIAS<br />
SERVER-CONFIG>EXIT<br />
Now you can enable cluster failover as shown in the following example:<br />
$ MULTINET CONFIGURE<br />
<strong>MultiNet</strong> Network Configuration Utility 5.4(nnn)<br />
[Reading in MAXIMUM configuration from MULTINET:MULTINET.EXE]<br />
[Reading in configuration from MULTINET:NETWORK_DEVICES.CONFIGURATION]<br />
NET-CONFIG>SET IP-CLUSTER-ALIASES 192.1.1.2<br />
NET-CONFIG>EXIT<br />
[Writing configuration to MULTINET:NETWORK_DEVICES.CONFIGURATION]<br />
[Writing Startup file MULTINET:START_MULTINET.COM]<br />
[Changes take effect after the next VMS reboot]<br />
$ DEFINE /SYSTEM /EXECUTIVE MULTINET_IP_CLUSTER_ALIASES "192.1.1.2"<br />
$ @MULTINET:START_SERVER<br />
Ensuring PATHWORKS Support is Enabled<br />
By default, <strong>MultiNet</strong> is configured to support PATHWORKS 5.0 running concurrently. To ensure<br />
this support is enabled:<br />
1. The cluster alias feature is also known as "cluster failover."<br />
* This service was disabled with <strong>MultiNet</strong> v4.3.<br />
11-39
Establishing IP Connectivity<br />
11-40<br />
1 Verify the presence of the PWIP (Pathworks over IP) device:<br />
$ SHOW DEV PWIP<br />
2 Invoke NET-CONFIG <strong>and</strong> enter the SHOW comm<strong>and</strong>. Check the "Load PWIP (Pathworks)<br />
driver:" line.<br />
3 If <strong>MultiNet</strong> is not configured to load the PWIP driver, enter the SET LOAD-PWIP-DRIVER<br />
comm<strong>and</strong>.<br />
4 Save the configuration to ensure it is loaded the next time your system reboots.<br />
Multicast Support<br />
To enable multicast packet reception under OpenVMS V5.5-2, create a custom<br />
SE0_CONFIGURE.COM file that adds the /MULTICAST=ALL qualifier to the MULTINET SET<br />
/INTERFACE comm<strong>and</strong> line in that comm<strong>and</strong> procedure.<br />
Multicast reception is enabled automatically in OpenVMS VAX V6.0 or later <strong>and</strong> in all versions of<br />
OpenVMS Alpha. The file MULTINET_ROOT:[MULTINET.EXAMPLES]SE0_CONFIGURE.COM is a<br />
template for such comm<strong>and</strong> procedures.
Enabling <strong>and</strong> Disabling MTU Discovery<br />
Establishing IP Connectivity<br />
Maximum Transmission Unit (MTU) discovery determines the maximum size of a TCP packet that<br />
can be sent through the network between two hosts. Performance improves when the largest, most<br />
efficient packet size possible with the hardware at each hop is enabled. RFC-1191 describes this<br />
feature, which is enabled by default.<br />
When MTU discovery becomes active for a remote host, it places a host route in the routing table<br />
with the MTU set to the appropriate size. This feature is potentially useful for tracing unusual<br />
routes.<br />
MTU discovery sets the Don't Fragment (DF) bit in IP packets. It is difficult to predict how routers<br />
from different vendors will h<strong>and</strong>le the DF bit; some h<strong>and</strong>le it correctly, some do not, some work<br />
until they need to fragment a packet, <strong>and</strong> some simply drop the packet. If you suspect a routing<br />
problem is affecting communications, disable MTU discovery by issuing the following comm<strong>and</strong>:<br />
$ MULTINET SET/KERNEL TCP_PMTU 0<br />
To enable it again, issue this comm<strong>and</strong>:<br />
$ MULTINET SET/KERNEL TCP_PMTU 1<br />
Both of these comm<strong>and</strong>s take effect immediately.<br />
Some versions of NCSA Telnet for DOS do not interoperate with <strong>MultiNet</strong> V3.3 <strong>and</strong> later because<br />
NCSA Telnet does not properly h<strong>and</strong>le MTU discovery negotiations. If you experience problems<br />
between this product <strong>and</strong> <strong>MultiNet</strong>, upgrade to NCSA Telnet version 2.3.07 r3 or later.<br />
Manipulating the ARP Table<br />
The Address Resolution Protocol (ARP) dynamically maps addresses between Internet <strong>and</strong><br />
Ethernet. ARP is used by all <strong>MultiNet</strong> Ethernet interface drivers <strong>and</strong> HP Computer FDDI drivers.<br />
ARP caches Internet-Ethernet address mappings. When an interface requests a mapping for an<br />
address not in the cache, ARP queues the message requiring the mapping <strong>and</strong> broadcasts an ARP<br />
request on the associated network requesting the address mapping.<br />
If a response is provided, the new mapping is cached in the ARP table <strong>and</strong> any pending messages<br />
are transmitted. ARP queues no more than one packet while waiting for a mapping request to be<br />
responded to; only the most recently "transmitted" packet is kept.<br />
To enable communications with systems that do not use ARP, the MULTINET SET /ARP utility<br />
allows you to add <strong>and</strong> delete entries in the Internet-to-Ethernet tables.<br />
CAUTION! Adding or modifying entries in the ARP table can seriously affect TCP/IP communications.<br />
Do not create or modify ARP table entries unless you are sure of their effects on your<br />
network.<br />
11-41
Establishing IP Connectivity<br />
11-42<br />
The SET/ARP qualifiers are:<br />
Qualifier Description<br />
/ADD Adds a specified host-to-Ethernet address translation to the ARP tables<br />
/DELETE Deletes a specified host-to-Ethernet address translation from the ARP tables<br />
/FLUSH Flushes temporary entries in the ARP tables<br />
/PERMANENT Used with /ADD or /FLUSH to specify whether an entry is added or flushed<br />
permanently<br />
/PROXY Used with /ADD to indicate that the translation of the local host's Ethernet<br />
address should be published on behalf of another host<br />
/PUBLISH Used with /ADD to indicate that the translation to be added is to be published<br />
on behalf of another host<br />
/TEMPORARY Used with /ADD or /FLUSH to specify whether an entry should be added or<br />
flushed temporarily. This is the default.<br />
GIF (generic/gateway) interface Usage<br />
The gif interface allows for the creation of Virtual Private Networks (VPNs) by encapsulating the<br />
traffic directed to the interface's remote address to within an additional IP header, creating a virtual<br />
network. If the traffic over this interface is subject to IPSEC, then the virtual network is private.<br />
Each gif interface has four IP addresses that need to be configured:<br />
1 The local address for the interface<br />
2 The remote (point to point peer) address for the interface<br />
3 The gateway address for this side of the tunnel<br />
4 The destination address for the remote side of the tunnel.<br />
The gif is configured with the following comm<strong>and</strong>s:<br />
local system:<br />
$ <strong>MultiNet</strong> SET/INTERFACE/CREATE GIFn<br />
$! n is unit number, compile time limited<br />
$ <strong>MultiNet</strong> SET/INTERFACE GIFn/PROTOCOL=IP/ADDRESS=A.B.C.D-<br />
$_/POINT_TO_POINT=E.F.G.H<br />
$ <strong>MultiNet</strong> SET/ROUTE/ADD=(DESTINATION=A.B.C.D,GATEWAY=127.0.0.1)<br />
$ <strong>MultiNet</strong> SET/ROUTE/ADD=(DESTINATION=E.F.G.H,GATEWAY=A.B.C.D)<br />
$ <strong>MultiNet</strong> SET/INTERFACE GIFn/TUNNEL=(DESTINATION=I.J.K.L,-
$_ GATEWAY=M.N.O.P)<br />
remote system:<br />
Establishing IP Connectivity<br />
$ <strong>MultiNet</strong> SET/INTERFACE/CREATE GIFn<br />
$! n is unit number, compile time limited<br />
$ <strong>MultiNet</strong> SET/INTERFACE GIFn/PROTOCOL=IP/ADDRESS=E.F.G.H-<br />
$_/POINT_TO_POINT=A.B.C.D<br />
$ <strong>MultiNet</strong> SET/ROUTE/ADD=(DESTINATION=E.F.G.H,GATEWAY=127.0.0.1)<br />
$ <strong>MultiNet</strong> SET/ROUTE/ADD=(DESTINATION=A.B.C.D,GATEWAY=E.F.G.H)<br />
$ <strong>MultiNet</strong> SET/INTERFACE GIFn/TUNNEL=(DESTINATION=M.N.O.P,-<br />
$_ GATEWAY=I.J.K.L)<br />
M.N.O.P is a public IP address (interface) on the local system. I.J.K.L is a public IP address<br />
(interface) on the remote system. A.B.C.D is the private network address on the local system.<br />
E.F.G.H is the private network address on the remote system. Routing can be set up to pass traffic<br />
for other systems through the tunnel. A comm<strong>and</strong> procedure could be written to create the tunnel<br />
<strong>and</strong> be used on each side with some minor exchanging of parameters. IPSEC traffic could be<br />
statically configured, or managed with the RACOON IPSEC Daemon.<br />
To get rid of the tunnel:<br />
$ <strong>MultiNet</strong> SET/INTERFACE/DELETE GIFn!delete tunnel <strong>and</strong> interface<br />
$ <strong>MultiNet</strong> SET/ROUTE/DELETE=(DESTINATION=A.B.C.D, GATEWAY=127.0.0.1)<br />
The VPN encapsulates IPv4 traffic within another IPv4 packet (RFC 1853, RFC 2003).<br />
This VPN is not compatible with Microsoft VPN which uses either PPTP (Microsoft Proprietary)<br />
or L2TP/IPSec (RFC 2661).<br />
11-43
Establishing IP Connectivity<br />
11-44
Establishing IP Connectivity<br />
11-45
Establishing IP Connectivity<br />
11-46
Establishing IP Connectivity<br />
11-47
Establishing IP Connectivity<br />
11-48
Establishing IP Connectivity<br />
11-49
Chapter 12<br />
Configuring <strong>MultiNet</strong> Services<br />
This chapter describes how to configure <strong>MultiNet</strong> services. The chapter provides specific<br />
information about configuring the RLOGIN, RSHELL, NTY, TFTP, <strong>and</strong> SYSLOG services. The<br />
remaining chapters in this guide provide specifics about configuring other services.<br />
<strong>MultiNet</strong> services require basic IP connectivity on your system for the services to function<br />
properly. Read Chapter 11 to learn how to establish IP connectivity.<br />
For a list of the servers you can configure with SERVER-CONFIG, see Appendix A.<br />
Introducing Service Configuration Detecting Intruders<br />
Using SERVER-CONFIG to Configure<br />
Services<br />
Using MENU-CONFIG to Configure<br />
Services<br />
Introducing Service Configuration<br />
Using UCX-Compatible Services under <strong>MultiNet</strong><br />
Associating Comm<strong>and</strong> Procedures with Services<br />
Adding Your Own Services Setting Keepalive Timers<br />
Disabling, Enabling, <strong>and</strong> Deleting<br />
Services<br />
Configuring TFTP (Trivial File Transfer Protocol)<br />
Restricting Access to Servers Configuring "R" Services<br />
Auditing Access to Servers Configuring the TELNET Server for Kerberos V5<br />
Configuring SYSLOG<br />
When configured, <strong>MultiNet</strong> services start when a request for service is accepted by the master<br />
server (MULTINET_SERVER) process, which listens for incoming connections. When a<br />
connection request is received, either a separate, detached process is created to h<strong>and</strong>le the<br />
connection, or the MULTINET_SERVER process h<strong>and</strong>les the service internally.<br />
12-1
Configuring <strong>MultiNet</strong> Services<br />
12-2<br />
Configuration information for the master server is in the configuration file<br />
MULTINET:SERVICES.MASTER_SERVER which is read by the MULTINET_SERVER process<br />
when it starts to determine its configuration.<br />
When <strong>MultiNet</strong> is first installed, the normal set of services is enabled. Before starting <strong>MultiNet</strong>,<br />
you may want to verify that the server configuration meets your needs. This may require:<br />
• Disabling servers your site does not want accessed<br />
• Enabling servers your site wants accessed<br />
• Adding servers specific to your site<br />
The server configuration supplied with <strong>MultiNet</strong> is adequate to get a system up <strong>and</strong> running. The<br />
server configuration can be easily changed as needed.<br />
Generally, services are configured with one of the following configuration utilities:<br />
• SERVER-CONFIG, invoked with the MULTINET CONFIGURE /SERVERS comm<strong>and</strong><br />
• MENU-CONFIG, invoked with the MULTINET CONFIGURE /MENU comm<strong>and</strong><br />
This chapter describes how to use these utilities <strong>and</strong> provides information about other <strong>MultiNet</strong><br />
servers.<br />
Using SERVER-CONFIG to Configure Services<br />
The <strong>MultiNet</strong> comm<strong>and</strong> line-based server configuration utility (SERVER-CONFIG) is an<br />
interactive utility that controls which network servers are available on the local node. In addition,<br />
you can use SERVER-CONFIG to set restrictions on a server to prevent access from unauthorized<br />
sites, to keep a log file of connections to a server, <strong>and</strong> to limit the system resources available to a<br />
server.<br />
Invoking SERVER_CONFIG<br />
To invoke SERVER-CONFIG, enter this comm<strong>and</strong>:<br />
$ MULTINET CONFIGURE /SERVERS<br />
Exit this utility with the EXIT or QUIT comm<strong>and</strong>.<br />
To display the list of servers available under <strong>MultiNet</strong>, run SERVER-CONFIG, <strong>and</strong> issue the<br />
SHOW comm<strong>and</strong>. You can use the SHOW /FULL comm<strong>and</strong> to display the characteristics of a<br />
particular server. To change the default configuration, enable a server with the ENABLE comm<strong>and</strong><br />
<strong>and</strong> modify server configuration parameters with the SELECT <strong>and</strong> SET comm<strong>and</strong>s.<br />
In the following example, SERVER-CONFIG enables the TFTP server (which is disabled by<br />
default) displays the TFTP server's configuration, <strong>and</strong> restarts the MULTINET_SERVER process<br />
so the changes take effect immediately.<br />
$ MULTINET CONFIGURE /SERVERS<br />
<strong>MultiNet</strong> Server Configuration Utility 5.4(nnn)<br />
[Reading in configuration from MULTINET:SERVICES.MASTER_SERVER]<br />
SERVER-CONFIG>ENABLE TFTP<br />
SERVER-CONFIG>SHOW TFTP/full
Configuring <strong>MultiNet</strong> Services<br />
Service "TFTP":<br />
UDP socket (AF_INET,SOCK_DGRAM), Port 69<br />
INIT() = Merge_Image<br />
Program = "MULTINET:LOADABLE_TFTP.EXE"<br />
SERVER-CONFIG>RESTART<br />
Configuration modified, do you want to save it first?[YES]<br />
[Writing configuration to MULTINET_COMMON_ROOT:[MULTINET]<br />
SERVICES.MASTER_SERVER]<br />
%RUN-S-PROC_ID, identification of created process is 20600046<br />
SERVER-CONFIG>EXIT<br />
[Configuration not modified, so no update needed]<br />
$<br />
SERVER-CONFIG Comm<strong>and</strong>s<br />
Table 12-1 lists the SERVER-CONFIG comm<strong>and</strong>s.<br />
Before using a SET comm<strong>and</strong>, use the SELECT comm<strong>and</strong> to select a service.<br />
Table 12-1 SERVER-CONFIG Comm<strong>and</strong>s<br />
Comm<strong>and</strong> Description<br />
ADD Adds a service to the configuration<br />
ATTACH Detaches a terminal from calling process <strong>and</strong> attaches it to<br />
another process<br />
COPY Copies a service to create a new service<br />
DELETE Deletes a service from the current configuration<br />
DISABLE Disables a service in the current configuration<br />
ENABLE Enables a service in the current configuration<br />
EXIT Exits from the SERVER-CONFIG session<br />
GET Reads in a server configuration file<br />
NETCONTROL Contacts the NETCONTROL server<br />
PUSH Accesses the DCL comm<strong>and</strong> line while pausing<br />
SERVER-CONFIG<br />
QUIT Exits SERVER-CONFIG without saving changes<br />
RESTART Restarts the master server process<br />
SAVE Writes out the current server configuration file<br />
SELECT Selects a server for SET comm<strong>and</strong><br />
12-3
Configuring <strong>MultiNet</strong> Services<br />
12-4<br />
Table 12-1 SERVER-CONFIG Comm<strong>and</strong>s (Continued)<br />
Comm<strong>and</strong> Description<br />
SET ACCEPT-HOSTS Specifies hosts that can access the server<br />
SET ACCEPT-NETS Specifies networks that can access the server<br />
SET BACKLOG Specifies server connection queue limits<br />
SET CONNECTED Specifies a connection-request-received routine<br />
SET DISABLED-NODES Specifies VMScluster nodes on which the service is disabled<br />
SET ENABLED-NODES Specifies VMScluster nodes on which the service is enabled<br />
SET FLAGS Specifies a flag bit mask for service operation control<br />
SET INIT Specifies an initialize-service routine<br />
SET KEEPALIVE-TIMERS Specifies probes for cleaning up dormant connections<br />
SET LISTEN Specifies a listen-for-connections routine<br />
SET LOG-ACCEPTS Enables/disables successful connections logging<br />
SET LOG-FILE Specifies a log message destination<br />
SET LOG-REJECTS Enables/disables failed connections logging<br />
SET MAX-SERVERS Specifies the maximum number of processes<br />
SET PARAMETERS Specifies service-dependent parameters; affects the current<br />
configuration <strong>and</strong> becomes active the next time<br />
MULTINET_SERVER starts<br />
SET PQL-ASTLM a Specifies the OpenVMS AST (asynchronous system trap)<br />
limit (the number of pending ASTs available to a process)<br />
SET PQL-BIOLM a Specifies the OpenVMS buffered I/O limit (the number of<br />
outst<strong>and</strong>ing buffered I/O requests available to a process)<br />
SET PQL-BYTLM a Specifies the OpenVMS buffered I/O byte count limit (the<br />
number of bytes allowed in any single buffered I/O request)<br />
SET PQL-CPULM a Specifies the OpenVMS CPU time limit of the created<br />
process<br />
SET PQL-DIOLM a Specifies the OpenVMS direct I/O limit (the number of<br />
outst<strong>and</strong>ing direct I/O requests available to a process)<br />
SET PQL-ENQLM a Specifies the OpenVMS enqueue limit of the created<br />
process
Table 12-1 SERVER-CONFIG Comm<strong>and</strong>s (Continued)<br />
Comm<strong>and</strong> Description<br />
Configuring <strong>MultiNet</strong> Services<br />
SET PQL-FILLM a Specifies the OpenVMS open file limit (the number of open<br />
files available to a process)<br />
SET PQL-JTQUOTA a Specifies the OpenVMS job-wide logical name table byte<br />
quota (the quota allocated to the job-wide logical name table<br />
on its creation)<br />
SET PQL-PGFLQUOTA a Specifies the OpenVMS paging file quota of the created<br />
process<br />
SET PQL-PRCLM a Specifies the OpenVMS sub-process limit (the number of<br />
sub-processes available to a process)<br />
SET PQL-TQELM Specifies the OpenVMS timer queue entry limit (the number<br />
of timer queue entries available to a process)<br />
SET PRIORITY Specifies the OpenVMS priority for created processes<br />
SET PROGRAM Specifies an OpenVMS file name for run or merged images<br />
SET RECEIVE-BUFFER-SIZE Specifies the size of receive socket buffer<br />
SET REJECT-BY-DEFAULT Specifies what happens if no match is found on SET<br />
ACCEPT-HOSTS <strong>and</strong> SET REJECT-HOSTS, <strong>and</strong> on SET<br />
ACCEPT-NETS <strong>and</strong> SET REJECT-NETS<br />
SET REJECT-HOSTS Specifies hosts not allowed service access<br />
SET REJECT-MESSAGE Specifies a rejected connection message<br />
SET REJECT-NETS Specifies networks not allowed service access<br />
SET SEND-BUFFER-SIZE Specifies the size of the send socket buffer<br />
SET SERVICE Specifies a perform-service routine<br />
SET SERVICE-NAME Changes a service name. The underscore character can be<br />
used in the service name.<br />
SET SOCKET-FAMILY Specifies service family address<br />
SET SOCKET-OPTIONS Specifies setsockopt( ) options<br />
SET SOCKET-PORT Specifies the port for connection listening<br />
SET SOCKET-TYPE Specifies the socket type<br />
12-5
Configuring <strong>MultiNet</strong> Services<br />
12-6<br />
Table 12-1 SERVER-CONFIG Comm<strong>and</strong>s (Continued)<br />
Comm<strong>and</strong> Description<br />
SET USERNAME Specifies the name of the user under which the service is<br />
started; applies only to UCX services. A UCX service has<br />
the UCX_SERVER flag set<br />
SET WORKING-SET-EXTENT Specifies the OpenVMS working set extent of the created<br />
process<br />
SET WORKING-SET-QUOTA Specifies the OpenVMS working set quota of the created<br />
process<br />
SHOW Shows the current server configuration<br />
SHUTDOWN Stops the master server process<br />
SPAWN Executes a DCL comm<strong>and</strong>, or mimics PUSH<br />
STATUS Shows the SERVER-CONFIG status<br />
USE Reads in a server configuration file<br />
VERSION Shows the SERVER-CONFIG version<br />
WRITE Writes out the current server configuration file<br />
a. PQL st<strong>and</strong>s for process quota limits.<br />
When you run SERVER-CONFIG comm<strong>and</strong>s, a number of prompts are displayed. These prompts<br />
are explained in Appendix A. There are a number of per-service prompts when you modify server<br />
parameters. Some of these parameters control the operation of the server, including process priority,<br />
working set limit, restrictions, <strong>and</strong> auditing. Other parameters define operations of the server, such<br />
as the protocol <strong>and</strong> port number.<br />
Using MENU-CONFIG to Configure Services<br />
For each SERVER-CONFIG comm<strong>and</strong>, there is a corresponding comm<strong>and</strong> or parameter field you<br />
can modify using MENU-CONFIG. For basic information about MENU-CONFIG, see Chapter 9.<br />
To access the service configuration parameters through MENU-CONFIG:<br />
1 Start MENU-CONFIG with the MULTINET CONFIGURE /MENU comm<strong>and</strong>.<br />
2 Choose Configure <strong>MultiNet</strong> Server from the main <strong>MultiNet</strong> Configuration menu.<br />
3 To modify a service, choose View/Modify an Existing Service. When you do this, the Service<br />
Selection Menu appears.<br />
4 Choose the service you want to configure. A Server menu appears for the service you chose.<br />
5 To view the full list of service configuration comm<strong>and</strong>s, switch to Extended mode by pressing<br />
PF1. Each comm<strong>and</strong> allows you to view or modify specific types of service parameters.
Configuring <strong>MultiNet</strong> Services<br />
6 Select the desired set of service parameters <strong>and</strong> modify the parameter values as needed. Contextsensitive<br />
help describes each parameter as you select it.<br />
7 When done, return to the Server menu by pressing Ctrl/Z.<br />
8 If desired, configure other service parameters.<br />
9 To return to the Services Configuration menu, press Ctrl/Z.<br />
10To put your changes into effect, choose Restart the MULTINET_SERVER <strong>Process</strong>. The<br />
master server restarts using the new service configuration.<br />
11 Save or ab<strong>and</strong>on your changes by choosing Save Changes <strong>and</strong> Return to Previous Menu or<br />
Ab<strong>and</strong>on Changes <strong>and</strong> Return to Previous Menu, respectively.<br />
Adding Your Own Services<br />
The MULTINET_SERVER process can listen for user-written services (including IPX/SPX) <strong>and</strong>,<br />
when a connection request arrives, create an OpenVMS detached process running the user-written<br />
program. This process is created with full privileges. SYS$INPUT, SYS$OUTPUT, <strong>and</strong><br />
SYS$ERROR are set to the network. See the <strong>MultiNet</strong> for OpenVMS Programmer's Reference for<br />
descriptions of library routines for writing your own services that interface to <strong>MultiNet</strong>.<br />
The following example shows how to add a user-written service called NNTP to the <strong>MultiNet</strong><br />
configuration. The program NNTP_SERVER.EXE is invoked when an NNTP connection arrives.<br />
SERVER-CONFIG>ADD NNTP<br />
[Adding new configuration entry for service "NNTP"]<br />
Protocol: [TCP] TCP<br />
TCP Port number: 119<br />
Program to run: USER$DISK:[NNTP]NNTP_SERVER.EXE<br />
[Added service NNTP to configuration]<br />
[Selected service is now NNTP]<br />
SERVER-CONFIG><br />
Note! If your service uses the getservbyname( ) or getservbyport( ) socket library functions, you must<br />
also add your service to the HOSTS.LOCAL file <strong>and</strong> recompile your host tables.<br />
Disabling, Enabling, <strong>and</strong> Deleting Services<br />
You can tailor the MULTINET_SERVER to meet your specific needs by enabling or disabling<br />
services using the ENABLE, DISABLE, or DELETE comm<strong>and</strong>s.<br />
For example, to enable BOOTP service with the SERVER-CONFIG ENABLE BOOTP comm<strong>and</strong><br />
<strong>and</strong> restart the server to make the change immediately available, issue these comm<strong>and</strong>s:<br />
$ MULTINET CONFIGURE /SERVER<br />
<strong>MultiNet</strong> Server Configuration Utility 5.4(nnn)<br />
[Reading in configuration from MULTINET:SERVICES.MASTER_SERVER]<br />
SERVER-CONFIG>ENABLE BOOTP<br />
SERVER-CONFIG>RESTART<br />
Configuration modified, do you want to save it first ? [YES] RETURN<br />
[Writing configuration to MULTINET_COMMON_ROOT:[MULTINET]<br />
12-7
Configuring <strong>MultiNet</strong> Services<br />
12-8<br />
SERVICES.MASTER_SERVER]<br />
%RUN-S-PROC_ID, identification of created process is 20600046<br />
SERVER-CONFIG>EXIT<br />
[Configuration not modified, so no update needed]<br />
$<br />
The following example shows how to disable the SMTP service:<br />
SERVER-CONFIG>DISABLE SMTP<br />
Disabling or Enabling Services on a Per-Cluster-Node Basis<br />
You can enable or disable services on a per-node basis in a VMScluster. Using the SET<br />
ENABLED-NODES or SET DISABLED-NODES comm<strong>and</strong>s, you can specify a list of<br />
VMScluster nodes on which the service does or does not run. You must also enable the service<br />
using the ENABLE comm<strong>and</strong>. For example, to enable the SMTP service to run only on the<br />
VMScluster node VMSA:<br />
SERVER-CONFIG>SELECT SMTP<br />
[The Selected SERVER entry is now SMTP]<br />
SERVER-CONFIG>SET ENABLED-NODES<br />
You can now add new VAXcluster nodes for SMTP.<br />
An empty line terminates.<br />
Add VAXcluster node: VMSA<br />
Add VAXcluster node: RETURN<br />
SERVER-CONFIG><br />
Restricting Access to Servers<br />
<strong>MultiNet</strong> allows a system manager to restrict access to services on a per-service, per-network, or<br />
per-host basis.<br />
Note! Restriction lists are supported only for services that listen for connections through<br />
MULTINET_SERVER. For example, the NFS Server, which reads datagrams directly, ignores<br />
any restrictions configured through SERVER-CONFIG.<br />
Five service parameters (ACCEPT-HOSTS, ACCEPT-NETS, REJECT-HOSTS, REJECT-NETS,<br />
<strong>and</strong> REJECT-BY-DEFAULT) control whether the MULTINET_SERVER process allows or<br />
rejects a connection request based on the requesting host address, network, or subnetwork.<br />
• If the connection comes from a host listed in the ACCEPT-HOSTS or REJECT-HOSTS lists, the<br />
connection is accepted or rejected, respectively.<br />
• If the host is not found in one of these lists, the ACCEPT-NETS <strong>and</strong> REJECT-NETS lists are<br />
examined.<br />
• If a match is found, the connection is accepted or rejected.<br />
• If the host does not match any of these four lists, the action taken is governed by the REJECT-<br />
BY-DEFAULT parameter, which is normally set to FALSE, indicating that all connections are<br />
accepted.
Configuring <strong>MultiNet</strong> Services<br />
You can also use the ACCEPT-NETS <strong>and</strong> REJECT-NETS parameters to specify a subnetwork<br />
number. You specify a subnetwork by supplying the subnetwork number followed by a space <strong>and</strong><br />
the subnetwork mask for that subnetwork. For example:<br />
REJECT-NETS 128.1.1.0 255.255.255.0<br />
rejects only the hosts on the 128.1.1.n network. All other hosts on 128.1.n.n have access.<br />
Note! If you answer YES after the Internet address at the prompt, only connections from a port<br />
number below 1024 are accepted.<br />
The action taken to reject a connection depends on the protocol involved; for example, a UDP<br />
datagram is rejected by ignoring it, but a TCP connection is rejected by immediately closing the<br />
connection.<br />
The REJECT-MESSAGE parameter specifies a text string sent to the client before the connection is<br />
closed. The following example shows how to restrict access to the TELNET server to hosts that are<br />
on a local network at address 128.1.0.0, with the one exception of the host at the address 192.0.0.2.<br />
$ MULTINET CONFIGURE/SERVERS<br />
<strong>MultiNet</strong> Server Configuration Utility 5.4(nnn)<br />
[Reading in configuration from MULTINET:SERVICES.MASTER_SERVER]<br />
SERVER-CONFIG>SELECT TELNET<br />
[The Selected SERVER entry is now TELNET]<br />
SERVER-CONFIG>SET ACCEPT-NETS<br />
You can now add new addresses for TELNET. An empty line terminates.<br />
Add Address: 128.1.0.0<br />
Add Address: RETURN<br />
SERVER-CONFIG>SET ACCEPT-HOSTS<br />
You can now add new addresses for TELNET. An empty line terminates.<br />
Add Address: 192.0.0.2<br />
Add Address: RETURN<br />
SERVER-CONFIG>SET REJECT-BY-DEFAULT TRUE<br />
SERVER-CONFIG>SET REJECT-MESSAGE Illegal source of TELNET connection<br />
SERVER-CONFIG>SHOW/FULL<br />
Service "TELNET":<br />
TCP socket (AF_INET,SOCK_STREAM), Port 23<br />
Socket Options = SO_KEEPALIVE<br />
INIT() = TCP_Init<br />
LISTEN() = TCP_Listen<br />
CONNECTED() = TCP_Connected<br />
SERVICE() = Internal_Telnet<br />
Accept Hosts = IP-192.0.0.2<br />
Accept Nets = IP-128.1.0.0<br />
Reject by default all other hosts <strong>and</strong> nets<br />
Reject Message = "Illegal source of TELNET connection"<br />
SERVER-CONFIG>RESTART<br />
Configuration modified, do you want to save it first ? [YES] YES<br />
[Writing configuration to<br />
MULTINET_COMMON_ROOT:[MULTINET]SERVICES.MASTER_SERVER]<br />
12-9
Configuring <strong>MultiNet</strong> Services<br />
12-10<br />
%RUN-S-PROC_ID, identification of created process is 20600054<br />
SERVER-CONFIG><br />
Auditing Access to Servers<br />
<strong>MultiNet</strong> allows the security-conscious system manager to audit access to a service, file, or the<br />
OpenVMS process. Three service parameters govern the auditing that occurs when a connection is<br />
accepted or rejected:<br />
LOG-ACCEPTS Enables or disables logging for accepted connection requests.<br />
LOG-FILE Specifies the OpenVMS file name to which log messages are written. The<br />
auditing data collected by the <strong>MultiNet</strong> Server is collected in this file <strong>and</strong><br />
flushed (written to disk) approximately every five to ten minutes. To<br />
maintain different versions of this file, you can copy an empty file over the<br />
old one on a daily basis (or at a frequency that meets your needs).<br />
LOG-REJECTS Enables or disables logging for rejected connection requests. A request can<br />
be rejected if the REJECT-HOSTS, REJECT-NETS, or REJECT-BY-<br />
DEFAULT security restrictions are enabled <strong>and</strong> succeed, or if the ACCEPT-<br />
HOSTS <strong>and</strong> ACCEPT-NETS restrictions are enabled <strong>and</strong> fail. For more<br />
information, refer to the Restricting Access to Servers section.<br />
Note! The only services that support auditing are those that listen for connections through the<br />
MULTINET_SERVER. For example, the optional NFS server, which reads datagrams directly,<br />
ignores the auditing parameters.<br />
You should not turn on logging for a UDP service. Because there is no "formal" connection for<br />
UDP, every packet sent to the UDP service would be logged.<br />
The following example shows how to enable a log file on the TELNET service.<br />
$ MULTINET CONFIGURE /SERVERS<br />
<strong>MultiNet</strong> Server Configuration Utility 5.4(nnn)<br />
[Reading in configuration from MULTINET:SERVICES.MASTER_SERVER]<br />
SERVER-CONFIG>SELECT TELNET<br />
[The Selected SERVER entry is now TELNET]<br />
SERVER-CONFIG>SET LOG-ACCEPTS TRUE<br />
SERVER-CONFIG>SET LOG-REJECTS TRUE<br />
SERVER-CONFIG>SET LOG-FILE MULTINET:SERVER.LOG<br />
SERVER-CONFIG>SHOW/FULL<br />
Service "TELNET":<br />
TCP socket (AF_INET,SOCK_STREAM), Port 23<br />
Socket Options = SO_KEEPALIVE<br />
INIT() = TCP_Init<br />
LISTEN() = TCP_Listen<br />
CONNECTED() = TCP_Connected<br />
SERVICE() = Internal_Telnet<br />
Log File for Accepts & Rejects = MULTINET:SERVER.LOG
Configuring <strong>MultiNet</strong> Services<br />
SERVER-CONFIG>RESTART<br />
Configuration modified, do you want to save it first ? [YES] YES<br />
[Writing configuration to MULTINET_COMMON_ROOT:[MULTINET]<br />
SERVICES.MASTER_SERVER]<br />
%RUN-S-PROC_ID, identification of created process is 20600054<br />
SERVER-CONFIG><br />
The next example shows the auditing records written to the log file.<br />
15-JUN-2003 17:27:00 RPCPORTMAP (accepted) from [127.0.0.1,108]<br />
(localhost)<br />
15-JUN-2003 17:50:25 FINGER (accepted) from [192.41.228.65,1071] (ABC.COM)<br />
15-JUN-2003 21:10:40 RLOGIN (accepted) from [192.41.228.65,1022] (ABC.COM)<br />
16-JUN-2003 11:49:46 FINGER (accepted) from [192.41.228.65,1214] (ABC.COM)<br />
16-JUN-2003 11:51:05 RLOGIN (accepted) from [192.41.228.68,1022] (Bubba)<br />
16-JUN-2003 20:09:48 FTP (accepted) from [192.41.228.68,1039] (Bubba)<br />
Writing an Auditing Dispatcher<br />
<strong>MultiNet</strong> allows a system manager to further customize the auditing facilities.<br />
You can provide a user-written shareable image that is merged into the MULTINET_SERVER<br />
when the server is restarted. The user-written shareable image is called whenever a connection<br />
arrives with information about the connection <strong>and</strong> can perform the desired auditing.<br />
If the <strong>MultiNet</strong> Programmer’s Kit is installed, the directory MULTINET_ROOT:[MULTINET.EXAMPLES]<br />
contains the file USER_AUDITOR.C. This is a C-language template of a routine called when a<br />
connection arrives.<br />
Compile, link, <strong>and</strong> place it in the MULTINET: directory according to the instructions at the<br />
beginning of the file.<br />
Detecting Intruders<br />
<strong>MultiNet</strong> provides the IP address <strong>and</strong> an optional IP port number of a suspected intruder to<br />
OpenVMS accounting <strong>and</strong> intrusion detection. The IP address is recorded in hexadecimal format to<br />
make room for the optional IP port address. By default, the IP port address is included. To disable<br />
this feature, set the LGI_BRK_TERM system parameter to zero.<br />
This example shows accounting <strong>and</strong> intrusion reports generated with LGI_BRK_TERM set to one<br />
(the default).<br />
$ ACCOUNTING/NODE=TELNET<br />
Remote node name: TELNET Privilege : 00148000<br />
Remote ID: A12C800C:0F94 Privilege : FFFFFFC0<br />
^^^^^^^^ ^^^^<br />
IP address IP port<br />
$ SHOW INTRUSION<br />
Intrusion Type Count Expiration Source<br />
NETWORK SUSPECT 2 17:35:09.28 TELNET::A12C800C:0F94<br />
12-11
Configuring <strong>MultiNet</strong> Services<br />
12-12<br />
^^^^^^^^^^^^^^^^^^<br />
IP address IP port<br />
In these examples, A12C800C is the IP address 191.87.34.22 <strong>and</strong> 0F94 is IP port 3988, both<br />
expressed in hexadecimal. You can use the following DCL code to convert hexadecimal IP<br />
addresses <strong>and</strong> port numbers (of the form hex-address:hex-port-number) into dotted decimal format:<br />
$ IP_ADDRESS = F$ELEMENT(0,":",P1)<br />
$ PORT_NUMBER = F$ELEMENT(1,":",P1)<br />
$ WRITE SYS$OUTPUT F$FAO("IP address/port: !UL.!UL.!UL.!UL/!UL", -<br />
F$INTEGER("%X''F$EXTRACT(0,2,IP_ADDRESS)'"), -<br />
F$INTEGER("%X''F$EXTRACT(2,2,IP_ADDRESS)'"), -<br />
F$INTEGER("%X''F$EXTRACT(4,2,IP_ADDRESS)'"), -<br />
F$INTEGER("%X''F$EXTRACT(6,2,IP_ADDRESS)'"), -<br />
F$INTEGER("%X''PORT_NUMBER'"))<br />
$ EXIT<br />
Intrusion detection uses the physical (Ethernet) address, SPX port number, <strong>and</strong> possibly the target<br />
user name. The target user name appears only when the break-in attempt targets a valid account <strong>and</strong><br />
LGI_BRK_TERM is set to one (the default), as in the following example intrusion report.<br />
$ SHOW INTRUSION<br />
Intrusion Type Count Expiration Source<br />
TERM_USER SUSPECT 1 16:23:38.67 [A12C8000:AA.00.04.00.08.60#ECB]:<br />
^^^^^^^^ ^^^^^^^^^^^^^^^^^ ^^^ ^^^<br />
Network Ethernet address SPX User<br />
number port Name<br />
In this example,<br />
• A12C8000 is the network number, expressed in hexadecimal.<br />
• AA.00.04.00.08.60 is the Ethernet address, expressed in dotted-hexadecimal format.<br />
• ECB is the SPX port.<br />
• No user name is specified; the user name normally follows the ending colon.<br />
The OpenVMS SHOW INTRUSION Utility truncates the Source display field to 33 characters.<br />
The TERM_USER record is actually associated with a particular user name; you can delete it (with<br />
DELETE/INTRUSION) only by specifying the full source specification, including the invisible,<br />
truncated data.<br />
Detecting Intruders on an FTP Server<br />
The following example of an FTP_SERVER.COM file shows the use of the FTP server qualifiers.<br />
The first section ensures that global <strong>and</strong> local symbols appear as expected. Information is then<br />
taken from the logical names that store data about the person who has accessed this FTP server:<br />
MULTINET_FTP_ADDRESS Provides an ASCII representation of the user's<br />
IP address.
Configuring <strong>MultiNet</strong> Services<br />
MULTINET_FTP_HOSTNAME Provides an ASCII representation of the user's<br />
host name.<br />
MULTINET_ANONYMOUS_PASSWORD Contains an ASCII representation of the user's<br />
anonymous FTP password.<br />
MULTINET_FTP_MAXIMUM_IDLE_TIME Controls the duration (in seconds) the FTP<br />
server allows a connection to be idle before it<br />
is closed. The default is 300 seconds. This<br />
logical can be specified in any logical name<br />
table accessible to the user running the FTP<br />
server.<br />
$ Set := "Set"<br />
$ Set Symbol/Scope=(NoGlobal,NoLocal)<br />
$ If F$TrnLNM("MULTINET_FTP_ADDRESS") .Eqs. "" Then -<br />
<strong>MultiNet</strong> FTP/Server/Get_Remote_Info<br />
$ FTP_Address = F$TrnLNM("MULTINET_FTP_ADDRESS")<br />
$ FTP_Hostname = F$TrnLNM("MULTINET_FTP_HOSTNAME")<br />
$ FTP_Password = F$TrnLNM("MULTINET_ANONYMOUS_PASSWORD")<br />
$ Ident = FTP_Hostname<br />
$ If FTP_Hostname .Eqs. "" Then Ident = FTP_Address<br />
In the next section, if FTP_Hostname is null, the IP address could not be found in the host table or<br />
by DNS lookup. The Ident symbol is set to flag this event:<br />
$ Message = ""<br />
$ If FTP_Hostname .Eqs. "" Then -<br />
Message = Message + ",""Unknown hostname: ''Ident'; DNS Problem!"""<br />
$ If F$Edit(FTP_Password,"UPCASE") .Eqs. "GUEST" Then -<br />
Message = Message + ",""''Ident'; say who really you are."""<br />
$ Message = Message + ",""@WELCOME.TXT"""<br />
$ If Message .Nes. "" Then -<br />
Message = "/Message=("+F$Extract(1,256,Message)+")"<br />
In the following section, the banner message is altered to fit the circumstances under which the user<br />
logs in.<br />
$ If F$Extract(0,6,FTP_Address) .Eqs. "192.0." Then Goto Intruder<br />
$!<br />
$ DirOptions = "/Directory=Users:[Anonymous]"<br />
$ AccOptions = "/Access=NoWrite"<br />
$ <strong>MultiNet</strong> FTP/Server 'AccOptions' 'DirOptions' 'Message'<br />
$!<br />
$ Logout/Brief<br />
The following section tests the IP address for a known intruder. If the intruder is discovered, control<br />
12-13
Configuring <strong>MultiNet</strong> Services<br />
12-14<br />
is passed to the Intruder label. Next, the FTP server is called to h<strong>and</strong>le the anonymous login, <strong>and</strong><br />
when done, logs out.<br />
1 An offensive stance is taken when an intruder is discovered by running a FINGER of the<br />
intruder's system.<br />
2 INFLAME.TXT is invoked to display a personalized message.<br />
3 The FINGER output is displayed on the intruder's terminal.<br />
4 Mail is sent to the system manager to indicate that an intrusion event occurred.<br />
5 The procedure exits.<br />
$ Intruder:<br />
$ Set NoOn<br />
$ create finger.temp<br />
$ define/user sys$output finger.temp<br />
$ <strong>MultiNet</strong> Finger @'FTP_Address<br />
$!<br />
$ <strong>MultiNet</strong> FTP/Server/Reject/Message=("@Inflame.txt",-<br />
"Thanks for listening ''FTP_Password'@''Ident';<br />
now smile:","","@finger.temp")<br />
$ Mail/Subject="intruder FTP access from<br />
''FTP_Password'@''Ident'" finger.temp system<br />
$ del finger.temp;*<br />
$ logout/Brief<br />
Detecting Intruders with NETCONTROL Accounting<br />
If OpenVMS Accounting is enabled on your system, the following process header fields are set for<br />
network server processes created by the <strong>MultiNet</strong> master server:<br />
• CTL$T_NODENAME is the name of the service being run; for example, FTP, TELNET, or<br />
SMTP.<br />
• CTL$T_REMOTEID is the IP address of the remote client system in dotted-decimal format.<br />
This change can make attempted break-ins to your system easier to track. It also provides a simple<br />
mechanism for tracking remote access to your system.<br />
For example, to determine which users are using TELNET to gain access to your system, you can<br />
issue the comm<strong>and</strong>:<br />
$ ACCOUNTING /NODE=TELNET<br />
Note! The TELNET service complies with RFC-779 <strong>and</strong> provides location information.<br />
Note! IP address <strong>and</strong> port information is displayed in hexadecimal in accounting reports.<br />
The MULTINET NETCONTROL comm<strong>and</strong> features ACCOUNTING <strong>and</strong> DEBUG parameters for<br />
the NETCONTROL (master server) service.<br />
The format of this comm<strong>and</strong> is:
$ MULTINET NETCONTROL NETCONTROL ACCOUNTING n<br />
Configuring <strong>MultiNet</strong> Services<br />
By default (as described above), additional information is provided in the accounting record by the<br />
<strong>MultiNet</strong> server. You can disable this feature by setting n to 0. When set to 1, the remote name <strong>and</strong><br />
service name are added to the ACCOUNTING record.<br />
OpenVMS adds accounting records to a central database each time a special system event occurs.<br />
These events include processes exiting, images (programs) ending, failed logins, <strong>and</strong> so on.<br />
OpenVMS stores a record of the event with information from the process.<br />
One item that OpenVMS includes in the accounting record is the remote node ID, which it gets<br />
from the internals of the process. For most processes, the remote node ID is empty.<br />
When you use SET HOST to create a log for another node, DECnet fills in the remote node ID field<br />
when it creates the process. This information then appears in any accounting record generated for<br />
that process.<br />
If you suspect an intruder has attempted a security breach of your system, you can examine the<br />
accounting records to see who has logged in <strong>and</strong> identify where a login attempt originated.<br />
The master server fills in both the remote node ID <strong>and</strong> the node name field. The remote node ID<br />
field is set to the ASCII representation of the dotted-decimal IP address of the node that requested<br />
the service. The NODE NAME field is set to the service name, such as FTP, TELNET, <strong>and</strong> so on.<br />
The following example shows a LOGIN failure accounting record:<br />
LOGIN FAILURE<br />
-------------<br />
Username: MILLER UIC: [SYSTEM]<br />
Account: Finish time: 23-JUN-2003 21:27:34.47<br />
<strong>Process</strong> ID: 21200124 Start time: 23-JUN-2003 21:27:33.81<br />
Owner ID: Elapsed time: 0 00:00:00.66<br />
Terminal name: <strong>Process</strong>or time: 0 00:00:00.26<br />
Remote node addr: Priority: 4<br />
Remote node name: FTP Privilege : FFFFFFFF<br />
Remote ID: 161.44.128.94Privilege : FFFFFFFF<br />
Remote full name:<br />
Queue entry: Final status code: 00D380FC<br />
Queue name:<br />
Job name:<br />
Final status text:%LOGIN-F-INVPWD, invalid password<br />
Page faults: 166 Direct IO: 7<br />
Page fault reads: 5 Buffered IO: 12<br />
Peak working set: 246 Volumes mounted: 0<br />
Peak page file: 3280 Images executed: 1<br />
Using UCX-Compatible Services under <strong>MultiNet</strong><br />
Services written to be started by the auxiliary server (INETD) in HP TCP/IP Services for<br />
OpenVMS can be configured for use with <strong>MultiNet</strong> by setting the service parameter SET FLAGS<br />
UCX_SERVER.<br />
12-15
Configuring <strong>MultiNet</strong> Services<br />
12-16<br />
Driver enhancements support TeamLinks, POSIX sockets, DCE for OpenVMS, <strong>and</strong> TCP/IP<br />
Services V2.0 keepalive compatibility.<br />
The logical names UCX$INET_HOSTADDR <strong>and</strong> TCPIP$INET_HOSTADDR contain the text<br />
value of the primary interface. <strong>MultiNet</strong> defines UCX$INET_HOSTADDR <strong>and</strong><br />
TCPIP$INET_HOSTADDR automatically, much the same as other TCP/IP Services logical<br />
names. It is defined in START_MULTINET.COM.<br />
Performing a close (dassgn) operation on any TCP/IP Services (BG) device used in a select list<br />
cancels the select operation.<br />
The following logicals are defined for improved UCX compatibility:<br />
TCPIP$BIND_DOMAIN<br />
TCPIP$BIND_SERVER000<br />
TCPIP$BIND_SERVER001 (if more than one BIND server is defined)<br />
TCPIP$BIND_SERVER002 (if more than one BIND server is defined)<br />
TCPIP$DEVICE = BG:<br />
TCPIP$INET_DEVICE = BG:<br />
TCPIP$INET_HOST<br />
TCPIP$INET_HOSTADDR<br />
TCPIP$IPC_SHR = MULTINET:UCX$IPC_SHR<br />
Associating Comm<strong>and</strong> Procedures with Services<br />
You can specify DCL comm<strong>and</strong> procedures (.COM files) as the programs associated with <strong>MultiNet</strong><br />
services. When a service is initiated, <strong>MultiNet</strong> calls LOGINOUT to invoke the user's LOGIN.COM<br />
file <strong>and</strong> the specified DCL comm<strong>and</strong> procedure. When called, the DCL <strong>and</strong> CLI are mapped for use<br />
by the process. This feature gives the system manager a "hook" into a service with an easy-to-create<br />
comm<strong>and</strong> procedure. Note, however, that the comm<strong>and</strong> procedure cannot use SYS$INPUT.<br />
Therefore, do not use the READ SYS$INPUT or INQUIRE comm<strong>and</strong>s in the comm<strong>and</strong> procedure<br />
or a user's LOGIN.COM file.<br />
Make sure that all comm<strong>and</strong> procedures associated with services include a comm<strong>and</strong> that assigns<br />
SYS$INPUT to SYS$OUTPUT as follows:<br />
$ DEFINE /USER SYS$INPUT SYS$OUTUT<br />
This comm<strong>and</strong> must appear immediately before any comm<strong>and</strong> that runs an image, but is only in<br />
effect while the image is running. To ensure the assignment lasts for the duration of the entire<br />
comm<strong>and</strong> procedure, use the above comm<strong>and</strong> without the /USER qualifier:<br />
$ DEFINE SYS$INPUT SYS$OUTPUT<br />
Setting Keepalive Timers<br />
Keepalives are useful when other systems that connect to services provided by your system are<br />
subject to frequent crashing, resets, or power-offs (as with personal computers). TCP/IP<br />
connections must normally pass through a three-way h<strong>and</strong>shake sequence to be closed <strong>and</strong><br />
removed from the connection table. If a connection is open but idle, <strong>and</strong> the remote system is shut
Configuring <strong>MultiNet</strong> Services<br />
down, reset, or crashes, the connection is not closed down until your system attempts to<br />
communicate with the remote system. If an application or service does not attempt to communicate,<br />
a keepalive probe can clean up these dormant connections.<br />
The format for the SET KEEPALIVE-TIMERS function is:<br />
SERVER-CONFIG>SELECT service<br />
SERVER-CONFIG>SET KEEPALIVE-TIMERS idle-time probe-interval probe-count<br />
idle-time is the amount of time, in seconds, that a connection should be idle before the<br />
first keepalive probe is sent.<br />
probe-interval is the number of seconds between keepalive probes (75 seconds minimum).<br />
probe-count is the number of probes sent, with no reply from the other side of the<br />
connection, before the connection is destroyed.<br />
Setting any of these parameters to 0 retains its default setting.<br />
If you set the SO_KEEPALIVE socket option for a service, but you do not explicitly set<br />
KEEPALIVE-TIMERS, the default values are:<br />
• idle-time is 2 hours.<br />
• probe-interval is 75 seconds.<br />
• probe-count is 8.<br />
If you do not set the SO_KEEPALIVE socket option for a service, no keepalive probes are sent for<br />
connections to that service.<br />
Configuring TFTP (Trivial File Transfer Protocol)<br />
The <strong>MultiNet</strong> TFTP service uses st<strong>and</strong>ard Internet TFTP to perform file transfers. Like FTP, TFTP<br />
can also be used to transfer files between a host running OpenVMS <strong>and</strong> a remote host. Unlike FTP,<br />
TFTP cannot perform operations other than transferring files between a local system <strong>and</strong> a remote<br />
one; that is, TFTP cannot list directories, delete files, <strong>and</strong> so on.<br />
TFTP does not perform any authentication when transferring files, so a user name <strong>and</strong> password on<br />
the remote host are not required. In general, only files with world-read (W:R) access in certain<br />
directories on the remote host are available for reading, <strong>and</strong> only certain directories are available<br />
for writing.<br />
Use SERVER-CONFIG to enable TFTP as follows:<br />
$ MULTINET CONFIGURE /SERVER<br />
<strong>MultiNet</strong> Server Configuration Utility 5.4(nnn)<br />
[Reading in configuration from MULTINET:SERVICES.MASTER_SERVER]<br />
SERVER-CONFIG>ENABLE TFTP<br />
SERVER-CONFIG>EXIT<br />
[Writing configuration to MULTINET_COMMON_ROOT:[MULTINET]|<br />
12-17
Configuring <strong>MultiNet</strong> Services<br />
12-18<br />
SERVICES.MASTER_SERVER]<br />
$<br />
Note! The permissions of the accessed directories are not checked before the access is attempted.<br />
Because the TFTP protocol does not specify any user login or validation, the TFTP server<br />
permits only WORLD-readable files to be accessed.<br />
The TFTP server normally requires full file system pathnames, as it operates without a default<br />
directory. If you are using TFTP to download network servers which may not be able to provide full<br />
pathnames, you can set a TFTP default directory using the NET-CONFIG SET TFTP-<br />
DIRECTORY comm<strong>and</strong>.<br />
Note! The TFTP mail option, as defined in RFC-783, is obsolete <strong>and</strong> not supported under the <strong>MultiNet</strong><br />
TFTP server.<br />
Note! The TFTP server supports the BLKSIZE option (RFC 2348) with a minimum of 512 <strong>and</strong><br />
maximum of 8192. For image (octet) transfers the size must be a multiple of 512.<br />
TFTP File Name Translations<br />
The MULTINET:TFTP.FILENAME-TRANSLATIONS file can be used to translate between TFTP<br />
client file names <strong>and</strong> OpenVMS file names, <strong>and</strong> restrict TFTP access to certain files or directories.<br />
The following is an example of a MULTINET:TFTP.FILENAME-TRANSLATIONS file:<br />
#<br />
# TFTP filename fixups for broken TFTP<br />
# loaders & file access restrictions<br />
#<br />
RESTRICT-ACCESS<br />
#<br />
# This is a translation for a single file<br />
#<br />
/Foo/bar.dat SYS$MANAGER:BAR.DAT<br />
#<br />
# These two translations map an entire OpenVMS directory<br />
#<br />
/usr/lib/X11/ncd/configs/* NCD_CONFIGS:[000000]<br />
/ncd_fonts/dw75dpi/* NCD_FONTS:[DW75DPI]<br />
#<br />
# This translation is a file access restriction<br />
#<br />
SYS$SYSROOT:[SYSFONT.DECW.* SYS$SYSROOT:[SYSFONT.DECW.<br />
Use either "#" or "!" to start a comment.<br />
If the keyword RESTRICT-ACCESS is on a line by itself in the file, only files that match one of the<br />
translation specifications are accessible. This restricts TFTP access to specific directory<br />
hierarchies. If this string is not specified in the FTP.FILENAME-TRANSLATIONS file, all<br />
WORLD-readable files are accessible to TFTP clients.<br />
The first translation causes a client reference to /Foo/bar.dat to access the OpenVMS file
Configuring <strong>MultiNet</strong> Services<br />
SYS$MANAGER:BAR.DAT (note that comparisons are not case-sensitive). This is an example of<br />
a translation for a single file.<br />
The next two translations are examples of mapping an entire OpenVMS directory. If the client<br />
reference matches everything up to the asterisk (*), the rest of the client reference is appended to<br />
the translation string. For example, /usr/lib/X11/ncd/configs/foo.dat becomes<br />
NCD_CONFIGS:[000000]FOO.DAT.<br />
The last translation is an example of a file access restriction. The result of the translation is the<br />
same as the client-specified file. The TFTP server disallows subdirectory specifications that include<br />
".-" to ensure you cannot bypass access restrictions by going back up the VMS directory hierarchy.<br />
If the file MULTINET:TFTP.FILENAME-TRANSLATIONS is edited, NETCONTROL must be<br />
used to RELOAD it:<br />
$ MULTINET NETCONTROL TFTP RELOAD<br />
Configuring "R" Services<br />
This section describes configuration of the "R" services, RLOGIN <strong>and</strong> RSHELL.<br />
• RLOGIN provides a means of logging in to another system.<br />
• RSHELL executes comm<strong>and</strong>s remotely on another system.<br />
These services are enabled when <strong>MultiNet</strong> is installed.<br />
The authentication scheme used by RLOGIN <strong>and</strong> RSHELL is based on trusted users <strong>and</strong> trusted<br />
hosts specified in files on the destination system. The MULTINET:HOSTS.EQUIV file (/etc/<br />
hosts.equiv on UNIX systems) grants access on a system-wide basis. The file<br />
SYS$LOGIN:.RHOSTS (~/.rhosts on UNIX systems) can be used by individual users on a system<br />
to grant remote users access to their accounts.<br />
Note! Do not use IP addresses in the HOSTS.EQUIV or .RHOSTS file.<br />
Access control requirements differ between RLOGIN <strong>and</strong> other "R" services. RLOGIN requires<br />
both NETWORK <strong>and</strong> LOCAL access, while RSHELL, REXEC, RMT, <strong>and</strong> RCP only require<br />
NETWORK access.<br />
If you remove a user's NETWORK access, the user can still log in until their RLOGIN cache entry<br />
expires or is flushed. However, if you remove that user's LOCAL access, the user is denied access<br />
immediately, even if they have a current cache entry.<br />
The format of an entry in the HOSTS.EQUIV or .RHOSTS file is:<br />
hostname [username]<br />
If an entry containing only the host name is in the file MULTINET:HOSTS.EQUIV (or /etc/<br />
hosts.equiv) on the target system, all users on hostname with the same user name as on the target<br />
system can access the target without specifying a user name or password.<br />
Both MULTINET:HOSTS.EQUIV <strong>and</strong> SYS$LOGIN:.RHOSTS accept "wildcards" in host names.<br />
For example, to specify all hosts at FLOWERS.COM, include the following line:<br />
12-19
Configuring <strong>MultiNet</strong> Services<br />
12-20<br />
*.FLOWERS.COM<br />
If an entry in SYS$LOGIN:.RHOSTS or a user's ~/.rhosts file contains the following format, the<br />
specified username on the hostname system can access the user's account on the target system<br />
without specifying a password (or a user name if the user names are identical on the two systems):<br />
hostname username<br />
The next example shows a HOSTS.EQUIV file on the host SALES.FLOWERS.COM that gives<br />
users on SALES.FLOWERS.COM RLOGIN <strong>and</strong> RSHELL access to their own accounts on the<br />
system (this is allowed by the first two entries).<br />
In this example, FLOWERS.COM <strong>and</strong> BUBBA.FLOWERS.COM are identified (in the last two<br />
entries) as trusted hosts, allowing any user on either of these systems to have RLOGIN <strong>and</strong><br />
RSHELL access to the account of the same name on SALES.FLOWERS.COM without specifying<br />
a user name or password.<br />
localhost<br />
sales.flowers.com<br />
flowers.com<br />
bubba.flowers.com<br />
This example shows a .RHOSTS file that belongs to a user on SALES.FLOWERS.COM:<br />
flowers.com system<br />
unix.flowers.com root<br />
The first entry grants access to the user's account on the host SALES.FLOWERS.COM to user<br />
SYSTEM on host FLOWERS.COM. The second entry grants access to the user's account to user<br />
"root" on host UNIX.FLOWERS.COM. Hence, either of these two remote users can use RLOGIN<br />
or RSHELL to access the user's account on SALES.FLOWERS.COM without specifying a<br />
password.<br />
Note! When specifying a user in any of the authentication files (particularly on the UNIX operating<br />
system), make sure to specify the user name in the correct case. "ROOT" <strong>and</strong> "root" are treated<br />
as different user names under case-sensitive systems such as the UNIX Operating System.<br />
The host initiating the RLOGIN or RSHELL request must be listed in the destination host's<br />
hostname database or must be resolvable within the Domain Name System (DNS), if domain<br />
name service is enabled. If the destination host cannot determine the initiating host's name from<br />
the IP address in the connection request, it rejects the request.<br />
The RLOGIN server parameters INCLUDE-AUTHENTICATION-INDICATION, INCLUDE-<br />
PORT-NUMBER <strong>and</strong> INCLUDE-SEND-LOCATION cause an authentication indication, a port<br />
number, or a send location (or all three) to be placed in the TT_ACCPORTNAM field of the NTY<br />
device control block. These parameters are disabled by default. To enable them, use SERVER-<br />
CONFIG (MULTINET CONFIGURE /SERVER).<br />
Disabling the St<strong>and</strong>ard Error RSHELL Connection
Configuring <strong>MultiNet</strong> Services<br />
The RSHELL /NOSTDERR option disables creation of the connection from the remote RSHELL<br />
server back to the client for "st<strong>and</strong>ard error" output. This allows you to use the RSHELL comm<strong>and</strong><br />
through firewalls that do not allow TCP connections that originate from outside the local network.<br />
When you use this option, the remote RSHELL server sends messages to the "st<strong>and</strong>ard output"<br />
connection, so error messages are still displayed.<br />
RLOGIN <strong>and</strong> RSHELL Authentication Cache<br />
The <strong>MultiNet</strong> RLOGIN <strong>and</strong> RSHELL servers cache the contents of the .RHOSTS <strong>and</strong><br />
HOSTS.EQUIV files <strong>and</strong> authentication information from the SYSUAF file in memory for ten<br />
minutes to improve performance. This means that changes made to these files may not be<br />
noticed by the network immediately. Use the following comm<strong>and</strong> to flush the cache before the<br />
timeout period:<br />
$ MULTINET NETCONTROL RLOGIN FLUSH<br />
You can use SERVER-CONFIG to change the timeout on these caches by setting the RHOSTS-<br />
TIMEOUT or UAF-TIMEOUT parameters for RSHELL, RLOGIN, or REXEC. The default value<br />
for these parameters is 600 seconds. Setting a value of 0 (zero) disables the cache. Because the "R"<br />
services share a common authentication cache, you need only set these parameters for one service.<br />
If you set different values for different servers, only one of the values is used, so set these<br />
parameters on only one server. The following example shows how to set the timeout parameter.<br />
$ MULTINET CONFIGURE/SERVER<br />
<strong>MultiNet</strong> Server Configuration Utility 5.4(nnn)<br />
[Reading in configuration from MULTINET:SERVICES.MASTER_SERVER]<br />
SERVER-CONFIG>SELECT RLOGIN<br />
[The Selected SERVER entry is now RLOGIN]<br />
SERVER-CONFIG>SET PARAMETERS<br />
Delete parameter "rhosts-timeout 0" ? [NO] YES<br />
[Parameter "rhosts-timeout 0" deleted from RLOGIN]<br />
You can now add new parameters for RLOGIN. An empty line terminates.<br />
Add Parameter: RHOSTS-TIMEOUT 3600<br />
Add Parameter: UAF-TIMEOUT 60<br />
Add Parameter:<br />
[Service specific parameters for RLOGIN changed]<br />
SERVER-CONFIG><br />
The UAF access type specification for RSHELL access is NETWORK. <strong>MultiNet</strong> checks all access<br />
times.<br />
The MULTINET NETCONTROL RLOGIN SHOW comm<strong>and</strong> shows the time the information read<br />
in from specific .RHOSTS files will expire. This is the time remaining until the .RHOSTS file is<br />
read in again.<br />
Note! A non-existent .RHOSTS file is treated the same as an empty .RHOSTS file.<br />
Controlling RSHELL <strong>and</strong> REXEC <strong>Process</strong> Deletion<br />
If a client closes a connection before the remote process finishes, the RSHELL <strong>and</strong> REXEC servers<br />
12-21
Configuring <strong>MultiNet</strong> Services<br />
12-22<br />
may delete the process. This behavior affects PC-based X servers that use REXEC to launch X<br />
applications.<br />
This default action can be changed by using SERVER-CONFIG to SET PARAMETER as in the<br />
following example:<br />
$ multinet configure /server<br />
. . . startup messages . . .<br />
SERVER-CONFIG>select rshell<br />
[The Selected SERVER entry is now RSHELL]<br />
SERVER-CONFIG>set parameter<br />
You can now add new parameters for RSHELL. An empty line terminates.<br />
Add Parameter: ? parameter, one of the following:<br />
DEBUG DISALLOW-RHOSTS DISALLOW-X-DISPLAY<br />
PREVENT-PROCESS-DELETION RHOSTS-TIMEOUT UAF-TIMEOUT<br />
or confirm with carriage return<br />
Add Parameter: PREVENT-PROCESS-DELETION<br />
Add Parameter:<br />
[Service specific parameters for RSHELL changed]<br />
SERVER-CONFIG><br />
Controlling Automatic WSA Device Creation<br />
By default, <strong>MultiNet</strong> "R" services create WSA devices <strong>and</strong> set displays to simplify setup for X<br />
client users, allowing users to run X clients without explicitly issuing the SET DISPLAY<br />
comm<strong>and</strong>. To disable this feature, set DISALLOW-X-DISPLAY with the SET PARAMETER<br />
comm<strong>and</strong> (in SERVER-CONFIG) or with Set Service Specific Options (in MENU-CONFIG).<br />
Inhibiting Output in Comm<strong>and</strong> Procedures for "R" Services<br />
Problems arise when remote users log into systems using a login comm<strong>and</strong> procedure<br />
(SYS$LOGIN:SYLOGIN.COM or SYS$MANAGER:SYLOGIN.COM) that requires screen<br />
output. To inhibit this behavior, make sure the following lines are included at the top of all login<br />
comm<strong>and</strong> procedures:<br />
$ VERIFY = 'F$VERIFY(0) ! Turn off verify without echoing<br />
$ IF F$MODE() .EQS. "OTHER" THEN EXIT ! If a DETACHED process (RSHELL)<br />
. . .<br />
$ IF VERIFY THEN SET VERIFY ! If a batch job, may want to turn<br />
! verify back on.<br />
Permitting "R" Service Access to Captive or Restricted Accounts<br />
In general, "R" services should not be permitted access to captive or restricted OpenVMS accounts.<br />
However, if your users depend on such access, define the following logical to allow access to these<br />
types of accounts:
$ DEFINE/SYSTEM/EXEC MULTINET_RSHELL_ALLOW_CAPTIVE "TRUE"<br />
Configuring the TELNET Server for Kerberos V5<br />
Enable the Kerberos V5 functionality with the following comm<strong>and</strong>s:<br />
Configuring <strong>MultiNet</strong> Services<br />
$ MULTINET CONFIGURE /SERVER<br />
... startup messages...<br />
SERVER-CONFIG>SELECT TELNET<br />
(The Selected SERVER entry is now TELNET)<br />
SERVER-CONFIG>SET PROGRAM MULTINET:LOADABLE_KTELNET_CONTROL<br />
(Program to run for TELNET set to MULTINET:LOADABLE_KTELNET_CONTROL)<br />
SERVER-CONFIG>SET INIT Merge_Image<br />
(Init action of TELNET set to Merge_Image)<br />
After the values are saved <strong>and</strong> the Master Server is restarted, Kerberos 5 functionality is available.<br />
The authentication behavior on the TELNET Server is determined by the system logical<br />
MULTINET_AUTH_TELNET. It has 3 possible values: ALLOWED, REQUIRED, <strong>and</strong><br />
DISABLED.<br />
Note! Not all configuration options are available with the Kerberos V5 Server. While the Kerberos V5<br />
Server is started <strong>and</strong> terminated by the Master Server, it runs as a separate process. It uses a<br />
limited subset of server control options. server control options currently supported are: INIT,<br />
Program, Priority, <strong>and</strong> Log-Accepts. To set the SOCKET-PORT option, use the system logical<br />
MULTINET_TELNET_PORT.<br />
The default is DISABLED; a login prompt will result. When the value is REQUIRED, any user<br />
without a valid Kerberos V5 Ticket Granting Ticket (TGT) will be rejected. Finally, if the value is<br />
ALLOWED, the user can log-in to the server with or without a valid Kerberos V5 TGT (with a<br />
login prompt resulting if no TGT).<br />
For example, to force authentication by any remote telnet client, set the logical as follows:<br />
$ DEFINE/SYSTEM MULTINET_TELNET_AUTH REQUIRED<br />
Note! Kerberos V5 requires Kerberos for HP OpenVMS (Version 2.0), which is available from the HP<br />
Web site. The Kerberos V5 applications can also run with any Kerberos V5-compliant Key<br />
Distribution Center (KDC) software. Kerberos V5 applies to VMS V7.0 or higher, <strong>and</strong> VMS<br />
Alpha V7.2-2 or higher.<br />
Configuring the TELNET Server for NTY Devices<br />
The TELNET server parameters INCLUDE-AUTHENTICATION-INDICATION, INCLUDE-<br />
PORT-NUMBER <strong>and</strong> INCLUDE-SEND-LOCATION cause an authentication indication, a port<br />
number, or a send location (or all three) to be placed in the TT_ACCPORNAM field of the NTY<br />
device control block. These parameters are disabled by default. To enable them, use SERVER-<br />
CONFIG (MULTINET CONFIGURE /SERVER).<br />
Note! These parameters will not function with the Kerberos 5 Telnet server, as it uses pty devices.<br />
12-23
Configuring <strong>MultiNet</strong> Services<br />
12-24<br />
Enable these parameters with the following comm<strong>and</strong>s:<br />
$ MULTINET CONFIGURE /SERVER<br />
. . . startup messages . . .<br />
SERVER-CONFIG>SELECT TELNET<br />
[The Selected SERVER entry is now TELNET]<br />
SERVER-CONFIG>SET PARAMETERS<br />
You can now add new parameters for TELNET. An empty line terminates.<br />
Add Parameter: INCLUDE-AUTHENTICATION-INDICATION<br />
Add Parameter: INCLUDE-PORT-NUMBER<br />
Add Parameter: INCLUDE-SEND-LOCATION<br />
Add Parameter: RETURN<br />
[Service specific parameters for TELNET changed]<br />
SERVER-CONFIG><br />
If these parameters are defined, the appropriate information is stored in the TT_ACCPORNAM<br />
field.<br />
These parameters appear in the Remote Port Info field of the SHOW TERMINAL <strong>and</strong> SHOW<br />
USERS comm<strong>and</strong> output. The INCLUDE-SEND-LOCATION parameter enables support for RFC<br />
779 in the Telnet server. In the following example, the port number is 1021, <strong>and</strong> the /AUTH<br />
qualifier indicates that WHORFIN used authentication to log in from LOT49.FLOWERS.COM.<br />
$ SHOW TERMINAL<br />
Terminal: _VTA84: Device_Type: VT100 Owner: WHORFIN<br />
Physical terminal: _NTY3:<br />
Remote Port Info: LOT49.FLOWERS.COM/1021/AUTH<br />
Input: 9600 LFfill: 0 Width: 80 Parity: None<br />
Output: 9600 CRfill: 0 Page: 24<br />
Terminal Characteristics:<br />
Interactive Echo Type_ahead No Escape<br />
No Hostsync TTsync Lowercase Tab<br />
Wrap Scope Remote No Eightbit<br />
No Broadcast No Readsync No Form Fulldup<br />
No Modem No Local_echo Autobaud Hangup<br />
No Brdcstmbx No DMA Altypeahd Set_speed<br />
No Commsync Line Editing Insert editing No Fallback<br />
No Dialup No Secure server Disconnect No Pasthru<br />
No Syspassword No SIXEL Graphics No Soft Characters No Printer Port<br />
Numeric Keypad ANSI_CRT No Regis No Block_mode<br />
Advanced_video No Edit_mode DECEC_CRT2<br />
No DEC_CRT3 No DEC_CRT4 VMS Style Input<br />
$<br />
Authentication information is not valid if someone uses the LOGOUT /NOHANG comm<strong>and</strong> <strong>and</strong><br />
then logs in again.
Configuring SYSLOG<br />
Configuring <strong>MultiNet</strong> Services<br />
SYSLOG receives messages from remote IP nodes that have been configured to forward SYSLOG<br />
messages to the <strong>MultiNet</strong> host. SYSLOG then directs the messages to a file, terminal, or OPCOM.<br />
In addition, messages can be forwarded elsewhere. 1<br />
SYSLOG is provided with <strong>MultiNet</strong>, <strong>and</strong> you can enable it with SERVER-CONFIG. By default,<br />
when <strong>MultiNet</strong> is installed, SYSLOG is disabled.<br />
Note! Messages generated by the MULTINET_SERVER process are not sent via SYSLOG, but are<br />
instead directed to OPCOM. OPCOM copies the messages to the<br />
SYS$MANAGER:OPERATOR.LOG file.<br />
With SYSLOG enabled, you can determine the precise output of message classes <strong>and</strong> specify how<br />
priority messages are h<strong>and</strong>led. Message classes <strong>and</strong> facility keywords are described in Table 12-2.<br />
Table 12-2 SYSLOG Message Classes<br />
Message Type Facility Keyword<br />
Authorization messages auth<br />
BOOTP messages bootpd<br />
Daemon (background processes) messages daemon<br />
Domain Name System messages named<br />
GATED (gateway messages) gated<br />
Kernel messages kern<br />
LPR messages lpr<br />
mesages from local facilities local0 - local7<br />
NEWS messages news<br />
Mail utility messages mail<br />
Network Time Protocol (NTP) messages ntpd<br />
PPP messages ppp<br />
Security services messages security<br />
Messages generated by user programs user<br />
1. Forwarding messages are specified with the Forwarding comm<strong>and</strong> in the SYSLOG configuration<br />
file.<br />
12-25
Configuring <strong>MultiNet</strong> Services<br />
Enabling SYSLOG<br />
12-26<br />
Enable SYSLOG with SERVER-CONFIG <strong>and</strong> modify the file<br />
MULTINET:SYSLOG.CONFIGURATION. Enable SYSLOG as follows:<br />
$ MULTINET CONFIGURE /SERVER<br />
<strong>MultiNet</strong> Server Configuration Utility 5.4(nnn)<br />
[Reading in configuration from MULTINET:SERVICES.MASTER_SERVER]<br />
SERVER-CONFIG>ENABLE SYSLOG<br />
SERVER-CONFIG>EXIT<br />
[Writing configuration to MULTINET_COMMON_ROOT:[MULTINET]<br />
SERVICES.MASTER_SERVER]<br />
$<br />
Add entries to the configuration file in the following form: selector action<br />
Separate the fields with tabs. The selector is a semicolon-separated list of priority specifications in<br />
this form: facility.level[;facility.level]<br />
• facility is a keyword (see Table 12-2).<br />
Both facility <strong>and</strong> level are generated by applications on the remote host. The action specifies how<br />
SYSLOG responds to these messages. If the applications on the remote host do not write messages<br />
to SYSLOG, they are not displayed.<br />
Possible values for facility are auth, bootpd, daemon, gated, kern, mail, named, ntpd, security,<br />
user, <strong>and</strong> asterisk (*). (Specify an asterisk to include all messages written to SYSLOG of the<br />
specified priority.)<br />
Each facility represents a different source of system message. The level is the priority level for each<br />
message. Possible values ranging from most severe to least severe are panic, emerg, alert, crit,<br />
err, error, warn, warning, notice, info, debug, <strong>and</strong> asterisk (*). (Specify an asterisk to include all<br />
messages for the specified level.)<br />
Examples of facility.level statements are:<br />
Example Description<br />
*.debug All debug messages<br />
ntp.info Network Time Protocol information messages<br />
gated.warn GATED warning messages<br />
The action is the destination of the message. Possible message destinations include:<br />
Destination Specified As Example<br />
Broadcast<br />
(RWALL)<br />
Asterisk *
Destination Specified As Example<br />
Console Use OPCOM /OPCOM<br />
Configuring <strong>MultiNet</strong> Services<br />
File Precede the fully specified file name with a slash /USERS:<br />
[HOLMES]OUTFILE.<br />
Forwarding Precede the IP address or host name with an at sign<br />
(@)<br />
Each message h<strong>and</strong>led by SYSLOG includes a time stamp, the facility name at the beginning of the<br />
message, <strong>and</strong> a newline character at the end of the message.<br />
Comments are entered in the SYSLOG.CONFIGURATION file as pound signs (#) at the beginning<br />
of the line.<br />
SYSLOG Configuration File Examples<br />
Some example SYSLOG.CONFIGURATION file entries are shown below:<br />
@192.92.38.1<br />
OPCOM Precede with a slash /OPCOM<br />
Terminal Precede the terminal name with a slash <strong>and</strong> end name<br />
with a colon<br />
/TXA3:<br />
# SYSLOG.CONFIGURATION examples<br />
#<br />
# Each entry is tab-separated <strong>and</strong> has this form:<br />
# selector action<br />
#<br />
*.debug /OPCOM<br />
kern.panic;kern.warning /OPCOM<br />
syslog.info /users:[treefrog]syslog_info_messages.<br />
*.error @forwardhost<br />
user.* /users:[treefrog]all_user_messages.<br />
12-27
Configuring <strong>MultiNet</strong> Services<br />
12-28
This chapter describes how to configure network routing.<br />
Routing Methods Overview<br />
Configuring Static IP Routes<br />
Routing Methods Overview<br />
<strong>MultiNet</strong> provides two routing methods:<br />
The IP routing table<br />
(also known as static<br />
routing)<br />
The GATED<br />
dynamic gateway<br />
routing daemon<br />
Chapter 13<br />
Configuring Network Routing<br />
Specifies the IP addresses of destinations <strong>and</strong> gateways for your<br />
communications. Use static routing when you have a very simple<br />
network, or a moderately complex network with a configuration that<br />
does not change often. Static routing is simple to configure <strong>and</strong> use.<br />
H<strong>and</strong>les multiple routing protocols <strong>and</strong> replaces ROUTED <strong>and</strong> EGPUP.<br />
GATED is used when node or gateway reconfigurations occur<br />
frequently, where the network geometry changes as networks come <strong>and</strong><br />
go, or when dynamic routing protocols are being used for other reasons.<br />
GATED is more difficult to configure <strong>and</strong> use, but is much more<br />
flexible than static routing <strong>and</strong> provides a much greater selection of<br />
features.<br />
Configuring Static IP Routes<br />
The <strong>MultiNet</strong> SET /ROUTE comm<strong>and</strong> specifies static IP routing, including the default route. This<br />
comm<strong>and</strong> is normally invoked automatically by the network startup comm<strong>and</strong> file generated by the<br />
<strong>MultiNet</strong> Network Configuration Utility (NET-CONFIG).<br />
Note! If the GATED gateway routing service is enabled, it takes full control of your routing tables <strong>and</strong><br />
removes any statically-defined routes that are not also specified in the GATED configuration.<br />
13-1
Configuring Network Routing<br />
Adding Static Routes<br />
13-2<br />
You can configure a static default route using NET-CONFIG.<br />
You can add additional static routes by creating the comm<strong>and</strong> file<br />
MULTINET:LOCAL_ROUTES.COM, which is executed as part of the network startup.<br />
An example of the comm<strong>and</strong> for configuring a static route is:<br />
$ MULTINET SET/ROUTE/ADD=(DEST=DEFAULT,GATE=192.0.0.1)<br />
Changing the Default Route<br />
To change the default route, first delete the current default route, then add the new one:<br />
$ MULTINET SET/ROUTE/DELETE=(DEST=DEFAULT,GATE=IP address)<br />
$ MULTINET SET/ROUTE/ADD=(DEST=DEFAULT,GATE=IP address)<br />
Using GateD<br />
The Gateway Routing Daemon (GateD) manages multiple routing protocols, including the Routing<br />
Information Protocol (RIP), Local Network Protocol (HELLO), Router Discovery Protocol, Open<br />
Shortest Path First (OSPF) protocol, Exterior Gateway Protocol (EGP), <strong>and</strong> Border Gateway<br />
Protocol (BGP).<br />
Using GateD, the network administrator can control the flow of routing information through a<br />
configuration language. Once you start GateD, it makes routing decisions based on the data<br />
gathered by the routing protocols. If routing using GateD, use GateD exclusively.<br />
GateD allows you to control importing <strong>and</strong> exporting routing information by:<br />
• Individual protocol<br />
• Source <strong>and</strong> destination Autonomous System (AS)<br />
• Source <strong>and</strong> destination interface<br />
• Previous hop router<br />
• Specific destination address<br />
You can assign preference levels for different combinations of imported routing information by<br />
using a flexible masking capability. In <strong>MultiNet</strong>, the name of the GateD process is GateD.<br />
GateD Configuration File<br />
<strong>MultiNet</strong> stores GateD configuration information in the MULTINET:GATED.CONF file. You must<br />
create this file before you can use GateD. For details on GateD configuration, see GateD<br />
Configuration Statements.
GateD Route Selection<br />
Configuring Network Routing<br />
GateD determines the "best" route using preference values set for each protocol or peer. Each route<br />
has a single associated preference value, even though you can set preferences at many places in the<br />
GATED.CONF file. The last (or most specific) preference value is the one GateD uses. Some<br />
protocols have a secondary preference, sometimes called a "tie-breaker."<br />
The factors GateD uses in determining "best" routes include:<br />
• The route with the numerically smallest preference value is preferred.<br />
• For two routes with equal preferences, the route with the numerically smallest preference2<br />
(the "tie-breaker") is preferred.<br />
• A route learned from an interior gateway protocol is preferred over a route learned from an<br />
exterior gateway protocol. Least preferred is a route learned indirectly by an interior protocol<br />
from an exterior protocol.<br />
• If Autonomous System (AS) path information is available, it helps determine the most preferred<br />
route:<br />
– A route with an AS path is preferred over one without an AS path.<br />
– If the AS paths <strong>and</strong> origins are identical, the route with the lower metric is preferred.<br />
– A route with an AS path origin of interior protocol is preferred over one with an origin of<br />
exterior protocol. Least preferred is an AS path with an unknown origin.<br />
– A route with a shorter AS path is preferred.<br />
• If both routes are from the same protocol <strong>and</strong> AS, the one with the lower metric is preferred.<br />
• The route with the lowest numeric next-hop address is used.<br />
Preference values range from 0 to 255. Table 13-1 summarizes the default preference values for<br />
routes learned in various ways.<br />
Table 13-1 Default Routing Preference Values Defined by GateD Statements<br />
Default preference value Is defined by ... statement<br />
0 interface<br />
10 ospf<br />
20 gendefault (internally generated default)<br />
30 redirect<br />
40 kernel (routes learned using the socket route)<br />
60 static<br />
90 hello<br />
100 rip<br />
110 (point-to-point interfaces)<br />
13-3
Configuring Network Routing<br />
Starting <strong>and</strong> Stopping GateD<br />
13-4<br />
Table 13-1 Default Routing Preference Values Defined by GateD Statements (Continued)<br />
120 interfaces (routes to interfaces that are down)<br />
130 aggregate/generate<br />
150 ospf (AS external)<br />
170 bgp<br />
200 egp<br />
After creating the MULTINET:GATED.CONF file, you need to stop <strong>and</strong> restart GateD. Follow<br />
these steps:<br />
1 Log in as the system manager.<br />
2 Stop the GateD process by entering: MULTINET GATED/STOP<br />
3 Restart the GateD process by entering: @MULTINET:START_SERVER<br />
Note! It is not necessary to stop <strong>and</strong> restart GateD to get it to read a new MULTINET:GATED.CONF<br />
file, just use MULTINET GATED/LOAD.<br />
Configuring GATED<br />
Use the comm<strong>and</strong>s in Table 13-2 to manage the GateD process. To use these comm<strong>and</strong>s, you need<br />
OPER or SYSPRV privilege.<br />
Table 13-2 GateD Comm<strong>and</strong>s<br />
Comm<strong>and</strong> Description<br />
MULTINET GATED/CHECK (file) Checks a GateD configuration file<br />
for syntax errors<br />
MULTINET GATED/DUMP Dumps the state of the GateD process<br />
to a file<br />
MULTINET GATED/LOAD Loads a new GateD configuration<br />
file<br />
MULTINET GATED/SET/TRACE Controls tracing in GateD<br />
MULTINET GATED/SHOW/OSPF/ADVERTISE Shows OSPF link state<br />
advertisements
Table 13-2 GateD Comm<strong>and</strong>s (Continued)<br />
Comm<strong>and</strong> Description<br />
Configuring Network Routing<br />
MULTINET GATED/SHOW/OSPF/AS Shows the AS external database<br />
entries<br />
MULTINET GATED/SHOW/OSPF/DESTINATIONS Shows the list of destinations <strong>and</strong><br />
their indices<br />
MULTINET GATED/SHOW/OSPF/ERRORS Shows the OSPF error log<br />
MULTINET GATED/SHOW/OSPF/HOPS Shows the set of next hops for the<br />
OSPF router queried<br />
MULTINET GATED/SHOW/OSPF/INTERFACES Shows all configured interfaces for<br />
OSPF<br />
MULTINET GATED/SHOW/OSPF/LOG Shows the cumulative OSPF log of<br />
input/output statistics<br />
MULTINET GATED/SHOW/OSPF/ NEIGHBORS Shows all OSPF routing neighbors<br />
MULTINET GATED/SHOW/OSPF/ROUTING Shows the OSPF routing table<br />
MULTINET GATED/SHOW/OSPF/STATE Shows the link state database (except<br />
AS Externals)<br />
MULTINET GATED/SHOW/RIP Queries Routing Information<br />
Protocol (RIP) gateways<br />
MULTINET GATED/SHOW/TRACE Shows tracing in GateD<br />
MULTINET GATED/STOP Stops the GateD process<br />
MULTINET GATED/TOGGLE_TRACING Toggles tracing in GateD<br />
MULTINET GATED/UPDATE_INTERFACES Rescans the GateD network<br />
interfaces<br />
13-5
Configuring Network Routing<br />
GateD Configuration Statements<br />
13-6<br />
The GateD configuration file is MULTINET:GATED.CONF. This file must be present for the<br />
GateD process to run. The structure of the GateD configuration language is similar to C. The<br />
configuration file consists of statements terminated by a semicolon (;). Statements consist of tokens<br />
separated by a space. This structure simplifies identification of the associated parts of the<br />
configuration.<br />
You can include comment lines either by beginning them with a pound sign (#) or delimiting them<br />
with slash asterisk (/*) <strong>and</strong> asterisk slash (*/). The configuration file consists of the following<br />
sections, which reflect the order in which the statements, if used, must appear:<br />
Directives (%directory, %include)<br />
Statements traceoptions<br />
options<br />
interfaces<br />
Definitions autonomous-system<br />
routeid<br />
martians<br />
Protocols rip<br />
help redirect router-discovery server/client<br />
bgp<br />
ospf<br />
Static routes static<br />
Control import<br />
export<br />
aggregate<br />
generate
Directives<br />
Directive statements include:<br />
• %directory<br />
• %include<br />
Directives Configuring Network Routing<br />
Directive statements provide special instructions to the parser. They do not relate to the protocol<br />
configuration <strong>and</strong> can occur anywhere in GATED.CONF. They also end in a new line instead of a<br />
semicolon (;) like the other statements.<br />
Format<br />
%directory "directory"<br />
Defines the directory where the include files go if you do not fully specify directory as part of the<br />
filename in the %include statement. Does not actually change the current directory, but simply<br />
applies the directory prefix.<br />
%include "filename"<br />
Identifies an include file. GateD includes the contents of the file in GATED.CONF at the point<br />
where the %include appears. If you do not fully specify the filename, it is relative to the directory<br />
defined in %directory. The %include directive causes GateD to parse the specified file completely<br />
before resuming. You can nest up to ten levels of include files.<br />
13-7
Configuring Network Routing traceoptions<br />
traceoptions<br />
The traceoptions statement controls tracing options. You can configure GateD tracing options<br />
at many levels. These include file specifications, control options, <strong>and</strong> global <strong>and</strong> protocol-specific<br />
tracing options.<br />
13-8<br />
Lower levels of statements inherit tracing options from the next higher level, unless overridden.<br />
Format<br />
traceoptions [ "tracefile" [replace] [size size[k | m] files files]]<br />
[nostamp] traceoptions [except traceoptions] | none ;<br />
Options <strong>and</strong> Parameters<br />
"tracefile"<br />
File to receive tracing information. If this filename is not fully specified, GateD creates it in the<br />
directory where you started GateD.<br />
replace<br />
Replaces an existing file. The default is to append to an existing file.<br />
size size[k | m] files files<br />
Limits the maximum size, in k or m or the files indicated, of the trace file (the minimum is 10k).<br />
When the file reaches size, GateD creates a new version.<br />
nostamp<br />
Control option which means not to prepend a timestamp to all trace lines. The default is to prepend<br />
a timestamp.<br />
traceoptions<br />
Specific to each protocol statement. Note that these global options may not apply to all protocols.<br />
except traceoptions<br />
Disables more specific trace options after enabling broader ones.<br />
none<br />
Turns off all tracing for the protocol or peer.
Table 13-3 Global Trace Options<br />
Option Description<br />
traceoptions Configuring Network Routing<br />
adv For debugging: traces the allocation <strong>and</strong> freeing of policy blocks.<br />
all Turns on the general, normal, policy, route, state, task, <strong>and</strong> timer<br />
options.<br />
general Shorth<strong>and</strong> for specifying both the normal <strong>and</strong> route options.<br />
iflist Traces reading of the kernel interface. Useful to specify this with the<br />
-t option on the comm<strong>and</strong> line since the first interface scan occurs before reading<br />
the configuration file.<br />
normal Traces normal protocol occurrences (abnormal protocol occurrences are always<br />
traced).<br />
parse For debugging: traces the lexical analyzer <strong>and</strong> parser.<br />
policy Traces how protocol <strong>and</strong> user-specified policy apply to routes imported <strong>and</strong><br />
exported.<br />
route Traces routing table changes for routes installed by the protocol or peer.<br />
state Traces state machine transitions in the protocols.<br />
symbols Traces symbols read from the kernel at startup. The only useful way to specify this<br />
level of tracing is to use the -t option on the comm<strong>and</strong> line, since GateD reads the<br />
symbols from the kernel before parsing the configuration file.<br />
task Traces system interface <strong>and</strong> processing associated with the protocol or peer.<br />
timer Traces timer usage by the protocol or peer.<br />
13-9
Configuring Network Routing options<br />
options<br />
The options statements let you specify some global options. If used, options must appear before any<br />
other type of configuration statement in GATED.CONF.<br />
Format<br />
options [nosend]<br />
[noresolv]<br />
[gendefault [preference value][gateway host] ]<br />
[syslog [upto] loglevel]<br />
[mark time] ;<br />
Options <strong>and</strong> Parameters<br />
13-10<br />
nosend<br />
Does not send packets. Makes it possible to run GateD on a live network to test protocol<br />
interactions, without actually participating in the routing protocols. You can examine the packet<br />
traces in the GateD log to verify that GateD functions properly. Most useful for RIP <strong>and</strong> HELLO.<br />
Does not yet apply to BGP, <strong>and</strong> not useful with EGP <strong>and</strong> OSPF.<br />
noresolv<br />
Does not resolve symbolic names into IP addresses. By default, GateD uses the<br />
gethostbyname() <strong>and</strong> getnetbyname() library calls that usually use the Domain Name<br />
System (DNS) instead of the host’s local host <strong>and</strong> network tables. If there is insufficient routing<br />
information to send DNS queries, GateD deadlocks during startup. Use this option to prevent these<br />
calls.<br />
Note! When you use this option, symbolic names cause configuration file errors.<br />
gendefault [preference value] [gateway host]<br />
nogendefault<br />
Creates a default route with the special protocol default when a BGP or EGP neighbor is up. You<br />
can disable this for each BGP/EGP group with the nogendefault option. By default, this route<br />
has a preference value of 20. This route is normally not installed in the kernel forwarding table;<br />
it is only present for announcement to other protocols. The gateway option installs the default<br />
route in the kernel forwarding table with a next hop of the gateway defined.<br />
Note! Using more general options is preferred to using gendefault. (See aggregate for details on<br />
the generate statement.)<br />
syslog [upto] loglevel<br />
Amount of data GateD logs to OPCOM. OpenVMS systems map UNIX syslog logging levels to<br />
OPCOM severity levels. The default is syslog upto info. The mapping of syslog to OPCOM<br />
logging levels appears in Table 13-4.
options Configuring Network Routing<br />
mark time<br />
GateD sends a message to the trace log at the specified time interval. Can be one method of<br />
determining if GateD is still running.<br />
Table 13-4 Mapping of UNIX syslog Levels to OpenVMS OPCOM Severity Levels<br />
syslog log level Is equivalent to OPCOM level...<br />
emerg FATAL<br />
alert FATAL<br />
crit FATAL<br />
err ERROR<br />
warning WARNING<br />
notice INFORMATIONAL<br />
info (default) INFORMATIONAL<br />
debug INFORMATIONAL<br />
Example<br />
# generate a default route when peering with an EGP or BGP neighbor:<br />
#<br />
options gendefault ;<br />
13-11
Configuring Network Routing interfaces<br />
interfaces<br />
An interface is the connection between a router <strong>and</strong> one of its attached networks. Specify a physical<br />
interface by interface name, IP address, or domain name. Multiple reference levels in the<br />
configuration language let you identify interfaces using wildcards (only the device driver part of<br />
the name, to match any unit number), interface type names, or addresses.<br />
Format<br />
13-12<br />
interfaces {<br />
options<br />
[strictinterfaces]<br />
[scaninterval time] ;<br />
interface list<br />
[preference value]<br />
[down preference value]<br />
[passive]<br />
[simplex]<br />
[reject]<br />
[blackhole] ;<br />
define address<br />
[broadcast address] | [pointtopoint address]<br />
[netmask mask]<br />
[multicast] ;<br />
} ;<br />
Options Clause<br />
options<br />
[strictinterfaces]<br />
[scaninterval time] ;<br />
strictinterfaces<br />
Makes it a fatal error to use reference interfaces not present when you start GateD or that are not<br />
part of the define parameter. Normally, GateD issues a warning message <strong>and</strong> continues.<br />
scaninterval time<br />
Sets how often GateD scans the kernel interface list for changes. The default is every 15 seconds on<br />
most systems, <strong>and</strong> 60 seconds on systems that pass interface status changes through the routing<br />
socket (such as BSD 4.4).<br />
Interface Clause<br />
Sets interface options on the specified interfaces. A list can consist of interface names, domain<br />
names, numeric addresses, or the value all. Include one or more interface names, including<br />
wildcard names (without a number) <strong>and</strong> those that can specify more than one interface or address.
There are three ways to reference an interface:<br />
There are four types of interfaces allowed:<br />
interfaces Configuring Network Routing<br />
By wildcard Only the device driver part of the name, to match any unit number.<br />
By name Combined device driver <strong>and</strong> unit number of an interface.<br />
By address IP address or domain name (if resolving to one address only).<br />
Loopback Must have the address 127.0.0.1. Packets from a loopback<br />
interface go back to the originator. Also used for reject <strong>and</strong><br />
blackhole routes (not supported in <strong>MultiNet</strong>). The interface<br />
ignores any net mask. It is useful to assign an additional address<br />
to the loopback interface that is the same as the OSPF or BGP<br />
router ID; this allows routing to a system based on router ID that<br />
works if some interfaces are down.<br />
Broadcast Multiaccess interface capable of physical level broadcast, such as<br />
Ethernet, Token-Ring, <strong>and</strong> FDDI. A broadcast interface has an<br />
associated subnet mask <strong>and</strong> broadcast address. The interface<br />
route to a broadcast network is a route to the complete subnet.<br />
Point-to-point Tunnel to another host, usually on some sort of serial link. A<br />
point-to-point interface has a local address <strong>and</strong> a remote address.<br />
The remote address must be unique among the interface<br />
addresses on a given router. Many point-to-point interfaces <strong>and</strong><br />
up to one non point-to-point interface must share the local<br />
address. This conserves subnets as you do not need any when<br />
using this technique. If you use a subnet mask on a point-to-point<br />
interface, only RIP version 1 <strong>and</strong> HELLO use it to determine<br />
which subnets propagate to the router on the other side of the<br />
point-to-point interface.<br />
Nonbroadcast multiaccess<br />
(NBMA)<br />
Multiaccess but not capable of broadcast, such as frame relay <strong>and</strong><br />
X.25. This type of interface has a local address <strong>and</strong> a subnet<br />
mask.<br />
preference value<br />
Sets the preference for routes to this interface when it is up <strong>and</strong> GateD determines it to function<br />
properly. The default preference value is 0. While the preference statement is optional, it is<br />
strongly recommended that you set an explicit preference value if you do use it.<br />
down preference value<br />
Sets the preference for routes to this interface when GateD determines that it does not function<br />
properly, but the kernel does not indicate that it is down. The default down preference value is 120.<br />
13-13
Configuring Network Routing interfaces<br />
13-14<br />
passive<br />
Does not change the preference of the route to the interface if determined not to function properly<br />
from lack of routing information. GateD checks this only if the interface actively participates in a<br />
routing protocol.<br />
simplex<br />
The interface does not recognize its own broadcast packets. Some systems define an interface as<br />
simplex with the IFF_SIMPLEX flag. On others, the configuration defines it. On simplex<br />
interfaces, packets from the local host are assumed to have been looped back in software <strong>and</strong> are<br />
not used to indicate that the interface functions properly.<br />
reject, blackhole<br />
Not supported in <strong>MultiNet</strong>. Normally, this uses the address of the interface that matches these<br />
criteria as the local address when installing reject routes in the kernel. A blackhole route is like a<br />
reject route except that it does not support unreachable messages.
Define Clause Configuring Network Routing<br />
Define Clause<br />
interfaces {<br />
define address<br />
[broadcast address] | [pointtopoint address]<br />
[netmask mask]<br />
[multicast] ;<br />
} ;<br />
Defines interfaces not present when starting GateD so that the configuration file can reference them<br />
when using options strictinterfaces.<br />
broadcast address<br />
Makes the interface broadcast-capable (for Ethernet or Token-Ring) <strong>and</strong> specifies the broadcast<br />
address.<br />
pointtopoint address<br />
Makes the interface point-to-point (such as SLIP or PPP) <strong>and</strong> specifies the address on the local side<br />
of the interface. The first address in the define statement references the host on the remote end of<br />
the interface.<br />
An interface not defined as broadcast or pointtopoint must be nonbroadcast multiaccess<br />
(NBMA), such as for an X.25 network.<br />
netmask mask<br />
Subnet mask to use on the interface. Ignored on point-to-point interfaces.<br />
multicast<br />
Makes the interface multicast-capable.<br />
Examples<br />
1 This example sets the interface as passive.<br />
# do not mark interface 192.168.95.41 as down,<br />
# even if there is no traffic:<br />
#<br />
interfaces{<br />
interface 192.168.95.41 passive ;<br />
} ;<br />
2 This example shows the interface statements used with the rip statement (see the rip<br />
description). Users would receive RIP packets only from interfaces sva-0 <strong>and</strong> sva-1, but not<br />
from fza-0, <strong>and</strong> sva-1 would be the only one that could send them.<br />
13-15
ip yes {<br />
interface all noripin noripout ;<br />
interface sva ripin<br />
;<br />
interface sva-1 ripout ;<br />
} ;
Definition Statements<br />
Definition statements include:<br />
autonomoussystem routerid martians<br />
Definition Statements Configuring Network Routing<br />
Definition statements are general configuration statements that relate to all of GateD or at least to<br />
more than one protocol. You must use these statements for any protocol statements in the<br />
configuration file.<br />
Format<br />
autonomoussystem ASnumber [loops number] ;<br />
An autonomous system (AS) is a set of routers under a single technical administration, using an<br />
internal protocol <strong>and</strong> common metrics to route packets within the AS, <strong>and</strong> an external protocol to<br />
route packets to other ASs. The Network Information Center (NIC) assigns AS numbers.<br />
The autonomoussystem statement sets the AS number of the router. You require this option if<br />
using BGP or EGP. The loops option is only for protocols supporting AS paths, such as BGP. It<br />
controls the number of times this AS can appear in an AS path, <strong>and</strong> defaults to 1.<br />
routerid host ;<br />
A router ID is an IP address used as a unique identifier assigned to represent a specific router,<br />
usually the address of an attached interface. The routerid statement sets the router ID for the<br />
BGP <strong>and</strong> OSPF protocols. The default is the address of the first interface GateD encounters. The<br />
address of a non-point-to-point interface is preferred over the local address of a point-to-point<br />
interface, <strong>and</strong> an address on a loopback interface that is not the loopback address (127.0.0.1) is<br />
most preferred.<br />
martians {<br />
host host [allow] ;<br />
network [allow] ;<br />
network mask mask [allow] ;<br />
network masklen number [allow] ;<br />
default [allow] ;<br />
} ;<br />
The martians statement defines a list of invalid addresses, called martians, that the routing<br />
software ignores. Sometimes a misconfigured system sends out obviously invalid destination<br />
addresses. The statement allows additions to the list of martian addresses. (See Route Filtering for<br />
details on specifying ranges.)<br />
You can also use the allow parameter to explicitly allow a subset of an otherwise disallowed<br />
range.<br />
13-17
Configuring Network Routing Definition Statements<br />
Example<br />
13-18<br />
This example shows the use of all three definition statements, autonomoussystem, routerid,<br />
<strong>and</strong> martians.<br />
# use AS number 249:<br />
#<br />
autonomoussystem 249 ;<br />
#<br />
# set the router<br />
ID number:<br />
#<br />
routerid 192.168.95.41 ;<br />
#<br />
# prevent routes to<br />
0.0.0.26 from ever being accepted:<br />
#<br />
martians {<br />
host 0.0.0.26 ;<br />
};
Route Filtering Configuring Network Routing<br />
Route Filtering<br />
You can filter routes by matching a certain set of routes by destination, or by destination <strong>and</strong> mask.<br />
Use route filters on martians, import, <strong>and</strong> export statements.<br />
The action taken when no match is found depends on the context. For example, import <strong>and</strong> export<br />
route filters assume an all reject ; at the end of a list. A route matches the most specific filter<br />
that applies. Specifying more than one filter with the same destination, mask, <strong>and</strong> modifiers<br />
generates an error.<br />
Format<br />
network [exact | refines | allow]<br />
network mask mask [exact | refines]<br />
network masklen number [exact | refines]<br />
all<br />
default<br />
host host<br />
Options <strong>and</strong> Parameters<br />
network<br />
Destination network IP address. You can use one of the following options:<br />
exact Destination mask must match the supplied mask exactly.<br />
Used to match a network, but no subnets or hosts of that network.<br />
refines Destination mask must be more specified (longer) than the filter mask.<br />
Used to match subnets or hosts of a network, but not the network.<br />
allow See the martians definition statement.<br />
mask mask<br />
Destination network mask.<br />
masklen number<br />
Length of the destination network mask.<br />
all<br />
Entry matches anything. Equivalent to 0.0.0.0 mask 0.0.0.0.<br />
default<br />
Matches the default route. To match, the address must be the default address <strong>and</strong> the mask must be<br />
all zeros. Equivalent to 0.0.0.0 mask 0.0.0.0 exact. (Not valid for martians statements.)<br />
13-19
Configuring Network Routing Route Filtering<br />
13-20<br />
host host<br />
Matches the specific host. To match, the address must match exactly the specified host, <strong>and</strong> the<br />
network mask must be a host mask (all 1s). Equivalent to host mask 255.255.255 exact.<br />
(Not valid for martians statements.)
ip Configuring Network Routing<br />
rip<br />
GateD supports the Routing Information Protocol (RIP). RIP is a distance-vector protocol for<br />
distributing routing information at the local network level of the Internet. In distance-vector<br />
routing, each router transmits destination addresses <strong>and</strong> costs to its neighbors (computers<br />
communicating over RIP).<br />
RIP versions 1 <strong>and</strong> 2 are the most commonly used interior protocol. RIP selects the route with the<br />
lowest metric as the best route. The metric is a hop count representing the number of gateways<br />
through which data must pass to reach its destination. The longest path that RIP accepts is 15 hops.<br />
If the metric is greater than 15, a destination is considered unreachable <strong>and</strong> GateD discards the<br />
route. RIP assumes the best route uses the fewest gateways, that is, the shortest path, not taking into<br />
account congestion or delay along the way.<br />
RIP uses two types of packets: requests <strong>and</strong> responses.<br />
Requests. A request asks for information about specific destinations or for all destinations. RIP can<br />
send requests when a router:<br />
• Comes up<br />
• Receives timed-out information about a destination<br />
If a request fails to specify a destination, RIP assumes the router requests information about all<br />
destinations.<br />
Responses. Responses contain destination <strong>and</strong> cost pairs. RIP sends responses under the following<br />
three conditions:<br />
• In response to a request<br />
• When information changes; for example, cost information<br />
• At set intervals; for example, reporting the destination to each neighbor every 30 seconds<br />
RIP discards the destination <strong>and</strong> cost information if a neighbor fails to report the distance to a<br />
destination after a certain time interval.<br />
RIP IP Addresses. RIP version 1 contains no provision for passing around a mask. RIP infers the<br />
mask based on whether the address is class A, B, or C. Sometimes there are special cases when the<br />
inferred mask differs from class A, B, or C. For example:<br />
• When you use RIP with a subnet (in this case the routers must know the subnet mask for a<br />
particular network number)<br />
• When the system updates RIP with an address reported as 0.0.0.0, RIP considers this address as<br />
a default destination with a mask of 0.0.0.0<br />
• When the system updates RIP with bits set in the host portion of the address, RIP assumes the<br />
address refers to a host with a mask of 255.255.255.255<br />
With RIP version 2, you can specify the network mask with each network in a packet.<br />
Configuring RIP. You configure RIP in the GATED.CONF file using a GateD protocol statement<br />
that enables or disables RIP. The syntax of the rip statement is as follows, with the parameters<br />
described next:<br />
13-21
Configuring Network Routing rip<br />
Format<br />
13-22<br />
rip yes | no | on | off<br />
[{[no]broadcast ;<br />
nocheckzero ;<br />
preference value ;<br />
defaultmetric metric ;<br />
query authentication [ none | [ [simple | md5] password ] ] ;<br />
interface list<br />
[[no]ripin ] [ [no]ripout ]<br />
[metricin metric]<br />
[metricout metric] ;<br />
[version 1] | [ version 2 [multicast | broadcast] ]<br />
[ [secondary] authentication [ none | [ [simple | md5] password ] ] ] ;<br />
trustedgateways list ;<br />
sourcegateways list ;<br />
traceoptions options ;<br />
}] ;<br />
Options <strong>and</strong> Parameters<br />
yes | on (default)<br />
no | off<br />
When enabled on a host, RIP listens in the background to routing updates. When enabled on a<br />
gateway, RIP supplies routing updates. Enabled by default.<br />
broadcast ;<br />
Broadcasts RIP packets regardless of the number of interfaces present. Useful when propagating<br />
static routes or routes learned from another protocol into RIP. In some cases, using broadcast<br />
when only one network interface is present can cause data packets to traverse a single network<br />
twice. The default for more than one interface.<br />
nobroadcast ;<br />
Does not broadcast RIP packets on attached interfaces even if there is more than one. If you use the<br />
sourcegateways parameter, routes are still unicast directly to that gateway. The default for a<br />
single interface.<br />
nocheckzero ;<br />
Does not make sure that reserved fields in incoming RIP version 1 packets are zero. Normally RIP<br />
rejects packets whose reserved fields are zero.<br />
preference value ;<br />
Sets the preference for routes learned from RIP. A preference specified in import policy can<br />
override this. The default preference value is 100.
ip Configuring Network Routing<br />
defaultmetric metric ;<br />
Metric used when advertising routes learned from other protocols. Choice of values requires that<br />
you explicitly specify a metric in order to export routes from other protocols into RIP. A metric<br />
specified in export policy can override this. The default metric is 16.<br />
query authentication ;<br />
Authentication required of query packets that do not originate from routers. The default is none.<br />
13-23
Configuring Network Routing Interface Clause<br />
Interface Clause<br />
rip yes | no | on | off<br />
[{[no]broadcast ;<br />
nocheckzero ;<br />
preference value ;<br />
defaultmetric metric ;<br />
query authentication [ none | [ [simple | md5] password ] ] ;<br />
interface list<br />
[ [no]ripin ] [ [no]ripout ]<br />
[metricin metric]<br />
[metricout metric] ;<br />
[version 1] | [ version 2 [multicast | broadcast] ]<br />
[ [secondary] authentication [none | [ [simple | md5] password] ] ;<br />
trustedgateways list ;<br />
sourcegateways list ;<br />
traceoptions options ;<br />
}] ;<br />
Controls various attributes of sending RIP on specific interfaces. (See the interfaces statement for a<br />
description of list.) Note that if there are multiple interfaces configured on the same subnet, only<br />
the first one on which RIP output is configured sends the RIP updates. This limitation is required<br />
because of the way the UNIX kernel operates. A future GateD release will hopefully remove this<br />
limitation. The default list value is all.<br />
13-24<br />
ripin (default)<br />
noripin<br />
Use ripin explicitly when using noripin on a wildcard interface descriptor. The noripin option<br />
ignores RIP packets received over the specified interfaces.<br />
ripout (default)<br />
noripout<br />
Use ripin explicitly when using noripout on a wildcard interface descriptor. The noripin<br />
does not send RIP packets over the specified interfaces.<br />
metricin metric<br />
RIP metric to add to incoming routes before they are installed in the routing table. Makes the router<br />
prefer RIP routes learned using the specified interfaces less than those learned from other<br />
interfaces. The default is the kernel interface metric plus 1. If using this as the absolute value, the<br />
kernel metric is not added.<br />
metricout metric<br />
RIP metric to add to routes sent over the specified interface(s). Makes other routers prefer other<br />
sources of RIP routes over this router. The default metric value is 0.<br />
version 1 (default)<br />
Sends RIP version 1 packets over the specified interface(s).
Interface Clause Configuring Network Routing<br />
version 2 [multicast | broadcast]<br />
Sends RIP version 2 packets over the specified interfaces. If IP multicasting support is available on<br />
this interface, the default is to send full version 2 packets. If multicasting is not available, version 1<br />
compatible version 2 packets are sent. Options include:<br />
multicast<br />
(default)<br />
Multicasts RIP version 2 packets over this interface.<br />
broadcast Broadcasts RIP version 1 compatible version 2 packets over this interface even<br />
if IP multicasting is available<br />
[secondary] authentication [none | [ [simple | md5] password] ]<br />
Authentication type to use. Applies only to RIP version 2 <strong>and</strong> is ignored for RIP-1 packets. If you<br />
specify a password, the authentication type defaults to simple. The password should be a quoted<br />
string with 0 to 16 characters. If you specify secondary, this defines the secondary authentication.<br />
The default is authentication none.<br />
Remaining Options <strong>and</strong> Parameters<br />
rip yes | no | on | off<br />
[{[no]broadcast ;<br />
nocheckzero ;<br />
preference value ;<br />
defaultmetric metric ;<br />
query authentication [ none | [ [simple | md5] password ] ] ;<br />
interface list<br />
[[no]ripin ] [ [no]ripout ]<br />
[metricin metric]<br />
[metricout metric] ;<br />
[version 1] | [ version 2 [multicast | broadcast] ]<br />
[ [secondary] authentication [none | [ [simple | md5] password ] ];<br />
trustedgateways list ;<br />
sourcegateways list ;<br />
traceoptions options ;<br />
}] ;<br />
trustedgateways list<br />
List of gateways from which RIP accepts updates (host names or IP addresses). If used, only<br />
updates from the gateways in the list are accepted. The default list value is all.<br />
sourcegateways list<br />
List of routers to which RIP sends packets directly, not through multicasting or broadcasting. If<br />
used, only updates from the gateways in the list are accepted. The default list value is all.<br />
13-25
Configuring Network Routing Interface Clause<br />
13-26<br />
traceoptions options<br />
RIP-specific trace options:<br />
packets All RIP packets, or packets [detail] send or [detail] recv (detail<br />
provides a more verbose format to provide more details; if used, detail must<br />
come before send or recv)<br />
request RIP information request packets, such as REQUEST, POLL <strong>and</strong> POLLENTRY<br />
response RIP RESPONSE packets that actually contain routing information
hello Configuring Network Routing<br />
hello<br />
GateD supports the HELLO protocol. HELLO is an interior protocol that uses delay as the deciding<br />
factor when selecting the best route. Delay is the round trip time between source <strong>and</strong> destination.<br />
HELLO is not as widely used as when it was the interior protocol of the original 56-Kb/sec<br />
NSFNET backbone <strong>and</strong> used between LSI-11 ("fuzzball") routers. Because of this, HELLO is<br />
disabled by default.<br />
By default, HELLO, like RIP, uses the kernel interface metric set by the ifconfig comm<strong>and</strong> to<br />
influence metrics added to routes as they are installed in the routing table (metricin). Since the<br />
kernel interface metric is in hops, it must be translated into HELLO’s millisecond metric. For the<br />
translation scheme, see Table 13-5.<br />
Table 13-5 HELLO Hops-to-Metrics Translation<br />
This<br />
many<br />
Hops<br />
You configure HELLO in the GATED.CONF file using a GateD protocol statement that enables or<br />
disables HELLO.<br />
When enabled, HELLO assumes nobroadcast when only one interface exists. HELLO assumes<br />
broadcast when more than one interface exists.<br />
Format<br />
Translate to this<br />
HELLO metric<br />
hello yes | no | on | off<br />
[{[no]broadcast ;<br />
preference value ;<br />
defaultmetric metric ;<br />
interface list<br />
[ [no]helloin ]<br />
[ [no]helloout ]<br />
[metricin metric]<br />
[metricout metric] ;<br />
trustedgateways list ;<br />
sourcegateways list ;<br />
This<br />
many<br />
Hops<br />
Translate to this<br />
HELLO metric<br />
This<br />
many<br />
Hops<br />
0 0 6 713 12 75522<br />
1 100 7 1057 13 11190<br />
2 148 8 1567 14 16579<br />
3 219 9 2322 15 24564<br />
4 325 10 3440 16 3000<br />
5 481 11 5097<br />
Translate to this<br />
HELLO metric<br />
13-27
Configuring Network Routing hello<br />
}]<br />
;<br />
13-28<br />
traceoptions options ;<br />
Options <strong>and</strong> Parameters<br />
yes | on or no | off (default)<br />
When enabled on a host, HELLO listens in the background for routing updates. When enabled on a<br />
gateway, HELLO supplies routing updates. Disabled by default.<br />
broadcast ;<br />
nobroadcast ;<br />
The broadcast option broadcasts HELLO packets regardless of the number of interfaces present.<br />
Useful when propagating static routes or routes learned from another protocol into HELLO. In<br />
some cases, using broadcast when only one network interface is present can cause data packets<br />
to traverse a single network twice. The default for more than one interface.<br />
The nobroadcast option does not broadcast HELLO packets on attached interfaces, even if there<br />
is more than one. If you use the sourcegateways parameter, routes are still unicast directly to that<br />
gateway. The default for a single interface.<br />
preference value ;<br />
Preference for routes learned from HELLO. A preference specified in import policy can override<br />
this. The default preference value is 90.<br />
defaultmetric metric ;<br />
Metric used when advertising routes learned from other protocols. Requires you to explicitly<br />
specify a metric in order to export routes from other protocols into HELLO. A metric specified in<br />
export policy can override this. The default metric is 30000.<br />
Interface Clause<br />
interface list<br />
[ [no]helloin ]<br />
[ [no]helloout ]<br />
[metricin metric]<br />
[metricout metric] ;<br />
Controls various attributes of sending HELLO on specific interfaces. (See interfaces statement for a<br />
description of list.) Note that if there are multiple interfaces configured on the same subnet, only<br />
the first interface that has HELLO output configured sends the HELLO updates. This limitation is<br />
required because of the way the UNIX kernel operates. A future GateD release will hopefully<br />
remove this limitation. The default interface list value is all.<br />
helloin (default)<br />
nohelloin
hello Configuring Network Routing<br />
Use helloin explicitly when using nohelloin on a wildcard interface descriptor. The<br />
nohelloin option ignores HELLO packets received over the specified interfaces.<br />
helloout (default)<br />
nohelloout<br />
Use helloout explicitly when using nohelloout on a wildcard interface descriptor. The<br />
nohelloout option does not send HELLO packets over the specified interfaces.<br />
metricin metric<br />
HELLO metric to add to incoming routes before GateD installs them in the routing table. Makes<br />
this router prefer HELLO routes learned from other interfaces over those from the specified<br />
interface(s). The default is the kernel interface metric plus one. If using this as the absolute value,<br />
GateD does not add the kernel metric to the routing table.<br />
metricout metric<br />
HELLO metric to add to routes that are sent over the specified interface(s). Makes other routers<br />
prefer other sources of HELLO routes over this router. The default metric out metric value is 0.<br />
Remaining Options <strong>and</strong> Parameters<br />
hello yes | no | on | off<br />
[{ [no]broadcast ;<br />
preference value ;<br />
defaultmetric metric ;<br />
interface list<br />
[ [no]helloin ]<br />
[ [no]helloout ]<br />
[metricin metric]<br />
[metricout metric] ;<br />
trustedgateways list ;<br />
sourcegateways list ;<br />
traceoptions options ;<br />
}] ;<br />
trustedgateways list<br />
List of gateways from which HELLO accepts updates (host names or IP addresses). If used,<br />
HELLO accepts only updates from the gateways in the list. The default list value is all.<br />
sourcegateways list<br />
List of routers to which HELLO sends packets directly, not through multicasting or broadcasting. If<br />
used, HELLO accepts only updates from the gateways in the list. The default list value is all.<br />
traceoptions packets<br />
All HELLO packets, or packets [detail] send or [detail] recv (detail provides a more<br />
verbose format to provide more details; if used, detail must come before send or recv).<br />
13-29
Configuring Network Routing icmp<br />
icmp<br />
On systems without the BSD routing socket, GateD listens to ICMP messages received by the<br />
system. <strong>Process</strong>ing of ICMP redirect messages is h<strong>and</strong>led by the redirect statement.<br />
13-30<br />
Currently the only reason to specify the icmp statement is to be able to trace the ICMP messages<br />
that GateD receives.<br />
Format<br />
icmp { traceoptions options ; }<br />
Options <strong>and</strong> Parameters<br />
traceoptions options ;<br />
ICMP tracing options (which you can modify with detail <strong>and</strong> recv) are as follows:<br />
packets All ICMP packets received<br />
redirect Only ICMP Redirect packets received<br />
routerdiscovery Only ICMP Router Discovery packets received<br />
info Only ICMP informational packets, which include mask request/<br />
response, info request/response, echo request/response <strong>and</strong> timestamp<br />
request/response<br />
error Only ICMP error packets, which include time exceeded, parameter<br />
problem, unreachable <strong>and</strong> source quench
edirect Configuring Network Routing<br />
redirect<br />
GateD controls whether ICMP redirect messages can modify the kernel routing table. If disabled,<br />
GateD only prevents a system from listening to ICMP redirects. By default, ICMP redirects are<br />
enabled on hosts, <strong>and</strong> disabled on gateways that run as RIP or HELLO suppliers.<br />
You configure ICMP redirect h<strong>and</strong>ling in the GATED.CONF file using a GateD protocol statement.<br />
Format<br />
redirect yes | no | on | off<br />
[{preference value ;<br />
interface list [ [no]redirects ] ;<br />
trustedgateways list ;<br />
}]<br />
;<br />
Options <strong>and</strong> Parameters<br />
yes | on<br />
no | off<br />
Enabled by default on hosts. Disabled by default on gateways running as RIP or HELLO suppliers.<br />
preference value<br />
Preference for routes learned from a redirect. The default preference value is 30.<br />
interface list [ [no]redirects ]<br />
Enables <strong>and</strong> disables redirects interface by interface. (See interfaces for a description of list.) The<br />
default interface list value is all. The possible parameters are:<br />
redirects<br />
(default)<br />
May be necessary when you use noredirects on a wildcard interface<br />
descriptor.<br />
noredirects Ignores redirects received over the specified interface(s). The default is to<br />
accept redirects on all interfaces.<br />
trustedgateways list<br />
List of gateways from which redirects are accepted (host names or addresses). By default, all<br />
routers on the shared network(s) are trusted to supply redirects. If used, only redirects from the<br />
gateways in the list are accepted. The default list value is all.<br />
13-31
Configuring Network Routing routerdiscovery server<br />
routerdiscovery server<br />
The Router Discovery Protocol is an IETF st<strong>and</strong>ard protocol used to inform hosts of the existence<br />
of routers without having hosts wiretap routing protocols such as RIP. Use it in place of, or in<br />
addition to, statically configured default routes in hosts.<br />
The protocol is in two parts, the server that runs on routers <strong>and</strong> the client that runs on hosts (see the<br />
next statement). GateD treats these much like two separate protocols that you can enable only one<br />
at a time.<br />
The Router Discovery Server runs on routers <strong>and</strong> announces their existence to hosts. It does this by<br />
periodically multicasting or broadcasting a Router Advertisement to each interface on which it is<br />
enabled. These Router Advertisements contain a list of all router addresses on a given interface <strong>and</strong><br />
their preference for use as a default router.<br />
Initially these Router Advertisements occur every few seconds, then fall back to occurring every<br />
few minutes. In addition, a host may send a Router Solicitation to which the router will respond<br />
with a unicast Router Advertisement (unless a multicast or broadcast advertisement is due<br />
momentarily).<br />
Each Router Advertisement contains an Advertisement Lifetime field indicating how long the<br />
advertised addresses are valid. This lifetime is configured such that another Router Advertisement<br />
is sent before the lifetime expires. A lifetime of zero indicates that one or more addresses are no<br />
longer valid.<br />
On systems supporting IP multicasting, the Router Advertisements are sent to the all-hosts<br />
multicast address 224.0.0.1 by default. However, you can specify broadcast. When Router<br />
Advertisements are being sent to the all-hosts multicast address, or an interface is configured for<br />
the limited-broadcast address 255.255.255.255, all IP addresses configured on the physical<br />
interface are included in the Router Advertisement. When the Router advertisements are being sent<br />
to a net or subnet broadcast, only the address associated with that net or subnet is included.<br />
Note! Do not mix routerdiscovery server <strong>and</strong> routerdiscovery client statements in the<br />
GATED.CONF file or you may get unintended results. You should also include preference<br />
statements in the interfaces <strong>and</strong> routerdiscovery statements whenever possible.<br />
Format<br />
routerdiscovery server yes | no | on | off<br />
[{ traceoptions state ;<br />
interface list<br />
[minadvinterval time]<br />
[maxadvinterval time]<br />
[lifetime time] ;<br />
address list<br />
[advertise] | [ignore]<br />
[broadcast] | [multicast]<br />
[ineligible] | [preference value] ;<br />
}] ;<br />
13-32
Note! Interface must be mentioned in the “Interface” directive.<br />
Options <strong>and</strong> Parameters<br />
routerdiscovery server Configuring Network Routing<br />
yes | on<br />
no | off<br />
Enables or disables Router Discovery Protocol Server.<br />
traceoptions state<br />
The state is the only trace option, which traces the state transitions. The Router Discovery Server<br />
does not directly support packet tracing options; tracing of router discovery packets is enabled<br />
through the icmp statement described in the icmp statement section.<br />
Interface Clause<br />
routerdiscovery server yes | no | on | off<br />
[{ traceoptions state ;<br />
interface list<br />
[minadvinterval time]<br />
[maxadvinterval time]<br />
[lifetime time] ;<br />
address list<br />
[advertise] | [ignore]<br />
[broadcast] | [multicast]<br />
[ineligible] | [preference value] ;<br />
}];<br />
interface list<br />
Parameters that apply to physical interfaces. Note a slight difference in convention from the rest of<br />
GateD: interface specifies just physical interfaces, while address specifies protocol (in this<br />
case, IP) addresses.<br />
maxadvinterval time<br />
Maximum time allowed between sending broadcast or multicast Router Advertisements from the<br />
interface. Must be no less than 4 <strong>and</strong> no more than 30:00 (30 minutes). The default is 10:00 (10<br />
minutes).<br />
minadvinterval time<br />
Minimum time allowed between sending unsolicited broadcast or multicast Router Advertisements<br />
from the interface. Must be no less than 3 seconds <strong>and</strong> no greater than maxadvinterval. The<br />
default is 0.75 X maxadvinterval.<br />
lifetime time<br />
Lifetime of addresses in a Router Advertisement. Must be no less than maxadvinterval <strong>and</strong> no<br />
greater than 2:30:00 (two hours, thirty minutes). The default is 3 X maxadvinterval.<br />
13-33
Configuring Network Routing routerdiscovery server<br />
Address Clause<br />
13-34<br />
routerdiscovery server yes | no | on | off<br />
[{ traceoptions state ;<br />
interface list<br />
[minadvinterval time]<br />
[maxadvinterval time]<br />
[lifetime time] ;<br />
address list<br />
[advertise] | [ignore]<br />
[broadcast] | [multicast]<br />
[preference value] | [ineligible] ;<br />
}];<br />
address list<br />
Parameters that apply to the specified set of addresses on this physical interface. Note a slight<br />
difference in convention from the rest of GateD: interface specifies just physical interfaces<br />
while address is protocol (in this case, IP) addresses.<br />
advertise (default)<br />
ignore<br />
The advertise keyword includes the specified addresses in Router Advertisements. The ignore<br />
keyword does not.<br />
broadcast<br />
multicast<br />
The broadcast keyword includes the given addresses in a broadcast Router Advertisement<br />
because this system does not support IP multicasting, or some hosts on an attached network do not<br />
support IP multicasting. It is possible to mix addresses on a physical interface such that some are<br />
included in a broadcast Router Advertisement <strong>and</strong> some are included in a multicast Router<br />
Advertisement. This is the default if the router does not support IP multicasting.<br />
The multicast keyword includes the given addresses in a multicast Router Advertisement. If the<br />
system does not support IP multicasting, the address(es) is not included. If the system supports IP<br />
multicasting, the default is to include the addresses in a multicast Router Advertisement if the given<br />
interface supports IP multicasting. If not, the addresses are included in a broadcast Router<br />
Advertisement.<br />
preference value<br />
ineligible<br />
The preference keyword sets the preferability of the addresses as a default router address,<br />
relative to other router addresses on the same subnet. A 32-bit, signed, two’s complement integer,<br />
with higher values meaning more preferable. Note that hex 80000000 may only be specified as<br />
ineligible. The default value is 0. Use a preference statement whenever possible.<br />
The ineligible keyword assigns the given addresses a preference of hex 80000000, which<br />
means that it is not eligible to be the default route for any hosts. This is useful when the addresses<br />
should not be used as a default route, but are given as the next hop in an ICMP Redirect. This
outerdiscovery server Configuring Network Routing<br />
allows the hosts to verify that the given addresses are up <strong>and</strong> available.<br />
13-35
Configuring Network Routing routerdiscovery client<br />
routerdiscovery client<br />
A host listens for Router Advertisements through the all-hosts multicast address (224.0.0.2) if IP<br />
multicasting is available <strong>and</strong> enabled, or on the interface’s broadcast address. When starting up, or<br />
when reconfigured, a host may send a few Router Solicitations to the all-routers multicast address,<br />
224.0.0.2, or the interface’s broadcast address.<br />
When a Router Advertisement with a non-zero lifetime is received, the host installs a default route<br />
to each of the advertised addresses. If the preference is ineligible, or the address is not on an<br />
attached interface, the route is marked unusable but retained. If the preference is usable, the metric<br />
is set as a function of the preference such that the route with the best preference is used. If more<br />
than one address with the same preference is received, the one with the lowest IP address will be<br />
used. These default routes are not exportable to other protocols.<br />
When a Router Advertisement with a zero lifetime is received, the host deletes all routes with next<br />
hop addresses learned from that router. In addition, any routers learned from ICMP Redirects<br />
pointing to these addresses will be deleted. The same happens when a Router Advertisement is not<br />
received to refresh these routes before the lifetime expires.<br />
Note! Do not mix routerdiscovery server <strong>and</strong> routerdiscovery client statements in the GATED.CONF<br />
file or you may get unintended results.<br />
You should also include preference statements in the interfaces <strong>and</strong> routerdiscovery statements<br />
whenever possible.<br />
Format<br />
routerdiscovery client yes | no | on | off<br />
[{ traceoptions state ;<br />
preference value ;<br />
interface list<br />
[enable] | [disable]<br />
[broadcast] | [multicast]<br />
[quiet] | [solicit] ;<br />
}] ;<br />
Options <strong>and</strong> Parameters<br />
13-36<br />
yes | on<br />
no | off<br />
Enables or disables the Router Discovery Protocol Client.<br />
traceoptions state ;<br />
The state is the only trace option, which traces the state transitions. The Router Discovery Server<br />
does not directly support packet tracing options; tracing of router discovery packets is enabled<br />
through the icmp statement described in the icmp statement section.
outerdiscovery client Configuring Network Routing<br />
preference value ;<br />
Preference of all Router Discovery default routes. Use a preference statement whenever possible.<br />
Default is 55.<br />
Interface Clause<br />
routerdiscovery client yes | no | on | off<br />
[{ traceoptions state ;<br />
preference value ;<br />
interface list<br />
[enable] | [disable]<br />
[broadcast] | [multicast]<br />
[solicit] | [quiet] ;<br />
}] ;<br />
interface list<br />
Parameters that apply to physical interfaces. Note a slight difference in convention from the rest of<br />
GateD: interface specifies just physical interfaces. The Router Discovery Client has no<br />
parameters that apply only to interface addresses.<br />
enable (default)<br />
disable<br />
Either performs or does not perform Router Discovery on the specified interfaces.<br />
broadcast<br />
multicast<br />
The broadcast keyword broadcasts Router Solicitations on the specified interfaces. This is the<br />
default if IP multicast support is not available on this host or interface.<br />
The multicast keyword multicasts Router Solicitations on the specified interfaces. If IP multicast<br />
is not available on this host <strong>and</strong> interface, no solicitation is performed. The default is to multicast<br />
Router Solicitations if the host <strong>and</strong> interface support it, otherwise Router Solicitations are<br />
broadcast.<br />
solicit (default)<br />
quiet<br />
Either sends or does not send Router Solicitations on this interface, even though Router Discovery<br />
is performed.<br />
13-37
Configuring Network Routing egp<br />
egp<br />
GateD supports the Exterior Gateway Protocol (EGP). EGP is an exterior routing protocol that<br />
moves routing information between Autonomous Systems (ASs). Unlike interior protocols, EGP<br />
propagates only reachability indications, not true metrics. EGP updates contain metrics, called<br />
distances, which range from 0 to 255. GateD only compares EGP distances learned from the same<br />
AS. EGP currently has limited usage. By default, EGP is disabled.<br />
Before EGP sends routing information to a remote router, it must establish an adjacency with that<br />
router. This occurs by exchanging Hello <strong>and</strong> I Heard You (I-H-U) messages with that router. (Hello<br />
should not to be confused with the HELLO protocol, or OSPF HELLO messages.) Computers<br />
communicating over EGP are called EGP neighbors, <strong>and</strong> the exchange of Hello <strong>and</strong> I-H-U<br />
messages is known as acquiring a neighbor.<br />
Once you acquire a neighbor, the system polls it for routing information. The neighbor responds by<br />
sending an update containing routing information. If the system receives a poll from its neighbor, it<br />
responds with its own update packet. When the system receives an update, it includes routes from<br />
the update into its routing database. If the neighbor fails to respond to three consecutive polls,<br />
GateD assumes that the neighbor is down <strong>and</strong> removes the neighbor’s routes from its database.<br />
You configure EGP in the GATED.CONF file using a GateD protocol statement.<br />
Format<br />
egp yes | no | on | off<br />
[{ preference value ;<br />
defaultmetric metric ;<br />
packetsize max ;<br />
traceoptions options ;<br />
group<br />
[peeras ASnumber]<br />
[localas ASnumber]<br />
[maxup number<br />
{ neighbor host<br />
[metricout metric]<br />
[preference value]<br />
[preference2 value]<br />
[ttl ttl]<br />
[nogendefault]<br />
[importdefault]<br />
[exportdefault]<br />
[gateway gateway]<br />
[lcladdr local-address]<br />
[sourcenet network]<br />
[minhello | p1 time]<br />
[minpoll | p2 time]<br />
[traceoptions options] ;<br />
} ;<br />
}] ;<br />
13-38
Options <strong>and</strong> Parameters<br />
egp Configuring Network Routing<br />
yes | on<br />
no | off (default)<br />
Enables or disables EGP support. Disabled by default.<br />
preference value ;<br />
Preference for routes learned from EGP. A preference specified on the group or neighbor<br />
statements or by import policy can override this. The default preference value is 200.<br />
defaultmetric metric ;<br />
Metric used when advertising routes over EGP. This choice of values requires you to explicitly<br />
specify a metric when exporting routes to EGP neighbors. A metric specified on the neighbor or<br />
group statements or in export policy can override this. The default metric is 255.<br />
packetsize max ;<br />
Maximum size of a packet that EGP expects to receive from this neighbor. If EGP receives a larger<br />
packet, it is incomplete <strong>and</strong> EGP discards it. EGP notes the length of this packet <strong>and</strong> increases the<br />
expected size to be able to receive a packet of this size. Specifying the parameter prevents the first<br />
packet from being dropped. All packet sizes are rounded up to a multiple of the system page size.<br />
The default packet size max value is 8192.<br />
traceoptions options ;<br />
Tracing options for EGP (can be overridden on a group or neighbor basis):<br />
packets All EGP packets, or packets [detail] send or [detail] recv (detail provides<br />
a more verbose format to provide more details; if used, detail must come before<br />
send or recv)<br />
hello EGP HELLO/I-HEARD-U packets used to determine neighbor reachability<br />
acquire EGP ACQUIRE/CEASE packets used to initiate <strong>and</strong> terminate EGP sessions<br />
update EGP POLL/UPDATE packets used to request <strong>and</strong> receive reachability updates<br />
Group Clause<br />
group<br />
[peeras ASnumber]<br />
[localas ASnumber]<br />
[maxup number<br />
{ neighbor host<br />
[metricout metric]<br />
[preference value]<br />
[preference2 value]<br />
[ttl ttl]<br />
[nogendefault]<br />
13-39
Configuring Network Routing egp<br />
13-40<br />
[importdefault]<br />
[exportdefault]<br />
[gateway gateway]<br />
[lcladdr local-address]<br />
[sourcenet network]<br />
[minhello | p1 time]<br />
[minpoll | p2 time]<br />
[traceoptions options] ; } ;<br />
EGP neighbors must be members of a group, which groups all neighbors in one AS. Parameters<br />
specified in the group clause apply to all the subsidiary neighbors, unless explicitly overridden on<br />
a neighbor clause. Any number of group clauses can specify any number of neighbor clauses.<br />
You can specify any parameters from the neighbor subclause on the group clause to provide<br />
defaults for the whole group (which you can override for individual neighbors).<br />
The group clause is the only place to set the following attributes:<br />
peeras ASnumber<br />
AS number expected from peers in the group. Learned dynamically.<br />
localas ASnumber<br />
AS that GateD represents to the group. Usually only used when masquerading as another AS. Use<br />
is discouraged. Set globally in autonomoussystem.<br />
maxup number<br />
Number of neighbors GateD should acquire from this group. GateD attempts to acquire the first<br />
maxup neighbors in the order listed. If one of the first neighbors is not available, it acquires one<br />
farther down the list. If after startup, GateD does manage to acquire the more desirable neighbor, it<br />
drops the less desirable one. By default, GateD acquires all neighbors in the group.<br />
Group Neighbor Clause<br />
egp yes | no | on | off<br />
[{ preference value ;<br />
defaultmetric metric ;<br />
packetsize max ;<br />
traceoptions options ;<br />
group<br />
[peeras ASnumber]<br />
[localas ASnumber]<br />
[maxup number<br />
{ neighbor host<br />
[metricout metric]<br />
[preference value]<br />
[preference2 value]<br />
[ttl ttl]<br />
[nogendefault]<br />
[importdefault]
egp Configuring Network Routing<br />
[exportdefault]<br />
[gateway gateway]<br />
[lcladdr local-address]<br />
[sourcenet network]<br />
[p1 time | minhello]<br />
[p2 time | minpoll]<br />
[traceoptions options] ; } ; }] ;<br />
Each neighbor subclause defines one EGP neighbor within a group. The only required part of the<br />
subclause is the host argument, the symbolic host name or IP address of the neighbor.<br />
metricout metric<br />
Metric used for all routes sent to this neighbor. Overrides the default metric set in the egp statement<br />
<strong>and</strong> any metrics specified by export policy, but only for this specific neighbor or group of<br />
neighbors.<br />
preference value<br />
Preference used for routes learned from these neighbors. Can differ from the default EGP<br />
preference set in the egp statement, so that GateD can prefer routes from one neighbor, or group of<br />
neighbors, over another. Import policy can explicitly override this.<br />
preference2 value<br />
Tie-breaker, in the case of a preference tie. The default value is 0.<br />
ttl ttl<br />
IPL time-to-live. Provided when attempting to communicate with improperly functioning routers<br />
that ignore packets sent with a TTL 1. The default ttl for local neighbors is 1; the default for<br />
nonlocal neighbors is 255.<br />
nogendefault<br />
Does not generate a default route when EGP receives a valid update from its neighbor. The default<br />
route is only generated when you enable the gendefault option.<br />
importdefault<br />
Accepts the default route (0.0.0.0) if included in a received EGP update. For efficiency, some<br />
networks have external routers announce a default route to avoid sending large EGP update<br />
packets. The default route in the EGP update is ignored.<br />
exportdefault<br />
Includes the default route (0.0.0.0) in EGP updates sent to this EGP neighbor. Allows the system to<br />
advertise the default route using EGP. Normally a default route is not included in EGP updates.<br />
gateway gateway<br />
Router on an attached network used as the next hop router for routes received from this neighbor if<br />
a network is not shared with a neighbor. Rarely used.<br />
13-41
Configuring Network Routing egp<br />
13-42<br />
lcladdr local-address<br />
Address used on the local end of the connection with the neighbor. The local address must be on an<br />
interface shared with the neighbor, or with the neighbor’s gateway when using the gateway option.<br />
A session only opens when an interface with the appropriate local address (through which the<br />
neighbor or gateway address is directly reachable) is operating.<br />
sourcenet network<br />
Network queried in the EGP Poll packets. If there is no network shared with the neighbor, specify<br />
one of the networks attached to the neighbor. Also use to specify a network shared with the<br />
neighbor, other than the one on which the EGP packets are sent. Normally not needed. The default<br />
is the network shared with the neighbor’s address.<br />
p1 time or minhello<br />
Minimum acceptable interval between the transmission of EGP HELLO packets. If the neighbor<br />
fails to respond to three hello packets, GateD stops trying to acquire the neighbor. Setting a larger<br />
interval gives the neighbor a better chance to respond. The minhello is an alias for the p1 value<br />
defined in the EGP specification. The default time value is 30.<br />
egp yes | no | on | off<br />
[{ preference value ;<br />
defaultmetric metric ;<br />
packetsize max ;<br />
traceoptions options ;<br />
group<br />
[peeras ASnumber]<br />
[localas ASnumber]<br />
[maxup number<br />
{ neighbor host<br />
[metricout metric]<br />
[preference value]<br />
[preference2 value]<br />
[ttl ttl]<br />
[nogendefault]<br />
[importdefault]<br />
[exportdefault]<br />
[gateway gateway]<br />
[lcladdr local-address]<br />
[sourcenet network]<br />
[minhello | p1 time]<br />
[minpoll | p2 time]<br />
[traceoptions options] ; } ; }] ;<br />
p2 time or minpoll<br />
Time interval between polls to the neighbor. If three polls are sent without a response, the neighbor<br />
is declared "down" <strong>and</strong> all routes learned from that neighbor are removed from the routing<br />
database. A longer polling interval supports a more stable routing database but is not as responsive
egp Configuring Network Routing<br />
to routing changes. The minpoll is an alias for the p2 value defined in the EGP specification. The<br />
default time value is 120.<br />
traceoptions options<br />
Tracing options for this EGP neighbor, which are:<br />
packets All EGP packets, or packets [detail] send or [detail] recv (detail provides<br />
a more verbose format to provide more details; if used, detail must come before<br />
send or recv)<br />
hello EGP HELLO/I-HEARD-U packets used to determine neighbor reachability<br />
acquire EGP ACQUIRE/CEASE packets used to initiate <strong>and</strong> terminate EGP sessions<br />
update EGP POLL/UPDATE packets used to request <strong>and</strong> receive reachability updates<br />
13-43
Configuring Network Routing bgp<br />
bgp<br />
The Border Gateway Protocol (BGP) is an exterior routing protocol used to exchange routing<br />
information between multiple transit Autonomous Systems (ASs) as well as between transit <strong>and</strong><br />
stub ASs. BGP is related to EGP but operates with more capability, greater flexibility, <strong>and</strong> less<br />
b<strong>and</strong>width required. BGP uses path attributes to provide more information about each route. It<br />
maintains an AS path, which includes the AS number of each AS the route transits, providing<br />
information sufficient to prevent routing loops in an arbitrary topology. You can also use path<br />
attributes to distinguish between groups of routes to determine administrative preferences. This<br />
allows greater flexibility in determining route preference to achieve a variety of administrative<br />
ends.<br />
BGP supports two basic types of sessions between neighbors—internal (sometimes called IBGP)<br />
<strong>and</strong> external. Internal sessions run between routers in the same AS, while external sessions run<br />
between routers in different ASs. When sending routes to an external peer, the local AS number is<br />
prepended to the AS path. Hence routes received from an external peer are guaranteed to have the<br />
AS number of that peer at the start of the path. Routes received from an internal neighbor do not<br />
generally have the local AS number prepended to the AS path. Hence, these routes generally have<br />
the same AS path the route had when the originating internal neighbor received the route from an<br />
external peer. Routes with no AS numbers in the path may be legitimately received from internal<br />
neighbors; these indicate that the received route should be considered internal to your own AS.<br />
The BGP implementation supports three versions of the BGP protocol—versions 2, 3 <strong>and</strong> 4. BGP<br />
versions 2 <strong>and</strong> 3 are similar in capability <strong>and</strong> function. They only propagate classed network routes,<br />
<strong>and</strong> the AS path is a simple array of AS numbers. BGP version 4 propagates fully general address<strong>and</strong>-mask<br />
routes, <strong>and</strong> the AS path has some structure to represent the results of aggregating<br />
dissimilar routes.<br />
External BGP sessions may or may not include a single metric, which BGP calls the Multi-Exit<br />
Discriminator (MED), in the path attributes. For BGP versions 2 <strong>and</strong> 3 this metric is a 16-bit<br />
unsigned integer; for BGP version 4 it is a 32-bit unsigned integer. In either case, smaller values of<br />
the metric are preferred. Currently this metric only breaks ties between routes with equal preference<br />
from the same neighbor AS. Internal BGP sessions carry at least one metric in the path attributes,<br />
which BGP calls the LocalPref. The size of the metric is identical to the MED. For BGP versions 2<br />
<strong>and</strong> 3, this metric is better when its value is smaller; for version 4 it is better when it is larger. BGP<br />
version 4 sessions optionally carry a second metric on internal sessions, this being an internal<br />
version of the MED. The use of these metrics depends on the type of internal protocol processing<br />
specified.<br />
BGP collapses routes with similar path attributes into a single update for advertisement. Routes<br />
received in a single update are readvertised in a single update. The churn caused by the loss of a<br />
neighbor is minimized, <strong>and</strong> the initial advertisement sent during peer establishment is maximally<br />
compressed. BGP does not read information from the kernel message by message, but fills the<br />
input buffer. It processes all complete messages in the buffer before reading again. BGP also does<br />
multiple reads to clear all incoming data queued on the socket. This feature may cause other<br />
protocols to be blocked for prolonged intervals by a busy peer connection.<br />
13-44<br />
All unreachable messages are collected into a single message <strong>and</strong> sent prior to reachable routes<br />
during a flash update. For these unreachable announcements, the next hop is set to the local address
gp Configuring Network Routing<br />
on the connection, no metric is sent, <strong>and</strong> the path origin is set to incomplete. On external<br />
connections the AS path in unreachable announcements is set to the local AS; on internal<br />
connections the AS path is set to zero length.<br />
BGP implementation expects external peers to be directly attached to a shared subnet, <strong>and</strong> expects<br />
those peers to advertise next hops that are host addresses on that subnet (although this constraint<br />
can be relaxed by configuration for testing). For groups of internal peers, however, there are several<br />
alternatives that can be selected by specifying the group type. Type internal groups expect all peers<br />
to be directly attached to a shared subnet so that, like external peers, the next hops received in BGP<br />
advertisements may be used directly for forwarding. Type routing groups instead determine the<br />
immediate next hops for routes, by using the next hop received with a route from a peer as a<br />
forwarding address, <strong>and</strong> using this to look up an immediate next hop in an IGP’s routes. Such<br />
groups support distant peers, but need to be informed of the IGP whose routes they use to<br />
determine immediate next hops. Finally, type IGP groups expect routes from the group peers not to<br />
be used for forwarding at all. Instead, they expect that copies of the BGP routes are also received<br />
through an IGP, <strong>and</strong> that the BGP routes are only used to determine the path attributes associated<br />
with the IGP routes. Such groups also support distant peers <strong>and</strong> also need to be informed of the IGP<br />
with which they are running.<br />
For internal BGP group types (<strong>and</strong> for test groups), where possible, a single outgoing message is<br />
built for all group peers based on the common policy. A copy of the message is sent to every peer in<br />
the group, with possible adjustments to the next hop field as appropriate to each peer. This<br />
minimizes the computational load of running large numbers of peers in these types of groups. BGP<br />
allows unconfigured peers to connect if an appropriate group was configured with an allow clause.<br />
Format<br />
bgp yes | no | on | off<br />
[{ preference value ;<br />
defaultmetric metric ;<br />
traceoptions options ;<br />
group type<br />
external peeras ASnumber<br />
| internal peeras ASnumber<br />
| igp peeras ASnumber proto proto<br />
| routing peeras ASnumber proto proto interface list<br />
| test peeras ASnumber<br />
{ allow<br />
{ network<br />
network mask mask<br />
network masklen number<br />
all<br />
host host } ;<br />
peer host<br />
[metricout metric]<br />
[localas ASnumber]<br />
[nogendefault]<br />
[gateway gateway]<br />
13-45
Configuring Network Routing bgp<br />
13-46<br />
} ;<br />
}] ;<br />
[preference value]<br />
[preference2 value]<br />
[lcladdr local-address]<br />
[holdtime time]<br />
[version number]<br />
[passive]<br />
[sendbuffer number]<br />
[recvbuffer number]<br />
[indelay time]<br />
[outdelay time]<br />
[keep [all | none] ]<br />
[analretentive]<br />
[noauthcheck]<br />
[noaggregatorid]<br />
[keepalivesalways]<br />
[v3asloopokay]<br />
[nov4asloop]<br />
[logupdown]<br />
[ttl ttl]<br />
[traceoptions options] ;<br />
Options <strong>and</strong> Parameters<br />
yes | on<br />
no | off (default)<br />
Enables or disables BGP support. Disabled by default.<br />
preference value ;<br />
Preference for routes learned from BGP. A preference specified on the group or peer statements,<br />
or by import policy, can override this. The default preference value is 170.<br />
defaultmetric metric ;<br />
Metric used when advertising routes over BGP. A metric specified on the group or peer<br />
statements, or in export policy, can override this. The default metric is 65535.<br />
traceoptions options ;<br />
Tracing options for BGP. May be overridden on a group or peer basis. The trace options are:<br />
packets All BGP packets, or packets [detail] send or [detail] recv (detail<br />
provides a more verbose format to provide more details; if used, detail must<br />
come before send or recv).<br />
open BGP OPEN packets used to establish a peer relationship
Group Type Clause<br />
peeras<br />
For group type, specify one of the following peeras options:<br />
bgp Configuring Network Routing<br />
update BGP UPDATE packets used to pass network reachability information<br />
keepalive BGP KEEPALIVE packets used to verify peer reachability<br />
external peeras ASnumber In the classic external BGP group, full policy checking is<br />
applied to all incoming <strong>and</strong> outgoing advertisements. The<br />
external neighbors must be directly reachable through one<br />
of the machine’s local interfaces. No metric included in<br />
external advertisements <strong>and</strong> the next hop is computed with<br />
respect to the shared interface.<br />
internal peeras ASnumber Internal group operating where there is no IP-level IGP; for<br />
example, an SMDS network or MILNET. All neighbors in<br />
this group must be directly reachable over a single<br />
interface. All next-hop information is computed with<br />
respect to this interface. Import <strong>and</strong> export policy may be<br />
applied to group advertisements. Routes received from<br />
external BGP or EGP neighbors are readvertised with the<br />
received metric.<br />
igp peeras ASnumber Internal group that runs in association with an interior<br />
protocol. The IGP group examines routes the IGP exports,<br />
<strong>and</strong> sends an advertisement only if the path attributes could<br />
not be entirely represented in the IGP tag mechanism. Only<br />
the AS path, path origin, <strong>and</strong> transitive optional attributes<br />
are sent with routes. No metric is sent, <strong>and</strong> the next hop is<br />
set to the local address the connection uses. Received<br />
internal BGP routes are not used or readvertised. Instead,<br />
the AS path information is attached to the corresponding<br />
IGP route <strong>and</strong> the latter is used for readvertisement.<br />
Since internal IGP peers are sent only a subset of the routes<br />
the IGP exports, the export policy used is the IGP’s. There<br />
is no need to implement the "don’t route from peers in the<br />
same group" constraint, since the advertised routes are<br />
routes that IGP already exports.<br />
13-47
Configuring Network Routing bgp<br />
Group Type Allow Clause<br />
13-48<br />
routing peeras ASnumber Internal group that uses the routes of an interior protocol to<br />
resolve forwarding addresses. A type routing group<br />
propagates external routes between routers not directly<br />
connected, <strong>and</strong> computes immediate next hops for these<br />
routes by using the BGP next hop that arrived with the route<br />
as a forwarding address to be resolved using an internal<br />
protocol’s routing information.<br />
In essence, internal BGP is used to carry AS external<br />
routes, while the IGP is expected to only carry AS internal<br />
routes, <strong>and</strong> the latter is used to find immediate next hops for<br />
the former. The next hop in BGP routes advertised to the<br />
type routing peers are set to local address on BGP<br />
connection to those peers, as it is assumed a route to this<br />
address is propagated over IGP.<br />
group type<br />
external peeras ASnumber<br />
| internal peeras ASnumber<br />
| igp peeras ASnumber proto proto<br />
| routing peeras ASnumber proto proto interface list<br />
| test peeras ASnumber<br />
{ allow<br />
• proto proto—Interior protocol used to resolve BGP<br />
route next hops, <strong>and</strong> can be the name of any IGP in the<br />
configuration.<br />
• interface list—Optionally provides a list of interfaces<br />
whose routes are carried over the IGP for which third<br />
party next hops can be used instead.<br />
test peeras ASnumber Extension to external BGP that implements a fixed policy<br />
using test peers. Fixed policy <strong>and</strong> special case code make<br />
test peers relatively inexpensive to maintain. Test peers do<br />
not need to be on a directly attached network. If GateD <strong>and</strong><br />
the peer are on the same (directly attached) subnet, the<br />
advertised next hop is computed with respect to that<br />
network; otherwise the next hop is the local machine’s<br />
current next hop.<br />
All routing information advertised by <strong>and</strong> received from a<br />
test peer is discarded, <strong>and</strong> all BGP advertisable routes are<br />
sent back to the test peer. Metrics from EGP- <strong>and</strong> BGPderived<br />
routes are forwarded in the advertisement;<br />
otherwise no metric is included.
gp Configuring Network Routing<br />
{ network<br />
network mask mask<br />
network masklen number<br />
all<br />
host host } ;<br />
Allows peer connections from any addresses in the specified range of network <strong>and</strong> mask pairs.<br />
Configure all parameters for these peers on the group clause. The internal peer structures are<br />
created when an incoming open request is received, <strong>and</strong> destroyed when the connection is broken.<br />
(For details on specifying the network/mask pairs, see Route Filtering.)<br />
Group Type Peer Clause<br />
Configures an individual peer. Each peer inherits all parameters specified on a group as defaults.<br />
You can override these defaults using parameters explicitly specified in the peer subclause. Allows<br />
the following parameters:<br />
metricout metric<br />
Primary metric on all routes sent to the specified peer(s). Overrides the default metric, a metric<br />
specified on the group, <strong>and</strong> any metric specified by export policy.<br />
localas ASnumber<br />
AS that GateD represents to this group of peers. ASnumber is set globally in autonomoussystem.<br />
nogendefault<br />
Does not generate a default route when EGP receives a valid update from its neighbor. The default<br />
route is generated only when enabling the gendefault option.<br />
gateway gateway<br />
If a network is not shared with a peer, specifies a router on an attached network used as the next hop<br />
router for routes received from this neighbor. Not needed in most cases.<br />
preference value<br />
Preference used for routes learned from these peers. Can differ from the default BGP preference set<br />
in the bgp statement, so that GateD can prefer routes from one peer, or group of peers, over others.<br />
Import policy can explicitly override this.<br />
preference2 value<br />
In the case of a preference tie, can break the tie.<br />
lcladdr local-address<br />
Address used on the local end of the TCP connection with the peer. For external peers, the local<br />
address must be on an interface shared with the peer or with the peer’s gateway when using the<br />
gateway parameter. A session with an external peer only opens when an interface with the<br />
appropriate local address (through which the peer or gateway address is directly reachable) is<br />
operating. For other types of peers, a peer session is maintained when any interface with the<br />
specified local address is operating. In either case, incoming connections are only recognized as<br />
13-49
Configuring Network Routing bgp<br />
13-50<br />
matching a configured peer if they are addressed to the configured local address.<br />
holdtime time<br />
BGP holdtime value to use when negotiating the connection with this peer, in seconds. According<br />
to BGP, if GateD does not receive a keepalive, update, or notification message within the period<br />
specified in the Hold Time field of the BGP Open message, the BGP connection is closed. The<br />
value must be either 0 (no keepalives are sent) or at least 3.<br />
version number<br />
Version of the BGP protocol to use with this peer. If specified, only the specified version is offered<br />
during negotiation. Currently supported versions are 2, 3, <strong>and</strong> 4. By default, the highest<br />
supported version is used first, <strong>and</strong> version negotiation is attempted.<br />
passive<br />
Does not attempt active OPENs to this peer. GateD should wait for the peer to issue an open. By<br />
default, all explicitly configured peers are active.<br />
sendbuffer number <strong>and</strong> recvbuffer number<br />
Controls the amount of send <strong>and</strong> receive buffering asked of the kernel. The maximum number<br />
supported is 65535 bytes, although many kernels have a lower limit. Not needed on normally<br />
functioning systems. By default, the maximum supported is configured.<br />
indelay time <strong>and</strong> outdelay time<br />
Dampens route fluctuations. The indelay is the amount of time a route learned from a BGP peer<br />
must be stable before it is accepted into the GateD routing database. The outdelay is the amount<br />
of time a route must be present in the GateD routing database before it is exported to BGP. Default<br />
time in both cases is 0.<br />
group type<br />
peer host<br />
[metricout metric]<br />
[localas ASnumber]<br />
[nogendefault]<br />
[gateway gateway]<br />
[preference value]<br />
[preference2 value]<br />
[lcladdr local-address]<br />
[holdtime time]<br />
[version number]<br />
[passive]<br />
[sendbuffer number]<br />
[recvbuffer number]<br />
[indelay time]<br />
[outdelay time]<br />
[ keep [all | none] ]<br />
[analretentive]
gp Configuring Network Routing<br />
[noauthcheck]<br />
[noaggregatorid]<br />
[keepalivesalways]<br />
[v3asloopokay]<br />
[nov4asloop]<br />
[logupdown]<br />
[ttl ttl]<br />
[traceoptions options] ; } ; }] ;<br />
keep all<br />
Retains routes learned from a peer even if the routes’ AS paths contain one of our exported AS<br />
numbers.<br />
analretentive<br />
Issues warning messages when receiving questionable BGP updates such as duplicate routes <strong>and</strong>/or<br />
deletions of nonexistent routes. Normally these events are silently ignored.<br />
noauthcheck<br />
Communicates with an implementation that uses some form of authentication other than the normal<br />
authentication field of all ones.<br />
noaggregatorid<br />
GateD should specify the routerid in the aggregator attribute as zero (instead of its routerid) in<br />
order to prevent different routers in an AS from creating aggregate routes with different AS paths.<br />
keepalivesalways<br />
GateD should always send keepalives, even when an update could have correctly substituted for<br />
one. Allows interoperability with routers that do not completely obey the protocol specifications on<br />
this point.<br />
v3asloopokay<br />
By default, GateD does not advertise routes whose AS path is looped (that have an AS appearing<br />
more than once in the path) to version 3 external peers. Setting this flag removes this constraint.<br />
Ignored when set on internal groups or peers.<br />
nov4asloop<br />
Does not advertise routes with looped AS paths to version 4 external peers. Can be useful to avoid<br />
advertising such routes to peer which would incorrectly forward the routes on to version 3<br />
neighbors.<br />
logupdown<br />
Logs a message using syslog whenever a BGP peer enters or leaves ESTABLISHED state.<br />
ttl ttl<br />
Provided when attempting to communicate with improperly functioning routers that ignore packets<br />
sent with a TTL 1. Not all kernels allow the TTL to be specified for TCP connections. The default<br />
13-51
Configuring Network Routing bgp<br />
13-52<br />
ttl for local neighbors is 1; the default for nonlocal neighbors is 255.<br />
traceoptions options ;<br />
Tracing options for this BGP neighbor include:<br />
packets All BGP packets, or packets [detail] send or [detail] recv (detail<br />
provides a more verbose format to provide more details; if used, detail must<br />
come before send or recv)<br />
open BGP OPEN packets used to establish a peer relationship<br />
update BGP UPDATE packets used to pass network reachability information<br />
keepalive BGP KEEPALIVE packets used to verify peer reachability
ospf Configuring Network Routing<br />
ospf<br />
Open Shortest Path First (OSPF) routing is a shortest-path-first (SPF) or link-state protocol. OSPF<br />
is an interior gateway protocol that distributes routing information between routers in a single<br />
Autonomous System (AS). OSPF chooses the least cost path as the best path. Suitable for complex<br />
networks with many routers, OSPF provides equal cost multipath routing where packets to a single<br />
destination can be sent over more than one interface simultaneously. In a link-state protocol, each<br />
router maintains a database describing the entire AS topology, which it builds out of the collected<br />
link state advertisements of all routers. Each participating router distributes its local state (that is,<br />
the router’s usable interfaces <strong>and</strong> reachable neighbors) throughout the AS by flooding.<br />
Each multiaccess network with at least two attached routers has a designated router <strong>and</strong> a backup<br />
designated router. The designated router floods a link state advertisement for the multiaccess<br />
network <strong>and</strong> has other special responsibilities. The designated router concept reduces the number of<br />
adjacencies required on a multiaccess network.<br />
OSPF lets you group networks into areas. Routing information passed between areas is abstracted,<br />
which can significantly reduce routing traffic. OSPF uses four different types of routes, listed in<br />
order of preference—intra-area, inter-area, type 1 external, <strong>and</strong> type 2 external. Intra-area paths<br />
have destinations within the same area, while inter-area paths have destinations in other OSPF<br />
areas. AS External (ASE) routes are routes to destinations external to the AS. Routes imported into<br />
OSPF as type 1 routes are supposed to be from IGPs whose external metrics are directly<br />
comparable to OSPF metrics.<br />
When making a routing decision, OSPF adds the internal cost of the AS Border router to the<br />
external metric. Type 2 ASEs are used for EGPs whose metrics are not comparable to OSPF<br />
metrics. In this case, GateD uses only the internal OSPF cost of the AS Border router in the routing<br />
decision.<br />
From the topology database, each router constructs a tree of the shortest paths with itself as the<br />
root. This shortest-path tree gives the route to each destination in the AS. Externally derived<br />
routing information appears on the tree as leaves. The link-state advertisement format distinguishes<br />
between information acquired from external sources <strong>and</strong> from internal routers, so that there is no<br />
ambiguity about the source or reliability of routes. Externally derived routing information (for<br />
example, routes learned from EGP or BGP) passes transparently through the AS <strong>and</strong> is separate<br />
from OSPF’s internally derived data. Each external route can also be tagged by the advertising<br />
router, enabling a passing of additional information between routers on the borders of the AS.<br />
OSPF optionally includes type of service (TOS) routing <strong>and</strong> allows administrators to install<br />
multiple routes to a given destination for each type of service (such as for low delay or high<br />
throughput.) A router running OSPF uses the destination address <strong>and</strong> the TOS to choose the best<br />
route to the destination.<br />
OSPF intra- <strong>and</strong> inter-area routes are always imported into the GateD routing database with a<br />
preference of 10. It would be a violation of the protocol if an OSPF router did not participate fully<br />
in the area’s OSPF, so it is not possible to override this. Although it is possible to give other routes<br />
lower preference values explicitly, it is ill-advised to do so.<br />
Hardware multicast capabilities are also used where possible to deliver link-status messages.<br />
OSPF areas are connected by the backbone area, the area with identifier 0.0.0.0. All areas must be<br />
13-53
Configuring Network Routing ospf<br />
13-54<br />
logically contiguous <strong>and</strong> the backbone is no exception. To permit maximum flexibility, OSPF<br />
allows the configuration of virtual links to enable the backbone area to appear contiguous when<br />
they are actually not.<br />
All routers in an area must agree on that area’s parameters. A separate copy of the link-state<br />
algorithm is run for each area. Because of this, most configuration parameters are defined on a per<br />
area basis. All routers belonging to an area must agree on that area’s configuration.<br />
Misconfiguration leads to adjacencies not forming between neighbors, <strong>and</strong> routing information<br />
might not flow, or even loop.<br />
Authentication. You can authenticate OSPF protocol exchanges. Authentication guarantees that<br />
routing information is imported only from trusted routers, to protect the Internet <strong>and</strong> its users.<br />
There are two authentication schemes available. The first uses a simple authentication key of up to<br />
eight characters <strong>and</strong> is st<strong>and</strong>ardized. The second is still experimental <strong>and</strong> uses the MD5 algorithm<br />
<strong>and</strong> an authentication key of up to 16 characters.<br />
The simple password provides very little protection, because in many cases it is possible to easily<br />
capture packets from the network <strong>and</strong> learn the authentication key. The experimental MD5<br />
algorithm provides much more protection, as it does not include the authentication key in the<br />
packet.<br />
The OSPF specification currently specifies that you configure the authentication type per area with<br />
the ability to configure separate passwords per interface. This was extended to allow configuration<br />
of different authentication types <strong>and</strong> keys per interface. Also, you can specify both a primary <strong>and</strong> a<br />
secondary authentication type <strong>and</strong> key on each interface. Outgoing packets use the primary<br />
authentication type, but incoming packets may match either the primary or secondary<br />
authentication type <strong>and</strong> key.<br />
You configure OSPF in the MULTINET:GATED.CONF file using a GateD protocol statement.<br />
Format<br />
ospf yes | no | on | off<br />
[{ defaults<br />
{ preference value ;<br />
cost cost ;<br />
tag [as] tag ;<br />
type 1 | type 2 ;<br />
} ;<br />
exportlimit routes ;<br />
exportinterval time ;<br />
traceoptions options;<br />
monitorauthkey key ;<br />
monitorauth none | [simple | md5] authkey ;<br />
backbone | area area<br />
{ authtype 0 | authtype 1 | none | simple ;<br />
stub [cost cost] ;<br />
networks<br />
{ network [restrict] ;
}] ;<br />
Options <strong>and</strong> Parameters<br />
network mask mask [restrict] ;<br />
network masklen number [restrict] ;<br />
host host [restrict] ;<br />
} ;<br />
stubhosts<br />
{ host cost cost ; } ;<br />
interface list [cost cost]<br />
{ interface-parameters } ;<br />
interface list nonbroadcast [cost cost]<br />
{ pollinterval time ;<br />
routers<br />
{ gateway [eligible] ; } ;<br />
interface-parameters<br />
} ;<br />
/* Backbone only: */<br />
virtuallink neighborid router-id transitarea area<br />
{ interface-parameters } ;<br />
} ;<br />
ospf Configuring Network Routing<br />
yes | on<br />
no | off<br />
Enables or disables OSPF support.<br />
defaults<br />
Defaults used when importing OSPF ASE routes into the GateD routing table, <strong>and</strong> exporting routes<br />
from the GateD routing table into OSPF ASEs, including:<br />
preference value; How OSPF routes compete with routes from other protocols in the<br />
GateD routing table. The default preference value is 150.<br />
cost cost ; Used when exporting a non-OSPF route from the GateD routing table<br />
into OSPF as an ASE. Export policy can explicitly override this. The<br />
default cost is 1.<br />
tag [as] tag ; OSPF ASE routes have a 32-bit tag field that the OSPF protocol does<br />
not use, but export policy can use it to filter routes. When OSPF<br />
interacts with an EGP, you can use the tag field to propagate AS path<br />
information. In this case you would specify the as keyword <strong>and</strong> the<br />
tag is limited to 12 bits of information. The default tag value is 0.<br />
type 1 or 2 ; Export policy can explicitly change <strong>and</strong> override the default here. The<br />
default is type 1.<br />
13-55
Configuring Network Routing ospf<br />
13-56<br />
exportlimit routes ;<br />
How many ASEs are generated <strong>and</strong> flooded in each batch. The default export limits routes value is<br />
100.<br />
exportinterval time ;<br />
How often a batch of ASE link state advertisements are generated <strong>and</strong> flooded into OSPF. The<br />
default export interval time value is 1 (once per second).<br />
traceoptions options ;<br />
In addition to the following OSPF specific trace flags, OSPF supports the state which traces<br />
interface <strong>and</strong> neighbor state machine transitions:<br />
lsabuild Link State Advertisement creation<br />
spf Shortest Path First (SPF) calculations<br />
lsatransmit Link State Advertisement (LSA) transmission<br />
lsareceive LSA reception<br />
state State transitions<br />
Packet tracing options (which you can modify with detail, send, <strong>and</strong> recv):<br />
hello OSPF HELLO packets used to determine neighbor reachability<br />
dd OSPF Database Description packets used in synchronizing OSPF databases<br />
request OSPF Link State Request packets used in synchronizing OSPF databases<br />
lsu OSPF Link State Update packets used in synchronizing OSPF databases<br />
ack OSPF Link State Ack packets used in synchronizing OSPF databases<br />
monitorauthkey key ;<br />
monitorauth none | [simple | md5] authkey ;<br />
You can query the OSPF state using the ospf_monitor (this should be a hyperlink) utility, which<br />
sends nonst<strong>and</strong>ard OSPF packets that generate a text response from OSPF. If you configure an<br />
authentication key, the incoming requests must match the specified authentication key. These<br />
packets cannot change OSPF state, but the act of querying OSPF can expend system resources. Not<br />
authenticated by default.<br />
backbone/area Clause Options <strong>and</strong> Parameters<br />
ospf yes | no | on | off<br />
[{ defaults<br />
{ preference value ;
ospf Configuring Network Routing<br />
cost cost ;<br />
tag [as] tag ;<br />
type 1 | type 2 ;<br />
} ;<br />
exportlimit routes ;<br />
exportinterval time ;<br />
traceoptions options;<br />
monitorauthkey key ;<br />
monitorauth none | [simple | md5] authkey ;<br />
backbone | area area<br />
{ authtype 0 | authtype 1 | none | simple ;<br />
stub [cost cost] ;<br />
networks<br />
{ network [restrict] ;<br />
network mask mask [restrict] ;<br />
network masklen number [restrict] ;<br />
host host [restrict] ;<br />
} ;<br />
stubhosts<br />
{ host cost cost ; } ;<br />
interface list [cost cost]<br />
{ interface-parameters } ;<br />
interface list nonbroadcast [cost cost]<br />
{ pollinterval time ;<br />
routers<br />
{ gateway [eligible] ; } ;<br />
interface-parameters<br />
} ;<br />
/* Backbone only: */<br />
virtuallink neighborid router-id transitarea area<br />
{ interface-parameters } ;<br />
} ;<br />
}] ;<br />
backbone or area area<br />
Configures each OSPF router into at least one OSPF area. If you configure more than one area, at<br />
least one must be the backbone. Configure the backbone using the backbone keyword only; you<br />
cannot specify it as area 0. The backbone interface can be a virtuallink.<br />
Further parameters include:<br />
authtype 0 or 1 or none or simple OSPF specifies an authentication scheme per area.<br />
Each interface in the area must use this same<br />
authentication scheme, although it can use a<br />
different authentication key. 0 is the same as<br />
none; 1 is the same as simple.<br />
13-57
Configuring Network Routing ospf<br />
13-58<br />
stub [cost cost] A stub area is one in which there are no ASE<br />
routes. Use cost to inject a default route into the<br />
area with the specified cost.<br />
networks<br />
{ network [restrict] ;<br />
network mask mask [restrict] ;<br />
network masklen number [restrict] ;<br />
host host [restrict] ; } ;<br />
The networks list describes the scope of an area.<br />
Intra-area LSAs that fall within the specified<br />
ranges are not advertised into other areas as interarea<br />
routes. Instead, the specified ranges are<br />
advertised as summary network LSAs.<br />
If you specify restrict, the summary network<br />
LSAs are not advertised. Intra-area LSAs that do<br />
not fall into any range are also advertised as<br />
summary network LSAs. This option is very<br />
useful on well designed networks in reducing the<br />
amount of routing information propagated<br />
between areas. The entries in this list are either<br />
networks, or a subnetwork/mask pair.<br />
stubhosts { host cost cost ; } The stubhosts list specifies directly attached hosts<br />
that should be advertised as reachable from this<br />
router, <strong>and</strong> the costs with which they should be<br />
advertised. Specify point-to-point interfaces here<br />
on which it is not desirable to run OSPF.<br />
It is also useful to assign an additional address to<br />
the loopback interface (one not on the 127<br />
network) <strong>and</strong> advertise it as a stub host. If this<br />
address is the same one used as the router ID, it<br />
enables routing to OSPF routers by router ID,<br />
instead of by interface address. This is more<br />
reliable than routing to one of the router’s interface<br />
addresses, which may not always be reachable.<br />
interface list cost cost<br />
{interface-parameters}<br />
Use this form of the interface clause (with the<br />
optional cost value, <strong>and</strong> immediately followed by<br />
the interface-parameters) to configure a<br />
broadcast (which requires IP multicast support) or<br />
a point-to-point interface. (See the interfaces<br />
statement for a description of list.) Each interface<br />
has a cost. The costs of all the interfaces a packet<br />
must cross to reach a destination are summed to<br />
get the cost to that destination. The cost can be any<br />
non-zero value (the default is 1).
ospf Configuring Network Routing<br />
The following are the interface-parameters. You can specify them on any class of interface:<br />
enable | disable ;<br />
retransmitinterval time ;<br />
transitdelay time ;<br />
priority value ;<br />
hellointerval time ;<br />
routerdeadinterval time ;<br />
authkey key ;<br />
retransmitinterval time Number of seconds between link state advertisement<br />
retransmissions for adjacencies belonging to this interface.<br />
transitdelay time Estimated number of seconds required to transmit a link<br />
state update over this interface. Takes into account<br />
transmission <strong>and</strong> propagation delays <strong>and</strong> must be greater<br />
than 0.<br />
priority value Number between 0 <strong>and</strong> 255 specifying the priority for<br />
becoming the designated router on this interface. When<br />
two routers attached to a network both attempt to become<br />
designated router, the one with the highest priority prevails.<br />
A router whose router priority is 0 is ineligible to become<br />
designated router.<br />
hellointerval time Length of time, in seconds, between Hello packets that the<br />
router sends on the interface.<br />
routerdeadinterval time Number of seconds not hearing a router’s Hello packets<br />
before the router’s neighbors will declare it down.<br />
authkey key Used by OSPF authentication to generate <strong>and</strong> verify the<br />
authentication field in the OSPF header. You can configure<br />
the authentication key on a per-interface basis. Specify it<br />
using one to eight decimal digits separated by periods, a<br />
one to eight byte hexadecimal string preceded by 0x, or a<br />
one to eight character string in double quotes.<br />
ospf yes | no | on | off<br />
.<br />
.<br />
.<br />
backbone | area area<br />
{ authtype 0 | authtype 1 | none | simple ;<br />
stub [cost cost] ;<br />
networks<br />
{ network [restrict] ;<br />
network mask mask [restrict] ;<br />
13-59
Configuring Network Routing ospf<br />
13-60<br />
network masklen number [restrict] ;<br />
host host [restrict] ;<br />
} ;<br />
stubhosts<br />
{ host cost cost ; } ;<br />
interface list [cost cost]<br />
{ interface-parameters } ;<br />
interface list nonbroadcast [cost cost]<br />
{ pollinterval time ;<br />
routers<br />
{ gateway [eligible] ; } ;<br />
interface-parameters<br />
} ;<br />
/* Backbone only: */<br />
virtuallink neighborid router-id transitarea area<br />
{ interface-parameters } ;<br />
} ;<br />
}] ;<br />
interface list nobroadcast [cost cost]<br />
{ pollinterval time ;<br />
routers<br />
{ gateway [eligible] ; } ;<br />
interface-parameters } ;<br />
This form of the interface clause (with the nobroadcast option) is for point-to-point interfaces<br />
only. By default, OSPF packets to neighbors on point-to-point interfaces are sent using the IP<br />
multicast mechanism. GateD detects this condition <strong>and</strong> falls back to using sending unicast OSPF<br />
packets to this point-to-point neighbor.<br />
If you do not want IP multicasting, because the remote neighbor does not support it, specify<br />
nobroadcast to force the use of unicast OSPF packets. You can also use this option to eliminate<br />
warnings when GateD detects the bug mentioned previously. (See the previous page for the<br />
interface-parameters.)<br />
Use this form of the interface clause to specify a nonbroadcast interface on a nonbroadcast<br />
multiaccess (NBMA) media. Since an OSPF broadcast media must support IP multicasting, you<br />
must configure a broadcast-capable media, such as Ethernet, that does not support IP multicasting<br />
as a nonbroadcast interface. A nonbroadcast interface supports any of the st<strong>and</strong>ard interface clauses<br />
listed previously, plus the following two that are specific to nonbroadcast interfaces:<br />
pollinterval time Before adjacency is established with a neighbor, OSPF packets are<br />
sent periodically at the specified poll interval.<br />
routers gateway By definition, it is not possible to send broadcast packets to<br />
discover OSPF neighbors on a nonbroadcast, so you must configure<br />
all neighbors. The list includes one or more neighbors <strong>and</strong> an<br />
indication of their eligibility to become a designated router.
static Configuring Network Routing<br />
virtuallink neighborid routerid transitarea area<br />
{ interface-parameters } ;<br />
For backbone only: Virtual links are used to establish or increase connectivity of the backbone area.<br />
The neighborid is the router-ID of the other end of the virtual link. The transit area specified<br />
must also be configured on this system. You can specify all st<strong>and</strong>ard interface parameters defined<br />
by the interface clause previously described on a virtual link. (See the previous page for the<br />
interface-parameters.)<br />
static<br />
The static statements define the static routes GateD uses. A single static statement can specify<br />
any number of routes. These statements must occur after protocol statements <strong>and</strong> before<br />
control statements in GATED.CONF. Specify any number of static statements, each<br />
containing any number of static route definitions. You can override these routes with ones with<br />
better preference values.<br />
Format<br />
static<br />
{ host host gateway list<br />
| network [mask mask | masklen number] gateway list<br />
| default gateway list<br />
[interface list]<br />
[preference value]<br />
[retain]<br />
[reject]<br />
[blackhole]<br />
[noinstall]<br />
;<br />
network [mask mask | masklen number]<br />
interface interface<br />
[preference value]<br />
[retain]<br />
[reject]<br />
[blackhole]<br />
[noinstall]<br />
;<br />
} ;<br />
Options <strong>and</strong> Parameters<br />
host...gateway list or default gateway list<br />
Most general form of the static statement. Defines a static route through one or more gateways.<br />
Static routes are installed when one or more of the gateways listed are available on directly attached<br />
interfaces. If more than one eligible gateway is available, they are limited by the number of<br />
multipath destinations supported.<br />
13-61
Configuring Network Routing import<br />
The second form of the network mask... clause farther down in the statement is for primitive<br />
support of multiple network addresses on one interface.<br />
interface list<br />
Gateways are valid only when they are on one of these interfaces.<br />
preference value<br />
Preference of this static route. Controls how this route competes with routes from other protocols.<br />
The default value is 60.<br />
retain<br />
Prevent specific static routes from being removed. Normally GateD removes all routes except<br />
interface routes from the kernel forwarding table during a graceful shutdown. Useful for ensuring<br />
that some routing is available when GateD is down.<br />
reject, blackhole<br />
Not supported in <strong>MultiNet</strong>. Install this route as a reject or blackhole route. Instead of forwarding<br />
a packet like a normal route, reject routes drop packets <strong>and</strong> send unreachable messages to the<br />
packet originators. Not all kernel forwarding engines support reject routes. A blackhole route is like<br />
a reject route, except that unreachable messages are not supported.<br />
noinstall<br />
Do not install the route in the kernel forwarding table when active, but make it still exportable to<br />
other protocols. Normally the route with the lowest preference is installed there <strong>and</strong> is the route<br />
exported to other protocols.<br />
import<br />
The control statements are:<br />
13-62<br />
• import<br />
• export<br />
• aggregate<br />
• generate<br />
Format<br />
import [restrict | preference value]<br />
The import statements control importing routes from routing protocols, <strong>and</strong> installing the routes in<br />
GateD’s routing database. The format of an import statement varies depending on the source<br />
protocol. In all cases, you can specify one of two keywords to control how routes compete with
other protocols:<br />
Importing Routes from BGP <strong>and</strong> EGP<br />
import Configuring Network Routing<br />
restrict Restrict the routes from the routing table. In some cases this means<br />
that the routes are not installed in the routing table. In others, it means<br />
that they are installed with a negative preference; this prevents them<br />
from becoming active so that they will not be installed in the<br />
forwarding table or exported to other protocols.<br />
preference value Preference value used when comparing this route to other routes from<br />
other protocols. The route with the lowest preference available at any<br />
given route becomes the active route, is installed in the forwarding<br />
table, <strong>and</strong> can be exported to other protocols. The individual protocols<br />
configure the default preferences.<br />
You can control EGP importation by AS. Note that EGP <strong>and</strong> BGP versions 2 <strong>and</strong> 3 only support<br />
propagating natural networks, so the host <strong>and</strong> default route filters are meaningless. BGP version 4<br />
supports propagating any destination along with a contiguous network mask.<br />
EGP <strong>and</strong> BGP both store any routes rejected implicitly by their not being mentioned in a route<br />
filter, or explicitly if restrict appears in the routing table with a negative preference. A negative<br />
preference prevents a route from becoming active, which prevents it from being installed in the<br />
forwarding table or exported to other protocols. This removes the need to break <strong>and</strong> reestablish a<br />
session on reconfiguring if changing the importation policy.<br />
The syntax of the import statement for importing routes from BGP or EGP is any of the following:<br />
import proto bgp | egp autonomoussystem ASnumber restrict ;<br />
import proto bgp | egp autonomoussystem ASnumber<br />
[preference value] {<br />
route-filter [restrict | preference value] ; } ;<br />
import proto bgp aspath ASpathregexp<br />
origin any | [igp] [egp] [incomplete] restrict ;<br />
import proto bgp aspath ASpathregexp<br />
origin any | [igp] [egp] [incomplete]<br />
[preference value] {<br />
routefilter [restrict | preference value] ; } ;<br />
The third <strong>and</strong> fourth variation of the import statements is for BGP only <strong>and</strong> supports controlling<br />
propagation by using AS path regular expressions. An AS path is a list of ASs that routing<br />
information passes through to get to a router, <strong>and</strong> an indicator of the origin of the AS path. Use this<br />
information to set the preference of one path to a destination network over another. You do this by<br />
listing patterns applied to AS paths when importing <strong>and</strong> exporting routes. Each AS that a route<br />
passes through prepends its AS number to the beginning of the AS path.<br />
13-63
Configuring Network Routing import<br />
Aspath Clause<br />
13-64<br />
The following aspath clause in the import statement indicates that an AS matching the<br />
ASpathregexp with the specified origin is matched. The parameters follow:<br />
aspath ASpathregexp origin any | [igp] [egp] [incomplete]<br />
Aspath Clause Regular Expression<br />
ASpathregexp<br />
Regular expression, with the alphabet as the set of AS numbers, consisting of one or more AS path<br />
expressions, which are terms <strong>and</strong> operators. An AS path term (ASpathterm) consists of the<br />
following:<br />
ASnumber Any valid AS system number, from 1 through 65534.<br />
. Matches any AS number.<br />
(ASpathregexp) Parentheses group sub-expressions. An operator such as asterisk (*) or<br />
question mark (?) works on a single element or on a regular expression<br />
enclosed in parentheses.<br />
Aspath Clause Operators<br />
AS path operators consists of the following:<br />
ASpathterm {m} Exactly m repetitions, where m is a positive integer.<br />
ASpathterm {m,} m or more repetitions, where m is a positive integer.<br />
ASpathterm {m,n} At least m <strong>and</strong> at most n repetitions, where m <strong>and</strong> n are both<br />
nonnegative integers <strong>and</strong> m
Importing Routes from RIP, HELLO, <strong>and</strong> Redirects<br />
import Configuring Network Routing<br />
You can control importing RIP, HELLO, <strong>and</strong> Redirect routes by any protocol, source interface, or<br />
source gateway. If using more than one, they are processed from most general (protocol) to most<br />
specific (gateway). RIP <strong>and</strong> HELLO do not support preferences to choose between routes of the<br />
same protocol; they use metrics instead. They also do not save rejected routes since they have short<br />
update intervals.<br />
The syntax of the import statement for importing routes from RIP, HELLO, or redirects is either<br />
of the following:<br />
import proto rip | hello | redirect<br />
[interface list | gateway list]<br />
restrict ;<br />
import proto rip | hello | redirect<br />
[interface list | gateway list]<br />
[preference value]<br />
{ routefilter [restrict | preference value] ; } ;<br />
Importing Routes from OSPF<br />
You can only control importing AS External (ASE) routes. OSPF intra- <strong>and</strong> inter-area routes are<br />
always imported into the GateD routing table with a preference of 10. If using an ospftag, the<br />
import clause only applies to routes with the specified tag.<br />
You can only restrict importing OSPF ASE routes if functioning as an AS border router. Do this by<br />
specifying an export ospfase clause. Specifying an empty export clause can restrict importing<br />
ASEs, when no ASEs are exported.<br />
Like the other interior protocols, you cannot use preference to choose between OSPF ASE<br />
routes; OSPF costs accomplish this. Routes rejected by policy go into the table with a negative<br />
preference.<br />
The syntax of the import statement for importing routes from OSPF is either of the following:<br />
import proto ospfase [tag ospftag] restrict ;<br />
import proto ospfase [tag ospftag]<br />
[preference value]<br />
{ routefilter [restrict | preference value] ; } ;<br />
export<br />
The control statements are:<br />
• import<br />
• export<br />
• aggregate<br />
• generate<br />
13-65
Configuring Network Routing import<br />
Format<br />
13-66<br />
export [restrict | metric metric]<br />
The export statement controls which routes GateD advertises to other systems. Like import, the<br />
export syntax varies slightly for each protocol. Both syntaxes are similar <strong>and</strong> the meanings of<br />
many of the parameters are the same. The main difference is that while source information controls<br />
importing routes, both destination <strong>and</strong> source information control exporting routes.<br />
The outer portion of a given export statement specifies the destination of the routing information<br />
you control. The middle portion restricts the sources. The innermost portion is a route filter used to<br />
select individual routes.<br />
One thing that applies in all cases is the specification of a metric. All protocols define a default<br />
metric for routes exported. In most cases, this can be overridden at several levels of the export<br />
statement. The most specific specification of a metric is the one applied to the route exported. The<br />
values you can specify for a metric depend on the destination protocol the export statement<br />
references:<br />
restrict Do not export anything. If specified on the destination portion of the<br />
export statement, it means not to export anything to this destination. If<br />
specified on the source portion, it means not to export anything from this<br />
source. If specified as part of a route filter, it means not to export the routes<br />
matching that filter.<br />
metric metric Metric used when exporting to the specified destination.<br />
Exporting to EGP <strong>and</strong> BGP<br />
The AS controls exporting to EGP <strong>and</strong> BGP, the same policy applied to all routers in the AS. EGP<br />
metrics range from 0 through 255, with 0 the most attractive. BGP metrics are 16-bit unsigned<br />
quantities (that range from 0 through 65535, inclusive with 0 the most attractive). While BGP<br />
version 4 actually supports 32-bit unsigned quantities, GateD does not yet support this.<br />
If you do not specify an export policy, only routes to attached interfaces are exported. If you specify<br />
any policy, the defaults are overridden; you should explicitly specify everything you want exported.<br />
(Note that EGP <strong>and</strong> BGP versions 2 <strong>and</strong> 3 only support the propagation of natural networks, so the<br />
host <strong>and</strong> default route filters are meaningless. BGP version 4 supports the propagation of any<br />
destination along with a contiguous network mask.)<br />
The syntax of the export statement for exporting routes to EGP or BGP is either of the following:<br />
export proto bgp | egp as ASnumber restrict ;<br />
export proto bgp | egp as ASnumber [metric metric]<br />
{ exportlist ; } ;<br />
Exporting to RIP <strong>and</strong> HELLO<br />
Any protocol, interface, or gateway can control exporting to RIP <strong>and</strong> HELLO. If you specify more<br />
than one, they are processed from most general (protocol) to most specific (gateway). It is not
import Configuring Network Routing<br />
possible to set metrics for exporting RIP routes into RIP, or exporting HELLO routes into HELLO.<br />
Attempts to do this are silently ignored.<br />
If you do not specify an export policy, RIP <strong>and</strong> interface routes are exported into RIP <strong>and</strong> HELLO,<br />
<strong>and</strong> interface routes are exported into HELLO. If you specify any policy, the defaults are<br />
overridden; it is necessary to explicitly specify everything that should be exported.<br />
RIP version 1 <strong>and</strong> HELLO assume that all subnets of the shared network have the same subnet<br />
mask, so they are only able to propagate subnets of that network. RIP version 2 is capable of<br />
propagating all routes, when not sending version 1 compatible updates.<br />
To announce routes that specify a next hop of the loopback interface (static <strong>and</strong> internally generated<br />
default routes) over RIP or HELLO, specify the metric at some level in the export clause. Just<br />
setting a default metric is not sufficient. This is a safeguard to verify that the announcement is<br />
intended.<br />
The syntax of the export statement for exporting routes to RIP or HELLO is either of the<br />
following:<br />
export proto rip | hello<br />
[interface list | gateway list] restrict ;<br />
export proto rip | hello<br />
[interface list | gateway list] [metric metric]<br />
{ exportlist ; } ;<br />
Exporting to OSPF<br />
It is not possible to create OSPF intra- or inter-area routes by exporting routes from the GateD<br />
routing table into OSPF. It is only possible to export from the GateD routing table into OSPF ASE<br />
routes. It is also not possible to control the propagation of OSPF routes within the OSPF protocol.<br />
There are two types of OSPF ASE routes, type 1 <strong>and</strong> type 2 (see the OSPF protocol configuration<br />
for details on the two types). Specify the default type using the defaults subclause of the ospf<br />
clause. You can override this with the export statement.<br />
OSPF ASE routes also have the provision to carry a tag. This is an arbitrary 32-bit number you can<br />
use on OSPF routers to filter routing information. (See the OSPF protocol configuration for details<br />
on OSPF tags.) You can override the default tag specified by the ospf defaults clause with a tag<br />
specified on the export statement.<br />
The syntax of the export statement for exporting routes to OSPF is either of the following:<br />
export proto osfpase [type 1 | 2] [tag ospf-tag] restrict ;<br />
export proto osfpase [type 1 | 2] [tag ospf-tag]<br />
[metric metric]<br />
{ exportlist ; } ;<br />
13-67
Configuring Network Routing import<br />
Exporting BGP <strong>and</strong> EGP Routes<br />
13-68<br />
You can specify BGP <strong>and</strong> EGP routes by source AS. You can export all routes by AS path. The<br />
syntax of the proto statement for exporting BGP or EGP routes is either of the following:<br />
proto bgp | egp autonomoussystem ASnumber restrict ;<br />
proto bgp | egp autonomoussystem ASnumber [metric metric]<br />
{ routefilter [restrict | metric metric] ; } ;<br />
Exporting RIP <strong>and</strong> HELLO Routes<br />
You can export RIP <strong>and</strong> HELLO routes by protocol, source interface, or source gateway. The<br />
syntax of the proto statement for exporting RIP or HELLO routes is either of the following:<br />
proto rip | hello<br />
[interface list | gateway list] restrict ;<br />
proto rip | hello<br />
[interface list | gateway list] [metric metric]<br />
{ routefilter [restrict | metric metric] ; } ;<br />
Exporting OSPF Routes<br />
You can export both OSPF <strong>and</strong> OSPF ASE routes into other protocols. The syntax of the proto<br />
statement for exporting OSPF routes is either of the following:<br />
proto ospfase | ospfase restrict ;<br />
proto ospfase | ospfase [metric metric]<br />
{ routefilter [restrict | metric metric] ; } ;<br />
Exporting Routes from Nonrouting Protocols with Interface<br />
If you want GateD to export direct or static routes, or routes learned from the kernel, use the<br />
protocol statement or interface statement along with the interface of the next hop in the GateD<br />
configuration file. The syntax of the proto statement for exporting routes from nonrouting<br />
protocols with an interface is either of the following:<br />
proto direct | static | kernel<br />
[interface list] restrict ;<br />
proto direct | static | kernel<br />
[interface list] [metric metric]<br />
{ routefilter [restrict | metric metric] ; } ;<br />
The proto statement parameters include:<br />
direct Routes to directly attached interfaces.<br />
static Static routes specified in a static clause.
Exporting Routes from Nonrouting Protocols by Protocol<br />
import Configuring Network Routing<br />
kernel On systems with the routing socket, routes learned from the routing socket are<br />
installed in the GateD routing table with a protocol of kernel. You can export these<br />
routes by referencing this protocol. This is useful when it is desirable to have a script<br />
install routes with the route comm<strong>and</strong> <strong>and</strong> propagate them to other routing<br />
protocols.<br />
If you want GateD to export default or aggregate routes, use the protocol statement in the GateD<br />
configuration file. The syntax of the proto statement for exporting routes from nonrouting<br />
protocols by protocol is either of the following:<br />
proto default | aggregate restrict ;<br />
proto default | aggregate<br />
[metric metric]<br />
{ routefilter [restrict | metric metric] ; } ;<br />
The proto statement parameters include:<br />
default Routes created by the gendefault option. Use route generation instead.<br />
aggregate Routes synthesized from other routes when using the aggregate <strong>and</strong><br />
generate statements.<br />
Exporting by AS Path<br />
When configuring BGP, all routes get an AS path when added to the routing table. For all interior<br />
routes, this AS path specifies IGP as the origin <strong>and</strong> no ASEs in the AS path (the current AS is<br />
added when the route is exported). For EGP routes, this AS path specifies EGP as the origin <strong>and</strong> the<br />
source AS as the AS path. For BGP routes, the AS path is stored as learned from BGP. (The AS<br />
path regular expression syntax appears in the Importing Routes from BGP <strong>and</strong> EGP subsection.)<br />
The syntax of the proto statement for exporting by AS path is either of the following:<br />
proto proto | all aspath ASpathregexp<br />
origin any | [igp] [egp] [incomplete] restrict ;<br />
proto proto | all aspath ASpathregexp<br />
origin any | [igp] [egp] [incomplete] [metric metric]<br />
{ routefilter [restrict | metric metric] ; } ;<br />
13-69
Configuring Network Routing aggregate<br />
Exporting by Route Tag<br />
13-70<br />
Both OSPF <strong>and</strong> RIP version 2 currently support tags. All other protocols always have a tag of zero.<br />
You can select the source of exported routes based on this tag. This is useful when classifying<br />
routes by tag when exporting them into a given routing protocol. The syntax of the proto<br />
statement for exporting by route tag is either of the following:<br />
proto proto | all all tag tag restrict ;<br />
proto proto | all all tag tag<br />
[metric metric]<br />
{ routefilter [restrict | metric metric] ; } ;<br />
aggregate<br />
The control statements are:<br />
• import<br />
• export<br />
• aggregate<br />
• generate<br />
Use route aggregation to generate a more general route from a specific one. Use it, for example, at<br />
an AS border to generate a route to a network to be advertised through EGP, given the presence of<br />
one or more subnets of that network learned through RIP. Regional <strong>and</strong> national networks also use<br />
route aggregation to reduce routing information. By carefully allocating network addresses to<br />
clients, regional networks can just announce one route to regional networks instead of hundreds.<br />
No aggregation occurs unless explicitly requested in an aggregate statement.<br />
Aggregate routes are not actually used for packet forwarding by the originator of the aggregate<br />
route, only by the receiver (if it wishes). A router, receiving a packet that does not match one of the<br />
component routes that led to the generation of an aggregate route, is supposed to respond with an<br />
ICMP network unreachable message. This prevents packets for unknown component routes<br />
from following a default route into another network where they would be continuously forwarded<br />
back to the border router, until their TTL expires. Sending an unreachable message for a missing<br />
piece of an aggregate is only possible on systems that support reject routes, which <strong>MultiNet</strong> does<br />
not.<br />
Format<br />
aggregate default | network [mask mask | masklen number]<br />
[preference value] [brief]<br />
{ proto [all | direct | static | kernel | aggregate | proto]<br />
[as AS | tag tag | aspath ASpathregexp] restrict ;<br />
proto [all | direct | static | kernel | aggregate | proto]<br />
[as AS | tag tag | aspath ASpathregexp] [preference value]<br />
{ routefilter [restrict | preference value] ; } ;<br />
} ;
Options <strong>and</strong> Parameters<br />
aggregate Configuring Network Routing<br />
preference value<br />
The default preference value is 130.<br />
brief<br />
Truncate the AS path to the longest common AS path. The default is to build an AS path consisting<br />
of SETs <strong>and</strong> SEQUENCEs of all contributing AS paths.<br />
proto proto<br />
In addition to the special protocols listed, you can select the contributing protocol from among<br />
those currently configured in GateD.<br />
aggregate default | network [mask mask | masklen number<br />
[preference value] [brief]<br />
{ proto [all | direct | static | kernel | aggregate | proto]<br />
[as AS | tag tag | aspath ASpathregexp]<br />
restrict ;<br />
proto [all | direct | static | kernel | aggregate | proto]<br />
[as AS | tag tag | aspath ASpathregexp]<br />
[preference value]<br />
{ routefilter [restrict | preference value] ; } ;<br />
} ;<br />
as AS<br />
Restrict selection of routes to those learned from the specified AS.<br />
tag tag<br />
Restrict selection of routes to those with the specified tag.<br />
aspath ASpathregexp<br />
Restrict selection of routes to those that match the specified AS path.<br />
restrict<br />
Restrict certain routes from contributing to the specified aggregate.<br />
A route can only contribute to an aggregate route that is more general than itself; it must match the<br />
aggregate under its mask. Any given route can only contribute to one aggregate route, which will<br />
be the most specific configured, but an aggregate route can contribute to a more general aggregate.<br />
13-71
Configuring Network Routing generate<br />
generate<br />
The control statements are:<br />
13-72<br />
• import<br />
• export<br />
• aggregate<br />
• generate<br />
A slight variation on aggregation is generating a route based on certain conditions. This is<br />
sometimes known as the "route of last resort." This route inherits the next hops <strong>and</strong> AS path from<br />
the contributor specified with the lowest (most favorable) preference. The most common usage is to<br />
generate a default based on the presence of a route from a peer on a neighboring backbone.<br />
Format<br />
generate default | network [mask mask | masklen number]<br />
[preference value] [brief]<br />
{ [as AS | tag tag | aspath ASpathregexp]<br />
restrict ;<br />
proto [all | direct | static | kernel | aggregate | proto]<br />
[as AS | tag tag | aspath ASpathregexp]<br />
[preference value]<br />
{ routefilter [restrict | preference value] ; } ;<br />
} ;
Sample GateD Configurations<br />
generate Configuring Network Routing<br />
Figure 13-1 shows two networks connected within an AS using RIP. Example 13-1, Example 13-2,<br />
<strong>and</strong> Example 13-3 show the RIP statements on each end host <strong>and</strong> gateway alpha, which has IP<br />
forwarding enabled. All systems are running GateD.<br />
Figure 13-1 Sample RIP Configuration<br />
Example 13-1 GateD Configuration File for izar<br />
# turn on RIP <strong>and</strong> listen for updates.<br />
#<br />
rip on;<br />
Example 13-2 GateD Configuration File for alpha<br />
# turn on RIP.<br />
#<br />
rip yes;<br />
#<br />
# use RIP to pass routing information to the banzai network.<br />
#<br />
export proto rip interface 10.10.10.1<br />
{<br />
# we know about the flowers network, so announce it.<br />
#<br />
proto direct {<br />
10.10.8.0 mask 255.255.255.0;<br />
};<br />
# use RIP to announce all routes learned from flowers.<br />
#<br />
proto rip interface 10.10.8.0 {<br />
all;<br />
};<br />
};<br />
13-73
Configuring Network Routing generate<br />
13-74<br />
Example 13-3 GateD Configuration File for omega<br />
# turn on RIP <strong>and</strong> listen for updates.<br />
#<br />
rip on;<br />
Example 13-4 shows a sample RIP statement where the gateway announces a default route to the<br />
backbone, <strong>and</strong> announces all of the individual subnet routes to the outside world.<br />
Example 13-4 Default RIP Announcements<br />
# enable RIP:<br />
#<br />
rip yes;<br />
# using RIP, announce all local subnets via interface 192.168.12.3:<br />
#<br />
export proto rip interface 192.168.12.3 metric 3<br />
{<br />
proto rip interface 192.168.1.5<br />
{<br />
all;<br />
};<br />
};<br />
#<br />
# Using RIP, announce default via interface 192.168.1.5:<br />
#<br />
export proto rip interface 192.168.3.1<br />
{<br />
proto rip interface 192.168.1.5<br />
{<br />
default;<br />
};<br />
};<br />
Example 13-5 shows a configuration for AS 283 that enables RIP <strong>and</strong> OSPF, which you can use to<br />
test both.
Example 13-5 Using RIP <strong>and</strong> OSPF<br />
# this interface is passive:<br />
#<br />
interfaces {<br />
interface SVA-0 passive;<br />
};<br />
#<br />
# this Autonomous System number is 283:<br />
#<br />
autonomoussystem 283;<br />
#<br />
# turn on RIP:<br />
# packets are to be broadcast.<br />
# metric for routes learned via other protocols is 5.<br />
# multicast RIP V2 packets on SVA-0.<br />
#<br />
rip yes {<br />
broadcast;<br />
generate Configuring Network Routing<br />
defaultmetric 5;<br />
interface SVA-0 version 2 multicast;<br />
};<br />
#<br />
# turn on OSPF:<br />
# Trace Link State Advertisement creation <strong>and</strong><br />
# Shortest Path First calculations<br />
# use authentication key "ZZZZZZZZ" when h<strong>and</strong>ling OSPF queries.<br />
# this system is on the backbone.<br />
# use simple password authentication for this area.<br />
# make this system very unlikely to be a designated router.<br />
# set the OSPF header authentication key to "YYYYYYYY" for<br />
# packets going out on SVA-0.<br />
#<br />
ospf yes {<br />
traceoptions lsabuild spf;<br />
monauthkey "ZZZZZZZZ";<br />
backbone {<br />
authtype simple;<br />
interface all {<br />
priority 2;<br />
};<br />
interface SVA-0 {<br />
authkey "YYYYYYYY";<br />
};<br />
};<br />
};<br />
13-75
Configuring Network Routing generate<br />
13-76<br />
Example 13-6 shows a configuration for a static route.<br />
Example 13-6 Static Routes<br />
#<br />
# in this example our host's address is 192.168.1.42<br />
#<br />
static {<br />
192.168.2.0 masklen 24 interface 192.168.1.42 retain;<br />
default gateway 192.168.1.1 ;<br />
;
RTSOLD<br />
generate Configuring Network Routing<br />
RTSOLD is the IPv6 router solicitation daemon. It will be automatically run at startup when IPv6<br />
has been enabled for an interface. RTSOLD sends ICMPv6 Router Solicitation messages on the<br />
specified interface. The ICMPv6 code will use the information in Router Advertisement messages<br />
that it receives to configure interface prefix <strong>and</strong> default route. IPv6 Routers send out advertisement<br />
messages periodically <strong>and</strong> when requested; usage of RTSOLD reduces the amount of time until a<br />
router advertisement message is processed by the system <strong>and</strong> IPv6 routes are defined. RTSOLD<br />
will send out solicitation messages until a Router Advertisment message has been received or three<br />
attempts have been made.<br />
Usage:<br />
rtsold [-adDF] [interface]<br />
options:<br />
• a - auto interface probe. RTSOLD determines what interfaces are available <strong>and</strong> sends out<br />
solicitation messages on the interfaces that it finds.<br />
• d - debug level 1<br />
• D - debug level 2, includes timer information<br />
• F - Force setting of kernel variables. IPV6CTL_ACCEPT_RTADV is set to 1 <strong>and</strong><br />
IPV6CTL_FORWARDING is set to 0 (zero). This allows Router Advertisement messages to be<br />
processed <strong>and</strong> disables forwarding (routing) on this system.<br />
<strong>MultiNet</strong>:Start_<strong>MultiNet</strong>.com will start RTSOLD with -a -F when an IPv6 interface has been<br />
configured.<br />
13-77
Configuring Network Routing generate<br />
13-78
Chapter 14<br />
Network Time Protocol (NTP)<br />
NTP is the application set for network time protocol functions. It replaces XNTP as of <strong>MultiNet</strong> 5.1<br />
<strong>and</strong> XNTP is no longer included in <strong>MultiNet</strong>. NTP is version 4 of the NTP protocol, while XNTP<br />
was version 3. Much older versions of <strong>MultiNet</strong> included NTP version 2, but this was removed in<br />
an earlier release of <strong>MultiNet</strong>. Where “NTP” is used in the current release it refers to the latest<br />
version, NTPv4.<br />
Converting from earlier versions of NTP<br />
NTP is backwards compatible with prior NTP protocol versions back to version 2, <strong>and</strong> version 1 in<br />
client/server mode. This allows other nodes in the network to be upgraded at different times with<br />
minimal disruption. The configuration of NTP <strong>and</strong> XNTP is very similar, <strong>and</strong> many NTP.CONF<br />
files will work unmodified with either. Some config file options are no longer supported, <strong>and</strong> some<br />
new options have been added, but the most commonly used options have not changed.<br />
If you are running NTPv2 now, you must convert existing NETCONTROL parameters into the<br />
NTP.CONF file for use with NTP. See Converting to the NTP.CONF File for instructions.<br />
<strong>MultiNet</strong>’s NTP implementation is based on Network Time Protocol Version 4.2 from David L.<br />
Mills <strong>and</strong> the University of Delaware, <strong>and</strong> complies with RFC 1305. (Copyright information is<br />
included on the verso of the title page of this guide.)<br />
Overview of NTP<br />
The st<strong>and</strong>ard timescale used by most nations of the world is Coordinated Universal Time (UTC),<br />
which is based on the Earth's rotation about its axis, <strong>and</strong> the Gregorian Calendar, which is based on<br />
the Earth's rotation about the Sun. UTC time is disseminated by various means, including radio <strong>and</strong><br />
satellite navigation systems, telephone modems <strong>and</strong> portable clocks. For reasons of cost <strong>and</strong><br />
convenience, it is not possible to equip every computer with a method of receiving these time<br />
signals directly. However, it is possible to equip some number of computers acting as primary time<br />
servers to synchronize a much larger number of secondary servers <strong>and</strong> clients connected by a<br />
common network. In order to do this, a distributed network clock synchronization protocol is<br />
required which can transmit an accurate reading to one or more clients <strong>and</strong> adjust each client clock<br />
14-1
Network Time Protocol (NTP)<br />
14-2<br />
as required. This is what the Network Time Protocol is for.<br />
The synchronization protocol determines the time offset of the server clock relative to the client<br />
clock. On request, the server sends a message including the time the request arrived <strong>and</strong> the time<br />
the response was returned. The client included the time it sent the request in the request message,<br />
<strong>and</strong> records the time the response arrived back from the server as well. With these four values, or<br />
timestamps, the client can determine the server-client propagation delay (by assuming that this is<br />
half the round-trip time) <strong>and</strong> subtract this from the time difference between client <strong>and</strong> server time<br />
settings to determine its clock offset relative to the server. In general, this is a useful<br />
approximation; however, in the Internet of today, network paths <strong>and</strong> the associated delays can<br />
differ significantly due to the individual service providers, <strong>and</strong> this can contribute to error in<br />
determining offset. A stable, symmetrical (in terms of propagation delay) <strong>and</strong> reliable connection<br />
to the time server is important in minimizing this type of error.<br />
NTP attempts to compensate for the problem of network instability by allowing the use of several<br />
servers as time sources <strong>and</strong> determining which of them is most reliable through statistical means<br />
that compare them to each other. All sources are assumed to have correct times, but those that<br />
differ markedly from the group are eventually ignored as having unreliable connections, or being<br />
otherwise poor sources of correct time information. This tends to limit malicious activities as well,<br />
where a server that reports false times is inserted in a network, as well as bad time servers that<br />
result from hardware failure that can have much the same effect.<br />
Clock errors can be due to other causes than variations in network delay. Other causes include<br />
latencies in computer hardware <strong>and</strong> software (jitter), as well as clock oscillator instability (w<strong>and</strong>er).<br />
Despite these sources of error, NTP can, over many updates, discipline a clock to stay remarkably<br />
close to the actual time, even when a time server is not available for some period<br />
Programs <strong>and</strong> Files<br />
There are several programs <strong>and</strong> files that make up NTP in <strong>MultiNet</strong>. These are described in more<br />
detail later in this chapter.<br />
Program Files<br />
The following programs make up the NTP implementation in <strong>MultiNet</strong>:<br />
NTPD The NTP server process used to maintain the system clock <strong>and</strong> to pass<br />
time information to lower stratum clients <strong>and</strong> servers. While this<br />
program runs as a server process, it also functions as a client in<br />
requesting time data from other servers on the network.<br />
NTPDATE An interactive “one shot” time setting utility. It is useful for setting the<br />
initial time on a system, perhaps at boot time, to minimize the<br />
correction necessary with NTPD. If NTPD is not desired for some<br />
reason, NTPDATE used in a recurring batch job can be used to<br />
maintain a system’s clock fairly accurately.
Network Time Protocol (NTP)<br />
NTPDC NTPDC is used to query the NTPD server about its current state <strong>and</strong> to<br />
request changes in that state. Extensive state <strong>and</strong> statistics information<br />
is available through the NTPDC interface. In addition, nearly all the<br />
configuration options which can be specified at startup using NTPD's<br />
configuration file may also be specified at run time using NTPDC.<br />
NTPQ The NTPQ utility program is used to query NTP servers about current<br />
state <strong>and</strong> to request changes in that state. Requests to read <strong>and</strong> write<br />
arbitrary variables can be assembled, with raw <strong>and</strong> pretty-printed output<br />
options being available. NTPQ can also obtain <strong>and</strong> print a list of peers<br />
in a common format by sending multiple queries to the server. NTPQ<br />
<strong>and</strong> NTPDC perform similar functions, but use different protocols to<br />
communicate with NTPD.<br />
NTPTRACE NTPTRACE determines where a given NTPD server gets its time, <strong>and</strong><br />
follows the chain of NTP servers back to their master time source.<br />
Configuration Files<br />
NTP uses the following configuration files:<br />
NTP.CONF MULTINET:NTP.CONF is used to specify servers from which time<br />
information is requested as well as many other aspects of NTPD<br />
behavior. See the description of NTPD for a list of options <strong>and</strong> their<br />
definitions. NTP.CONF is read only at NTPD startup, so if you make<br />
changes you will need to restart NTPD.<br />
NTP.KEYS MULTINET:NTP.KEYS is used to define security information used in<br />
authorization operations. (SeeNote! The keys used by the NTPQ <strong>and</strong><br />
NTPDC programs are checked against passwords requested by the<br />
programs <strong>and</strong> entered by h<strong>and</strong>..)<br />
TIMEZONES.DAT A default set of timezone rules is compiled into NTP. You can use the<br />
MULTINET SET/TIMEZONE comm<strong>and</strong> in conjunction with this file<br />
to add other timezone rules. See the Timezone section for more<br />
information about timezones <strong>and</strong> the use of this file.<br />
Other Files<br />
NTP uses the following files:<br />
NTPD.LOG The NTPD server outputs progress <strong>and</strong> error information to the<br />
MULTINET:NTPD.LOG file. (See Troubleshooting Tips.)<br />
NTP.DRIFT The MULTINET:NTP.DRIFT file consists of data maintained by<br />
NTPD <strong>and</strong> used to speed up clock frequency adjustments when NTPD<br />
is restarted. You should not modify this file.<br />
14-3
Network Time Protocol (NTP)<br />
Configuration<br />
NTP Network Design<br />
14-4<br />
NTP does not attempt to synchronize clocks to each other. Rather, each server attempts to<br />
synchronize to Universal Coordinated Time (UTC) using the best available sources <strong>and</strong> available<br />
transmission paths to those sources. This is a fine point which is worth underst<strong>and</strong>ing. A group of<br />
NTP-synchronized clocks may be close to each other in time, but this is not a consequence of the<br />
clocks in the group having synchronized to each other, but rather because each clock has<br />
synchronized closely to UTC via the best source it has access to.<br />
The most important factor in providing accurate, reliable time is the selection of modes <strong>and</strong> servers<br />
to be used in the configuration file. An NTP network should consist of a multiply redundant<br />
hierarchy of servers <strong>and</strong> clients, with each level in the hierarchy identified by stratum number.<br />
Primary servers operate at stratum one <strong>and</strong> provide synchronization to secondary servers operating<br />
at stratum two <strong>and</strong> so on to higher strata. In this hierarchy, clients are simply servers that have no<br />
dependents.<br />
Determine which list of peers/servers you want to include in the configuration file. Include at least<br />
one (but preferably two) peer or server hosts that you are assured:<br />
• Are running NTP<br />
• Provide accurate time<br />
• Synchronize to Internet Time Servers (if they are not themselves ITSs)<br />
Two hosts provide reliability in case one goes down. You do not need to identify what stratum each<br />
host is. NTP determines this through the reference information it sends in its data exchanges.<br />
NTP data is exchanged periodically between hosts as encapsulated in UDP datagrams, <strong>and</strong><br />
adjustments are made based on an NTP algorithm. The frequency of exchange is related to the<br />
server’s experience of time corrections. The more accurate the local clock becomes over time <strong>and</strong><br />
after many adjustments, the less often the NTP server checks the need for corrections. The<br />
frequency of exchange is rarely intrusive to normal network operation. Also, the unreliability of<br />
UDP has no measurable impact on the process, <strong>and</strong> the process does not depend on any such<br />
reliability.<br />
Primary servers are servers with reliable time sources, such as GPS receivers or atomic clocks, <strong>and</strong><br />
can be found on the public internet, or set up within an intranet. Stratum numbers equate to the<br />
number of intermediate servers (or hops) between a given host <strong>and</strong> the Stratum 1 server it is<br />
ultimately referencing. Stratum numbers are not assigned statically, but change as server<br />
connections change. NTP servers can be (<strong>and</strong> often are) other types of systems running NTP, not<br />
just OpenVMS systems.<br />
The stratum method allows for backup timekeeping in case a node or connection goes down, <strong>and</strong><br />
stratum numbers may change as a consequence. In Figure 14-1 (a), each node has a stratum<br />
number based on hop count, with the ITS at the top of the pyramid. The solid arrows are the active<br />
synchronization paths <strong>and</strong> direction of timing information flow; the lighter arrows are background<br />
synchronization paths where timing information is exchanged but not necessarily used for<br />
synchronization. Figure 14-1 (b) shows the same network with one of the connections broken —
note that the stratum for the affected peer increases from 2 to 3.<br />
Figure 14-1 Synchronization Through Strata<br />
Network Time Protocol (NTP)<br />
NTP makes local system time adjustments by either slewing or stepping the clock. Slewing runs the<br />
clock faster or slower than its normal frequency. Stepping sets the clock immediately to the correct<br />
time. Stepping occurs infrequently, only when there is a large time offset to adjust, such as when<br />
starting NTPD or when making daylight savings time (DST) changes.<br />
Under some circumstances it can be disruptive to step the clock, such as when running database<br />
software that journals transactions. Such software can become very confused when a transaction is<br />
completed prior to the time at which it began, such as can happen when a clock is stepped<br />
backwards during a transaction’s lifetime. In such cases the slewalways configuration option can<br />
be used to turn off stepping of the clock, <strong>and</strong> force all adjustments to be made by slewing. For large<br />
time changes, such as DST changeovers, the adjustment can take a long time (several hours) to<br />
complete, <strong>and</strong> during this time the system’s time will not be correct. For this reason it is not wise to<br />
allow a system set for slewalways to act as a server to another system.<br />
In determining your NTP network design, keep in mind the way that the NTP protocol works, <strong>and</strong><br />
how NTPD will determine the correct time. There should be several time servers in the<br />
configuration for each node, with good, reliable <strong>and</strong> non-congested paths between them. Nodes<br />
that will act only as clients can use the slewalways option, but nodes used as time sources by other<br />
nodes should generally allow stepping of the time so that inaccuate times are not reported for<br />
extended periods at Daylight Savings Time (DST) changeovers. See the NTP.CONF section of this<br />
chapter for more information on the slewalways option <strong>and</strong> the Timezone section for more<br />
information on DST h<strong>and</strong>ling.<br />
Authentication<br />
NTP implements a general purpose address- <strong>and</strong> mask-based restriction list (see the restrict config<br />
option). While this is not adequate to prevent hacking attacks, it can be useful to lock out a<br />
malfunctioning server that is disrupting normal operations. See the Access Control Comm<strong>and</strong>s<br />
section for more information.<br />
The NTP st<strong>and</strong>ard specifies an extension which provides cryptographic authentication of received<br />
14-5
Network Time Protocol (NTP)<br />
14-6<br />
NTP packets. This is implemented in NTPD using the MD5 algorithm to compute a digital<br />
signature, or message digest. See the Authentication Using a Keys File section for more<br />
information.<br />
Finding Servers<br />
In many large organizations there is an administrator for the organization’s networks which h<strong>and</strong>les<br />
management of various network services. This person or department can usually provide<br />
information on local NTP servers, <strong>and</strong> often suggest configurations that are known to work.<br />
There are also a number of publicly available time servers on the internet. A list of such servers<br />
can be accessed via the web at "http://www.eecis.udel.edu/~ntp" These data are updated on a<br />
regular basis using information provided voluntarily by various site administrators.<br />
NTP.CONF<br />
The NTP.CONF file is used to specify the inital configuration of the NTPD server. It contains<br />
information about servers <strong>and</strong> peers, modes of operation, non-default file names, <strong>and</strong> other<br />
configuration data. See the table for a list of available options, <strong>and</strong> a brief description of what each<br />
does.<br />
NTP.CONF file options:<br />
peer<br />
peer [ address ] [ version 4 ] [ key 0 ] [ minpoll<br />
6 ] [ maxpoll 10 ]<br />
Specifies that the server is to operate in symmetric active mode with the<br />
specified remote server. In this mode, the local server can be<br />
synchronized to the remote server <strong>and</strong>, in addition, the remote server<br />
can be synchronized by the local server. This is useful in a network of<br />
servers where, depending on various failure scenarios, either the local<br />
or remote server may be the better source of time.<br />
The address can be a domain name or an IP address in dotted quad<br />
notation<br />
The key specifies that all packets sent to an address are to include<br />
authentication fields encrypted using the specified key identifier, which<br />
is an unsigned 32-bit integer. The default is to not include an encryption<br />
field.<br />
Version specifies the protocol version number to be used for outgoing<br />
NTP packets. Versions 1, 2, 3 <strong>and</strong> 4 are the choices, with version 4 the<br />
default.
server<br />
broadcast<br />
Network Time Protocol (NTP)<br />
server [ address ] [ version 4 ] [ key 0 ] [<br />
minpoll 6 ] [ maxpoll 10 ]<br />
Specifies that the local server is to operate in client mode with the<br />
specified remote server. In this mode, the local server can be<br />
synchronized to the remote server, but the remote server can never be<br />
synchronized to the local server.<br />
The address can be a domain name or an IP address in dotted quad<br />
notation<br />
The key specifies that all packets sent to an address are to include<br />
authentication fields encrypted using the specified key identifier, which<br />
is an unsigned 32-bit integer. The default is to not include an encryption<br />
field.<br />
Version specifies the protocol version number to be used for outgoing<br />
NTP packets. Versions 1, 2, 3 <strong>and</strong> 4 are the choices, with version 4 the<br />
default.<br />
broadcast [ address ] [ version 4 ] [ key 0 ] [ ttl<br />
1 ]<br />
Specifies broadcast mode, where the local server sends periodic<br />
broadcast messages to a client population at the broadcast/multicast<br />
address specified. This specification applies only to the local server<br />
operating as a sender. For operation as a broadcast client, see the<br />
broadcastclient option that follows. In this mode address is usually<br />
the broadcast address on (one of) the local networks.<br />
The key specifies that all packets sent to an address are to include<br />
authentication fields encrypted using the specified key identifier, which<br />
is an unsigned 32-bit integer. The default is to not include an encryption<br />
field.<br />
Version specifies the protocol version number to be used for outgoing<br />
NTP packets. Versions 1, 2, 3 <strong>and</strong> 4 are the choices, with version 4 the<br />
default.<br />
ttl specifies the number of routers to pass through before the packet is<br />
discarded. The default is 127 routers.<br />
14-7
Network Time Protocol (NTP)<br />
14-8<br />
broadcastclient broadcastclient<br />
This comm<strong>and</strong> directs the local server to listen for broadcast messages<br />
at the broadcast address of the local network. Upon hearing a broadcast<br />
message for the first time, the local server measures the nominal<br />
network delay using a brief client/server exchange with the remote<br />
server, then enters the broadcastclient mode, in which it listens for <strong>and</strong><br />
synchronizes to succeeding broadcast messages.<br />
Note! In order to avoid accidental or malicious disruption in this<br />
mode, both the local <strong>and</strong> remote servers should operate using<br />
authentication <strong>and</strong> the same trusted key <strong>and</strong> key identifier.<br />
multicastclient multicastclient [ address ]<br />
Specifies that this host is a multicast client for multicasts to the<br />
specified multicast address.<br />
manycastclient<br />
manycastserver<br />
manycastclient [ address ] [ version 4 ] [ key 0 ]<br />
[ minpoll 6 ] [ maxpoll 10 ]<br />
Specify that this host is a manycast client <strong>and</strong> provide relevant settings.<br />
manycastserver [ address ]<br />
Specify that this host is a manycast server for the given address.<br />
broadcastdelay broadcastdelay 0.004<br />
The broadcast <strong>and</strong> multicast modes require a special calibration to<br />
determine the network delay between the local <strong>and</strong> remote servers.<br />
Ordinarily, this is done automatically by the initial protocol exchanges<br />
between the client <strong>and</strong> server. In some cases, the calibration procedure<br />
may fail due to network or server access controls, for example. This<br />
comm<strong>and</strong> specifies the default delay to be used under these<br />
circumstances. Typically (for Ethernet), a number between 0.003 <strong>and</strong><br />
0.007 seconds is appropriate. The default when this comm<strong>and</strong> is not<br />
used is 0.004 seconds.
estrict<br />
driftfile<br />
Network Time Protocol (NTP)<br />
restrict [ address ] [ mask 255.255.255.0 ]<br />
ignore|noserve|notrust|noquery<br />
Restrict access from <strong>and</strong> to the specified address for the specified types<br />
of access.<br />
The address argument, expressed in dotted quad form, is the address of<br />
a host or network. The mask argument, also expressed in dotted quad<br />
form, defaults to 255.255.255.255, meaning that the address is treated<br />
as the address of an individual host. A default entry (address 0.0.0.0,<br />
mask 0.0.0.0) is always included <strong>and</strong>, given the sort algorithm, is<br />
always the first entry in the list.<br />
Note! While numeric-address is normally given in dotted-quad format,<br />
the text string default, with no mask option, can be used to<br />
indicate the default entry.<br />
Ignore - Ignores all packets from hosts which match this entry. If this<br />
flag is specified, neither queries nor time server polls are responded to.<br />
noquery - ignores all NTP mode 6 <strong>and</strong> 7 packets (information queries<br />
<strong>and</strong> configuration requests generated by NTPQ <strong>and</strong> NTPDC) from the<br />
source. Time service is not affected.<br />
noserve - Ignores NTP packets whose mode is other than 6 or 7. In<br />
effect, time service is denied, though queries may still be permitted.<br />
notrust - Treats these hosts normally in other respects, but never uses<br />
them as synchronization sources.<br />
driftfile file_name<br />
Specify the name of the drift file. The default is<br />
MULTINET:NTP.DRIFT if this option is not used.<br />
The drift file is used to record the frequency offset of the local clock<br />
oscillator. If the file exists, it is read at startup in order to set the initial<br />
frequency offset <strong>and</strong> then updated once per hour with the current<br />
frequency offset computed by the daemon. If the file does not exist or<br />
this comm<strong>and</strong> is not given, the initial frequency offset is assumed zero.<br />
In this case, it may take some hours for the frequency to stabilize <strong>and</strong><br />
the residual timing errors to subside.<br />
keys keys file_name<br />
Specify the name of the keys file. The default is<br />
MULTINET:NTP.KEYS if this option is not used.<br />
14-9
Network Time Protocol (NTP)<br />
14-10<br />
statsdir<br />
statsdir path<br />
Indicates the full path of a directory where statistics files should be<br />
created. This keyword allows the (otherwise constant) filegen filename<br />
prefix to be modified for file generation sets, which is useful for<br />
h<strong>and</strong>ling statistics logs.
filegen<br />
Network Time Protocol (NTP)<br />
filegen [ file filename ] [ type typename ] [<br />
enable | disable ]<br />
Configures the generation fileset name. Generation filesets provide a<br />
means for h<strong>and</strong>ling files that are continuously growing during the<br />
lifetime of a server. Server statistics are a typical example for such files.<br />
At most one element of the set is being written to at any one time. The<br />
type given specifies when <strong>and</strong> how data is directed to a new element of<br />
the set.<br />
filename - This string is directly concatenated to the directory<br />
MULTINET: or the directory prefix specified using the statsdir option.<br />
The suffix for this filename is generated according to the type of a<br />
fileset.<br />
typename - A file generation set is characterized the following<br />
typenames:<br />
none — One element of the fileset is used for each, NTPD server.<br />
day — One file generation set element is created per day. A day is<br />
defined as the period between 00:00 <strong>and</strong> 24:00 UTC. The fileset<br />
member suffix consists of a dot (.) <strong>and</strong> a day specification in the form<br />
YYYYMMDD. YYYY is a 4-digit year number (such as 2003). MM is<br />
a two digit month number. DD is a two digit day number. Thus, all<br />
information written at 10 December 2002 would end up in a file named<br />
prefix filename.20021210.<br />
week — Any fileset member contains data related to a certain week of<br />
a year. The term week is defined by computing day-of-year modulo 7.<br />
Elements of such a file generation set are distinguished by appending<br />
the following suffix to the fileset filename base: a dot, a 4-digit year<br />
number, the letter W, <strong>and</strong> a 2-digit week number. For example,<br />
information from January 10th, 2003 would end up in a file with suffix<br />
.2003W1.<br />
month — One generation fileset element is generated per month. The<br />
filename suffix consists of a dot, a 4-digit year number, <strong>and</strong> a 2-digit<br />
month.<br />
year — One generation file element is generated per year. The<br />
filename suffix consists of a dot <strong>and</strong> a 4-digit year number.<br />
age — This type of file generation sets changes to a new element of the<br />
fileset every 24 hours of server operation. The filename suffix consists<br />
of a dot, the letter a, <strong>and</strong> an 8-digit number. This number is taken to be<br />
the number of seconds the server is running at the start of the<br />
corresponding 24-hour period.<br />
Information is only written to a file generation by specifying enable;<br />
output is prevented by specifying disable.<br />
14-11
Network Time Protocol (NTP)<br />
14-12<br />
publickey publickey file_name<br />
Specify the public keys file location.<br />
privatekey privatekey file_name<br />
clientlimit<br />
clientperiod<br />
Specify the private key file location.<br />
clientlimit [ n ]<br />
Sets the client_limit variable that limits the number of<br />
simultaneous access-controlled clients. The default value is 3.<br />
clientperiod [ 3600 ]<br />
Sets the client_limit_period variable that specifies the number of<br />
seconds after which a client is considered inactive <strong>and</strong> thus no longer is<br />
counted for client limit restriction. The default value is 3600 seconds.<br />
trustedkey trustedkey [ key ]<br />
Specifies the encryption key identifiers which are trusted for the<br />
purposes of authenticating peers suitable for synchronization. The<br />
authentication procedures require that both the local <strong>and</strong> remote servers<br />
share the same key <strong>and</strong> key identifier for this purpose, although<br />
different keys can be used with different servers. The key arguments are<br />
32-bit unsigned integers.<br />
requestkey<br />
controlkey<br />
Note! NTP key 0 is fixed <strong>and</strong> globally known. If meaningful<br />
authentication is to be performed, the 0 key should not be<br />
trusted.<br />
requestkey [ key]<br />
Specifies the key identifier to use with the NTPDC program, which<br />
uses a proprietary protocol specific to this distribution of NTPD. The<br />
key argument to this comm<strong>and</strong> is a 32-bit unsigned integer. If no<br />
requestkey comm<strong>and</strong> is included in the configuration file, or if the keys<br />
do not match, NTPDC requests are ignored.<br />
controlkey [ key ]<br />
Specifies the key identifier to use with the NTPQ program, which uses<br />
the st<strong>and</strong>ard protocol defined in RFC 1305. The key argument to this<br />
comm<strong>and</strong> is a 32-bit unsigned integer. If no controlkey comm<strong>and</strong> is<br />
included in the configuration file, or if the keys do not match, NTPQ<br />
requests are ignored.
setvar setvar [ value ]<br />
Network Time Protocol (NTP)<br />
This comm<strong>and</strong> adds an additional system variable. These variables can<br />
be used to distribute additional information such as the access policy. If<br />
the variable of the form name = value is followed by the default<br />
keyword, the variable is listed as part of the default system variables<br />
(ntpq rv comm<strong>and</strong>). These additional variables serve informational<br />
purposes only. They are not related to the protocol other than that they<br />
can be listed. The known protocol variables always override any<br />
variables defined using the setvar mechanism.<br />
logfile logfile file_name<br />
logconfig<br />
enable<br />
Specify the logfile name. The default is MULTINET:NTPD.LOG if<br />
this option is not specified.<br />
logconfig [+|-|=]<br />
[{sync|sys|peer|clock}{{,all}{info|statistics|eve<br />
nts|status}}]...<br />
Specify logging options.<br />
enable<br />
auth|bclient|ntp|kernel|monitor|stats|calibrate<br />
Enable various options.<br />
auth - Enables the server to synchronize with unconfigured peers only if<br />
the peer was correctly authenticated using a trusted key <strong>and</strong> key<br />
identifier. (SeeNote! The keys used by the NTPQ <strong>and</strong> NTPDC programs<br />
are checked against passwords requested by the programs <strong>and</strong> entered<br />
by h<strong>and</strong>..) The default for this setting is disable.<br />
bclient - When enabled, this is identical to the broadcastclient<br />
comm<strong>and</strong>. The default for this flag is disable.<br />
ntp - Enables the server to adjust its local clock by means of NTP. If<br />
disabled, the local clock free-runs at its intrinsic time <strong>and</strong> frequency<br />
offset. This flag is useful in case the local clock is controlled by some<br />
other device or protocol <strong>and</strong> NTP is used only to provide<br />
synchronization to other clients. The default for this flag is enable.<br />
kernel - this setting is not used in the <strong>MultiNet</strong> implementation.<br />
monitor - Enables the monitoring facility. See the monlist comm<strong>and</strong><br />
of the NTPDC program for further information. The default for this flag<br />
is enable.<br />
stats - Enables the statistics facility. For further information, see<br />
Monitoring Comm<strong>and</strong>s. The default for this flag is enable.<br />
calibrate - this setting is not used in the <strong>MultiNet</strong> implementation.<br />
14-13
Network Time Protocol (NTP)<br />
14-14<br />
disable<br />
slewalways<br />
panic<br />
debug<br />
set_vms_logicals<br />
call_dst_proc<br />
disable<br />
auth|bclient|ntp|kernel|monitor|stats|calibrate<br />
Disable various options. See the enable entry for details.<br />
slewalways<br />
Specify that the clock time is always to be slewed, never stepped.<br />
NTPD normally steps the clock when there is a relatively large time<br />
error to adjust. The slewalways comm<strong>and</strong> directs the local NTP<br />
server to always slew the clock, regardless of how large the required<br />
correction is. This comm<strong>and</strong> is useful to avoid an abrupt one hour clock<br />
change when daylight savings time (DST) changes occur. For DST<br />
changes when slewalways is specified, NTPD slews the clock over a<br />
period of about 6 hours.<br />
panic max_adjust_time<br />
Set the maximum time change that will be allowed. If non-zero, this<br />
value should always be at least 4000 seconds to allow for DST time<br />
changes even on systems with large time errors. This was known as<br />
“WAYTOOBIG” in XNTP.<br />
If set to zero, the panic sanity check is disabled <strong>and</strong> a clock offset of<br />
any value will be accepted.<br />
debug [level]<br />
Set the debug logging severity level.<br />
set_vms_logicals<br />
Causes the NTP server to also adjust the value of the VMS logicals<br />
SYS$TIMEZONE_DIFFERENTIAL,<br />
SYS$TIMEZONE_DAYLIGHT_SAVING <strong>and</strong><br />
SYS$TIMEZONE_NAME when it changes the<br />
“MULTINET_TIMEZONE” logical at DST start or end. The following<br />
files will also be updated: DTSS$TIMEZONE_DIFFERENTIAL <strong>and</strong><br />
SYS$TIMEZONE.DAT<br />
NTP does NOT set SYS$TIMEZONE_RULE, which generally does<br />
not change. The format of SYS$TIMEZONE_RULE is specified in<br />
SYS$MANAGER:UTC$TIME_SETUP.COM.<br />
call_dst_proc<br />
Causes the NTP server to spawn a subprocess to execute the<br />
MULTINET:NTPD_DST_PROC.COM procedure, if such a procedure<br />
file exists with the proper protections, when changing into or out of<br />
DST, or when first starting up. See the “Using the call_dst_procoption”<br />
below for more information.
set_clock_daily<br />
set_clock_daily<br />
Timezone Configuration <strong>and</strong> Hardware Clock Overview<br />
Network Time Protocol (NTP)<br />
When this is included in NTP.CONF, then NTPD will only make one<br />
call a day (instead of once an hour) to the routine that sets the TOY<br />
clock to insure that the value is preserved. This reduces the number of<br />
entries in the Integrity system event logs. NTPD may set the clock<br />
more often than daily, but it will be done only to correct any drift that is<br />
detected. In our tests on a RX2600 this happened approximately every<br />
6 hours.<br />
By OpenVMS convention, the system clock is usually set to the local time, but network protocols<br />
represent time in Coordinated Universal Time (UTC, sometimes referred to as GMT). To convert<br />
between local time <strong>and</strong> UTC, <strong>MultiNet</strong> uses built-in rules or rules provided by the system manager.<br />
Each country or geographical area has its own names for timezones <strong>and</strong> its own rules for Daylight<br />
Savings Time (DST). The names of these timezones <strong>and</strong> rules are not necessarily unique. For<br />
example, "EST" could refer to the United States Eastern St<strong>and</strong>ard Time, the Canadian Eastern<br />
St<strong>and</strong>ard Time (which uses different DST rules), or the Australian Eastern St<strong>and</strong>ard Time (which is<br />
a different offset from UTC as well as having different DST rules).<br />
<strong>MultiNet</strong> uses the name of the local timezone as specified by the system manager, along with<br />
timezone rules, to calculate the offset between the local time <strong>and</strong> UTC, so it is important that an<br />
appropriate set of timezone rules be selected for the location where the system is located.<br />
<strong>MultiNet</strong> assumes that the hardware clock is always set exactly to local time. For a smooth<br />
transition to <strong>and</strong> from Daylight Savings Time the hardware clock must be reset at the appropriate<br />
time.<br />
Using a military time zone or an explicit GMT offset disables automatic Daylight Savings Time<br />
transitions.<br />
Timezone Support<br />
Because it is impossible to anticipate every country or area in which <strong>MultiNet</strong> might be used, <strong>and</strong><br />
because the Daylight Savings Time rules are subject to change by government action, <strong>MultiNet</strong><br />
permits you to write your own site-specific timezone rules. There are two types of timezone rules:<br />
compiled-in <strong>and</strong> loadable.<br />
• Compiled-in rules are geographically centered around the United States but also include foreign<br />
timezones whose names do not conflict with the U.S. timezones.<br />
• Loadable rules are selected with the MULTINET NETCONFIG SET TIMEZONE-RULES<br />
comm<strong>and</strong> <strong>and</strong> can be used to override the compiled-in rules.<br />
<strong>MultiNet</strong> includes a database of the most common loadable rules. You can select these rules as-is,<br />
or modify them to conform to the correct local timezone rules.<br />
When <strong>MultiNet</strong> searches the timezone rules looking for a zone, it first searches the loadable rules in<br />
the order they are specified, then searches the compiled-in rules. This method allows you to change<br />
14-15
Network Time Protocol (NTP)<br />
14-16<br />
the compiled-in rules by loading rules that override them.<br />
In addition to the st<strong>and</strong>ard one-letter U.S. military time zones <strong>and</strong> timezones of the form<br />
GMT+hh:mm or GMT-hh:mm, there are compiled-in timezone rules supported by <strong>MultiNet</strong> which<br />
are shown in Table 14-1<br />
Table 14-1 Compiled-In Timezone Rules<br />
Timezone Name GMT Offset DST Rules Area or Country<br />
EST or EDT -5 hours U.S. Federal Eastern United States<br />
CST or CDT -6 hours U.S. Federal Central United States<br />
MST or MDT -7 hours U.S. Federal Mountain United States<br />
PST or PDT -8 hours U.S. Federal Pacific United States<br />
YST or YDT -9 hours U.S. Federal Yukon<br />
HST -10 -none- Hawaii<br />
NST or NDT -3:30 hours Canadian Canadian Newfoundl<strong>and</strong><br />
AST or ADT -4 hours Canadian Canadian Atlantic<br />
JST +9 hours -none- Japan<br />
SST +8 hours -none- Singapore<br />
GMT +0 hours -none- Greenwich Mean Time<br />
GMT or BST +0 hours British Britain<br />
WET or WET-DST +0 hours European Western Europe<br />
MET or MET-DST +1 hour European Middle Europe<br />
CET or CET-DST +1 hour European Central Europe (Middle Europe)<br />
EET or EET-DST +2 hours European Eastern Europe<br />
NZST or NZDT +12 hours New<br />
Zeal<strong>and</strong><br />
New Zeal<strong>and</strong><br />
Loadable Timezone Rules<br />
Loadable timezone rules provided with <strong>MultiNet</strong> are in the text file<br />
MULTINET:TIMEZONES.DAT. You can copy this file to MULTINET:TIMEZONES.LOCAL,<br />
<strong>and</strong> then add user-written timezone rules to override the compiled-in rules.
Loadable timezone rules consist of three parts:<br />
Format of COUNTRY Specification<br />
COUNTRY countryname zonename [zonename . . .]<br />
Network Time Protocol (NTP)<br />
COUNTRY A collection of timezones (ZONEs). For example, the country US selects all U.S.<br />
timezones. This provides a convenient way to select groups of timezones.<br />
ZONE A specification of a particular timezone, including the name of the zone, the UTC<br />
offset, the DST rules in effect, <strong>and</strong> the name to use while DST is in effect.<br />
RULE A rule for determining when DST is in effect.<br />
The COUNTRY specification gives the name of a geographical area <strong>and</strong> the names of the<br />
timezones associated with it. This provides a way to group timezones so they may be selected more<br />
conveniently.<br />
The following example shows the definition of the country "US", listing the zones corresponding<br />
to the United States. The example for Arizona is slightly different, showing the zone "US/Arizona"<br />
instead of "US/Mountain." ("US/Arizona" is the definition of a Mountain timezone that does not<br />
observe Daylight Savings Time.)<br />
Country US US/Eastern US/Central US/Mountain US/Pacific US/Yukon US/<br />
Hawaii<br />
Country US/Arizona -<br />
US/Eastern US/Central US/Arizona US/Pacific US/Yukon US/Hawaii<br />
Format of ZONE Specification<br />
ZONE zonename gmtoffset rulename st<strong>and</strong>ard-name dst-name [COMPILED_IN]<br />
zonename The name by which this zone can be selected, or the name by which it is<br />
referred to in a COUNTRY specification.<br />
gmtoffset This zone's st<strong>and</strong>ard time offset from UTC.<br />
rulename Is the name of the RULE specification that determines when DST is in effect<br />
for this zone. The rulename may be an underscore (_) to indicate that this<br />
zone does not use DST.<br />
st<strong>and</strong>ard-name<br />
<strong>and</strong> dst-name<br />
The names by which this zone is referred to during st<strong>and</strong>ard time, <strong>and</strong> during<br />
Daylight Savings Time, respectively. These are the names by which SET<br />
TIMEZONE selects the local timezone.<br />
14-17
Network Time Protocol (NTP)<br />
14-18<br />
The ZONE specification describes a timezone:<br />
If there are no DST rules, the dst-name should be specified as an underscore (_). The optional<br />
COMPILED_IN keyword indicates that this rule is compiled-in <strong>and</strong> need not be loaded, as long as<br />
no other rules conflict with it. If you edit a COMPILED_IN ZONE specification, you must remove<br />
the COMPILED_IN keyword to force the ZONE specification to be loaded.<br />
The following example shows the definition of the normal United States Mountain timezone. The<br />
Arizona example shows the definition of a Mountain timezone that does not observe Daylight<br />
Savings Time.<br />
Zone US/Mountain -7:00 US MST MDT COMPILED_IN<br />
Zone US/Arizona -7:00 _ MST<br />
Format of a RULE Specification<br />
RULE rulename startyear ruletype save start-date end-date<br />
The RULE specification describes a rule or set of rules for determining at what times DST is in<br />
effect:<br />
rulename The name of the RULE specification in ZONE specifications.<br />
startyear The year during which this DST rule takes effect. The rule remains in effect<br />
until a later startyear is specified in a rule with the name rulename.<br />
ruletype Specifies the type of DST rules. There are three permitted values:<br />
• DST indicates normal Northern-Hemisphere Daylight Savings Time rules,<br />
which switch at the time <strong>and</strong> date indicated.<br />
• REV_DST indicates normal Southern-Hemisphere Daylight Savings Time<br />
rules.<br />
NULL indicates that no Daylight Savings Time is in effect during the specified<br />
years.<br />
save Indicates the difference between St<strong>and</strong>ard Time <strong>and</strong> DST.<br />
start-date <strong>and</strong><br />
end-date<br />
Specify the starting <strong>and</strong> ending dates for DST. Specific dates can be specified,<br />
or rules such as "First Sunday" or "Last Sunday" can be used. For days other<br />
than the “First” or “Last” you must use dayname >= date. For example the<br />
second Sunday is expressed as Sunday >= 8. See the file<br />
MULTINET:TIMEZONES.DAT for examples of specifying dates.<br />
The following example illustrates the United States Federal Daylight Savings Time rules:<br />
Rule US 2007 DST 1:00 Sunday>=8 March 2:00 First Sunday November 2:00<br />
Rule US 1987 DST 1:00 First Sunday April 2:00 Last Sunday October 2:00<br />
Rule US 1976 DST 1:00 Last Sunday April 2:00 Last Sunday October 2:00
Network Time Protocol (NTP)<br />
Rule US 1975 DST 1:00 23 February 2:00 Last Sunday October 2:00<br />
Rule US 1974 DST 1:00 6 January 2:00 Last Sunday October 2:00<br />
Rule US 1970 DST 1:00 Last Sunday April 2:00 Last Sunday October 2:00<br />
Loadable Timezone Rules Provided with <strong>MultiNet</strong><br />
Table 14-2 shows the loadable rules provided in the MULTINET:TIMEZONES.DAT file which<br />
you may modify or augment as appropriate for your location.<br />
Table 14-2 Loadable Timezone Rules<br />
Country Name Rule Name Timezone Name GMT Offset DST Rules<br />
GMT GMT a 0 hours -none-<br />
UT UT a 0 hours -none-<br />
US-Military US-Military/Z a Z 0 hours -none-<br />
US-Military US-Military/A a A -1 hour -none-<br />
US-Military US-Military/B a B -2 hours -none-<br />
US-Military US-Military/C a C -3 hours -none-<br />
US-Military US-Military/D a D -4 hours -none-<br />
US-Military US-Military/E a E -5 hours -none-<br />
US-Military US-Military/F a F -6 hours -none-<br />
US-Military US-Military/G a G -7 hours -none-<br />
US-Military US-Military/H a H -8 hours -none-<br />
US-Military US-Military/I a I -9 hours -none-<br />
US-Military US-Military/K a K -10 hours -none-<br />
US-Military US-Military/L a L -11 hours -none-<br />
US-Military US-Military/M a M -12 hours -none-<br />
US-Military US-Military/N a N 1 hour -none-<br />
US-Military US-Military/O a O 2 hours -none-<br />
US-Military US-Military/P a P 3 hours -none-<br />
14-19
Network Time Protocol (NTP)<br />
14-20<br />
Table 14-2 Loadable Timezone Rules (Continued)<br />
Country Name Rule Name Timezone Name GMT Offset DST Rules<br />
US-Military US-Military/Q a Q 4 hours -none-<br />
US-Military US-Military/R a R 5 hours -none-<br />
US-Military US-Military/S a S 6 hours -none-<br />
US-Military US-Military/T a T 7 hours -none-<br />
US-Military US-Military/U a U 8 hours -none-<br />
US-Military US-Military/V a V 9 hours -none-<br />
US-Military US-Military/W a W 10 hours -none-<br />
US-Military US-Military/X a X 11 hours -none-<br />
US-Military US-Military/Y a Y 12 hours -none-<br />
US US/Eastern a EST/EDT -5 hours US Federal<br />
US US/Central a CST/CDT -6 hours US Federal<br />
US US/Mountain a MST/MDT -7 hours US Federal<br />
US US/Pacific a PST/PDT -8 hours US Federal<br />
US US/Yukon a YST/YDT -9 hours US Federal<br />
US US/Hawaii a HST -10 hours -none-<br />
US/East-Indiana US/East-Indiana EST -5 hours -none-<br />
US/Arizona US/Arizona MST -7 hours -none-<br />
Canada Canada/<br />
Newfoundl<strong>and</strong> a<br />
NST/NDT -3:30 hours Canadian<br />
Canada Canada/Atlantic a AST/ADT -4 hours Canadian<br />
Canada Canada/Eastern EST/EDT -5 hours Canadian<br />
Canada Canada/Central CST/CDT -6 hours Canadian<br />
Canada Canada/Mountain MST/MDT -7 hours Canadian
Table 14-2 Loadable Timezone Rules (Continued)<br />
Network Time Protocol (NTP)<br />
Country Name Rule Name Timezone Name GMT Offset DST Rules<br />
Canada Canada/Pacific PST/PDT -8 hours Canadian<br />
Canada Canada/Yukon YST/YDT -9 hours Canadian<br />
Canada Canada/<br />
Saskatchewan<br />
CST -6 hours -none-<br />
Israel Israel IST/DST +2 hours Israeli<br />
Australia Australia/Tasmania EST 10 hours Australian<br />
Australia Australia/<br />
Queensl<strong>and</strong><br />
EST 10 hours -none-<br />
Australia Australia/North CST 9:30 hours -none-<br />
Australia Australia/West WST 8 hours -none-<br />
Australia Australia/South CST 9:30 hours Australian<br />
Australia Australia/Victoria CST 10 hours Australian<br />
Australia Australia/NSW CST 10 hours Australian<br />
Australia Australia/<br />
Yarcowinna<br />
CST 9:30 hours Australian<br />
Australia Australia/LHI CST 10:30 hours Australian<br />
Europe Britain a GMT/BST 0 hours GB-Eire<br />
Europe Europe/Western a WET/WET-DST 0 hours W-Eur<br />
Europe Europe/Middle a MET/MET-DST 1 hour M-Eur<br />
Europe Europe/Central a CET/CET-DST 1 hour M-Eur<br />
Europe Europe/Eastern a EET/EET-DST 2 hours E-Eur<br />
Icel<strong>and</strong> GMT 1 hour -none-<br />
Pol<strong>and</strong> MET 1 hour W-Eur<br />
Turkey EET/EET/DST 3 hours Turkey<br />
Japan Japan a JST +9 hours -none-<br />
Singapore Singapore a SST +8 hours -none-<br />
14-21
Network Time Protocol (NTP)<br />
Selecting Timezone Rules<br />
14-22<br />
Table 14-2 Loadable Timezone Rules (Continued)<br />
Country Name Rule Name Timezone Name GMT Offset DST Rules<br />
NewZeal<strong>and</strong> NewZeal<strong>and</strong> a NZST/NZDT +12 hours New<br />
Zeal<strong>and</strong><br />
a. This timezone is compiled-in also.<br />
Timezone rules <strong>and</strong> the local timezone name are set in the <strong>MultiNet</strong> system startup comm<strong>and</strong> file,<br />
MULTINET:START_MULTINET.COM. You can use the <strong>MultiNet</strong> NET-CONFIG utility to<br />
specify the local timezone <strong>and</strong> which rules to load using the SET TIMEZONE <strong>and</strong> SET<br />
TIMEZONE-RULES comm<strong>and</strong>s. The following example shows how to select the United States<br />
Arizona rules <strong>and</strong> the local timezone MST:<br />
$ MULTINET CONFIGURE<br />
NET-CONFIG>SET TIMEZONE MST<br />
NET-CONFIG>SET TIMEZONE-RULES US/ARIZONA<br />
NET-CONFIG>EXIT<br />
Using the call_dst_proc option<br />
When NTPD is started, <strong>and</strong> whenever the local timezone shifts between daylight savings DST <strong>and</strong><br />
st<strong>and</strong>ard (STD) time, if the local zone rule specifies such behavior, the NTPD server will check the<br />
MULTINET_TIMEZONE logical, <strong>and</strong> set it if required. The setting will only be between the DST<br />
name <strong>and</strong> the STD name for the zone, so the configuration described above is still necessary, but if<br />
your system was down during a DST shft, this can correct the logical name to match the current<br />
system clock time <strong>and</strong> the applicable zone rule when NTPD is started. If your NTP.CONF file<br />
specifies the “set_vms_logicals” option, the SYS$TIMEZONE_DIFFERENTIAL,<br />
SYS$TIMEZONE_DAYLIGHT_SAVING <strong>and</strong> SYS$TIMEZONE_NAME logicals will be<br />
updated as well.<br />
Since there are many systems with other time-related logical names, or other items that may need<br />
updating or adjusting based on a DST change, the call_dst_proc option has been provided. If this<br />
option is used in NTP.CONF, the NTPD server will look for a file called<br />
MULTINET:NTPD_DST_PROC.COM any time it checks on the MULTINET_TIMEZONE<br />
logical (at startup <strong>and</strong> at a DST shift). If this file exists, <strong>and</strong> has the proper protections (no WORLD<br />
write or execute access, <strong>and</strong> owned by SYSTEM ([1,4])) a sub-process will be spawned to execute<br />
it. This procedure can contain any comm<strong>and</strong>s needed, but care should be exercised in constructing<br />
this file, as it will be executing with the same privileges as the NTPD process. A “placeholder”<br />
procedure is included with <strong>MultiNet</strong>, but its contents are all comments <strong>and</strong> will do nothing as<br />
shipped.<br />
The invocation of the MULTINET:NTPD_DST_PROC.COM procedure will be equivalent to this:<br />
Where:<br />
@MULTINET:NTPD_DST_PROC.COM p1 p2 p3 p4 p5
• p1 = Current timezone name - string (e.g. "EST" or "EDT")<br />
• p2 = Timezone offset in seconds - integer (e.g. "-18000" or "-14400")<br />
• p3 = DST in effect? - boolean ("Y", "N")<br />
• p4 = In Twilight Zone? - boolean ("Y", "N")<br />
•p5 = Startup or DST change? - string ("START" or "DST")<br />
Network Time Protocol (NTP)<br />
14-23
Network Time Protocol (NTP)<br />
14-24<br />
P1, the Current Timezone Name, is a string specifying the current name of the local timezone. For<br />
North American Eastern St<strong>and</strong>ard Time, this will be “EST” in the winter, <strong>and</strong> “EDT” in the<br />
summer, when DST is active. For timezones that don’t do DST, it will always be the zone name.<br />
P2, the Timezone Offset, is a signed integer specifying the offset, in seconds, from UTC for the<br />
local zone, at the current time. For North American Eastern St<strong>and</strong>ard Time this is “-18000” (-5<br />
hours), for the same zone with DST in effect it is “-14400” (-4 hours).<br />
P3, the DST flag. This will be “Y” if DST is currently in effect for the zone, <strong>and</strong> “N” if it isn’t, or if<br />
the zone doesn’t do DST.<br />
P4, the Twilight Zone flag. When a zone exits from DST, it sets its time back an hour. This means<br />
that for that hour, the time *appears* to be a DST time by the local DST rules, but isn’t really, since<br />
DST has already ended. That hour is called the “twilight zone” by <strong>MultiNet</strong> NTP. If the current<br />
time is in that period, the P4 parameter will be “Y”, otherwise it will be “N”.<br />
P5, the startup/DST flag. This tells the procedure whether it is being called as a part of NTPD’s<br />
startup processing, or as part of a DST change.<br />
These parameters are provided so that the procedure can take different action under different<br />
conditions. They may all be ignored if that is appropriate. The NTPD server doesn’t depend on any<br />
particular behavior, so long as the MULTINET_TIMEZONE logical is left alone <strong>and</strong> the system<br />
clock is not altered. The final completion status of the called procedure will be logged by the NTPD<br />
server, along with the PID of the spawned sub-process.<br />
Access Control Comm<strong>and</strong>s<br />
NTP implements a general purpose address- <strong>and</strong> mask-based restriction list (see the restrict config<br />
option). The list is sorted by address <strong>and</strong> by mask, <strong>and</strong> the list is searched in this order for matches,<br />
with the last match found defining the restriction flags associated with the incoming packets. The<br />
source address of incoming packets is used for the match, with the 32-bit address combined with<br />
the mask associated with the restriction entry <strong>and</strong> then compared with the entry’s address (which<br />
was also combined with the mask) to look for a match.<br />
The restriction facility was implemented to conform with the access policies for the original<br />
NSFnet backbone time servers. While this facility may be otherwise useful for keeping unwanted<br />
or broken remote time servers from affecting your own, it should not be considered an alternative to<br />
the st<strong>and</strong>ard NTP authentication facility. Source address based restrictions are easily circumvented<br />
by a determined hacker.<br />
Authentication Using a Keys File<br />
The NTP st<strong>and</strong>ard specifies an extension which provides cryptographic authentication of received<br />
NTP packets. This is implemented in NTPD using the MD5 algorithm to compute a digital<br />
signature, or message digest. The specification allows any one of possibly four billion keys,<br />
numbered with 32-bit key identifiers, to be used to authenticate an association. The servers<br />
involved in an association must agree on the key <strong>and</strong> key identifier used to authenticate their<br />
messages.<br />
Keys <strong>and</strong> related information are specified in the file MULTINET:NTP.KEYS, which should be
Network Time Protocol (NTP)<br />
exchanged <strong>and</strong> stored using secure procedures. There are three classes of keys involved in the<br />
current implementation. One class is used for ordinary NTP associations, another for the NTPQ<br />
utility program, <strong>and</strong> the third for the NTPDC utility program.<br />
Key File Format<br />
For MD5, keys are 64 bits (8 bytes), read from the MULTINET:NTP.KEYS file. While key<br />
number 0 is fixed by the NTP st<strong>and</strong>ard (as 64 zero bits) <strong>and</strong> may not be changed, one or more of the<br />
keys numbered 1 through 15 may be arbitrarily set in the keys file.<br />
The keys file uses the same comment conventions as the configuration file. Key entries use a fixed<br />
format of the form:<br />
keyno type key<br />
• keyno is a positive integer<br />
• type is a single character M for the MD5 key format<br />
• key is the key itself<br />
The key is a one to eight character ASCII string using the MD5 authentication scheme.<br />
Note! Both the keys <strong>and</strong> the authentication scheme must be identical between a set of peers sharing<br />
the same key number.<br />
Note! The keys used by the NTPQ <strong>and</strong> NTPDC programs are checked against passwords requested<br />
by the programs <strong>and</strong> entered by h<strong>and</strong>.<br />
NTP Utilities<br />
There are several utility programs included with NTP. These allow setting the system clock from a<br />
time server, querrying <strong>and</strong> controlling NTP servers on the local system or on remote hosts, <strong>and</strong><br />
tracing the chain of time servers back to the top stratum server being used to set the local time.<br />
These utilities are all accessable through the MULTINET comm<strong>and</strong> (i.e. “MULTINET NTPDATE<br />
. . .”), or as DCL foreign comm<strong>and</strong> symbols through the use of the<br />
MULTINET:NTP_DEFINE.COM procedure to define these comm<strong>and</strong>s. The same image is<br />
executed in either case <strong>and</strong> it is mostly a matter of personal preference which is used. The foreign<br />
comm<strong>and</strong>s can be undefined by use of the MULTINET:NTP_UNDEFINE.COM procedure.<br />
14-25
Network Time Protocol (NTP) NTPDATE<br />
NTPDATE<br />
The NTPDATE utility sets the local date <strong>and</strong> time, by polling the NTP servers given as the server<br />
arguments, to determine the correct time. A number of samples are obtained from each of the<br />
servers specified <strong>and</strong> a subset of the NTP clock filter <strong>and</strong> selection algorithms are applied to select<br />
the best of these.<br />
Note! The accuracy <strong>and</strong> reliability of ntpdate depends on the number of servers, the number of polls<br />
each time it is run, <strong>and</strong> the interval between runs.<br />
14-26<br />
The NTPDATE utility can be run manually as necessary to set the host clock, or it can be run from<br />
the system startup comm<strong>and</strong> file to set the clock at boot time. This is useful in some cases to set the<br />
clock initially before starting the NTP daemon, NTPD. It is also possible to run NTPDATE from a<br />
batch job. However, it is important to note that NTPDATE with contrived batch jobs is no<br />
substitute for the NTP daemon, which uses sophisticated algorithms to maximize accuracy <strong>and</strong><br />
reliability while minimizing resource use. Finally, since NTPDATE does not discipline the host<br />
clock frequency as does NTPD, the accuracy using NTPDATE is limited.<br />
The NTPDATE utility makes time adjustments in one of two ways. If it determines that the clock is<br />
wrong by more than 0.5 second, it simply steps the time by calling the $SETIME system service. If<br />
the error is less than 0.5 second, it slews the time by temporarily adjusting system clock variables.<br />
The latter technique is less disruptive <strong>and</strong> more accurate when the error is small, <strong>and</strong> works quite<br />
well when NTPDATE is run by a batch job every hour or two.<br />
The NTPDATE utility declines to set the date if NTPD is running on the same host. When running<br />
NTPDATE every hour or two from a batch job, as an alternative to running NTPD, results in<br />
precise enough timekeeping to avoid stepping the clock.<br />
Format<br />
ntpdate [ -bBdoqsuv ] [ -a key ] [ -e authdelay ] [ -k keyfile ] [ -o version ] [ -p<br />
samples ] [-t timeout ] server [ ... ]<br />
Comm<strong>and</strong> Line Options<br />
-a key<br />
Enables the authentication function <strong>and</strong> specifies the key identifier to be used for authentication as<br />
the argument key. The keys <strong>and</strong> key identifiers must match in both the client <strong>and</strong> server key files.<br />
The default is to disable the authentication function.<br />
-B<br />
Force the time to always be slewed, even if the measured offset is greater than ~128 ms. The<br />
default is to step the time if the offset is greater than ~128 ms.<br />
Note! If the offset is large, it can sometimes take several hours to slew the clock to the correct value.<br />
During this time, the host should not be used to synchronize clients.
NTPDATE Network Time Protocol (NTP)<br />
-b<br />
Force the time to be stepped, rather than slewed (default). This option should be used when called<br />
from a startup file at boot time.<br />
-d<br />
Enable the debugging mode, in which ntpdate will go through all the steps, but not adjust the local<br />
clock. Information useful for general debugging will also be printed.<br />
-e authdelay<br />
Specify the processing delay to perform an authentication function as the value authdelay, in<br />
seconds <strong>and</strong> fraction. This number is usually small enough to be negligible for most purposes,<br />
though specifying a value may improve timekeeping on very slow CPU's.<br />
-k keyfile<br />
Specifies the path for the authentication key file as the string keyfile. The default is<br />
MULTINET:NTP.KEYS. This file should be in the format described for NTPD configuration.<br />
-o version<br />
Specifies the NTP version for outgoing packets as the integer version, which can be 1, 2, 3 or 4.<br />
The default is 4. This allows NTPDATE to be used with older NTP versions.<br />
-p samples<br />
Specifies the number of samples to be acquired from each server as the integer samples, with values<br />
from 1 to 8 inclusive. The default is 4.<br />
-q<br />
Query only - don't set the clock.<br />
-s<br />
Enables OPCOM messaging. This is designed primarily for the convenience of batch jobs.<br />
-t timeout<br />
Specifies the maximum time waiting for a server response as the value timeout, in seconds <strong>and</strong><br />
fraction. The value is rounded to a multiple of 0.2 seconds. The default is 1 second, a value suitable<br />
for polling across a LAN.<br />
14-27
Network Time Protocol (NTP) NTPDATE<br />
14-28<br />
-u<br />
Directs NTPDATE to use an unprivileged port on outgoing packets. This is most useful when<br />
behind a firewall that blocks incoming traffic to privileged ports, <strong>and</strong> you want to synchronize with<br />
hosts beyond the firewall.<br />
-v<br />
Be verbose. This option will cause ntpdate's version identification string to be logged.
NTPTRACE Network Time Protocol (NTP)<br />
NTPTRACE<br />
The NTPTRACE utility determines where a given NTP server gets its time, <strong>and</strong> follows the chain<br />
of NTP servers back to their master time source. If given no arguments, it starts with localhost.<br />
Here is an example of the output from NTPTRACE:<br />
$ ntptrace<br />
localhost: stratum 4, offset 0.0019529, synch distance 0.144135<br />
server2ozo.com: stratum 2, offset 0.0124263, synch distance 0.115784<br />
usndh.edu: stratum 1, offset 0.0019298, synch distance 0.011993, refid<br />
’WWVB’<br />
On each line, the fields are (left to right): the host name, host stratum, time offset between that host<br />
<strong>and</strong> the local host (as measured by NTPTRACE; this is why it is not always zero for localhost),<br />
host synchronization distance, <strong>and</strong> (only for stratum-1 servers) the reference clock ID. All times are<br />
given in seconds.<br />
Note! The stratum is the server hop count to the primary source, while the synchronization distance is<br />
the estimated error relative to the primary source. The NTP server must be synchronized to a<br />
peer.<br />
Format<br />
ntptrace [ -vdn ] [ -r retries ] [ -t timeout ] [ server ]<br />
Comm<strong>and</strong> Line Options<br />
-d<br />
Turns on some debugging output.<br />
-n<br />
Turns off the printing of hostnames; instead, host IP addresses are given. This may be useful if a<br />
nameserver is down.<br />
-r retries<br />
Sets the number of retransmission attempts for each host. The default is 5.<br />
-t timeout<br />
Sets the retransmission timeout (in seconds). The default is 2.<br />
-v<br />
Prints verbose information about the NTP servers.<br />
14-29
Network Time Protocol (NTP) NTPDC<br />
NTPDC<br />
The NTPDC utility is used to query the NTPD server about its current state <strong>and</strong> to request changes<br />
in that state. The program runs interactively or uses comm<strong>and</strong> line arguments. Extensive state <strong>and</strong><br />
statistics information is available through the NTPDC interface. In addition, nearly all the<br />
configuration options that can be specified at startup using NTPD’s configuration file may also be<br />
specified at run-time using NTPDC.<br />
The NTPDC utility uses NTP mode 7 packets to communicate with the NTP server, <strong>and</strong> can be<br />
used to query any compatible server on the network which permits it.<br />
Note! Since NTP is a UDP protocol, this communication is somewhat unreliable, especially over large<br />
distances, in terms of network topology. NTPDC makes no attempt to retransmit requests, <strong>and</strong><br />
times out requests if the remote host is not heard from within a suitable timeout time.<br />
14-30<br />
NTPDC’s operation is specific to the NTPD implementation <strong>and</strong> can be expected to work only with<br />
this, <strong>and</strong> possibly some previous versions, of the daemon. Requests from a remote NTPDC<br />
program that affect the state of the local server must be authenticated, which requires both the<br />
remote program <strong>and</strong> local server to share a common key <strong>and</strong> key identifier.<br />
Comm<strong>and</strong> Line Format<br />
ntpdc [ -ilnps ] [ -c comm<strong>and</strong> ] [ host ] [ ...]<br />
Comm<strong>and</strong> Line Arguments<br />
(If comm<strong>and</strong> line arguments are omitted, NTPDC runs in interactive mode.)<br />
-c<br />
The comm<strong>and</strong> that follows is interpreted as an interactive format comm<strong>and</strong> <strong>and</strong> is added to the list<br />
of comm<strong>and</strong>s to be executed on the specified host(s). The comm<strong>and</strong> must be in double quotes if it<br />
consists of more than one word. Multiple -c options can be given.<br />
-i<br />
Force ntpdc to operate in interactive mode. Prompts will be written to the st<strong>and</strong>ard output <strong>and</strong><br />
comm<strong>and</strong>s read from the st<strong>and</strong>ard input.<br />
-l<br />
Obtain a list of peers which are known to the server(s). This switch is equivalent to -c listpeers.<br />
-n<br />
Displays all host addresses in dotted quad numeric format rather than converting them to canonical<br />
hostnames.<br />
-p
NTPDC Network Time Protocol (NTP)<br />
Print a list of the peers known to the server as well as a summary of their state. This is equivalent to<br />
-c peers.<br />
-s<br />
Print a list of the peers known to the server as well as a summary of their state, but in a slightly<br />
different format than the -p switch. This is equivalent to -c dmpeers.<br />
host<br />
Sets the host to which future queries are sent, as either a hostname or a numeric address. If host is<br />
omitted, the local host is used.<br />
Interactive Comm<strong>and</strong>s<br />
Internal Comm<strong>and</strong>s<br />
Interactive format comm<strong>and</strong>s consist of a keyword followed by zero to four arguments. Only<br />
enough characters of the full keyword to uniquely identify the comm<strong>and</strong> need be typed. The output<br />
of a comm<strong>and</strong> is normally sent to the st<strong>and</strong>ard output, but you can send the output of individual<br />
comm<strong>and</strong>s to a file by appending a greater than (>) followed by a filename to the comm<strong>and</strong> line.<br />
? [ comm<strong>and</strong>-keyword ]<br />
help [ comm<strong>and</strong>-keyword ]<br />
A question mark (?) by itself prints a list of all the known comm<strong>and</strong> keywords. A question mark<br />
(?) followed by a comm<strong>and</strong> keyword prints function <strong>and</strong> usage information.<br />
delay milliseconds<br />
Specifies a time interval to be added to timestamps included in requests that require authentication.<br />
This is used to enable unreliable server reconfiguration over long delay network paths or between<br />
machines whose clocks are unsynchronized.<br />
host [ hostname ]<br />
Sets the host to which future queries are sent. Hostname may be either a hostname or a numeric<br />
address.<br />
hostnames [ yes | no ]<br />
If yes is specified, host names are printed in information displays. If no is specified, numeric<br />
addresses are printed instead. The default is yes, unless modified using the comm<strong>and</strong> line -n switch.<br />
keyid [ keyid ]<br />
Allows a key number to be used by NTPDC to authenticate configuration requests. This must<br />
correspond to a key number the server has been configured to use for this purpose.<br />
quit<br />
Exits NTPDC.<br />
14-31
Network Time Protocol (NTP) NTPDC<br />
14-32<br />
passwd<br />
Prompts you to type in a password (which is not echoed) that is used to authenticate configuration<br />
requests. The password must correspond to the key configured for use by the NTP server for this<br />
purpose if such requests are to be successful.<br />
timeout [ milliseconds ]<br />
Specifies a timeout period for responses to server queries. The default is approximately 8000<br />
milliseconds.<br />
Note! Since NTPDC retries each query once after a timeout, the total waiting time for a timeout is<br />
twice the timeout value set.<br />
Control Message Comm<strong>and</strong>s<br />
Query comm<strong>and</strong>s produce NTP mode 7 packets containing requests for information being sent to<br />
the server. These are read-only comm<strong>and</strong>s in that they make no modification of the server<br />
configuration state.<br />
listpeers<br />
Obtains <strong>and</strong> prints a brief list of the peers for which the server is maintaining state. These should<br />
include all configured peer associations, as well as those peers whose stratum is such that they are<br />
considered by the server to be possible future synchronization c<strong>and</strong>idates.<br />
peers<br />
Obtains a list of peers for which the server is maintaining state, along with a summary of that state.<br />
Summary information includes the address of the remote peer; local interface address (0.0.0.0 if a<br />
local address has yet to be determined); stratum of the remote peer (a stratum of 16 indicates the<br />
remote peer is unsynchronized); polling interval (in seconds); reachability register (in octal); <strong>and</strong><br />
current estimated delay, offset, <strong>and</strong> dispersion of the peer (all in seconds).<br />
The character in the left margin indicates the mode this peer entry is operating in as per the table.:<br />
+ Symmetric active<br />
- Symmetric passive<br />
= Remote server is being polled in client mode<br />
^ Server is broadcasting to this address<br />
~ Remote peer is sending broadcasts<br />
* Peer the server is currently synchronizing to<br />
The contents of the host field may be in one of four forms: a hostname, IP address, reference clock<br />
implementation name with its parameter, or REFCLK (implementation number, parameter). With<br />
hostnames no, only IP-addresses are displayed.
NTPDC Network Time Protocol (NTP)<br />
dmpeers<br />
A slightly different peer summary list. Identical to the output of the peers comm<strong>and</strong>, except for the<br />
character in the leftmost column. Characters only appear beside peers which were included in the<br />
final stage of the clock selection algorithm. Characters indicate server validity according to the<br />
following table:<br />
. peer was cast off in the falseticker detection<br />
+ peer made it through falseticker detection<br />
* Peer the server is currently synchronizing with<br />
showpeer peer-address [ ... ]<br />
Shows a detailed display of the current peer variables for one or more peers. Most of these values<br />
are described in the NTP Version 2 specification. Underst<strong>and</strong>ing this information will require a<br />
detailed underst<strong>and</strong>ing of the inner workings of the NTP protocol, which is also available in the<br />
RFCs that specify the protocol.<br />
pstats peer-address [ ... ]<br />
Shows per-peer statistic counters associated with the specified peer(s).<br />
loopinfo [ oneline | multiline ]<br />
Prints the values of selected loop filter variables. The loop filter is the part of NTP which deals<br />
with adjusting the local system clock.<br />
loop filter is the part of NTP that deals with adjusting the local system clock<br />
offset is the last offset given to the loop filter by the packet processing code<br />
frequency is the frequency error of the local clock in parts per million (ppm)<br />
time_const controls the stiffness of the phase-lock loop <strong>and</strong> thus the speed at which it<br />
can adapt to oscillator drift<br />
watchdog timer<br />
value<br />
is the number of seconds elapsed since the last sample offset was given to<br />
the loop filter<br />
The oneline <strong>and</strong> multiline options specify the format in which this information is to be<br />
printed, with multiline as the default.<br />
sysinfo<br />
Prints a variety of system state variables, such as the state related to the local server. All except the<br />
last four lines are described in the NTP Version 3 specification, RFC 1305.<br />
The system flags can be set <strong>and</strong> cleared by the enable <strong>and</strong> disable configuration comm<strong>and</strong>s,<br />
respectively. These are the auth, bclient, monitor, pll, pps, <strong>and</strong> stats flags. (See the<br />
NTPD section for the meaning of these flags.)<br />
14-33
Network Time Protocol (NTP) NTPDC<br />
14-34<br />
The stability is the residual frequency error remaining after the system frequency correction is<br />
applied, <strong>and</strong> is intended for maintenance <strong>and</strong> debugging. In most architectures, this value initially<br />
decreases from as high as 500 ppm to a nominal value in the range .01 to 0.1 ppm. If it remains high<br />
for some time after starting the server, something might be wrong with the local clock.<br />
The broadcastdelay shows the default broadcast delay, as set by the broadcastdelay<br />
configuration comm<strong>and</strong>.. The authdelay shows the default authentication delay, as set by the<br />
authdelay configuration comm<strong>and</strong>.<br />
sysstats<br />
Prints statistics counters maintained in the protocol module.<br />
memstats<br />
Prints statistics counters related to memory allocation code.<br />
iostats<br />
Prints statistics counters maintained in the input-output module.<br />
timerstats<br />
Prints statistics counters maintained in the timer/event queue support code.<br />
reslist<br />
Obtains <strong>and</strong> prints the server’s restriction list. This list is usually printed in sorted order <strong>and</strong> may<br />
help to underst<strong>and</strong> how the restrictions are applied.<br />
monlist [ version ]<br />
Obtains <strong>and</strong> prints traffic counts collected <strong>and</strong> maintained by the monitor facility. You do not<br />
normally need to specify the version number.<br />
Runtime Configuration Requests<br />
All requests that cause state changes in the server are authenticated by the server using the<br />
requestkey in the configuration file (which can be disabled by the server by not configuring a<br />
key). The key number <strong>and</strong> the corresponding key must also be made known to NTPDC. This can be<br />
done using NTPDC’s keyid <strong>and</strong> passwd comm<strong>and</strong>s, the latter of which prompts at the terminal<br />
for a password to use as the encryption key. You are also prompted automatically for both the key<br />
number <strong>and</strong> password the first time a comm<strong>and</strong> is given that would result in an authenticated<br />
request to the server. Authentication not only provides verification that the requester has<br />
permission to make such changes, but also gives an extra degree of protection against transmission<br />
errors.<br />
Authenticated requests always include a timestamp in the packet data, which is included in the<br />
computation of the authentication code. This timestamp is compared by the server to its receive<br />
timestamp. If they differ by more than a small amount, the request is rejected. This is done for two<br />
reasons. First, it makes simple replay attacks on the server, by someone who might be able to<br />
overhear traffic on your LAN, much more difficult. Secondly, it makes it more difficult to request<br />
configuration changes to your server from topologically remote hosts. While the reconfiguration
NTPDC Network Time Protocol (NTP)<br />
facility works well with a server on the local host, <strong>and</strong> may work adequately between time<br />
synchronized hosts on the same LAN, it works very poorly for more distant hosts. As such, if<br />
reasonable passwords are chosen, care is taken in the distribution <strong>and</strong> protection of keys, <strong>and</strong><br />
appropriate source address restrictions are applied, the run-time reconfiguration facility should<br />
provide an adequate level of security.<br />
The following comm<strong>and</strong>s all make authenticated requests.<br />
addpeer peer-address [ keyid ] [ version ] [ prefer ]<br />
Adds a configured peer association at the given address <strong>and</strong> operates in symmetric active mode.<br />
Note! An existing association with the same peer may be deleted when this comm<strong>and</strong> is executed, or<br />
may simply be converted to conform to the new configuration, as appropriate. If the optional<br />
keyid is a non-zero integer, all outgoing packets to the remote server have an authentication<br />
field attached, encrypted with this key. If the value is 0 (or not given), no authentication is done.<br />
The version can be 1, 2, 3 or 4, <strong>and</strong> defaults to 4. The prefer keyword indicates a preferred<br />
peer (<strong>and</strong> thus is used primarily for clock synchronization if possible).<br />
addserver peer-address [ keyid ] [ version ] [ prefer ]<br />
Identical to the addpeer comm<strong>and</strong>, except that the operating mode is client.<br />
broadcast peer-address [ keyid ] [ version ] [ prefer ]<br />
Identical to the addpeer comm<strong>and</strong>, except that the operating mode is broadcast. In this case a<br />
valid key identifier <strong>and</strong> key are required. The peer-address parameter can be the broadcast address<br />
of the local network, or a multicast group address assigned to NTP. If using a multicast address, a<br />
multicast-capable kernel is required.<br />
unconfig peer-address [ ... ]<br />
Removes the configured bit from the specified peers. In many cases, this deletes the peer<br />
association. When appropriate, however, the association may persist in an unconfigured mode if the<br />
remote peer is willing to continue in this fashion.<br />
enable [ flag ] [ ... ]<br />
disable [ flag ] [ ... ]<br />
Operates the same as the enable <strong>and</strong> disable configuration file comm<strong>and</strong>s of NTPD.<br />
restrict address mask flag [ flag ]<br />
Operates the same as the restrict configuration file comm<strong>and</strong>s of NTPD.<br />
unrestrict address mask flag [ flag ]<br />
Unrestricts the matching entry from the restrict list.<br />
delrestrict address mask [ ntpport ]<br />
Deletes the matching entry from the restrict list.<br />
readkeys<br />
14-35
Network Time Protocol (NTP) NTPDC<br />
14-36<br />
Causes the current set of authentication keys to be purged <strong>and</strong> a new set to be obtained by rereading<br />
the keys file (MULTINET:NTP.KEYS). This allows encryption keys to be changed without<br />
restarting the server.<br />
trustedkey keyid [ ... ]<br />
untrustedkey keyid [ ... ]<br />
Operates the same as the trustedkey <strong>and</strong> untrustedkey configuration file comm<strong>and</strong>s of NTPD.<br />
authinfo<br />
Returns information concerning the authentication module, including known keys <strong>and</strong> counts of<br />
encryptions <strong>and</strong> decryptions which have been done.<br />
reset<br />
Clears the statistics counters in various modules of the server.
NTPQ Network Time Protocol (NTP)<br />
NTPQ<br />
The NTPQ utility is used to query NTP servers that implement the recommended NTP mode 6<br />
control message format about current state <strong>and</strong> to request changes in that state. The program runs<br />
interactively or uses comm<strong>and</strong> line arguments. Requests to read <strong>and</strong> write arbitrary variables can be<br />
assembled, with output options available. NTPQ can also obtain <strong>and</strong> print a list of peers in a<br />
common format by sending multiple queries to the server.<br />
The utility uses NTP mode 6 packets to communicate with the NTP server, <strong>and</strong> hence can be used<br />
to query any compatible server on the network which permits it.<br />
Note! Since NTP is a UDP protocol, this communication is somewhat unreliable, especially over large<br />
distances in terms of network topology. NTPQ makes one attempt to retransmit requests, <strong>and</strong><br />
times out requests if the remote host is not heard from within a suitable timeout time.<br />
Comm<strong>and</strong> Line Format<br />
ntpq [ -inp ] [- c comm<strong>and</strong> ] [ host ] [ ... ]<br />
If comm<strong>and</strong> line arguments are omitted, NTPQ runs in interactive mode.<br />
-c<br />
The comm<strong>and</strong> that follows is interpreted as an interactive format comm<strong>and</strong> <strong>and</strong> is added to the list<br />
of comm<strong>and</strong>s to be executed on the specified host(s). The comm<strong>and</strong> must be in double quotes if it<br />
consists of more than one word. Multiple -c options may be given.<br />
-i<br />
Force NTPQ to operate in interactive mode. Prompts will be written to the st<strong>and</strong>ard output <strong>and</strong><br />
comm<strong>and</strong>s read from the st<strong>and</strong>ard input.<br />
-n<br />
Displays all host addresses in dotted quad numeric format rather than converting them to canonical<br />
hostnames.<br />
-p<br />
Print a list of the peers known to the server as well as a summary of their state. This is equivalent to<br />
the peers interactive comm<strong>and</strong>.<br />
host<br />
Sets the host to which future queries are sent, as either a hostname or a numeric address. If host is<br />
omitted, the local host is used.<br />
14-37
Network Time Protocol (NTP) NTPQ<br />
Interactive Comm<strong>and</strong>s<br />
Interactive format comm<strong>and</strong>s consist of a keyword followed by zero to four arguments. Only enough<br />
characters of the full keyword to uniquely identify the comm<strong>and</strong> need be typed. The output is sent to<br />
the st<strong>and</strong>ard output.<br />
14-38<br />
Internal Comm<strong>and</strong>s<br />
Internal comm<strong>and</strong>s are executed entirely within the NTPQ program itself <strong>and</strong> do not result in NTP<br />
mode 6 requests being sent to a server.<br />
? [ comm<strong>and</strong>-keyword ]<br />
help [ comm<strong>and</strong>-keyword ]<br />
A question mark (?) by itself prints a list of all the known comm<strong>and</strong> keywords. A question mark<br />
followed by a comm<strong>and</strong> keyword prints function <strong>and</strong> usage information for that comm<strong>and</strong>.<br />
addvars variable_name [ = value ] [ ... ]<br />
rmvars variable_name [ ... ]<br />
clearvars<br />
The data carried by NTP mode 6 messages consists of a list of items of the form variable_name =<br />
value, where the = value is ignored, <strong>and</strong> can be omitted, in requests to the server to read variables.<br />
NTPQ maintains an internal list in which data to be included in control messages can be assembled,<br />
<strong>and</strong> sent using the readlist <strong>and</strong> writelist comm<strong>and</strong>s described below. The addvars comm<strong>and</strong><br />
allows variables <strong>and</strong> their optional values to be added to the list. If more than one variable is to be<br />
added, the list should be comma-separated <strong>and</strong> not contain white space. The rmvars comm<strong>and</strong> can<br />
be used to remove individual variables from the list, while the clearlist comm<strong>and</strong> removes all<br />
variables from the list.<br />
authenticate yes | no<br />
Normally NTPQ does not authenticate requests unless they are write requests. The comm<strong>and</strong><br />
authenticate yes causes NTPQ to send authentication with all requests it makes. Authenticated<br />
requests causes some servers to h<strong>and</strong>le requests slightly differently.<br />
cooked<br />
Causes output from query comm<strong>and</strong>s to be "cooked" for user readability. Variables NTPQ<br />
recognizes have their values reformatted for readability. Variables that NTPQ determines should<br />
have a decodeable value, but do not, are marked with a trailing question mark (?).<br />
debug more | less | off<br />
Turns internal query program debugging on <strong>and</strong> off.<br />
delay milliseconds<br />
Specify a time interval to be added to timestamps included in requests which require authentication.<br />
This is used to enable (unreliable) server reconfiguration over long delay network paths or between<br />
machines whose clocks are unsynchronized. Actually the server does not now require timestamps
in authenticated requests, so this comm<strong>and</strong> may be obsolete.<br />
NTPQ Network Time Protocol (NTP)<br />
host [ hostname ]<br />
Sets the host to which future queries are sent. Hostname may be either a hostname or a numeric<br />
address.<br />
hostnames [ yes | no ]<br />
If yes is specified, hostnames are printed in information displays. If no, numeric addresses are<br />
printed instead. The default is yes, unless modified using the comm<strong>and</strong> line -n switch.<br />
keyid keyid<br />
This comm<strong>and</strong> allows the specification of a key number to be used to authenticate configuration<br />
requests. This must correspond to a key number the server has been configured to use for this<br />
purpose.<br />
ntpversion [ 1 | 2 | 3 | 4 ]<br />
Sets the NTP version number that NTPQ claims in packets. Default is 4.<br />
Note! Mode 6 control messages (<strong>and</strong> modes) didn't exist in NTP version 1.<br />
quit<br />
Exits NTPQ.<br />
passwd<br />
This comm<strong>and</strong> prompts you to type in a password (which will not be echoed) which will be used to<br />
authenticate configuration requests. The password must correspond to the key configured for use<br />
by the NTP server for this purpose if such requests are to be successful.<br />
raw<br />
Causes all output from query comm<strong>and</strong>s to be printed as received from the remote server. The only<br />
formatting or interpretation done on the data is to transform non-ASCII data into a printable form.<br />
timeout [ milliseconds ]<br />
Specifies a timeout period for responses to server queries. The default is about 5000 milliseconds.<br />
Note! Since NTPQ retries each query once after a timeout, the total waiting time for a timeout is twice<br />
the timeout value set. If the milliseconds value is omitted, the current timeout period is<br />
displayed.<br />
Control Message Comm<strong>and</strong>s<br />
Each peer known to an NTP server has a 16-bit integer association identifier assigned to it. NTP<br />
control messages that carry peer variables must identify the peer to which the values correspond by<br />
including its association ID. An association ID of 0 is special, <strong>and</strong> indicates the variables are<br />
system variables whose names are drawn from a separate name space.<br />
Control message comm<strong>and</strong>s result in one or more NTP mode 6 messages being sent to the server,<br />
14-39
Network Time Protocol (NTP) NTPQ<br />
14-40<br />
<strong>and</strong> cause the data returned to be printed in some format. Most comm<strong>and</strong>s currently implemented<br />
send a single message <strong>and</strong> expect a single response. The current exceptions are the peers comm<strong>and</strong>,<br />
which will send a preprogrammed series of messages to obtain the data it needs, <strong>and</strong> the mreadlist<br />
<strong>and</strong> mreadvar comm<strong>and</strong>s, which will iterate over a range of associations.<br />
associations<br />
Obtains <strong>and</strong> prints a list of association identifiers <strong>and</strong> peer status for in-spec peers of the server<br />
being queried. The list is printed in columns. The first of these is an index numbering the<br />
associations from 1 for internal use, the second is the actual association identifier returned by the<br />
server, <strong>and</strong> the third is the status word for the peer, as described in Appendix B.2.2 of the NTP<br />
specification RFC 1305. This is followed by a number of columns containing data decoded from<br />
the status word.<br />
clockvar [ assocID ] [ variable_name [ = value [ ... ]] [ ... ]<br />
cv [ assocID ] [ variable_name [ = value [ ... ] ] [ ... ]<br />
Requests that a list of the server's clock variables be sent. Servers which have a radio clock or other<br />
external synchronization will respond positively to this. If the association identifier is omitted or<br />
zero the request is for the variables of the system clock <strong>and</strong> will generally get a positive response<br />
from all servers with a clock. If the server treats clocks as pseudo-peers, <strong>and</strong> hence can possibly<br />
have more than one clock connected at once, referencing the appropriate peer association ID will<br />
show the variables of a particular clock. Omitting the variable list will cause the server to return a<br />
default variable display.<br />
lassocations<br />
Obtains <strong>and</strong> prints a list of association identifiers <strong>and</strong> peer statuses for all associations for which the<br />
server is maintaining state. This comm<strong>and</strong> differs from the associations comm<strong>and</strong> only for servers<br />
which retain state for out-of-spec client associations (i.e., fuzzballs). Such associations are<br />
normally omitted from the display when the associations comm<strong>and</strong> is used, but are included in the<br />
output of lassociations.<br />
lpassociations<br />
Print data for all associations, including out-of-spec client associations, from the internally cached<br />
list of associations. This comm<strong>and</strong> differs from passociations only when dealing with fuzzballs.<br />
lpeers<br />
Like the peers comm<strong>and</strong>, except a summary of all associations for which the server is maintaining<br />
state is printed. This can produce a much longer list of peers from fuzzball servers.<br />
mreadlist assocID assocID<br />
mrl assocID assocID<br />
Like the readlist comm<strong>and</strong>, except the query is done for each of a range of (non-zero) association<br />
IDs. This range is determined from the association list cached by the most recent associations<br />
comm<strong>and</strong>.<br />
mreadvar assocID assocID [ variable_name [ = value [ ... ]<br />
mrv assocID assocID [ variable_name [ = value [ ... ]
NTPQ Network Time Protocol (NTP)<br />
Like the readvar comm<strong>and</strong>, except the query is done for each of a range of (non-zero) association<br />
IDs. This range is determined from the association list cached by the most recent associations<br />
comm<strong>and</strong>.<br />
opeers<br />
An old form of the peers comm<strong>and</strong> with the reference ID replaced by the local interface address.<br />
passociations<br />
Displays association data concerning in-spec peers from the internally cached list of associations.<br />
This comm<strong>and</strong> performs identically to the associations except that it displays the internally stored<br />
data rather than making a new query.<br />
peers<br />
Obtains a list of in-spec peers of the server, along with a summary of each peer’s state. Summary<br />
information includes the address of the remote peer; the reference ID (0.0.0.0 if the ref ID is<br />
unknown); stratum of the remote peer; type of the peer (local, unicast, multicast, or broadcast),<br />
when the last packet was received; polling interval (in seconds); reachability register (in octal); <strong>and</strong><br />
the current estimated delay, offset <strong>and</strong> dispersion of the peer (all in milliseconds). The character in<br />
the left margin indicates the fate of this peer in the clock selection process:<br />
character rv cmd Description<br />
reject The peer is discarded as unreachable, synchronized to this server<br />
(synch loop) or outrageous synchronization distance.<br />
x falsetick The peer is discarded by the intersection algorithm as a falseticker.<br />
. excess The peer is discarded as not among the first ten peers sorted by<br />
synchronization distance <strong>and</strong> so is probably a poor c<strong>and</strong>idate.<br />
- outlyer Discarded by the clustering algorithm<br />
+ c<strong>and</strong>idat The peer is a survivor <strong>and</strong> a c<strong>and</strong>idate for the combining algorithm.<br />
# selected The peer is a survivor, but not among the first six peers sorted by<br />
synchronization distance. If the assocation is ephemeral, it may be<br />
demobilized to conserve resources.<br />
* peer The peer has been declared the system peer <strong>and</strong> lends its variables to<br />
the system variables.<br />
o peer The peer has been declared the system peer <strong>and</strong> lends its variables to<br />
thesystem variables. However, a PPS signal is in use<br />
Note! Since the peers comm<strong>and</strong> depends on the ability to parse the values in the responses it gets,<br />
it may fail to work with servers that poorly control the data formats.<br />
The contents of the host field may be in one of three forms. It may be a hostname, an IP address, or<br />
14-41
Network Time Protocol (NTP) NTPQ<br />
14-42<br />
a reference clock implementation name with its parameter. With hostnames no, only IP<br />
addresses are displayed.<br />
pstatus assocID<br />
Sends a read status request to the server for the given association. (See the associations comm<strong>and</strong><br />
for assocIDs). The names <strong>and</strong> values of the peer variables returned are printed.<br />
Note! The status word from the header is displayed preceding the variables, both in hexidecimal <strong>and</strong><br />
in English.<br />
readlist [ assocID ]<br />
rl [ assocID ]<br />
Requests that the values of the variables in the internal variable list be returned by the server. If the<br />
association ID is omitted or is 0 the variables are assumed to be system variables. Otherwise they<br />
are treated as peer variables. If the internal variable list is empty a request is sent without data,<br />
which should induce the remote server to return a default display.<br />
readvar [ assocID [ variable-name [ = value ] [ ... ] ] ]<br />
rv [ assocID [ variable-name [ =value ] [ ... ] ] ]<br />
Requests that the values of the specified variables be returned by the server, by sending a read<br />
variables request. If you omit the association ID or give it as zero, the variables are system<br />
variables; otherwise they are peer variables <strong>and</strong> the values returned are those of the corresponding<br />
peer. (See the associations comm<strong>and</strong> for assocIDs). Omitting the variable list sends a request with<br />
no data, which should induce the server to return a default display. If more than one variable is<br />
requested, separate the variable list with commas <strong>and</strong> do not include spaces.<br />
writevar assocID variable_name [ = value [ ...]<br />
Like the readvar request, except the specified variables are written instead of read.<br />
writelist [ assocID ]<br />
Like the readlist request, except the internal list variables are written instead of read.<br />
NTP Management<br />
Master Server<br />
The <strong>MultiNet</strong> Master_Server process is responsible for starting the NTPD server. When the<br />
Master_Server process is started, or restarted, it will check the list of enabled servers in the<br />
MULTINET:SERVICES.MASTER_SERVER file <strong>and</strong> start those that are enabled. To enable NTP<br />
use the following comm<strong>and</strong>s:<br />
$ multinet configure/servers<br />
<strong>MultiNet</strong> Server Configuration Utility V5.4(42)<br />
[Reading in configuration from MULTINET:SERVICES.MASTER_SERVER]<br />
SERVER-CONFIG>enable ntp
NTPQ Network Time Protocol (NTP)<br />
SERVER-CONFIG>exit<br />
[Writing configuration to<br />
MULTINET_COMMON_ROOT:[MULTINET]SERVICES.MASTER_SERVER]<br />
If it is desired that NTP be started immediately, restarting the master server is necessary in addition<br />
to the above comm<strong>and</strong>s, otherwise NTP will be started the next time <strong>MultiNet</strong> is started.<br />
Netcontrol<br />
The <strong>MultiNet</strong> NETCONTROL comm<strong>and</strong> is used to start <strong>and</strong> stop the NTP_SERVER process. It<br />
can also be used to make certain changes to the operation of NTP, or to inquire about specific items<br />
od information.<br />
To start the NTP_SERVER process:<br />
$ multinet netcontrol ntp<br />
Connected to NETCONTROL server on "LOCALHOST"<br />
< pseudo.process.com Network Control V5.4(10) at Sun 21-Dec-2003<br />
9:58PM-EST<br />
NTP>start<br />
< Starting NTP server<br />
< NTP server started, process id E9<br />
NTP>quit<br />
<strong>MultiNet</strong> NETCONTROL supports the following NTP-specific comm<strong>and</strong>s:<br />
DEBUG Allows setting of the debug level<br />
NOOP Sends a null comm<strong>and</strong>. Useful for making sure the<br />
server is running.<br />
NTP-CONTROL-VERSION Displays the version of the NTP-CONTROL software.<br />
RELOAD Causes the NTP_SERVER process to restart.<br />
SHOW Displays some information about current server status<br />
<strong>and</strong> peers.<br />
SHUTDOWN Causes the NTP_SERVER process to exit.<br />
START Causes the NTP_SERVER process to be created.<br />
VERSION Displays the version info for the NTP server <strong>and</strong> NTP-<br />
CONTROL software.<br />
WAYTOOBIG Allows setting of the panic/waytoobig value<br />
14-43
Network Time Protocol (NTP) NTPQ<br />
Monitoring<br />
14-44<br />
NTP includes a comprehensive monitoring facility suitable for continuous, long term recording of<br />
server <strong>and</strong> client timekeeping performance. (See the statistics configuration option for a<br />
listing of each type of statistic currently supported.)<br />
Troubleshooting Tips<br />
Here are some troubleshooting tips:<br />
• Make sure the entries in the NTP configuration file MULTINET:NTP.CONF are correct. At the<br />
minimum, there must be a server or peer declaration for a machine that is reachable, <strong>and</strong> if<br />
authentication is enabled, set it up to properly authenticate NTP packets. The machine serving<br />
time must be connected either to lower stratum machines or to some reference time source.<br />
• Make sure that the logical MULTINET_TIMEZONE is properly defined to reflect the timezone<br />
(<strong>and</strong> daylight savings). If the logical is undefined or incorrect, NTP is likely to abort.<br />
• The MULTINET_TIMEZONE logical is defined by <strong>MultiNet</strong> when the system starts. If<br />
<strong>MultiNet</strong> has already been started, issuing the following comm<strong>and</strong> will temporarily redefine the<br />
logical:<br />
MULTINET SET /TIMEZONE=/SELECT=<br />
However, the new value will not be preserved through a system reboot. To permanently change<br />
the value of this logical, the timezone rules must be configured using MULTINET<br />
CONFIGURE according to the description on page 14-22 of the <strong>MultiNet</strong> v5.4 Administrator’s<br />
<strong>Guide</strong>. However, MULTINET CONFIGURE will not redefine the logical on the running<br />
system. If <strong>MultiNet</strong> has already been started, you have to do both.<br />
• If using the slewalways comm<strong>and</strong>, make sure the system time is within 4000 seconds (or<br />
whatever panic is set to) of the correct time before starting NTPD. If the local system time is off<br />
by more than this amount from server time, NTPD logs a message <strong>and</strong> stops running. Also, if the<br />
local clock is not within a minute or two of correct time when starting NTPD with slewalways<br />
set, it may take some time for NTPD to synchronize the clock. Ideally, set the clock with<br />
NTPDATE or SET TIME before starting NTPD.<br />
• Make sure that TIMED <strong>and</strong> DTSS services are not running on the system. These services are<br />
used to synchronize time, <strong>and</strong> interfere with NTP.<br />
• The following messages are generated by the NTP server. They may go to either OPCOM or the<br />
MULTINET:NTPD.LOG file, or both. This log file is the best source of information for trouble-<br />
shooting in that it contains a record of these messages as well as additional informational<br />
messages. Messages appear in the log file without the bracketed prefix. There are four types of<br />
messages generated:<br />
• Configuration messages<br />
• Peer contact messages<br />
• Synchronization messages<br />
• Unexpected error condition messages<br />
Access error messages help by entering<br />
$ HELP MULTINET MESSAGES
Troubleshooting Using NTPQ<br />
NTPQ Network Time Protocol (NTP)<br />
The NTPQ utility has a few comm<strong>and</strong>s that are helpful in identifying problems. The peers<br />
comm<strong>and</strong> is one of the simplest <strong>and</strong> is a quick way to check the offset (time difference) between the<br />
local host <strong>and</strong> peer machines.<br />
The readvar comm<strong>and</strong> is useful for more in depth information. Without arguments, it displays<br />
information about the local host. When readvar is followed by an assocID, it displays information<br />
about the peer corresponding to the assocID (use associations to display the assocIDs for all<br />
peers). Of interest is the record of time offsets <strong>and</strong> round trip delays for packets (the filtoffset<br />
<strong>and</strong> filtdelay fields). This provides a record of the last eight time updates obtained from a peer.<br />
The comm<strong>and</strong> readvar assocID flash displays a useful variable, flash, which can be of<br />
particular interest for troubleshooting. The bits in the flash variable, if set, have the following<br />
meaning in relation to a peer:<br />
0x01 /* duplicate packet received */<br />
0x02 /* bogus packet received */<br />
0x04 /* protocol unsynchronized */<br />
0x08 /* peer delay/dispersion bounds check */<br />
0x10 /* peer authentication failed */<br />
0x20 /* peer clock unsynchronized */<br />
0x40 /* peer stratum out of bounds */<br />
0x80 /* root delay/dispersion bounds check */<br />
Configuration Example<br />
Figure 14-2 shows a highly redundant <strong>and</strong> robust configuration with multiple levels of backups. On<br />
the Internet close to your network, you have host 192.168.34.1 running at stratum 1, <strong>and</strong><br />
192.168.34.2 at stratum 2. In-house, you have host 192.168.67.1 synchronized with a radio clock<br />
<strong>and</strong> configured as a stratum 1 master clock.<br />
14-45
Network Time Protocol (NTP) NTPQ<br />
14-46<br />
Figure 14-2 Sample NTP Configuration<br />
As backup servers, you have two hosts, 192.168.67.2 <strong>and</strong> 192.168.67.3, in the climate-controlled<br />
room, one configured at stratum 10 <strong>and</strong> the other at 12. All other workstations on the floor point to<br />
these three servers as their synchronization source. When everything is running, every local host is<br />
synchronized to 192.168.67.1, since it is closer than Internet host 192.168.34.1. All the machines<br />
(peers) run at stratum 2.<br />
If internal host 192.168.67.1 goes down <strong>and</strong> the Internet connection is still up, either Internet host<br />
192.168.34.1 or 192.168.34.2 is selected depending on its availability, <strong>and</strong> the backup servers,<br />
192.168.67.2 <strong>and</strong> 192.168.67.3, run at stratum 2 or 3, depending on which Internet host was<br />
selected. The peers synchronize off 192.168.67.2 or 192.168.67.3 at stratum 3 or 4, again<br />
depending on which Internet host was selected.<br />
With 192.168.67.1 still unavailable <strong>and</strong> the Internet connection lost or all the Internet servers<br />
unavailable, 192.168.67.2 runs at stratum 10, since it was configured that way as a local clock. It<br />
then becomes the lowest stratum number in the network <strong>and</strong> all other hosts (including<br />
192.168.67.3) are synchronized to it at stratum 11.<br />
If 192.168.67.2 goes down, 192.168.67.3 runs at stratum 12 <strong>and</strong> all other hosts synchronize at<br />
stratum 13. It is important to set the stratum of 192.168.67.3 to 12. If set to 11, it might have a<br />
problem synchronizing to 192.168.67.2, since it may try to synchronize off it but finds it has the<br />
same stratum value. 192.168.67.3 would rather synchronize to 192.168.67.2 than to itself.<br />
Example 14-1 shows the configuration file entries for each of the three local servers (the other local<br />
hosts would all be configured as peers). You do not need to explicitly identify the peer strata, <strong>and</strong><br />
the order of items is irrelevant.
Example 14-1 Sample Entries in the Host NTP.CONF Files<br />
; NTP Configuration on 192.168.67.1<br />
master-clock 1<br />
; NTP Configuration on 192.168.67.2<br />
local-master 10<br />
server 192.168.67.1<br />
server 192.168.34.1<br />
server 192.168.34.2<br />
peer 192.168.67.3<br />
; NTP Configuration on 192.168.67.3<br />
local-master 12<br />
server 192.168.67.1<br />
server 192.168.34.1<br />
server 192.168.34.2<br />
peer 192.168.67.2<br />
; NTP Configuration for Computer Room Host 192.168.67.x<br />
server 192.168.67.1<br />
server 192.168.67.2<br />
server 192.168.67.3<br />
peer 192.168.67.y<br />
peer 192.168.67.z<br />
.<br />
.<br />
.<br />
Converting to the NTP.CONF File<br />
NTPQ Network Time Protocol (NTP)<br />
If you want to convert existing NTPv2 NETCONTROL parameters to the NTP.CONF file for NTP<br />
under <strong>MultiNet</strong> 5.0 or later, you will have to do it manually. The CONVNTP.COM procedure<br />
included in prior versions of <strong>MultiNet</strong> to do this automatically is not supported in versions of<br />
<strong>MultiNet</strong> that include NTPv4 support (<strong>MultiNet</strong> 5.0 <strong>and</strong> later). If you want to convert<br />
automatically, you should not upgrade directly to <strong>MultiNet</strong> v5.0, but upgrade to a prior version<br />
first, convert your NTPv2 configuration, then upgrade to the latest release.<br />
14-47
Network Time Protocol (NTP) NTPQ<br />
14-48<br />
The following conversions need to be made:<br />
NTPv2 parameter NTPv4 keyword NTPv4 file<br />
peer peer NTP.CONF<br />
passive peer NTP.CONF<br />
server server NTP.CONF<br />
trusting trustedkey NTP.KEYS<br />
If the "configuration-file" parameter is encountered you should examine the associated file to see if<br />
any of the contents need to be added to the new NTP.CONF file:<br />
All other NTPv2 parameters may be ignored.<br />
A system running NTPv4 will correctly interact with other systems, either clients, servers, or peers<br />
that are running NTPv2 or XNTP. NTP servers exchange version information with each other <strong>and</strong><br />
operate with the lowest common denominator.
Chapter 15<br />
Configuring Electronic Mail<br />
This chapter describes how to configure the <strong>MultiNet</strong> SMTP (Simple Mail Transport Protocol)<br />
server to send <strong>and</strong> receive electronic mail.<br />
If you are running PMDF or another mail system that provides its own SMTP support, refer to that<br />
mail system's documentation.<br />
Modifying the <strong>MultiNet</strong> SMTP Configuration<br />
File<br />
Modifying the <strong>MultiNet</strong> SMTP Configuration File<br />
The <strong>MultiNet</strong> SMTP configuration is stored in the START_SMTP.COM <strong>and</strong><br />
START_SMTP_LOCAL.COM startup comm<strong>and</strong> procedures. Use the MAIL-CONFIG utility to<br />
edit these files. You start the utility by entering the MULTINET CONFIGURE /MAIL comm<strong>and</strong>.<br />
After using this configuration utility, stop <strong>and</strong> restart the mail queues. Enter<br />
• @MULTINET:START_SMTP.COM to update the VMScluster.<br />
• @MULTINET:START_SMTP_LOCAL.COM to update the local host only.<br />
Pipelining <strong>and</strong> Extended SMTP<br />
IMAP Server<br />
SMTP Statistics <strong>and</strong> Accounting Post Office Protocol (POP) Versions 2 <strong>and</strong> 3<br />
Configuring Mail Parameters Configuring SMTP Service for ALL-IN-1<br />
Users<br />
Configuring the SMTP Server for Inbound<br />
Mail<br />
Configuring the SMTP Symbiont <strong>and</strong> Mail<br />
Queues for Outbound Mail<br />
Configuring the SMTP-DECnet Mail Gateway<br />
The current release of SMTP implements Extended SMTP (RFC-1869) <strong>and</strong> Pipelining (RFC-2197)<br />
15-1
Configuring Electronic Mail<br />
Delivering Mail to Specific Folders<br />
15-2<br />
The SMTP server supports mail delivery to folders other than the NEWMAIL folder. The<br />
foldernames are restricted to UPPERCASE characters only, the pound sign (#), <strong>and</strong> the underscore<br />
(_). Use of the comma (,) in a foldername causes an error. Mail addressed to user+folder@host is<br />
delivered to the specified folder. You can disable this mechanism by defining the system-wide<br />
logical name MULTINET_SMTP_DISABLE_FOLDER_DELIVERY.<br />
Using the Mail Delivery Mechanisms<br />
The current release of SMTP supports alias file extensions that request mail delivery to a file or<br />
specify addresses in a separate file. You must use the SMTP aliases file, specified with MULTINET<br />
CONFIG/MAIL, to list all of these mail delivery mechanisms. The default is<br />
MULTINET:SMTP_ALIASES. The syntax for these aliases follows the form of those described in<br />
Configuring Mail Aliases found later in this chapter. It is necessary to use the colon <strong>and</strong> semicolon<br />
in the comm<strong>and</strong> lines as shown in the examples.<br />
device:[directory]mail.file Appends mail to the specified file. If no filetype is<br />
specified, the default is .yyyy-mm,<br />
• yyyy <strong>and</strong> mm are to the current year <strong>and</strong> month,<br />
respectively.<br />
alias3 : ">filespec" ;<br />
Rejecting Mail Messages<br />
The SMTP server supports a set of rules for rejecting mail messages received by itself based on the<br />
mail header contents or any combination of MAIL FROM, RCPT TO, <strong>and</strong> Source IP Address<br />
values. Mail matching the criteria can be ignored or rejected quietly with a message to the SMTP<br />
client or delivered to an address rewritten according to the rule specification. This capability can be<br />
useful for controlling SPAM <strong>and</strong> preventing your system from being used as a mail relay.
Configuring Electronic Mail<br />
The file MULTINET:SMTP_SERVER_REJECT. contains the rejection <strong>and</strong> rewrite rules. You may<br />
specify an alternate file via the logical name MULTINET_SMTP_SERVER_REJECT_FILE. A<br />
rejection file line of the form #include device:[directory]reject.file temporarily suspends<br />
processing of the current file <strong>and</strong> begins processing of the specified file. Rejection files can be<br />
nested to arbitrary depth. Comments may be included in rejection files by placing any of the<br />
characters ; or ! or # in the first column of a line. The following is a sample rejection file:<br />
!<br />
! This is a sample reject file for the company FLOWERS.COM.<br />
!<br />
! This file is processed sequentially. In other words, processing ends on<br />
! the first rule that the message applies to. So if you have a wildcard<br />
! accept at the top of this file, then no other rules will be processed.<br />
!<br />
! Entries can have one of the following formats:<br />
!<br />
! from_user [from_ip to_user action action-data]<br />
!<br />
! :rfc822 header<br />
!<br />
! Wildcards can be used in FROM_USER, FROM_IP, <strong>and</strong> TO_USER. ACTION is the<br />
! reject action, which is one of:<br />
!<br />
! n Don't reject, but rewrite TO address to be ACTION-DATA.<br />
! If ACTION-DATA is blank then we simply deliver to TO_USER.<br />
!<br />
! y Reject <strong>and</strong> use optional ACTION-FIELD as a rejection message<br />
! format that can contain up to three %s formatting<br />
! designators for mail from, mail to, <strong>and</strong> local domainname.<br />
!<br />
! q Reject quietly -- don't inform Sending SMTP Client that<br />
! message will be discarded. If only FROM_USER is specified<br />
! other fields default to FROM_IP=*, TO_USER=*, <strong>and</strong> ACTION=n.<br />
!<br />
! Don't rewrite or reject any mail to "postmaster*"<br />
!<br />
! * * postmaster* n<br />
!<br />
! Accept all messages with MAIL FROM: (bounce messages)<br />
! This rule is commented out because you probably don't want it, although<br />
! We're _supposed_ to always accept it. This is the main method relay<br />
! attacks use, by always saying they are from to take advantage of that<br />
! RFC hole.<br />
!<br />
! * * n<br />
!<br />
! Reject anything with a Message-ID that appears to have originated from<br />
! cyberpromo.com or nowhere.com<br />
!<br />
:Message-ID: <br />
15-3
Configuring Electronic Mail<br />
15-4<br />
:Message-ID: <br />
!<br />
! Reject mail from well-known SPAM sites with sample non-st<strong>and</strong>ard error<br />
! messages.<br />
!<br />
* * y "Spam from rejected"<br />
* * y "Spam from to rejected"<br />
* * y "Spam rejected;%.0s%.0s Contact postmaster@%s"<br />
!<br />
! Disallow percent-hacks (e.g, joe%somewhere.com@flowers.com)<br />
!<br />
* * *@*@*flowers.com y "No forwarding-path relaying allowed"<br />
!<br />
! Disallow "!" UUCP hacks (e.g. somewhere.com!joe@flowers.com)<br />
!<br />
* * *!* y "No UUCP relaying allowed"<br />
!<br />
! Rewrite all mail to webmaster to the postmaster<br />
!<br />
* * webmaster@*flowers.com n postmaster@flowers.com<br />
!<br />
!<br />
! Disallow relaying through our mailer, <strong>and</strong> only allow users on our<br />
! networks to claim to be from our company (flowers.com)<br />
!<br />
* * *@flowers.com n<br />
* * *@daisy.flowers.com n<br />
* * *@[10.0.0.1] n<br />
!<br />
10.0.0.* * n<br />
10.115.140.* * n<br />
10.115.141.* * n<br />
!<br />
! Allow our internal systems to bounce mail out.<br />
!<br />
10.0.0.* * n<br />
10.115.140.* * n<br />
10.115.141.* * n<br />
!<br />
! If a message has slipped through all the tests above, then we want to<br />
! reject it, as they are either relaying through us or it's not a valid<br />
! MAIL FROM.<br />
!<br />
*@* * *@* y "no relaying through this site"<br />
* * *@* y "missing domain name in MAIL FROM"<br />
!<br />
!end of sample file<br />
Mail rejection rules have two formats:<br />
• :RFC822_header pattern
Configuring Electronic Mail<br />
This format causes rejection of any mail in which a line with the specified header matches the<br />
given pattern. The following rejection message is sent to the client:<br />
554 Message rejected due to header contents<br />
Note! Use caution when rejecting mail based on header contents. No other criteria are considered<br />
during rejection processing.<br />
• from_user ip_address to_user action action_data<br />
This format causes rejection or alternate delivery of all messages that match all of the patterns<br />
specified. The action item can be as follows:<br />
n Means do not reject the mail, but deliver it to the address specified as the action_data. If<br />
action_data is not specified, deliver the message to its intended recipient.<br />
y Means reject the mail, sending the action_data string to the SMTP client as a rejection<br />
message. The action_data item is actually used as a format string <strong>and</strong> may contain from<br />
one to three %s formatting designators to include the from_user, the to_user, <strong>and</strong> the SMTP<br />
server name, in that order. If action_data is missing, the default rejection message is<br />
553-Mail to not allowed;<br />
553 Contact Postmaster@ to remove block<br />
q Means reject the mail, but do not give the SMTP client any indication that it has been<br />
rejected. Use caution when rejecting messages quietly.<br />
Each of the pattern specifications pattern, from_user, ip_address, <strong>and</strong> to_user may contain the<br />
OpenVMS * <strong>and</strong> % wildcard characters.<br />
You can represent from_addr expressions in the SMTP_SERVER_REJECT filter with the <br />
syntax. So, *@*domain.com <strong>and</strong> are the same expression. To return to the<br />
previous behavior, add the following line to the top of your SMTP_SERVER_REJECT file:<br />
* * n<br />
(Accept any mail with a MAIL FROM: of )<br />
When comparing the RCPT TO: address with the SMTP_SERVER_REJECT file expressions, any<br />
‘%’ signs in the RCPT TO: address are changed to ‘@’. You can write filter rules in the<br />
SMTP_SERVER_REJECT files that can match against forward-path relays. You can add the rule<br />
of<br />
* * *@*@localdomain y “No forward-path relaying allowed”<br />
to your SMTP_SERVER_REJECT file above the rules that accept mail with the destination of your<br />
domains. RCPT TO.: addresses will replace any % character with the @ character for matching<br />
purposes only so you can filter with *@*@*-type rules. So, RCPT TO.: is<br />
changed to xxx@yyy@zzz. You can use the logical name MULTINET_SMTP_SERVER_REJECT_INFO<br />
to control debug <strong>and</strong> informational OPCOM messages produced during rejection processing. You<br />
15-5
Configuring Electronic Mail<br />
15-6<br />
should define it to have some non-zero value to request OPCOM messages. The following values<br />
may be combined to control message quantity <strong>and</strong> content:<br />
Values To show...<br />
1 mail rejected due to action y<br />
2 rewritten addresses (action n with action_data)<br />
4 the reject message sent to the remote system<br />
8 configuration file parsing<br />
16 non-written addresses (action n <strong>and</strong> no action_data)<br />
32 mail rejected due to action q<br />
64 mail rejected due to header rules<br />
The value 65 is appropriate for auditing rejection activity.<br />
The SMTP service supports both IPv4 <strong>and</strong> IPv6. There are no configuration parameters to control<br />
which one is used, though system managers should be aware of potential reachability issues when<br />
switching SMTP to use IPv6.<br />
The remainder of this chapter describes the configuration tasks.<br />
SMTP Statistics <strong>and</strong> Accounting<br />
The following sections discuss how to get SMTP statistics <strong>and</strong> accounting information.<br />
Network Service Monitoring<br />
Partial support for RFC 2788 (Network Monitoring MIB) has been added to SMTP. To use the 2788<br />
feature, do the following:<br />
$ MULTINET CONFIGURE/SERVER<br />
SELECT SMTP<br />
SET FLAGS SNMP_MONITORED<br />
WRITE<br />
EXIT<br />
$ @MULTINET:START_SERVER<br />
This feature requires the SNMP Agent X functionality; to use this SNMP must be configured to<br />
have Agent X service enabled, <strong>and</strong> to allow 127.0.0.1 to be an AGENTX_PEER. See Chapter 23<br />
for more information on SNMP <strong>and</strong> Agent X.<br />
SMTP’s network service monitoring is based on RFC 2788 (Monitoring MIB). Information is<br />
maintained only while the service is active. The following items from the Network Services
Monitoring MIB (RFC 2788) are available in the enterprises.105.2.25 MIB:<br />
Table 15-1 RFC2788 Network Services Monitoring MIB<br />
Configuring Electronic Mail<br />
ApplAccumulatedInboundAssociations (Counter) the total number of connections that the<br />
SMTP program has serviced since it was started.<br />
enterprises.105.2.25.10<br />
ApplDescription (String) Description of the program/application.<br />
enterprises.105.2.25.16<br />
ApplInboundAssociations (Counter) The number of connections currently<br />
active. enterprises.105.2.25.8<br />
ApplIndex (Integer) unique application index. The port SMTP is<br />
offered on (25). enterprises.105.2.25.1<br />
ApplLastChange (TimeTicks) the value of sysUpTime when the SMTP<br />
program entered the current state.<br />
enterprises.105.2.25.7<br />
ApplLastInboundActivity (TimeTicks) the value of sysUpTime at the time the<br />
most recent connection was established. enterprises.105.2.25.12<br />
ApplName (String) SMTP. enterprises.105.2.25.2<br />
ApplOperStatus (Integer) the operational status of the SMTP program;<br />
the values are: up(1), down(2), halted(3), congested(4),<br />
restarting(5), quiescing(6). Some of these<br />
values may not be used. enterprises.105.2.25.6<br />
ApplRejectedInboundAssociations (Counter) the number of connections that have been<br />
rejected (due to not being allowed from the access list<br />
values). enterprises.105.2.25.14<br />
ApplUptime (TimeTicks) the value of the SNMP variable sysUp-<br />
Time when the SMTP program was started. enterprises.105.2.25.5<br />
ApplVersion (String) the version of the SMTP program. enterprises.105.2.25.4<br />
Note! When displaying the enterprises.105.2.25<br />
MIB, entries for 1 to 17 will display but some<br />
(specifically .3, .9, .11, .13, .15, .17) will have<br />
0 values.<br />
15-7
Configuring Electronic Mail<br />
Mail Monitoring<br />
15-8<br />
Partial support for RFC 2789 (Mail Monitoring MIB) has been added to SMTP. To enable this<br />
feature, do the following:<br />
$ MULTINET CONFIGURE/MAIL<br />
SET RFC2789 TRUE<br />
WRITE<br />
EXIT<br />
$ @MULTINET:START_SMTP<br />
This feature requires the SNMP Agent X functionality; to use this SNMP must be configured to<br />
have Agent X service enabled, <strong>and</strong> to allow 127.0.0.1 <strong>and</strong> the system’s own IP address to be an<br />
AGENTX_PEER. See Chapter 23 for more information on SNMP <strong>and</strong> Agent X.<br />
Table 15-2 RFC2789 Mail Monitoring MIB<br />
MtaReceivedMessages The number of messages received since Message<br />
Transfer Agent (MTA) initialization.<br />
enterprises.105.3.25.1<br />
MtaStoredMessages The total number of messages currently stored in the<br />
MTA. enterprises.105.3.25.2<br />
MtaTransmittedMessages The number of messages transmitted since MTA initialization.<br />
enterprises.105.3.25.3<br />
MtaReceivedVolume The total volume of messages received since MTA initialization,<br />
measured in kilo-octets.<br />
enterprises.105.3.25.4<br />
MtaStoredVolume The total volume of messages currently stored in the<br />
MTA, measured in kilo-octets. enterprises.105.3.25.5<br />
MtaTransmittedVolume The total volume of messages transmitted since MTA<br />
initialization, measured in kilo-octets.<br />
enterprises.105.3.25.6<br />
MtaReceivedRecipients The total number of recipients specified in all messages<br />
received since MTA initialization.<br />
enterprises.105.3.25.7<br />
MtaStoredRecipients The total number of recipients specified in all messages<br />
currently stored in the MTA. enterprises.105.3.25.8<br />
MtaTransmittedRecipients The total number of recipients specified in all messages<br />
transmitted since MTA initialization.<br />
enterprises.105.3.25.9
Table 15-2 RFC2789 Mail Monitoring MIB (Continued)<br />
Configuring Electronic Mail<br />
MtaSuccessfulConvertedMessages The number of messages that have been successfully<br />
converted from one form to another since MTA initialization.<br />
enterprises.105.3.25.10<br />
MtaFailedConvertedMessages The number of messages for which an unsuccessful<br />
attempt was made to convert them from one form to<br />
another since MTA initialization.<br />
enterprises.105.3.25.11<br />
This information can be displayed with the MULTINET SHOW /SNMP comm<strong>and</strong>. See the SHOW<br />
/SNMP comm<strong>and</strong> in the <strong>MultiNet</strong> for OpenVMS Administrator’s Reference.<br />
Session Accounting<br />
<strong>MultiNet</strong> can record accounting information from services that have been enabled. Currently this<br />
includes FTP <strong>and</strong> SMTP. The accounting information includes information about when a network<br />
session took place <strong>and</strong> how much data was transferred. The accounting facility is enabled from<br />
MULTINET CONFIGURE/SERVER <strong>and</strong> reads MULTINET:ACCOUNTING.CONF for additional<br />
configuration information. The format of the accounting records is described in<br />
MULTINET_ROOT:[MULTINET.EXAMPLES]ACCOUNTING.H<br />
A sample program using this is in MULTINET_ROOT:[MULTINET.EXAMPLES]ACC_DUMP.C<br />
Configuring Session Accounting<br />
To configure Session Accounting, follow these steps:<br />
1 Edit the ACCOUNTING configuration file, as described in the next section.<br />
2 To start the procedure, do the following:<br />
$ MULTINET CONFIGURE/SERVER<br />
ENABLE ACCOUNTING<br />
WRITE<br />
$ @MULTINET:START_SERVER<br />
Configuration File<br />
The Accounting configuration file is MULTINET:ACCOUNTING.CONF. The Accounting<br />
configuration file defines:<br />
• The Port the Accounting program listens on. This should be an unused port, not the port for the<br />
service on which logging is being enabled.<br />
• The name of the file used for accounting records. This file is opened shareable <strong>and</strong> new records<br />
are always appended to it. To start a new file stop the Accounting program, delete (or rename)<br />
the existing file, <strong>and</strong> restart the Accounting program.<br />
• The IP addresses of systems that are allowed to write accounting records to this host.<br />
15-9
Configuring Electronic Mail<br />
Note! After editing the configuration, stop <strong>and</strong> restart the Accounting program so that the changes can<br />
take effect.<br />
File Format<br />
Follow these guidelines when entering data in the Accounting configuration file:<br />
15-10<br />
• Allow one line for each item.<br />
• Enter information in any order; in uppercase or lowercase.<br />
• Use a pound sign (#) or exclamation point (!) to denote comments. The Accounting facility<br />
ignores all information following these characters.<br />
The comm<strong>and</strong>s that can be in MULTINET:ACCOUNTING.CONF are:<br />
PORT port_number The TCP port that the accounting program should listen on.<br />
PEER ip-address The IP address of a host that is allowed to log records with the accounting<br />
software.<br />
FILENAME filename The name of the file that the accounting records will be written to. The<br />
MULTINET: device is assumed if a device is not specified as part of<br />
the file specification.<br />
Displaying the Contents of the Logging File<br />
To view accounting information, do the following:<br />
$ MULTINET ACCOUNTING/INPUT= [/output=output filename] -<br />
_$ [/since=start_date] [/before=end_date] [/protocol={SMTP, FTP, MAIL}] [/CSV]<br />
• accounting_data_file is the name of the logging file you want to see.<br />
• output filename is the name of the file you want to call this information. If this field is omitted,<br />
the information displays to the terminal screen.<br />
• start_date is the beginning date you want the comm<strong>and</strong> to start with. The date format is<br />
[DD-MMM-YYYY [:]] [hh:mm:ss]cc] If not specified, all records display up to the end of the<br />
data found.<br />
• DD is the day of the month, counting from 01.<br />
• MMM is the abbreviation for the month, like JAN, FEB, MAR.<br />
• YYYY is the number of the year, including the century (1999, 2000, 2001, 2002, 2003).<br />
• hh is the hour, from 00 to 23.<br />
• mm is the minute, from 00 to 59.<br />
• ss is the second, from 00 to 59.<br />
• cc is hundredths of seconds.<br />
The time is always in local time.<br />
• end_date is the ending date you want the comm<strong>and</strong> to end with. The date format is
Configuring Electronic Mail<br />
[DD-MMM-YYYY [:]] [hh:mm:ss]cc] If not specified, all records display until the end of the<br />
file.<br />
• protocol is any combination of SMTP, FTP, or MAIL.<br />
• CSV is the Comma Separated Values, for input to products like Excel.<br />
Accounting File Record Format<br />
The accounting file is written using OpenVMS RMS records. The format of these records is<br />
defined in MULTINET_ROOT:[MULTINET.EXAMPLES]ACCOUNTING.H, <strong>and</strong> listed below:<br />
struct accountingPDU {<br />
char version;<br />
char type; /* type of record */<br />
/*<br />
* FTP:<br />
* C - Client<br />
* S - Server<br />
*<br />
* SMTP:<br />
* N - Network delivery (send)<br />
* L - Local delivery (received)<br />
* R - Rejected message<br />
*<br />
*/<br />
char flags; /* not currently used */<br />
char reserved; /* for future use */<br />
int payload_length; /* length (in bytes) of data after header */<br />
int port; /* IP port of reporting service - 25 SMTP, 21<br />
- FTP */<br />
int reporterIP; /* IP address of reporter */<br />
};<br />
struct FTPaccounting_data {<br />
struct accountingPDU header;<br />
int start_time[2]; /* VMS time that session started */<br />
int end_time[2]; /* VMS time that session ended */<br />
int datasent; /* KBytes of file data sent */<br />
int datarecv; /* KBytes of file data received */<br />
int filessent; /* Number of files sent */<br />
int filesrecv; /* Number of files received */<br />
int partnerIP; /* IP address of partner */<br />
char user[12]; /* username that operations were done under */<br />
};<br />
struct SMTPaccounting_data {<br />
struct accountingPDU header;<br />
int date[2]; /* Time of activity */<br />
int msg_size; /* size of message in bytes */<br />
int from_str_size; /* size of From: string */<br />
int to_str_size; /* size of To: string */<br />
15-11
Configuring Electronic Mail<br />
15-12<br />
};<br />
char from_to_str[1]; /* text of From & To string */<br />
Configuring SMTP for Accounting<br />
To configure SMTP for accounting purposes, do the following:<br />
$ MULTINET CONFIGURE/MAIL<br />
SET ACCOUNTING-HOST hostname<br />
SET ACCOUNTING-PORT port number<br />
WRITE<br />
EXIT<br />
$ @MULTINET:START_SMTP<br />
The collected accounting information can be displayed with the MULTINET ACCOUNTING<br />
comm<strong>and</strong>.<br />
See the MULTINET ACCOUNTING comm<strong>and</strong> in Chapter 1 of the <strong>MultiNet</strong> for OpenVMS<br />
Administrator’s Reference.<br />
Configuring Mail Parameters<br />
The parameters that control the operations of the <strong>MultiNet</strong> mailer are described in Table 15-3.<br />
Configuring Mail Parameters with MAIL-CONFIG<br />
To configure mail parameters with the MAIL-CONFIG utility:<br />
1 Start MAIL-CONFIG with the MULTINET CONFIGURE /MAIL comm<strong>and</strong>.<br />
2 Use the SET parameter_name comm<strong>and</strong>s (for detailed descriptions of these comm<strong>and</strong>s, refer to<br />
the <strong>MultiNet</strong> for OpenVMS <strong>Administrator's</strong> Reference).<br />
3 Save the configuration with the SAVE comm<strong>and</strong>.<br />
4 Quit MAIL-CONFIG with the QUIT comm<strong>and</strong>.<br />
The modified configuration takes effect the next time your system reboots or the queues are<br />
restarted.
Mail Parameters<br />
Configuring Electronic Mail<br />
Table 15-3describes all the mail parameters you can set with the MAIL-CONFIG utility.<br />
Table 15-3 Mail Parameters<br />
Parameter Description<br />
ALIAS-FILE File in which SMTP aliases are stored; see the Configuring<br />
Mail Aliases section.<br />
DECNET-DOMAIN Domain name for DECnet gateway function; see the<br />
Configuring the SMTP-DECnet Mail Gateway section.<br />
DELIVERY-RECEIPTS Specifies whether mail receipts are sent when incoming<br />
mail containing Delivery-Receipt-To: or Return-Receipt-<br />
To: headers is submitted to the SMTP queue. If TRUE, mail<br />
receipts are sent.<br />
DISALLOW-USER-REPLY-TO When TRUE, prevents VMS MAIL users from setting a<br />
Reply-To: header address with the logical name<br />
MULTINET_SMTP_REPLY_TO.<br />
FORWARDER Identifies a host (known as a mail hub) to which mail<br />
should be forwarded if a host name cannot be resolved for<br />
an address. The specified name must resolve to an IP<br />
address; it must not resolve to an MX record.<br />
FORWARD-LOCAL-MAIL Forwards all mail designated for local users to the mail hub<br />
instead of delivering it locally. Can be overridden by entries<br />
in the SMTP_ALIASES file.<br />
FORWARD-REMOTE-MAIL Forwards all SMTP-delivered mail to the mail hub instead<br />
of directly to the destination host. Can be overridden by a<br />
GATEWAY or LOCAL-DOMAIN entry.<br />
HEADER-CONTROL Controls which RFC-822 headers appear in messages<br />
delivered to VMS MAIL users.<br />
HOST-ALIAS-FILE Contains a list of host names considered aliases for the local<br />
host name.<br />
LOCAL-MAIL-FORWARDER Identifies a host to which mail should be forwarded when a<br />
local mail delivery fails because the user name is unknown.<br />
POSTMASTER Identifies the user name of the system postmaster.<br />
QUEUE-COUNT Specifies the number of mail processing queues to create on<br />
a particular system.<br />
15-13
Configuring Electronic Mail<br />
15-14<br />
Table 15-3 Mail Parameters (Continued)<br />
Parameter Description<br />
REPLY-CONTROL Specifies how Internet mail headers should be mapped to<br />
the VMS MAIL from header. Permitted values are FROM<br />
<strong>and</strong> REPLY-TO. You may specify both as a commaseparated<br />
list.<br />
RESENT-HEADERS When FALSE, the SMTP symbiont omits the Resent-From,<br />
Resent-To, <strong>and</strong> Resent-Date headers that are usually<br />
included when a message is forwarded using a VMS MAIL<br />
forwarding address.<br />
RETRY-INTERVAL Specifies the amount of time (in minutes) that should elapse<br />
after a failed attempt before another attempt is made.<br />
RETURN-INTERVAL Specifies the amount of time (in hours) a message can<br />
remain in the processing queue before it is returned to<br />
sender.<br />
SEND-BROADCAST-CLASS Controls the OpenVMS broadcast class used by SMTP for<br />
SEND-type messages (which are sent to a terminal).<br />
SMTP-HOST-NAMES A list of up to 16 host names to consider as aliases for the<br />
local host. See the Specifying SMTP Host Aliases section.<br />
START-QUEUE-MANAGER Determines whether START_SMTP.COM starts the VMS<br />
queue manager if it is not already running.<br />
To configure mail parameters via logical name, see the <strong>MultiNet</strong> for OpenVMS <strong>Administrator's</strong><br />
Reference.<br />
SMTP Configuration Using Logicals<br />
When using a logical name to configure mail parameters, if the setting is for all users, define the<br />
logical system-wide. For example:<br />
$ DEFINE/SYSTEM/EXECUTIVE MULTINET_SPOOL [PATH.DIRECTORY]<br />
SMTP SYMBIONT LOGICAL<br />
An SMTP SYMBIONT logical may be set up to enable additional logging for debugging purposes.
For example:<br />
$ DEFINE/SYSTEM/EXECUTIVE MULTINET_SMTP_SYMBIONT_LOG TRUE<br />
Configuring Electronic Mail<br />
will enable logging. The default logging filename <strong>and</strong> location is<br />
MULTINET:MULTINET_SMTP_LOG.queuename. If you wish to change the location <strong>and</strong>/or<br />
filename, you may define:<br />
$ DEFINE/SYSTEM/EXECUTIVE MULTINET_SMTP_LOG "filespec"<br />
where filespec is similar to DEVICE:[dir]filename. If the filename does not specify an extension,<br />
then the queuename will be utilized.<br />
MIME processing<br />
If the logical MULTINET_SMTP_ALLOW_MIME_SEND is defined to Yes, 1 or True, then if the<br />
first line of the message file being sent begins with the mime tag, the blank line at the end of the<br />
header section will be suppressed so that the header lines in the mime message file will be seen as<br />
header lines rather than message body. The string that is used as the mime tag can be controlled<br />
with the logical MULTINET_SMTP_MIME_TAG which defaults to “Mime-version:”<br />
Mail Outbound Sanity Checking<br />
Outbound mail sanity checking can be used to test the operation type of the mail message before it<br />
is sent out. If there is no operation type, the file is not sent. Use this logical to disable sanity<br />
checking:<br />
$ DEFINE/SYSTEM/EXECUTIVE MULTINET_SMTP_DISABLE_OPTYPE_SANITY_CHECK<br />
Configuring the SMTP Server for Inbound Mail<br />
The <strong>MultiNet</strong> SMTP server accepts mail from remote hosts <strong>and</strong> delivers it to users' mailboxes.<br />
By default, the SMTP server is disabled when you install <strong>MultiNet</strong>. For details on configuring <strong>and</strong><br />
controlling <strong>MultiNet</strong> servers, see Chapter 12.<br />
Translating UNIX-Style Linefeeds to SMTP-Compliant End-of-Line Character<br />
Sequences<br />
<strong>MultiNet</strong> provides a logical name to solve the problem of systems sending messages containing<br />
lines terminated by an LF character only instead of the proper CR/LF sequence. The following<br />
comm<strong>and</strong> tells <strong>MultiNet</strong> to accept the bare LF as the end-of-line indicator:<br />
$ DEFINE/SYSTEM/EXEC MULTINET_SMTP_ACCEPT_UNIX_LF TRUE<br />
<strong>MultiNet</strong> lets you validate the contents of the envelope-from field by defining the system-wide<br />
logical name MULTINET_SMTP_REJECT_INVALID_DOMAINS. Use the equivalence string<br />
STRICT to require the presence of a host in those addresses. For example, require MAIL FROM:<br />
rather than MAIL FROM: . The host specified in the MAIL FROM: address<br />
must exist in the DNS database.<br />
15-15
Configuring Electronic Mail<br />
15-16<br />
The logical name MULTINET_SMTP_ACCEPT_UNIX_LF has been added as a synonym for<br />
MULTINET_SMTP_ACCEPT_UNIX_LF_BRAIN_DAMAGE. You can define either to have the<br />
same effect.<br />
Configuring the SMTP Server to Limit System/Vendor Information<br />
<strong>MultiNet</strong> provides you with a way to limit the system/vendor information given out on connection,<br />
HELP, <strong>and</strong> QUIT. The MULTINET_SMTP_SUPPRESS_VENDOR logical removes operating<br />
system <strong>and</strong> TCP stack information from SMTP server text responses.<br />
Configuring the SMTP Symbiont <strong>and</strong> Mail Queues for Outbound Mail<br />
<strong>MultiNet</strong> lets users send mail to remote destinations by submitting outbound messages to mail<br />
queues that are processed by the <strong>MultiNet</strong> SMTP symbiont. You can configure the SMTP symbiont<br />
to:<br />
• Control users' ability to specify their own REPLY-To: headers (see the Specifying the<br />
REPLY_TO Header section.)<br />
• Provide more than one server queue for each cluster node. By default, <strong>MultiNet</strong> provides one<br />
server queue for each cluster node running <strong>MultiNet</strong> (see the Configuring Mail Queues<br />
section.).<br />
• Forward mail through a central mail hub (see the Forwarding Mail through a Mail Hub section.)<br />
• Use gateways to reach specific hosts, domains, or "virtual" domains (see the Configuring Mail<br />
Gateways section.)<br />
• Use host aliases (see the Specifying SMTP Host Aliases section.)<br />
• Use mail aliases (see the Configuring Mail Aliases section.)<br />
You can also write your own SMTP dispatcher by modifying <strong>and</strong> compiling the SMTP user exit<br />
MULTINET_ROOT:[MULTINET.EXAMPLES]USER_SMTP_DISPATCH.C. Instructions for<br />
modifying the dispatcher are outside the scope of this manual.<br />
For outbound mail, <strong>MultiNet</strong> SMTP eases the 255 character limitation on RFC-822 To: <strong>and</strong> CC:<br />
header lengths. The limit of 255 characters was imposed because some mail applications cannot<br />
h<strong>and</strong>le headers longer than 255 characters.<br />
The default header length is 1024 characters. The logical name<br />
MULTINET_SMTP_MAXIMUM_822_TO_LENGTH can be used to override the 1024 byte<br />
default length of the To: <strong>and</strong> Cc: header fields. The logical can set the maximum length to<br />
anywhere from 256 to 65535. To automatically lower the case of usernames in outbound messages,<br />
define the logical name MULTINET_VMSMAIL_LOCASE_USERNAME.<br />
Specifying the REPLY_TO Header<br />
The MULTINET_SMTP_REPLY_TO logical name lets you specify the value for the RFC822<br />
REPLY-TO: header. For example, to set your Reply-To: header to FNORD@FLOWERS.COM,<br />
use the comm<strong>and</strong>:<br />
$ DEFINE MULTINET_SMTP_REPLY_TO "FNORD@FLOWERS.COM"
Configuring Electronic Mail<br />
This logical name only affects mail agents that use the SMTP% interface (for example, OpenVMS<br />
<strong>and</strong> DECwindows mail). The system manager can disable the use of this logical name with the SET<br />
DISALLOW-USER-REPLY-TO comm<strong>and</strong> of the MULTINET CONFIGURE /MAIL utility.<br />
Disabling VRFY <strong>and</strong> EXPN<br />
To disable VRFY <strong>and</strong> EXPN processing, use the logical name<br />
MULTINET_SMTP_SERVER_DISABLE_VRFYEXPN. Define it to have some non-zero value to<br />
disable the requisite functions. The following values may be combined to specify which function:<br />
Value Function<br />
1 to disable VRFY<br />
2 to disable EXPN<br />
3 to disable both VRFY <strong>and</strong> EXPN<br />
Configuring Mail Queues<br />
<strong>MultiNet</strong> uses OpenVMS server queues for SMTP processing. Initially, <strong>MultiNet</strong> configures each<br />
cluster node running <strong>MultiNet</strong> with a server queue <strong>and</strong> configures a generic queue for the entire<br />
cluster. New messages are placed in the generic queue for processing, which distributes mail<br />
processing to the first available server queue.<br />
For example, if three clustered nodes, Huey, Louey, <strong>and</strong> Dewey, are running <strong>MultiNet</strong>, <strong>MultiNet</strong><br />
creates three server queues <strong>and</strong> one generic queue. The queue names are:<br />
SMTP_HUEY [Execution queue]<br />
SMTP_LOUEY [Execution queue]<br />
SMTP_DEWEY [Execution queue]<br />
MULTINET_SMTP [Generic queue]<br />
The following example lists the queues for node Huey:<br />
$ SHOW QUEUE MULTINET_SMTP/FULL<br />
Generic server queue MULTINET_SMTP<br />
/GENERIC=(SMTP_HUEY,SMTP_LOUEY,SMTP_DEWEY) /OWNER=[SYSTEM]<br />
/PROTECTION=(codes)<br />
$ SHOW QUEUE SMTP_HUEY/FULL<br />
Server queue SMTP_HUEY, idle, on HUEY::, mounted form DEFAULT<br />
/BASE_PRIORITY=4 /DEFAULT=(FEED,FORM=DEFAULT) /OWNER=[SYSTEM]<br />
/PROCESSOR=MULTINET_SMTP_SYMBIONT /PROTECTION=(codes)<br />
The queues SMTP_LOUEY <strong>and</strong> SMTP_DEWEY are also created, <strong>and</strong> are similar to the<br />
SMTP_HUEY queue shown.<br />
15-17
Configuring Electronic Mail<br />
Note! A st<strong>and</strong>alone (non-clustered machine) has two queues created by default; that is, one generic<br />
queue (MULTINET_SMTP) <strong>and</strong> one execution queue (SMTP_ nodename).<br />
Configuring Multiple Queues<br />
15-18<br />
If mail traffic is heavy on your system, you can configure multiple server queues on one or more<br />
nodes using MAIL-CONFIG. To configure multiple queues with the MAIL-CONFIG utility:<br />
1 Start MAIL-CONFIG with the MULTINET CONFIGURE /MAIL comm<strong>and</strong>.<br />
2 Use the SET QUEUE-COUNT comm<strong>and</strong> to specify the number of queues on the node (for a full<br />
description of this comm<strong>and</strong>, refer to the <strong>MultiNet</strong> for OpenVMS <strong>Administrator's</strong> Reference).<br />
3 Save the configuration with the SAVE comm<strong>and</strong>.<br />
4 Quit MAIL-CONFIG with the QUIT comm<strong>and</strong>.<br />
The modified configuration takes effect the next time your system reboots.<br />
Configuring Queue Groups<br />
In heterogeneous cluster environments, you may need to partition mail processing by grouping<br />
homogeneous subsets of your cluster into queue groups using MAIL-CONFIG. To configure queue<br />
groups with the MAIL-CONFIG utility:<br />
1 Start MAIL-CONFIG with the MULTINET CONFIGURE /MAIL comm<strong>and</strong>.<br />
2 Use the ADD QUEUE-GROUP <strong>and</strong> DELETE QUEUE-GROUP comm<strong>and</strong>s to add or delete<br />
queues (for descriptions of these comm<strong>and</strong>s, refer to the <strong>MultiNet</strong> for OpenVMS <strong>Administrator's</strong><br />
Reference).<br />
3 Save the configuration with the SAVE comm<strong>and</strong>.<br />
4 Quit MAIL-CONFIG with the QUIT comm<strong>and</strong>.<br />
The modified configuration takes effect the next time your system reboots.<br />
Forwarding Mail through a Mail Hub<br />
Many sites provide outbound e-mail access to the Internet through a single system known as a mail<br />
hub to deliver all outbound mail on behalf of the other hosts at the site. A mail hub typically<br />
implements a single-address scheme for e-mail users at the site, so that all users have addresses of<br />
the form username@sitename rather than username@hostname.sitename. Site administrators often<br />
configure mail hubs to provide Internet e-mail access to hosts that do not have direct access to the<br />
Internet. To forward mail through a mail hub:<br />
1 Specify the host that will serve as a mail hub.<br />
2 Specify the conditions under which <strong>MultiNet</strong> forwards mail to the mail hub.<br />
The following sections describe these procedures.<br />
Specifying a Mail Hub<br />
To specify the host that will serve as a mail hub for your <strong>MultiNet</strong> host:<br />
1 Start MAIL-CONFIG (MULTINET CONFIGURE /MAIL).
Configuring Electronic Mail<br />
2 Modify the FORWARDER parameter:<br />
• With MAIL-CONFIG, use the SET FORWARDER mailhub_hostname comm<strong>and</strong>.<br />
3 If desired, set any of the following conditions for forwarding mail to the mail hub:<br />
• Forward mail addressed to users on remote hosts (see the Forwarding Mail Addressed to<br />
Remote Hosts section.)<br />
• Exclude hosts in specific domains from remote mail hub forwarding (see the Excluding<br />
Hosts in Specific Domains From Mail Forwarding section.)<br />
• Forward mail addressed to users on the local host (see the Forwarding Local Mail section.)<br />
Exclude specific local users from mail hub forwarding (see the Excluding Specific Local Users<br />
from Mail Forwarding section.)<br />
4 Exit the configuration utility. When prompted, save the new parameters.<br />
5 To make the changes take effect immediately, stop <strong>and</strong> restart the mail queues. To update the<br />
VMScluster, use the @MULTINET:START_SMTP.COM comm<strong>and</strong>. To update the local host<br />
only, use the @MULTINET:START_SMTP_LOCAL.COM comm<strong>and</strong>. Otherwise, your changes<br />
take effect the next time you reboot your system.<br />
Forwarding Mail Addressed to Remote Hosts<br />
To configure <strong>MultiNet</strong> to forward mail addressed to remote users via a mail hub:<br />
1 Make sure the FORWARDER parameter specifies the host you want to use as a mail hub (see<br />
the Specifying a Mail Hub section.).<br />
2 Start MAIL-CONFIG (MULTINET CONFIGURE /MAIL).<br />
3 Modify the FORWARD-REMOTE-MAIL parameter:<br />
• With MAIL-CONFIG, use the SET FORWARD-REMOTE-MAIL TRUE comm<strong>and</strong>.<br />
4 If desired, exclude hosts in specific domains from mail hub forwarding (see the Excluding Hosts<br />
in Specific Domains From Mail Forwarding section.).<br />
5 If desired, specify other conditions under which <strong>MultiNet</strong> forwards mail to the mail hub (see the<br />
Specifying a Mail Hub section.).<br />
6 Exit the configuration utility. When prompted, save the new parameters.<br />
7 To make the changes take effect immediately, stop <strong>and</strong> restart the mail queues with<br />
@MULTINET:START_SMTP.COM to update the VMScluster or with<br />
@MULTINET:START_SMTP_LOCAL.COM to update the local host only. Otherwise, your<br />
changes take effect the next time you reboot your system.<br />
Excluding Hosts in Specific Domains From Mail Forwarding<br />
If you configure <strong>MultiNet</strong> to forward mail addressed to remote users via a mail hub (see the<br />
Forwarding Local Mail section), you can exclude hosts in specific domains from the mail<br />
forwarding system by adding the domain to a list of "local domains." To modify the local domain<br />
list:<br />
1 Make sure remote mail forwarding is enabled (see the Forwarding Mail Addressed to Remote<br />
Hosts section.).<br />
15-19
Configuring Electronic Mail<br />
15-20<br />
2 Start MAIL-CONFIG (MULTINET CONFIGURE /MAIL).<br />
3 To add a domain to the list:<br />
• With MAIL-CONFIG, use the ADD LOCAL-DOMAIN domain_name comm<strong>and</strong>. If<br />
domain_name begins with a dot, it specifies a domain name. Otherwise, domain_name<br />
specifies a host name.<br />
4 To delete a domain from the list:<br />
• With MAIL-CONFIG, use the DELETE LOCAL-DOMAIN domain_name comm<strong>and</strong>.<br />
5 Exit the configuration utility. When prompted, save the modified configuration.<br />
6 To make the new configuration take effect immediately, stop <strong>and</strong> restart the mail queues with<br />
@MULTINET:START_SMTP.COM to update the VMScluster or with<br />
@MULTINET:START_SMTP_LOCAL.COM to update the local host only. Otherwise, your<br />
changes take effect the next time you reboot your system.<br />
Forwarding Local Mail<br />
To configure <strong>MultiNet</strong> to forward mail addressed to local users via a mail hub:<br />
1 Make sure the FORWARDER parameter specifies the host you want to use as a mail hub (see<br />
the Specifying a Mail Hub section.).<br />
2 Start MAIL-CONFIG (MULTINET CONFIGURE /MAIL).<br />
3 Modify the FORWARD-LOCAL-MAIL parameter:<br />
• With MAIL-CONFIG, use the SET FORWARD-LOCAL-MAIL TRUE comm<strong>and</strong>.<br />
4 If desired, exclude specific local users from mail hub forwarding (see the Excluding Specific<br />
Local Users from Mail Forwarding section.).<br />
5 If desired, exclude specific local users from mail hub forwarding (see the Excluding Specific<br />
Local Users from Mail Forwarding section.).<br />
6 Exit the configuration utility. When prompted, save the new parameters.<br />
7 To make the changes take effect immediately, stop <strong>and</strong> restart the mail queues with<br />
@MULTINET:START_SMTP.COM to update the VMScluster or with<br />
@MULTINET:START_SMTP_LOCAL.COM to update the local host only. Otherwise, your<br />
changes take effect the next time you restart your system.<br />
The logical name MULTINET_SMTP_APPEND_FORWARDER_TO_MX can be used to prevent<br />
SMTP from appending the forwarder to the MX list by default. To do this:<br />
$ DEFINE/SYSTEM/EXECUTIVE MULTINET_SMTP_APPEND_FORWARDER_TO_MX FALSE<br />
If the logical name is not defined (or is defined to anything not beginning with F, N, or 0), then the<br />
FORWARDER is appended to the MX list.<br />
When the logical name MULTINET_SMTP_IGNORE_INTERFACE_NAMES is defined (as<br />
/system, or any value), the <strong>MultiNet</strong> SMTP mail delivery procedure does not compare the<br />
destination address with the addresses of the interfaces on the system to determine if the message<br />
could be delivered locally. The default (no logical defined) is to check the addresses of the<br />
interfaces on the system. Defining this logical causes the MX records to be used exclusively in
determining where a mail message should be delivered.<br />
Excluding Specific Local Users from Mail Forwarding<br />
Configuring Electronic Mail<br />
If you configure <strong>MultiNet</strong> to forward local mail via a mail hub (see the Forwarding Local Mail<br />
section), you can exclude specific local users from the mail forwarding system by creating mail<br />
aliases for them in the MULTINET:SMTP_ALIASES file. Each users' alias must be in the<br />
following format: username: *; For more information on configuring mail aliases, see the<br />
Configuring Mail Aliases section.<br />
Configuring Mail Gateways<br />
You can configure <strong>MultiNet</strong> with gateways to particular hosts or domains to override the normal<br />
host lookup used by SMTP or to configure "virtual" domains not actually present on the network.<br />
You can use MAIL-CONFIG. To configure mail gateways with MAIL-CONFIG:<br />
1 Start MAIL-CONFIG with the MULTINET CONFIGURE /MAIL comm<strong>and</strong>.<br />
2 Use the ADD GATEWAY <strong>and</strong> DELETE GATEWAY comm<strong>and</strong>s (for descriptions of these<br />
comm<strong>and</strong>s, refer to <strong>MultiNet</strong> for OpenVMS <strong>Administrator's</strong> Reference).<br />
3 Save the configuration with the SAVE comm<strong>and</strong>.<br />
4 Quit MAIL-CONFIG with the QUIT comm<strong>and</strong>.<br />
The modified configuration takes effect the next time your system reboots.<br />
For example, to make it easier for users to address mail to BITNET users, configure a gateway for<br />
the .BITNET "domain" to point to one of the Internet-BITNET gateway systems, such as<br />
CUNYVM.CUNY.EDU:<br />
MAIL-CONFIG>ADD GATEWAY .BITNET CUNYVM.CUNY.EDU<br />
Once defined, any mail bound for an address ending in .BITNET is sent to the gateway you<br />
specified (in this case, CUNYVM.CUNY.EDU).<br />
Specifying SMTP Host Aliases<br />
If your system is a member of a VMScluster, you can define host aliases, which are host names<br />
interpreted by the mailer as aliases for the actual local host name. You can specify these aliases in<br />
return addresses for individual users.<br />
Setting Host Aliases<br />
<strong>MultiNet</strong> relies on two parameters to obtain its list of host aliases:<br />
SMTP-HOST-NAMES Is a comma-separated list of up to 16 host aliases. If defined, the first<br />
alias in the list is the name used for outgoing mail. Any aliases are<br />
names for which your host accepts incoming mail.<br />
HOST-ALIAS-FILE Is the complete file specification of a file containing an unlimited list<br />
of host alias entries (one entry per line). The HOST-ALIAS-FILE<br />
value defaults to MULTINET:SMTP_HOST_ALIASES.<br />
15-21
Configuring Electronic Mail<br />
15-22<br />
To change your host aliases with MAIL-CONFIG, use the SET SMTP-HOST-NAMES comm<strong>and</strong><br />
or the SET HOST-ALIAS-FILE comm<strong>and</strong> <strong>and</strong> save the modified configuration with the SAVE<br />
comm<strong>and</strong>. The new configuration takes effect the next time you reboot the system or the queues are<br />
restarted. Alternatively, specify the alias file name dynamically with the following comm<strong>and</strong>:<br />
$ DEFINE/SYSTEM/EXEC MULTINET_SMTP_HOST_ALIASES_FILE file-spec<br />
If this logical name is not defined, by default the SMTP software looks for the file<br />
MULTINET:SMTP_HOST_ALIASES. Names in the host aliases file should be listed one per line.<br />
Specifying Host Aliases for Individual Users<br />
The logical name MULTINET_SMTP_FROM_HOST lets you change the host name that appears<br />
in your return address on outgoing mail.<br />
Normally, the host name you choose must be a "local" host name; that is, it must be one of the<br />
registered SMTP host name aliases on the system (either from the SMTP-HOST-NAMES setting<br />
or the HOST-ALIAS-FILE). If it is not a known alias, the setting is ignored.<br />
If you define the host name in executive mode, however, MULTINET_SMTP_FROM_HOST can<br />
be any arbitrary host name. The name is not checked against the SMTP host name.<br />
When the logical MULTINET_SMTP_ENVELOPE_FROM_HOST is defined the value is used for<br />
the host name instead of the actual host name when sending the MAIL FROM: line to the remote<br />
server. This is useful if there are multiple independent systems that send mail that you would like to<br />
appear to be a single system.<br />
This feature lets users from different administrative entities within an organization have return<br />
addresses that reflect the names of those entities. To enable this feature:<br />
1 Set up MX records in DNS so mail is routed to the local host for each separate host name. For<br />
information about MX records, see the discussion of zone files in Chapter 10.<br />
2 Set up SMTP-HOST-NAMES or the HOST-ALIAS-FILE with a list of host names.<br />
3 Define the logical name MULTINET_SMTP_FROM_HOST for each user. Base the value for<br />
this logical name on some aspect of the department or organization to which the user belongs.<br />
Configuring Mail Aliases<br />
The <strong>MultiNet</strong> SMTP system supports system-wide mail aliases, system-wide mailing lists, <strong>and</strong> peruser<br />
mail aliases. The default system-wide alias file is MULTINET:SMTP_ALIASES. You can<br />
configure this name or specify a list of alias file names.<br />
Per-user mail aliases are kept in the file SMTP_ALIASES in each user's login directory. The format<br />
for alias entries is: alias: real_address[,...];<br />
• alias is an alphanumeric string.<br />
• real_address is either a local or remote electronic mail address.<br />
You can specify multiple addresses by separating them with commas; the alias definition may span<br />
multiple lines, if needed, <strong>and</strong> must always be terminated with a semicolon (;).<br />
For example, a local user has the user name "JB134A", but wants to receive SMTP mail sent to the
Configuring Electronic Mail<br />
address "john". The system manager adds the following line to the alias file: john: jb134a;<br />
You can both forward a mail message <strong>and</strong> deliver it to a local mailbox by adding the mailbox name,<br />
preceded by an underscore, to the MULTINET:SMTP_ALIASES file. The following example<br />
shows such an alias entry:<br />
FNORD: FNORD@SOMEWHERE.FLOWERS.COM, _FNORD;<br />
The leading underscore on the second address (_FNORD), tells the SMTP symbiont to skip any<br />
further alias processing.<br />
Mailing Lists<br />
Mailing lists are a special form of mail alias <strong>and</strong> are supported only in the system-wide alias files.<br />
The format for specifying a mailing list is: list-name:: owner-address, file-spec;<br />
• A double-colon (::) signifies that this alias is a mailing list.<br />
• owner-address is the address of the mailing list owner. Messages sent to this mailing list go to<br />
each subscriber on the list with the return-path set to this address. The owner address can be an<br />
actual user's address or an alias, if desired.<br />
• file-spec is the file specification for the file containing the subscribers to the mailing list.<br />
Specify a complete path name for this file, including the device <strong>and</strong> directory.<br />
For example, you might want to set up a mailing list called OPERATIONS-STAFF for your<br />
operations staff, <strong>and</strong> have your operations manager, user OPER1, manage that list. You might set<br />
up the mailing list this way:<br />
Operations-Staff:: Operations-Manager, USERS:[OPER1]STAFF.LIST;<br />
Operations-Manager: OPER1;<br />
Mail sent to OPERATIONS-STAFF is forwarded to the addresses listed in<br />
USERS:[OPER1]STAFF.LIST. Because this file is in OPER1's area, the operations manager has<br />
control over who is included in the list. The list is set up in this example so the return-path on list<br />
messages is set to "Operations-Manager" instead of user OPER1; setting up the list owner as an<br />
alias makes it easier to change list owners at a later date.<br />
Specifying the System-Wide Mail Alias File<br />
By default, the <strong>MultiNet</strong> SMTP system obtains system-wide mail aliases from the<br />
MULTINET:SMTP_ALIASES file. You can configure <strong>MultiNet</strong> to use any other file, or to use<br />
multiple files.<br />
To change the SMTP aliases file with MAIL-CONFIG, use the SET ALIASES-FILE comm<strong>and</strong>,<br />
then save the modified configuration with the SAVE comm<strong>and</strong>. The new configuration takes effect<br />
the next time you reboot the system.<br />
Using Mail Aliases <strong>and</strong> Mailing Lists From VMS MAIL<br />
If you want aliases configured within the <strong>MultiNet</strong> SMTP alias file to be accessible to local VMS<br />
MAIL users (or those connected via DECnet), specify the address using the <strong>MultiNet</strong> SMTP VMS<br />
15-23
Configuring Electronic Mail<br />
15-24<br />
MAIL foreign mail protocol interface.<br />
For example, a local user wanting to send mail to the "gcc-users" mailing list would specify the<br />
address SMTP%"gcc-users".<br />
Note! You can, however, define a VMS MAIL alias containing the SMTP% specification. To define the<br />
VMS MAIL alias "Operations-Staff," use the VMS MAIL SET FORWARD comm<strong>and</strong>:<br />
MAIL> SET FORWARD SMTP%"""Operations-Staff-USERS""" /USER=Operations-<br />
Staff<br />
<strong>MultiNet</strong> SMTP uses the RFC-822 To: <strong>and</strong> CC: headers to provide the contents of the VMSmail<br />
To: <strong>and</strong> CC: fields. To enable this processing, define the logical name<br />
MULTINET_VMSMAIL_USE_RFC822_TO_HEADER.<br />
Note! VMSmail limits the length of its To: <strong>and</strong> CC: fields to 255 characters.<br />
IMAP Server<br />
The Internet Message Access Protocol (IMAP) server lets an IMAP-compliant client mail program<br />
access remote message storage as if the storage were local. <strong>MultiNet</strong>'s implementation is based on<br />
IMAP Version 4, Revision 1.<br />
IMAP <strong>and</strong> the Post Office Protocol (POP3), described in the next section, operate differently.<br />
IMAP retains the message on the server, whereas POP3 retrieves the message <strong>and</strong> stores it "offline"<br />
on the client, thereby deleting it from the mail server. IMAP does not delete the mail message<br />
<strong>and</strong> lets you access your mail from more than one client workstation at a time.<br />
IMAP was designed to:<br />
• Be fully compatible with Internet messaging st<strong>and</strong>ards, such as MIME.<br />
• Allow message access <strong>and</strong> management from more than one computer.<br />
• Allow access without relying on less efficient file access protocols.<br />
• Provide support for "online," "offline," <strong>and</strong> "disconnected" access modes<br />
• Support concurrent access to shared mailboxes.<br />
• Eliminate the need for the client software to know about the server's file storage format.<br />
The IMAP protocol includes operations for:<br />
• Creating, deleting, <strong>and</strong> renaming mailboxes<br />
• Checking for new messages<br />
• Permanently removing messages<br />
• Setting <strong>and</strong> clearing flags<br />
• Server-based RFC-822 <strong>and</strong> MIME parsing <strong>and</strong> searching<br />
• Selective fetching of message attributes, texts, <strong>and</strong> portions thereof, for efficiency<br />
For other IMAP features <strong>and</strong> how they contrast with those of POP3, see either of these web sites:<br />
http://www.imap.org/imap.vs.pop.brief.html
http://www.imap.org/imap.vs.pop.html<br />
Inhibiting Output in Comm<strong>and</strong> Procedures for the IMAP Service<br />
Configuring Electronic Mail<br />
Problems arise when remote users log into systems using a login comm<strong>and</strong> procedure<br />
(SYS$LOGIN:SYLOGIN.COM or SYS$MANAGER:SYLOGIN.COM) that requires screen<br />
output. To inhibit this behavior, make sure the following lines are included at the top of all login<br />
comm<strong>and</strong> procedures:<br />
$ VERIFY = 'F$VERIFY(0) ! Turn off verify without echoing<br />
$ IF F$MODE() .EQS. "OTHER" THEN EXIT ! If a DETACHED process (IMAP)...<br />
$ IF VERIFY THEN SET VERIFY ! If a batch job, may want to turn<br />
! verify back on.<br />
IMAP Mail Folders<br />
In contrast to POP3, IMAP allows you to access server mail folders (message stores) other than<br />
INBOX. In MAIL, for example, if you create a NOTES folder, you can access mail in that folder.<br />
This NOTES folder can be in a mail file other than the default MAIL.MAI file. In fact, you can set<br />
a configuration parameter that determines the way mail folders are presented to the client so that<br />
you can use folders in these other mail files.<br />
Your default mail directory includes a .IMAPRC file in which you can set certain configuration<br />
directives (described more fully in the IMAP Directives File section that follows). Among these<br />
directives is allow-subfolders. This directive specifies that folder names are comprised of a<br />
directory (optional), mail file, <strong>and</strong> folder. For example, the NOTES folder in MAIL.MAI is<br />
represented as mail/notes (as opposed to just notes if the directive were not set). This would<br />
distinguish it from another NOTES folder in the OLD.MAI mail file, for example, which would be<br />
named old/notes.<br />
Each level beyond the second in this hierarchy represents a subdirectory of the default mail<br />
directory. For example, the NOTES folder in [.ARCHIVED]MAIL.MAI has the IMAP equivalent<br />
of archived/mail/notes.<br />
Because of this folder syntax ambiguity, directory names, file names, <strong>and</strong> folders can overlap, such<br />
as the examples in Table 15-4.<br />
Table 15-4 IMAP Mail Folders Overlapping Syntax Examples<br />
This mail file... Containing this folder... Has this IMAP equivalent...<br />
MAIL.MAI NOTES mail/notes<br />
[.MAIL]NOTES.MAI STUFF mail/notes/stuff<br />
[.MAIL.NOTES]STUFF.MAI BOBS mail/notes/stuff/bobs<br />
Entries in the syntax can at different times be mail files, directories, subdirectories, or folders.<br />
Because of this overlap, the server must keep an internal representation of the hierarchy <strong>and</strong> mark<br />
15-25
Configuring Electronic Mail<br />
15-26<br />
what each level of the folder name means. This information is critical when renaming or deleting<br />
folders.<br />
One restriction is that a first level folder (MAIL, for example) cannot be a message store, since it<br />
represents only a file <strong>and</strong> not a mail folder. INBOX, however, is a special case. INBOX is always<br />
INBOX, cannot be deleted or renamed (a rename moves messages to the renamed folder but does<br />
not delete INBOX), <strong>and</strong> never goes away. In IMAP, INBOX is mail/NEWMAIL by default, <strong>and</strong> is<br />
hidden to the user.<br />
(Note that you can change the mail "in-box" from INBOX to another folder by defining the fileinbox-messages-to-folder<br />
directive in the .IMAPRC file. See the next section for details.)<br />
You can also access mail files in your login directory (SYS$LOGIN) by prefixing the folder name<br />
with a tilde (~). The ~ folder is reserved <strong>and</strong> cannot be used by other folders.<br />
IMAP Directives File<br />
Users can set certain preferences by creating a file in their default mail directory called .IMAPRC<br />
<strong>and</strong> including directives. Table 15-5 lists these directives along with their meanings. Each directive<br />
must be on its own line <strong>and</strong> in lowercase.<br />
Table 15-5 IMAP Configuration Directives in .IMAPRC<br />
This directive... Does the following...<br />
set allow-child-folders Enables or disables the use of subfolders <strong>and</strong> the way that<br />
folders are presented to the client. By default, this value is<br />
false. If you want to set the value to be true, put this line in the<br />
.IMAPRC file: set allow-child-folders true.<br />
(See the previous section for details.)<br />
set autofile-messages-to-folder<br />
foldername<br />
Moves read messages from INBOX to the specified folder in<br />
the user's default mail file. By default, this option is disabled.<br />
set case-insensitive-folders Specifies that folder names are case-insensitive. Otherwise,<br />
two folders with the same name but with different cases could<br />
become inaccessible to the IMAP client. Newly created<br />
folders are created in uppercase on the server. By default, this<br />
value is false. If you want to set the value to be true, put this<br />
line in the .IMAPRC file:<br />
set case-insensitive-folders true.<br />
set do-purge-reclaim Enables or disables purge-reclaim operations upon closing a<br />
folder. By default, this value is true.<br />
set folder-timer delta_time Specifies the frequency the IMAP server will check for<br />
externally created folders. By default, this value is 00:02:00<br />
(2 minutes).
Table 15-5 IMAP Configuration Directives in .IMAPRC (Continued)<br />
This directive... Does the following...<br />
IMAP Options in the Global IMAPD.CONF file<br />
Configuring Electronic Mail<br />
set inbox-folder foldername Maps INBOX to the specified folder in the user's default mail<br />
file. By default, this value is NEWMAIL.<br />
set newmail-timer delta_time Specifies the frequency the IMAP server will check folders<br />
for new messages. (Note that checking for new mail is time<br />
consuming for large folders.) By default, this value is<br />
00:00:30 (30 seconds).<br />
These options are valid in the global IMAPD.CONF file (MULTINET:IMAPD.CONF) as shown<br />
in Table 15-6:<br />
Table 15-6 Valid options in the Global IMAPD.CONF file (MULTINET:IMAPD.CONF)<br />
This directive... Does the following...<br />
set decnet-address nodename namespace<br />
domainname<br />
Maps the specified decnet nodename <strong>and</strong>/or<br />
namespace to a given domain name. Use " " to<br />
represent either a blank nodename or namespace.<br />
Multiple entries are allowed. By default, this<br />
option is disabled. Example: set decnet-address<br />
knob " " door.com.<br />
set enable-full-cache Enables or disables full message caching. By<br />
default, this value is false.<br />
set max-ping-count integer Specifies, in number of messages, the threshold at<br />
which the server will no longer attempt to check for<br />
new messages. By default, this value is 20000.<br />
set smtp-transport-prefix string Specifies the SMTP transport prefix. By default,<br />
this value is SMTP. If you want to change it to MX,<br />
put this line in the IMAPD.CONF:<br />
set smtp-transport-prefix MX.<br />
set trailing-header-marker string Specifies a text string used to indicate the start of<br />
RFC822 message headers if the system does not<br />
place them at the start of the message. By default,<br />
this option is disabled.<br />
15-27
Configuring Electronic Mail<br />
IMAP State Information Files<br />
15-28<br />
The IMAP server includes files created in the user's mail directory where it maintains state<br />
information, as shown in the following table.<br />
Table 15-7 IMAP State Information Files<br />
This file... Stores...<br />
.MAILBOXLIST Folders to which the user subscribes.<br />
.NEWMAILBOXES List of folders known to be empty. OpenVMS MAIL deletes<br />
folders once it deletes the last message, so that the server<br />
must "remember" these folders.<br />
mailfolder.foldernameuidvalidity For each folder, the UIDs for all the messages. The file<br />
name is composed of the folder name <strong>and</strong> its<br />
UIDVALIDITY code. For example:<br />
MAIL.NEWMAIL3B3200E6. In the example, the folder<br />
name is NEWMAIL <strong>and</strong> the UID validity code is<br />
3B3200E6.<br />
IMAP Logicals<br />
The following IMAP logicals are supported:<br />
MULTINET_IMAPD_MESSAGE_ONE<br />
By default, an informing message of This message can not be retrieved is sent to the user<br />
when the processing message is too big. You can use this logical to define a different informing<br />
message. For example, if you define the logical like this:<br />
$ define/sys/exe MULTINET_IMAPD_MESSAGE_ONE "Your mail is too big to be<br />
processed"<br />
The message seen by the user is:<br />
Your mail is too big to be processed.<br />
If the defined logical string starts with @, the rest of the string defines a text file that holds the text.<br />
The maximum file size of the informing message is 255 bytes. For example, if you define the logical<br />
like this:<br />
$ define/sys/exe MULTINET_IMAPD_MESSAGE_ONE "@MULTINET:IMAPD_MSG_ONE.TXT"<br />
<strong>and</strong> edit the file MULTINET:IMAPD_MSG_ONE.TXT to be:<br />
The size of this message is too big for the IMAP server to process. Most likely it has a big<br />
attachment file. Contact the sender to arrange re-transmission by other means such as FTP.<br />
-System Manager.<br />
The text message from the System Manager is seen by the user when the processing message
cannot be retrieved.<br />
MULTINET_IMAPD_MESSAGE_SIZE_LIMIT<br />
Configuring Electronic Mail<br />
There could be times when an oversized mail file prevents the mail system from working. This<br />
oversized mail file could also slow down other processes on the system. If such a case happens, use<br />
this logical to limit the size of the mail that IMAP processes.<br />
When a mail file size reaches the limit defined by this logical, IMAP does not process it <strong>and</strong> sends<br />
a message to the user. Use the following metrics to define this logical: "S" (40K records), "M"<br />
(120K records), or "L" (240K records).<br />
Note! Because VMS uses records to define the mail size <strong>and</strong> a record could have as few as 1 byte to<br />
as many as 255 bytes, the size limit defined by the logical does not reflect the actual mail size in<br />
bytes. For example:<br />
$ define/sys/exe MULTINET_IMAPD_MESSAGE_SIZE_LIMIT "M"<br />
A mail with a 5MB attachment file could reach the limit. But another mail with a 6MB attachment<br />
file could pass the limit.<br />
Note! If the logical is not defined, the mail size limit is actually the current VMS Page file limit quota<br />
(Pgflquo) of the IMAP process.<br />
MULTINET_IMAPD_LOGLEVEL n<br />
This logical enables additional logging for debugging purposes. Output is written to the file<br />
MULTINET:IMAP_SERVER.LOG. By default, this logical is unassigned. IMAP events normally<br />
are logged to SYSLOG.<br />
MULTINET_IMAP_UPDATE_LOGIN_TIME<br />
This logical updates the last non-interactive login field in this SYSUAF for each IMAP login.<br />
Post Office Protocol (POP) Versions 2 <strong>and</strong> 3<br />
The <strong>MultiNet</strong> Post Office Protocol version 2 (POP2) <strong>and</strong> version 3 (POP3) servers allow a remote<br />
user to access mail stored in VMS MAIL files from POP2 <strong>and</strong> POP3 mail clients. The POP2<br />
protocol is documented in RFC-937, "Post Office Protocol: Version 2," <strong>and</strong> POP3 is documented in<br />
RFC-1460, "Post Office Protocol: Version 3."<br />
The remote user must have a valid account on the OpenVMS host <strong>and</strong> mail must be delivered into<br />
the VMS MAIL files associated with the account. A user specifies a user name <strong>and</strong> password when<br />
VMS MAIL is accessed from a POP2 or POP3 client.<br />
The POP3 server accepts Kerberos V4 authentication in place of user name <strong>and</strong> password<br />
authentication. The current release of the Eudora mail client supports this method of authentication.<br />
The POP3 server allows cross-realm Kerberos V4 authentication when the logical name<br />
MULTINET_POP3_ENABLE_CROSS_REALM_AUTHENTICATION is defined.<br />
The POP3 server waits indefinitely for input from POP3 clients. A logical is definable so you can<br />
15-29
Configuring Electronic Mail<br />
15-30<br />
specify the amount of time the POP3 server should wait for input before closing the connection.<br />
The logical is MULTINET_POP3_INPUT_WAIT x, where x is a normal VMS time string.<br />
The POP3 server supports Unique Identifier Lists (via the UIDL comm<strong>and</strong>) for improved operation<br />
of Eudora clients.<br />
The current release of the <strong>MultiNet</strong> POP3 server does not support the APOP authentication<br />
mechanism. The user name <strong>and</strong> password are validated by LOGINOUT, <strong>and</strong> a server process is<br />
created on the OpenVMS host. The server process invokes both the system-wide login comm<strong>and</strong><br />
procedure (SYS$MANAGER:SYLOGIN.COM) <strong>and</strong> the user's LOGIN.COM before the POP<br />
server image is run. A log file is created in the user's login directory detailing the transactions<br />
between the client <strong>and</strong> the OpenVMS system; with POP2 this log file is called<br />
POP2_SERVER.LOG with POP3, it is called POP3_SERVER.LOG.<br />
POP Logical Names<br />
You can define the logical names described in this section to provide additional functionality to<br />
POP2 <strong>and</strong> POP3. These logicals, which affect several aspects of mail operation, can be defined<br />
either system-wide or for individual users.<br />
Note! The default value for all of these logicals is 0 (all bits disabled).<br />
You can use these logicals for either POP2 or POP3. In using the logicals, substitute either 2 (for<br />
POP2) or 3 (for POP3) for the x in the logical name.<br />
MULTINET_POP3_UPDATE_LOGIN_TIME<br />
When defined /SYSTEM, this causes the LAST NONINTERACTIVE DATE/TIME field in<br />
SYSAUF to be updated with the time the POP3 session was started. Note that this logical applies to<br />
POP3 sessions only.<br />
Specifying POP Functions Using the MULTINET_POPx_FLAGS Logical<br />
This logical specifies functions as decimal values that are interpreted as described in the following<br />
table. To define more than one function, add the decimal values together; for an example, see the<br />
Defining the Logicals System-Wide section.<br />
Value Effect<br />
1 Read only messages marked as new from the NEWMAIL folder. The default is to read<br />
all messages in this folder. If MULTINET_POPx_SOURCE_FOLDER is defined, this<br />
flag is ignored.<br />
2 Move messages from the NEWMAIL folder to the MAIL folder after they are read. If<br />
MULTINET_POPx_DEST_FOLDER is defined, this flag is ignored.
Value Effect<br />
Configuring Electronic Mail<br />
4 Release the POP client before the VMS mailbox is actually closed; that is, cause a<br />
quick close. VMS MAIL can take several minutes to reclaim large amounts of deleted<br />
message space. The server replies to the client with a success, closes the connection,<br />
releases the client, <strong>and</strong> closes the mailbox. Any errors that result from closing the<br />
mailbox when this flag is enabled are lost.<br />
16 Remove the "NODE::" portion of the "From:" address. The <strong>MultiNet</strong> POP server<br />
creates RFC-822 headers from VMS headers before sending the message to the POP<br />
client. If the mail message was received via SMTP, SMTP headers are used.<br />
When NODE is the same as the OpenVMS logical name SYS$NODE, the "NODE::"<br />
portion of the address is removed; otherwise, this portion of the address is retained.<br />
For example:<br />
• For a local node WHITEFANG in which a message originates via DECnet from a<br />
remote OpenVMS host, the "From:" line is WHARFIN::HOLMES.<br />
• After conversion to RFC-822 conventions, the line is<br />
"WHARFIN::HOLMES"@WHITEFANG.YOYODYNE.COM.<br />
• Because some POP clients cannot reply to this address, the bit value represented by<br />
16 should be enabled. When enabled, the "From:" line becomes<br />
HOLMES@YOYODYNE.COM.<br />
NOTE: If a message is routed via DECnet before being received by SMTP, enabling<br />
this bit invalidates the return path to the remote DECnet node.<br />
32 Deleted messages are saved into the folder specified by<br />
MULTINET_POPX_DEST_FOLDER. Otherwise, when a message is deleted, it is<br />
removed completely.<br />
64 POP builds headers from the OpenVMS Mail "From" statement. Specify this flag<br />
when your mailer has been configured to not insert the SMTP headers as the first lines<br />
of text in the message.<br />
The only time you should use this value in the MULTINET_POP3_FLAGS logical<br />
name is when you want to construct ad hoc SMTP headers (that is, when your SMTP<br />
agent is configured to place the real headers at the bottom of the message).<br />
128 The mail box is compressed, but all versions of MAIL.OLD in the MAIL directory are<br />
deleted.<br />
Setting the MULTINET_POPx_DEST_FOLDER <strong>and</strong><br />
MULTINET_POPx_SOURCE_FOLDER Logicals<br />
The MULTINET_POPx_DEST_FOLDER logical specifies the folder containing messages that<br />
have been read.<br />
The MULTINET_POPx_SOURCE_FOLDER logical specifies the folder from which to read<br />
15-31
Configuring Electronic Mail<br />
15-32<br />
messages. The default folder name is NEWMAIL.<br />
By default, the POP2 <strong>and</strong> POP3 servers look for mail in the NEWMAIL folder of the user's<br />
OpenVMS MAIL files. This default may be overridden by defining the logical names<br />
MULTINET_POPx_SOURCE_FOLDER <strong>and</strong> MULTINET_POPx_DEST_FOLDER in the file<br />
SYS$LOGIN:LOGIN.COM. For example, if a POP3 user wants to access mail stored in the MAIL<br />
folder by default, place the following comm<strong>and</strong> in LOGIN.COM:<br />
$ DEFINE MULTINET_POP3_SOURCE_FOLDER "MAIL"<br />
Note! OpenVMS MAIL folder names are case-insensitive.<br />
When a mail message is accessed by POP2 or POP3, it remains in its original folder until the POP<br />
client deletes it. This happens even if the mail is being accessed from the user's NEWMAIL folder.<br />
Users may, however, define the logical name MULTINET_POPx_FLAGS, using the value 2, in<br />
their LOGIN.COM files to alter this behavior. If MULTINET_POPx_FLAGS is set to 2, mail<br />
messages are placed in a user's MAIL folder. This occurs after they are read via POP from the<br />
NEWMAIL folder, if the POP client does not delete the messages after it reads them.<br />
This behavior is the same as with OpenVMS MAIL. For example, if a POP2 user wants mail read<br />
from the NEWMAIL folder placed in the MAIL folder after being read, add this comm<strong>and</strong> to<br />
LOGIN.COM:<br />
$ DEFINE MULTINET_POP2_FLAGS "2"<br />
Again, the user must also configure the POP2 client so messages are not deleted after they are read.<br />
If the client deletes a message, it is not saved in either the MAIL or NEWMAIL folder on the<br />
OpenVMS server.<br />
Defining the Logicals System-Wide<br />
All POP logical names can be defined system-wide for all users, as shown in the following<br />
example:<br />
$ DEFINE /SYSTEM /EXECUTIVE MULTINET_POP3_FLAGS "7"<br />
This example sets the flags parameter so that:<br />
• All users only read messages from the NEWMAIL folder that are marked as new.<br />
• Messages are moved from the NEWMAIL folder to the MAIL folder after they are read.<br />
• The POP client is released quickly at the end of the mail session.<br />
Configuring SMTP Service for ALL-IN-1 Users<br />
The <strong>MultiNet</strong> mailer supports users of HP's ALL-IN-1 office automation environment (often<br />
referred to as ALL-IN-1 IOS or ALL-IN-1 Classic) <strong>and</strong> ALL-IN-1 MAIL via an interface to<br />
Message Router, the backbone of HP's MAILbus product line. This interface allows both ALL-IN-<br />
1 IOS <strong>and</strong> ALL-IN-1 MAIL users to send <strong>and</strong> receive SMTP mail. Message Router V3.1 or later is<br />
required for this feature to function properly. For information on sending <strong>and</strong> receiving SMTP mail<br />
from within ALL-IN-1 IOS <strong>and</strong> ALL-IN-1 MAIL, see the electronic mail chapter in the User's
<strong>Guide</strong>.<br />
Before Configuration<br />
Configuring Electronic Mail<br />
You must have Message Router V3.1 or later installed on your system before configuring the<br />
<strong>MultiNet</strong> SMTP to Message Router (SMTP/MR) interface. If you want to support automated<br />
conversion of WPS <strong>and</strong> DX documents in ALL-IN-1 messages to ASCII, you must also have the<br />
Message Router VMS MAIL Gateway (MRGATE) installation kit.<br />
You do not need to install MRGATE on your system; however, certain object libraries in the<br />
MRGATE kit are needed to provide the necessary document conversion functions. The SMTP/MR<br />
gateway software functions even if the document conversion is not built. It does, however, cause all<br />
WPS <strong>and</strong> DX message bodyparts to be discarded as the ALL-IN-1 message passes through<br />
SMTP/MR.<br />
Configuring SMTP/MR<br />
The MR_CONFIGURE.COM comm<strong>and</strong> procedure in the MULTINET: directory is used to<br />
configure the SMTP/MR gateway software. Execute this procedure with the DCL comm<strong>and</strong>:<br />
$ @MULTINET:MR_CONFIGURE<br />
The comm<strong>and</strong> procedure presents a series of prompts. Enter a question mark (?) at any time to<br />
display more information about that prompt. The configuration comm<strong>and</strong> procedure prompts you<br />
for the following information:<br />
1 Whether to display a detailed explanation before each question. It is recommended that you<br />
answer YES to this question the first time you run the configuration procedure.<br />
2 The domain name of the gateway system. This is a domain-style host name used to refer to the<br />
gateway from the Internet. Be sure the name you choose is within a domain or subdomain over<br />
which you have administrative authority, <strong>and</strong> is not currently being used for another host. If your<br />
local domain is FLOWERS.COM, a reasonable choice for this domain name would be<br />
MR.FLOWERS.COM. This name is largely for internal use, <strong>and</strong> should not be needed to address<br />
mail to ALL-IN-1 users.<br />
3 The domain name to be used for local ALL-IN-1 IOS users. This is a domain-style host name<br />
used to indicate to the <strong>MultiNet</strong> mailer that it should pass the message to the Message Router for<br />
delivery to an ALL-IN-1 user. Be sure the name you choose is within a domain or subdomain<br />
over which you have administrative authority, <strong>and</strong> is not currently being used for another host. If<br />
your local domain is FLOWERS.COM, a reasonable choice for this domain name would be<br />
A1.FLOWERS.COM.<br />
Note! If you are not running ALL-IN-1 IOS, you should specify NONE.<br />
4 The domain name to use for local ALL-IN-1 MAIL users. This is a domain-style host name used<br />
to indicate to the <strong>MultiNet</strong> mailer that it should pass the message to Message Router for delivery<br />
to an ALL-IN-1 user. Be sure the name you choose is within a domain or subdomain over which<br />
you have administrative authority, <strong>and</strong> is not currently being used for another host. If your local<br />
domain is FLOWERS.COM, a reasonable choice for this domain name would be<br />
AM.FLOWERS.COM.<br />
15-33
Configuring Electronic Mail<br />
Note! If you are not running ALL-IN-1 MAIL, you should specify NONE.<br />
15-34<br />
5 The Message Router mailbox name used for the gateway. This Message Router mailbox name is<br />
used by ALL-IN-1 users to send outbound SMTP mail. You are directed later to create this<br />
mailbox with the Message Router MRMAN utility. The default value of "SMTP" should be<br />
used.<br />
Both ALL-IN-1 IOS <strong>and</strong> ALL-IN-1 MAIL users use the address form user@host@SMTP to<br />
specify remote SMTP recipients. Each ALL-IN-1 mail utility places this outbound mail in the<br />
Message Router mailbox named SMTP. The <strong>MultiNet</strong> mailer "picks up" mail from this mailbox<br />
<strong>and</strong> sends it via the normal SMTP delivery mechanism.<br />
The current version of <strong>MultiNet</strong> allows both ALL-IN-1 IOS <strong>and</strong> ALL-IN-1 MAIL users to reply<br />
to messages imported with the V comm<strong>and</strong> or forwarded into ALL-IN-1 using an address of the<br />
form MRGATE:"A1::user" or MRGATE::"AM::user". Return addresses are translated from<br />
Message Router format to a more st<strong>and</strong>ard RFC-822 format in a fashion analogous to the<br />
DECnet to SMTP gateway conversion. The following logical names can be used to customize<br />
the translation:<br />
MULTINET_SMTP_MRGATE_NAME Change the name of the Message Router gateway<br />
mailbox. The default value is MRGATE.<br />
MULTINET_SMTP_A1_NAME Change the name of the ALL-IN-1 IOS gateway<br />
mailbox. The default value is A1.<br />
MULTINET_SMTP_AM_NAME Change the name of the ALL-IN-1 MAIL gateway<br />
mailbox. The default value is AM.<br />
MULTINET_SMTP_A1_DOMAIN Specify the RFC-822 domain associated with the<br />
ALL-IN-1 IOS gateway. Use the domain you<br />
specified when configuring your SMTP/MR<br />
gateway.<br />
MULTINET_SMTP_AM_DOMAIN Specify the RFC-822 domain associated with the<br />
ALL-IN-1 MAIL gateway. Use the domain you<br />
specified when configuring your SMTP/MR<br />
gateway.<br />
6 The Message Router mailbox name used for delivery to ALL-IN-1 MAIL users. This Message<br />
Router mailbox is used to deliver inbound SMTP mail to ALL-IN-1 MAIL users. Normally this<br />
mailbox is named "AM", but the name is configurable. If your site uses a name other than AM,<br />
enter that name.<br />
7 The Message Router mailbox name used by default when mail is sent to the domain name of the<br />
gateway system (for example, MR.FLOWERS.COM). Specify the default value, "MRGATE," to<br />
indicate the Message Router VMS MAIL Gateway mailbox.<br />
8 The Message Router mailbox name for the local system. Specify the DECnet node name of the<br />
local system. SMTP/MR uses this name to generate addresses that are valid on remote systems.
Configuring Electronic Mail<br />
9 The names of any null routes. Specify the name of the local DECnet node <strong>and</strong> any other nodes in<br />
a homogeneous VMScluster (including the cluster alias). Message Router routing information<br />
often includes local DECnet node names or a cluster alias which is superfluous in outbound<br />
SMTP mail. To determine the names of any null routes, use the MRMAN utility SHOW *<br />
comm<strong>and</strong>. Null routes have the general form:<br />
nullname, Replace=<br />
The names you specify at this point are automatically stripped from addresses passing through<br />
SMTP/MR, greatly simplifying them when they pass into the SMTP world. Use a blank entry to<br />
terminate the list.<br />
10The SMTP address of the local postmaster, which should be the full domain-style e-mail address<br />
of the user who should receive error messages generated by SMTP/MR.<br />
11 The password associated with this gateway's Message Router mailbox (SMTP by default).<br />
Message Router protects each mailbox with a password to ensure privacy of mail messages.<br />
12Whether you want to have messages with WPS <strong>and</strong> DX bodyparts automatically converted to<br />
ASCII. SMTP/MR can perform these conversions if it is linked against libraries provided as part<br />
of various Message Router products, notably MRGATE. If you intend to have messages in these<br />
special formats converted to ASCII, answer YES. If you answer NO, these bodyparts are not<br />
converted, <strong>and</strong> may be discarded.<br />
13You are then prompted for the names of several SMTP/MR configuration files. Accept the<br />
defaults for each of these file names.<br />
14You are then asked if you want to generate the configuration files. If you are satisfied with all of<br />
your responses, type YES.<br />
In the following example, which shows an MR_CONFIGURE.COM session, the local host's<br />
DECnet node name is MIGUEL, while its TCP/IP host name is MIGUEL.FLOWERS.COM. The<br />
DECnet cluster alias is IRISDN; <strong>and</strong> other hosts in the homogeneous VAXcluster are named<br />
WHARFIN, BIGBTE, <strong>and</strong> YAYA. The e-mail address of the local postmaster is<br />
POSTMASTER@FLOWERS.COM.<br />
$ @MULTINET:MR_CONFIGURE<br />
SMTP-MR Configuration Utility, Version V3.1<br />
This utility creates an initial pair of databases for mapping SMTP<br />
RFC 822-style addresses to Message Router X.400-style addresses <strong>and</strong><br />
back again. Only minimal mappings are created to support ALL-IN-1<br />
users sending <strong>and</strong> receiving SMTP mail. If you need full MAILbus to<br />
SMTP gatewaying capabilities, contact <strong>Process</strong> <strong>Software</strong> at (508) 879-6994<br />
about their PMDF <strong>and</strong> PMDF-MR e-mail gateway products.<br />
Important note: No changes are made to existing SMTP-MR database<br />
information until all questions have been answered. This utility can be<br />
aborted at any prompt by entering a CTRL/Z. The files output by this<br />
utility may optionally be redirected to a different location so they will<br />
have no impact on the existing SMTP-MR databases.<br />
15-35
Configuring Electronic Mail<br />
15-36<br />
Do you wish to continue [Y]? RETURN<br />
Do you wish to have a detailed explanation printed before each question<br />
[N]? RETURN<br />
Domain name of the gateway: MR.FLOWERS.COM<br />
Domain name for local ALL-IN-1 IOS users [A1.FLOWERS.COM]: RETURN<br />
Domain name for local ALL-IN-1 MAIL users [AM.FLOWERS.COM]: RETURN<br />
Message Router mailbox name for the gateway [SMTP]: RETURN<br />
ALL-IN-1 IOS mailbox known to Message Router [A1]: RETURN<br />
ALL-IN-1 MAIL mailbox known to Message Router [AM]: RETURN<br />
Message Router mailbox used by default [MRGATE]: RETURN<br />
Local system's Message Router mailbox [MIGUEL]: RETURN<br />
Local node name or other null routes [RETURN if no more]: MIGUEL<br />
Local node name or other null routes [RETURN if no more]: WHRFIN<br />
Local node name or other null routes [RETURN if no more]: BIGBTE<br />
Local node name or other null routes [RETURN if no more]: YAYA<br />
Local node name or other null routes [RETURN if no more]: IRISDN<br />
Local node name or other null routes [RETURN if no more]:<br />
RFC822 address of local PostMaster: postmaster@flowers.com<br />
Password for the Message Router mailbox: flowers<br />
Convert WPS-PLUS <strong>and</strong> DX messages to ASCII automatically [Y]? RETURN<br />
SMTP to MR mapping text file [MULTINET:TO_MR.]: RETURN<br />
MR to SMTP mapping text file [MULTINET:FROM_MR.]: RETURN<br />
Gateway options file [MULTINET:MR_OPTIONS.]: RETURN<br />
SMTP-MR checklist file name [MULTINET:SMTP-MR.CHECKLIST]: RETURN<br />
All configuration questions have been answered.<br />
Do you wish to generate the configuration files [Y]? RETURN<br />
Generating SMTP to MR mapping text file...<br />
SMTP to MR mapping text file is complete.<br />
Generating MR to SMTP mapping text file...<br />
MR to SMTP mapping text file is complete.<br />
Generating the setup checklist...<br />
Checklist file is complete.<br />
Generating options file...<br />
Options file is complete<br />
***********************************************************************<br />
* To complete your SMTP-MR configuration, carry out the steps<br />
* detailed in the setup checklist MULTINET:SMTP-MR.CHECKLIST.<br />
***********************************************************************<br />
$<br />
Configuring SMTP/MR Document Conversion<br />
The DCF document conversion utility is used by SMTP/MR to convert WPS <strong>and</strong> DX message<br />
bodyparts to ASCII text. This utility is built from document conversion library routines supplied as<br />
part of the Message Router VMS MAIL Gateway (MRGATE) distribution kit. SMTP/MR can
Configuring Electronic Mail<br />
function without this utility, but cannot convert WPS <strong>and</strong> DX bodyparts to ASCII without it.<br />
Bodyparts in outbound SMTP mail that cannot be converted to ASCII are discarded.<br />
The DCF utility is not supplied in executable form with SMTP/MR; it must be built after<br />
SMTP/MR is configured. The comm<strong>and</strong> procedure MULTINET:DCF_BUILD.COM is provided to<br />
accomplish this. This procedure prompts for two items:<br />
• The location of the save set from which to extract the necessary conversion libraries<br />
• The name of a directory into which the libraries should temporarily be placed while the utility is<br />
being linked. Under MRGATE V3.1, the name of the save set containing the conversion libraries<br />
is MRGATE031.A.<br />
You need not copy the saveset from the distribution media for DCF_BUILD.COM to work. For<br />
example, if you want to access the libraries on a TK50 containing MRGATE while on a VAXstation<br />
3100, you would specify the saveset name as MKA500:MRGATE031.A. The following example<br />
shows how to build the DCF utility from a saveset located in the SYS$MANAGER directory:<br />
$ @MULTINET:DCF_BUILD<br />
Directory to put libraries in [SYS$SCRATCH:]: RETURN<br />
File specification of save set from which to extract libraries:<br />
SYS$MANAGER:MRGATE031.A<br />
Extracting libraries...<br />
%BACKUP-S-CREATED, created SYS$SYSROOT:[SYSMGR]KOALA.OLB;1<br />
%BACKUP-S-CREATED, created SYS$SYSROOT:[SYSMGR]DCF_BASE.OLB;1<br />
%BACKUP-S-CREATED, created SYS$SYSROOT:[SYSMGR]DCF_TRANSLATE.OLB;1<br />
%BACKUP-S-CREATED, created SYS$SYSROOT:[SYSMGR]DCF_MAIL_CONVERSIONS.OLB;1<br />
%BACKUP-S-CREATED, created SYS$SYSROOT:[SYSMGR]DCF_DSAF.OLB;1<br />
%BACKUP-S-CREATED, created SYS$SYSROOT:[SYSMGR]WPADOC.OLB;1<br />
%BACKUP-S-CREATED, created SYS$SYSROOT:[SYSMGR]WPABASE.OLB;1<br />
%BACKUP-S-CREATED, created SYS$SYSROOT:[SYSMGR]XPORT.OLB;1<br />
Linking DCF utility...<br />
Cleaning up...<br />
Done<br />
$<br />
The DCF utility is never invoked interactively. It is always invoked automatically by the SMTP/MR<br />
gateway whenever it has mail containing WPS or DX bodyparts it needs to send via SMTP.<br />
Note! You must use the A save set from MRGATE V3.1 or V3.2 to build DCF. Versions V3.3 <strong>and</strong> later<br />
do not contain the object files needed to link to DCF. If you upgrade to MRGATE V3.3, save your<br />
V3.1 or V3.2 distribution media.<br />
Completing SMTP/MR Configuration<br />
In addition to the SMTP/MR configuration data files, the file MULTINET:SMTP-MR.CHECKLIST<br />
is created by the MR_CONFIGURE.COM comm<strong>and</strong> procedure. This file contains the steps needed<br />
to complete the SMTP/MR configuration, which include:<br />
1 Adding the SMTP/MR gateway mailbox to your Message Router configuration. Run the<br />
MRMAN utility exactly as documented in the checklist file. The Message Router mailbox name<br />
<strong>and</strong> password must be exactly the same as you specified to MR_CONFIGURE.COM.<br />
15-37
Configuring Electronic Mail<br />
15-38<br />
2 Building the WPS <strong>and</strong> DX document conversion utility. See the previous section for details on<br />
building this utility.<br />
3 Configuring your Domain Name System (DNS) name server for SMTP/MR operation. You must<br />
add a Mail eXchanger (MX) record to your name server configuration for the following:<br />
• The domain name of the gateway itself (MR.FLOWERS.COM in the example in the<br />
Configuring SMTP/MR section)<br />
• The domain name used to direct mail to your ALL-IN-1 IOS users (A1.FLOWERS.COM in<br />
the example in the Configuring SMTP/MR section)<br />
• The domain name used to direct mail to your ALL-IN-1 MAIL users (AM.FLOWERS.COM<br />
in the example in the Configuring SMTP/MR section).<br />
If the host running SMTP/MR is named MIGUEL.FLOWERS.COM, the DNS Resource<br />
Records (RRs) you would use in the DNS configuration file for the domain FLOWERS.COM<br />
are:<br />
MR.FLOWERS.COM. IN MX 0 MIGUEL.FLOWERS.COM.<br />
A1.FLOWERS.COM. IN MX 0 MIGUEL.FLOWERS.COM.<br />
AM.FLOWERS.COM. IN MX 0 MIGUEL.FLOWERS.COM.<br />
For more detailed information on configuring a DNS name server, see Chapter 10, "Host Tables<br />
<strong>and</strong> DNS."<br />
4 If you are not running a DNS name server locally, you must add additional host records to the<br />
MULTINET:HOSTS.LOCAL file for the host names of the gateway <strong>and</strong> your ALL-IN-1 users.<br />
Using the names from the above example, <strong>and</strong> assuming that the IP address for<br />
MIGUEL.FLOWERS.COM is 128.0.0.1, you would add the following lines to<br />
MULTINET:HOSTS.LOCAL:<br />
HOST : 128.0.0.1 : MR.FLOWERS.COM : : : :<br />
HOST : 128.0.0.1 : A1.FLOWERS.COM : : : :<br />
HOST : 128.0.0.1 : AM.FLOWERS.COM : : : :<br />
Note! You should:<br />
• Place these lines after the entry for MIGUEL.FLOWERS.COM.<br />
• Specify each name on a line by itself. Merging entries in the hosts file prevents the gateway<br />
from functioning properly.<br />
• Recompile <strong>and</strong> re-install the host tables after adding the new entries.<br />
For detailed information on adding entries to your host tables, see Chapter 10.<br />
5 Submitting the comm<strong>and</strong> procedure MULTINET:MR_TO_MULTINET.COM to the appropriate<br />
batch queue on your system. This comm<strong>and</strong> procedure runs periodically to transfer mail from<br />
the SMTP/MR Message Router mailbox (normally SMTP) to the <strong>MultiNet</strong> mailer. Examine this<br />
comm<strong>and</strong> procedure before submitting it to ensure it runs in the batch queue <strong>and</strong> under the<br />
desired user name.
Enhanced MAILbus Support<br />
Configuring Electronic Mail<br />
If you need additional MAILbus support for ALL-IN-1 users beyond sending <strong>and</strong> receiving SMTP<br />
mail, contact <strong>Process</strong> <strong>Software</strong> about their PMDF-MR product. PMDF-MR is designed to be a<br />
fully-functional gateway between MAILbus <strong>and</strong> the extensive list of protocols supported by their<br />
PMDF e-mail gateway product. For additional information on PMDF-MR <strong>and</strong> PMDF, contact:<br />
<strong>Process</strong> <strong>Software</strong>, LLC<br />
959 Concord Street<br />
Framingham, MA 01701<br />
Phone: (508) 879-6994<br />
Fax: (508) 879-0042<br />
sales@process.com<br />
Configuring the SMTP-DECnet Mail Gateway<br />
<strong>MultiNet</strong> can be set up as a gateway to route mail between SMTP <strong>and</strong> DECnet-only hosts, with<br />
appropriate address translations to make the DECnet-style addresses easier for Internet hosts to<br />
interpret. To do this, you set the DECNET-DOMAIN mail parameter <strong>and</strong> add an appropriate MX<br />
record to the Domain Name Service. The addresses of DECnet mail sent out via SMTP will be<br />
rewritten such that the DECnet node name(s) appear under the DECNET-DOMAIN name in the<br />
host-part of the address. The addresses of incoming SMTP mail for hosts under the DECNET-<br />
DOMAIN are automatically converted into DECnet addresses <strong>and</strong> delivered to the DECnet-only<br />
hosts.<br />
DECnet-to-SMTP Mail<br />
In the DECnet-to-SMTP direction, a VMS MAIL user on a DECnet-only host sends SMTP mail by<br />
specifying an address of the form:<br />
node::SMTP%"user@host"<br />
node is the DECnet node name of the system running <strong>MultiNet</strong>.<br />
<strong>MultiNet</strong> recognizes that the mail originated in DECnet <strong>and</strong>, if the DECNET-DOMAIN parameter<br />
is set, rewrites the originating address in the form<br />
user@node.decnet-domain.<br />
For example, FLOWERS.COM has set up node HQ as a DECnet-SMTP gateway. A user named<br />
JOHN on DECnet-only node WHARFIN at FLOWERS.COM addresses mail to the Info-<strong>MultiNet</strong><br />
mailing list as: HQ::SMTP%"Info-<strong>MultiNet</strong>@ABC.COM"<br />
JOHN's DECnet return address, WHARFIN::JOHN, is rewritten by the gateway as:<br />
JOHN@WHARFIN.DNET.FLOWERS.COM<br />
instead of:<br />
"WHARFIN::JOHN"@HQ.FLOWERS.COM<br />
which some Internet mailers would have trouble parsing.<br />
15-39
Configuring Electronic Mail<br />
15-40<br />
SMTP-to-DECnet Mail<br />
For the SMTP-DECnet gateway to work in the SMTP-to-DECnet direction, other hosts on your<br />
network must be told that mail for host names under the DECNET-DOMAIN should be sent to the<br />
gateway host. If you use Domain Name Service, the easiest way to do this is to set up a wildcard<br />
MX record for the DECNET-DOMAIN. In our example, the MX record looks like this:<br />
*.DNET.FLOWERS.COM. IN MX 0 HQ.FLOWERS.COM.<br />
This MX record causes other hosts on the Internet to send mail destined for any host under<br />
DNET.FLOWERS.COM to node HQ. The gateway automatically recognizes the DECNET-<br />
DOMAIN in the host-name part of the address, rewrites the address to its DECnet form, <strong>and</strong> sends<br />
it through VMS MAIL.<br />
If you do not use DNS, you must add a fully qualified host name for each DECnet node to your host<br />
tables. In our example, a return message to user JOHN on node WHARFIN would be addressed to:<br />
JOHN@WHARFIN.DNET.FLOWERS.COM.<br />
When HQ receives that message, it translates the address to its DECnet form:<br />
WHARFIN::JOHN<br />
<strong>and</strong> sends the message to that address using VMS MAIL.
Chapter 16<br />
Printer Configuration<br />
This chapter describes the printing services provided by <strong>MultiNet</strong>. <strong>MultiNet</strong> supports printing<br />
through the LPD, IPP <strong>and</strong> telnet (STREAM <strong>and</strong> NTY) protocols.<br />
Configuring the LPD/LPR Server Using the NTYSMB Symbiont for Remote,<br />
TCP-Connected Printers<br />
Troubleshooting the LPD Server Troubleshooting the Print Queue<br />
Configuring Print Queues Internet Printing Protocol (IPP)<br />
LPD <strong>and</strong> Stream Symbiont User Exit Support<br />
Configuring the LPD/LPR Server<br />
An LPD server allows other hosts <strong>and</strong> networks to access queues on the server system. The queues<br />
can be any valid OpenVMS queue, including LAT queues <strong>and</strong> terminal queues, <strong>and</strong> do not have to<br />
be <strong>MultiNet</strong> print client queues. A <strong>MultiNet</strong> system is disabled as an LPD server by default in the<br />
distribution kit.<br />
To grant access to other hosts or networks, run the <strong>MultiNet</strong> Server Configuration Utility<br />
(SERVER-CONFIG) with the comm<strong>and</strong>:<br />
$ MULTINET CONFIGURE /SERVERS<br />
<strong>and</strong> enable the LPD server:<br />
SERVER-CONFIG>ENABLE LPD<br />
then select the LPD server:<br />
SERVER-CONFIG>SELECT LPD<br />
To add hosts, type the comm<strong>and</strong>:<br />
SERVER-CONFIG>SET ACCEPT-HOSTS<br />
16-1
Printer Configuration<br />
16-2<br />
You are first prompted to delete the hosts currently in the configuration, then prompted to add new<br />
hosts to the configuration by their IP addresses. To add access to all hosts on a particular network,<br />
issue the comm<strong>and</strong>:<br />
SERVER-CONFIG>SET ACCEPT-NETS<br />
You are prompted in a similar fashion for networks. For additional information on granting <strong>and</strong><br />
denying access to <strong>MultiNet</strong> services, see Chapter 12.<br />
Access control changes take effect immediately when you restart the <strong>MultiNet</strong> master server<br />
process with the RESTART comm<strong>and</strong> before exiting. To log errors to OPCOM, type this comm<strong>and</strong><br />
before restarting the master server process:<br />
$ REPLY/ENABLE=NET/TEMP<br />
The following example shows how to grant LPD access to two specific hosts <strong>and</strong> to all hosts on a<br />
given network. (Note that HOSTS.EQUIV is not consulted when determining trusted hosts.)<br />
$ MULTINET CONFIGURE /SERVERS<br />
<strong>MultiNet</strong> Server Configuration Utility 5.4(nnn)<br />
[Reading in configuration from MULTINET:SERVICES.MASTER_SERVER]<br />
SERVER-CONFIG>SHOW LPD /FULL<br />
Service "LPD":<br />
TCP socket (AF_INET,SOCK_STREAM), Port 515<br />
Socket Options = SO_KEEPALIVE<br />
INIT() = TCP_Init<br />
LISTEN() = TCP_Listen<br />
CONNECTED() = TCP_Connected<br />
SERVICE() = Run_Program<br />
Program = "MULTINET:SERVER_LPD.EXE"<br />
Accept Hosts = IP*127.0.0.1<br />
Reject by default all other hosts <strong>and</strong> nets<br />
Reject Message = "Your host does not have line printer access"<br />
SERVER-CONFIG>SELECT LPD<br />
[The Selected SERVER entry is now LPD]<br />
SERVER-CONFIG>SET ACCEPT-HOSTS<br />
Delete address "IP*127.0.0.1" ? [NO]<br />
You can now add new addresses for LPD. An empty line terminates.<br />
Add Address: 192.41.228.1<br />
Add Address: 192.41.228.65<br />
Add Address: RETURN<br />
SERVER-CONFIG>SET ACCEPT-NETS<br />
You can now add new addresses for LPD. An empty line terminates.<br />
Add Address: 192.16.72.0<br />
Add Address: RETURN<br />
SERVER-CONFIG>RESTART<br />
Configuration modified, do you want to save it first ? [YES] RETURN<br />
[Writing configuration to<br />
MULTINET_COMMON_ROOT:[MULTINET]SERVICES.MASTER_SERVER]<br />
%RUN-S-PROC_ID, identification of created process is 202002BD
SERVER-CONFIG>EXIT<br />
[Configuration not modified, so no update needed]<br />
$<br />
Printer Configuration<br />
Setting a Default LPD User Name<br />
A print request expects to be printed under a valid OpenVMS user name. If the print request<br />
originates from a remote system, the user name may not map to a valid OpenVMS user name.<br />
When defining a default LPD user name, any print request that does not map to a valid OpenVMS<br />
user name maps to the default LPD user name, <strong>and</strong> is accepted by the LPD server.<br />
It is recommended that you define the default LPD user name even if the user names on the remote<br />
system match those on the OpenVMS system. Some printing systems use the name "root" or "lpd"<br />
instead of the actual user name when dispatching a print job to a remote system; those names may<br />
not match any valid OpenVMS user name. To set a default LPD user name:<br />
$ MULTINET CONFIGURE<br />
<strong>MultiNet</strong> Network Configuration Utility 5.4(nnn)<br />
[Reading in MAXIMUM configuration from MULTINET:MULTINET.EXE]<br />
[Reading in configuration from MULTINET:NETWORK_DEVICES.CONFIGURATION]<br />
NET-CONFIG>SET LPD-DEFAULT-USERNAME PYEWACKET<br />
NET-CONFIG>EXIT<br />
[Writing configuration to MULTINET:NETWORK_DEVICES.CONFIGURATION]<br />
[Writing Startup file MULTINET:START_MULTINET.COM]<br />
[Changes take effect after the next VMS reboot]<br />
To make the default user name take effect immediately without rebooting the system, define the<br />
following logical:<br />
$ DEFINE/SYSTEM/EXECUTIVE MULTINET_LPD_DEFAULT_USERNAME "PYEWACKET"<br />
Note! The LPD default user name must exist in the UAF file. It can be non-privileged <strong>and</strong> it can be<br />
"dis-usered," but it must exist.<br />
You can set up logical names to map remote LPD users to local users through a mechanism known<br />
as proxy access. Using logical names is useful when you want to receive LPD print jobs from a<br />
UNIX system on which the user names <strong>and</strong> UIDs on the client <strong>and</strong> server are completely<br />
uncoordinated.<br />
Note! Proxy mappings take precedence over the default mapping. To map a remote user's LPD<br />
requests for printing as if they were queued by a local user:<br />
$ DEFINE/SYSTEM/EXECUTIVE MULTINET_LPD_PROXY_'user' 'local_user'<br />
For example, to map remote user BROWN's LPD requests for printing as if they were queued by<br />
the local user JONES:<br />
$ DEFINE/SYSTEM/EXECUTIVE MULTINET_LPD_PROXY_BROWN JONES<br />
16-3
Printer Configuration<br />
Changing the LPD Spool Directory<br />
16-4<br />
By default, LPD print jobs (<strong>and</strong> SMTP mail messages) on the OpenVMS system are stored in the<br />
directory MULTINET_COMMON_ROOT:[MULTINET.SPOOL]. You can change the directory<br />
with the NET-CONFIG SET SPOOL-DIRECTORY comm<strong>and</strong>:<br />
$ MULTINET CONFIGURE<br />
NET-CONFIG>SET SPOOL-DIRECTORY DISK$TEMP:[MULTINET]<br />
You must redefine the logical that points to the spooling area unless you reboot the system after<br />
modifying the <strong>MultiNet</strong> configuration. Make sure the directory protections are set to<br />
SYSTEM:RWED, OWNER:RWED, GROUP:RE, <strong>and</strong> WORLD:RE.<br />
$ DEFINE/SYSTEM/EXEC MULTINET_SPOOL DISK$TEMP:[MULTINET]<br />
Cancelling LPD Print Jobs<br />
<strong>MultiNet</strong> includes an implementation of the UNIX lprm utility which you can invoke with the<br />
MULTINET LPRM comm<strong>and</strong>. LPRM removes print jobs from remote UNIX (LPD) print queues<br />
<strong>and</strong> can be run by users.<br />
Specify the jobs to be removed by job number. If you do not specify any jobs, the currently active<br />
job is deleted by default. The remote LPD queue associated with SYS$PRINT on the local system<br />
is used by default in the MULTINET LPRM comm<strong>and</strong>.<br />
Use the /QUEUE qualifier to specify an alternate print queue, <strong>and</strong> the /USER qualifier to specify an<br />
alternate user name for the jobs to be deleted.<br />
Note! You must have either SYSPRV or OPER privileges to specify a user name other than your own.<br />
To cancel all LPD print jobs, use the /SUPERUSER qualifier (which also requires SYSPRV<br />
privilege).<br />
Controlling host name lookup<br />
If the logical MULTINET_LPD_DO_ASYNC_LOOKUP is not defined to 1, True, or Yes, then<br />
the LPD print symbiont will now resolve the remote host name with getaddrinfo, <strong>and</strong> is capable of<br />
resolving <strong>and</strong> connecting to an IPv6 address.<br />
$ DEFINE/SYSTEM/EXEC MULTINET_LPD_DO_ASYNC_LOOKUP TRUE<br />
Configuring Printers on Remote Systems<br />
Once you have set up the LPD server to accept incoming connections, you must set up the remote<br />
system for remote printing. When setting up print queues on other systems, specify the OpenVMS<br />
queue name as the remote printer name. (You can use the # character in remote printer names.) For<br />
example, an Apple LaserWriter is attached to the <strong>MultiNet</strong> host ABC.COM <strong>and</strong> is configured as the<br />
queue SYS$PRINT. To configure a remote printer queue named "laser" on a UNIX system to direct<br />
output to SYS$PRINT on ABC.COM, add the following entry to /etc/printcap:
laser|lw|LaserWriter II on host ABC.COM:\<br />
:rm=abc.com:rp=sys$print:sd=/var/spool/laser:lp=:<br />
The following fields are required:<br />
Name Purpose<br />
laser Remote system queue name; in this example, laser<br />
rm Node name of the OpenVMS LPD server<br />
rp OpenVMS queue name on the OpenVMS LPD server<br />
sd Local UNIX spool directory<br />
lp Set to null to avoid LPD bugs<br />
When a user on the UNIX system issues this comm<strong>and</strong>:<br />
% lpr -Plaser foo<br />
Printer Configuration<br />
lpr searches /etc/printcap on the local system for an entry of "laser", <strong>and</strong> transfers the file "foo" to<br />
the LPD server on ABC.COM, which queues "foo" to SYS$PRINT.<br />
Checking Remote Printer Queues<br />
To display the contents of a remote queue that serves an OpenVMS print queue, use the comm<strong>and</strong>:<br />
$ MULTINET SHOW /QUEUE=vms_queue_name<br />
vms_queue_name is the name of the local OpenVMS queue.<br />
The contents of the remote queue are accessed for display using the TCP LPD service.<br />
Note! Queues configured with the STREAM protocol cannot be displayed with this comm<strong>and</strong>.<br />
LPD Jobs (Inbound)<br />
<strong>MultiNet</strong> allows control of the job-queueing parameters used for incoming LPD print jobs using<br />
logical names. The formats for these logical names, which specify their scope, are:<br />
MULTINET_LPD_queuename_typechar_parametername<br />
Specifies a parameter value for a specific queue <strong>and</strong> file type.<br />
MULTINET_LPD_queuename_*_parametername<br />
Specifies the default for a specific queue <strong>and</strong> all file types on that queue.<br />
MULTINET_LPD_*_typechar_parametername<br />
Specifies the default for all queues with a specified file type.<br />
MULTINET_LPD_*_*_parametername<br />
16-5
Printer Configuration<br />
16-6<br />
Specifies a default for all queues <strong>and</strong> all file types.<br />
Enter an asterisk in a logical name to match any queuename or typechar. An asterisk cannot be used<br />
for a parametername. The values in the logicals are:<br />
• parametername, which is one of the following::<br />
Value Description<br />
P1, P2, P3, P4, P5, P6, P7, P8 OpenVMS print job parameters [PRINT /PARAM=()]<br />
BURST /BURST qualifier (ALL, ONE, or NO)<br />
FEED /FEED qualifier (YES or NO)<br />
FILETYPE Type of spool file (FIXED512 or LFSTREAM)<br />
FLAG /FLAG qualifier (ALL, ONE, or NO)<br />
FORM Form name<br />
PASSALL /PASSALL qualifier (YES or NO)<br />
SETUP /SETUP qualifier, list of setup modules<br />
TRAILER /TRAILER qualifier (ALL, ONE, or NO)<br />
• queuename, the name of a printer visible to LPD clients.<br />
• typechar, a single letter specifying the file's data type; accepted values are c, d, f, g, l, n, p, r, t,<br />
<strong>and</strong> v. The f value is the lpr default if a user does not specify a type flag. r is required if a user<br />
specifies -f.<br />
For example, if you want print jobs sent to your system via LPD <strong>and</strong> submitted to a OpenVMS<br />
print queue called PRINT01 to use the bottom input tray, you would issue this comm<strong>and</strong>:<br />
$ DEFINE/EXEC/TABLE=MULTINET_PRINTER_TABLE -<br />
_$ MULTINET_LPD_PRINT01_*_P1 "INPUT_TRAY=BOTTOM"<br />
$<br />
These logical names must all be defined in the MULTINET_PRINTER_TABLE logical name<br />
table. If you have not already run PRINTER-CONFIG, the MULTINET_PRINTER_TABLE<br />
logical name table may not exist. Verify the MULTINET_PRINTER_TABLE logical name table<br />
exists:<br />
1 Start PRINTER-CONFIG with the following comm<strong>and</strong>:<br />
$ MULTINET CONFIGURE /PRINTERS<br />
2 Save the unmodified configuration:<br />
PRINTER-CONFIG>SAVE
Printer Configuration<br />
This comm<strong>and</strong> writes the file MULTINET:REMOTE-PRINTER-QUEUES.COM which<br />
contains the comm<strong>and</strong> to create the MULTINET_PRINTER_TABLE logical name table.<br />
3 Exit PRINTER-CONFIG.<br />
PRINTER-CONFIG>EXIT<br />
4 Execute the MULTINET:REMOTE-PRINTER-QUEUES.COM comm<strong>and</strong> procedure.<br />
Note! MULTINET:REMOTE-PRINTER-QUEUES.COM is executed automatically when <strong>MultiNet</strong><br />
starts. If you define these logical names manually, they will be lost after rebooting. To preserve<br />
your logical name definitions, add the appropriate DEFINE comm<strong>and</strong>s to your startup comm<strong>and</strong><br />
procedure.<br />
The following example shows how to configure the <strong>MultiNet</strong> LPD server to h<strong>and</strong>le inbound jobs<br />
submitted with the -v option.<br />
$ DEFINE/EXECUTIVE_MODE/TABLE=MULTINET_PRINTER_TABLE -<br />
_$ MULTINET_LPD_*_V_PASSALL "YES"<br />
$ DEFINE/EXECUTIVE_MODE/TABLE=MULTINET_PRINTER_TABLE -<br />
_$ MULTINET_LPD_*_V_FILETYPE "FIXED512"<br />
Note! This was the default behavior in <strong>MultiNet</strong> up to <strong>and</strong> including V3.2 Rev D. For more information,<br />
see the lpr -v Support section.<br />
The following example specifies that all LPD jobs queued to SYS$PRINT be submitted with the<br />
form "WIDE":<br />
$ DEFINE/EXECUTIVE_MODE/TABLE=MULTINET_PRINTER_TABLE -<br />
_$ MULTINET_LPD_SYS$PRINT_*_FORM WIDE<br />
Note! The MULTINET_PRINTER_TABLE logical name table <strong>and</strong> all logical names within the table<br />
must be defined in executive mode. To confirm this, enter the following comm<strong>and</strong>:<br />
$ SHOW LOGICAL/FULL/TABLE=MULTINET_PRINTER_TABLE<br />
MULTINET_PRINTER_queuename_PASSALL_FILTER if a queue or a job is set to<br />
/PASSALL, this logical makes the default filter character "v" unless this logical exists <strong>and</strong> specifies<br />
a different value.<br />
MULTINET_PRINTER_queuename_SUPPRESS_REMOTE_BANNER if defined, does not<br />
include the "L" comm<strong>and</strong> in the control file to request a banner page.<br />
MULTINET_PRINTER_queuename_NO_FFLF_DEFAULT or<br />
MULTINET_PRINTER_*_NO_FFLF_DEFAULT if the value is "Y", "T" or "1", then NOFFLF is<br />
enabled; otherwise it is disabled.<br />
16-7
Printer Configuration<br />
lpr -v Support<br />
16-8<br />
Under <strong>MultiNet</strong> V3.2 <strong>and</strong> earlier, the LPD server automatically interpreted the UNIX lpr -v option<br />
to indicate that the file being printed has a binary format, such as a graphics file. The LPD server<br />
stored the file in a binary, fixed, 512-byte format <strong>and</strong> submitted the file to an OpenVMS printer<br />
queue using the /PASSALL option. To retain this functionality, define the following logical names:<br />
Note! You must specify the YES <strong>and</strong> FIXED512 logical values in uppercase.<br />
$ DEFINE/EXECUTIVE_MODE/TABLE=MULTINET_PRINTER_TABLE -<br />
_$ MULTINET_LPD_*_V_PASSALL "YES"<br />
$ DEFINE/EXECUTIVE_MODE/TABLE=MULTINET_PRINTER_TABLE -<br />
_$ MULTINET_LPD_*_V_FILETYPE "FIXED512"<br />
The lpr -v option is not enabled until you specifically enable it. lpr -v changes the default file<br />
format from STREAM_LF 1 to fixed 512-byte format.<br />
You can also use this logical to compensate for systems that cannot pass the -v qualifier. All files<br />
will be passed in /PASSALL mode if the asterisk (*) is used in place of the v in the definition.<br />
$ DEFINE /EXECUTIVE_MODE /TABLE=MULTINET_PRINTER_TABLE -<br />
_$ MULTINET_LPD_*_*_PASSALL "YES"<br />
Troubleshooting the LPD Server<br />
The error message "record too large for user's buffer," indicates a file format problem. Define the<br />
following logicals, <strong>and</strong> specify that all print comm<strong>and</strong>s <strong>and</strong> any print qualifiers are treated as fixed<br />
512-byte files.<br />
$ DEFINE/EXECUTIVE_MODE/TABLE=MULTINET_PRINTER_TABLE -<br />
_$ MULTINET_LPD_*_*_PASSALL TRUE<br />
$ DEFINE/EXECUTIVE_MODE/TABLE=MULTINET_PRINTER_TABLE -<br />
_$ MULTINET_LPD_*_*_FILETYPE FIXED512<br />
For information about interpreting the asterisk (*) in logical names, see the LPD Jobs (Inbound)<br />
section.<br />
The file is removed from the queue on the client side, but the job never appears in the OpenVMS<br />
queue. Enable OPCOM with the comm<strong>and</strong>:<br />
$ REPLY/ENABLE=NET/TEMP<br />
<strong>and</strong> try the PRINT comm<strong>and</strong> again. The OPCOM error message, "your host does not have line<br />
printer access," indicates that the server has not been set up to allow incoming connections from the<br />
1. STREAM_LF is now called LFSTREAM. The fixed 512-byte format is called FIXED512.
Printer Configuration<br />
remote host. See the Configuring the LPD/LPR Server section.<br />
If no OPCOM error messages display, use the following comm<strong>and</strong> to verify that the default LPD<br />
user name has been defined in EXECUTIVE mode:<br />
$ SHOW LOGICAL/FULL MULTINET_LPD_DEFAULT_USERNAME<br />
If the logical does not exist, or is not defined in executive mode, refer to the Setting a Default LPD<br />
User Name section.<br />
To generate a log file with LPD, do the following:<br />
$ DEFINE/SYSTEM MULTINET_LPD_SYMBIONT_DEBUG<br />
A value is not required for the logical. If the logical exists, debug logging is ON; if the logical does<br />
not exist, debug logging is OFF. The equivalence string for the logical is not checked.<br />
Restart the queue. If the OPCOM messages are enabled, a notification is printed telling you that<br />
debugging is enabled.<br />
To turn off the SYMBIONT log file, deassign the logical <strong>and</strong> restart the SYMBIONT queue(s) that<br />
were (re)started since you defined the logical because the symbiont only looks for the logical when<br />
the queue starts up.<br />
$ DEASSIGN/SYSTEM MULTINET_LPD_SYMBIONT_DEBUG<br />
The log files are created in MULTINET_SPOOL:LPD_DEBUG_pid.LOG<br />
pid is the hexidecimal process ID of the symbiont process in question. There may be as many as 16<br />
queues sharing the same log file, since log files are per symbiont process, not per queue, <strong>and</strong> each<br />
process can support processing for up to 16 queues.<br />
The error message Invalid data file size received, indicates a LPR client sent a invalid<br />
printing job. This could occur if a Windows 2000 LPR client is wrongly configured.<br />
Configuring Print Queues<br />
This section describes how to configure a TCP/IP print queue using <strong>MultiNet</strong>. <strong>MultiNet</strong> supports<br />
two printer protocols: STREAM <strong>and</strong> LPD. Set up print queues using either:<br />
• The interactive <strong>MultiNet</strong> PRINTER-CONFIG utility, which is used to configure OpenVMS<br />
TCP/IP printer queues<br />
• The <strong>MultiNet</strong> MENU-CONFIG Configure Print Queues option<br />
PRINTER-CONFIG creates <strong>and</strong> maintains configuration information about <strong>MultiNet</strong> TCP/IP<br />
queues. By default, this utility stores configuration information in the file MULTINET:REMOTE-<br />
PRINTER-QUEUES.COM, which also contains the necessary DCL comm<strong>and</strong>s to configure the<br />
printer pseudo-devices <strong>and</strong> set up the OpenVMS print queues.<br />
After using this utility to configure the queue, invoke the comm<strong>and</strong> procedure<br />
MULTINET:REMOTE-PRINTER-QUEUES.COM to create an OpenVMS queue on the system.<br />
16-9
Printer Configuration<br />
16-10<br />
You can invoke this comm<strong>and</strong> procedure at any time to initialize a new queue without affecting any<br />
queues already running. Use this queue exactly like any other OpenVMS queue; it responds to<br />
st<strong>and</strong>ard OpenVMS PRINT <strong>and</strong> QUEUE comm<strong>and</strong>s. To run the printer queue configuration<br />
manager, issue the comm<strong>and</strong>:<br />
$ MULTINET CONFIGURE/PRINTERS<br />
Configuring an LPD Protocol Queue<br />
The LPD protocol is a st<strong>and</strong>ard for sharing printers between hosts on an IP network. The protocol is<br />
defined by RFC-1179, <strong>and</strong> is integrated into the OpenVMS printing system with the<br />
MULTINET_LPD_SYMBIONT executable. LPD was originally intended for system-to-system<br />
print job transfers, but many printer Ethernet cards now support LPD protocol so that LPD can be<br />
used for printing directly to a printer. The following parameters are used with the<br />
MULTINET_LPD_SYMBIONT:<br />
• ADDRESS=host_addr or ADDRESS:host_addr<br />
• CLASS=class_string or CLASS:class_string<br />
• FILTER=filter_char or FILTER:filter_char<br />
• NOFFLF=Y/T/1 or NOFFLF:Y/T/1<br />
• PRINTER=remote_queue_name or PRINTER:remote_queue_name<br />
• RETAIN_CR=Y/T/1 or RETAIN_CR:Y/T/1<br />
This protocol separates the print job into two parts:<br />
• A df file (data file) that contains the actual data in the print file<br />
• A cf file (control file) that contains comm<strong>and</strong>s for how the file should be printed<br />
The df file is sent first <strong>and</strong> must be spooled on the server until the cf file arrives with instructions<br />
for how the server should print the file. This process causes more overhead when printing a file.<br />
If you are using the LPD protocol to print directly to a printer, make sure the printer's network<br />
interface supports LPD. Consult the printer interface documentation to confirm this. To initially<br />
configure an LPD queue, use the PRINTER-CONFIG ADD comm<strong>and</strong>. The utility prompts you for<br />
the following information:<br />
Remote Host Name:<br />
The IP address of the remote system or printer to which the print job will be sent. The address may<br />
be specified in st<strong>and</strong>ard "dot" notation (i.e. 123.456.789.012), or as a DNS name if there is an entry<br />
in the DNS server or host table of the sending system for the printer or terminal server in question.<br />
Protocol Type: [LPD]<br />
Press RETURN to accept the default (LPD protocol).<br />
Remote Queue Name: [lp]<br />
A remote queue name used by the LPD protocol. If this is a system-to-system print setup, the<br />
remote queue name must match the name of an existing queue defined on the remote system. If the<br />
print jobs will go directly to a printer, the remote queue name often designates the "spooling" area
Printer Configuration<br />
that exists on the printer's network interface card.<br />
The remote printer queue name is not arbitrary; it is specific to the type of network interface<br />
installed in the printer. Consult the printer's network interface documentation for the correct remote<br />
queue name.<br />
The following example shows the initial configuration of a queue called HP5 that points to an<br />
HP4si printer with an internal HP Jet Direct Card, using LPD protocol.<br />
$ MULTINET CONFIGURE/PRINTER<br />
<strong>MultiNet</strong> Remote Printer Configuration Utility 5.4(20)<br />
[Reading in configuration from MULTINET:REMOTE-PRINTER-QUEUES.COM]<br />
PRINTER-CONFIG>ADD HP5<br />
[Adding new configuration entry for queue "HP5"]<br />
Remote Host Name: 161.49.2.3 or printer.flowers.com<br />
Protocol Type: [LPD] <br />
Remote Queue Name: [lp] TEXT<br />
[HP5 => 161.44.192.5, TEXT]<br />
PRINTER-CONFIG>SHOW HP5<br />
Queue Name IP Destination Remote Queue Name<br />
---------- --------------- -----------------<br />
HP5 161.49.2.3 TEXT<br />
PRINTER-CONFIG>EXIT<br />
[Writing configuration to MULTINET:REMOTE-PRINTER-QUEUES.COM]<br />
Invoke the MULTINET:REMOTE-PRINTER-QUEUES.COM comm<strong>and</strong> procedure to initialize<br />
the printer queue.<br />
Input Record Modification<br />
By default, the MULTINET_LPD_SYMBIONT does no input record modification. Records are<br />
read in, formatted <strong>and</strong> presented to the output code by the st<strong>and</strong>ard OpenVMS printer symbiont<br />
library routines. The LPD protocol is implemented in the output routine of the symbiont. There are<br />
times, however, when it may be desireable to h<strong>and</strong>le record input differently. For instance, the<br />
st<strong>and</strong>ard routines treat records with leading form feed (FF) characters differently from other<br />
records. Leading <strong>and</strong> trailing carriage control is stripped from such records, <strong>and</strong>, if the record<br />
consisted only of a FF character, the leading carriage control bytes of the following record are<br />
suppressed. In most cases this yields the desired output on paper, but when it doesn’t, it may be<br />
useful to be able to specify other behavior. That’s what the LPD symbiont’s EMBED_CC <strong>and</strong><br />
ADD_EOR capabilities are intended to help with.<br />
Note! Please see the OpenVMS Utility Reference Manual for more information about print symbionts,<br />
input filtering <strong>and</strong> the h<strong>and</strong>ling of various file formats.<br />
The EMBED_CC <strong>and</strong> ADD_EOR capabilities are optional, <strong>and</strong> must be enabled though the use of<br />
a new logical name (MULTINET_LPD_SYMBIONT_FILTER_ENABLED) to be usable. Without<br />
this logical being present in the system logical name table at the time the symbiont process is<br />
started, neither of these capabilities will work This logical causes the symbiont process to initialize<br />
differently than it does when the logical is not present. All other symbiont capabilities work<br />
16-11
Printer Configuration<br />
16-12<br />
normally regardless of the presense or absense of this logical.<br />
The EMBED_CC capability allows the carriage control specified for the file to be embedded in the<br />
data records prior to their being passed to the main formatting routine of the OpenVMS print<br />
symbiont. The records will have no separate carriage control specified once this is done, <strong>and</strong> will<br />
be equivalent to printing an embedded carriage control file. The carriage control specified for each<br />
record can be the default provided by the input routines, or it can be specified on a system, queue,<br />
or job basis. If the carriage control is specified, this will override whatever implicit carraige control<br />
is present in the file being printed.<br />
The ADD_EOR capability allows specification of a byte to be added to the end of each data record.<br />
This byte will follow any leading carriage control bytes, the data, <strong>and</strong> any trailing carriage control<br />
bytes if these are embedded, or precede them if they are not.<br />
The EMBED_CC <strong>and</strong> ADD_EOR capabilities can be used individually or together, or not used at<br />
all, as needs dictate. Both require that the MULTINET_LPD_SYMBIONT_FILTER_ENABLED<br />
logical be defined when the symbiont process is first started.<br />
Logical names are used to control these two capabilities on a system-wide or queue-specific basis.<br />
PRINT comm<strong>and</strong> parameters are used to control them on a per-job basis. See the appropriate<br />
sections below for more information on using these capabilities.<br />
Logicals used in controlling EMBED_CC <strong>and</strong>/or ADD_EOR operations:<br />
• MULTINET_LPD_SYMBIONT_FILTER_ENABLED - Define as 1/T/Y to enable<br />
EMBED_CC <strong>and</strong> ADD_EOR capabilitie.<br />
Example:<br />
$ DEFINE/SYSTEM/EXECUTIVE_MODE MULTINET_LPD_SYMBIONT_FILTER_ENABLED Y<br />
• MULTINET_LPD_EMBED_CC <strong>and</strong> MULTINET_LPD__EMBED_CC - Turns on<br />
carriage control (CC) embedding. Value is the specification for the CC longword if it's an 8 digit<br />
HEX number, beginning with "0x". If the value is 1/T/Y it enables embedding of the default CC<br />
as h<strong>and</strong>ed to the Input_File routine. If the value is 0/F/N, embedding is disabled.<br />
The 8 digit HEX number used to specify an override CC value consists of four bytes, each of which<br />
specifies a different aspect of the CC. From lowest order byte (right most) to highest:<br />
Byte 1: Repeat count for Leading CC<br />
Byte 2: Leading CC value<br />
Byte 3: Repeat count for Trailing CC<br />
Byte 4: Trailing CC value<br />
The CC values are the actual ASCII character code value, except that zero is not "NUL", but is used<br />
to specify the sequence "CRLF".<br />
Example:<br />
$ DEFINE/SYSTEM/EXECUTIVE_MODE MULTINET_LPD_EMBED_CC "0x0D010A01"<br />
In the preceding example, the four bytes are shown from the highest order byte (fourth) to the
Printer Configuration<br />
lowest order byte (first), with “0D” representing the fourth byte , “01” representing the third byte,<br />
“0A” representing the second byte, <strong>and</strong> “01” representing the first byte. This value would specify a<br />
single leading Line Feed (LF) byte, <strong>and</strong> a single trailing Carriage Return (CR) byte.<br />
$ DEFINE/SYSTEM/EXECUTIVE_MODE MULTINET_LPD_FOOBAR_EMBED_CC "Y"<br />
says to embed the default CC for each record, as specified in the OpenVMS Utility Routines<br />
manual. For a Carriage-Return Carriage Control file this is a leading LF, trailing CR, with special<br />
h<strong>and</strong>ling around FF characters.<br />
Note! MULTINET_LPD_SYMBIONT_FILTER_ENABLED must be defined when the symbiont process<br />
is started in order for this to be effective!<br />
• MULTINET_LPD_ADD_EOR <strong>and</strong> MULTINET_LPD__ADD_EOR - Specifies that an<br />
EOR marker byte is to be added to the end of each input record, <strong>and</strong> what the value of that<br />
marker is to be. The marker is specified as either a two-digit HEX number, prefixed with "0x",<br />
or the actual ASCII character to use.<br />
Example:<br />
$ DEFINE/SYSTEM/EXECUTIVE_MODE MULTINET_LPD_ADD_EOR "0x7C"<br />
$ DEFINE/SYSTEM/EXECUTIVE_MODE MULTINET_LPD_ADD_EOR "|"<br />
These two specifications are equivalent, <strong>and</strong> will result in a vertical bar, or “pipe”, character being<br />
added to the end of each record. If CC is being embedded, this byte will appear following the<br />
trailing CC byte(s). If CC is not being embedded, this byte will precede any trailing CC byte(s).<br />
Note! MULTINET_LPD_SYMBIONT_FILTER_ENABLED must be defined when the symbiont process<br />
is started in order for this to be effective!<br />
Print parameters used in controlling EMBED_CC <strong>and</strong>/or ADD_EOR operations:<br />
• /PARAMETER=(EMBED_CC=)<br />
The job parameter equivalent of MULTINET_LPD_EMBED_CC. Value has the same range of<br />
options as for that logical.<br />
• /PARAMETER=(ADD_EOR=)<br />
The job parameter equivalent of MULTINET_LPD_ADD_EOR. Value has the same range of<br />
options as for that logical.<br />
Note! MULTINET_LPD_SYMBIONT_FILTER_ENABLED must be defined when the symbiont process<br />
is started in order for either of these to be effective!<br />
Logical Names Provided for Controlling LPD Print <strong>Process</strong>ing<br />
Three logical names allow you to control LPD queue print job h<strong>and</strong>ling. By default, the LPD<br />
symbiont passes the letter "f" (for "formatted" file) as the print filter character the LPD server uses<br />
when you issue a st<strong>and</strong>ard PRINT request to an LPD queue. If you include the /PASSALL qualifier<br />
on your print request, the LPD symbiont uses the letter "v" (for "Versatec", that is, binary output)<br />
instead. In addition, the LPD symbiont normally strips CR (carriage return) characters from CRLF<br />
16-13
Printer Configuration<br />
16-14<br />
(carriage return, line feed) line-termination sequences, in keeping with the UNIX notion of LF<br />
(Line Feed) as the new-line character.<br />
• The MULTINET_PRINTER_queuename_DEFAULT_FILTER logical name allows you to<br />
specify the print filter character to use instead of "f" on the specified LPD queue. Declare the<br />
alternative, normal print filter character as follows:<br />
$ DEFINE /TABLE=MULTINET_PRINTER_TABLE -<br />
_$ MULTINET_PRINTER_queuename_DEFAULT_FILTER "character"<br />
queuename is the name of the queue for which you are modifying the print filter character, <strong>and</strong><br />
"character" is the character to be used.<br />
You may override both the default character <strong>and</strong> the alternative character by including the<br />
/PARAMETER=(FILTER="character") qualifier on your print request (assuming the logical<br />
name MULTINET_PRINTER_queuename_ALLOW_USER_SPEC is defined appropriately.<br />
MULTINET_PRINTER_queuename_ALLOW_USER_SPEC<br />
If defined with an equivalence string of "Y", "T" or "1", the user can specify the ADDRESS <strong>and</strong><br />
PRINTER values for the print job on the PRINT comm<strong>and</strong>, in the /PARAMETERS qualifier. In<br />
addition, specifying this logical will result in requeue retries, rather than the default timed retries<br />
when there is a problem with a connection. If this logical is not defined, or is defined with some<br />
other equivalence string, the ADDRESS <strong>and</strong> PRINTER parameters entered on the PRINT<br />
comm<strong>and</strong> by the user will be ignored, <strong>and</strong> timed retries will be performed.).<br />
• The MULTINET_PRINTER_queuename_PASSALL_FILTER logical name allows you to<br />
specify the print filter character to use instead of "v" on the specified LPD queue. Declare the<br />
alternative, passall print filter character as follows:<br />
$ DEFINE /TABLE=MULTINET_PRINTER_TABLE -<br />
_$ MULTINET_PRINTER_queuename_PASSALL_FILTER "character"<br />
queuename is the name of the queue for which you are modifying the passall print filter<br />
character, <strong>and</strong> "character" is the character to be used.<br />
You may override both the default character <strong>and</strong> the alternative passall character by including<br />
both the /PARAMETER=(FILTER="character") qualifier <strong>and</strong> the /PASSALL qualifier on your<br />
print request.<br />
• The MULTINET_PRINTER_queuename_RETAIN_CR_DEFAULT logical name allows you to<br />
specify the disposition of CR characters in CRLF sequences on the specified LPD queue.<br />
Change CR processing on the queue as follows:<br />
$ DEFINE /TABLE=MULTINET_PRINTER_TABLE -<br />
_$ MULTINET_PRINTER_queuename_RETAIN_CR_DEFAULT "boolean"<br />
queuename is the name of the queue for which you are modifying the CR disposition.<br />
"boolean" indicates whether or not CR characters are to be retained in CRLF sequences included<br />
in text sent to the remote system for printing.
Printer Configuration<br />
You may override both the default CR disposition <strong>and</strong> the alternative disposition by including<br />
the /PARAMETER=(RETAIN_CR="boolean" qualifier on your print request.<br />
• The MULTINET_LPD_SYMBIONT_DEBUG logical name enables debug logging.<br />
• The MULTINET_PRINTER_queuename_SUPPRESS_FF logical name controls whether CRFF<br />
is added to jobs.<br />
• The MULTINET_PRINTER_queuename_NO_TELNET logical name controls Telnet IAC code<br />
expansion.<br />
If you want an extra blank line on each page <strong>and</strong>, consequently, an extra blank page when the<br />
bottom margin has been reached, set the logical MULTINET_NLPx_REMOTE_PRINTER to<br />
include the configuration parameter DOLFFF=Y. Depending on your printer, it may be desirable to<br />
keep the behavior <strong>and</strong> not have the extra blank line <strong>and</strong> extra blank page.<br />
Using Retry Timers<br />
When the symbiont cannot connect to the remote system, or the remote LPD server reports<br />
insufficient resources for printing a job, the symbiont requeues the job for a later attempt. Requeue<br />
attempts are reported directly to the user who submitted the print job only if the user specified<br />
/NOTIFY in the print comm<strong>and</strong>. The requeue time is controlled through logical names; you can<br />
control the length of time a job will wait before being attempted again after a connection failure by<br />
defining a logical name as follows:<br />
$ DEFINE/SYSTEM MULTINET_LPD_SYMBIONT_RETRY_INTERVAL "delta-time"<br />
The default value is "0 00:10:00.00", or ten minutes.<br />
You can also control the maximum amount of time that should elapse before the symbiont gives up<br />
on a job with this comm<strong>and</strong>:<br />
$ DEFINE/SYSTEM MULTINET_LPD_SYMBIONT_MAX_RETRY_INTERVAL "delta-time"<br />
The default value is "0 02:00:00.00", or two hours.<br />
You must specify the delta-time values in quotation marks, <strong>and</strong> with a space separating the number<br />
of days from the number of hours, so the symbiont can process them correctly.<br />
LPD uses timer retries to queues that are not set up to allow user-specified printer destinations. For<br />
the other queues, jobs are placed in the queue to be tried again. The advantage to the timer retries is<br />
that successive jobs are not sent to the printer until the symbiont can actually contact the printer.<br />
Use the following logical to control timer retry intervals:<br />
$ DEFINE/SYSTEM/EXEC MULTINET_LPD_SYMBIONT_CONNECT_TIMERS “n n”<br />
Its equivalence string should be two numbers, separated by one space, that specify a) the retry<br />
interval <strong>and</strong> b) the maximum retry time, in seconds. By default, the interval starts at 600 seconds<br />
(10 minutes); for each retry, that value is doubled until the maximum retry time of 7200 seconds (2<br />
hours) is reached. The default would be represented by the following logical definition:<br />
$ DEFINE/SYSTEM/EXEC MULTINET_LPD_SYMBIONT_CONNECT_TIMERS “600 7200”<br />
• OPCOM messages from the LPD symbiont now include the queue name <strong>and</strong> entry number<br />
16-15
Printer Configuration<br />
16-16<br />
associated with the message.<br />
• OPCOM messages from the LPD symbiont can be disabled by defining the following logical:<br />
$ DEFINE/SYSTEM/EXEC MULTINET_PRINTER_NO_OPCOM true<br />
It is recommended that the OPCOM messages not be disabled. They may block legitimate problem<br />
messages, in addition to informational messages about trying connections. This logical can be used<br />
for both the LPD <strong>and</strong> STREAM symbionts.<br />
MULTINET_LPD_SYMBIONT_LFTAIL <strong>and</strong> MULTINET_LPD_SYMBIONT_*_LFTAIL allow<br />
reversion to legacy behavior of terminating jobs with an rather than . To enable this<br />
behavior, use one of these values: Y, T, or 1.<br />
MULTINET_LPD_MAXSTREAMS specifies the maximum number of streams each symbiont<br />
process will h<strong>and</strong>le.<br />
MULTINET_LPD_KEEPALIVE turns on keepalives when making socket connections. To enable<br />
this behavior, use one of these values: 1, y, Y, t, or T.<br />
MULTINET_LPD_SYMBIONT_RESOURCE_TIMERS specifies the initial <strong>and</strong> maximum<br />
resource retry delay times.<br />
Adding Print Queue Parameters<br />
You can define queue parameters on each <strong>MultiNet</strong> queue using the MULTINET CONFIGURE/<br />
PRINTER utility. Refer to the <strong>MultiNet</strong> for OpenVMS <strong>Administrator's</strong> Reference for specific<br />
parameters. The following example shows how to add a device control library called HP3SI to the<br />
queue called HP5.<br />
$ MULTINET CONFIGURE/PRINTER<br />
<strong>MultiNet</strong> Remote Printer Configuration Utility 5.4(20)<br />
[Reading in configuration from MULTINET:REMOTE-PRINTER-QUEUES.COM]<br />
PRINTER-CONFIG>SELECT HP5<br />
[The Selected Printer is now HP5]<br />
PRINTER-CONFIG>SET LIBRARY HP3SI<br />
[Library HP3SI]<br />
PRINTER-CONFIG>SHOW HP5<br />
Queue Name IP Destination Remote Queue Name<br />
---------- --------------- -----------------<br />
HP5 161.49.2.3 TCP port 9100<br />
Device Control Library = HP3SI<br />
PRINTER-CONFIG>EXIT<br />
[Writing configuration to MULTINET:REMOTE-PRINTER-QUEUES.COM]<br />
Remember to invoke the REMOTE-PRINTER-QUEUES.COM procedure after exiting the<br />
configuration utility to add the parameters to the queue. Some parameters are only valid with the<br />
INITIALIZE /QUEUE comm<strong>and</strong>, so you may need to first stop <strong>and</strong> delete the queue, then invoke<br />
the REMOTE-PRINTER-QUEUE comm<strong>and</strong> procedure before the new parameters take effect.<br />
Starting Multiple Print Queues
Printer Configuration<br />
You can start either a single print queue or a list of queues, in addition to starting all print queues<br />
using the comm<strong>and</strong> procedure MULTINET:REMOTE-PRINTER-QUEUES.COM. The syntax for<br />
the comm<strong>and</strong> procedure is:<br />
$ @MULTINET:REMOTE-PRINTER-QUEUES [queue1,[queue2,queue3,...]]<br />
If you do not provide any queue names on the comm<strong>and</strong> line, the procedure attempts to start all<br />
defined queues. For example, to start SYS$PRINT:<br />
$ @MULTINET:REMOTE-PRINTER-QUEUES SYS$PRINT<br />
Or, to start SYS$PRINT <strong>and</strong> SYS$LASER:<br />
$ @MULTINET:REMOTE-PRINTER-QUEUES SYS$PRINT,SYS$LASER<br />
Using User-Specified Print Destinations<br />
<strong>MultiNet</strong> allows users to override some of the parameters that you specify when you configure a<br />
print queue. You can enable user-specified print destinations, using the ADDRESS <strong>and</strong> PRINTER<br />
parameters, on a per-queue basis:<br />
$ DEFINE/TABLE=MULTINET_PRINTER_TABLE -<br />
_$ MULTINET_PRINTER_queuename_ALLOW_USER_SPEC TRUE<br />
If you want to allow users to specify their own print destinations for LPD printing, define this<br />
logical name during your system startup sequence. To define the logical using MENU-CONFIG:<br />
$ MULTINET CONFIGURE /PRINTER<br />
PRINTER-CONFIG>SELECT queuename<br />
PRINTER-CONFIG>SET ALLOW-USER-SPECIFIC ENABLE<br />
PRINTER-CONFIG>EXIT<br />
To override the parameters associated with an LPD queue, use the /PARAMETERS qualifier with<br />
the PRINT comm<strong>and</strong>. Specify an alternative destination, a print filter, or how carriage return<br />
characters are to be treated with these parameters:<br />
ADDRESS=n.n.n.n<br />
Specifies the address of the destination host. This value must be a numeric IP address, not a host<br />
name. If not specified, the address configured for the queue in the <strong>MultiNet</strong> printer configuration<br />
utility (PRINTER-CONFIG) is used.<br />
CLASS=class_string<br />
Specifies the string to put on the "class" line in the control file. This gets used in various ways, but<br />
mostly appears on the banner page if one is printed.<br />
“PRINTER=name”<br />
Specifies the name of the printer on the destination host. Use quotation marks around the entire<br />
parameter specification, since many systems are case-sensitive regarding printer names. If you<br />
specify ADDRESS <strong>and</strong> omit this parameter, the printer name defaults to "lp." If you omit both<br />
16-17
Printer Configuration<br />
16-18<br />
ADDRESS <strong>and</strong> PRINTER, the printer name configured for the queue in the <strong>MultiNet</strong> printer<br />
configuration utility is used.<br />
RETAIN_CR={ Y | N}<br />
Specifies whether the symbiont should not convert CR/LF sequences into bare LFs when sending a<br />
text file to the remote system. The default is N; CR/LF sequences are converted to bare LFs. A<br />
setting of Y means the sequences are not converted. This parameter is ignored if you submit the job<br />
with the /PASSALL qualifier.<br />
“FILTER=x”<br />
Specifies the "print filter" character to be sent with the print job to the remote system. Use<br />
quotation marks around the entire parameter, since filter specifications are generally case-sensitive.<br />
By default, the symbiont uses "f" for text files <strong>and</strong> "v" for files submitted with the /PASSALL<br />
qualifier.<br />
RESTART<br />
Restarts the queues with the modified configuration information.<br />
NOFFLF=Y/T/1<br />
Specifies whether the symbiont does not add a Line Feed after a Form Feed when sending a text file<br />
to the remote system.<br />
For example, to print to an alternate destination:<br />
$ PRINT/PARAM=(ADDRESS=192.168.34.22,"PRINTER=HP5",RETAIN=Y,FILTER="1")-<br />
_$ LOGIN.COM<br />
If the case of the printer name or filter character must be preserved, these parameter values must be<br />
enclosed in quotes. In the preceding example, the filter character has been specified as a lowercase<br />
“l”.<br />
In the example, the LPD client symbiont is instructed to send the file to the LPD server on host<br />
192.168.34.22 for queue HP5, retaining carriage return characters, <strong>and</strong> using a filter of "l". The<br />
queue entry in the local OpenVMS LPD client queue looks like:<br />
$ SHOW QUEUE/FULL SYS$PRINT<br />
Printer queue SYS$PRINT, stopped, on NODE:NLP8, mounted form DEFAULT<br />
/BASE_PRIORITY=4, /DEFAULT=(FORM=DEFAULT) /OWNER=[SYSTEM]<br />
/PROCESSOR=MULTINET_LPD_SYMBIONT /PROTECTION=(S:M,O:D,G:R,W:S)<br />
Entry Jobname Username Blocks Status<br />
----- ------- -------- ------ ------<br />
795 LOGIN USER 9 Printing<br />
Submitted 23-MAY-2003 09:40 /FORM=DEFAULT<br />
/PARAM=("ADDRESS=192.168.34.22", "PRINTER=HP5", "RETAIN=Y", "FILTER=1")<br />
/PRIORITY=100<br />
File: _DKA100:[USER]LOGIN.COM;1
Customizing Printer Queues<br />
Printer Configuration<br />
You can add special characteristics to queues by using customized comm<strong>and</strong> procedures. You can<br />
do this globally to all STREAM or LPD queues, or limit them to each individual queue. These<br />
comm<strong>and</strong> procedures are automatically invoked every time REMOTE-PRINTER-QUEUES.COM<br />
is invoked.<br />
A customized comm<strong>and</strong> procedure must contain all comm<strong>and</strong>s to spool the NLP device to the<br />
queue <strong>and</strong> to initialize the queue. Review the comm<strong>and</strong> procedure MULTINET:REMOTE-<br />
PRINTER-QUEUES.COM to see how <strong>and</strong> when these customized comm<strong>and</strong> procedures are<br />
called.<br />
• To add a special queue characteristic or qualifier to all STREAM queues, create a comm<strong>and</strong><br />
procedure called INITIALIZE_STREAM_QUEUE.COM in the MULTINET directory.<br />
• To customize all LPD queues, create a file called INITIALIZE_LPD_QUEUE.COM in the<br />
MULTINET directory.<br />
• To customize individual queues, create a file called INITIALIZE_queuename.COM in the<br />
MULTINET directory.<br />
The following example shows a customized comm<strong>and</strong> procedure to add the /SEPARATE qualifier<br />
to a queue called HP5. The file is located in the MULTINET directory <strong>and</strong> is called<br />
INITIALIZE_HP5.COM.<br />
$! Custom initialization procedure for stream queue HP5<br />
$!<br />
$ NLP_Device = P1<br />
$ Remote_Address = P2<br />
$ Remote_port = P3<br />
$ Default_Form = P4<br />
$!<br />
$ If F$GetDVI(NLP_Device,"SPL") Then Set Device/NoSpool 'NLP_Device'<br />
$ Set Device/Spool=HP5 'NLP_Device':<br />
$ Initialize/Queue/<strong>Process</strong>or=<strong>MultiNet</strong>_Stream_Symbiont HP5 -<br />
/On='NLP_Device'/Start/library=hp3sidevctl/separate=(reset=(reset))<br />
$ Exit<br />
Note! The customized comm<strong>and</strong> procedure must contain all the comm<strong>and</strong>s to spool the NLP.<br />
The NLP device must be unique for each queue. The MULTINET:REMOTE_PRINTER_QUEUES.COM<br />
comm<strong>and</strong> procedure chooses the next available NLP device when initializing the queue. To<br />
determine the correct NLP device, use PRINTER-CONFIG to add a new queue. After exiting the<br />
utility, examine the MULTINET:REMOTE_PRINTER_QUEUES.COM comm<strong>and</strong> procedure to<br />
determine which NLP device was assigned to the new queue. Use the comm<strong>and</strong>s in that comm<strong>and</strong><br />
procedure as a template for creating the customized comm<strong>and</strong> procedure.<br />
Note! REMOTE_PRINTER_QUEUES.COM passes the NLP device name as one of several<br />
parameters to the customized comm<strong>and</strong> procedure.<br />
16-19
Printer Configuration<br />
Configuring a STREAM Protocol Queue<br />
16-20<br />
The print client STREAM protocol is a TELNET-based protocol that is not defined by an RFC.<br />
This is the recommended protocol for printing from VAX systems <strong>and</strong> is integrated into the<br />
OpenVMS printing system with the MULTINET_STREAM_SYMBIONT executable.<br />
To initially configure a STREAM queue, use the PRINTER-CONFIG ADD comm<strong>and</strong>. The ADD<br />
comm<strong>and</strong> has a maximum limit of 5000 symbionts per system. The utility prompts you for the<br />
following information:<br />
Remote Host Name:<br />
The IP address of the printer or of the terminal server to which the printer is attached. The address<br />
may be specified in st<strong>and</strong>ard "dot" notation (i.e., 123.456.789.012), or as a DNS name if there is an<br />
entry in the DNS server or host table of the sending system for the printer or terminal server in<br />
question.<br />
Protocol Type: [LPD]<br />
Type the word STREAM to indicate STREAM protocol.<br />
TCP Port Number: [23]<br />
The port number to which the TCP/IP connection will attach. If the printer has an Ethernet card<br />
installed in it, the port number is listed in the Ethernet card documentation; check there first, or call<br />
the card manufacturer to confirm the port number. For example, HPLJ Jet Direct cards use port<br />
9100 for the TCP port number.<br />
If the printer is attached to a terminal server, the port number refers to the physical port on the<br />
terminal server to which the printer is attached. For example, the HP 90TL terminal server adds<br />
2000 to the actual physical port number to address the correct port. If the printer is physically<br />
attached to port 3, add 2000 to 3, making the port number 2003. Direct any questions on addressing<br />
the correct port number to the appropriate terminal server vendor.<br />
The following example shows the initial configuration of a queue called HP5 that points to an<br />
HP4si printer with an internal HP Jet Direct Card, using STREAM protocol. (For terminal servers,<br />
such as the HP 90TL, make sure the logical name MULTINET_PRINTER_printername_NO_TELNET<br />
is enabled. where printername is the name that was given to the printer in<br />
MU CONFIGURE /PRINTERS.)<br />
$ MULTINET CONFIGURE/PRINTER<br />
<strong>MultiNet</strong> Remote Printer Configuration Utility 5.4(20)<br />
[Reading in configuration from MULTINET:REMOTE-PRINTER-QUEUES.COM]<br />
PRINTER-CONFIG>ADD HP5<br />
[Adding new configuration entry for queue "HP5"]<br />
Remote Host Name: 192.168.2.3 or printer.flowers.com<br />
Protocol Type: [LPD] STREAM<br />
TCP Port Number: [23] 9100<br />
[HP5 => 192.168.2.3, TCP port 9100 (no telnet option negotiation)]<br />
PRINTER-CONFIG>SHOW HP5<br />
Queue Name IP Destination Remote Queue Name<br />
---------- -------------- -----------------
HP5 192.168.2.3 TCP port 9100<br />
Telnet Options <strong>Process</strong>ing will be suppressed<br />
PRINTER-CONFIG>EXIT<br />
[Writing configuration to MULTINET:REMOTE-PRINTER-QUEUES.COM]<br />
Printer Configuration<br />
Invoke the MULTINET:REMOTE-PRINTER-QUEUES.COM comm<strong>and</strong> procedure to initialize<br />
the printer queue.<br />
Troubleshooting a STREAM Protocol Queue<br />
To generate a log file with STREAM, do the following:<br />
$ DEFINE/SYSTEM MULTINET_STREAM_SYMBIONT_DEBUG<br />
A value is not required here as with NTYSMB. If the logical exists, debug logging is ON; if the<br />
logical does not exist, debug logging is OFF. The equivalence string for the logical is not checked.<br />
Restart the queue. If the OPCOM messages are enabled, a notification is printed telling you that<br />
debugging is enabled.<br />
To turn off the STREAM log file, deassign the logical <strong>and</strong> restart the STREAM queue(s) that were<br />
(re)started since you defined the logical because the symbiont only looks for the logical when the<br />
queue starts up.<br />
$ DEASSIGN/SYSTEM MULTINET_STREAM_SYMBIONT_DEBUG<br />
The log files are created in MULTINET_SPOOL:STREAM_DEBUG_pid.LOG<br />
pid is the hexidecimal process ID of the symbiont process in question. There may be as many as 16<br />
queues sharing the same log file, since log files are per symbiont process, not per queue, <strong>and</strong> each<br />
process can support processing for up to 16 queues.<br />
Logical Names Provided for Controlling STREAM <strong>Process</strong>ing<br />
• The MULTINET_STREAM_SYMBIONT_DEBUG logical name enables debug logging.<br />
• The MULTINET_PRINTER_queuename_SUPPRESS_FF logical name controls whether CRFF<br />
is added to jobs.<br />
• The MULTINET_PRINTER_queuename_NO_TELNET logical name controls Telnet IAC code<br />
expansion.<br />
• If MULTINET_STREAM_DO_ASYNC_LOOKUP is not defined to 1, True, or Yes, then the<br />
stream print symbiont will now resolve the remote host name with getaddrinfo, <strong>and</strong> is capable of<br />
resolving <strong>and</strong> connecting to an IPv6 address.<br />
• $ DEFINE/SYSTEM/EXEC MULTINET_LPD_DO_ASYNC_LOOKUP TRUE<br />
• The MULTINET_STREAM_DEAD_LINK_TIMEOUT <strong>and</strong><br />
MULTINET_STREAM_queuename_DEAD_LINK_TIMEOUT logical name control dead link<br />
detection <strong>and</strong> h<strong>and</strong>ling.<br />
The MULTINET_STREAM_SYMBIONT can be configured for detection <strong>and</strong> h<strong>and</strong>ling of "dead<br />
links", that is, a TCP/IP link that stops responding, but was not closed properly by the remote end.<br />
16-21
Printer Configuration<br />
16-22<br />
To enable dead link detection, define a system logical:<br />
$ DEFINE/SYSTEM MULTINET_STREAM_DEAD_LINK_TIMEOUT "timeout_secs<br />
[[] ]"<br />
or:<br />
$ DEFINE/SYSTEM MULTINET_STREAM_queuename_DEAD_LINK_TIMEOUT "timeout_secs<br />
[[] ]"<br />
Both of the _secs values are integers specifying seconds. Timeout_secs is the number of seconds a<br />
write has to take before it is considered a dead link. Requeue_secs specifies how many seconds to<br />
hold a job if it gets requeued due to a dead link. Option is one of the following:<br />
• "REQUEUE" — requeue the job with a hold for requeue_secs.<br />
• "CONTINUE" — continue with job...just open a new link.<br />
• "STOP" — stop the queue.<br />
The default behavior is "REQUEUE" if none is specified explicitly, <strong>and</strong> the default requeue_secs is<br />
zero (that is, no delay) if no time is specified.<br />
Note! None of these guarantee that a print job will not be affected adversely by a lost link, especially<br />
when it is due to the printer interface being powered off suddenly.<br />
A problem can occur when the symbiont tries to open a connection <strong>and</strong> the remote host refuses the<br />
connection. Possible reasons for this refusal could be that there is another connection already open<br />
on that port by another system or the connection from the previous job the symbiont sent has not<br />
finished closing. You can control how long the symbiont waits to retry a connection after it is<br />
refused with the MULTINET_STREAM_SYMBIONT_TIMERS logical. The logical sets the<br />
initial <strong>and</strong> the maximum time to wait before retrying the connection. For example, if you defined<br />
the logical as follows it would retry the connection after 1 second <strong>and</strong> double the time between<br />
subsequent retries until it reached the maximum of 10 seconds.<br />
$ DEFINE/SYSTEM/EXEC MULTINET_STREAM_SYMBIONT_TIMERS "1 10"<br />
LPD <strong>and</strong> Stream Symbiont User Exit Support<br />
A user exit is a mechanism for customizing the way the print symbiont sends jobs to the printer,<br />
beyond the methods provided by <strong>MultiNet</strong>. A user exit is a shareable image that contains symbols<br />
the symbiont reads at runtime for special processing instructions.<br />
The user exits in the LPD symbiont have been modified for the current release of <strong>MultiNet</strong>. The file<br />
MULTINET_ROOT:[MULTINET.EXAMPLES]USER_LPD_CLIENT.C1 (it is provided in the<br />
distribution kit) contains the template for an LPD symbiont customization image. The definitions in<br />
it have changed since the last release to better support printing with HP Corporation’s DCPS<br />
symbiont.<br />
The file shows how to modify the way the LPD protocol symbiont generates the control file it sends
over the network, <strong>and</strong> the name <strong>and</strong> Internet address of the server to which it connects.<br />
Printer Configuration<br />
Note! If you use user exits, you must update your source code, recompile, <strong>and</strong> relink your routines.<br />
See the comments in the beginning of the file for information on compiling <strong>and</strong> linking the code<br />
properly. Install the routine by placing USER_LPD_CLIENT.EXE in the MULTINET: directory.<br />
The customized image will be used the next time the symbiont starts.<br />
The Stream symbiont supports user exits provided in the MULTINET_ROOT:[MULTINET.EXAMPLES]<br />
directory (available only if the library <strong>and</strong> include files are installed during the <strong>MultiNet</strong><br />
installation procedure). The Stream user exit is named USER_STREAM_CLIENT.C.<br />
The LPD user exit takes the first parameter specified in the OpenVMS PRINT /PARAMETER=<br />
qualifier <strong>and</strong> maps it to the job classification (emulating the UNIX lpr -C option). After adding<br />
changes to an exit file, compile the file, link it with the /SHARE qualifier, <strong>and</strong> copy the resulting<br />
executable into the common directory MULTINET_COMMON_ROOT:[MULTINET].<br />
If you have user exits built with <strong>MultiNet</strong> V3.2, you must add your changes to the new user exit<br />
templates <strong>and</strong> rebuild your exit code after installing this release of <strong>MultiNet</strong>.<br />
________________________<br />
1. This interface is subject to change without notice. <strong>Process</strong> <strong>Software</strong> does not support customer modifications to<br />
these interfaces. <strong>Process</strong> <strong>Software</strong> does not guarantee future changes will not be made that could break a customer’s<br />
modifications.<br />
Note! With the current release of <strong>MultiNet</strong>, USER_LPD_CLIENT.C supports the addition of a linefeed<br />
after a formfeed. You use logical names <strong>and</strong> print parameters to control the behavior. Use a<br />
logical name of the form MULTINET_PRINTER_queuename_NO_FFLF_DEFAULT:<br />
queuename is the name of the queue you are using or is the * character to designate all LPD queues<br />
defined in the logical name table MULTINET_PRINTER_TABLE to execute each time <strong>MultiNet</strong><br />
starts:<br />
$ DEFINE/EXECUTIVE/TABLE=MULTINET_PRINTER_TABLE ...<br />
or use the NOFFLF parameter in a print comm<strong>and</strong> to control the behavior for a particular queue:<br />
$ PRINT/PARAMETERS=(NOFFLF=TRUE) filespec<br />
The LPD <strong>and</strong> Stream symbionts have been enhanced in the following ways:<br />
• The first 16 bytes of the work area (the per-stream data area) in the symbionts are reserved for<br />
customer use.<br />
• The customizable psm_max_streams_v33() routine is called by the symbionts to determine the<br />
number of streams that a symbiont should initialize.<br />
• International character set translations are supported with the shareable user exit image<br />
MULTINET:USER_TRANSLATE.EXE. After adding changes to a customizable file, compile<br />
the file <strong>and</strong> link it with the /SHARE qualifier. (You can request a sample<br />
USER_TRANSLATE.C source module from <strong>Process</strong> <strong>Software</strong> Technical Support.)<br />
• All <strong>MultiNet</strong> LPD <strong>and</strong> stream symbionts can be configured with a remote printer or host’s<br />
16-23
Printer Configuration<br />
16-24<br />
domain name in addition to its IP address.<br />
Using the NTYSMB Symbiont for Remote,<br />
TCP-Connected Printers<br />
<strong>MultiNet</strong> V5.4 provides a print symbiont for sending print jobs to remote TCP-connected printers.<br />
This symbiont-NTYSMB-which works in conjunction with network terminal port (NTY) devices,<br />
can be used instead of <strong>MultiNet</strong> STREAM print queues. The NTYSMB symbiont<br />
• Allows for user exits. See file USER_NTYSMB_CLIENT.C in the<br />
MULTINET_ROOT:[MULTINET.EXAMPLES] directory.<br />
• Sends a form feed at the end of a job.<br />
• Corrects timer h<strong>and</strong>ling in the case where the maximum timeout is reached. The timers are<br />
controlled by two values taken from the equivalence string for the<br />
MULTINET_NTYSMB_TIMERS logical name, initial <strong>and</strong> ceiling. The values for initial <strong>and</strong><br />
ceiling are given in seconds. The initial value is how soon, after the first connection attempt<br />
fails, the symbiont is to retry the connection. On subsequent connection failures, the symbiont<br />
backs off its retries exponentially, until it’s only retrying every ceiling seconds. By default,<br />
initial is 10 seconds <strong>and</strong> ceiling is 7200 seconds (2 hours). The NTYSMB symbiont never gives<br />
up on a job. Define the logical name as:<br />
$ DEFINE/SYSTEM/EXEC MULTINET_NTYSMB_TIMERS “initial ceiling”<br />
• Zeros out channel information in case a write request is received when a shutdown or close is in<br />
progress.<br />
• Fixes queue shutdown when a timed retry is outst<strong>and</strong>ing <strong>and</strong> a STOP/REQUEST is issued<br />
against the queue.<br />
• Corrects I/O synchronization problems where data could be sent to the printer out of order.<br />
Note! If you have any questions or concerns about the symbiont, please contact the <strong>Process</strong> <strong>Software</strong><br />
Technical Support department.<br />
MULTINET_NTYSMB_DEBUG causes various debug options to be enabled.<br />
MULTINET_NTYSMB_*_MAXTIMERMSG <strong>and</strong><br />
MULTINET_NTYSMB_queuename_MAXTIMERMSG specifies the message to be issued when<br />
the connection timer hits the maximum value. One "%s" argument will be supplied in the form of<br />
the queue name.
NTYSMB Advantages Over STREAM Queues<br />
NTY queues have the following advantages over STREAM queues:<br />
Printer Configuration<br />
Improved print formatting The st<strong>and</strong>ard OpenVMS print symbiont normally takes<br />
advantage of formatting capabilities in the OpenVMS<br />
terminal driver. These capabilities were only partially<br />
emulated by the STREAM symbiont. Because<br />
MULTINET_NTYSMB uses network terminal port<br />
devices, full print symbiont formatting is now supported.<br />
More control over queues’ devices The st<strong>and</strong>ard SET TERMINAL <strong>and</strong> queue operation<br />
comm<strong>and</strong>s are used to set up the NTY terminal device <strong>and</strong><br />
MULTINET_NTYSMB print queues. System managers<br />
wanting to take advantage of the OpenVMS queue<br />
manager's Autostart capability may now do so with this<br />
new print queue support.<br />
Familiar management interface The NTY Control Program (NTYCP) <strong>and</strong><br />
MULTINET_NTYSMB print symbiont are patterned after<br />
Hewlett-Packard’s LAT Control Program (LATCP) <strong>and</strong><br />
LAT print symbiont, providing a management interface<br />
that should be familiar to many OpenVMS system<br />
managers.<br />
16-25
Printer Configuration<br />
Setting Up a Print Queue with MULTINET_NTYSMB<br />
Note! <strong>MultiNet</strong> must be started before NTY devices can be created or MULTINET_NTYSMB print<br />
queues can be initialized or started.<br />
16-26<br />
System managers using the OpenVMS queue manager's Autostart capability must leave<br />
Autostart disabled until after <strong>MultiNet</strong> is started <strong>and</strong> NTY devices have been set up.<br />
To set up a print queue with MULTINET_NTYSMB:<br />
1 Create the NTY device.<br />
Use the NTY Control Program (NTYCP) to create the terminal device:<br />
$ NTYCP := $MULTINET:NTYCP<br />
$ NTYCP CREATE PORT NTYnnnn /NODE=node/port<br />
You can invoke the NTYCP program as an OpenVMS "foreign" comm<strong>and</strong>, as shown above, or<br />
run in interactive mode:<br />
$ RUN MULTINET:NTYCP<br />
NTYCP>CREATE PORT NTYnnnn /NODE=node/port<br />
NTYCP>EXIT<br />
NTYCP uses st<strong>and</strong>ard DCL-style comm<strong>and</strong> parsing. The "?" help feature available in other<br />
<strong>MultiNet</strong> utilities is not available in NTYCP.<br />
2 Set up the terminal characteristics:<br />
$ SET TERMINAL NTYnnnn:/PERMANENT/NOBROADCAST/NOTYPEAHEAD/NOWRAP/FORM<br />
3 Set up spooling, if desired:<br />
$ SET DEVICE/SPOOLED=(queue-name,SYS$SYSDEVICE:) NTYnnnn<br />
4 Initialize <strong>and</strong> start the queue:<br />
$ INITIALIZE/QUEUE/ON=NTYnnnn:queue-name/PROCESSOR=MULTINET_NTYSMB/START<br />
The following is an example of a print queue set up to an HP LaserJet printer with a JetDirect card.<br />
$ NTYCP := $MULTINET:NTYCP<br />
$ NTYCP CREATE PORT NTY1001/NODE=hp-laserjet/PORT=9100<br />
%NTYCP-S-CREPORT, device _NTY1001: created to host 192.1.1.5, port 9100<br />
$ SET TERMINAL/PERMANENT NTY1001:/NOBROADCAST/NOTYPEAHEAD/NOWRAP/FORM<br />
$ INITIALIZE/QUEUE/ON=NTY1001: HP_LASERJET/PROCESSOR=MULTINET_NTYSMB/<br />
START<br />
Troubleshooting the MULTINET_NTYSMB<br />
To generate a log file with NTYSMB, do the following:
$ DEFINE/SYSTEM MULTINET_NTYSMB_DEBUG 7<br />
Printer Configuration<br />
The equivalence string for this logical is an integer. Various bits in this value control different<br />
aspects of debug logging. A value of 7 enables full debug logging, <strong>and</strong> is the recommended setting.<br />
Restart the queue. If the OPCOM messages are enabled, a notification is printed telling you that<br />
debugging is enabled.<br />
To turn off the NTYSMB log file, deassign the logical <strong>and</strong> restart the NTYSMB queue(s) that were<br />
(re)started since you defined the logical because the symbiont only looks for the logical when the<br />
queue starts up.<br />
$ DEASSIGN/SYSTEM MULTINET_NTYSMB_DEBUG<br />
The log files are created in MULTINET_SPOOL:NTYSMB_DEBUG_pid.LOG<br />
pid is the hexidecimal process ID of the symbiont process in question. There may be as many as 16<br />
queues sharing the same log file, since log files are per symbiont process, not per queue, <strong>and</strong> each<br />
process can support processing for up to 16 queues.<br />
Since these log files are intended to assist <strong>Process</strong> <strong>Software</strong> in deciphering problems, their output<br />
might not make sense to you.<br />
Troubleshooting the Print Queue<br />
This section describes potential print queue problems <strong>and</strong> recommended solutions.<br />
• When executing REMOTE-PRINTER-QUEUES.COM, the following messages may appear:<br />
%SET-E-NOTSET, error modifying NLPx:<br />
-SYSTEM-W-DEVASSIGN, device has channels assigned<br />
%SET-E-NOTSET, error modifying NLPx<br />
-CLI-E-DEVALSPL, device already spooled<br />
%JBC-I-QUENOTMOD, modifications not made to running queue4<br />
These messages occur when the comm<strong>and</strong> file tries to modify an existing queue. The messages<br />
are only warnings <strong>and</strong> do not affect the queues in any way.<br />
• Another situation may occur where the print job is "stair-stepping" down the page. It appears as<br />
if the job contains carriage line feeds, but no carriage returns.<br />
– If the queue is set up as an LPD queue pointing to a printer, the wrong remote queue name has<br />
been specified in the printer configuration. Check the documentation for the printer's Ethernet<br />
card for the correct remote queue name. (See the Configuring an LPD Protocol Queue<br />
section.)<br />
– If the queue is set up as a STREAM queue pointing to a Hewlett-Packard LaserJet, the<br />
problem is the line termination setting on the printer. Most HPLJ printers are initially<br />
configured with line termination set to =. For printing from VMS systems, the line<br />
termination should be set to =+. Consult the printer documentation about<br />
changing this parameter.<br />
• The print job prints all on one line.<br />
16-27
Printer Configuration<br />
16-28<br />
If this is a STREAM queue pointing to a printer connected to a terminal server, the terminal<br />
server characteristics must be modified. Check the terminal server documentation for the proper<br />
comm<strong>and</strong>s <strong>and</strong> instructions for logging onto the terminal server. The following example shows<br />
the comm<strong>and</strong>s for a Hewlett-Packard 90TL terminal server.<br />
CHANGE PORT port# TELNET SERVER NEWLINE TO HOST <br />
CHANGE PORT port# TELNET SERVER NEWLINE FROM TERMINAL <br />
• The queue prints text properly, but graphics do not print correctly.<br />
If the TELNET negotiation option is ON, you may need to disable it with the SET SUPPRESS-<br />
TELNET parameter described in the <strong>MultiNet</strong> for OpenVMS <strong>Administrator's</strong> Reference.<br />
Before <strong>MultiNet</strong> V3.5, the TELNET negotiation option was always ON when defining a<br />
STREAM queue. Now, the default is to set TELNET negotiation OFF by default, unless it is<br />
using the default port 23. The following example shows how to disable TELNET negotiation.<br />
$ MULTINET CONFIGURE/PRINTER<br />
PRINTER-CONFIG>SEL queue-name<br />
PRINTER-CONFIG>SET SUPPRESS-TELNET ENABLE<br />
PRINTER-CONFIG>EXIT<br />
Be sure all privileges are enabled; then invoke MULTINET:REMOTE-PRINTER-<br />
QUEUES.COM.<br />
• PostScript files do not print.<br />
When printing PostScript files, set the queue to NOFEED. Remove any FLAG pages from the<br />
queue. See the <strong>MultiNet</strong> for OpenVMS <strong>Administrator's</strong> Reference for information about the SET<br />
NOFEED <strong>and</strong> SET FLAG comm<strong>and</strong>s. You should also specify that the OpenVMS form on<br />
which the job is printed be set to the maximum width, <strong>and</strong> defined with /NOWRAP <strong>and</strong> /<br />
NOTRUNC. Use the following comm<strong>and</strong>s to determine the characteristics of the form being<br />
used on the queue:<br />
$ SHOW QUEUE/FORM/FULLform-name<br />
An example of the characteristics on a form called POSTSCRIPT is shown in the following<br />
example:<br />
Form name Number Description<br />
--------- ------ -----------<br />
POSTSCRIPT (stock=DEFAULT) 3 Postscript input; white paper<br />
/LENGTH=66 /MARGIN=(BOTTOM=6) /STOCK=DEFAULT /WIDTH=65535<br />
To define the form with the proper characteristics, use the DEFINE/FORM comm<strong>and</strong>.
Internet Printing Protocol (IPP)<br />
Printer Configuration<br />
The IPP print symbiont is an OpenVMS print symbiont working with the OpenVMS printing<br />
subsystem to implement an IPP Client. It allows printing over a network to printers <strong>and</strong> servers that<br />
support the IPP v1.0 network printing protocol. The user interface is similar to other print<br />
symbionts in that it uses PRINT comm<strong>and</strong>s or system library calls to submit jobs to print queues.<br />
The IPP protocol has specific qualifier values <strong>and</strong> queue settings that must be present to allow the<br />
symbiont to function. This section describes both the configuration of IPP print queues <strong>and</strong> the use<br />
of the PRINT comm<strong>and</strong>. For information on submitting jobs to print queues using system library<br />
calls, see the appropriate OpenVMS documentation.<br />
IPP Protocol Background<br />
The Internet Printing Protocol solves a number of problems in existing network printing protocols;<br />
the most common is the LPD protocol, originally implemented on UNIX operating systems.<br />
From RFC 2568:<br />
"The Internet Printing Protocol (IPP) is an application level protocol that can be used for<br />
distributed printing on the Internet. This protocol defines interactions between a client <strong>and</strong> a<br />
server. The protocol allows a client to inquire about capabilities of a printer, to submit print<br />
jobs <strong>and</strong> to inquire about <strong>and</strong> cancel print jobs. The server for these requests is the Printer;<br />
the Printer is an abstraction of a generic document output device <strong>and</strong>/or a print service<br />
provider. Thus, the Printer could be a real printing device, such as a computer printer or fax<br />
output device, or it could be a service that interfaced with output devices."<br />
IPP has a better error reporting capability than LPD or TELNET. It supports multi-sided printing,<br />
l<strong>and</strong>scape/portrait layouts, <strong>and</strong> multiple pages per physical sheet ("number-up") printing. Because<br />
not all printer models that support IPP will support all capabilities, the IPP protocol includes a way<br />
for the symbiont to query the printer as to its capabilities before a job is sent. If the printer cannot<br />
h<strong>and</strong>le a given request, the job is aborted with an error status. The error status appears in the system<br />
accounting log.<br />
IPP uses the HTTP 1.1 protocol as its transport layer; however, it has its own reserved port number,<br />
port 631. You can use the IPP Symbiont to print to other port numbers, including the st<strong>and</strong>ard<br />
HTTP port (80), but you need to specify the port number as part of the printer URL if the port<br />
number is not the default IPP port number. If you are printing through a firewall this could be a<br />
factor to consider. For a full description of the IPP protocol, see the relevant RFCs listed below.<br />
The IPP Printer Working Group has a web page with at least a partial list of printers that claim to<br />
support IPP. It is at:<br />
http://www.pwg.org/ipp/index.html<br />
16-29
Printer Configuration<br />
Relevant RFCs<br />
16-30<br />
The RFCs related to IPP v1.0 are:<br />
Design Goals for an Internet Printing Protocol RFC 2567<br />
Rationale for the Structure <strong>and</strong> Model <strong>and</strong><br />
Protocol for the Internet Printing Protocol<br />
Additional RFCs are referenced by these, such as the ones describing HTTP v1.1, MIME Media<br />
Types, etc. The specific RFCs are called out in the above documents.<br />
Limitations of this Implementation<br />
The IPP symbiont implements a subset of the IPP v1.0 protocol consisting of all required portions<br />
<strong>and</strong> several selected optional features. Note that not all features are available on all printers; most<br />
printers implement a subset of the available protocol capabilities.<br />
Not all printers claiming to support IPP implement IPP correctly. Some use supersets of HTTP 1.0,<br />
rather than the required HTTP 1.1. Some do unusual things with TCP/IP connections, such as<br />
having extremely short timeouts. The symbiont has been adapted to support as many of these<br />
inconsistencies as possible (see the "EXPECT_LINK_CLOSURES" option for an example). The<br />
symbiont may or may not behave as expected with such printers depending on your particular<br />
network characteristics <strong>and</strong> exactly what the printer manufacturer has done differently from what is<br />
specified in the RFCs. The symbiont should work with any fully compliant IPP v1.0 printer or<br />
server.<br />
Configuration<br />
RFC 2568<br />
Internet Printing Protocol/1.0: Model <strong>and</strong> Semantics RFC 2566<br />
Internet Printing Protocol/1.0: Encoding <strong>and</strong> Transport RFC 2565<br />
Internet Printing Protocol/1.0: Implementer's <strong>Guide</strong> RFC 2639<br />
Mapping between LPD <strong>and</strong> IPP Protocols RFC 2569<br />
The IPP symbiont has a flexible configuration. You can supply the information in the queue setup<br />
itself, as the "/DESCRIPTION=" string which is supported by OpenVMS as part of the<br />
"INITIALIZE/QUEUE" comm<strong>and</strong>. You can supply the information in a "configuration" system<br />
logical name that the symbiont checks. You can use both, putting some information on one place,<br />
<strong>and</strong> some in the other. You can also put configuration information in one or more files <strong>and</strong><br />
reference those files from the /DESCRIPTION string <strong>and</strong>/or "configuration" logical name (see the<br />
"/INCLUDE=" option), or even from other such files. If you have large numbers of queues making<br />
up complicated groupings with similar requirements, this flexibility can help reduce the time<br />
required to set up <strong>and</strong> maintain queues.
Printer Configuration<br />
In addition to the basic configuration information, there are several optional logical names used to<br />
control specific behaviors. Note that the default behaviors may be adequate to your needs.<br />
The following sections describe the various logical names, queue settings, <strong>and</strong> PRINT comm<strong>and</strong><br />
options available with the IPP symbiont. In many cases there is a "Global" version, that affects<br />
all IPP symbiont queues on the system, as well as a "queue-specific" version that affects only a<br />
specified queue. PRINT comm<strong>and</strong> options affect only the job being submitted.<br />
Global Settings<br />
These logical names establish configuration values for all queues on the system, not on a queue-byqueue<br />
basis. Where there are queue-specific settings related to these, these become the default<br />
values, overriding any built-in defaults.<br />
MULTINET_IPP_CONFIG<br />
Specifies one or more of the qualifiers described in the Queue-specific Settings section. These<br />
qualifiers are not case sensitive. Underscores (_) in the qualifier names are optional. Each may be<br />
abbreviated as long as the result is not ambiguous. There is no default. This logical provides<br />
defaults that may be overridden by the queue-specific configuration logical,<br />
MULTINET_IPP_queuename_CONFIG, for a given queue.<br />
MULTINET_IPP_DEFAULT_DOCUMENT_FORMAT<br />
Specifies a string to use as the document format, unless specified differently for a given queue or<br />
print job. The actual document format used on a given job must be a valid MIME media type,<br />
supported by the printer to which the job is sent. The default is "text/plain".<br />
MULTINET_IPP_DOCALIAS_FILE<br />
Specifies document format name aliasing. Rather than having to specify long mime-media-type<br />
names for document formats, you can define local names that are equivalent, <strong>and</strong> the symbiont will<br />
do the replacement. For example, you can define “PS” as equivalent to “application/postscript”,<br />
<strong>and</strong> use it in print comm<strong>and</strong>s as /DOCUMENT_FORMAT=PS. There is an escape mechanism in<br />
case a logical name is ever made into a different MIME-media-type. Prefixing the document format<br />
name with % prevents alias translation. %PS means just send it as PS, do not translate PS into<br />
APPLICATION/POSTSCRIPT in the request.<br />
To use aliasing, define the system logical name MULTINET_IPP_DOCALIAS_FILE with the<br />
filename of the alias file as the equivalence string. The format of the alias file is:<br />
MULTINET_IPP_mime-name<br />
Blank lines are ignored. Lines starting with # are treated as comments <strong>and</strong> are ignored. Document<br />
format name aliasing has been added. Rather than having to specify long mime-media-type names<br />
for document formats, you can now define local names that are equivalent, <strong>and</strong> the symbiont will<br />
do the replacement. For example, you can define "PS" as equivalent to "application/postscript",<br />
<strong>and</strong> use it in print comm<strong>and</strong>s such as:<br />
"/DOCUMENT_FORMAT=PS". The<br />
There is an "escape mechanism" in case a local name is ever made into a different MIME-mediatype.<br />
Prefixing the document format name with "%" prevents alias translation. "%PS" means "just<br />
16-31
Printer Configuration<br />
16-32<br />
send it as 'PS', don't translate "PS" into "application/postscript" in the request.<br />
To use aliasing, define the system logical name "MULTINET_IPP_DOCALIAS_FILE" with the<br />
filename of the alias file as the equivalence string.<br />
The format of lines in the alias file is:<br />
Mime-name: alias, alia, alias...<br />
Blank lines are ignored, <strong>and</strong> lines starting with "#" are treated as comments <strong>and</strong> are ignored.<br />
MULTINET_IPP_IGNORE_DESCRIPTION<br />
MULTINET_IPP_queuename_IGNORE_DESCRIPTION<br />
If this logical is defined, the symbiont ignores the /DESCRIPTION strings for all IPP queues. This<br />
allows use of /DESCRIPTION for other information without affecting the symbiont. Configuration<br />
of the symbiont must be done through use of the MULTINET_IPP_CONFIG logical, or the queuespecific<br />
logical, MULTINET_IPP_queuename_CONFIG if<br />
MULTINET_IPP_IGNORE_DESCRIPTION is defined. The value of the equivalence string for<br />
MULTINET_IPP_IGNORE_DESCRIPTION is not important. The existence or non-existence of<br />
the logical is all that is checked. This logical provides defaults that may be overridden by the<br />
queue-specific configuration logical, MULTINET_IPP_queuename_IGNORE_DESCRIPTION,<br />
for a given queue.<br />
MULTINET_IPP_JOB_RETRY_DELAY<br />
Specifies, as an OpenVMS delta time specification, the length of time to hold a job when it is requeued<br />
due to a temporary problem. The default value is "0 00:10:00.00" (10 minutes).<br />
MULTINET_IPP_MAX_LOG_BYTES<br />
Specifies how many bytes of data will be logged by the send <strong>and</strong> receive routines when running<br />
with logging level set to DETAILED_TRACE. The value is an integer. A negative value sets the<br />
limit to infinite (all data will be logged). A value of zero turns off inclusion of data to the log file. A<br />
positive value sets the actual number of bytes logged, <strong>and</strong> any additional data is ignored. The<br />
default action is to log all data.<br />
MULTINET_IPP_MAX_STREAMS<br />
Specifies the number of streams (queues) that each IPP symbiont process can h<strong>and</strong>le. This is an<br />
integer from 1 to 16. The default is 16.<br />
MULTINET_IPP_LOG_LEVEL<br />
Specifies one of the Logging Levels values listed in Table 16-3, <strong>and</strong> is used to determine how<br />
serious a message must be before it is written to the log file. Only those messages marked as this<br />
level, or as a more serious level, are logged. The default is JOB_TRACE.<br />
MULTINET_IPP_LOGFILE<br />
Specifies the name of the log file. All queues for a given symbiont process will share this file unless<br />
there are individual queue overrides. The default is to create the log file in the default spool<br />
directory, with the name IPP_SYMBIONT_pid.LOG.
Printer Configuration<br />
MULTINET_IPP_OPCOM_LEVEL<br />
Specifies one of the Logging Levels values listed in Table 16-3, <strong>and</strong> is used to determine how<br />
serious a message must be before it is sent to OPCOM. Only those messages marked as this level,<br />
or as a more serious level, are sent. The default is INFO.<br />
MULTINET_IPP_OPCOM_TERMINAL<br />
Specifies the OPCOM operator "terminal" to send OPCOM messages to. Permissible values are<br />
listed later in this section. The default is the "PRINT" operator.<br />
Queue-specific Settings<br />
These items are specified as qualifiers in the queue's /DESCRIPTION string, <strong>and</strong>/or in the<br />
MULTINET_IPP_queuename_CONFIG logical equivalence string...the two are concatenated<br />
before being processed. These qualifiers are not case sensitive. The underscores in the qualifier<br />
names are optional. Each may be abbreviated as long as the result is not ambiguous. The two<br />
sections below contain the complete list of qualifiers.<br />
Queue-specific Required Qualifier<br />
/PRINTER_URI<br />
A valid URI, or list of URIs, for the printer or printers to be sent to from this queue. Wildcards are<br />
allowed ("*" to match one or more characters, "?" for a single character). The individual URIs in<br />
the list are separated from each other with the vertical bar ("|") character. The first URI in the list<br />
that does not include any wildcards is the default printer for the queue. If there are no default<br />
printer URIs <strong>and</strong> you have not specified a particular printer URI with the PRINT comm<strong>and</strong>, the job<br />
is aborted. Any printer URI specified with the PRINT comm<strong>and</strong> must match at least one of the<br />
URIs listed for the queue or the job will be aborted.<br />
Queue-specific Optional Qualifiers<br />
/COMMENT=quoted string<br />
Allows inclusion of a quoted string of text that the symbiont will ignore, other than to write to the<br />
log file <strong>and</strong>/or OPCOM if the logging level is set to SYMBIONT or a more detailed setting.<br />
/COPIES_DEFAULT=number<br />
Specifies the number of copies of each document to print unless specified otherwise on the PRINT<br />
comm<strong>and</strong>. The default value is 1.<br />
/DEBUG<br />
Causes the symbiont to retain all spool files <strong>and</strong> to force DETAILED_TRACE logging to the log<br />
file, regardless of what other settings might be specified. Note that /DEBUG forces the setting for<br />
MAX_LOG_BYTES to a minimum of 512 bytes. You can set it higher, but any setting lower than<br />
512 bytes will be ignored when /DEBUG is used.<br />
16-33
Printer Configuration<br />
16-34<br />
/DEFAULT_DOCUMENT_FORMAT=formatspec or<br />
/DOCUMENT_FORMAT_DEFAULT=formatspec<br />
Specifies the default document format for the queue. This value will be a MIME media type that is<br />
supported for the printer or printers served by this queue. It could also be the string<br />
"***printer_default***", which will result in whatever the target printer defines as its default when<br />
no document format is specified on the PRINT comm<strong>and</strong>.<br />
/EXPECT_LINK_CLOSURES<br />
Specifies that the printer is not fully HTTP 1.1 compliant because it does not support persistent<br />
connections, <strong>and</strong> does not send a "Connection: Close" header line in its last response. Therefore,<br />
the symbiont should assume that such a line was sent in every response, using a new link for each<br />
request, closing the old one, <strong>and</strong> not treating it as an error if the other end closes the link after<br />
sending a response.<br />
/FINISHINGS_DEFAULT=keyword<br />
Specifies finishing operations to be performed on the printed documents. May or may not be<br />
supported by a given IPP server. Any or all of the four available finishings may be specified. Case<br />
is ignored. Keywords are:<br />
• NONE<br />
• STAPLE<br />
• PUNCH<br />
• COVER<br />
• BIND<br />
/[NO]FLAG_DEFAULT<br />
Specifies whether a “job-sheets” attribute will be specified for jobs by default. If<br />
/FLAG_DEFAULT is used, job-sheets will be requested as “st<strong>and</strong>ard”. If /NOFLAG_DEFAULT is<br />
used, job-sheets will be requested as “none”.<br />
/INCLUDE=filename<br />
Specifies a sequential access text file containing additional qualifiers from this list. These qualifiers<br />
are read <strong>and</strong> processed at the point where the /INCLUDE qualifier is encountered, <strong>and</strong> share the<br />
precedence of that point.<br />
/JOB_PRIORITY_DEFAULT=integer<br />
Specifies the priority of the print job. 1 is the lowest, 100 is the highest.<br />
/JOB_RETRY_DELAY=deltatime<br />
Specifies, as an OpenVMS delta time specification, the length of time to hold a job when it is requeued<br />
due to a temporary problem. The default value is "0 00:10:00.00" (10 minutes).<br />
/LOG_FILE=filename<br />
Specifies the name of the queue log file to write messages to for this queue. The default is in<br />
<strong>MultiNet</strong>'s default spool directory, unless overridden by a global setting, as described in Global
Printer Configuration<br />
Settings. The default filename is IPP_SYMBIONT_<strong>Process</strong>_PID.LOG.<br />
/LOG_LEVEL=logging_level<br />
Specifies one of the Logging Levels values listed in Table 16-3 on page 16-42, <strong>and</strong> is used to<br />
determine the severity of a message before it is written to the queue log file. Only those messages<br />
marked as this level, or a more serious one, are logged. The default is JOB_TRACE unless<br />
overridden by a global MULTINET_IPP_LOG_LEVEL logical.<br />
/MAX_LOG_BYTES=number<br />
Specifies how many bytes of data will be logged by the send <strong>and</strong> receive routines when running<br />
with logging level set to DETAILED_TRACE. The value is an integer. A negative value sets the<br />
limit to infinite (all data will be logged). A value of zero turns off inclusion of data to the log file. A<br />
positive value sets the actual number of bytes logged, <strong>and</strong> any additional data is ignored. The<br />
default action is to log all data.<br />
/MEDIA_DEFAULT=name<br />
This attribute identifies the medium that the printer uses for all pages of the Job.<br />
The values for "media" include medium-names, medium-sizes, input-trays <strong>and</strong> electronic forms.<br />
See your printer documentation for details concerning what values are supported for your printer.<br />
St<strong>and</strong>ard keyword values are taken from ISO DPA <strong>and</strong> the Printer MIB <strong>and</strong> are listed in Section 14<br />
of RFC 2566. Some servers may support definition of locally created names as well. See<br />
Table 16-1 for st<strong>and</strong>ard values for input trays. Table 16-1 contains examples of st<strong>and</strong>ard names.<br />
These names include, but are not limited to the following:<br />
Table 16-1 St<strong>and</strong>ard Media Names<br />
Name Description<br />
default The default medium for the output device<br />
iso-a4-white Specifies the ISO A4 white medium<br />
iso-a4-colored Specifies the ISO A4 colored medium<br />
iso-a4-transparent Specifies the ISO A4 transparent medium<br />
na-letter-white Specifies the North American letter white medium<br />
na-letter-colored Specifies the North American letter colored medium<br />
na-letter-transparent Specifies the North American letter transparent medium<br />
na-legal-white Specifies the North American legal white medium<br />
na-legal-colored Specifies the North American legal colored medium<br />
na-9x12-envelope Specifies the North American 9x12 envelope medium<br />
16-35
Printer Configuration<br />
16-36<br />
Table 16-1 St<strong>and</strong>ard Media Names (Continued)<br />
monarch-envelope Specifies the Monarch envelope<br />
na-number-10-envelope Specifies the North American number 10 business envelope medium<br />
na-7x9-envelope Specifies the North American 7x9 inch envelope<br />
na-9x11-envelope Specifies the North American 9x11 inch envelope<br />
na-10x14-envelope Specifies the North American 10x14 inch envelope<br />
na-number-9-envelope Specifies the North American number 9 business envelope<br />
na-6x9-envelope Specifies the North American 6x9 inch envelope<br />
na-10x15-envelope Specifies the North American 10x15 inch envelope<br />
executive-white Specifies the white executive medium<br />
folio-white Specifies the folio white medium<br />
invoice-white Specifies the white invoice medium<br />
ledger-white Specifies the white ledger medium<br />
quarto-white Specified the white quarto medium<br />
iso-a0-white Specifies the ISO A0 white medium<br />
iso-a1-white Specifies the ISO A1 white medium<br />
a Specifies the engineering A size medium<br />
b Specifies the engineering B size medium<br />
c Specifies the engineering C size medium<br />
d Specifies the engineering D size medium<br />
e Specifies the engineering E size medium<br />
The following st<strong>and</strong>ard values are defined for input-trays:<br />
Table 16-2 Input Tray Names<br />
Name Description<br />
top The top input tray in the printer.<br />
middle The middle input tray in the printer.<br />
bottom The bottom input tray in the printer.
Table 16-2 Input Tray Names (Continued)<br />
envelope The envelope input tray in the printer.<br />
manual The manual feed input tray in the printer.<br />
large-capacity The large capacity input tray in the printer.<br />
main The main input tray<br />
side The side input tray<br />
Printer Configuration<br />
/MULTIPLE_DOCUMENT_HANDLING_DEFAULT=keyword<br />
This qualifier is relevant only for jobs consisting of two or more documents, <strong>and</strong> when the IPP<br />
server supports jobs with multiple documents. The qualifier controls finishing operations <strong>and</strong> the<br />
placement of one or more pages onto media sheets. When printing multiple copies, it also controls<br />
the order in which the copies that result are produced. St<strong>and</strong>ard keyword values are<br />
single-document<br />
If a Job has multiple documents, say, the documents are called A <strong>and</strong> B, then the result printing the<br />
data (A <strong>and</strong> then B) will be treated as a single sequence of media sheets for finishing operations;<br />
that is, finishing would be performed on the concatenation of the two documents. The Printer will<br />
not force the data in each document to start on a new page.<br />
If more than one copy is requested, the ordering of the pages resulting from printing will be A, B,<br />
A, B, ..., <strong>and</strong> the Printer will force each copy (A, B) to start on a new media sheet.<br />
separate-documents-uncollated-copies<br />
If a Job has multiple documents, say, the documents are called A <strong>and</strong> B, then the result of printing<br />
each document will be treated as a single sequence of media sheets for finishing operations; that is,<br />
the documents A <strong>and</strong> B would each be finished separately. The Printer will force each copy of the<br />
data in a single document to start on a new sheet.<br />
If more than one copy is made, the ordering of the pages will be A, A, ..., B, B ... .<br />
separate-documents-collated-copies<br />
If a Job has multiple documents, say, A <strong>and</strong> B, then the result will be that each document will be<br />
treated as a single sequence of media sheets for finishing operations; that is, A <strong>and</strong> B would each be<br />
finished separately. The Printer will force each copy of the result of processing the data in a single<br />
document to start on a new sheet.<br />
If more than one copy is made, the ordering of the documents will be A, B, A, B,... .<br />
single-document-new-sheet<br />
Same as 'single-document', except that the Printer will ensure that the first page of each document<br />
in the job is placed on a new media sheet.<br />
The 'single-document' value is the same as 'separate-documents-collated-copies' with respect to<br />
ordering of print-stream pages, but not media sheet generation, since 'single-document' will put the<br />
16-37
Printer Configuration<br />
16-38<br />
first page of the next document on the back side of a sheet if an odd number of pages have been<br />
produced so far for the job, while 'separate-documents-collated-copies' always forces the next<br />
document or document copy on to a new sheet. In addition, if the "finishings" attribute specifies<br />
'staple', then with 'single-document', documents A <strong>and</strong> B are stapled together as a single document<br />
with no regard to new sheets, with 'single-document-new-sheet', documents A <strong>and</strong> B are stapled<br />
together as a single document, but document B starts on a new sheet, but with 'separate-documentsuncollated-copies'<br />
<strong>and</strong> 'separate-documents-collated-copies', documents A <strong>and</strong> B are stapled<br />
separately.<br />
Note! None of these values provide means to produce uncollated sheets within a document, i.e.,<br />
where multiple copies of sheet n are produced before sheet n+1 of the same document.<br />
/NUMBER_UP_DEFAULT=number<br />
Specifies the number of page images to be placed on each side of each sheet of paper. The number<br />
must be an integer that is acceptable to the IPP server. If the number specified is not a value<br />
supported by the server, the job aborts.<br />
/OPCOM_LEVEL=logging_level<br />
Specifies one of the Logging Levels value listed in Table 16-3, <strong>and</strong> is used to determine the severity<br />
of a message before it is sent to OPCOM. Only those messages marked as this level, or at a more<br />
serious level, are sent. The default is INFO unless overridden by a global<br />
MULTINET_IPP_OPCOM_LEVEL logical.<br />
/OPCOM_TERMINAL=opcom_term<br />
Specifies which OPCOM operator "terminal" to send OPCOM messages to. Available values are<br />
listed in OPCOM Terminal Names. The default is the "PRINT" operator. See the OpenVMS<br />
documentation for the "REPLY/ENABLE" comm<strong>and</strong> for more information on OPCOM terminals.<br />
/ORIENTATION_DEFAULT=keyword<br />
Specifies the default page orientation. Case is ignored. Supported values are:<br />
• PORTRAIT<br />
• REVERSE_PORTRAIT<br />
• LANDSCAPE<br />
• REVERSE_LANDSCAPE<br />
/PAGE_RANGE_DEFAULT="range[,range]..."<br />
Specifies the page numbers to print. range is either a single integer page number, or a pair of page<br />
numbers, separated by a hyphen. Multiple range specifications are separated by commas. For<br />
example:<br />
$ PRINT/QUEUE=IPP_QUEUE/PARAM=(PAGE_RANGES="1,3-6,9,10 ,12-14") TEST.TXT<br />
The example specifies the pages: 1, 3, 4, 5, 6, 9, 10, 12, 13, <strong>and</strong> 14. Note that embedded spaces are<br />
allowed, <strong>and</strong> ignored.
QUALITY_DEFAULT=keyword<br />
Specifies the quality of the printed material. Case is ignored. The keywords are:<br />
• DRAFT<br />
• NORMAL<br />
• HIGH<br />
/SIDES_DEFAULT=keyword<br />
Specifies how the printing is to be placed on the paper.<br />
Printer Configuration<br />
• ONE-SIDED: prints each consecutive page upon one side of consecutive media sheets.<br />
• TWO-SIDED-LONG-EDGE: prints each consecutive pair of pages upon the front <strong>and</strong> back<br />
sides of consecutive media sheets, with the orientation of each pair of pages on the long edge.<br />
This positioning is called “duplex” or “head-to-head” also.<br />
• TWO-SIDED-SHORT-EDGE: prints each consecutive pair of pages upon front <strong>and</strong> back sides<br />
of consecutive media sheets, with the orientation of each pair of print-stream pages on the short<br />
edge. This positioning is called “tumble” or “head-to-toe” also.<br />
/SPOOL_DIRECTORY=dirspec<br />
Specifies the directory to use for storing temporary files used while processing print jobs for the<br />
queue. The default is <strong>MultiNet</strong>'s default spool directory.<br />
Order of <strong>Process</strong>ing<br />
The various logicals <strong>and</strong> qualifiers described in the previous two sections sometimes define the<br />
same configuration item. The operation has been defined, but the precedence has not. The order,<br />
from lowest precedence to highest, is:<br />
1 Built-in hard coded default values.<br />
2 Global logicals, as described in the first section.<br />
3 Queue-specific qualifiers found in the /DESCRIPTION string of the queue.<br />
4 Queue-specific qualifiers found in the queue-specific CONFIG logical.<br />
The queue-specific qualifiers are parsed second, allowing for an override of the global settings<br />
on a queue-by-queue basis when that behavior is desired.<br />
Print Comm<strong>and</strong> Options<br />
Print comm<strong>and</strong> options are specified using the OpenVMS st<strong>and</strong>ard /PARAMETERS qualifier. The<br />
list of options is enclosed in parenthesis. For example,<br />
$ PRINT /QUEUE=IPP_PRINTER_1<br />
/PARAMETER=(COPIES=3, ORIENTATION=LANDSCAPE) FILE.TXT<br />
These options are not case sensitive. The underscores in the option names are optional. Each may<br />
be abbreviated as long as the result is not ambiguous. The available print comm<strong>and</strong> options are:<br />
16-39
Printer Configuration<br />
16-40<br />
PRINTER=printer_uri<br />
Specifies the target printer when the queue default is not desired, or when there is no queue default.<br />
The printer URI specified must match at least one of the defined printer_uri's for the print queue.<br />
Wildcards cannot be used in the printer URI.<br />
COPIES=number<br />
Specifies the number of copies of each document to print. The default value is 1.<br />
SIDES=keyword<br />
Specifies how the printing is to be placed on the paper. The keyword must be one of the following:<br />
• ONE-SIDED or 1sided: prints each consecutive page upon one side of consecutive media sheets.<br />
• TWO-SIDED-LONG-EDGE or two-long-edge or 2long_side: prints each consecutive pair of<br />
pages upon the front <strong>and</strong> back sides of consecutive media sheets, with the orientation of each<br />
pair of pages on the long edge. This positioning is called “duplex” or “head-to-head” also.<br />
• TWO-SIDED-SHORT-EDGE or two-short-edge or 2short_side: prints each consecutive pair of<br />
pages upon front <strong>and</strong> back sides of consecutive media sheets, with the orientation of each pair of<br />
print-stream pages on the short edge. This positioning is called “tumble” or “head-to-toe” also.<br />
ORIENTATION=keyword<br />
Specifies the page orientation. The keyword must be one of:<br />
• PORTRAIT<br />
• REVERSE_PORTRAIT<br />
• LANDSCAPE<br />
• REVERSE_LANDSCAPE<br />
These can be abbreviated to any non-ambiguous prefix. Case is ignored.<br />
[NO]FLAG<br />
Requests, or suppresses, the printing of an IPP flag page for the job. The printer may, or may not,<br />
respond to this request. The exact format of this flag page is up to the IPP Server (printer)<br />
implementation.<br />
NUMBER_UP=number<br />
Specifies the number of page images to be placed on each side of each sheet of paper. The number<br />
must be an integer that is acceptable to the IPP server. If the number specified is not a value<br />
supported by the server, the job aborts.<br />
DOCUMENT_FORMAT=MIME-media-type or<br />
DOCUMENT_FORMAT=***printer_default***<br />
Specifies the document format of the files in the job, or specifies use of the printer's built-in default.<br />
The default for this qualifier is the default for the queue. Also, if the queue configuration does not<br />
specify a default document format, the hard coded default is "text/plain".<br />
JOB_PRIORITY=integer
Printer Configuration<br />
Specifies the priority of the print job at the IPP server (not to be confused with the OpenVMS<br />
queue priority). 1 is the lowest, 100 is the highest.<br />
FINISHINGS=“keyword[,keyword]...”<br />
Specifies finishing operations to be performed on the printed documents. May or may not be<br />
supported by a given IPP server. Any or all of the four available finishings may be specified. Case<br />
is ignored.<br />
• BIND<br />
• COVER<br />
• PUNCH<br />
• STAPLE<br />
MULTIPLE_DOCUMENT_HANDLING=keyword<br />
Specifies how you want the printer to print your job. The keyword is one of the following:<br />
• Single_Document or 1Document<br />
• Separate_Documents_Uncollated_Copies or UncollatedSeparate<br />
• Separate_Documents_Collated_Copies or CollatedSeparate<br />
• Single_Document_New_Sheet or NewSheet<br />
Case is ignored. See /MULTIPLE_DOCUMENT_HANDLING_DEFAULT=keyword in this<br />
chapter for information on single document, separate-documents-uncollated-copies, separatedocuments-collated-copies,<br />
<strong>and</strong> single-document-new-sheet h<strong>and</strong>ling.<br />
PAGE_RANGES="range[,range]..."<br />
Specifies the page numbers to print. range is either a single integer page number, or a pair of page<br />
numbers, separated by a hyphen. Multiple range specifications are separated by commas <strong>and</strong><br />
enclosed in double quotes.<br />
For example:<br />
$ PRINT/QUEUE=IPP_QUEUE/PARAM=(PAGE_RANGES="1,3-6, 9, 10, 12-14")<br />
FILE.TXT<br />
Note that embedded spaces are allowed, <strong>and</strong> ignored. The example specifies the pages: 1, 3, 4, 5, 6,<br />
9, 10, 12, 13, <strong>and</strong> 14.<br />
MEDIA=name<br />
This attribute identifies the medium that the Printer uses for all pages of the Job.<br />
The values for "media" include medium-names, medium-sizes, input-trays <strong>and</strong> electronic forms.<br />
See your printer documentation for details concerning what values are supported for your printer.<br />
St<strong>and</strong>ard keyword values are taken from ISO DPA <strong>and</strong> the Printer MIB <strong>and</strong> are listed in section 14<br />
of RFC 2566. Some servers may support definition of locally created names as well.<br />
See Table 16-1 <strong>and</strong> Table 16-2 for the st<strong>and</strong>ard media names.<br />
QUALITY=keyword<br />
16-41
Specifies the quality of the printed material. Case is ignored. The keyword choices are:<br />
• DRAFT<br />
• HIGH<br />
• NORMAL<br />
Allowable Values<br />
Several of the configuration <strong>and</strong> job submission settings require values for OPCOM terminal<br />
names or logging severity levels. This section defines the allowable values for these options.<br />
OPCOM Terminal Names<br />
CARDS<br />
CENTRAL<br />
CLUSTER<br />
DEVICES<br />
DISKS<br />
LICENSE<br />
NETWORK<br />
PRINTER (default)<br />
SECURITY<br />
TAPES<br />
OPER1<br />
OPER2<br />
OPER3<br />
OPER4<br />
OPER5<br />
OPER6<br />
OPER7<br />
OPER8<br />
OPER9<br />
OPER10<br />
OPER11<br />
OPER12<br />
NONE (do NOT send to OPCOM...<br />
except OVERRIDE events)
Logging Levels<br />
Printer Configuration<br />
All values may be abbreviated to any non-ambiguous prefix. These values are not case sensitive.<br />
Table 16-3 Logging Levels<br />
DETAILED_TRACE All events<br />
FILE Events related to processing of individual files<br />
JOB Events related to processing of individual jobs<br />
SYMBIONT Events related to the state of the symbiont<br />
INFO Events providing information about non-error conditions<br />
WARNING Events warning of potential problems that do not halt processing<br />
ERROR Events reporting an error that prevented processing of a job<br />
FATAL Events reporting an error that stopped a queue<br />
ABORT Events reporting an error that caused the symbiont to exit<br />
There are a few messages that are marked to be reported regardless of the setting of the various<br />
OPCOM <strong>and</strong> log file severity levels. These are kept to a minimum, but are considered to be<br />
important enough to override the logging level settings. These cannot be suppressed.<br />
Using Logicals to Define Queue Configurations<br />
This section provides examples of using logicals to define queue configuration prior to queue<br />
initialization. This method can be used both as an alternative to <strong>and</strong> in addition to the<br />
/DESCRIPTION string shown in the previous examples. See the Configuration section for a<br />
complete description of all available qualifiers.<br />
Setting Up IPP Symbiont Queues<br />
Creating an IPP symbiont queue is done using the OpenVMS INITIALIZE/QUEUE comm<strong>and</strong>. All<br />
st<strong>and</strong>ard qualifiers are allowed, but the /DESCRIPTION qualifier has special use with the IPP<br />
symbiont. See the Configuration section.<br />
Setting up IPP Symbiont Queues Using Queue-Specific Logicals<br />
Set up an IPP symbiont queue named ENG_PRINTER to obtain its configuration information from<br />
a queue specific configuration file <strong>and</strong> to print a flag page with each job.<br />
$ DEFINE/SYSTEM MULTINET_IPP_ENG_PRINTER_CONFIG -<br />
_$ "/INCLUDE=SYS$SYSTEM:ENG_PRINTER.SETUP/FLAG_DEFAULT"<br />
$ INITIALIZE/QUEUE/PROCESSOR=MULTINET_IPP_SYMB ENG_PRINTER<br />
16-43
Printer Configuration<br />
16-44<br />
The file SYS$SYSTEM:ENG_PRINTER.SETUP contains:<br />
/printer="ipp://engprinter.mynet.com:631/ipp"<br />
Setting Up an IPP Symbiont Queue to Print Only to a Specific Printer<br />
Set up the IPP symbiont queues named IPP_PRINT_QUEUE <strong>and</strong> IPP_PRINT_2 to print only to<br />
the iprinter.mynet.com printer on port 631. Additionally, IPP_PRINT_2 will always print two<br />
copies of each submitted file if copies are supported by the printer.<br />
$ DEFINE/SYSTEM MULTINET_IPP_CONFIG -<br />
_$ "/PRINTER_URI=""ipp://iprinter.mynet.com:631/ipp"""<br />
$ INITIALIZE/QUEUE /PROCESSOR=MULTINET_IPP_SYMB IPP_PRINT_QUEUE<br />
$ INITIALIZE/QUEUE /PROCESSOR=MULTINET_IPP_SYMB -<br />
_$ /DESCRIPTION="/copies_default=2" IPP_PRINT_2<br />
Setting Up to Print to Multiple Printers Using Wildcards<br />
Set up an IPP symbiont queue to print to any IPP printer in the mynet.com domain, with the default<br />
printer being iprinter.mynet.com:<br />
$ INITIALIZE/QUEUE /PROCESSOR=MULTINET_IPP_SYMB /DESCRIPTION="/printer=<br />
""http://iprinter.mynet.com:631/ipp|*.mynet.com""" IPP_PRINT_QUEUE<br />
Setting Up Two Queues Using a Disk File for Queue Settings<br />
Set up two IPP symbiont queues to print to any printer in the mynet.com domain, with the default<br />
printer being iprinter.mynet.com for one queue, <strong>and</strong> oprinter.mynet.com for the other. Log all<br />
possible messages to the log file, but send only messages more severe than FILE_TRACE to<br />
OPCOM. Use a 5 minute retry delay, <strong>and</strong> make the document format default the same as the<br />
printer's default. Use a disk file for the configuration information common to both queues:<br />
$ INITIALIZE/QUEUE /PROCESSOR=MULTINET_IPP_SYMB -<br />
_$ /DESCRIPTION="/printer=<br />
""http://iprinter.mynet.com:631/ipp|*.mynet.com""<br />
/include=SYS$SYSTEM:IPP_QUEUE.SETUP" IPRINTER_QUEUE<br />
$ INITIALIZE/QUEUE /PROCESSOR=MULTINET_IPP_SYMB -<br />
_$ /DESCRIPTION="/printer=<br />
""http://oprinter.mynet.com:631/ipp|*.mynet.com""<br />
/include=SYS$SYSTEM:IPP_QUEUE.SETUP" OPRINTER_QUEUE<br />
The file SYS$SYSTEM:IPP_QUEUE.SETUP contains:<br />
/log_level=DETAILED_TRACE<br />
/opcom_level=FILE_TRACE<br />
/job_retry_delay="0 00:05:00.00"<br />
/default_document_format=***printer_default***
Printer Configuration<br />
Setting Up Two Queues with no Configuration Values in the INITIALIZE<br />
Comm<strong>and</strong><br />
Do the same as the prior example, but put as much of the configurations in disk files as possible to<br />
allow changes to queue characteristics without having to re-initialize the queues:<br />
$ INITIALIZE/QUEUE /PROCESSOR=MULTINET_IPP_SYMB -<br />
_$ /DESCRIPTION="/INCLUDE=SYS$SYSTEM:IPP_IPRINTER.SETUP" IPRINTER_QUEUE<br />
$ INITIALIZE/QUEUE /PROCESSOR=MULTINET_IPP_SYMB -<br />
_$ /DESCRIPTION="/INCLUDE=SYS$SYSTEM:IPP_OPRINTER.SETUP" OPRINTER_QUEUE<br />
The file SYS$SYSTEM:IPP_IPRINTER.SETUP contains:<br />
/printer="http://iprinter.mynet.com:631/ipp|*.mynet.com"<br />
/include=SYS$SYSTEM:IPP_QUEUE.SETUP<br />
The file SYS$SYSTEM:IPP_OPRINTER.SETUP contains:<br />
/printer="http://oprinter.mynet.com:631/ipp|*.mynet.com"<br />
/include=SYS$SYSTEM:IPP_QUEUE.SETUP<br />
The file SYS$SYSTEM:IPP_QUEUE.SETUP contains:<br />
/log_level=DETAILED_TRACE<br />
/opcom_level=FILE_TRACE<br />
/job_retry_delay="0 00:05:00.00"<br />
/default_document_format=***printer_default***<br />
Submitting Jobs to IPP Symbiont Print Queues<br />
This section describes how to submit jobs to the IPP symbiont print queues.<br />
Printing a Single Text File to an IPP Queue<br />
Print the file FOO.TXT to the IPRINTER (default destination printer) set up in the prior examples:<br />
$ PRINT/QUEUE=IPRINTER_QUEUE foo.txt<br />
Specifying the Destination Printer on the Print Comm<strong>and</strong><br />
Print a single text file to a non-default printer on a queue with a wild carded printer URL:<br />
$ PRINT /QUEUE=iprinter_queue -<br />
_$ /PARAM=(printer="ipp://another.mynet.com/ipp/port1") foo.txt<br />
Note! The above will fail unless the queue specifies another.mynet.com as a legal URL, either<br />
explicitly or by using wildcards.<br />
Using Other Print Qualifiers<br />
Print a text file to a default printer on a queue but specify the document format <strong>and</strong> additional<br />
copies:<br />
$ PRINT /QUEUE=iprinter_queue -<br />
_$ /PARAM=(document="plain/text",copies=3)foo.txt<br />
16-45
Printer Configuration<br />
MULTINET IPP SHOW Comm<strong>and</strong><br />
16-46<br />
The MULTINET IPP SHOW utility allows a user to learn the capabilities supported by an IPP<br />
server. The comm<strong>and</strong> syntax is:<br />
$ MULTINET IPP SHOW server_URI /qualifiers...<br />
Refer to the <strong>MultiNet</strong> for OpenVMS Administrator’s Reference <strong>Guide</strong>, Chapter 1, for details.
Chapter 17<br />
RMT Server <strong>and</strong> Client Configuration<br />
This chapter explains how to configure the RMT (Remote Magnetic Tape) server, <strong>and</strong> how to use<br />
RMTALLOC (the RMT client) with tape drives <strong>and</strong> CD-ROM drives.<br />
For Information About See This Section<br />
RMT server Configuring the Remote Magnetic Tape Server<br />
General information about the RMT client About the RMT Client<br />
RMTALLOC Using RMTALLOC<br />
RMTALLOC qualifiers Using RMTALLOC Qualifiers<br />
Configuring the Remote Magnetic Tape Server<br />
17-The <strong>MultiNet</strong> remote magnetic tape server (RMT) uses the BSD RMT protocol to allow UNIX <strong>and</strong> PC<br />
users to access tape drives on OpenVMS systems. Most systems derived from BSD 4.2 <strong>and</strong> 4.3 support<br />
the rdump <strong>and</strong> rrestore comm<strong>and</strong>s for accessing tape drives served by RMT.<br />
To enable <strong>and</strong> configure the <strong>MultiNet</strong> RMT server:<br />
1 Make sure RSHELL works from the UNIX Operating system user "root" to the OpenVMS user<br />
ROOT. If no OpenVMS user ROOT exists, the RMT server uses the OpenVMS user SYSTEM.<br />
Note! For ROOT <strong>and</strong> SYSTEM, the system-wide MULTINET:HOSTS.EQUIV file is ignored <strong>and</strong> an<br />
explicit entry in SYS$LOGIN:.RHOSTS is required to grant access.<br />
2 Make sure the ROOT/SYSTEM LOGIN.COM <strong>and</strong> the system-wide SYLOGIN.COM do not<br />
print anything when you issue remote RSHELL (under OpenVMS) or rsh (under the UNIX<br />
Operating System or on PCs) comm<strong>and</strong>s. Anything written to SYS$OUTPUT from these<br />
comm<strong>and</strong> procedures interferes with the RMT protocol.<br />
The following example shows comm<strong>and</strong>s that prevent output from being displayed by SYSTEM/<br />
ROOT LOGIN.COM <strong>and</strong> SYLOGIN.COM.<br />
17-1
RMT Server <strong>and</strong> Client Configuration<br />
17-2<br />
$ VERIFY = 'F$VERIFY(0) ! Turn off verify without echoing<br />
$ IF F$MODE() .EQS. "OTHER" THEN EXIT ! If a DETACHED process (RSHELL)<br />
. . .<br />
$ IF VERIFY THEN SET VERIFY ! If a batch job, may want to turn<br />
! verify back on.<br />
You can specify either UNIX- or OpenVMS-style magtape device names or an OpenVMS file<br />
name for writing to a disk file.<br />
When you specify UNIX-style names, options are encoded in the unit number (minor device<br />
number). The correspondence between the options <strong>and</strong> their associated unit numbers is as follows:<br />
Device Options<br />
mt0<br />
through<br />
mt3<br />
mt4<br />
through<br />
mt7<br />
mt8<br />
through<br />
mt11<br />
mt12<br />
through<br />
mt15<br />
mt16<br />
through<br />
mt19<br />
mt20<br />
through<br />
mt23<br />
rmt0<br />
through<br />
rmt3<br />
rmt4<br />
through<br />
rmt7<br />
rmt8<br />
through<br />
rmt11<br />
/NOMOUNT /STREAM /DENS=800 /REWIND /NOUNLOAD<br />
/NOMOUNT /STREAM /DENS=800 /NOREWIND /NOUNLOAD<br />
/NOMOUNT /STREAM /DENS=160 /REWIND /NOUNLOAD<br />
/NOMOUNT /STREAM /DENS=160 /NOREWIND /NOUNLOAD<br />
/NOMOUNT /STREAM /DENS=625 /REWIND /NOUNLOAD<br />
/NOMOUNT /STREAM /DENS=625 /NOREWIND /NOUNLOAD<br />
/NOMOUNT /NOSTREAM /DENS=800 /REWIND /NOUNLOAD<br />
/NOMOUNT /NOSTREAM /DENS=800 /NOREWIND /NOUNLOAD<br />
/NOMOUNT /NOSTREAM /DENS=16 /REWIND /NOUNLOAD
Device Options<br />
rmt12<br />
through<br />
rmt15<br />
rmt16<br />
through<br />
rmt19<br />
rmt20<br />
through<br />
rmt23<br />
RMT Server <strong>and</strong> Client Configuration<br />
The OpenVMS tape drive name is chosen automatically as the first tape drive, or you can set it<br />
using the NET-CONFIG SET DEFAULT-RMT-TAPE-DEVICE comm<strong>and</strong>.<br />
When you specify OpenVMS-style names, the options are encoded in qualifiers; the exact format<br />
is: vms_node_name:volume_name[/qualifiers[...]]<br />
For example: # rdump 0f abc.com:/dev/rmt8 /usr \<br />
or:<br />
# rdump 0f abc.com:mua0:/nomount/nostream \<br />
/dens=1600/nounload /USR<br />
or:<br />
/NOMOUNT /NOSTREAM /DENS=16 /NOREWIND /NOUNLOAD<br />
/NOMOUNT /NOSTREAM /DENS=62 /REWIND /NOUNLOAD<br />
/NOMOUNT /NOSTREAM /DENS=62 /NOREWIND /NOUNLOAD<br />
# rdump 0f abc.com:mua0:xxx/nostream<br />
/dens=1600/nounload \<br />
/comment="Please mount volume XXX on drive mua0" /usr<br />
Table 17-1 shows the qualifiers available for OpenVMS tape drive names.<br />
Table 17-1 RMT Server Tape Drive Name Qualifiers<br />
Qualifiers Description<br />
/BLOCKSIZE=size Block size at which to write the tape. Default: 65534 bytes.<br />
/DENSITY=density Specifies the density at which to write a tape. Default: current<br />
density.<br />
/[NO]REWIND Specifies whether to rewind the drive on close; ignored unless<br />
/NOMOUNT is specified. Default: /REWIND.<br />
/[NO]UNLOAD Specifies whether to unload the drive on close. Default: /UNLOAD.<br />
17-3
RMT Server <strong>and</strong> Client Configuration<br />
About the RMT Client<br />
17-4<br />
Table 17-1 RMT Server Tape Drive Name Qualifiers (Continued)<br />
Qualifiers Description<br />
/COMMENT="string" Comment to display in the remote OPCOM message, either<br />
appended to or replacing the default text, depending on the resulting<br />
string length being less than the 78-character maximum. This<br />
message is the only opportunity to send a tape-specific message to<br />
the remote operator. (MOUNT/COMMENT strings are not passed to<br />
a remote system.) Because RMTALLOC will not complete until a<br />
tape has been loaded <strong>and</strong> the drive is online, use COMMENT to<br />
make sure the operator is aware of your request.<br />
/[NO]MOUNT Mounts the tape drive using the OpenVMS MOUNT service.<br />
/NOMOUNT accesses the tape drive without mounting it. This<br />
qualifier is used for UNIX utilities which expect the tape drive to<br />
hold its current position (not rewind) if they close it. By not mounting<br />
it, the tape drive does not rewind when dismounted. Default:<br />
/MOUNT.<br />
/[NO]STREAMING Accesses the tape drive as a sequential device (a UNIX character<br />
device). /NOSTREAMING accesses the tape drive as a raw device (a<br />
UNIX block device). Default: /STREAMING.<br />
The RMT client MULTINET RMTALLOC is used for accessing tape or CD-ROM drives on<br />
remote hosts over TCP (using RSHELL 1 ). RMTALLOC depends on an RMT server to function<br />
properly. RMTALLOC creates a pseudo device2 that appears as an OpenVMS physical device to<br />
the OpenVMS BACKUP, COPY, <strong>and</strong> other utilities. The actual tape or CD-ROM drive can be on<br />
another <strong>MultiNet</strong> OpenVMS system or on any host running the RMT server, such as those running<br />
the BSD or SunOS UNIX operating system.<br />
For CD-ROM, RMTALLOC treats the drive as a file system, which speeds file access.<br />
There are some limits to the types of tape devices you can access on other operating systems <strong>and</strong><br />
the amount of control available. Because UNIX tapes <strong>and</strong> tape drivers cannot write variable-length<br />
blocks <strong>and</strong> do not allow skipping forward over records between read operations, they cannot be<br />
used with OpenVMS BACKUP or COPY comm<strong>and</strong>s.<br />
Limitations of UNIX Devices <strong>and</strong> <strong>Software</strong><br />
The following list describes known limitations of common UNIX devices <strong>and</strong> software:<br />
1. If restrictions apply where RSHELL does not work, or if RSHELL outputs spurious login messages or greetings,<br />
RMTALLOC does not work.<br />
2. The pseudo device is named "RMTx:", x is the unit number.
RMT Server <strong>and</strong> Client Configuration<br />
• UNIX QIC tape drives cannot be used.<br />
• SunOS RMT servers require you to use /UNIX_SERVER=BROKEN so you can back up one<br />
single-volume BACKUP saveset. Use BACKUP/REWIND to copy to or from tape.<br />
• ULTRIX RMT servers require you to use /UNIX_SERVER=ULTRIX to obtain full OpenVMS<br />
tape functionality.<br />
• SGI's IRX RMT server (as of 4.0.5) does not interoperate with OpenVMS tape operations.<br />
• IBM RS6000/AIX requires a special translation on the IBM side because IBM uses incompatible<br />
RMT comm<strong>and</strong>s.<br />
Using RMTALLOC<br />
To use RMTALLOC:<br />
1 Make sure the media is in the drive <strong>and</strong> the drive is online. If you verify this, use the<br />
/SEMANTICS=(COMMENT=comment) qualifier to inform the remote VMS operator of a<br />
pending device mount.<br />
2 Allocate the drive with RMTALLOC.<br />
3 Mount the tape or CD-ROM drive. Use the same MOUNT comm<strong>and</strong> you would for a VMS<br />
device.<br />
4 Read from or write to the tape, or read the information from the CD-ROM.<br />
5 Dismount the tape or CD-ROM drive.<br />
6 Deallocate the tape or CD-ROM drive.<br />
7 Remove the media from the drive.<br />
In its simplest form, you can specify RMTALLOC as follows:<br />
$ MULTINET RMTALLOC hostname::devicename<br />
For example, for a tape device, enter:<br />
$ RMTALLOC CONE.IRIS.COM::MUA0: MYTAPE<br />
For a CD-ROM drive, enter:<br />
$ RMTALLOC /CD CONTROL::DISK$CD: MYCD /USER=SYSTEM<br />
These examples are explained further in the following sections.<br />
RMTALLOC Tape Drive Access Example<br />
The following example shows how to allocate a tape drive <strong>and</strong> write to tape using the OpenVMS<br />
TAR utility:<br />
$ RMTALLOC CONE.FLOWERS.COM::MUA0: MYTAPE<br />
%RMT-I-ALLOC, _MYSYS$RMT1: allocated (CONE.FLOWERS.COM::MUA0:)<br />
$ MOUNT /FOREIGN /RECORD_SIZE=512 /BLOCK_SIZE=10240 MYTAPE<br />
%MOUNT-I-MOUNTED, MYTAPE mounted on _MYSYS$RMT1:<br />
17-5
RMT Server <strong>and</strong> Client Configuration<br />
17-6<br />
$ TAR /ARCHIVE=MYTAPE WRITE AFILE.TXT<br />
%TAR-S-WRITTEN, written USERS:[ME]AFILE.TXT;1 (13495 bytes)<br />
%TAR-S-TOTWRITE, total of 1 file written<br />
$ DISMOUNT _MYSYS$RMT1:<br />
$ DEALLOCATE _MYSYS$RMT1:<br />
In this example, the host CONE.FLOWERS.COM contains the tape drive. The two colons<br />
separating the host name follow the style of DECnet device specifications; RMTALLOC accepts<br />
either single or double colon separators. MYTAPE is the tape logical name associated with the<br />
pseudo device. In the MOUNT statement, the /FOREIGN qualifier specifies that the device is not<br />
file structured.<br />
RMTALLOC CD-ROM Access Examples<br />
In the first example, a CD-ROM on an OpenVMS host is accessed from another OpenVMS host:<br />
$ RMTALLOC/CD/NOWRITE CONTROL::DISK$CD: MYCD /USERNAME=SYSTEM<br />
%RMT-I-ALLOC, _MYSYS$RCD3: allocated (CONTROL.FLOWERS.COM::DISK$CD:)<br />
$ MOUNT/OVERRIDE=ID MYCD:<br />
%MOUNT-I-WRITELOCK, volume is write locked<br />
%MOUNT-I-MOUNTED, VMS055LST1 mounted on _MYSYS$RCD3:<br />
Read from the CD-ROM drive, then dismount <strong>and</strong> deallocate the drive:<br />
$ DISMOUNT MYCD:<br />
$ DEALLOCATE MYCD:<br />
In this example:<br />
• The RMTALLOC statement includes the /CD qualifier to indicate the device is a CD-ROM<br />
drive.<br />
• The /NOWRITE qualifier is the default whenever you specify /CD; omitting it indicates the<br />
device is read-only.<br />
• CONTROL: is the host on which the CD-ROM is located.<br />
• DISK$CD: is the drive name.<br />
• MYCD is the device name.<br />
• The /USER=SYSTEM qualifier ensures the SYSTEM account is accessed on the remote host 1 .<br />
• The /MOUNT comm<strong>and</strong> uses the /OVERRIDE=ID qualifier to inhibit MOUNT protection<br />
checks of the volume identifier in the CD-ROM label.<br />
• The DISMOUNT <strong>and</strong> DEALLOCATE comm<strong>and</strong>s are used after information is read from the<br />
CD-ROM.<br />
1. If the remote host is an OpenVMS system, the account used must have LOG_IO privilege.
In the next example, a CD-ROM drive on a UNIX host is accessed:<br />
RMT Server <strong>and</strong> Client Configuration<br />
$ RMTALLOC/CD/NOWRITE UNIXBOX::"/dev/rsr1" MYCD /USERNAME=root<br />
%RMT-I-ALLOC, _MYSYS$RCD3: allocated (UNIXBOX.FLOWERS.COM::/dev/rsr0)<br />
$ MOUNT/OVERRIDE=ID MYCD:<br />
%MOUNT-I-WRITELOCK, volume is write locked<br />
%MOUNT-I-MOUNTED, VMS055LST2 mounted on _MYSYS$RCD3:<br />
Read from the CD-ROM drive, then dismount <strong>and</strong> deallocate the drive:<br />
$ DISMOUNT MYCD:<br />
$ DEALLOCATE MYCD:<br />
In this example, the RMTALLOC statement contains the name of the UNIX host (UNIXBOX::)<br />
that has the CD-ROM drive. The device name is specified in UNIX style. If the device name is not<br />
specified, the default is the "/dev/rsr0" device.<br />
The user name is set to the "root" login, which is a UNIX login similar to the OpenVMS SYSTEM<br />
login. The MOUNT, DISMOUNT, <strong>and</strong> DEALLOCATE comm<strong>and</strong>s are the same whether the CD-<br />
ROM is on another OpenVMS system or a UNIX host.<br />
Using RMTALLOC Qualifiers<br />
RMTALLOC qualifiers, apart from those already discussed (/CD, /NOWRITE, <strong>and</strong><br />
/USERNAME), provide the following additional features:<br />
VMS-to-VMS negotiation Remote operator interaction Remote login control<br />
Message suppression Write protection<br />
VMS-to-VMS Negotiation<br />
When accessing a drive on an OpenVMS host, if both systems are running <strong>MultiNet</strong>, RMT uses an<br />
improved protocol to transfer OpenVMS device attributes <strong>and</strong> I/O completion status values<br />
between your system <strong>and</strong> the remote host. Because this negotiation is compatible with UNIX<br />
Operating System implementations of RMT (including BSD <strong>and</strong> SunOS), it is enabled by default.<br />
You may disable it with the RMTALLOC /NOVMS_ATTRIBUTES qualifier if compatibility<br />
problems arise.<br />
Suppressing Messages<br />
Use the /NOLOG qualifier to suppress system status messages. Use this option in DCL comm<strong>and</strong><br />
procedures to prevent the messages from displaying. /LOG is the default.<br />
Controlling Remote Login<br />
Use the /PASSWORD qualifier to specify a password for the remote host when you do not have a<br />
.RHOSTS file. This qualifier poses a security risk because the password is transmitted over the<br />
17-7
RMT Server <strong>and</strong> Client Configuration<br />
17-8<br />
network as plain text. When you use /PASSWORD, the REXEC server (instead of the RSHELL<br />
server) is called on the remote host. The password is in the format used by the system you are<br />
contacting.<br />
Similarly, use the /USERNAME qualifier to specify the login name to access on the remote system.<br />
On a UNIX system, the specified login must exist in the /etc/passwd file.<br />
Use the /TRUNCATE_USERNAME qualifier to truncate an OpenVMS user name to a maximum<br />
of eight characters for use with some UNIX systems.<br />
Interacting with the Remote Operator<br />
Use the /SEMANTICS qualifier only with tape drive access to interact with the operator of the<br />
remote system or to specify tape drive information to the remote system.<br />
Use the optional BLOCKSIZE <strong>and</strong> DENSITY values to specify information used by the remote<br />
system to read the tape. All other values send messages to the operator via the OPCOM message<br />
facility. Without specifying any values, the following information is displayed when RMTALLOC<br />
is called:<br />
%%%%%%%%%%% OPCOM date time %%%%%%%%%%%<br />
FROM NODE nodename AT date time<br />
REQUEST nn, FROM USER username ON nodename<br />
Please mount device _nodename$devicename:<br />
RMT tape service request from nodename.domain<br />
The COMMENT value is specified as a string enclosed in double-quotes; the information is<br />
displayed in the remote OPCOM message, either appended to or replacing the default text<br />
depending on whether the resulting length is less than the 78-character maximum. Supplying the<br />
COMMENT value is the only way you can send a tape-specific message to the remote operator.<br />
The OPCOM message from the DCL MOUNT/COMMENT comm<strong>and</strong> is not passed to the remote<br />
RMT server; this message is only sent to OPCOM for a local operation. The default RMTALLOC<br />
comm<strong>and</strong> mounts the remote tape foreign, causing an OPCOM message to be generated if the tape<br />
drive is offline.<br />
Note! The RMTALLLOC /SEMANTICS=NOMOUNT comm<strong>and</strong> does not work correctly with<br />
multivolume BACKUP savesets.<br />
Write Protection<br />
Use the /WRITE qualifier to make sure that write protection is respected; /NOWRITE is the default<br />
for CD-ROM drives.<br />
By default, RMTALLOC mounts a remote tape drive for read-write access. If the remote tape drive<br />
is physically protected from write access, you must use /NOWRITE to indicate you want read-only<br />
access to the tape drive. Otherwise, the remote UNIX RMT server usually returns an error<br />
indicating "Permission Denied."
Chapter 18<br />
Configuring <strong>and</strong> Managing FTP<br />
The FTP (File Transfer Protocol) server provides file access between remote systems. Information<br />
about using this utility is in the <strong>MultiNet</strong> for OpenVMS User's <strong>Guide</strong>.<br />
FTP is configured automatically during the <strong>MultiNet</strong> installation procedure. This chapter explains<br />
how to administer the FTP client <strong>and</strong> server.<br />
Configuring the FTP Client Managing an FTP Server<br />
Configuring the FTP Client<br />
Configuring the FTP client consists of creating a MULTINET:FTP.INIT file for site-specific<br />
purposes. When the FTP client is started, the comm<strong>and</strong>s in the MULTINET:FTP.INIT file are<br />
executed before the comm<strong>and</strong>s in the SYS$LOGIN:FTP.INIT file of the user running FTP. See the<br />
<strong>MultiNet</strong> for OpenVMS User's <strong>Guide</strong> for more information about creating FTP.INIT files.<br />
The FTP client censors the output of the NLST/LIST comm<strong>and</strong>s. A period (.) replaces unprintable<br />
characters.<br />
If the logical name MULTINET_FTP_DELAY_TRANSFER_NEGOTIATION is defined, then the<br />
FTP client does not attempt to negotiate STRU O VMS transfer mode until after you have logged<br />
into the remote system successfully. You can define this logical at the user or system level.<br />
$ DEFINE MULTINET_FTP_DELAY_TRANSFER_NEGOTIATION anything<br />
If the logical MULTINET_FTP_SIZE_BEFORE_GET is defined to FALSE, NO, or 0 (zero) the<br />
SIZE comm<strong>and</strong> will not be sent before the GET comm<strong>and</strong> for a file. When the logical is not<br />
defined, or is defined to a value other than FALSE, NO, or 0, the SIZE comm<strong>and</strong> is sent. Any<br />
returned value is used to preallocate the file size <strong>and</strong> to report progress of a file transfer. Some FTP<br />
servers leave the file open accidentally after the SIZE comm<strong>and</strong>.<br />
If the logical name MULTINET_FTP_NONPASV is defined, then the FTP client will start up in<br />
PASSIVE OFF mode. The default client behavior is PASSIVE ON.<br />
18-1
Configuring <strong>and</strong> Managing FTP<br />
Managing an FTP Server<br />
18-2<br />
Managing an FTP server may include the following tasks:<br />
• Creating an anonymous FTP login (see the Configuring Anonymous FTP section).<br />
• Creating an FTP server login comm<strong>and</strong> procedure (see the Creating an FTP Server Login<br />
Comm<strong>and</strong> Procedure section).<br />
• Using log files (see the Using FTP Log Files section).<br />
• Managing FTP security (see the Managing FTP Security section).<br />
• Specifying a message at connect time (see the Specifying a Message at Connect Time section).<br />
• Specifying UNIX-style listings (see the Specifying UNIX-Style Listings section).<br />
• Specifying the maximum idle time before a connection times out (see the Specifying the<br />
Maximum Idle Time section).<br />
• Using FTP server site comm<strong>and</strong>s (see the Using FTP Site Comm<strong>and</strong>s section).<br />
• Using Network Service Monitoring (see the Network Service Monitoring section).<br />
• Using Session Accounting (see the Session Accounting section).<br />
Configuring Anonymous FTP<br />
To set up anonymous FTP access on your system:<br />
1 Create an account named ANONYMOUS with the password GUEST. Any password works<br />
from the remote host but the account is validated with the password GUEST. Use the OpenVMS<br />
AUTHORIZE utility to create the account:<br />
$ RUN SYS$SYSTEM:AUTHORIZE<br />
UAF>ADD ANONYMOUS /PASSWORD=GUEST /OWNER="Anonymous FTP" -<br />
/DEVICE=device/UIC=[uic]<br />
UAF> Ctrl/Z<br />
$<br />
uic is the UIC to use for ANONYMOUS.<br />
device is the device on which the directory [ANONYMOUS] is located.<br />
2 Use the NOLOCAL, NOBATCH, NOREMOTE, <strong>and</strong> NODIALUP access restrictions to the<br />
ANONYMOUS login to prevent other forms of access. You set these restrictions by running<br />
AUTHORIZE <strong>and</strong> issuing the comm<strong>and</strong>:<br />
UAF>MODIFY ANONYMOUS /NOLOCAL /NOBATCH /NOREMOTE /NODIALUP<br />
3 To prevent access to the account through DECnet, do not grant the NETMBX privilege to<br />
ANONYMOUS. To make sure that ANONYMOUS does not have the NETMBX privilege,<br />
issue the following AUTHORIZE comm<strong>and</strong>:<br />
UAF>MODIFY ANONYMOUS /PRIV=NONETMBX /DEFPRIV=NONETMBX
Configuring <strong>and</strong> Managing FTP<br />
4 To restrict anonymous FTP access to the [ANONYMOUS] directory tree, use the NET-CONFIG<br />
utility SET ANONYMOUS-FTP-DIRECTORY <strong>and</strong> SET ANONYMOUS-FTP-ACCESS to set<br />
this access restriction. See the <strong>MultiNet</strong> for OpenVMS <strong>Administrator's</strong> Reference for additional<br />
information about NET-CONFIG comm<strong>and</strong>s.<br />
Anonymous FTP server processes are created with the process name *FTP_pwd,<br />
pwd is the password the user specifies.<br />
By convention, many people specify GUEST, their personal name, or their local user name for the<br />
password, because anything is accepted.<br />
If you do not want to create FTP_SERVER.LOG files in the anonymous directory, assign a new<br />
default directory for the login with a directory restriction to make sure the log files appear in the<br />
correct directory. In this example, an alternate FTP directory is created for the log files:<br />
$ SET DEFAULT SYS$SYSTEM<br />
$ RUN SYS$SYSTEM:AUTHORIZE<br />
UAF>MODIFY ANONYMOUS/DEVICE=SYS$COMMON:/DIR=[SYSMGR.ANONYMOUS]<br />
UAF>EXIT<br />
$ CREATE/DIRECTORY/OWNER=ANONYMOUS SYS$COMMON:[SYSMGR.ANONYMOUS]<br />
$ MULTINET CONFIGURE<br />
NET-CONFIG>SET ANONYMOUS-FTP-DIRECTORY USERS:[ANONYMOUS]<br />
NET-CONFIG>EXIT<br />
$<br />
You can now control the setting of the MULTINET_ANONYMOUS_FTP_CONTROL logical<br />
name using either the network configuration utility ($ MULTINET CONFIGURE) or the menu<br />
configuration utility ($ MULTINET CONFIGURE /MENU). For example, using the network<br />
configuration utility:<br />
$ MULTINET CONFIGURE<br />
NET-CONFIG>SET ANONYMOUS-FTP-ACCESS NOWRITE,NOSPAWN<br />
NET-CONFIG>EXIT<br />
[Changes take effect after the next <strong>MultiNet</strong> reload]<br />
$<br />
This is a new method for controlling the definition of that logical name. Other methods required<br />
you to define the logical name yourself during system startup. You can make the change take effect<br />
before the next system reboot by defining the associated logical name DEFINE /SYSTEM<br />
/EXECUTIVE_MODE MULTINET_ANONYMOUS_FTP_CONTROL "...". For example:<br />
$ DEFINE /SYSTEM /EXECUTIVE_MODE MULTINET_ANONYMOUS_FTP_CONTROL -<br />
_$ “NOSPAWN,NODELETE”<br />
The default setting is NOWRITE, NOSPAWN. See Table 18-1 for other options.<br />
If you do not want to use the “anonymous” name, there is a logical that will allow users to use<br />
names which are not anonymous, but have the same anonymous account behavior. The<br />
MULTINET_ANONYMOUS_USERNAMES logical usage is shown in the following example:<br />
18-3
Configuring <strong>and</strong> Managing FTP<br />
18-4<br />
$ DEFINE /SYSTEM /EXEC MULTINET_ANONYMOUS_USERNAMES<br />
_$“anonymous,user1,user2,..."<br />
If you define this logical as shown in the preceding example <strong>and</strong> set the “user1,user2,...” accounts<br />
using the same password as the anonymous account, then the FTP server will treat “user1,user2,...”<br />
as an anonymous type of user.<br />
Specifying a Range of FTP Server Port Numbers<br />
The logical MULTINET_FTP_SERVER_DATA_PORT_RANGE specifies the range of port<br />
numbers to use for passive connections. The format is:<br />
$ DEFINE /SYSTEM /EXEC MULTINET_FTP_SERVER_DATA_PORT_RANGE””<br />
When this logical is defined, the FTP server will use port numbers between the specified values for<br />
the data channel when operating in passive mode.<br />
Creating an FTP Server Login Comm<strong>and</strong> Procedure<br />
To limit user activities during an FTP session, edit the FTP_SERVER.COM file using this<br />
comm<strong>and</strong>:<br />
$ MULTINET FTP/SERVER [qualifier]<br />
Table 18-1 lists the FTP server qualifiers.<br />
Table 18-1 FTP Server Qualifiers<br />
Qualifier Purpose<br />
/ACCESS=([NOLIST],<br />
[NOWRITE], [NOSPAWN],<br />
[NOREAD], [NODELETE])<br />
Denies write or search access for this session; NOSPAWN<br />
disables the site SPAWN comm<strong>and</strong>; NOREAD prohibits<br />
read access. By default, /ACCESS=NOSPAWN is used for<br />
anonymous FTP sessions to prevent users from spawning<br />
comm<strong>and</strong>s. NOWRITE disables the storing of files.<br />
NODELETE disables the deletion/renaming of files.<br />
/DIRECTORY=(directory1,...) Restricts access to these directory trees (note plural).
Table 18-1 FTP Server Qualifiers (Continued)<br />
Qualifier Purpose<br />
Using FTP Log Files<br />
Configuring <strong>and</strong> Managing FTP<br />
/GET_REMOTE_INFO Gets information about the remote system. This qualifier<br />
works by defining the logical names<br />
MULTINET_FTP_ADDRESS,<br />
MULTINET_FTP_HOSTNAME,<br />
MULTINET_FTP_LOCAL_ADDRESS, <strong>and</strong><br />
MULTINET_FTP_ANONYMOUS_PASSWORD <strong>and</strong> then<br />
exiting without invoking the FTP server.<br />
Note! MULTINET_FTP_ANONYMOUS_PASSWORD is<br />
only set if the user name is "anonymous."<br />
When MULTINET_FTP_DONT_REPORT_FILESIZE is<br />
defined, the estimate of the number of bytes to be<br />
transmitted is not included in the 150 reply line to a GET<br />
operation.<br />
/MESSAGE=message Displays a banner message when the user logs in. This<br />
message precedes the "User xxx logged in..." line.<br />
/REJECT Instead of accepting the connection, rejects the login with<br />
the error specified in the /MESSAGE qualifier.<br />
The <strong>MultiNet</strong> FTP server keeps a log of all FTP transactions that occur after login between the<br />
client <strong>and</strong> server in an FTP_SERVER.LOG file in the user's login directory on the server system. A<br />
log file is created for each FTP client session. The previous log is overwritten when a new session<br />
starts, but you can specify a number of log files to retain.<br />
Note! If the <strong>MultiNet</strong> FTP server process does not start or mysteriously disappears, examine the<br />
beginning of FTP_SERVER.LOG for error messages. Because the system-wide login comm<strong>and</strong><br />
procedure (SYS$MANAGER:SYLOGIN.COM) <strong>and</strong> the user's LOGIN.COM are executed as part<br />
of the server process creation, errors in these procedures can cause the server process to<br />
terminate. In most instances, however, the reason for the process terminating appears at the<br />
beginning of the FTP_SERVER.LOG file.<br />
The following sample log file contains the FTP transactions involved when the user logs in under<br />
the user name "HOLMES," issues a "DIRECTORY" comm<strong>and</strong>, <strong>and</strong> then retrieves the file<br />
"FOO.BAR."<br />
-------------------------------------------------------<br />
FTP Login request received at Wed Jun 14 19:05:10 2003<br />
from remote IP address 127.0.0.1<br />
-------------------------------------------------------<br />
>>> 230 User HOLMES logged into U1:[HOLMES] at Wed 07-Jun-2003 19:05, job<br />
18-5
Configuring <strong>and</strong> Managing FTP<br />
18-6<br />
3a.<br />
> 200 Type A ok.<br />
> 200 Stru F ok.<br />
> 200 Mode S ok.<br />
> 200 Port 4.14 at Host 127.0.0.1 accepted.<br />
> 150 List started.<br />
>>> 226 Transfer completed.<br />
> 200 Port 4.15 at Host 127.0.0.1 accepted.<br />
> 150 ASCII retrieve of USERS:[HOLMES]FOO.BAR;1 started.<br />
>>> 226 Transfer completed. 210 (8) bytes transferred.<br />
> 221 QUIT comm<strong>and</strong> received. Goodbye.<br />
HOLMES job terminated at 11-JUN-2003 19:05:23.08<br />
By setting the logical name MULTINET_FTP_SERVER_LOG_LIMIT in the LOGIN.COM file,<br />
you can specify that log files be retained. Set the logical name to a dash (-) to retain all log files, or<br />
specify a number in the range of 1 to 32000.<br />
Directory size restrictions limit the number of potential files that can actually be created. If you do<br />
not specify a number or value, one log file is created or overwritten for each FTP session. Use the<br />
DCL PURGE comm<strong>and</strong> to delete unneeded log files. The following example specifies that 42 log<br />
files be retained:<br />
$ DEFINE MULTINET_FTP_SERVER_LOG_LIMIT 42<br />
Managing FTP Security<br />
Because the FTP server process is started by running SYS$SYSTEM:LOGINOUT.EXE, both the<br />
system-wide login comm<strong>and</strong> procedure (SYS$MANAGER:SYLOGIN.COM) <strong>and</strong> the specific<br />
user's LOGIN.COM are executed. As a result, any customization (default file protection, process/<br />
job logical name definitions, <strong>and</strong> so on) done in these comm<strong>and</strong> procedures is available under the<br />
FTP server process.<br />
All st<strong>and</strong>ard OpenVMS security-checking mechanisms also validate the FTP server process<br />
creation. If a login comm<strong>and</strong> procedure contains any comm<strong>and</strong>s specific to interactive jobs (for<br />
example, SET TERMINAL comm<strong>and</strong>s), the FTP server process may crash. To avoid this problem<br />
without altering the functionality of comm<strong>and</strong> procedures, use the DCL lexical function F$MODE<br />
with interactive comm<strong>and</strong>s. For example:<br />
$ IF F$MODE() .EQS. "INTERACTIVE" THEN SET TERMINAL /INQUIRE<br />
You can use the following logicals in the FTP_SERVER.COM comm<strong>and</strong> procedure to restrict<br />
specific users from some types of access:
Configuring <strong>and</strong> Managing FTP<br />
• The following logical restricts 'username' to accessing only the specified directories when<br />
connecting to the host using FTP:<br />
MULTINET_''username'_FTP_DIRECTORY "directory-spec,..."<br />
This logical is used in the FTP_SERVER/DIRECTORY-directory_spec,... qualifier.<br />
• The following logical restricts 'username' to only the type of access specified when accessing the<br />
host via FTP:<br />
MULTINET_''username'_FTP_CONTROL "access-spec,..."<br />
This logical is used in the FTP_SERVER/ACCESS=access-spec,... qualifier.<br />
access-spec=[NO]LIST, [NO]WRITE, [NO]SPAWN, or [NO]READ<br />
• The following logical limits the information given out on connection or when using the STAT<br />
comm<strong>and</strong>:<br />
MULTINET_FTP_CONNECT_BANNER “FTP server name”<br />
If this logical is defined as whitespace, operating system <strong>and</strong> TCP stack information is removed<br />
from the FTP server connection banner. If this logical is defined with a specific FTP server<br />
name, the information banner does not appear in response to the STAT comm<strong>and</strong>.<br />
Accepting Wildcards Upon Delete<br />
You can apply the logical MULTINET_FTP_DISALLOW_WILDCARD_DELETES to anything<br />
to disallow the new functionality of accepting wildcards on delete. This may be done at the process,<br />
group, or system level.<br />
Specifying a Message at Connect Time<br />
The MULTINET_FTP_ANNOUNCE logical provides a SYS$ANNOUNCE-style message along<br />
with the "220" banner at connect time. Define the logical in a fashion similar to<br />
SYS$ANNOUNCE, using one of the following comm<strong>and</strong>s:<br />
$ DEFINE/SYSTEM MULTINET_FTP_ANNOUNCE "message text"<br />
In the following version, the announcement is in the specified file:<br />
$ DEFINE/SYSTEM MULTINET_FTP_ANNOUNCE "@file specification"<br />
Specifying UNIX-Style Listings<br />
If you define the logical name MULTINET_FTP_UNIX_STYLE_BY_DEFAULT, the FTP Server<br />
starts in UNIX emulation mode.<br />
The control of version number displays has been reworked in response to LIST <strong>and</strong> NLST<br />
comm<strong>and</strong>s. The default is VMS-mode output.<br />
The logical name MULTINET_FTP_UNIX_STRIP_VERSION no longer has any effect. In UNIX<br />
mode, the FTP Server always removes version numbers from directory listings.<br />
18-7
Configuring <strong>and</strong> Managing FTP<br />
18-8<br />
The logical name MULTINET_FTP_STRIP_VERSION causes VMS mode output to have no<br />
versions.<br />
Note! It is recommended that you NOT use the MULTINET_FTP_STRIP_VERSION logical. Stripping<br />
version numbers from the VMS mode LIST output can cause problems for some FTP clients<br />
(notably WS_FTP).<br />
The logical name MULTINET_FTP_ALL_VERSIONS requests the NLST <strong>and</strong> LIST comm<strong>and</strong>s to<br />
display all version numbers. If MULTINET_FTP_ALL_VERSIONS is defined, the logical name<br />
MULTINET_FTP_STRIP_VERSION has no effect.<br />
Note! MULTINET_FTP_ALL_VERSIONS is ignored if the FTP Server is in UNIX emulation mode.<br />
The FTP Server updates UNIX emulation improving <strong>MultiNet</strong> interoperability with various FTP<br />
Clients. Features of the UNIX emulation mode are<br />
• The syntax you use for a directory determines the mode you want. For example, CWD / uses<br />
UNIX mode; CWD [] uses VMS mode.<br />
• The LIST comm<strong>and</strong> returns output similar to that produced by ls -al.<br />
• The logical name MULTINET_FTP_UNIX_STYLE_CASE_INSENSITIVE allows UNIX style<br />
filename h<strong>and</strong>ling to be case insensitive.<br />
• Mixed case file names <strong>and</strong> those with special characters are translated into legal OpenVMS file<br />
names using the NFS mappings.<br />
• The directories listing uses UNIX syntax. For example, USERS:[MRUHL] becomes /users/<br />
mruhl.<br />
• When changing directories or referencing files using an absolute UNIX pathname, directory<br />
lookups treat SYS$LOGIN as if they were the root directory (/). So, if SYS$LOGIN is<br />
USERS:[MRUHL],<br />
/login.com refers to USERS:[MRUHL]LOGIN.COM <strong>and</strong> /multinet_common_root/multinet<br />
refers to USERS:[MRUHL.MULTINET_COMMON_ROOT.MULTINET] if that directory<br />
exists. If it does not exist, the first segment of the pathname is used as the device specification in<br />
a second lookup attempt, <strong>and</strong> /multinet_common_root/multinet refers to<br />
MULTINET_COMMON_ROOT:[MULTINET].<br />
• If the FTP Server is in UNIX mode, the SYST comm<strong>and</strong> displays the banner “UNIX <strong>MultiNet</strong><br />
Unix Emulation.” If the FTP Server is in VMS mode, the SYST comm<strong>and</strong> displays the<br />
equivalence string associated with the MULTINET_FTP_SYST_BANNER logical name (if<br />
defined). Otherwise, the SYST comm<strong>and</strong> displays “VMS <strong>MultiNet</strong> Vx.y(rev)”:<br />
– Vx.y is the <strong>MultiNet</strong> version number.<br />
– (rev) is the revision number of the FTP Server.<br />
Note! The logical name MULTINET_FTP_SYST_BANNER is ignored if the FTP Server is already in<br />
UNIX mode.<br />
The FTP Server does not drop spaces in filenames. It converts them to the character sequence $7A.<br />
The FTP Server protects privileged ports by not opening data connections to privileged ports.
Configuring <strong>and</strong> Managing FTP<br />
The file open routines allow all modes to fetch data from a file open for write but marked for shared<br />
access.<br />
The FTP Service corrects synchronization problems resulting in messages repeatedly sent to the<br />
FTP Client.<br />
The interoperability problem with Microsoft Internet Explorer where Internet Explorer expects the<br />
server PORT reply to a PASV request to be enclosed in parentheses contrary to RFC stipulation that<br />
the client should search for a digit, not the left parenthesis has been fixed.<br />
There is no PASV comm<strong>and</strong> interference with data link window sizing.<br />
If you want the device name, the file name, <strong>and</strong> the directory name included in the results of all<br />
NLST comm<strong>and</strong>s, define the logical MULTINET_FTP_INCLUDE_DEVICE_IN_NLST. This<br />
logical may be declared system wide or in the user’s LOGIN.COM file.<br />
The FTP Service corrects a problem with RENAME operations with UNIX-style file<br />
specifications. The RENAME operation overrides the current protection of the file to do the<br />
operation <strong>and</strong> then restores it afterwards. This is necessary because directories are created such that<br />
they cannot be deleted without changing the protection. To cause RENAME to observe the file<br />
protection, define the logical MULTINET_FTP_OBSERVE_VMS_PROTECTION to true.<br />
UNIX File Names<br />
An FTP default is to rename files by changing the final dot (.) to $5N. The logical<br />
MULTINET_FTP_DODROP1DOT lets you override this FTP default by dropping the final dot<br />
<strong>and</strong> NOT adding $5N.<br />
VMS always implies that a dot is present in file names regardless of whether it is followed by an<br />
extension. VMS also does not support multiple dots in a file name. The rule FTP follows is that<br />
when there is only one dot, <strong>and</strong> that dot is the final character, the dot is converted to $5N. The<br />
resultant local file is then distinguishable from a similarly named file that did not have a dot. For<br />
example, “FILE.” becomes “FILE$5N” when using the FTP default; however, “FILE.” becomes<br />
“FILE” with the logical defined.<br />
The FTP server displays the creation month, day, <strong>and</strong> year of a file for a UNIX mode directory if<br />
the file is older than 1 year (365 days). If the logical MULTINET_FTP_UNIX_YEAR_OLD_FILES is<br />
defined False, No, or 0 (zero), the old behavior is restored, displaying all files with Month, Day,<br />
<strong>and</strong> Time.<br />
The logical MULTINET_FTP_DISALLOW_UNIX_STYLE controls whether UNIX-style<br />
filename parsing is done. The default value for MULTINET_FTP_DISALLOW_UNIX_STYLE is<br />
true (T), UNIX-style filename parsing is not h<strong>and</strong>led. If you want UNIX-style filename parsing,<br />
you must define this logical as FALSE. When UNIX-style parsing is enabled, it is not normally<br />
done until a CD comm<strong>and</strong> has been done with a directory specification that contains a “/” in it. For<br />
example:<br />
FTP> cd ../my_directory<br />
Note! For some FTP clients (<strong>MultiNet</strong> is one of them) you will have to enclose the directory<br />
specification in quotes (“ ”) when it contains the “/” to prevent the client from attempting to parse<br />
18-9
Configuring <strong>and</strong> Managing FTP<br />
18-10<br />
it.<br />
To exit UNIX-type filename parsing, use a CD comm<strong>and</strong> with either the “[” or “ cd [-.my_directory]<br />
$ DEFINE/SYSTEM/NOLOG/EXEC MULTINET_FTP_DISALLOW_UNIX_STYLE FALSE<br />
Some graphical display FTP clients expect the output of directory comm<strong>and</strong>s to be in a UNIX<br />
system format. To enable this UNIX format, use the following either at the system level or in the<br />
user's LOGIN.COM:<br />
$ DEFINE MULTINET_FTP_DISALLOW_UNIX_STYLE FALSE<br />
<strong>and</strong><br />
$ DEFINE MULTINET_FTP_UNIX_STYLE_BY_DEFAULT ANYTHING<br />
Specifying the Maximum Idle Time<br />
The MULTINET_FTP_MAXIMUM_IDLE_TIME logical specifies the length of time before an<br />
idle FTP server connection times out. The value is set in seconds, with a default of 300 seconds. If<br />
this logical is set to 0, timeouts are disabled.<br />
The logical name MULTINET_FTP_FAST_TIMEOUT is equivalent to the settings in these<br />
logicals MULTINET_NAMESERVER_RETRANS <strong>and</strong> MULTINET_NAMESERVER_RETRY<br />
for the FTP server process to 5 <strong>and</strong> 2 respectively. This helps the FTP Server start up faster when<br />
DNS PTR records for the client are improperly defined or nonexistent.<br />
Using FTP Site Comm<strong>and</strong>s<br />
Table 18-2 lists the comm<strong>and</strong>s for controlling <strong>and</strong> configuring the FTP server from the FTP<br />
prompt.<br />
Table 18-2 FTP Site Comm<strong>and</strong>s<br />
Comm<strong>and</strong> Description<br />
SITE SHOW TIME Shows the time on the system the FTP server is running<br />
on.<br />
SITE NONE This is a NO OPERATION.<br />
SITE PRIV [privileges] Turns ON or OFF VMS privileges. If no privileges are<br />
specified, displays the current privileges.
Table 18-2 FTP Site Comm<strong>and</strong>s (Continued)<br />
Comm<strong>and</strong> Description<br />
Defining FTP Messages<br />
Configuring <strong>and</strong> Managing FTP<br />
SITE RMS BLOCK [ON|OFF] Turns Block Image mode transfers ON or OFF, or if there<br />
is no argument, displays the current state.<br />
When image (binary) transfers are done with Block Image<br />
mode OFF (the default), the FTP server opens VMS<br />
record files such that the record control information is not<br />
included in the data <strong>and</strong> a linefeed separates each record.<br />
With Block Image mode ON the record control<br />
information <strong>and</strong> the data are transferred.<br />
SITE RMS RECSIZE [value] With no argument, displays the current record size. With<br />
an argument, sets the record size for Image PUT transfers<br />
to the size specified. The default is 512.<br />
SITE SPAWN comm<strong>and</strong> Spawns a subprocess <strong>and</strong> uses the rest of the line as a<br />
VMS DCL comm<strong>and</strong>. Not valid for CAPTIVE processes.<br />
SITE RMS STREAM [ON|OFF] With no argument, displays the current state. When ON,<br />
writes text files in Stream-LF format.<br />
When OFF (default), writes text files as VMS carriagecontrol<br />
record files.<br />
SITE +VMS+ Enables VMS + mode transfers.<br />
SITE VMS Disables VMS + mode transfers.<br />
SITE WINDOW-SIZE With no argument, displays the TCP window size. With<br />
an argument, sets the window size for the data channel.<br />
Default value is 32768 bytes<br />
The MULTINET_FTP_221_REPLY logical lets you define the message users see when they end<br />
the FTP session. If you do not define this logical, <strong>MultiNet</strong> uses the default message instead “221<br />
QUIT comm<strong>and</strong> received. Goodbye.” You can define a text string or file. If the string starts with the<br />
“at” sign @, it specifies the name of a file containing text to be displayed. For example:<br />
$ DEFINE/SYSTEM/EXEC MULTINET_FTP_221_REPLY -<br />
_$ "Connection to FTP server has been closed"<br />
Now, when the user closes the FTP connection, the following message appears:<br />
221 Connection to FTP server has been closed<br />
18-11
Configuring <strong>and</strong> Managing FTP<br />
18-12<br />
The MULTINET_FTP_230_REPLY logical defines a message to appear when a user successfully<br />
logs in. If you do not define this logical, <strong>MultiNet</strong> uses the default message instead. As with<br />
MULTINET_FTP_221_REPLY, you can define a text string or file. For example:<br />
$ DEFINE/SYSTEM/EXEC MULTINET_FTP_230_REPLY-<br />
_$ "Login successful"<br />
Now, when the user logs in using FTP, the following message appears:<br />
230 Login successful<br />
The MULTINET_FTP_ANONYMOUS_230_REPLY logical defines a message to appear when an<br />
ANONYMOUS user successfully logs in. If you do not define this logical, <strong>MultiNet</strong> uses the<br />
default message instead. As with MULTINET_FTP_230_REPLY, you can define a text string or<br />
file. For example:<br />
$ DEFINE/SYSTEM/EXEC MULTINET_FTP_ANONYMOUS_230_REPLY-<br />
_$ "ANONYMOUS login successful"<br />
Now, when a user logs in using the ANONYMOUS account, the following message appears:<br />
230 ANONYMOUS login successful<br />
The MULTINET_FTP_421_REPLY logical lets you defines the message user’s see when they<br />
connect to the server but should not log in. After sending the message, the connection closes. For<br />
example, you can define this logical to prevent FTP access for a short time period. Be sure to<br />
deassign the logical after this period to allow FTP access again. If the string starts with the “at” sign<br />
@, it specifies the name of a file containing text to be displayed. For example:<br />
$ DEFINE/SYSTEM/EXEC MULTINET_FTP_421_REPLY-<br />
_$ "System maintenance in progress until 17:30"<br />
Now, when the user connects to the host using FTP, the following message appears <strong>and</strong> then the<br />
connection closes:<br />
421 System maintenance in progress until 17:30<br />
Specifying the Name of a Log File<br />
The MULTINET_FTP_LOGFILE (system level, executive mode) logical can be defined to specify<br />
the name of a log file. For example:<br />
$ DEFINE/SYSTEM/EXEC MULTINET_FTP_LOGFILE-<br />
_$ SYS$COMMON:[SYSMGR]FTPLOGIN.LOG<br />
If this logical exists, the FTP server writes a record to the specified file each time a user attempts to<br />
log in. Each record includes the date <strong>and</strong> time, the remote host's internet address, <strong>and</strong> whether the<br />
login succeeded. This is especially useful to use if you suspect someone has tried to break into the<br />
FTP server.<br />
This logical specifies the name of the file to which all comm<strong>and</strong>s <strong>and</strong> responses to ANONYMOUS<br />
FTP services are logged. If MULTINET_FTP_LOG_ALL_USERS is also defined, then comm<strong>and</strong>s
Configuring <strong>and</strong> Managing FTP<br />
<strong>and</strong> responses for all users are logged. If <strong>MultiNet</strong> is already running, the Master Server must be<br />
restarted (@MULTINET:START_SERVER) for these definitions to take effect.<br />
The logical MULTINET_FTP_LOG_ALL_USERS causes all comm<strong>and</strong>s <strong>and</strong> responses to be<br />
logged to the file defined by MULTINET_FTP_LOGFILE. The default (when this logical is not<br />
defined) is to just log the comm<strong>and</strong>s <strong>and</strong> responses for anonymous users.<br />
$ DEFINE/SYSTEM/EXEC MULTINET_FTP_LOG_ALL_USERS TRUE<br />
The FTP client <strong>and</strong> the FTP server normally check the record size of an ASCII transfer <strong>and</strong><br />
disallow more than 8192 byte records (as a sanity check). However, you can define the<br />
MULTINET_FTP_MAXREC logical to override the default of 8192. The definition of the<br />
MULTINET_FTP_MAXREC logical is commented out but defined in the FTP_CONTROL.COM<br />
file as follows:<br />
$ DEFINE/SYSTEM/NOLOG/EXEC MULTINET_FTP_MAXREC 8192<br />
Note that the maximum record size supported by OpenVMS is 65535.<br />
Defining a File Name<br />
The MULTINET_DIRECTORY_MESSAGE_FILENAME logical can be defined to name the file<br />
you want to appear when a session enters a directory. For example:<br />
$ DEFINE/SYSTEM/EXEC MULTINET_DIRECTORY_MESSAGE_FILENAME flowers.txt<br />
Password Lifetime Warnings<br />
This section describes how to define password messages in <strong>MultiNet</strong>.<br />
Defining Password Messages<br />
The MULTINET_FTP_PASSWORD_WARNING_MESSAGE logical lets you define the message<br />
users see when their password is going to expire. If you want the amount of time before the<br />
password expires to be included, add %s to the logical.<br />
$ DEFINE/SYSTEM/EXEC MULTINET_FTP_PASSWORD_WARNING_MESSAGE %s<br />
$ DEFINE/SYSTEM/EXEC MULTINET_FTP_PASSWORD_WARNING_MESSAGE message text<br />
string<br />
The MULTINET_FTP_PASSWORD_WARNING_TIME logical uses the VMS delta time to<br />
specify the minimum remaining lifetime for the user's password. If the remaining lifetime is greater<br />
than the VMS delta time then no message appears. It is necessary to define this value to enable<br />
checking for the remaining lifetime of a password.<br />
$ DEFINE/SYSTEM/EXEC MULTINET_FTP_PASSWORD_WARNING_TIME dddd hh:mm:ss.hh<br />
The MULTINET_FTP_RECEIVE_THRESHOLD logical specifies the amount of buffer space that<br />
can be used to buffer transmitted data on the data socket. The default value if 6144. If this logical is<br />
defined <strong>and</strong> it begins with a /, then it specifies the fraction of the window size; if only a fraction is<br />
specified, then it indicates the number of bytes to be used. The ? in the logical represents where<br />
defined values go.<br />
18-13
Configuring <strong>and</strong> Managing FTP<br />
18-14<br />
$ DEFINE/SYSTEM/EXECUTIVE MULTINET_FTP_RECEIVE_THRESHOLD ?<br />
The MULTINET_FTP_NOLOGIN_EXPIRED_PASSWORD logical lets you prevent accounts<br />
with expired passwords from logging in.<br />
$ DEFINE/SYSTEM/EXEC MULTINET_FTP_NOLOGIN_EXPIRED_PASSWORD TRUE<br />
will prevent a user with an expired password from logging in <strong>and</strong> displays the following message:<br />
<br />
Checking IP Address<br />
By default the <strong>MultiNet</strong> FTP server checks the IP address given in the port comm<strong>and</strong> <strong>and</strong> does not<br />
make the connection if the IP address does not match that of the control connection. This can be<br />
disabled by defining the logical MULTINET_FTP_SERVER_RELAXED_PORT_COMMAND.<br />
$ DEFINE MULTINET_FTP_SERVER_RELAXED_PORT_COMMAND 197.0.0.1<br />
Configuring the FTP server for TLS (FTPS)<br />
Follow these steps to configure the <strong>MultiNet</strong> FTP server to allow TLS authentication:<br />
• Generate or obtain certificate <strong>and</strong> key files. On OpenVMS V8.3 SSL$COM:SSL$CERT_TOOL<br />
can be used to do this.<br />
• Place the certificate <strong>and</strong> key file where you want them <strong>and</strong> verify that the protection is set such<br />
that world has no access.<br />
• Using MULTINET CONFIGURE/SERVER select FTP <strong>and</strong> set the RFC-4217-CERTIFICATE<br />
<strong>and</strong> RFC-4217-KEY parameters to the location of the appropriate files. Optionally set the<br />
REQUIRE_TLS parameter to YES.<br />
• Restart the <strong>MultiNet</strong> master server - @multinet:start_server restart<br />
FTP server parameters for TLS<br />
RFC4217-CERTIFICATE Specifies the certificate file to be used with RFC 4217 netgotiation.<br />
The certificate <strong>and</strong> key files must be created by an external means such as the SSL certificate tool<br />
<strong>and</strong> be in PEM format. Both a certificate <strong>and</strong> key file must be specified set up to allow TLS<br />
negotiation. On OpenVMS V8.3 you can use @SSL$COM:SSL$CERT_TOOL.<br />
RFC4217-KEY Specifies the private key file to be used with RFC 4217 negotiation. The<br />
certificate <strong>and</strong> key files must be created by an external means such as the SSL certificate tool <strong>and</strong><br />
be in PEM format. Both a certificate <strong>and</strong> key file file must be specified set up to allow TLS<br />
negotiation. On OpenVMS V8.3 you can use @SSL$COM:SSL$CERT_TOOL.<br />
REQUIRE-TLS YES Specifies that user authentications other than anonymous <strong>and</strong> users that<br />
have no password must use TLS authentication. The FTP USER comm<strong>and</strong> will get a 530 response<br />
if it is issued before TLS authentication has been done. This prevents passwords from being<br />
exchanged in clear text mode with the users.
Network Service Monitoring<br />
Configuring <strong>and</strong> Managing FTP<br />
FTP’s network service monitoring is based on RFC 2788 (Network Services Monitoring MIB).<br />
Information is maintained only while the service is active. The following items from the Network<br />
Services Monitoring MIB (RFC 2788) are available in the enterprises.105.2.25 MIB:<br />
Table 18-3 Network Services Monitoring Items<br />
ApplAccumulatedInboundAssociations (Counter) the total number of connections that the<br />
FTP Listener program has serviced since it was<br />
started. enterprises.105.2.21.10<br />
ApplDescription (String) Description of the program/application. This<br />
is the banner that gets printed when the client connects<br />
to the FTP Listener program. enterprises.105.2.21.16<br />
ApplInboundAssociations (Counter) The number of connections currently<br />
active. enterprises.105.2.21.8<br />
ApplIndex (Integer) unique application index. The port FTP is<br />
offered on (21). enterprises.105.2.21.1<br />
ApplLastChange (TimeTicks) the value of sysUpTime when the FTP<br />
Listener program entered the current state. enterprises.105.2.21.7<br />
ApplLastInboundActivity (TimeTicks) the value of sysUpTime at the time the<br />
most recent connection was established. enterprises.105.2.21.12<br />
ApplName (String) FTP. enterprises.105.2.21.2<br />
ApplOperStatus (Integer) the operational status of the FTP Listener<br />
program; the values are: up(1), down(2), halted(3),<br />
congested(4), restarting(5), quiescing(6). Some of<br />
these values may not be used. enterprises.105.2.21.6<br />
ApplRejectedInboundAssociations (Counter) the number of connections that have been<br />
rejected (due to not being allowed from the access list<br />
values). enterprises.105.2.21.14<br />
ApplUptime (TimeTicks) the value of the SNMP variable sysUp-<br />
Time when the FTP Listener program was started.<br />
This time has a resolution of 5 minutes.<br />
enterprises.105.2.21.5<br />
ApplVersion (String) the version of the FTP Listener program.<br />
enterprises.105.2.21.4<br />
18-15
Configuring <strong>and</strong> Managing FTP<br />
18-16<br />
This feature requires the SNMP Agent X functionality. To use this SNMP must be configured to<br />
have Agent X service enabled, <strong>and</strong> to allow the system's IP <strong>and</strong> the local host addresses (127.0.0.1)<br />
to each be an AGENTX_PEER. See Chapter 23 for more information on SNMP <strong>and</strong> Agent X. This<br />
information can be displayed with the MULTINET SHOW/SNMP comm<strong>and</strong> <strong>and</strong> can be displayed<br />
with a MIB browser.<br />
To enable network service monitoring, do the following:<br />
$ MULTINET CONFIGURE /SERVER<br />
SELECT FTP<br />
SET FLAGS SNMP_MONITORED | PASS_FOREIGN_SOCKET<br />
WRITE<br />
EXIT<br />
$ @MULTINET:START_SERVER<br />
Any service using TCP_INIT, TCP_LISTEN, <strong>and</strong> TCP_CONNECTED routines may use SET<br />
FLAGS SNMP_MONITORED. The level of functionality may vary with the service.<br />
Session Accounting<br />
<strong>MultiNet</strong> can record accounting information from services that have been enabled. Currently this<br />
includes FTP <strong>and</strong> SMTP. The accounting information includes information about when a network<br />
session took place <strong>and</strong> how much data was transferred. The accounting facility is enabled by setting<br />
the accounting port <strong>and</strong> the accounting host <strong>and</strong> reading MULTINET:ACCOUNTING.CONF for<br />
additional configuration information. The format of the accounting records is described in<br />
MULTINET_ROOT:[MULTINET.EXAMPLES]ACCOUNTING.H<br />
A sample program using this is in MULTINET_ROOT:[MULTINET.EXAMPLES]ACC_DUMP.C<br />
You must configure FTP <strong>and</strong> session accounting in order to activate the accounting function. FTP-<br />
ACCOUNTING-HOST is the name of the system running the accounting program. FTP-<br />
ACCOUNTING-PORT is the port number that the program was set up to listen on. FTP accounting<br />
can be configured with the following:<br />
MULTINET CONFIGURE /NETWORK<br />
SET FTP-ACCOUNTING-HOST name<br />
SET FTP-ACCOUNTING-PORT number<br />
WRITE<br />
EXIT<br />
In order for accounting to be activated before your next reboot, you can define the logicals as<br />
follows:<br />
$ DEFINE/SYSTEM/EXECUTIVE MULTINET_FTP_ACCOUNTING_HOST lillies<br />
$ DEFINE/SYSTEM/EXECUTIVE MULTINET_FTP_ACCOUNTING_PORT 1234<br />
Note! The accounting port must be set to an unused port, not the port for the service on which<br />
accounting is being enabled.
Configuring <strong>and</strong> Managing FTP<br />
The next section explains how to configure the file.<br />
The collected accounting information can be displayed with the MULTINET ACCOUNTING<br />
comm<strong>and</strong>. See Chapter 1 of the <strong>MultiNet</strong> for OpenVMS Administrator’s Reference for more<br />
information about the MULTINET ACCOUNTING comm<strong>and</strong>.<br />
Configuration File<br />
The Accounting configuration file is MULTINET:ACCOUNTING.CONF. The Accounting<br />
configuration file defines:<br />
• The Port the Accounting program listens on. This should be an unused port, not the port for the<br />
service on which logging is being enabled, <strong>and</strong> the same port specified to FTP or SMTP.<br />
• The name of the file used for accounting records. This file is opened shareable <strong>and</strong> new records<br />
are always appended to it. To start a new file stop the Accounting program, delete (or rename)<br />
the existing file, <strong>and</strong> restart the Accounting program.<br />
• The IP addresses of systems that are allowed to write accounting records to this host.<br />
Note! After editing the configuration, stop <strong>and</strong> restart the Accounting program so that the changes can<br />
take effect.<br />
File Format<br />
Follow these guidelines when entering data in the Accounting configuration file:<br />
• Allow one line for each item.<br />
• Enter information in any order; in upper- or lowercase.<br />
• Use a pound sign (#) or exclamation point (!) to denote comments. The Accounting facility<br />
ignores all information following these characters.<br />
The comm<strong>and</strong>s that can be in MULTINET:ACCOUNTING.CONF are:<br />
PORT port_number The TCP port that the accounting program should listen on.<br />
PEER ip-address The IP address of a host that is allowed to log records with the accounting<br />
software.<br />
FILENAME filename The name of the file that the accounting records will be written to. The<br />
MULTINET: device is assumed if a device is not specified as part of<br />
the file specification.<br />
Enabling the Accounting Logger<br />
To enable the FTP accounting logger, do the following:<br />
$ MULTINET CONFIGURE/SERVER<br />
ENABLE ACCOUNTING<br />
WRITE<br />
$ @MULTINET:START_SERVER<br />
18-17
Configuring <strong>and</strong> Managing FTP<br />
Displaying the Contents of the Logging File<br />
18-18<br />
To view accounting information, do the following:<br />
$ MULTINET ACCOUNTING/INPUT= [/output=output filename] -<br />
_$ [/since=start_date] [/before=end_date] [/protocol={SMTP, FTP, MAIL}] [/CSV]<br />
• accounting_data_file is the name of the logging file you want to see.<br />
• output filename is the name of the file you want to call this information. If this field is omitted,<br />
the information displays to the terminal screen.<br />
• start_date is the beginning date you want the comm<strong>and</strong> to start with. The date format is<br />
[DD-MMM-YYYY [:]] [hh:mm:ss]cc] If not specified, all records display up to the end of the<br />
data found.<br />
• DD is the day of the month, counting from 01.<br />
• MMM is the abbreviation for the month, like JAN, FEB, MAR.<br />
• YYYY is the number of the year, including the century (1999, 2000, 2001, 2002, 2003).<br />
• hh is the hour, from 00 to 23.<br />
• mm is the minute, from 00 to 59.<br />
• ss is the second, from 00 to 59.<br />
• cc is hundredths of seconds.<br />
The time is always in local time.<br />
• end_date is the ending date you want the comm<strong>and</strong> to end with. The date format is<br />
[DD-MMM-YYYY [:]] [hh:mm:ss]cc] If not specified, all records display until the end of the<br />
file.<br />
• protocol is any combination of SMTP, FTP, or MAIL.<br />
• CSV is the Comma Separated Values, for input to products like Excel.<br />
Accounting File Record Format<br />
The accounting file is written using OpenVMS RMS records. The format of these records is<br />
defined in MULTINET_ROOT:[MULTINET.EXAMPLES]ACCOUNTING.H, <strong>and</strong> listed below:<br />
/*<br />
* PDU format<br />
*/<br />
struct accountingPDU {<br />
char version;<br />
char type; /* type of record */<br />
/*<br />
* FTP:<br />
* C - Client<br />
* S - Server<br />
*<br />
* SMTP:<br />
* N - Network delivery (send)<br />
* L - Local delivery (received)
Configuring <strong>and</strong> Managing FTP<br />
* F - Forwarded<br />
* R - Returned<br />
* D - Delivery Receipt<br />
* Q - ReQueued<br />
*<br />
*/<br />
char flags; /* not currently used */<br />
char reserved; /* for future use */<br />
int payload_length; /* length (in bytes) of data after header */<br />
int port; /* IP port of reporting service - 25 SMTP, 21 - FTP */<br />
int reporterIP; /* IP address of reporter */<br />
};<br />
struct FTPaccounting_data {<br />
struct accountingPDU header;<br />
int start_time[2]; /* VMS time that session started */<br />
int end_time[2]; /* VMS time that session ended */<br />
int datasent; /* KBytes of file data sent */<br />
int datarecv; /* KBytes of file data received */<br />
int filessent; /* Number of files sent */<br />
int filesrecv; /* Number of files received */<br />
int partnerIP; /* IP address of partner */<br />
char user[12]; /* username that operations were done under */<br />
};<br />
struct SMTPaccounting_data {<br />
struct accountingPDU header;<br />
int date[2]; /* Time of activity */<br />
int msg_size; /* size of message in bytes */<br />
int from_str_size; /* size of From: string */<br />
int to_str_size; /* size of To: string */<br />
char from_to_str[1]; /* text of From & To string */<br />
};<br />
#define accounting_Close 1<br />
typedef struct accounting_peer_info {<br />
struct accounting_peer_info *next;<br />
ulong ia;<br />
} accounting_peer_info;<br />
#define MAX_STRING_LEN 255<br />
FTP <strong>and</strong> IPv6<br />
A separate service entry (FTP_INET6) is available to support FTP over IPv6. The Network Service<br />
Monitoring <strong>and</strong> Session Accounting have not yet been updated for IPv6. The same logicals <strong>and</strong><br />
comm<strong>and</strong> files are used for both FTP over IPv4 <strong>and</strong> FTP over IPv6. When IPv6 is in use FTP uses<br />
18-19
Configuring <strong>and</strong> Managing FTP<br />
18-20<br />
the EPSV <strong>and</strong> EPRT comm<strong>and</strong>s. Other than the differences noted, FTP over IPv6 should be the<br />
same as FTP over IPv4. FTP is capable of accepting mapped IPv4 connections, so it is possible to<br />
disable the FTP service <strong>and</strong> enable FTP_INET6 to take care of both IPv4 <strong>and</strong> IPv6.
Introduction<br />
This chapter describes the Dynamic Host Configuration Protocol (DHCP) client.<br />
Setting DHCP Client Parameters DHCP Client Configuration<br />
Chapter 19<br />
DHCP Client<br />
Setting Up the DHCP Client Troubleshooting the DHCP Client<br />
General Description<br />
The DHCP client resides on the client host <strong>and</strong> dynamically sets the network configuration. The<br />
<strong>MultiNet</strong> DHCP client communicates with a DHCP server to get an IPv4 address <strong>and</strong> other<br />
configuration information. It uses this information to configure the network parameters of the host<br />
<strong>and</strong> to start up the network.<br />
When the network starts on the host, the DHCP client communicates dynamically <strong>and</strong><br />
automatically with the DHCP server in case reconfiguration is needed. The configuration<br />
information the client uses is defined by the policy stored in the DHCP server.<br />
For more general DHCP information, see RFC2132 <strong>and</strong> RFC2131. Also, see Chapter 21 of this<br />
guide for general DHCP process <strong>and</strong> <strong>MultiNet</strong> DHCP server information.<br />
<strong>MultiNet</strong> 5.4 provides support for a DHCP client. Because it supports a single network interface on<br />
the host, you can only use the DHCP client to configure a single network line in <strong>MultiNet</strong>.<br />
<strong>Process</strong> <strong>Software</strong> recommends that you do not use the DHCP client with other <strong>MultiNet</strong><br />
components that usually need a static IPv4 address on the same host, such as DHCP server,<br />
authoritative DNS server, <strong>and</strong> GateD.<br />
19-1
DHCP Client<br />
Setting DHCP Client Parameters<br />
19-2<br />
The DHCP Client service uses the parameters listed in Table 19-1.<br />
Table 19-1 DHCP Client Parameters<br />
Parameters Description<br />
CONFIGFILE The name of the configuration file. The default is<br />
MULTINET:DHCLIENT.CONF.<br />
DEBUG A decimal integer that is a bitmask of debugging levels used to select<br />
messages to pass to OPCOM <strong>and</strong> the debug log file specified in the<br />
DEBUG-FILE parameter. The debugging levels are (in decimal):<br />
1 Fatal Errors<br />
3 Errors <strong>and</strong> Warnings<br />
7 Informationals<br />
15 Debug Messages<br />
31 Dump Packets (formatted)<br />
63 Dump Packets (hex)<br />
By default, Fatal Errors, Errors, <strong>and</strong> Warnings are logged.<br />
DEBUG-FILE The name of the debug log file. Use this parameter to capture debug<br />
logging in a file. The default is that debug logging is not written to any<br />
file if LOG-TO-OPCOM is 1. If LOG-TO-OPCOM is 0 (zero), the<br />
default file is MULTINET:DHCLIENT.LOG<br />
INTERFACE-ROUTE A decimal integer 1 (one). Use this parameter to add a static IP route<br />
to the <strong>MultiNet</strong> Kernel routing table. The optional INTERFACE<br />
keyword forces the routing to be for a locally connected interface. If<br />
the parameter is not set, the default is to create a gateway route.<br />
LEASEFILE The name of the file DHCP uses to save client lease information to<br />
survive across reboots. To completely clear the lease information,<br />
delete the file specified <strong>and</strong> create an empty version. The default is<br />
MULTINET:DHCLIENT.DB. This is not used if DHCP Safe-failover<br />
is used.<br />
LOG-DATE This parameter determines whether the date is included in each entry<br />
in the debug log file. The default is 0 (zero); the date is not included.<br />
LOG-TO-OPCOM This parameter determines whether debug logging messages are<br />
written to OPCOM. Debug messages are also written to DEBUG-<br />
FILE parameter value if DEBUG-FILE is specified or this parameter<br />
is 0 (zero). Severe errors <strong>and</strong> warnings are always logged to OPCOM.<br />
The default is 1, everything is logged to OPCOM.
Note! Example 19-1 shows how to use MULTINET CONFIGURE /SERVER to set DHCP client<br />
parameters.<br />
Setting Up the DHCP Client<br />
DHCP Client<br />
Before setting up a DHCP client, you should talk to your network administrator. The administrator<br />
may want to assign a host name to your DHCP client<br />
If this is your first time using the DHCP client on the host, you need to do the following:<br />
$ COPY MULTINET:DHCLIENT_CONF.DEFAULT MULTINET:DHCLIENT.CONF<br />
Then, edit the file “MULTINET:DHCLIENT.CONF” to replace this line:<br />
#Send host-name “testing”;<br />
with this line:<br />
Send host-name “any hostname you want”;<br />
You can configure your local host to use the DHCP client when you run the <strong>MultiNet</strong> configuration<br />
utilities SERVER-CONFIG <strong>and</strong> MENU-CONFIG.<br />
To enable the DHCP client service <strong>and</strong> to set a parameter, use:<br />
$ MULTINET CONFIGURE /SERVER<br />
To set up the ethernet interface <strong>and</strong> enable this interface for DHCP client use:<br />
$ MULTINET CONFIGURE /MENU<br />
After configuring the local host to use the DHCP client, you can run @MULTINET:START_SERVER<br />
to start <strong>MultiNet</strong>. You can use the same method to disable the DHCP client on the host. Here are<br />
two examples:<br />
Example 19-1 Using MULTINET CONFIGURE /SERVER<br />
$ MULTINET CONFIGURE /SERVER<br />
<strong>MultiNet</strong> Server Configuration Utility v5.4(nn)<br />
[Reading in configuration from MULTINET:SERVICES.MASTER_SERVER]<br />
SERVER-CONFIG>SELECT DHCLIENT<br />
[The Selected SERVER entry is now DHCLIENT]<br />
SERVER-CONFIG>SET PARAMETERS<br />
Delete parameter “DEBUG 3”? [NO] RETURN<br />
You can now add new parameters for DHCLIENT. An empty line terminates.<br />
Add Parameter: DEBUG-FILE MULTINET:DHCLIENT.LOG<br />
Add Parameter: RETURN<br />
[Service specific parameters for DHCLIENT changed]<br />
SERVER-CONFIG>ENABLE DHCLIENT<br />
SERVER-CONFIG>EXIT<br />
19-3
DHCP Client<br />
19-4<br />
[Writing configuration to<br />
MULTINET_COMMON_ROOT:[MULTINET]SERVICES.MASTER_SERVER]<br />
[Configuration not modified, so no update needed]<br />
$<br />
To enable the ethernet interface for the DHCP client with MENU-CONFIG, do the following:<br />
1 Start MENU-CONFIG by typing<br />
$ MULTINET CONFIGURE /MENU.<br />
2 Choose Configure Network Interface from the <strong>MultiNet</strong> Configuration Menu.<br />
3 Choose Modify an Existing Network Interface from the Network Interface Configuration Menu.<br />
4 Select Interface from the Interface Selection Menu.<br />
5 Choose Allow DHCP Client Packets through the Interface from the Modify SE0 Interface Menu.<br />
6 If the DHCP Client interface is DISABLED, press the Space bar to enable it.<br />
7 Press Ctrl/Z.<br />
8 Chose Save Changes <strong>and</strong> Return to Previous Menu, then press Return to save the configuration.<br />
9 Choose Exit Utility then press Return.<br />
This procedure creates the Network configuration data file,<br />
MULTINET:NETWORK_DEVICES.CONFIGURATION, as well as creating the Network Startup<br />
file, MULTINET:START_MULTINET.COM to reflect your system’s configuration.<br />
To activate your DHCP Client interface on a running system, use this comm<strong>and</strong>:<br />
$ DEFINE/SYSTEM/EXECUTIVE MULTINET_DHCP_CLIENT “1”<br />
After enabling the DHCP Client, start the DHCP Client service by restarting the <strong>MultiNet</strong> Master<br />
Server. If the DHCP Client service is already running, shut it down first by issuing this comm<strong>and</strong>:<br />
$ MULTINET NETCONTROL DHCLIENT SHUTDOWN<br />
Then start the <strong>MultiNet</strong> Master Server with this comm<strong>and</strong>:<br />
$ @MULTINET:START_SERVER<br />
Disabling the DHCP Client<br />
To disable the DHCP Client, do the following:<br />
1 Run<br />
$ MULTINET CONFIGURE/SERVER<br />
2 Issue the comm<strong>and</strong>:<br />
SERVER-CONFIG>DISABLE DHCLIENT<br />
3 Save the configuration with the WRITE comm<strong>and</strong> <strong>and</strong> EXIT.<br />
4 Run
$ MULTINET CONFIGURE/MENU<br />
DHCP Client<br />
5 Choose Configure Network Interface from the <strong>MultiNet</strong> Configuration Menu.<br />
6 Choose Modify an Existing Network Interface from the Network Interface Configuration Menu.<br />
7 Select the interface from the Interface Selection Menu.<br />
8 Choose Allow DHCP Client Packets through the Interface <strong>and</strong> press the space bar to change the<br />
value to DISABLED.<br />
9 Save the changes <strong>and</strong> exit the menu.<br />
10Reboot the system.<br />
To avoid rebooting the system, deassign the logical MULTINET_DHCP_CLIENT after disabling<br />
the interface <strong>and</strong> restart the <strong>MultiNet</strong> server with the @MULTINET:START_SERVER<br />
comm<strong>and</strong>.<br />
DHCP Client Functions <strong>and</strong> Logicals<br />
The DHCP Client is started as a VMS detached process (MULTINET_DHCLIENT) when<br />
<strong>MultiNet</strong> starts.<br />
When the client starts, it configures the network interface (the line) with an IP address of "0.0.0.0",<br />
<strong>and</strong> then sends a DHCP discover packet to contact any DHCP server on the net. After getting an IP<br />
address <strong>and</strong> other net configuration information back from a DHCP server, it restarts the network<br />
interface with the IP address <strong>and</strong> configures <strong>MultiNet</strong> on the host with the information it received.<br />
That information may include the default gateway, DNS domain name, host name, DNS servers’ IP<br />
addresses, <strong>and</strong> other things. After the network interface is configured <strong>and</strong> started, the DHCP client<br />
goes to sleep <strong>and</strong> waits for specified events (lease expired, renewal time reached) to wake it up<br />
again for possible re-configuration.<br />
If the DHCP client can not get the information it needs from the DHCP server, it may re-try until it<br />
succeeds. The re-try frequency can be controlled by the configuration file.<br />
The DHCP client process sets the following items only when configuring the network interface, if it<br />
received the appropriate information from the DHCP server:<br />
• IP address of the network interface<br />
• Host name of the network interface<br />
• Domain Name<br />
• DNS client (Resolver)<br />
• Routes/Gateway<br />
It may change or set the following <strong>MultiNet</strong> logical:<br />
MULTINET_NAMESERVERS<br />
It may change the following related OpenVMS logicals:<br />
UCX$BIND_DOMAIN UCX$BIND_SERVER000<br />
19-5
DHCP Client<br />
DHCP Client Configuration<br />
19-6<br />
UCX$BIND_SERVER00x UCX$INET_DOMAIN<br />
UCX$INET_HOST UCX$INET_HOSTADDR<br />
TCPIP$BIND_DOMAIN TCPIP$BIND_SERVER000<br />
TCPIP$BIND_SERVER00x TCPIP_DOMAINNAME<br />
TCPIP_NAMESERVERS<br />
The <strong>MultiNet</strong> DHCP client uses the configuration file MULTINET:DHCLIENT.CONF to control<br />
the behavior of the client. Use the template file MULTINET:DHCLIENT_CONF.DEFAULT to<br />
start with.<br />
To explore more configuration possibilities, read the following dhclient.conf descriptions. The<br />
descriptions are based on the ISC's descriptions for the UNIX version of the DHCP client<br />
configuration file. The original document can be found on the ISC's website at http://www.isc.org/<br />
isc.<br />
The dhclient.conf file is a free-form ASCII text file. The file may contain extra tabs <strong>and</strong> new lines<br />
for formatting purposes. Keywords in the file are case-insensitive. Comments begin with the #<br />
character <strong>and</strong> end at the end of the line <strong>and</strong> may be placed anywhere within the file (except within<br />
quotation marks). You can use the dhclient.conf file to configure the behavior of the client in the<br />
following ways:<br />
• Protocol timing<br />
• Information requested from the server<br />
• Information required of the server<br />
• Defaults to use if the server does not provide certain information<br />
• Values with which to override information provided by the server<br />
• Values to prepend or append to information provided by the server<br />
The configuration file can also be preloaded with addresses to use on networks that do not have<br />
DHCP servers.<br />
Protocol Timing<br />
The timing behavior of the client need not be configured by the user. If no timing configuration is<br />
provided by the user, a reasonable timing behavior will be used by default — one which results in<br />
timely updates without placing an inordinate load on the server. The following statements can be
used to adjust the timing behavior of the DHCP client if required.<br />
Table 19-2 DHCP Client Protocol Timing Statements<br />
Statement Description<br />
DHCP Client<br />
backoff-cutoff time The client uses an exponential backoff algorithm with some r<strong>and</strong>omness,<br />
so that if many clients try to configure themselves at the same time, they<br />
will not make their requests in lockstep. The backoff-cutoff statement<br />
determines the maximum amount of time the client is allowed to backoff.<br />
The default is two minutes<br />
initial-interval time The initial-interval statement sets the amount of time between the first<br />
attempt to reach a server <strong>and</strong> the second attempt to reach a server by<br />
recalculating the interval between messages. It is incremented by twice<br />
the current interval multiplied by a r<strong>and</strong>om number between zero <strong>and</strong><br />
one. If it is greater than the backoff-cutoff amount, it is set to that<br />
amount. The default is ten seconds.<br />
reboot time When the client is restarted, it first tries to reacquire the last address it<br />
had. This is called the INIT-REBOOT state. This is the quickest way to<br />
get started if it is still attached to the same network it was attached to<br />
when it last ran. The reboot statement sets the time that must elapse after<br />
the client first tries to reacquire its old address before it gives up <strong>and</strong> tries<br />
to discover a new address. The reboot timeout default is ten seconds.<br />
retry time The retry statement determines the time that must pass after the client<br />
has determined that there is no DHCP server present before it tries again<br />
to contact a DHCP server. By default, this is 5 minutes.<br />
select-timeout time It is possible to have more than one DHCP server serving any given<br />
network. It is also possible that a client may receive more than one offer<br />
in response to its initial lease discovery message. It may be that one of<br />
these offers is preferable to the other (e.g., one offer may have the<br />
address the client previously used, <strong>and</strong> the other may not). The selecttimeout<br />
is the time after the client sends its first lease discovery request<br />
at which it stops waiting for offers from servers, assuming that it has<br />
received at least one such offer. If no offers have been received by the<br />
time the select-timeout has expired, the client will accept the first offer<br />
that arrives. By default, the select-timeout is zero seconds — that is, the<br />
client will take the first offer it sees.<br />
19-7
DHCP Client<br />
Lease Requirements <strong>and</strong> Requests<br />
19-8<br />
Table 19-2 DHCP Client Protocol Timing Statements (Continued)<br />
Statement Description<br />
timeout time The timeout statement determines the amount of time that must pass<br />
between when the client begins to try to determine its address <strong>and</strong> the<br />
time it decides that it is not going to be able to contact a server. The<br />
default is 60 seconds. After the timeout has passed, if there are any static<br />
leases defined in the configuration file, or any leases remaining in the<br />
lease database that have not yet expired, the client loops through these<br />
leases attempting to validate them. If it finds one that appears to be valid,<br />
it uses that lease’s address. If there are no valid static leases or unexpired<br />
leases in the lease database, the client restarts the protocol after the<br />
defined retry interval.<br />
The DHCP protocol allows the client to request the server to send it specific information. The<br />
protocol also allows the client to reject offers from servers if they do not contain information the<br />
client needs, or if the information provided is not satisfactory. There is a variety of data contained<br />
in offers that DHCP servers send to DHCP clients. The DHCP client can request any of the DHCP<br />
options, see Table 19-4 in this guide for a list of options.<br />
Table 19-3 DHCP Client Lease Options<br />
Lease Option Description<br />
request [ option ] [, ... option ]; The request statement causes the client to request that any<br />
server responding to the client send the client its values for the<br />
specified options. Only the option names should be specified<br />
in the request statement, not option parameters. For example,<br />
request subnet-mask, routers;<br />
require [ option ] [, ... option ]; The require statement lists options that must be sent in order<br />
for an offer to be accepted. Offers that do not contain all the<br />
listed options are ignored.
Table 19-3 DHCP Client Lease Options (Continued)<br />
send { [ option declaration ]<br />
[, ... option declaration ]}<br />
Option Modifiers<br />
DHCP Client<br />
The send statement causes the client to send the specified<br />
options to the server with the specified values. These are full<br />
option declarations as described in Chapter 21 in this guide.<br />
Options that are always sent in the DHCP protocol should not<br />
be specified here. The one exception is that the client can specify<br />
a requested-lease-time option other than the default<br />
requested lease time, which is two hours. The other obvious<br />
use for this statement is to send information to the server that<br />
allows it to differentiate between this client <strong>and</strong> other clients or<br />
kinds of clients. For example,<br />
send host-name “my-name”;<br />
In some cases, a client may receive option data from the server that is not appropriate for that client,<br />
or may not receive information that it needs, <strong>and</strong> for which a useful default value exists. It may also<br />
receive information that is useful, but needs to be supplemented with local information. To h<strong>and</strong>le<br />
these needs, these option modifiers are available.<br />
Table 19-4 DHCP Client Option Modifiers<br />
Modifier Description<br />
append [ option declaration ]; Use the append statement if the client should use the values<br />
supplied by the server followed by a value you supply. The<br />
append statement can only be used for options that allow<br />
more than one value to be given. This restriction is not<br />
enforced. If you ignore it, the behavior is unpredictable.<br />
default [ option declaration ]; Use the default statement to specify a default value if no<br />
value was supplied by the server.<br />
prepend [ option declaration ]; Use the prepend statement if the client should use a value<br />
you supply followed by the values supplied by the server.<br />
The prepend statement can only be used for options that<br />
allow more than one value to be given. This restriction is not<br />
enforced. If you ignore it, the behavior is unpredictable.<br />
supersede [ option declaration ]; Use the supersede statement if the client should always use<br />
a locally-configured value or values rather than whatever is<br />
supplied by the server.<br />
19-9
DHCP Client<br />
Lease Declarations<br />
19-10<br />
A lease statement consists of the lease keyword, followed by a left curly brace ( { ), followed by<br />
one or more lease declaration statements, followed by a right curly brace ( } ).<br />
lease { lease-declaration [ ... lease-declaration ] }<br />
The DHCP client may decide after some period of time (see Protocol Timing) that it is not going to<br />
succeed in contacting a server. At that time, it consults its own database of old leases <strong>and</strong> tests each<br />
one that has not yet timed out by pinging the listed router for that lease to see if that lease could<br />
work. It is possible to define one or more fixed leases in the client configuration file for networks<br />
where there is no DHCP or BOOTP service, so that the client can still configure its address<br />
automatically. This is done with the lease statement.<br />
Note! The lease statement is also used in the dhclient.db file in order to record leases that have been<br />
received from DHCP servers. Some of the syntax for leases as described below is only needed<br />
in the dhclient.db file. Such syntax is documented here for completeness.<br />
The following lease declarations are possible:<br />
Table 19-5 DHCP Client Lease Declarations<br />
Declaration Description<br />
bootp; The bootp statement indicates that the lease was acquired using the<br />
BOOTP protocol rather than the DHCP protocol. It is never necessary<br />
to specify this in the client configuration file. The client uses<br />
this syntax in its lease database file.<br />
filename "string"; The filename statement specifies the name of the boot filename to<br />
use. This is not used by the st<strong>and</strong>ard client configuration script, but<br />
is included for completeness.<br />
fixed-address ip-address; The fixed-address statement sets the IP address of a particular<br />
lease. This is required for all lease statements. The IP address must<br />
be specified as a dotted quad (e.g., 12.34.56.78).<br />
interface "string"; The interface statement indicates the interface on which the lease<br />
is valid. If set, this lease will be tried only on a particular interface.<br />
When the client receives a lease from a server, it always records the<br />
interface number on which it received that lease. If predefined<br />
leases are specified in the dhclient.conf file, the interface should<br />
also be specified, although this is not required.<br />
option option-declaration; The option statement specifies the value of an option supplied by<br />
the server, or, in the case of predefined leases declared in dhclient.conf,<br />
the value that the user wants the client configuration<br />
script to use if the predefined lease is used.
Table 19-5 DHCP Client Lease Declarations (Continued)<br />
renew date;<br />
rebind date;<br />
expire date;<br />
DHCP Client<br />
The renew statement defines the time at which the DHCP client<br />
should begin trying to contact its server to renew a lease that it is<br />
using.<br />
The rebind statement defines the time at which the DHCP client<br />
should begin to try to contact any DHCP server in order to renew<br />
its lease.<br />
The expire statement defines the time at which the DHCP client<br />
must stop using a lease if it has not been able to contact a server in<br />
order to renew it.<br />
These declarations are set automatically in leases acquired by the<br />
DHCP client, but must be configured in predefined leases: a predefined<br />
lease whose expiration time has passed will not be used by<br />
the DHCP client. Dates are specified as follows:<br />
//<br />
::<br />
W YYYY/MM/DD HH:MM:SS<br />
W is the day of the week, from zero (Sunday) to six (Saturday).<br />
YYYY is the year, including the century.<br />
MM is the number of the month, from 01 to 12.<br />
DD is the day of the month, counting from 01.<br />
HH is the hour, from 00 to 23.<br />
MM is the minute, from 00 to 59.<br />
SS is the second, from 00 to 59.<br />
The time is always in Greenwich Mean Time, not local time.<br />
server-name "string"; The server-name statement specifies the name of the boot server<br />
name to use. This is not used by the st<strong>and</strong>ard client configuration<br />
script.<br />
script "script-name"; The script statement specifies the file name of the DHCP client<br />
configuration script. This script is used by the DHCP client to set<br />
the interface's initial configuration prior to requesting an address,<br />
to test the address once it has been offered, <strong>and</strong> to set the interface's<br />
final configuration once a lease has been acquired. If no lease is<br />
acquired, the script is used to test predefined leases, if any, <strong>and</strong> also<br />
called once if no valid lease can be identified. The default value for<br />
“script-name” is “MULTINET:DHCLIENT-SCRIPT.COM”.<br />
19-11
DHCP Client<br />
Other Declarations<br />
Example<br />
19-12<br />
Table 19-6 DHCP Client Other Declarations<br />
Declaration Description<br />
reject ip-address; The reject statement causes the DHCP client to reject offers from servers<br />
who use the specified address as a server identifier. This can be used to<br />
avoid being configured by rogue or misconfigured DHCP servers, although<br />
it should be a last resort; better to track down the bad DHCP server <strong>and</strong> fix<br />
it.<br />
The following configuration file is used on an ALPHA machine with VMS 7.1.<br />
# template of MULTINET:DHCLIENT.CONF<br />
send host-name "lambda2";<br />
send dhcp-lease-time 3600;<br />
prepend domain-name-servers 127.0.0.1;<br />
request subnet-mask, broadcast-address, time-offset, routers,<br />
domain-name, domain-name-servers, host-name;<br />
require subnet-mask, domain-name-servers;<br />
timeout 60;<br />
retry 60;<br />
reboot 10;<br />
select-timeout 5;<br />
initial-interval 2;<br />
script "multinet:dhclient-script.com";<br />
reject 10.10.10.10; # reject the offer from this DHCP server<br />
The first line, starting with the #, is a comment line. The last line rejects the offer from the DHCP<br />
server with an IP address of 10.10.10.10. This is not a simple dhclient.conf file. In many cases, it<br />
is sufficient to just create an empty dhclient.conf file <strong>and</strong> let the DHCP client use default values.<br />
Troubleshooting the DHCP Client<br />
How do I know the DHCP client has configured my network successfully?<br />
There are two ways to do it:<br />
Check if the "MULTINET_DHCP_CLIENT" logical is equal to "1", you can do:<br />
$ SHOW LOGICAL MULTINET_DHCP_CLIENT<br />
"MULTINET_DHCP_CLIENT" = "1" (LNM$SYSTEM_TABLE)
$<br />
Run the $ MULTINET CONFIGURE /INTERFACE comm<strong>and</strong>.<br />
1 Check the line DHCP Client for which the interface is enabled.<br />
2 Check that the line DHCP Client Flag: is set.<br />
$ MULTINET CONFIGURE /INTERFACE<br />
DHCP Client<br />
<strong>MultiNet</strong> Network Configuration Utility v5.4(nn)<br />
[Reading in MAXIMUM configuration from MULTINET:MULTINET.EXE]<br />
[Reading in configuration from MULTINET:NETWORK_DEVICES.CONFIGURATION]<br />
NET-CONFIG>SHOW<br />
Interface Adapter CSR Address Flags/Vector<br />
--------- ------- ----------- -----------se0<br />
(Shared VMS Ethernet/FDDI) -NONE- -NONE- -NONE-<br />
[TCP/IP: 10.10.10.10]<br />
[VMS Device: EWA0, Link Level: Ethernet]<br />
DHCP Client for the interface is enabled<br />
Official Host Name: dumdum.fuges.com<br />
Domain Nameserver: 127.0.0.1<br />
Timezone: EST<br />
Timezone Rules: US/EASTERN<br />
Load UCX $QIO driver: TRUE<br />
Load PWIP (Pathworks) driver: TRUE<br />
DHCP Client Flag: 1<br />
NET-CONFIG>QUIT<br />
$<br />
What if I cannot ping an IP address on the internet?<br />
If you can ping the same IP address from another host <strong>and</strong> the network interface has been<br />
configured by the DHCP client, check the gateway <strong>and</strong> route configuration on the host.<br />
What if I can ping a host by its IP address but not by its name?<br />
• The DNS client on the host may not be configured right. Type<br />
$ SHOW LOGICAL MULTINET_NAMESERVERS<br />
to make sure the DNS client information is correct.<br />
• The DNS server may be down.<br />
19-13
DHCP Client<br />
Why is the local address "0.0.0.0" when I use "$ multinet configure /interface"<br />
<strong>and</strong> then use “show”?<br />
The DHCP client has failed to allocate an IP address. The possible reasons <strong>and</strong> solutions are:<br />
Where can I find the status information of the DHCP client?<br />
19-14<br />
Reason Solution<br />
There is no DHCP server on the net. Set up a DHCP server.<br />
The DHCP server is not configured correctly. Modify the DHCP server configuration.<br />
The DHCP client is configured to reject the DHCP<br />
server.<br />
• The file MULTINET:DHCLIENT-SCRIPT-ENV.TMP contains the most recent environment<br />
variables used by the DHCP client script file to configure the network.<br />
• The file MULTINET:DHCLIENT.DB contains the DHCP client lease history.<br />
• The file MULTINET:DHCLIENT.LOG contains information about the DHCP client process.<br />
The MULTINET:DHCLIENT.LOG file is not created by the default setting of the DHCP client. To<br />
create this log file, configure the DHCP client to enable the error <strong>and</strong> debug logging:<br />
$ MULTINET CONFIGURE /SERVER<br />
SERVER-CONFIG>SELECT DHCLIENT<br />
SERVER-CONFIG>SET PARAMETERS<br />
Add Parameter:DEBUG 7<br />
Add Parameter:<br />
SERVER-CONFIG>WRITE<br />
SERVER-CONFIG>RESTART<br />
(Debug levels are listed in Table 19-1)<br />
Reconfigure the DHCP client to not<br />
reject the DHCP server.<br />
The hostname selection process failed. Use another host name.<br />
There are no IP addresses available in the DHCP<br />
server.<br />
Increase the IP address on the DHCP<br />
pool server.
Chapter 20<br />
Configuring the Font Server<br />
This chapter explains how to use the <strong>MultiNet</strong> font server to provide fonts for X11R5 (<strong>and</strong> later) X<br />
servers on your network. To underst<strong>and</strong> the material in this chapter, you should be familiar with<br />
font administration on X11R5 servers.<br />
Underst<strong>and</strong>ing the Font Server Getting Information About the Font Server<br />
The Font Server Configuration File Controlling the <strong>MultiNet</strong> Font Server<br />
Specifying Font Servers Defining Font Catalogues<br />
Supported Font Types Adding Fonts to the Font Server<br />
Enabling the Font Server<br />
Underst<strong>and</strong>ing the Font Server<br />
The <strong>MultiNet</strong> font server makes fonts on your OpenVMS system available to remote X11R5 (<strong>and</strong><br />
later) X servers without using a distributed file system, such as NFS, or file transfer via FTP or<br />
TFTP.<br />
The main advantages of font servers over distributed file systems or file transfer are:<br />
• Simplicity of font administration.<br />
• Redundancy. X servers can use multiple font servers. If one font server fails or is unavailable,<br />
the X server can request fonts from another font server.<br />
You can add font servers to an X server font search path the same way you add directories to the<br />
font search path. For example, you can add a font server to the font search path of X servers<br />
running on UNIX systems with the xset +fp <strong>and</strong> xset fp+ comm<strong>and</strong>s.<br />
• When an X server needs a font, it sends a request to the font server.<br />
• If the requested font is on the font server, the font is transferred to the X server.<br />
• If the font is not on the font server, the X server continues to search the rest of the font search<br />
path, which may include other font servers.<br />
20-1
Configuring the Font Server<br />
20-2<br />
You can also configure the font server to return the names of other font servers (known as<br />
alternates) that the X server can search when the font server fails to find a requested font.<br />
The Font Server Configuration File<br />
The <strong>MultiNet</strong> font server obtains its configuration parameters from the configuration file<br />
MULTINET:FONT_SERVER.CONFIGURATION, which is equivalent to the /usr/lib/X11/fs/<br />
config configuration file used by font servers on UNIX systems. Although the file names are<br />
different, the file formats are identical; you can use configuration files from UNIX systems on your<br />
OpenVMS host.<br />
The configuration file is an ASCII text file that contains a list of configuration parameter names<br />
<strong>and</strong> values. Each parameter name is followed by an equals sign (=) <strong>and</strong> the desired value.<br />
Table 20-1 describes the font server configuration parameters.<br />
Table 20-1 Font Server Configuration Parameters<br />
Parameter Accepted Values Description<br />
cache size cardinal number Specifies the size of the font server's font cache. To<br />
improve font access speed, specify a large font<br />
cache. Default: 10000.<br />
catalogue list of strings Lists font path element names, delimited by commas.<br />
The <strong>MultiNet</strong> font server supports only a single<br />
catalogue (all), which contains all specified fonts.<br />
alternate-server list of strings Lists alternate servers for this font server.<br />
client-limit cardinal number Specifies the number of clients this font server<br />
supports before refusing service.<br />
default-point-size cardinal number Specifies the default point size (in decipoints) for<br />
fonts that don't specify a point size.<br />
default-resolutions comma-delimited<br />
list of integers<br />
Specifies the default resolutions the server supports.<br />
This information may be used as a hint for prerendering,<br />
<strong>and</strong> substituted for scaled fonts which do<br />
not specify a resolution.<br />
error-file string Specifies the log file into which all warnings <strong>and</strong><br />
errors are written.<br />
port cardinal number Specifies the TCP port on which the server listens for<br />
connections.<br />
trusted-clients comma-delimited<br />
list of host names<br />
Determines which hosts can use the font server. If<br />
you don't specify any hosts (the default), all hosts<br />
can use the font server. If you specify hosts, they are<br />
the only ones that can use the font server.
An example font server configuration file follows.<br />
Configuring the Font Server<br />
# Font server configuration file<br />
# <strong>MultiNet</strong> Font Server<br />
# Specify the font directories to export.<br />
#<br />
# WARNING: The file DECW$FONT_DIRECTORY.DAT must exist. If it does not,<br />
you<br />
# can create it with the comm<strong>and</strong> $ MU FONT MKFONTDIR [directory,...]<br />
#<br />
catalogue = sys$common:[sysfont.decw.100dpi],<br />
sys$common:[sysfont.decw.75dpi],<br />
sys$common:[sysfont.decw.common],<br />
sys$common:[sysfont.decw.cursor16],<br />
sys$common:[sysfont.decw.cursor32]<br />
#<br />
# Uncomment this line to start logging errors to a file on disk.<br />
# Restart the font server to put logging into effect.<br />
#<br />
#error-file = <strong>MultiNet</strong>:fs.errors<br />
#<br />
# in decipoints<br />
default-point-size = 120<br />
default-resolutions = 75,75,100,100<br />
Specifying Font Servers<br />
All X11R5 (<strong>and</strong> later) servers use the same syntax for specifying font servers:<br />
transport/host_name:port_number[/catalogue]<br />
– transport is "TCP."<br />
– host_name is the name of the host on which the font server is running.<br />
– port_number is the port on which the <strong>MultiNet</strong> font server listens for requests from remote X<br />
servers. By convention, the <strong>MultiNet</strong> font server listens on port 7000.<br />
– catalogue is the catalogue the <strong>MultiNet</strong> font server provides (by default, "all"). Catalogues are the<br />
equivalent of search paths on the font server. For details on defining catalogues, see the Defining<br />
Font Catalogues section.<br />
Supported Font Types<br />
The <strong>MultiNet</strong> font server supports the following font formats:<br />
BDF MIT SNF Speedo<br />
DECwindows PCF<br />
20-3
Configuring the Font Server<br />
20-4<br />
<strong>MultiNet</strong> also includes two comm<strong>and</strong>s for converting font formats:<br />
MULTINET FONT COMPILE Compiles BDF fonts into PCF format. Type HELP<br />
MULTINET FONT COMPILE for online help.<br />
MULTINET FONT UNCOMPILE Converts fonts supported by the font server into BDF<br />
format. Type HELP MULTINET FONT UNCOMPILE<br />
for online help.<br />
The default font alias file name is DECW$FONT_ALIAS.DAT to match the default font values<br />
used by Hewlett-Packard.<br />
Enabling the Font Server<br />
To enable the <strong>MultiNet</strong> font server, use the SERVER-CONFIG utility (MULTINET CONFIGURE<br />
/SERVER). For example, to enable the font server on a single OpenVMS system, enter:<br />
$ MULTINET CONFIGURE /SERVER<br />
SERVER-CONFIG>ENABLE FONTSERVER<br />
SERVER-CONFIG>RESTART<br />
Configuration modified, do you want to save it ? [YES] YES<br />
SERVER-CONFIG>QUIT<br />
$<br />
Getting Information About the Font Server<br />
This section describes how to get information about a specific font server. Use the MULTINET<br />
FONT comm<strong>and</strong> to obtain the following information about the font server:<br />
• Current font server configuration (see the Checking the Font Server Configuration section)<br />
• Names of available fonts (see the Listing Available Fonts section)<br />
• Font file data (see the Viewing Font Data section)<br />
Checking the Font Server Configuration<br />
To check the status of the <strong>MultiNet</strong> font server, enter:<br />
$ MULTINET FONT INFO /SERVER=font_server_name:port_number)<br />
– font_server_name is the name of the font server you want to check. Use the font server name<br />
syntax described in the Specifying Font Servers section.<br />
– port_number is the port on which the font server listens. By convention, the <strong>MultiNet</strong> font server<br />
listens on port 7000.<br />
The following example shows the information generated by this comm<strong>and</strong> on a system that acts as<br />
a font server with no alternates.<br />
$ MULTINET FONT INFO /SERVER=WHORFIN:7000<br />
name of server: WHORFIN:7000<br />
version number: 2
vendor string: ABC, Incorporated<br />
vendor release number: 5001<br />
maximum request size: 16384 longwords (65536 bytes)<br />
number of catalogues: 1<br />
all<br />
Number of alternate servers: 0<br />
number of extensions: 0<br />
$<br />
For more information, type HELP MULTINET FONT INFO.<br />
Listing Available Fonts<br />
To list the names of available fonts on a font server, enter:<br />
$ MULTINET FONT LIST /SERVER=font_server_name font_spec<br />
Configuring the Font Server<br />
– font_server_name is the name of the font server from which you want to obtain the list of fonts.<br />
Use the font server name syntax described in Specifying Font Servers.<br />
– font_spec is a font specification, in which you may include wildcard characters.<br />
The following example shows the comm<strong>and</strong> that lists all "fixed" fonts on the font server.<br />
$ MULTINET FONT LIST /SERVER=WHORFIN:7000 *FIXED*<br />
-misc-fixed-bold-r-normal--0-0-75-75-c-0-iso8859-1<br />
-misc-fixed-bold-r-normal--13-120-75-75-c-70-iso8859-1<br />
-misc-fixed-bold-r-normal--13-120-75-75-c-80-iso8859-1<br />
-misc-fixed-bold-r-normal--15-140-75-75-c-90-iso8859-1<br />
-misc-fixed-bold-r-semicondensed--0-0-75-75-c-0-iso8859-1<br />
-misc-fixed-bold-r-semicondensed--13-120-75-75-c-60-iso8859-1<br />
-misc-fixed-medium-r-normal--0-0-75-75-c-0-iso8859-1<br />
-misc-fixed-medium-r-normal--10-100-75-75-c-60-iso8859-1<br />
-misc-fixed-medium-r-normal--13-120-75-75-c-70-iso8859-1<br />
-misc-fixed-medium-r-normal--13-120-75-75-c-80-iso8859-1<br />
-misc-fixed-medium-r-normal--14-130-75-75-c-70-iso8859-1<br />
-misc-fixed-medium-r-normal--15-140-75-75-c-90-iso8859-1<br />
-misc-fixed-medium-r-normal--20-200-75-75-c-100-iso8859-1<br />
-misc-fixed-medium-r-normal--8-80-75-75-c-50-iso8859-1<br />
-misc-fixed-medium-r-normal--9-90-75-75-c-60-iso8859-1<br />
-misc-fixed-medium-r-semicondensed--0-0-75-75-c-0-iso8859-1<br />
-misc-fixed-medium-r-semicondensed--12-110-75-75-c-60-iso8859-1<br />
-misc-fixed-medium-r-semicondensed--13-120-75-75-c-60-iso8859-1<br />
-sony-fixed-medium-r-normal--0-0-100-100-c-0-iso8859-1<br />
-sony-fixed-medium-r-normal--16-120-100-100-c-80-iso8859-1<br />
-sony-fixed-medium-r-normal--24-170-100-100-c-120-iso8859-1<br />
fixed<br />
fixed<br />
$<br />
For more information, type HELP MULTINET FONT LIST.<br />
20-5
Configuring the Font Server<br />
Viewing Font Data<br />
20-6<br />
To list the data that comprises a specific font, log into the host running the font server, <strong>and</strong> enter:<br />
$ MULTINET FONT SHOW /SERVER=font_server_name font_spec<br />
– font_server_name is the name of the font server from which you want to obtain the font data. Use<br />
the font server name syntax described in the Specifying Font Servers section.<br />
– font_spec is a font specification, in which you may include wildcard characters.<br />
For information on other MULTINET FONT SHOW qualifiers, refer to the <strong>MultiNet</strong> for OpenVMS<br />
<strong>Administrator's</strong> Reference.<br />
The following example shows the comm<strong>and</strong> that lists the data for two characters in the Courier<br />
font:<br />
$ MULTINET FONT SHOW /SERVER=WHORFIN:7000 /START=52 /END=53 *COURIER*<br />
opened font *COURIER*<br />
Direction: Left to Right<br />
Range: 32 to 255<br />
Default char: 32<br />
Min bounds:<br />
Left: -2 Right: 1 Ascent: -1 Descent: -5 Width: 6<br />
Max bounds:<br />
Left: 3 Right: 7 Ascent: 9 Descent: 2 Width: 6<br />
Font Ascent: 8 Font Descent: 2<br />
FONT -Adobe-Courier-Bold-O-Normal--11-80-100-100-M-60-ISO8859-1<br />
FOUNDRY Adobe<br />
FAMILY_NAME Courier<br />
WEIGHT_NAME Bold<br />
SLANT O<br />
SETWIDTH_NAME Normal<br />
ADD_STYLE_NAME<br />
PIXEL_SIZE 11<br />
POINT_SIZE 80<br />
RESOLUTION_X 100<br />
RESOLUTION_Y 100<br />
SPACING M<br />
AVERAGE_WIDTH 60<br />
CHARSET_REGISTRY ISO8859<br />
CHARSET_ENCODING 1<br />
CAP_HEIGHT 6<br />
X_HEIGHT 5<br />
FACE_NAME Courier Bold Oblique<br />
COPYRIGHT Copyright (c) 1984, 1987 Adobe Systems Incorporated. All<br />
Rights Reserved. Copyright (c) 1988, 1991 Digital Equipment Corporation.<br />
All Rights Reserved.<br />
NOTICE No mark<br />
_DEC_DEVICE_FONTNAMES PS=Courier-BoldOblique<br />
_DEC_PRODUCTINFO DECwindows Fonts V2.2, 07-Nov-1991<br />
RELATIVE_SETWIDTH 50
Configuring the Font Server<br />
RELATIVE_WEIGHT 70<br />
CHARSET_COLLECTIONS ASCII ISO8859-1 ADOBE-STANDARD<br />
FULL_NAME Courier Bold Oblique<br />
RESOLUTION 138<br />
QUAD_WIDTH 6<br />
char #52 '4'<br />
Left: 0 Right: 5 Ascent: 7 Descent: 0 Width: 6<br />
---##<br />
--###<br />
-#-##<br />
#--#-<br />
#####<br />
--##-<br />
--##char<br />
#53 '5'<br />
Left: 0 Right: 6 Ascent: 7 Descent: 0 Width: 6<br />
--####<br />
-##---<br />
-###--<br />
--##-<br />
---##-<br />
#--##-<br />
###---<br />
$<br />
For more information, type HELP MULTINET FONT SHOW.<br />
Controlling the <strong>MultiNet</strong> Font Server<br />
This section describes how to control the font server.<br />
Use the MULTINET NETCONTROL FONTSERVER comm<strong>and</strong> for the following tasks:<br />
• Starting the font server (see the Starting the Font Server section)<br />
• Stopping the font server (see the Stopping the FS Server section)<br />
• Restarting the font server (see the Restarting the Font Server section)<br />
• Reloading the font server configuration (see the Reloading the Font Server Configuration<br />
section)<br />
• Flushing the font server cache (see the Flushing the Font Server Cache section)<br />
• Resetting the font server (see the Resetting the Font Server section)<br />
Starting the Font Server<br />
To start the <strong>MultiNet</strong> font server, enter:<br />
$ MULTINET NETCONTROL FONTSERVER START<br />
< FS Server Started, process id pid<br />
When the font server starts, it reads the master configuration file,<br />
MULTINET:FONT_SERVER.CONFIGURATION. For information about the master<br />
20-7
Configuring the Font Server<br />
20-8<br />
configuration file, see The Font Server Configuration File section.<br />
Stopping the FS Server<br />
To stop the <strong>MultiNet</strong> font server, enter:<br />
$ MULTINET NETCONTROL FONTSERVER SHUTDOWN<br />
< FS Server Shutdown<br />
Restarting the Font Server<br />
Restarting the font server is a convenient alternative to first stopping <strong>and</strong> then starting it as<br />
described in the Starting the Font Server section <strong>and</strong> the Stopping the FS Server section.<br />
When the font server restarts, it reads the configuration file,<br />
MULTINET:FONT_SERVER.CONFIGURATION. For information about the font server<br />
configuration file, see The Font Server Configuration File section.<br />
To restart the <strong>MultiNet</strong> font server, enter:<br />
$ MULTINET NETCONTROL FONTSERVER RESTART<br />
< FS Server Started, process id pid<br />
Note! Because the font server provides fonts on request, restarting does not disrupt any connections.<br />
Reloading the Font Server Configuration<br />
Changes to the font server configuration file (MULTINET:FONT_SERVER.CONFIGURATION)<br />
only take effect when the font server is started, restarted, or when the configuration files are<br />
reloaded. Reloading the font server allows you to reload font server configuration files without<br />
restarting the font server.<br />
For information on the font server configuration file, see The Font Server Configuration File<br />
section. To reload the font server configuration file, enter:<br />
$ MULTINET NETCONTROL FONTSERVER RELOAD<br />
< WHORFIN.FLOWERS.COM Network Control 5.4 (nnn) at Wed 26-Nov-2003 1:33PM-<br />
PST<br />
< OK: FS server configuration reloading<br />
Note! Because the font server provides fonts on request, reloading does not disrupt active<br />
connections.
Flushing the Font Server Cache<br />
Configuring the Font Server<br />
To improve performance, the font server keeps copies of requested fonts in a cache. To flush the<br />
font cache, enter:<br />
$ MULTINET NETCONTROL FONTSERVER FLUSH<br />
< WHORFIN.FLOWERS.COM Network Control 5.4(nnn) at Wed 26-Nov-2003 1:36PM-<br />
PST<br />
< OK: Font Server cache flushed<br />
The size of this cache is defined in the font server configuration file,<br />
MULTINET:FONT_SERVER.CONFIGURATION. For details about the font server<br />
configuration, see The Font Server Configuration File section.<br />
Resetting the Font Server<br />
For convenience, <strong>MultiNet</strong> provides a RESET comm<strong>and</strong> to flush <strong>and</strong> reload the font server. To<br />
reset the font server, enter:<br />
$ MULTINET NETCONTROL FONTSERVER RESET<br />
< WHORFIN.FLOWERS.COM Network Control 5.4(nnn) at Wed 26-Nov-2003 1:37PM-<br />
PST<br />
< OK: Font Server reset<br />
Defining Font Catalogues<br />
Font catalogues are the font server equivalent of X server font search paths. To make fonts<br />
available via the font server, add the directories in which they reside to the "catalogue" line in the<br />
font server configuration file MULTINET:FONT_SERVER.CONFIGURATION.<br />
For example, the default catalogue definition supplied with <strong>MultiNet</strong> is defined as:<br />
catalogue = sys$common:[sysfont.decw.100dpi],<br />
sys$common:[sysfont.decw.75dpi],<br />
sys$common:[sysfont.decw.common],<br />
sys$common:[sysfont.decw.cursor16],<br />
sys$common:[sysfont.decw.cursor32]<br />
If you modify the font server configuration file, the changes only take effect when you start, restart,<br />
reload, or reset the font server.<br />
Adding Fonts to the Font Server<br />
To make a new font available via the font server:<br />
1 Install the font file in the appropriate font directory on the font server host. If the font is in BDF<br />
format, you may want to convert the font into PCF format with the MULTINET FONT<br />
COMPILE comm<strong>and</strong> to improve font server performance (type HELP MULTINET FONT<br />
COMPILE for online help).<br />
20-9
Configuring the Font Server<br />
20-10<br />
2 Update the font directory's DECW$FONT_DIRECTORY.DAT file with the MULTINET FONT<br />
MKFONTDIR comm<strong>and</strong> (type HELP MULTINET FONT MKFONTDIR for online help). This<br />
comm<strong>and</strong> creates the DECW$FONT_DIRECTORY.DAT file.<br />
Note! If the DECW$FONT_DIRECTORY.DAT file is not found, the font server fails. Be sure to run<br />
MULTINET FONT MKFONTDIR manually in each DECwindows font directory in which you add<br />
a font file. Failing to do so may result in the font server not serving the st<strong>and</strong>ard DECwindows<br />
fonts.<br />
Note! When using MU FONT MKFONTDIR you must specify directories, not logical disks. For<br />
example, MU FONT MKFONTDIR MULTINET: is not valid.<br />
3 If desired, add an alias for the new font to the font directory's DECW$FONT_ALIAS.DAT file.<br />
4 Make sure the font directory is included in the "catalogue" statement in the font server<br />
configuration file MULTINET:FONT_SERVER.CONFIGURATION. For details, see the<br />
Defining Font Catalogues section. If you must modify the configuration file, reload the font<br />
server configuration (see the Reloading the Font Server Configuration section).<br />
For example, to configure the <strong>MultiNet</strong> font server to provide the fonts included in the NCDware<br />
3.0 distribution for VMS, include the following font directories in your catalogue definition:<br />
NCD_ROOT:[FONTS.PCF.100DPI]<br />
NCD_ROOT:[FONTS.PCF.75DPI]<br />
NCD_ROOT:[FONTS.PCF.DW100DPI]<br />
NCD_ROOT:[FONTS.PCF.DW75DPI]<br />
NCD_ROOT:[FONTS.PCF.MISC]<br />
NCD_ROOT:[FONTS.PCF.XOL]
Chapter 21<br />
Configuring Remote Systems with RARP,<br />
BOOTP, <strong>and</strong> DHCP Server<br />
This chapter explains how to configure <strong>MultiNet</strong> to supply network configuration data to remote<br />
client systems when they boot.<br />
Choosing a Network Configuration Server Checking the DHCP Configuration<br />
RARP (Reverse Address Resolution Protocol) Reloading the DHCP Configuration<br />
BOOTP (Bootstrap Protocol) DHCP Conversion Tool<br />
DHCP (Dynamic Host Configuration<br />
Protocol)<br />
Client Classing<br />
Using RARP DNS Dynamic Updates Within DHCP<br />
Using BOOTP Host Name Generation<br />
Using DHCP DHCP Options<br />
DHCP Lease Format Configuring DHCP Safe-failover<br />
Boot File for DHCP Safe-failover DHCP Safe-failover Configuration File<br />
Statements<br />
DHCP Safe-failover Lease File Statements Transitioning to DHCP Safe-failover Partner<br />
Down State<br />
Setting DHCP Parameters Viewing DHCP Information<br />
Address Lease States in DHCP Dump Files<br />
<strong>MultiNet</strong> provides three services that provide configuration data to remote systems:<br />
• RARP (Reverse Address Resolution Protocol)<br />
• BOOTP (Bootstrap Protocol) (responds only to BOOTP clients)<br />
21-1
Configuring Remote Systems with RARP, BOOTP, <strong>and</strong> DHCP Server<br />
21-2<br />
• DHCP (Dynamic Host Configuration Protocol) (responds to both BOOTP <strong>and</strong> DHCP clients)<br />
The BOOTP <strong>and</strong> DHCP servers allow a network administrator to configure various hosts on the<br />
network from a single location. In addition to the management of IP addresses, BOOTP <strong>and</strong> DHCP<br />
also provide configuration parameters to clients, such as default gateway, domain name server, <strong>and</strong><br />
subnet mask.<br />
Choosing a Network Configuration Server<br />
This section presents a brief description of the services <strong>and</strong> some criteria for deciding which<br />
protocol <strong>and</strong> services to use. The following table lists the advantages <strong>and</strong> disadvantages of the three<br />
protocols:<br />
Service Advantages <strong>and</strong> Disadvantages<br />
RARP Supplies IP addresses only.<br />
BOOTP Lets you provide vendor-specific configuration data. Works in conjunction with<br />
TFTP. Provides static configuration data only.<br />
DHCP Lets you provide vendor-specific configuration data. Provides both BOOTP <strong>and</strong><br />
DHCP services. Provides dynamic configuration for mobile computing, but does not<br />
solve all problems of mobile computing.<br />
RARP (Reverse Address Resolution Protocol)<br />
RARP’s sole function is to provide IP addresses to hosts that broadcast RARP requests with their<br />
hardware addresses.<br />
BOOTP (Bootstrap Protocol)<br />
BOOTP sends IP addresses <strong>and</strong> other configuration data to hosts that broadcast BOOTP requests.<br />
Because some BOOTP clients require more data to boot than can fit in a BOOTP response, BOOTP<br />
provides a means for specifying the location of a boot file. The BOOTP client can then load the file<br />
using TFTP (Trivial File Transfer Protocol). Usually, the data in the boot file (such as an X server<br />
for an X terminal) is specific to the vendor of the BOOTP client software.<br />
The BOOTP service responds to BOOTP requests only. If you are using the BOOTP-only service,<br />
DHCP services are not available. The BOOTP server is provided for backwards compatibility for<br />
those sites not wanting to change their configuration.<br />
DHCP (Dynamic Host Configuration Protocol)<br />
DHCP is an extension of the BOOTP protocol. DHCP sends IP addresses <strong>and</strong> other configuration<br />
data to hosts that broadcast DHCP requests. DHCP "leases" an IP address to a remote system for a<br />
finite time. DHCP lets you manage IP addresses <strong>and</strong> configuration data for a "pool" of remote<br />
systems, which makes DHCP useful for mobile computers that connect to multiple subnets.<br />
As with BOOTP, DHCP provides a means for specifying the location of a boot file which the
Configuring Remote Systems with RARP, BOOTP, <strong>and</strong> DHCP Server<br />
DHCP client can load using TFTP. For details on creating a downloadable boot file for a specific<br />
type of host, refer to the vendor's documentation.<br />
If you are using the DHCP server, all BOOTP services are available as well. A <strong>MultiNet</strong> host can<br />
have only one of the servers (BOOTP or DHCP) enabled because both use the same port.<br />
Note! Your BOOTP <strong>and</strong> DHCP configuration files must be located in the default location of<br />
MULTINET: in order for an automatic conversion to occur.<br />
Using RARP<br />
RARP (Reverse Address Resolution Protocol) is commonly used by diskless hosts to determine<br />
their Internet address. While ARP (Address Resolution Protocol) lets hosts resolve Internet<br />
addresses into Ethernet addresses, RARP lets them resolve Ethernet addresses into Internet<br />
addresses. Configuring the <strong>MultiNet</strong> RARP server consists of:<br />
1 Obtaining the data needed by each RARP client (see the Obtaining Data for RARP Clients<br />
section).<br />
2 On HP Ethernet interfaces only, enabling RARP packet reception (see the Enabling RARP<br />
Packet Reception on HP Ethernet Interfaces section).<br />
3 Enabling <strong>and</strong> starting RARP (see the Enabling <strong>and</strong> Starting RARP Service section).<br />
4 Adding client systems to the RARP configuration file (see the Adding Clients to the RARP<br />
Configuration File section).<br />
5 Reloading the RARP configuration (see the Reloading RARP Configuration section).<br />
Note! Because RARP clients send their requests in a link-layer broadcast (Ethernet, for example) <strong>and</strong><br />
most routers do not forward link-layer broadcasts, make sure the <strong>MultiNet</strong> system <strong>and</strong> all its<br />
RARP clients are on the same physical network.<br />
Obtaining Data for RARP Clients<br />
Obtain the IP <strong>and</strong> Ethernet addresses for each client you want to use with RARP. To obtain a<br />
client's Ethernet interface address, refer to the interface documentation.<br />
Ethernet addresses are expressed as six hexadecimal numbers (ranging from 0 to ff) separated by<br />
colons. IP addresses are expressed in dotted-decimal format.<br />
Enabling RARP Packet Reception on HP Ethernet Interfaces<br />
If your <strong>MultiNet</strong> system has an HP Ethernet interface, enable RARP packet reception with the<br />
MULTINET SET /INTERFACE comm<strong>and</strong>. For example, to enable RARP packet reception on the<br />
se0 interface:<br />
$ MULTINET SET/INTERFACE/VMS_DEVICE=XQA0:/LINK_LEVEL=ETHERNET/RARP SE0<br />
To automatically enable RARP packet reception when <strong>MultiNet</strong> starts, make sure to add the /RARP<br />
qualifier to the MULTINET SET /INTERFACE comm<strong>and</strong> line in the custom initialization comm<strong>and</strong><br />
procedure for the interface, as described in Chapter 11.<br />
21-3
Configuring Remote Systems with RARP, BOOTP, <strong>and</strong> DHCP Server<br />
Enabling <strong>and</strong> Starting RARP Service<br />
21-4<br />
To enable RARP, use SERVER-CONFIG or MENU-CONFIG. To enable the RARP server with<br />
SERVER-CONFIG:<br />
$ MULTINET CONFIGURE /SERVER<br />
<strong>MultiNet</strong> Server Configuration Utility 5.4(nnn)<br />
[Reading in configuration from MULTINET:SERVICES.MASTER_SERVER]<br />
SERVER-CONFIG>ENABLE RARP<br />
SERVER-CONFIG>EXIT<br />
[Writing configuration to<br />
MULTINET_COMMON_ROOT:[MULTINET]SERVICES.MASTER_SERVER]<br />
$<br />
To enable RARP with MENU-CONFIG:<br />
1 Start MENU-CONFIG with the MULTINET CONFIGURE /MENU comm<strong>and</strong>.<br />
2 Choose Configure <strong>MultiNet</strong> Server from the <strong>MultiNet</strong> Configuration menu.<br />
3 Choose View/Modify an Existing Service from the Services Configuration menu.<br />
4 Choose RARP from the Service Selection menu.<br />
5 Choose Enable or Disable Service from the RARP menu.<br />
6 If the RARP service state is DISABLED, press SPACE to enable it.<br />
7 Press Ctrl/Z until MENU-CONFIG prompts you to save the server configuration, <strong>and</strong> press<br />
RETURN to save the configuration.<br />
Once you have enabled RARP, start it by restarting the <strong>MultiNet</strong> Master Server:<br />
$ @MULTINET:START_SERVER<br />
Adding Clients to the RARP Configuration File<br />
The <strong>MultiNet</strong> RARP server uses Ethernet-to-IP address translations from the<br />
MULTINET:RARP.CONFIGURATION file. Each single-line entry in RARP.CONFIGURATION<br />
contains an Ethernet address <strong>and</strong> the corresponding Internet address.<br />
The following RARP.CONFIGURATION sample shows the IP addresses assigned to the hosts with<br />
Ethernet addresses aa:00:04:00:45:12 <strong>and</strong> 00:0c:00:17:12:67.<br />
#<br />
# This is a sample RARP database. It provides the mapping between<br />
# ethernet addresses <strong>and</strong> IP addresses as used by RARP.<br />
#<br />
# ethernet address ip address<br />
# ---------------- ---------aa:00:04:00:45:12<br />
192.0.0.1<br />
00:0c:00:17:12:67 192.0.0.2
Reloading RARP Configuration<br />
Configuring Remote Systems with RARP, BOOTP, <strong>and</strong> DHCP Server<br />
After modifying the MULTINET:RARP.CONFIGURATION file, reload the RARP configuration<br />
with the following comm<strong>and</strong>:<br />
$ MULTINET NETCONTROL RARP RELOAD<br />
Using BOOTP<br />
The <strong>MultiNet</strong> BOOTP (Bootstrap Protocol) service lets your OpenVMS system help diskless hosts<br />
<strong>and</strong> other network devices establish network connectivity. The remote system broadcasts a BOOTP<br />
request over the network with its Ethernet address. The BOOTP server looks up the host's address<br />
in a configuration file (MULTINET:BOOTP-SERVER.CONFIGURATION) <strong>and</strong> responds with the<br />
host's IP address, subnet mask, gateway address, initial load file, <strong>and</strong> any other data needed by the<br />
client. Using this information, the client can boot from the network.<br />
Starting with <strong>MultiNet</strong> V3.5, <strong>MultiNet</strong> includes two BOOTP servers: An older server provided for<br />
backwards compatibility for those sites not wanting to change their configuration, <strong>and</strong> a newer<br />
DHCP/BOOTP server that provides features not present in the older, BOOTP-only server.<br />
For details on BOOTP see RFC-951, "Bootstrap Protocol," <strong>and</strong> RFC-1084, "BOOTP Vendor<br />
Information Extensions."<br />
Configuring the BOOTP server involves:<br />
1 Obtaining the data required by each BOOTP client (see Obtaining Data for BOOTP Clients).<br />
2 Enabling <strong>and</strong> starting BOOTP (see Enabling <strong>and</strong> Starting BOOTP).<br />
3 Modifying the BOOTP configuration file (see Modifying the BOOTP Configuration File).<br />
4 Reloading the BOOTP configuration (see Reloading the BOOTP Configuration).<br />
5 Disabling debug messages, if desired (see Disabling BOOTP OPCOM Messages).<br />
Note! While BOOTP is often used with clients <strong>and</strong> servers on the same network, they can be on<br />
different physical networks. Most routers can be configured to forward BOOTP requests; refer<br />
to your router documentation.<br />
Obtaining Data for BOOTP Clients<br />
Make a list of the configuration parameters (known as BOOTP options) required by the devices<br />
you want to configure using BOOTP. Table 21-1 lists BOOTP options.<br />
Because some network devices require large amounts of information or vendor-specific<br />
configuration at boot time, BOOTP lets you specify the path names of additional configuration files<br />
the client can download from TFTP servers. For details on creating downloadable configuration<br />
files for a specific host, refer to the vendor's documentation.<br />
Note! If you are running DNS, make sure you use the same IP address <strong>and</strong> host name data used by<br />
your primary site's DNS servers.<br />
If you are using host tables instead of DNS, make sure you use the same IP address <strong>and</strong> host<br />
name data listed in MULTINET:HOSTS.LOCAL.<br />
21-5
Configuring Remote Systems with RARP, BOOTP, <strong>and</strong> DHCP Server<br />
Enabling <strong>and</strong> Starting BOOTP<br />
21-6<br />
You can enable BOOTP with SERVER-CONFIG or MENU-CONFIG.<br />
To enable BOOTP with SERVER-CONFIG, enter the following:<br />
$ MULTINET CONFIGURE /SERVER<br />
<strong>MultiNet</strong> Server Configuration Utility 5.4(nnn)<br />
[Reading in configuration from MULTINET:SERVICES.MASTER_SERVER]<br />
SERVER-CONFIG>ENABLE BOOTP<br />
SERVER-CONFIG>EXIT<br />
[Writing configuration to<br />
MULTINET_COMMON_ROOT:[MULTINET]SERVICES.MASTER_SERVER]<br />
$<br />
Note! BOOTP cannot run while DHCP is enabled because both services use the same port. You can<br />
use MENU-CONFIG or SERVER-CONFIG to disable DHCP.<br />
To enable BOOTP with MENU-CONFIG:<br />
1 Start MENU-CONFIG with the MULTINET CONFIGURE /MENU comm<strong>and</strong>.<br />
2 Choose Configure <strong>MultiNet</strong> Server from the <strong>MultiNet</strong> Configuration menu.<br />
3 Choose View/Modify an Existing Service from the Services Configuration menu.<br />
4 Choose BOOTP from the Service Selection menu.<br />
5 Choose Enable or Disable Service from the BOOTP Server menu.<br />
6 If the BOOTP service state is DISABLED, press SPACE to enable it.<br />
7 Press Ctrl/Z until MENU-CONFIG prompts you to save the server configuration, <strong>and</strong> press<br />
RETURN to save the configuration.<br />
After enabling BOOTP, start it by restarting the <strong>MultiNet</strong> Master Server:<br />
$ @MULTINET:START_SERVER<br />
Modifying the BOOTP Configuration File<br />
<strong>MultiNet</strong> supplies a MULTINET:BOOTP-SERVER.CONFIGURATION file that contains<br />
comments <strong>and</strong> a number of examples to help you enter information for your hosts.
BOOTP Options for the BOOTP Server<br />
Configuring Remote Systems with RARP, BOOTP, <strong>and</strong> DHCP Server<br />
Table 21-1 describes the options you can define for each host <strong>and</strong> an example of each option.<br />
Table 21-1 BOOTP Options<br />
Field Description Example<br />
bf File downloaded by TFTP to the client at boot time. This<br />
file is supplied by the device vendor. The file must exist<br />
<strong>and</strong> be world-readable. If the file is not found, a null file<br />
specification is returned.<br />
bs Bootfile size. If the value is the string "auto" or no value<br />
is given, the server automatically determines the size.<br />
Otherwise, the specified value is passed verbatim. The<br />
size is expressed in 512-byte blocks.<br />
cs Space-separated list of "quote of the day" server IP<br />
addresses. The cookie (as in "fortune cookie") server is<br />
described in RFC-865.<br />
bf="mom$load:xncd16_lt"<br />
bs=auto or bs=24<br />
cs=192.41.228.92<br />
ds Space-separated list of domain name server IP addresses ds=192.41.228.65<br />
gw IP address of the default gateway gw=128.2.13.1<br />
ha Hardware address of the client. The format of the<br />
hardware address depends on the hardware type (ht).<br />
Specify the hardware type (ht) before the hardware<br />
address (ha).<br />
ha=00DD00C88900<br />
hd Home directory for the boot files hd="sys$sysroot:<br />
[bootp-boot files]"<br />
hn Flag requesting the host name to be sent to the client.<br />
When an entry contains this tag, the contents of the name<br />
field (the initial string of characters on each record up to,<br />
but not including the first colon) are sent to the client. If<br />
the name field is greater than 58 characters, only the host<br />
field (up to the first period) is sent. If the host field by<br />
itself does not fit, no value is sent.<br />
hn<br />
21-7
Configuring Remote Systems with RARP, BOOTP, <strong>and</strong> DHCP Server<br />
21-8<br />
Table 21-1 BOOTP Options (Continued)<br />
Field Description Example<br />
ht Hardware address type. The hardware type must be<br />
interpreted before the hardware address (ha). Valid values<br />
are the hardware type, expressed as a decimal number as<br />
defined by the RFCs or a text string that maps to the<br />
hardware type number:<br />
ethernet 1 ieee803 6 chaos 5<br />
ethernet3 2 tr 6 arcnet 7<br />
ether 1 token-ring 6 ax.25 3<br />
ether3 2 pronet 4<br />
im Space-separated list of Imagen-type "Impress" server IP<br />
addresses<br />
ht=ethernet, ht=6<br />
im=192.168.228.92<br />
192.168.228.93<br />
ip IP address of the host ip=192.168.228.82<br />
lg Space-separated list of MIT-LCS UDP log server IP<br />
addresses<br />
lg=192.168.228.42<br />
lp Space-separated list of LPR server IP addresses lp=192.168.228.37<br />
ns Space-separated list of IEN-116 name server IP addresses ns=192.168.228.77<br />
rl Space-separated list of RLP (Resource Location Protocol)<br />
server IP addresses<br />
rl=192.168.228.19<br />
sa IP address of a boot server sa=192.168.228.222<br />
sm Subnetwork mask sm=255.255.255.192<br />
tc Template host label. Use the tc field to "include"<br />
information from another entry in the configuration file.<br />
You may create a common entry for a group of hosts,<br />
such as a specific vendor's X terminals. Use the tc field to<br />
combine information specific to each model. Information<br />
in the current entry overrides information included by the<br />
tc field. A tc entry may also "include" another entry with<br />
a tc field of its own.<br />
td TFTP directory. Used to reference part of a directory that<br />
may be hidden from the client via the TFTP server.<br />
tc=global.dummy<br />
td="TFTP$DIR:"
Table 21-1 BOOTP Options (Continued)<br />
Configuring Remote Systems with RARP, BOOTP, <strong>and</strong> DHCP Server<br />
Field Description Example<br />
to Time offset (in seconds) east of GMT for the client.<br />
Table 21-2 lists accepted values. BOOTP uses negative<br />
numbers west of GMT <strong>and</strong> positive numbers east of<br />
GMT. See Table 21-2 for the time offset values you can<br />
specify in this field.<br />
Table 21-2 provides time offset values you can specify in the to field.<br />
to=25200<br />
ts Space-separated list of time server IP addresses ts=192.41.228.77<br />
Tn "Generic" tag of the type "Tn=value,"<br />
– n is the number assigned the option.<br />
– value is either ASCII data enclosed in quotes or binary<br />
data expressed as hexadecimal digits.<br />
When expressing binary data that represents short or long<br />
values, be sure to check the byte order to compensate for<br />
the difference between OpenVMS byte order <strong>and</strong> network<br />
byte order. For values with known tags, the server can<br />
convert between the two. For values in generic tags,<br />
however, the server cannot tell the difference between a<br />
four-byte binary string <strong>and</strong> an unsigned long value.<br />
vm "Vendor magic" to send: "auto", "rfc1048", "rfc1084",<br />
"cmu", or a dotted-decimal value. Vendor magic is always<br />
"rfc1084" when using DHCP. Default: auto.<br />
Table 21-2 BOOTP “to” Option Values<br />
Timezone<br />
Time<br />
Offset<br />
DST Time<br />
Offset Timezone<br />
T123="Hello World" or<br />
T124=FFFE2CEF<br />
vm="rfc1048"<br />
Time<br />
Offset<br />
AST/ADT -14400 -10800 MET/MET-DST 7200 3600<br />
DST Time<br />
Offset<br />
BST 0 3600 MST/MDT -25200 -21600<br />
CET/CET-DST 7200 3600 NST/NDT -12600 -9000<br />
CST/CDT -21600 -18000 NZST 86400 90000<br />
EET/EET-DST 10800 14400 PST/PDT -28800 -25200<br />
EST/EDT -18000 -14400 SST +28800 none<br />
GMT 0 none UTC 0 none<br />
21-9
Configuring Remote Systems with RARP, BOOTP, <strong>and</strong> DHCP Server<br />
<strong>Guide</strong>lines for the BOOTP Configuration File<br />
21-10<br />
Table 21-2 BOOTP “to” Option Values (Continued)<br />
Timezone<br />
Time<br />
Offset<br />
DST Time<br />
Offset Timezone<br />
HST -36000 none WET/WET-DST 3600 7200<br />
JST 32400 none YST/YDT -32400 -28800<br />
The following guidelines govern modification of the<br />
MULTINET:BOOTP-SERVER.CONFIGURATION file:<br />
• Edit the configuration file with any text editor.<br />
• Use a pound sign (#) in the first column of the line to designate a comment line. Comment <strong>and</strong><br />
blank lines are ignored by the server.<br />
• Specify the hardware type (ht) before the hardware address (ha).<br />
• Specify IP addresses in dotted-decimal notation.<br />
Note! If you enter an IP address with leading zeros as part of the address (for example,<br />
192.41.012.011), the octets with leading zeros are interpreted as octal values rather than<br />
decimal values.<br />
• For readability, limit each entry to one line when possible. Otherwise, put each field on a<br />
separate line.<br />
• Separate entry fields with a colon (:). When lines are continued on another line, separate fields<br />
with a colon followed by a backslash. You should start each new line with a tab followed by a<br />
colon. Here are examples of the two different entry styles:<br />
ncd16s:\<br />
:ht=ethernet:\<br />
:bf="mom$load:xncd16_lt":\<br />
:gw=192.41.228.71:\<br />
:sm=255.255.255.192:\<br />
:ds=192.41.228.65:\<br />
:to=25200:<br />
tree:tc=ncd16s:ha=0000C0545F24:ip=192.41.228.75:<br />
Time<br />
Offset<br />
DST Time<br />
Offset<br />
• Use the tc field as an "include" statement to succinctly provide additional information for an<br />
individual device, as shown in the example entries above. The entry called "tree" is for an<br />
individual NCD terminal. Including the tc option adds all of the information in the "ncd16s"<br />
entry to the "tree" entry.<br />
The tc field lets you create a common entry for a class of hosts (such as a vendor's X<br />
terminals) that conveys generic information. Entries that include tc options supply information<br />
specific to an individual terminal, such as its IP address.<br />
Information in the individual entry overrides the information included by the tc field.
Configuring Remote Systems with RARP, BOOTP, <strong>and</strong> DHCP Server<br />
• When specifying more than one server for the cs, ds, im, lg, lp, ns, rl <strong>and</strong> ts fields, separate<br />
subsequent server values with spaces.<br />
Using a UNIX bootptab File<br />
If you are also running a BOOTP server on a UNIX system, you can use the UNIX system's<br />
bootptab configuration file after making the following changes:<br />
• Copy the bootptab file to MULTINET:BOOTP-SERVER.CONFIGURATION.<br />
• Change the syntax of directories <strong>and</strong> file names to OpenVMS format.<br />
• Do not add names that conflict with existing entries.<br />
Reloading the BOOTP Configuration<br />
After modifying MULTINET:BOOTP-SERVER.CONFIGURATION, reload the BOOTP<br />
configuration with the following comm<strong>and</strong>:<br />
$ MULTINET NETCONTROL BOOTP RELOAD<br />
Disabling BOOTP OPCOM Messages<br />
After you test your BOOTP configuration, you may want to suppress some of the messages the<br />
BOOTP server sends to OPCOM by changing the debug level of the BOOTP server, as shown in<br />
this example:<br />
$ MULTINET NETCONTROL BOOTP DEBUG -1<br />
If you want this change to take place each time <strong>MultiNet</strong> is started, use the SERVER-CONFIG SET<br />
PARAMETERS comm<strong>and</strong> as follows:<br />
$ MULTINET CONFIGURE /SERVER<br />
<strong>MultiNet</strong> Server Configuration Utility 5.4(nnn)<br />
[Reading in configuration from MULTINET:SERVICES.MASTER_SERVER]<br />
SERVER-CONFIG>SELECT BOOTP<br />
[The Selected SERVER entry is now BOOTP]<br />
SERVER-CONFIG>SET PARAMETERS<br />
Delete parameter "bootfile MULTINET:BOOTP-SERVER.CONFIGURATION" ?<br />
[NO]RETURN<br />
You can now add new parameters for BOOTP. An empty line terminates.<br />
Add Parameter: debug -1<br />
Add Parameter: RETURN<br />
[Service specific parameters for BOOTP changed]<br />
SERVER-CONFIG>RESTART<br />
Configuration modified, do you want to save it first ? [YES] RETURN<br />
[Writing configuration to MULTINET_COMMON_ROOT:[MULTINET]<br />
SERVICES.MASTER_SERVER]<br />
%RUN-S-PROC_ID, identification of created process is 20600046<br />
SERVER-CONFIG>EXIT<br />
[Configuration not modified, so no update needed]<br />
$<br />
21-11
Configuring Remote Systems with RARP, BOOTP, <strong>and</strong> DHCP Server<br />
Using DHCP<br />
21-12<br />
The <strong>MultiNet</strong> DHCP (Dynamic Host Configuration Protocol) server lets your OpenVMS system<br />
help diskless hosts <strong>and</strong> other network devices establish network connectivity. The DHCP server<br />
provides all of the functions of BOOTP plus dynamic addressing <strong>and</strong> additional configuration<br />
options.<br />
The DHCP server offers a network host a temporary lease of an IP address rather than an ownership<br />
of an IP address, such as BOOTP does. The lease identifies the length of time the client can safely<br />
use its assigned IP address. The network administrator sets the lease length using parameters in the<br />
configuration file. It is recommended that the network administrator assign lease lengths based on<br />
on the number of network users <strong>and</strong> the number of available IP addresses the DHCP server can<br />
assign. To configure the DHCP server:<br />
1 Obtain the data required by each DHCP client (see Obtaining Data for DHCP Clients).<br />
2 Modify the DHCP configuration file (see Introducing the Configuration File).<br />
3 Enable <strong>and</strong> start the DHCP server (see Enabling <strong>and</strong> Starting DHCP).<br />
4 If you modify the configuration file after starting the DHCP server, reload the DHCP server (see<br />
Reloading the DHCP Configuration).<br />
Note! DHCP uses DNS for host names <strong>and</strong> IP addresses; thus, a malfunction in your DNS server can<br />
affect the DHCP server.<br />
DHCP <strong>Process</strong><br />
DHCP goes through an initializing, selecting, requesting, binding, renewal, rebinding, <strong>and</strong><br />
expiration cycle when negotiating for an IP address, as shown in Figure 21-1. The process is as<br />
follows:<br />
1 The client just added or relocated on the network requests an IP address by broadcasting a<br />
DHCPDISCOVER message to the local subnet over the well-known BOOTP server port. (The<br />
client can also go through a BOOTP router or relay agent to forward the DHCPDISCOVER to<br />
additional remote DHCP servers.) This is the initializing state.<br />
2 The participating DHCP servers respond with a DHCPOFFER message if they have a valid<br />
configuration for the client. The client may get many of these messages, which contain the IP<br />
address <strong>and</strong> configuration data. (The servers make sure to reserve the addresses so as not to<br />
accidentally offer them to another client.) At this point the client enters the selecting state.<br />
3 After selecting an address, the client broadcasts the selected address <strong>and</strong> name of the "winning"<br />
server (DHCP Server 1 in Figure 21-1) using a DHCPREQUEST message. This is the requesting<br />
state. All the other servers can now safely unreserve their addresses.<br />
4 Server 1 sends the client a DHCPACK (acknowledgement) message with the negotiated IP<br />
address, the lease, <strong>and</strong> the network configuration parameters. The client now enters the binding<br />
state <strong>and</strong> can fully use the assigned IP address.<br />
5 About halfway through the lease, the client sends Server 1 another DHCPREQUEST for a lease<br />
renewal, <strong>and</strong> enters the renewal state. If the server deems the lease renewable, it sends back<br />
another DHCPACK to update the lease (including any new parameters). The client now returns<br />
to the binding state, as in step 4.
Configuring Remote Systems with RARP, BOOTP, <strong>and</strong> DHCP Server<br />
6 If the client cannot renew the lease (such as if Server 1 is down), the client waits until about<br />
87.5% of the way through the lease <strong>and</strong> broadcasts another DHCPREQUEST to all DHCP<br />
servers. Any server can now return a DHCPACK containing the extended lease <strong>and</strong> updated<br />
parameters. This is the rebinding state.<br />
7 When the lease reaches 100% expired, or a server sends back a DHCPNAK negative<br />
acknowledgement message, the client must give up the IP address. It then returns to the<br />
initializing state <strong>and</strong> has to start the address negotiation over again.<br />
Figure 21-1 DHCP Address Request <strong>and</strong> Allocation <strong>Process</strong><br />
See the DHCP RFCs for more information. DHCP is defined in RFC 2131 <strong>and</strong> RFC 2132.<br />
Two DHCP servers are recommended for a network. The benefit of having more than one server is<br />
if one fails another is available to continue processing requests, ensuring that all hosts (old <strong>and</strong><br />
new) are serviced continuously. Refer to DHCP Safe-failover Introduction for more information.<br />
21-13
Configuring Remote Systems with RARP, BOOTP, <strong>and</strong> DHCP Server<br />
Obtaining Data for DHCP Clients<br />
21-14<br />
Make a list of the configuration parameters (known as DHCP options) required by the devices you<br />
want to configure using DHCP.<br />
Enabling <strong>and</strong> Starting DHCP<br />
You can enable the DHCP server with SERVER-CONFIG or MENU-CONFIG. To enable the<br />
DHCP server with SERVER-CONFIG, do the following:<br />
$ MULTINET CONFIGURE /SERVER<br />
<strong>MultiNet</strong> Server Configuration Utility 5.4(nnn)<br />
[Reading in configuration from MULTINET:SERVICES.MASTER_SERVER]<br />
SERVER-CONFIG>ENABLE DHCP<br />
SERVER-CONFIG>EXIT<br />
[Writing configuration to<br />
MULTINET_COMMON_ROOT:[MULTINET]SERVICES.MASTER_SERVER]<br />
$<br />
Note! DHCP cannot run while the BOOTP server is enabled because both servers use the same port.<br />
Because the DHCP server provides BOOTP service as well, there is no need to run the BOOTP<br />
service.<br />
To enable the DHCP server with MENU-CONFIG, do the following:<br />
1 Start MENU-CONFIG with the MULTINET CONFIGURE /MENU comm<strong>and</strong>.<br />
2 Choose Configure <strong>MultiNet</strong> Server from the <strong>MultiNet</strong> Configuration menu.<br />
3 Choose View/Modify an Existing Service from the Services Configuration menu.<br />
4 Choose DHCP from the Service Selection menu.<br />
5 Choose Enable or Disable Service from the DHCP Server menu.<br />
6 If the DHCP service state is DISABLED, press the keyboard SPACE bar to enable it.<br />
7 Press Ctrl/Z until MENU-CONFIG prompts you to save the server configuration, <strong>and</strong> press<br />
RETURN to save the configuration.<br />
After you have enabled DHCP, start the DHCP server by restarting the <strong>MultiNet</strong> Master Server. If<br />
the DHCP server is already running, shut it down first.<br />
$ MULTINET NETCONTROL DHCP SHUTDOWN<br />
$ @MULTINET:START_SERVER<br />
Checking the DHCP Configuration<br />
After modifying the configuration file, it is good practice to verify the syntax by running the DHCP<br />
server interactively specifying the -t flag, as follows:<br />
$ dhcpd :== $multinet:dhcpd.exe<br />
$ dhcpd -t [-cf ]<br />
You can test both the configuration file <strong>and</strong> the lease file using the -T flag:
Configuring Remote Systems with RARP, BOOTP, <strong>and</strong> DHCP Server<br />
$ dhcpd “-T” [-cf ] [-lf ]<br />
The -t flag causes the DHCP server to run just far enough to read <strong>and</strong> parse the configuration file.<br />
The DHCP server displays a copyright notice as well as a message for each syntax error<br />
encountered. If the DHCP server displays only the copyright notice, the configuration file has no<br />
syntax errors.<br />
The -T flag causes the DHCP server to run just far enough to read <strong>and</strong> parse the configuration <strong>and</strong><br />
lease files.<br />
DHCPD can be made to use an alternate configuration file with the -cf flag, or an alternate lease file<br />
with the -lf flag. If you do not specify the -cf flag, the DHCP server reads the default configuration<br />
file MULTINET:DHCPD.CONF. If you do not specify the -lf flag, the DHCP server reads the<br />
default lease file MULTINET:DHCPD.LEASES. Because of the importance of using the same<br />
lease database at all times when running DHCPD in production, these flags should be used only for<br />
testing lease files or database files in a non-production environment.<br />
Reloading the DHCP Configuration<br />
If you modify MULTINET:DHCPD.CONF after starting the DHCP server, restart DHCP with the<br />
following comm<strong>and</strong> so the DHCP server rereads DHCPD.CONF:<br />
$ MULTINET NETCONTROL DHCP RESTART<br />
DHCP Conversion Tool<br />
The DHCP_CONVERSION_TOOL assists in moving from the DHCP server in <strong>MultiNet</strong> V4.1 <strong>and</strong><br />
earlier to the DHCP server in <strong>MultiNet</strong> V5.2 <strong>and</strong> later. This tool converts the configuration files<br />
<strong>and</strong> state file from the 4.1 DHCP server to the format of the configuration <strong>and</strong> lease files of the 5.4<br />
DHCP server. It is run automatically by the comm<strong>and</strong> procedure that starts the <strong>MultiNet</strong> Master<br />
Server, MULTINET:START_SERVER.COM. However, it is recommended that customers run the<br />
conversion tool <strong>and</strong> double check the output ahead of time.<br />
The conversion tool reads the old BOOTP <strong>and</strong> DHCP configuration files <strong>and</strong> writes out a<br />
configuration file in the new format, representing a merging of the two old configuration files, with<br />
DHCP configuration information being preferred. All information from the old configuration files<br />
is in the new file. Information that was duplicated or that does not have an equivalent in the new<br />
configuration file is represented with comment lines.<br />
The conversion tool then reads the old state file <strong>and</strong> writes out a lease file in the new format.<br />
The conversion tool preserves the old configuration <strong>and</strong> state files where they were. The network<br />
administrator can use them to validate the new configuration <strong>and</strong> lease files.<br />
The conversion tool may also be run directly. The names of the input <strong>and</strong> output files may be<br />
specified on the comm<strong>and</strong> line. If they are not specified, the tool will prompt for them. Enter<br />
“NONE” for the file name if you do not have the input file. For example, if you do not have a<br />
BOOTP configuration file:<br />
21-15
Configuring Remote Systems with RARP, BOOTP, <strong>and</strong> DHCP Server<br />
21-16<br />
$ dhcpconvert :== $multinet:dhcp_conversion_tool.exe<br />
$ dhcpconvert dhcp-server.configuration NONE -<br />
_$ dhcp-state.dat dhcpd.conf dhcpd.leases<br />
Enter “?” as the sole parameter to get a help message. The default file names for the five files are:<br />
MULTINET:DHCP-SERVER.<br />
CONFIGURATION<br />
MULTINET:BOOTP-SERVER.<br />
CONFIGURATION<br />
The conversion tool may produce large configuration files. To reduce the size of these<br />
configuration files, set the following logical name before running the conversion tool:<br />
$ define MULTINET_DHCP_CONV_BRIEF YES<br />
Introducing the Configuration File<br />
the old DHCP configuration file<br />
the old BOOTP configuration file<br />
MULTINET:DHCPD.CONF the new DHCP configuration file<br />
MULTINET:DHCP-STATE.DAT the old DHCP state file containing the lease status<br />
MULTINET:DHCPD.LEASES the new DHCP lease file<br />
<strong>MultiNet</strong> supplies a MULTINET:DHCPD.CONF file that contains comments <strong>and</strong> a number of<br />
examples to help you enter information for your hosts. You can edit the configuration file with any<br />
text editor. Add or remove entries as needed.<br />
The dhcpd.conf file is a free-form ASCII text file. The file may contain extra tabs <strong>and</strong> newlines for<br />
formatting purposes. Keywords in the file are case-insensitive. Comments may be placed anywhere<br />
within the file (except within quotation marks). Comments begin with the # character <strong>and</strong> end at the<br />
end of the line. See 21-3Sample DHCPD.CONF File at the end of this chapter.<br />
The file consists of a list of statements. Statements fall into two categories: parameters <strong>and</strong><br />
declarations.<br />
Parameter statements always say one of the following:<br />
• How to do something (e.g., how long a lease to offer).<br />
• Whether to do something (e.g., should the DHCP server provide addresses to unknown clients).<br />
• What parameters to provide to the client (e.g., use gateway 220.177.244.7).<br />
Global parameters are at the beginning of the file. Some examples of global parameters are the<br />
organization's domain name <strong>and</strong> the addresses of the name servers (if they are common to the entire<br />
organization).<br />
It is legal to specify host addresses in parameters as domain names rather than as numeric IP<br />
addresses. If a given hostname resolves to more than one IP address (for example, if that host has<br />
two ethernet interfaces), both addresses are supplied to the client.
Configuring Remote Systems with RARP, BOOTP, <strong>and</strong> DHCP Server<br />
Both the shared-network statement <strong>and</strong> the subnet statement can have parameters.<br />
The most obvious reason for having subnet-specific parameters is that each subnet, of necessity,<br />
has its own router. For example, something like:<br />
option routers 204.254.239.1;<br />
Note! The address here is specified numerically. This is not required. If you have a different domain<br />
name for each interface on your router, it is perfectly appropriate to use the domain name for<br />
that interface instead of the numeric address. However, there may be only one domain name for<br />
all of a router's IP addresses, <strong>and</strong> it would not be appropriate to use that name here.<br />
Parameters starting with the option keyword correspond to actual DHCP options. Parameters that<br />
do not start with the option keyword either control the behavior of the DHCP server (e.g., how long<br />
a lease the DHCP server will give out), or specify client parameters that are not optional in the<br />
DHCP protocol (for example, server-name <strong>and</strong> filename).<br />
Each host can have host-specific parameters. These could include such things as the:<br />
• Hostname option.<br />
• Name of a file to upload (the filename parameter).<br />
• Address of the server from which to upload the file (the next-server parameter).<br />
In general, any parameter can appear anywhere that parameters are allowed, <strong>and</strong> will be applied<br />
according to the scope in which the parameter appears.<br />
All parameters must be specified first before you can specify any declarations that depend on those<br />
parameters. Parameters should be set inside declarations so they can be set on a per-subnet or a perhost<br />
basis.<br />
Declarations are used to:<br />
• Describe the topology of the network.<br />
• Describe clients on the network.<br />
• Provide addresses that can be assigned to clients.<br />
• Apply a group of parameters to a group of declarations.<br />
Declarations about network topology include the subnet <strong>and</strong> the shared-network declarations.<br />
For every subnet to be served, <strong>and</strong> for every subnet connected to the DHCP server, there must be<br />
one subnet declaration. This declaration tells the DHCP server how to recognize that an address is<br />
on that particular subnet. A subnet declaration is required for each subnet even if no addresses will<br />
be dynamically allocated on that subnet.<br />
There are different declarations required for different situations. The following is a list of the basic<br />
declarations in a configuration file.<br />
• For clients with dynamically assigned addresses, a range declaration must appear within the<br />
subnet declaration, or a pool declaration.<br />
• For clients with statically assigned addresses, or for installations where only known clients will<br />
be served, each client must have a host declaration.<br />
21-17
Configuring Remote Systems with RARP, BOOTP, <strong>and</strong> DHCP Server<br />
21-18<br />
• If parameters are to be applied to a group of declarations that are not related strictly on a per<br />
subnet, class, or pool basis, the group declaration can be used.<br />
Some installations have physical networks allowing more than one IP subnet to operate. For<br />
example, if your site has a requirement that 8-bit subnet masks be used, but a department with a<br />
single physical ethernet network exp<strong>and</strong>s beyond 254 nodes, you may have to run two 8-bit subnets<br />
on the same ethernet until a new physical network is added. In this case, you can enclose the subnet<br />
declarations for these two networks in a shared-network declaration.<br />
Some sites may have departments that have clients on more than one subnet, but it may be desirable<br />
to offer those clients a uniform set of parameters that are different than what would be offered to<br />
clients from other departments on the same subnet.<br />
• For clients declared explicitly with host declarations, enclose these declarations in a group<br />
declaration using the parameters that are common to that department.<br />
• For clients with dynamically assigned addresses, one way to group parameter assignments is by<br />
network topology. Alternately, host declarations can provide parameters <strong>and</strong> if they have no<br />
fixed-address parameter, the clients get an address dynamically assigned. See Example 21-1<br />
below.<br />
• Clients can be grouped into classes <strong>and</strong> assigned IP addresses from specific pools.<br />
When a client is to be booted, its boot parameters are determined by consulting the following<br />
scopes in this order:<br />
1 Client’s host declaration (if any).<br />
2 Group declaration (if any) that enclosed the host declaration.<br />
3 Subclass declaration for the subclass the client belongs to (if any).<br />
4 Class declaration for the class the client belongs to (if any).<br />
5 Pool declaration that the assigned IP address comes from (if any).<br />
6 Subnet declaration for the subnet on which the client is booting.<br />
7 Shared-network declaration (if any) containing that subnet.<br />
8 Top-level parameters that may be specified outside of any declaration.<br />
When searching for a host declaration, the DHCP server looks for one with a fixed-address<br />
parameter that matches the subnet or shared network on which the client is booting.<br />
Imagine that you have a site with a lot of NCD X-Terminals. These terminals come in a variety of<br />
models, <strong>and</strong> you want to specify the boot files for each model. One way to do this would be to have<br />
host declarations for each server <strong>and</strong> group them by model:<br />
Example 21-1 Host Declarations<br />
group {<br />
filename "Xncd19r";<br />
next-server ncd-booter;<br />
host ncd1 { hardware ethernet 0:c0:c3:49:2b:57; }<br />
host ncd4 { hardware ethernet 0:c0:c3:80:fc:32; }
Configuring Remote Systems with RARP, BOOTP, <strong>and</strong> DHCP Server<br />
host ncd8 { hardware ethernet 0:c0:c3:22:46:81; }<br />
}<br />
group {<br />
filename "Xncd19c";<br />
next-server ncd-booter;<br />
host ncd2 { hardware ethernet 0:c0:c3:88:2d:81; }<br />
host ncd3 { hardware ethernet 0:c0:c3:00:14:11; }<br />
}<br />
group {<br />
filename "XncdHMX";<br />
next-server ncd-booter;<br />
host ncd1 { hardware ethernet 0:c0:c3:11:90:23; }<br />
host ncd4 { hardware ethernet 0:c0:c3:91:a7:8; }<br />
host ncd8 { hardware ethernet 0:c0:c3:cc:a:8f; }<br />
}<br />
Address Allocation<br />
Address allocation is done when a client is in the INIT state <strong>and</strong> has sent a DHCPDISCOVER<br />
message.When the DHCP server is looking for an IP address to allocate to a client, it checks first<br />
• if the client has an active lease on an IP address, or<br />
• if the client has an expired lease on an IP address that has not been reassigned.<br />
It then follows these rules:<br />
– If a lease was found but the client is not permitted to use it, then the lease is freed (if it was<br />
not expired already).<br />
– If no lease is found or a lease was found <strong>and</strong> the client is not permitted to use the address, then<br />
the server looks for an address that is not in use <strong>and</strong> that the client is permitted to have among<br />
the list of address pools on the client’s subnet.<br />
– If no addresses are found that can be assigned to the client, then no response is sent to the<br />
client.<br />
– If an address is found that the client is permitted to have, then the address is allocated to the<br />
client.<br />
Note! IP addresses that have never been assigned are chosen over those that have previously been<br />
assigned to other clients.<br />
If the client thinks it has a valid lease <strong>and</strong> sends a DHCPREQUEST to initiate or renew that lease,<br />
the server has three choices. It can<br />
• Ignore the DHCPREQUEST.<br />
• Send a DHCPNAK, telling the client to stop using the address.<br />
• Send a DHCPACK, telling the client to use the address.<br />
If the server finds the requested address <strong>and</strong> that address is available to the client, the server sends a<br />
DHCPACK.<br />
If the address is no longer available or the client is not permitted to have it, the server sends a<br />
DHCPNAK.<br />
21-19
Configuring Remote Systems with RARP, BOOTP, <strong>and</strong> DHCP Server<br />
21-20<br />
If the server knows nothing about the address, the server remains silent. However, if the address is<br />
incorrect for the network segment to which the client is attached <strong>and</strong> the server is authoritative for<br />
that segment, the server sends a DHCPNAK.<br />
Address Pools<br />
Pool declarations let you have different allocation policies for different address allocation pools. A<br />
client may be denied access to one pool, but allowed access to another pool on the same network<br />
segment.<br />
A pool declaration is used to specify how a group of addresses should be treated differently than<br />
another group of addresses, even if they are on the same network segment or subnet.<br />
For example, you can provide a large set of addresses assigned to DHCP clients that are known to<br />
your DHCP server, while at the same time providing a small set of addresses that are available for<br />
unknown clients. If you have a firewall, you can arrange for addresses from one pool to have access<br />
to the Internet, while addresses in another pool do not have access to the Internet. The following<br />
example illustrates how you could set up a pair of pool declarations.<br />
subnet 10.0.0.0 netmask 255.255.255.0 {<br />
option routers 10.0.0.254;<br />
}<br />
# Unknown clients get this pool.<br />
pool {<br />
option domain-name-servers bogus.example.com;<br />
max-lease-time 300;<br />
range 10.0.0.200 10.0.0.253;<br />
allow unknown clients;<br />
}<br />
# Known clients get this pool.<br />
pool {<br />
option domain-name-servers ns1.example.com, ns2.example.com;<br />
max-lease-time 28800;<br />
range 10.0.0.5 10.0.0.199;<br />
deny unknown clients;<br />
}<br />
You can also set up entirely different subnets for known <strong>and</strong> unknown clients. This is possible<br />
because address pools exist at the level of shared networks, so address ranges within pool<br />
declarations can be on different subnets, as long as they are on the same shared network.<br />
Pool Permit Lists<br />
The above example shows that address pools can have permit lists. A permit list controls which<br />
clients are allowed access to the address pool <strong>and</strong> which clients are not allowed access. Each entry<br />
in a permit list is introduced with the allow or deny keyword. The following table describes the four
Configuring Remote Systems with RARP, BOOTP, <strong>and</strong> DHCP Server<br />
possibilities for eligibility to addresses from the address pool.<br />
If a pool has... Then...<br />
a permit list only those clients that match specific entries on the permit list are eligible<br />
for addresses from the pool.<br />
a deny list only those clients that do not match any entries on the deny list are eligible<br />
for addresses from the pool.<br />
both a permit list<br />
<strong>and</strong> a deny list<br />
neither a permit<br />
list nor a deny list<br />
only clients that match the permit list <strong>and</strong> do not match the deny list are<br />
eligible for addresses from the pool.<br />
all clients are eligible for addresses from the pool.<br />
Range declarations that appear outside of pool declarations in the same shared-network are grouped<br />
into two pools: one which allows all clients for range statements with the “dynamic-bootp”<br />
keyword <strong>and</strong> one which denies dynamic-bootp clients for range statements without the “dynamicbootp”<br />
keyword.<br />
As described in the Address Allocation section, the DHCP server checks each IP address to see if<br />
the client is permitted to use it, in response to both DHCPDISCOVER <strong>and</strong> DHCPREQUEST<br />
messages. The DHCP server checks both the address pool permit lists <strong>and</strong> the relevant in-scope<br />
allow <strong>and</strong> deny statements.<br />
See Table 21-3 for the recognized allow <strong>and</strong> deny statements. They can be used to permit or refuse<br />
access to known or unknown clients, members of a class, dynamic bootp clients, or all clients.<br />
Note! The DHCP v2.0 (<strong>MultiNet</strong> v4.2) style allow <strong>and</strong> deny statements (e.g., allow/deny unknownclients)<br />
<strong>and</strong> range statement dynamic-bootp keyword do not mix well with pool permit lists. A<br />
v2.0-style deny statement overrides the pool permit lists, <strong>and</strong> the dynamic-bootp keyword is<br />
ignored inside of pools. Note also that the default for dynamic-bootp changes from deny to allow<br />
when pools are used.<br />
Client Classing<br />
You can separate clients into classes, treating each client differently depending on what class it is<br />
in. To separate clients into classes, use conditional statements (see the Conditional Behavior<br />
section) or a match statement within a class declaration. You can specify a limit on the total number<br />
of clients within a particular class or subclass that may hold leases at one time using the lease limit<br />
statement. You can specify automatic subclassing based on the contents of the client packet using<br />
the spawn with statement.<br />
To add clients to classes based on conditional evaluation, write a conditional statement to match the<br />
clients you want in the class. Then, put an add statement in the conditional's list of statements. For<br />
example, to identify requests coming from Microsoft (R) NT RAS servers:<br />
21-21
Configuring Remote Systems with RARP, BOOTP, <strong>and</strong> DHCP Server<br />
21-22<br />
if substring (option dhcp-client-identifier, 1, 3) = "RAS" {<br />
add "ras-clients";<br />
}<br />
An equivalent way to do this is to specify the conditional expression as a matching expression in<br />
the class statement. For example:<br />
class "ras-clients" {<br />
match if substring (option dhcp-client-identifier, 1, 3) = "RAS";<br />
}<br />
Note! Whether you use matching expressions or add statements (or both) to classify clients, you must<br />
write a class declaration for any class that you use.<br />
If you want no match statement <strong>and</strong> no in-scope statements for a class, the declaration looks like<br />
this, for example:<br />
class "ras-clients" {<br />
}<br />
Important! The add statement adds the client to the class after the address assignment has been<br />
completed. This means the client will not be affected by pool permits related to that class if<br />
the client is a member of a class due to an add statement.<br />
Subclasses<br />
In addition to classes, you can declare subclasses. A subclass is a class having the same name as a<br />
regular class but with a specific submatch expression that is hashed for quick matching. It is<br />
quicker to find five subclasses within one class than it is to find five classes with match<br />
expressions. The following example illustrates how to code for subclasses:<br />
class "allocation-class-1" {<br />
match hardware;<br />
}<br />
class "allocation-class-2" {<br />
match hardware;<br />
}<br />
subclass "allocation-class-1" 1:0:0:c4:aa:29:44;<br />
subclass "allocation-class-1" 1:8:0:2b:4c:39:ad;<br />
subclass "allocation-class-2" 1:8:0:2b:a9:cc:e3;<br />
subnet 10.0.0.0 netmask 255.255.255.0 {<br />
pool {<br />
allow members of "allocation-class-1";<br />
range 10.0.0.11 10.0.0.50;<br />
}<br />
pool {<br />
allow members of "allocation-class-2";
Configuring Remote Systems with RARP, BOOTP, <strong>and</strong> DHCP Server<br />
range 10.0.0.51 10.0.0.100;<br />
}<br />
}<br />
The data following the class name in the subclass declaration is a constant value used in matching<br />
the match expression for the class. During class matching, the server evaluates the match<br />
expression <strong>and</strong> looks up the result in the hash table. If a match if found, the client is considered a<br />
member of both the class <strong>and</strong> the subclass.<br />
You can specify subclasses with or without scope (i.e., statements). In the above example, the sole<br />
purpose of the subclass is to allow some clients access to one address pool, while other clients are<br />
given access to the other pool. Thus, these subclasses are declared without any statements (scope).<br />
If you wanted to define different parameter values for some clients, you would declare those<br />
subclasses with scopes.<br />
For example: if you had a single client needing some configuration parameters, while most did not,<br />
you might write the following subclass declaration for that client:<br />
subclass "allocation-class-2" 1:08:00:2b:a1:11:31 {<br />
option root-path "samsara:/var/diskless/alphapc";<br />
filename "/tftpboot/netbsd.alphapc-diskless";<br />
}<br />
In the previous examples, subclassing is being used as a way to control address allocation on a perclient<br />
basis. However, it is possible to use subclassing in ways that are not specific to clients. For<br />
example, to use the value of the vendor-class-identifier option to determine what values to send in<br />
the vendor-encapsulated-options option. See the Vendor Encapsulated Options section.<br />
Note! If you are using , the hardware address is preceded by the hardware type. In<br />
this example, the “1:” indicates Ethernet.<br />
Per-Class Limits on Dynamic Address Allocation<br />
The number of clients in a class that can be assigned leases can be limited. This limiting makes it<br />
difficult for a new client in a class to get an address. Once a class has reached its limit, the only way<br />
a new client in that class can get a lease is for an existing client to relinquish its lease, either by<br />
• letting it expire, or<br />
• sending a DHCPRELEASE packet.<br />
The following example illustrates how to specify classes with lease limits.<br />
class "limited-1" {<br />
lease limit 4;<br />
}<br />
This produces a class in which a maximum of four members may hold leases at one time.<br />
If you want to provide clients at a particular site with more than one IP address, but do not want to<br />
provide these clients with their own subnet, nor give them an unlimited number of IP addresses<br />
from the network segment to which they are connected, you can create a spawning class <strong>and</strong> use<br />
lease limits. A spawning class is a class that produces subclasses automatically based on what the<br />
21-23
Configuring Remote Systems with RARP, BOOTP, <strong>and</strong> DHCP Server<br />
21-24<br />
client sends.<br />
Many cable modem head-end systems can be configured to add a Relay Agent Information option<br />
to DHCP packets when relaying them to the DHCP server. These systems typically add a circuit ID<br />
or remote ID option that uniquely identifies the customer site. The following example illustrates<br />
how to write a class declaration to take advantage of these relay agent options to create lease<br />
limited classes on the fly:<br />
class "customer" {<br />
match if exists agent.circuit-id;<br />
spawn with option agent.circuit-id;<br />
lease limit 4;<br />
}<br />
With this class declaration, whenever a request comes in from a customer site, the circuit ID option<br />
is checked against the class's hash table.<br />
• If a subclass matches the circuit ID, the client is classified in that subclass.<br />
• If no subclass matches the circuit ID, a new subclass is created <strong>and</strong> logged in the dhcpd.leases<br />
file <strong>and</strong> the client is classified in the new subclass.<br />
Once a client is classified, it is treated according to the rules of the class; as in the example above,<br />
being subjected to the per-site limit of four leases.<br />
Note! The use of the subclass spawning mechanism is not restricted to relay agent options. This<br />
particular example is given only because it is a straightforward one.<br />
Conditional Behavior<br />
The DHCP server can be configured to perform conditional behavior depending on the packets it<br />
receives.<br />
Conditional behavior is specified using the if statement <strong>and</strong> the else or elsif statements. A<br />
conditional statement can appear anywhere that a regular statement can appear, <strong>and</strong> can enclose one<br />
or more such statements. The following is an example of a conditional statement.<br />
if option dhcp-user-class = "accounting" {<br />
max-lease-time 17600;<br />
option domain-name "accounting.example.org";<br />
option domain-name-servers ns1.accounting.example.org,<br />
ns2.accounting.example.org;<br />
} elsif option dhcp-user-class = "engineering" {<br />
max-lease-time 17600;<br />
option domain-name "engineering.example.org";<br />
option domain-name-servers ns1.engineering.example.org,<br />
ns2.engineering.example.org;<br />
} else {<br />
max-lease-time 600;<br />
option domain-name "misc.example.org";<br />
option domain-name-servers ns1.misc.example.org,
Configuring Remote Systems with RARP, BOOTP, <strong>and</strong> DHCP Server<br />
ns2.misc.example.org;<br />
}<br />
Both the if statement <strong>and</strong> the elsif continuation statement take expressions that, when evaluated,<br />
produce a boolean result. See the Expressions section for more information.<br />
• If the expression evaluates to true, then the statements enclosed in braces following the if<br />
statement are executed. All subsequent elsif <strong>and</strong> else clauses are skipped.<br />
• If the expression evaluates to false, then the statements enclosed in braces following the if<br />
statement are not executed <strong>and</strong> each subsequent elsif clause is checked until an elsif clause is<br />
encountered that evaluates to true.<br />
• If such an elsif clause is found, then the statements in braces following it are executed. Any<br />
subsequent elsif <strong>and</strong> else clauses are skipped.<br />
• If all the if <strong>and</strong> elsif clauses are checked but none of their expressions evaluate to true, then if<br />
there is an else clause, then the statements enclosed in braces following the else clause are<br />
evaluated.<br />
Note! Boolean expressions that evaluate to null are treated as false in conditionals.<br />
DNS Dynamic Updates Within DHCP<br />
The DHCP server performs dynamic updates to DNS using DNS's dynamic updating functionality.<br />
To be sure that updates are allowed from the DHCP server, see Chapter 10, Host Tables <strong>and</strong> DNS.<br />
The allow-update { }; statement in the Zone section enables the DNS server<br />
to allow updates from that system.<br />
The following statements in the DHCP server's configuration file are related to dynamic updating:<br />
• allow/deny dynamic-update;<br />
• allow/deny update-A-record;<br />
• allow/deny name-by-client;<br />
• invalid-ddns-chars {fail | discard | replace [“chars”]};<br />
Dynamic updates can be enabled or disabled by using the allow/deny dynamic-update statement in<br />
the configuration file. The default is to not perform dynamic updates. Dynamic updates can be<br />
turned on or off on a per subnet basis.<br />
Note! Dynamic updates are not done at all for static assignments to BOOTP clients, <strong>and</strong> the support<br />
for static assignments to DHCP clients is to add DNS entries only.<br />
When dynamic updating is enabled, the DHCP server determines the client's Fully Qualified<br />
Domain Name (FQDN) <strong>and</strong> assigns it an IP address. The FQDN is determined either by what the<br />
client sends or by what is in the configuration file. This behavior is controlled by the allow/deny<br />
name-by-client statement in the configuration file.<br />
If you use the deny name-by-client statement or if the client does not send a name, you must specify<br />
the host name in the configuration file using one of the following methods:<br />
• Using option host-name “name” (see the Host Name Generation section)<br />
21-25
Configuring Remote Systems with RARP, BOOTP, <strong>and</strong> DHCP Server<br />
21-26<br />
• Specifying use-host-decl-names on in conjunction with host declarations.<br />
If the hostname specified by the client contains invalid characters for DNS, the DHCP server can<br />
h<strong>and</strong>le them one of three ways:<br />
• Consider it a failure <strong>and</strong> not do the dynamic update.<br />
• Throw away the invalid characters.<br />
• Replace the invalid characters with specified valid characters.<br />
This behavior is controlled by the invalid-ddns-chars statement in the configuration file.<br />
The FQDN <strong>and</strong> IP address are used in the dynamic update to create a PTR resource record (RR).<br />
The DHCP server also optionally creates an A RR. This option is enabled or disabled by using the<br />
allow/deny update-A-record statement in the configuration file. The default is to not create the A<br />
RR. This can be set on a per subnet basis. See Chapter 10, Host Tables <strong>and</strong> DNS, the DNS Zone<br />
Information Files section for information about PTR resource records <strong>and</strong> A resource records.<br />
When dynamic updating is allowed, the DHCP server adds the resource records whenever an IP<br />
address is leased to a client. The RRs are deleted if the IP address is released or if the IP address is<br />
leased to a different client. Also, the RRs are deleted for expired leases periodically.<br />
Transaction Signatures (TSIG)<br />
The DHCP server supports using Transaction Signatures (TSIG) on dynamic updates to DNS. Note<br />
that you need a DNS server that supports TSIG, such as <strong>MultiNet</strong> V5.1's BIND 8.2 server.<br />
The use of TSIG can be enabled or disabled by using the secure-ddns statement in the configuration<br />
file. The default is to not use TSIG. The use of TSIG can be turned on or off on a per subnet basis.<br />
Turn on the use of TSIG using:<br />
secure-ddns on;<br />
For each DNS server that you want to use TSIG with, you must specify a key using the key<br />
declaration:<br />
key ip-address {<br />
[ algorithm "hmac-md5"; ]<br />
key-id "key-name";<br />
secret "key";<br />
}<br />
• ip-address is the IP address of the DNS server<br />
• algorithm specifies the algorithm to use. The only supported algorithm is "hmac-md5". This<br />
statement is optional.<br />
• key-id specifies the name of the key as a string. This must match the key name being used by the<br />
DNS server (e.g., configured in named.conf).<br />
• secret specifies the secret key to use in base-64 format. This must match the secret key used by<br />
the DNS server (in named.conf).<br />
An example key declaration for the DNS server at IP address 10.9.8.7 is:
Configuring Remote Systems with RARP, BOOTP, <strong>and</strong> DHCP Server<br />
key 10.9.8.7 {<br />
key-id "dhcp-tsig";<br />
secret "A5vhC+DjsocELGEYhj0iBBSQRgJvxnY/emD0C3kRtEpo";<br />
};<br />
Host Name Generation<br />
Some DHCP clients require that the server send them a host name. The <strong>MultiNet</strong> DHCP server can<br />
generate a host name if it cannot get the host name in another way. The generated host name can<br />
contain parts of the host's IP address, client ID, <strong>and</strong>/or MAC address. This host name is sent to the<br />
client <strong>and</strong> is combined with the domain name to create the Fully Qualified Domain Name (FQDN)<br />
required for dynamic DNS updates. See the DNS Dynamic Updates Within DHCP section. As<br />
described in the DNS Dynamic Updates Within DHCP section, the allow/deny name-by-client<br />
statement in the configuration file controls whether the DHCP server uses information from the<br />
client to determine the host name <strong>and</strong> FQDN.<br />
The DHCP server generates a host name if it is enabled to do so <strong>and</strong> either<br />
• allow name-by-client is specified <strong>and</strong> the client does not send a host name.<br />
or<br />
• deny name-by-client is specified <strong>and</strong> the DHCP server does not find a host name in the<br />
configuration file or in DNS (if get-lease-hostnames is set).<br />
To enable the DHCP server to generate host names, specify in the configuration file an option hostname<br />
statement with a value containing certain key values in addition to any characters that are<br />
valid for the host-name option (see Table 21-4). The option host-name statement can be specified<br />
for example at the top level, in a subnet statement, or in a host statement.<br />
The key values are as follows. You can include more than one in the same host-name value.<br />
Note! Some of these do not by themselves generate a unique identifier.<br />
Key Meaning<br />
%A First byte of the host's IP address.<br />
Example: for address 10.24.25.201, the key would return 10.<br />
%B Second byte of the host's IP address.<br />
Example: for address10.24.25.201, the key would return 24.<br />
%C Third byte of the host's IP address.<br />
Example: for address 10.24.25.201, the key would return 25.<br />
%D Fourth byte of the host's IP address.<br />
Example: for address 10.24.25.201, the key would return 201.<br />
%H Host part of the host's IP address.<br />
Example: for address 10.24.25.201 with subnet mask 255.255.0.0, the key would return<br />
6601.<br />
21-27
Configuring Remote Systems with RARP, BOOTP, <strong>and</strong> DHCP Server<br />
21-28<br />
Key Meaning<br />
%I Client Identifier sent by the host. (in hex). For example: 0174657374.<br />
%-I Client ID as above, except that hyphens (-) are used to separate each byte.<br />
%M MAC address of the host.<br />
%-M MAC address of the host, as above, except that hyphens (-) are used to separate each<br />
byte.<br />
%N Host name sent by the client, if any. If none, “Host”.<br />
%P Printable characters from the client ID. For example: if the client ID was 0174657374,<br />
the 01 is thrown away <strong>and</strong> the resulting hostname is “test”.<br />
%S Subnet part of the host's IP address.<br />
Example: for address 10.24.25.201 with subnet mask 255.255.0.0, the key would return<br />
102400.<br />
%-S Subnet part of the host's IP address, as above, except that hyphens (-) are used to<br />
separate each byte. For example: 10-24-0-0.<br />
You can intersperse string constants such as hyphens between key definitions. However, if the<br />
generated host name exceeds 63 characters, it is truncated. Here is an example host-name<br />
statement:<br />
option host-name "Host%H-%-S";<br />
For a lease pool defined with an address range of 192.168.11.6 through 192.168.11.10 <strong>and</strong> a subnet<br />
mask of 255.255.255.0, the DHCP server generates the following host names:<br />
Host6-192-168-11-0<br />
Host7-192-168-11-0<br />
Host8-192-168-11-0<br />
Host9-192-168-11-0<br />
Host10-192-168-11-0<br />
The %N key allows you to use the host name as sent by the client (option 12) <strong>and</strong> then add<br />
something unique to it to generate a unique name. For example, if multiple clients all send the name<br />
"dilbert" you can make them unique by appending the MAC (hardware) address, as follows:<br />
deny name-by-client;<br />
option host-name "%N-%M";<br />
This would generate the host name "dilbert-010203040506" for a client with hardware address<br />
01:02:03:04:05:06.
Configuration File Declarations <strong>and</strong> Parameters<br />
Configuring Remote Systems with RARP, BOOTP, <strong>and</strong> DHCP Server<br />
Table 21-3 describes the declarations <strong>and</strong> parameters you can use in a configuration file.<br />
See Table 21-10 for a list of DHCP Safe-failover-related configuration file statements.<br />
Table 21-3 DHCP Statements<br />
Statement Description<br />
add Use the add statement to add a client to the class whose name is<br />
specified in class-name.<br />
Important! Because this statement executes after IP address<br />
allocation is completed, class membership caused by this<br />
statement cannot be used in the address allocation<br />
process.<br />
add “class-name”;<br />
algorithm Used only inside of key declarations, the algorithm statement specifies<br />
the algorithm to use for Transaction Signatures (TSIG) on dynamic<br />
DNS updates. The only supported algorithm is "hmac-md5". This<br />
statement is optional.<br />
algorithm "hmac-md5";<br />
allow <strong>and</strong> deny Use the allow <strong>and</strong> deny statements to control the behavior of the DHCP<br />
server.<br />
The allow <strong>and</strong> deny keywords have different meanings depending on<br />
the context.<br />
• In a pool context, use these keywords to set up access lists for<br />
address allocation pools.<br />
• In other contexts, use these keywords to control general server<br />
behavior with respect to clients based on scope.<br />
21-29
Configuring Remote Systems with RARP, BOOTP, <strong>and</strong> DHCP Server<br />
21-30<br />
Table 21-3 DHCP Statements (Continued)<br />
Statement Description<br />
allow <strong>and</strong> deny in<br />
scope<br />
These allow <strong>and</strong> deny statements work the same way whether the client<br />
is sending a DHCPDISCOVER or a DHCPREQUEST message,<br />
• an address is allocated to the client (either the old requested address<br />
or a new address), <strong>and</strong> then,<br />
• that address is tested to see if it is okay for the client to have it.<br />
If the client requested it, <strong>and</strong> it is not okay, the server sends a<br />
DHCPNAK message. Otherwise, the server does not respond to the<br />
client. If it is okay to give the address to the client, the server sends a<br />
DHCPACK message.<br />
Note! These are not recommended for use inside pool declarations.<br />
See the Pool Permit Lists section for an important note.<br />
Use the unknown-clients flag to tell the DHCP server to dynamically<br />
assign addresses to unknown clients or to not assign addresses to<br />
unknown clients. An unknown client is one that does not have a host<br />
declaration. The default is to allow dynamic address assignments to<br />
unknown clients.<br />
allow unknown-clients; deny unknown-clients;<br />
Use the bootp flag to tell the DHCP server to respond to bootp queries<br />
or to not respond to bootp queries. The default is to allow bootp<br />
queries.<br />
allow bootp; deny bootp;<br />
Use the dynamic-bootp flag to tell the DHCP server to dynamically<br />
assign addresses to bootp clients or to not do so. The default is to allow<br />
dynamic bootp for IP addresses declared in pool declarations. The<br />
default for range statements outside of pool declarations is set by the<br />
presence or absence of the dynamic-bootp keyword. Deny dynamicbootp<br />
overrides the dynamic-bootp range key word.<br />
allow dynamic-bootp; deny dynamic-bootp;<br />
Use the booting flag to tell the DHCP server to respond to queries from<br />
a particular client or to not respond to queries from a particular client.<br />
The default is to allow booting. If it is disabled for a particular client,<br />
that client will not be able to get an address from the DHCP server.<br />
allow booting; deny booting;
Table 21-3 DHCP Statements (Continued)<br />
Statement Description<br />
allow <strong>and</strong> deny in<br />
scope (cont’d)<br />
Configuring Remote Systems with RARP, BOOTP, <strong>and</strong> DHCP Server<br />
Use the dynamic-update flag to tell the DHCP server to perform<br />
dynamic DNS updates or to not perform them. The default is to deny<br />
dynamic DNS updates.<br />
allow dynamic-update; deny dynamic-update;<br />
Use the name-by-client flag to tell the DHCP server to determine the<br />
hostname <strong>and</strong> Fully Qualified Domain Name (FQDN) for dynamic<br />
DNS updates from information sent by the client or from information in<br />
the configuration file. The default is to deny use of client-specified<br />
information.<br />
allow name-by-client; deny name-by-client;<br />
Use the dhcpinform flag to tell the DHCP server to respond to<br />
DHCPINFORM messages or to not respond. The default is to allow<br />
DHCPINFORM messages for authoritative subnets, <strong>and</strong> to deny<br />
DHCPINFORM messages for non-authoritative subnets.<br />
allow dhcpinform; deny dhcpinform;<br />
Use the update-A-record flag to tell the DHCP server to update the A<br />
resource record or not when performing DNS updates (the PTR<br />
resource record is always updated). The default is to deny updating the<br />
A resource record.<br />
allow update-A-record; deny update-A-record;<br />
Use the ras-servers flag to tell the DHCP server to respond to queries<br />
from Microsoft (R) NT RAS Servers or to not respond to NT RAS<br />
queries. The default is to allow NT RAS queries.<br />
allow ras-servers; deny ras-servers;<br />
Allow/deny ras-servers is supported for backward compatibility. The<br />
way to do deny ras-servers in version 3.0 of DHCP (<strong>MultiNet</strong> v5.1) is<br />
to use a conditional statement:<br />
if substring (option dhcp-client-identifier, 1,3) =<br />
“RAS” {<br />
deny booting;<br />
}<br />
21-31
Configuring Remote Systems with RARP, BOOTP, <strong>and</strong> DHCP Server<br />
21-32<br />
Table 21-3 DHCP Statements (Continued)<br />
Statement Description<br />
allow <strong>and</strong> deny in<br />
pool declarations<br />
See thePool Permit Lists section for discussion, defaults, <strong>and</strong> important<br />
notes.<br />
Use known clients to allow or prevent allocation from this pool to any<br />
client that has a host declaration. A client is known if it has a host<br />
declaration in any scope.<br />
allow known clients; deny known clients;<br />
Use unknown clients to allow or prevent allocation from this pool to<br />
any client that has no host declaration.<br />
allow unknown clients; deny unknown clients;<br />
Use members of “class” to allow or prevent allocation from this pool to<br />
any client that is a member of the named class.<br />
allow members of “class-name”;<br />
deny members of “class-name”;<br />
Use dynamic bootp clients to allow or prevent allocation from this pool<br />
to any BOOTP client.<br />
allow dynamic bootp clients;<br />
deny dynamic bootp clients;<br />
Use all clients to allow or prevent allocation from this pool to all<br />
clients. You can use this, for example, when you want to write a pool<br />
declaration but you want to hold it in reserve; or when you want to<br />
renumber your network quickly, <strong>and</strong> thus want the server to force all<br />
clients that have been allocated addresses from this pool to obtain new<br />
addresses immediately when they next renew their leases.<br />
allow all clients; deny all clients;<br />
always-broadcast Use the always-broadcast statement to cause the DHCP server to<br />
always broadcast its responses. This feature is to h<strong>and</strong>le clients who do<br />
not set the broadcast flag in their requests <strong>and</strong> yet require a broadcast<br />
response. We recommend you restrict the use of this feature to as few<br />
clients as possible.<br />
always-broadcast flag;
Table 21-3 DHCP Statements (Continued)<br />
Statement Description<br />
Configuring Remote Systems with RARP, BOOTP, <strong>and</strong> DHCP Server<br />
always-reply-rfc1048 Some BOOTP clients expect RFC 1048-style responses, but do not<br />
follow RFC 1048 rules when sending their requests. You can determine<br />
if a client is having this problem:<br />
• if it is not getting the options you have configured for it.<br />
<strong>and</strong><br />
• if you see in the server log the message "(non-rfc1048)" printed<br />
with each BOOTREQUEST that is logged.<br />
If you want to send RFC 1048 options to this kind of client, set the<br />
always-reply-rfc1048 option in that client's host declaration. The<br />
DHCP server responds with an RFC 1048-style vendor options field.<br />
This flag can be set in any scope, <strong>and</strong> affects all clients covered by that<br />
scope.<br />
always-reply-rfc1048 flag;<br />
21-33
Configuring Remote Systems with RARP, BOOTP, <strong>and</strong> DHCP Server<br />
21-34<br />
Table 21-3 DHCP Statements (Continued)<br />
Statement Description<br />
[not] authoritative When the DHCP server receives a DHCPREQUEST message from a<br />
DHCP client requesting a specific IP address, the DHCP protocol<br />
requires that the server determine whether the IP address is valid for the<br />
network to which the client is attached. If the address is not valid, the<br />
DHCP server should respond with a DHCPNAK message, forcing the<br />
client to acquire a new IP address.<br />
To make this determination for IP addresses on a particular network<br />
segment, the DHCP server must have complete configuration<br />
information for that network segment. Unfortunately, it is not safe to<br />
assume that DHCP servers are configured with complete information.<br />
Therefore, the DHCP server normally assumes that it does not have<br />
complete information, <strong>and</strong> thus is not sufficiently authoritative to safely<br />
send DHCPNAK messages as required by the protocol.<br />
This default assumption should not be true for any network segment<br />
that is in the same administrative domain as the DHCP server. For such<br />
network segments, the authoritative statement should be specified, so<br />
that the server sends DHCPNAK messages as required by the protocol.<br />
If the DHCP server receives requests only from network segments in<br />
the same administrative domain, you can specify the authoritative<br />
statement at the top of the configuration file (in the global scope).<br />
Note! Version 2.0 (<strong>MultiNet</strong> v4.2) of the DCHP server makes the<br />
opposite assumption: that the DCHP server is configured with<br />
all configuration information for all network segments of which<br />
it is aware. If this assumption is not valid for your configuration,<br />
you must write not authoritative statements for all network<br />
segments where this assumption is not true (or at the top of the<br />
configuration file).<br />
authoritative;<br />
not authoritative;
Table 21-3 DHCP Statements (Continued)<br />
Statement Description<br />
Configuring Remote Systems with RARP, BOOTP, <strong>and</strong> DHCP Server<br />
class This statement groups clients together based on information they send.<br />
A client can become a member of a class in the following ways:<br />
• through an add statement<br />
• based on the class’s matching rules<br />
• because the client matches a subclass of that class<br />
Class-name is the name of the class <strong>and</strong> is used in:<br />
• add statements<br />
• members of permit statements<br />
• subclass declarations for subclasses of the named class<br />
When a packet is received from a client, every class declaration is<br />
examined for a match, match if, or spawn statement. That statement is<br />
checked to see if the client is a member of the class.<br />
The class declaration statements are lease limit, match, match if, <strong>and</strong><br />
spawn with.<br />
class “class-name” {[ statements ][ declarations ]}<br />
default-lease-time Time is the length (in seconds) that the DHCP server assigns to a lease<br />
if the requesting client did not ask for a specific amount of time for the<br />
lease to be active. The infinite lease value is “infinite”. The default is<br />
43,200 seconds (12 hours).<br />
You should set the value of default-lease-time NO larger than the value<br />
of max-lease-time.<br />
default-lease-time time;<br />
21-35
Configuring Remote Systems with RARP, BOOTP, <strong>and</strong> DHCP Server<br />
21-36<br />
Table 21-3 DHCP Statements (Continued)<br />
Statement Description<br />
dynamic-bootplease-cutoff<br />
dynamic-bootplease-length<br />
Use the dynamic-bootp-lease-cutoff statement to set the ending time for<br />
all leases dynamically assigned to BOOTP clients. By default, the<br />
DHCP server assigns infinite leases to all BOOTP clients because they<br />
do not have any way of renewing leases, <strong>and</strong> do not know that their<br />
leases could expire. However, it may make sense to set a cutoff date for<br />
all BOOTP leases. For example, the end of a school term, or the time at<br />
night when a facility is closed <strong>and</strong> all machines are required to be<br />
powered off.<br />
Date should be the date all assigned BOOTP leases will end. The date<br />
is specified in the form:<br />
W YYYY/MM/DD HH:MM:SS<br />
W is the day of the week, from zero (Sunday) to six (Saturday).<br />
YYYY is the year, including the century.<br />
MM is the number of the month, from 01 to 12.<br />
DD is the day of the month, counting from 01.<br />
HH is the hour, from 00 to 23.<br />
MM is the minute, from 00 to 59.<br />
SS is the second, from 00 to 59.<br />
The time is always in Greenwich Mean Time, not local time.<br />
dynamic-bootp-lease-cutoff date;<br />
Use the dynamic-bootp-lease-length statement to set the length of<br />
leases dynamically assigned to BOOTP clients. You may be able to<br />
assume that a lease is no longer in use if its holder has not used BOOTP<br />
or DHCP to get its address within a certain time period. The length of<br />
the time period is your judgment call.<br />
Specify length in seconds. The infinite lease value is “infinite”. If a<br />
BOOTP client reboots during a timeout period, the lease duration is<br />
reset to length so a BOOTP client that boots frequently never loses its<br />
lease. This parameter should be adjusted with extreme caution. The<br />
default is an infinite lease.<br />
dynamic-bootp-lease-length length;<br />
filename Use the filename statement to specify the name of the initial boot file<br />
that is to be loaded by a client. The filename should be recognizable to<br />
whatever file transfer protocol the client can be expected to use.<br />
filename filename;
Table 21-3 DHCP Statements (Continued)<br />
Statement Description<br />
Configuring Remote Systems with RARP, BOOTP, <strong>and</strong> DHCP Server<br />
fixed-address To make a static IP address assignment for a client, the client must<br />
match a host declaration, as described later. In addition, the host<br />
declaration must contain a fixed-address declaration. A fixed-address<br />
declaration specifies one or more IP addresses or domain names that<br />
resolve to IP addresses. If a client matches a host declaration, <strong>and</strong> one<br />
of the IP addresses specified in the host declaration is valid for the<br />
network segment to which the client is connected, the client is assigned<br />
that IP address.<br />
A static IP address assignment overrides a dynamically assigned IP<br />
address that is valid on that network segment. That is, if a new static<br />
mapping for a client is added after the client has a dynamic mapping,<br />
the client cannot use the dynamic mapping the next time it tries to<br />
renew its lease. The DHCP server will not assign an IP address that is<br />
not correct for the network segment to which the client is attached <strong>and</strong><br />
will not override a valid dynamic mapping for one network segment<br />
based on a static mapping that is valid on a different network segment.<br />
You can specify a domain name instead of an IP address in a fixedaddress<br />
declaration. However, you should do this only for long-lived<br />
domain name records — the DHCP server only looks up the record on<br />
startup. So, if the record changes while the server is running, the server<br />
continues to use the record’s former value.<br />
fixed-address address [,...,address];<br />
get-lease-hostnames Use the get-lease-hostnames statement to tell the DHCP server to look<br />
up the domain name corresponding to each address in the lease pool<br />
<strong>and</strong> use that address for the DHCP hostname option.<br />
If flag is true, the lookup is done for all addresses in the current scope.<br />
If flag is false (the default), lookups are not done.<br />
get-lease-hostnames flag;<br />
group Use the group statement to apply one or more parameters to a group of<br />
declarations. You can use it to group hosts, shared networks, subnets, or<br />
other groups.<br />
group {[statements] [declarations]}<br />
21-37
Configuring Remote Systems with RARP, BOOTP, <strong>and</strong> DHCP Server<br />
21-38<br />
Table 21-3 DHCP Statements (Continued)<br />
Statement Description<br />
hardware Use the hardware clause inside a host statement to specify the network<br />
hardware address of a BOOTP or DHCP client.<br />
hardware-type must be the name of a physical hardware interface type.<br />
Ethernet, Token-Ring, <strong>and</strong> FDDI are the only recognized types.<br />
The hardware-address should be a set of hexadecimal octets (numbers<br />
from 0 through ff) separated by colons (:).<br />
hardware hardware-type hardware-address;
Table 21-3 DHCP Statements (Continued)<br />
Statement Description<br />
Configuring Remote Systems with RARP, BOOTP, <strong>and</strong> DHCP Server<br />
host The host declaration provides information about a particular client.<br />
Name should be a unique name for the host declaration, but a specific<br />
meaning is not required. If the use-host-decl-names flag is enabled,<br />
name is sent in the host-name option if no host-name option is<br />
specified.<br />
Host declarations match DHCP or BOOTP clients based on either the<br />
client's hardware address or the dhcp-client-identifier option that the<br />
client sends. BOOTP clients do not normally send a dhcp-clientidentifier<br />
option. So, you must use the hardware address for all clients<br />
that might send BOOTP protocol requests.<br />
The host declaration has three purposes:<br />
• to assign a static IP address to a client<br />
• to declare a client as "known"<br />
• to specify a scope in which statements can be executed for a specific<br />
client<br />
You can make the DHCP server treat some DHCP clients differently<br />
from others if host declarations exist for those clients. Any request<br />
coming from a client that matches a host declaration is considered to be<br />
from a "known" client. Requests that do not match any host declaration<br />
are considered to be from "unknown" clients. You can use this<br />
knowledge to control how addresses are allocated.<br />
It is possible to write more than one host declaration for a client. If you<br />
want to assign more than one static address to a given client, you can<br />
either specify more than one address in the fixed-address statement or<br />
you can write multiple host declarations.<br />
Multiple host declarations are needed if the client has different<br />
requirements (scopes) on different subnets. For each IP address that<br />
requires a different scope, one host declaration should exist. A client<br />
can be in the scope of only one host declaration at a time. Host<br />
declarations with static address assignments are in scope for a client<br />
only if one of the address assignments is valid for the network segment<br />
to which the client is connected. If you want to boot a client using static<br />
addresses on some subnets, <strong>and</strong> using dynamically assigned addresses<br />
on other subnets, you need to write a host declaration with no fixedaddress<br />
statement. There can be only one such host declaration per<br />
client. Its scope is used whenever that client receives a dynamically<br />
assigned address.<br />
host name { [statements] [declarations] }<br />
21-39
Configuring Remote Systems with RARP, BOOTP, <strong>and</strong> DHCP Server<br />
21-40<br />
Table 21-3 DHCP Statements (Continued)<br />
Statement Description<br />
if The if statement conditionally executes statements based on the values<br />
the client sends or other information. See the Conditional Behavior<br />
section for more information.<br />
if boolean-expression { [statements] }<br />
[elsif boolean-expression { [statements] }]<br />
[else { [statements] } ]<br />
invalid-ddns-chars This statement specifies how DHCP should h<strong>and</strong>le invalid characters in<br />
the hostname for Dynamic DNS updates (DDNS).<br />
fail tells DHCP to display a message <strong>and</strong> not perform any DNS updates<br />
if there are any invalid characters in the hostname. This is the same as<br />
the behavior of the DHCP server in <strong>MultiNet</strong> V4.2. This is the default.<br />
invalid-ddns-chars fail;<br />
discard tells DHCP to throw away the invalid characters in the<br />
hostname.<br />
invalid-ddns-chars discard;<br />
replace tells DHCP to replace the invalid characters with the specified<br />
character(s). If none are specified, the default replacement character is<br />
the hyphen ('-').<br />
invalid-ddns-chars replace ["characters"];<br />
key The key declaration specifies keys to use for Transaction Signatures<br />
(TSIG) to sign dynamic DNS updates. See the Transaction Signatures<br />
(TSIG) section.<br />
key _ip-address_ {<br />
[ algorithm "algorithm-name"; ]<br />
key-id "key-name";<br />
secret "key";<br />
}<br />
key-id Used only inside of key declarations, the key-id statement specifies the<br />
name of the key to use for Transaction Signatures (TSIG) on dynamic<br />
DNS updates. This key name must match the name that the DNS server<br />
is using (as specified in named.conf).<br />
key-id "key-name";
Table 21-3 DHCP Statements (Continued)<br />
Statement Description<br />
Configuring Remote Systems with RARP, BOOTP, <strong>and</strong> DHCP Server<br />
lease limit This statement causes the DHCP server to limit the number of members<br />
of a class that can hold a lease at any one time. This limit applies to all<br />
addresses the DHCP server allocates in the class, not just addresses on a<br />
particular network segment.<br />
• If a client is a member of more than one class with lease limits, the<br />
server assigns the client an address based on either class.<br />
• If a client is a member of one or more classes with limits <strong>and</strong> one or<br />
more classes without limits, the classes without limits are not<br />
considered.<br />
lease limit limit;<br />
lease-scan-interval This statement specifies how frequently to scan for expired leases. The<br />
default is 60 seconds.<br />
lease-scan-interval seconds;<br />
match data-expression is evaluated using the contents of a client’s request. If it<br />
returns a value that matches a subclass of the class in which the match<br />
statement appears, the client is considered a member of both the<br />
subclass <strong>and</strong> the class.<br />
match data-expression;<br />
match if boolean-expression is evaluated when the server receives a packet from<br />
the client. If it is true, the client is considered a member of the class.<br />
The boolean-expression may depend on the contents of the packet the<br />
client sends.<br />
match if boolean-expression;<br />
max-delayed-acks Use the max-delayed-acks statement to specify the maximum number<br />
of DHCPACKs to batch up. The default is 8. To disable the delaying of<br />
DHCPACKs, specify a value of 1.<br />
To improve performance under very heavy loads, the DHCP server<br />
delays sending DHCPACK messages by up to 2 seconds. All<br />
DHCPACKs accumulated in that time are sent in a batch.<br />
max-delayed-acks count;<br />
21-41
Configuring Remote Systems with RARP, BOOTP, <strong>and</strong> DHCP Server<br />
21-42<br />
Table 21-3 DHCP Statements (Continued)<br />
Statement Description<br />
max-lease-time Use the max-lease-time statement to assign the maximum amount of<br />
time (in seconds) to a lease. The only exception to this is Dynamic<br />
BOOTP lease lengths because they are not specified by the client <strong>and</strong><br />
are not limited by this maximum. The infinite lease value is “infinite”.<br />
The default is 86,400 seconds (24 hours).<br />
Note! You should set the value of max-lease-time at least as large as<br />
default-lease-time.<br />
max-lease-time time;<br />
min-lease-time Use the min-lease-time statement to assign the minimum length in<br />
seconds to a lease. The infinite lease value is “infinite”. By default,<br />
there is no minimum.<br />
min-lease-time should be less than or equal to default-lease-time <strong>and</strong><br />
max-lease-time.<br />
min-lease-time time;<br />
min-secs Use the min-secs statement to assign the minimum amount of time (in<br />
seconds) it takes for the DHCP server to respond to a client’s request<br />
for a new lease.<br />
The number of seconds is based on what the client reports in the secs<br />
field of the requests it sends. The maximum value is 255 seconds.<br />
Usually, setting this to one second results in the DHCP server not<br />
responding to the client's first request, but always responding to the<br />
client’s second request.<br />
You can use the min-secs statement to set up a secondary DHCP server<br />
to never offer an address to a client until the primary server has been<br />
given a chance to do so. If the primary server is down, the client binds<br />
to the secondary server; otherwise, clients should always bind to the<br />
primary.<br />
Note! This does not permit a primary server <strong>and</strong> a secondary server<br />
to share a pool of dynamically-allocatable addresses.<br />
See information about Safe-failover in this chapter.<br />
min-secs seconds;
Table 21-3 DHCP Statements (Continued)<br />
Statement Description<br />
Configuring Remote Systems with RARP, BOOTP, <strong>and</strong> DHCP Server<br />
next-server Use the next-server statement to specify the host address of the server<br />
from where the client will load the initial boot file (specified in the<br />
filename statement).<br />
server-name should be a numeric IP address or a domain name. The<br />
DHCP server’s IP address is used if no next-server parameter applies to<br />
a given client.<br />
next-server name;<br />
one-lease-per-client Use the one-lease-per-client statement to have the server free any other<br />
leases the client holds when the client sends a DCCPREQRUEST for a<br />
particular lease.<br />
This presumes the client has forgotten any lease not mentioned in the<br />
DHCPREQUEST. For example, the client has only a single network<br />
interface <strong>and</strong> it does not remember leases it is holding on networks to<br />
which it is not currently attached. Neither of these assumptions are<br />
guaranteed or provable, so use caution in the use of this statement.<br />
one-lease-per-client flag;<br />
option This statement specifies actual DHCP protocol options to send to the<br />
client. The option statement is described in the DHCP Options section.<br />
option definition This statement assigns a name <strong>and</strong> a type to an option code. See the<br />
Defining New Options section for more information.<br />
option name code code = definition;<br />
option space This statement specifies a new option space. This declaration must<br />
precede all definitions for options in the space being specified. Spacename<br />
should be the name of the option space. Currently three option<br />
space names are predefined:<br />
• dhcp (default)<br />
• agent<br />
• server<br />
If an option name is specified without an option space, it is assumed the<br />
name refers to an option in the dhcp option space. For example, the<br />
option names dhcp.routers <strong>and</strong> routers are equivalent.<br />
option space space-name;<br />
21-43
Configuring Remote Systems with RARP, BOOTP, <strong>and</strong> DHCP Server<br />
21-44<br />
Table 21-3 DHCP Statements (Continued)<br />
Statement Description<br />
ping The DHCP server uses ping to check if a particular IP address is in use<br />
by sending a packet of information <strong>and</strong> waiting for a response. This<br />
statement turns ping on <strong>and</strong> off. The default is ON.<br />
ping flag;<br />
ping-retries This statement defines the number of times the DHCP server pings an<br />
IP address before it concludes that the address is not in use. The default<br />
is 1.<br />
ping-retries count;<br />
ping-timeout This statement defines the time (in seconds) that ping should wait for a<br />
response. The default is 1 second.<br />
ping-timeout time;<br />
pool This statement specifies an address pool from which IP addresses can<br />
be allocated. This pool can be customized to have its own permit list to<br />
control client access <strong>and</strong> its own scope to declare pool-specific<br />
parameters. You can put pool declarations within subnet declarations or<br />
within shared-network declarations. You can use the range declaration<br />
to specify the addresses in a particular pool.<br />
• For subnet declarations: specified addresses must be correct within<br />
the pool declaration within which it is made.<br />
• For shared-network declarations: specified addresses must be on<br />
subnets that were previously specified within the same sharednetwork<br />
declaration.<br />
pool {[permit list][range declaration][statements]}
Table 21-3 DHCP Statements (Continued)<br />
Statement Description<br />
Configuring Remote Systems with RARP, BOOTP, <strong>and</strong> DHCP Server<br />
range For any subnet on which addresses are assigned dynamically, there<br />
must be at least one range declaration. The range declaration specifies<br />
that the server may allocate to DHCP clients every address, from lowaddress<br />
to high-address. You can specify a single IP address by<br />
omitting high-address.<br />
All IP addresses in the range should be on the same subnet. If the range<br />
declaration appears within a subnet declaration, all addresses should be<br />
on the declared subnet. If the range declaration appears within a<br />
shared-network declaration, all addresses should be on subnets already<br />
declared within the shared-network declaration.<br />
You may specify the dynamic-bootp flag if addresses in the specified<br />
range can be dynamically assigned to both BOOTP <strong>and</strong> DHCP clients.<br />
requested-optionsonly<br />
Note! The dynamic-bootp flag was deprecated in version 3.0<br />
(<strong>MultiNet</strong> v5.1) of the DHCP server in favor of declaring the<br />
address within a pool <strong>and</strong> specifying in the permit list that<br />
dynamic allocation for BOOTP clients is permitted.<br />
range [dynamic-bootp] low-address [high-address];<br />
Use the requested-options-only statement to send just the options<br />
requested by the client. To send a specific set of options, set requestedoptions-only<br />
to true <strong>and</strong> specify the dhcp-parameter-request-list option.<br />
The following sends only the subnet-mask, routers, <strong>and</strong> domain-nameservers<br />
options to the client (assuming they are defined in the<br />
configuration file):<br />
host restricted {<br />
hardware ethernet 01:02:03:04:05:06;<br />
option dhcp-parameter-request-list 1, 3, 6;<br />
requested-options-only true;<br />
}<br />
We recommend you restrict the use of this feature to as few clients as<br />
possible.<br />
requested-options-only flag;<br />
secret Used only inside of key declarations, the secret statement specifies the<br />
actual secret key to use for Transaction Signatures (TSIG) on dynamic<br />
DNS updates. The format is base-64. The value must match the key<br />
used by the DNS server (as specified in named.conf).<br />
secret "key";<br />
21-45
Configuring Remote Systems with RARP, BOOTP, <strong>and</strong> DHCP Server<br />
21-46<br />
Table 21-3 DHCP Statements (Continued)<br />
Statement Description<br />
secure-ddns Use the secure-ddns statement to cause the DHCP server to use<br />
Transaction Signatures (TSIG) to sign dynamic DNS updates. The<br />
default is to not use TSIG.<br />
secure-ddns flag;<br />
server-identifier The server-identifier statement is equivalent to the dhcp-serveridentifier<br />
option. See the dhcp-server-identifier option for more<br />
information<br />
server-identifier hostname;<br />
server-name Use the server-name statement to inform the client of the server’s name<br />
from which it is booting. name should be the name provided to the<br />
client.<br />
server-name name;<br />
shared-network Use this statement to inform the DHCP server that some IP subnets<br />
share the same physical network. Declare all subnets in the same shared<br />
network within a shared-network statement.<br />
Parameters specified in the shared-network statement will be used<br />
when booting clients on those subnets unless parameters provided at<br />
the subnet or host level override them. If more than one subnet in a<br />
shared network has addresses available for dynamic allocation, those<br />
addresses are collected into a common pool. There is no way to specify<br />
which subnet of a shared network a client should boot on.<br />
Name should be the name of the shared network. Make the name<br />
descriptive as it will be used when printing debugging messages. Give<br />
it a syntax of a valid domain name (although it will never be used as<br />
such), or any arbitrary name enclosed in quotation marks.<br />
shared-network name {[statements] [declarations]}<br />
site-option-space Use the site-option-space statement to determine the option space from<br />
which site-local options are taken. Site-local options have codes<br />
ranging from 128 to 254. If no site-option-space is specified, sitespecific<br />
options are taken from the default option space.<br />
site-option-space option-space;
Table 21-3 DHCP Statements (Continued)<br />
Statement Description<br />
Configuring Remote Systems with RARP, BOOTP, <strong>and</strong> DHCP Server<br />
spawn with data-expression must evaluate to a non-null value for the server to look<br />
for a subclass of the class that matches the evaluation.<br />
• If such a subclass exists, the client is considered a member of both<br />
the subclass <strong>and</strong> the class.<br />
• If no such subclass exists, one is created <strong>and</strong> recorded in the lease<br />
database, <strong>and</strong> the client is considered a member of the new subclass<br />
as well as the class.<br />
spawn with data-expression;<br />
subclass This statement specifies a subclass of the class named by class-name.<br />
Class-data should be either<br />
• a text string enclosed in quotes, or<br />
• a list of bytes expressed in hexadecimal, separated by colons.<br />
Clients match subclasses after evaluating the match or spawn with<br />
statements in the class declaration for class-name. If the evaluation<br />
matches class-data, the client is a member of the subclass <strong>and</strong> the class.<br />
subclass “class-name” class-data;<br />
subclass “class-name” class-data {<br />
[statements]<br />
}<br />
21-47
Configuring Remote Systems with RARP, BOOTP, <strong>and</strong> DHCP Server<br />
21-48<br />
Table 21-3 DHCP Statements (Continued)<br />
Statement Description<br />
subnet This statement contains information specific to a subnet. The<br />
information communicates the following to DHCP:<br />
• Enough information for DHCP to determine if an IP address is on<br />
that subnet.<br />
• What the subnet-specific parameters are.<br />
• What addresses may be dynamically allocated to clients booting on<br />
that subnet.<br />
Use the range declaration to specify what addresses are available to be<br />
dynamically allocated to clients booting on the subnet.<br />
Two things are required to define a subnet:<br />
• The subnet-number<br />
• The netmask<br />
The subnet-number <strong>and</strong> the netmask entry is an IP address or domain<br />
name that resolves to the subnet-number or the netmask of the subnet<br />
being described. The subnet-number <strong>and</strong> the netmask are enough to<br />
determine if any given IP address is on the specified subnet.<br />
Note! A netmask must be given with every subnet declaration. If<br />
there is any variance in subnet masks at a site, use a subnetmask<br />
option statement in each subnet declaration to set the<br />
desired subnet mask. The subnet-mask option statement<br />
overrides the subnet mask declared in the subnet statement.<br />
subnet subnet-number netmask netmask<br />
{[statements][declarations]}
Table 21-3 DHCP Statements (Continued)<br />
Statement Description<br />
Configuring Remote Systems with RARP, BOOTP, <strong>and</strong> DHCP Server<br />
use-host-decl-names If the use-host-decl-names parameter is true, the name provided for<br />
each host declaration is given to the client as its hostname. The default<br />
is false. For example:<br />
use-lease-addr-fordefault-route<br />
group {<br />
use-host-decl-names on;<br />
host joe {<br />
hardware ethernet 08:00:2b:4c:29:32;<br />
fixed-address joe.fugue.com;<br />
}<br />
}<br />
is equivalent to<br />
host joe {<br />
hardware ethernet 08:00:2b:4c:29:32;<br />
fixed-address joe.fugue.com;<br />
option host-name “joe”;<br />
}<br />
An option host-name statement within a host declaration overrides the<br />
use of the name in the host declaration.<br />
use-host-decl-names flag;<br />
If the use-lease-addr-for-default-route parameter is true in a given<br />
scope, the IP address of the lease being assigned is sent to the client<br />
instead of the value specified in the routers option (or sending no value<br />
at all). This causes some clients to ARP for all IP addresses, which can<br />
be helpful if your router is configured for proxy ARP.<br />
If use-lease-addr-for-default-route is enabled <strong>and</strong> an option routers<br />
statement are both in scope, use-lease-addr-for-default-route is<br />
preferred.<br />
use-lease-addr-for-default-route flag;<br />
user-class This statement has been deprecated in favor of the more powerful class<br />
statement. See the example in the Vendor Encapsulated Options<br />
section.<br />
vendor-class This statement has been deprecated in favor of the more powerful class<br />
statement. See the example in the Vendor Encapsulated Options<br />
section.<br />
21-49
Configuring Remote Systems with RARP, BOOTP, <strong>and</strong> DHCP Server<br />
Expressions<br />
21-50<br />
Table 21-3 DHCP Statements (Continued)<br />
Statement Description<br />
vendor-option-space Use the vendor-option-space statement to instruct the server to<br />
construct a vendor-encapsulated-options option using all the defined<br />
options in the option space. If no vendor-encapsulated-options option is<br />
defined, the server sends this option to the client, if appropriate.<br />
vendor-option-space option-space;<br />
The DHCP server can evaluate expressions while executing statements. The DHCP server’s<br />
expression evaluator returns the following types:<br />
• A boolean, a true or false (on or off) value.<br />
• An integer, a 32-bit quantity that may be treated as signed or unsigned, depending on the<br />
context.<br />
• A string of data, a collection of zero or more bytes. Any byte value is valid in a data string — the<br />
DHCP server maintains a length rather than depending on a NUL termination.<br />
Expression evaluation is performed when a request is received from a DHCP client. Values in the<br />
packet sent by the client can be extracted <strong>and</strong> used to determine what to send back to the client. If<br />
the expression refers to a field or option in the packet for which there is no value, the result is null.<br />
Null values are treated specially in expression evaluation. A Boolean expression that returns a null<br />
value is considered false. A data expression that returns a null value generally results in the<br />
statement using the value not having any effect.<br />
The following is an example of using four types of expressions to produce the name of a PTR<br />
record for the IP address being assigned to a client:<br />
concat (binary-to-ascii (10, 8, “.”, reverse (1, leased-address)),<br />
“.in-addr.arpa.”);<br />
BOOLEAN EXPRESSIONS<br />
The following are the boolean expressions supported by DHCP.<br />
boolean-expression-1 <strong>and</strong><br />
boolean-expression-2<br />
boolean-expression-1 or<br />
boolean-expression-2<br />
The <strong>and</strong> operator evaluates to true if both boolean expressions<br />
evaluate to true. The <strong>and</strong> operator evaluates to false if either<br />
boolean expression does not evaluate to true. If either of the<br />
boolean expressions is null, the result is null.<br />
The or operator evaluates to true if either of the boolean<br />
expressions evaluate to true. The or operator evaluates to false if<br />
both of the boolean expressions evaluate to false. If either of the<br />
boolean expressions is null, the result is null.
DATA EXPRESSIONS<br />
Configuring Remote Systems with RARP, BOOTP, <strong>and</strong> DHCP Server<br />
check “class-name” The check operator evaluates to true if the packet being considered<br />
comes from a client in the specified class. Class-name must be a<br />
string that corresponds to the name of a defined class.<br />
data-expression-1 =<br />
data-expression-2<br />
The = operator compares the results of evaluating two data<br />
expressions, evaluating to true if they are the same; evaluating to<br />
false if they are not. If one of the expressions is null, the result is<br />
null.<br />
exists option-name The exists expression evaluates to true if the specified option exists<br />
in the incoming DHCP packet.<br />
known The known expression evaluates to true if the client whose request<br />
is being processed is known; that is, if the client has a host<br />
declaration.<br />
not boolean-expression The not operator evaluates to true if the boolean expression<br />
evaluates to false. The not operator evaluates to false if the boolean<br />
expression evaluates to true. If the boolean expression evaluates to<br />
null, the result is null.<br />
The following are the expressions supported by DHCP that return a data string.<br />
binary-to-ascii<br />
(numeric-expr1,<br />
numeric-expr2,<br />
data-expr1, data-expr2)<br />
numeric-expr1, numeric-expr2, data-expr1, <strong>and</strong> data-expr2 are all<br />
evaluated as expressions <strong>and</strong> the results of those evaluations are<br />
used as follows.<br />
The binary-to-ascii operator converts the binary data in data-expr2<br />
into an ASCII string, using data-expr1 as a separator. How the<br />
conversion is done is controlled by numeric-expr1 <strong>and</strong> numericexpr2.<br />
• numeric-expr1 specifies the base to convert into. Any value 2<br />
through 16 is supported. For example, a value of 10 would<br />
produce decimal numbers in the result.<br />
• numeric-expr2 specifies the number of bits in data-expr2 to treat<br />
as a single unit. The value can be 8, 16, or 32.<br />
This example converts the binary value of an IP address into its<br />
dotted decimal equivalent:<br />
binary-to-ascii(10, 8, ".", 168364039)<br />
The result would be the string "10.9.8.7".<br />
21-51
Configuring Remote Systems with RARP, BOOTP, <strong>and</strong> DHCP Server<br />
21-52<br />
colon-separated<br />
hexadecimal list<br />
concat (data-expr1,<br />
data-expr2)<br />
encode-int<br />
(numeric-expr, width)<br />
A list of hexadecimal octet values, separated by colons, may be<br />
specified as a data expression. A single hexidecimal number,<br />
appearing in a context where a data string is expected, is interpreted<br />
as a data string containing a single byte.<br />
data-expr1 <strong>and</strong> data-expr2 are evaluated <strong>and</strong> the concatenated result<br />
of these two evaluations is returned.<br />
• If either subexpression evaluates to null, the result is the value of<br />
the expression that did not evaluate to null.<br />
• If both expressions evaluate to null, the result is null.<br />
numeric-expr is evaluated <strong>and</strong> encoded as a data string of the<br />
specified width, in network byte order (with the most significant<br />
byte first). If numeric-expr evaluates to null, the result is null.<br />
hardware The hardware operator returns a data string whose first element is<br />
the htype field of the packet being considered, <strong>and</strong> whose<br />
subsequent elements are the first hlen bytes of the chaddr field of<br />
the packet.<br />
• If there is no packet, or if the RFC 2131 hlen field is invalid, the<br />
result is null.<br />
Supported hardware types are:<br />
• ethernet (1)<br />
• token-ring (6)<br />
• fddi (8)<br />
leased-address In any context where the processing client request has been assigned<br />
an IP address, this data expression returns that IP address.<br />
option option-name The option operator returns the contents of the specified option in<br />
the incoming DHCP packet.<br />
packet (offset, length) The packet operator returns the specified portion of the packet being<br />
considered. The packet operator returns a value of null where no<br />
packet is being considered. Offset <strong>and</strong> length are applied to the<br />
contents of the packet as in the substring operator. The link-layer,<br />
IP, <strong>and</strong> UDP headers are not available.
everse (numeric-expr1,<br />
data-expr2)<br />
substring (data-expr,<br />
offset, length)<br />
NUMERIC EXPRESSIONS<br />
Configuring Remote Systems with RARP, BOOTP, <strong>and</strong> DHCP Server<br />
numeric-expr1 <strong>and</strong> data-expr2 are evaluated. The result of dataexpr2<br />
is reversed in place, using chunks of the size specified in<br />
numeric-expr1.<br />
For example, if numeric-expr1 evaluates to four <strong>and</strong> data-expr2<br />
evaluates to twelve bytes of data, the reverse expression evaluates to<br />
twelve bytes of data constructed in the following way:<br />
• the last four bytes of the input data,<br />
• followed by the middle four bytes,<br />
• followed by the first four bytes.<br />
The substring operator evaluates the data expression <strong>and</strong> returns the<br />
substring of the result of that evaluation that starts offset bytes from<br />
the beginning <strong>and</strong> continues for length bytes. Offset <strong>and</strong> length are<br />
numeric expressions.<br />
• If data-expr, offset, or length evaluate to null, the result is null.<br />
• If offset is greater than or equal to the length of the evaluated<br />
data, a zero-length data string is returned.<br />
• If length is greater than the remaining length of the evaluated<br />
data after offset, a data string containing all data from offset to<br />
the end of the evaluated data is returned.<br />
suffix (data-expr, length) The suffix operator evaluates data-expr <strong>and</strong> returns the last length<br />
bytes of that evaluation. Length is a numeric expression.<br />
• If data-expr or length evaluate to null, the result is null.<br />
• If length evaluates to a number greater than the length of the<br />
evaluated data, the evaluated data is returned.<br />
“text” A text string, enclosed in quotes, may be specified as a data<br />
expression. The string returns the text between the quotes, encoded<br />
in ASCII.<br />
Numeric expressions evaluate to an integer. In general, the precision of numeric expressions is at<br />
least 32 bits. However, the precision of such integers may be more than 32 bits.<br />
extract-int (data-expr, width) The extract-int operator extracts an integer value in network<br />
byte order after evaluating data-expr. Width is the width in bits<br />
(either 8, 16, 32) of the integer to extract. If the evaluation of<br />
data-expr does not provide an integer of the specified size, a<br />
value of null is returned.<br />
21-53
Configuring Remote Systems with RARP, BOOTP, <strong>and</strong> DHCP Server<br />
DHCP Options<br />
21-54<br />
number Number can be any numeric value between zero <strong>and</strong> the<br />
maximum representable size.<br />
The Dynamic Host Configuration protocol allows the client to receive options from the DHCP<br />
server describing the network configuration <strong>and</strong> various services that are available on the network.<br />
When configuring the DHCP server, options must often be declared. The syntax for declaring<br />
options, <strong>and</strong> the names <strong>and</strong> formats of the options in the default dhcp option space that can be<br />
declared, are in Table 21-4.<br />
DHCP option statements always start with the keyword option, followed by an option name,<br />
followed by option data. Only options needed by clients must be specified.<br />
An option name is an optional option space name followed by a period (“.”) followed by the option<br />
name. The default option space is dhcp. There are two other predefined option spaces: agent <strong>and</strong><br />
server. You can also define option spaces of your own. See the sections Relay Agent Information<br />
Option <strong>and</strong> Defining New Options in this chapter.<br />
Option data comes in these formats:<br />
• The ip-address data type can be entered either as an explicit IP address (e.g., 239.254.197.10) or<br />
as a domain name (e.g., haagen.isc.org). When entering a domain name, be sure that the domain<br />
name resolves to the single IP address.<br />
• The int32 <strong>and</strong> uint32 data types specify signed <strong>and</strong> unsigned 32-bit integers.<br />
The int16 <strong>and</strong> uint16 data types specify signed <strong>and</strong> unsigned 16-bit integers.<br />
The int8 <strong>and</strong> uint8 data types specify signed <strong>and</strong> unsigned 8-bit integers. Unsigned 8-bit<br />
integers are also sometimes referred to as octets.<br />
• The string data type specifies an NVT ASCII string. It must be enclosed in quotation marks. For<br />
example, option domain-name “isc.org”;<br />
• The flag data type specifies a boolean value. Booleans can be either true (ON) or false (OFF).<br />
You can use TRUE <strong>and</strong> FALSE, or ON <strong>and</strong> OFF.<br />
• The data-string data type specifies either an NVT ASCII string enclosed in quotation marks, or<br />
a series of octets specified in hexadecimal, separated by colons. For example, option dhcpclient-identifier<br />
“CLIENT-FOO”; or option dhcp-client-identifier 43:4c:49:54:2d:46:4f:4f;<br />
Strings <strong>and</strong> data-strings when enclosed in quotation marks can contain normal C-type characters<br />
such as “\t” for a tab.<br />
If the option value is a list (such as for the routes option), you must list them in the configuration<br />
file in the order you want the client to use the values. The DHCP server does not re-order them.<br />
Also, option data may be specified using an expression that returns a data string (see<br />
theExpressions section). The syntax is<br />
option option-name = data-expression;
St<strong>and</strong>ard DHCP Options<br />
Configuring Remote Systems with RARP, BOOTP, <strong>and</strong> DHCP Server<br />
Table 21-4 describes the st<strong>and</strong>ard DHCP options. Underlined items indicate user input items.<br />
Note! All of these options could be specified with the dhcp option space listed explicitly. For example:<br />
option dhcp.bootfile-name “bootfile.lis”;<br />
Table 21-4 DHCP Option Space Options<br />
Option Description<br />
option all-subnets-local flag; Use this option to indicate whether or not to assume<br />
all subnets of the client’s IP network use the same<br />
MTU as the client’s subnet.<br />
ON means assume all subnets share the same MTU.<br />
OFF means assume some subnets have smaller<br />
MTUs.<br />
option arp-cache-timeout uint32; Use this option to identify the timeout (in seconds)<br />
for ARP cache entries.<br />
option bootfile-name string; Use this option to identify a bootstrap file. If this<br />
option is supported by the client, it should have the<br />
same effect as the filename declaration. BOOTP<br />
clients are unlikely to support this option. Some<br />
DHCP clients support it; others require it.<br />
option boot-size uint16; Use this option to specify the length in 512-octet<br />
blocks of the client’s default boot image.<br />
option broadcast-address ip-address; Use this option to identify the broadcast address in<br />
use on the client’s subnet. See STD 3 (RFC 1122),<br />
section 3.2.1.3 for legal values for broadcast<br />
addresses.<br />
option cookie-servers<br />
ip-address [, ip-address ...];<br />
Use this option to list RFC 865 cookie servers in<br />
order of preference.<br />
option default-ip-ttl uint8; Use this option to identify the default time-to-live the<br />
client should use on outgoing datagrams.<br />
option default-tcp-ttl uint8; Use this option to identify the default TTL to use<br />
when sending TCP segments. The minimum value is<br />
1.<br />
option dhcp-client-identifier<br />
data-string;<br />
Use this option to specify a DHCP client identifier<br />
only in a host declaration. The DHCP server uses it to<br />
locate the host record by matching against the client<br />
identifier.<br />
21-55
Configuring Remote Systems with RARP, BOOTP, <strong>and</strong> DHCP Server<br />
21-56<br />
Table 21-4 DHCP Option Space Options (Continued)<br />
Option Description<br />
option dhcp-max-message-size uint16; Use this option to specify the maximum length<br />
DHCP message that the client is able to accept. Use<br />
this option in the DHCP configuration file to supply a<br />
value when the client does not.<br />
option dhcp-parameter-request-list<br />
uint8[,uint8...];<br />
option dhcp-server-identifier<br />
ip-address;<br />
option domain-name-servers<br />
ip-address [, ip-address ...];<br />
Note! Use this option with caution. Make sure that<br />
the client can accept a message of the<br />
specified size.<br />
Use this option to request that the server return<br />
certain options. Use this option in the DHCP<br />
configuration file to override the client's list, or to<br />
supply a list when the client does not. The value is a<br />
list of valid DHCP option codes as listed in RFC<br />
2132.<br />
Use this option to identify the value sent in the DHCP<br />
Server Identifier option. The value must be an IP<br />
address for the DHCP server, <strong>and</strong> must be reachable<br />
by all clients it is sent to.<br />
It is recommended to NOT use the dhcp-serveridentifier<br />
option. The only reason to use it is to force<br />
a value other than the default value to be sent on<br />
occasions where the default value would be incorrect.<br />
The default value is the first IP address associated<br />
with the physical network interface on which the<br />
request arrived. The usual case where the dhcpserver-identifier<br />
option needs to be sent is when a<br />
physical interface has more than one IP address, <strong>and</strong><br />
the one being sent by default is not appropriate for<br />
some or all clients served by that interface.<br />
Another case is when an alias is defined for the<br />
purpose of having a consistent IP address for the<br />
DHCP server, <strong>and</strong> it is desired that the clients use this<br />
IP address when contacting the server.<br />
Use this option to list Domain Name System (STD<br />
12, RFC 1035) name servers in order of preference.<br />
option domain-name string; Use this option to identify the domain name the client<br />
should use when resolving hostnames via the Domain<br />
Name System.
Table 21-4 DHCP Option Space Options (Continued)<br />
Option Description<br />
Configuring Remote Systems with RARP, BOOTP, <strong>and</strong> DHCP Server<br />
option extensions-path string; Use this option to indicate the path-name of a file the<br />
client should load containing more options.<br />
option finger-server<br />
ip-address [, ip-address ...];<br />
option font-servers<br />
ip-address [, ip-address ...];<br />
Use this option to list the Finger servers in order of<br />
preference.<br />
Use this option to list X Window System Font servers<br />
in order of preference.<br />
option host-name string; Use this option to name the client. The name may or<br />
may not be qualified with the local domain name. It is<br />
preferable to use the domain-name option to specify<br />
the domain name. See RFC 1035 for character set<br />
restrictions.<br />
The host-name option is also used to specify a<br />
template for hostname generation. See the Host Name<br />
Generation section.<br />
option ieee802-3-encapsulation flag; If the interface is an Ethernet, use this option to<br />
indicate whether the client uses Ethernet Version 2<br />
(RFC 894) or IEEE 802.3 (RFC 1042) encapsulation.<br />
OFF means use RFC 894 encapsulation.<br />
ON means use RFC 1042 encapsulation.<br />
option ien116-name-servers<br />
ip-address [, ip-address ...];<br />
option impress-servers<br />
ip-address [, ip-address ...];<br />
Use this option to list IEN 116 name servers in order<br />
of preference.<br />
Use this option to list Imagen Impress servers in<br />
order of preference.<br />
option interface-mtu uint16; Use this option to identify what MTU value to use on<br />
this interface. The minimum legal value is 68.<br />
option ip-forwarding flag; Use this option to indicate if the client should<br />
configure its IP layer for packet forwarding.<br />
ON means disable forwarding.<br />
OFF means enable forwarding.<br />
option irc-server<br />
ip-address [, ip-address ...];<br />
option log-servers<br />
ip-address [, ip-address ...];<br />
Use this option to list the IRC servers in order of<br />
preference.<br />
Use this option to list MIT-LCS UDP log servers in<br />
order of preference.<br />
21-57
Configuring Remote Systems with RARP, BOOTP, <strong>and</strong> DHCP Server<br />
21-58<br />
Table 21-4 DHCP Option Space Options (Continued)<br />
Option Description<br />
option lpr-servers<br />
ip-address [, ip-address ...];<br />
Use this option to list RFC 1179 line printer servers<br />
in order of preference.<br />
option mask-supplier flag; Use this option to indicate whether or not the client<br />
should respond to subnet mask requests using ICMP.<br />
ON means do not respond to subnet mask requests.<br />
OFF means respond to subnet mask requests.<br />
option max-dgram-reassembly uint16; Use this option to indicate the maximum size<br />
datagram the client should be prepared to reassemble.<br />
The minimum legal value is 576.<br />
option merit-dump string; Use this option to indicate the path-name of a file to<br />
which the client’s core image should be dumped in<br />
the event of a client crash. The path is formatted as a<br />
character string using the NVT ASCII character set.<br />
option mobile-ip-home-agent<br />
ip-address [, ip-address ...];<br />
Use this option to list mobile IP home agents in order<br />
of preference. Usually there will be only one agent.<br />
option nds-context data-string; Use this option to identify the initial NDS context the<br />
client should use.<br />
option nds-servers<br />
ip-address [, ip-address...];<br />
Use this option to list Novell Directory Services<br />
servers in order of preference.<br />
option nds-tree-name data-string; Use this option to name the NDS tree the client will<br />
be contacting.<br />
option netbios-dd-server<br />
ip-address [, ip-address ...];<br />
option netbios-name-servers<br />
ip-address [, ip-address ...];<br />
Use this option to list RFC 1001/1002 NetBIOS<br />
Datagram Distribution servers in order of preference.<br />
Use this option to list RFC 1001/1002 NetBIOS<br />
Name Server name servers in order of preference.<br />
Note! NetBIOS is the same as WINS.<br />
option netbios-node-type uint8; Use this option to configure configurable NetBIOS<br />
over TCP/IP clients as described in RFC 1001/1002.<br />
The value is a single octet identifying the client type.<br />
1 B-node: Broadcast — No WINS<br />
2 P-node: Peer — WINS only<br />
4 M-node: Mixed — Broadcast, then WINS<br />
8 H-node: Hybrid — WINS, then Broadcast
Table 21-4 DHCP Option Space Options (Continued)<br />
Option Description<br />
Configuring Remote Systems with RARP, BOOTP, <strong>and</strong> DHCP Server<br />
option netbios-scope string; Use this option to specify the NetBIOS over TCP/IP<br />
scope parameter for the client as specified in RFC<br />
1001/1002. See RFC1001, RFC1002, <strong>and</strong> RFC1035<br />
for character-set restrictions.<br />
option nis-domain string; Use this option to specify the client’s NIS (Sun<br />
Network Information Services) domain. Use the<br />
NVT ASCII character set to define the domain<br />
character string.<br />
option nis-servers<br />
ip-address [, ip-address ...];<br />
Use this option to list NIS servers in order of<br />
preference.<br />
option nisplus-domain string; Use this option to specify the client's NIS+ domain.<br />
Use the NVT ASCII character set to define the<br />
domain character string.<br />
option nisplus-servers<br />
ip-address [, ip-address ...];<br />
Use this option to list NIS+ servers in order of<br />
preference.<br />
option non-local-source-routing flag; Use this option to indicate if the client should<br />
configure its IP layer to allow forwarding of<br />
datagrams with non-local source routes.<br />
ON means disable forwarding.<br />
OFF means enable forwarding.<br />
option nntp-server<br />
ip-address [, ip-address ...];<br />
option ntp-servers<br />
ip-address [, ip-address ...];<br />
Use this option to list NNTP servers in order of<br />
preference.<br />
Use this option to list NTP (RFC 1305) servers in<br />
order of preference.<br />
option option-nnn data-string; Use this option to identify any DHCP option not<br />
listed here. nnn is the number of the option.<br />
option path-mtu-aging-timeout uint32; Use this option to specify the timeout to use (in<br />
seconds) when aging Path MTU values that were<br />
discovered by the mechanism defined in RFC 1191.<br />
option path-mtu-plateau-table<br />
uint16 [, uint16 ...];<br />
Use this option to specify a table of MTU sizes to use<br />
when performing Path MTU Discovery as defined in<br />
RFC 1191. The table is a list of 16-bit unsigned<br />
integers. You must list them in order from smallest to<br />
largest. The minimum MTU value cannot be smaller<br />
than 68.<br />
21-59
Configuring Remote Systems with RARP, BOOTP, <strong>and</strong> DHCP Server<br />
21-60<br />
Table 21-4 DHCP Option Space Options (Continued)<br />
Option Description<br />
option perform-mask-discovery flag; Use this option to indicate whether or not the client<br />
should perform subnet mask discovery using ICMP.<br />
ON means do not perform mask discovery.<br />
OFF means perform mask discovery.<br />
option policy-filter ip-address<br />
ip-address [, ip-address ip-address ...];<br />
option pop-server<br />
ip-address [, ip-address ...];<br />
option resource-location-servers<br />
ip-address [, ip-address ...];<br />
Use this option to indicate the policy filters for nonlocal<br />
source routing. The filters consist of IP<br />
addresses <strong>and</strong> masks that indicate which destination/<br />
mask pairs to use when filtering incoming source<br />
routes.<br />
The client should discard any source routed datagram<br />
whose next-hop address does not match one of the<br />
filters. See STD 3 (RFC 1122) for more information.<br />
Use this option to list POP3 servers in order of<br />
preference.<br />
Use this option to list RFC 887 Resource Location<br />
servers in order of preference.<br />
option root-path string; Use this option to specify the path-name that contains<br />
the client’s root disk. The path is formatted as a<br />
character string using the NVT ASCII character set.<br />
option router-discovery flag; Use this option to indicate whether or not the client<br />
should solicit routers using the Router Discovery<br />
mechanism defined in RFC 1256.<br />
ON means do not perform router discovery.<br />
OFF means perform router discovery.<br />
option routers<br />
ip-address [, ip-address ...];<br />
option router-solicitation-address<br />
ip-address;<br />
option smtp-server<br />
ip-address [, ip-address ...];<br />
Use this option to list IP addresses for routers on the<br />
client’s subnet, listing the routers in order of<br />
preference.<br />
Use this option to identify the address where the<br />
client transmits router solicitation requests.<br />
Use this option to list SMTP servers in order of<br />
preference.
Table 21-4 DHCP Option Space Options (Continued)<br />
Option Description<br />
option static-routes ip-address<br />
ip-address [, ip-address ip-address ...];<br />
option streettalk-directory-assistanceserver<br />
ip-address [, ip-address ...];<br />
option streettalk-server<br />
ip-address [, ip-address ...];<br />
Configuring Remote Systems with RARP, BOOTP, <strong>and</strong> DHCP Server<br />
Use this option to specify a list of static routes that<br />
the client should install in its routing cache. If there<br />
are multiple routes to the same destination, you<br />
should list them in descending order of priority.<br />
The routes are made up of IP address pairs. The first<br />
address is the destination address; the second address<br />
is the router for the destination.<br />
The default route (0.0.0.0) is an illegal destination for<br />
a static route. Use the routers option to specify the<br />
default route.<br />
Use this option to list the StreetTalk Directory<br />
Assistance (STDA) servers in order of preference.<br />
Use this option to list the StreetTalk servers in order<br />
of preference.<br />
option subnet-mask ip-address; Use this option indicate the client’s subnet mask as<br />
per RFC 950. If no subnet mask option is in scope,<br />
the DHCP server uses the subnet mask from the<br />
subnet declaration on which the address is being<br />
assigned. If a subnet mask option is in scope for the<br />
address being assigned, it overrides the subnet mask<br />
specified in the subnet declaration.<br />
option swap-server ip-address; Use this option to identify the IP address of the<br />
client’s swap server.<br />
option tcp-keepalive-garbage flag; Use this option to indicate whether the client sends<br />
TCP keepalive messages with an octet of garbage for<br />
compatibility with older implementations.<br />
ON means do not send a garbage octet.<br />
OFF means send a garbage octet.<br />
option tcp-keepalive-interval uint32; Use this option to indicate the interval (in seconds)<br />
the client TCP waits before sending a keepalive<br />
message on a TCP connection. The time is specified<br />
as a 32-bit unsigned integer.<br />
0 (zero) means do not generate keepalive messages<br />
unless requested by an application.<br />
21-61
Configuring Remote Systems with RARP, BOOTP, <strong>and</strong> DHCP Server<br />
Relay Agent Information Option<br />
21-62<br />
Table 21-4 DHCP Option Space Options (Continued)<br />
Option Description<br />
option tftp-server-name string; Use this option to identify a TFTP server. If this<br />
option is supported by the client, it should have the<br />
same effect as the server-name declaration. BOOTP<br />
clients are unlikely to support this option. Some<br />
DHCP clients support it; others require it.<br />
option time-offset int32; Use this option to specify the offset of the client’s<br />
subnet (in seconds) from Coordinated Universal<br />
Time (UTC). Use negative numbers for West of UTC<br />
<strong>and</strong> positive number for East of UTC.<br />
option time-servers<br />
ip-address [, ip-address ...];<br />
Use this option to list RFC 868 time servers in order<br />
of preference.<br />
option trailer-encapsulation flag; Use this option to indicate if the client negotiates the<br />
use of trailers (RFC 893) when using the ARP<br />
protocol.<br />
ON means do not use trailers.<br />
OFF means use trailers.<br />
option vendor-encapsulated-options<br />
data-string;<br />
option www-server<br />
ip-address [, ip-address ...];<br />
option x-display-manager<br />
ip-address [, ip-address ...];<br />
Use this option to specify vendor specific<br />
information. See theVendor Encapsulated Options<br />
section.<br />
Use this option to list WWW servers in order of<br />
preference.<br />
Use this option to list the systems running X Window<br />
System Display Manager in order of preference.<br />
A relay agent can add a series of encapsulated options to a DHCP packet when relaying that packet<br />
to the DHCP server. The server can make address allocation decisions (or whatever decisions it<br />
wants) based on these options. The server returns these options in any replies it sends through the<br />
relay agent. The relay agent can use the information in these options for delivery or accounting<br />
purposes.<br />
The relay agent option has two suboptions. To reference these options in the DHCP server, specify<br />
the option space name "agent", followed by a period, followed by the option name.
Note! It is not useful to specify these options to be sent.<br />
Table 21-5 Agent Option Space Options<br />
option agent.circuit-id<br />
string;<br />
option agent.remote-id<br />
string;<br />
Defining New Options<br />
Configuring Remote Systems with RARP, BOOTP, <strong>and</strong> DHCP Server<br />
You can define new options with the DHCP server. Each DHCP option has the following:<br />
• A name, used by you to refer to the option.<br />
• A code, a number used by the DHCP server to refer to the option.<br />
• A structure, describing what the contents of the option look like.<br />
To define a new option, choose a name that is not in use for any other option. For example, you can<br />
not use "host-name" because the DHCP protocol already defines a host-name option. You should<br />
refer to the options listed in this chapter as these are all the DHCP options in use by <strong>MultiNet</strong>.<br />
After choosing a name, choose a code. For site-local options, all codes between 128 <strong>and</strong> 254 are<br />
reserved for DHCP options, so you can use any one of these.<br />
The structure of an option is the format in which the option data appears. The DHCP server<br />
supports a few simple types: for example, integers, booleans, strings, <strong>and</strong> IP addresses. The server<br />
also supports the ability to define arrays of single types or arrays of fixed sequences of types. The<br />
syntax for declaring new options is:<br />
option new-name code new-code = definition ;<br />
The circuit-id suboption encodes an agent-local identifier of<br />
the circuit from which a DHCP client-to-server packet was<br />
received. It is intended for agents who will use it in relaying<br />
DHCP responses back to the proper circuit. The format of this<br />
option is defined to be vendor-dependent.<br />
The remote-id suboption encodes information about the<br />
remote host end of a circuit. Examples include the following:<br />
caller ID information, username information, remote ATM<br />
address, <strong>and</strong> cable modem ID. This is an opaque object that is<br />
administratively guaranteed to be unique to a particular remote<br />
end of a circuit.<br />
The values of new-name <strong>and</strong> new-code are the name <strong>and</strong> the code you have chosen for the new<br />
option. The definition is one of the following simple option type definitions.<br />
BOOLEAN option new-name code new-code = boolean ;<br />
An option of type boolean is a flag with a value of either ON (true) or OFF<br />
(false). For example:<br />
option use-zephyr code 180 = boolean;<br />
option use-zephyr on;<br />
21-63
Configuring Remote Systems with RARP, BOOTP, <strong>and</strong> DHCP Server<br />
21-64<br />
INTEGER option new-name code new-code = sign integer width ;<br />
The sign token should either be blank, unsigned, or signed. The<br />
width can be either 8, 16 or 32, referring to the number of bits in the integer.<br />
For example, a definition of the sql-connection-max option <strong>and</strong> its use:<br />
option sql-connection-max code 192 = unsigned integer 16;<br />
option sql-connection-max 1536;<br />
IP-ADDRESS option new-name code new-code = ip-address ;<br />
An option of type IP address can be expressed either as a domain name or as<br />
an explicit IP address. For example:<br />
option sql-server-address code 193 = ip-address;<br />
option sql-server-address sql.example.com;<br />
TEXT option new-name code new-code = text ;<br />
An option of type text encodes an ASCII text string. For example:<br />
DATA<br />
STRING<br />
option sql-default-connection-name code 194 = text;<br />
option sql-default-connection-name "PRODZA";<br />
option new-name code new-code = string ;<br />
An option of type data string is a collection of bytes. It can be specified either<br />
as quoted text, like the text type, or as a list of hexadecimal octets separated<br />
by colons whose values must be between 0 <strong>and</strong> FF. For example:<br />
option sql-identification-token code 195 = string;<br />
option sql-identification-token<br />
17:23:19:a6:42:ea:99:7c:22;<br />
ARRAYS Options can contain arrays of any of the above types except for the text <strong>and</strong><br />
the data string types. For example:<br />
option kerberos-servers code 200 = array of ip-address;<br />
option kerberos-servers 10.20.10.1, 10.20.11.1;
Vendor Encapsulated Options<br />
Configuring Remote Systems with RARP, BOOTP, <strong>and</strong> DHCP Server<br />
RECORDS Options can contain data structures consisting of a sequence of data types,<br />
sometimes called a record type. For example:<br />
option contrived-001 code 201 = { boolean, integer 32,<br />
text };<br />
option contrived-001 on 1772 "contrivance";<br />
It is also possible to have options that are arrays of records. For example:<br />
option new-static-routes code 201 = array of {<br />
ip-address, ip-address, ip-address, integer 8 };<br />
option static-routes<br />
10.0.0.0 255.255.255.0 net-0-rtr.example.com 1,<br />
10.0.1.0 255.255.255.0 net-1-rtr.example.com 1,<br />
10.2.0.0 255.255.224.0 net-2-0-rtr.example.com 3;<br />
The DHCP protocol defines the vendor-encapsulated-options option. This allows vendors to define<br />
their own options that will be sent encapsulated in a st<strong>and</strong>ard DHCP option. The format of the<br />
vendor-encapsulated-options option is either a chunk of opaque data, or an actual option buffer just<br />
like a st<strong>and</strong>ard DHCP option buffer.<br />
You can send this option to clients in one of two ways:<br />
• define the data directly, using a text string or a colon-separated list of hexadecimal values<br />
• define an option space, define some options in that option space, provide values for them, <strong>and</strong><br />
specify that this option space should be used to generate the vendor-encapsulated-options option<br />
To send a simple chunk of data, provide a value for the option in the right scope. For example:<br />
option vendor-encapsulated-options<br />
2:4:AC:11:41:1:<br />
3:12:73:75:6e:64:68:63:70:2d:73:65:72:76:65:72:31:37:2d:31:<br />
4:12:2f:65:78:70:6f:72:74:2f:72:6f:6f:74:2f:69:38:36:70:63;<br />
To define a new option space to store vendor options, use the option space statement. The name can<br />
then be used in option definitions. For example:<br />
option space SUNW;<br />
option SUNW.server-address code 2 = ip-address;<br />
option SUNW.server-name code 3 = text;<br />
option SUNW.root-path code 4 = text;<br />
Once you have defined an option space <strong>and</strong> some options, you can set up scopes that define values<br />
for those options <strong>and</strong> when to use them. For example, suppose you want to h<strong>and</strong>le two different<br />
classes of clients. Using the option space definition, the previous<br />
option vendor-encapsulated-options example can be implemented using classes as<br />
21-65
Configuring Remote Systems with RARP, BOOTP, <strong>and</strong> DHCP Server<br />
21-66<br />
follows:<br />
class "vendor-classes" {<br />
match option vendor-class-identifier;<br />
}<br />
option SUNW.server-address 172.17.65.1;<br />
option SUNW.server-name "sundhcp-server17-1";<br />
subclass "vendor-classes" "SUNW.Ultra-5_10" {<br />
vendor-option-space SUNW;<br />
option SUNW.root-path "/export/root/sparc";<br />
}<br />
subclass "vendor-classes" "SUNW.i86pc" {<br />
vendor-option-space SUNW;<br />
option SUNW.root-path "/export/root/i86pc";<br />
}<br />
Regular scoping rules apply. This lets you define values that are global in the global scope, <strong>and</strong><br />
define values that are specific to a particular class in the local scope.<br />
The vendor-option-space declaration indicates that in that scope the vendor-encapsulated-options<br />
option should be constructed using the values of all the options in the SUNW option space.<br />
DHCP Lease Format<br />
The DHCP server keeps a persistent database of leases it has assigned. This database is a free-form<br />
ASCII file containing a series of lease declarations. Every time a lease is acquired, renewed, or<br />
released, its new value is recorded at the end of the lease file. So, if more than one declaration<br />
appears for a given lease, the last one in the file is the current one.<br />
Currently, the only declaration that is used in the dhcpd.leases file is the lease declaration.<br />
lease ip-address {statements...}<br />
Each lease declaration includes the client’s leased IP address. The statements within the braces<br />
define, for example, the duration of the lease <strong>and</strong> to whom it is assigned.<br />
Table 21-6 describes the statements the DHCP server puts into a lease file<br />
See Table 21-11 for a list of DHCP Safe-failover related lease file statements.<br />
Table 21-6 DHCP Lease File Statements<br />
Lease Statement Description<br />
ab<strong>and</strong>oned; Records that the DHCP server saw the IP address in use on<br />
the network when it was thought to be free. The DHCP<br />
server detects active addresses with ping tests or "DHCP<br />
decline" messages from DHCP clients.
Table 21-6 DHCP Lease File Statements (Continued)<br />
Lease Statement Description<br />
Configuring Remote Systems with RARP, BOOTP, <strong>and</strong> DHCP Server<br />
billing class “class-name”; If this lease is a member of a class with “lease limit” set, this<br />
records that class.<br />
billing subclass “class-name”<br />
subclass-data;<br />
If this lease is a member of a subclass with “lease limit” set,<br />
this records the class <strong>and</strong> subclass.<br />
client-hostname “hostname”; Records the hostname if the client sends a hostname using<br />
the hostname option.<br />
domain-name “domain-name”; Specifies the DNS domain name sent to the client (if any).<br />
dynamic-bootp; Indicates the address was leased to a BOOTP client.<br />
ends date; Records the end time of a lease.<br />
Lease dates are specified by the DHCP server as follows:<br />
FQDN<br />
“fully-qualified-domain-name”;<br />
hardware<br />
hardware-type mac-address;<br />
W YYYY/MM/DD HH:MM:SS<br />
W is the day of the week, from zero (Sunday) to six<br />
(Saturday).<br />
YYYY is the year, including the century.<br />
MM is the number of the month, from 01 to 12.<br />
DD is the day of the month, counting from 01.<br />
HH is the hour, from 00 to 23.<br />
MM is the minute, from 00 to 59.<br />
SS is the second, from 00 to 59.<br />
The time is always in Greenwich Mean Time, not local time.<br />
Specifies the fully qualified domain name used by the<br />
DHCP server to perform the dynamic DNS update for the<br />
lease (if any).<br />
Specifies the hardware type <strong>and</strong> the MAC address as a series<br />
of hexadecimal octets, separated by colons.<br />
hostname “hostname”; Records the hostname if the DHCP server looks up the<br />
hostname in DNS. This happens only if the parameter getlease-hostnames<br />
was set.<br />
starts date; Records the start time of a lease.<br />
21-67
Configuring Remote Systems with RARP, BOOTP, <strong>and</strong> DHCP Server<br />
Working with DHCP Leases<br />
21-68<br />
Table 21-6 DHCP Lease File Statements (Continued)<br />
Lease Statement Description<br />
uid client-identifier; Records the client identifier as a series of hexadecimal<br />
octets, regardless of whether the client specifies an ASCII<br />
string or uses the hardware type/MAC address format. If the<br />
client used a client identifier to acquire its address, the client<br />
identifier is recorded using the uid statement.<br />
The DHCP server requires that a lease database be present before it will start. The <strong>MultiNet</strong><br />
installation supplies an empty MULTINET:DHCPD.LEASES file.<br />
In order to prevent the lease database from growing without bound, the file is rewritten from time<br />
to time. First, a temporary lease database is created <strong>and</strong> all known leases are dumped to it. Then, the<br />
old lease database is renamed MULTINET:DHCPD.LEASES_OLD. Finally, the newly written<br />
lease database is moved into place.<br />
Be aware of the following situation: if the DHCP server process is killed or the system crashes after<br />
the old lease database has been renamed but before the new lease database has been moved into<br />
place, the MULTINET:DHCPD.LEASES file disappears. The DHCP server will refuse to start. Do<br />
not create a new lease file when this happens. If you do, you will lose all your old bindings. Instead,<br />
rename MULTINET:DHCPD.LEASES_OLD to MULTINET:DHCPD.LEASES, restoring the old,<br />
valid lease file, <strong>and</strong> then start the DHCP server. This guarantees that a valid lease file will be<br />
restored.<br />
Ab<strong>and</strong>oned Leases<br />
Ab<strong>and</strong>oned leases are reclaimed automatically. When a client asks for a new address, <strong>and</strong> the server<br />
finds that there are no addresses available, it checks to see if there are any ab<strong>and</strong>oned leases. The<br />
server allocates the oldest ab<strong>and</strong>oned lease. The st<strong>and</strong>ard procedures for checking for lease address<br />
conflicts are still followed, so if the ab<strong>and</strong>oned lease's IP address is still in use, it is reab<strong>and</strong>oned.<br />
If a client requests an ab<strong>and</strong>oned address, the server assumes that the address was ab<strong>and</strong>oned<br />
because the lease file was corrupted, <strong>and</strong> that the client is the machine that responded when the<br />
lease was pinged, causing it to be ab<strong>and</strong>oned. In that case, the address is immediately assigned to<br />
the requesting client.<br />
Static Leases<br />
Leases that are given to clients for statically assigned IP addresses are treated differently than those<br />
for dynamically assigned IP addresses. An address is statically assigned by using a host declaration<br />
with a fixed-address statement.<br />
Static lease information is not saved by the DHCP server. This means that they are not recorded in<br />
the lease file (DHCPD.LEASES). If your configuration uses only statically assigned IP addresses,<br />
you will not see any entries in the lease file.
Configuring Remote Systems with RARP, BOOTP, <strong>and</strong> DHCP Server<br />
This also means that the NETCONTROL SHOW comm<strong>and</strong>s do not have any lease information to<br />
display for static assignments.<br />
• For SHOW CLIENT, statically assigned IP addresses are not supported.<br />
• For SHOW SUBNET <strong>and</strong> SHOW LEASES, statically assigned IP addresses are not shown.<br />
• For SHOW ALL, SHOW HADDR, SHOW CID, <strong>and</strong> in the dump file produced by the DUMP<br />
comm<strong>and</strong>, statically assigned IP addresses are identified as "Static Assignment" <strong>and</strong> no lease<br />
information is shown.<br />
• For STATISTICS <strong>and</strong> SHOW POOLS, statically assigned IP addresses are not included in the<br />
pool or subnet statistics.<br />
DNS dynamic updates are supported only partially for static assignments. When the lease is<br />
granted, the appropriate A <strong>and</strong> PTR resource records are added automatically. However, since the<br />
lease information is not saved, the DHCP server does not delete the DNS entries when the lease<br />
expires or is released.<br />
Registering Clients While the DHCP Server is Running<br />
The DHCP server can register <strong>and</strong> unregister clients without having to restart the server. host<br />
declarations <strong>and</strong> subclass declarations can be added or removed from the running server using add<br />
<strong>and</strong> remove comm<strong>and</strong>s in an update file, by default MULTINET:DHCPD.UPDATES.<br />
The comm<strong>and</strong>s that can be placed into the update file are described in sectionUpdate File<br />
Statements below.<br />
You would use host declarations if you are controlling access to IP addresses via allow/deny<br />
unknown-clients statements in your DHCPD.CONF configuration file. You would use subclass<br />
statements if you are controlling access to IP address pools using classes configured with the match<br />
statement <strong>and</strong> using pools with allow/deny members of _class_ statements.<br />
Note! The registration or unregistration of a client via the update file only affects the running server.<br />
The host <strong>and</strong> subclass declarations must also be added to the DHCPD.CONF configuration<br />
file.<br />
You tell the DHCP server to execute the comm<strong>and</strong>s in the update file using the NETCONTROL<br />
DHCP UPDATE comm<strong>and</strong>:<br />
$ multinet netcontrol dhcp update<br />
A different file name can optionally be specified:<br />
$ multinet netcontrol dhcp update mydir:dhcpd.updates<br />
You can verify the syntax of the update file before sending it to the DHCP server by using the -u<br />
flag on the dhcpd comm<strong>and</strong> line:<br />
$ dhcpd :== $multinet:dhcpd.exe<br />
$ dhcpd -t -u filename<br />
The update file name is not optional. Note that the configuration file is read in before the update<br />
file. A different configuration file can be specified using the -cf flag.<br />
21-69
Configuring Remote Systems with RARP, BOOTP, <strong>and</strong> DHCP Server<br />
21-70<br />
You can check the DHCP server <strong>and</strong> see if a given host or subclass is known, for example to see if<br />
you need to add it, using the following netcontrol comm<strong>and</strong>s:<br />
$ multinet netcontrol show isknown host hw-addr-or-client-id<br />
$ multinet netcontrol show isknown subclass class-name subclass-data<br />
Update File Statements<br />
Table 21-7 describes the comm<strong>and</strong>s you can use in an update file.<br />
Table 21-7 DHCP Update File Comm<strong>and</strong>s<br />
Statement Description<br />
add host Registers a client by adding the specified host declaration. The host<br />
declaration is in the same format as in the configuration file. This makes the<br />
specified hardware address <strong>and</strong>/or client identifier "known".<br />
Examples:<br />
add host name { [statements] }<br />
Note that static IP address assignments can be added by specifying the<br />
fixed-address statement in the host declaration.<br />
add subclass Registers a client by adding the specified subclass to the specified class. The<br />
class must be declared in the DHCPD.CONF configuration file. The<br />
subclass declaration is the same format as in the configuration file. This<br />
adds the specified subclass value as a member of the specified class.<br />
add subclass "class-name" subclass-data;<br />
add subclass "class-name" subclass-data {<br />
[statements]<br />
}<br />
delete host Un-registers a client by removing the specified host declaration. The host is<br />
specified by hardware address or client identifier. This makes the<br />
specified host "unknown". Note that all host declarations that match the<br />
hardware address or client identifier are deleted.<br />
delete host hw-addr-or-client-id;<br />
delete subclass Un-registers a client by removing the specified subclass from the specified<br />
class. This makes the specified subclass no longer a member of the class.<br />
delete subclass "class-name" subclass-data;<br />
add host fred {<br />
hardware ethernet 01:02:03:04:05:06;
Configuring Remote Systems with RARP, BOOTP, <strong>and</strong> DHCP Server<br />
fixed-address 10.9.8.7;<br />
option routers 10.9.8.1;<br />
}<br />
add host wilma {<br />
option dhcp-client-identifier "wilma-cid";<br />
}<br />
delete host 01:02:03:04:05:06;<br />
delete host "wilma-cid";<br />
add subclass "gold" 01:01:02:03:04:05:06 {<br />
option host-name "fred";<br />
}<br />
add subclass "silver" "wilma-cid";<br />
delete subclass "gold" 01:01:02:03:04:05:06;<br />
delete subclass "silver" "wilma-cid";<br />
DHCP Safe-failover Introduction<br />
Since a DHCP server is responsible for the network's IP management, it can also be a potential<br />
point of network failure if it becomes unavailable. Using multiple servers with non-overlapping IP<br />
address pools is one way to provide limited fault-tolerance. For example: imagine a network with<br />
two DHCP servers. Server A has an address range of 100 IP addresses. Server B has a range of 50<br />
different addresses. Both servers have a non-overlapping range of addresses. When a node<br />
broadcasts for an address, both servers respond, each offering an address from its own distinct<br />
range. Upon receiving both offers, the node chooses one. Typically, the response that reaches the<br />
node first is selected. In this case, Server A's. When Server B determines its offer is not needed, it<br />
returns the offered address to its own range, allowing it to be offered again.<br />
If one of the servers is down, the other server continues to service the nodes. Now, instead of<br />
having two offers, each new node has only one offer, from the remaining server. Nodes that<br />
received their lease from the unavailable server attempt to reconnect with it. If the unavailable<br />
server does not respond in time, the nodes then attempt to get a new address from a new server. The<br />
other server can then offer an address from its own range. So, even though one server is down, the<br />
DHCP clients continue to function with the other server.<br />
Note! The two DHCP servers operate without any communications or data sharing between them.<br />
Each server works as a st<strong>and</strong>alone server.<br />
Since most nodes select the first offer received, having two servers could result in partial use of<br />
both IP address pools. Sometimes it is preferable to have a primary DHCP server with the bulk of<br />
the IP addresses while the secondary server has a smaller range of IP addresses.<br />
Note! One way to accomplish the above mentioned configuration is to put the secondary server<br />
behind a router on a different subnet, while the primary server stays on the same segment as<br />
the nodes. This allows the primary server to respond more quickly than the secondary server.<br />
21-71
Configuring Remote Systems with RARP, BOOTP, <strong>and</strong> DHCP Server<br />
21-72<br />
<strong>Process</strong> <strong>Software</strong> takes the use of multiple servers to another level by offering DHCP Safe-failover.<br />
DHCP Safe-failover allows a secondary DHCP server to back up the primary DHCP server with<br />
the addition of taking into account network failure. This strategy insures that clients can reliably log<br />
into their corporate network <strong>and</strong> know they will be able to connect to corporate resources.<br />
In safe failover mode both the primary <strong>and</strong> the backup DHCP servers share a common IP address<br />
lease pool. In the event the primary DHCP server fails the backup DHCP server automatically<br />
senses the primary server is not operating <strong>and</strong> automatically assumes complete DHCP operation.<br />
When the primary DHCP server becomes operational, it synchronizes with the backup DHCP<br />
server <strong>and</strong> resumes all the responsibilities of the primary DHCP server. All assignments performed<br />
by the backup DHCP server while acting as the primary server are transferred to the primary DHCP<br />
upon resumption of primary server responsibilities.<br />
Safe-failover adds support for network failure, as well as server failure. In the event the network<br />
fails, the secondary server believes the primary server is out of service <strong>and</strong> begins operation. The<br />
secondary server serves leases from a reserved pool shared by the Safe-failover partner servers.<br />
This reserve pool can be adjusted by the MIS system administrator.<br />
Configuring DHCP Safe-failover<br />
To configure your DHCP servers to use Safe-failover, perform the following steps:<br />
1 Choose one system to be the Primary <strong>and</strong> a second system to be the Secondary.<br />
2 Determine the IP addresses of the Primary <strong>and</strong> Secondary systems. If a system has more than<br />
one IP address, choose one to use for DHCP Safe-failover messages.<br />
3 On the Primary system, create the boot file at MULTINET:DHCPD.BOOT with the keyword<br />
"primary", the primary <strong>and</strong> secondary IP addresses, <strong>and</strong> configuration ID.<br />
On the primary system, the configuration ID would normally be "dhcpd". See Boot File for<br />
DHCP Safe-failover for more information about boot files.<br />
Primary system boot file syntax:<br />
primary "config-id";<br />
4 On the Secondary system, create the boot file at MULTINET:DHCPD.BOOT with the keyword<br />
"secondary", the secondary <strong>and</strong> the primary IP addresses, <strong>and</strong> configuration ID. On the<br />
secondary system, the configuration ID may be "dhcpd" or may be a name that refers to the<br />
primary. Either way, the names of the configuration, lease, <strong>and</strong> state files must match this name.<br />
Secondary system boot file syntax:<br />
secondary "config-id";<br />
5 If you don't already have a configuration file, write a configuration file containing the subnets,<br />
shared networks, IP address ranges, hosts, etc, that reflect your network <strong>and</strong> the hosts you want<br />
the DHCP server to service. Include any DHCP Safe-failover parameters as needed (see DHCP<br />
Safe-failover Configuration File Statements).<br />
6 Copy the configuration file to the MULTINET directory on both the Primary <strong>and</strong> the Secondary<br />
systems.
Configuring Remote Systems with RARP, BOOTP, <strong>and</strong> DHCP Server<br />
Note! Make sure the name of the configuration file matches the config-id parameter in the boot file<br />
for that system.<br />
Preferably, the configuration files on the Primary <strong>and</strong> the Secondary server systems should be<br />
the same. To help ensure that the configuration file is valid for both systems, make sure it<br />
contains a subnet statement for every subnet that either the Primary or the Secondary system<br />
has a network interface on.<br />
7 Make sure that both the Primary <strong>and</strong> the Secondary systems have lease files in the MULTINET<br />
directory with the name that matches config-id. If the lease file does not exist, create an<br />
empty one.<br />
8 Run the DHCP server on both the Primary <strong>and</strong> the Secondary systems. The two servers will<br />
establish communications with each other <strong>and</strong> you're in business!<br />
Boot File for DHCP Safe-failover<br />
To use Safe-failover, create a boot file at MULTINET:DHCPD.BOOT. The boot file is used to<br />
specify the following for Safe-failover operation:<br />
• Server's mode of operation<br />
• Server's own IP address<br />
• Partner server's IP address<br />
• Configuration ID<br />
The format of the boot file is:<br />
mode [server-IP partner-IP] "config-id";<br />
If the boot file is not present, the server operates with DHCP Safe-failover disabled. It uses<br />
multinet:dhcpd.conf <strong>and</strong> multinet:dhcpd.leases for its default configuration <strong>and</strong> lease files. In this<br />
state, the service parameters CONFIGFILE <strong>and</strong> LEASEFILE may be used to rename or move these<br />
files. The server does not use a state file to keep track <strong>and</strong> remember its state transitions when<br />
running in st<strong>and</strong>alone mode (that is, with DHCP Safe-failover disabled). See State File for DHCP<br />
Safe-failover for a description of state files. The following server modes are possible:<br />
Table 21-8 DHCP Safe-failover Server Modes<br />
Mode In this mode the server runs...<br />
Primary As the Primary server, with DHCP Safe-failover functionality enabled. In this<br />
mode, the server tries to "shadow" each of its lease transactions to its configured<br />
secondary server.<br />
Secondary As the Secondary or Backup server, with DHCP Safe-failover functionality<br />
enabled. The server receives lease transaction updates from its configured<br />
Primary server, <strong>and</strong> maintains an up-to-the-minute hot backup of the lease<br />
database. If the primary server crashes, or is shut down, the Secondary server<br />
takes over.<br />
21-73
Configuring Remote Systems with RARP, BOOTP, <strong>and</strong> DHCP Server<br />
21-74<br />
Table 21-8 DHCP Safe-failover Server Modes (Continued)<br />
Mode In this mode the server runs...<br />
St<strong>and</strong>alone With DHCP Safe-failover disabled.<br />
The IP address following the server mode is the server's own address, the next IP address is the<br />
partner server's IP address.<br />
The configuration ID is the file name (without the file type) of the configuration, lease, <strong>and</strong> state<br />
files. For example, if the configuration id is ALPHA, the DHCP server will look for a the<br />
configuration file named ALPHA.CONF, a lease file named ALPHA.LEASES, <strong>and</strong> a state file<br />
named ALPHA.STATE.<br />
Example 21-2 Boot File<br />
primary 199.23.24.11 199.23.24.25 "ALPHA";<br />
The example boot file designates the current server as the primary with its own IP address<br />
199.23.24.11 <strong>and</strong> the partner server's IP address 199.23.24.25. The partner server is a Secondary<br />
server. This follows from the current server being a Primary server.<br />
If the mode of operation is "st<strong>and</strong>alone", the server's IP address <strong>and</strong> partner server's IP address are<br />
not needed. The format is as follows:<br />
st<strong>and</strong>alone "config-id";<br />
State File for DHCP Safe-failover<br />
The state file is written by the DHCP server when it is running with DHCP Safe-failover enabled.<br />
The purpose of the state file is to save server state changes so that a server can "remember" its last<br />
state if it crashes or is re-started. Alternately, the state file can be used by the operator to force the<br />
DHCP server to start up in a desired mode (operator override). This feature allows the operator to<br />
switch the server into partner-down mode without a lengthy time-out period, or to start up in<br />
recover mode (that is, to force the DHCP server to download the entire lease database from the<br />
partner).<br />
The server appends a line to the state file every time its DHCP Safe-failover state changes. The last<br />
line in the file is the most current DHCP Safe-failover state.<br />
The state file consists of one or more lines of the following format:<br />
server_state transaction_count; [date-time;]<br />
server_state is one of the following
:<br />
Table 21-9 DHCP Safe-failover Server States<br />
Configuring Remote Systems with RARP, BOOTP, <strong>and</strong> DHCP Server<br />
failover-disabled primary-comint primary-conflict<br />
startup backup-comint backup-conflict<br />
primary-normal primary-partnerdown primary-recover<br />
backup-normal backup-partnerdown backup-recover<br />
Server-to-server messages are each assigned a monotonously increasing transaction number, which<br />
is recorded in the transaction_count field. This is an unsigned 32 bit number.<br />
If the date-time stamp is present, the DHCP server assumes that the state was recorded by the<br />
server itself. In this case, the server, upon starting up, calculates the safest state based on the<br />
recorded state <strong>and</strong> the time elapsed. If the date-time stamp is not present, the DHCP server treats<br />
the entry as an operator-written override comm<strong>and</strong> <strong>and</strong> starts up in the specified state.<br />
DHCP Safe-failover Configuration File Statements<br />
The statements shown in Table 21-12 have been added to the DHCP configuration file for DHCP<br />
Safe-failover. These are in addition to the DHCP configuration file statements listed in Table 21-4.<br />
All of the parameters in Table 21-12 must be placed in the configuration file's global scope. With<br />
the exception of the backup-pool-size parameter. It may also be specified within a shared-network<br />
or subnet declaration.<br />
Table 21-10 DHCP Safe-failover Configuration File Statements<br />
Statement Description<br />
backup-ack-interval The number of seconds used as the basis of the DHCP server's<br />
logarithmic back-off algorithm used for resending ACK messages to the<br />
secondary server. The default is 1 second.<br />
backup-ack-interval seconds;<br />
backup-pool-size This is the percentage of the IP address pool set aside for the Secondary<br />
server’s emergency use. The DHCP server will reserve no more than<br />
50% of the available addresses. The default is 10%.<br />
backup-pool-size percent;<br />
com-int-timeout The number of seconds the server should wait for an expected response<br />
from its partner before switching to communication interrupted mode.<br />
The default is 600 seconds (10 minutes).<br />
com-int-timeout seconds;<br />
21-75
Configuring Remote Systems with RARP, BOOTP, <strong>and</strong> DHCP Server<br />
DHCP Safe-failover Lease File Statements<br />
21-76<br />
Table 21-10 DHCP Safe-failover Configuration File Statements (Continued)<br />
Statement Description<br />
failover-port The UDP port the Primary <strong>and</strong> Secondary servers should use for<br />
DHCP Safe-failover messages. The default is 647.<br />
failover-port port;<br />
mclt Maximum Client Lead Time: This is the length of lease in seconds to<br />
give out on a first time basis, or the client lead time for renewals. See the<br />
DHCP failover internet draft for a more detailed explanation. The<br />
default is 3600 seconds (1 hour).<br />
mclt seconds;<br />
safe-period-timeout The number of seconds spent in communication interrupted state before<br />
automatic switch over to partner-down state. A value of 0 means no<br />
automatic switch over. The default is 0 seconds.<br />
safe-period-timeout seconds;<br />
startup-delay The number of seconds to wait during startup before the server moves<br />
from STARTUP state to the state specified in the state file. The default is<br />
5 seconds.<br />
startup-delay seconds;<br />
The statements shown in Table 21-11 have been added to the DHCP lease file for DHCP Safefailover.<br />
These are in addition to the DHCP lease file statements listed in Table 21-6.<br />
Table 21-11 DHCP Safe-failover Lease File Statements<br />
Statement Description<br />
acked-sec-interval seconds; Acknowledged secondary lease interval. For information,<br />
see the DHCP failover internet draft.<br />
acked-sec-interval-start date; The time when the partner was notified of the lease.<br />
active; This IP address has a current lease.<br />
backup; This IP address is reserved for use by the secondary<br />
(backup) server.<br />
desired-interval seconds; The length of the desired lease.<br />
expired; The lease for this IP address has expired.
Configuring Remote Systems with RARP, BOOTP, <strong>and</strong> DHCP Server<br />
Table 21-11 DHCP Safe-failover Lease File Statements (Continued)<br />
Statement Description<br />
free; This IP address is available to be assigned.<br />
last-partner-transaction date; The time when the partner last updated the lease.<br />
released; The lease for this IP address has been released by the client<br />
or by the operator.<br />
reset; The DHCP server had marked this IP address as<br />
ab<strong>and</strong>oned. The operator changed its status to available.<br />
revoked; The lease for this IP address has been revoked by the<br />
operator.<br />
safe-lease; This is used in the Partner Down state to indicate that the IP<br />
address belongs to this server.<br />
transaction-id number; This is the transaction number that was assigned to this<br />
lease when it was queued or sent as an update to the partner<br />
server.<br />
update-count n; For each lease, the server which issues the lease sends an<br />
update to its partner server. This statement records the state<br />
of that update.<br />
0 — means no update is required<br />
1 — means that no update has been sent<br />
2+ — means 1 or more updates have been sent<br />
Transitioning to DHCP Safe-failover Partner Down State<br />
There are three ways that the DHCP server can transition to Partner Down state, which indicates<br />
that its DHCP Safe-failover partner is down.<br />
1 If the parameter safe-period-timeout is specified in the configuration file, the DHCP server<br />
transitions to Partner Down state automatically after it has been in Communication Interrupt<br />
state for the specified time.<br />
2 The operator can put the DHCP server into Partner Down state by executing the following<br />
netcontrol comm<strong>and</strong>:<br />
$ multinet netcontrol dhcp partnerdown<br />
3 The operator can edit the DHCP server's state file <strong>and</strong> add a line to the end containing the Partner<br />
Down state <strong>and</strong> transaction number desired:<br />
primary-partnerdown transaction-number;<br />
21-77
Configuring Remote Systems with RARP, BOOTP, <strong>and</strong> DHCP Server<br />
21-78<br />
or<br />
backup-partnerdown transaction-number;<br />
The next time the DHCP server is restarted, it starts up in Partner Down state. The operator can<br />
restart the DHCP server by executing the following netcontrol comm<strong>and</strong>:<br />
$ multinet netcontrol dhcp restart<br />
Setting DHCP Parameters<br />
The DHCP service uses the parameters listed in Table 21-12.<br />
Table 21-12 DHCP Server Parameters<br />
Parameter Description<br />
ACCOUNTING This parameter determines if the DHCP server process performs VMS<br />
accounting. The default is 0 (OFF).<br />
CONFIGFILE The name of the configuration file. The default is<br />
MULTINET:DHCPD.CONF.<br />
Not used if DHCP Safe-failover is being used.<br />
DEBUG A decimal integer that is a bitmask of debugging levels used to select<br />
messages to pass to OPCOM <strong>and</strong> the debug log file specified in the<br />
DEBUG-FILE parameter. The debugging levels are (in decimal):<br />
1 Fatal Errors<br />
3 Errors <strong>and</strong> Warnings<br />
7 Informationals<br />
15 Debug Messages<br />
31 Dump Packets (Formatted)<br />
63 Dump Packets (Hex)<br />
By default, Fatal Errors, Errors, <strong>and</strong> Warnings are logged.<br />
DEBUG-FILE The name of the debug log file. Use this parameter to capture debug<br />
logging in a file. The default is that debug logging is not written to any<br />
file if LOG-TO-OPCOM is 1. If LOG-TO-OPCOM is 0, the default file<br />
is MULTINET:DHCPDEBUG.LOG<br />
DUMPFILE The name of the "dump" file. This is the output of the NETCONTROL<br />
DUMP comm<strong>and</strong>. The default is MULTINET:DHCPD.DUMP.<br />
IMAGE-NAME The name of the image to run in the DHCP server process. The default<br />
is MULTINET:DHCPD.EXE.
Table 21-12 DHCP Server Parameters (Continued)<br />
Parameter Description<br />
Configuring Remote Systems with RARP, BOOTP, <strong>and</strong> DHCP Server<br />
LEASEFILE The name of the file DHCP uses to save client lease information to<br />
survive across reboots. To completely clear the lease information,<br />
delete the file specified <strong>and</strong> create an empty version. The default is<br />
MULTINET:DHCPD.LEASES.<br />
Not used if DHCP Safe-failover is being used.<br />
LOG-DATE This parameter determines whether the date is included in each entry in<br />
the debug log file. The default is 0; the date is not included.<br />
LOG-TO-OPCOM This parameter determines whether debug logging messages are written<br />
to OPCOM. Debug messages are also written to DEBUG-FILE<br />
parameter value if DEBUG-FILE is specified or this parameter is 0.<br />
Severe errors <strong>and</strong> warnings are always logged to OPCOM. The default<br />
is 1, everything is logged to OPCOM.<br />
PROCESS-NAME The name of the DHCP server process. The default is DHCP_SERVER.<br />
SYS-ERROR The name of a file that will contain anything written to SYS$ERROR<br />
by the DHCP server. This information could be helpful in diagnosing<br />
problems. The default is _NL:. This means SYS$ERROR is not<br />
directed to any file.<br />
SYS-OUTPUT The name of a file that will contain anything written to SYS$OUTPUT<br />
by the DHCP server. This information could be helpful in diagnosing<br />
problems. The default is _NL: meaning SYS$OUTPUT not directed to<br />
any file.<br />
SWAP This parameter determines whether process swapping is inhibited for<br />
the DHCP server process. The default is 1, swapping is enabled.<br />
UPDATEFILE The name of the update file. This file contains update comm<strong>and</strong>s that<br />
the DHCP server executes upon a NETCONTROL UPDATE<br />
comm<strong>and</strong>. The default is MULTINET:DHCPD.UPDATES.<br />
You may set any of the parameters listed in Table 21-6, as shown in the following example:<br />
$ MULTINET NETCONTROL DHCP SHUTDOWN (if DHCP is running)<br />
$ MULTINET CONFIGURE /SERVER<br />
<strong>MultiNet</strong> Server Configuration Utility 5.4(nnn)<br />
[Reading in configuration from MULTINET:SERVICES.MASTER_SERVER]<br />
SERVER-CONFIG>SELECT DHCP<br />
[The Selected SERVER entry is now DHCP]<br />
SERVER-CONFIG>SET PARAMETERS<br />
Delete parameter "configfile MULTINET:DHCPD.CONF" ? [NO] RETURN<br />
21-79
Configuring Remote Systems with RARP, BOOTP, <strong>and</strong> DHCP Server<br />
21-80<br />
You can now add new parameters for DHCP. An empty line terminates.<br />
Add Parameter: debug 3<br />
Add Parameter: RETURN<br />
[Service specific parameters for DHCP changed]<br />
SERVER-CONFIG>RESTART<br />
Configuration modified, do you want to save it first ? [YES] RETURN<br />
[Writing configuration to MULTINET_COMMON_ROOT:[MULTINET]<br />
SERVICES.MASTER_SERVER]<br />
%RUN-S-PROC_ID, identification of created process is 20600046<br />
SERVER-CONFIG>EXIT<br />
[Configuration not modified, so no update needed]<br />
$<br />
Viewing DHCP Information<br />
<strong>MultiNet</strong> provides two NETCONTROL comm<strong>and</strong>s for displaying information about the DHCP<br />
server:<br />
• NETCONTROL SHOW (see the NETCONTROL SHOW Comm<strong>and</strong> section)<br />
• NETCONTROL STATISTICS (see the NETCONTROL STATISTICS Comm<strong>and</strong> section)<br />
NETCONTROL SHOW Comm<strong>and</strong><br />
The DHCP NETCONTROL SHOW comm<strong>and</strong> has seven subcomm<strong>and</strong>s: SHOW CLIENT, SHOW<br />
LEASES, SHOW SUBNET, SHOW ALL, SHOW HADDR, SHOW CID, <strong>and</strong> SHOW POOLS.<br />
Viewing Lease Information for Specific IP Addresses<br />
The DHCP NETCONTROL SHOW CLIENT comm<strong>and</strong> displays the current lease binding details<br />
on a particular IP address. It must be an IP address in the dynamic pool. Statically-bound IP<br />
addresses are not supported. The syntax for SHOW CLIENT is:<br />
$ MULTINET NETCONTROL DHCP SHOW CLIENT dotted-decimal-ip-address<br />
dotted-decimal-ip-address is the IP address of a client.<br />
For example:<br />
$ MULTINET NETCONTROL DHCP SHOW CLIENT 10.5.64.1<br />
Connected to NETCONTROL server on "LOCALHOST"<br />
< x.process.com Network Control V5.4(10) at Fri 4-Aug-2003 3:23PM-EDT<br />
< DHCP Client: 10.5.64.1<br />
< IP Address=10.5.64.1<br />
< State=Bound (expired)<br />
< Subnet Mask=255.255.255.0<br />
< Default Gateway=10.5.64.100<br />
< Hardware Address=00004400AABB<br />
< Client ID=74657374 (“test”)<br />
< Lease=300 secs, Obtained 06-Aug-2003 22:21:22 GMT Expires 16-Aug-<br />
2003 22:26:22 GMT (-75426 secs)<br />
< End of Show DHCP Client
Configuring Remote Systems with RARP, BOOTP, <strong>and</strong> DHCP Server<br />
Viewing Lease Information for all Leased IP Addresses<br />
The DHCP NETCONTROL SHOW LEASES comm<strong>and</strong> takes no arguments. It displays for all<br />
subnets the IP addresses that have leases (pending, active, or expired). Lease information for<br />
statically-assigned IP addresses is not available. For example:<br />
$ MULTINET NETCONTROL DHCP SHOW LEASES<br />
Connected to NETCONTROL server on "LOCALHOST"<br />
< x.process.com Network Control V5.4(10) at Wed 2-Aug-2003 2:32PM-EST<br />
< List all leases<br />
< Shared Network local<br />
< Subnet 10.5.64.0 netmask 255.255.255.0<br />
< Subnet 10.5.165.0 netmask 255.255.255.0<br />
< Pool 1<br />
< IP Addr=10.5.64.1, State=Bound (expired), Lease Expires<br />
03-Mar-2003 19:32:43 GMT (-4 secs)<br />
< IP Addr=10.5.64.13, State=Offered, Lease Expires 08-Aug-2003<br />
19:34:07 GMT (80 secs)<br />
< IP Addr=10.5.64.2, State=Bound, Lease Expires 08-Aug-2003 19:36:52<br />
GMT (245 secs)<br />
< End of lease list<br />
Viewing Address Pools for Specific Subnets<br />
The DHCP NETCONTROL SHOW SUBNET comm<strong>and</strong> displays all of the DHCP address pools<br />
for the shared network that ip-address is in. It lists each subnet that is on the shared network <strong>and</strong><br />
each IP address in each pool. Statically-bound IP addresses are not shown. The syntax for SHOW<br />
SUBNET is:<br />
$ MULTINET NETCONTROL DHCP SHOW SUBNET dotted-decimal-ip-address<br />
dotted-decimal-ip-address is any IP address in that subnet.<br />
You would typically use the subnet value or an IP address from a pool for the subnet. For example:<br />
$ MULTINET NETCONTROL DHCP SHOW SUBNET 10.5.64.0<br />
Connected to NETCONTROL server on "LOCALHOST"<br />
< x.process.com Network Control V5.4(10) at Mon 14-Aug-2003 7:09PM-EDT<br />
< List given Subnet pool<br />
< Shared Network local<br />
< Subnet 10.5.64.0 netmask 255.255.255.0<br />
< Subnet 10.5.165.0 netmask 255.255.255.0<br />
< Pool 1<br />
< IP Addr=10.5.64.3, State=Free, No Lease<br />
< IP Addr=10.5.64.1, State=Bound, Lease Expires 14-Aug-2003 22:21:14<br />
GMT (2867 secs)<br />
< End of Subnet pool list<br />
21-81
Configuring Remote Systems with RARP, BOOTP, <strong>and</strong> DHCP Server<br />
21-82<br />
Viewing Address Pools for All Subnets<br />
The DHCP NETCONTROL SHOW ALL comm<strong>and</strong> takes no arguments. It shows the SHOW<br />
SUBNET output for all subnets in the DHCP server configuration. Then it prints information about<br />
all static assignments.<br />
Note! For static assignments, lease information is not available.For example:<br />
$ MULTINET NETCONTROL DHCP SHOW ALL<br />
Connected to NETCONTROL server on "LOCALHOST"<br />
< x.process.com Network Control V5.4(10) at Tue 11-Jul-2003 11:24AM-EDT<br />
< List all Subnet pools<br />
< Shared Network local<br />
< Subnet 10.5.64.0 netmask 255.255.255.0<br />
< Subnet 10.5.165.0 netmask 255.255.255.0<br />
< Pool 1<br />
< IP Addr=10.5.64.3, State=Free, No Lease<br />
< IP Addr=10.5.64.1, State=Bound, Lease Expires 15-Jul-2003 22:21:14<br />
GMT (2867 secs)<br />
< DHCP Static Assignments<br />
< IP Addr=10.5.64.15, State=(Static Assignment)<br />
< IP Addr=10.5.165.17, State=(Static Assignment)<br />
< IP Addr=10.5.165.200, State=(Static Assignment)<br />
< End of Subnet pool lists<br />
Viewing Matched Leases for Hardware Addresses<br />
The DHCP NETCONTROL SHOW HADDR comm<strong>and</strong> shows all client entries that match a given<br />
hardware address. The clients can have leases on multiple subnets simultaneously.<br />
Note! For hardware addresses that have static assignments, lease information is not available.<br />
The syntax for the NETCONTROL SHOW HADDR comm<strong>and</strong> is<br />
$ MULTINET NETCONTROL DHCP SHOW HADDR MAC_address<br />
For example:<br />
$ MULTINET NETCONTROL DHCP SHOW HADDR 00004400AABB<br />
Connected to NETCONTROL server on "LOCALHOST"<br />
< x.process.com Network Control V5.4(10) at Fri 04-Aug-2003 4:41PM-EDT<br />
< DHCP Hardware Address: 00004400AABB<br />
< IP Address=10.5.64.1<br />
< State=Bound (expired)<br />
< Subnet Mask=255.255.255.0<br />
< Default Gateway=10.5.64.100<br />
< Hardware Address=00004400AABB<br />
< Client ID=74657374 (“test”)<br />
< Lease=300 secs, Obtained 08-Aug-2003 22:21:22 GMT Expires 08-Aug-<br />
2003 22:26:22 GMT (-80091 secs)
End of Show DHCP HAddr<br />
Configuring Remote Systems with RARP, BOOTP, <strong>and</strong> DHCP Server<br />
Viewing Matched Leases for Client ID<br />
The DHCP NETCONTROL SHOW CID comm<strong>and</strong> shows all client entries that match a given<br />
Client ID. The clients can have leases on multiple subnets simultaneously.<br />
Note! For client IDs that have static assignments, lease information is not available, as shown in this<br />
example. The syntax for the NETCONTROL SHOW CID comm<strong>and</strong> is<br />
$ MULTINET NETCONTROL DHCP SHOW CID Client_ID_in_hex<br />
For example:<br />
$ MULTINET NETCONTROL DHCP SHOW CID 7465737431<br />
Connected to NETCONTROL server on "LOCALHOST"<br />
< x.process.com Network Control V5.4(10) at Mon 10-Jul-2003<br />
6:36PM-EDT<br />
< DHCP Client ID: 7465737431<br />
< IP Address=10.24.25.1<br />
< State=(Static Assignment)<br />
< Subnet Mask=255.255.255.0<br />
< Default Gateway=<br />
< Hardware Address=<br />
< Client ID=7465737431 (“test1”)<br />
< End of Show DHCP Client ID<br />
Viewing IP Address Pool Availability<br />
The DHCP NETCONTROL SHOW POOLS comm<strong>and</strong> takes no arguments. It displays a table<br />
showing for each IP address pool the number of IP addresses that are available. An IP address pool<br />
corresponds to a shared-network statement, a subnet statement, or a pool statement in the DHCP<br />
configuration file. For each pool the following information is displayed:<br />
Shared Network The name from the shared-network statement or the subnet number from the<br />
subnet statement.<br />
Pool “Total” for the complete information for the shared network, otherwise a<br />
number identifying the pool. You can see which IP addresses are in which<br />
pools using the SHOW ALL or SHOW SUBNET comm<strong>and</strong>.<br />
Total The total number of IP addresses in the pool.<br />
Ab<strong>and</strong>oned The number of IP addresses in the pool which were found in use on the<br />
network when they were thought to be free.<br />
21-83
Configuring Remote Systems with RARP, BOOTP, <strong>and</strong> DHCP Server<br />
21-84<br />
Reserved If DHCP Safe-failover is in use, the number of IP addresses in the pool<br />
reserved for the secondary DHCP server. These addresses are unassigned but<br />
reserved for the secondary.<br />
Available The number of IP addresses in the pool available to be leased.<br />
For example:<br />
$ MULTINET NETCONTROL DHCP SHOW POOLS<br />
Connected to NETCONTROL server on "LOCALHOST"<br />
< x.process.com Network Control V5.4(10) at Fri 11-Feb-2003 5:25PM-EST<br />
< List Pool Availability<br />
< Shared Network Pool Total Ab<strong>and</strong>oned Reserved Available<br />
< -------------- ---- ----- --------- -------- ---------<br />
< local total 44 5 0 15<br />
< 1 44 5 0 15<br />
< 10.12.1.0 total 128 2 0 57<br />
< 1 111 0 0 54<br />
< 2 11 2 0 0<br />
< 3 6 0 0 3<br />
< End of pool availability list<br />
NETCONTROL STATISTICS Comm<strong>and</strong><br />
The DHCP NETCONTROL STATISTICS comm<strong>and</strong> displays the number of clients in each shared<br />
network. This is supplied for backward compatibility only. Use SHOW POOLS instead.<br />
Address Lease States in DHCP Dump Files<br />
After obtaining a DHCP dump using MULTINET NETCONTROL DHCP DUMP, you will see<br />
fields in the dump preceded by a pound sign (#). Those fields are values created while the server is<br />
running. These fields are provided to help you troubleshoot problems. The lease states (denoted by<br />
# State= in the dump) are described in Table 21-13.<br />
Table 21-13 DHCP Address Lease States<br />
State Description<br />
Ab<strong>and</strong>oned The address was seen in use on the network when it was thought to be free. The<br />
DHCP server detects active addresses with ping tests or "DHCP decline"<br />
messages from DHCP clients.<br />
Bound The address was assigned in response to a DHCP Request message. If the<br />
address lease expires, it remains in "bound" state to help the client regain the<br />
same IP address it previously used. The address is actually free. The "(expired)"<br />
modifier on the state value indicates this state.
Configuring Remote Systems with RARP, BOOTP, <strong>and</strong> DHCP Server<br />
Table 21-13 DHCP Address Lease States (Continued)<br />
State Description<br />
Free The address has never been bound, <strong>and</strong> is available in the pool.<br />
Offered The address has been offered to a client in response to the client's DHCP<br />
Discover message, but the client has not asked for the address via a DHCP<br />
Request message.<br />
Pinging The address is in the middle of a ping test.<br />
Reserved for<br />
Secondary<br />
Static<br />
Assignment<br />
Sample DHCPD.CONF File<br />
Example 21-3 shows a sample DHCPD.CONF file.<br />
Example 21-3 Sample DHCPD.CONF File<br />
#<br />
# MULTINET:DHCPD.CONF -- sample DHCP configuration file<br />
#<br />
# option definitions common to all supported networks...<br />
option domain-name “fugue.com”;<br />
option domain-name-servers toccato.fugue.com;<br />
default-lease-time 43200;<br />
option subnet-mask 255.255.255.0;<br />
option time-offset 18000;<br />
use-host-decl-names on;<br />
# Shared network declaration is used to group subnets which share the same<br />
# physical network together. The name is specified so that the shared<br />
# network can be referred to in log messages --<br />
# it serves no other function.<br />
#<br />
# Note: You must have a subnet declaration for the subnet that the DHCP<br />
# server system is on even if you don’t want any address pool for the same<br />
# subnet (or multiple subnets if the system is multi-homed).<br />
shared-network FUGUE {<br />
Used for DHCP Safe-failover: The address is set aside for the secondary<br />
server’s emergency use.<br />
The client identifier or hardware address is statically assigned; the binding does<br />
not expire.<br />
# option definitions common to this shared network.<br />
option subnet-mask 255.255.255.224;<br />
21-85
Configuring Remote Systems with RARP, BOOTP, <strong>and</strong> DHCP Server<br />
21-86<br />
default-lease-time 600;<br />
max-lease-time 7200;<br />
# One of the two IP subnets that share this physical network<br />
#<br />
# Address ranges can be specified for each subnet attached to a shared<br />
# network. Since these subnets share the same physical network, addresses<br />
# are pooled together, <strong>and</strong> assignments are made without regard to the<br />
# actual subnet. If the optional dynamic-bootp keyword is given in the<br />
# address range declaration, then addresses in that range can be assigned<br />
# either with the DHCP protocol or the BOOTP protocol; otherwise, only<br />
# DHCP clients will have addresses allocated from the address range.<br />
#<br />
# Note that each IP subnet can have its own options specific to that<br />
# subnet. Options that are not specified in the subnet are taken from the<br />
# shared network (if any) <strong>and</strong> then from the global option list.<br />
}<br />
subnet 204.254.239.0 netmask 255.255.255.224 {<br />
range 204.254.239.10 204.254.239.20;<br />
option broadcast-address 204.254.239.20;<br />
option routers prelude.fugue.com;<br />
# The other subnet that shares this physical network<br />
subnet 204.254.239.32 netmask 255.255.255.224 {<br />
range dynamic-bootp 204.254.239.42 204.254.239.52;<br />
option broadcast-address 204.254.239.31;<br />
option routers snarg.fugue.com;<br />
}<br />
# Subnets can have no pooled ip addresses.<br />
subnet 10.10.10.0 netmask 255.255.255.0 {<br />
}<br />
}<br />
# IP subnets that are alone on their physical wire should be declared by<br />
# themselves. The DHCP server still refers to them as shared networks in<br />
# log messages, but this is simply an artifact of the underlying data<br />
# structure.<br />
#<br />
# Note that options can be specified in the subnet declaration that<br />
# supercede the global options specified earlier.<br />
subnet 192.5.5.0 netmask 255.255.255.224 {<br />
range 192.5.5.26 192.5.5.40;<br />
option domain-name-servers bb.home.vix.com, gw.home.vix.com;<br />
option domain-name “vix.com”;<br />
option routers 192.5.5.1;<br />
option subnet-mask 255.255.255.224;<br />
option broadcast-address 192.5.5.41;
}<br />
default-lease-time 600;<br />
max-lease-time 7200;<br />
Configuring Remote Systems with RARP, BOOTP, <strong>and</strong> DHCP Server<br />
# Hosts that require special configuration options can be listed in host<br />
# statements. If no address is specified, the address will be allocated<br />
# dynamically (if possible), but the host-specific information will still<br />
# come from the host declaration.<br />
host passacaglia {<br />
hardware ethernet 0:0:c0:5d:bd:95;<br />
filename “vmunix.passacaglia”;<br />
server-name “toccato.fugue.com”;<br />
}<br />
# Fixed IP addresses can also be specified for hosts. These addresses<br />
# should not also be listed as being available for dynamic assignment.<br />
# Hosts for which fixed IP addresses have been specified can boot using<br />
# BOOTP or DHCP. Hosts for which no fixed address is specified can only be<br />
# booted with DHCP, unless there is an address range on the subnet to<br />
# which a BOOTP client is connected which has the dynamic-bootp flag set.<br />
host fantasia {<br />
hardware ethernet 08:00:07:26:c0:a5;<br />
fixed-address fantasia.fugue.com;<br />
}<br />
# If a DHCP or BOOTP client is mobile <strong>and</strong> might be connected to a variety<br />
# of networks, more than one fixed address for that host can be specified.<br />
# Hosts can have fixed addresses on some networks, but receive dynamically<br />
# allocated address on other subnets; in order to support this, a host<br />
# declaration for that client must be given which does not have a fixed<br />
# address. If a client should get different parameters depending on what<br />
# subnet it boots on, host declarations for each such network should be<br />
# given. Finally, if a domain name is given for a host’s fixed address <strong>and</strong><br />
# that domain name evaluates to more than one address, the address<br />
# corresponding to the network to which the client is attached, if any,<br />
# will be assigned.<br />
host confusia {<br />
hardware ethernet 02:03:04:05:06:07;<br />
fixed-address confusia-1.fugue.com, confusia-2.fugue.com;<br />
filename “vmunix.confusia”;<br />
server-name “toccato.fugue.com”;<br />
}<br />
host confusia {<br />
hardware ethernet 02:03:04:05:06:07;<br />
fixed-address confusia-3.fugue.com;<br />
filename “vmunix.confusia”;<br />
server-name “snarg.fugue.com”;<br />
}<br />
21-87
Configuring Remote Systems with RARP, BOOTP, <strong>and</strong> DHCP Server<br />
21-88<br />
host confusia {<br />
hardware ethernet 02:03:04:05:06:07;<br />
filename “vmunix.confusia”;<br />
server-name “bb.home.vix.com”;<br />
}<br />
# Some other examples<br />
host host1 {<br />
option dhcp-client-identifier “host1”;<br />
fixed-address 10.10.11.101, 10.11.22.101;<br />
}<br />
# Do not allow this one to boot<br />
host host2<br />
hardware ethernet aa:cc:04:00:33:11;<br />
deny booting;<br />
}
Chapter 22<br />
Managing the XDM Server<br />
This chapter explains how to configure the <strong>MultiNet</strong> XDM (X Display Manager) server to manage<br />
remote systems running X (X Window System) servers. The <strong>MultiNet</strong> XDM server is based on<br />
X11R6 sources from MIT.<br />
Underst<strong>and</strong>ing X Display Management Controlling the XDM Server<br />
XDM Administrative Tasks Controlling Access to the XDM Server<br />
Enabling <strong>and</strong> Starting the XDM Server Managing X11R3 Displays<br />
Modifying the XDM Server Configuration<br />
Underst<strong>and</strong>ing X Display Management<br />
The <strong>MultiNet</strong> XDM server provides login services to X servers through graphical dialog boxes.<br />
From a user's perspective, logging in at a <strong>MultiNet</strong> XDM-managed X server is no different than<br />
logging in at an OpenVMS system console.<br />
Initially, the user sees the st<strong>and</strong>ard DECwindows banner <strong>and</strong> login dialog. After the user supplies a<br />
valid user name <strong>and</strong> password, the DECwindows Session Manager starts <strong>and</strong> launches any<br />
applications configured for automatic startup. After the user logs out from the Session Manager, the<br />
banner <strong>and</strong> login dialog reappear.<br />
Users of X11R4 (<strong>and</strong> later) servers benefit from XDM because they can take advantage of the<br />
DECwindows Session Manager as if they were using a host.<br />
Users can also specify which host they want to use. This feature is provided by XDMCP (X<br />
Display Management Communications Protocol), used for communication between X servers <strong>and</strong><br />
XDM servers.<br />
From a system manager's perspective, XDM provides a convenient way to extend the LOGINOUT<br />
service to users on remote X servers <strong>and</strong> to specify which X servers are managed by each XDM<br />
server host.<br />
22-1
Managing the XDM Server<br />
Accessing the XDM Server<br />
22-2<br />
Before an X server can be managed, you must grant it access to your XDM server. In a network of<br />
dozens or hundreds of X servers, it may not be practical to manage every X server that requests<br />
XDM service. In these cases, you can restrict access to your XDM server. The manner in which<br />
access is granted depends on the version of the X server <strong>and</strong> how it requests XDM service.<br />
X11R4 (<strong>and</strong> later) X servers can generate three basic types of management requests, as explained in<br />
Table 22-1.<br />
Table 22-1 XDMCP Requests<br />
Request<br />
Type Description XDM Server Response<br />
Direct Sent by X<br />
server to a<br />
specific host<br />
Broadcast Broadcast by<br />
X server to all<br />
hosts on the<br />
local network<br />
Indirect Sent by X<br />
server to a<br />
specific host<br />
If the XDM server is configured to accept requests from the<br />
user's X server, the host produces a login dialog on that server. If<br />
the XDM server is configured to refuse service to the user's X<br />
server, no login dialog appears, <strong>and</strong> the user must try a different<br />
host. For information on selectively rejecting XDMCP direct<br />
requests, see the H<strong>and</strong>ling Direct <strong>and</strong> Broadcast Requests<br />
section.<br />
The XDM server responds to broadcast requests as if they were<br />
direct requests. Broadcasts can result in several XDM servers<br />
accepting the request; it is then up to the X server to determine<br />
which host to use. Some X servers simply use the first host to<br />
respond. Others present a list of responding hosts in a chooser<br />
dialog box, <strong>and</strong> the user selects a host from the list.<br />
If the host's XDM server is configured to h<strong>and</strong>le indirect requests<br />
from the X server, the host either forwards the request to another<br />
XDM server host or returns a list of XDM servers from which the<br />
user can choose.<br />
Note! Only X11R5 <strong>and</strong> X11R6 XDM servers can properly<br />
h<strong>and</strong>le forwarded requests.<br />
The <strong>MultiNet</strong> XDM server does not h<strong>and</strong>le indirect requests.<br />
From the user's perspective, broadcast <strong>and</strong> indirect requests provide similar benefits. From an<br />
administrator's perspective, however, indirect requests allow the XDM server administrator to<br />
select an XDM server for users.<br />
Consider a situation in which BROWN.FLOWERS.COM, an X terminal, is configured to make<br />
indirect requests for display management to an OpenVMS host, WHORFIN.FLOWERS.COM,<br />
running the <strong>MultiNet</strong> XDM server. The administrator of WHORFIN can specify which XDM<br />
servers will manage BROWN by forwarding inquiries to another XDM server.
Managing the XDM Server<br />
X11R3 servers cannot take advantage of XDMCP, which was not introduced until X11R4. Instead,<br />
X11R3 servers do not allow users to choose a host. For information on managing X11R3 servers,<br />
see the Managing X11R3 Displays section.<br />
Special Features of the <strong>MultiNet</strong> XDM Server<br />
Unlike many XDM servers, the <strong>MultiNet</strong> XDM server does not control X sessions after users have<br />
logged in. Instead, it starts the processes that produce the login dialog <strong>and</strong> authenticate the user,<br />
then passes control to the DECwindows Session Manager. When the user terminates the session<br />
using the Session Manager, the X session ends <strong>and</strong> XDM starts a new login cycle. This method<br />
allows you to change XDM server configuration, stop the XDM server, <strong>and</strong> restart the XDM server<br />
without interrupting any X sessions already in progress.<br />
Configuration of a remote user's session is identical to the customization of a local DECwindows<br />
user's session. Traditionally, XDM servers on UNIX systems allow user environments to be<br />
configured by scripts (comm<strong>and</strong> procedures) that are run before, during, <strong>and</strong> upon ending each X<br />
session. The <strong>MultiNet</strong> XDM server, however, takes advantage of the DECwindows STARTLOGIN<br />
<strong>and</strong> LOGINOUT processes to eliminate the need for extra comm<strong>and</strong> procedures.<br />
The <strong>MultiNet</strong> XDM server does not h<strong>and</strong>le indirect requests.<br />
XDM Administrative Tasks<br />
The following are common administrative tasks for the XDM server:<br />
• Enabling the XDM server (see the Enabling <strong>and</strong> Starting the XDM Server section).<br />
• Modifying the XDM server configuration (see the Modifying the XDM Server Configuration<br />
section).<br />
• Controlling the XDM server (see the Controlling the XDM Server section).<br />
• Controlling access to the XDM server (see the Controlling Access to the XDM Server section).<br />
• Managing X11R3 displays (see the Managing X11R3 Displays section).<br />
With the exception of controlling the XDM server, each task requires you to modify XDM<br />
configuration files <strong>and</strong> update the XDM server with the new information (as described in the<br />
Controlling the XDM Server section).<br />
Enabling <strong>and</strong> Starting the XDM Server<br />
When <strong>MultiNet</strong> is first installed, the XDM server is disabled, <strong>and</strong> you must enable it. After the<br />
server is enabled, it starts automatically when <strong>MultiNet</strong> starts.<br />
1 Issue the following DCL comm<strong>and</strong>:<br />
$ MULTINET CONFIGURE /SERVER<br />
2 At the SERVER-CONFIG prompt, enter:<br />
SERVER-CONFIG>ENABLE XDM<br />
3 To verify that the XDM server is enabled, enter:<br />
22-3
Managing the XDM Server<br />
22-4<br />
SERVER-CONFIG>SHOW XDM<br />
If no asterisk (*) appears to the left of "XDM" in the output, the service is enabled.<br />
4 To exit the configuration utility, enter:<br />
SERVER-CONFIG>EXIT<br />
5 Restart the master server:<br />
$ @MULTINET:START_SERVER.COM<br />
Modifying the XDM Server Configuration<br />
XDM is configured through X resources <strong>and</strong> files specified through X resources. When the XDM<br />
server starts or you reload its configuration, it configures itself according to the contents of its<br />
master configuration file, MULTINET:XDM.CONFIGURATION, including reading the contents<br />
of files specified in the master configuration file.<br />
Resource parameters for <strong>MultiNet</strong> XDM are listed in Table 22-2 <strong>and</strong> Table 22-3.<br />
These resources modify the global behavior of XDM. Because the resource manager uses colons to<br />
separate the name of the resource from its value <strong>and</strong> dots to separate resource name parts, XDM<br />
substitutes underscores for both dots <strong>and</strong> colons when generating the resource name.<br />
Note! If you import an XDM configuration file from a UNIX system, the startup, session, <strong>and</strong> authorize<br />
resources have no effect on the <strong>MultiNet</strong> XDM server.<br />
The following is a sample XDM.CONFIGURATION file:<br />
DisplayManager.logFile: multinet:xdm-errors.log<br />
DisplayManager.servers: multinet:xdm.servers<br />
DisplayManager.accessFile: multinet:xdm.access<br />
DisplayManager.removeDomainname: false<br />
Table 22-2 XDM Server Resources<br />
Configuration File Resource Description<br />
DisplayManager.accessFile Specifies a file containing a database of host names<br />
that are either allowed direct access to this host or to<br />
which queries should be forwarded. For details, see the<br />
Controlling Access to the XDM Server section. The<br />
equivalent file on UNIX systems is /usr/lib/X11/xdm/<br />
Xaccess. Default: MULTINET:XDM.ACCESS.
Table 22-2 XDM Server Resources (Continued)<br />
Configuration File Resource Description<br />
Managing the XDM Server<br />
DisplayManager.debugLevel Sets the debug output level. Default: 0.<br />
You can also set this value while the XDM server is<br />
running with the comm<strong>and</strong> MULTINET<br />
NETCONTROL XDM DEBUG.<br />
DisplayManager.logFile Specifies the file in which errors are logged when the<br />
logType resource is FILE. The equivalent file on<br />
UNIX systems is /usr/lib/X11/xdm/xdm-errors.<br />
Default: MULTINET:XDM.LOG.<br />
DisplayManager.logType Specifies where XDM server messages are logged:<br />
OPCOM, SYSLOG, FILE, or STDOUT. Default:<br />
OPCOM.<br />
DisplayManager.removeDomainName Specifies whether XDM removes the domain name<br />
portion of host names if they are the same as the<br />
domain name of the local host. Removing the domain<br />
name is useful because name resolvers typically create<br />
fully qualified host names when computing display<br />
names for XDMCP clients. Default: true.<br />
DisplayManager.requestPort Specifies the UDP port number to which the XDM<br />
server listens for incoming XDMCP requests. Unless<br />
you need to debug the system, do not change the value<br />
from the default. Default: 177 (the st<strong>and</strong>ard for<br />
XDMCP).<br />
DisplayManager.servers Specifies a file containing a list of foreign X servers to<br />
manage. If the file specification is prefixed with an @<br />
sign, it contains one listing per line. A foreign X server<br />
is an X display that does not support the XDMCP<br />
protocol. The equivalent file on UNIX systems is<br />
/usr/lib/X11/xdm/Xservers.<br />
Default: MULTINET:XDM.SERVERS.<br />
You can use the configuration parameters in Table 22-3 to adjust the way the XDM server transfers<br />
control of the X terminal to a DECwindows process. The default values for these parameters should<br />
be suitable for ordinary DECwindows usage.<br />
Under normal operation, the XDM server creates an X connection to the managed display before<br />
starting a process to invoke the DECwindows login screen. When the login completes <strong>and</strong> the<br />
DECwindows Session Manager starts, it h<strong>and</strong>s off the initial X connection to the process. The<br />
initial X connection closes down automatically when the session ends, causing the X display to<br />
reset <strong>and</strong> either shut down or restart the XDM login chooser (depending on how the X terminal or<br />
22-5
Managing the XDM Server<br />
22-6<br />
software is configured).<br />
Table 22-3 Advanced XDM Resources<br />
Configuration Resource Description<br />
DisplayManager.loginCheckInterval The number of seconds the XDM server waits between<br />
checks to see if the DECwindows login process has<br />
begun. Default: 5<br />
DisplayManager.loginTries The number of checks the XDM server makes to see if<br />
the DECwindows login process has begun. Default: 12<br />
DisplayManager.sessionCheckInterval The number of seconds the XDM server waits between<br />
checks to see if the DECwindows login process has<br />
h<strong>and</strong>ed control to the user's Session Manager. Default:<br />
10<br />
DisplayManager.sessionTries The number of checks the XDM server makes to see if<br />
the user's Session Manager started. Default: 30<br />
DisplayManager.bypassSessionCheck If set to true, the check for the start of a Session<br />
Manager is bypassed. Default: false<br />
DisplayManager.sessionManagers A comma-separated list of image names, without<br />
device or directory specifications, that the XDM<br />
server should consider to be Session Managers for a<br />
DECwindows session. Default:<br />
DECW$SESSION.EXE<br />
Controlling the XDM Server<br />
This section describes the following XDM tasks:<br />
• Checking the status of the XDM server<br />
• Starting the XDM server<br />
• Stopping the XDM server<br />
• Restarting the XDM server<br />
• Reloading the XDM configuration<br />
For most of these tasks, you use the MULTINET NETCONTROL utility.<br />
Checking the Status of the XDM Server<br />
To check the status of the <strong>MultiNet</strong> XDM server, enter:<br />
$ MULTINET NETCONTROL XDM SHOW<br />
The following example shows the information generated by this comm<strong>and</strong> on a system named<br />
WHORFIN that manages three X terminals, BANZAI, BROWN, <strong>and</strong> MIGUEL. When the terminal
Managing the XDM Server<br />
is displaying a DECwindows login screen, the following comm<strong>and</strong> output changes to show the<br />
words "not logged in" instead of a process identifier number.<br />
$ MULTINET NETCONTROL XDM SHOW<br />
Connected to NETCONTROL server on "WHORFIN"<br />
< WHORFIN.YOYDYNE.COM<br />
< Network Control 5.4(8) at Wed 8-Oct-2003 11:37AM-EST<br />
< XDM Current Managed Displays:<br />
< Display BANZAI.FLOWERS.COM:0.0 Type XDMCP <strong>Process</strong> 20E002A8<br />
< Display BROWN.FLOWERS.COM:0.0 Type XDMCP <strong>Process</strong> 20E00289<br />
< Display MIGUEL.FLOWERS.COM:2005.0 Type XDMCP <strong>Process</strong> 20E00242<br />
< OK<br />
Starting the XDM Server<br />
This section describes how to start the <strong>MultiNet</strong> XDM server.<br />
Note! The XDM server is automatically started when <strong>MultiNet</strong> starts.<br />
Before starting the <strong>MultiNet</strong> XDM server, make sure it is enabled. For details, see the Enabling <strong>and</strong><br />
Starting the XDM Server section.<br />
To start the <strong>MultiNet</strong> XDM server, enter:<br />
$ MULTINET NETCONTROL XDM START<br />
When the XDM server starts, it reads the master configuration file,<br />
MULTINET:XDM.CONFIGURATION, to determine which configuration files to read, then reads<br />
them. (For information on modifying the master configuration file, see the Modifying the XDM<br />
Server Configuration section). You can specify other configuration files simply by modifying the<br />
contents of the master configuration file <strong>and</strong> then restarting the XDM server (see Restarting the<br />
XDM Server), or by reloading the XDM configuration files (see the Reloading the XDM<br />
Configuration section).<br />
The following example shows the information generated by this comm<strong>and</strong>:<br />
$ MULTINET NETCONTROL XDM START<br />
< XDM Server Started, process id pid<br />
Stopping the XDM Server<br />
To stop the <strong>MultiNet</strong> XDM server, enter:<br />
$ MULTINET NETCONTROL XDM SHUTDOWN<br />
The following example shows the information generated by this comm<strong>and</strong>:<br />
$ MULTINET NETCONTROL XDM SHUTDOWN<br />
< XDM Server Shutdown<br />
22-7
Managing the XDM Server<br />
Restarting the XDM Server<br />
22-8<br />
Restarting the XDM server is a convenient alternative to stopping <strong>and</strong> starting the XDM server as<br />
described in the Starting the XDM Server section <strong>and</strong> the Stopping the XDM Server section.<br />
When the XDM server restarts, it reads the master configuration file<br />
MULTINET:XDM.CONFIGURATION to determine which configuration files to read, then reads<br />
them.<br />
To restart the XDM server, enter:<br />
$ MULTINET NETCONTROL XDM RESTART<br />
The following example shows the information generated by this comm<strong>and</strong>:<br />
$ MULTINET NETCONTROL XDM RESTART<br />
Connected to NETCONTROL server on "LOCALHOST"<br />
< WHORFIN.FLOWERS.COM Network Control 5.4(8) at Tue 30-Sep-2003 12:47AM-<br />
EST<br />
< XDM Server Started, process id 2040024B<br />
$<br />
For information on modifying the master configuration file, see the Modifying the XDM Server<br />
Configuration section.<br />
Reloading the XDM Configuration<br />
Changes to XDM server configuration take effect when the XDM server is started or restarted or<br />
when the configuration files are reloaded. Reloading the XDM server allows you to reload the<br />
XDM server configuration files without restarting the XDM server <strong>and</strong> interrupting connections<br />
between X servers <strong>and</strong> the XDM server.<br />
When the XDM server reloads its configuration, it first reads the<br />
MULTINET:XDM.CONFIGURATION master configuration file to determine which other files to<br />
read, then reads them. For information on modifying the master configuration file, see the<br />
Modifying the XDM Server Configuration section.<br />
To reload the XDM configuration files, enter:<br />
$ MULTINET NETCONTROL XDM RELOAD<br />
The following example shows the information generated by this comm<strong>and</strong> produces:<br />
$ MULTINET NETCONTROL XDM RELOAD<br />
< OK: XDM server configuration reloading<br />
Controlling Access to the XDM Server<br />
Access to the <strong>MultiNet</strong> XDM server by X11R4 (<strong>and</strong> later) servers is controlled through the<br />
MULTINET:XDM.ACCESS file. This file contains the following information:<br />
• Displays the XDM server will manage<br />
• Displays the XDM server will not manage
• Displays <strong>and</strong> the XDM servers that will manage them<br />
• Macro definitions<br />
Managing the XDM Server<br />
The following sections explain how to edit XDM.ACCESS to h<strong>and</strong>le direct, broadcast, <strong>and</strong> indirect<br />
requests.<br />
H<strong>and</strong>ling Direct <strong>and</strong> Broadcast Requests<br />
To manage X servers that make direct or broadcast requests, add their names to the XDM.ACCESS<br />
file as follows:<br />
• To manage a specific X server, include a line with the server host name.<br />
• To reject a specific X server, include a line with the server host name preceded by an<br />
exclamation point (!).<br />
• To manage any X server that requests management, include a line consisting of an asterisk (*).<br />
For convenience, you can define lists of hosts in macros in XDM.ACCESS. To define a macro,<br />
include a line at the top of the file in the following format:<br />
%macroname host_list<br />
You can then use the macro name (including the leading percent sign (%)) in the file.<br />
The following sample XDM.ACCESS file allows any host to be managed by the XDM server.<br />
# Access control file for XDMCP connections<br />
#<br />
* #any host can get a login window<br />
Managing X11R3 Displays<br />
Although X11R3 X servers do not allow users to select the host they are going to log into, they can<br />
still be managed by the <strong>MultiNet</strong> XDM server. Once an X server is managed by one host, however,<br />
the user has limited ability to change to another host.<br />
To configure the <strong>MultiNet</strong> XDM server to manage a specific X11R3 display:<br />
1 Add the X11R3 display to the <strong>MultiNet</strong> XDM server's XDM.SERVERS file (see the Specifying<br />
X11R3 Displays section).<br />
2 Configure the X11R3 display to grant access to the <strong>MultiNet</strong> host (see the Setting Up Host<br />
Access on the Display section).<br />
3 Make sure the X11R3 display is not already managed by another XDM server (see the Ensuring<br />
No Other Host Is Managing the Display section).<br />
4 Reload the XDM server configuration (see the Reloading the XDM.SERVERS File section).<br />
Specifying X11R3 Displays<br />
The XDM server obtains a list of X displays to manage from the MULTINET:XDM.SERVERS file<br />
whenever it starts or you reload its configuration files.<br />
22-9
Managing the XDM Server<br />
Note! The XDM server obtains its list of X11R3 servers from the file specified in the<br />
DisplayManager.servers resource in the XDM master configuration file,<br />
MULTINET:XDM.CONFIGURATION.<br />
22-10<br />
Add an entry to XDM.SERVERS in the following format:<br />
server_name foreign<br />
• server_name is the name of the X11R3 server you want to manage, in the st<strong>and</strong>ard X format<br />
(hostname:server number[.screen number]).<br />
• "foreign" indicates that server_name does not use XDMCP.<br />
The following sample XDM.SERVERS file contains entries for two X11R3 servers, BANZAI:0<br />
<strong>and</strong> MIGUEL:0.<br />
banzai.flowers.com:0 foreign<br />
miguel.flowers.com:0 foreign<br />
You can also specify classes of displays that share similar requirements.<br />
Setting Up Host Access on the Display<br />
Before the XDM server can produce a login dialog box on an X11R3 display, it must be granted<br />
access to the display via the X host access mechanism.<br />
Note! The <strong>MultiNet</strong> XDM server does not support the MIT-MAGIC-COOKIE-1 mechanism.<br />
The XDM server can only present the LOGINOUT dialog on X11R3 servers on which host access<br />
restrictions are entirely disabled, or enabled specifically for your <strong>MultiNet</strong> XDM server host.<br />
For many X servers, you can disable access restrictions with the xhost client, or by modifying<br />
configuration files before starting the server. Refer to your X server administration documentation<br />
for information on granting access to remote hosts.<br />
Ensuring No Other Host Is Managing the Display<br />
If an X11R3 display is already being managed by another XDM server, either remove the display<br />
from the other XDM server's configuration (usually the XSERVERS file) or change the X server's<br />
host access list so the other XDM server cannot access the display. Cancel the login dialog <strong>and</strong><br />
verify that the other XDM server's login dialog does not return.
Reloading the XDM.SERVERS File<br />
Managing the XDM Server<br />
Reload the MULTINET:XDM.SERVERS file (or stop <strong>and</strong> restart the XDM server) after you have:<br />
• Specified which X11R3 servers you want to manage in the MULTINET:XDM.SERVERS file<br />
• Granted access to your XDM server<br />
• Made sure that no other XDM server is managing the X servers<br />
The XDM server reads the XDM.SERVERS configuration file when it starts (see the Starting the<br />
XDM Server section), restarts (see the Restarting the XDM Server section), <strong>and</strong> when you reload its<br />
configuration (see the Reloading the XDM Configuration section).<br />
22-11
Chapter 23<br />
Configuring <strong>MultiNet</strong> SNMP Services<br />
This chapter explains how to configure <strong>MultiNet</strong> SNMP (Simple Network Management Protocol)<br />
agents. SNMP agents are the hosts managed by SNMP.<br />
Underst<strong>and</strong>ing SNMP Performing SNMP Functions with <strong>MultiNet</strong><br />
Configuring <strong>MultiNet</strong> SNMP Services<br />
Underst<strong>and</strong>ing SNMP<br />
SNMP is a protocol from which hosts called network management stations can obtain <strong>and</strong> modify<br />
information on other network hosts called SNMP agents.<br />
Typical SNMP-based network management systems employ a host that has been configured as an<br />
SNMP agent from which the current network configuration of other network nodes can be analyzed<br />
<strong>and</strong> modified. Such management systems often provide graphical interfaces for these tasks.<br />
SNMP Managers, Agents, <strong>and</strong> Traps<br />
SNMP-managed networks typically include the following network entities:<br />
Network Management<br />
Station (NMS)<br />
Is a node that requests information about, or makes changes to,<br />
remote nodes. The NMS interface is completely vendor-specific.<br />
<strong>MultiNet</strong> performs basic SNMP via the MULTINET SET <strong>and</strong><br />
MULTINET SHOW comm<strong>and</strong>s using the /SNMP_HOST qualifiers<br />
(see the Performing SNMP Functions with <strong>MultiNet</strong> section).<br />
23-1
Configuring <strong>MultiNet</strong> SNMP Services<br />
Configuring <strong>MultiNet</strong> SNMP Services<br />
23-2<br />
SNMP agent This software allows the local network configuration to be<br />
examined or modified by an NMS. <strong>MultiNet</strong> provides an SNMP<br />
agent in the form of the SNMP service.<br />
The data managed by an SNMP agent is called the Management<br />
Information Base (MIB). The <strong>MultiNet</strong> SNMP agent supports the<br />
current Internet st<strong>and</strong>ard MIB known as MIB-II, described in the<br />
file RFC1213-MIB.<br />
<strong>MultiNet</strong> manages MIBs according to the IETF draft<br />
“draft_ref_dhcp_server_mib-02.txt”. Both RFC1213-MIB <strong>and</strong><br />
“draft_ref_...” are found on the IETF website.<br />
<strong>MultiNet</strong> SNMP agent software is extensible. To have private MIBS<br />
served by the <strong>MultiNet</strong> SNMP agent, develop a shareable image that<br />
exports the APIs in the private MIBs plus the routine need to access<br />
the MIB variables. See the <strong>MultiNet</strong> for OpenVMS Programmer’s<br />
Reference — SNMP Extensible Agent API Routines.<br />
Traps Traps receive requests such as non-authenticated SNMP requests<br />
that are not h<strong>and</strong>led directly by the SNMP agent. Traps are sent only<br />
to clients configured to receive traps, as defined in the SNMP agent<br />
configuration file (SNMPD.CONF). The agent supports all traps<br />
defined in the SNMP protocol, except EGP-Neighbor-Loss, Warm-<br />
Start, <strong>and</strong> Enterprise-Specific.<br />
Before NMS can obtain or modify network configuration data, the<br />
NMS must be authenticated by the agent. The agent compares a<br />
community string sent by the manager to the local read or write<br />
community strings.<br />
The agent must authenticate community strings sent by the NMS<br />
before authenticating requests:<br />
• For read operations, the NMS string must match the agent’s read<br />
community string.<br />
• For write operations, the NMS string must match the agent’s<br />
write community string.<br />
The following is an overview of how to configure a host as an SNMP agent. Each step is discussed<br />
in detail following this overview.<br />
1 Enable the SNMP service (see the Enabling the SNMP Service section).<br />
2 Configure an SNMP subagent by setting the subagent image (see the Configuring SNMP<br />
Subagents (except AgentX) section).
Configuring <strong>MultiNet</strong> SNMP Services<br />
3 Edit the SNMP configuration file (see the Configuration File section).<br />
4 Restart the master server.<br />
When the <strong>MultiNet</strong> SNMP agent starts, it obtains configuration data from the<br />
MULTINET:SNMPD.CONF file. Since the SNMPD.CONF file does not exist, you need to edit it<br />
using a text editor.<br />
Note! SNMP parameters cannot be modified with the SNMP-CONFIG or MENU-CONFIG utilities. The<br />
MULTINET CONFIGURE/SNMP <strong>and</strong> MULTINET CONFIGURE/MENU (Configuring the SNMP<br />
Subagent) comm<strong>and</strong>s are not supported.<br />
Enabling the SNMP Service<br />
To enable the SNMP service using the SERVER-CONFIG utility:<br />
1 Start SERVER-CONFIG:<br />
$ MULTINET CONFIGURE /SERVERS<br />
2 Enable the SNMP service:<br />
SERVER-CONFIG>ENABLE SNMP<br />
3 If desired, enable SNMP service on specific VMScluster nodes, or restrict access to the service<br />
as described in Chapter 12.<br />
4 Save the modified service configuration.<br />
SERVER-CONFIG>SAVE<br />
[Writing configuration to<br />
MULTINET_COMMON_ROOT:[MULTINET]SERVICES.MASTER_SERVER]<br />
5 Restart the MULTINET-SERVER process:<br />
SERVER-CONFIG>RESTART<br />
6 Exit the utility:<br />
SERVER-CONFIG>RESTART<br />
Private MIB Application Program Interface<br />
In addition to SMUX <strong>and</strong> AgentX, <strong>MultiNet</strong>’s SNMP agent supports subagents serving private<br />
MIBs through an application programming interface (API). Under this scheme, anyone willing to<br />
have their private MIBs served by <strong>MultiNet</strong>’s SNMP agent should develop a shareable image that<br />
exports the APIs in them in addition to the routines they may need for accessing the MIB variables.<br />
The SNMP API routines are described in Chapter 5 of the <strong>MultiNet</strong> for OpenVMS Programmer's<br />
Reference, SNMP Extensible Agent API Routines.<br />
23-3
Configuring <strong>MultiNet</strong> SNMP Services<br />
Configuring SNMP Subagents (except AgentX)<br />
23-4<br />
To configure an SNMP subagent on your host using the SERVER-CONFIG utility:<br />
1 Start SERVER-CONFIG:<br />
$ MULTINET CONFIGURE /SERVERS<br />
2 Select the SNMP service:<br />
SERVER-CONFIG>SELECT SNMP<br />
3 Set the subagent-image:<br />
SERVER-CONFIG>SET SUBAGENT-IMAGE<br />
You can now delete old entries or add new ones. Enter the name of one subagent per prompt,<br />
until finished. When finished, press Return at the prompt. Do not enter the .EXE extension.<br />
4 Save the modified server configuration <strong>and</strong> exit.<br />
SEVER-CONFIG>SAVE<br />
[Writing configuration to<br />
MULTINET_COMMON_ROOT:[MULTINET]SERVICES.MASTER_SERVER<br />
5 Restart the MULTINET-SERVER process:<br />
SERVER-CONFIG>RESTART<br />
6 Exit the utility:<br />
SERVER-CONFIG>EXIT<br />
SNMP Multiplexing Peers<br />
The SNMP Multiplexing (SMUX) protocol is an SNMP subagent extension protocol. Each<br />
subagent or peer registers a MIB subtree with the SNMP Agent. Requests for objects residing in a<br />
registered MIB subtree are passed from the SNMP Agent using the SMUX protocol to the<br />
subagent. The subagent passes the results of an SNMP query back to the SNMP Agent. The<br />
practical limit to the number of peers is 30.<br />
Enabling SMUX (DEFINE/SYSTEM/EXEC MULTINET_SNMP_SMUX 1) when there are no<br />
SMUX subagents to use it can interfere with walking of the SNMP management base due to the<br />
SMUX MIB returning NoSuchName when no subagents exist. SMUX is an historical protocol, <strong>and</strong><br />
should not be enabled unless there are subagents that will be using it. Specific items in the SNMP<br />
management base that appear after the SMUX MIB can still be queried when they are accessed<br />
from the start of their management base.<br />
The SNMP server only accepts SMUX connections from peers listed by IP address in the<br />
SNMPD.CONF file. To enable SMUX support, issue the following comm<strong>and</strong> before starting<br />
SNMP:
$ DEFINE/SYSTEM/EXECUTIVE MULTINET_SNMP_SMUX 1<br />
SMUX_PEER ip-address<br />
Configuring <strong>MultiNet</strong> SNMP Services<br />
The SNMP agent listens on TCP port 199 for peer connections, while the connection to the SNMP<br />
client is over UDP port 161, with traps sent over UDP port 162. Multiple peers registering the same<br />
subtree are each assigned a priority, <strong>and</strong> the agent can send multiple variables in a single request.<br />
The SMUX protocol is described in RFC 1227.<br />
SNMP Agent Extensibility (AgentX) Peers<br />
The SNMP agent listens on TCP port 705 for subagent connections. The AgentX framework<br />
consists of a single processing entity called the master agent. This master agent, available on the<br />
st<strong>and</strong>ard transport address, sends <strong>and</strong> receives SNMP protocol messages in an agent role but has<br />
little or no direct access to management information. While some of the AgentX protocol messages<br />
appear similar in syntax <strong>and</strong> semantics to the SNMP, remember that AgentX is not SNMP. Refer to<br />
RFCs 2741 <strong>and</strong> 2742 for complete AgentX information. The SNMP server only accepts AgentX<br />
connections from peers listed in the SNMPD.CONF file. To enable AgentX support, issue the<br />
following comm<strong>and</strong> before starting SNMP:<br />
$ DEFINE/SYSTEM/EXECUTIVE MULTINET_SNMP_AGENTX 1<br />
or<br />
$ MULTINET CONFIGURE/NET<br />
NET-CONFIG>SET SNMP-AGENTX TRUE<br />
Setting Up <strong>MultiNet</strong> to Use HP Insight Manager<br />
HP Insight Manager support has been added to <strong>MultiNet</strong>. The HP Insight Manager (CIM) uses the<br />
SNMP extensibility provided by Agent X to allow remote examination <strong>and</strong> notification of system<br />
conditions that may need attention. Remote management agents like CIM allow systems<br />
administration personnel to manage more systems while still meeting response time goals by<br />
providing access to critical information from a central location. The remote management agent<br />
communicates with the SNMP agent on the system being managed, which then sends the request to<br />
a program specifically designed to manage a particular component of the system.<br />
Customers desiring to run HP Insight Manager (v7.1 <strong>and</strong> later of OpenVMS for Alpha) need to<br />
obtain TCP/IP Services v5.1 or greater for OpenVMS from HP in order to get the<br />
TCPIP$ESNMP_SHR.EXE, <strong>and</strong> TCPIP$HR_MIB.EXE images. Contact Hewlett-Packard<br />
Corporation (www.hewlett-packard.com) to get the kit for TCP/IP Services v5.1 or greater.<br />
HP Insight Manager is available on AXP systems with VMS v7.* only. Please follow these<br />
instructions.<br />
1 Install <strong>MultiNet</strong><br />
2 Install HP Management Agents<br />
3 Copy the TCP/IP Services kit from HP’s site, checking for latest patches<br />
23-5
Configuring <strong>MultiNet</strong> SNMP Services<br />
23-6<br />
4 Extract TCPIP$ACCESS_SHR.EXE <strong>and</strong> TCPIP$ESNMP_SHR.EXE (PRODUCT EXTRACT<br />
FILE/SELECT=filename) from the TCPIP Services kit <strong>and</strong> place them in SYS$SHARE:.<br />
5 Copy TCPIP$ESNMP_SHR.EXE to SYS$SHARE:UCX$ESNMP_SHR.EXE<br />
6 Extract TCPIP$HR_MIB.EXE from the TCPIP Services kit <strong>and</strong> place in SYS$SYSTEM:<br />
$ DEFINE/SYSTEM/EXECUTIVE MULTINET_SNMP_AGENTX 1<br />
$ DEFINE/SYSTEM TCPIP$AGENTX_INET_PORT 705<br />
$ DEFINE/SYSTEM TCPIP$AGENTX_LOCAL_PORT 705<br />
Note! Make sure all files extracted from the TCP/IP Services kit have WORLD:RE protection.<br />
7 Add the following to MULTINET:SNMPD.CONF:<br />
AGENTX_PEER 127.0.0.1<br />
community elmginkgo 127.0.0.1 read (<strong>and</strong> other community strings as<br />
needed)<br />
8 Comment out SMUX_PEER from MULTINET:SNMPD.CONF<br />
9 Restart SNMP with this comm<strong>and</strong>:<br />
$ MULTINET NETCONTROL SNMP RELOAD<br />
or<br />
Start <strong>MultiNet</strong><br />
10Start HP Insight Manager<br />
11 Run /process=HR_MIB SYS$SYSTEM:TCPIP$HR_MIB<br />
The Host Resources MIB (RFC 1514) supplied with TCP/IP Services will now work with SNMP.<br />
Note! The new ESNMP client interface in HP's TCP/IP services v5.1 or greater uses Agent X to allow<br />
others to provide additional objects for SNMP to manage. HP's Insight Management Agents for<br />
OpenVMS are written to use the ESNMP client interface, hence the addition of Agent X protocol<br />
allows them to be used with <strong>MultiNet</strong>.<br />
By using the ESNMP library, or Agent X directly, writers of TCP/IP services can allow the state<br />
of the service to be queried <strong>and</strong> controlled remotely. This can be useful if the service does not<br />
have a user interface, or runs under batch, or as a detached process.<br />
Configuration File<br />
The SNMP configuration file SNMPD.CONF is located in the MULTINET_ROOT directory. The<br />
SNMP file defines:<br />
• Values for a subset of MIB management objects<br />
• Clients <strong>and</strong> communities who can access the SNMP agent<br />
• MIB access privileges for each client <strong>and</strong> community
• Authentication Failure, Link Up, <strong>and</strong> Link Down traps' status<br />
• Originating addresses for traps<br />
• SMUX peer details<br />
• Agent X peer details<br />
Configuring <strong>MultiNet</strong> SNMP Services<br />
Note! After editing the configuration to fit your needs, stop <strong>and</strong> restart the SNMP agent so that the<br />
changes can take effect. If you do not edit the configuration file, the SNMP agent uses default<br />
values.<br />
File Format<br />
Follow these guidelines when entering data in the SNMP configuration file:<br />
• Allow one line for each item.<br />
• Enter information in any order, in upper- or lowercase.<br />
• Enter variable string information (id-string <strong>and</strong> contact-name) in upper- or lowercase, depending<br />
on the operating system. Some SNMP clients on your network (such as those running UNIX)<br />
might require information in a specific case.<br />
• Use a pound sign (#) or an exclamation point (!) to denote comments. SNMP ignores all<br />
information following these characters.<br />
• Place quotation marks (" ") around strings that contain spaces or that require more than one line<br />
in the file, <strong>and</strong> around the comment characters when used as regular characters.<br />
Values for MIB Objects<br />
To define the values of several MIB objects in the SNMP configuration file, use the corresponding<br />
keywords listed in Table 23-1.<br />
Table 23-1 MIB Objects<br />
MIB object name... Has keyword...<br />
system.sysDescr SYSDESCR<br />
system.sysContact SYSCONTACT<br />
system.sysLocation SYSLOCATION<br />
if.ifTable.ifEntry.ifDescr <strong>and</strong><br />
if.ifTable.ifEntry.ifSpeed<br />
The following paragraphs explain how to define each item.<br />
SYSDESCR [ id-string ]<br />
INTERFACE<br />
system.sysServices SYSSERVICES<br />
The id-string is the full name of the hardware, operating system, <strong>and</strong> networking software. For<br />
23-7
Configuring <strong>MultiNet</strong> SNMP Services<br />
23-8<br />
example:<br />
SYSDESCR "AlphaServer 8400, VMS V7.1, <strong>Process</strong> <strong>Software</strong> <strong>MultiNet</strong> for<br />
OpenVMS"<br />
If you omit the id-string, <strong>MultiNet</strong> tries to obtain this information from your current system. If the<br />
attempt fails, the default is System description is unknown. Try again, entering a different<br />
id-string.<br />
SYSCONTACT [ contact-name ]<br />
The contact-name specifies the person to contact for the host, <strong>and</strong> how you can contact this person<br />
(such as by mailbox address). For example:<br />
SYSCONTACT "John Smith, X 1234, smith@process.com"<br />
The default is System contact is unknown at this time. Try again, entering a different<br />
contact-name.<br />
SYSLOCATION [ system-location ]<br />
The system-location specifies the geographical location of the host. For example:<br />
SYSLOCATION "Main Street, Anytown, MA"<br />
The default is: System location is unknown at this time. Try again, entering a different<br />
system-location.<br />
INTERFACE [ line-id line-speed description ]<br />
The line-id specifies the line identification for the IP layer network device. The line-speed specifies<br />
the line speed in bits per second. The description is the manufacturer's name, product name, <strong>and</strong><br />
hardware version for the interface. For example:<br />
INTERFACE SE0-1 10000000 "DELQA Ethernet Controller Version 1.0"<br />
SYSSERVICES [ services-set-number ]<br />
The services-set-number default is 72. RFC 1213, Management Information Base for Network<br />
Management of TCP/IP-based Internets: MIB-II, explains how to calculate the value of servicesset-number.<br />
HOSTID ip-address<br />
Specifies the IP address to use as the source address for traps sent either from the SNMP Agent or<br />
from the TRAP_GEN program. If this is not specified the address of the first interface (often SE0)<br />
is used. When this is specified it is checked against the addresses of the interfaces present on the<br />
system.
Community Parameters<br />
Configuring <strong>MultiNet</strong> SNMP Services<br />
The SNMP configuration file must contain the following information for each client permitted<br />
access to the SNMP agent:<br />
COMMUNITY community-name internet-address type<br />
community-name Specifies the name of the community to which the client belongs.<br />
internet-address Specifies the client's internet address.<br />
If you enter 0.0.0.0, any address can use the community. The internet<br />
address can be optionally followed by /mask for READ <strong>and</strong> WRITE.<br />
type Defines the access profile as one of the following:<br />
The following is an example of some community parameters defined in the configuration file.<br />
Example 23-1 Community Parameters<br />
community northeast 192.168.4.56 READ<br />
community northeast 192.168.220.1 WRITE<br />
community southwest 192.168.23.1 WRITE<br />
community southwest 192.168.23.1 TRAPS<br />
• Client 192.168.4.56 in the northeast community has READ access to the MIB, while client<br />
192.168.220.1 in the same community has WRITE access.<br />
• Client 192.168.23.1 belongs to the southwest community. This community has WRITE<br />
access to the MIB <strong>and</strong> can receive all traps.<br />
Template Configuration File<br />
• READ — The client can retrieve data from the MIB on this host.<br />
• WRITE — The client can retrieve data from <strong>and</strong> write data to the<br />
MIB on this host.<br />
• TRAPS — The client will receive all enabled traps.<br />
SNMP Services provides a TEMPLATE_SNMPD.CONF file in<br />
MULTINET_COMMON:[MULTINET] that you can use as a basis (see Example 23-2).<br />
Example 23-2 Sample SNMP Configuration File<br />
! SNMP Agent (SNMPD) Configuration File (template)<br />
!<br />
! System description: sysdescr <br />
! Typically the id string would include:<br />
23-9
Configuring <strong>MultiNet</strong> SNMP Services<br />
23-10<br />
! VAX cpu model (such as MicroVAX II, VAX 8650, etc)<br />
! VMS <strong>and</strong> version number<br />
! "<strong>Process</strong> <strong>Software</strong> <strong>MultiNet</strong> for OpenVMS Version 5.4"<br />
!<br />
sysdescr "place system description string here"<br />
!<br />
! System Contact: syscontact <br />
!<br />
syscontact "place name, phone number, <strong>and</strong> mail address of administrator<br />
here"<br />
!<br />
! System Location: syslocation <br />
!<br />
syslocation "place system location information here"<br />
! Line Interfaces Information: interface <br />
! <br />
! Note: You usually need not define these. SNMPD provides good defaults.<br />
!<br />
! is one of LPB-, ETHER-, UNA-, QNA-, BNA-, SVA-, MNA-,ISA-,KFE,<br />
! MXE-, ERA-, EWA-,CEC-, EIA-, CLIP-, ELA-,FDDI-,MFA-,FZA-, FAA-, FEA-,<br />
! FQA-, FPA-, TR-, TRA-,TRE-, TRW-,PRO-, HYP-, DSV-, DSB-,DST-, X25-,SLIP,<br />
! DECnet-, PPP-,PSD- followed by a unit number. Note that the unit number<br />
! may be an encoding of the controller when the device is an ethernet<br />
! adapter.<br />
!<br />
! (A = 0, B= 1, C=2, etc.)<br />
!<br />
! is an integer in bits per second of the data rate of the<br />
! device<br />
!<br />
! is a quoted string describing the device.<br />
!<br />
!interface una-0 10000000 "HEWLETT-PACKARD DELUA Ethernet controller"<br />
!<br />
! Communities:<br />
! community <br />
! <br />
!<br />
community readers 192.168.1.2 READ<br />
community netman 192.168.2.3 WRITE<br />
community nettraps 192.168.3.4 TRAPS<br />
!<br />
! To disable authentication traps, remove the "!" from the following<br />
! line.<br />
!no-auth-traps<br />
!<br />
! To disable link status traps, remove the "!" from the following<br />
!line.
!no-link-traps<br />
!<br />
! SMUX Peers:<br />
! AGENTX_PEER <br />
! SMUX_PEER <br />
!<br />
AGENTX_PEER 192.168.6.7<br />
SMUX_PEER 192.168.4.5<br />
SMUX_PEER 192.168.5.6<br />
Configuring <strong>MultiNet</strong> SNMP Services<br />
AGENTX_PEER ip-address—The SNMP server only accepts AGENT X connections from peers<br />
listed by IP address in the SNMPD.CONF file. Use the following syntax in the file:<br />
AGENTX_PEER ip-address<br />
The COMMUNITY, SMUX_PEER, <strong>and</strong> AGENTX_PEER statements in the SNMPD.CONF file<br />
can take an optional mask after the internet address. The mask should be separated from the<br />
internet address with a / (slash). Valid values are from 0 to 32, with 32 being the default. Although<br />
the TRAPS community accepts a mask, it is not used currently.<br />
For example:<br />
community ournet 192.168.1.10 write !implied /32<br />
community ourmgr 192.168.1.0/24 read<br />
The /24 specifies that only the first 24 bits must match. In this example, IP addresses from<br />
192.168.1.0 to 192.168.1.255 can use the community ourmgr. The mask should be separated<br />
from the internet address with a / (slash). Valid values are from 0 to 32, with 32 being the default. A<br />
more restrictive IP address may be used within a less restrictive one. For example:<br />
community process 192.168.6.0/24 READ<br />
community process 192.168.6.42 WRITE<br />
This allows all nodes in 192.168.6 to have READ access with the community name process <strong>and</strong><br />
192.168.6.42 to have WRITE access with the community name process.<br />
The following comm<strong>and</strong> can be used to display enabled SNMP Agent X subagents in the output of<br />
the SHOW comm<strong>and</strong>:<br />
$ MULTINET CONFIGURE /NETWORK<br />
$ SET SNMP-AGENTX TRUE<br />
$ SET SNMP-AGENTX FALSE<br />
TRUE enables SNMP Agent X service; FALSE disables SNMP Agent X service. A line displays in<br />
the output of the SHOW comm<strong>and</strong> if SNMP Agent X subagents are enabled.<br />
23-11
Configuring <strong>MultiNet</strong> SNMP Services<br />
Sending SNMP Traps from <strong>MultiNet</strong><br />
23-12<br />
SNMP traps can be sent from <strong>MultiNet</strong> in the following manner:<br />
Define the symbol:<br />
trap_gen :== $multinet:trap_gen<br />
Then type:<br />
$ trap_gen [....]<br />
identifies the location in the MIB tree that this trap pertains to.<br />
An example would be:<br />
1.3.6.1.4.105.3,<br />
which denotes a location in <strong>Process</strong> <strong>Software</strong>'s portion of the MIB tree.<br />
is an integer representing the generic trap value.<br />
is an integer representing the specific trap value.<br />
are arbitrary strings separated by spaces that are passed to the agent<br />
receiving the trap as octet strings.<br />
The TRAP_GEN program uses the trap community definitions in the MULTINET:SNMPD.CONF<br />
file to determine where to send the trap.<br />
Note! For <strong>MultiNet</strong> 5.4 there is also a program available that will listen for traps <strong>and</strong> format them for<br />
display. In order to invoke this program, run MULTINET:TRAP_LISTEN. It prompts for an<br />
optional file to log information to (default it the terminal) <strong>and</strong> the port number to listen on (default<br />
is 162).<br />
Disabling Traps<br />
All traps that the SNMP agent supports are initially enabled. You can disable traps by editing the<br />
configuration file. These changes take effect the next time you start the agent. Table 23-2 shows<br />
how to disable traps.<br />
Table 23-2 Disabling Traps<br />
Disable this trap... By entering...<br />
Authentication Failure no-auth-traps<br />
Link Up no-link-traps<br />
Link Down no-link-traps<br />
Note! SNMP clients can enable or disable the Authentication Failure trap while the SNMP agent is<br />
running. These clients must have WRITE community access.
Generating Traps<br />
To generate an SNMP trap, define the symbol:<br />
TRAP_GEN :== $MULTINET:TRAP_GEN<br />
Then type:<br />
$ TRAP_GEN <br />
[....]<br />
Configuring <strong>MultiNet</strong> SNMP Services<br />
Identifies the location in the MIB tree that this trap pertains to.<br />
An example would be: 1.3.6.1.4.105.3, denoting a location in<br />
<strong>Process</strong> <strong>Software</strong>'s portion of the MIB tree.<br />
Is an integer representing the generic trap value.<br />
Is an integer representing the specific trap value.<br />
Are arbitrary strings separated by spaces that are passed to the<br />
agent receiving the trap as octet strings.<br />
The TRAP_GEN program uses the trap community definitions in the MULTINET:SNMPD.CONF<br />
file to determine where to send the trap.<br />
To specify a particular ip-address for SNMP traps to orginate from put the following line in<br />
MULTINET:SNMPD.CONF<br />
HOSTID ip_address<br />
The ip_address specified is checked against those on the system when the line is parsed.<br />
SNMP Log File<br />
When the SNMP agent starts up, it creates a log file called MULTINET:SNMPSERVER.LOG. This<br />
file contains information about the activities of the SNMP agent, such as:<br />
• The time the agent starts up <strong>and</strong> shuts down.<br />
• When SMUX peers open or close a connection, <strong>and</strong> register or de-register a MIB tree.<br />
• Any errors found in the SNMP configuration file.<br />
• Any errors that occur when the agent is running.<br />
Start, Shutdown, or Reload the SNMP Configuration Without Rebooting<br />
To start, shutdown, or reload the SNMP configuration using NETCONTROL:<br />
$ MULTINET NETCONTROL SNMP START<br />
$ MULTINET NETCONTROL SNMP SHUTDOWN<br />
$ MULTINET NETCONTROL SNMP RELOAD<br />
23-13
Configuring <strong>MultiNet</strong> SNMP Services<br />
23-14<br />
<strong>MultiNet</strong> has a separate SNMP_AGENT process. Once the SNMP service is enabled via the<br />
MULTINET CONFIGURE/SERVERS comm<strong>and</strong>, the SNMP_AGENT process can be accessible<br />
via the NETCONTROL comm<strong>and</strong>s. You can also enable the SNMP service using the MULTINET<br />
CONFIGURE/MENU comm<strong>and</strong>.<br />
Performing SNMP Functions with <strong>MultiNet</strong><br />
The MULTINET SET <strong>and</strong> MULTINET SHOW comm<strong>and</strong>s accept the /SNMP_HOST qualifier for<br />
using remote host information.<br />
Table 23-3 shows qualifiers you can use with the /SNMP_HOST qualifier in MULTINET SHOW<br />
comm<strong>and</strong>s to obtain information from remote SNMP agents.<br />
Table 23-3 MULTINET SHOW /SNMP Comm<strong>and</strong>s<br />
Qualifier Description<br />
/COMMUNITY_NAME=”string” Specifies the community name string sent with this<br />
comm<strong>and</strong> to the remote host. The default is public.<br />
Note! The case of the community name must match<br />
what is specified in SNMPD.CONF. The name<br />
must be specified in quotes unless it is all<br />
uppercase.<br />
/CONNECTIONS[=ALL] Displays network connections. If you use the =ALL<br />
argument, MULTINET SHOW also displays sockets on<br />
which servers are listening.<br />
/ARP Displays the Ethernet Address Resolution Protocol tables.<br />
This qualifier (or /ROUTE) must precede all other<br />
qualifiers.<br />
/MIB_VAR[=variable_name] Displays the value of the SNMP MIB variable,<br />
variable_name. The value can be any MIB-II variable<br />
described in RFC-1213. If you omit variable_name, all<br />
MIB variables are displayed.<br />
/ROUTE Displays routing information for the IP protocol. This<br />
qualifier (or /ARP) must precede all other qualifiers.<br />
/STATISTICS[=protocol] Causes MULTINET SHOW to display either network<br />
interface statistics or protocol statistics or both, as defined<br />
in MIB-II. If you specify /STATISTICS without a value,<br />
INTERFACE statistics are displayed.
Chapter 24<br />
Configuring <strong>MultiNet</strong> Kerberos Authentication<br />
Service<br />
This chapter provides information about configuring <strong>and</strong> managing a secure network using the<br />
<strong>MultiNet</strong> Kerberos Authentication Service.<br />
You can use <strong>MultiNet</strong> Kerberos with the TELNET, RCP, RLOGIN, RSHELL, <strong>and</strong> POP3 services.<br />
Underst<strong>and</strong>ing Kerberos Administering Kerberos<br />
Hardware Requirements Using Cross-Realm Authentication<br />
Configuring Kerberos Configuring Secondary KDCs<br />
Testing Your Configuration Determining How a User Has Logged In<br />
Copying the Database to Other Hosts<br />
Note! This chapter applies to Kerberos V4 only. Kerberos V5 database <strong>and</strong> utilities support requires<br />
the installation of the Kerberos for OpenVMS product, based on MIT Kerberos V5 Release<br />
1.2.6. Kerberos V5 application support is currently available for SSH <strong>and</strong> Telnet only.<br />
Underst<strong>and</strong>ing Kerberos<br />
<strong>MultiNet</strong> Authentication Service is an implementation of the Kerberos 1 distributed authentication<br />
system developed at Project Athena 2 at MIT, <strong>and</strong> is installed automatically with <strong>MultiNet</strong>.<br />
Note! TELNET authentication support is based on a draft st<strong>and</strong>ard that is subject to change. However,<br />
if the st<strong>and</strong>ard changes, updates will be provided to <strong>MultiNet</strong> Authentication Services to<br />
1. Kerberos is a trademark of the Massachusetts Institute of Technology. In ancient mythology,<br />
Kerberos was the three-headed dog that guarded the gates of Hades.<br />
2. Project Athena is a trademark of the Massachusetts Institute of Technology (MIT).<br />
24-1
Configuring <strong>MultiNet</strong> Kerberos Authentication Service<br />
24-2<br />
conform to the latest version of the st<strong>and</strong>ard.<br />
Kerberos provides network security by regulating user access to networking services. <strong>MultiNet</strong><br />
Kerberos consists of administrative utilities <strong>and</strong> database creation <strong>and</strong> maintenance tools.<br />
One host is designated the primary KDC (Kerberos Distribution Center) on which the<br />
authentication database resides. Other hosts, called secondary KDCs, can contain duplicates of the<br />
database for backup purposes. If no reply is obtained from the primary KDC, one of the secondary<br />
KDCs is consulted.<br />
In Kerberos, the administrative name for a site is realm; for example, FLOWERS.COM. The realm<br />
name is case-sensitive <strong>and</strong> is usually expressed in uppercase.<br />
Kerberos provides a secure way to prove a user's identity across an unsecure network. A server<br />
makes authorization decisions based on the user's identity. Kerberos is an authentication system,<br />
not an authorization system, although authentication is a prerequisite for authorization.<br />
Kerberos Tickets<br />
Kerberos security works by granting users a permit to access a service. This permit is called a<br />
ticket. A ticket provides access to a single server from a single client host <strong>and</strong> has a default duration<br />
of eight hours. The duration can be set from 5 minutes to 21 hours. When this time period elapses,<br />
attempts to access servers fail; users must request new tickets.<br />
When users log in, they run the MULTINET KERBEROS INIT utility, supplying their user names<br />
<strong>and</strong> Kerberos passwords. All necessary tickets are then issued. Before logging out, users run<br />
MULTINET KERBEROS DESTROY to release any remaining tickets. At any time during a login<br />
session, users can:<br />
• Obtain ticket status with the MULTINET KERBEROS LIST utility<br />
• Acquire new tickets with MULTINET KERBEROS INIT<br />
• Change their passwords with MULTINET KERBEROS PASSWORD<br />
• Release old tickets with MULTINET KERBEROS DESTROY<br />
A ticket contains:<br />
• The name of the server<br />
• The name of the client (the user)<br />
• The Internet address of the user's system<br />
• A timestamp, the duration for which the ticket is valid (called the lifetime)<br />
• A session key<br />
Once a ticket is issued, it can be used repeatedly until it expires. A user's tickets are kept in the<br />
MULTINET_KRBTKT_username logical name table.<br />
A detailed description of the Kerberos protocol is beyond the scope of this chapter. In short,<br />
obtaining a ticket involves sending encrypted messages between the client, the KDC, <strong>and</strong> the<br />
application server. This protocol allows a server to be sure the client has the correct password<br />
without revealing the password to intruders on the network.
Kerberos Database Overview<br />
Configuring <strong>MultiNet</strong> Kerberos Authentication Service<br />
Users are authenticated through the Kerberos database, which contains user names <strong>and</strong> encrypted<br />
passwords. Before creating the Kerberos database, the system manager assigns the Kerberos master<br />
password (often called the master key.)<br />
The master key controls access to all aspects of the authentication system <strong>and</strong> must be kept<br />
confidential <strong>and</strong> secure. All other passwords in the Kerberos system are encrypted using the master<br />
key as the encryption key.<br />
Hardware Requirements<br />
Kerberos requires a secure system on which the Kerberos authentication database resides. <strong>Process</strong><br />
<strong>Software</strong> recommends that this system be physically secure, dedicated, not accessible over the<br />
network via NFS or the VMScluster disk-sharing protocol, <strong>and</strong> not performing paging over the<br />
network.<br />
Kerberos files should be backed up regularly. Backup media contain copies of the KDC database<br />
<strong>and</strong> master key <strong>and</strong> should be secured.<br />
Configuring Kerberos<br />
Kerberos configuration consists of the following steps:<br />
1 Creating the Kerberos configuration file (see the Step 1: Creating the Kerberos Configuration<br />
File section).<br />
2 If necessary, creating a special file that matches domain names to realm names (see the Step 2:<br />
Creating the MULTINET:KERBEROS.REALMS File section).<br />
3 Initializing the Kerberos database (see the Step 3: Initializing the Kerberos Database section).<br />
4 Storing the database master key in a protected master key file (see the Step 4: Storing the Master<br />
Key section).<br />
5 Adding users <strong>and</strong> services to the database (see the Step 5: Adding Users <strong>and</strong> Servers to the<br />
Principal Database section).<br />
6 Creating a protected key file for each server that will run Kerberos-modified network server<br />
programs (see the Step 6: Creating Protected Key Files section).<br />
7 Moving the protected key file to each server (see the Step 7: Moving the Protected Key Files<br />
section).<br />
8 If necessary, changing the Kerberos port designation (see the Step 8: Changing the Kerberos<br />
Port Designation section).<br />
9 Enabling the Kerberos server (see the Step 9: Enabling the Kerberos Server section).<br />
When these steps are completed, you must test the configuration, Then, you can copy the database<br />
to other hosts (secondary KDCs), if necessary.<br />
Step 1: Creating the Kerberos Configuration File<br />
Create the MULTINET:KERBEROS.CONFIGURATION file with WORLD READ (W:R)<br />
permission to specify the local realm <strong>and</strong> identify your local ticket servers, <strong>and</strong> any other realms in<br />
24-3
Configuring <strong>MultiNet</strong> Kerberos Authentication Service<br />
24-4<br />
which users need to be authenticated. The following is an example of a<br />
MULTINET:KERBEROS.CONFIGURATION file:<br />
FLOWERS.COM<br />
FLOWERS.COM holmes.flowers.com admin server<br />
FLOWERS.COM brown.flowers.com<br />
ABC.COM kerberos.abc.com admin server<br />
ATHENA.MIT.EDU kerberos.mit.edu admin server<br />
ATHENA.MIT.EDU kerberos-1.mit.edu<br />
In this example:<br />
• The first line defines the local realm, FLOWERS.COM. The local realm is often the local<br />
domain name, as in this example.<br />
Note! In this example, the realm name is shown in uppercase, which is the usual convention <strong>and</strong> is<br />
recommended. Because realm names are case-sensitive, however, be sure to list your realm<br />
name in the proper case.<br />
• Subsequent lines that begin with FLOWERS.COM define local KDCs. Here,<br />
holmes.flowers.com is the name of the system acting as the KDC, the secure host that acts as the<br />
ticket server <strong>and</strong> contains the Kerberos principal database. The admin server argument<br />
designates a master KDC server, which services ticket requests, as well as requests for<br />
modifications to the Kerberos database (such as a user's password change requests).<br />
Note! Use "admin server" for the primary KDC only. For secondary KDCs, omit this parameter. See<br />
the Configuring Secondary KDCs section.<br />
• All other lines define ticket servers in foreign realms, in which users can remotely be<br />
authenticated. These servers are also used for cross-realm authentication (see the Using Cross-<br />
Realm Authentication section).<br />
Propagate any changes you make to the Kerberos configuration file on the master KDC to all<br />
other servers so all servers contain the same information.<br />
Step 2: Creating the MULTINET:KERBEROS.REALMS File<br />
If the realm name in the MULTINET:KERBEROS.CONFIGURATION file is different from the<br />
domain name of this system, create a MULTINET:KERBEROS.REALMS file. This file consists of<br />
lines listing fully qualified domain names followed by their realm names. For example:<br />
whorfin.flowers.com FOO.COM<br />
In this case, whorfin.flowers.com is the domain name of this host, <strong>and</strong> FOO.COM is the realm<br />
name specified in the MULTINET:KERBEROS.CONFIGURATION file.<br />
An entire domain can also be mapped to a specific realm with lines such as:<br />
.mit.edu ATHENA.MIT.EDU
Configuring <strong>MultiNet</strong> Kerberos Authentication Service<br />
This causes domain names that end in ".mit.edu," such as "buckaroo.mit.edu," to be considered part<br />
of the ATHENA.MIT.EDU realm.<br />
Step 3: Initializing the Kerberos Database<br />
Initialize the Kerberos database on a KDC by entering:<br />
$ MULTINET KERBEROS DATABASE INIT<br />
Realm name [REALM]: FLOWERS.COM<br />
You will be prompted for the database Master Password.<br />
It is important that you NOT FORGET this password.<br />
Kerberos master key: password<br />
Verifying, please re-enter Kerberos master key: password<br />
$<br />
Perform this step only on a host acting as a KDC. This comm<strong>and</strong> prompts you for the local realm<br />
name (FLOWERS.COM in this example) <strong>and</strong> the database master password (master key). If you<br />
ever need to run MULTINET KERBEROS DATABASE INIT again on a system that has already<br />
been configured for Kerberos, a procedure is provided in the comm<strong>and</strong> page for this utility in the<br />
<strong>MultiNet</strong> for OpenVMS <strong>Administrator's</strong> Reference.<br />
Note! The master password key is any string meeting the guidelines of an OpenVMS-style password,<br />
except it is case-sensitive <strong>and</strong> can be up to 64 characters in length. Protect the master key as<br />
carefully as you would the SYSTEM password.<br />
After informational messages appear, the database is initialized <strong>and</strong> resides in the system-specific<br />
part of the MULTINET directory. The database files are named KERBEROS_PRINCIPAL.* <strong>and</strong><br />
are only readable by SYSTEM. Do not change the protections on these files; doing so may<br />
compromise the security of your KDC.<br />
Note! The database must reside on a local disk on the KDC host. A database on a network disk<br />
cannot be made sufficiently secure. For this reason, the KDC host should be dedicated solely<br />
for this use <strong>and</strong> should not have remote login servers enabled.<br />
Step 4: Storing the Master Key<br />
Run MULTINET KERBEROS DATABASE STASH to store the database master key in a file the<br />
KDC reads when it starts up, as shown here:<br />
$ MULTINET KERBEROS DATABASE STASH<br />
Kerberos master key: password<br />
Verifying, please re-enter Kerberos master key: password<br />
Current Kerberos master key version is 1.<br />
Perform this comm<strong>and</strong> only on a host acting as a KDC. You are prompted for the database master<br />
key. When this utility completes, Kerberos stores the master key in the<br />
MULTINET:KERBEROS.MASTER_KEY file, <strong>and</strong> protects the file from world access. Do not<br />
change the protections on this file; doing so may compromise the security of your KDC.<br />
24-5
Configuring <strong>MultiNet</strong> Kerberos Authentication Service<br />
Step 5: Adding Users <strong>and</strong> Servers to the Principal Database<br />
24-6<br />
Edit the principal database to add users <strong>and</strong> servers by entering the following comm<strong>and</strong> on the<br />
primary KDC for a given realm:<br />
$ MULTINET KERBEROS DATABASE EDIT /NOPROMPT<br />
Table 24-1 explains the prompts shown in the following examples.<br />
The first example adds a record for the user "john." Each user is identified by a unique single-word<br />
principal name, which is usually the user name.<br />
$ MULTINET KERBEROS DATABASE EDIT /NOPROMPT<br />
Opening database . . .<br />
Current Kerberos master key version is 1.<br />
Previous of default values are in [brackets],<br />
enter return to leave the same, or new value.<br />
Principal name: john<br />
Instance: RETURN<br />
, Create [y] ? RETURN<br />
Principal: john, Instance: , kdc_key_ver: 1<br />
New Password: password<br />
Verifying, please re-enter New Password: password<br />
Principal's new key version = 1<br />
Expiration date (enter yyyy-mm-dd) [ 2010-12-31 ] ? RETURN<br />
Max ticket lifetime (*5 minutes) [ 255 ] ? RETURN<br />
Attributes [ 0 ] ? RETURN<br />
Edit O.K.<br />
Principal name: RETURN<br />
$<br />
The second example adds a record for the class of services "rcmd," which is associated with the<br />
host "whorfin."<br />
$ MULTINET KERBEROS DATABASE EDIT /NOPROMPT<br />
Opening database . . .<br />
Current Kerberos master key version is 1.<br />
Previous of default values are in [brackets],<br />
enter return to leave the same, or new value.<br />
Principal name: rcmd<br />
Instance: whorfin<br />
, Create [y] ? RETURN<br />
Principal: rcmd, Instance: whorfin, kdc_key_ver: 1<br />
New Password: RANDOM<br />
R<strong>and</strong>om password [y] ? RETURN<br />
Principal's new key version = 1<br />
Expiration date (enter yyyy-mm-dd) [ 2003-01-01 ] ? RETURN<br />
Max ticket lifetime (*5 minutes) [ 255 ] ? RETURN<br />
Attributes [ 0 ] ? RETURN<br />
Edit O.K.<br />
Principal name: RETURN<br />
$
Configuring <strong>MultiNet</strong> Kerberos Authentication Service<br />
General Hints for Adding Users <strong>and</strong> Services to the Database<br />
When adding user information, enter the user name as the principal name; <strong>and</strong> leave the instance<br />
blank (press RETURN at the prompt). When adding a server entry:<br />
• Enter the class name used by the service as the principal name; for example, the "rcmd" is the<br />
class name for the RCP, RLOGIN, RSHELL, <strong>and</strong> TELNET services.<br />
• For the instance value, enter the short form name of the server host, such as "whorfin" in the<br />
previous example. Do not use the fully qualified domain name.<br />
• Always specify RANDOM at the "New Password:" prompt. Because this password is never<br />
entered by a system manager, the password should be r<strong>and</strong>om to provide additional security.<br />
When adding either a user entry or a service entry:<br />
• Note that both the principal <strong>and</strong> instance names are case-sensitive.<br />
• Specify the /NOPROMPT qualifier at the end of the comm<strong>and</strong> to cause the master key to be read<br />
from the master key file. If you do not enter this qualifier, you are prompted for the master key<br />
password.<br />
• If a principal does not exist, you are prompted to create it. If you create a principal, you must<br />
supply a password.<br />
• To exit, press RETURN at a principal name prompt.<br />
• KERBEROS DATABASE EDIT takes the values to use as defaults from the "default" principal<br />
in the database. By specifying "default" as the principal name with KERBEROS DATABASE<br />
EDIT, any subsequent values you enter for the prompts that follow become the new default<br />
values the next time you use KERBEROS DATABASE EDIT. To make these values take effect,<br />
exit the utility, then re-invoke it. Any new principals created will use the new values provided by<br />
the default principal.<br />
KERBEROS DATABASE EDIT Prompts<br />
Table 24-1 explains the prompts displayed by the KERBEROS DATABASE EDIT comm<strong>and</strong>.<br />
Table 24-1 KERBEROS DATABASE EDIT Prompts<br />
Prompt Meaning<br />
Enter Kerberos<br />
master key:<br />
The encryption key for the Kerberos database. This is the master password<br />
for Kerberos administration <strong>and</strong> must be safeguarded. This is a st<strong>and</strong>ard<br />
VMS-style password except the value is case-sensitive <strong>and</strong> can be up to 64<br />
characters in length.<br />
Principal name: Case-sensitive value, generally a user name if you are adding a user to the<br />
database, or the name of a principal used by a Kerberized server if you are<br />
entering a class of service. Exit the utility by pressing RETURN at this<br />
prompt.<br />
24-7
Configuring <strong>MultiNet</strong> Kerberos Authentication Service<br />
Step 6: Creating Protected Key Files<br />
24-8<br />
Table 24-1 KERBEROS DATABASE EDIT Prompts (Continued)<br />
Prompt Meaning<br />
Instance: A case-sensitive string value. When adding users to the database, enter an<br />
empty string (press RETURN.) When associating a service type with a host,<br />
the instance is the host name. If the principal name is for a new user or<br />
application, the next prompt is "Not found, Create [y] ?". Enter y to create<br />
the principal entry, or n to enter another principal name.<br />
Change password: Change the password for a user or service. This prompt only appears if you<br />
specified an existing principal or instance name. If you enter y, you are<br />
prompted for the new password. If you enter n, you are prompted for the<br />
Expiration date.<br />
New Password: Enter a new password. You can enter RANDOM for the password to<br />
indicate that the password is known only within the software. This feature<br />
adds additional security.<br />
Note! You must enter RANDOM in all uppercase. The only use for the<br />
RANDOM password feature with user accounts is to prevent the<br />
user from accessing the Kerberos system. If you did not select the<br />
RANDOM feature, <strong>and</strong> chose to change the password, enter a<br />
new password. You are prompted to verify the password you<br />
enter.<br />
Expiration date: The date on which a user can no longer access the system, or the date an<br />
application is no longer valid.<br />
Max ticket<br />
lifetime:<br />
The maximum lifetime in minutes for a user's ticket. This can be any value<br />
from 5 to 1275 minutes (21 hours, 15 minutes).<br />
Attributes: The valid range of this value is 0 to 65535, inclusive. The meaning of this<br />
value is system- <strong>and</strong> application-dependent. <strong>MultiNet</strong> applications<br />
currently do not use this value.<br />
Generate a protected key file on the KDC for any host on which you want to run a "Kerberized"<br />
application server. Before performing this step, make sure you include the host name in the<br />
Kerberos database. (For the purposes of this discussion, it is assumed that the database has been<br />
edited to contain two principals, both of which have the name "rcmd", one with the instance<br />
"whorfin" <strong>and</strong> the second with the instance "holmes.")<br />
Use the following comm<strong>and</strong> to generate a protected server key file:<br />
$ MULTINET KERBEROS DATABASE SRVTAB /NOPROMPT server_name<br />
Replace server_name with the name of the host on which you are creating the KERBEROS.SRVTAB<br />
file. To specify server_name as a case-sensitive name, use quotation marks. Otherwise, the
Configuring <strong>MultiNet</strong> Kerberos Authentication Service<br />
MULTINET KERBEROS DATABASE SRVTAB comm<strong>and</strong> converts server_name to lowercase<br />
letters.<br />
Note! server_name is not a fully qualified domain name, <strong>and</strong> does not contain dots in its name. Enter<br />
/NOPROMPT with the comm<strong>and</strong> before the server name <strong>and</strong> after the "SRVTAB" keyword to<br />
suppress the master key prompt.<br />
The created file name has the format:<br />
server_name-NEW-KERBEROS.SRVTAB<br />
For example, to create the encrypted key file for the server host "whorfin," enter the following<br />
comm<strong>and</strong>. This comm<strong>and</strong> creates the WHORFIN-NEW-KERBEROS.SRVTAB file:<br />
$ MULTINET KERBEROS DATABASE SRVTAB /NOPROMPT WHORFIN<br />
Step 7: Moving the Protected Key Files<br />
After you create a protected key file for a server host, move it to the system-specific <strong>MultiNet</strong><br />
directory on the specified server_name, renaming it to MULTINET:KERBEROS.SRVTAB. Protect<br />
the file from any world access.<br />
Note! The contents of a server's KERBEROS.SRVTAB file are sensitive. A stolen<br />
KERBEROS.SRVTAB file could be used to impersonate a server so that a client doing mutual<br />
authentication could be fooled into believing that the fake server is the real one. If you do not<br />
have an encrypted data transfer facility, KERBEROS.SRVTAB files should be taken to the<br />
server hosts via tape or other nonbroadcast medium, <strong>and</strong> protected against any world access.<br />
Step 8: Changing the Kerberos Port Designation<br />
You can configure a KDC to listen on specific ports for ticket requests. If you set an explicit port<br />
number, the KDC listens only to that port. If you do not set a port number, both ports 88 <strong>and</strong> 750 are<br />
used. For example, to make the KDC only listen to port 88, configure Kerberos as follows:<br />
$ MULTINET CONFIGURE /SERVER<br />
<strong>MultiNet</strong> Server Configuration Utility 5.4(nnn)<br />
[Reading in configuration from MULTINET:SERVICES.MASTER_SERVER]<br />
SERVER-CONFIG>SELECT KERBEROS<br />
[The Selected SERVER entry is now KERBEROS]<br />
SERVER-CONFIG>SET SOCKET-PORT 88<br />
[KERBEROS socket port is 88]<br />
SERVER-CONFIG>SHOW/FULL<br />
Service "KERBEROS":<br />
UDP socket (AF_INET,SOCK_DGRAM), Port 88<br />
INIT() = Merge_Image<br />
Program = "MULTINET:LOADABLE_KERBEROS"<br />
SERVER-CONFIG>EXIT<br />
24-9
Configuring <strong>MultiNet</strong> Kerberos Authentication Service<br />
Step 9: Enabling the Kerberos Server<br />
24-10<br />
On a primary KDC, enable the Kerberos server <strong>and</strong> the administration server. In a VMScluster, use<br />
the <strong>MultiNet</strong> Network Configuration Utility (NET-CONFIG) SET ENABLED-NODES comm<strong>and</strong><br />
to control the node(s) on which the Kerberos <strong>and</strong> administration servers run. To enable these<br />
services, enter:<br />
$ MULTINET CONFIGURE /SERVERS<br />
<strong>MultiNet</strong> Server Configuration Utility 5.4(nnn)<br />
[Reading in symbols from SERVER image MULTINET:SERVER.EXE]<br />
[Reading in configuration from MULTINET:SERVICES.MASTER_SERVER]<br />
SERVER-CONFIG>ENABLE KERBEROS<br />
SERVER-CONFIG>ENABLE KADMIN<br />
SERVER-CONFIG>RESTART<br />
Configuration modified, do you want to save it first ? [YES] RETURN<br />
SERVER-CONFIG>EXIT<br />
[Writing configuration to MULTINET_COMMON_ROOT:[MULTINET]<br />
SERVICES.MASTER_SERVER]<br />
$<br />
On a secondary KDC, enable only the KERBEROS server, not the KADMIN server.<br />
On an application server, enter the following comm<strong>and</strong>s to enable the Kerberized services. Enable<br />
Kerberized RLOGIN by enabling the KLOGIN service, <strong>and</strong> enable both the Kerberized RCP <strong>and</strong><br />
RSHELL services by enabling KSHELL. The comm<strong>and</strong>s are:<br />
$ MULTINET CONFIGURE /SERVERS<br />
<strong>MultiNet</strong> Server Configuration Utility 5.4(nnn)<br />
[Reading in symbols from SERVER image MULTINET:SERVER.EXE]<br />
[Reading in configuration from MULTINET:SERVICES.MASTER_SERVER]<br />
SERVER-CONFIG>ENABLE KLOGIN<br />
SERVER-CONFIG>ENABLE KSHELL<br />
SERVER-CONFIG>RESTART<br />
Configuration modified, do you want to save it first ? [YES] RETURN<br />
SERVER-CONFIG>EXIT<br />
[Writing configuration to MULTINET_COMMON_ROOT:[MULTINET]<br />
SERVICES.MASTER_SERVER]<br />
$<br />
Kerberos is now configured.<br />
Testing Your Configuration<br />
If you have not done so already, create an entry in the database for yourself using the MULTINET<br />
KERBEROS DATABASE EDIT comm<strong>and</strong>. You can enter the following comm<strong>and</strong> to obtain your<br />
initial ticket:<br />
$ MULTINET KERBEROS INIT<br />
When you are prompted for a password, enter the password you specified when you created the<br />
database entry.
Configuring <strong>MultiNet</strong> Kerberos Authentication Service<br />
Alternately, you can authenticate yourself using a principal name other than your current login<br />
name by entering, for example:<br />
$ MULTINET KERBEROS INIT /USERNAME=FRED<br />
Note! If you use the /USERNAME qualifier with MULTINET KERBEROS INIT, you must also use the<br />
/USERNAME qualifier with MULTINET KERBEROS PASSWORD.<br />
You should then be able to use RLOGIN to log into a system running Kerberos on which you have<br />
an account. For example, to log into WHORFIN, specify the comm<strong>and</strong>:<br />
$ RLOGIN /AUTH WHORFIN /USER=FRED<br />
The /AUTH qualifier is the shortened form of /AUTHENTICATION=KERBEROS. (Because no<br />
other options exist for the /AUTHENTICATION qualifier, specifying /AUTH without assigning a<br />
value has the same effect.) If you are using a principal name different from the OpenVMS user<br />
name under which you are logged in, use the /USERNAME qualifier with RLOGIN.<br />
Kerberized RSHELL should also function properly, as in this example:<br />
$ RSHELL /AUTH WHORFIN SHOW USERS<br />
You can use an Ethernet protocol analyzer, such as TCPDUMP, to look at the differences between<br />
the protocols used by RLOGIN <strong>and</strong> RLOGIN /AUTH. Refer to the <strong>MultiNet</strong> for OpenVMS<br />
<strong>Administrator's</strong> Reference for more information on TCPDUMP.<br />
Note! For <strong>MultiNet</strong> V4.1 <strong>and</strong> later, TCPDUMP can be invoked on the same host that you want to<br />
analyze.<br />
Copying the Database to Other Hosts<br />
Propagate the database by writing the contents of the Kerberos database to an ASCII text file. You<br />
can transport this text file to another KDC <strong>and</strong> reload it. This process is useful for creating<br />
secondary KDCs <strong>and</strong> for the interchange between different vendors' Kerberos implementations <strong>and</strong><br />
different platforms. Refer to Configuring Secondary KDCs for more information about secondary<br />
KDCs. Passwords are encrypted <strong>and</strong> stored in the file as ASCII text.<br />
Administering Kerberos<br />
After creating the Kerberos database, you may need to perform the following tasks during normal<br />
Kerberos usage:<br />
• Deciding whether users can obtain tickets from alternate realms (see the Obtaining Tickets from<br />
Alternate Realms section).<br />
• Editing or deleting user principal entries (see the Deleting <strong>and</strong> Editing Principal Entries<br />
section).<br />
• Adding new servers to the database (see the Adding Entries for Application Servers section).<br />
• Backing up the Kerberos database (see the Backing Up the Database section).<br />
• Adding new users to the database (see the Step 5: Adding Users <strong>and</strong> Servers to the Principal<br />
24-11
Configuring <strong>MultiNet</strong> Kerberos Authentication Service<br />
24-12<br />
Database section).<br />
Obtaining Tickets from Alternate Realms<br />
You can configure Kerberos to allow a user to obtain a ticket-granting ticket from another realm,<br />
which grants access to the hosts in that realm. For example, if the local realm is BANZAI.EDU,<br />
<strong>and</strong> the other realm is FLOWERS.COM, a user on a host in BANZAI.EDU enters:<br />
$ MULTINET KERBEROS INIT/REALM=FLOWERS.COM<br />
The user could then use the obtained ticket to access hosts in the FLOWERS.COM realm.<br />
To permit this type of access, add information in the local KERBEROS.CONFIGURATION file to<br />
identify the KDC hosts in the foreign realm, such as:<br />
FLOWERS.COM holmes.flowers.com admin server<br />
The complete BANZAI.EDU local KERBEROS.CONFIGURATION file might be:<br />
BANZAI.EDU<br />
BANZAI.EDU buckaroo.banzai.edu admin server<br />
FLOWERS.COM holmes.flowers.com admin server<br />
Deleting <strong>and</strong> Editing Principal Entries<br />
To delete or edit principal names, you must dump the complete database into an ASCII text file,<br />
edit the file, <strong>and</strong> reload the database from the ASCII file. See the Configuring Secondary KDCs<br />
section for information about the KERBEROS DATABASE DUMP <strong>and</strong> KERBEROS DATABASE<br />
LOAD comm<strong>and</strong>s.<br />
To prevent users or applications from being authenticated by Kerberos, use MULTINET<br />
KERBEROS DATABASE EDIT to change their passwords.<br />
Adding Entries for Application Servers<br />
Use the MULTINET KERBEROS DATABASE EDIT utility to add entries for servers. When<br />
adding servers, the principal name is the service class; for example, the "rcmd" class of service is<br />
used by TELNET <strong>and</strong> all of the "R" services.<br />
The instance name is the host name of the server on which the service runs. The password is<br />
RANDOM. See the Step 5: Adding Users <strong>and</strong> Servers to the Principal Database section for an<br />
example of adding a service.<br />
When you add a new application server to a Kerberos system, <strong>and</strong> after adding a principal to the<br />
database, run the MULTINET KERBEROS DATABASE SRVTAB utility to create a server<br />
password file for the remote system. You must move this file to the remote system so users can log<br />
into the server.<br />
For details about using MULTINET KERBEROS DATABASE EDIT, see the Step 5: Adding Users<br />
<strong>and</strong> Servers to the Principal Database section <strong>and</strong> the Step 6: Creating Protected Key Files section.
Configuring <strong>MultiNet</strong> Kerberos Authentication Service<br />
Note! The transfer of the file created by MULTINET KERBEROS DATABASE SRVTAB must be kept<br />
secure <strong>and</strong> protected. For example, the file should not be transferred over the network in<br />
unencrypted form, but rather by tape or floppy disk.<br />
Backing Up the Database<br />
The MULTINET KERBEROS DATABASE DUMP <strong>and</strong> MULTINET KERBEROS DATABASE<br />
LOAD utilities are provided for maintaining the database.<br />
These utilities dump the contents of the Kerberos database into an ASCII text file <strong>and</strong> reload it.<br />
Once the Kerberos database is configured <strong>and</strong> all user <strong>and</strong> server information is added, the entire<br />
database can be written as an ASCII text file for transfer to another system <strong>and</strong> for backup. See the<br />
Configuring Secondary KDCs section for more information about the DUMP <strong>and</strong> LOAD<br />
comm<strong>and</strong>s.<br />
Using Cross-Realm Authentication<br />
Cross-realm authentication permits users to log into hosts in a foreign realm even though their<br />
initial tickets are from the local realm. This is accomplished by cooperation between the KDCs in<br />
the local <strong>and</strong> remote realms. Cross-realm authentication depends on realm administrators<br />
maintaining a password for mutual access to the respective realms. An entry is added to the<br />
Kerberos database at each realm.<br />
Configuring Cross-Realm Authentication<br />
To configure cross-realm authentication:<br />
1 Create a Kerberos ticket-granting ticket by running MULTINET KERBEROS DATABASE<br />
EDIT to add principal entries to the database.<br />
a At the Principal name prompt, enter krbtgt <strong>and</strong> press RETURN.<br />
b At the Instance prompt, enter the name of the other realm. The password you enter should be<br />
previously agreed to by the administrators at each realm on which authentication occurs.<br />
2 Add an entry for each foreign realm to the MULTINET:KERBEROS.CONFIGURATION file<br />
3 Have each user who needs to access the other realm create a .KLOGIN file in the user's login<br />
directory on the remote host. An administrator in the remote realm may have to create this file if<br />
the local user cannot initially log into the remote host. A .KLOGIN file contains entries of the<br />
form:<br />
username.@local_realm_name<br />
This entry indicates to the RLOGIN, RSHELL, <strong>and</strong> TELNET servers that the user is authorized<br />
to log into an account on the remote host once the user's identity has been verified through crossrealm<br />
authentication.<br />
Note! The existence of a .KLOGIN file prevents the user from logging into an account in the user's<br />
local realm if the user name on the account is the same as the user's principal name.<br />
The cooperating KDCs must have a pair of krbtgt entries with the same password. The<br />
administrators of the two realms decide on this password <strong>and</strong> both must know it. If a pair of KDCs<br />
24-13
Configuring <strong>MultiNet</strong> Kerberos Authentication Service<br />
24-14<br />
in different realms have exchanged passwords for their ticket-getting ticket principals, the KDCs<br />
can prove their identities to one another. When a client has proved its identity to the local KDC, the<br />
client can prove its identity to the remote KDC through the chain of trust the KDCs have<br />
established.<br />
The following example shows the simplicity of cross-realm authentication.<br />
• FLOWERS.COM <strong>and</strong> BANZAI.EDU want to allow cross-realm authentication between their<br />
realms. The administrators of the two realms decide to use "yayajohn" as the password.<br />
• At FLOWERS.COM, the "krbtgt" principal, instance BANZAI.EDU, is added to the KDC<br />
database, using the "yayajohn" password. The KERBEROS.CONFIGURATION file contains<br />
this entry which identifies the KDC in the foreign realm BANZAI.EDU:<br />
BANZAI.EDU buckaroo.banzai.edu admin server<br />
• At BANZAI.EDU, the "krbtgt" principal, instance FLOWERS.COM, is added to the KDC<br />
database, using the "yayajohn" password. The KERBEROS.CONFIGURATION file contains<br />
this entry which identifies the KDC in the foreign realm FLOWERS.COM:<br />
FLOWERS.COM holmes.flowers.com admin server<br />
• John at FLOWERS.COM needs to log into the host Buckaroo at BANZAI.EDU. An account<br />
with user name JOHN is created on Buckaroo, <strong>and</strong> the following .KLOGIN file is created in<br />
JOHN's home directory on Buckaroo: john.@FLOWERS.COM<br />
This entry indicates to the RLOGIN server on Buckaroo that John (who, through cross-realm<br />
authentication, has proven himself to be the user JOHN in the realm FLOWERS.COM) is<br />
allowed to log into the account JOHN on Buckaroo. This .KLOGIN entry is required because<br />
JOHN in the realm FLOWERS.COM is not necessarily the same person as JOHN in the realm<br />
BANZAI.EDU, so permission must be explicitly granted for JOHN to log into the account in the<br />
BANZAI.EDU realm.<br />
Configuring Secondary KDCs<br />
A secondary KDC provides a backup if the primary KDC becomes unavailable for any reason.<br />
Clients can be configured so that if no reply is obtained from the primary KDC, a secondary KDC<br />
is consulted.<br />
The secondary KDC is initialized like a primary KDC (using MULTINET KERBEROS<br />
DATABASE INITIALIZE), but instead of populating the database with the MULTINET<br />
KERBEROS DATABASE EDIT comm<strong>and</strong>, the database is copied from the primary KDC.<br />
On the primary KDC, store the database by entering:<br />
$ MULTINET KERBEROS DATABASE DUMP filename<br />
Note! Even though passwords are not recognizable without the master key, unencrypted transmission<br />
of the dump file (using FTP, for example) can compromise network security. Knowledge of the<br />
names of principals is, in itself, sensitive information that would be valuable to an intruder.<br />
If the main intent of using Kerberos is to protect the internal system from outside intruders, it
Configuring <strong>MultiNet</strong> Kerberos Authentication Service<br />
may be reasonably safe to transfer the dump file on the local network without encryption.<br />
For the highest level of security, you should store the dump file on a removable disk or tape <strong>and</strong><br />
physically transport the media to the other host or use encrypted file transfer (not supported by<br />
<strong>MultiNet</strong>).<br />
On the secondary KDC, reload the ASCII text file <strong>and</strong> create a new database by entering:<br />
$ MULTINET KERBEROS DATABASE LOAD filename<br />
On hosts running the UNIX Operating System, log in as root <strong>and</strong> enter:<br />
# kdb_util load filename<br />
Each host that can act as a client (for utilities like TELNET) should add have a line in its<br />
KERBEROS.CONFIGURATION file that lists the secondary as a KDC for the local realm, but<br />
does not include "admin server" because that should only be included for primary KDCs. An<br />
example of an entry in the configuration file is:<br />
FLOWERS.COM<br />
FLOWERS.COM john.flowers.com admin server<br />
FLOWERS.COM johnjohn.flowers.com<br />
Determining How a User Has Logged In<br />
You can add the following DCL comm<strong>and</strong>s to the SYS$SYLOGIN.COM file to determine if a user<br />
has logged in using Kerberos:<br />
$ VIAKERB = F$GETDVI("TT","TT_ACCPORNAM")<br />
$ IF F$LOCATE("/Auth",VIAKERB) .NE. F$LENGTH(VIAKERB) THEN -<br />
_$ WRITE SYS$OUTPUT "Logged-in with strong authentication."<br />
These comm<strong>and</strong>s display the message in the last line if the user logs in using Kerberized TELNET<br />
or RLOGIN.<br />
Note! All quoted text in these comm<strong>and</strong>s is case-sensitive.<br />
The TT_ACCPORNAM variable only includes the /AUTH indicator if the INCLUDE-<br />
AUTHENTICATION-INDICATION parameter is set on the TELNET <strong>and</strong> RLOGIN services. To<br />
set it:<br />
$ MULTINET CONFIGURE /SERVER<br />
<strong>MultiNet</strong> Server Configuration Utility 5.4(nnn)<br />
[Reading in configuration from MULTINET:SERVICES.MASTER_SERVER]<br />
SERVER-CONFIG>SEL TELNET<br />
[The Selected SERVER entry is now TELNET]<br />
SERVER-CONFIG>SET PARAMETER<br />
Delete parameter "include-port-number" ? [NO] RETURN<br />
Delete parameter "include-authentication-indication" ? [NO] RETURN<br />
24-15
You can now add new parameters for TELNET. An empty line terminates.<br />
Add Parameter: INCLUDE-AUTHENTICATION-INDICATION<br />
Add Parameter: RETURN<br />
[Service specific parameters for TELNET changed]<br />
SERVER-CONFIG>EXIT<br />
After adding the parameter, restart the <strong>MultiNet</strong> Server:<br />
$ @MULTINET:START_SERVER
Chapter 25<br />
X11-Gateway Configuration<br />
The <strong>MultiNet</strong> X11-Gateway program provides X (X Window System) connectivity between a<br />
DECnet-only host <strong>and</strong> an IP-only host by a <strong>MultiNet</strong> node as an application gateway. The X11-<br />
Gateway is bidirectional; it functions as a gateway from a DECnet-only X client to an IP-only X<br />
server, or vice versa.<br />
The gateway node requires <strong>MultiNet</strong> <strong>and</strong> DECnet software only. There is no requirement for the<br />
gateway to be running any X software. The gateway software can support multiple X Windows<br />
connections simultaneously.<br />
Concepts X11-Gateway Security<br />
Allowing an IP Client Access to a DECnet Server X11-Gateway Debugging<br />
Allowing a DECnet Client Access to an IP Server<br />
Concepts<br />
Before configuring the X11-Gateway, be sure you underst<strong>and</strong> the following terms:<br />
Client The node executing the X application<br />
Gateway The node connected to an IP network <strong>and</strong> a DECnet network. Information from<br />
the client on one network is passed through the gateway to the server on the other<br />
network.<br />
Server The node running the X server software. (Typically a host with a mouse,<br />
keyboard, <strong>and</strong> at least one bit-mapped screen.)<br />
Server<br />
number<br />
A unique number identifying the X11-Gateway to <strong>MultiNet</strong>, DECnet, <strong>and</strong> the X<br />
software on the client <strong>and</strong> server nodes. Each configured gateway is assigned a<br />
unique server number by the system manager.<br />
25-1
X11-Gateway Configuration<br />
25-2<br />
To avoid conflicts with current <strong>and</strong> future versions of DECwindows software, use numbers<br />
beginning with 10 <strong>and</strong> increment for each new gateway. For example, assign the number 10 to the<br />
first X11-Gateway, the number 11 to the second, <strong>and</strong> so on. As you remove X11-Gateways from the<br />
system, you can reuse their server numbers.<br />
Allowing an IP Client Access to a DECnet Server<br />
To configure the X11-Gateway host to allow an IP client access to a DECnet server:<br />
1 Choose an X11-Gateway server number between 10 <strong>and</strong> 999.<br />
2 Create a TCP port number by adding 6000 to the server number. For example, if the server<br />
number is 13, the TCP port number is 6013. TCP port 6000 is used by DECwindows servers.<br />
Select port numbers starting at 6010 to avoid conflicts with DECwindows.<br />
3 Add the X11-Gateway service to the list of TCP/IP services using the Server Configuration<br />
Utility (SERVER-CONFIG). Information about using this utility <strong>and</strong> its comm<strong>and</strong>s is provided<br />
in Chapter 12.<br />
The prefix "X11-GATEWAYxxx" is added to the name of the service you install; xxx is the<br />
server number you selected in Step 1. For example, for server number 10, the service you add<br />
using SERVER-CONFIG is X11-GATEWAY10. SERVER-CONFIG provides the X11-<br />
GATEWAY13 service, but the number 13 has no significance; this service is provided only as an<br />
example. You can use this service or any number of your choice between 10 <strong>and</strong> 999. If you<br />
chose 13 as the server number in Step 1, you can enable the existing X11-GATEWAY13 service<br />
using SERVER-CONFIG. There is no need to add this service, as it has already been added it.<br />
The following example adds an X11-Gateway server number of 12.<br />
$ MULTINET CONFIGURE/SERVER<br />
<strong>MultiNet</strong> Server Configuration Utility 5.4(nnn)<br />
[Reading in configuration from MULTINET:SERVICES.MASTER_SERVER]<br />
SERVER-CONFIG>ADD X11-GATEWAY12<br />
[Adding new configuration entry for service "X11-GATEWAY12"]<br />
Protocol: [TCP] RETURN<br />
TCP Port number: 6012<br />
Program to run: MULTINET:X11-GATEWAY.EXE<br />
[Added service X11-GATEWAY12 to configuration]<br />
[Selected service is now X11-GATEWAY12]<br />
SERVER-CONFIG>RESTART<br />
Configuration modified, do you want to save it first ? [YES] RETURN<br />
[Writing configuration to<br />
MULTINET_COMMON_ROOT:[MULTINET]SERVICES.MASTER_SERVER]<br />
%RUN-S-PROC_ID, identification of created process is 20E0026B<br />
SERVER-CONFIG>EXIT<br />
4 Define the X11-Gateway logical names. The X11-Gateway accepts connections from the IP<br />
network <strong>and</strong> routes the X protocol requests to a specific DECnet X server. Specify the server<br />
using the following logical names:<br />
• MULTINET_XGATEWAY_TCPIP_server_number_HOSTNAME<br />
Specifies the DECnet host name. This logical name must be defined, but do not include the
colons from the DECnet host name.<br />
• MULTINET_XGATEWAY_TCPIP_server_number_SERVER<br />
X11-Gateway Configuration<br />
The X server number of the node where the X client application is displayed. Most hosts run<br />
one X server, which is designated as server 0 (zero). This logical name is optional if the<br />
DECnet X server number is zero. The X11-Gateway assumes a DECnet X server number of<br />
zero if you do not define this logical. You should define the logical if the DECnet X server<br />
number is not zero.<br />
In the following example, the X11-Gateway server number is 12. The X11-Gateway accepts<br />
connections from the IP network <strong>and</strong> gateways them to X server 1 on the DECnet node BRONX.<br />
Assign values to these logical names using comm<strong>and</strong>s like the following examples:<br />
$ DEFINE/SYSTEM/EXEC MULTINET_XGATEWAY_TCPIP_12_HOSTNAME BRONX<br />
$ DEFINE/SYSTEM/EXEC MULTINET_XGATEWAY_TCPIP_12_SERVER 1<br />
Insert these logical name definitions in the system startup procedure so they are invoked after the<br />
DECnet <strong>and</strong> <strong>MultiNet</strong> startup procedures execute.<br />
Running an IP Client on a DECnet Server<br />
To bring up the X application on the IP-client-to-DECnet-server configuration:<br />
1 On the DECnet server, authorize DECnet connections from user SYSTEM on the gateway node.<br />
If the MULTINET_SERVER process on the gateway node has been started under a user name<br />
other than SYSTEM, that user should also be authorized. A less secure, but more reliable,<br />
method is to authorize the "*" user. See the X11-Gateway Security section.<br />
On UNIX systems, use the xhost comm<strong>and</strong> to provide connection authorization. On ULTRIX or<br />
OpenVMS, use the Session Manager.<br />
2 On the IP client, set the display variable to point to the X11-Gateway host. Use the X11-Gateway<br />
server number for the display server number.<br />
On UNIX systems, use the setenv comm<strong>and</strong> to modify the DISPLAY environment. On<br />
OpenVMS systems, use the SET DISPLAY comm<strong>and</strong>.<br />
3 On the IP client, start the X application.<br />
For example:<br />
• The IP X client node is the UNIX node pelham.flowers.com. The X11-Gateway node is<br />
amtrak.flowers.com (TCP/IP) <strong>and</strong> AMTRAK:: (DECnet). The X11-Gateway server number is<br />
12. BRONX:: is an OpenVMS DECnet X server.<br />
• On the BRONX:: node, the user authorizes protocol DECNET, node AMTRAK, <strong>and</strong> user "*"<br />
using the Security pull-down menu in the Session Manager.<br />
• On the pelham.flowers.com UNIX node, the user runs setenv to set the DISPLAY environment<br />
variable to the value amtrak.flowers.com:12.1. The user can then invoke an X application.<br />
• The X application appears on the BRONX:: node.<br />
25-3
X11-Gateway Configuration<br />
Allowing a DECnet Client Access to an IP Server<br />
25-4<br />
To configure the X11-Gateway to allow a DECnet client access to an IP server:<br />
1 Choose an X11-Gateway server number as described in Allowing an IP Client Access to a<br />
DECnet Server.<br />
2 Add the X11-Gateway to the list of DECnet objects. The object name for the X11-Gateway has<br />
the value X$Xserver_number. For example, for a server number of 17, set the object with this<br />
comm<strong>and</strong>:<br />
$ RUN SYS$SYSTEM:NCP<br />
NCP> DEFINE OBJECT X$X17 NUMBER 0 FILE MULTINET:X11-GATEWAY.EXE<br />
NCP> SET OBJECT X$X17 NUMBER 0 FILE MULTINET:X11-GATEWAY.EXE<br />
If the DECnet default account is disabled, the comm<strong>and</strong> should include a valid USERNAME<br />
<strong>and</strong> PASSWORD on the gateway system. In this example the X11-Gateway server number is 17:<br />
$ RUN SYS$SYSTEM:NCP<br />
NCP> DEFINE OBJECT X$X17 NUMBER 0 FILE -<br />
_ MULTINET:X11-GATEWAY.EXE USER SYSTEM PASS systempassword<br />
NCP> SET OBJECT X$X17 NUMBER 0 FILE MULTINET:X11-GATEWAY.EXE -<br />
_ USER SYSTEM PASS systempassword<br />
3 Define the logical names. The X11-Gateway accepts connections from the DECnet network <strong>and</strong><br />
directs X protocol requests to a specific IP X server. Specify the server is using the following<br />
logical names:<br />
• MULTINET_XGATEWAY_DECNET_server_number_HOSTNAME<br />
Specifies the IP X server host name. You must define this logical name.<br />
• MULTINET_XGATEWAY_DECNET_server_number_SERVER<br />
Specifies the X server number, which is typically set at 0 (zero) to indicate that a single<br />
server is being used. If a second server is in use, set this value to 1, <strong>and</strong> so on. If this logical<br />
name is not defined, the default value is 0. For example, the X11-Gateway server number is<br />
17. The X11-Gateway accepts connections from the DECnet network <strong>and</strong> directs them to X<br />
server number 1 on the IP node englewood-nj.flowers.com. The logical names are then<br />
defined as:<br />
$ DEFINE/SYSTEM/EXEC MULTINET_XGATEWAY_DECNET_17_HOSTNAME -<br />
_$ ENGLEWOOD-NJ.FLOWERS.COM<br />
$ DEFINE/SYSTEM/EXEC MULTINET_XGATEWAY_DECNET_17_SERVER 1<br />
Insert these logical name definitions into the system startup procedure so the definitions occur after<br />
the invocation of the DECnet <strong>and</strong> <strong>MultiNet</strong> startup procedures.
Running the DECnet Client on the IP Server<br />
X11-Gateway Configuration<br />
To bring up the X application on the DECnet-client-to-IP-server configuration:<br />
1 On the IP server, authorize IP connections from the gateway node. X-over-IP does not provide<br />
user name information. If a user name is required as part of the authorization (for example, on<br />
OpenVMS) use a "*" value. Connection authorization is usually accomplished with the xhost<br />
comm<strong>and</strong> on UNIX systems, or with the OpenVMS or ULTRIX Session Manager.<br />
2 On the DECnet client, set the display variable to point to the X11-Gateway host. The X11-<br />
Gateway server number should be used for the display server number. On UNIX hosts (including<br />
ULTRIX) use the setenv comm<strong>and</strong>; on OpenVMS systems, use the SET DISPLAY comm<strong>and</strong>.<br />
3 On the DECnet client, execute the X Windows application.<br />
For example:<br />
• The DECnet X client is an OpenVMS node METRO::. The X11-Gateway node is DENISE::<br />
(DECnet) <strong>and</strong> DENISE.FLOWERS.COM (TCP/IP). The X11-Gateway server number is 17.<br />
The IP X server is the UNIX host englewood-nj.flowers.com.<br />
• On englewood-nj the user authorizes node denise.flowers.com by entering the comm<strong>and</strong>:<br />
% xhost +denise.flowers.com<br />
• On METRO, the user issues the comm<strong>and</strong>:<br />
$ SET DISPLAY/CREATE/NODE=DENISE/TRANS=DECNET/SERVER=17<br />
• The user can then invoke an X application, which appears on the englewood-nj server.<br />
X11-Gateway Security<br />
The X11-Gateway node does not attempt to restrict connections it receives from the network. As a<br />
result, any node or user on the client side of the gateway can access the server, essentially allowing<br />
a client user to monitor all activity on the X server via the X11-Gateway.<br />
For IP-client-to-DECnet-server connections, you can reduce risk by using the ACCEPT-HOSTS/<br />
ACCEPT-NETS capabilities of the <strong>MultiNet</strong> master server on the gateway host. For more<br />
information, see Chapter 12.<br />
For DECnet-client-to-IP-server connections, your risk can be reduced by using the NCP utility to<br />
limit access to the gateway host.<br />
<strong>Process</strong> <strong>Software</strong> does not recommend running the X11-Gateway on untrusted networks unless<br />
other restrictions have been imposed by the system manager.<br />
X11-Gateway Debugging<br />
The best programs for testing client-to-gateway to server connectivity are based on the Xlib<br />
routines (as opposed to widget toolkits).<br />
The ICO program is available on most X implementations (for example, /usr/bin/X11/ico or<br />
DECW$EXAMPLES:ICO) <strong>and</strong> works well for debugging problems. The ICO program opens a<br />
25-5
X11-Gateway Configuration<br />
25-6<br />
window <strong>and</strong> causes an icosahedron to bounce around the window. When this program works, X<br />
works as well. Exit the OpenVMS version of this program by pressing Ctrl/Y in the window from<br />
which you invoked ICO. You can also use the <strong>MultiNet</strong> X11DEBUG comm<strong>and</strong> to debug<br />
OpenVMS IP client problems.<br />
Selected Error Numbers from ERRNO.H<br />
Table 25-1 lists error values from the ERRNO.H file.<br />
Table 25-1 ERRNO.H Error Values<br />
Error Value Description<br />
ENETUNREACH 51 The IP network you are trying to contact is currently<br />
unreachable.<br />
ECONNRESET 54 The connection was reset by the remote node. This typically<br />
occurs when the remote host has rebooted <strong>and</strong> the local host<br />
attempts to transmit on a stale connection.<br />
ETIMEDOUT 60 The connection timed out during the open.<br />
ECONNREFUSED 61 The connection was refused. This occurs when a connection is<br />
attempted to a nonexistent server process.<br />
EHOSTUNREACH 65 There is no route to the host you are trying to contact.<br />
X11-Gateway Error Messages<br />
The X11-Gateway node transmits NETWORK class operator messages when an error is encountered.<br />
You can change the level of information supplied by X11-Gateway messages by defining the<br />
logical name MULTINET_XGATEWAY_DEBUG_LEVEL in the system table. Set this value to:<br />
• 0 — to receive fatal errors<br />
• 1 — for debugging messages<br />
• 2 — for informational messages<br />
For example, to select debug level 1:<br />
$ DEFINE/SYSTEM/EXEC MULTINET_XGATEWAY_DEBUG_LEVEL 1<br />
$ @MULTINET:START_SERVER<br />
If the logical name does not exist, the DEBUG level defaults to a value of zero. All error messages<br />
from the X11-Gateway are prefixed with "Xgateway:". The errno values can be translated by<br />
examining Table 25-1, or by consulting ERRNO.H in the <strong>MultiNet</strong> Programmer’s Kit. Status values<br />
are OpenVMS error values that you can examine using the comm<strong>and</strong> WRITE SYS$OUTPUT<br />
F$MESSAGE(Status).
Chapter 26<br />
Configuring DECnet-over-IP Circuits<br />
A special DECnet device driver allows the <strong>MultiNet</strong> system manager to configure a DECnet line<br />
<strong>and</strong> circuit between two cooperating <strong>MultiNet</strong> systems across an arbitrary IP network. This special<br />
driver encapsulates DECnet packets in UDP datagrams for transport via the IP protocols, in much<br />
the same way as VMS PSI encapsulates DECnet packets in X.25 when doing Data Link Mapping.<br />
Using the Configuration Tools DECnet Encapsulation Over Unreliable Networks<br />
Examples of Connecting Two Systems Using MULTINET SET /DECNET<br />
Using the Configuration Tools<br />
<strong>MultiNet</strong> provides two tools for configuring DECnet-over-IP connections:<br />
• DECNET-CONFIG, the comm<strong>and</strong>-line configuration utility invoked with the MULTINET<br />
CONFIGURE /DECNET comm<strong>and</strong><br />
• The MENU-CONFIG Configure DECnet over IP comm<strong>and</strong><br />
For details about these utilities, see Chapter 2, the DECNET-CONFIG chapter of the <strong>MultiNet</strong> for<br />
OpenVMS <strong>Administrator's</strong> Reference, <strong>and</strong> the online comm<strong>and</strong> reference (invoked with the HELP<br />
MULTINET comm<strong>and</strong>).<br />
Once configured, a DECnet-over-IP circuit comes up automatically when the hosts on each side of<br />
the DECnet connection are rebooted.<br />
When configuring a DECnet-over-IP circuit, you are prompted for:<br />
• The IP address of the host on the opposite side of the connection<br />
• The COST that DECnet assigns to the circuit<br />
• The HELLO TIMER that DECnet should use on this circuit<br />
For proper DECnet operation, the COST <strong>and</strong> HELLO TIMER must be the same on both sides of<br />
the connection.<br />
Note! If you configure a DECnet-over-IP link, <strong>and</strong> you also run DECnet over another Ethernet<br />
26-1
Configuring DECnet-over-IP Circuits<br />
26-2<br />
interface, you must configure your system as a router as follows:<br />
$ RUN SYS$SYSTEM:NCP<br />
NCP>DEFINE EXECUTOR TYPE ROUTING IV<br />
Non-routing hosts can only communicate with the hosts reachable via the circuit with the lowest<br />
cost. If, for example, your Ethernet circuit has a cost of 4, <strong>and</strong> your DECnet-over-IP link has a<br />
cost of 1 (the default), your system will be unable to communicate with hosts accessible over<br />
the Ethernet link.<br />
Full DECnet routing functionality is supported only on VAX systems. This is a Hewlett-Packard<br />
restriction, not one imposed by <strong>MultiNet</strong>. For more information, refer to SPD 48.48.04<br />
Examples of Connecting Two Systems<br />
The following examples show how to make a connection between two systems, betty.urub.edu (IP<br />
address 192.0.0.6) <strong>and</strong> wilma.fstone.com (IP address 128.0.0.125). The first example shows the<br />
circuit configuration on the host "betty":<br />
$ MULTINET CONFIGURE /DECNET<br />
<strong>MultiNet</strong> DECNET Circuit Configuration Utility 5.4(nnn)<br />
[Reading in configuration from MULTINET:DECNET-CIRCUITS.COM]<br />
DECNET-CONFIG>ADD<br />
[Adding new configuration entry for DECnet circuit "TCP-0-0"]<br />
Destination IP Address: [NONE] 128.0.0.125<br />
DECnet circuit cost: [1] 1<br />
DECnet hello timer (in seconds): [300] 300<br />
[TCP-0-0 => 128.0.0.125 (Cost=1, Hello Timer=300)]<br />
DECNET-CONFIG>EXIT<br />
[Writing configuration to MULTINET:DECNET-CIRCUITS.COM]<br />
$<br />
The next example shows the circuit configuration on the host "wilma":<br />
$ MULTINET CONFIGURE /DECNET<br />
<strong>MultiNet</strong> DECNET Circuit Configuration Utility 5.4(nnn)<br />
[Reading in configuration from MULTINET:DECNET-CIRCUITS.COM]<br />
DECNET-CONFIG>ADD<br />
[Adding new configuration entry for DECnet circuit "TCP-0-0"]<br />
Destination IP Address: [NONE] 192.0.0.6<br />
DECnet circuit cost: [1] 1<br />
DECnet hello timer (in seconds): [300] 300<br />
[TCP-0-0 => 192.0.0.6 (Cost=1, Hello Timer=300)]<br />
DECNET-CONFIG>EXIT<br />
[Writing configuration to MULTINET:DECNET-CIRCUITS.COM]<br />
$
DECnet Encapsulation Over Unreliable Networks<br />
Configuring DECnet-over-IP Circuits<br />
Both TCP <strong>and</strong> DECnet guarantee reliable delivery of data over unreliable networks 1 . This is<br />
accomplished through an acknowledgment scheme in which the receiver of the data tells the<br />
transmitter of the data that the data has arrived intact. If the acknowledgment is not received within<br />
a certain period of time (known as the retransmission timer), the data is resent by the transmitter.<br />
The data transmitter must make a good estimate of the retransmission timer. Too long an interval<br />
causes unnecessary waits before retransmission occurs, reducing the usable b<strong>and</strong>width of the<br />
network. Too short an interval means the transmitter might retransmit data that was merely delayed<br />
in transit, unnecessarily loading the network.<br />
• TCP chooses the retransmission timer as a function of the mean <strong>and</strong> the variance in the roundtrip<br />
time so that a statistically small percentage of packets are unnecessarily retransmitted.<br />
• DECnet chooses the retransmission timer as the product of the round trip time (with a minimum<br />
of one second) <strong>and</strong> the delay factor.<br />
DECnet's scheme (or schema?) does not take into account the variance of the round-trip time <strong>and</strong><br />
estimated roundtrip times of less than one second.<br />
DECnet uses a very conservative value for the delay factor to avoid any unnecessary<br />
retransmissions into congested, low-speed links. A single lost packet results in a delay of at least<br />
five seconds in DECnet traffic. Over high-speed, low-latency circuits with any substantial packet<br />
loss, this delay results in a severe performance degradation.<br />
If your network has these characteristics, you can substantially increase performance by reducing<br />
the delay factor using NCP on each of your nodes. Doing so gives DECnet a more aggressive<br />
retransmission strategy which results in shorter delays following a lost packet. Specify the delay<br />
factor in units of 1/16th of the mean round-trip time using the NCP EXECUTOR parameter<br />
DELAY FACTOR.<br />
Reasonable factors range from 1.5 to 3, or DELAY FACTOR values from 24 to 48. A<br />
retransmission factor of 1.5 is very aggressive <strong>and</strong> about as small as is reasonable before many<br />
extra retransmissions occur; a value of 3 more closely mimics TCP's behavior over lines which<br />
have typical variances in the roundtrip time.<br />
You can set the DELAY FACTOR to 24/16ths (1.5) using the following NCP comm<strong>and</strong>s:<br />
$ MCR NCP<br />
NCP>SET EXECUTOR DELAY FACTOR 24<br />
NCP>DEFINE EXECUTOR DELAY FACTOR 24<br />
NCP>EXIT<br />
$<br />
Using MULTINET SET /DECNET<br />
Use the MULTINET SET/DECNET comm<strong>and</strong> to configure the TCPAx: DECnet devices for<br />
running DECnet over UDP.<br />
1. Unreliable networks are also known as "lossy" networks when a significant packet loss rate occurs.<br />
26-3
Configuring DECnet-over-IP Circuits<br />
Note! You should configure DECnet circuits using DECNET-CONFIG, which invokes MULTINET SET/<br />
DECNET as part of network startup to set up the DECnet link. You can use this utility to change<br />
the configuration once the network has started.<br />
26-4
Chapter 27<br />
Configuring the <strong>MultiNet</strong> NFSV2 Server<br />
This chapter describes how to configure <strong>and</strong> maintain the <strong>MultiNet</strong> NFS Server, the <strong>MultiNet</strong><br />
software that allows users of OpenVMS computers to export files to a variety of computers.<br />
This chapter refers to the <strong>MultiNet</strong> NFS Server <strong>and</strong> NFS Client software as the NFS Server <strong>and</strong><br />
NFS Client, <strong>and</strong> to the OpenVMS server host as the server, <strong>and</strong> to NFS client hosts as clients.<br />
Underst<strong>and</strong>ing the <strong>MultiNet</strong> NFS Server<br />
Enabling the <strong>MultiNet</strong> NFS Server<br />
Shutting Down the NFS Server<br />
Controlling NFS File Access with OpenVMS<br />
Access Control Lists (ACLs)<br />
NFS Server Configuration Overview Configuring PC-NFSD Remote Printing<br />
Service<br />
Creating OpenVMS User Accounts for Client<br />
Users<br />
Invoking the NFS Configuration Utility (NFS-<br />
CONFIG) <strong>and</strong> Displaying Configuration<br />
Information<br />
Booting Diskless Hosts Using NFS<br />
Modifying NFS Server Mount Point Options<br />
Creating UID/GID Mappings Modifying NFS Server Global Parameters<br />
Exporting File Systems NFS Server Memory Considerations<br />
Reloading the <strong>MultiNet</strong> NFS Server<br />
Configuration <strong>and</strong> Restarting the Server<br />
Directory <strong>and</strong> File Cache Parameters<br />
Testing the System Configuration Timezone Parameters<br />
Configuring Clients Special Debugging Parameters<br />
Restricting Access to a Mount Point NFS Troubleshooting Tips<br />
27-1
Configuring the <strong>MultiNet</strong> NFSV2 Server<br />
Underst<strong>and</strong>ing the <strong>MultiNet</strong> NFS Server<br />
27-2<br />
The <strong>MultiNet</strong> NFS Server is a high-performance OpenVMS implementation of Sun Microsystems'<br />
Network File System (NFS) protocol. It allows client computers running a variety of operating<br />
systems to remotely access files on an OpenVMS server. To users on a client system, all mounting<br />
<strong>and</strong> access operations are transparent, <strong>and</strong> the mounted directories <strong>and</strong> files appear to reside on the<br />
client.<br />
After the <strong>MultiNet</strong> NFS Server is installed, the system manager configures the server <strong>and</strong> its clients<br />
to allow network file access. The <strong>MultiNet</strong> NFS Server includes configuration utilities for this<br />
purpose.<br />
The <strong>MultiNet</strong> NFS Server is exceptionally fast due to parallel request processing, a file <strong>and</strong><br />
directory cache between the file systems <strong>and</strong> the network, <strong>and</strong> an optional writeback cache feature.<br />
For example, because the <strong>MultiNet</strong> NFS Server can process many client requests simultaneously, a<br />
single client does not interfere with the requests of others.<br />
Servers <strong>and</strong> Clients<br />
A <strong>MultiNet</strong> NFS Server system is an OpenVMS system that makes its local files available to the<br />
network. A client is a host that accesses these files as if they were its own. Typical clients include:<br />
• Sun Microsystems hosts or similar systems running the UNIX Operating System<br />
• IBM PC computers <strong>and</strong> PC-compatible systems running the MS-DOS Operating System<br />
• Hewlett-Packard computers running the ULTRIX (Tru64 UNIX) Operating System<br />
• OpenVMS computers running the <strong>MultiNet</strong> NFS Client (V4.1 or greater).<br />
The OpenVMS server can make any of its file systems available to the network. A file system is a<br />
hierarchy of devices, directories, <strong>and</strong>/or files stored as a FILES-11 ODS-2 or ODS-5 on-line disk<br />
structure. File systems can include bound volumes <strong>and</strong> shadow sets.<br />
The OpenVMS server exports the file systems, making them available to the network. Authorized<br />
clients mount the exported file systems, making them available to their users as if they were local<br />
directories <strong>and</strong> files.<br />
Each file system is identified by the name of its mount point; that is, the name of the device or<br />
directory at the top of its hierarchy. When a client mounts a file system, it connects the mount point<br />
to a mount directory in its own file system. Through this connection, all files below the mount point<br />
on the server are available to client users as if they were below the client mount directory.<br />
Note! Exported file system names cannot be longer than 14 characters.<br />
The NFS Server allows NFS clients access to only the highest version of OpenVMS files.<br />
Each client automatically converts mounted directory <strong>and</strong> file structures, contents, <strong>and</strong> names to the<br />
format required by its own operating system. For example, an OpenVMS file named:<br />
USERS:[JOE_NOBODY]LOGIN.COM<br />
might appear to a UNIX end user as:
vmsmachine/users/joe_nobody/login.com<br />
<strong>and</strong> to an MS-DOS end user as:<br />
E:\users\joe_nobody\login.com<br />
Configuring the <strong>MultiNet</strong> NFSV2 Server<br />
Note! The <strong>MultiNet</strong> NFS Server can convert all valid UNIX, MS-DOS, or ULTRIX file names to valid<br />
OpenVMS names. Similarly, the server can convert those OpenVMS file names back to valid<br />
UNIX, MS-DOS, or ULTRIX names.<br />
Security<br />
The <strong>MultiNet</strong> NFS Server provides two levels of security:<br />
Access to<br />
Individual... Description<br />
File systems Can be restricted to specific clients listed in mount restriction lists for<br />
those file systems, as described in the Restricting Access to a Mount<br />
Point section.<br />
Directories <strong>and</strong> files These are controlled on a per-user basis. The <strong>MultiNet</strong> NFS Server<br />
consults a database that maps users on NFS client systems to OpenVMS<br />
userids. When the NFS Server receives an NFS file access request, it<br />
maps the client user identifier in the request to an OpenVMS userid/UIC<br />
<strong>and</strong> compares the UIC to the owner, protection mask, <strong>and</strong> any directory<br />
or file ACLs. The NFS Server either grants or denies access, as described<br />
in the Mapping Between Users' OpenVMS <strong>and</strong> Client Identifiers section.<br />
The <strong>MultiNet</strong> NFS Server considers default privileges as defined by the user's UAF entry that<br />
override OpenVMS protection codes (SYSPRV, BYPASS, READALL, <strong>and</strong> GRPPRV) when<br />
granting access. However, since UNIX clients don't underst<strong>and</strong> OpenVMS privileges, the client<br />
may prevent an operation which would otherwise have been allowed. If the UNIX user root (uid 0)<br />
is mapped to an OpenVMS user with BYPASS privilege, the user root can access all files.<br />
To get GROUP protection access to a file from UNIX clients, a user must pass both the client <strong>and</strong><br />
the server protection check. The client check is done using the UNIX GID; the server check is done<br />
using the Group portion of the OpenVMS UIC. For GROUP access to be granted, a user must be in<br />
the same UIC group on the OpenVMS system <strong>and</strong> have the same GID on the UNIX system.<br />
Note! All NFS security relies on trusting the client to provide the server with truthful authentication<br />
parameters. Nothing in the NFS protocol specification prevents a client from using fraudulent<br />
parameters to bypass the security system.<br />
VMS DELETE access does not directly translate to NFS. In NFS, a user with WRITE access to the<br />
directory can delete a file. The NFS Server implements DELETE access in the same way as NFS.<br />
With this in mind, it is important for the system manager to review protection settings on exported<br />
file systems.<br />
27-3
Configuring the <strong>MultiNet</strong> NFSV2 Server<br />
Mapping Between Users' OpenVMS <strong>and</strong> Client Identifiers<br />
27-4<br />
Clients identify each user to the network by a pair of UNIX or UNIX-style user-ID (UID) <strong>and</strong><br />
group-ID (GID) codes. During an access operation, the server translates back <strong>and</strong> forth between the<br />
user's OpenVMS UIC <strong>and</strong> UID/GID pair. Whenever the server starts up, it reads the<br />
NFS.CONFIGURATION file which includes a UID Translation database that maps each user's<br />
OpenVMS user name to their client UID/GID pair. The server translates each user name to its UIC<br />
<strong>and</strong> builds a translation table to map between each UID/GID pair <strong>and</strong> UIC.<br />
As described in the following sections, you must create <strong>and</strong> maintain the UID translation list which<br />
maps between each users' OpenVMS user name <strong>and</strong> UID/GID pair.<br />
Note! For file protections to work properly, each mapping must be both unique <strong>and</strong> consistent in each<br />
direction (see the Grouping NFS Client Systems for UID/GID Mappings section for a description<br />
of exceptions to this rule). You cannot map a single UID to multiple OpenVMS user names, nor<br />
can you use a single user name for multiple UIDs.<br />
For a PC-NFSD client user, you must create a UNIX-type UID/GID pair when you specify the<br />
mapping. Whenever the user provides the correct access information to the server, the server<br />
provides the client with the user's UID/GID.<br />
To display the current UID translation list, use the SHOW comm<strong>and</strong> described in the Invoking the<br />
NFS Configuration Utility (NFS-CONFIG) <strong>and</strong> Displaying Configuration Information section.<br />
Grouping NFS Client Systems for UID/GID Mappings<br />
In the <strong>MultiNet</strong> UID/GID to OpenVMS user name translation database, each entry is associated<br />
with a particular NFS group. An NFS group is a collection of NFS systems that share a single set of<br />
UID/GID mappings. Within an NFS group, the mapping between UID/GID pairs <strong>and</strong> OpenVMS<br />
user names on the server system must be one-to-one. You cannot map a single UID/GID to multiple<br />
user names, nor can you use a single user name for multiple UID/GIDs. However, duplicate<br />
translations may exist between NFS groups.<br />
If no NFS group is specified when a UID/GID translation is added to the configuration, the<br />
translation is placed in the "default" NFS group. Translations in this group are used only for client<br />
systems not specified in an NFS group.<br />
Note! A client system must not reside in more than one NFS group.<br />
When the <strong>MultiNet</strong> NFS Server receives an NFS request from a client, it consults the local NFS<br />
group database to determine which group the client is associated with. If the client is not specified<br />
explicitly in a group, it is assumed to be in the default group. Once the NFS Server has determined<br />
the NFS group to which the client belongs, it uses the UID/GID translation list for that group to<br />
determine the OpenVMS user name (<strong>and</strong> hence, OpenVMS UIC) to use when accessing local files.<br />
If there is no UID/GID mapping for a user in the NFS group to which the client system belongs, the<br />
user is treated as unknown, <strong>and</strong> the UID/GID -2/-2 is used. Any translations in the default group are<br />
not considered if the client is specified in an NFS group.<br />
UNIX password files may be copied from client systems for UID/GID translations when OpenVMS<br />
user names are the same as those on the client. UNIX password files may also be placed in an NFS
Configuring the <strong>MultiNet</strong> NFSV2 Server<br />
group. With the addition of a password file, be sure the UIDs within the NFS group remain unique.<br />
Consider the following example. At Flowers Inc., the engineering department has a group of UNIX<br />
hosts, the sales department has a collection of PCs, <strong>and</strong> the marketing department has a mix of PCs<br />
<strong>and</strong> UNIX hosts. Each group also has its own UNIX system acting as an NFS server for the group.<br />
Unfortunately, the groups did not coordinate with each other when they assigned user names <strong>and</strong><br />
UID/GID pairs, <strong>and</strong> none of the groups are willing to change their current configurations. The<br />
accounting department, on the other h<strong>and</strong>, recently purchased a VAX 4000 computer running<br />
OpenVMS <strong>and</strong> the <strong>MultiNet</strong> NFS Server <strong>and</strong> wishes to make certain personnel data available via<br />
NFS to the other groups.<br />
The accounting system manager configures the NFS Server on the VAX system as follows:<br />
1 Using the NFS-CONFIG ADD NFS-GROUP comm<strong>and</strong>, the system manager creates the three<br />
NFS groups ENGINEERING, SALES, <strong>and</strong> MARKETING, placing the NFS systems in each<br />
department in the appropriate NFS group. The default group is used for NFS systems in the<br />
accounting department.<br />
2 The system manager obtains UID/GID mappings from each department <strong>and</strong> creates OpenVMS<br />
user names for each NFS client user who needs access to the NFS server on the OpenVMS<br />
system.<br />
3 Finally, the system manager uses the NFS-CONFIG ADD UID-TRANSLATION <strong>and</strong> ADD<br />
NFS-PASSWD-FILE comm<strong>and</strong>s to create the mappings between OpenVMS user names <strong>and</strong> the<br />
UID/GID pairs for each NFS group. See Naming Mount Points for details on specifying these<br />
mappings.<br />
If all systems in your environment share the same UID/GID pairs, you do not need to create or<br />
specify NFS groups. All translations are automatically placed in the default group (which has no<br />
group name associated with it).<br />
H<strong>and</strong>ling Incomplete Mappings<br />
When mappings are incomplete or nonexistent, access operations are severely limited or denied.<br />
If any OpenVMS files or directories are owned by a UIC for which there is no mapping, the server<br />
h<strong>and</strong>les them as though they were owned by the UNIX user "nobody," whose identifiers are UID -<br />
2, GID -2. Similarly, if any client users have UIDs for which there are no mappings, the server<br />
grants them access to OpenVMS files as if they were the OpenVMS user DEFAULT, whose UIC is<br />
[200,200]. In either case, only the WORLD-READ <strong>and</strong> WORLD-EXECUTE file protection<br />
settings are granted.<br />
WRITE access is never granted to unmapped users even in those cases where OpenVMS<br />
protections allow WORLD WRITE access.<br />
UNIX File System Semantics<br />
This section describes the techniques the <strong>MultiNet</strong> NFS Server uses to map UNIX file system<br />
semantics to OpenVMS file system semantics.<br />
27-5
Configuring the <strong>MultiNet</strong> NFSV2 Server<br />
Mapping UNIX File Links<br />
27-6<br />
The <strong>MultiNet</strong> NFS Server provides primitive support for symbolic <strong>and</strong> hard link operations under<br />
OpenVMS.<br />
Because the OpenVMS file system has no support for symbolic links, symbolic links created by an<br />
NFS Client are stored under OpenVMS in a file with undefined record attributes which begins with<br />
"*SYMLINK*". Using this method of storing link contents, the NFS Server appears to support<br />
symbolic links, but the links cannot be used directly by OpenVMS applications.<br />
The NFS Server supports the hard link operation by making additional directory entries for a file<br />
under OpenVMS. These hard links can be used directly by OpenVMS applications. Unlike the<br />
UNIX file system, the OpenVMS file system does not keep a link reference count on files which<br />
have multiple links, although the NFS Server attempts to simulate this by keeping a reference count<br />
in memory. After the reference count is purged by a reboot or by restarting the NFS Server, deleting<br />
a file with multiple hard links could result in the loss of data although there may be other directory<br />
entries.<br />
Likewise, deleting a file's remaining directory entry (if the file previously had hard links) could<br />
result in the contents of the file not being deleted, resulting in a lost file which can later be found by<br />
disk analysis. These limitations are inherent in the OpenVMS file system.<br />
Mapping UNIX Device Special Files<br />
Device block <strong>and</strong> character special files created by an NFS client are stored under OpenVMS in a<br />
file with undefined record attributes which begins with "*SPECIAL*". Using this method of<br />
storing special files, the NFS Server appears to support them, but the files cannot be used directly<br />
by OpenVMS applications.<br />
Mapping UNIX setuid, setgid, <strong>and</strong> "sticky" File Modes<br />
The <strong>MultiNet</strong> NFS Server appears to support the setuid, setgid, <strong>and</strong> sticky (VTX) file modes by<br />
using the reserved-to-customer bits in the user characteristics field of the file header. Although<br />
these protection modes have no meaning to OpenVMS, the NFS Server still stores them.<br />
Mapping UNIX File Names<br />
The <strong>MultiNet</strong> NFS Server attempts to store files with any file name, even when client file names<br />
contain characters not permitted by OpenVMS. To accomplish this, the <strong>MultiNet</strong> NFS Server<br />
performs a mapping between OpenVMS <strong>and</strong> NFS client file names, using the inverse mapping of<br />
the <strong>MultiNet</strong> NFS Client. This mapping ensures consistency between other NFS clients accessing<br />
<strong>and</strong> creating files using the <strong>MultiNet</strong> NFS Server, <strong>and</strong> the <strong>MultiNet</strong> NFS Client accessing <strong>and</strong><br />
creating files using other NFS servers. All mapping sequences on the OpenVMS server begin with<br />
the "$" escape character. This file name mapping can be disabled as described in the Mount Point<br />
Option Summary section.<br />
As "$" is the mapping sequence escape character, a real "$" in a file name as seen by the client is<br />
mapped to "$$" on the OpenVMS server. For example, the client file name "foo$bar.c" maps to<br />
"FOO$$BAR.C" on the OpenVMS server.<br />
A "$" followed by a letter (A to Z) in a file name on the server indicates a case-shift in the file name
Configuring the <strong>MultiNet</strong> NFSV2 Server<br />
on the client. For client systems like UNIX which support case-sensitive file names, a file name can<br />
begin in lowercase <strong>and</strong> change back <strong>and</strong> forth between uppercase <strong>and</strong> lowercase. For example, the<br />
client file name "aCaseSENSITIVEFilename" would map to<br />
"A$C$ASE$SENSITIVEF$ILENAME" on the OpenVMS NFS server.<br />
A "$" followed by any digit 4 to 9 indicates a mapping as shown in Figure 27-1.<br />
Figure 27-1 File Name Mapping<br />
VMS<br />
Char.<br />
Server<br />
Char.<br />
Hex<br />
Value<br />
VMS<br />
Char.<br />
Server<br />
Char.<br />
Hex<br />
Value<br />
VMS<br />
Char.<br />
Server<br />
Char.<br />
$4A ^A 1 $5A ! 21 $7A Space 20<br />
$4B ^B 2 $5B “ 22 $7B ; 3B<br />
$4C ^C 3 $5C # 23 $7C < 3C<br />
$4D ^D 4 $5E % 25 $7D = 3D<br />
$4E ^E 5 $5F & 26 $7E > 3E<br />
$4F ^F 6 $5G ‘ 27 $7F ? 3F<br />
$4G ^G 7 $5H ( 28<br />
$4H ^H 8 $5I ) 29 $8A @ 40<br />
$4I ^I 9 $5J * 2A $8B [ 5B<br />
$4J ^J A $5K + 2B $8C \ 5C<br />
$4K ^K B $5L ’ 2C $8D ] 5D<br />
$4L ^L C $5N . 2E $8E ^ 5E<br />
$4M ^M D $5O / 2F<br />
$4N ^N E $5Z : 3A $9A ‘ 60<br />
$4O ^O F $9B { 7B<br />
$4P ^P 10 $6A ^@ 00 $9C | 7C<br />
$4Q ^Q 11 $6B ^[ 1B $9D } 7D<br />
$4R ^R 12 $6C ^\ 1C $9E ~ 7E<br />
$4S ^S 13 $6D ^] 1D $9F DEL 7F<br />
$4T ^T 14 $6E ^^ 1E<br />
Hex<br />
Value<br />
27-7
Configuring the <strong>MultiNet</strong> NFSV2 Server<br />
27-8<br />
VMS<br />
Char.<br />
Server<br />
Char.<br />
$4U ^U 16 $6F ^_ 1F<br />
$4V ^V 16<br />
$4W ^W 17<br />
$4X ^X 18<br />
$4Y ^Y 19<br />
Hex<br />
Value<br />
$4Z ^Z 1A<br />
VMS<br />
Char.<br />
Server<br />
Char.<br />
Hex<br />
Value<br />
VMS<br />
Char.<br />
Server<br />
Char.<br />
Hex<br />
Value<br />
The digit after the dollar sign <strong>and</strong> the trailing letter indicates the character in the client file name. In<br />
the special case of the "dot" character (.), the first dot in the client file name maps directly to a dot<br />
in the server OpenVMS file name. Any dot characters after the first one in the client file name are<br />
mapped to the character sequence "$5N" on the OpenVMS server. In directory files, any dot in the<br />
client file name maps to "$5N" on the server. For example, the client file name "foo.bar#1.old"<br />
maps to "FOO.BAR$5C1$5NOLD" on the OpenVMS server unless "foo.bar#1.old" was a<br />
directory file, in which case it would map to "FOO$5NBAR$5C1$5NOLD.DIR" on the OpenVMS<br />
server.<br />
Finally, a "$" followed by a three-digit octal number indicates a character in the file name on the<br />
server that has the binary value of that three-digit octal number. As all character binary values from<br />
0 to 177 (octal) already have mappings, only characters from 200 to 377 are mapped in this fashion.<br />
Thus, the leading digit of the octal number must be either 2 or 3.<br />
Mapping OpenVMS Text Files to UNIX Text Files<br />
The <strong>MultiNet</strong> NFS Server attempts to make access to text files as transparent as possible. Most<br />
OpenVMS files containing ASCII text have RMS record attributes of Variable Length Records<br />
with Carriage Return Carriage Control (VAR-CR). When VAR-CR files are read via the NFS<br />
Server, the NFS Server automatically converts the contents of the file into the equivalent UNIX<br />
byte stream. Because of this conversion, there are a number of restrictions imposed on VAR-CR<br />
files:<br />
• VAR-CR files cannot be written to unless the file is first truncated to a size of zero.<br />
• Access to extremely large VAR-CR files (those larger than the size of the cache specified by<br />
MAXIMUM-CACHE-BUFFERS <strong>and</strong> MAXIMUM-FILESYSTEM-BUFFERS) is extremely<br />
slow, <strong>and</strong> may result in NFS timeouts if the file system is not mounted with a large enough<br />
timeout value. This happens because the NFS server may need to read the entire file to convert a<br />
small portion near the end of the file, <strong>and</strong> because the entire file must be read to determine its<br />
size when represented as a Stream file.<br />
All other types of files are not converted by the NFS Server. The client sees the raw disk blocks<br />
directly.
NFS Server Architecture<br />
Configuring the <strong>MultiNet</strong> NFSV2 Server<br />
The <strong>MultiNet</strong> NFS Server includes five top-level protocols that run parallel to each other over a<br />
stack of lower-level protocols. The top-level protocols are:<br />
• The Network File System protocol (NFS) is an IP-family protocol that provides remote file<br />
system access, h<strong>and</strong>ling client queries.<br />
• The RPC (Remote Procedure Call) mount protocol (RPCMOUNT) is used by clients to mount<br />
file systems <strong>and</strong> get mount-point information.<br />
• The RPC-protocol port mapper (RPCPORTMAP) performs the mapping between RPC program<br />
numbers <strong>and</strong> UDP <strong>and</strong> TCP port numbers.<br />
• The RPC quota daemon (RPCQUOTAD) returns disk quota information.<br />
• The RPC status monitor (RPCSTATUS) <strong>and</strong> the RPC lock manager (RPCLOCKMGR) together<br />
coordinate access to sections of files.<br />
• The PC-NFSD protocol provides authentication <strong>and</strong> remote-printing functions specific to PC-<br />
NFS. Only PC <strong>and</strong> PC-compatible clients use this protocol.<br />
Underlying the NFS, RPCLOCKMGR, RPCMOUNT, RPCPORTMAP, RPCQUOTAD,<br />
RPCSTATUS, <strong>and</strong> PC-NFSD protocols is a stack of protocols:<br />
• The Remote Procedure Call (RPC) protocol allows clients to make procedure calls across the<br />
network to the server.<br />
• The external Data Representation (XDR) protocol h<strong>and</strong>les architectural differences between the<br />
client <strong>and</strong> server systems, allowing the NFS protocol to communicate between systems of<br />
dissimilar architectures.<br />
• The User Datagram Protocol (UDP), Transmission Control Protocol (TCP), <strong>and</strong> Internet<br />
Protocol (IP) are used for the lowest levels of communication.<br />
Traditionally, NFS has always been run over UDP. The <strong>MultiNet</strong> NFS Server also supports<br />
communication over TCP, which may provide performance improvements when communicating<br />
with NFS clients across slow network links or wide area networks (WANs), which suffer from<br />
packet loss <strong>and</strong> delay.<br />
The list of queues that PCNFSD returns in a single UDP datagram is limited to the first 45,000<br />
bytes.<br />
NFS Server Configuration Overview<br />
There are three main aspects to configuring the <strong>MultiNet</strong> NFS Server system:<br />
1 Enabling the NFS Server on the server host.<br />
2 Configuring the NFS server.<br />
3 Configuring the clients.<br />
These operations are performed normally in the following sequence:<br />
1 Enable the NFS Server, using SERVER-CONFIG.<br />
2 Make sure that each user who will access the server has an OpenVMS user account on the server<br />
<strong>and</strong> an account on the client.<br />
27-9
Configuring the <strong>MultiNet</strong> NFSV2 Server<br />
27-10<br />
3 Invoke NFS-CONFIG to perform Steps 4 through 6.<br />
4 Provide the NFS Server with a basis for translating between the OpenVMS <strong>and</strong> client identifiers<br />
for each user.<br />
5 Export each file system:<br />
a Choose a name for the mount point.<br />
b Export the mount point <strong>and</strong> reload the server to make the change effective.<br />
c Mount <strong>and</strong> test the file system on each client.<br />
d If you want to restrict access to the file system to specific clients, create a mount restriction<br />
list for the mount point, restart the server, <strong>and</strong> retest the mount operation from each client.<br />
6 Only when necessary, change global parameter settings (followed by a server restart), <strong>and</strong> retest<br />
the configuration. The default parameter settings are sufficient in most cases.<br />
The following sections describe these operations.<br />
Enabling the <strong>MultiNet</strong> NFS Server<br />
Enable the <strong>MultiNet</strong> NFS Server by enabling the following services:<br />
• NFS server<br />
• RPCMOUNT mount server<br />
• RPCQUOTAD quota server<br />
• RPCLOCKMGR lock manager<br />
• RPCSTATUS status monitor<br />
• RPCPORTMAP RPC-protocol port mapper<br />
For networks that include IBM PC or PC-compatible clients with PC-NFS software, you should<br />
also enable the PC-NFSD server. Use the <strong>MultiNet</strong> Server Configuration Utility (SERVER-<br />
CONFIG) to enable these services.<br />
The following sample sessions show how to enable protocols with SERVER-CONFIG. The first<br />
example pertains to systems that do not include PC clients <strong>and</strong> do not use the PC-NFSD protocol:<br />
$ MULTINET CONFIGURE/SERVER<br />
<strong>MultiNet</strong> Server Configuration Utility 5.4(nnn)<br />
[Reading in configuration from MULTINET:SERVICES.MASTER_SERVER]<br />
SERVER-CONFIG>ENABLE NFS<br />
SERVER-CONFIG>ENABLE RPCMOUNT<br />
SERVER-CONFIG>ENABLE RPCQUOTAD<br />
SERVER-CONFIG>ENABLE RPCPORTMAP<br />
SERVER-CONFIG>ENABLE RPCLOCKMGR<br />
SERVER-CONFIG>ENABLE RPCSTATUS<br />
SERVER-CONFIG>RESTART<br />
Configuration modified, do you want to save it first ? [YES] YES<br />
[Writing configuration to<br />
SYS$COMMON:[MULTINET]SERVICES.MASTER_SERVER]<br />
%RUN-S-PROC_ID, identification of created process is 0000017A<br />
SERVER-CONFIG>EXIT
Configuring the <strong>MultiNet</strong> NFSV2 Server<br />
[Configuration not modified, so no update needed]<br />
$<br />
The following example pertains to systems that do include PC clients <strong>and</strong> use PC-NFSD.<br />
$ MULTINET CONFIGURE/SERVER<br />
<strong>MultiNet</strong> Server Configuration Utility 5.4(nnn)<br />
[Reading in configuration from MULTINET:SERVICES.MASTER_SERVER]<br />
SERVER-CONFIG>ENABLE NFS<br />
SERVER-CONFIG>ENABLE RPCMOUNT<br />
SERVER-CONFIG>ENABLE RPCQUOTAD<br />
SERVER-CONFIG>ENABLE RPCPORTMAP<br />
SERVER-CONFIG>ENABLE RPCLOCKMGR<br />
SERVER-CONFIG>ENABLE RPCSTATUS<br />
SERVER-CONFIG>ENABLE PCNFSD<br />
SERVER-CONFIG>RESTART<br />
Configuration modified, do you want to save it first ? [YES] YES<br />
[Writing configuration to<br />
SYS$COMMON:[MULTINET]SERVICES.MASTER_SERVER]<br />
%RUN-S-PROC_ID, identification of created process is 0000017A<br />
SERVER-CONFIG>EXIT<br />
[Configuration not modified, so no update needed]<br />
$<br />
Creating OpenVMS User Accounts for Client Users<br />
An OpenVMS user account must exist for each client user who will have access to the OpenVMS<br />
file systems. In addition, the account must have access to those file systems.<br />
As described in the Creating UID/GID Mappings section, you must also provide the server with a<br />
basis for mapping between each user's client <strong>and</strong> OpenVMS accounts.<br />
Invoking the NFS Configuration Utility (NFS-CONFIG) <strong>and</strong> Displaying<br />
Configuration Information<br />
To invoke the NFS Configuration Utility (NFS-CONFIG), enter:<br />
$ MULTINET CONFIGURE/NFS<br />
In response, NFS-CONFIG reads its current configuration file, NFS.CONFIGURATION, as shown<br />
in the following example. All configuration operations that use NFS-CONFIG change this file.<br />
$ MULTINET CONFIGURE/NFS<br />
<strong>MultiNet</strong> NFS Configuration Utility 5.4(nnn)<br />
[Reading in configuration from MULTINET:NFS.CONFIGURATION]<br />
NFS-CONFIG><br />
You can display various information about the current configuration in the<br />
NFS.CONFIGURATION file. The following examples include these lists:<br />
• The file system export list, which is a list of the file systems available to the network. A mount<br />
restrictions list appears next to the entry for each file system, showing the clients that can access<br />
27-11
Configuring the <strong>MultiNet</strong> NFSV2 Server<br />
27-12<br />
the file system (unless all clients can access it).<br />
• The UID/GID to OpenVMS user name translation list.<br />
• The global parameter list, which contains the server's global parameters.<br />
These lists <strong>and</strong> corresponding aspects of server configurations are explained in subsequent sections<br />
of this chapter.<br />
NFS-CONFIG>SHOW<br />
Filesystem Restrictions<br />
---------- ------------<br />
SYS$SYSDEVICE: brown.flowers.com localhost<br />
UID Translations: VMS Username Unix UID Unix GID<br />
------------ -------- --------<br />
JOHN 10 15<br />
BANZAI 2 40<br />
NFS-CONFIG><br />
The following example shows a full display:<br />
NFS-CONFIG>SHOW /FULL<br />
Exported Filesystem "SYS$SYSDEVICE:":<br />
Mounts restricted to:<br />
brown.flowers.com<br />
localhost<br />
UID Translations: VMS Username Unix UID Unix GID<br />
------------ -------- --------<br />
JOHN 10 15<br />
BANZAI 2 40<br />
Kernel-Mode NFS server.<br />
Kernel-Mode exceptions will cause NFS to hibernate for debugging.<br />
Number of RPC Transports: 100 simultaneous requests<br />
Size of duplicate request cache: 250 entries<br />
File cache timer interval: 30 seconds<br />
Read-Only flush age: 50000 seconds<br />
Read/Write flush age: 50000 seconds<br />
File info flush age: 1200 seconds<br />
Directory info flush age: 300 seconds<br />
File info idle flush age: 600 seconds<br />
Directory info idle flush age: 150 seconds<br />
Use Directory Blocking ASTs for cache consistency<br />
Use File Blocking ASTs for cache consistency<br />
Maximum cache files: 3000 files<br />
Maximum cache buffers: 500 buffers<br />
Maximum open channels: 50 channels<br />
Maximum file system files: 3000 files<br />
Maximum file system buffers: 500 buffers<br />
Maximum file system channels: 50 channels<br />
Maximum Queued Removes: 25 files<br />
Seconds Before Writeback: 3 seconds<br />
Maximum Dirty Buffers: 0 buffers (no limit)
Configuring the <strong>MultiNet</strong> NFSV2 Server<br />
Maximum Write Jobs: 0 operations (no limit)<br />
NFS-CONFIG><br />
Creating UID/GID Mappings<br />
The following sections describe how to create <strong>and</strong> manipulate UID/GID mappings.<br />
Adding <strong>and</strong> Deleting Mappings<br />
There are two methods for adding <strong>and</strong> deleting mappings of user names to UID/GID pairs. You can<br />
combine these methods as needed:<br />
• Add <strong>and</strong> delete individual mappings <strong>and</strong> NFS groups with NFS-CONFIG.<br />
• If the system includes UNIX clients with users with the same UNIX <strong>and</strong> OpenVMS user names,<br />
use one or more "/etc/passwd" files as the basis for multiple mappings <strong>and</strong> add those mappings<br />
to the configuration with NFS-CONFIG.<br />
After creating or modifying the UID translation list, reload the server to make the changes take<br />
effect, as described in the Reloading the <strong>MultiNet</strong> NFS Server Configuration <strong>and</strong> Restarting the<br />
Server section.<br />
Adding <strong>and</strong> Deleting Individual Mappings<br />
The ADD UID-TRANSLATION comm<strong>and</strong> creates an individual mapping between an OpenVMS<br />
user name <strong>and</strong> a UID/GID pair. For example:<br />
NFS-CONFIG>ADD UID-TRANSLATION JOHN 10 15<br />
To create a mapping between an OpenVMS user name <strong>and</strong> a UID/GID pair associated with the<br />
NFS group MARKETING, for example:<br />
NFS-CONFIG>ADD UID-TRANSLATION JOHN 10 15 MARKETING<br />
If you are creating UID/GID pairs, each code must be a positive integer or zero, <strong>and</strong> each user must<br />
have a unique UID, independent of the operating system the client is running. Someone who uses<br />
multiple clients must have the same UID for each of the clients, or use NFS groups to group<br />
together systems sharing the same UID mappings. To delete an individual mapping, use the<br />
DELETE UID-TRANSLATION comm<strong>and</strong>:<br />
NFS-CONFIG>DELETE UID-TRANSLATION JOHN<br />
To delete a mapping associated with an NFS group:<br />
NFS-CONFIG>DELETE UID-TRANSLATION MARKETING/JOHN<br />
Adding <strong>and</strong> Deleting NFS Groups<br />
Use the ADD NFS-GROUP comm<strong>and</strong> to create an NFS group. For example:<br />
NFS-CONFIG>ADD NFS-GROUP SALES WHORFIN.FLOWERS.COM, CC.FLOWERS.COM<br />
Note! Client names must be fully qualified.<br />
27-13
Configuring the <strong>MultiNet</strong> NFSV2 Server<br />
27-14<br />
To delete a system from an NFS group, use the DELETE NFS-GROUP comm<strong>and</strong>:<br />
NFS-CONFIG>DELETE NFS-GROUP SALES WHORFIN.FLOWERS.COM<br />
To delete the NFS group itself, use an asterisk (*) for the host specification:<br />
NFS-CONFIG>DELETE NFS-GROUP SALES *<br />
Adding Multiple Mappings<br />
The /etc/passwd files from UNIX NFS clients can be used to create multiple mappings only when<br />
the user names on the UNIX <strong>and</strong> OpenVMS systems are the same. To create a multi-user mapping,<br />
use FTP (or another file transfer utility) to copy each applicable /etc/passwd file from the UNIX<br />
system to the OpenVMS system running the NFS Server. Use the NFS-CONFIG ADD NFS-<br />
PASSWD-FILE comm<strong>and</strong> to create the mapping. For example:<br />
NFS-CONFIG>ADD NFS-PASSWD-FILE MULTINET:NFS.PASSWD<br />
To create a multi-user mapping associated with the NFS group MARKETING, you might use the<br />
comm<strong>and</strong>:<br />
NFS-CONFIG>ADD NFS-PASSWD-FILE MULTINET:NFS.PASSWD1 MARKETING<br />
CAUTION! If you add or delete users, or change the mapping between user name <strong>and</strong> UID/GID in an<br />
/etc/passwd file on an NFS client, be sure to make the same change in the NFS passwd<br />
file on the server.<br />
The following example shows a UID translation list that includes both individual mappings <strong>and</strong><br />
passwd file entries created with the NFS-CONFIG ADD UID-TRANSLATION <strong>and</strong> ADD NFS-<br />
PASSWD-FILE comm<strong>and</strong>s (excerpted from the output of a SHOW comm<strong>and</strong>).<br />
NFS Passwd Files: MULTINET:NFS.PASSWD, MULTINET:NFS.PASSWD2<br />
UID Translations: VMS Username Unix UID Unix GID<br />
------------ -------- --------<br />
JOHN 10 15<br />
BANZAI 2 40<br />
The next example shows a UID translation list that includes NFS group entries, individual<br />
mappings, <strong>and</strong> passwd file entries created with the NFS-CONFIG ADD NFS-GROUP, ADD UID-<br />
TRANSLATION, <strong>and</strong> ADD NFS-PASSWD-FILE comm<strong>and</strong>s (excerpted from the output of a<br />
SHOW comm<strong>and</strong>).<br />
NFS Group Name Members<br />
-------------- -------<br />
ENGINEERING control.flowers.com,fang.flowers.com<br />
SALES small-berries.flowers.com,whorfin.flowers.com<br />
NFS Passwd Files: ENGINEERING/MULTINET:NFS.PASSWD, MULTINET:NFS.PASSWD2<br />
UID Translations: VMS Username Unix UID Unix GID<br />
------------ -------- --------
JOHN 10 15<br />
BANZAI 2 40<br />
ENGINEERING/MAX 30 10<br />
SALES/TOMMY 30 10<br />
Configuring the <strong>MultiNet</strong> NFSV2 Server<br />
To delete an NFS passwd file entry, use the DELETE NFS-PASSWD-FILE comm<strong>and</strong>. For<br />
example:<br />
NFS-CONFIG>DELETE NFS-PASSWD-FILE MULTINET:NFS.PASSWD<br />
Exporting File Systems<br />
To make a file system available to the network, you must export it by adding the name of the file<br />
system's mount point to the NFS.CONFIGURATION file system export list, then reloading the<br />
NFS Server. To display the current list, use the SHOW comm<strong>and</strong>. A sample list is included in the<br />
Invoking the NFS Configuration Utility (NFS-CONFIG) <strong>and</strong> Displaying Configuration Information<br />
section.<br />
Note! All directories accessible via NFS must have at least READ <strong>and</strong> EXECUTE access set for the<br />
desired level of access (SYSTEM, OWNER, GROUP, or WORLD). In particular, the root<br />
directory file 000000.DIR (<strong>and</strong> possibly other directories below it) must have WORLD READ<br />
<strong>and</strong> EXECUTE access set. Otherwise, users on UNIX <strong>and</strong> PC systems may not be able to<br />
access files in their directories below 000000.DIR, even if they own those files <strong>and</strong> directories. If<br />
the directory protections are set incorrectly, directories that have files in them may appear to be<br />
empty.<br />
Naming Mount Points<br />
You must specify the names of the server mount points that are to be available to the network. The<br />
server accepts the following formats for mount point names:<br />
• A device name (for example, DUA0:)<br />
• A device <strong>and</strong> directory name (for example, DUA0:[USERS] or SYS$SYSDEVICE:[USERS])<br />
• A logical name (for example, SYS$SYSDEVICE: or SYS$SYSTEM:)<br />
When a mount point can be specified with more than one name (for example, SYS$SYSDEVICE:,<br />
DISK$VAXVMSRL4:, <strong>and</strong> DUA0:) you can use any of them. However, note that the name you<br />
choose is also the name the client uses to access the file system when mounting it.<br />
Although exported file systems can overlap, this practice is not recommended because information<br />
is duplicated in the NFS server cache. Overlapping information in the cache will often cause<br />
undesirable behavior by the NFS Server.<br />
For example, if you use the device name DUA0: as a mount point, you make the entire file system<br />
available for access. If you use the directory name DUA0:[USERS] as a mount point, you make<br />
DUA0:[USERS...]*.* available. If you specify both DUA0: <strong>and</strong> DUA0:[USERS] as mount points,<br />
the DUA0:[USERS] mount point is redundant <strong>and</strong> will result in unexpected behavior by the NFS<br />
Server.<br />
27-15
Configuring the <strong>MultiNet</strong> NFSV2 Server<br />
Note! To export a directory that requires you to use more than 13 characters, you must create a logical<br />
name that points to the directory <strong>and</strong> export the logical name instead of the directory name.<br />
Adding File Systems to the Export List<br />
27-16<br />
Use the NFS-CONFIG ADD EXPORT comm<strong>and</strong> to export a mount point. Remember that you<br />
must reload the NFS Server to make the new mount point available to the network.<br />
Note! Do not export search paths.<br />
The following example adds the file system SYS$SYSDEVICE: to the export list.<br />
$ MULTINET CONFIGURE/NFS<br />
<strong>MultiNet</strong> NFS Configuration Utility 5.4(nnn)<br />
[Reading in configuration from MULTINET:NFS.CONFIGURATION]<br />
NFS-CONFIG>ADD EXPORT SYS$SYSDEVICE:<br />
[Added new Exported file system "SYS$SYSDEVICE:"]<br />
[Current Exported File System set to "SYS$SYSDEVICE:"]<br />
NFS-CONFIG>RESTART<br />
Once exported, a file system is "open" or available to all clients. You can restrict access to a mount<br />
point (as described in the Restricting Access to a Mount Point section); however, you should first<br />
configure the clients that will access it <strong>and</strong> test the resulting configuration before defining<br />
restrictions. Performing configuration operations in this sequence facilitates the verification of file<br />
system exports <strong>and</strong> mounts, since the server will not reject mount requests to an open file system.<br />
Similarly, although you can change the settings of several global parameters (as described in the<br />
Modifying NFS Server Global Parameters section), wait until you have tested your initial<br />
configuration before making such changes.<br />
If your network includes PC clients, you may want to configure the remote printing service of the<br />
PC-NFSD protocol (as described in the Configuring PC-NFSD Remote Printing Service section).<br />
Removing File Systems from the Export List<br />
To remove a file system from the network, use the NFS-CONFIG DELETE EXPORT comm<strong>and</strong>.<br />
For example:<br />
NFS-CONFIG>DELETE EXPORT SYS$DEVICE:<br />
Establishing Cluster-wide Aliases<br />
<strong>MultiNet</strong> allows the system manager to declare a cluster-wide IP address serviced by a single node<br />
at any given time. If that node should fail, servicing of the cluster-wide IP address will "fail-over"<br />
to another node, allowing NFS clients to continue to access cluster disks even if the host running<br />
the NFS Server crashes. For more information about creating cluster-wide IP addresses, refer to<br />
Chapter 11.
Configuring the <strong>MultiNet</strong> NFSV2 Server<br />
Reloading the <strong>MultiNet</strong> NFS Server Configuration <strong>and</strong> Restarting the Server<br />
Whenever you change the server configuration, you alter the NFS.CONFIGURATION file. Most of<br />
the remaining procedures described in this chapter change the configuration. Before you can use a<br />
new or revised configuration, you must reload the <strong>MultiNet</strong> NFS Server, either from within NFS-<br />
CONFIG or from DCL.<br />
Reloading the server involves reloading the NFS <strong>and</strong> RPCMOUNT services:<br />
• Enter the following comm<strong>and</strong> to reload both protocols:<br />
NFS-CONFIG>RELOAD<br />
• Enter the following comm<strong>and</strong> from DCL to restart only the <strong>MultiNet</strong> NFS Server:<br />
$ MULTINET NETCONTROL NFS RELOAD<br />
• Enter the following comm<strong>and</strong> from DCL to restart only the RPCMOUNT protocol:<br />
$ MULTINET NETCONTROL RPCMOUNT RELOAD<br />
Note! You may also restart the NFS Server by killing the current process <strong>and</strong> running a new one. The<br />
following DCL comm<strong>and</strong> does this:<br />
NFS-CONFIG>RESTART<br />
Restarting the server causes the file cache to be flushed <strong>and</strong> the new server will need to rebuild<br />
it. Therefore, it is recommended that you use the RELOAD comm<strong>and</strong> whenever possible.<br />
Shutting Down the NFS Server<br />
You can edit your SYSHUTDOWN.COM procedure to include comm<strong>and</strong>s that stop the NFS<br />
Server. For example:<br />
$ MULTINET NETCONTROL NFS SHUTDOWN<br />
Testing the System Configuration<br />
Test the configuration at these times:<br />
• After your initial configuration, when you have:<br />
– Specified the mappings between UIDs/GIDs <strong>and</strong> user names<br />
– Configured the <strong>MultiNet</strong> NFS Server<br />
– Restarted the NFS Server<br />
– Configured one or more clients for the NFS Server<br />
• After you modify the configuration by reconfiguring the NFS Server, adding clients, or<br />
reconfiguring existing clients<br />
To test a configuration, check all file systems from one client, <strong>and</strong> at least one file system from<br />
every client:<br />
27-17
Configuring the <strong>MultiNet</strong> NFSV2 Server<br />
27-18<br />
1 Log in as one of the client's users. For example, on a Sun Microsystems host client, you might<br />
log in as "joebob" (be sure your system includes a mapping for "joebob's" UID/GID <strong>and</strong> a user<br />
name on the server system).<br />
2 Mount a file system the user can access. For instructions on mounting file systems, see the<br />
Configuring Clients section.<br />
3 Check the mount as described in the next steps.<br />
a Check the contents of the file system's mount directory. For example, on a Sun host client,<br />
use the "cd" comm<strong>and</strong> to change to the mount directory, <strong>and</strong> the "ls -l" comm<strong>and</strong> to list the<br />
names of the directory's files.<br />
b Verify that files in the mount directory can be read. For example, on a Sun host client, use the<br />
"cp" comm<strong>and</strong> to copy a file from directories under the mount point to the /dev/null<br />
directory.<br />
c Verify that files can be written to the OpenVMS server. For example, on a Sun host client,<br />
use the following comm<strong>and</strong> to copy a file to the current directory:<br />
% cp /vmunix .<br />
Note! <strong>Process</strong> <strong>Software</strong> recommends using the "cp" utility to test the server because it is better at<br />
reporting protection problems than most other UNIX utilities, including "cat."<br />
4 Repeat this process until you have mounted <strong>and</strong> checked all file systems that the client's users<br />
wish to access.<br />
5 Log in from each of the other clients <strong>and</strong> check file system mounts as described in Steps 1<br />
through 4.<br />
Checking for Errors<br />
After exporting file systems <strong>and</strong> restarting the server, but before configuring clients, enter the<br />
following comm<strong>and</strong>:<br />
$ REPLY/ENABLE=NETWORK/TEMP<br />
This comm<strong>and</strong> causes network event messages to be displayed on your terminal, including error<br />
messages from the NFS <strong>and</strong> RPCMOUNT servers. See the <strong>MultiNet</strong> for OpenVMS Messages,<br />
Logicals, <strong>and</strong> DECnet Applications book for lists of error messages <strong>and</strong> the conditions that<br />
generate them.<br />
Configuring Clients<br />
After configuring the <strong>MultiNet</strong> NFS Server, you must configure each client that will access<br />
OpenVMS server file systems. Different types of clients require different configuration procedures.<br />
There are, however, two general guidelines for configuring clients:<br />
• Each client must explicitly mount each file system to which it requires access. For most types of<br />
clients, a mount directory must be created for each file system.<br />
• For most types of clients, you must change the default settings of some configuration parameters<br />
in the client's MOUNT comm<strong>and</strong>. These settings control how the client accesses the OpenVMS
Configuring the <strong>MultiNet</strong> NFSV2 Server<br />
server.<br />
The following section explains how to configure Sun Microsystems hosts running SunOS (UNIX).<br />
Chapter 28 explains how to configure OpenVMS systems as clients using the <strong>MultiNet</strong> NFS Client<br />
software.<br />
Configuring Sun Host Clients<br />
As part of the configuration process, you must log into each client <strong>and</strong> mount all file systems the<br />
client will have access to. For each client, you may also need to adjust the "wsize," "timeo," <strong>and</strong><br />
"retrans" parameters for the client's mount comm<strong>and</strong>. Before a file system is mounted, you must<br />
also ensure that the directory under which a file system will be mounted exists on the client.<br />
Mounting File Systems on Sun Hosts<br />
Mount each file system as follows:<br />
1 Use the "mkdir" comm<strong>and</strong> to create the mount directories. For example, enter the following<br />
comm<strong>and</strong> while logged in as "root" to create a directory called "/mnt":<br />
# mkdir /mnt<br />
2 Mount each file system by executing the mount comm<strong>and</strong> with conservative values for "wsize,"<br />
"timeo," <strong>and</strong> "retrans," using this syntax:<br />
# mount -o , retrans=5 \<br />
vmsmachine:sys\$sysdevice: /mnt<br />
For example:<br />
# mount -o soft,rw,timeo=50, retrans=5 \<br />
vmsmachine:sys\$sysdevice: /mnt<br />
Once you have mounted the remote file system, you can experiment with other "wsize," "timeo,"<br />
<strong>and</strong> "retrans" values to improve performance, as described in the Explicitly Specifying Mount<br />
Parameter Settings section.<br />
Note! When the mount point name is specified with OpenVMS syntax, any special characters (for<br />
example, $, [, <strong>and</strong> ]) must be delimited with a backslash (\) for proper processing by the C shell.<br />
3 If a mount is not successful, errors may be reported to the user's display or to the OpenVMS<br />
console via OPCOM. (NUL characters no longer appear in the OPCOM output.)<br />
4 After performing a successful mount, <strong>and</strong> after adjusting the "wsize," "timeo," <strong>and</strong> "retrans"<br />
values, add the file system <strong>and</strong> its mount parameters to the client's /etc/fstab file so file system<br />
mounts will occur automatically.<br />
Explicitly Specifying Mount Parameter Settings<br />
As part of configuring a Sun Microsystems host client, you may need to change the number of<br />
block I/O daemon (biod) processes or the values of one or more mount-parameter settings to<br />
correct the two problems discussed next. Make these corrections after performing the first mount of<br />
27-19
Configuring the <strong>MultiNet</strong> NFSV2 Server<br />
27-20<br />
a file system as described in Step 2 in the procedure in the preceding section.<br />
The OpenVMS XQP is relatively slow. There are times when the <strong>MultiNet</strong> NFS Server must<br />
perform many operations before returning the answer to a seemingly simple query. The resulting<br />
delay can cause a client to report "RPC timeout errors" <strong>and</strong> unnecessarily retransmit its query.<br />
For example, accessing a large directory file can cause an unexpected delay in processing an NFS<br />
request. <strong>Process</strong> <strong>Software</strong> recommends you keep fewer than 1,000 files in each directory, especially<br />
when you frequently add <strong>and</strong> delete files.<br />
Such problems usually occur sporadically, <strong>and</strong> are often not reproducible because the server has<br />
cached the result <strong>and</strong> can answer the query quickly when it is made a second time.<br />
In Step 2 of Mounting File Systems on Sun Hosts the problem was avoided by mounting the file<br />
system with larger than normal "timeo" (timeout) <strong>and</strong>/or "retrans" (retransmission) parameter<br />
settings. The higher "timeo" value increases the length of delay the server will tolerate before<br />
timing out. However, if a packet is lost during transmission, a large "timeo" value means a long<br />
delay before retransmission.<br />
The higher "retrans" value increases the number <strong>and</strong> rate of retransmissions a client makes before<br />
timing out, hence decreasing the delay between retransmissions. Retransmissions do not adversely<br />
affect the server, however, as each new request is recorded in the duplicate-requests cache<br />
(described in the Modifying NFS Server Global Parameters section). The server discards all<br />
retransmissions (which are duplicates of the original request) as it processes the original.<br />
The "timeo" <strong>and</strong> "retrans" values can be adjusted to achieve an appropriate tradeoff for your<br />
network. A high "timeo" value with a low "retrans" value is an appropriate solution for a reliable<br />
network that requires few retransmissions. In contrast, although specifying a high "retrans" value<br />
<strong>and</strong> a low "timeo" value can create significant overhead in unnecessary queries, this solution is<br />
appropriate for an unreliable network because it minimizes the delay when a packet is lost.<br />
The total time available to the server to complete an operation is the product of the "timeo" <strong>and</strong><br />
"retrans" values. For most systems, appropriate values are 50 for "timeo" (5 seconds-"timeo" is<br />
usually specified in tenths of seconds), <strong>and</strong> 5 for "retrans."<br />
Restricting Access to a Mount Point<br />
By default, when you export a file system, its mount point is "open" <strong>and</strong> available for mounting by<br />
any client on your network. However, for each exported file system, you can create a list of clients<br />
permitted to mount it. This list, called the mount restriction list, appears next to the name of the file<br />
system's mount point in the export list. The presence of a mount restriction list prevents all unlisted<br />
clients from mounting the mount point.<br />
You can export a mount point for read-only access using the NFS-CONFIG comm<strong>and</strong> ADD<br />
MOUNT-RESTRICTION. Use the -ro (read-only) keyword instead of the nfs_group name. Any<br />
attempts to write to the disk specified by this mount point fails. This restriction affects any NFS<br />
group associated with that particular mount point. This example shows how to export a disk to<br />
restrict all users to read-only access:<br />
NFS-CONFIG>ADD MOUNT-RESTRICTION DISK$ONE -ro
Configuring the <strong>MultiNet</strong> NFSV2 Server<br />
The next example shows how to restrict one group of users (those on BOOTE.FLOWERS.COM) to<br />
read-only access, at the same time denying access to everyone else:<br />
NFS-CONFIG>ADD MOUNT-RESTRICTION DISK$USERS BOOTE.FLOWERS.COM<br />
NFS-CONFIG>ADD MOUNT-RESTRICTION DISK$USERS -ro<br />
Use NFS-CONFIG to create <strong>and</strong> modify mount restriction lists. Use the following procedure to<br />
create a mount restriction list for a file system's mount point or add a client to the list. You must<br />
reload the server before a new or changed list goes into effect.<br />
1 Select the mount point by entering SELECT.<br />
2 Add a client to the mount point's list by entering ADD MOUNT-RESTRICTION. (If no list<br />
exists, specify the first client to automatically create a list.)<br />
3 In addition to a client name, you can specify the name of an NFS group as described in the<br />
Grouping NFS Client Systems for UID/GID Mappings section. Specifying a group name is<br />
equivalent to individually listing each of the clients in that group.<br />
The following example shows the client SALES.FLOWERS.COM being added to the mount<br />
restriction list for the SYS$SYSDEVICE: mount point.<br />
NFS-CONFIG>SELECT SYS$SYSDEVICE:<br />
[Current Exported File System set to "SYS$SYSDEVICE:"]<br />
NFS-CONFIG>ADD MOUNT-RESTRICTION SALES.FLOWERS.COM<br />
[Added Mount restriction to "SYS$SYSDEVICE:" allowing host<br />
“sales.flowers.com"]<br />
NFS-CONFIG>RESTART<br />
$<br />
4 To remove a client from the mount restriction list, use the DELETE MOUNT-RESTRICTION<br />
comm<strong>and</strong> followed by the RESTART comm<strong>and</strong>.<br />
5 To display the mount restriction list for a mount point, use the SHOW comm<strong>and</strong>.<br />
Controlling NFS File Access with OpenVMS Access Control Lists (ACLs)<br />
Because of the differences between OpenVMS security <strong>and</strong> UNIX system security (after which<br />
NFS is modeled), configuring the NFS Server to h<strong>and</strong>le ACLs properly requires a thorough<br />
underst<strong>and</strong>ing of both systems.<br />
The <strong>MultiNet</strong> NFS Server h<strong>and</strong>les ACL mappings by allowing the addition of VMS rights<br />
identifiers to the NFS UID/GID translation table. The syntax is the same as that for adding a user<br />
name to the table.<br />
Some effort is required to determine the necessary correlation between UIC groups <strong>and</strong> rights<br />
identifiers in OpenVMS <strong>and</strong> GIDs on the NFS client. The network administrator must scan the<br />
owners <strong>and</strong> ACLs of the files being exported <strong>and</strong> make sure all UICs <strong>and</strong> rights identifiers<br />
associated with the file system have a valid UID/GID translation. This is necessary to make sure the<br />
<strong>MultiNet</strong> NFS Server's representation of security information on all files is accurate.<br />
Although file access is determined by the server based on the user's UIC, the correct representation<br />
of security information to the client can be critical. Many multi-user clients grant access to data in<br />
27-21
Configuring the <strong>MultiNet</strong> NFSV2 Server<br />
27-22<br />
the cache locally, without making a request to the server. Therefore, it is imperative that the<br />
representation of a file's protection <strong>and</strong> security information is accurate.<br />
Single-user clients do not usually have this problem. However, on any client that denies access<br />
based on returned security information, improper mapping may deny access unnecessarily.<br />
To make sure the <strong>MultiNet</strong> NFS Server can h<strong>and</strong>le requests for files with ACLs:<br />
1 Make sure there are UID/GID translations for all rights identifiers in all ACLs associated with<br />
exported files.<br />
2 For each rights identifier, make sure the appropriate users on NFS client systems have the same<br />
GID.<br />
To illustrate this solution, consider an environment in which the files belonging to a project are<br />
exported as part of a single file system <strong>and</strong> you need to control access to each project's files by an<br />
ACL. Perform the following tasks for each project:<br />
1 On the NFS client, select a GID for the project members.<br />
2 Then, on the <strong>MultiNet</strong> NFS Server:<br />
a Create UID/GID mappings for each NFS client user who needs to access the project files (see<br />
the Creating UID/GID Mappings section). These mappings must match the GIDs on the<br />
client for the project.<br />
b Use AUTHORIZE to create a new identifier for the project.<br />
c Add a UID mapping for the project identifier. The GID associated with the project identifier<br />
must be the same as the project GID assigned to the NFS client. The choice of UID can be<br />
arbitrary, but the UID must not conflict with any other currently assigned UIDs.<br />
d Modify the protection of the project files to allow no WORLD or GROUP access. If the<br />
OpenVMS group is significant, however, you may want to allow GROUP access.<br />
e Add ACLs to the project files <strong>and</strong> directories that grant READ <strong>and</strong> WRITE access to holders<br />
of the project identifier that you created in Step 3.<br />
f Use AUTHORIZE to grant the project identifier you created in Step 2 to users with the<br />
project GID (created in Step 1).<br />
3 Now, to add new users to the project:<br />
• Assign the project GID to the user on the NFS client. This mapping must match the GID on<br />
the client for the project.<br />
• Add a UID/GID mapping for the user on the <strong>MultiNet</strong> NFS Server.<br />
• Grant the OpenVMS group identifier to the new user.<br />
Note! The preceding procedure is the supported method for using ACLs to control access to files<br />
exported via NFS. If you cannot use this method, refer to the How the <strong>MultiNet</strong> NFS Server<br />
Interprets ACL <strong>and</strong> UIC Protection section for details on how the <strong>MultiNet</strong> NFS Server converts<br />
UIC <strong>and</strong> ACL protection information into UID/GID-style file protection masks for NFS clients.<br />
Idiosyncrasies of ACL Support over NFS<br />
When using ACLs, OpenVMS lets the <strong>MultiNet</strong> NFS Server assign different access masks for
Configuring the <strong>MultiNet</strong> NFSV2 Server<br />
many different groups of users. When a file's attributes are transmitted to the client, the NFS<br />
protocol only lets the server return an access mask for the owner's GID; the protocol does not allow<br />
the <strong>MultiNet</strong> NFS Server to return multiple GIDs <strong>and</strong> their associated access masks. Because some<br />
NFS clients grant or deny access based on the protections returned with the file's attributes, the<br />
<strong>MultiNet</strong> NFS Server's responses to attribute requests sometimes change the owner's GID <strong>and</strong><br />
associated access mask to properly represent access for the client user.<br />
One anomaly these dynamic responses produce is that a directory listing on the client (for example,<br />
an ls -l comm<strong>and</strong> on a UNIX client) shows files accessed through ACLs as being owned by<br />
different GIDs at different times, depending on who accessed them most recently.<br />
If the client grants or denies access based on the protection information in the cache, users may<br />
experience intermittent access failures when more than one user tries to gain access to the same file<br />
via an ACL. This phenomenon happens when the user would normally receive access through the<br />
group or through an ACE (access control list entry).<br />
While world access can always be consistently mapped, owner access is only consistently mapped<br />
if the ACL does not contain ACEs that cannot be mapped to a GID. For details, see the How the<br />
<strong>MultiNet</strong> NFS Server H<strong>and</strong>les ACLs section. If the UID/GID translation table is configured<br />
correctly, users should never have access to files to which they have no legitimate access on the<br />
server. However, they may intermittently be denied access.<br />
How the <strong>MultiNet</strong> NFS Server Interprets ACL <strong>and</strong> UIC Protection<br />
The main difficulty facing <strong>MultiNet</strong> NFS Server administrators is how to coordinate NFS use of the<br />
UNIX-style UID/GID protection model with OpenVMS ACL support.<br />
Note! Consulting ACLs as part of an NFS Server's access-checking scheme is necessary, but not<br />
sufficient, to adequately support the presence of ACLs assigned to files.<br />
Consider the case where an OpenVMS system manager wants to grant access to files based on<br />
project groups without having to make sure that all client UIDs map to the same OpenVMS group.<br />
A single user may be a member of several projects, a concept incompatible with the single-group<br />
model used by VMS.<br />
It might seem that the system manager only needs to add rights identifiers to the mapped accounts<br />
<strong>and</strong> then set up ACLs on the appropriate files. The problem with this scheme is that file protections<br />
would normally be set to WORLD=NOACCESS, allowing file accesses to be granted only by the<br />
ACL. However, because the file protections deny access on a UID basis, any local access checks<br />
performed at the client will fail, bypassing the ACLs.<br />
This problem can be solved if the <strong>MultiNet</strong> NFS Server makes intelligent use of the NFS GID. The<br />
NFS protocol allows a single user to be identified with up to 10 groups (projects), consistent with<br />
UNIX. In this model, the NFS client checks the list of GIDs assigned to the local user to see if it<br />
matches the group ID associated with the file. If there is a match, the GROUP field of the file<br />
protection mask is used to determine accessibility.<br />
The <strong>MultiNet</strong> NFS Server takes advantage of this model by selectively modifying the returned<br />
group ownership for files based upon applicable ACEs. The <strong>MultiNet</strong> NFS Server processes ACLs<br />
in the following manner. To determine whether the NFS Server will grant access:<br />
27-23
Configuring the <strong>MultiNet</strong> NFSV2 Server<br />
27-24<br />
1 The NFS Server obtains rights identifiers for the OpenVMS account associated with the<br />
requester's UID.<br />
2 The NFS Server selects the first (if any) ACE assigned to the file (matching one of the rights<br />
identifiers held by the OpenVMS account). The protection specified in the ACE is used in place<br />
of the protection mask associated with the file.<br />
3 If there are no matching ACEs, the <strong>MultiNet</strong> NFS Server performs the st<strong>and</strong>ard UIC protection<br />
check.<br />
When asked by the NFS client for the protection mask <strong>and</strong> ownership for a file, the NFS Server<br />
does the following:<br />
1 The NFS Server obtains rights identifiers for the OpenVMS account associated with the<br />
requester's UID.<br />
2 If one of the ACE identifiers matches the file owner's UIC, the NFS Server uses the protection<br />
mask in the ACE to calculate the OWNER field of the protection mask returned to the NFS<br />
client. Otherwise, the NFS Server uses the OWNER field of the protection mask associated with<br />
the file to calculate the OWNER field returned to the NFS client.<br />
3 The NFS Server selects the first (if any) protection ACE assigned to the file (matching one of the<br />
rights identifiers held by the requester's VMS account).<br />
4 If the NFS server encounters a matching ACE whose identification is a UIC, <strong>and</strong> the identifier:<br />
• Is in the same OpenVMS group as the file owner, the server ignores the ACE.<br />
• Is not in the same OpenVMS group as the file owner, the server maps the requester's UIC <strong>and</strong><br />
GID along with the along with the ACE's protection mask as the owner of the file when<br />
returning NFS attribute information<br />
5 If the NFS server selects an ACE, the group ownership it returns to the NFS client is taken from<br />
the GID associated with the matching identifier.<br />
If no matching ACE is found, the <strong>MultiNet</strong> NFS server obtains the GID for the file from the file<br />
owner.<br />
To assign GIDs to UICs <strong>and</strong> identifiers, use the NFS-CONFIG ADD UID comm<strong>and</strong> described in<br />
the Creating UID/GID Mappings section.<br />
Under this scheme, the system manager sets file protections as needed (for example,<br />
W:NOACCESS, G:RWE), <strong>and</strong> creates an ACL to grant access to processes holding a specific rights<br />
identifier.<br />
When the NFS client performs local access checking, it compares the list of GIDs (associated with<br />
the user) against the file's group ownership, which the NFS Server bases on the ACL information<br />
for the file. This scheme prevents the client's caching mechanism from defeating the ACLs<br />
associated with the file.<br />
How the <strong>MultiNet</strong> NFS Server H<strong>and</strong>les ACLs<br />
The key to underst<strong>and</strong>ing how ACLs affect file access is in the exchange that takes place when an<br />
NFS client requests attributes for a file or directory it wants to access. The client sends the server<br />
the user's UID/GID pair when it identifies the file it wants to access. The server must respond with
Configuring the <strong>MultiNet</strong> NFSV2 Server<br />
the UID/GID pair of the file's owner along with the protections on that file in UNIX format (R/W/E<br />
for owner, group, <strong>and</strong> world/others). To accomplish this, the NFS Server must translate the<br />
OpenVMS protection mask, applicable ACEs, <strong>and</strong> UIC-based file owner into a UNIX-style<br />
protection mask <strong>and</strong> UID/GID-based owner.<br />
If the file being requested has no ACLs associated with it, the NFS Server simply returns the<br />
OpenVMS file owner's UID/GID pair which it obtains from the NFS Server's UID translation table<br />
<strong>and</strong> the file's owner, group, <strong>and</strong> world protections.<br />
If the file has an ACL, the NFS Server scans the ACL for ACEs in a format that does not allow the<br />
NFS Server to map group protections. These ACLs must be h<strong>and</strong>led in a special way (see the<br />
H<strong>and</strong>ling ACLs with Unmappable ACEs section).<br />
If there are no unmappable ACEs, the client's UID is translated, <strong>and</strong> the ACL is scanned for a<br />
match based on the associated UIC. At the same time, the list is also scanned for ACEs that should<br />
be mapped to world or owner protections. Based on the scan, the server returns attributes as<br />
follows:<br />
• The OWNER protection mask returned is the owner default protection mask logically OR'd with<br />
the access mask of the first ACE matching the owner's UIC <strong>and</strong> associated rights identifiers.<br />
This emulates OpenVMS behavior <strong>and</strong> prevents the owner of the file from being denied access<br />
because of an ACE.<br />
• The WORLD protection mask returned is the access mask associated with the first "wildcard"<br />
ACE, if one exists. Otherwise, the WORLD protection mask returned is the default WORLD<br />
protection.<br />
• The GROUP protection mask returned is the access mask associated with the first ACE<br />
matching the requestor's UIC <strong>and</strong> associated rights identifiers. The GID returned is the GID<br />
translation of the rights identifier or UIC that matched this ACE. If no such ACE is found, the<br />
GROUP protection mask returned is the default group protection mask <strong>and</strong> the GID returned is<br />
the GID translation of the file's owner.<br />
• The UID returned is the UID translation of the file's owner.<br />
H<strong>and</strong>ling ACLs with Unmappable ACEs<br />
Occasionally, ACE access cannot be mapped to a GID as described in the previous section. This<br />
happens when the ACE identifier is specified in the following manner:<br />
[*,member]<br />
This also happens in cases of multiple identifiers on a single ACE, such as:<br />
ACE Description<br />
A+B A <strong>and</strong> B represent rights identifiers.<br />
[a,*]+[b,*] a <strong>and</strong> b represent UIC groups.<br />
A+[a,*] A is a rights identifier <strong>and</strong> a is a UIC group.<br />
27-25
Configuring the <strong>MultiNet</strong> NFSV2 Server<br />
27-26<br />
If the ACL associated with the file contains any ACEs that cannot be mapped to a GID, file<br />
attributes are returned as follows:<br />
• The owner protection mask returned is the access mask associated with the first ACE matching<br />
the requestor's UIC <strong>and</strong> associated rights identifiers. If no such ACE is found, the owner<br />
protection mask returned is the default protection mask appropriate for the requestor; that is, the<br />
owner's default protection mask if they own the file, the group protection mask if appropriate,<br />
<strong>and</strong> so on.<br />
• The owner UID/GID returned is the UID/GID translation of the requestor.<br />
• The group protection mask returned is NONE.<br />
• The world protection mask returned is NONE.<br />
The <strong>MultiNet</strong> NFS Server cannot accurately represent OpenVMS protections in this case. This<br />
technique ensures no users are granted access to data to which they would not normally have access<br />
in the client's cache on the server. However, on multi-user clients where access is denied based on<br />
cached file attributes, this mapping may result in intermittent access failures to other users trying to<br />
access the file simultaneously.<br />
Disabling the NFS Server's ACL Support<br />
You can disable the <strong>MultiNet</strong> NFS Server's ACL support with the logical name<br />
MULTINET_NFS_SERVER_NFS_ACL_SUPPORT_DISABLED. To do so, this logical name<br />
must be defined as TRUE or YES in the system-wide logical name table.<br />
After defining the logical name, restart the <strong>MultiNet</strong> NFS Server so the definition takes effect.<br />
/VMS_STYLE_CREATE Mount Point Option<br />
The /VMS_STYLE_CREATE mount point option instructs the <strong>MultiNet</strong> NFS Server to use<br />
OpenVMS semantics to determine the file owner when a file is created by an NFS client. This<br />
mechanism lets NFS clients create files <strong>and</strong> charge disk quota to a rights identifier in the same way<br />
that OpenVMS users are accustomed.<br />
Normally, the NFS Server sets the file owner field exactly as specified by the NFS Client software.<br />
Limitations <strong>and</strong> Restrictions<br />
Alarm ACEs are not supported.<br />
Configuring PC-NFSD Remote Printing Service<br />
The <strong>MultiNet</strong> PC-NFSD server includes support for a remote printing service used by PC <strong>and</strong> PCcompatible<br />
clients running PC-NFS. This section describes how to configure the service.<br />
Before you can configure the service, the PC-NFSD server must be enabled (usually performed<br />
when enabling the <strong>MultiNet</strong> NFS Server). Before PC users can use the service, you must set up<br />
OpenVMS accounts, UID/GID names, <strong>and</strong> UID/GID-user name translations for them. The cacheinterrupt<br />
parameters (described later in the Modifying NFS Server Global Parameters section,)<br />
must also be set to 1 (the default setting).<br />
To configure the service, you must specify a generic mount directory name the server can use to
Configuring the <strong>MultiNet</strong> NFSV2 Server<br />
create individual mount directories for spool areas on the clients. Each of these directories must be<br />
below an exported mount point available to all of the PCs.<br />
The exported mount point directory must allow write access by the PC client users so their<br />
subdirectories <strong>and</strong> print files can be created.<br />
For example, if the PC-NFSD spool area is specified as SYS$SYSDEVICE:[TMP], all PCNFS<br />
user print files are placed in this directory, <strong>and</strong> all PCNFS users must have write access to the<br />
SYS$SYSDEVICE:[TMP] directory.<br />
If the PC-NFSD spool area is specified as SYS$SYSDEVICE:[TMP.%], PCNFS user print files are<br />
placed in individual subdirectories of SYS$SYSDEVICE:[TMP], <strong>and</strong> all PCNFS users must have<br />
write access to the SYS$SYSDEVICE:[TMP] directory.<br />
The generic name can include a percent (%) character, which is replaced by the names of individual<br />
clients when the server creates their spool directories.<br />
For example, if all clients can access either SYS$SYSDEVICE: or SYS$SYSDEVICE:[TMP]<br />
exported file systems, the name SYS$SYSDEVICE:[TMP.%] could be used for the generic spool<br />
directory. When the server receives a client's first remote printing request, the server creates a<br />
mount spool directory for that client. The server defines the name for this directory by using the<br />
generic directory name <strong>and</strong> replaces "%" with the client's name. The server supplies the name to the<br />
client, <strong>and</strong> the client mounts the directory. From then on, the client uses the directory to hold all<br />
files to be printed remotely, <strong>and</strong> the server performs all of the printing operations.<br />
Configure the remote-printing service as described in the following example, <strong>and</strong> as illustrated in<br />
the following example.<br />
Note! You use SERVER-CONFIG (not NFS-CONFIG) for this task. You also use SERVER-CONFIG to<br />
restart the server after you have finished.<br />
1 Check the following settings before configuring the remote printing service:<br />
• Make sure file protections on the exported directories <strong>and</strong> subdirectories are as desired for<br />
the specified user names. Make sure file protection on the exported directory allows at least<br />
WORLD:RE access.<br />
• For PCNFS printing, make sure the PC-NFSD spool directory allows write access by the user<br />
<strong>and</strong> the user has sufficient disk quota if disk quotas are enabled on the OpenVMS volume<br />
that contains the PC-NFSD spool area.<br />
2 Invoke the SERVER-CONFIG utility:<br />
$ MULTINET CONFIGURE/SERVER<br />
3 Select the PC-NFSD protocol:<br />
SERVER-CONFIG>SELECT PCNFSD<br />
4 Invoke the parameter-editing procedure:<br />
SERVER-CONFIG>SET PARAMETER<br />
27-27
Configuring the <strong>MultiNet</strong> NFSV2 Server<br />
27-28<br />
5 If the SPOOL-DIRECTORY parameter is set, the utility asks you if you want to delete it.<br />
Respond by entering YES.<br />
Delete parameter "spool-directory" ? [NO] Y<br />
6 The utility prompts you to add parameters or exit the utility. Set the SPOOL-DIRECTORY<br />
parameter <strong>and</strong> specify the generic directory name for it:<br />
You can now add new parameters for PCNFSD. An empty line terminates.<br />
Add Parameter: SPOOL-DIRECTORY directory_name<br />
directory_name is the generic spool directory name.<br />
7 In response, the utility prompts you again to add parameters or exit the utility. Press RETURN to<br />
exit.<br />
8 Restart the <strong>MultiNet</strong> master server.<br />
$ MULTINET CONFIGURE/SERVER<br />
<strong>MultiNet</strong> Server Configuration Utility 5.4(nnn)<br />
[Reading in configuration from MULTINET:SERVICES.MASTER_SERVER]<br />
SERVER-CONFIG>SELECT PCNFSD<br />
[The Selected SERVER entry is now PCNFSD]<br />
SERVER-CONFIG>SET PARAMETER<br />
Delete parameter "spool-directory" ? [NO] Y<br />
You can now add new parameters for PCNFSD. An empty line terminates.<br />
Add Parameter: SPOOL-DIRECTORY SYS$SYSDEVICE:[TMP.%]<br />
Add Parameter:<br />
[Service specific parameters for PCNFSD changed]<br />
Restart the server to make these changes take effect.<br />
SERVER-CONFIG>RESTART<br />
Configuration modified, do you want to save it first ? [YES] Y<br />
[Writing configuration to<br />
SYS$COMMON:[MULTINET]SERVICES.MASTER_SERVER]<br />
%RUN-S-PROC_ID, identification of created process is 000002CD<br />
SERVER-CONFIG>EXIT<br />
$<br />
Use the logical name MULTINET_PCNFSD_QUEUE_TYPES to select the type of queues you<br />
want returned. Define the queues to be a comma-separated list of these valid queue types:<br />
GENERIC, PRINTER, SERVER, SYMBIONT, <strong>and</strong> TERMINAL.<br />
$ DEFINE/SYSTEM/EXECUTIVE MULTINET_PCNFSD_QUEUE_TYPES "PRINTER"<br />
Use the logical name MULTINET_PCNFSD_PRINTER_LIMIT to determine if the returned<br />
packet size is to be limited (takes a number for its value, in bytes). If this logical is not defined,<br />
<strong>MultiNet</strong> determines the size of the packet at run-time. For example:<br />
$ DEFINE/SYSTEM/EXECUTIVE MULTINET_PCNFSD_PRINTER_LIMIT 45000
Booting Diskless Hosts Using NFS<br />
Configuring the <strong>MultiNet</strong> NFSV2 Server<br />
This section explains how to configure <strong>MultiNet</strong> to boot diskless systems.<br />
The proliferation of inexpensive diskless UNIX hosts has made it desirable to boot them using an<br />
OpenVMS server system, thereby eliminating the need for expensive UNIX server system<br />
hardware.<br />
Booting diskless hosts using <strong>MultiNet</strong> is probably not supported by the host manufacturer <strong>and</strong><br />
requires considerable knowledge of host booting <strong>and</strong> some creativity in transferring the necessary<br />
files from the media on which they are stored to the system running OpenVMS.<br />
<strong>MultiNet</strong> has succeeded in booting Sun Microsystems <strong>and</strong> Hewlett-Packard’s DECstation hosts;<br />
the techniques described in this manual will likely work with other models.<br />
This section assumes the system manager has already configured the diskless client with<br />
appropriate UID mappings. In particular, the UID 0 GID 0 (root) should be mapped to the<br />
OpenVMS user name which owns the files being accessed by the client during the boot.<br />
Moving Files to OpenVMS<br />
Booting your diskless host requires that you transfer the contents of your UNIX distribution media<br />
into directories on your system running OpenVMS. Typically, the host vendor provides comm<strong>and</strong><br />
procedures for loading the distribution media onto the disk of a UNIX system <strong>and</strong> building an<br />
appropriately configured UNIX kernel. These comm<strong>and</strong> procedures are not likely to execute<br />
correctly under OpenVMS.<br />
The easiest way to transfer these files to the OpenVMS system is to:<br />
1 Install the files on a host with disks.<br />
2 Boot <strong>and</strong> configure the host using the methods supported by the host vendor.<br />
3 Using NFS, mount an OpenVMS system directory on the host <strong>and</strong> transfer the files using "cpio"<br />
or "tar."<br />
Note! You may have to find a host already running to read the distribution media.<br />
Booting Diskless DECstation Systems<br />
This section describes how to configure <strong>MultiNet</strong> to boot a diskless DECstation system.<br />
To configure <strong>MultiNet</strong> to boot a DECstation System, you must underst<strong>and</strong> the booting process <strong>and</strong><br />
the protocols involved. DECstation Systems boot in the following manner:<br />
1 The diskless DECstation client broadcasts an Ethernet request for assistance using MOP<br />
(Maintenance Operation Protocol).<br />
2 The OpenVMS server answers the MOP request <strong>and</strong>, using the MOP protocol, downloads its<br />
kernel image (/vmunix) <strong>and</strong> its configuration (name, Internet address, <strong>and</strong> so on) to the client.<br />
3 Using the NFS protocol suite, the client mounts its root file system, locates its swap file, <strong>and</strong><br />
proceeds to execute /etc/rc to boot.<br />
27-29
Configuring the <strong>MultiNet</strong> NFSV2 Server<br />
Configuring MOP<br />
27-30<br />
The MOP protocol is part of DECnet-VAX, <strong>and</strong> you use NCP (Network Control Program) to<br />
configure it. To boot a diskless DECstation system:<br />
1 An OpenVMS server must be running DECnet-VAX <strong>and</strong> using an HP Ethernet controller.<br />
2 The MOP protocol must first be enabled on the Ethernet device by turning on the SERVICE<br />
option. For example:<br />
$ MCR NCP DEFINE CIRCUIT QNA-0 SERVICE ENABLED<br />
$ MCR NCP SET CIRCUIT QNA-0 STATE OFF<br />
$ MCR NCP SET CIRCUIT QNA-0 STATE ON SERVICE ENABLED<br />
3 An entry must be made in the DECnet database for each client host. A DECnet name <strong>and</strong> address<br />
must be assigned to the host (even if it is not using DECnet protocol). For example:<br />
$ MCR NCP DEFINE NODE 24.172 NAME CLNT0<br />
$ MCR NCP DEFINE NODE CLNT0 HARDWARE ADDRESS 08-00-2B-12-A1-0F<br />
$ MCR NCP DEFINE NODE CLNT0 -<br />
_$ LOAD ASSIST AGENT MULTINET:DECSTATION_LOAD_ASSIST_AGENT.EXE<br />
$ MCR NCP DEFINE NODE CLNT0 LOAD ASSIST PARAMETER MULTINET:CLNT0.BOOT<br />
$ MCR NCP SET NODE CLNT0 ALL<br />
The boot parameter file specified as the LOAD ASSIST PARAMETER above looks like this:<br />
!<br />
! CLNT0 boot parameters<br />
!<br />
load-file DECSTATION:[CLNT0_ROOT]VMUNIX.<br />
client maxwell<br />
address 192.41.228.75<br />
broadcast 192.41.228.79<br />
netmask 192.41.228.240<br />
root nfs:/decstation/clnt0_root<br />
swap rz3b<br />
server-name kaos<br />
server-address 192.41.228.65<br />
Specifying the DECstation Mount Points<br />
In addition to the normal configuration of the NFS Server, the DECstation System's root file system<br />
must be explicitly listed in the NFS Server's configuration.<br />
DECstation Systems make assumptions about the format of the NFS file h<strong>and</strong>le, which NFS clients<br />
are expected to treat as 32 bytes of opaque data. This problem can be overcome by telling the<br />
<strong>MultiNet</strong> NFS Server that a particular file is a DECstation root mount point <strong>and</strong> the NFS Server<br />
will use a different form of file h<strong>and</strong>le, as shown in the following example.<br />
<strong>MultiNet</strong> NFS Configuration Utility 5.4(nnn)<br />
[Reading in configuration from MULTINET:NFS.CONFIGURATION]
Configuring the <strong>MultiNet</strong> NFSV2 Server<br />
NFS-CONFIG>ADD DECSTATION-MOUNT-POINT DECSTATION:[000000]CLNT0_ROOT.DIR;1<br />
NFS-CONFIG><br />
With an appropriately configured /vmunix kernel <strong>and</strong> root file system, the DECstation client should<br />
now be able to boot.<br />
Use caution when parsing mount point paths. A wrong device can be mounted if the device<br />
specification lacks a colon (:).<br />
Booting Diskless Sun Microsystems Hosts<br />
This section describes how to configure <strong>MultiNet</strong> to boot a diskless Sun host. The following list<br />
describes how a Sun Microsystems host boots; the required configuration is in Step 3.<br />
1 The diskless Sun client broadcasts a request on the Ethernet using RARP protocol to discover its<br />
Internet address. In particular, RARP (Reverse Address Resolution Protocol) must be enabled<br />
<strong>and</strong> an entry must be made in the MULTINET:RARP.CONFIGURATION file, which maps the<br />
Ethernet address of the host to the Internet address. For information on configuring the RARP<br />
service, see Chapter 21.<br />
2 The client sends a TFTP request to the system that answered the RARP request for the file in the<br />
form hex_internet_address.system_type. For example, a Sun-3/80 System using the Internet<br />
address 192.41.228.74 requests the file C029E44A.SUN3X. The TFTP boot file is copied into<br />
this directory under the appropriate name.<br />
3 The client broadcasts an RPC BOOTPARAMETERS request to discover the name of its<br />
gateway, its root file system, <strong>and</strong> its swap <strong>and</strong> dump files.<br />
Enable the RPCBOOTPARAMS service using SERVER-CONFIG, <strong>and</strong> add an entry to the<br />
MULTINET:BOOTPARAMS.CONFIGURATION file which specifies the root <strong>and</strong> swap file<br />
names for the host.<br />
Note! The swap file must be created in advance <strong>and</strong> should be set to /NOBACKUP.<br />
The following example shows a BOOTPARAMS entry for the client "whitefang" booting from<br />
the server system "london."<br />
Note! "whitefang" must have an entry in the host tables or Domain Name System for the<br />
BOOTPARAMS service to be able to answer the request.<br />
whitefang root=london:/users/suns/root \<br />
swap=london:/users/suns/swap/whitefang.swap \<br />
dump=london:/users/suns/swap/whitefang.swap<br />
With an appropriately configured /vmunix kernel <strong>and</strong> root file system, the host should now be<br />
able to boot.<br />
4 The client uses the RPCMOUNT <strong>and</strong> NFS protocols to mount its root file system, loads its<br />
/vmunix kernel image, <strong>and</strong> proceeds to execute /etc/rc to finish the boot.<br />
Modifying NFS Server Mount Point Options<br />
By default, the <strong>MultiNet</strong> NFS Server maps OpenVMS file system semantics to UNIX file system<br />
27-31
Configuring the <strong>MultiNet</strong> NFSV2 Server<br />
27-32<br />
semantics. File names undergo a special mapping <strong>and</strong> only the top version of files is accessible<br />
through NFS. This section describes the mount point options that control or disable this conversion.<br />
The NFS protocol specification requires the NFS Server to act like a UNIX file system. If you use<br />
any of the options described in this section, the NFS Server acts more like an OpenVMS file<br />
system, <strong>and</strong> may be incompatible with some NFS clients.<br />
Note! The mount point options have been tested with Sun Microsystems <strong>and</strong> DECstation clients <strong>and</strong><br />
should be used with caution, especially with other non-UNIX, non-OpenVMS NFS clients.<br />
The mount point options are specified as "qualifiers" to the mount point name, separated from the<br />
mount point name with a "#" character. With the NFS client, the switches are part of the directory<br />
specification being mounted. Because the switches are passed in the name, these options cannot be<br />
used with the automounter.<br />
Mount Point Option Summary<br />
Table 27-1 shows the qualifiers used to control the behavior of the NFS Server.<br />
Table 27-1 Mount Point Options<br />
Qualifier Description<br />
/APPROXIMATE_TEXT_SIZE Allows UNIX comm<strong>and</strong>s such as ls -l to execute<br />
faster by determining file sizes only when the<br />
OpenVMS file length exceeds the specified<br />
threshold.<br />
/CREATE_NEW_VERSION Causes an NFS create() operation on an already<br />
existing file to create a new version of the file instead<br />
of overwriting the old version. This qualifier has no<br />
effect on ULTRIX clients, because they do not send<br />
the correct NFS operation.<br />
/DISPLAY_TOP_VERSION Causes the NFS Server to display the OpenVMS<br />
version number at the end of a file name when that<br />
file name is the highest version number available.<br />
The version number is usually not displayed.<br />
/DISPLAY_VERSION Causes the NFS Server to display files that are not the<br />
highest version number. These files are usually not<br />
displayed.<br />
/VMS_FILENAMES Disables the file name mapping described in the<br />
Mapping UNIX File Names section.
Table 27-1 Mount Point Options (Continued)<br />
Qualifier Description<br />
Examples of Mount Point Option Usage<br />
Configuring the <strong>MultiNet</strong> NFSV2 Server<br />
/VMS_LOWERCASE_FILENAMES Disables the file name mapping described in the<br />
Mapping UNIX File Names section, but changes the<br />
OpenVMS name to lowercase for display.<br />
Note: This applies to ODS-2 exports only.<br />
/VMS_STYLE_CREATE Enables the use of OpenVMS semantics instead of<br />
NFS semantics for determining ownership of created<br />
files. With NFS semantics, the NFS Client specifies<br />
everything explicitly. With OpenVMS semantics, file<br />
ownership may be inferred from the parent directory,<br />
ACLs, previous versions, <strong>and</strong> so on.<br />
The following example shows mounting <strong>and</strong> accessing a file system from UNIX using mount point<br />
options.<br />
# mount -o soft,rw kaos:/users\#/vms_filenames/display_version /mnt<br />
# ls /mnt/SMITH.DIR<br />
BIN.DIR TMP.DIR<br />
LOGIN.COM TODO<br />
LOGIN.COM;32 TODO.;508<br />
MAIL.MAI<br />
#<br />
Modifying NFS Server Global Parameters<br />
Global parameters affect <strong>MultiNet</strong> NFS Server operations. Their default settings are appropriate for<br />
almost all configurations. The following sections describe the NFS global parameters <strong>and</strong> explain<br />
how to change their values.<br />
Global parameters can be set with the NFS-CONFIG SET comm<strong>and</strong>. For a complete list of SET<br />
comm<strong>and</strong>s, refer to the <strong>MultiNet</strong> for OpenVMS <strong>Administrator's</strong> Reference. Descriptions of the<br />
global parameters are also available online with the NFS-CONFIG HELP comm<strong>and</strong> <strong>and</strong> in the<br />
MENU-CONFIG context-sensitive help after choosing the Set Global File Server Parameters<br />
comm<strong>and</strong> (Configure NFS⇒ Configure Global Parameters⇒ Set Global File Server). You<br />
must be in Extended mode (not Basic mode) to view the “Configure Global Parameters” option on<br />
the menu. Use the PF1 key to toggle between modes.<br />
Note! Change the settings only if absolutely necessary.<br />
The NFS global parameters control:<br />
• Operations of the directory <strong>and</strong> file cache, including its size <strong>and</strong> discard rate<br />
• Operations of the duplicate-requests cache<br />
27-33
Configuring the <strong>MultiNet</strong> NFSV2 Server<br />
27-34<br />
• Special operations for debugging the server<br />
Most of the parameters control the operation of the directory <strong>and</strong> file cache that exists between the<br />
server's file systems <strong>and</strong> the network. The following sections describe the cache <strong>and</strong> the<br />
parameters.<br />
If you must change the settings, wait until after you complete the initial system configuration <strong>and</strong><br />
test. It is much easier to test <strong>and</strong> debug specific aspects of the <strong>MultiNet</strong> NFS Server before you<br />
have changed global characteristics.<br />
NFS Mode of Operation<br />
The default for the server is kernel mode. If the server becomes unresponsive, reboot the server <strong>and</strong><br />
change to user mode. This will, however, give you slower performance. If the server becomes<br />
unresponsive in user mode, issue this comm<strong>and</strong><br />
$ STOP /ID=pid.<br />
If the server crashes when in user mode, restart the server. The comm<strong>and</strong>s for changing to the two<br />
modes follow:<br />
• To put into user mode:<br />
$ mu conf/nfs<br />
NFS-CONFIG>SET USER-MODE 1<br />
[Global NFS parameter "user-mode-server" set to 1]<br />
NFS-CONFIG>restart<br />
Configuration modified, do you want to save it first ? [YES] YES<br />
[Writing NFS file server configuration to<br />
MULTINET_COMMON_ROOT:[MULTINET]NFS.CONFIGURATION]<br />
Connected to NETCONTROL server on "127.0.0.1"<br />
< pc4.nail.net Network Control V5.4(10) at Thu 26-Oct-2003 4:29PM-MST<br />
< NFS/RPCLockMgr Server Started<br />
< RPCMOUNT database reloaded<br />
NFS Client UID mappings reloaded.<br />
NFS-CONFIG>exit<br />
• To put into kernel mode (default):<br />
NFS-CONFIG>SET USER-MODE 0<br />
[Global NFS parameter "user-mode-server" set to 0]<br />
NFS-CONFIG>restart<br />
Configuration modified, do you want to save it first ? [YES] YES<br />
[Writing NFS file server configuration to<br />
MULTINET_COMMON_ROOT:[MULTINET]NFS.CONFIGURATION]<br />
Connected to NETCONTROL server on "127.0.0.1"<br />
< pc4.nail.net Network Control V5.4(10) at Thu 26-Oct-2003 4:29PM-MST<br />
< NFS/RPCLockMgr Server Started<br />
< RPCMOUNT database reloaded<br />
NFS Client UID mappings reloaded.
NFS-CONFIG>exit<br />
NFS Server Memory Considerations<br />
Configuring the <strong>MultiNet</strong> NFSV2 Server<br />
The <strong>MultiNet</strong> NFS Server uses memory in the following manner to cache files <strong>and</strong> directories for<br />
faster access, to hold various internal states, <strong>and</strong> to buffer requests that arrive from the clients:<br />
• The NFS code <strong>and</strong> fixed data structures require about 1400 pages.<br />
• The server's file <strong>and</strong> directory cache consumes the most memory-by default, a little under 20,000<br />
pages (or 10 megabytes) of virtual memory.<br />
As you install <strong>and</strong> configure OpenVMS <strong>and</strong> the <strong>MultiNet</strong> NFS Server, make sure that no<br />
OpenVMS limitation will interfere with these server requirements. If possible, specify a value of at<br />
least 30,000 for the SYSGEN VIRTUALPAGECNT parameter, <strong>and</strong> provide at least 30,000 pages<br />
of space in the system page file. If these resources are not available, adjust the settings of the<br />
server's parameters to decrease the maximum size of the cache, allowing it to fit within the limits of<br />
the available memory.<br />
The following equation defines the maximum amount of memory the server can use at one time, as<br />
a function of the global parameters.<br />
total_memory_consumption = (fixed_consumption +)<br />
(variable_cache_consumption)<br />
fixed_consumption = 1400 pages<br />
variable_cache_consumption = (1 page x MAXIMUM-CACHE-FILES)<br />
+ (17 pages x MAXIMUM-CACHE-BUFFERS)<br />
+ (1 page x MAXIMUM-OPEN-CHANNELS)<br />
MAXIMUM-CACHE-FILES — is the maximum number of<br />
file headers that can be cached.<br />
MAXIMUM-CACHE-BUFFERS — is the maximum number<br />
of data buffers that can be cached.<br />
<strong>Process</strong> Memory<br />
<strong>Process</strong> memory requirements <strong>and</strong> limitations are defined by:<br />
MAXIMUM-OPEN-CHANNELS — is the maximum number<br />
of channels that can be open at a time between the disk <strong>and</strong> the<br />
cache.<br />
• SYSGEN parameters you set when configuring OpenVMS<br />
• <strong>MultiNet</strong> NFS Server process quotas<br />
• <strong>MultiNet</strong> NFS Server global parameters you specify when configuring the server<br />
27-35
Configuring the <strong>MultiNet</strong> NFSV2 Server<br />
Virtual <strong>and</strong> Physical Memory<br />
27-36<br />
OpenVMS imposes two memory limits: virtual <strong>and</strong> physical. As indicated in the following<br />
discussion, you must make sure that OpenVMS provides the server with adequate resources for<br />
both virtual <strong>and</strong> physical memory <strong>and</strong> that the relationship between the amounts of the two is<br />
appropriate.<br />
The amount of virtual memory available to the server is defined by the lesser of:<br />
• The SYSGEN VIRTUALPAGECNT parameter<br />
• The <strong>MultiNet</strong> NFS Server PAGEFILE quota-by default, 65,536 pages<br />
The amount of physical memory available to the <strong>MultiNet</strong> NFS Server is defined by the lesser of:<br />
• The SYSGEN WSMAX parameter<br />
• The <strong>MultiNet</strong> NFS Server WSQUOTA <strong>and</strong> WSEXTENT quotas-by default, 2,000 <strong>and</strong> 20,000<br />
pages, respectively<br />
When you install <strong>and</strong> configure an OpenVMS server, be sure to provide the server with enough<br />
virtual <strong>and</strong> physical memory. If the server runs out of virtual memory, it returns ENOBUFS error<br />
messages to clients whose requests cannot be satisfied. See the <strong>MultiNet</strong> for OpenVMS Messages,<br />
Logicals, <strong>and</strong> DECnet Applications book for information about ENOBUFS messages.<br />
It is equally important to provide enough physical memory to the server to prevent excessive page<br />
faulting under normal operation. If physical memory is scarce, reduce the cache's default size so<br />
enough memory is available to hold it without heavy page faulting, or allow the page faulting.<br />
In general, a disk read performed to satisfy a page fault requires far fewer resources than a disk read<br />
performed to replace part of the cache that has been removed. This removal occurs as the server<br />
reaches the cache size limit specified in the configuration parameters. However, during a page<br />
fault, the server can perform no other activity for any client.<br />
Under conditions of high load from many clients, better performance usually results from reducing<br />
the size of the cache to eliminate or reduce page faulting. Under high load from a few clients, better<br />
performance usually results from allowing the page faulting.<br />
OpenVMS Channels<br />
When a client requests information not in the cache, the server uses OpenVMS channels to access<br />
the required directories <strong>and</strong> files from disk. When you install <strong>and</strong> configure an OpenVMS server,<br />
you must ensure enough channels are available for server requirements. If the server runs out of<br />
OpenVMS channels, it returns an ENOBUFS error message to the client that requested the<br />
additional channel.<br />
By default, the server can use up to 50 channels at once. (This number is appropriate for almost all<br />
systems, because channels are generally deassigned shortly after they have been used to read data<br />
into the cache.) You can increase or decrease the maximum number of channels by adjusting the<br />
setting of the server's MAXIMUM-OPEN-CHANNELS global parameter.<br />
If you plan to increase the MAXIMUM-OPEN-CHANNELS value, you might need to increase the<br />
setting of the SYSGEN CHANNELCNT parameter when you install the server because this<br />
OpenVMS parameter must always have a value that is at least 10% greater than that of
Configuring the <strong>MultiNet</strong> NFSV2 Server<br />
MAXIMUM-OPEN-CHANNELS. Do not increase the value for MAXIMUM-OPEN-<br />
CHANNELS above 450; this limit is set by the server's open file limit (FILLM) quota.<br />
For more information about the global parameters that affect channel availability <strong>and</strong> operation, see<br />
the Directory <strong>and</strong> File Cache Parameters section.<br />
Directory <strong>and</strong> File Cache Parameters<br />
The directory <strong>and</strong> file cache holds data from directories <strong>and</strong> files that has been requested by client<br />
users. When answering repeated requests for the same data, the server uses the cache rather than the<br />
disk, greatly improving response time.<br />
Channels, File Headers, <strong>and</strong> Data Buffers<br />
When an NFS client user first requests information about a directory or file, the server assigns a<br />
channel to access it, <strong>and</strong> creates a cache entry to hold the contents of a file header. A cached file<br />
header contains information about characteristics of the directory or file (for example, its size or<br />
owner).<br />
As the user requests data from the directory or file, the server creates 8-kilobyte data buffers for it,<br />
using the channel to read the data from disk.<br />
If a channel remains inactive for a pre-specified length of time, the server deassigns the channel.<br />
However, the cached header <strong>and</strong> data buffers remain in the cache, <strong>and</strong> user requests can be satisfied<br />
without accessing the file on disk again.<br />
Directory <strong>and</strong> File Times<br />
OpenVMS does not correctly update modification dates for directories on disk. (A directory<br />
modification date is the time when the specified directory was brought into the NFS Server's<br />
directory <strong>and</strong> file cache.) However, because clients rely on modification dates when they use their<br />
own caches, the NFS Server provides clients with modification dates.<br />
Concurrency Parameters<br />
The NUMBER-OF-RPC-TRANSPORTS parameter controls the number of simultaneous requests<br />
the NFS Server can process.<br />
When the set limit is reached, no new requests are processed until one of the requests in progress<br />
completes. <strong>Process</strong>ing multiple requests simultaneously prevents a single client from locking out<br />
other clients while it is performing a slow operation.<br />
The default setting for this parameter (10) allows the server to process 10 requests simultaneously.<br />
This value may be changed to adjust the tradeoff between concurrency <strong>and</strong> memory requirements.<br />
Cache Interrupt Parameters<br />
You can set the cache-interrupt parameters to cause the server to automatically discard cached<br />
information about a directory or file when an OpenVMS user tries to access the directory or file on<br />
the disk. The USE-DIRECTORY-BLOCKING-ASTS <strong>and</strong> USE-FILE-BLOCKING-ASTS<br />
parameters control whether the server flushes the cache in this situation.<br />
27-37
Configuring the <strong>MultiNet</strong> NFSV2 Server<br />
27-38<br />
These parameters can be set to 1 (on) or 0 (off). By default, they are both on, causing the server to<br />
discard the cached file header <strong>and</strong> all data buffers for a directory or file whenever an OpenVMS<br />
user attempts to access it on disk. These parameters must be set to 1 (one) to allow PC clients to use<br />
the PC-NFSD remote printing function. A setting of 1 also ensures that client users almost always<br />
receive the directory or file as it exists on disk. This consistency comes at the expense of the<br />
overhead of the additional interrupts <strong>and</strong> disk reads.<br />
Cache-Timing Parameters<br />
Because cached information may not be automatically updated if the directory or file is changed on<br />
the disk, the server periodically discards cached information. This requires a reread from disk the<br />
next time the information is needed.<br />
The cache-timing parameters control the intervals at which channels are deassigned, <strong>and</strong> at which<br />
cached headers <strong>and</strong> cached data buffers are discarded. One of the parameters controls the polling<br />
interval at which the other parameters are checked.<br />
Several of the cache-timing parameters distinguish between idle <strong>and</strong> active channels <strong>and</strong> cached<br />
data. An idle entity is one that is not being accessed by any client; an active entity is one that is in<br />
use.<br />
Some of the cache timing parameters apply only to directories or only to files. Directory settings<br />
affect the speed at which local OpenVMS users see files created <strong>and</strong> deleted; file settings affect the<br />
speed at which users see file contents created <strong>and</strong> deleted.<br />
Cache Maintenance Interval Parameters<br />
The FILE-CACHE-TIMER-INTERVAL parameter determines how often the <strong>MultiNet</strong> NFS Server<br />
scans the cache, polls the other parameters to see if their timers have expired, <strong>and</strong> processes those<br />
that have.<br />
The default setting for the FILE-CACHE-TIMER-INTERVAL parameter (30 seconds) is normally<br />
not changed during configuration.<br />
Channel Deassignment Parameters<br />
The READ-ONLY-FLUSH-AGE <strong>and</strong> READ-WRITE-FLUSH-AGE parameters determine how<br />
long idle channels can remain assigned to a file.<br />
The READ-ONLY-FLUSH-AGE parameter applies to files that have been opened for read<br />
operations only; the READ-WRITE-FLUSH-AGE parameter applies to files that have been opened<br />
for both read <strong>and</strong> write operations. Closing a channel does not discard the data in the file headers<br />
<strong>and</strong> data buffers; clients can continue to access the cached data without requiring that the file be<br />
reopened.<br />
The default values are 180 seconds for read-only channels <strong>and</strong> 60 seconds for read-write channels.<br />
You can shorten or lengthen the timer intervals to adjust tradeoffs between improved response time<br />
<strong>and</strong> the overhead of keeping channels assigned.<br />
Cache Refresh Parameters<br />
The DIRECTORY-INFO-IDLE-FLUSH-AGE, DIRECTORY-INFO-FLUSH-AGE, FILE-INFO-
Configuring the <strong>MultiNet</strong> NFSV2 Server<br />
IDLE-FLUSH-AGE, <strong>and</strong> FILE-INFO-FLUSH-AGE parameters control how long cached headers<br />
<strong>and</strong> data buffers for a directory or file can remain in the cache.<br />
As previously indicated, unless the cache-interrupt parameters are on, cached headers <strong>and</strong> buffers<br />
are not automatically discarded whenever an OpenVMS user attempts to access directories <strong>and</strong><br />
files on disk. The cache-flush parameters specify a period after which the server discards cached<br />
information (requiring rereads from disk if the information is needed again). Two of the parameters<br />
control idle intervals, <strong>and</strong> two control active intervals.<br />
Each setting for the four parameters represents a tradeoff between response time <strong>and</strong> concurrency<br />
between information stored in the cache <strong>and</strong> on the disk.<br />
The default setting for the DIRECTORY-INFO-IDLE-FLUSH-AGE parameter is 150 seconds. The<br />
default setting for the DIRECTORY-INFO-FLUSH-AGE is 300 seconds. (In combination, these<br />
settings specify that cached directory information is discarded after 300 seconds if the information<br />
is in use, but discarded after 150 seconds if the information is not in use.)<br />
The default setting for the FILE-INFO-IDLE-FLUSH-AGE parameter is 600 seconds. The default<br />
setting for the FILE-INFO-FLUSH-AGE parameter is 1200 seconds.<br />
You can raise or lower any of the default settings, but do not set either directory parameter below<br />
15 seconds or the server will be unable to complete directory operations.<br />
Cache Size Parameters<br />
The cache-size parameters for the directory <strong>and</strong> file cache determine the maximum numbers of<br />
channels, file headers, <strong>and</strong> data buffers that can simultaneously exist for the cache or for a given<br />
file system. The settings for each of these parameters reflect tradeoffs between response time <strong>and</strong><br />
memory requirements.<br />
In addition, in combination with SYSGEN's VIRTUALPAGECNT parameter <strong>and</strong> allowable page<br />
blocks, three of these parameters affect the maximum amount of memory that the variable portion<br />
of the cache can use at a time. As described in the NFS Server Memory Considerations section,<br />
those parameters are MAXIMUM-CACHE-FILES, MAXIMUM-CACHE-BUFFERS, <strong>and</strong><br />
MAXIMUM-OPEN-CHANNELS.<br />
OpenVMS Channel Usage Parameters<br />
The MAXIMUM-OPEN-CHANNELS <strong>and</strong> MAXIMUM-FILESYSTEM-CHANNELS parameters<br />
determine the maximum number of open channels allowed simultaneously for the cache as a whole<br />
<strong>and</strong> for single file systems on a per-mount-point basis.<br />
When a set limit is reached, <strong>and</strong> a request to access a new directory or file is received, the server<br />
deassigns the oldest open channel <strong>and</strong> uses the channel to complete the new request, ignoring the<br />
setting of the READ-ONLY-FLUSH-AGE or READ-WRITE-FLUSH-AGE parameter.<br />
The default setting for both parameters is 50. You can change either value to adjust the tradeoff<br />
between response time <strong>and</strong> memory requirements. Do not increase them to greater than 90% of the<br />
value for the OpenVMS SYSGEN parameter CHANNELCNT, which determines the maximum<br />
number of channels available to the OpenVMS system as a whole. The 10% buffer between the<br />
values is required to h<strong>and</strong>le the OpenVMS channels used for operations other than server<br />
27-39
Configuring the <strong>MultiNet</strong> NFSV2 Server<br />
27-40<br />
operations, <strong>and</strong> to h<strong>and</strong>le the times when the server is briefly allowed to exceed the MAXIMUM-<br />
OPEN-CHANNELS value (for example, the period between the time when the server opens a<br />
channel that causes the limit to be exceeded <strong>and</strong> the time when it closes another channel to observe<br />
the limit).<br />
If the server runs out of OpenVMS channels, an ENOBUFS error is returned to the client that<br />
requested the additional channel (see the <strong>MultiNet</strong> for OpenVMS Messages, Logicals, <strong>and</strong> DECnet<br />
Applications book).<br />
Cache Memory Requirements Parameters<br />
The MAXIMUM-CACHE-FILES, MAXIMUM-FILESYSTEM-FILES, MAXIMUM-CACHE-<br />
BUFFERS, <strong>and</strong> MAXIMUM-FILESYSTEM-BUFFERS parameters determine the maximum<br />
number of cached file headers <strong>and</strong> data buffers allowed simultaneously for the cache as a whole<br />
<strong>and</strong> for single file systems on a per-mount-point basis.<br />
As described earlier, cached file headers contain attribute information for directories <strong>and</strong> files, <strong>and</strong><br />
data buffers contain data from directories <strong>and</strong> files. A cached file header requires about 128 bytes<br />
of memory; a data buffer requires about 8 kilobytes.<br />
The default setting for both cached-header parameters is 3000; the default setting for both databuffer<br />
parameters is 500. You can change these settings to adjust the tradeoffs between response<br />
time <strong>and</strong> memory requirements, but increasing any of the values may require increasing the size of<br />
the server's virtual address space or page file quota, as described in the NFS Server Memory<br />
Considerations section.<br />
Note! Unless the settings for MAXIMUM-CACHE-BUFFERS <strong>and</strong> MAXIMUM-FILESYSTEM-<br />
BUFFERS are high enough to allow the cache to hold the largest files the client will access,<br />
performance will be severely degraded for those files. Each cached data buffer holds 16 disk<br />
blocks.<br />
Auto Server Cache Sizing<br />
The NFS Server limits the number of files it has open at one time based on the BYTLM process<br />
quota. For the server to operate properly, it must have sufficient BYTLM to have 30 files open<br />
simultaneously. If the server process BYTLM quota is too small to accommodate this requirement,<br />
the server issues the following OPCOM messages:<br />
%%%%%%%%%% OPCOM 11-APR-2003 14:52:04.87 %%%%%%%%%%<br />
Message from user SMITH on NODE1<br />
NFS Server: Max Accessed files: 11.<br />
"11" is the calculated number of simultaneous file accesses the server can have, based on the<br />
available BYTLM quota.<br />
If this number is less than 30, the following message also appears:<br />
%%%%%%%%%% OPCOM 11-APR-2003 14:52:04.88 %%%%%%%%%%<br />
Message from user SMITH on NODE1<br />
NFS Server: Increase BYTLM to new_value.
Configuring the <strong>MultiNet</strong> NFSV2 Server<br />
new_value is the recommended value for the BYTLM process quota.<br />
Use SERVER-CONFIG to set the BYTLM process quota for the NFS Server process:<br />
$ MULTINET CONFIGURE/SERVER<br />
SERVER-CONFIG>SELECT NFS<br />
SERVER-CONFIG>SET PQL-BYTLM nnnnn<br />
SERVER_CONFIG>EXIT<br />
Restart the NFS Server to put the new process quota into effect:<br />
$ MULTINET NETCONTROL NFS RESTART<br />
Writeback Cache Parameters<br />
The SECONDS-BEFORE-WRITEBACK, MAXIMUM-DIRTY-BUFFERS, <strong>and</strong> MAXIMUM-<br />
WRITE-JOBS parameters control the functions of the optional writeback feature of the directory<br />
<strong>and</strong> file cache.<br />
The directory <strong>and</strong> files cache normally functions as a write-through cache. In this case, whenever a<br />
client is notified that a write request has completed, the data is stored on the disk, <strong>and</strong> data integrity<br />
is guaranteed.<br />
The optional writeback feature greatly increases the speed of write operations (as perceived by the<br />
user) by notifying the client that write operations are complete when the data is stored in cache<br />
memory on the server, but before it has been written to disk.<br />
This increase in perceived write performance is achieved at the risk of data loss if the OpenVMS<br />
server system crashes while a write operation is in progress. During a write operation, data may<br />
also be lost if the server encounters an error such as insufficient disk space or disk quota or a<br />
hardware write error.<br />
If the server cannot complete a writeback write operation, it discards the write operation, flags the<br />
file's cached header to indicate the error, <strong>and</strong> sends an error message in response to the next request<br />
for the file. However, if there is no new request before the affected header is discarded or the next<br />
request is from another user, data can be lost.<br />
If you enable the writeback cache feature, you can prevent data losses from occurring during<br />
system shutdowns by adding the following line to the server's<br />
SYS$MANAGER:SYSHUTDWN.COM file:<br />
$ MULTINET NETCONTROL NFS SHUTDOWN<br />
Note! You can also use this comm<strong>and</strong> to perform a simple shutdown of the NFS Server.<br />
The writeback cache parameters have the following meanings:<br />
• The SECONDS-BEFORE-WRITEBACK parameter determines whether the writeback feature<br />
is enabled, <strong>and</strong> specifies how long the server will delay initiating a write operation after<br />
receiving data for a write request. The longer the delay, the greater the chance that the server can<br />
coalesce multiple small write operations into fewer, larger, <strong>and</strong> more efficient operations.<br />
27-41
Configuring the <strong>MultiNet</strong> NFSV2 Server<br />
Note! This timing parameter is not affected by the FILE-CACHE-TIMER-INTERVAL parameter.<br />
27-42<br />
The default setting (0) disables the writeback feature. Any other value enables the feature. The<br />
recommended value for writeback delay is five seconds; little performance is gained from longer<br />
delays.<br />
• If the writeback cache is enabled, the MAXIMUM-DIRTY-BUFFERS <strong>and</strong> MAXIMUM-<br />
WRITE-JOBS parameters control its operation.<br />
• MAXIMUM-DIRTY-BUFFERS sets a limit on the number of buffers that can remain in the<br />
cache awaiting writeback before the SECONDS-BEFORE-WRITEBACK time has expired. As<br />
soon as this limit is reached, the server begins writeback of the oldest buffer.<br />
The default setting for this parameter (0) sets no limit.<br />
• MAXIMUM-WRITE-JOBS sets a limit on the number of write operations that can be<br />
simultaneously processed. When this limit is reached, the server defers starting a new write<br />
operation until a current operation completes.<br />
The default setting for this parameter (0) sets no limit.<br />
Duplicate Request Detection Cache Parameters<br />
The server has a duplicate-request detection cache to store the most recent responses it has sent to<br />
clients requesting directory <strong>and</strong> file access. The NUMBER-OF-DUPLICATE-REQUESTS-<br />
CACHED parameter defines the number of responses that can be cached.<br />
The duplicate-request detection cache operates in conjunction with the cache the RPC protocol<br />
module keeps of the transaction IDs (XIDs) of the last 400 requests it has seen. The RPC layer uses<br />
its cache to detect duplicate requests.<br />
For example, if the network layer drops a UDP packet containing a response to a client, the client<br />
repeats the request after an interval, <strong>and</strong> the RPC protocol notifies the <strong>MultiNet</strong> NFS Server that the<br />
request was a duplicate. The server then looks in its duplicate-request detection cache for the<br />
response so it can resend it without repeating the original operation.<br />
By default, the cache stores the last 250 responses sent.<br />
Note! Too low a value causes the following error message to be printed frequently on the OpenVMS<br />
console: "Duplicate Detected but not in cache." Too low a value can also cause an incorrect<br />
answer to be sent. A value above 400 has the same effect as 400, which is the maximum<br />
number of XIDs stored by the RPC protocol.<br />
Delete-Behind Cache Parameters<br />
The MAXIMUM-QUEUED-REMOVES parameter affects the way client users perceive the speed<br />
at which directories <strong>and</strong> files are deleted.<br />
The OpenVMS file deletion operation is very slow. The <strong>MultiNet</strong> NFS Server uses its deletebehind<br />
queue to hide some of this delay from the client user; when a request to delete a directory or<br />
file arrives, the request is answered immediately, but the delete request is usually only queued to<br />
the OpenVMS file system.<br />
The MAXIMUM-QUEUED-REMOVES parameter limits the number of requests that can be
Configuring the <strong>MultiNet</strong> NFSV2 Server<br />
queued; when that number is reached, the next delete request must wait until the next queued<br />
request has completed. This delay can be significant if the next request is to delete a large directory;<br />
directory deletions always occur synchronously, <strong>and</strong> each file in a directory must be deleted before<br />
the directory itself is deleted.<br />
Therefore, the parameter's setting defines when, in a series of deletions, the client user perceives<br />
the delay in the OpenVMS deletion. The default setting is 25.<br />
Timezone Parameters<br />
Although OpenVMS does not track timezones, the <strong>MultiNet</strong> NFS Server requires this information.<br />
The TIMEZONE parameter identifies the local timezone for the OpenVMS server. This parameter<br />
is also a <strong>MultiNet</strong> global parameter. If the parameter is set appropriately there, you do not need to<br />
set it again as a server global parameter.<br />
The server uses the TIMEZONE setting to calculate the offset between Greenwich Mean Time <strong>and</strong><br />
the local time recorded for directories <strong>and</strong> files when they are cached <strong>and</strong> modified in the cache.<br />
Valid TIMEZONE settings are the timezone abbreviations; for example, PST (Pacific St<strong>and</strong>ard<br />
Time). When the setting defines a U.S. timezone, the server automatically adjusts the time zone to<br />
conform to the U.S. Federal Daylight Savings Time rules.<br />
The default setting is GMT (Greenwich Mean Time). If your local time <strong>and</strong> the time to which your<br />
OpenVMS clock is set differ, set the TIMEZONE parameter to correspond to the OpenVMS clock.<br />
For more information about <strong>MultiNet</strong>'s h<strong>and</strong>ling of time, see Chapter 14.<br />
Special Debugging Parameters<br />
The following special debugging parameters exist only to debug the <strong>MultiNet</strong> NFS Server under<br />
unusual circumstances. Do not use them without instructions from <strong>Process</strong> <strong>Software</strong> Technical<br />
Support.<br />
CRASH-ON-EXCEPTION MAXIMUM_DEBUG_PRINTS<br />
DEBUG-MESSAGE-CACHE-SIZE NFSDEBUG<br />
EXIT-ON-EXCEPTION PRINT-TO-STDOUT<br />
FILECACHE-DEBUG RPCDEBUG<br />
HIBERNATE-ON-EXCEPTION<br />
NFS Troubleshooting Tips<br />
This section describes workarounds for common problems encountered when using the NFS<br />
Server.<br />
Approximate Text Size Threshold<br />
If you have many large files, UNIX comm<strong>and</strong>s that expect file sizes to be available may take a long<br />
27-43
Configuring the <strong>MultiNet</strong> NFSV2 Server<br />
27-44<br />
time to execute. To set the approximate text size threshold so UNIX comm<strong>and</strong>s like ls -l execute<br />
faster:<br />
1 Set the threshold on the server system.<br />
2 Use the mount option on the client system so the threshold takes effect.<br />
The following example shows how to set the threshold on the server:<br />
$ MULTINET CONFIGURE /NFS<br />
NFS-CONFIG>SET APPROXIMATE-TEXT-SIZE-THRESHOLD 250<br />
[Global NFS parameter "approximate-text-size-threshold" set to 250]<br />
NFS-CONFIG>SAVE<br />
[Writing NFS file server config to<br />
MULTINET_ROOT:[MULTINET]NFS.CONFIGURATION]<br />
NFS-CONFIG>RELOAD<br />
Connected to NETCONTROL server on "127.0.0.1"<br />
< Code-Z.FLOWERS.COM Network Control 5.4(nnn) at Mon 18-Aug-2003 9:25PM-<br />
PDT<br />
< OK: NFS/RPCLockMgr server configuration reloading<br />
< RPCMOUNT database reloaded<br />
To take advantage of the approximate text size threshold, NFS clients must mount the file system<br />
with the /APPROXIMATE_TEXT_SIZE option. The following example shows how to use the<br />
mount option on a UNIX NFS client.<br />
% mount -o soft hq:/altusers/alex/test\#/approximate_text<br />
NFS Stream_LF File Conversion<br />
If you receive an error message related to incompatible file attributes, the following information<br />
will help. When you use the COPY comm<strong>and</strong> to copy a non-Stream_LF format file to a disk<br />
mounted by the <strong>MultiNet</strong> NFS Client, <strong>MultiNet</strong> converts the file to Stream_LF format (by default)<br />
to ensure that text files can be shared between OpenVMS <strong>and</strong> UNIX systems. To preserve the non-<br />
Stream_LF format, use the /SEMANTICS=NOSTREAM_CONVERSION qualifier as part of the<br />
NFSMOUNT comm<strong>and</strong>.<br />
For more information on the NFSMOUNT comm<strong>and</strong>, refer to the comm<strong>and</strong> page in the DCL<br />
Comm<strong>and</strong>s section of the <strong>MultiNet</strong> for OpenVMS <strong>Administrator's</strong> Reference. For more information<br />
on NFS default file attributes, see Chapter 28.<br />
Performance Problems with Large Directories<br />
Because of XQP limitations, you may experience performance problems when processing certain<br />
requests on large directory trees. <strong>Process</strong> <strong>Software</strong> recommends that you keep fewer than 1,000<br />
files in each directory.
Introduction<br />
Chapter 28<br />
Configuring the <strong>MultiNet</strong> NFS V3 Server<br />
<strong>MultiNet</strong> 5.4 <strong>and</strong> later incorporates Version 3 of the NFS Server. Version 3 provides:<br />
- support for 64-bit file sizes <strong>and</strong> offsets, to h<strong>and</strong>le files larger than 2 gigabytes<br />
- support for asynchronous writes on the server, to improve write performance<br />
- additional file attributes in many replies, to avoid the need to re-fetch them, thus reducing network<br />
traffic<br />
- a READDIRPLUS operation, to get file h<strong>and</strong>les <strong>and</strong> attributes along with file names when<br />
scanning a directory<br />
- assorted other improvements<br />
Server Security & Initial Configuration<br />
Just like the existing Version 2 NFS Server, the v3 Server provides several features that maintain<br />
the integrity of the OpenVMS filesystem.<br />
First, the Server requires that the local system must register any user trying to access OpenVMS<br />
files. You do this through the PROXY database when you configure the Server <strong>and</strong> through later<br />
modifications as needed.<br />
Second, you must export an OpenVMS directory for an NFS user to access it. The Server does this<br />
through the EXPORT database when you configure the Server <strong>and</strong> through later modifications as<br />
needed.<br />
The initial offering of the NFS v3 Server utilizes a compiled binary format for it’s PROXY <strong>and</strong><br />
EXPORT databases. Initially, these databases will use the existing proxy <strong>and</strong> export information<br />
found in the <strong>MultiNet</strong> NFS.CONFIGURATION file. To get the data into the proper format for the<br />
NFS v3 server, the CONVERT_NFS tool must be invoked. The CONVERT_NFS tool will read<br />
the NFS.CONFIGURATION file <strong>and</strong> set up the v3 only NFS_EXPORT.DAT <strong>and</strong><br />
NFS_PROXY.DAT files. The CONVERT_NFS tool is invoked from the comm<strong>and</strong> line:<br />
$ RUN CONVERT_NFS<br />
There is minimal output, <strong>and</strong> two files are created - NFS_EXPORT.DAT <strong>and</strong> NFS_PROXY.DAT.<br />
At this time, any changes made via $ MULTINET CONFIGURE /NFS will not be picked up by<br />
the NFS v3 server until CONVERT_NFS is invoked. Future versions of <strong>MultiNet</strong> will streamline<br />
this process.<br />
Refer to the <strong>MultiNet</strong> NFS V2 Server documentation in the previous chapter for further details on<br />
28-1
Configuring the <strong>MultiNet</strong> NFS V3 Server<br />
28-2<br />
configuring proxies, exports, <strong>and</strong> the supporting protocols (i.e., portmapper, etc.) The NFS v3<br />
Server utilizes the same supporting RPC protocols as the NFS v2 Server<br />
NOTE: The initial implementation of the NFSV3 service (NFSV3_SERVER) will run in<br />
conjunction with the NFS service (NFS_SERVER) or by itself. The only dependency is the<br />
RPCPORTMAP service. A future version of <strong>MultiNet</strong> will incorporate an NFS server that<br />
supports both NFS v2 <strong>and</strong> NFS v3 from the same process.<br />
Mounting Client Directories<br />
NFS v3 clients access OpenVMS files on the NFS server by mounting directories. The MOUNT v3<br />
protocol services the mount requests from clients attempting to mount an NFS v3 export.<br />
Mounting procedures vary by client <strong>and</strong> may require superuser privileges, or in the case of PC<br />
clients, a username <strong>and</strong> password. Some clients mount a remote directory automatically when they<br />
reboot the system (as in the case of fstab). Others mount a remote directory dynamically when<br />
they reference the remote file (as with an automount).<br />
Mount procedures require the following information:<br />
• The pathname of the exported directory that matches the pathname in the EXPORT database<br />
• The name of the host running the server that contains the files you want mounted<br />
• A pathname on the client designated as the mount point<br />
Example 28-1 shows a mount comm<strong>and</strong> provided by a Unix Solaris 5.9 Client to the<br />
NFSV3_SERVER running on host IRIS, using the defined export of NFS0:[USER.MNT] . The<br />
export is mounted onto the local /mnt partition.<br />
Example 28-1 Client Mount Comm<strong>and</strong><br />
# mount IRIS:DKA0:\[USERS.MNT\] /mnt<br />
In the example, IRIS is the name of the <strong>MultiNet</strong> host. DKA0:[USERS.MNT] is the exported<br />
directory. /mnt is the mount point on the Solaris client host.<br />
Check your NFS client documentation before mounting directories.<br />
File Formats<br />
The NFS protocol does not define st<strong>and</strong>ard file <strong>and</strong> record formats or a way of representing<br />
different types, such as text or data files. Each operating system can have a unique file structure <strong>and</strong><br />
record format.<br />
The Server provides access to all OpenVMS files. However, even though an NFS client can access<br />
a file, the client may not be able to correctly interpret the contents of a file because of the<br />
differences in record formats.<br />
The UNIX operating system stores a file as a stream of bytes <strong>and</strong> uses a line feed (LF) character to
Configuring the <strong>MultiNet</strong> NFS V3 Server<br />
mark the end of a text file line. PC systems also store a file as a stream of bytes, but use a carriagereturn/line-feed<br />
(CRLF) character sequence to mark the end of a text file line. PC systems<br />
sometimes also use a Ctrl/Z character to mark the end of a file.<br />
The OpenVMS operating system, with its Record Management Services (RMS), provides many<br />
file organizations <strong>and</strong> record formats. RMS supports sequential, relative, <strong>and</strong> indexed file<br />
organizations. It also supports FIXED, STREAM, STREAM_CR, STREAM_LF, UNDEFINED,<br />
VARIABLE, <strong>and</strong> variable with fixed size control area (VFC) files.<br />
NFS clients most commonly need to share text files. STREAM is the RMS record format that most<br />
closely matches PC text files. STREAM_LF is the RMS record format that most closely matches<br />
UNIX text files.<br />
In OpenVMS, you can store st<strong>and</strong>ard text files in VARIABLE, STREAM_LF, or VFC record<br />
format. Most OpenVMS utilities can process these text files regardless of the record format because<br />
the utilities access them through RMS.<br />
The intent of the Server is to provide convenient access to the majority of OpenVMS files. Because<br />
many OpenVMS text files are VARIABLE or VFC format, the Server converts these files to<br />
STREAM or STREAM_LF format as it reads them.<br />
Reading Files<br />
The Server reads all files (except VARIABLE <strong>and</strong> VFC) block by block without interpreting or<br />
converting them. It reads VARIABLE <strong>and</strong> VFC files by converting them to STREAM or<br />
STREAM_LF, based on a selected option. The file on the NFS server remains unchanged.<br />
The Server's automatic file conversion process can cause a slow reading of VARIABLE <strong>and</strong> VFC<br />
files. For example, in returning the file size, it reads the entire file. Full directory listings can also<br />
be slow if the directory contains a number of VARIABLE or VFC record format files. If you need<br />
frequent access to these files, consider converting them using the OpenVMS CONVERT utilities.<br />
Writing Files<br />
By default, the Server creates STREAM_LF files, but can also create STREAM files on dem<strong>and</strong>. It<br />
writes all files except VARIABLE <strong>and</strong> VFC block by block without interpreting or converting<br />
them. If an NFS client tries to write to or change the size of an existing file not having STREAM,<br />
STREAM_LF, STREAM_CR, FIXED, or UNDEFINED format, the Server returns an EINVAL<br />
error.<br />
Implementation<br />
This section describes the Server restrictions <strong>and</strong> implementation of the Network File System<br />
(NFS) protocol. The material presented here requires a thorough underst<strong>and</strong>ing of the protocols. It<br />
does not explain or describe the protocols.<br />
28-3
Configuring the <strong>MultiNet</strong> NFS V3 Server<br />
Restrictions<br />
28-4<br />
The Server has the following OpenVMS-related restrictions:<br />
• The Server supports Files-11 ODS-2 structure level disks, ODS-5 formatted disks, <strong>and</strong> any CD-<br />
ROM format.<br />
• The Server does not implement volume protection. All exported devices should be public<br />
devices.<br />
• The Server does not generate security or audit alarms. However, the Server writes access<br />
violations to log file MULTINET:NFSV3_SERVER.LOG.<br />
• When creating files <strong>and</strong> directories, the Server sets the owner UIC of the file or directory to the<br />
UIC derived from the UID/GID in the create request authentication information or to the UID/<br />
GID in the set attributes information (if available).<br />
NFS Protocol Procedures<br />
The Server implements the following NFS protocol (version 3) procedures (while continuing to<br />
support version 2):<br />
Procedures Description<br />
ACCESS (v3 only)<br />
(access)<br />
COMMIT CACHED<br />
WRITE DATA<br />
(v3 only)<br />
(commit)<br />
CREATE FILE<br />
(create)<br />
The server determines the access rights that a user, as identified by the<br />
credentials in the request, has with respect to a file system object.<br />
The server forces data to stable storage that was previously written with<br />
an asynchronous write call.<br />
The server creates files using the record format specified in the EXPORT<br />
database entry. The client may specify one of 3 methods to create the file:<br />
UNCHECKED: File is created without checking for the existence of a<br />
duplicate file.<br />
GUARDED: Checks for the presence of a duplicate <strong>and</strong> fails the request<br />
if a duplicate exists.<br />
EXCLUSIVE: Follows exclusive creation semantics, using a verifier to<br />
ensure exclusive creation of the target.
Procedures Description<br />
GET ATTRIBUTES<br />
(getattr)<br />
GET DYNAMIC<br />
FILESYSTEM<br />
INFO (v3 only)<br />
(fsstat)<br />
Configuring the <strong>MultiNet</strong> NFS V3 Server<br />
Gets a file's attributes. The Server h<strong>and</strong>les certain file attributes in ways<br />
that are compatible with the OpenVMS system. These attributes are:<br />
File protection—The Server maps the OpenVMS file protection mask to<br />
the UNIX file protection mask.<br />
Number of links—Although OpenVMS supports hard links, it does not<br />
maintain a reference count. Therefore, the Server sets this value to 1 for<br />
regular files <strong>and</strong> 2 for directory files.<br />
UID/GID—The Server maps a file owner's UIC to a UID/GID pair<br />
through the PROXY database.<br />
Device number—The Server returns the device number as -1.<br />
Bytes used—The total number of bytes used by the file.<br />
Filesystem id—The Server returns the filesystem ID as 0.<br />
Access, modify, status change times—The OpenVMS system does not<br />
maintain the same file times as NFS requires. The Server returns the<br />
OpenVMS revision (modify) time for all three NFS times.<br />
For directory files, the Server returns the access, status change, <strong>and</strong><br />
modify times as a reasonably recent time, based on the time of the last<br />
Server-initiated directory change, <strong>and</strong> the NFS_DIRTIME_TIMER<br />
parameter. This is a benefit to clients that cache directory entries based on<br />
the directory times.<br />
OpenVMS bases its time on local time, while UNIX bases its time on<br />
Universal time (or Greenwich mean time), <strong>and</strong> these times may not agree.<br />
The offset from Universal time specified when configuring <strong>MultiNet</strong><br />
resolves the difference between local <strong>and</strong> Universal time.<br />
The server provides volatile information about a filesystem, including:<br />
– total size <strong>and</strong> free space (in bytes)<br />
– total number of files <strong>and</strong> free slots<br />
– estimate of time between file system modifications<br />
28-5
Configuring the <strong>MultiNet</strong> NFS V3 Server<br />
28-6<br />
Procedures Description<br />
GET FILESYSTEM<br />
STATISTICS (v2<br />
only)<br />
(statfs)<br />
GET STATIC<br />
FILESYSTEM<br />
INFO (v3 only)<br />
(fsinfo)<br />
Returns filesystem statistics. The Server h<strong>and</strong>les certain file attributes in<br />
ways that are compatible with the OpenVMS system. These attributes are:<br />
Block size—The block size is 1024.<br />
Total number of blocks—The total number of blocks is the<br />
SYS$GETDVI MAXBLOCK parameter divided by 2.<br />
Blocks free—The number of blocks free is the SYS$GETDVI<br />
FREEBLOCK parameter divided by 2.<br />
Blocks available—The number of blocks available to unprivileged users<br />
is the same as the number of blocks free.<br />
The server provides nonvolatile information about a filesystem,<br />
including:<br />
– preferred <strong>and</strong> maximum read transfer sizes<br />
– preferred <strong>and</strong> maximum write transfer sizes<br />
– flags for support of hard links <strong>and</strong> symbolic links<br />
– preferred transfer size of readdir replies<br />
– server time granularity<br />
– whether or not times can be set in a setattr request<br />
LINK (link) Creates a hard link to a file. The Server stores the link count in an<br />
application access control entry (ACE) on the file.<br />
LOOKUP FILE<br />
(lookup)<br />
MAKE<br />
DIRECTORY<br />
(mkdir)<br />
READ<br />
DIRECTORY<br />
(readdir)<br />
READ<br />
DIRECTORY<br />
PLUS<br />
ATTRIBUTES (v3<br />
only)<br />
(readdirplus)<br />
Looks up a file name. If the file name does not have a file extension, the<br />
Server first searches for a directory with the specified name. If the Server<br />
fails to locate a directory, it searches for the file name without an<br />
extension.<br />
Creates a directory. The OpenVMS system does not allow the remote host<br />
to create more than eight directory levels from the root of the OpenVMS<br />
filesystem. The Server ignores access <strong>and</strong> modifies times in the request.<br />
Reads a directory. The Server returns file names using the filename<br />
mapping scheme as specified in the EXPORT database entry. The Server<br />
also drops the VMS version number from the file name for the highest<br />
version of the file.<br />
In addition to file names, the server returns file h<strong>and</strong>les <strong>and</strong> attributes in<br />
an extended directory list.
Procedures Description<br />
READ FROM FILE<br />
(read)<br />
REMOVE<br />
DIRECTORY<br />
(rmdir)<br />
REMOVE FILE<br />
(remove)<br />
RENAME FILE<br />
(rename)<br />
READ LINK<br />
(readlink)<br />
SET ATTRIBUTES<br />
(setattr)<br />
SYMBOLIC LINK<br />
(symlink)<br />
Configuring the <strong>MultiNet</strong> NFS V3 Server<br />
Reads from a file. The Server converts VARIABLE <strong>and</strong> VFC files to<br />
STREAM or STREAM_LF format (depending on the option set) as it<br />
reads them. The server returns EOF when detected.<br />
Deletes a directory.<br />
Deletes a file.<br />
Renames a file. If the destination filename is the same as an existing<br />
filename <strong>and</strong> the destination filename does not have a zero or negative<br />
version number, the Server overwrites the existing file.<br />
Reads the contents of a symbolic link.<br />
Sets file attributes. The Server h<strong>and</strong>les certain file attributes in ways that<br />
are compatible with the OpenVMS system. These attributes are:<br />
File protection—The Server maps the UNIX file protection mask to the<br />
OpenVMS file protection mask, as shown earlier in this chapter.<br />
UID/GID—The client changes the file owner's UIC. The PROXY<br />
database maps the new UID/GID to an OpenVMS UIC. If the Server<br />
cannot locate the new UID/GID in the database, it returns an error <strong>and</strong><br />
does not change the owner UIC.<br />
Size—If the file size is larger than the allocated size, the Server extends<br />
the file. If the size is 0, the Server truncates the file <strong>and</strong> sets the record<br />
attributes to sequential STREAM_LF. You cannot change the size of<br />
variable length or VFC files (except to zero).<br />
Access time—Changing the access time has no effect on the OpenVMS<br />
system.<br />
Modify time—The modify time updates the OpenVMS revision time.<br />
Creates a symbolic link. The Server creates the file with an undefined<br />
record structure <strong>and</strong> uses an application ACE on the file to mask it as a<br />
symbolic link.<br />
28-7
Configuring the <strong>MultiNet</strong> NFS V3 Server<br />
Troubleshooting<br />
28-8<br />
Procedures Description<br />
WRITE TO FILE<br />
(write)<br />
Writes to a file. The Server does not allow a remote host to write to a<br />
directory file, or to VARIABLE <strong>and</strong> VFC files.<br />
If the Server allowed a remote host to write to an existing OpenVMS file<br />
that was not a STREAM_LF or fixed-length record format file, the file<br />
could become corrupted. The Server does not allow a remote host to<br />
explicitly change the record format of an OpenVMS file.<br />
The Server can return the non-st<strong>and</strong>ard NFS error ETXTBSY (26) <strong>and</strong><br />
EINVAL (22). The Server returns ETXTBSY when an OpenVMS user<br />
has a file open for exclusive access <strong>and</strong> an NFS user tries to use the file in<br />
a way that is inconsistent with the way the OpenVMS user opened the<br />
file. The Server returns EINVAL if an NFS user tries to write to or change<br />
the size of a VARIABLE or VFC record format file.<br />
With Version 3, the server will support asynchronous writes (see commit).<br />
If you are experiencing network communication-related problems on the NFS v3 Server, please<br />
check the following items:<br />
1 Make sure <strong>MultiNet</strong> is running on the OpenVMS system.<br />
2 Confirm the RPC services running with the following comm<strong>and</strong> at the DCL prompt:<br />
$ MULTINET SHOW /RPC<br />
3 Make sure the Server is running. If not, start it by entering the following comm<strong>and</strong> at the DCL<br />
prompt: $ MULTINET NETCONTROL NFSV3 RESTART<br />
4 To verify general connectivity between the two systems, try using FTP or TELNET, if purchased<br />
<strong>and</strong> installed on your system. For example, try to open a TELNET connection with the remote<br />
host in question. If another product is not available on your system, try using the PING utility.<br />
5 Verify the internet addresses the local host <strong>and</strong> the remote hosts are using. If your local network<br />
includes a gateway, also verify the gateway address.<br />
6 If you are experiencing problems performing NFS operations from a NFS client, check the<br />
Server's NFSV3_SERVER.LOG file. It may contain messages that can help isolate the problem.
Chapter 29<br />
Using the NFS Client<br />
This chapter describes how to configure <strong>and</strong> maintain the <strong>MultiNet</strong> NFS Client, which allows users<br />
of OpenVMS client computers to access files on a variety of server computers.<br />
This chapter refers to the <strong>MultiNet</strong> NFS Client <strong>and</strong> NFS Server software as the NFS Client <strong>and</strong> NFS<br />
Server <strong>and</strong> the OpenVMS client system <strong>and</strong> server system as the client <strong>and</strong> server.<br />
Underst<strong>and</strong>ing the NFS Client<br />
Reloading the NFS Client<br />
Underst<strong>and</strong>ing the NFS Client<br />
Mounting <strong>and</strong> Dismounting File Systems<br />
Mounting File Systems During <strong>MultiNet</strong> Startup<br />
Advanced NFS Client Mount Options<br />
NFS Client Setup Overview Creating ACPs (Ancillary Control <strong>Process</strong>es) for NFS<br />
Mounts<br />
Creating UID/GID Mappings NFS Clients Using BACKUP<br />
The <strong>MultiNet</strong> NFS Client is an OpenVMS implementation of Sun Microsystems' Network File<br />
System (NFS) protocol. It allows client hosts running the OpenVMS operating system to remotely<br />
access files on a variety of server computers that use different operating systems. To users on an<br />
OpenVMS client system, all mounting <strong>and</strong> access operations are transparent, <strong>and</strong> mounted<br />
directories <strong>and</strong> files appear as native FILES-11 volumes.<br />
Servers <strong>and</strong> Clients<br />
The <strong>MultiNet</strong> NFS Client software allows an OpenVMS system to access file systems made<br />
available to the network by many types of server systems, including:<br />
• Sun Microsystems hosts or similar systems running the UNIX operating system<br />
• Hewlett-Packard computers running the ULTRIX (HP UNIX) operating system<br />
• OpenVMS systems running the <strong>MultiNet</strong> NFS Server The client identifies each file system by<br />
the name of its mount point on the server, which is the name of the device or directory at the top<br />
of the file system hierarchy. When mounting the file system, the client connects the mount point<br />
29-1
Using the NFS Client<br />
29-2<br />
to a mount device in its own hierarchy; for example, NFS2:. Through this connection, all files<br />
below the mount point are available to client users as if they resided on the mount device.<br />
The client converts all mounted directory <strong>and</strong> file structures, contents, <strong>and</strong> names to the format<br />
required by OpenVMS automatically. For example, a UNIX file named:<br />
/usr/joe/.login<br />
appears to an OpenVMS client user as:<br />
DISK$UNIX:[USR.JOE].LOGIN;1<br />
The <strong>MultiNet</strong> NFS Client can convert most valid UNIX or ULTRIX file names to valid OpenVMS<br />
names <strong>and</strong> vice versa. See the Storing OpenVMS File Names on an NFS Server section for a<br />
complete description of the <strong>MultiNet</strong> NFS Client file-naming conventions.<br />
<strong>MultiNet</strong> NFS Client Use of User IDs<br />
NFS server systems identify each of their users to the network by a pair of UNIX or UNIX-style<br />
user-ID (UID) <strong>and</strong> group-ID (GID) codes. During an access operation, the client translates back<br />
<strong>and</strong> forth between the user's OpenVMS UIC (user identification code) <strong>and</strong> UID/GID pair.<br />
For example, a user named Moore has a account on a UNIX server with a UID of 504 <strong>and</strong> a GID of<br />
10. The UID <strong>and</strong> GID are mapped on the OpenVMS client to a user name BMOORE with a UIC<br />
consisting of the userid 504 <strong>and</strong> group affiliation 10.<br />
When the NFS client ACP (ancillary control process) starts, it reads the NFS.CONFIGURATION<br />
file, including the UID translations list. The client uses the list to translate each OpenVMS user<br />
name to its UID/GID pair <strong>and</strong> builds a translation table that maps UID/GID pairs to their<br />
corresponding OpenVMS UICs.<br />
As described in the following sections, you must create <strong>and</strong> maintain the UID translation list that<br />
maps each user's OpenVMS user name to a UID/GID pair. For file protections to work properly,<br />
mappings must be both unique <strong>and</strong> consistent in each direction (see the Grouping NFS Client<br />
Systems for UID/GID Mappings section for a description of exceptions to this rule). You cannot<br />
map a single UID to multiple OpenVMS user names, nor can you use a single user name for<br />
multiple UIDs.<br />
Whenever the UID/GID to OpenVMS UIC mapping is modified, the <strong>MultiNet</strong> NFS Client must be<br />
reloaded for the changes to take effect. See the Reloading the NFS Client section for more<br />
information on restarting the NFS Client.<br />
Grouping NFS Client Systems for UID/GID Mappings<br />
If all the systems in your environment share the same UID/GID pairs, you need not create or<br />
specify NFS groups. All translations are automatically placed in the default group, which has no<br />
group name associated with it.<br />
In the database that translates between UID/GID pairs <strong>and</strong> OpenVMS user names, each entry is<br />
associated with a particular NFS group. An NFS group is a collection of NFS systems sharing a<br />
single set of UID/GID pairs. An example of a collection of systems that would be placed in an NFS<br />
group would be a UNIX file server <strong>and</strong> diskless UNIX client systems which share the same /etc/
Using the NFS Client<br />
passwd file. Within an NFS group, the mapping between UID/GID pairs <strong>and</strong> OpenVMS user names<br />
must be one-to-one: you cannot map a single UID/GID to multiple user names, nor can you use a<br />
single user name for multiple UID/GIDs. However, duplicate translations may exist between NFS<br />
groups.<br />
When the <strong>MultiNet</strong> NFS Client sends an NFS request to a server, it consults the local NFS group<br />
database to determine with which group the server is associated. If the server is not specified<br />
explicitly in a group, it is assumed to be in the default group. Once the NFS Client has determined<br />
the NFS group to which the server belongs, it uses the UID/GID translation list for that group to<br />
determine the UID/GID pair to use for a particular local user when accessing files on the server.<br />
Mapping Example<br />
Consider the following example. At Flowers, Inc., the engineering department has a group of<br />
UNIX hosts, the sales department has a collection of PCs, <strong>and</strong> the marketing department has a mix<br />
of PCs <strong>and</strong> UNIX hosts. Each group also has its own UNIX system acting as an NFS server for the<br />
group. Unfortunately, the groups did not coordinate with each other when they assigned user names<br />
<strong>and</strong> UID/GID pairs; <strong>and</strong> none of the groups are willing to change their current configurations. The<br />
accounting department, on the other h<strong>and</strong>, recently purchased a VAX-4000 computer running<br />
OpenVMS <strong>and</strong> the <strong>MultiNet</strong> NFS Client <strong>and</strong> wishes to use NFS to access certain personnel data<br />
that each department maintains on a local server.<br />
The accounting system manager configures the NFS Client on the OpenVMS system as follows:<br />
1 Using the NFS-CONFIG ADD NFS-GROUP comm<strong>and</strong>, the system manager creates the three<br />
NFS groups ENGINEERING, SALES, <strong>and</strong> MARKETING, placing the NFS systems in each<br />
department in the appropriate NFS group (the default group will be used for systems in the<br />
accounting department).<br />
2 Departments create accounts (<strong>and</strong> hence UID/GID pairs) on their servers that the system<br />
manager can map to local OpenVMS user ids.<br />
3 Finally, the system manager uses the NFS Configuration Utility ADD UID-TRANSLATION<br />
<strong>and</strong> ADD NFS-PASSWD-FILE comm<strong>and</strong>s to create mappings between OpenVMS user names<br />
<strong>and</strong> UID/GID pairs for each NFS group. See the Adding <strong>and</strong> Deleting Mappings section for<br />
details on specifying these mappings.<br />
Effects of Incomplete Mappings<br />
When mappings are incomplete or nonexistent, access operations are denied or severely limited.<br />
If any server files or directories are owned by a UID for which there is no mapping, the client<br />
h<strong>and</strong>les them as though they were owned by the OpenVMS user "DEFAULT" ([200,200]). The<br />
client grants access only according to the WORLD file protection setting of these files.<br />
File System Limitations<br />
If your <strong>MultiNet</strong> system is running both the <strong>MultiNet</strong> NFS Client <strong>and</strong> NFS Server, you cannot<br />
configure the Server to export a file system that has been mounted by the Client. The Server can<br />
export local disks only when the Server <strong>and</strong> Client are running on the same system.<br />
Because the NFS Client does not completely emulate the "on disk" structure of the OpenVMS file<br />
29-3
Using the NFS Client<br />
29-4<br />
system, some applications that directly read the file system may not work correctly over the NFS<br />
Client.<br />
Note! The NFS Client can only mount file systems from OpenVMS systems that are using the <strong>MultiNet</strong><br />
NFS Server.<br />
Finally, you may notice that a file's ID (FID) changes every time the file system is remounted. This<br />
happens because the NFS protocol does not allow a local file ID to be stored on the remote host;<br />
therefore, each NFS client device (NFSx:) has its own idea of what the FID is. The client keeps a<br />
cache of local FIDs which it generates by choosing monotonically increasing numbers. Therefore, a<br />
file mounted multiple times in a cluster may have a different FID on each node. This might cause<br />
trouble with print queues that execute on a node other than the one that submitted the job.<br />
DISKQUOTA Limitations<br />
Although the NFS Client supports NFS server disk quotas, it does not support use of the DCL<br />
SHOW QUOTA comm<strong>and</strong> or the DISKQUOTA utility to examine or manipulate these quotas.<br />
Security <strong>and</strong> File Protections<br />
The NFS Client supports the st<strong>and</strong>ard OWNER, GROUP, <strong>and</strong> WORLD protections allowing<br />
READ, WRITE, EXECUTE, <strong>and</strong> DELETE access (DELETE access is taken from the WRITE<br />
access settings on the server system). Each user has a user account on the OpenVMS client as well<br />
as on the server. The NFS Client compares the UIC of the user to the owner <strong>and</strong> protection mask of<br />
the directory or file <strong>and</strong> then grants or denies access, as indicated earlier in the <strong>MultiNet</strong> NFS Client<br />
Use of User IDs section.<br />
OpenVMS Access Control Lists (ACLs) are supported when accessing files on <strong>MultiNet</strong> NFS<br />
Server OpenVMS systems, as well as most UNIX NFS server systems.<br />
Storing OpenVMS File Attributes on an NFS Server<br />
The NFS protocol assumes an underlying file system in which files are merely streams of bytes<br />
with records delimited by linefeed characters (corresponding to the OpenVMS RMS Stream_LF<br />
record format). The NFS Client supports storage of non-Stream_LF files on an NFS server through<br />
attribute description files <strong>and</strong> file name-dependent attribute defaults.<br />
When using the NFS Client, if you create a non-Stream_LF OpenVMS file or a file with ACLs<br />
associated with it on an NFS server, the NFS Client automatically creates a companion file to hold<br />
the attributes. The companion file is a text file in FDL (File Description Language) format.<br />
The client hides the companion file from the user's view; the user sees only a single file with all of<br />
the attributes. If you rename or delete the original file from the client, the client automatically<br />
renames or deletes the companion file. However, if you rename or delete a file from the server side,<br />
you must also rename the companion file. If you do not, file attributes will be lost, the file will<br />
revert to stream attributes, <strong>and</strong> its contents may become unusable.<br />
For example, if you create the remote indexed sequential file "foo.bar," the client creates a second<br />
remote file ".$fdl$foo.bar" to hold the attributes. For details on controlling the NFS client's use of<br />
FDL files, see the Advanced NFS Client Mount Options section.
Using the NFS Client<br />
Ordinary text files (Stream_LF files) are stored in UNIX byte-stream format <strong>and</strong> do not require<br />
companion files. If you use the OpenVMS COPY comm<strong>and</strong> to copy a non-Stream_LF file to an<br />
NFS Client mounted disk, the file will be converted automatically to Stream_LF format. To disable<br />
this conversion, use the NOSTREAM_CONVERSION option of the NFSMOUNT<br />
/SEMANTICS=qualifier.<br />
Note! When communicating with a UNIX NFS server system, this option prevents UNIX users from<br />
accessing these unconverted files as Stream_LF text files.<br />
Certain types of files default to a type other than Stream_LF, <strong>and</strong> the absence of a companion file<br />
implies attributes other than Stream_LF. For example, a *.EXE file defaults to a fixed length 512byte<br />
record file. Table 29-1 lists the default file attributes included with <strong>MultiNet</strong>.<br />
Table 29-1 NFS Client Default File Attributes<br />
File Name File Type Default File Attributes<br />
*.EXE Executable Fixed 512-byte records<br />
*.OBJ Object File Variable-length records<br />
*.OLB Object Library Fixed 512-byte records<br />
*.MAI Mail Folder Indexed file, variable-length records<br />
*.MLB Macro Library Fixed 512-byte records<br />
*.HLB Help Library Fixed 512-byte records<br />
*.TLB Text Library Fixed 512-byte records<br />
*.STB Symbol Table Variable-length records<br />
*.DECW$BOOK Bookreader Book Variable-length records<br />
*.DECW$FONT Bookreader Font Sequential file, FORMAT undefined<br />
*.DECW_BOOK ULTRIX Book Variable-length records<br />
*.UID DECwindows UID Fixed 4096-byte records w/ CR<br />
Storing OpenVMS File Names on an NFS Server<br />
The <strong>MultiNet</strong> NFS Client uses a special file-naming convention to provide a one-to-one mapping<br />
between UNIX <strong>and</strong> OpenVMS file names. As a result of this convention, there are certain<br />
restrictions on names that can be assigned to files accessed using the NFS Client.<br />
The <strong>MultiNet</strong> NFS Client attempts to give OpenVMS users access to all files on servers, even when<br />
server file names contain characters not permitted by OpenVMS. To accomplish this, the <strong>MultiNet</strong><br />
NFS Client performs a mapping between OpenVMS <strong>and</strong> NFS server file names, using the inverse<br />
mapping of the <strong>MultiNet</strong> NFS Server. This mapping ensures consistency between other NFS clients<br />
29-5
Using the NFS Client<br />
29-6<br />
accessing <strong>and</strong> creating files using the <strong>MultiNet</strong> NFS Server, <strong>and</strong> the <strong>MultiNet</strong> NFS Client accessing<br />
<strong>and</strong> creating files using other NFS servers. All mapping sequences on the OpenVMS client begin<br />
with the escape character "$".<br />
As "$" is the mapping sequence escape character, a real "$" in a file name on the server is mapped<br />
to "$$" on the OpenVMS client. For example, the server file name "foo$bar.c" would map to<br />
"FOO$$BAR.C" on the OpenVMS client.<br />
A "$" followed by a letter (A to Z) in a file name on the client indicates a case-shift in the file name<br />
on the server. For server systems like UNIX, which support case-sensitive file names, a file name<br />
can begin in lowercase <strong>and</strong> alternate between uppercase <strong>and</strong> lowercase. For example, the server file<br />
name "aCaseSENSITIVEFilename" would map to "A$C$ASE$SENSITIVEF$ILENAME" on the<br />
OpenVMS client. A "$" followed by any digit 4 to 9 indicates a mapping as shown in Figure 20-1.<br />
Figure 29-1 File Name Mapping<br />
VMS<br />
Char.<br />
Server<br />
Char.<br />
Hex<br />
Value<br />
VMS<br />
Char.<br />
Server<br />
Char.<br />
Hex<br />
Value<br />
VMS<br />
Char.<br />
Server<br />
Char.<br />
$4A ^A 1 $5A ! 21 $7A Space 20<br />
$4B ^B 2 $5B “ 22 $7B ; 3B<br />
$4C ^C 3 $5C # 23 $7C < 3C<br />
$4D ^D 4 $5E % 25 $7D = 3D<br />
$4E ^E 5 $5F & 26 $7E > 3E<br />
$4F ^F 6 $5G ‘ 27 $7F ? 3F<br />
$4G ^G 7 $5H ( 28<br />
$4H ^H 8 $5I ) 29 $8A @ 40<br />
$4I ^I 9 $5J * 2A $8B [ 5B<br />
$4J ^J A $5K + 2B $8C \ 5C<br />
$4K ^K B $5L ’ 2C $8D ] 5D<br />
$4L ^L C $5N . 2E $8E ^ 5E<br />
$4M ^M D $5O / 2F<br />
$4N ^N E $5Z : 3A $9A ‘ 60<br />
$4O ^O F $9B { 7B<br />
$4P ^P 10 $6A ^@ 00 $9C | 7C<br />
Hex<br />
Value
VMS<br />
Char.<br />
Server<br />
Char.<br />
Using the NFS Client<br />
$4Q ^Q 11 $6B ^[ 1B $9D } 7D<br />
$4R ^R 12 $6C ^\ 1C $9E ~ 7E<br />
$4S ^S 13 $6D ^] 1D $9F DEL 7F<br />
$4T ^T 14 $6E ^^ 1E<br />
$4U ^U 16 $6F ^_ 1F<br />
$4V ^V 16<br />
$4W ^W 17<br />
$4X ^X 18<br />
$4Y ^Y 19<br />
Hex<br />
Value<br />
$4Z ^Z 1A<br />
VMS<br />
Char.<br />
Server<br />
Char.<br />
Hex<br />
Value<br />
VMS<br />
Char.<br />
Server<br />
Char.<br />
Hex<br />
Value<br />
The digit after the dollar sign <strong>and</strong> the trailing letter indicates the character in the server file name. In<br />
the special case of the "dot" character (.), the first dot in the server file name maps directly to a dot<br />
in the client OpenVMS file name. Any following dot characters on the server are mapped to the<br />
character sequence "$5N" on the OpenVMS client. In directory files, any dot character in the server<br />
file name maps to "$5N" on the client. For example, the server file name "foo.bar#1.old" maps to<br />
"FOO.BAR$5C1$5NOLD" on the OpenVMS client (unless "foo.bar#1.old" is a directory file, in<br />
which case it maps to "FOO$5NBAR$5C1$5NOLD.DIR" on the OpenVMS client).<br />
The NFS Client also supports OpenVMS file version numbers. If a file created using the NFS<br />
Client has a file version number other than 1, the resulting file on the server contains the OpenVMS<br />
version number. The highest version of the file is hard-linked to the name without the version<br />
number.<br />
Finally, a "$" followed by a three-digit octal number indicates a character in the file name on the<br />
server that has the binary value of that three-digit octal number. As all character binary values from<br />
0 to 177 (octal) already have mappings, only characters from 200 to 377 are mapped in this fashion.<br />
Thus, the leading digit of the octal number must be either 2 or 3.<br />
NFS Client Architecture<br />
The NFS Client consists of a device driver <strong>and</strong> an ACP process that receives requests from the<br />
OpenVMS Record Management Services (RMS) <strong>and</strong> translates them into NFS requests. Because<br />
the NFS Client is called by RMS, applications using RMS or the st<strong>and</strong>ard input/output routines of<br />
OpenVMS programming languages do not need to be modified to access files through the NFS<br />
Client. The NFS Client presents a $QIO interface identical to the interface documented in the VMS<br />
I/O User's Reference Manual: Part I.<br />
The NFS Client includes two top-level protocols that run parallel to each other above a stack of<br />
29-7
Using the NFS Client<br />
29-8<br />
lower-level protocols:<br />
• The Network File System (NFS) protocol is an IP-family protocol that provides remote file<br />
system access, h<strong>and</strong>ling client queries.<br />
• The Remote Procedure Call (RPC) mount protocol, RPCMOUNT, is used by the NFSMOUNT<br />
<strong>and</strong> NFSDISMOUNT comm<strong>and</strong>s to get mount-point information from the server systems.<br />
Underlying the NFS <strong>and</strong> RPCMOUNT protocols is a stack of protocols:<br />
• The remote Procedure Call (RPC) protocol allows the client to make procedure calls across the<br />
network to servers.<br />
• The external Data Representation (XDR) protocol h<strong>and</strong>les architectural differences between the<br />
client <strong>and</strong> sever systems, allowing the NFS protocol to communicate between systems with<br />
dissimilar architectures.<br />
• The RPC/NFS Lock Manager protocol allows the NFS Client to support file-locking (exclusive<br />
write access).<br />
• User Datagram Protocol (UDP), Transmission Control Protocol (TCP), <strong>and</strong> Internet Protocol<br />
(IP) are used for the lowest levels of communication.<br />
Traditionally, NFS has only run over UDP. The <strong>MultiNet</strong> NFS Client also supports communication<br />
over TCP. This may provide reliability <strong>and</strong> performance improvements when communicating with<br />
NFS server systems across slow network links or wide area networks (WANs), which suffer from<br />
packet loss <strong>and</strong> delay.<br />
NFS Client Setup Overview<br />
Configuring the NFS Client alters the NFS.CONFIGURATION file. This file includes the<br />
OpenVMS user name <strong>and</strong> the UNIX (server) UID <strong>and</strong> GID for each user of the NFS Client.<br />
The initial setup of the NFS Client consists of the following operations:<br />
1 Using NFS-CONFIG to provide the client with a basis for translating between each user's<br />
OpenVMS client <strong>and</strong> server user IDs.<br />
2 Mounting remote file systems by using the DCL NFSMOUNT comm<strong>and</strong> (requires CMKRNL,<br />
SETPRV, SYSPRV, SYSNAM, ALTPRI, DETACH, ACNT, <strong>and</strong> SYSLCK privileges).<br />
3 Reloading the client.<br />
The following sections describe these client setup operations.<br />
Creating UID/GID Mappings<br />
There are four steps to configuring the mapping between the user IDs used for each user by the<br />
OpenVMS client <strong>and</strong> the servers:<br />
1 Invoking the NFS-CONFIG utility.<br />
2 Displaying the current mapping data (optional).<br />
3 Using the utility to set up or modify the mapping.<br />
4 Exiting the utility.
Invoking the NFS-CONFIG Utility<br />
Using the NFS Client<br />
To invoke NFS-CONFIG, enter the following comm<strong>and</strong>. In response, NFS-CONFIG reads the<br />
current NFS.CONFIGURATION file.<br />
$ MULTINET CONFIGURE/NFS<br />
<strong>MultiNet</strong> NFS Configuration Utility 5.4<br />
[Reading in configuration from MULTINET:NFS.CONFIGURATION]<br />
NFS-CONFIG><br />
Displaying the Current Mapping List<br />
If you are modifying an existing client configuration, you might want to display the current UID<br />
translations list by displaying the NFS.CONFIGURATION file: The NFS-CONFIG SHOW<br />
comm<strong>and</strong> displays the file.<br />
NFS-CONFIG>SHOW<br />
The following example shows the type of information in the file. The sample file contains:<br />
• The UID translations list<br />
• Other information that relates only to NFS Server operation<br />
NFS-CONFIG>SHOW<br />
UID Translations: VMS Username Unix UID Unix GID<br />
------------ -------- --------<br />
JOHN 10 15<br />
BANZAI 2 40<br />
NFS Passwd Files: MULTINET_ROOT:[MULTINET]NFS.PASSWD<br />
NFS-CONFIG><br />
For more information about the NFS-CONFIG SHOW comm<strong>and</strong>, see the NFS-CONFIG chapter in<br />
the <strong>MultiNet</strong> for OpenVMS <strong>Administrator's</strong> Reference.<br />
Adding <strong>and</strong> Deleting Mappings<br />
There are two methods for adding <strong>and</strong> deleting mappings of user names to UID/GID pairs. You can<br />
combine these methods as needed:<br />
• Add <strong>and</strong> delete individual mappings with NFS-CONFIG.<br />
• If the system includes UNIX servers whose user names are the same as the OpenVMS user<br />
names, you can use one or more /etc/passwd files as the basis for multiple mappings, <strong>and</strong> add<br />
<strong>and</strong> delete those mappings in groups with NFS-CONFIG.<br />
After creating or modifying the UID Translations list, restart the client to put the changes into<br />
effect, as described in the Reloading the NFS Client section.<br />
Adding <strong>and</strong> Deleting Individual Mappings<br />
The ADD UID-TRANSLATION comm<strong>and</strong> creates an individual mapping between an OpenVMS<br />
29-9
Using the NFS Client<br />
29-10<br />
user name <strong>and</strong> a UID/GID pair. For example:<br />
NFS-CONFIG>ADD UID-TRANSLATION JOHN 10 15<br />
To create a mapping between an OpenVMS user name <strong>and</strong> a UID/GID pair associated with the<br />
NFS group MARKETING, use a comm<strong>and</strong> like the following example:<br />
NFS-CONFIG>ADD UID-TRANSLATION JOHN 10 15 MARKETING<br />
If you are creating UID/GID pairs, each code must be a positive integer or zero, <strong>and</strong> each user must<br />
have a unique UID. A user of multiple servers must have the same UID for each of the servers or<br />
use NFS groups to group together systems sharing the same UID mappings.<br />
To delete these mappings, use the DELETE UID-TRANSLATION comm<strong>and</strong>, for example:<br />
NFS-CONFIG>DELETE UID-TRANSLATION JOHN<br />
To delete a mapping associated with an NFS group, for example, the user JOHN in the<br />
MARKETING group:<br />
NFS-CONFIG>DELETE UID-TRANSLATION MARKETING/JOHN<br />
Remember that after creating or modifying the UID translation list, you must restart the client to<br />
make the changes take effect (see the Reloading the NFS Client section.).<br />
Adding <strong>and</strong> Deleting NFS Groups<br />
The ADD NFS-GROUP comm<strong>and</strong> creates an NFS group. For example:<br />
NFS-CONFIG>ADD NFS-GROUP SALES WHORFIN.FLOWERS.COM, CC.FLOWERS.COM<br />
To delete a system from an NFS group, use the DELETE NFS-GROUP comm<strong>and</strong>; for example:<br />
NFS-CONFIG>DELETE NFS-GROUP SALES WHORFIN.FLOWERS.COM<br />
To delete the NFS group itself <strong>and</strong> all UID/GID mappings associated with the group, use an asterisk<br />
(*) for the host specification; for example:<br />
NFS-CONFIG>DELETE NFS-GROUP SALES *<br />
Adding <strong>and</strong> Deleting Multiple Mappings<br />
If the UNIX <strong>and</strong> OpenVMS systems use the same user names, you can use the "/etc/passwd" files<br />
from UNIX NFS servers to create multiple mappings. To create a multi-user mapping, use FTP (or<br />
another file transfer utility) to copy the applicable /etc/passwd files from the UNIX systems to the<br />
OpenVMS system running NFS Client. Then run the NFS Configuration Utility, <strong>and</strong> use the ADD<br />
NFS-PASSWD-FILE comm<strong>and</strong> to create the mapping. For example:<br />
NFS-CONFIG>ADD NFS-PASSWD-FILE MULTINET:NFS.PASSWD<br />
To create a multi-user mapping associated with the NFS group MARKETING, you might use the<br />
comm<strong>and</strong>:
NFS-CONFIG>ADD NFS-PASSWD-FILE MULTINET:NFS.PASSWD1 MARKETING<br />
Using the NFS Client<br />
CAUTION! If you add or delete users, or change the mapping between user name <strong>and</strong> UID/GID in the<br />
/etc/passwd file on an NFS server, be sure to make the same change in the NFS passwd<br />
file on the client.<br />
The following example UID translations list includes both individual mappings <strong>and</strong> passwd file<br />
entries (excerpted from the output of a SHOW comm<strong>and</strong>).<br />
NFS Passwd Files: MULTINET:NFS.PASSWD, MULTINET:NFS.PASSWD2<br />
UID Translations: VMS Username Unix UID Unix GID<br />
------------ -------- --------<br />
JOHN 10 15<br />
BANZAI 2 40<br />
The following example UID translation list includes NFS group entries, individual mappings, <strong>and</strong><br />
passwd file entries created with the NFS Configuration Utility ADD NFS-GROUP, ADD UID-<br />
TRANSLATION, <strong>and</strong> ADD NFS-PASSWD-FILE comm<strong>and</strong>s (excerpted from the output of a<br />
SHOW comm<strong>and</strong>).<br />
NFS Group Name Members<br />
-------------- -------<br />
ENGINEERING control.flowers.com,fang.flowers.com<br />
SALES small-berries.flowers.com,whorfin.flowers.com<br />
NFS Passwd Files: ENGINEERING/MULTINET:NFS.PASSWD, MULTINET:NFS.PASSWD2<br />
UID Translations: VMS Username Unix UID Unix GID<br />
------------ -------- --------<br />
JOHN 10 15<br />
BANZAI 2 40<br />
ENGINEERING/MAX 30 10<br />
SALES/TOMMY 30 10<br />
To delete an NFS passwd file entry, use the DELETE NFS-PASSWD-FILE comm<strong>and</strong>. For<br />
example:<br />
NFS-CONFIG>DELETE NFS-PASSWD-FILE MULTINET:NFS.PASSWD<br />
Mounting <strong>and</strong> Dismounting File Systems<br />
The final step in performing the first NFS Client configuration is to mount the remote file systems<br />
that you want client users to access as if they were local files. You can also modify an existing<br />
client configuration by mounting or dismounting file systems.<br />
Mounting a File System<br />
Use the NFSMOUNT comm<strong>and</strong> to mount an NFS file system. NFSMOUNT requires CMKRNL,<br />
SETPRV, SYSPRV, SYSNAM, ALTPRI, DETACH, ACNT, <strong>and</strong> SYSLCK privileges. For example:<br />
29-11
Using the NFS Client<br />
29-12<br />
$ nfsmount sun::"/ufs" disk$sun<br />
%NFSMOUNT-I-MOUNTED, SUN::/ufs NFS mounted on _NFS2:<br />
$<br />
The example comm<strong>and</strong> mounts the file system "/ufs," which is located on the server "sun" on the<br />
local mount device _NFS2:.<br />
The double quotes are necessary in the sample comm<strong>and</strong> because of the special meaning of the<br />
slash (/) character in OpenVMS. The quotes are not necessary when mounting a file system<br />
exported by another OpenVMS system.<br />
Dismounting a File System<br />
When you dismount a file system, you free the resources used by the NFS Client. To dismount a<br />
file system, use the NFSDISMOUNT comm<strong>and</strong>:<br />
$ nfsdismount mount_device<br />
For example:<br />
$ nfsdismount nfs2:<br />
$<br />
You can use either the logical name specified in the NFSMOUNT comm<strong>and</strong> or the actual NFS<br />
device name (such as NFS2:) in the mount_device field of the NFSDISMOUNT comm<strong>and</strong>.<br />
Reloading the NFS Client<br />
Before you can use a new or revised set of UID translations, you must first reload the UID<br />
mappings into the NFS Client with the DCL comm<strong>and</strong>:<br />
$ NFSMOUNT /RELOAD<br />
You may also update the client's UID mappings using NFS-CONFIG with the following comm<strong>and</strong>:<br />
NFS-CONFIG>RELOAD<br />
For instructions on using the NFSDISMOUNT <strong>and</strong> NFSMOUNT comm<strong>and</strong>s, see the Mounting<br />
<strong>and</strong> Dismounting File Systems section.<br />
Note! If no file systems are mounted, reloading does not work.<br />
Mounting File Systems During <strong>MultiNet</strong> Startup<br />
When the START_MULTINET.COM script executes during <strong>MultiNet</strong> startup, it checks the<br />
MULTINET: directory for the existence of a file named NFS_MOUNT.COM. If this file exists, it<br />
will be executed in order to mount any remote file system desired by the system manager. The<br />
following example illustrates such a file:<br />
$ SET NOON<br />
$ Show Queue 'F$GetSYI("NODENAME")'_BATCH/<br />
Output=Sys$Manager:Nfs_Mount.Tmp/All
Using the NFS Client<br />
$ Open/Read File SYS$MANAGER:NFS_Mount.Tmp<br />
$Loop:<br />
$ Read/End=Done File Line<br />
$ If "''F$Element(1," ",F$Edit(Line,"TRIM,COMPRESS"))'" .Eqs. "NFS_MOUNT"<br />
-<br />
Then Goto Skip<br />
$ Goto Loop<br />
$Done:<br />
$ Submit/User=System/Queue='F$GetSYI("NODENAME")'_BATCH -<br />
/NoPrint -<br />
<strong>MultiNet</strong>:NFS_MOUNT_BATCH -<br />
/Name=NFS_MOUNT/Log=Sys$Manager:NFS_Mount.Log<br />
$Skip:<br />
$ Close File<br />
$ Delete Sys$Manager:NFS_Mount.Tmp;*<br />
This DCL program submits another DCL comm<strong>and</strong> file, NFS_MOUNT_BATCH.COM, to the<br />
queue node_BATCH to do the work after the system boots.<br />
The following is an example of NFS_MOUNT_BATCH.COM:<br />
$ Verify = 'f$verify(0)<br />
$ Set Proc/Name="NFS Mounter"<br />
$ Purge NFS_MOUNT.Log<br />
$ SET NOON<br />
$ Errors = 0<br />
$!<br />
$! Attempt to mount the CD player on NFS.FLOWERS.COM<br />
$!<br />
$ IF .Not. F$GetDVI("DISK$CD","EXISTS") Then -<br />
NFSMOUNT/VMS/TRANS=TCP/SOFT NFS.FLOWERS.COM::DISK$CD: DISK$CD -<br />
/VOLUME="CD_ROM"<br />
$ If .Not. $Status Then Errors = Errors + 1<br />
$!<br />
$! Check the status <strong>and</strong> requeue job if necessary.<br />
$!<br />
$ If Errors .Eq. 0 Then Exit<br />
$ Submit/User=System/Queue=SYS$BATCH -<br />
/NoPrint /Name=NFS_MOUNT -<br />
<strong>MultiNet</strong>:NFS_MOUNT_BATCH -<br />
/After="''F$CvTime("+01:00","ABSOLUTE")'"<br />
Creating ACPs (Ancillary Control <strong>Process</strong>es) for NFS Mounts<br />
The NFS Client has an NFS_CLIENT_ACP process that assists the driver by performing some<br />
operations that are easier to do in a separate process rather than at the driver level.<br />
Because this ACP process is single-threaded, using a single ACP for all NFS devices has a<br />
significant drawback. If you have multiple NFS devices mounted to different computer systems <strong>and</strong><br />
29-13
Using the NFS Client<br />
29-14<br />
an operation hangs on one system, all of the NFS devices are affected.<br />
Specifying NFSMOUNT /PROCESSOR=UNIQUE creates a separate ACP process for each NFS<br />
device. This allows NFS devices to function in parallel so one device does not have to wait for an<br />
NFS operation on another device to complete. Multiple ACPs provide for multiple outst<strong>and</strong>ing I/O<br />
operations on different devices.<br />
The setting /PROCESSOR=UNIQUE creates a separate NFS_CLIENT_n process for each mount,<br />
– n is the number of the NFS device (for example, NFS_CLIENT_2, which corresponds to the<br />
device NFS2).<br />
The following example illustrates the use of /PROCESSOR=UNIQUE, creating four ACP<br />
processes (one for each device):<br />
$ NFSMOUNT /PROCESSOR=UNIQUE SCROOGE::USERS: SCROOGE$USERS<br />
$ NFSMOUNT /PROCESSOR=UNIQUE PIP::UTIL: PIP$UTIL<br />
$ NFSMOUNT /PROCESSOR=UNIQUE HAVERSHAM::ADMIN: HAVERSHAM$ADMIN<br />
$ NFSMOUNT /PROCESSOR=UNIQUE MARLEY::ENG:MARLEY$ENG<br />
A setting of /PROCESSOR=SAME=nfs_device assigns the mount to the same ACP process as the<br />
specified nfs_device. For example, /PROCESSOR=SAME=NFS3 assigns this mount to the<br />
NFS_CLIENT_3 ACP process.<br />
Note! The specified device may be either the NFS device name itself (for example, NFS3), or a logical<br />
name pointing at the NFS device.<br />
Mounts specified without the /PROCESSOR qualifier use the default process NFS_CLIENT_ACP.<br />
<strong>Process</strong> <strong>Software</strong> recommends that you use the /PROCESSOR qualifier to group mounts on the<br />
remote server. If the server goes down, access to other servers is not affected. You can use the<br />
/SOFT qualifier to permit NFS operations to time-out instead of hanging indefinitely.<br />
The following example illustrates the use of /PROCESSOR=SAME. In this example, all access to<br />
the server SCOOBY goes through one ACP process, <strong>and</strong> all access to PIP goes through another<br />
process.<br />
$ NFSMOUNT /PROCESSOR=UNIQUE SCROOGE::USERS: SCROOGE$USERS<br />
$ NFSMOUNT /PROCESSOR=SAME=SCROOGE$USERS SCROOGE::DKA100: SCROOGE$DKA100<br />
$ NFSMOUNT /PROCESSOR=UNIQUE PIP::UTIL: PIP$UTIL<br />
$ NFSMOUNT /PROCESSOR=SAME=PIP$UTIL PIP::FOO: PIP$FOO<br />
NFS Clients Using BACKUP<br />
The OpenVMS BACKUP utility can write a saveset to an NFS-mounted disk, but the <strong>MultiNet</strong><br />
NFS Client does not support specifying files on an NFS-mounted disk as the input-specifier in a<br />
BACKUP comm<strong>and</strong>.<br />
BACKUP works with the <strong>MultiNet</strong> NFS Client in a limited way with the following restrictions:
Using the NFS Client<br />
• BACKUP preserves the UIC it finds on a file. If an NFS UNIX file has a UID that does not map<br />
to an OpenVMS UIC, the file is backed up as if it belonged to DEFAULT. When you restore the<br />
file, it will belong to the UNIX user "nobody" (UID -2, GID -2).<br />
• BACKUP does not preserve certain bits of information associated with UNIX (such as the<br />
"sticky" or set-UID bits).<br />
• NFS identifies UNIX files using a 32-byte file h<strong>and</strong>le. However, the file h<strong>and</strong>le must be<br />
presented to OpenVMS as a 6-byte FID. Because the number of possible 32-byte file h<strong>and</strong>les is<br />
much greater than the number of possible 6-byte FIDs, <strong>MultiNet</strong> must implement a cached<br />
mapping scheme. This approach works well with applications that only care about FID<br />
consistency as long as the file is accessed. However, some applications (such as BACKUP)<br />
expect consistent FIDs for the life of the file.<br />
Note! Using BACKUP with NFS-mounted files copies the contents of the files, but does not copy the<br />
semantics of files created from foreign operating systems. <strong>Process</strong> <strong>Software</strong> recommends<br />
backing up OpenVMS files to a remote tape via RMT (Remote Magtape Protocol) using<br />
MULTINET RMTALLOC (see Chapter 17).<br />
Advanced NFS Client Mount Options<br />
The <strong>MultiNet</strong> NFS Client uses a number of techniques to map OpenVMS semantics such as file<br />
attributes <strong>and</strong> file version numbers to the underlying UNIX file system present on an NFS server. In<br />
using these techniques, it makes the assumption that full UNIX semantics, such as file names <strong>and</strong><br />
hard links, are available on the NFS server. Failure to provide an NFS server that satisfies these<br />
assumptions results in incorrect operation of the NFS client.<br />
NFS servers that do not correctly support the full UNIX file system semantics can be used with the<br />
<strong>MultiNet</strong> NFS Client in a restricted fashion. The /SEMANTICS qualifier to the NFSMOUNT<br />
comm<strong>and</strong> tells the NFS Client that the NFS server does not support certain operations, <strong>and</strong> these<br />
operations should not be attempted. Use of certain /SEMANTICS values will mean that some<br />
OpenVMS capabilities will not be available, but the client will still function.<br />
Table 29-2 lists each semantic <strong>and</strong> how it changes the behavior of the NFS Client. You can specify<br />
more than one semantic on a mount request. For more information on the use of the /SEMANTICS<br />
qualifier, refer to the NFSMOUNT comm<strong>and</strong> page in the <strong>MultiNet</strong> for OpenVMS <strong>Administrator's</strong><br />
Reference.<br />
Table 29-2 NFS Client Semantics<br />
Semantics Value Description<br />
ADVISORY_CLOSE Sends an OpenVMS server a comm<strong>and</strong> to close the file<br />
when there are no more references to it on the client.<br />
NOFDL_FILES Disables the use of ".$fdl$" files by the <strong>MultiNet</strong> NFS<br />
Client to store RMS attributes. This option must be used if<br />
the NFS server does not allow these file names. Its use<br />
severely limits the ability of the NFS Client to store<br />
record attributes.<br />
29-15
Using the NFS Client<br />
29-16<br />
Table 29-2 NFS Client Semantics (Continued)<br />
Semantics Value Description<br />
NOLINKS Normally, the NFS Client uses a hard link operation to<br />
link the top version of a file name "foo.bar;12" to the<br />
unversioned name "foo.bar" for more convenient access<br />
from the NFS server side. This option disables creating<br />
this hard link <strong>and</strong> may be used either to reduce the<br />
overhead of creating it or if the NFS server does not<br />
support hard links.<br />
NOSTREAM_CONVERSION Normally, the NFS Client converts requests to create<br />
Variable Length Record Carriage Return Carriage Control<br />
(VAR-CR) files into requests to create Stream files, to<br />
ensure that text files can be shared between OpenVMS<br />
<strong>and</strong> UNIX systems. This option disables this conversion.<br />
NOUNIQUE_FILENO Specifies that the NFS server does not generate unique<br />
filenumbers for each file (most NFS servers do). If the<br />
client knows that filenumbers are unique, it uses a faster<br />
algorithm to refresh stale directory entries in the cache.<br />
Use of this switch disables the faster refresh algorithm.<br />
NOVERSIONS Normally the NFS Client stores multiple versions of<br />
OpenVMS files by using the semicolon character in the<br />
file name on the NFS server side. This option must be<br />
used to disable the creation multiple versions of files if<br />
the NFS server does not support file names with the<br />
semicolon character.<br />
NOVMS_ACCESS_CHECKING Specifies that the client should not perform a full<br />
OpenVMS access check, including a check for ACLs <strong>and</strong><br />
security alarms. If this option is not specified, the NFS<br />
Client will consider ACLs <strong>and</strong> security alarms when<br />
granting or denying access.<br />
PRESERVE_DATES Specifies that the client should maintain the file's creation,<br />
backup, <strong>and</strong> expiration dates in an FDL file. For<br />
information on storing OpenVMS file attributes in FDL<br />
files, see the Storing OpenVMS File Names on an NFS<br />
Server section.<br />
UPPER_CASE_DEFAULT Assumes file names are in uppercase on the server until it<br />
sees the $ character used to toggle case.
Table 29-2 NFS Client Semantics (Continued)<br />
Semantics Value Description<br />
Using the NFS Client<br />
VMS_FILENAMES Specifies that the NFS Client does not perform the usual<br />
mapping between OpenVMS <strong>and</strong> UNIX-style file names.<br />
This option can be used to permit all OpenVMS file<br />
names to be stored using the NFS Client, but its use<br />
prevents the NFS Client from being used to access files<br />
which do not conform to the OpenVMS file name<br />
conventions.<br />
VMS_SERVER Specifies that the NFS server is a <strong>MultiNet</strong> NFS Server of<br />
revision V3.0 or later, which supports the OpenVMSspecific<br />
extensions to the NFS protocol to store file<br />
attributes. If the NFS Server does not support these<br />
extensions, the mount will fail. This option overrides any<br />
other semantics specified.<br />
29-17
Chapter 30<br />
Configuring the Secure Shell (SSH) v1 Server<br />
This chapter describes how to configure <strong>and</strong> maintain the <strong>MultiNet</strong> Secure Shell (SSH) v1 server.<br />
This is the server side of the software that allows secure interactive connections to other computers<br />
in the manner of rlogin/rshell/telnet. The SSH server has been developed to discriminate between<br />
SSH v1 <strong>and</strong> SSH v2 protocols, so the two protocols can coexist simultaneously on the same system.<br />
SSH1 <strong>and</strong> SSH2 Differences<br />
SSH1 <strong>and</strong> SSH2 are different, <strong>and</strong> incompatible, protocols. The SSH1 implementation is based on<br />
the V1.5 protocol, <strong>and</strong> F-Secure 1.3.7 code base, <strong>and</strong> the SSH2 implementation is based on the V2<br />
protocol <strong>and</strong> the WRQ RSIT 6.1.0 code base. While SSH2 is generally regarded to be more secure<br />
than SSH1, both protocols are offered by <strong>MultiNet</strong>, <strong>and</strong> although they are incompatible, they may<br />
exist simultaneously on a <strong>MultiNet</strong> system. The <strong>MultiNet</strong> server front-end identifies what protocol<br />
a client desires to use, <strong>and</strong> will create an appropriate server for that client.<br />
Note! You must install the DEC C 6.0 backport library on all OpenVMS VAX v5.5-2 <strong>and</strong> v6.0 systems<br />
prior to using SSH. This is the AACRT060.A file. You can find the ECO on the <strong>MultiNet</strong> CD the<br />
following directory: VAX55_DECC_RTL.DIR.<br />
Restrictions:<br />
When using SSH1 to connect to a VMS server, if the VMS account is set up with a secondary<br />
password, SSH1 does not prompt the user for the secondary password. If the VMS primary<br />
password entered is valid, the user is logged in, bypassing the secondary password.<br />
When using SSH1 to execute single comm<strong>and</strong>s (in the same manner as RSHELL), some keystrokes<br />
like CTRL/Y are ignored. In addition, some interactive programs such as HELP may not function<br />
as expected. This is a restriction of SSH1. If this behavior poses a problem, log into the remote<br />
system using SSH1 in interactive mode to execute the program.<br />
30-1
Configuring the Secure Shell (SSH) v1 Server<br />
Underst<strong>and</strong>ing the <strong>MultiNet</strong> Secure Shell Server<br />
30-2<br />
Secure Shell daemon (SSHD) is the daemon program for SSH that listens for connections from<br />
clients. The server program replaces rshell <strong>and</strong> telnet programs. The server/client programs provide<br />
secure encrypted communications between two untrusted hosts over an insecure network. A new<br />
daemon is created for each incoming connection. These daemons h<strong>and</strong>le key exchange, encryption,<br />
authentication, comm<strong>and</strong> execution, <strong>and</strong> data exchange.<br />
Servers <strong>and</strong> Clients<br />
A <strong>MultiNet</strong> SSH server is an OpenVMS system server that acts as a host for executing interactive<br />
comm<strong>and</strong>s or for conducting an interactive session. The server software consists of two processes<br />
(for future reference, “SSHD” will refer to both SSHD_MASTER <strong>and</strong> SSHD, unless otherwise<br />
specified):<br />
• SSHD_MASTER, recognizes the differences between SSH v1 <strong>and</strong> SSH v2 <strong>and</strong> starts the<br />
appropriate server. If the request is for SSH v1, then a new SSH v1 server is run; if the request is<br />
for SSH v2, then a new SSH v2 server is run.<br />
• SSHD, a copy of which is spawned for each time a new connection attempt is made from a<br />
client. SSHD h<strong>and</strong>les all the interaction with the SSH client.<br />
A client is any system that accesses the server. A client program (SSH) is provided with <strong>MultiNet</strong>,<br />
but any SSH client that uses SSH version 1 protocol may be used to access the server. Examples of<br />
such programs are FISSH, <strong>MultiNet</strong> SSH, <strong>and</strong> TCPware SSH on OpenVMS systems; TTSSH,<br />
SecureCRT®, F-Secure SSH Client, <strong>and</strong> PuTTY on Windows®-based systems; <strong>and</strong> other SSH<br />
programs on UNIX-based systems.<br />
Security<br />
Each host has a host-specific RSA key (normally 1024 bits) that identifies the host. Additionally,<br />
when the SSHD daemon starts, it generates a server RSA key (normally 768 bits). This key is<br />
regenerated every hour (the time may be changed in the configuration file) if it has been used, <strong>and</strong><br />
is never stored on disk. Whenever a client connects to the SSHD daemon,<br />
• SSHD sends its host <strong>and</strong> server public keys to the client.<br />
• The client compares the host key against its own database to verify that it has not changed.<br />
• The client generates a 256 bit r<strong>and</strong>om number. It encrypts this r<strong>and</strong>om number using both the<br />
host key <strong>and</strong> the server key, <strong>and</strong> sends the encrypted number to the server.<br />
• The client <strong>and</strong> the server start to use this r<strong>and</strong>om number as a session key which is used to<br />
encrypt all further communications in the session.<br />
The rest of the session is encrypted using a conventional cipher. Currently, IDEA (the default),<br />
DES, 3DES, Blowfish, <strong>and</strong> ARCFOUR are supported.<br />
• The client selects the encryption algorithm to use from those offered by the server.<br />
• The server <strong>and</strong> the client enter an authentication dialog.<br />
• The client tries to authenticate itself using any of the following methods:<br />
– .rhosts authentication
– .rhosts authentication combined with RSA host authentication<br />
– RSA challenge-response authentication<br />
– password-based authentication<br />
Configuring the Secure Shell (SSH) v1 Server<br />
Note! Rhosts authentication is normally disabled because it is fundamentally insecure, but can be<br />
enabled in the server configuration file, if desired.<br />
System security is not improved unless the RLOGIN <strong>and</strong> RSHELL services are disabled.<br />
When the client authenticates itself successfully, a dialog is entered for preparing the session. At<br />
this time the client may request things such as:<br />
• forwarding X11 connections<br />
• forwarding TCP/IP connections<br />
• forwarding the authentication agent connection over the secure channel<br />
Finally, the client either requests an interactive session or execution of a comm<strong>and</strong>. The client <strong>and</strong><br />
the server enter session mode. In this mode, either the client or the server may send data at any<br />
time, <strong>and</strong> such data is forwarded to/from the virtual terminal or comm<strong>and</strong> on the server side, <strong>and</strong><br />
the user terminal in the client side. When the user program terminates <strong>and</strong> all forwarded X11 <strong>and</strong><br />
other connections have been closed, the server sends comm<strong>and</strong> exit status to the client, <strong>and</strong> both<br />
sides exit.<br />
Break-in <strong>and</strong> Intrusion Detection<br />
Care must be exercised when configuring the SSH clients <strong>and</strong> server to minimize problems due to<br />
intrusion records created by OpenVMS security auditing. The SSH user should consult the system<br />
manager to determine the authentication methods offered by the SSH server. The client should then<br />
be configured to not attempt any authentication method that is not offered by the server.<br />
If a client attempts authentication methods not offered by the server, the OpenVMS security<br />
auditing system may log several intrusion records for each attempt to create a session to that server.<br />
The result being that the user could be locked out <strong>and</strong> prevented from accessing the server system<br />
without intervention from the server's system manager.<br />
The authentication methods to be offered by the server are determined by the configuration<br />
keywords RhostsAuthentication, RhostsRSAAuthentication, RSAAuthentication, <strong>and</strong><br />
PasswordAuthentication. The number of intrusion records to be logged for any attempted SSH<br />
session is determined by the StrictIntrusionLogging configuration keyword.<br />
When StrictIntrusionLogging is set to YES (the default), each method that is tried <strong>and</strong> fails causes<br />
an intrusion record to be logged:<br />
• When Rhosts, RhostsRSA or RSA authentications are attempted <strong>and</strong> fail, one intrusion record<br />
will be logged for each failed method.<br />
Note! RSA ACE/Agent for OpenVMS is no longer supported by RSA Security. Therefore, <strong>Process</strong><br />
<strong>Software</strong> can no longer assist with RSA ACE/Agent for OpenVMS-related problems. <strong>Process</strong><br />
<strong>Software</strong> recommends using SSH instead.<br />
30-3
Configuring the Secure Shell (SSH) v1 Server<br />
30-4<br />
• When password authentication is attempted, one intrusion record will be logged for each failed<br />
password.<br />
Example 1<br />
The server is set up to allow Rhosts, RSA, <strong>and</strong> password authentication; also, up to three password<br />
attempts are allowed. If all methods fail, five intrusion records are logged:<br />
1 for the failed Rhosts<br />
1 for the failed RSA<br />
3 for the failed password attempts, one per attempt<br />
When StrictIntrusionLogging is set to NO, it has the effect of relaxing the number of intrusions<br />
logged. Overall failure of all authentication methods simply counts as a single failure, except for<br />
password authentication. The following rules apply:<br />
• When password authentication is attempted, one intrusion record is logged for each failed<br />
password.<br />
• When any of Rhosts, RhostsRSA, or RSA authentication fails, <strong>and</strong> password authentication is<br />
not attempted, exactly one intrusion record is logged, as opposed to one for each failed method.<br />
• When any of Rhosts, RhostsRSA, or RSA authentication fails, but password authentication is<br />
attempted <strong>and</strong> succeeds, the only intrusion record(s) logged is one for each failed password<br />
attempt.<br />
Example 2:<br />
The server is set up to allow Rhosts, RSA, <strong>and</strong> password authentication; also, up to three password<br />
attempts are allowed. If all methods fail, three intrusion records are logged:<br />
0 for the failed Rhosts<br />
0 for the failed RSA<br />
3 for the failed password attempts, one per attempt<br />
Example 3:<br />
The server is set up to allow Rhosts, RSA, <strong>and</strong> password authentication; also, up to three password<br />
attempts are allowed. Rhosts <strong>and</strong> RSA fail, but password authentication is successful after 1 failed<br />
password. Therefore, one intrusion record is logged:<br />
0 for the failed Rhosts<br />
0 for the failed RSA<br />
1 for the failed password attempt<br />
Example 4:<br />
The server is set up to allow Rhosts, RhostsRSA, <strong>and</strong> RSA authentication, but not password<br />
authentication. If all methods fail, one intrusion record is logged.<br />
Example 5:<br />
The server is set up to allow Rhosts, RhostsRSA, <strong>and</strong> RSA authentication, but not password<br />
authentication. Rhosts <strong>and</strong> RSA authentication both fail, but RhostsRSA succeeds. No intrusion<br />
records are logged.
Configuring SSHD Master for SSH1<br />
Configuring the Secure Shell (SSH) v1 Server<br />
SSHD Master is configured using the MULTINET CONFIGURE/SERVER comm<strong>and</strong>, selecting<br />
SSH, <strong>and</strong> using the following options:<br />
Note! The recommended method to start SSHD Master is to use the MULTINET NETCONTROL SSH<br />
START comm<strong>and</strong>. All of these options are set using MULTINET CONFIG/SERVER, <strong>and</strong><br />
modifying the SSH service.<br />
Example 30-1<br />
$ MULTINET CONFIGURE /SERVER<br />
<strong>MultiNet</strong> Server Configuration Utility V5.4(42)<br />
[Reading in configuration from MULTINET:SERVICES.MASTER_SERVER]<br />
SERVER-CONFIG>SELECT SSH<br />
[The Selected SERVER entry is now SSH]<br />
SERVER-CONFIG>SET PARAM<br />
Delete parameter "enable-ssh1" ? [NO]<br />
Delete parameter "enable-ssh2" ? [NO]<br />
You can now add new parameters for SSH. An empty line terminates.<br />
Add Parameter:PORT 33000<br />
Add Parameter:<br />
[Service specific parameters for SSH changed]<br />
SERVER-CONFIG>SHOW/FULL<br />
Service "SSH":<br />
INIT() = Merge_Image<br />
Program = "MULTINET:LOADABLE_SSH_CONTROL"<br />
Priority = 5<br />
Log for Accepts & Rejects = OPCOM<br />
Parameters = "enable-ssh1"<br />
"enable-ssh2"<br />
"port 33000"<br />
SERVER-CONFIG>EXIT<br />
[Writing configuration to<br />
MULTINET_COMMON_ROOT:[MULTINET]SERVICES.MASTER_SERVER]<br />
Expired Passwords<br />
The SSH v1 protocol does not provide a method for changing an expired VMS password. When an<br />
expired password is encountered by the SSH1 server, it will do one of two things.<br />
1 If the logical name MULTINET_SSH_ALLOW_EXPIRED_PW is defined for allowing access<br />
for passwords that have exceeded the UAF value for PWDLIFETIME, or if the logical name<br />
MULTINET_SSH_ALLOW_PREEXPIRED_PW is defined for allowing access for users that<br />
have a pre-expired password, the server will allow the user to log in. In the logical name table<br />
LNM$SSH_LOGICALS, the logical name MULTINET_SSH_pid_PWDEXP (where pid is the<br />
process ID for the user process) will be defined. The system manager can look for this logical to<br />
be defined, <strong>and</strong> if so, take action such as executing the DCL SET PASSWORD comm<strong>and</strong>.<br />
30-5
Configuring the Secure Shell (SSH) v1 Server<br />
30-6<br />
2 If the appropriate logical is not set as described above, the user will be denied access to the<br />
system. In that case, the user must log in interactively via another mechanism such as telnet <strong>and</strong><br />
change the password, or the system manager must reset the password.<br />
When a user is allowed access to the system with an expired password, the LOGIN_FLAGS for the<br />
process will reflect this. The values of the LOGIN_FLAGS will be as follows:<br />
• new mail has been received (JPI$M_NEW_MAIL_AT_LOGIN)<br />
• the password is about to expire (JPI$M_PASSWORD_WARNING)<br />
• the password has expired (JPI$M_PASSWORD_EXPIRED)<br />
The DCL lexical function F$GETJPI may be used to examine these flags, as can the $GETJPI(W)<br />
system service or LIB$GETJPI RTL function. When an expired password value is detected, the<br />
user may then execute a SET PASSWORD comm<strong>and</strong> in the comm<strong>and</strong> procedure run for the<br />
account.<br />
For example:<br />
$!<br />
$! Login_flags:<br />
$! 1 = new mail messages waiting (JPI$M_NEW_MAIL_AT_LOGIN)<br />
$! 4 = password expired during login (JPI$M_PASSWORD_EXPIRED)<br />
$! 5 = password expires within 5 days (JPI$M_PASSWORD_WARNING)<br />
$!<br />
$ flags = f$getjpi("", "LOGIN_FLAGS")<br />
$ new_flags = (flags/2)*2<br />
$ if new_flags .ne. flags then write sys$output "New mail waiting"<br />
$!<br />
$!Note - new_flags is used below because it has the NEW_MAIL_AT_LOGIN$<br />
$! bit stripped. The rest of the possible values are all<br />
$! discrete; i.e., you can't have combinations of them at the<br />
$! same time.<br />
$!<br />
$ if new_flags .eq. 4 then write sys$output "Password expired during login"<br />
$ if new_flags .eq. 5 then write sys$output "Password expires within 5 days"<br />
$!<br />
OPTIONS<br />
bits n<br />
Specifies the number of bits in the server key. The default is 768.<br />
ssh1-config-file filename<br />
Specifies the name of the configuration file. The default is MULTINET:SSHD_CONFIG.<br />
debug debug-level<br />
Turns debugging on using any non-zero debug level.
enable-ssh1<br />
Enables SSH v1 sessions.<br />
host-key-file filename<br />
Configuring the Secure Shell (SSH) v1 Server<br />
Specifies the file from which the host key is read. The default is MULTINET:SSH_HOST_KEY.<br />
keygen-time n<br />
Specifies how often the server key is regenerated. The default is 3600 seconds (one hour). The<br />
motivation for regenerating the key often is that the key is never stored physically on disk. It is kept<br />
in the address space of the server, <strong>and</strong> after an hour, it becomes impossible to recover the key for<br />
decrypting intercepted communications even if the machine is broken into or physically seized. A<br />
value of zero indicates that the key will never be regenerated.<br />
listen-address<br />
Specify the IPV4 address on which to listen for connect request. This may be a valid IPV4 address<br />
or ANY to listen on all addresses. If not specified, the default is to listen on all addresses.<br />
port n<br />
Specifies the port on which the server listens for connections. The default is 22.<br />
quiet_mode<br />
Specifies that nothing is sent to the SSH system log. Normally, the beginning, authentication, <strong>and</strong><br />
termination of each connection is logged.<br />
verbose<br />
Specifies that verbose message logging will be performed by SSHD MASTER.<br />
Configuration File<br />
SSHD reads configuration data from MULTINET:SSHD_CONFIG (or the file specified with the<br />
ssh1-config-file keyword in MULTINET CONFIGURE/SERVER). The file contains keyword<br />
value pairs, one per line. The following keywords are possible. Keywords are case insensitive.<br />
Table 30-1 SSH1 Configuration File Keywords [SSHD_CONFIG]<br />
Keyword Value Default Description<br />
AllowForwardingPort Port list Permit forwarding for the<br />
specified ports<br />
AllowForwardingTo Host/port list Permit forwarding for hosts<br />
30-7
Configuring the Secure Shell (SSH) v1 Server<br />
30-8<br />
Table 30-1 SSH1 Configuration File Keywords [SSHD_CONFIG] (Continued)<br />
Keyword Value Default Description<br />
AllowGroups List Access control by UAF<br />
rightslist entries<br />
AllowHosts Host list Access control by hostname<br />
AllowShosts Host list Access control by hostname<br />
AllowTcpForwarding Y/N Y Enable TCP port forwarding<br />
AllowUsers User list Access control by username<br />
DenyForwardingPort Port list Forbid forwarding for ports<br />
DenyForwardingTo Host/port list Forbid forwarding for hosts<br />
DenyGroups Rights list Deny access for UAF<br />
rightslist identifiers<br />
DenyHosts Host list Deny access for hosts<br />
DenySHosts Host list Deny access for hosts<br />
DenyUsers User list Access control by username<br />
FascistLogging Y/N Y Verbose logging<br />
Hostkey Filename Ssh_host_key. Host key filename<br />
IdleTimeout Time 0 (infinite) Set idle timeout<br />
IgnoreRhosts Y/N N Ignore local rhosts<br />
IgnoreRootRhosts Y/N Y Ignore system rhosts<br />
KeepAlive Y/N Y Send keepalives<br />
ListenAddress IP address 0.0.0.0 Listen on given interface<br />
LoginGraceTime Time 600 Time limit for authentication<br />
in seconds<br />
PasswordAuthentication Y/N Y Permit password<br />
authentication<br />
PermitEmptyPasswords Y/N N Permit empty (blank)<br />
passwords<br />
PermitRootLogin Y/N N SYSTEM can log in
Starting the SSH Server for the First Time<br />
Configuring the Secure Shell (SSH) v1 Server<br />
Table 30-1 SSH1 Configuration File Keywords [SSHD_CONFIG] (Continued)<br />
Keyword Value Default Description<br />
QuietMode Y/N N Quiet mode<br />
R<strong>and</strong>omSeed Filename R<strong>and</strong>om_seed R<strong>and</strong>om seed file<br />
RhostsAuthentication Y/N N Enable rhosts authentication<br />
RhostsRSAAuthentication Y/N Y Enable rhosts with RSA<br />
authentication<br />
RSAAuthentication Y/N Y Enable RSA authentication<br />
StrictIntrusionLogging Y/N Y Determine how intrusion<br />
records are created by failed<br />
authentication attempts<br />
StrictModes Y/N N Strict checking for directory<br />
<strong>and</strong> file protection<br />
SyslogFacility Syslog level “DAEMON” Syslog log facility<br />
VerboseLogging Y/N Y Verbose logging (also known<br />
as FacistLogging)<br />
X11Forwarding Y/N Y Enable X11 forwarding<br />
X11DisplayOffset #offset 10 Limit X displays for SSH<br />
Follow these instructions for using SSH for the first time.<br />
1 Use the MULTINET CONFIGURE/SERVER comm<strong>and</strong> to enable the SSH v1 server.<br />
$ MULTINET CONFIGURE/SERVER<br />
<strong>MultiNet</strong> Server Configuration Utility V5.4(42)<br />
[Reading in configuration from MULTINET:SERVICES.MASTER_SERVER]<br />
SERVER-CONFIG>SHOW/FULL SSH<br />
Service "SSH": ***DISABLED***<br />
INIT() = Merge_Image<br />
Program = "MULTINET:LOADABLE_SSH_CONTROL"<br />
Priority = 5<br />
Parameters = “enable-ssh1”<br />
“enable-ssh2”<br />
SERVER-CONFIG>ENABLE SSH<br />
SERVER-CONFIG>EXIT<br />
30-9
Configuring the Secure Shell (SSH) v1 Server<br />
30-10<br />
[Writing configuration to<br />
MULTINET_COMMON_ROOT:[MULTINET]SERVICES.MASTER_SERVER]<br />
Note! The parameter “enable-ssh1” must be set. It it is not set, SSH v1 sessions will not be accepted<br />
by the server.<br />
2 Use SSHKEYGEN /SSH1 to generate an ssh1 key <strong>and</strong> to create the file SSH_HOST_KEY in<br />
the MULTINET: directory.<br />
$ MULTINET SSHKEYGEN /SSH1 /HOST<br />
Initializing r<strong>and</strong>om number generator...<br />
Generating p: ...++ (distance 64)<br />
Generating q: .......................................++ (distance 516)<br />
Computing the keys...<br />
Testing the keys...<br />
Key generation complete.<br />
Key file will be MULTINET_ROOT:[MULTINET]SSH_HOST_KEY.<br />
Your identification has been saved in MULTINET:SSH_HOST_KEY.<br />
Your public key is:<br />
1024 37<br />
1210318365576698697865367869291969476388228444969905611864276308<br />
9072776904462744415966821020109463617644202397294642277946718549<br />
4404442577594868297087171013359743853182442579923801302020844011<br />
5343754909847513973160249324735913146330232410424936751015953611<br />
18716872491123857940537322891584850459319961275605927<br />
SYSTEM@roadrr.acme.com<br />
Your public key has been saved in<br />
MULTINET_ROOT:[MULTINET]SSH_HOST_KEY.pub<br />
3 Copy the template configuration file to the <strong>MultiNet</strong> directory renaming it to SSHD_CONFIG.;<br />
$ COPY MULTINET:SSHD_CONFIG.TEMPLATE MULTINET:SSHD_CONFIG.;<br />
Note! As delivered, the template file provides a reasonably secure SSH environment. However,<br />
<strong>Process</strong> <strong>Software</strong> recommends this file be examined <strong>and</strong> modified appropriately to reflect the<br />
security policies of your organization.<br />
4 Restart <strong>MultiNet</strong>. This creates the SSH server process <strong>and</strong> defines the SSH logical names.<br />
$ @MULTINET:START_SERVER RESTART<br />
$ SHOW PROCESS "SSHD Master"<br />
7-JUL-2003 09:03:06.42 User: SYSTEM <strong>Process</strong> ID: 00000057<br />
Node: PANTHR <strong>Process</strong> name: "SSHD Master"<br />
Terminal:<br />
User Identifier: [SYSTEM]<br />
Base priority: 4<br />
Default file spec: Not available<br />
Number of Kthreads: 1
Devices allocated: BG1:<br />
BG2:<br />
$ SHOW LOGICAL/SYSTEM SSH*<br />
(LNM$SYSTEM_TABLE)<br />
"SSH_DIR" = "MULTINET_SPECIFIC_ROOT:[MULTINET]"<br />
"SSH_EXE" = "MULTINET_COMMON_ROOT:[MULTINET]"<br />
"SSH_LOG" = "MULTINET_SPECIFIC_ROOT:[MULTINET.SSH]"<br />
"SSH_TERM_MBX" = "MBA23:"<br />
Configuring the Secure Shell (SSH) v1 Server<br />
Configuring the SSH1 Server on a VMScluster with a Common System Disk<br />
When configuring the SSH1 server on a VMScluster with a common system disk, you must create<br />
the appropriate directories on all cluster nodes other than one on which <strong>MultiNet</strong> was originally<br />
installed. Note that this does not need to be done for cluster members that do not share a common<br />
system disk.<br />
The following procedure should be followed on each cluster node other than the cluster node on<br />
which <strong>MultiNet</strong> was originally installed:<br />
• Create the necessary directory:<br />
$ CREATE/DIR MULTINET_SPECIFIC[MULTINET_SSH]/PROT=(WO:RE,GR:RE)<br />
• Edit the MULTINET_SPECIFIC:[MULTINET.SSH]SSHD_CONFIG file as necessary. This<br />
may be copied from another cluster node, or it may be created fresh from the<br />
SSHD_CONFIG.TEMPLATE file.<br />
• Configure the SSH1 server using MULTINET CONFIGURE/SERVER<br />
• Generate the SSH1 host keys using MULTINET SSHKEYGEN/SSH1/HOST<br />
• (Re)start SSHD Master using MULTINET NETCONTROL SSH RESTART<br />
Changing SSH1 Configuration File After Enabling SSH1<br />
If you make a change to the SSH1 configuration file after you have enabled SSH1, you must restart<br />
SSH for these changes to take effect.<br />
$ MULTINET NETCONTROL SSH RESTART<br />
Note! When issuing the RESTART comm<strong>and</strong> for SSH, all active SSH server sessions are terminated.<br />
Active client sessions are not affected.<br />
Connection <strong>and</strong> Login <strong>Process</strong><br />
To create a session, SSHD does the following:<br />
30-11
Configuring the Secure Shell (SSH) v1 Server<br />
30-12<br />
1 SSHD_MASTER process sees the connection attempt. It creates an SSHD v1 or v2 process,<br />
depending on the protocol version presented to it by the client. SSHD_MASTER then passes<br />
necessary information to the SSHD process, such as the server key <strong>and</strong> other operating<br />
parameters.<br />
2 SSHD process performs validation for the user.<br />
3 Assuming the login is successful, SSHD process creates a pseudoterminal for the user (an<br />
_FTAnn: device). This device is owned by the user logging in.<br />
4 SSHD process creates an interactive process on the pseudoterminal, using the username, priority,<br />
<strong>and</strong> privileges of the user logging in. If a comm<strong>and</strong> was specified, it is executed <strong>and</strong> the session<br />
is terminated.<br />
5 SSH generates the file SSHD.LOG in the directory MULTINET_ROOT:[MULTINET.SSH] for<br />
each connection to the SSH server. Many connections result in many log files. Instead of<br />
purging the files on a regular basis, use the following DCL comm<strong>and</strong> to limit the number of<br />
versions:<br />
$ SET FILE /VERSION_LIMIT=x MULTINET_ROOT:[MULTINET.SSH]SSHD.LOG<br />
Note! The value for /VERSION_LIMIT must not be smaller than the maximum number of<br />
simultaneous SSH sessions anticipated. If the value is smaller, SSH users may be prevented<br />
from establishing sessions with the server.<br />
FILES<br />
MULTINET:HOSTS.EQUIV<br />
Contains host names, one per line. This file is used during .rhosts authentication. Users on those<br />
hosts are permitted to log in without a password, provided they have the same username on both<br />
machines. The hostname may also be followed by a username. Such users are permitted to log in as<br />
any user on the remote machine (except SYSTEM). Additionally, the syntax +@group can be used<br />
to specify netgroups. Negated entries start with a dash (-). If the client host/user is matched in this<br />
file, login is permitted provided the client <strong>and</strong> server usernames are the same. Successful RSA host<br />
authentication is required. This file should be world-readable but writeable only by SYSTEM.<br />
It is never a good idea to use usernames in hosts.equiv. It means the named user(s) can log in as<br />
anybody, which includes accounts that own critical programs <strong>and</strong> directories. Using a username<br />
grants the user SYSTEM access. The only valid use for usernames is in negative entries.<br />
Note! This warning also applies to rshell/rlogin.<br />
MULTINET:SHOSTS.EQUIV<br />
<strong>Process</strong>ed as MULTINET:HOSTS.EQUIV. May be useful in environments that want to run both<br />
rshell/rlogin <strong>and</strong> ssh.<br />
MULTINET:SSH_HOST_KEY<br />
Contains the private part of the host key. This file does not exist when <strong>MultiNet</strong> is first installed.
Configuring the Secure Shell (SSH) v1 Server<br />
The SSH server starts only with this file. This file must be created manually using the comm<strong>and</strong>:<br />
$ MULTINET SSHKEYGEN /SSH1 /HOST.<br />
This file should be owned by SYSTEM, readable only by SYSTEM, <strong>and</strong> not accessible to others.<br />
To create a host key with a name that is different than what SSHKEYGEN creates, do one of the<br />
following:<br />
• Generate with MULTINET SSHKEYGEN /SSH1 /HOST <strong>and</strong> simply rename the file.<br />
• Generate a public/private key pair using SSHKEYGEN without the /HOST switch, <strong>and</strong> copying<br />
<strong>and</strong> renaming the resulting files appropriately.<br />
By default the logical name SSH_DIR points to the MULTINET_SPECIFIC_ROOT:[MULTINET]<br />
directory.<br />
Refer to the <strong>MultiNet</strong> for OpenVMS User’s <strong>Guide</strong>, Chapter 8, for more details about<br />
SSHKEYGEN.<br />
MULTINET:SSH_HOST_KEY.PUB<br />
Contains the public part of the host key. This file should be world-readable but writeable only by<br />
SYSTEM. Its contents should match the private part of the key. This file is not used for anything; it<br />
is only provided for the convenience of the user so its contents can be copied to known hosts files.<br />
MULTINET:SSH_KNOWN_HOSTS<br />
SYS$LOGIN1 : [.SSH]KNOWN_HOSTS<br />
Checks the public key of the host. These files are consulted when using rhosts with RSA host<br />
authentication. The key must be listed in one of these files to be accepted. (The client uses the same<br />
files to verify that the remote host is the one you intended to connect.) These files should be<br />
writeable only by SYSTEM (the owner). MULTINET:SSH_KNOWN_HOSTS should be worldreadable,<br />
<strong>and</strong> SYS$LOGIN:[.SSH]KNOWN_HOSTS can, but need not be, world-readable.<br />
SSH2:SSH_RANDOM_SEED<br />
SYS$LOGIN:[.SSH]RANDOM_SEED<br />
Contains a seed for the r<strong>and</strong>om number generator. This file should only be accessible by system.<br />
MULTINET:SSHD_CONFIG<br />
Contains configuration data for SSHD. This file should be writeable by system only, but it is<br />
recommended (though not necessary) that it be world-readable.<br />
AUTHORIZED_KEYS<br />
In the user’s SYS$LOGIN[.SSH]directory<br />
1. In this chapter, the [.SSH] subdirectory in the user’s login directory displays as SYS$LOGIN:[.SSH]<br />
30-13
Configuring the Secure Shell (SSH) v1 Server<br />
30-14<br />
Lists the RSA keys that can be used to log into the user's account. This file must be readable by<br />
system. It is recommended that it not be accessible by others. The format of this file is described<br />
below.<br />
SYS$LOGIN:.SHOSTS<br />
In the user’s SYS$LOGIN:[.SSH] directory<br />
Permits access using SSH only. For SSH, this file is the same as for .rhosts. However, this file is not<br />
used by rlogin <strong>and</strong> rshell daemon.<br />
SYS$LOGIN:.RHOSTS<br />
This file contains host-username pairs, separated by a space, one per line. The given user on the<br />
corresponding host is permitted to log in without a password. The same file is used by rlogin <strong>and</strong><br />
rshell. SSH differs from rlogin <strong>and</strong> rshell in that it requires RSA host authentication in addition to<br />
validating the hostname retrieved from domain name servers. The file must be writeable only by<br />
the user. It is recommended that it not be accessible by others. It is possible to use netgroups in the<br />
file. Either host or username may be of the form +@groupname to specify all hosts or all users in<br />
the group.<br />
AUTHORIZED_KEYS File Format<br />
The SYS$LOGIN:[.SSH]AUTHORIZED_KEYS file lists the RSA keys that are permitted for<br />
RSA authentication. Each line of the file contains one key (empty lines <strong>and</strong> lines starting with a ‘#’<br />
are comments <strong>and</strong> ignored). Each line consists of the following fields, separated by spaces:<br />
Table 30-2 RSA Keys<br />
Key Description<br />
bits Is the length of the key in bits.<br />
comment Not used for anything (but may be convenient for the user to identify the key).<br />
exponent Is a component used to identify <strong>and</strong> make up the key.<br />
modulus Is a component used to identify <strong>and</strong> make up the key.<br />
options Optional; its presence is determined by whether the line starts with a number or<br />
not (the option field never starts with a number.)<br />
Note! Lines in this file are usually several hundred characters long (because of the size of the RSA<br />
key modulus). You do not want to type them in; instead, copy the IDENTITY.PUB file <strong>and</strong> edit it.<br />
The options (if present) consists of comma-separated option specifications. No spaces are<br />
permitted, except within double quotes. Option names are case insensitive.<br />
The following RSA key file AUTHORIZED_KEYS option specifications are supported:
Allowforwardingport=””<br />
Configuring the Secure Shell (SSH) v1 Server<br />
Can be followed by any number of port numbers, separated by spaces. Remote forwarding is<br />
allowed for those ports whose number matches one of the patterns.<br />
You can use ‘*’ as a wildcard entry for all ports.<br />
You can use these formats ‘>x’, ‘ in the specification. For<br />
example:<br />
allowforwardingport “2,52,2043”<br />
Allowforwardingto=””<br />
Can be followed by any number of hostname <strong>and</strong> port number patterns, separated by spaces. A port<br />
number pattern is separated from a hostname pattern by a colon. For example: hostname:port<br />
Forwardings from the client are allowed to those hosts <strong>and</strong> port pairs whose name <strong>and</strong> port number<br />
match one of the patterns.<br />
You can use ‘*’ <strong>and</strong> ‘?’ as wildcards in the patterns for host names. Normal name servers are used<br />
to map the client’s host into a fully-qualified host name. If the name cannot be mapped, its IP<br />
address is used as the hostname.<br />
You can use ‘*’ as a wildcard entry for all ports.<br />
You can use these formats ‘>x’, ‘x’, ‘
Configuring the Secure Shell (SSH) v1 Server<br />
30-16<br />
number pattern is separated from a hostname by a colon. For example: hostname:port number<br />
pattern<br />
Forwardings from the client are disallowed to those hosts <strong>and</strong> port pairs whose name <strong>and</strong> port<br />
number match one of the patterns.<br />
You can use ‘*’ <strong>and</strong> ‘?’ as wildcards in the patterns for host names. Normal name servers are used<br />
to map the client’s host into a fully-qualified host name. If the name cannot be mapped, its IP<br />
address is used as a host name.<br />
You can use ‘*’ as a wildcard entry for all ports.<br />
You can use these formats ‘>x’, ‘
1024 33 12121...312314325 ylo@foo.bar<br />
from="*.emptybits.com,!sluf.psccos.com"<br />
1024 35 23...2334 ylo@niksula<br />
comm<strong>and</strong>="dir *.txt",no-port-forwarding<br />
1024 33 23...2323 xxxxx.acme.com<br />
allowforwardingport="localhost:80"<br />
1024 35 23...2334 www@localhost<br />
Configuring the Secure Shell (SSH) v1 Server<br />
SSH_KNOWN_HOSTS File Format<br />
The MULTINET:SSH_KNOWN_HOSTS <strong>and</strong> SYS$LOGIN:[.SSH]KNOWN_HOSTS files<br />
contain host public keys for all known hosts. The global file should be prepared by the<br />
administrator (optional), <strong>and</strong> the per-user file is maintained automatically; whenever the user<br />
connects an unknown host its key is added to the per-user file. Each line in these files contains the<br />
following fields: hostnames, bits, exponent, modulus, comment. The fields are separated by spaces.<br />
Hostnames is a comma-separated list of patterns (* <strong>and</strong> ? act as wildcards). Each pattern is matched<br />
against the fully-qualified host names (when authenticating a client) or against the user-supplied<br />
name (when authenticating a server). A pattern may be preceded by '!' to indicate negation; if the<br />
hostname matches a negated pattern, it is not accepted (by that line) even if it matched another<br />
pattern on the line.<br />
Bits, exponent, <strong>and</strong> modulus are taken directly from the host key. They can be obtained from<br />
MULTINET:SSH_HOST_KEY.PUB. The optional comment field continues to the end of the line,<br />
<strong>and</strong> is not used. Lines starting with # <strong>and</strong> empty lines are ignored as comments. When performing<br />
host authentication, authentication is accepted if any matching line has the proper key.<br />
It is permissible (but not recommended) to have several lines or different host keys for the same<br />
names. This happens when short forms of host names from different domains are put in the file. It is<br />
possible that the files contain conflicting information. Authentication is accepted if valid<br />
information can be found from either file.<br />
Note! The lines in these files are hundreds of characters long. Instead of typing in the host keys,<br />
generate them by a script or by copying MULTINET:SSH_HOST_KEY.PUB <strong>and</strong> adding the host<br />
names at the front.<br />
Example<br />
closenet,closenet.hut.fi,...,130.233.208.41<br />
1024 37 159...93 closenet.hut.fi<br />
SSH Logicals<br />
These logicals are used with the SSH server in the system logical name table.<br />
$ SHOW LOGICAL/SYSTEM *SSH*<br />
30-17
Configuring the Secure Shell (SSH) v1 Server<br />
30-18<br />
SSH_DIR<br />
Points to the directory where the SSH1 configuration, master server log file, <strong>and</strong> host key files are<br />
kept. Normally, this is MULTINET_SPECIFIC_ROOT:[MULTINET]. It is defined in<br />
START_SSH.COM.<br />
SSH_EXE<br />
Points to the directory where SSH executables are kept. Normally, this is<br />
MULTINET_COMMON_ROOT:[MULTINET]. It is defined in START_SSH.COM.<br />
SSH_LOG<br />
Points to the directory where the log files are kept. Normally, this is<br />
MULTINET_SPECIFIC_ROOT:[MULTINET.LOG]. It is defined in START_SSH.COM.<br />
SSH_TERM_MBX<br />
Mailbox used by SSHD_MASTER to receive termination messages from SSHD daemon processes.<br />
Do not change this logical name. This is created by the SSHD_MASTER process.<br />
MULTINET_SSH_ACC_REJ_LOG_FILE<br />
If the user has set a log file to log connection accept <strong>and</strong> reject messages, this logical will be<br />
defined <strong>and</strong> will provide the name of the log file. This logical is set by using the SET LOG-FILE<br />
keyword in MULTINET CONFIGURE/SERVER, <strong>and</strong> should not be modified directly by the user.<br />
MULTINET_SSH_ALLOW_EXPIRED_PW<br />
Allows logging in to an account when the account's password has expired due to pwdlifetime<br />
elapsing. This applies to all users <strong>and</strong> circumvents normal VMS expired-password checking, <strong>and</strong><br />
therefore should be used with caution. An entry is made into the SSH_LOG:SSHD.LOG file when<br />
access is allowed using this logical name.<br />
When access is allowed by way of this logical, the logical name table LNM$SSH_LOGICALS<br />
contains a logical name constructed as MULTINET_SSH_pid_PWDEXP (where pid is the PID for<br />
the process). The system manager can use this to execute, for example, the DCL SET PASSWORD<br />
comm<strong>and</strong> in the site SYLOGIN.COM file.<br />
MULTINET_SSH_ALLOW_PREEXPIRED_PW<br />
Allows logging in to an account when the password has been pre-expired. This applies to all users<br />
<strong>and</strong> circumvents normal VMS expired-password checking, <strong>and</strong> therefore should be used with<br />
caution. An entry is made into the SSH_LOG:SSHD.LOG file when access is allowed using this<br />
logical name.<br />
When access is allowed by way of this logical, the logical name table LNM$SSH_LOGICALS<br />
contains a logical name constructed as MULTINET_SSH_pid_PWDEXP (where pid is the PID for<br />
the process). The system manager can use this to execute, for example, the DCL SET PASSWORD<br />
comm<strong>and</strong> in the site SYLOGIN.COM file.
MULTINET_SSH_DISPLAY_SYS$ANNOUNCE<br />
Configuring the Secure Shell (SSH) v1 Server<br />
The SSH v1 protocol does not allow for the display of SYS$ANNOUNCE prior to logging in. If<br />
this logical is set, the contents of SYS$ANNOUNCE is displayed immediately after successful<br />
authentication <strong>and</strong> prior to the display of the contents of SYS$WELCOME.<br />
MULTINET_SSH_ENABLE_SSH1_CONNECTIONS<br />
Set by the <strong>MultiNet</strong> master server process to enable SSH V1 sessions.<br />
MULTINET_SSH_KEYGEN_MIN_PW_LEN<br />
Defines the minimum passphrase length when one is to be set in SSHKEYGEN. If not defined,<br />
defaults to zero.<br />
MULTINET_SSH_LOG_ACCEPTS<br />
When set, causes the server to log successful connection requests as either an OPCOM message or<br />
a line in a log file. Specified by the SET LOG-ACCEPT comm<strong>and</strong> in MULTINET CONFIGURE/<br />
SERVER. Note that the server does not use the information set in the ACCEPT-HOSTS keyword in<br />
CONFIGURE/SERVER. Rather, it uses the "AllowHosts" <strong>and</strong> "DenyHosts" keywords in the SSH<br />
server configuration file. Also, a successful connection request doesn't equate to a successful<br />
authentication request. This logical should not be modified directly by the user.<br />
MULTINET_SSH_LOG_MBX<br />
Points to the OpenVMS mailbox used to log connection accept <strong>and</strong> reject messages. This must not<br />
be modified by the user.<br />
MULTINET_SSH_LOG_REJECTS<br />
When set, causes the server to log rejected connection requests as either an OPCOM message or a<br />
line in a log file. Specified by the SET LOG-REJECT comm<strong>and</strong> in MULTINET CONFIGURE/<br />
SERVER. Note that the server does not use the information set in the REJECT-HOSTS keyword in<br />
CONFIGURE/SERVER. Rather, it uses the "AllowHosts" <strong>and</strong> "DenyHosts" keywords in the SSH<br />
server configuration file. This logical should not be modified directly by the user.<br />
MULTINET_SSH_MAX_SESSIONS<br />
Set this to the maximum number of concurrent SSH sessions you want to allow on the server<br />
system. If MULTINET_SSH_MAX_SESSIONS is not defined, the default is 1000. Setting<br />
MULTINET_SSH_MAX_SESSIONS to zero (0) causes an error. The value must be between 1 <strong>and</strong><br />
1000. The suggested place to set this is in START_SSH.COM. You must restart SSH for these<br />
changes to take effect.<br />
MULTINET_SSH_PARAMETERS_n<br />
These values are set by <strong>MultiNet</strong> <strong>and</strong> must not be modified by the user.<br />
30-19
Configuring the Secure Shell (SSH) v1 Server<br />
30-20<br />
MULTINET_SSH_USE_SYSGEN_LGI<br />
If defined, causes SSHD to use the VMS SYSGEN value of LGI_PWD_TMO to set the login grace<br />
time, overriding anything specified in the comm<strong>and</strong> line or the configuration file.
Chapter 31<br />
Configuring the Secure Shell (SSH) Server v2<br />
This chapter describes how to configure <strong>and</strong> maintain the <strong>MultiNet</strong> Secure Shell (SSH) server v2.<br />
This is the server side of the software that allows secure interactive connections to other computers<br />
in the manner of rlogin/rshell/telnet. The SSH server has been developed to discriminate between<br />
SSH v1 <strong>and</strong> SSH v2 protocols, so the two protocols can coexist simultaneously on the same system.<br />
SSH1 <strong>and</strong> SSH2 Differences<br />
SSH1 <strong>and</strong> SSH2 are different, <strong>and</strong> incompatible, protocols. The <strong>MultiNet</strong> SSH1 implementation is<br />
based on the version 1.5 protocol, <strong>and</strong> F-Secure 1.3.7 code base, <strong>and</strong> the SSH2 implementation is<br />
based on the V2 protocol <strong>and</strong> the WRQ RSIT 6.1.0 code base. While SSH2 is generally regarded to<br />
be more secure than SSH1, both protocols are offered by <strong>MultiNet</strong>, <strong>and</strong> although they are<br />
incompatible, they may exist simultaneously on a <strong>MultiNet</strong> system. The <strong>MultiNet</strong> server front-end<br />
identifies what protocol a client desires to use, <strong>and</strong> will create an appropriate server for that client.<br />
The cryptographic library used by <strong>MultiNet</strong> SSH2 (this does not apply to SSH1 sessions) is<br />
compiled from unaltered cryptographic source code from F-Secure which is FIPS 140-2 level 2<br />
compliant, as determined by the Computer Security Division of the National Institute of Science<br />
<strong>and</strong> Technology (NIST).<br />
Note! You must install the DEC C 6.0 backport library on all OpenVMS VAX v6.0 <strong>and</strong> earlier systems<br />
prior to using SSH. This is the AACRT060.A file. You can find the ECO on the <strong>MultiNet</strong> CD in<br />
the following directory: VAX55_DECC_RTL.DIR.<br />
Restrictions:<br />
When using SSH2 to connect to a VMS server, if the VMS account is set up with a secondary<br />
password, SSH2 does not prompt the user for the secondary password. If the VMS primary<br />
password entered is valid, the user is logged in, bypassing the secondary password.<br />
When using SSH2 to execute single comm<strong>and</strong>s (in the same manner as RSHELL), some keystrokes<br />
like CTRL/Y are ignored. In addition, some interactive programs such as HELP may not function<br />
as expected. This is a restriction of SSH2. If this behavior poses a problem, log into the remote<br />
system using SSH2 in interactive mode to execute the program.<br />
31-1
Configuring the Secure Shell (SSH) Server v2<br />
Underst<strong>and</strong>ing the <strong>MultiNet</strong> Secure Shell Server<br />
31-2<br />
Secure Shell daemon (SSHD) is the daemon program for SSH2 that listens for connections from<br />
clients. The server program replaces rshell <strong>and</strong> telnet programs. The server/client programs provide<br />
secure encrypted communications between two untrusted hosts over an insecure network. A new<br />
daemon is created for each incoming connection. These daemons h<strong>and</strong>le key exchange, encryption,<br />
authentication, comm<strong>and</strong> execution, <strong>and</strong> data exchange.<br />
Servers <strong>and</strong> Clients<br />
A <strong>MultiNet</strong> SSH server is an OpenVMS system that acts as a host for executing interactive<br />
comm<strong>and</strong>s or for conducting an interactive session. The server software consists of two pieces of<br />
software (for future reference, “SSHD” will refer to both SSHD_MASTER <strong>and</strong> SSHD, unless<br />
otherwise specified):<br />
• SSHD_MASTER, recognizes the differences between SSH v1 <strong>and</strong> SSH v2 <strong>and</strong> starts the<br />
appropriate server. If the request is for SSH v1, then the existing SSH v1 server is run; if the<br />
request is for SSH v2, then the SSH v2 server is run.<br />
• SSHD, a copy of which is spawned for each connection instance. SSHD h<strong>and</strong>les all the<br />
interaction with the SSH client.<br />
A client is any system that accesses the server. A client program (SSH) is provided with <strong>MultiNet</strong>,<br />
but any SSH client that uses SSH version 2 protocol may be used to access the server. Examples of<br />
such programs are <strong>MultiNet</strong> SSH, TCPware SSH, SecureCRT®, <strong>and</strong> F-Secure SSH Client for<br />
Windows®, MacSSH for Macintosh® systems, <strong>and</strong> other SSH programs on UNIX-based systems.<br />
Each host has a key using DSA encryption <strong>and</strong> is usually 1024 bits long (although, the user may<br />
create a different-sized key, if desired). The same key may be used on multiple machines. For<br />
example, each machine in a VMScluster could use the same key.<br />
When a client connects to the SSHD daemon:<br />
• The client <strong>and</strong> server together, using the Diffie-Hellman key-exchange method, determine a 256bit<br />
r<strong>and</strong>om number to use as the "session key". This key is used to encrypt all further<br />
communications in the session.<br />
Note that this key may be renegotiated between the client <strong>and</strong> the server on a periodic basis by<br />
including the RekeyIntervalSeconds keyword in the server configuration file<br />
(SSH2_DIR:SSHD2_CONFIG). This is desirable because during long sessions, the more data<br />
that is exchanged using the same encryption key, the more likely it is that an attacker who is<br />
watching the encrypted traffic could deduce the session key.<br />
• The server informs the client which encryption methods it supports. See the description of the<br />
CIPHERS configuration keyword for the encryption methods supported.<br />
• The client selects the encryption algorithm from those offered by the server.<br />
• The client <strong>and</strong> the server then enter a user authentication dialog. The server informs the client<br />
which authentication methods it supports, <strong>and</strong> the client then attempts to authenticate the user by<br />
using some or all of the authentication methods. The following authentication algorithms are<br />
supported:<br />
– public-key (DSA keys)
Configuring the Secure Shell (SSH) Server v2<br />
– hostbased<br />
– password keyboard-interactive<br />
– Kerberos V5 (password, kerberos-tgt, kerberos-1, kerberos-tgt-1, kerberos-2, kerberos-tgt-2)<br />
– Certificate<br />
System security is not improved unless the RLOGIN <strong>and</strong> RSHELL services are disabled.<br />
If the client authenticates itself successfully, a dialog is entered for preparing the session. At this<br />
time the client may request things like:<br />
• forwarding X11 connections<br />
• forwarding TCP/IP connections<br />
• forwarding the authentication agent connection over the secure channel<br />
Finally, the client either requests an interactive session or execution of a comm<strong>and</strong>. The client <strong>and</strong><br />
the server enter session mode. In this mode, either the client or the server may send data at any<br />
time, <strong>and</strong> such data is forwarded to/from the virtual terminal or comm<strong>and</strong> on the server side, <strong>and</strong><br />
the user terminal in the client side. When the user program terminates <strong>and</strong> all forwarded X11 <strong>and</strong><br />
other connections have been closed, the server sends comm<strong>and</strong> exit status to the client, <strong>and</strong> both<br />
sides exit.<br />
Expired Password H<strong>and</strong>ling<br />
The SSH2 server supports expired password changing for interactive accounts without the<br />
CAPTIVE or RESTRICTED flags set <strong>and</strong>, via the DCL SET PASSWORD comm<strong>and</strong>. When an<br />
expired password is detected, the server will behave as if a SET PASSWORD comm<strong>and</strong> was<br />
specified by the user as a remotely-executed comm<strong>and</strong> (e.g., $ ssh foo set password), <strong>and</strong> the user<br />
will be logged out after changing the password. The user may then log in again using the changed<br />
password.<br />
For CAPTIVE or RESTRICTED accounts, or for those accounts where LGICMD is set in the UAF<br />
record, the scenario is different. In these cases, the server can't directly execute SET PASSWORD<br />
comm<strong>and</strong>, because the comm<strong>and</strong> procedure specified in the LGICMD field of the UAF record will<br />
override the SSH server attempting to do a SET PASSWORD comm<strong>and</strong>. For these types of<br />
accounts, the system manager <strong>and</strong>/or user can use the value of the LOGIN_FLAGS for the process<br />
(normal interactive sessions may also examine these flags). For SSH logins, these flags will<br />
reflect:<br />
• new mail has been received (JPI$M_NEW_MAIL_AT_LOGIN)<br />
• the password is about to expire (JPI$M_PASSWORD_WARNING)<br />
• the password has expired (JPI$M_PASSWORD_EXPIRED)<br />
The DCL lexical function F$GETJPI may be used to examine these flags, as can the $GETJPI(W)<br />
system service or LIB$GETJPI RTL function. When an expired password value is detected, the<br />
user may then execute a SET PASSWORD comm<strong>and</strong> in the comm<strong>and</strong> procedure run for the<br />
account.<br />
31-3
Configuring the Secure Shell (SSH) Server v2<br />
31-4<br />
For example:<br />
$!<br />
$! Login_flags:<br />
$! 1 = new mail messages waiting (JPI$M_NEW_MAIL_AT_LOGIN)<br />
$! 4 = password expired during login (JPI$M_PASSWORD_EXPIRED)<br />
$! 5 = password expires within 5 days (JPI$M_PASSWORD_WARNING)<br />
$!<br />
$ flags = f$getjpi("", "LOGIN_FLAGS")<br />
$ new_flags = (flags/2)*2<br />
$ if new_flags .ne. flags then write sys$output "New mail waiting"<br />
$!<br />
$! Note - new_flags is used below because it has the NEW_MAIL_AT_LOGIN$<br />
$! bit stripped. The rest of the possible values are all<br />
$! discrete; i.e., you can't have combinations of them at the<br />
$! same time.<br />
$!<br />
$ if new_flags .eq. 4 then write sys$output "Password expired during login"<br />
$ if new_flags .eq. 5 then write sys$output "Password expires within 5 days"<br />
$!<br />
When an account in the SYSUAF has an expired password <strong>and</strong> the system syslogin.com or user’s<br />
login.com has a SET TERM comm<strong>and</strong>, a warning message will be displayed prior to prompting to<br />
change the password as shown in the following example:<br />
Your password has expired; you must set a new password to log in<br />
% SET-W-NOTSET, error modifying DKA0:<br />
-SET-E-INVDEV, device is invalid for requested operation<br />
Old password:<br />
The way to suppress these warning messages would be to check for the appropriate login flag,<br />
ignoring any SET TERM comm<strong>and</strong>s. For example:<br />
$ flags = $getjpi(““, “LOGIN_FLAGS”)<br />
$ new_flags = (flags/2)*2<br />
$ if new_flags.eq.4 then goto skip_the_inquiry<br />
Break-In <strong>and</strong> Intrusion Detection<br />
Care must be exercised when configuring the SSH clients <strong>and</strong> server to minimize problems due to<br />
intrusion records created by OpenVMS security auditing. The SSH user should consult the system<br />
manager to determine the authentication methods offered by the SSH server. The client should then<br />
be configured to not attempt any authentication method that is not offered by the server.<br />
If a client attempts authentication methods not offered by the server, the OpenVMS security<br />
auditing system may log several intrusion records for each attempt to create a session to that server.<br />
The result being that the user could be locked out <strong>and</strong> prevented from accessing the server system<br />
without intervention from the server's system manager.<br />
The authentication methods to be offered by the server are determined by the configuration<br />
keywords AllowedAuthentications <strong>and</strong> RequiredAuthentications. The number of intrusion records
Configuring the Secure Shell (SSH) Server v2<br />
to be logged for any attempted SSH session is determined by the StrictIntrusionLogging<br />
configuration keyword.<br />
When StrictIntrusionLogging is set to YES (the default), each method that is tried <strong>and</strong> fails causes<br />
an intrusion record to be logged. The following rules apply:<br />
• When HostBased or PublicKey authentications are attempted <strong>and</strong> fail, one intrusion record is<br />
logged for each failed method.<br />
• When password authentication is attempted, one intrusion record is logged for each failed<br />
password.<br />
Example 1:<br />
The server is set up to allow HostBased <strong>and</strong> password authentication; also, up to three password<br />
attempts are allowed. If all methods fail, four intrusion records are logged:<br />
1 for the failed HostBased<br />
3 for the failed password attempts, one per attempt<br />
When StrictIntrusionLogging is set to NO, it has the effect of relaxing the number of intrusions<br />
logged. Overall failure of all authentication methods simply counts as a single failure, except for<br />
password authentication. The following rules apply:<br />
• When password authentication is attempted, one intrusion record is logged for each failed<br />
password.<br />
• When any of HostBased or PublicKey authentication fails, <strong>and</strong> password authentication is not<br />
attempted, exactly one intrusion record is logged, as opposed to one for each failed method.<br />
• When any of HostBased or PublicKey authentication fails, but password authentication is<br />
attempted <strong>and</strong> succeeds, the only intrusion record(s) logged is one for each failed password<br />
attempt.<br />
Example 2:<br />
The server is set up to allow HostBased <strong>and</strong> password authentication; also, up to three password<br />
attempts are allowed. If all methods fail, three intrusion records are logged:<br />
0 for the failed HostBased<br />
3 for the failed password attempts, one per attempt<br />
Example 3:<br />
The server is set up to allow HostBased <strong>and</strong> password authentication; also, up to three password<br />
attempts are allowed. HostBased <strong>and</strong> RSA fail, but password authentication is successful after 1<br />
failed password. Therefore, one intrusion record is logged:<br />
0 for the failed HostBased<br />
1 for the failed password attempt<br />
Example 4:<br />
The server is set up to allow HostBased <strong>and</strong> PublicKey authentication, but not password<br />
authentication. If all methods fail, one intrusion record is logged.<br />
31-5
Configuring the Secure Shell (SSH) Server v2<br />
31-6<br />
Example 5:<br />
The server is set up to allow HostBased <strong>and</strong> PublicKey authentication, but not password<br />
authentication. HostBased authentication fails, but PublicKey succeeds. No intrusion records are<br />
logged.<br />
Configuring SSHD Master<br />
SSHD Master is configured using the MULTINET CONFIGURE/SERVER comm<strong>and</strong>, selecting<br />
SSH, <strong>and</strong> using the following parameters:<br />
Note! The only supported methods to start SSHD Master are to restart the <strong>MultiNet</strong> server if SSH is<br />
not currently running, or to use the MULTINET NETCONTROL SSH START comm<strong>and</strong>. All of<br />
these options are set using MULTINET CONFIGURE/SERVER, <strong>and</strong> modifying the SSH service.<br />
bits n<br />
Specifies the number of bits in the server key. The default is 768.<br />
debug debug-level<br />
Disables or enables debugging levels. Values are between 0 <strong>and</strong> 50. Zero (0) disables debugging<br />
<strong>and</strong> higher values turn on successively more debugging.<br />
ipv4-disable<br />
Disables the server from listening on an IPV4 socket.<br />
ipv6-disable<br />
Disables the server from listenting on an IPV6 socket.<br />
enable-ssh2<br />
Enables SSH V2 sessions.<br />
listen-address<br />
Specify the IPV4 or IPV6 address on which to listen for connect request. This may be a valid IPV4<br />
or IPV6 address, or ANY to listen on all addresses. If not specified, the default is to listen on all<br />
IPV4 <strong>and</strong> IPV6 addresses.<br />
port n<br />
Specifies the port on which the server listens for connections. The default is 22.
quiet_mode<br />
Configuring the Secure Shell (SSH) Server v2<br />
Specifies that nothing is sent to the system log. Normally, the beginning, authentication, <strong>and</strong><br />
termination of each connection is logged.<br />
ssh2-config-file filename<br />
Specifies the name of the configuration file. The default is SSH2_DIR:SSHD2_CONFIG.<br />
verbose<br />
Specifies that verbose message logging will be performed by SSHD MASTER<br />
SSH2 Configuration File<br />
SSHD reads configuration data from its configuration file. By default, this file is<br />
SSH2_DIR:SSHD2_CONFIG. The file contains keyword value pairs, one per line. Lines starting<br />
with # <strong>and</strong> empty lines are interpreted as comments. The following keywords are possible.<br />
Keywords are case insensitive.<br />
Table 31-1 SSH2 Configuration File Keywords [SSHD2_CONFIG]<br />
Keyword Value Default Description<br />
AllowedAuthentications List Publickey,<br />
Password<br />
Permitted<br />
techniques. Valid<br />
values are:<br />
Keyboardinteractive,<br />
password, publickey,<br />
hostbased,<br />
kerberos-1,<br />
kerberos-tgt-1,<br />
kerberos-2,<br />
kerberos-tgt-2.<br />
Along with Required<br />
Authentications, the<br />
system administrator<br />
can force the users to<br />
complete several<br />
authentications<br />
before they are<br />
considered<br />
authenticated.<br />
31-7
Configuring the Secure Shell (SSH) Server v2<br />
31-8<br />
Table 31-1 SSH2 Configuration File Keywords [SSHD2_CONFIG] (Continued)<br />
Keyword Value Default Description<br />
AllowedPasswordAuthentications List kerberos, local Specifies the<br />
different password<br />
authentication<br />
schemes that are<br />
allowed.<br />
Only kerberos <strong>and</strong><br />
local are acceptable.<br />
AllowGroups List Access control by<br />
UAF rightslist<br />
entries<br />
AllowHosts Host list Access control by<br />
hostname<br />
AllowShosts Host list Access control by<br />
hostname<br />
AllowTcpForwarding Y/N Y Enable TCP port<br />
forwarding<br />
AllowTcpForwardingForUsers User list Per-User forwarding<br />
AllowTcpForwardingForGroups Rights list Per-Rightslist ID<br />
forwarding<br />
AllowUsers User list Access control by<br />
username<br />
AllowX11Forwarding Y/N Y Enable X11<br />
forwarding<br />
AuthInteractiveFailureTimeout Seconds 2 Delay, in seconds,<br />
that the server delays<br />
after a failed attempt<br />
to log in using<br />
keyboard-interactive<br />
<strong>and</strong> password<br />
authentication.
Configuring the Secure Shell (SSH) Server v2<br />
Table 31-1 SSH2 Configuration File Keywords [SSHD2_CONFIG] (Continued)<br />
Keyword Value Default Description<br />
AuthKbdInt.NumOptional Number 0 Specifies how many<br />
optional submethods<br />
must be passed<br />
before the<br />
authentication is<br />
considered a success.<br />
(Note that all<br />
reported submethods<br />
must always be<br />
passed.) See<br />
AuthKbdInt.Optional<br />
for specifying<br />
optional<br />
submethods, <strong>and</strong><br />
AuthKbdInt.Require<br />
d for required<br />
submethods. The<br />
default is 0, although<br />
if no required<br />
submethods are<br />
specified, the client<br />
must always pass at<br />
least one optional<br />
submethod.<br />
31-9
Configuring the Secure Shell (SSH) Server v2<br />
31-10<br />
Table 31-1 SSH2 Configuration File Keywords [SSHD2_CONFIG] (Continued)<br />
Keyword Value Default Description<br />
AuthKbdint.Optional List None Specifies the<br />
optional submethods<br />
keyboard-interactive<br />
will use. Currently<br />
only the submethod<br />
password is defined.<br />
AuthKbdInt.NumOpt<br />
ional specifies how<br />
many optional<br />
submethods must be<br />
passed. The<br />
keyboard-interactive<br />
authentication<br />
method is considered<br />
a success when the<br />
specified amount of<br />
optional submethods<br />
<strong>and</strong> all required<br />
submethods are<br />
passed.<br />
AuthKbdInt.Required Specifies the<br />
required submethods<br />
that must be passed<br />
before the keyboardinteractive<br />
authentication<br />
method can succeed.<br />
AuthKbdInt.Retries Number 3 Specifies how many<br />
times the user can<br />
retry keyboardinteractive.<br />
AuthorizationFile Filename Authorization Authorization file for<br />
publickey<br />
authentication.
Configuring the Secure Shell (SSH) Server v2<br />
Table 31-1 SSH2 Configuration File Keywords [SSHD2_CONFIG] (Continued)<br />
Keyword Value Default Description<br />
AuthPublicKey.MaxSize Number 0 Specifies the<br />
maximum size of a<br />
publickey that can be<br />
used to log in. Value<br />
of 0 disables the<br />
check.<br />
AuthPublicKey.MinSize Number 0 Specifies the<br />
minimum size of a<br />
publickey that can be<br />
used to log in. Value<br />
of 0.<br />
Cert.RSA.Compat.HashScheme md5 or sha md5 Previous clients <strong>and</strong><br />
servers may use<br />
hashes in RSA<br />
certificates<br />
incoherently<br />
(sometimes SHA-1<br />
<strong>and</strong> sometimes<br />
MD5). This<br />
specifies the hash<br />
used when a<br />
signature is sent to<br />
old versions during<br />
the initial key<br />
exchanges.<br />
BannerMessageFile Filename SYS$ANNOUNCE Message sent to the<br />
client before<br />
authentication<br />
begins.<br />
CheckMail Y/N Y Display information<br />
about new mail<br />
messages when<br />
logging in<br />
Ciphers Cipher list Encryption ciphers<br />
offered<br />
DenyGroups Rights list Deny access for<br />
UAF rightslist<br />
identifiers<br />
31-11
Configuring the Secure Shell (SSH) Server v2<br />
31-12<br />
Table 31-1 SSH2 Configuration File Keywords [SSHD2_CONFIG] (Continued)<br />
Keyword Value Default Description<br />
DenyHosts Host list Deny access for<br />
hosts<br />
DenySHosts Host list Deny access for<br />
hosts<br />
DenyTcpForwardingForUsers User list Forbid forwarding<br />
for listed users<br />
DenyTcpForwardingForGroups Rights list Forbid forwarding<br />
for listed rightslist<br />
names<br />
DenyUsers User list Access control by<br />
username<br />
FascistLogging Y/N Y Verbose logging<br />
ForwardACL Pattern None With this option, you<br />
can have more finegrained<br />
control over<br />
what the client is<br />
allowed to forward,<br />
<strong>and</strong> to where. See<br />
ForwardACL Notes<br />
below.<br />
ForwardAgent Y/N Y Enable agent<br />
forwarding
Configuring the Secure Shell (SSH) Server v2<br />
Table 31-1 SSH2 Configuration File Keywords [SSHD2_CONFIG] (Continued)<br />
Keyword Value Default Description<br />
HostCA Certificate None Specifies the CA<br />
certificate (in binary<br />
or PEM (base64)<br />
format) to be used<br />
when authenticating<br />
remote hosts. The<br />
certificate received<br />
from the host must<br />
be issued by the<br />
specified CA <strong>and</strong><br />
must contain a<br />
correct alternate<br />
name of type DNS<br />
(FQDN). If no CA<br />
certificates are<br />
specified in the<br />
configuration file,<br />
the protocol tries to<br />
do key exchange<br />
with ordinary public<br />
keys. Otherwise,<br />
certificates are<br />
preferred. Multiple<br />
CAs are permitted.<br />
HostCANoCRLs Certificate None Similar to HostCA,<br />
but disables CRL<br />
checking for the<br />
given ca-certificate.<br />
31-13
Configuring the Secure Shell (SSH) Server v2<br />
31-14<br />
Table 31-1 SSH2 Configuration File Keywords [SSHD2_CONFIG] (Continued)<br />
Keyword Value Default Description<br />
HostCertificateFile Filename None This keyword works<br />
very much like<br />
PublicHostKeyFile,<br />
except that the file is<br />
assumed to contain<br />
an X.509 certificate<br />
in binary format. The<br />
keyword must be<br />
paired with a<br />
corresponding<br />
HostKeyFile option.<br />
If multiple<br />
certificates with the<br />
same publickey type<br />
(DSS or RSA) are<br />
specified, only the<br />
first one is used.<br />
HostbasedAuthForceClient<br />
HostnameDNSMatch<br />
Y/N N Host name given by<br />
client.<br />
Hostkeyfile Filename Hostkey Host key filename<br />
HostSpecificConfig Pattern None Specifies a<br />
subconfiguration file<br />
for this server, based<br />
on the hostname of<br />
the client system.<br />
IdentityFile Filename Identification Identity filename<br />
IdleTimeout Time 0 = none Set idle timeout (in<br />
seconds)<br />
IgnoreRhosts Y/N N Don’t use rhosts <strong>and</strong><br />
shosts for hostbased<br />
authentication for all<br />
users<br />
IgnoreRootRhosts Y/N Y Don’t use rhosts <strong>and</strong><br />
shosts files for<br />
authenticatio of<br />
SYSTEM<br />
KeepAlive Y/N Y Send keepalives
Configuring the Secure Shell (SSH) Server v2<br />
Table 31-1 SSH2 Configuration File Keywords [SSHD2_CONFIG] (Continued)<br />
Keyword Value Default Description<br />
LdapServers Server URL None Specified as ldap://<br />
server.domainname:389<br />
CRLs are<br />
automatically<br />
retrieved from the<br />
CRL distribution<br />
point defined in the<br />
certificate to be<br />
checked if the point<br />
exists. Otherwise,<br />
the comma-separated<br />
server list given by<br />
option LdapServers<br />
is used. If<br />
intermediate CA<br />
certificates are<br />
needed in certificate<br />
validity checking,<br />
this option must be<br />
used or retrieving the<br />
certificates will fail.<br />
ListenAddress IP address 0.0.0.0 Listen on given<br />
interface<br />
Macs Algorithm Select MAC<br />
(Message<br />
Authentication<br />
Code) algorithm<br />
MapFile Filename None This keyword<br />
specifies a mapping<br />
file for the preceding<br />
Pki keyword.<br />
Multiple mapping<br />
files are permitted<br />
per one Pki keyword.<br />
The mapping file<br />
format is described<br />
below.<br />
31-15
Configuring the Secure Shell (SSH) Server v2<br />
31-16<br />
Table 31-1 SSH2 Configuration File Keywords [SSHD2_CONFIG] (Continued)<br />
Keyword Value Default Description<br />
MaxBroadcastsPerSecond #broadcasts 0 Listen for UDP<br />
broadcasts<br />
NoDelay Y/N N Enable Nagel<br />
Algorithm<br />
PasswordAuthentication Y/N Y Permit password<br />
authentication<br />
PasswordGuesses #guesses 3 Limit number of<br />
password tries to<br />
specified number<br />
PermitEmptyPasswords Y/N N Permit empty (blank)<br />
passwords<br />
PermitRootLogin Y/N N SYSTEM can log in
Configuring the Secure Shell (SSH) Server v2<br />
Table 31-1 SSH2 Configuration File Keywords [SSHD2_CONFIG] (Continued)<br />
Keyword Value Default Description<br />
Pki Filename None This keyword<br />
enables user<br />
authentication using<br />
certificates. Cacertificate<br />
must be an<br />
X.509 certificate in<br />
binary format. This<br />
keyword must be<br />
followed by one or<br />
more MapFile<br />
keywords. The<br />
validity of a received<br />
certificate is checked<br />
separately using each<br />
of the defined Pki<br />
keywords in turn<br />
until they are<br />
exhausted (in which<br />
case the<br />
authentication fails),<br />
or a positive result is<br />
achieved. If the<br />
certificate is valid,<br />
the mapping files are<br />
examined to<br />
determine whether<br />
the certificate allows<br />
the user to log in. A<br />
correct signature<br />
generated by a<br />
matching private key<br />
is always required.<br />
PkiDisableCrls Y/N Y This keyword<br />
disables CRL<br />
checking for the Pki<br />
keyword, if<br />
argument is “Y”.<br />
PrintMotd Y/N Y Display<br />
SYS$WELCOME<br />
when logging in<br />
31-17
Table 31-1 SSH2 Configuration File Keywords [SSHD2_CONFIG] (Continued)<br />
Keyword Value Default Description<br />
PublicHostKeyFile Filename Hostkey.pub Host key file<br />
location<br />
QuietMode Y/N N Quiet mode<br />
R<strong>and</strong>omSeedFile Filename R<strong>and</strong>om_seed R<strong>and</strong>om seed file<br />
RekeyIntervalSeconds #seconds 0 Frequency of<br />
rekeying<br />
RequiredAuthentication Authenticat<br />
ion list<br />
Authentications<br />
client must support<br />
RequireReverseMapping Y/N N Remote IP address<br />
must map to<br />
hostname<br />
ResolveClientHostName Y/N Y Controls whether the<br />
server will try to<br />
resolve the client IP<br />
address at all, or not.<br />
This is useful when<br />
you know that the<br />
DNS cannot be<br />
reached, <strong>and</strong> the<br />
query would cause<br />
additional delay in<br />
logging in. Note that<br />
if you set this to<br />
“no”, you should not<br />
set<br />
RequireReverseMap<br />
ping to “yes”.<br />
RSAAuthentication Y/N Y Enable RSA<br />
authentication
Configuring the Secure Shell (SSH) Server v2<br />
Table 31-1 SSH2 Configuration File Keywords [SSHD2_CONFIG] (Continued)<br />
Keyword Value Default Description<br />
SendKeyGuess Y/N Y This parameter<br />
controls whether the<br />
server will try to<br />
guess connection<br />
parameters during<br />
key exchange, or not.<br />
Some clients do not<br />
support key<br />
exchange guesses<br />
<strong>and</strong> may fail when<br />
they are present.<br />
SftpSysLogFacility log facility None Defines the log<br />
facility the sftpserver<br />
will use<br />
StrictIntrusionLogging Y/N Y Determine how<br />
intrusion records are<br />
created by failed<br />
authentication<br />
attempts.<br />
StrictModes Y/N N Strict checking for<br />
directory <strong>and</strong> file<br />
protection.<br />
SyslogFacility Facility AUTH Defines what log<br />
facility to be used<br />
when logging server<br />
messages.<br />
Terminal.AllowUsers pattern All users List users that are<br />
allowed terminal<br />
(interactive) access<br />
to the server.<br />
Terminal.DenyUsers pattern None List users that are<br />
denied terminal<br />
(interactive) access<br />
to the server.<br />
31-19
Configuring the Secure Shell (SSH) Server v2<br />
31-20<br />
Table 31-1 SSH2 Configuration File Keywords [SSHD2_CONFIG] (Continued)<br />
Keyword Value Default Description<br />
Terminal.AllowGroups pattern All groups Similar to<br />
Terminal.Allow-<br />
Users but matches<br />
groups instead of<br />
usernames.<br />
Terminal.DenyGroups pattern None Similar to<br />
Terminal.Deny-<br />
Users but matches<br />
groups instead of<br />
usernames<br />
UserConfigDirectory Directory SYS$LOGIN: Location of user<br />
SSH2 directories<br />
UserKnownHosts Y/N Y Respect user [.ssh2]<br />
known hosts keys<br />
UserSpecificConfig Pattern None Specifies a<br />
subconfiguration file<br />
for this server, based<br />
on user logging in.<br />
VerboseMode Y/N N Verbose mode
Configuring the Secure Shell (SSH) Server v2<br />
The keywords /MAC <strong>and</strong> /CIPHER have discrete values, plus there are values that actually denote<br />
a grouping of 2 or more of the discrete values. Each of these values may be put in the configuration<br />
file (SSH2_DIR:SSHD2_CONFIG).<br />
Table 31-2 MAC <strong>and</strong> Cipher Discrete Values<br />
MACs discrete values:<br />
hmac-sha1, hmac-sha256, hmac-md5, hmac-ripemd160, none<br />
group ANYMAC consists of:<br />
hmac-sha1, hmac-sha256, hmac-md5, hmac-ripemd160<br />
group ANY consists of:<br />
hmac-sha1, hmac-sha256, hmac-md5, hmac-ripemd160, none<br />
group ANYSTD consists of:<br />
hmac-sha1, hmac-md5, none<br />
group ANYSTDMAC consists of:<br />
hmac-sha1, hmac-md5<br />
Ciphers discrete values:<br />
3des, aes, blowfish, aes128-ctr, aes128-cbc, aes192-ctr, aes192-cbc, aes256-ctr,<br />
aes256-cbc, 3des-ctr, 3des-cbc, blowfish-ctr, blowfish-cbc, des-cbc@ssh.com,<br />
rc2-cbc@ssh.com, none<br />
group ANYSTDCIPHER consists of:<br />
aes128-ctr, aes128-cbc, aes192-ctr, aes192-cbc, aes256-ctr, aes256-cbc, 3des-ctr,<br />
3des-cbc, blowfish-ctr, blowfish-cbc<br />
group ANY consists of:<br />
aes128-ctr, aes128-cbc, aes192-ctr, aes192-cbc, aes256-ctr, aes256-cbc, 3des-ctr,<br />
3des-cbc, blowfish-ctr, blowfish-cbc, des-cbc@ssh.com, rc2-cbc@ssh.com, none<br />
group ANYCIPHER<br />
aes128-cbc, 3des-cbc, twofish128-cbc, cast128-cbc, twofish-cbc, blowfish-cbc,<br />
aes192-cbc, aes256-cbc, twofish192-cbc, twofish256-cbc, arcfour,<br />
des-cbc@ssh.com, rc2-cbc@ssh.com<br />
group ANYSTD<br />
aes128-cbc, 3des-cbc, twofish128-cbc, cast128-cbc, twofish-cbc, blowfish-cbc,<br />
aes192-cbc, aes256-cbc, twofish192-cbc, twofish256-cbc, arcfour, none<br />
A discrete value or a group identifier may be used with MACS <strong>and</strong> CIPHERS. For example, in the<br />
31-21
Configuring the Secure Shell (SSH) Server v2<br />
31-22<br />
configuration file, the following examples could be used:<br />
Ciphers ANYCIPHER<br />
Ciphers 3des, aes128-cbc<br />
MACs ANYMAC<br />
MACs hmac-sha1<br />
Aliases may be used for some st<strong>and</strong>ard ciphers:<br />
Alias Value<br />
aes aes128-cbc<br />
3des 3des-cbc<br />
blowfish blowfish-cbc<br />
HostSpecificConfig Notes:<br />
The global server file (SSH_DIR:SSHD2_CONFIG) now can use the keyword HostSpecificConfig<br />
to allow the specification of a configuration file based on the client system. These lines are<br />
specified as:<br />
HostSpecificConfig hostname subconfig-file<br />
hostname will be used to match the client host, as specified under option AllowHosts. The file<br />
subconfig-file will then be read, <strong>and</strong> configuration data amended accordingly. The file is read<br />
before any actual protocol transactions begin, <strong>and</strong> you can specify most of the options allowed in<br />
the main configuration file. You can specify more than one subconfiguration file, in which case the<br />
patterns are matched <strong>and</strong> the files read in the order specified. Later defined values of configuration<br />
options will either override or amend the previous value, depending on which option it is. The<br />
effect of redefining an option is described in the documentation for that option. For example,<br />
setting Ciphers in the subconfiguration file will override the old value, but setting AllowUsers will<br />
amend the value.<br />
The subconfig-file will be assumed by default to exist in the SSH2_DIR directory. However, this<br />
may be overridden by specifying a complete directory/file specification. For example:<br />
HostSpecificConfig foo.bar.com dka0:[sshconfigs]fooconfig.dat<br />
HostSpecificConfig lima.beans.com limaconfig.dat<br />
In the first instance, an incoming connection from “foo.bar.com” will use the subconfig file<br />
dka0:[sshconfigs]fooconfig.dat. In the second example, an incoming connection from<br />
“lima.beans.com” will use ssh2_dir:limaconfig.dat.<br />
Unlike ssh2_config, the subconfig files may have configuration blocks, or stanzas, in them. They
Configuring the Secure Shell (SSH) Server v2<br />
are used per-host. The subconfiguration heading is interpreted identically to what is described<br />
above (i.e, with UserSpecificConfig, the pattern is of the format “hostname”.)<br />
Note! If the subconfig file cannot be found or cannot be parsed successfully for any reason, access to<br />
the system will be denied for the system to which the subconfig file applies.<br />
UserSpecificConfig Notes:<br />
The global server file (SSH2_DIR:SSHD2_CONFIG) now can use the keyword<br />
UserSpecificConfig to allow the specification of a configuration file based on the username of the<br />
user who’s logging into the server. These keywords are of the form:<br />
UserSpecificConfig user[%group] [@host] subconfig-file<br />
pattern will be used to match the username, as specified under the option AllowUsers. The file<br />
subconfig-file will then be read, <strong>and</strong> configuration data amended accordingly. The file is read<br />
before any actual protocol transactions begin, <strong>and</strong> you can specify most of the options allowed in<br />
the main configuration file. You can specify more than one subconfiguration file, in which case the<br />
patterns are matched <strong>and</strong> the files read in the order specified. Later defined values of configuration<br />
options will either override or amend the previous value, depending on which option it is. The<br />
effect of redefining an option is described in the documentation for that option. For example,<br />
setting Ciphers in the subconfiguration file will override the old value, but setting AllowUsers will<br />
amend the value.<br />
Unlike sshd2_config, the subconfig files may have configuration blocks, or stanzas, in them. They<br />
are used per user. The subconfiguration heading is interpreted identically to what is described<br />
above (i.e., with UserSpecificConfig, the pattern is of the format “user[%group] [@host]”.<br />
The subconfig-file will be assumed by default to exist in the SSH2_DIR directory. However, this<br />
may be overridden by specifying a complete directory/file specification. For example:<br />
UserSpecificConfig dilbert dka0:[sshconfigs]dilbert.dat<br />
UserSpecificConfig boss@lima.beans.com pointyhair.dat<br />
In the first instance, an incoming connection for user dilbert will use the subconfig file<br />
dka0:[sshconfigs]dilbert.dat. In the second example, an incoming connection from user boss at<br />
system lima.beans.com will user ssh2:dir:pointyhair.dat.<br />
Note! If the subconfig file cannot be found or cannot be parsed successfully for any reason, access to<br />
the system will be denied for the user to which the subconfig file applies.<br />
KEYBOARD-INTERACTIVE Notes:<br />
At this point, KEYBOARD-INTERACTIVE mode is simply another form of password<br />
authentication. The user won’t notice anything different with this mode. In the future, <strong>Process</strong><br />
<strong>Software</strong> may implement items such as system passwords, secondary passwords, <strong>and</strong> true VMSstyle<br />
password changing using this authentication method. As other clients support the use of the<br />
KEYBOARD-INTERACTIVE authentication method for doing password authentication (without<br />
using any external callouts from the mechanism such as secureid cards), the server should support<br />
31-23
Configuring the Secure Shell (SSH) Server v2<br />
31-24<br />
those clients.<br />
ForwardACL Notes<br />
With this option, you can have more fine-grained control over what the client is allowed to forward,<br />
<strong>and</strong> to where. Format for this option is:<br />
[allow|deny] [local|remote] user-pat forward-pat [originator-pat]<br />
user-pat will be used to match the client-user, as specified under the option UserSpecificConfig.<br />
forward-pat is a pattern of format host-id[%port]. This has different interpretations, depending on<br />
whether the ACL is specified for local or remote forwards. For local forwards, the host-id will<br />
match with the target host of the forwarding, as specified under the option AllowHosts. port will<br />
match with the target port. Also, if the client sent a host name, the IP address will be looked up<br />
from the DNS, which will be used to match the pattern. For remote forwardings, where the forward<br />
target is not known (the client h<strong>and</strong>les that end of the connection); this will be used to match with<br />
the listen address specified by the user (<strong>and</strong> as such is not as usable as with local forwards). port<br />
will match the port the server is supposed to be listening to with this forward. With local forwards,<br />
originator-pat will match with the originator address that the client has reported. Remember, if you<br />
do not administer the client machine, users on that machine may use a modified copy of ssh that<br />
can be used to lie about the originator address. Also, with NATs (Network Address Translation), the<br />
originator address will not be meaningful (it will probably be an internal network address).<br />
Therefore, you should not rely on the originator address with local forwards, unless you know<br />
exactly what you are doing. With remote forwards, originator-pat will match with the IP address of<br />
the host connecting to the forwarded port. This will be valid information, as it is the server that is<br />
checking that information.<br />
If you specify any allow directives, all fowards in that class (local or remote) not specifically<br />
allowed will be denied (note that local <strong>and</strong> remote forwards are separate in this respect, e.g., if you<br />
have one “allow remote” definition, local forwards are still allowed, pending other restrictions). If a<br />
forward matches with both allow <strong>and</strong> deny directives, the forwarding will be denied. Also, if you<br />
have specified any of the options [Allow.Deny]TcpForwardingForUsers.Groups] or<br />
AllowTcpForwarding, <strong>and</strong> the forwarding for the user is disabled with those, an allow directive will<br />
not re-enable the forwarding for the user. Forwarding is enabled by default.<br />
MappingFileFormat<br />
When certificates are used in user authentication, one or more mapping files determine whether the<br />
user can log to an account with a certificate. The mapping file must contain one or more lines in the<br />
following format:<br />
account-id keyword arguments<br />
Keyword must be one of the following: Email, EmailRegex, Subject, SerialAndIssuer, or<br />
SubjectRegex.<br />
Arguments are different for each keyword. The following list describes each variation:<br />
Email<br />
arguments: an email address in st<strong>and</strong>ard format. If the certificate contains the email address as an
alternate name, it is good for logging in as user account-id.<br />
Subject<br />
Configuring the Secure Shell (SSH) Server v2<br />
arguments: a subject name in DN notation (LDAP style). If the name matches the one in the<br />
certificate, the certificate is good for logging in as user account-id.<br />
31-25
Configuring the Secure Shell (SSH) Server v2<br />
31-26<br />
SerialAndIssuer<br />
arguments: a number <strong>and</strong> an issuer name in DN notation (LDAP style), separated by whitespace. If<br />
the issuer name <strong>and</strong> serial number match those in the certificate, the certificate is good for logging<br />
in as user account-id.<br />
EmailRegex<br />
arguments: a regular expression (egrep syntax). If it matches an altername (of type email-address)<br />
in the certificate, the certificate is good lor logging in as user account-id. As a special feature, if<br />
account-id contains a string %subst%, it is replaced by the first parenthesized substring of the<br />
regular expression before comparing it with the account the user is trying to log into.<br />
SubjectRegex<br />
Works identically to EmailRegex, except it matches the regular expression to the canonical subject<br />
name in the received certificate.<br />
Empty lines <strong>and</strong> lines beginning with # are ignored.<br />
EXAMPLE: MAPPINGFILE<br />
guest email guest@domain.org<br />
guest subject C=Fl,O=Company Ltd., CN-Guest User<br />
guest SerialAndUser 123 C=Fl, O=Foo\Ltd., CN=Test CA<br />
%subst% EmailRegex ([a-z]+)@domain.\org<br />
%subst% Subjectregex ^C=Fl,O=Company,CN=([a-z]+)$<br />
The example EmailRegex permits in users with email addresses with domain domain.org <strong>and</strong><br />
usernames that contain only letters, each user to the account that corresponds to the username part<br />
of the email address.<br />
The example SubjectRegex lets in all users with fields C=Fl <strong>and</strong> O=Company in the subject name if<br />
their CN field contains only letters <strong>and</strong> is the account name they are trying to log into.<br />
Note the ^ <strong>and</strong> $ at the beginning <strong>and</strong> end of the regular expression; they are required to prevent the<br />
regular expression from matching less than the whole string (subject name).<br />
Note also that all characters interpreted by the regular expression parser as special characters must<br />
be escaped with a backslash if they are a part of the subject name. This also means that the<br />
backslash in the SerialAndIssuer example would have to be escaped with another backslash if the<br />
same subject name was used in a SubjectRegex rule.
Starting the SSH Server for the First Time<br />
Configuring the Secure Shell (SSH) Server v2<br />
Follow these instructions for using SSH for the first time.<br />
1 Use the MULTINET CONFIGURE/SERVER comm<strong>and</strong> to enable the SSH v2 server.<br />
$ MULTINET CONFIGURE/SERVER<br />
<strong>MultiNet</strong> Server Configuration Utility V5.4(42)<br />
[Reading in configuration from MULTINET:SERVICES.MASTER_SERVER]<br />
SERVER-CONFIG>SHOW/FULL SSH<br />
Service "SSH": ***DISABLED***<br />
INIT() = Merge_Image<br />
Program = "MULTINET:LOADABLE_SSH_CONTROL"<br />
Priority = 5<br />
Parameters = “enable-ssh1”<br />
“enable-ssh2”<br />
SERVER-CONFIG>ENABLE SSH<br />
SERVER-CONFIG>EXIT<br />
[Writing configuration to<br />
MULTINET_COMMON_ROOT:[MULTINET]SERVICES.MASTER_SERVER]<br />
Note! The parameter “enable-ssh2” must be set. It it is not set, SSH v2 sessions will not be accepted<br />
by the server.<br />
2 Use SSHKEYGEN /SSH2 to generate an ssh2 key <strong>and</strong> to create the server keys in the<br />
SSH2_HOSTKEY_DIR directory:<br />
$ DEFINE MULTINET_SSH2_HOSTKEY_DIR -<br />
_$ MULTINET_SPECIFIC_ROOT:[MULTINET.SSH2.HOSTKEYS]<br />
$ MULTINET SSHKEYGEN /SSH2 /HOST<br />
Generating 1024-bit dsa key pair<br />
8 .oOo.oOoo.oO<br />
Key generated.<br />
1024-bit dsa, lillies@flower.plants.com, Mon Aug 04 2003 09:19:47<br />
Private key saved to multinet_ssh2_hostkey_dir:hostkey.<br />
Public key saved to multinet_ssh2_hostkey_dir:hostkey.pub<br />
3 Copy the template server configuration file to the ssh2_dir: directory renaming it<br />
SSHD2_CONFIG.:<br />
$ COPY MULTINET_SPECIFIC_ROOT:[MULTINET.SSH2]SSHD2_CONFIG.TEMPLATE -<br />
_$ MULTINET_SPECIFIC_ROOT:[MULTINET.SSH2]SSHD2_CONFIG.<br />
4 Copy the template client configuration file to the ssh2_dir: directory renaming it<br />
SSH2_CONFIG.:<br />
$ COPY MULTINET_SPECIFIC_ROOT:[MULTINET.SSH2]SSH2_CONFIG.TEMPLATE -<br />
_$ MULTINET_SPECIFIC_ROOT:[MULTINET.SSH2]SSH2_CONFIG.<br />
31-27
Configuring the Secure Shell (SSH) Server v2<br />
Note! As delivered, the template files provide a reasonably secure SSH environment. However,<br />
<strong>Process</strong> <strong>Software</strong> recommends these files be examined <strong>and</strong> modified appropriately to reflect<br />
the security policies of your organization.<br />
31-28<br />
5 Restart <strong>MultiNet</strong>. This creates the SSH server process <strong>and</strong> defines the SSH logical names.<br />
$ @MULTINET:START_SERVER RESTART<br />
$ SHOW=SYSTEM/PROCESS=3D "SSHD Master"<br />
7-JUL-2003 09:03:06.42 User: SYSTEM <strong>Process</strong> ID: 00000057<br />
Node: PANTHR <strong>Process</strong> name: "SSHD Master"<br />
Terminal:<br />
User Identifier: [SYSTEM]<br />
Base priority: 4<br />
Default file spec: Not available<br />
Number of Kthreads: 1<br />
Devices allocated: BG1:<br />
BG2:<br />
$ SHOW LOGICAL/SYSTEM *SSH*<br />
"MULTINET_SSH2_HOSTKEY_DIR" =<br />
"MULTINET_SPECIFIC_ROOT:[MULTINET.SSH2.HOSTKEYS]"<br />
"MULTINET_SSH2_KNOWNHOSTS_DIR" =<br />
"MULTINET_SPECIFIC_ROOT:[MULTINET.SSH2.KNOWNHOSTS]"<br />
"MULTINET_SSH_ENABLE_SSH2_CONNECTIONS" = "1"<br />
"SSH2_DIR" = "MULTINET_SPECIFIC_ROOT:[MULTINET.SSH2]"<br />
"SSH_DIR" = "MULTINET_SPECIFIC_ROOT:[MULTINET]"<br />
"SSH_EXE" = "MULTINET_COMMON_ROOT:[MULTINET]"<br />
"SSH_LOG" = "MULTINET_SPECIFIC_ROOT:[MULTINET.SSH]"<br />
"SSH_TERM_MBX" = "MBA36:"
Configuring the Secure Shell (SSH) Server v2<br />
Configuring the SSH2 Server on a VMScluster with a Common System Disk<br />
When configuring the SSH2 server on a VMScluster with a common system disk, you must create<br />
the appropriate directories on all cluster nodes other than the one on which <strong>MultiNet</strong> was originally<br />
installed. Note that this does not need to be done for cluster members that do not share a common<br />
system disk.<br />
The following procedure should be followed on each cluster node other than the cluster node on<br />
which <strong>MultiNet</strong> was originally installed:<br />
• Create the necessary directories:<br />
$ CREATE/DIR MULTINET_SPECIFIC_ROOT:[MULTINET.SSH2]/PROT=(WO:RE,GR:RE)<br />
$ CREATE/DIR MULTINET_SPECIFIC_ROOT:[MULTINET:SSH2.KNOWNHOSTS]/PROT=(WO:R,GR:R)<br />
$ CREATE/DIR MULTINET_SPECIFIC_ROOT:[MULTINET.SSH2.HOSTKEYS]/PROT=(WO:R,GR:R)<br />
$ CREATE/DIR MULTINET_SPECIFIC_ROOT:[MULTINET.SSH]/PROT=(WO:RE,GR:RE)<br />
• Edit the MULTINET_SPECIFIC_ROOT:[MULTINET.SSH2]SSHD2_CONFIG file as<br />
necessary. This may be copied from another cluster node, or it may be created fresh from the<br />
SSHD2_CONFIG.TEMPLATE file.<br />
• Edit the MULTINET_SPECIFIC_ROOT:[MULTINET.SSH2]SSH2_CONFIG file as necessary.<br />
This may be copied from another cluster node, or it may be created fresh from the<br />
SSH2_CONFIG.TEMPLATE file.<br />
• Configure the SSH2 server using MULTINET CONFIGURE/SERVER<br />
• Generate the SSH2 host keys using MULTINET SSHKEYGEN/SSH2/HOST<br />
• (Re)start SSHD Master using MULTINET NETCONTROL SSH RESTART<br />
Changing SSH2 Configuration File After Enabling SSH2<br />
If you make a change to the SSH configuration file after you have enable SSH, you must restart<br />
SSH for these changes to take effect.<br />
$ MULTINET NETCONTROL SSH RESTART<br />
Note! When issuing the "RESTART" comm<strong>and</strong> for SSH, all active SSH server sessions are<br />
terminated. Active client sessions are not affected.<br />
Connection <strong>and</strong> Login <strong>Process</strong><br />
To create a session, SSHD does the following:<br />
1 SSHD_MASTER sees the connection attempt. It creates an SSHD process, passing the operating<br />
parameters to it. SSHD performs validation for the user.<br />
2 Assuming the login is successful, SSHD creates a pseudo terminal for the user (an _FTAnn:<br />
device). This device is owned by the user attempting to log in.<br />
3 SSHD creates an interactive process on the pseudo terminal, using the username, priority, <strong>and</strong><br />
privileges of the user who is attempting to log in. If a comm<strong>and</strong> was specified, it is executed <strong>and</strong><br />
the session is terminated.<br />
31-29
Configuring the Secure Shell (SSH) Server v2<br />
FILES<br />
31-30<br />
4 SSH generates the file SSHD.LOG for each connection to the SSH server. Many connections<br />
result in many log files. Instead of purging the files on a regular basis, use the following DCL<br />
comm<strong>and</strong> to limit the number of versions:<br />
$ SET FILE /VERSION_LIMIT=x MULTINET_ROOT:[MULTINET.SSH]SSHD.LOG<br />
Note! The value for /VERSION_LIMIT must not be smaller than the maximum number of<br />
simultaneous SSH sessions anticipated. If the value is smaller, SSH users may be<br />
prevented from establishing sessions with the server.<br />
MULTINET:HOSTS.EQUIV<br />
Contains host names, one per line. This file is used during .rhosts authentication. Users on those<br />
hosts are permitted to log in without a password, provided they have the same username on both<br />
machines. The hostname may also be followed by a username. Such users are permitted to log in as<br />
any user on the remote machine (except SYSTEM). Additionally, the syntax +@group can be used<br />
to specify netgroups. Negated entries start with dash (-). If the client host/user is matched in this<br />
file, login is permitted provided the client <strong>and</strong> server usernames are the same. Successful RSA host<br />
authentication is required. This file should be world-readable but writable only by SYSTEM.<br />
It is never a good idea to use usernames in hosts.equiv. It means the named user(s) can log in as<br />
anybody, which includes accounts that own critical programs <strong>and</strong> directories. Using a username<br />
grants the user SYSTEM access. The only valid use for usernames is in negative entries.<br />
Note! This warning also applies to rshell/rlogin.<br />
MULTINET:SHOSTS.EQUIV<br />
<strong>Process</strong>ed as MULTINET:HOSTS.EQUIV. May be useful in environments that want to run both<br />
rshell/rlogin <strong>and</strong> ssh.<br />
MULTINET_SSH2_HOSTKEY_DIR:HOSTKEY<br />
Contains the private part of the host key. This file does not exist when <strong>MultiNet</strong> is installed. The<br />
SSH server starts only with this file. This file must be created manually using the comm<strong>and</strong>:<br />
$ MULTINET SSHKEYGEN /SSH2 /HOST.<br />
This file should be owned by SYSTEM, readable only by SYSTEM, <strong>and</strong> not accessible to others.<br />
To create a host key with a name that is different than what SSHKEYGEN creates, do one of the<br />
following:<br />
• Generate with SSHKEYGEN /SSH2/HOST <strong>and</strong> simply rename the file(s).<br />
• Generate without the /HOST switch <strong>and</strong> then name the file(s) whatever you want.<br />
By default the logical name SSH2_DIR points to the MULTINET_SPECIFIC_ROOT:[MULTINET.SSH2]<br />
directory.
Configuring the Secure Shell (SSH) Server v2<br />
Refer to the <strong>MultiNet</strong> for OpenVMS User’s <strong>Guide</strong>, Chapter 8, for more details about SSHKEYGEN.<br />
MULTINET_SSH2_HOSTKEY_DIR:HOSTKEY.PUB<br />
Contains the public part of the host key. This file should be world-readable but writable only by<br />
SYSTEM. Its contents should match the private part. This file is not used for anything; it is only<br />
provided for the convenience of the user so its contents can be copied to known hosts files.<br />
SSH2:SSH_RANDOM_SEED<br />
SYS$LOGIN1 :[.SSH]RANDOM_SEED<br />
Contains a seed for the r<strong>and</strong>om number generator. This file should only be accessible by system.<br />
SSH2_DIR:SSHD2_CONFIG<br />
Contains configuration data for the v2 SSHD server. This file should be writable by system only,<br />
but it is recommended (though not necessary) that it be world-readable.<br />
SYS$LOGIN:[.SSH2].SHOSTS<br />
Permits access using SSH2 only. For SSH2, this file is the same as for .rhosts. However, this file is<br />
not used by rlogin <strong>and</strong> rshell daemon.<br />
SYS$LOGIN:.RHOSTS<br />
This file contains host-username pairs, separated by a space, one per line. The given user on the<br />
corresponding host is permitted to log in without a password. The same file is used by rlogin <strong>and</strong><br />
rshell. SSH2 differs from rlogin <strong>and</strong> rshell in that it requires RSA host authentication in addition to<br />
validating the hostname retrieved from domain name servers (unless compiled with the -withrhosts<br />
configuration option). The file must be writable only by the user. It is recommended that it<br />
not be accessible by others. It is possible to use netgroups in the file. Either host or username may<br />
be of the form +@groupname to specify all hosts or all users in the group.<br />
SYS$LOGIN:[.SSH2]AUTHORIZATION<br />
This file contains information on how the server verifies the identity of a user.<br />
SYS$LOGIN:[.SSH2.KNOWNHOSTS]xxxxyyyy.pub<br />
These are the public host keys of hosts that a user wants to log in from using "hostbased"<br />
authentication (equivalent to the SSH1's "RhostsRSAAuthentication"). Also, a user must set up his/<br />
her individual .SHOSTS or .RHOSTS file. If the username is the same in both hosts, it is adequate<br />
to put the public host key in SSH2_DIR:KNOWNHOSTS <strong>and</strong> add the host's name to the systemwide<br />
SHOSTS.EQUIV or RHOSTS.EQUIV file.<br />
1. In this chapter, the [.SSH] subdirectory in the user’s login directory displays as SYS$LOGIN:[.SSH]<br />
31-31
Configuring the Secure Shell (SSH) Server v2<br />
31-32<br />
xxxx is the hostname (FQDN) <strong>and</strong> yyyy denotes the public key algorithm of the key ("ssh-dss" or<br />
"ssh-rsa").<br />
For example flower.plants.com's host key algorithm is "ssh-dss". The hostkey would then be<br />
"flower_plants_com_ssh-dss.pub" in the [.SSH2.KNOWNHOSTS] directory.<br />
SSH2 AUTHORIZATION File Format<br />
The Authorization file contains information on how the server verifies the identity of a user. This<br />
file has the same general syntax as the SSH2 configuration files. The following keywords may be<br />
used:<br />
Table 31-3 SSH2 AUTHORIZATION Keywords<br />
Keyword Description<br />
KEY The filename of a public key in the [.SSH2] directory in the user's SYS$LOGIN<br />
directory. This key is used for identification when contacting the host. If there<br />
are multiple KEY lines, all are acceptable for login.<br />
COMMAND This keyword, if used, must follow the KEY keyword above. This is used to<br />
specify a "forced comm<strong>and</strong>" that executes on the server side instead of<br />
anything else when the user is authenticated. This option might be useful for<br />
restricting certain public keys to perform certain operations.<br />
SSH2 Logicals<br />
These logicals are used with the SSH server in the system logical name table.<br />
$ SHOW LOGICAL/SYSTEM *SSH*<br />
SSH_DIR<br />
Points to the directory where the master server log file is kept. Normally, this is<br />
MULTINET_SPECIFIC_ROOT:[MULTINET]. It is defined in START_SSH.COM."<br />
SSH_EXE<br />
Points to the directory where SSH executables are kept. Normally, this is<br />
MULTINET_COMMON_ROOT:[MULTINET]. It is defined in START_SSH.COM.<br />
SSH_LOG<br />
Points to the directory where the log files are kept. Normally, this is<br />
MULTINET_SPECIFIC_ROOT:[MULTINET.SSH]. It is defined in START_SSH.COM.
MULTINET_LOG_MBX<br />
Configuring the Secure Shell (SSH) Server v2<br />
Points to the OpenVMS mailbox used to log connection accept <strong>and</strong> reject messages. This must not<br />
be modified by the user.<br />
MULTINET_SSH_ACC_REJ_LOG_FILE<br />
If the user has set a log file to log connection accept <strong>and</strong> reject messages, this logical will be<br />
defined <strong>and</strong> will provide the name of the log file. This logical is set by using the SET LOG-FILE<br />
keyword in MULTINET CONFIGURE/SERVER, <strong>and</strong> should not be modified directly by the user.<br />
MULTINET_SSH_LOG_ACCEPTS<br />
When set, causes the server to log successful connection requests as either an OPCOM message or<br />
a line in a log file. Specified by the SET LOG-ACCEPT comm<strong>and</strong> in MULTINET CONFIGURE/<br />
SERVER. Note that the server does not use the information set in the ACCEPT-HOSTS keyword<br />
in CONFIGURE/SERVER. Rather, it uses the "AllowHosts" <strong>and</strong> "DenyHosts" keywords in the<br />
SSH server configuration file. Also, a successful connection request doesn't equate to a successful<br />
authentication request. This logical should not be modified directly by the user.<br />
MULTINET_SSH_LOG_REJECTS<br />
When set, causes the server to log rejected connection requests as either an OPCOM message or a<br />
line in a log file. Specified by the SET LOG-REJECT comm<strong>and</strong> in MULTINET CONFIGURE/<br />
SERVER. Note that the server does not use the information set in the REJECT-HOSTS keyword in<br />
CONFIGURE/SERVER. Rather, it uses the "AllowHosts" <strong>and</strong> "DenyHosts" keywords in the SSH<br />
server configuration file. This logical should not be modified directly by the user.<br />
MULTINET_SSH_MAX_SESSIONS<br />
Set this to the maximum number of concurrent SSH sessions you want to allow on the server<br />
system. If MULTINET_SSH_MAX_SESSIONS is not defined, the default is 1000. Setting<br />
MULTINET_SSH_MAX_SESSIONS to zero (0) will cause an error. The value must be between 1<br />
<strong>and</strong> 1000. The suggested place to set this is in START_SSH.COM. SSH must be restarted to use the<br />
new value if it is changed.<br />
SSH_TERM_MBX<br />
Mailbox used by SSHD_MASTER to receive termination messages from SSHD daemon processes.<br />
Do not change this logical name. This is created by the SSHD_MASTER process.<br />
MULTINET_SSH_KEYGEN_MIN_PW_LEN<br />
Defines the minimum passphrase length when one is to be set in SSHKEYGEN. If not defined,<br />
defaults to zero.<br />
MULTINET_SSH_PARAMETERS_n<br />
These values are set by <strong>MultiNet</strong> <strong>and</strong> must not be modified by the user.<br />
31-33
Configuring the Secure Shell (SSH) Server v2<br />
31-34<br />
MULTINET_SSH_USE_SYSGEN_LGI<br />
If defined, causes SSHD to use the VMS SYSGEN value of LGI_PWD_TMO to set the login grace<br />
time, overriding anything specified in the comm<strong>and</strong> line or the configuration file.<br />
MULTINET_SSH_ENABLE_SSH2_CONNECTIONS<br />
Enables SSHD Master to accept SSH V2 sessions.<br />
MULTINET_SSH2_HOSTKEY_DIR<br />
Directory containing the host keys for the SSH V2 server. Normally set to<br />
MULTINET_SPECIFIC_ROOT:[MULTINET.SSH2.HOSTKEYS]<br />
MULTINET_SSH2_KNOWNHOSTS_DIR<br />
Directory containing the public keys for known systems. Normally set to<br />
MULTINET_SPECIFIC_ROOT:[MULTINET.SSH2.KNOWNHOSTS].<br />
SSH2_DIR<br />
Contains all SSH V2-specific files, such as configuration files. Normally set to<br />
MULTINET_SPECIFIC_ROOT:[MULTINET.SSH2]<br />
SSH daemon Files<br />
These files are used by or created by SSH when you log into a daemon. These files are not to be<br />
altered in any way.<br />
SSH_LOG:SSHD.LOG<br />
This log file is created by each SSHD daemon.<br />
SSHD_MASTER.LOG<br />
This log file is created by SSHD_MASTER.<br />
SSH_START.COM<br />
This files is used to start SSH.
Chapter 32<br />
Configuring IPSEC <strong>and</strong> SETKEY<br />
This chapter describes how to configure the IP Security (IPSEC) <strong>and</strong> SETKEY protocols. IPSEC<br />
provides per-packet authenticity/confidentiality guarantees between peers that communicate using<br />
IPSEC.<br />
IPSEC provides security for transmission of sensitive information over unprotected networks such<br />
as the Internet. IPSEC acts at the network layer, protecting <strong>and</strong> authenticating IP packets between<br />
participating IPSEC devices.<br />
About the IP Security (IPSEC) Protocol<br />
IPSEC consists of a couple of separate protocols that are listed below:<br />
Authentication Header (AH): Provides authenticity guarantee for packets, by attaching strong<br />
crypto checksums to packets. Unlike other protocols, AH covers the whole packet, from the IP<br />
header to the end of the packet.<br />
If you receive a packet with AH <strong>and</strong> the checksum operation was successful, you can be sure about<br />
two things if you <strong>and</strong> the peer share a secret key, <strong>and</strong> no other party knows the key:<br />
• The packet was originated by the expected peer. The packet was not generated by impersonator.<br />
• The packet was not modified in transit.<br />
Encapsulating Security Payload (ESP): Provides confidentiality guarantee for packets, by<br />
encrypting packets with encryption algorithms. If you receive a packet with ESP <strong>and</strong> have<br />
successfully decrypted it, you can be sure that the packet was not wiretapped in the middle,<br />
provided that you <strong>and</strong> the peer share a secret key, <strong>and</strong> no other party knows the key.<br />
IP payload compression (IPcomp): ESP provides encryption service to the packets. However,<br />
encryption tends to give negative impact to compression on the wire (such as ppp compression).<br />
IPcomp provides a way to compress packets before encryption by ESP. (Of course, you can use<br />
IPcomp alone if you wish to).<br />
32-1
Configuring IPSEC <strong>and</strong> SETKEY<br />
32-2<br />
Internet Key Exchange (IKE): An alternate form of keying is called Internet Key Exchange.<br />
Note! Security of IPSEC protocols depends on the secrecy of secret keys. If secret keys are<br />
compromised, IPSEC protocols can no longer be secure. Take precautions about permission<br />
modes of configuration files, key database files, or whatever may lead to information leakage.<br />
Security Associations <strong>and</strong> Security Policies<br />
Both ESP <strong>and</strong> AH rely on security associations. A security association (SA) consists of a source,<br />
destination <strong>and</strong> an instruction. The collection of all SA’s maintained by the network kernel for a<br />
system is termed the security association database (SAD). A sample authentication SA may look<br />
like this:<br />
add 10.0.0.11 10.0.0.216 ah 15700 -A hmac-md5 ”1234567890123456”;<br />
This says “traffic going from 10.0.0.11 to 10.0.0.216 that needs an AH can be signed using HMAC-<br />
MD5 using secret 1234567890123456”. This instruction is labelled with SPI (“Security Parameter<br />
Index”) id “15700” (SPI’s will be covered later). SAs are symmetrical; both sides of a conversation<br />
share exactly the same SA, it is not mirrored on the other side. Note that there is no ‘autoreverse’<br />
rule - this SA only describes a possible authentication from 10.0.0.11 to 10.0.0.216. For two-way<br />
traffic, two SAs are needed.<br />
Following is a sample SA:<br />
add 10.0.0.11 10.0.0.216 esp 15701 -E 3des-cbc “123456789012123456789012”;<br />
This says “traffic going from 10.0.0.11 to 10.0.0.216 that needs encryption can be encyphered<br />
using 3des-cbc with key 123456789012123456789012”. The SPI id is “15701”.<br />
SAs describe possible instructions, but do not in fact describe policy as to when these need to be<br />
used. In fact, there could be an arbitrary number of nearly identical SAs with only differing SPI ids.<br />
To do actual cryptography, we need to describe a security policy (SP). This policy can include<br />
things such as “use ipsec if available” or “drop traffic unless we have ipsec”. The collection of SPs<br />
for a system is termed the security policy database (SPD).<br />
A typical simple Security Policy (SP) looks like this:<br />
spdadd 10.0.0.216 10.0.0.11 any -P out ipsec esp/transport//require ah/transport//require;<br />
If entered on host 10.0.0.216, this means that all traffic going out to 10.0.0.11 must be encrypted<br />
<strong>and</strong> be wrapped in an AH authenticating header. Note that this does not describe which SA is to be<br />
used, that is left as an exercise for the kernel to determine.<br />
In other words, a Security Policy specifies what we want; a Security Association describes how we<br />
want it.<br />
Outgoing packets are labelled with the SA SPI (“the how”) which the kernel used for encryption<br />
<strong>and</strong> authentication so the remote can look up the corresponding verification <strong>and</strong> decryption<br />
instruction.
IPSEC Configuration File<br />
Configuring IPSEC <strong>and</strong> SETKEY<br />
The configuration file for IPSEC is loaded by the SETKEY program. The default name <strong>and</strong><br />
location of this file is MULTINET:IPSEC.CONF, but other filenames may be used when<br />
specifying the -f switch for SETKEY.<br />
The configuration file describes all the Security Associations (SA) <strong>and</strong> Security Policies (SP) for<br />
the system. Lines starting with the “#” character are treated as comment lines. Configuration<br />
descriptions can be spread over multiple lines in the file. Each description must end with a<br />
semicolon.<br />
Configuration File Options<br />
add [-4n] src dst protocol spi [extensions] algorithm ...;<br />
Add an SAD entry. This can fail with multiple reasons, including when the key length does not<br />
match the specified algorithm.<br />
get [-4n] src dst protocol spi;<br />
Show an SAD entry.<br />
delete [-4n] src dst protocol;<br />
Remove all SAD entries that match the specification.<br />
deleteall [-4n] src dst protocol;<br />
Removes all SAD entries that match the specification.<br />
flush [protocol];<br />
Clears all SAD entries matched by the options. -F on the comm<strong>and</strong> line achieves the same<br />
functionality.<br />
dump [protocol];<br />
Dumps all SAD entries matched by the options. -D on the comm<strong>and</strong> line achieves the same<br />
functionality.<br />
spdadd [-4n] src_range dst_range upperspec policy;<br />
Adds an SPD entry.<br />
spdflush ;<br />
Clears all SPD entries. -FP on the comm<strong>and</strong> line achieves the same functionality.<br />
spddump ;<br />
Dumps all SPD entries. -DP on the comm<strong>and</strong> line achieves the same functionality.<br />
Configuration File Operation Arguments<br />
Arguments for the configuration file operations are as follows:<br />
src/dst<br />
32-3
Configuring IPSEC <strong>and</strong> SETKEY<br />
32-4<br />
Source/destination of the secure communication is specified as IPv4/v6 addresses. SETKEY can<br />
resolve a FQDN into numeric addresses. If the FQDN resolves into multiple addresses, SETKEY<br />
will install multiple SAD/SPD entries into the kernel by trying all possible combinations. -4 <strong>and</strong> -n<br />
restricts the address resolution of FQDN in certain ways. -4 restricts results into IPv4/v6 addresses<br />
only. -n avoids FQDN resolution <strong>and</strong> requires addresses to be numeric addresses.<br />
Protocol (where protocol is one of the following):<br />
• esp ESP based on RFC 2406<br />
• esp-old ESP based on RFC 1827<br />
• ah AH based on RFC 2402<br />
• ah-old AH based on RFC 1826<br />
• ipcomp IPComp<br />
spi<br />
Security Parameter Index (SPI) for the SAD <strong>and</strong> the SPD. spi must be a decimal number or a<br />
hexadecimal number prefixed by ‘0x’.<br />
SPI values between 0 <strong>and</strong> 255 are reserved for future use by IANA.<br />
Extensions<br />
May take the following values:<br />
-m mode<br />
Specify a security protocol mode for use. Mode is one of the following: transport, tunnel or any.<br />
The default value is any.<br />
-r size<br />
Specify window size in bytes for replay prevention. size must be a decimal number in 32-bit<br />
word. If size is zero or not specified, replay checks don’t take place.<br />
-u id<br />
Specify the identifier of the policy entry in SPD. See policy.<br />
-f pad_option<br />
Defines the content of the ESP padding, <strong>and</strong> must be one of the following:<br />
• zero-pad All of the padding are zero.<br />
• r<strong>and</strong>om-pad A series of r<strong>and</strong>omized values are set.<br />
• seq-pad A series of sequential increasing numbers started from 1 are set.<br />
-f nocyclic-seq<br />
Don’t allow cyclic sequence number.<br />
-ls time in seconds
Specify the soft lifetime duration of the SA.<br />
-lh time in seconds<br />
Specify the hard lifetime duration of the SA.<br />
Algorithm<br />
-E ealgo key<br />
Specify an encryption algorithm for ESP.<br />
Configuring IPSEC <strong>and</strong> SETKEY<br />
-E ealgo key -A aalgo key<br />
Specify an encryption algorithm ealgo, as well as a payload authentication algorithm aalgo, for<br />
ESP.<br />
-A aalgo key<br />
Specify an authentication algorithm for AH.<br />
-C calgo [-R]<br />
Specify a compression algorithm for IPComp. If -R is specified, the spi field value will be used<br />
as the IPComp CPI (compression parameter index). If -R is not specified, the kernel<br />
will use well-known CPI, <strong>and</strong> the spi field will be used only as an index for kernel internal<br />
usage.<br />
key must be a double-quoted character string, or a series of hexadecimal digits preceded by “0x”.<br />
Possible values for ealgo, aalgo, <strong>and</strong> calgo are specified in Table 32-1 <strong>and</strong> Table 32-2.<br />
src_range<br />
dst_range<br />
These are selections of the secure communication specified as an IPv4/v6 address or an IPv4/v6<br />
address range, <strong>and</strong> it may also include a TCP/UDP port specification. The addresses may take one<br />
of the following forms (an example of each is shown):<br />
Address 192.168.0.15<br />
Address/prefixlen 192.168.0.15/24<br />
Address[port] 192.168.0.15[1234]<br />
Address/prefixlen[port] 192.168.0.15/24[1234]<br />
Note that prefixlen <strong>and</strong> port must be decimal numbers. The square brackets around port are<br />
necessary. For FQDN resolution, the rules applicable to src <strong>and</strong> dst apply here as well.<br />
32-5
Configuring IPSEC <strong>and</strong> SETKEY<br />
32-6<br />
upperspec<br />
Upper-layer protocol to be used. icmp6, ip4, <strong>and</strong> any can be specified, where any indicates “any<br />
protocol.” The protocol number may also be used.<br />
policy<br />
Policy is one of the following three formats:<br />
-P direction discard protocol/mode/src-dst/level[...]<br />
-P direction none protocol/mode/src-dst/level[...]<br />
-P direction ipsec protocol/mode/src-dst/level[...]<br />
• direction must be out or in.<br />
• discard means the packet matching indexes will be discarded.<br />
• none means that IPsec operations will not take place on the packet.<br />
• ipsec means that IPsec operations will take place on the packet.<br />
• protocol/mode/src-dst/level specifies the rule as to how the packet will be processed:<br />
• protocol must be one of ah, esp or ipcomp.<br />
• mode must be transport. Note that only transport is valid for the implementation of <strong>MultiNet</strong>, as<br />
tunneling isn’t supported.<br />
• Both src <strong>and</strong> dst can be omitted.<br />
level must be one of the following:<br />
• default means the kernel consults the system-wide default against the protocol specified.<br />
• use means that the kernel uses a SA if one is available.<br />
• require means SA is required whenever the kernel sends a packet matched with the policy.<br />
• unique is the same as require; in addition, it allows the policy to bind with the unique outbound<br />
SA.<br />
Configuration Encryption Algorithms<br />
The following table shows the supported algorithms that can be used as aalgo in a -A aalgo<br />
protocol parameter:<br />
Table 32-1 Authentication Algorithms<br />
Algorithm Key Length in Bits<br />
hmac-md5 128<br />
hmac-sha1 160<br />
keyed-md5 128<br />
keyed-sha1 160<br />
null 0 to 2048
Configuring IPSEC <strong>and</strong> SETKEY<br />
The following table shows the supported algorithms that can be used as ealgo in a -E ealgo protocol<br />
parameter:<br />
Table 32-2 Encryption Algorithms<br />
Algorithm Key Length in Bits<br />
blowfish-cbc 40 to 448<br />
cast128-cbc 40 to 128<br />
des-cbc 64<br />
3des-cbc 192<br />
des-deriv 64<br />
rijndael-cbc 128/192/256<br />
Only deflate may be used as calgo in a -C ealgo protocol parameter.<br />
Simple Configuration Example<br />
What follows is a very simple configuration for talking from host 10.0.0.216 to 10.0.0.11 using<br />
encryption <strong>and</strong> authentication.<br />
On host 10.0.0.216:<br />
add 10.0.0.216 10.0.0.11 ah 24500 -A hmac-md5 “1234567890123456”;<br />
add 10.0.0.216 10.0.0.11 esp 24501 -E 3des-cbc “12345678901212345678901222”;<br />
spdadd 10.0.0.216 10.0.0.11 any -P out ipsec esp/transport//require ah/transport//require;<br />
On host 10.0.0.11, the same Security Associations, no Security Policy:<br />
add 10.0.0.216 10.0.0.11 ah 24500 -A hmac-md5 “1234567890123456”;<br />
add 10.0.0.216 10.0.0.11 esp 24501 -E 3des-cbc “12345678901212345678901222”;<br />
With the above configuration in place, $ mu ping 10.0.0.11 from 10.0.0.216 looks like this using<br />
tcpdump:<br />
22:37:52 10.0.0.216>10.0.0.11:AH(spi=0x00005fb4,seq=0xa):ESP(spi=0x00005fb5,seq=0xa)(DF)<br />
23:37:52 10.0.0.11>10.0.0.216:icmp:echo reply<br />
Note how the ping back from 10.0.0.11 is plainly visible. The forward ping cannot be read by<br />
tcpdump (as the packet is encrypted), but it does show the Security Parameter Index of AH <strong>and</strong><br />
ESP, which tells 10.0.0.11 how to verify the authenticity of our packet <strong>and</strong> how to decrypt it.<br />
A problem with the previous example is that it specifies a policy on how 10.0.0.216 should treat<br />
packets going to 10.0.0.11, <strong>and</strong> that it specifies how 10.0.0.11 should treat those packets. However<br />
it does not instruct 10.0.0.11 to discard unauthenticated or unencrypted traffic. Hence, anybody<br />
could insert spoofed <strong>and</strong> completely unencrypted data <strong>and</strong> 10.0.0.11 will accept it. To remedy the<br />
above, we need an incoming Security Policy on 10.0.0.11, as follows:<br />
32-7
Configuring IPSEC <strong>and</strong> SETKEY<br />
32-8<br />
spdadd 10.0.0.216 10.0.0.11 any -P in ipsec esp/transport//require ah/transport//require;<br />
This instructs 10.0.0.11 that any traffic coming in to it from 10.0.0.216 is required to have valid<br />
ESP <strong>and</strong> AH.<br />
To complete this configuration, the return traffic needs to be encrypted <strong>and</strong> authenticated as well.<br />
Therefore, the following configurations will be required:<br />
On 10.0.0.216:<br />
flush;<br />
spdflush;<br />
# AH<br />
add 10.0.0.11 10.0.0.216 ah 15700 -A hmac-md5 “1234567890123456”;<br />
add 10.0.0.11 10.0.0.11 ah 24500 -A hmac-md5 “1234567890123456”;<br />
# ESP<br />
add 10.0.0.11 10.0.0.216 esp 15701 -E 3des-cbc “1234567890123456789012”;<br />
add 10.0.0.11 10.0.0.216 esp 24501 -E 3des-cbc “1234567890123456789012”;<br />
spdadd 10.0.0.216 10.0.0.11 any -P out ipsec esp/transport//require ah/transport//require;<br />
spdadd 10.0.0.11 10.0.0.216 any -P in ipsec esp/transport//require ah/transport//require;<br />
And on 10.0.0.11:<br />
flush;<br />
spdflush;<br />
# AH<br />
add 10.0.0.11 10.0.0.216 ah 15700 -A hmac-md5 “1234567890123456”;<br />
add 10.0.0.11 10.0.0.11 ah 24500 -A hmac-md5 “1234567890123456”;<br />
# ESP<br />
add 10.0.0.11 10.0.0.216 esp 15701 -E 3des-cbc “1234567890123456789012”;<br />
add 10.0.0.11 10.0.0.216 esp 24501 -E 3des-cbc “1234567890123456789012”;<br />
spdadd 10.0.0.216 10.0.0.11 any -P out ipsec esp/transport//require ah/transport//require;<br />
spdadd 10.0.0.11 10.0.0.216 any -P in ipsec esp/transport//require ah/transport//require;<br />
Note that in this example, identical keys were used for both directions of traffic. However, it’s not<br />
required to use identical keys for both directions.<br />
The SETKEY Program<br />
The configuration file for IPSEC is loaded by the SETKEY program. A foreign comm<strong>and</strong> must be<br />
defined to invoke SETKEY:<br />
$ setkey :== $multinet:setkey<br />
$ setkey [-v] -f filename<br />
$ setkey [“-aPlv”] “-D”<br />
$ setkey [“-Pv”] “-F”<br />
$ setkey [-h] -x
The possible comm<strong>and</strong> options for SETKEY are:<br />
Configuring IPSEC <strong>and</strong> SETKEY<br />
-D Dump the SAD entries. If with -P, the SPD entries are dumped.<br />
If with -a, the dead SAD entries will be displayed as well.<br />
-f filename Read the configuration comm<strong>and</strong>s from the specified file.<br />
-F Flush the SAD entries. If with -P, the SPD entries are flushed.<br />
-a A dead SAD entry means that it has been expired but remains in<br />
the system because it is referenced by some SPD entries.<br />
-h Add hexadecimal dump on -x mode.<br />
-l Loop forever with short output on -D.<br />
-v Be verbose. The program will dump messages exchanged on<br />
PF_KEY socket, including messages sent from other processes<br />
to the kernel.<br />
-x Loop forever <strong>and</strong> dump all the messages transmitted to PF_KEY<br />
socket.<br />
SETKEY Usage Examples<br />
Example 1: Parse <strong>and</strong> load the policies in the file MULTINET:IPSEC.CONF into the kernel (note<br />
that the output from parsing can be quite verbose, so part of the output has been deleted from the<br />
middle this example to keep it to a reasonable size):<br />
$ setkey “-f” multinet:ipsec.conf<br />
Starting parse<br />
Entering state 0<br />
Reducing via rule 1 (line 126), -> comm<strong>and</strong>s<br />
state stack now 0<br />
Entering state 1<br />
Reading a token: Next token is 261 (ADD)<br />
Shifting token 261 (ADD), Entering state 2<br />
Reducing via rule 57 (line 537), -> ipaddropts<br />
state stack now 0 1 2<br />
entering state 23<br />
Reading a token: Next token is 292 (STRING)<br />
Shifting token 292 (STRING), Entering state 36<br />
Reducing via rule 61 (line 568), STRING -> ipaddr<br />
state stack now 0 1 2 23<br />
Entering state 39<br />
...<br />
Entering state 19<br />
Reducing via rule 9 (line 141),spdadd_comm<strong>and</strong> -> comm<strong>and</strong><br />
state stack now 0 1<br />
32-9
Configuring IPSEC <strong>and</strong> SETKEY<br />
32-10<br />
Entering state 12<br />
Reducing via rule 2 (line 127), comm<strong>and</strong>s comm<strong>and</strong> -> comm<strong>and</strong>s<br />
state stack now 0<br />
Entering state 1<br />
Reading a token: Now at end of input.<br />
Shifting token 0 ($), Entering state 137<br />
Now at end of input.<br />
Example 2: Dump out the policies in the kernel:<br />
$ setkey “-PD”<br />
192.168.154.10/24[any] 192.168.228.100/24[any]any<br />
out ipsec<br />
esp/transport//use<br />
ah/transport//use<br />
spid=1 seq=0 pid=149<br />
refcnt=1<br />
Example 3: Dump out the SAD entries in the kernel:<br />
$ setkey “-D”<br />
192.168.228.100 192.168.154.10<br />
ah mode=any spi=1000(0x00002711)reqid=0(0x00000000)<br />
A:hmac -sha1 6d6f6761 6d6f6761 6d6f6761 6d6f6761<br />
replay=0 flags=0x00000040 state=mature seq=3 pid=149<br />
created: Dec 22 15:52:49 2003 current: Dec 22 15:54:30 2003<br />
diff: 101(s) hard:0(s) soft:0(s)<br />
last: hard:0(s) soft:0(s)<br />
current:0(bytes) hard:0(bytes) soft:0(bytes)<br />
allocated:0 hard:0 soft:0<br />
refcnt=1<br />
192.168.154.10.192 168.228.100<br />
ah mode=any spi=9877(0x00002695)reqid=0(0x00000000)<br />
A:hmac -sha1 686f6765 686f6765 686f6765 686f6765<br />
replay=0 flags=0x00000040 state=mature seq=2 pid=149<br />
created: Dec 22 15:52:49 2003 current: Dec 22 15:54:30 2003<br />
diff: 101(s) hard:0(s) soft:0(s)<br />
last: hard:0(s) soft:0(s)<br />
current:0(bytes) hard:0(bytes) soft:0(bytes)<br />
allocated:0 hard:0 soft:0<br />
refcnt=1<br />
192.168.228.100.192 168.154.10<br />
ah mode=transport spi=10000(0x00002710)reqid=0(0x00000000)<br />
E:3des-cbc deadbeef deadbeef deadbeef deadbeef deadbeef<br />
replay=0 flags=0x00000040 state=mature seq=1 pid=149<br />
created: Dec 22 15:52:49 2003 current: Dec 22 15:54:30 2003<br />
diff: 101(s) hard:0(s) soft:0(s)<br />
last: hard:0(s) soft:0(s)<br />
current:0(bytes) hard:0(bytes) soft:0(bytes)<br />
allocated:0 hard:0 soft:0<br />
refcnt=1
Configuring IPSEC <strong>and</strong> SETKEY<br />
192.168.154.10 192.168.228.100<br />
ah mode=transport spi=9876(0x00002694)reqid=0(0x00000000)<br />
E:3des-cbc 686f6765 686f6765 686f6765 686f6765 686f6765<br />
replay=0 flags=0x00000040 state=mature seq=0 pid=149<br />
created: Dec 22 15:52:49 2003 current: Dec 22 15:54:30 2003<br />
diff: 101(s) hard:0(s) soft:0(s)<br />
last: hard:0(s) soft:0(s)<br />
current:0(bytes) hard:0(bytes) soft:0(bytes)<br />
allocated:0 hard:0 soft:0<br />
refcnt=1<br />
Example 4: Dump the messages out on the PF_KEY socket.<br />
$ setkey “-hx”<br />
14:38:47.009961<br />
00000000:02 0b 00 00 06 00 00 00 00 00 00 00 00 00 00 00<br />
0000000010:02 0b 00 01 02 00 00 00 00 00 00 95 00 00 00<br />
sadb_msg { version=2 type=1 1 errno=0 satype=1<br />
len=2 reserved=0 seq=0 pid=149<br />
14:38:47 057809<br />
00000000:02 0b 00 01 02 00 00 00 00 00 00 00 95 00 00 00<br />
Example 5: Flush all of the entries from the kernel.<br />
$ setkey “-F”<br />
$ setkey “-D”<br />
No SAD entries.<br />
IPSEC Configuration File Examples<br />
Configuration Example: Host-to-Host Encryption<br />
If you want to run host-to-host (transport mode) encryption with manually configured secret keys,<br />
the following configuration should be sufficient:<br />
# multinet:ipsec.conf<br />
#<br />
# packet will look like this: IPv4 ESP payload<br />
# the node is on 10.1.1.1, peer is on 20.1.1.1<br />
add 10.1.1.1 10.2.1.1 esp 9876 -E 3des-cbc “hogehogehogehogehogehoge”;<br />
add 10.2.1.1 10.1.1.1 esp 10000 -E 3des-cbc<br />
0xdeadbeefdeadbeefdeadbeefdeadbeefdeadbeefdeadbeef;<br />
spdadd 10.1.1.1 10.2.1.1 any -P out ipsec esp/transport//use;<br />
From 10.1.1.1 to 10.2.1.1, use the 3DES-CBC algorithm with SPI 9876, with secret key<br />
“hogehogehogehhogehogehoge”.The traffic will be identified by SPI 9876.<br />
From 10.2.1.1 to 10.1.1.1, use 3DES-CBC algorithm with SPI 10000, with secret key<br />
0xdeadbeefdeadbeefdeadbeefdeadbeef.<br />
The last line configures per-packet IPSEC policy for the node. Using this configuration, the<br />
32-11
Configuring IPSEC <strong>and</strong> SETKEY<br />
32-12<br />
transmit node (10.1.1.1) used to send packets to the peer (20.1.1.1), is encrypted whenever a secret<br />
key is configured in to the kernel. The configuration does not prohibit unencrypted packets from<br />
20.1.1.1 to reach 10.1.1.1. To reject unencrypted packets, the following line would be added to the<br />
configuration file:<br />
spdadd 10.2.1.1 10.1.1.1 any -P in ipsec esp/transport//require;<br />
On the peer’s node (10.2.1.1), the configuration will look similar to what is shown in the following<br />
example. Note that the addresses need to be swapped on the “spdadd” line, but “add” lines do not<br />
need to be swapped.<br />
# multinet:ipsec.conf<br />
#<br />
# packet will look like this: IPv4 ESP payload<br />
# the node is on 10.2.1.1, peer is on 10.1.1.1<br />
add 10.1.1.1 10.2.1.1 esp 9876 -E 3des-cbc “hogehogehogehogehogehoge”;<br />
add 10.2.1.1 10.1.1.1 esp 10000 -E 3des-cbc<br />
0xdeadbeefdeadbeefdeadbeefdeadbeefdeadbeefdeadbeef<br />
spdadd 10.2.1.1 10.1.1.1 any -P out ipsec esp/transport//use;<br />
The previous example uses human-readable secret keys. However, using human-readable secret<br />
keys is discouraged by the IPSEC policy specification, since they are more likely to be<br />
compromised than binary keys. Binary keys should be used for normal operations.<br />
Key length is determined by algorithms. See Table 32-1 <strong>and</strong> Table 32-2 for the required key<br />
lengths. For 3des-cbc, the secret key must be 192 bits (24 bytes). If a shorter or longer key is<br />
specified, SETKEY will return an error when parsing the line.<br />
The following is an example of rijndael-cbc (also known as AES) using 128-bit keys.<br />
# multinet:ipsec.conf<br />
#<br />
# the packet will look like this: IPv4 ESP payload<br />
# the node is on 10.1.1.1, peer is on 10.2.1.1<br />
# rijndael -cbc with 128bit key<br />
add 10.1.1.1 10.2.1.1 esp 9876 -E rijndael -cbc “hogehogehogehoge”;<br />
add 10.2.1.1 10.1.1.1 esp 10000 -E rijndael -cbc<br />
0xdeadbeefdeadbeefdeadbeefdeadbeefdeadbeefdeadbeef;<br />
spdadd 10.1.1.1 10.2.1.1 any -P out ipsec esp/transport//use;<br />
Configuration Example: Host-to-Host Authentication<br />
The following example shows a sample configuration for host-to-host authentication:<br />
# multinet:ipsec.conf<br />
#<br />
# packet will look like this: IPv4 AH payload<br />
# the node is on 10.1.1.1, peer is on 10.2.1.1<br />
add 10.1.1.1 10.2.1.1 ah 9877 -A hmac-md5 “hogehogehogehoge”;<br />
add 10.2.1.1 10.1.1.1 ah 10001 -A hmac-md5 “mogamogamogamoga”;<br />
spdadd 10.1.1.1 10.2.1.1 any -P out ipsec ah/transport//use;
Configuration Example: Host-to-Host Encryption+Authentication<br />
Configuring IPSEC <strong>and</strong> SETKEY<br />
The following example shows sample keys that are configured for both AH <strong>and</strong> ESP.<br />
Note! It is recommended that you apply AH after ESP.<br />
# multinet:ipsec.conf<br />
#<br />
# packet will look like this: IPv4 AH ESP payload<br />
# the node is on 10.1.1.1, peer is on 10.2.1.1<br />
add 10.1.1.1 10.2.1.1 esp 9876 -E 3des-cbc “hogehogehogehogehogehoge”;<br />
add 10.2.1.1 10.1.1.1 esp 10000 -E 3des-cbc<br />
0xdeadbeefdeadbeefdeadbeefdeadbeefdeadbeefdeadbeef;<br />
add 10.1.1.1 10.2.1.1 ah 9877 -A hmac-md5 “mogamogamogamoga”;<br />
spdadd 10.1.1.1 10.2.1.1 any -P out ipsec esp/transport//use<br />
ah/transport//use;<br />
Conformance to St<strong>and</strong>ards <strong>and</strong> Interoperability<br />
The <strong>MultiNet</strong> 5.4 IPSEC implementation conforms to the following IPSEC st<strong>and</strong>ards: RFC 2401,<br />
RFC 2402, RFC 2404, RFC 2406, RFC 4835, RFC 4868. The IKEv2 (Racoon2) implementation<br />
provides support for RFC 4306, RFC 4307 <strong>and</strong> RFC 4718.<br />
Racoon Internet Key Exchange Daemon<br />
The RACOON service performs the task of securely creating security associations for participating<br />
systems. When a security policy senses the need of a security association, RACOON is notified<br />
<strong>and</strong> securely communicates with an Internet Key Exchange daemon on the other system to<br />
establish the security association. Security Policies must still be configured manually with the<br />
SETKEY program.<br />
The RACOON service can be controlled through the following MULTINET NETCONTROL<br />
comm<strong>and</strong>s:<br />
• DEBUG- set the debug level for a currently running Racoon IKE daemon.<br />
• ESTABLISH remote-ip-address [local-ip-address] – initiate key exchange protocol<br />
communication between the remote ip-address <strong>and</strong> the local ip-address. If local-ip-address is<br />
not specified then the value of MULTINET_HOST_NAME is used. This does not install<br />
Security Associations, but does the initial negotiation necessary to allow Security Associations<br />
to be established when necessary. It is not necessary to manually establish the negotiation<br />
information – RACOON will do it automatically when necessary.<br />
• FLUSH – flush all existing keys<br />
• NOOP - No Operation<br />
• SHOW – show existing key associations<br />
• SHUTDOWN – Shutdown the Racoon IKE Daemon. All established keys are flushed as part of<br />
this process.<br />
• START – Start the Racoon IKE Daemon<br />
• STOP – Same as SHUTDOWN<br />
32-13
Configuring IPSEC <strong>and</strong> SETKEY<br />
32-14<br />
• VERSION – Display control interface version<br />
The configuration file (MULTINET:RACOON.CONF) can be configured to h<strong>and</strong>le all systems in<br />
general, or specific systems.<br />
RACOON negotiates security associations for itself (ISAKMP SA, or phase 1 SA) <strong>and</strong> for kernel<br />
IPsec (IPsec SA, or phase 2 SA). The file consists of a sequence of directives <strong>and</strong> statements. Each<br />
directive is composed by a tag, <strong>and</strong> statements are enclosed by ‘{‘ <strong>and</strong> ‘}’. Lines beginning with ‘#’<br />
are comments.<br />
Meta Syntax<br />
Keywords <strong>and</strong> special characters that the parser expects exactly are displayed using this font.<br />
Parameters are specified with this font. Square brackets ‘[‘ <strong>and</strong> ‘]’ are used to show optional<br />
keywords <strong>and</strong> parameters. Note that you have to pay attention when this manual is describing port<br />
numbers. The port number is always enclosed by ‘[‘ <strong>and</strong> ‘]’. In this case, the port number is not an<br />
optional keyword. If it is possible to omit port number, the expression becomes [[port]]. The<br />
vertical bar (‘|’) is used to indicate a choice between optional parameters. Parentheses ‘(‘ <strong>and</strong> ‘)’ are<br />
used to group keywords <strong>and</strong> parameters when necessary. Major parameters are listed below.<br />
Numbermeans a hexadecimal or a decimal number. The former must be prefixed with `0x'.<br />
string path filemeans any string enclosed in ‘"‘ (double quote).<br />
Addressmeans IPv4 address.<br />
Portmeans a TCP/UDP port number. The port number is always enclosed by ‘[‘ <strong>and</strong> ‘]’.<br />
Timeunitis one of following: sec, secs, second, seconds, min, mins, minute, minutes, hour,<br />
hours.<br />
Path Specification<br />
path include path;<br />
specifies a path to include a file. See File Inclusion.<br />
path pre_shared_key file;<br />
specifies a file containing pre-shared key(s) for various ID(s). See Pre-shared key File.<br />
path certificate path;<br />
racoon will search this directory if a certificate or certificate request is received.<br />
path backupsa file;<br />
specifies a file to be stored a SA information which is negotiated by racoon. racoon will<br />
install SA(s) from the file with a boot option -B. The file is increasing because racoon<br />
simply adds a SA to the file at the moment. You should maintain the file manually.
File Inclusion<br />
include file<br />
other configuration files can be included.<br />
Configuring IPSEC <strong>and</strong> SETKEY<br />
Timer Specification<br />
timer { statements }<br />
specifies various timer values.<br />
counter number;<br />
the maximum number of retries to send. The default is 5.<br />
interval number timeunit;<br />
the interval to resend, in seconds. The default time is 10 seconds.<br />
persend number;<br />
the number of packets per send. The default is 1.<br />
phase1 number timeunit;<br />
the maximum time it should take to complete phase 1. The default time is 15 seconds.<br />
phase2 number timeuni;<br />
the maximum time it should take to complete phase 2. The default time is 10 seconds.<br />
Listening Port Specification<br />
listen { statements }<br />
If no listen directive is specified, racoon will listen on all of the available interface<br />
addresses. The following is the list of valid statements:<br />
isakmp address [[port]];<br />
If this is specified, racoon will only listen on address. The default port is 500, which<br />
is specified by IANA. You can provide more than one address definition.<br />
strict_address;<br />
require that all addresses for ISAKMP must be bound. This statement will be ignored<br />
if you do not specify any addresses.<br />
Remote Nodes Specifications<br />
remote (address | anonymous) [[port]] { statements }<br />
specifies the parameters for IKE phase 1 for each remote node. The default port is 500. If<br />
anonymous is specified, the statements apply to all peers which do not match any other<br />
remote directive.<br />
32-15
Configuring IPSEC <strong>and</strong> SETKEY<br />
32-16<br />
The following are valid statements:<br />
exchange_mode (main | aggressive | base);<br />
defines the exchange mode for phase 1 when racoon is the initiator. Also it means the<br />
acceptable exchange mode when racoon is responder. More than one mode can be specified by<br />
separating them with a comma. All of the modes are acceptable. The first exchange mode is<br />
what racoon uses when it is the initiator.<br />
doi ipsec_doi;<br />
means to use IPSEC-DOI as specified RFC 2407. You can omit this statement.<br />
situation identity_only;<br />
means to use SIT_IDENTITY_ONLY as specified RFC 2407. You can omit this statement.<br />
my_identifier idtype ...;<br />
specifies the identifier sent to the remote host <strong>and</strong> the type to use in the phase 1 negotiation.<br />
address, fqdn, user_fqdn, keyid <strong>and</strong> asn1dn can be used as an idtype. they are used like:<br />
my_identifier address [address];<br />
the type is the IP address. This is the default type if you do not specify an identifier to use.<br />
my_identifier user_fqdn string;<br />
the type is a USER_FQDN (user fully-qualified domain name).<br />
my_identifier fqdn string;<br />
the type is a FQDN (fully-qualified domain name).<br />
my_identifier keyid file;<br />
the type is a KEY_ID. my_identifier asn1dn [string]; the type is an ASN.1 distinguished<br />
name. If string is omitted, racoon will get DN from Subject field in the certificate.<br />
peers_identifier idtype ...;<br />
specifies the peer's identifier to be received. If it is not defined then racoon will not verify the<br />
peer's identifier in ID payload transmitted from the peer. If it is defined, the behavior of the<br />
verification depends on the flag of verify_identifier. The usage of idtype is same to<br />
my_identifier.
Configuring IPSEC <strong>and</strong> SETKEY<br />
verify_identifier (on | off);<br />
If you want to verify the peer's identifier, set this to on. In this case, if the value defined by<br />
peers_identifier is not same to the peer's identifier in the ID payload, the negotiation will<br />
failed. The default is off.<br />
certificate_type certspec;<br />
specifies a certificate specification. certspec is one of followings:<br />
x509 certfile privkeyfile;<br />
certfile means a file name of certificate. privkeyfile means a file name of secret key.<br />
peers_certfile (dnssec | certfile);<br />
If dnssec is defined, racoon will ignore the CERT pay- load from the peer, <strong>and</strong> try to get the<br />
peer's certificate from DNS instead. If certfile is defined, racoon will ignore the CERT payload<br />
from the peer, <strong>and</strong> will use this certificate as the peer's certificate.<br />
send_cert (on | off);<br />
If you do not want to send a certificate for some reason, set this to off. The default is on.<br />
send_cr (on | off);<br />
If you do not want to send a certificate request for some reason, set this to off. The default is<br />
on.<br />
verify_cert (on | off);<br />
If you do not want to verify the peer's certificate for some reason, set this to off. The default is<br />
on.<br />
lifetime time number timeunit;<br />
define a lifetime of a certain time which will be proposed in the phase 1 negotiations. Any<br />
proposal will be accepted, <strong>and</strong> the attribute(s) will be not proposed to the peer if you do not<br />
specify it(them). They can be individually specified in each proposal.<br />
initial_contact (on | off);<br />
enable this to send an INITIAL-CONTACT message. The default value is on. This message is<br />
useful only when the implementation of the responder choices an old SA when there are<br />
multiple SAs which are different established time, <strong>and</strong> the initiator reboots. If racoon did not<br />
use the message, the responder would use an old SA even when a new SA was established. The<br />
KAME stack has the switch in the system wide value, net.key.preferred_oldsa. when the value<br />
is zero, the stack always use a new SA.<br />
passive (on | off);<br />
If you do not want to initiate the negotiation, set this to on. The default value is off. It is useful<br />
for a server.<br />
32-17
Configuring IPSEC <strong>and</strong> SETKEY<br />
32-18<br />
proposal_check level;<br />
specifies the action of lifetime length <strong>and</strong> PFS of the phase 2 selection on the responder side.<br />
The default level is strict. If the level is:<br />
•obeythe responder will obey the initiator anytime.<br />
•StrictIf the responder's length is longer than the initiator's one, the responder uses the<br />
initiator's one. Otherwise it rejects the proposal. If PFS is not required by the responder, the<br />
responder will obey the proposal. If PFS is required by both sides <strong>and</strong> if the responder's group<br />
is not equal to the initiator's one, then the responder will reject the proposal.<br />
•ClaimIf the responder's length is longer than the initiator's one, the responder will use the<br />
initiator's one. If the responder's length is shorter than the initiator's one, the responder uses its<br />
own length AND sends a RESPONDER-LIFETIME notify message to an initiator in the case<br />
of lifetime. About PFS, this directive is same as strict.<br />
•exactIf the initiator's length is not equal to the responder's one, the responder will reject the<br />
proposal. If PFS is required by both sides <strong>and</strong> if the responder's group is not equal to the<br />
initiator's one, then the responder will reject the proposal.<br />
support_mip6 (on | off);<br />
If this value is set on then both values of ID payloads in phase 2 exchange are always used as<br />
the addresses of end-point of IPsec-SAs. The default is off.<br />
generate_policy (on | off);<br />
This directive is for the responder. Therefore you should set passive on in order that racoon<br />
only becomes a responder. If the responder does not have any policy in SPD during phase 2<br />
negotiation, <strong>and</strong> the directive is set on, then racoon will choice the first proposal in the SA<br />
payload from the initiator, <strong>and</strong> generate policy entries from the proposal. It is useful to<br />
negotiate with the client which is allocated IP address dynamically. Note that inappropriate<br />
policy might be installed by the initiator because the responder just installs policies as the<br />
initiator proposes. So that other communication might fail if such policies installed. This<br />
directive is ignored in the initiator case. The default value is off.<br />
nonce_size number;<br />
define the byte size of nonce value. Racoon can send any value although RFC2409 specifies<br />
that the value MUST be between 8 <strong>and</strong> 256 bytes. The default size is 16 bytes.<br />
proposal { sub-substatements }<br />
encryption_algorithm algorithm;<br />
specify the encryption algorithm used for the phase 1 negotiation. This directive must be<br />
defined. algorithm is one of following: des, 3des, blowfish, cast128 for Oakley. For other<br />
transforms, this statement should not be used.<br />
hash_algorithm algorithm;<br />
define the hash algorithm used for the phase 1 negotiation. This directive must be defined.<br />
algorithm is one of following: md5, sha1 for Oakley.
Configuring IPSEC <strong>and</strong> SETKEY<br />
authentication_method type;<br />
defines the authentication method used for the phase 1 negotiation. This directive must be<br />
defined. type is one of: pre_shared_key, rsasig, gssapi_krb.<br />
dh_group group;<br />
define the group used for the Diffie-Hellman exponentiations. This directive must be<br />
defined. group is one of following: modp768, modp1024, modp1536. Or you can define<br />
1, 2, or 5 as the DH group number. When you want to use aggressive mode, you must<br />
define same DH group in each proposal.<br />
lifetime time number timeunit;<br />
define lifetime of the phase 1 SA proposal. Refer to the description of lifetime directive<br />
immediately defined in remote directive.<br />
gssapi_id string;<br />
define the GSS-API endpoint name, to be included as an attribute in the SA, if the<br />
gssapi_krb authentication method is used. If this is not defined, the default value of `ike/<br />
hostname' is used, where hostname is the FQDN of the interface being used.<br />
Policy Specifications<br />
The policy directive is obsolete, policies are now in the SPD. racoon will obey the policy<br />
configured into the kernel by setkey, <strong>and</strong> will construct phase 2 proposals by combining sainfo<br />
specifications in racoon.conf, <strong>and</strong> policies in the kernel.<br />
Sainfo Specifications<br />
sainfo (source_id destination_id | anonymous) { statements }<br />
defines the parameters of the IKE phase 2 (IPsec-SA establishment). source_id <strong>and</strong><br />
destination_id are constructed like:<br />
address address [/ prefix] [[port]] ul_proto<br />
or<br />
idtype string<br />
It means exactly the content of ID payload. This is not like a filter rule. For example, if<br />
you define 3ffe:501:4819::/48 as source_id. 3ffe:501:4819:1000:/64 will not match.<br />
pfs_group group;<br />
define the group of Diffie-Hellman exponentiations. If you do not require PFS then you<br />
can omit this directive. Any proposal will be accepted if you do not specify one. group is<br />
32-19
Configuring IPSEC <strong>and</strong> SETKEY<br />
32-20<br />
one of following: modp768, modp1024, modp1536. Or you can define 1, 2, or 5 as the<br />
DH group number.<br />
lifetime time number timeunit;<br />
define the lifetime of amount of time which are to be used IPsec-SA. Any proposal will be<br />
accepted, <strong>and</strong> no attribute(s) will be proposed to the peer if you do not specify it(them).<br />
See the proposal_check directive.<br />
racoon does not have the list of security protocols to be negotiated. The list of security<br />
protocols are passed by SPD in the kernel. Therefore you have to define all of the potential<br />
algorithms in the phase 2 proposals even if there is a algorithm which will not be used. These<br />
algorithms are define by using the following three directives, <strong>and</strong> they are lined with single<br />
comma as the separator. For algorithms that can take variable-length keys, algorithm names<br />
can be followed by a key length, like ``blowfish 448''. racoon will compute the actual phase 2<br />
proposals by computing the permutation of the specified algorithms, <strong>and</strong> then combining them<br />
with the security protocol specified by the SPD. For example, if des, 3des, hmac_md5, <strong>and</strong><br />
hmac_sha1 are specified as algorithms, we have four combinations for use with ESP, <strong>and</strong> two<br />
for AH. Then, based on the SPD settings, racoon will construct the actual proposals. If the SPD<br />
entry asks for ESP only, there will be 4 proposals. If it asks for both AH <strong>and</strong> ESP, there will be<br />
8 proposals. Note that the kernel may not support the algorithm you have specified.<br />
encryption_algorithm algorithms;<br />
des, 3des, des_iv64, des_iv32, rc5, rc4, idea, 3idea, cast128, blowfish, null_enc,<br />
twofish, rijndael (used with ESP)<br />
authentication_algorithm algorithms;<br />
des, 3des, des_iv64, des_iv32, hmac_md5, hmac_sha1, non_auth (used with ESP<br />
authentication <strong>and</strong> AH)<br />
compression_algorithm algorithms;<br />
deflate (used with IPComp)<br />
Logging level<br />
log level;<br />
define logging level. level is one of following: notify, debug <strong>and</strong> debug2. The default is<br />
notify. If you put too high logging level on slower machines, IKE negotiation can fail due<br />
to timing constraint changes.<br />
Specifying the way to pad<br />
padding { statements }<br />
specified padding format. The following are valid statements:
Configuring IPSEC <strong>and</strong> SETKEY<br />
r<strong>and</strong>omize (on | off);<br />
enable using a r<strong>and</strong>omized value for padding. The default is on.<br />
r<strong>and</strong>omize_length (on | off);<br />
the pad length is r<strong>and</strong>om. The default is off.<br />
maximum_length number;<br />
define a maximum padding length. If r<strong>and</strong>omize_length is off, this is ignored. The<br />
default is 20 bytes.<br />
exclusive_tail (on | off);<br />
means to put the number of pad bytes minus one into last part of the padding. The default<br />
is on.<br />
strict_check (on | off);<br />
means to be constrained the peer to set the number of pad bytes. The default is off.<br />
Special directives<br />
complex_bundle (on | off);<br />
defines the interpretation of proposal in the case of SA bundle. Normally ``IP AH ESP IP<br />
payload'' is proposed as ``AH tunnel <strong>and</strong> ESP tunnel''. The interpretation is more common<br />
to other IKE implementations, however, it allows very limited set of combinations for<br />
proposals. With the option enabled, it will be pro- posed as ``AH transport <strong>and</strong> ESP<br />
tunnel''. The default value is off.<br />
Pre-shared key File<br />
Pre-shared key file defines a pair of the identifier <strong>and</strong> the shared secret key which are used<br />
at Pre-shared key authentication method in phase 1. The pair in each lines are separated by<br />
some number of blanks <strong>and</strong>/or tab characters like hosts(5). Key can be included any<br />
blanks because all of the words after 2nd column are interpreted as a secret key. Lines start<br />
with `#' are ignored. Keys which start with `0x' are hexadecimal strings. Note that the file<br />
must be owned by the user ID running racoon (usually the privileged user), <strong>and</strong> must not<br />
be accessible by others.<br />
32-21
Configuring IPSEC <strong>and</strong> SETKEY<br />
Example RACOON configuration file:<br />
32-22<br />
#<br />
# Basic Racoon configuration file<br />
#<br />
path pre_shared_key "multinet:psk.txt" ;<br />
remote anonymous<br />
{<br />
exchange_mode aggressive, main, base ;<br />
lifetime time 24 hour ;<br />
proposal {<br />
encryption_algorithm blowfish 448;<br />
hash_algorithm md5; #sha1;<br />
authentication_method pre_shared_key ;<br />
dh_group 5 ;<br />
}<br />
}<br />
sainfo anonymous<br />
{<br />
pfs_group 2;<br />
lifetime time 12 hour ;<br />
encryption_algorithm blowfish 448;<br />
authentication_algorithm hmac_sha1, hmac_md5 ;<br />
compression_algorithm deflate ;<br />
}<br />
Example pre-shared key file:<br />
192.168.1.2 deadbeef<br />
192.168.1.3 deadbeef<br />
192.168.1.4 deadbeef<br />
192.168.1.5 face0ff0<br />
Restrictions<br />
The following restrictions exist regarding the use of IPSEC in <strong>MultiNet</strong> V5.4. These restrictions<br />
may be lifted in future releases of <strong>MultiNet</strong>.<br />
• Security may not be set on a socket-by-socket basis via the use of setsockopt().<br />
• Only transport mode is supported to both AH <strong>and</strong> ESP. Tunnel mode (primarily used for VPN’s)<br />
is not supported in any mode (AH or ESP).<br />
• IPcomp is not currently implemented.
IPSec key management with Racoon2<br />
Configuring IPSEC <strong>and</strong> SETKEY<br />
Racoon2 is the new IPSEC key management package that replaces Racoon. The <strong>MultiNet</strong><br />
implementation is based upon racoon2-20090327c from the WIDE project <strong>and</strong> uses the OpenSSL-<br />
0.9.8k crypto library. <strong>MultiNet</strong> Racoon2 is available on OpenVMS Alpha <strong>and</strong> Integrity platforms<br />
<strong>and</strong> offers IKEv1 in main mode <strong>and</strong> IKEv2. Racoon2 consists of three images:<br />
• SPMD – the Security Policy Management Daemon, which installs security policies<br />
<strong>and</strong> acts on various requests from IKED<br />
• SPMDCTL – the program to send SPMD control messages while it is running<br />
• IKED – the IPSEC Key Exchange Daemon, which authenticates the identification<br />
of a remote system <strong>and</strong> establishes security associations. IKED supports the following<br />
specifications:<br />
• Internet Key Exchange (IKEv2) Protocol<br />
• RFC 4306, Internet Key Exchange (IKEv2) Protocol<br />
• RFC 4307, Cryptographic Algorithms for Use in the Internet Key Exchange Version<br />
2 (IKEv2)<br />
• RFC 4718, IKEv2 Clarifications <strong>and</strong> Implementation <strong>Guide</strong>lines<br />
• The Internet Key Exchange (IKE)<br />
• RFC 2409, The Internet Key Exchange (IKE)<br />
• RFC 3947, Negotiation of NAT-Traversal in the IKE<br />
• RFC 3948, UDP Encapsulation of IPsec ESP Packets<br />
All images assume a default configuration file of MULTINET:RACOON2.CONF<br />
Additional information on Racoon2 is available from http://www.racoon2.wide.ad.jp/ .<br />
Note! KINKD is not provided because there are a number of Kerberos routines that it needs that are<br />
not visible in the packages provided for OpenVMS by HP.<br />
SPMD<br />
SPMD manages IPsec Security Policy for racoon2, the key management daemon (IKED). It can<br />
also serve as a local DNS proxy server if you set on in racoon2 configuration file.<br />
usage:<br />
spmd [-dhV] [-f config] [-D level]<br />
-V show version number<br />
-f specify config file<br />
-d increase debug level(max ddd)<br />
-D specify debug level(1-3)<br />
32-23
Configuring IPSEC <strong>and</strong> SETKEY<br />
32-24<br />
-h show this help<br />
Note! When using comm<strong>and</strong> line options, make sure to enclose them in double quotes to preserve<br />
case.<br />
SPMD must be started first. Users who are familiar with SPMD on Unix platforms will notice that<br />
SPMD on <strong>MultiNet</strong> only runs in “foreground mode”.<br />
Name resolution<br />
• SPMD can provide name resolution for IKED on systems that do not run a name<br />
server. This can be either as a name server proxy, or based completely upon the<br />
HOSTS.LOCAL file. The logical MULTINET_SVCORDER can be used to define<br />
the order of name resolution <strong>and</strong> can be defined to any combination of local <strong>and</strong><br />
bind. The default value is bind.<br />
$ define/system MULTINET_SVCORDER “local, bind”<br />
SPMDCTL<br />
spmdctl connects to the spmd interface which is specified in the racoon2 configuration file, <strong>and</strong><br />
requests operations to spmd. These requests can be changes to the currently managed security<br />
policies <strong>and</strong> name servers, if SPMD is acting as a proxy name server.<br />
usage:<br />
spmdctl [-d] [-f RACOON2_CONF_FILE] COMMAND<br />
-d : display messages corresponded with spmd<br />
-f RACOON2_CONF_FILE : specify racoon2 configuration file<br />
COMMAND:<br />
ns {add|delete} address : add/delete nameserver<br />
ns list : show nameservers<br />
policy add selector_index \<br />
lifetime(sec) {transport|tunnel} \<br />
sp_src_ipaddr sp_dst_ipaddr \<br />
[sa_src_ipaddr sa_dst_ipaddr]<br />
: add policy<br />
policy delete selector_index<br />
: delete policy<br />
policy dump : show policies under spmd management<br />
interactive : process only login
shutdown : tell spmd to shutdown<br />
status : show statistics<br />
Configuring IPSEC <strong>and</strong> SETKEY<br />
Note! When using comm<strong>and</strong> line options, make sure to enclose them in double quotes to preserve<br />
case.<br />
IKED<br />
IKED is a key management daemon, which supports the Internet Key Exchange (IKE) protocol<br />
version 1 (RFC2409) <strong>and</strong> version 2 (RFC4306). It is driven by messages from the kernel via the<br />
PF_KEYv2 interface or by negotiation requests from remote peers, <strong>and</strong> manages IPSec Security<br />
Associations according to racoon2.conf. Users who are familiar with IKED on Unix platforms will<br />
notice that IKED on <strong>MultiNet</strong> only runs in “foreground mode”.<br />
usage:<br />
iked [-f file] [-p port] [-46] [-I address] \<br />
[-S selector_index] [-D number] [-dvVh] [-l logfile]<br />
-f specify the configuration file.<br />
-p specify the isakmp port number to listen to.<br />
-4 use IPv4 only.<br />
-6 use IPv6 only.<br />
-I immediately initiate to the address specified.<br />
-S immediately initiate using the selector specified.<br />
-D specify the debug flags.<br />
-d increase the debug level.<br />
-v specify to output messages to st<strong>and</strong>ard error,<br />
in addition to syslog.<br />
-V show the iked version.<br />
-h show this help.<br />
-l specify log output file (instead of syslog).<br />
Debug option:<br />
0x0001 DEBUG_FLAG_DEBUG log debug messages.<br />
0x0002 DEBUG_FLAG_TRACE show internal processing trace.<br />
0x0004 DEBUG_FLAG_CONFIG show config parsing trace.<br />
0x0008 DEBUG_FLAG_PFKEY PFKEY <strong>and</strong> SPMIF are ignored.<br />
Note! When using comm<strong>and</strong> line options, make sure to enclose them in double quotes to preserve<br />
case.<br />
32-25
Configuring IPSEC <strong>and</strong> SETKEY<br />
Authentication with pre-shared keys<br />
IKED uses the entire contents of the PSK file as the key, so watch for any trailing newlines that<br />
might get inadvertently added. This is different from Racoon, which uses a PSK file that is keyed<br />
by IP Address to designate the key.<br />
Authentication with Certificates<br />
The following steps are required to get two hosts using Racoon2 IKED to authenticate each other<br />
with certificates when using the IKEv1 or IKEv2 protocol:<br />
• Create a Certificate Signing Request with an unencrypted private key<br />
• Send the CSR file to the Certificate Authority (CA) for signing. Make sure that the<br />
CA includes the following information in the CRT (or PEM) file that is returned:<br />
• SubjectAtlName = DNS:FQDN<br />
• SubjectAltName = email:email_address_of_contact<br />
• SubjectAltName = IP:ip_address_of_system<br />
If the VMS OpenSSL software is used, then the above information needs to be added to the<br />
SSL$CONF:SSL$CA.CNF file before signing each certificate under the [CA_x509_extensions]<br />
section.<br />
• Convert the CRT files to PEM files (if necessary) with the following comm<strong>and</strong>s:<br />
• Openssl x509 –in host.crt –out host.der –outform DER<br />
• Openssl x509 –in host.der –inform DER –out host.pem –outform PEM<br />
• Hash certificates (PEM files) (option 9 with SSL$COM:SSL$CERT_TOOL)<br />
• Distribute the PEM files <strong>and</strong> hashed files to the hosts involved.<br />
32-26<br />
The default format for the SubjectAltName IP address is a binary value. If your CA encodes this as<br />
a text string then define the logical<br />
MULTINET_RACOON2_BINARY_IPV4_SUBJECTALTNAME FALSE (or<br />
MULTINET_RACOON2_BINARY_IPV6_SUBJECTALTNAME for IPv6).<br />
In addition to the above, IKEv2 needs the following in the Racoon2 configuration:<br />
Send_peers_id on;<br />
The OpenSSL code that IKED is built with looks in SSLCERTS: (not SSL$CERTS:) for the CA<br />
certificate, so you need to define the logical SSLCERTS to point to the directory that contains the<br />
CA certificate <strong>and</strong> any intermediate certificates in the chain.<br />
Scripts<br />
Comm<strong>and</strong> files (or scripts) can be invoked when certain events occur. The comm<strong>and</strong> files are
passed up to 8 parameters in the following format:<br />
• Parameter_name=parameter_value<br />
• Possible parameter names:<br />
• LOCAL_ADDR<br />
• LOCAL_PORT<br />
• REMOTE_ADDR<br />
• REMOTE_PORT<br />
• SELECTOR_INDEX<br />
• IPSEC_MODE<br />
• UPPER_LAYER_PROTOCOL<br />
• INTERNAL_ADDR4<br />
• APPLICATION_VERSION<br />
• OLD_SRC<br />
• OLD_DST<br />
• NEW_SRC<br />
• NEW_DST<br />
• INTERNAL_ADDR<br />
• INTERNAL_DNS4<br />
• INTERNAL_WINS4<br />
• INTERNAL_DHCP4<br />
• INTERNAL_ADDR6<br />
• INTERNAL_DNS6<br />
• INTERNAL_DHCP6<br />
• LOCAL_NET_ADDR<br />
• LOCAL_NET_PREFIXLEN<br />
• LOCAL_NET_PORT<br />
• REMOTE_NET_ADDR<br />
• REMOTE_NET_PREFIXLEN<br />
• REMOTE_NET_PORT<br />
Configuring IPSEC <strong>and</strong> SETKEY<br />
See “scripts” under “Directive details” for more information about which parameters can be used<br />
with which scripts.<br />
Compatibility with Racoon<br />
The <strong>MultiNet</strong> implementation of IKED has been modified so that it works with Racoon with more<br />
encryption keys than the typical IKED implementation would. Unfortunately, these changes will<br />
prevent it from working with other implementations of IKED in IKEv1 mode for some encryption<br />
methods. To disable this change define the following logical to No/False/0 before starting IKED:<br />
$ DEFINE/SYSTEM MULTINET_RACOON2_IKEV1_MORE_DEFAULT_KEYLENS NO<br />
32-27
Configuring IPSEC <strong>and</strong> SETKEY<br />
Troubleshooting<br />
The first step in troubleshooting is to start IKED with “-D7”. If possible, this should be done on<br />
both sides of the connection because one side may provide more useful information than the other<br />
as to why the security associations could not be negotiated. Potential causes of problems are:<br />
• Identification parameters (FQDN <strong>and</strong> IPADDR)<br />
• Authentication (pre-shared key or certificate)<br />
• IPSec requirements (requested combinations of ESP <strong>and</strong> AH, encryption <strong>and</strong> hash<br />
algorithms.)<br />
For IKEv1 there may be a set of lines similar to:<br />
32-28<br />
2010-03-24 09:34:24 [DEBUG]: IPSEC_DOI.C;23:372: Compared: DB:Peer<br />
2010-03-24 09:34:24 [DEBUG]: IPSEC_DOI.C;23:373: (lifetime = 28800:600)<br />
2010-03-24 09:34:24 [DEBUG]: IPSEC_DOI.C;23:376: (lifebyte = 0:0)<br />
2010-03-24 09:34:24 [DEBUG]: IPSEC_DOI.C;23:382: enctype = 3DES-CBC:3DES-<br />
CBC<br />
2010-03-24 09:34:24 [DEBUG]: IPSEC_DOI.C;23:387: (encklen = 0:0)<br />
2010-03-24 09:34:24 [DEBUG]: IPSEC_DOI.C;23:389: hashtype = MD5:SHA1<br />
2010-03-24 09:34:24 [DEBUG]: IPSEC_DOI.C;23:394: authmethod = pre-shared<br />
key:pre-shared key<br />
2010-03-24 09:34:24 [DEBUG]: IPSEC_DOI.C;23:399: dh_group = 1536-bit MODP<br />
group:1536-bit MODP group<br />
2010-03-24 09:34:24 [DEBUG]: IPSEC_DOI.C;23:271: no suitable proposal<br />
found.<br />
The above information points out the differences in the IKEv1 transport configurations between the<br />
two systems. The values compared are a combination of program defaults, values in the default<br />
configuration file, <strong>and</strong> values in the transport_ike configuration file, so all configuration files must<br />
be checked for the differences.<br />
PSKGEN<br />
PSKGEN is a simple program to write a text string to a specified file such that there is no record<br />
information in the file <strong>and</strong> no extraneous carriage control characters. This makes the file<br />
compatible with a file that might be generated on a Unix system. Use PSKGEN to generate a preshared<br />
key file, if that is the authentication method you have chosen. To use the program, define a<br />
symbol<br />
$ pskgen :== $multinet:pskgen<br />
$ pskgen multinet:racoon2_psk.txt deadbeef
usage:<br />
pskgen file_specification pre_shared_key_text<br />
Starting Racoon2 on <strong>MultiNet</strong><br />
1. 1. copy configuration file templates <strong>and</strong> edit them<br />
Configuring IPSEC <strong>and</strong> SETKEY<br />
$ copy multinet:racoon2_conf.template multinet:racoon2.conf<br />
etc...<br />
2. 2. start SPMD with the following comm<strong>and</strong> lines<br />
$ spmd :== $multinet:spmd<br />
$ spawn/nowait spmd -f multinet:racoon2.conf<br />
3. 3. start IKED with the following comm<strong>and</strong> lines<br />
$ iked :== $multinet:iked<br />
$ iked -f multinet:racoon2.conf<br />
Steps 2 <strong>and</strong> 3 above may be issued by h<strong>and</strong> in a terminal window. If you wish this to be started<br />
automatically with <strong>MultiNet</strong>, submit START_SPMD.COM as a batch job from<br />
MULTINET:LOCAL_INITIALIZATION.COM using the /after qualifier with a delta time such<br />
that SPMD/IKED startup takes place after <strong>MultiNet</strong> startup has completed. A future release of<br />
<strong>MultiNet</strong> will have this integrated into the <strong>MultiNet</strong> Master Server.<br />
$ submit/noprint/after=”+0:1:00” multinet:start_spmd.com<br />
The above line placed in MULTINET:LOCAL_INITIALIZATION.COM will submit to<br />
SYS$BATCH the procedure START_SPMD.COM for starting in 1 minute. You may need to<br />
adjust the delta time depending on your system configuration. It may also be necessary to<br />
uncomment the wait comm<strong>and</strong> between the startup of spmd <strong>and</strong> iked in START_SPMD.COM.<br />
32-29
Configuring IPSEC <strong>and</strong> SETKEY<br />
Configuration<br />
(The following is copied from the doc directory in the Racoon2 distribution; some misspellings <strong>and</strong><br />
grammatical errors have been corrected <strong>and</strong> some information has been changed to match the<br />
<strong>MultiNet</strong> implementation.)<br />
32-30<br />
The iked of Racoon2 supports Configuration Payload in IKEv2 protocol. This section describes<br />
how to use it with iked.<br />
Introduction<br />
The Configuration Payload (CP) is used to exchange configuration information between IKE peers.<br />
There are several kinds of information to be exchanged with CP in RFC4306. The current<br />
implementation however supports only the following pieces of information:<br />
• INTERNAL_IP4_DNS<br />
• INTERNAL_IP4_NBNS<br />
• INTERNAL_IP4_DHCP<br />
• APPLICATION_VERSION<br />
• INTERNAL_IP6_DNS<br />
• INTERNAL_IP6_NBNS<br />
• INTERNAL_IP6_DHCP<br />
The Configuration Payload has two types of exchange. One is request/reply <strong>and</strong> the other is set/ack.<br />
The current specification only defines the request/reply usage. The iked support only request/reply<br />
exchange accordingly.<br />
How iked works<br />
The iked of an initiator side sends a request to the responder <strong>and</strong> it receives the reply. Then it parses<br />
the reply <strong>and</strong> validates. The iked exports the information from the Configuration Payload as<br />
environment variables <strong>and</strong> calls the scripts in the configuration files. An administrator can use the<br />
information to configure callback scripts.<br />
The iked of a responder side receives a request from the initiator. It looks up the configuration <strong>and</strong><br />
sends the reply. There is no callback interface which the responder calls in the process of the<br />
Configuration Payload.
Configuration<br />
Initiator side<br />
Configuring IPSEC <strong>and</strong> SETKEY<br />
There are two directives to configure the Configuration Payload. One is "request" <strong>and</strong> the other is<br />
"script". They are in the "ikev2" directive in the "remote" directive.<br />
The "request" is used to configure what information will be requested.<br />
For example:<br />
request { ip4_dns; application_version; };<br />
Specifies that iked will request INTERNAL_IP4_DNS <strong>and</strong> APPLICATION_VERSION.<br />
"script" is used to configure the callback scripts of the Configuration Payload exchange. To use the<br />
Configuration Payload, we should configure child_up <strong>and</strong> child_rekey. For example:<br />
script {<br />
child_up "multinet:child-up";<br />
child_rekey "multinet:child-rekey";<br />
};<br />
In child-up <strong>and</strong> child-rekey, the information from the Configuration Payload is available as<br />
parameters to the comm<strong>and</strong> procedure containing the name <strong>and</strong> value of environment variables<br />
corresponding to the information. For example, the environment variable INTERNAL_DNS4<br />
stores INTERNAL_IP4_DNS.<br />
Responder side<br />
There are directives to configure the Configuration Payload. The "provide" directive specifies the<br />
information that will be provided to the initiators. The directive is in the "ikev2" directive in the<br />
"remote" directive. For example:<br />
provide {<br />
dhcp { 192.168.39.10; };<br />
application_version "Racoon2";<br />
};<br />
It specifies that the iked can provide "192.168.39.10" as an INTERNAL_IP4_DNS <strong>and</strong> "Racoon2"<br />
as an APPLICATION_VERSION.<br />
32-31
Configuring IPSEC <strong>and</strong> SETKEY<br />
Configuration Syntax<br />
This portion of the document describes the syntax of the configuration of racoon2.<br />
The syntax of the racoon2 configuration is not compatible with the syntax of old racoon. Note that<br />
this syntax might be changed in the future because racoon2 is still under development.<br />
Structure<br />
32-32<br />
There are ten main directives in the configuration. Details are described at "Directives details".<br />
• setval - It defines a constant string value which is unique in the whole configuration<br />
file.<br />
• default - It defines default values.<br />
• interface - It defines interfaces of each protocol.<br />
• resolver - It defines the resolver.<br />
• remote - It defines parameters for the remote KMP peer.<br />
• selector - It defines parameters of a selector.<br />
• policy - It defines a behavior when a packet is matched to a selector.<br />
• ipsec - It defines a SA or a SA bundle.<br />
• sa - It defines parameters of a SA.<br />
• addresspool - It defines the address ranges for address pool.<br />
The following picture shows how each directive relates to the others.<br />
setval default interface resolver<br />
+---(selector_index)--- remote<br />
| ^<br />
| |<br />
| (remote_index) +-(sa_index)-> sa<br />
v | |<br />
selector -+ | +-(ipsec_index)-> ipsec -+-(sa_index)-> sa<br />
| | |<br />
selector -+-(policy_index)-> policy -+-(ipsec_index)-> ipsec ---(sa_index)-> sa<br />
| |<br />
selector -+ +-(ipsec_index)-> ipsec ...<br />
: :
Limitation of string<br />
A string consists of the following characters:<br />
0x30-0x39 0-9<br />
0x41-0x5a A-Z<br />
0x61-0x7a a-z<br />
0x25 %<br />
0x2a *<br />
0x2d -<br />
0x2e .<br />
0x2f /<br />
0x3a :<br />
0x3f ?<br />
0x40 @<br />
0x5f _<br />
Configuring IPSEC <strong>and</strong> SETKEY<br />
A non-reserved string must be enclosed by double-quotations (" : 0x22).<br />
When characters are closed by double-quotations, it is distinguished as just a string.<br />
An index, selector_index for example, should consist of alpha-numeric characters (0-9 a-z A-Z).<br />
An index is not required to be enclosed by ". An IP address <strong>and</strong> a port number are not required to be<br />
enclosed by ".<br />
32-33
Configuring IPSEC <strong>and</strong> SETKEY<br />
Representation of IP addresses<br />
32-34<br />
An IPv4 address must consist of numeric characters (0-9) <strong>and</strong> periods (.).<br />
e.g. 203.178.141.194<br />
An IPv6 address must consist of hexadecimal-digit (0-9 a-f A-F), colons (:) <strong>and</strong> a percentage-mark<br />
(%) if necessary.<br />
e.g. 2001:200:0:8002:203:47ff:fea5:3085<br />
When a port number is required, the string "port" must follow an IP address string, <strong>and</strong> must be<br />
followed by a port number or a service name defined by the platform generally defined by /etc/<br />
services. The string "any" means that it will match with all port numbers.<br />
e.g.<br />
2001::1 port 80<br />
203.178.141.194 port any<br />
A network prefix is represented by a number delimited by a slash (/).<br />
e.g. ::1/0<br />
A range of addresses is represented by IP addresses delimited by a hyphen (-). NOTE THAT IT IS<br />
NOT IMPLEMENTED YET.<br />
e.g. 10.0.0.0-10.1.255.255<br />
Some reserved strings can be used.<br />
• MY_IP - all of IP addresses assigned to the interfaces.<br />
• MY_IPV6 - all of IPv6 addresses assigned to the interfaces.<br />
• MY_IPV6_GLOBAL - all of IPv6 global addresses assigned to the interfaces.<br />
• MY_IPV6_LINKLOCAL - all of IPv6 link-local addresses assigned to the interfaces.<br />
• MY_IPV4 - all of IPv4 addresses assigned to the interfaces.<br />
An interface name can be specified with a percentage-mark (%) followed by the interface name.<br />
e.g. MY_IPV6%fxp0
The following strings will be implemented.<br />
IP_ANY means ::0 <strong>and</strong> 0.0.0.0.<br />
Representation of bytes<br />
Configuring IPSEC <strong>and</strong> SETKEY<br />
The following directives are followed by a numeric byte amount specification as its parameter.<br />
• nonce_size<br />
• max_pad_len<br />
• max_retry_to_send<br />
• kmp_sa_lifetime_byte<br />
• ipsec_sa_lifetime_byte<br />
The following units can be used.<br />
• B<br />
• Byte<br />
• Bytes<br />
• KB<br />
• MB<br />
• GB<br />
32-35
Configuring IPSEC <strong>and</strong> SETKEY<br />
Representation of time<br />
32-36<br />
The following directives are followed by a numeric time data.<br />
• interval_to_send<br />
• times_per_send<br />
• kmp_sa_lifetime_time<br />
• kmp_sa_nego_time_limit<br />
• kmp_sa_grace_period<br />
• ipsec_sa_nego_time_limit<br />
• ipsec_sa_lifetime_time<br />
• dpd_delay<br />
• dpd_retry<br />
The following units can be used.<br />
• infinite<br />
• sec<br />
• secs<br />
• second<br />
• seconds<br />
• min<br />
• mins<br />
• minute<br />
• minutes<br />
• hour<br />
• hours<br />
• day<br />
• days<br />
• 0(zero) means infinite.<br />
Cryptographic algorithm <strong>and</strong> its representation<br />
The following directives define an algorithm type.<br />
• kmp_enc_alg<br />
• esp_enc_alg<br />
• esp_auth_alg<br />
• ah_auth_alg
Configuring IPSEC <strong>and</strong> SETKEY<br />
All of them are sent as a proposal, <strong>and</strong> a receiver evaluates the proposal with logical OR.<br />
They can define a size of a key <strong>and</strong> a key if needed.<br />
(algorithm name)[,(key length)[,(key)]]<br />
(key) is hexadecimal-digits or string. A string of hexadecimal-digits must start with (0x).<br />
e.g. 0x0123456789abcdef<br />
In the string case, it must be closed by (").<br />
Note that some algorithms specify the length of the key.<br />
If you do not specify size of key, you can define like below:<br />
(algorithm name),,(key)<br />
If you need to specify multiple algorithms, defining an algorithm list for example, you can define it<br />
by using (;) as delimiter.<br />
e.g.<br />
kmp_enc_alg { aes192_cbc,,0x1234; aes192_cbc; 3des_cbc; };<br />
The following lists cryptographic functions <strong>and</strong> algorithm names. Note that some algorithms are<br />
not implemented.<br />
kmp_enc_alg directive <strong>and</strong> esp_enc_alg directive can have one of the following algorithm types.<br />
• des_cbc_iv64<br />
• des_cbc<br />
• 3des_cbc<br />
• rc5_cbc<br />
• idea_cbc<br />
• cast128_cbc<br />
• blowfish_cbc<br />
• 3idea_cbc<br />
• des_cbc_iv32<br />
• rc4_cbc<br />
32-37
Configuring IPSEC <strong>and</strong> SETKEY<br />
• null_enc<br />
• rijndael_cbc<br />
• aes128_cbc<br />
• aes192_cbc<br />
• aes256_cbc<br />
• twofish_cbc<br />
32-38<br />
kmp_hash_alg directive can have one of the following algorithm types.<br />
• md5<br />
• sha1<br />
• tiger<br />
• sha2_256<br />
• sha2_384<br />
• sha2_512<br />
In case of IKEv2, kmp_hash_alg directive is used to specify an integrity check (MAC) algorithm<br />
for IKE_SA communication, <strong>and</strong> the following algorithm types are accepted.<br />
• hmac_md5<br />
• hmac_sha1<br />
• sha2_256<br />
• sha2_384<br />
• sha2_512<br />
• aes_xcbc<br />
• aes_cmac<br />
• kmp_prf_alg directive can have one of the following algorithm types.<br />
• hmac_md5<br />
• hmac_sha1<br />
• hmac_sha2_256<br />
• hmac_sha2_384<br />
• hmac_sha2_512<br />
• aes_xcbc<br />
• aes_cmac<br />
• des_mac<br />
• kpdk_md5<br />
In case of IKEv1, kmp_prf_alg directive is not used. Instead, HMAC version of hash algorithm<br />
specified by kmp_hash_alg is used.
Configuring IPSEC <strong>and</strong> SETKEY<br />
kmp_dh_group directive can have the group number or one of the following algorithm types.<br />
• 1 modp768<br />
• 2 modp1024<br />
• 3 ec2n155<br />
• 4 ec2n185<br />
• 5 modp1536<br />
• 14 modp2048<br />
• 15 modp3072<br />
• 16 modp4096<br />
• 17 modp6144<br />
• 18 modp8192<br />
kmp_auth_method directive can have one of the following algorithm types.<br />
• psk<br />
• dss<br />
• rsasig<br />
• rsaenc<br />
• rsarev<br />
• gssapi_krb<br />
esp_auth_alg <strong>and</strong> ah_auth_alg directive can have one of the following algorithm types.<br />
• hmac_md5<br />
• hmac_sha1<br />
• aes_xcbc<br />
• hmac_sha2_256<br />
• hmac_sha2_384<br />
• hmac_sha2_512<br />
• kpdk_md5<br />
• non_auth<br />
32-39
Configuring IPSEC <strong>and</strong> SETKEY<br />
32-40<br />
ipcomp_alg directive can have one of the following algorithm types.<br />
oui<br />
deflate<br />
lzs<br />
Variable substitution<br />
Environment variables can be referred from configuration files. The form is like $[environment<br />
variable].<br />
e.g. $[HOME]<br />
The C getenv routine is used to determine the value of the variable. You can also define variables<br />
by using setval directives. They are evaluated at once after all configuration files are read. When<br />
there is a duplicate string, it fails <strong>and</strong> stops evaluation of the configuration file.<br />
To define a variable, a variable name must be followed by a string:<br />
(string) (value) ;<br />
The string must begin with a capital alphabet, followed by alpha-numeric capital characters.<br />
Alpha-numeric capital characters are:<br />
0x30-0x39 0-9<br />
0x41-0x5a A-Z<br />
0x5f _<br />
To refer the variable, the form is like ${string}.<br />
e.g. ${HISNAME}<br />
setval can have a environment variable referred by $[variable] as its parameter.
Comments<br />
When (# 0x23) is found, all characters from it to a new line are ignored.<br />
Directives details<br />
• A directive consists of a string, a value <strong>and</strong> ";"(semi-colon) e.g.<br />
string value ;<br />
Values can be enclosed by "{" <strong>and</strong> "}" like<br />
directive {<br />
value ;<br />
value ;<br />
:<br />
};<br />
A value might be a directive recursively.<br />
Configuring IPSEC <strong>and</strong> SETKEY<br />
Values enclosed with ({) <strong>and</strong> (}) must also end with a semi-colon(;). The word is case-sensitive.<br />
The following lists the syntax of each directive.<br />
include<br />
include (file) ;<br />
The parser includes (file). Note that variables defined by setval are not allowed here. Environment<br />
variables can be used.<br />
setval<br />
setval { (definitions) } ;<br />
It defines a constant string value which is unique in the whole configuration file. It will be basically<br />
exp<strong>and</strong>ed after the whole configuration files are loaded. See Variable substitution for detail.<br />
32-41
Configuring IPSEC <strong>and</strong> SETKEY<br />
32-42<br />
default<br />
default { (directives) } ;<br />
It defines default values. Each directive can be included. Default values are overwritten by each<br />
specific value.<br />
interface<br />
interface { (directives) } ;<br />
It defines interfaces of each protocol.<br />
Sub-directives are:<br />
ike (address) [port (port)] ;<br />
It defines port numbers which iked uses.<br />
spmd (address) [port (port)] ;<br />
Defines port numbers by which spmd makes communication with IKED. The loopback address<br />
(127.0.0.1) is recommended.<br />
spmd_password (file) ;<br />
Defines the file name which contains the password to be used for communication between spmd<br />
<strong>and</strong> iked.<br />
application_bypass (on|off) ;<br />
When on (default) KMP daemons bypass the IPsec policies.<br />
When off, they rely on explicit policies but they can run encapsulated into IPsec tunnels for<br />
instance. Note the last configuration can be unsafe when a KMP uses a non-privileged port.
esolver<br />
resolver { (directives) } ;<br />
Configuring IPSEC <strong>and</strong> SETKEY<br />
It defines the spmd resolver proxy configuration. Sub-directives in the resolver directive are the<br />
followings.<br />
resolver (on|off) ;<br />
It controls the behavior of spmd as the resolver.<br />
When the directive is on, the spmd behaves as a resolver.<br />
Default is off.<br />
nameserver (address) [port (port)] ;<br />
It defines IP addresses of the upper DNS servers.<br />
The port number can be defined if needed.<br />
The default port number is 53.<br />
dns_query (address) [port (port)] ;<br />
It defines IP addresses to be listened to for DNS requests.<br />
The port number can be defined if needed.<br />
The default port number is 53.<br />
32-43
Configuring IPSEC <strong>and</strong> SETKEY<br />
32-44<br />
remote<br />
remote (remote_index) { (directives) } ;<br />
It defines parameters for the remote KMP peer. remote_index is a string value to identify a remote<br />
directive.<br />
A remote directive is referred from one or more policies by the remote_index.<br />
A remote might refer to the selector directive with the selector_index.<br />
Sub-directives in the remote directive are the followings.<br />
ikev1 { (directives) } ;<br />
It defines the IKEv1 configuration.<br />
ikev2 { (directives) } ;<br />
It defines the IKEv2 configuration.<br />
acceptable_kmp (ikev1|ikev2) ;<br />
It defines key management protocols to be used.<br />
The list defines the KMPs whom the responder allows to accept.<br />
The first protocol in the list defines the mode that the initiator uses.<br />
selector_index (selector_index) ;<br />
IT IS NOT IMPLEMENTED YET.<br />
It has a selector_index to be used in the road warrior case of the responder.<br />
The following sub directives are for each key management protocol.<br />
logmode (normal|debug) ;<br />
IT IS NOT IMPLEMENTED YET.<br />
It defines the logging mode.<br />
The default is normal.
logfile (file) ;<br />
Configuring IPSEC <strong>and</strong> SETKEY<br />
IT IS NOT IMPLEMENTED YET.<br />
It defines the logfile.<br />
When the log file is defined here, the log still dumps to the system log or the log file specified by<br />
the parameter of each program.<br />
passive (on|off) ;<br />
It controls the behavior of the daemon. When this directive is on, the daemon acts as responder<br />
only.<br />
The default is off.<br />
peers_ipaddr (address) [port (port)];<br />
It defines the IP addresses of the peer. The port number may be specified if needed. It can be used<br />
as the first search key to match with the IKE initial packet from initiator. Omitting this field or<br />
writing it as IP_RW requires default directive to h<strong>and</strong>le IKE initial packets.<br />
verify_id (on|off) ;<br />
IT IS NOT TESTED YET.<br />
Works only for the responder (the initiator has to configure its peer to authenticate it).<br />
verify_pubkey (on|off) ;<br />
IT IS NOT TESTED YET.<br />
send_cert (on|off) ;<br />
IT IS NOT TESTED YET.<br />
send_cert_req (on|off) ;<br />
IT IS NOT TESTED YET.<br />
32-45
Configuring IPSEC <strong>and</strong> SETKEY<br />
32-46<br />
nonce_size (number) ;<br />
IT IS NOT TESTED YET.<br />
initial_contact (on|off) ;<br />
IT IS NOT TESTED YET.<br />
support_proxy (on|off) ;<br />
IT WILL BE DONE ANOTHER WAY.<br />
It is enabled that the IP addresses delivered by the ID payloads in IKEv1 or the TS payloads in<br />
IKEv2 are used as the end point's IP addresses of the SAs in the transport mode case.<br />
my_id (ipaddr|email|fqdn|keyid|x509_subject) (value) ;<br />
They are valid in all KMP directives.<br />
It defines identifiers for the local-side entity.<br />
ipaddr (ip address)<br />
IPv4 or IPv6 address<br />
fqdn (FQDN)<br />
Fully Qualified Domain Name<br />
email (e-mail address)<br />
E-Mail address<br />
keyid ([file]|tag) (filename|data)<br />
A binary data a.k.a KEY-ID.<br />
Use a filename (default) or directly the data.<br />
x509_subject (filename)<br />
Subject Name in the certificate.<br />
peers_id (ipaddr|email|fqdn|keyid|x509_subject) (value) ;<br />
They are valid in all KMP directives.<br />
It defines the identifiers for the remote-side entity.<br />
send_peers_id (on|off) ;<br />
It enables the initiator to send the peer's ID.<br />
The default is off.
selector_check (obey|exact) ;<br />
IT IS NOT IMPLEMENTED YET.<br />
It is valid for the ikev2 directive.<br />
It defines the way to compare the ID <strong>and</strong> the TS value.<br />
obey<br />
exact<br />
Configuring IPSEC <strong>and</strong> SETKEY<br />
It means that the policy from the initiator will be installed.<br />
It is same as "generate_policy on;" in the IKEv1 case.<br />
If there is no policy matching with the intiator's one, it is<br />
rejected.<br />
The default is obey.<br />
proposal_check (obey|strict|claim|exact) ;<br />
IT IS NOT IMPLEMENTED YET.<br />
They are valid for both directives of the ikev1 <strong>and</strong> ikev2.<br />
It defines the way to compare the policies in the responder<br />
side.<br />
obey<br />
It means that the initiator's policy will be used.<br />
strict<br />
It means that the initiator's policy will be used if the lifetime in<br />
the policy from the initiator is less than the responder's one,<br />
AND the PFS is required.<br />
If it is not suitable, it is rejected.<br />
claim<br />
It is valid for the ikev1 directive. It means that the responder<br />
will use own policy if the specified value is smaller than peer's<br />
proposal, <strong>and</strong> sends a RESPONDER_LIFETIME notification.<br />
exact<br />
It means that the policy from the initiator exactly matches with<br />
the responder's one.<br />
If it is not suitable, it is rejected.<br />
The default is obey.<br />
r<strong>and</strong>om_pad_content (on|off) ;<br />
32-47
Configuring IPSEC <strong>and</strong> SETKEY<br />
32-48<br />
padlen_r<strong>and</strong>om (on|off) ;<br />
max_padlen (number) ;<br />
They are valid in all KMP directives.<br />
They define the padding.<br />
max_retry_to_send (number) ;<br />
interval_to_send (number) ;<br />
times_per_send (number) ;<br />
They are valid in all KMP directives.<br />
They define the retransmission timer.<br />
kmp_sa_lifetime_time (number) ;<br />
kmp_sa_lifetime_byte (number) ;<br />
kmp_sa_nego_time_limit (number) ;<br />
kmp_sa_grace_period (number) ;<br />
ipsec_sa_nego_time_limit (number) ;<br />
They are valid for both directives of the ikev1 <strong>and</strong> ikev2.<br />
They define the lifetime.<br />
kmp_enc_alg (algorithm) ;<br />
kmp_hash_alg (algorithm) ;<br />
kmp_prf_alg (algorithm) ;<br />
kmp_dh_group (algorithm) ;<br />
kmp_auth_method (algorithm) ;<br />
They are valid for both directives of the ikev1 <strong>and</strong> ikev2.<br />
They define the algorithms for each function.<br />
(algorithm) is described at the cryptographic algorithm <strong>and</strong> its<br />
representation. For IKEv1, kmp_prf_alg directive is not used. Instead,<br />
HMAC version of hash algorithm specified by kmp_hash_alg is used<br />
as prf algorithm.<br />
exchange_mode (main|aggressive|base|all) ;<br />
IT IS NOT IMPLEMENTED YET.<br />
It is valid for the ikev1 directive.<br />
It defines the exchange modes to be used.<br />
The list defines the modes that the responder is allowed to accept.<br />
The first mode in the list defines the mode that the initiator uses.<br />
my_gssapi_id (string) ;
IT IS NOT IMPLEMENTED YET.<br />
It is valid for the ikev1 directive.<br />
It defines the GSSAPI ID.<br />
It will be replaced by the my_principal directive.<br />
cookie_required (on|off);<br />
It is valid for the ikev2 directive.<br />
It controls whether the responder requires the cookie.<br />
Default is off.<br />
Configuring IPSEC <strong>and</strong> SETKEY<br />
need_pfs (on|off) ;<br />
It is valid for both directives of the ikev1 <strong>and</strong> ikev2.<br />
It controls to enable PFS or not.<br />
The daemon will send a KE payload in the phase 2 of IKEv1.<br />
Default is off.<br />
my_public_key (x509pem|pkcs12|ascii) (pubkey) (privkey)<br />
IT IS NOT FULLY IMPLEMENTED YET.<br />
It is valid for both directives of the ikev1 <strong>and</strong> ikev2.<br />
It defines the file names contained both my public key <strong>and</strong> my private<br />
key.<br />
The following string specifies the format of the file.<br />
x509pem<br />
X.509 PEM format<br />
pkcs12<br />
PKCS12 format<br />
ascii<br />
PGP ASCII ARMORED format<br />
peers_public_key (x509pem|pkcs12|ascii) (pubkey)<br />
IT IS NOT FULLY IMPLEMENTED YET.<br />
It is valid for both directives of the ikev1 <strong>and</strong> ikev2.<br />
It defines the file names contained both the peer's public key.<br />
pre_shared_key (file)<br />
It is valid for both directives of the ikev1 <strong>and</strong> ikev2.<br />
32-49
Configuring IPSEC <strong>and</strong> SETKEY<br />
32-50<br />
It defines the file name contained the pre-shared key.<br />
my_principal (principal-id)<br />
It is valid for the kink directive.<br />
It defines my principal identifier to be used.<br />
(principal-id) is like "principal@realm".<br />
peers_principal (principal-id)<br />
It is valid for the kink directive.<br />
It defines the peer's principal identifier.<br />
mobility_role (agent|mobile|correspondent)<br />
It is valid in all KMP directives.<br />
It is used by mobile IPv6 daemons.<br />
request { (config_request_list) };<br />
(available with IKEv2 only)<br />
Request Configuration Payload option to peer.<br />
config_request_list is an arbitrary list of following:<br />
dns;<br />
ip4_dns;<br />
ip6_dns;<br />
dhcp;<br />
ip4_dhcp;<br />
ip6_dhcp;<br />
application_version;<br />
dns is equivalent to specifying both ip4_dns <strong>and</strong><br />
ip6_dns; dhcp is equivalent to specifying both<br />
ip4_dhcp <strong>and</strong> ip6_dhcp;<br />
provide { (provide_option_list) } ;<br />
(available with IKEv2 only)<br />
Provide Configuration Payload option to peer.<br />
provide_option_list is a list of following options:<br />
addresspool (addresspool_index) ;<br />
dhcp (address) ;<br />
dns (address) ;<br />
application_version (string) ;
dpd (boolean) ;<br />
(available with IKEv1 only)<br />
This option (default on) enables negotiating RFC 3706<br />
Dead Peer Detection.<br />
For IKEv2, DPD (liveliness check) is always enabled.<br />
Configuring IPSEC <strong>and</strong> SETKEY<br />
dpd_delay (number) ;<br />
(available with IKEv1 or IKEv2)<br />
This option activates the DPD <strong>and</strong> sets the time (in seconds) allowed<br />
between two proof of life requests.<br />
For IKEv1, the default value is 0, which disables DPD monitoring, but<br />
still negotiates DPD support. For IKEv2, the default value is 3600 (1<br />
hour).<br />
dpd_retry (number) ;<br />
(available with IKEv1 only)<br />
If dpd_delay is set, this sets the delay (in seconds) to wait for a proof of<br />
life before considering it failed <strong>and</strong> sending another request. The<br />
default value is 5.<br />
For IKEv2, normal retransmission time is used instead.<br />
dpd_maxfail (number) ;<br />
(available with IKEv1 only)<br />
If dpd_delay is set, this sets the maximum number of proofs of life to<br />
request before considering the peer dead.<br />
The default value is 5.<br />
For IKEv2, normal retransmission algorithm with max_retry_to_send<br />
is used instead.<br />
script { (script_list) } ;<br />
(available with IKEv1 or IKEv2)<br />
Defines a list of hook scripts. script_list is a list of following items.<br />
phase1_up (script_path) ;<br />
phase1_down (script_path) ;<br />
phase2_up (script_path) ;<br />
phase2_down (script_path) ;<br />
phase1_rekey (script_path) ;<br />
phase2_rekey (script_path) ;<br />
migration (script_path) ;<br />
32-51
Configuring IPSEC <strong>and</strong> SETKEY<br />
32-52<br />
Also, ike_sa_up, ike_sa_down, ike_sa_rekey, child_up,<br />
child_down, child_rekey are synonymous to phase1_up,<br />
phase1_down, phase1_rekey, phase2_up, phase2_down,<br />
phase2_rekey, respectively.<br />
For IKEv1, only the phase1_up <strong>and</strong> phase1_down are effective. No<br />
other events are available.<br />
Scripts' argv[1] is equivalent to the event name.<br />
Parameters are passed using the environment variables.<br />
For phase1_up <strong>and</strong> phase1_down, following environment variables are<br />
defined:<br />
LOCAL_ADDR<br />
LOCAL_PORT<br />
REMOTE_ADDR<br />
REMOTE_PORT<br />
For phase2_up <strong>and</strong> phase2_down:<br />
LOCAL_ADDR<br />
REMOTE_ADDR<br />
SELECTOR_INDEX<br />
IPSEC_MODE<br />
LOCAL_NET_ADDR<br />
LOCAL_NET_PREFIXLEN<br />
LOCAL_NET_PORT<br />
REMOTE_NET_ADDR<br />
REMOTE_NET_PREFIXLEN<br />
REMOTE_NET_PORT<br />
UPPER_LAYER_PROTOCOL (decimal number or any)<br />
INTERNAL_ADDR (only if an address is leased to peer)<br />
INTERNAL_ADDR4 (leased from peer)<br />
INTERNAL_DNS4<br />
INTERNAL_WINS4<br />
INTERNAL_DHCP4<br />
INTERNAL_ADDR6<br />
INTERNAL_DNS6<br />
INTERNAL_DHCP6<br />
For migration:<br />
OLD_SRC
OLD_DST<br />
NEW_SRC<br />
NEW_DST<br />
selector<br />
selector (selector_index) { (directives) } ;<br />
Configuring IPSEC <strong>and</strong> SETKEY<br />
It defines parameters of a selector.<br />
selector_index is a string value to identical a selector directive.<br />
A selector directive refers to the policy directive with the policy_index.<br />
Sub-directives in the selector directive are the followings.<br />
order (number) ;<br />
IT IS NOT IMPLEMENTED YET.<br />
It defines the evaluation order in the kernel.<br />
It is not required to be unique.<br />
direction (inbound|outbound);<br />
It defines the direction of the packet.<br />
src (address) [port (port)];<br />
dst (address) [port (port)];<br />
It defines an IP address to be matched with packets.<br />
It can not be listed.<br />
A port number can be defined if needed.<br />
upper_layer_protocol (protocol) [(options)];<br />
It defines the last upper layer protocol to be matched with packets.<br />
any <strong>and</strong> strings in /etc/protocols can be used in (protocol).<br />
(options) depends on the protocol.<br />
for example, ipv6-icmp (type) (code)<br />
next_header_including (protocol)[:(option)];<br />
IT IS NOT IMPLEMENTED YET.<br />
IT CAN DEFINE ONLY ONE PORT NUMBER CURRENTLY, NOT LISTED.<br />
It defines upper layer protocols in the extension header chain to be<br />
matched with packets.<br />
any <strong>and</strong> strings in /etc/protocols can be used in (protocol).<br />
32-53
Configuring IPSEC <strong>and</strong> SETKEY<br />
32-54<br />
tagged (pf_tag_name);<br />
It overloads at the bootstrap installation the previous selectors by a pf<br />
tag. The usual selectors are still taken into account by KMPs but not by<br />
the kernel.<br />
Dynamic operations have to be done on pf rules, not on the SPD.<br />
policy_index (policy_index) ;<br />
It has policy_index to define a policy.<br />
reqid (number);<br />
It defines the request ID for SA sharing<br />
(cf. unique ipsec_level).<br />
It is used to support Mobile-IP.<br />
policy<br />
policy (policy_index) { (directives) } ;<br />
It defines a behavior after a packet is matched to a selector.<br />
policy_index is a string value to identical a policy directive.<br />
A policy is referred from one or more selectors by the policy_index(es).<br />
A policy refers to one or more ipsec directives.<br />
The ipsec directives will evaluate in logical OR by a KMP daemon.<br />
A policy may refer to a remote directive.<br />
Sub-directives in the policy directive are the followings.<br />
action (auto_ipsec|static_ipsec|discard|none) ;<br />
It defines an action of the policy.<br />
auto_ipsec<br />
It means the policy needs a key management.<br />
static_ipsec<br />
IT IS NOT IMPLEMENTED.<br />
discard<br />
It means the policy discards packets.<br />
none<br />
It means the policy bypasses the IPsec stack.<br />
install (on|off) ;<br />
Default is on, it makes possible to only declare the policy.
ipsec<br />
remote_index<br />
It has a remote_index.<br />
ipsec_index<br />
It has ipsec_index(es) to define proposals of IPsec.<br />
It is valid when the action directive is auto_ipsec.<br />
Configuring IPSEC <strong>and</strong> SETKEY<br />
my_sa_ipaddr (address) ;<br />
It defines an IP address of the end points of the SAs on my side.<br />
(address) is an IP address.<br />
It must be defined when the action directive is static_ipsec or tunnel.<br />
peers_sa_ipaddr (address) ;<br />
It defines an IP address of the end points of the SAs on the peer's side.<br />
Write IP_RW to generate policy dynamically.<br />
ipsec_level (unique|require|use) ;<br />
use<br />
NOT IMPLEMENTED<br />
When there is no SA for the packet, the kernel sends an acquire<br />
for the SA to KMPs, <strong>and</strong> sends the packet.<br />
require<br />
When there is no SA for the packet, the kernel sends an acquire<br />
for the SA to KMPs, <strong>and</strong> discards the packet. This SA installed<br />
will be used from other policies.<br />
unique<br />
PARTIALLY IMPLEMENTED, NOT EXPECTED TO WORK<br />
In addition to require directive, this SA will not be used from<br />
any other policy.<br />
ipsec_mode (transport|tunnel) ;<br />
It defines a IPsec mode.<br />
ipsec (ipsec_index) { (directives) } ;<br />
It defines a SA or a SA bundle.<br />
ipsec_index is a string value to identical a ipsec directive.<br />
32-55
Configuring IPSEC <strong>and</strong> SETKEY<br />
sa<br />
32-56<br />
An ipsec directive refers to one or more sa directives with sa_index(es).<br />
An ipsec directive is referred from the policy directive by the ipsec_index.<br />
Sub-directives in the ipsec are the followings.<br />
ipsec_sa_lifetime_time (number) ;<br />
It defines a life time of the SA in time.<br />
ipsec_sa_lifetime_byte (number) ;<br />
It defines a life time of the SA in bytes.<br />
ext_sequence (on|off) ;<br />
It enables extended sequence number processing described in the<br />
2401bis.<br />
The default is off.<br />
sa_index (sa_index) ;<br />
It has sa_index(es) to define an SA bundle.<br />
It can have three sa_indexes in maximum.<br />
When you want to define multiple SAs as an SA bundle, note that the<br />
following patterns are only allowed.<br />
AH<br />
ESP<br />
IPCOMP<br />
AH_ESP<br />
AH_IPCOMP<br />
ESP_IPCOMP<br />
AH_ESP_IPCOMP<br />
sa (sa_index) { (directives) } ;<br />
It defines parameters of an SA.<br />
sa_index is a string value to identical the sa directive.<br />
A sa directive is referred from the ipsec directive by the sa_index.<br />
Sub-directives in the sa are the followings.<br />
sa_protocol (ah|esp|ipcomp) ;<br />
It defines a protocol to be used.
esp_enc_alg (algorithm) ;<br />
It defines encryption algorithms to be used.<br />
It is valid when the sa_protocol is esp.<br />
esp_auth_alg (algorithm) ;<br />
It defines authentication algorithms to be used.<br />
It is valid when the sa_protocol is esp.<br />
ah_auth_alg (algorithm) ;<br />
It defines authentication algorithms to be used.<br />
It is valid when the sa_protocol is ah.<br />
ipcomp_alg (algorithm) ;<br />
It defines compression algorithms to be used.<br />
It is valid when the sa_protocol is ipcomp.<br />
spi (spi) ;<br />
NOTE THAT IT MAY BE OBSOLETE.<br />
It defines a SPI for a static SA.<br />
Configuring IPSEC <strong>and</strong> SETKEY<br />
addresspool<br />
addresspool (addresspool_index) { (address_ranges) } ;<br />
It defines address ranges to make available for remote host.<br />
For the address range, the first <strong>and</strong> last IP addresses of the range should be<br />
specified, separated with a - (hyphen-minus), followed by a ; (semicolon):<br />
(address) - (address) ;<br />
Note: you should put spaces before <strong>and</strong> after the hyphen, or else it may be<br />
parsed as a part of address string.<br />
Sample configuration<br />
The sample configuration files below are intended to show some of the functionality<br />
available, <strong>and</strong> do not illustrate the complete configuration language.<br />
32-57
Configuring IPSEC <strong>and</strong> SETKEY<br />
racoon2.conf<br />
32-58<br />
# Edit racoon2_vals.conf for your environment<br />
include "multinet:racoon2_vals.conf";<br />
# interface info<br />
interface<br />
{<br />
ike {<br />
MY_IP port 500;<br />
};<br />
#<br />
# For VMS specify loopback address <strong>and</strong> port number.<br />
#<br />
spmd {<br />
127.0.0.1 port 5500;<br />
};<br />
spmd_password "multinet:spmd.pwd";<br />
};<br />
# resolver info<br />
resolver<br />
{<br />
resolver off;<br />
# resolver on;<br />
# nameserver {<br />
# 192.168.0.3 port 53;<br />
# };<br />
# dns_query {<br />
# 127.0.0.1 port 53;<br />
# ::1 port 53;<br />
# };<br />
};<br />
#<br />
# This line includes default configuration file;<br />
# Please don't touch this line (especially novice user);<br />
#<br />
include "multinet:racoon2_default.conf";<br />
## Transport mode IKEv2 or IKEv1<br />
include "multinet:transport_ike.conf";
acoon2_vals.conf<br />
Configuring IPSEC <strong>and</strong> SETKEY<br />
setval {<br />
### Directory Settings ###<br />
# Preshared key file directory : specify if you want to use preshared<br />
# keys<br />
PSKDIR "multinet:";<br />
# Cert file directory : specify if you want to use certs<br />
CERTDIR "SSL$CERTS:";<br />
### ID Settings ###<br />
# your FQDN : specify if you want to use FQDN as your ID<br />
MY_FQDN "client.example.com";<br />
# Peer's FQDN : specify if you want to use FQDN as peer's ID<br />
PEERS_FQDN "server.example.com";<br />
### Preshared Key Setting ###<br />
# Preshared Key file name<br />
# You can generate it by pskgen.<br />
PRESHRD_KEY "psk2.txt";<br />
### Certicate Setting ###<br />
# Set following parameters if you use certificates in<br />
# IKE negotiation <strong>and</strong><br />
#_SET_ 'kmp_auth_method { rsasig;};' in each remote{}<br />
# section of tunnel_ike{_natt}.conf/transport_ike.conf<br />
# files.<br />
# For more information, please see USAGE.<br />
#<br />
# Your Public Key file name<br />
MY_PUB_KEY "client.pem";<br />
# Your Private Key file name<br />
MY_PRI_KEY "client.key";<br />
# Peer's Public Key file name<br />
PEERS_PUB_KEY "server.pem";<br />
### Transport Mode Settings ###<br />
# Your IP Address<br />
MY_IPADDRESS "192.168.0.1”;<br />
# Peer's IP Address<br />
PEERS_IPADDRESS "198.168.0.2";<br />
### Configuration Payload Settings (for IKEv2)###<br />
# IPv4 Address Pool For Assignment<br />
CP_ADDRPL4_START "10.7.73.128";<br />
CP_ADDRPL4_END "10.7.73.254";<br />
32-59
Configuring IPSEC <strong>and</strong> SETKEY<br />
32-60<br />
# IPv6 Address Pool For Assignment<br />
CP_ADDRPL6_START "fd01::1000";<br />
CP_ADDRPL6_END "fd02::2000";<br />
# DNS Server Address(es) (ex. "10.7.73.1; 10.7.73.2")<br />
CP_DNS "10.7.73.1";<br />
# DHCP Server Address(es)<br />
CP_DHCP "10.7.73.1";<br />
# Application Version String<br />
CP_APPVER "Racoon2 iked"<br />
### Scripts<br />
## IKEv2<br />
# IKESAUP_SCR "multinet:ikesa-up.com";<br />
# IKESADOWN_SCR "multinet:ikesa-down.com";<br />
# CHILDUP_SCR "multinet:child-up.com";<br />
# CHILDOWN_SCR "multinet:child-down.com";<br />
# IKESAREKEY_SCR "multinet:ikesa-rekey.com";<br />
# CHILDREKEY_SCR "multinet:child-rekey.com";<br />
# MIGRATION_SCR "multinet:migration.com";<br />
## IKEv1<br />
# PH1UP_SCR "multinet:ph1-up.com";<br />
# PH1DOWN_SCR "multinet:ph1-down.com";
acoon2_default.conf<br />
Configuring IPSEC <strong>and</strong> SETKEY<br />
#<br />
# default section<br />
#<br />
default<br />
{<br />
remote {<br />
acceptable_kmp { ikev2; ikev1; };<br />
ikev1 {<br />
logmode normal;<br />
kmp_sa_lifetime_time 600 sec;<br />
kmp_sa_lifetime_byte infinite;<br />
interval_to_send 10 sec;<br />
times_per_send 1;<br />
ipsec_sa_nego_time_limit 40 sec;<br />
kmp_enc_alg { 3des_cbc; };<br />
kmp_hash_alg { sha1; md5; };<br />
kmp_dh_group { modp3072; modp2048; modp1024; modp1536;};<br />
kmp_auth_method { psk; };<br />
r<strong>and</strong>om_pad_content off;<br />
};<br />
ikev2 {<br />
logmode normal;<br />
kmp_sa_lifetime_time infinite;<br />
kmp_sa_lifetime_byte infinite;<br />
max_retry_to_send 3;<br />
interval_to_send 10 sec;<br />
times_per_send 1;<br />
kmp_sa_nego_time_limit 60 sec;<br />
ipsec_sa_nego_time_limit 40 sec;<br />
kmp_enc_alg { 3des_cbc; };<br />
kmp_prf_alg { hmac_md5; hmac_sha1; };<br />
kmp_hash_alg { hmac_sha1; hmac_md5; };<br />
kmp_dh_group { modp3072; modp2048; modp1024; };<br />
kmp_auth_method { psk; };<br />
r<strong>and</strong>om_pad_content on;<br />
r<strong>and</strong>om_padlen on;<br />
max_padlen 50 bytes;<br />
};<br />
};<br />
policy {<br />
};<br />
ipsec {<br />
ipsec_mode transport;<br />
ipsec_level require;<br />
ipsec_sa_lifetime_time infinite;<br />
ipsec_sa_lifetime_byte infinite;<br />
32-61
Configuring IPSEC <strong>and</strong> SETKEY<br />
32-62<br />
};<br />
sa {<br />
};<br />
esp_enc_alg { 3des_cbc; };<br />
esp_auth_alg { hmac_sha1; hmac_md5; };<br />
};<br />
ipsec ipsec_ah_esp {<br />
ipsec_sa_lifetime_time 28800 sec;<br />
sa_index { ah_01; esp_01; };<br />
};<br />
ipsec ipsec_esp {<br />
ipsec_sa_lifetime_time 28800 sec;<br />
sa_index esp_01;<br />
};<br />
sa ah_01 {<br />
sa_protocol ah;<br />
ah_auth_alg { hmac_sha1; hmac_md5; };<br />
};<br />
sa esp_01 {<br />
sa_protocol esp;<br />
esp_enc_alg { 3des_cbc; };<br />
esp_auth_alg { hmac_sha1; hmac_md5; };<br />
};
transport_ike.conf<br />
Configuring IPSEC <strong>and</strong> SETKEY<br />
# ike transport mode (esp/tcp)<br />
remote ike_trans_remote {<br />
acceptable_kmp { ikev2; ikev1;};<br />
ikev2 {<br />
# my_id fqdn "${MY_FQDN}";<br />
my_id ipaddr "${MY_IPADDRESS}";<br />
# peers_id fqdn "${PEERS_FQDN}";<br />
peers_id ipaddr "${PEERS_IPADDRESS}";<br />
peers_ipaddr "${PEERS_IPADDRESS}" port 500;<br />
kmp_sa_nego_time_limit 600 sec;<br />
# ipsec_sa_nego_time_limit 360 sec;<br />
## Use Preshared Key<br />
# kmp_auth_method { psk; };<br />
# pre_shared_key "${PSKDIR}${PRESHRD_KEY}";<br />
## Use Certificate<br />
kmp_auth_method { rsasig; };<br />
my_public_key x509pem "${CERTDIR}${MY_PUB_KEY}"<br />
"${CERTDIR}${MY_PRI_KEY}";<br />
peers_public_key x509pem "${CERTDIR}${PEERS_PUB_KEY}" "";<br />
send_peers_id on;<br />
# script {<br />
# phase1_up "${PH1UP_SCR}";<br />
# phase1_down "${PH1DOWN_SCR}";<br />
# };<br />
};<br />
ikev1 {<br />
my_id ipaddr "${MY_IPADDRESS}";<br />
peers_id ipaddr "${PEERS_IPADDRESS}";<br />
# kmp_auth_method {psk; };<br />
# pre_shared_key "${PSKDIR}${PRESHRD_KEY}";<br />
kmp_auth_method { rsasig; };<br />
my_public_key x509pem "${CERTDIR}${MY_PUB_KEY}"<br />
"${CERTDIR}${MY_PRI_KEY}";<br />
peers_public_key x509pem "${CERTDIR}${PEERS_PUB_KEY}" "";<br />
peers_ipaddr "${PEERS_IPADDRESS}" port 500;<br />
nonce_size 16;<br />
kmp_hash_alg {sha1; md5;};<br />
# initial_contact on;<br />
# script {<br />
# phase1_up "${PH1UP_SCR}";<br />
# phase1_down "${PH1DOWN_SCR}";<br />
# };<br />
};<br />
selector_index ike_trans_sel_in;<br />
};<br />
32-63
Configuring IPSEC <strong>and</strong> SETKEY<br />
32-64<br />
selector ike_trans_sel_out {<br />
direction outbound;<br />
src "${MY_IPADDRESS}";<br />
dst "${PEERS_IPADDRESS}";<br />
upper_layer_protocol "tcp";<br />
policy_index ike_trans_policy;<br />
};<br />
selector ike_trans_sel_in {<br />
direction inbound;<br />
dst "${MY_IPADDRESS}";<br />
src "${PEERS_IPADDRESS}";<br />
upper_layer_protocol "tcp";<br />
policy_index ike_trans_policy;<br />
};<br />
policy ike_trans_policy {<br />
action auto_ipsec;<br />
remote_index ike_trans_remote;<br />
ipsec_mode transport;<br />
ipsec_index { ipsec_esp; };<br />
ipsec_level require;<br />
};
Chapter 33<br />
Intrusion Prevention System (IPS)<br />
This chapter describes the MutliNet Intrusion Prevention System (IPS). This security feature<br />
monitors network <strong>and</strong>/or system activities for malicious or unwanted behavior <strong>and</strong> can react, in<br />
real-time, to block or prevent those activities. IPS is highly flexible <strong>and</strong> customizable. When an<br />
attack is detected, pre-configured rules will block an intruder's IP address from accessing the<br />
<strong>MultiNet</strong> system, prevent an intruder from accessing a specific application, or both. The time<br />
period that the filter is in place is configurable. An API is provided so that <strong>MultiNet</strong> customers can<br />
incorporate the IPS functionality into user-written applications.<br />
IPS is implemented by instrumenting components (e.g, <strong>MultiNet</strong> SSH or FTP, or user-supplied<br />
components) with a <strong>Process</strong> <strong>Software</strong> supplied API that allows them to report events, such as<br />
invalid login attempts, to the FILTER_SERVER process. The filter server, started when <strong>MultiNet</strong><br />
starts, maintains the component rulesets <strong>and</strong> lists of events, based on the originating address for the<br />
offending connection, <strong>and</strong> when defined limits are reached, creates <strong>and</strong> sets timed filters in the<br />
<strong>MultiNet</strong> kernel to filter that traffic.<br />
IPS Operation<br />
All of the operating parameters such as the definition of rule, the number of events/unit time to<br />
trigger a filter, the duration of a filter, etc. are all defined by component configuration files.<br />
Events are recorded per source address, per rule, per destination address, per component. This<br />
provides the ability to have differing filtering criteria for different interfaces (for example, an<br />
internal network vs. an external network). Addresses or networks may be excluded from<br />
consideration when an event is logged. This feature allows, for example, different settings to be<br />
used for internal vs. external networks.<br />
Events “age”; after a time period, old events are discarded from the list of events so that infrequent<br />
event occurrences (e.g., mistyping a password) have less chance of inadvertently causing a filter to<br />
be set. Note that when a filter is triggered for an address <strong>and</strong> rule, the list of known events for that<br />
rule <strong>and</strong> address are deleted.<br />
Multiple filters may be set in sequence for a component/rule/source address/destination address as<br />
events are logged. The purpose of this is to make a filter progressively longer. For example, the first<br />
filter set for an address <strong>and</strong> rule might be 5 minutes long; the next, 10 minutes long; the next, 15<br />
minutes long; etc., up to 5 filter times.<br />
33-1
Intrusion Prevention System (IPS)<br />
Configuring IPS<br />
33-2<br />
IPS is configured in two steps:<br />
1 Configuring the main process-specific parameters of the FILTER_SERVER process (for<br />
example, the size of the mailbox used by applications to communicate with the<br />
FILTER_SERVER process).<br />
2 Editing the FILTER_SERVER configuration files to set the operating parameters of IPS; for<br />
example, the applications that will use IPS <strong>and</strong> setting the rule parameters for reporting events.<br />
Note! The FILTER_SERVER process will not be started if the file<br />
MULTINET:FILTER_SERVER_CONFIG.TXT does not exist.<br />
Configuring <strong>Process</strong>-Specific Parameters<br />
Logical names are used to set process-specific parameters for the FILTER_SERVER mailbox <strong>and</strong><br />
some of the process-specific quotas for the FILTER_SERVER process. These logical names are:<br />
MULTINET_FILTER_SERVER_TQELM<br />
MULTINET_FILTER_SERVER_ASTLM<br />
MULTINET_FILTER_SERVER_MBX_MSGS<br />
Determining the Correct FILTER_SERVER <strong>Process</strong> Quotas<br />
It is important to correctly determine the correct process quotas for the FILTER_SERVER process.<br />
High-volume systems, for example, an E-mail server where SMTP may detect many anomalies,<br />
may log large numbers of events in a short time. If the TQELM <strong>and</strong> ASTLM quotas for<br />
FILTER_SERVER are too low, the FILTER_SERVER process could enter MUTEX state <strong>and</strong> hang,<br />
preventing any events from being logged <strong>and</strong> possibly leading to other problems such as processes<br />
hanging while trying to log events.<br />
The amount of additional TQELM quota in addition to the default value (specified via the<br />
PQL_DTQELM SYSGEN parameter) required for the FILTER_SERVER process can be<br />
calculated as follows:<br />
• 1 for automated hourly reporting<br />
• 1 for automated 24-hour maintenance<br />
• 1 for each source address per rule per component for which an event has been received. These<br />
timers are used to clean up internal address structures <strong>and</strong> disappear after 24 hours of inactivity<br />
from that address.<br />
• 1 for each non-empty event queue per source address per rule per component. These timers are<br />
used to delete aged events from the event queue.<br />
Thus, the event frequency must be anticipated <strong>and</strong> the quotas adjusted appropriately for each<br />
installation. The hourly FILTER_SERVER logs will be of use for determining traffic patterns.<br />
The ASTLM quota tends to track the value for TQELM closely, but should have an additional 10%<br />
added to it for other uses.<br />
Both the ASTLM <strong>and</strong> TQELM quotas are controlled by logical names described in the previous
section. Both of the ASTLM <strong>and</strong> TQELM values default to 500.<br />
Determining the Correct FILTER_SEVER Mailbox Size<br />
Intrusion Prevention System (IPS)<br />
In addition to setting the TQELM <strong>and</strong> ASTLM process quotas correctly, the size of the mailbox<br />
used for communication with the FILTER_SERVER process must be correctly determined. Failure<br />
to do can result in events reported by instrumented components being lost. The mailbox is sized to<br />
h<strong>and</strong>le 400 simultaneous event messages by default.<br />
Once the mailbox size has been configured, either the system must be rebooted to allow the new<br />
mailbox size to be used (this is the preferred method), or the following procedure can be used to<br />
avoid a reboot in the near term:<br />
1 Stop IPS (MULTINET SET /IPS /STOP).<br />
2 Stop all applications using IPS (e.g., telnet sessions, ftp session, etc.).<br />
3 Delete the old mailbox by running MULTINET:DELMBX.EXE.<br />
4 Start IPS (MULTINET SET /IPS/START).<br />
5 Start any other applications previously stopped.<br />
Filter Server Main Configuration<br />
The filter server is configured using a main configuration file <strong>and</strong> per-component configuration<br />
files. The main configuration file is used to set overall configuration options for filter server<br />
operation, while the per-component configuration files contain configuration information for each<br />
instrumented component such as the ruleset to use, the prototype filter to be set, etc. Per-component<br />
configuration files are referenced by the main configuration file by using the “INCLUDE”<br />
keyword.<br />
Sample configuration files are supplied in the <strong>MultiNet</strong> distribution <strong>and</strong> must be copied <strong>and</strong><br />
modified as necessary to conform to the particular site’s security profile <strong>and</strong> interface<br />
configuration. These files are copied to the MULTINET directory when <strong>MultiNet</strong> is installed. Once<br />
these have been copied <strong>and</strong> modified, the filter server configuration may be reloaded via the<br />
MULTINET SET/IPS/RELOAD comm<strong>and</strong>. The template files supplied are:<br />
FILTER_SERVER_CONFIG.TEMPLATE<br />
SSH_FILTER_CONFIG.TEMPLATE<br />
IMAP_FILTER_CONFIG.TEMPLATE<br />
POP3_FILTER_CONFIG.TEMPLATE<br />
SNMP_FILTER_CONFIG.TEMPLATE<br />
SMTP_FILTER_CONFIG.TEMPLATE<br />
TELNET_FILTER_CONFIG.TEMPLATE<br />
REXEC_FILTER_CONFIG.TEMPLATE<br />
RSHELL_FILTER_CONFIG.TEMPLATE<br />
RLOGIN_FILTER_CONFIG.TEMPLATE<br />
33-3
Intrusion Prevention System (IPS)<br />
33-4<br />
The following table lists the main configuration file keywords. These are found in the file<br />
MULTINET:FILTER_SERVER_CONFIG.TXT:<br />
Table 33-1 Main configuration Keywords<br />
Keyword Default Description<br />
BLOCK_AT_DESTINATION_PORT NO If set to YES, indicates that all<br />
filters generated by the filter<br />
server will be for a specific<br />
destination port (the equivalent<br />
of a filter line of “EQ<br />
”). The port<br />
number to be used is specified<br />
for each component in the percomponent<br />
configuration file.<br />
If set NO, all filters generated by<br />
the filter server will deny access<br />
to all destination ports.<br />
DEBUG value 0 Indicates the amount of debug to<br />
output. Zero means no debug,<br />
while higher number mean more<br />
debug. This value should<br />
ordinarily never be set above 4<br />
without direction from <strong>Process</strong><br />
<strong>Software</strong>.<br />
ENTERPRISE_STRING Defines the location in the MIB<br />
tree that the trap used to send<br />
filter logging events via SNMP<br />
pertains to.<br />
GENERIC_TRAP_ID An integer representing the<br />
generic trap value when filter<br />
logging events are sent via<br />
SNMP.<br />
INCLUDE filename Specifies a per-component<br />
configuration file to load. Any<br />
number of INCLUDE statements<br />
may occur in the main<br />
configuration file.
Table 33-1 Main configuration Keywords (Continued)<br />
Keyword Default Description<br />
Filter Server Per-Component Configuration File<br />
Intrusion Prevention System (IPS)<br />
LOG_TO_LOGFILE NO If YES, information log<br />
messages are sent to the log file<br />
specified by the logfile keyword.<br />
LOG_TO_OPCOM NO If YES, informational messages<br />
are reported via OPCOM.<br />
LOG_TO_SNMP NO If YES, informational messages<br />
are reported via an SNMP trap.<br />
LOGFILE Specifies the log file used when<br />
the log_to_logfile keyword is<br />
specified.<br />
OPCOM_TARGET<br />
The per-component configuration files are loaded using the INCLUDE keyword in the main filter<br />
server configuration file. Each of these configuration files have the following format. The<br />
definition must begin with a COMPONENT keyword. Comments lines begin with a “#” character.<br />
COMPONENT component-name<br />
DESTINATION_ADDRESS<br />
EXCLUDE_ADDRESS<br />
DESTINATION_PORT<br />
PROTO_FILTER<br />
RULE rulename<br />
DESTINATION_ADDRESS<br />
DESTINATION_PORT<br />
MAX_COUNT<br />
DELTA_TIME<br />
FILTER_DURATIONS<br />
RULE rulename<br />
NETWORK,<br />
SECURITY<br />
Specifies the list of operator<br />
types to which events are written<br />
when the keyword<br />
LOG_TO_OPCOM is set. This<br />
is a comma-separated list, <strong>and</strong><br />
may contain any of the values<br />
which are valid for the VMS<br />
REPLY/ENABLE comm<strong>and</strong>.<br />
SPECIFIC_TRAP_ID An integer representing the<br />
specific trap value when filter<br />
logging events are sent via<br />
SNMP.<br />
33-5
Intrusion Prevention System (IPS)<br />
33-6<br />
MAX_COUNT<br />
DELTA_TIME<br />
FILTER_DURATIONS<br />
Each component may have as many rules defined for it as are appropriate for the component.<br />
However, the more rules defined for a component, the more complex it may be to instrument the<br />
component to actually report those rules. All entries in configuration files are not case-sensitive.<br />
The following table shows the keywords for a per-component configuration file:<br />
Table 33-2 Per-Component Configuration Keywords<br />
Keyword Scope Description<br />
COMPONENT component-name component Name of the component to which<br />
this applies (e.g., SSH).<br />
DELTA_TIME time rule Time, in seconds, where if<br />
max_count events are received for<br />
a rule from the same address, that<br />
will cause a filter to be set for that<br />
address.<br />
This is also the time for aging<br />
events. If the age of an event<br />
exceeds delta_time seconds, the<br />
event is dropped from the event<br />
list.<br />
DESTINATION_ADDRESS address component or<br />
rule<br />
Destination IP address (the<br />
<strong>MultiNet</strong> interface address) in<br />
CIDR format to check. This may<br />
be in ipv4 or ipv6 format.<br />
If destination_address occurs<br />
before the first rule in the percomponent<br />
configuration file, it<br />
will be used as a default for any<br />
rule for the component that doesn’t<br />
have a destination address<br />
specified.<br />
Note: multiple<br />
destination_address lines may be<br />
specified at the component level if<br />
all the interfaces specified have<br />
the same filtering criteria.
Table 33-2 Per-Component Configuration Keywords (Continued)<br />
Keyword Scope Description<br />
DESTINATION_PORT port component or<br />
rule<br />
EXCLUDE_ADDRESS address component or<br />
rule<br />
Sample Main Configuration File<br />
#=========================================================================<br />
#<br />
# FILTER_SERVER_CONFIG.TEMPLATE<br />
#<br />
#=========================================================================<br />
#<br />
# The following parameter determines the level of debug information<br />
# written to the debug log file. This should normally be set to a<br />
# value of 2 or less, <strong>and</strong> shouldn't be set above 4 without the<br />
# recommendation of <strong>Process</strong> <strong>Software</strong>, as higher debug levels will<br />
Intrusion Prevention System (IPS)<br />
Optional destination port. This will<br />
only be effective if the keyword<br />
BLOCK_AT_DESTINATION_PO<br />
RT is set in the main configuration<br />
file.<br />
A source address/mask in CIDR<br />
format from which events are<br />
ignored. This allows, for example,<br />
events from an internal network to<br />
be ignored while counting events<br />
from external networks.<br />
Multiple EXCLUDE_ADDRESS<br />
lines may be specified for each<br />
rule.<br />
FILTER_DURATIONS list rule List of durations for filters. This is<br />
a comma-delimited list of up to<br />
five filter durations, <strong>and</strong> it must be<br />
terminated with a -1.<br />
MAX_COUNT count rule Maximum number of events from<br />
the same address for a specific rule<br />
over delta_time seconds that will<br />
trigger a filter.<br />
PROTO_FILTER component This is a prototype filter to be used<br />
to build the filter set against an<br />
interface when a filter is triggered.<br />
The format of this filter is the same<br />
used in a filter file.<br />
RULE rulename component The user-defined name for a rule.<br />
33-7
Intrusion Prevention System (IPS)<br />
33-8<br />
# negatively impact the filter server (<strong>and</strong> possibly, system)<br />
# performance. The debug messages will be found in the file<br />
# MULTINET:FILTER_SERVER.OUT.<br />
#<br />
debug 4<br />
#<br />
# The following parameters define the logging locations. Note<br />
# that debug messages are not written to the logging locations.<br />
#<br />
# The first two parameters are used when logging to a log file.<br />
#<br />
logfile multinet:filter_logfile.log<br />
log_to_logfile yes<br />
#<br />
# The next parameter is used when logging to OPCOM.<br />
#<br />
log_to_opcom yes<br />
opcom_target NETWORK,SECURITY,OPER3<br />
#<br />
# The next parameters are used when logging via SNMP. Details<br />
# on the values for enterprise_string, generic_trap_id <strong>and</strong><br />
# specific_trap_id can be found in chapter 23 of the <strong>MultiNet</strong><br />
# Administrators <strong>Guide</strong>.<br />
#<br />
log_to_snmp no<br />
# enterprise_string<br />
# generic_trap_id<br />
# specific_trap_id<br />
#<br />
# The following parameter determines how filters are created. If<br />
# set to YES, then the destination port field is added to the filter<br />
# (e.g., "192.168.0.11/32 eq 22"). If set to NO, then no source<br />
# port field is added, which will cause the filter to block all<br />
# traffic of the specified protocol from the source address. If<br />
# not set, default is NO.<br />
#<br />
# block_at_destination_port yes<br />
#<br />
#=========================================================================<br />
#<br />
# The following lines defihe the individual configuration files<br />
# for each configured component that uses the filter server<br />
#<br />
#=========================================================================<br />
#<br />
include multinet:ftp_filter_config.txt<br />
include multinet:imap_filter_config.txt<br />
include multinet:pop3_filter_config.txt<br />
include multinet:smtp_filter_config.txt<br />
include multinet:snmp_filter_config.txt<br />
include multinet:ssh_filter_config.txt<br />
#<br />
For this configuration:<br />
• Debug will be reported at level 4 (this produces fairly detailed information, normally useful only<br />
by <strong>Process</strong> <strong>Software</strong> when debugging a problem).<br />
• Log messages will be logged to MULTINET:FILTER_LOGFILE.LOG <strong>and</strong> OPCOM.<br />
• When filters are logged, the destination port specified in the per-configuration files will be used.<br />
• Per-component configuration files for the <strong>MultiNet</strong> FTP, IMAP, POP3, SMTP, SNMP <strong>and</strong> SSH<br />
servers will be loaded.
Sample Component Configuration File<br />
The following is a configuration file for the SSH component:<br />
component ssh<br />
proto_filter "deny tcp 192.168.0.100/32 192.168.0.11/32 log"<br />
destination_address 192.168.0.16/32<br />
exclude_address 192.168.0/24<br />
destination_port 22<br />
rule ssh_bogus_id<br />
max_count 10<br />
delta_time 90<br />
filter_durations 300,600,1800,3600,-1<br />
rule ssh_authfailed<br />
max_count 10<br />
delta_time 90<br />
filter_durations 300,600,1800,3600,-1<br />
rule ssh_authfailed<br />
destination_address 192.168.10.2/16<br />
max_count 10<br />
delta_time 90<br />
filter_durations 300,600,1800,3600,-1<br />
rule ssh_userauth<br />
max_count 10<br />
delta_time 90<br />
filter_durations 300,600,1800,3600,-1<br />
rule ssh_invaliduser<br />
max_count 10<br />
delta_time 90<br />
filter_durations 300,600,1800,3600,-1<br />
Intrusion Prevention System (IPS)<br />
For component SSH, a “deny tcp” filter will be used. The source address/mask <strong>and</strong> destination<br />
address/mask parts of the prototype filter are ignored <strong>and</strong> are overwritten by the actual data<br />
specified by the source information gathered from the event that triggered the filter, <strong>and</strong> by the<br />
destination address/mask/port information specified by the corresponding keywords in this file.<br />
Events from the 192.168.0 network are all excluded from being counted.<br />
To examine the first three rules specified above:<br />
The rule is “ssh_bogus_id”. Since no address or mask is specified for this rule, it will use the<br />
default destination address of 192.168.0.16 <strong>and</strong> mask of 255.255.255.255 specified at the<br />
beginning of the component configuration. The rule states that if 10 events from the same source<br />
address are seen over 90 seconds, a filter is created using the proto_filter specified above. The first<br />
filter is 5 minutes long, the second, 10 minutes, <strong>and</strong> so on, until at the 5th time, a permanent filter is<br />
put in place for the address <strong>and</strong> interface that is causing the problem.<br />
The second rule is “ssh_authfailed”, <strong>and</strong> applies to events received as a result of connections on the<br />
interface with the default address of 192.168.0.16 <strong>and</strong> mask of 255.255.255.255, respectively.<br />
The third rule is also “ssh_authfailed”, but applies to events received a result of connections on the<br />
interface with the address 192.168.10.2, using a mask of 255.255.0.0. The max_count <strong>and</strong><br />
delta_time parameters are different for this interface than for the previous ssh_authfailed rule in the<br />
system.<br />
The remaining rules for this component will use the default address 192.168.0.16 <strong>and</strong> mask of<br />
255.255.255.255.<br />
33-9
Intrusion Prevention System (IPS)<br />
Note! If a rule specifies a destination address for an interface which does not currently exist, events<br />
for that interface will be dropped until the interface becomes available.<br />
33-10<br />
If your system has multiple interfaces (for example, SE0, SE1 <strong>and</strong> PD0), you must specify all<br />
interfaces in the same config file. For each rule in the config file, you must supply a separate<br />
section for each destination address (i.e., interface). The component keyword may occur exactly<br />
once in the configuration file. The following example shows a config file for component ftp for 5<br />
interfaces (SE0, SE1, PD0, PD1, PD2):<br />
=======================================================================<br />
#<br />
# FTP_FILTER_CONFIG.TXT<br />
#<br />
# Filter server configuration file for the FTP component.<br />
#<br />
#=======================================================================<br />
component ftp<br />
proto_filter "deny tcp 192.168.0.100/32 192.168.0.1/24 log"<br />
destination_port 21<br />
#<br />
# For SE0 <strong>and</strong> SE1<br />
#<br />
destination_address 192.168.0.29/32<br />
destination_address 192.168.0.25/32<br />
rule ftp_invaliduser<br />
max_count 10<br />
delta_time 300<br />
filter_durations 300,600,1800,3600,-1<br />
destination_address 192.168.0.29/32<br />
rule ftp_userauth<br />
max_count 21<br />
delta_time 180<br />
filter_durations 300,600,1800,3600,-1<br />
destination_address 192.168.0.29/32<br />
rule ftp_authfailed<br />
max_count 21<br />
delta_time 90<br />
filter_durations 300,600,1800,3600,-1<br />
destination_address 192.168.0.29/32<br />
rule ftp_timeout<br />
max_count 21<br />
delta_time 90<br />
filter_durations 300,600,1800,3600,-1<br />
destination_address 192.168.0.29/32<br />
#<br />
# For PD0<br />
#<br />
rule ftp_invaliduser<br />
max_count 10<br />
delta_time 300<br />
filter_durations 300,600,1800,3600,-1<br />
destination_address 192.168.0.28/32<br />
destination_port 1521<br />
rule ftp_userauth<br />
max_count 21<br />
delta_time 180<br />
filter_durations 300,600,1800,3600,-1<br />
destination_address 192.168.0.28/32<br />
destination_port 1521<br />
rule ftp_authfailed<br />
max_count 21<br />
delta_time 90<br />
filter_durations 300,600,1800,3600,-1<br />
destination_address 192.168.0.28/32<br />
destination_port 1521<br />
rule ftp_timeout
max_count 21<br />
delta_time 90<br />
filter_durations 300,600,1800,3600,-1<br />
destination_address 192.168.0.28/32<br />
destination_port 1521<br />
#<br />
# For PD1<br />
#<br />
rule ftp_invaliduser<br />
max_count 10<br />
delta_time 300<br />
filter_durations 300,600,1800,3600,-1<br />
destination_address 192.168.0.27/32<br />
exclude_address 192.168.0.0/24<br />
rule ftp_userauth<br />
max_count 21<br />
delta_time 180<br />
filter_durations 300,600,1800,3600,-1<br />
destination_address 192.168.0.27/32<br />
exclude_address 192.168.0.0/24<br />
rule ftp_authfailed<br />
max_count 21<br />
delta_time 90<br />
filter_durations 300,600,1800,3600,-1<br />
destination_address 192.168.0.27/32<br />
exclude_address 192.168.0.0/24<br />
rule ftp_timeout<br />
max_count 21<br />
delta_time 90<br />
filter_durations 300,600,1800,3600,-1<br />
destination_address 192.168.0.27/32<br />
exclude_address 192.168.0.0/24<br />
#<br />
# For PD2<br />
#<br />
rule ftp_invaliduser<br />
max_count 10<br />
delta_time 300<br />
filter_durations 300,600,1800,3600,-1<br />
destination_address 192.168.0.21/32<br />
rule ftp_userauth<br />
max_count 21<br />
delta_time 180<br />
filter_durations 300,600,1800,3600,-1<br />
destination_address 192.168.0.21/32<br />
rule ftp_authfailed<br />
max_count 21<br />
delta_time 90<br />
filter_durations 300,600,1800,3600,-1<br />
destination_address 192.168.0.21/32<br />
rule ftp_timeout<br />
max_count 21<br />
delta_time 90<br />
filter_durations 300,600,1800,3600,-1<br />
destination_address 192.168.0.21/32<br />
Intrusion Prevention System (IPS)<br />
The above example shows some configuration options for the system with 5 interfaces.<br />
Specifically:<br />
• Interfaces SE0 <strong>and</strong> SE1 will use identical rules, because they didn’t specifiy destination<br />
addresses within their rulesets <strong>and</strong> the destination addresses for SE0 <strong>and</strong> SE1 were specified at<br />
the component level. All other interface rules specified their own destination addresses at the<br />
rule level, so they will use specific rules for those specific addresses.<br />
• A default port of 21 was been specified for all interfaces. However, interface PD0 has specified<br />
33-11
Intrusion Prevention System (IPS)<br />
33-12<br />
a port of 1521, so that port will be used for PD0 only. All other interfaces will use the default<br />
port of 21.<br />
• Interface PD1 has an exclude_address specified for net 192.168.0.0/24. All events for PD1 that<br />
originated from that source net will be excluded from being counted by IPS. All other interfaces<br />
will count events from that network.<br />
Configuring IPS for Paired Network Interfaces<br />
To configure IPS for a paired netowrk interface environment where multiple interfaces are treated<br />
as a common link set, the rules are fairly simple.<br />
• Each physical <strong>and</strong> pseudo interface must be specified in the configuration files via<br />
destination_address rules for each interface.<br />
• All physical interfaces are treated equally. When an event is logged for any interface in the set,<br />
it’s as if it was logged against each interface in the set. Thus, when a filter is set on any interface<br />
in the set, the same filter is set on all physical interfaces in the set.<br />
• Filters are set only on the physical interfaces. Since pseudo devices (PDnnn) are not true<br />
interfaces, they cannot have filters set on them.<br />
• When a filter is created as a result of events coming in via a pseudo device, the destination<br />
address shown in the filter (using the MULTINET SHOW INTERFACE /FILTER comm<strong>and</strong>)<br />
will show the destination address for the pseudo device.<br />
When MUTLINET SET INTERFACE is used to perform any of the following tasks:<br />
• Create a paired network interface set via SET INTERFACE /COMMON_LINK<br />
• Start an interface via SET INTERFACE/UP<br />
IPS is notified of the change being made. This allows the FILTER_SERVER process to reevaluate<br />
all interfaces it knows about, so it can determine if modifications must be made to paired network<br />
interface sets about which it currently knows.<br />
The following example shows a configuration for the SSH component for a paired network<br />
interface configuration that consists of SE0, SE1, <strong>and</strong> PD0 where PD0’s physical interface is SE1:<br />
component ssh<br />
proto_filter "deny tcp 192.168.0.100/32 192.168.0.11/24 log"<br />
#<br />
# SE0’s address<br />
#<br />
destination_address 192.168.0.70/32<br />
#<br />
# SE1’s address<br />
#<br />
destination_address 192.168.0.71/32<br />
#<br />
# PD0’s address<br />
#<br />
destination_address 192.168.0.72/32<br />
#<br />
destination_port 22<br />
rule ssh_bogus_id<br />
max_count 10<br />
delta_time 90<br />
filter_durations 300,600,1800,3600,-1<br />
rule ssh_authfailed
max_count 10<br />
delta_time 90<br />
filter_durations 300,600,1800,3600,-1<br />
rule ssh_authfailed<br />
destination_address 192.168.10.2/32<br />
max_count 10<br />
delta_time 90<br />
filter_durations 300,600,1800,3600,-1<br />
rule ssh_userauth<br />
max_count 10<br />
delta_time 90<br />
filter_durations 300,600,1800,3600,-1<br />
rule ssh_invaliduser<br />
max_count 10<br />
delta_time 90<br />
filter_durations 300,600,1800,3600,-1<br />
Intrusion Prevention System (IPS)<br />
Using the above configuration, the next item illustrates a filter being set due to events that occurred<br />
on line PD0:<br />
RAPTOR_$<br />
%%%%%%%%%% OPCOM 29-OCT-2009 13:00:55.77 %%%%%%%%%%% (from node VOODOO at 29-OCT-2009<br />
13:00:59.12)<br />
Message from user JOHNDOE on VOODOO<br />
FILTER_SERVER: Filter queued on SE0 (192.168.0.70/32) at 29-OCT-2009 13:00:59.12<br />
Component: ssh, Rule: ssh_bogus_id<br />
deny tcp 192.168.0.11/32<br />
192.168.0.72/32 eq 22<br />
FLTSVR,LOG<br />
START: 29-OCT-2009 13:00:59.12 END: 29-OCT-2009 14:00:59.12<br />
RAPTOR_$<br />
%%%%%%%%%%% OPCOM 29-OCT-2009 13:00:55.80 %%%%%%%%%%% (from node VOODOO at 29-OCT-2009<br />
13:00:59.15)<br />
Message from user JOHNDOE on VOODOO<br />
FILTER_SERVER: Filter queued on SE1 (192.168.0.71/32) at 29-OCT-2009 13:00:59.15<br />
Component: ssh, Rule: ssh_bogus_id<br />
deny tcp 192.168.0.11/32<br />
192.168.0.72/32 eq 22<br />
FLTSVR,LOG<br />
START: 29-OCT-2009 13:00:59.15 END: 29-OCT-2009 14:00:59.15<br />
RAPTOR_$<br />
Note some things illustrated above:<br />
• Each physical address (SE0 <strong>and</strong> SE1) had a filter set on it.<br />
• No filter was set on interface PD0 because it is a pseudo interface.<br />
• The destination address for each event is that of interface PD0, since that was the source of the<br />
events that caused the filters to be set.<br />
Filter Reporting via OPCOM <strong>and</strong> Log File<br />
When a filter is set for an address/rule/destination/component, an informational message will<br />
appear either in OPCOM (if LOG_TO_OPCOM is set) or in the logfile (if LOG_TO_LOGFILE is<br />
set). The following message illustrates an OPCOM message, but the message to a logfile will have<br />
the same format.<br />
33-13
Intrusion Prevention System (IPS)<br />
33-14<br />
TWEET_$<br />
%%%%%%%%%%% OPCOM 16-MAY-2008 10:33:19.74 %%%%%%%%%%%<br />
Message from user SYSTEM on TWEET<br />
FILTER_SERVER: Filter queued on se0 (192.168.0.16) at 16-MAY-2008 10:33:19.74<br />
Component: ssh, Rule: ssh_bogus_id<br />
deny tcp 192.168.0.11/32<br />
192.168.0.0/24 eq 22<br />
FLTSVR,LOG<br />
START: 16-MAY-2008 10:33:19 END: 16-MAY-2008 10:38:19<br />
TWEET_$<br />
This message is in essentially the same format as that when a MULTINET SHOW/INTERFACE/<br />
FILTER comm<strong>and</strong> is performed:<br />
TWEET_$ mu show/interface se0/filter<br />
Device se0: flags=8863<br />
VMS Device = EWA0<br />
IP Address = 192.168.0.16<br />
No common links defined<br />
<strong>MultiNet</strong> Packet Filter List for se0:<br />
Logging is disabled<br />
Source Address / Port<br />
Action Proto Hits Destination Address / Port<br />
------ ----- ----- -----------------------------------------deny<br />
tcp 0 192.168.0.11/32<br />
192.168.0.0/24 eq 22<br />
FLTSVR,LOG<br />
START: 16-MAY-2008 10:33:19 END: 16-MAY-2008 10:38:19<br />
permit ip 13484 0.0.0.0/0<br />
0.0.0.0/0<br />
FLTSVR<br />
TWEET_$<br />
Average 0 bytes out, 0 bytes in per second<br />
Average 0 packets out, 0 packets in per second<br />
Note the second filter (the “permit ip” filter) that is shown. If there are currently no filters set for an<br />
interface when the filter server determines it needs to set a filter, it will add an explicit “permit ip”<br />
filter. This is done because the existence of any filter in a list of filters causes <strong>MultiNet</strong> to act as if a<br />
“deny everything” filter terminates the list. The “permit ip” filter will essentially prevent that<br />
problem from happening.<br />
Filter Reporting via SNMP<br />
When logging a filter via SNMP, the configuration keywords ENTERPRISE_STRING,<br />
GENERIC_TRAP_ID, <strong>and</strong> SPECIFIC_TRAP_ID must be specified (as well as the keyword<br />
LOG_TO_SNMP). In addition, the SNMP configuration file must be properly set up on the<br />
<strong>MultiNet</strong> system as specified in chapter 23 of the <strong>MultiNet</strong> <strong>Installation</strong> <strong>and</strong> Administrator’s <strong>Guide</strong>.<br />
When a filter is logged, the following fields will be reported:<br />
FILTER_SERVER: Filter queued on () at <br />
COMPONENT=component-name<br />
RULE=rulename
ACTION=actionname (e.g., “deny”)<br />
PROTOCOL=protocol (e.g., “TCP”)<br />
SOURCE=source address in CIDR format<br />
SOURCE_PORT= operator port (e.g., “EQ 22”)<br />
DESTINATION=destination address in CIDR format<br />
DEST_PORT=operator port (e.g., “EQ 22”)<br />
START=VMS absolute time<br />
END=VMS absolute time<br />
Correcting a Filter List<br />
Intrusion Prevention System (IPS)<br />
If a filter is inadvertently created by the filter server, the system manager should first correct the<br />
configuration problem (if one exists) that allowed the filter to be incorrectly set. Then, the system<br />
manager may retrieve the current list of filters in “manual filter form” that can be edited then<br />
reloaded onto the interface. The list is retrieved via the MU SHOW/INTERFACE/<br />
EXTRACT_FILTER comm<strong>and</strong>. For example:<br />
TWEET_$ mu show/int se0/filt<br />
Device se0: flags=8863<br />
VMS Device = EWA0<br />
IP Address = 192.168.0.16<br />
No common links defined<br />
<strong>MultiNet</strong> Packet Filter List for se0:<br />
Logging is disabled<br />
Source Address / Port<br />
Action Proto Hits Destination Address / Port<br />
------ ----- ----- -----------------------------------------deny<br />
tcp 0 192.168.0.11/32<br />
192.168.0.0/24 eq 22<br />
FLTSVR,LOG<br />
START: 16-MAY-2008 10:33:19 END: 16-MAY-2008 10:38:19<br />
deny tcp 15 192.168.0.38/32<br />
192.168.011/24 eq 22<br />
permit ip 13484 0.0.0.0/0<br />
0.0.0.0/0<br />
FLTSVR<br />
Average 0 bytes out, 0 bytes in per second<br />
Average 0 packets out, 0 packets in per second<br />
TWEET_$ mu show/interface se0/extract_filter=filter.txt<br />
TWEET_$ type filter.txt<br />
#<br />
# FILTER.TXT<br />
#<br />
# Generated 16-MAY-2008 10:51:31<br />
#<br />
#=======================================================================<br />
deny tcp 192.168.0.100/32 192.168.0.11/24 eq 22 start “16-MAY-2008 10:33:19” end “16-MAY-2008<br />
10:38:19”LOG<br />
deny tcp 192.168.0/32.192.168.0.11/24<br />
permit ip 0.0.0.0/32 0.0.0.0/32<br />
TWEET_$ <br />
33-15
Intrusion Prevention System (IPS)<br />
33-16<br />
TWEET_$ mu set/interface se0/filter=filter.dat<br />
TWEET_$ mu show/interface se0/filt<br />
Device se0: flags=8863<br />
VMS Device = EWA0<br />
IP Address = 192.168.0.16<br />
No common links defined<br />
<strong>MultiNet</strong> Packet Filter List for se0:<br />
Logging is disabled<br />
Source Address / Port<br />
Action Proto Hits Destination Address / Port<br />
------ ----- ----- -----------------------------------------deny<br />
tcp 15 192.168.0.38/32<br />
192.168.011/24 eq 22<br />
permit ip 13484 0.0.0.0/0<br />
0.0.0.0/0<br />
TWEET_$<br />
Average 0 bytes out, 0 bytes in per second<br />
Average 0 packets out, 0 packets in per second<br />
Configuring PMDF to use IPS on <strong>MultiNet</strong><br />
The IMAP, POP3 <strong>and</strong> SMTP servers referred to in the configuration template files above refer to<br />
the <strong>MultiNet</strong> servers only. Beginning with PMDF V6.4, PMDF has been instrumented to use IPS.<br />
The following PMDF template files are available in the PMDF_TABLE directory:<br />
FILTER_SERVER_PMDF_IMAP.TEMPLATE<br />
FILTER_SERVER_PMDF_POP3.TEMPLATE<br />
FILTER_SERVER_PMDF_SMTP.TEMPLATE<br />
These files should be copied to MULTINET:*.TXT <strong>and</strong> modifed as appropriate for your<br />
installation. Edit MULTINET:FILTER_SERVER_CONFIG.TXT to add INCLUDE lines for these<br />
component files, <strong>and</strong> comment out the INCLUDE lines for the st<strong>and</strong>ard <strong>MultiNet</strong> IMAP, POP <strong>and</strong><br />
SMTP files.<br />
Next, make sure the appropriate PMDF images are installed. The legacy IMAP <strong>and</strong> POP servers<br />
(PMDF_EXE:IMAPD.EXE <strong>and</strong> PMDF_EXE:POP3D.EXE) are already installed. The msgstore<br />
IMAP <strong>and</strong> POP servers (PMDF_EXE:IMAP_SERVER.EXE, PMDF_EXE:POP_SERVER.EXE),<br />
as well as the SMTP server (PMDF_EXE:TCP_SMTP_SERVER.EXE) are not installed, so they<br />
will need to be added to your PMDF_COM:PMDF_SITE_STARTUP.COM file if your PMDF<br />
installation uses them. These must all be installed using the /OPEN qualifier.<br />
At this point, define the logical name PMDF_DO_FILTER_SERVER to 1, using the /SYSTEM<br />
qualfier (this can be put in PMDF_COM:PMDF_SITE_STARTUP.COM as well).<br />
Finally, restart IPS via the MULTINET SET/IPS/RESTART comm<strong>and</strong>.<br />
Note! Note: the PMDF_TABLE:FILTER_SERVER_PMDF_POP3.TEMPLATE file as distributed in<br />
PMDF V6.4 has the incorrect port number of 143 specified. Make sure port 110 is specified in<br />
this file.<br />
Controlling the Filter Server
Intrusion Prevention System (IPS)<br />
The filter server is started at system startup time. However, it can be controlled using the<br />
MULTINET SET/IPS comm<strong>and</strong>. The valid comm<strong>and</strong>s <strong>and</strong> their uses are:<br />
Table 33-3 Filter Server Control Comm<strong>and</strong>s<br />
Comm<strong>and</strong> Description<br />
/DEBUG_LEVEL=level Change the debug level for the server. See the<br />
description for the debug main configuration<br />
keyword.<br />
/CLEAR_FILTERS Causes the FILTER_SERVER process to remove<br />
all filters set by IPS on all interfaces configured for<br />
IPS. This may be used with SET /IPS /START <strong>and</strong><br />
SET /IPS/RESTART, or may be used by itself with<br />
SET /IPS/CLEAR_FILTERS. When used by itself<br />
this causes a running IPS subsystem to remove the<br />
IPS filters <strong>and</strong> reset the event count information for<br />
the source address associated with each filter being<br />
removed.<br />
/RELOAD Re-read <strong>and</strong> parse the configuration files. Note that<br />
this will not wipe out existing event <strong>and</strong> rule<br />
information; it will simply update it so no potential<br />
filter information will be lost.<br />
/RESTART Stop <strong>and</strong> restart the filter server. All existing event<br />
<strong>and</strong> rule information will be lost <strong>and</strong> reloaded from<br />
the configuration files.<br />
/START Start the filter server if it’s not already running.<br />
/STOP Stop the filter server from running. All existing<br />
event <strong>and</strong> rule information will be lost.<br />
The current configuration of the filter server may also be displayed using the MULTINET SHOW/<br />
IPS /CONFIG= comm<strong>and</strong>. For example:<br />
$ multinet show/ips/config=server_stats.out<br />
$ type server_stats.out<br />
Filter server snapshot<br />
Debug level 6<br />
Block at destination port or system: PORT<br />
Log to: OPCOM SNMP trap<br />
Component ssh<br />
Rule ssh_bogus_id<br />
dest address: 192.168.0.16/32<br />
interface: se0<br />
max event count: 10<br />
33-17
Intrusion Prevention System (IPS)<br />
33-18<br />
delta time: 0 00:01:30.00<br />
filter durations: 300 600 1800 3600 -1<br />
Address 192.168.0.11/32<br />
number of still-queued events: 1<br />
number of filters created: 0<br />
Address entry to be deleted: N/A<br />
Event<br />
event time: 29-APR-2008 10:00:12.41<br />
expires: 29-APR-2008 10:01:42.41<br />
Rule ssh_authfailed<br />
dest address: 192.168.0.16/32<br />
interface: se0<br />
max event count: 10<br />
delta time: 0 00:01:30.00<br />
filter durations: 300 600 1800 3600 -1<br />
Rule ssh_userauth<br />
dest address: 192.168.0.16<br />
interface: se0<br />
max event count: 10<br />
delta time: 0 00:01:30.00<br />
filter durations: 300 600 1800 3600 -1<br />
Rule ssh_invaliduser<br />
dest address: 192.168.0.16/32<br />
interface: se0<br />
max event count: 10<br />
delta time: 0 00:01:30.00<br />
filter durations: 300 600 1800 3600 -1<br />
Rule ssh_invalid_id_msg<br />
dest address: 192.168.0.16/32<br />
interface: se0<br />
max event count: 5<br />
delta time: 0 00:02:00.00<br />
filter durations: 300 600 1800 3600 -1<br />
Filter Server Files<br />
The following files are associated with the filter server:<br />
MULTINET:FILTER_SERVER_HOURLY_LOG.yyyymmdd<br />
This file is an hourly activity log for the filter server. The file extension changes daily at midnight<br />
to reflect the current day. What follows is a sample log segment for one hour:<br />
Filter server hourly snapshot for hour 2 of 05/18/2008<br />
Component ssh<br />
Rule ssh_bogus_id<br />
number of hits 0<br />
Rule ssh_authfailed<br />
number of hits 0<br />
Rule ssh_userauth<br />
number of hits 0<br />
Rule ssh_invaliduser<br />
number of hits 2<br />
Address 192.168.0.10/32<br />
number of still-queued events: 0<br />
number of all events: 0<br />
number of filters created: 1<br />
Address entry to be deleted: 18-MAY-2008 05:55:45.45
Address 192.168.0.204<br />
number of still-queued events: 0<br />
number of all events: 2<br />
number of filters created: 0<br />
Address entry to be deleted: 18-MAY-2008 06:22:03.97<br />
Intrusion Prevention System (IPS)<br />
This log is showing that during the hour 01:00-02:00, 2 different source addresses were being<br />
tracked by the filter server.:<br />
The first address (192.168.0.10) had a filter created sometime in the last 4 hours (the time it takes<br />
an address to have no activity before its records are deleted by the filter server). The log indicates<br />
the address entry is to be deleted in 3 hours if there is no more activity; therefore, the filter was<br />
actually set in the previous hour (looking at the previous hour’s entry in the log file will confirm<br />
this).<br />
The second address (192.168.0.204) had 2 events during the hour that never triggered a filter <strong>and</strong><br />
were deleted after they aged. This address entry is scheduled to be deleted in 4 hours if there’s no<br />
more activity for it.<br />
MULTINET:FILTER_SERVER_CONFIG.TXT<br />
This is the main filter server configuration file. Optionally, the server will use the logical name<br />
FILTER_SERVER_CONFIG to determine the name of the main configuration file.<br />
MULTINET:FILTER_SERVER.OUT<br />
This file contains any output resulting from starting the filter server (e.g., the output from any DCL<br />
comm<strong>and</strong>s executed to start it) <strong>and</strong> all debug messages.<br />
Instrumenting a User-Written Application with IPS<br />
When instrumenting an application (aka, a component), there are several steps to be followed:<br />
• The user determines the component-specific parameters. These include:<br />
• The prototype filter to be used when a filter is created. This is the same format as that<br />
used when using a filter file. All filter features are supported, with the exception of the<br />
ESTABLISHED <strong>and</strong> REPEATING keywords. Note that the source address/mask/port <strong>and</strong><br />
destination address/mask/port fields of the filter will be overwritten during creation of the<br />
filter, according to the other parameters set in the configuration file.<br />
• Whether the filters created will block at the destination port or simply block all traffic<br />
from the source system (the BLOCK_AT_DESTINATION_PORT keyword).<br />
• The logging to be used.<br />
• The user determines the ruleset:<br />
• The user determines what rules are to be supported. There's no limit on the number of<br />
rules the filter server can maintain; the limit is really on how complex you want to make<br />
the component.<br />
• For each rule, you need to determine:<br />
• The name of the rule. This string (maximum length 35 characters) will be used by the<br />
filter server <strong>and</strong> by the call to the filter server API call send_filter_event.<br />
• The number of events/unit time that will trigger a filter (the MAX_COUNT <strong>and</strong><br />
DELTA_TIME fields).<br />
33-19
Intrusion Prevention System (IPS)<br />
33-20<br />
• The duration(s) of a filter. Up to 5 may be chosen, <strong>and</strong> the list must end with -1.<br />
• The user creates the component-specific configuration file, then adds a reference to it via the<br />
INCLUDE keyword in the main filter server configuration file. At this point, the filter server can<br />
be made aware of this new (or updated) configuration by using the MULTINET SET /IPS/<br />
RELOAD comm<strong>and</strong>.<br />
Note! The filter server configuration may be reloaded multiple times without causing problems for the<br />
filter server.<br />
Filter Server API<br />
There are two calls available in the filter server API. The function prototypes are defined in<br />
MULTINET_COMMON_ROOT:[MULTINET.INCLUDE]FILTER_SERVER_API.H. The first<br />
call is used to register with the filter server:<br />
int filter_server_register(char *component, 0, 0)<br />
where<br />
component is the name of the component<br />
The remaining two arguments are there for future expansion, <strong>and</strong> are ignored, but must be<br />
specified.<br />
The return values from this function are 1 (success) or 0 (an error occurred; most likely, this is<br />
because the filter server isn’t running). Normally this function is called once when the first event is<br />
logged. However, if an error is returned, it may be called again when additional events are logged.<br />
Note! The application that's registering MUST be an installed image, using /OPEN or /SHARED. It<br />
doesn't need to be installed with privileges. This is an attempt to help cut down on bogus<br />
applications registering with the server; it takes a conscious effort - <strong>and</strong> privileges - by the<br />
system manager to do this <strong>and</strong> therefore, to control this.<br />
The next function is used to format <strong>and</strong> send events to the filter server:<br />
where<br />
int send_filter_event(char *rule,<br />
char *source_address,<br />
u_short source_port,<br />
char *dest_address)<br />
rule is the name of the rule to be enforced. This must correspond to a rule keyword<br />
specified in the per-component configuration file for the component. If a match cannot be<br />
made, the event will be ignored by the filter server.<br />
source_address is the address of the system that caused the event to be logged (e.g,<br />
“192.168.0.1”). This may be in ipv4 or ipv6 format, but must be of the same address<br />
family as that of the destination_address specified for the component in the percomponent<br />
configuration file. Note that this is an address only. Do not specify address<br />
mask bits (e.g., “192.168.0.1/24”) with it.<br />
source_port is the source port on the originating system.
Intrusion Prevention System (IPS)<br />
dest_address is the destination address of the socket used to communicate to<br />
source_address. This information may be obtained by performing a getsockname function<br />
on the socket. Note that this is an address only. Do not specify address mask bits (e.g.,<br />
“192.168.0.11/24”) with it.<br />
To include these routines in your application, link using the library<br />
MULTINET_COMMON_ROOT:[MULTINET.LIBRARY]FILTER_SERVER_API.OLB.<br />
The following is an example of code used to send events to the filter server:<br />
void ssh_send_filter_event(int code, char *addr, int port, char *dest_addr)<br />
{<br />
char *rule;<br />
static int filter_server = -1;<br />
}<br />
if (filter_server == -1)<br />
filter_server = filter_server_register("SSH", 0, 0);<br />
if (!filter_server)<br />
return;<br />
switch(code)<br />
{<br />
case LGI$_NOSUCHUSER:<br />
case LGI$_NOTVALID:<br />
rule = "SSH_INVALIDUSER";<br />
break;<br />
}<br />
case LGI$_USERAUTH:<br />
rule = "SSH_USERAUTH";<br />
break;<br />
case LGI$_DISUSER:<br />
case LGI$_ACNTEXPIR:<br />
case LGI$_RESTRICT:<br />
case LGI$_INVPWD:<br />
case LGI$_PWDEXPIR:<br />
rule = "SSH_AUTHFAILED";<br />
break;<br />
default:<br />
printf("Unrecognized status code %d", code));<br />
return;<br />
send_filter_event(rule, addr, (unsigned short)port, dest_addr);<br />
33-21
Intrusion Prevention System (IPS)<br />
33-22
Chapter 34<br />
Using <strong>MultiNet</strong> for an OpenVMS Cluster<br />
Interconnect<br />
<strong>MultiNet</strong> V5.4 can be used to provide transport services for an OpenVMS IP cluster on Alpha <strong>and</strong><br />
Integrity systems running OpenVMS V8.4. Users should first follow the directions in the section on<br />
Cluster over IP in the OpenVMS <strong>Guide</strong>lines for Cluster Configurations manual. VMS configuration is<br />
done with SYS$MANAGER:CLUSTER_CONFIG_LAN.COM.<br />
When <strong>MultiNet</strong> V5.4 is installed on a system with IP clustering enabled, the <strong>MultiNet</strong> images will be<br />
copied to the appropriate system directories such that upon reboot the <strong>MultiNet</strong> images will be used<br />
instead of the TCP/IP Services images. <strong>MultiNet</strong> determines that the system is configured for IP clusters<br />
by checking the version of OpenVMS (8.4 or later) <strong>and</strong> the sysgen parameter NISCS_USE_UDP.<br />
<strong>MultiNet</strong> will still need to be configured as the configuration is not copied from the TCP/IP Services<br />
files. The TCP/IP Services images are duplicated in the system directories with the extension<br />
.TCPIP_EXE <strong>and</strong> .TCPIP_STB before copying the <strong>MultiNet</strong> images. This allows for returning to the<br />
TCP/IP Services images should there be a problem with <strong>MultiNet</strong>.<br />
The following line will be displayed during installation if the system is configured for IP Clustering:<br />
%MULTINET-I-IPCLUSTER, Updating IP Cluster images<br />
On system that do not have IP clustering enabled when <strong>MultiNet</strong> is installed follow the steps below<br />
1 Configure TCP/IP Services <strong>and</strong> IP clustering as docmented in the OpenVMS <strong>Guide</strong>lines for<br />
Cluster Configurations manual. This will create the following files:<br />
• SYS$SYSROOT:[SYSEXE]TCPIP$CLUSTER.DAT<br />
• SYS$SYSTEM:PE$IP_CONFIG.DAT.<br />
2 Execute MULTINET:SET_MULTINET_IP_CLUSTER.COM with the parameter INITIAL to<br />
enter the Multinet Files in the correct directories for VMS to find at boot time. This procedure<br />
will preserve the current TCP/IP Services image <strong>and</strong> copy the <strong>MultiNet</strong> images to the system<br />
directories with the appropriate names. The images are copied to the specific directories, not the<br />
common directories, so it will be necessary to manually move the images or do this on each<br />
system in the IP cluster that uses this boot disk. The following text will be displayed:<br />
$ @multinet:set_multinet_ip_cluster initial<br />
Saving HP's TCPIP$INTERNET_SERVICES.EXE as<br />
SYS$LOADABLE_IMAGES:TCPIP$INTERNET_SERVICES.TCPIP_EXE<br />
Updating sys$loadable_images:tcpip$internet_Services.exe with current<br />
<strong>MultiNet</strong> image<br />
Saving HP's TCPIP$BGDRIVER.EXE as<br />
SYS$LOADABLE_IMAGES:TCPIP$BGDRIVER.TCPIP_EXE<br />
updating sys$loadable_images:tcpip$bgdriver.exe with current <strong>MultiNet</strong><br />
image<br />
34-1
Using <strong>MultiNet</strong> for an OpenVMS Cluster Interconnect<br />
34-2<br />
3 Use SYSGEN to verify that the system parameter NISCS_USE_UDP is set to 1in the<br />
CURRENT set.<br />
4 Reboot the system. The system boot process will say that it is loading TCP/IP Services, but there<br />
will also be a <strong>MultiNet</strong> initialization message on the console. After the reboot is complete use<br />
the st<strong>and</strong>ard <strong>MultiNet</strong> startup procedure to finish starting <strong>MultiNet</strong>; this will install the<br />
remaining network communication pseudo-devices, define logicals, install images <strong>and</strong> start the<br />
<strong>MultiNet</strong> master server <strong>and</strong> necessary ancillary processes for full network functionality.<br />
Troubleshooting<br />
The following set of comm<strong>and</strong>s will verify that the <strong>MultiNet</strong> configuration <strong>and</strong> the IP cluster<br />
configuration agree. Any differences encountered will be displayed.<br />
$ <strong>MultiNet</strong> Configure/Network<br />
<strong>MultiNet</strong> Network Configuration Utility T5.4(109)<br />
[Reading in configuration from MULTINET:NETWORK_DEVICES.CONFIGURATION]<br />
NET-CONFIG>check<br />
If the <strong>MultiNet</strong> “KRNNOTFOUND failed to locate <strong>MultiNet</strong> kernel” message is displayed while<br />
attempting to start <strong>MultiNet</strong> <strong>and</strong> the BG device exists, then the most likely problem is that TCP/IP<br />
Services is being used instead of <strong>MultiNet</strong>. Use the <strong>MultiNet</strong> comm<strong>and</strong> procedure<br />
MULTINET:SET_MULTINET_IP_CLUSTER.COM to make sure that the <strong>MultiNet</strong> files are in<br />
the correct places.
SERVER-CONFIG Service Parameters<br />
Appendix A<br />
Server Configuration Parameters<br />
Table A-1 describes the service parameters you can set with the SERVER-CONFIG Utility.<br />
Table A-1 SERVER-CONFIG Service Parameters<br />
Parameter Description<br />
ACCEPT-HOSTS The list of hosts allowed access to this server. See Chapter 10.<br />
ACCEPT-NETS The list of networks or subnetworks that are allowed to access this<br />
server. See Chapter 10.<br />
BACKLOG The number of server connections to queue up before refusing to<br />
accept additional connections when MAX-SERVERS is reached.<br />
CONFFILE This file is used instead of the default MULTINET:NAMED.CONF<br />
file.<br />
CONNECTED a The name of the internal MULTINET_SERVER routine to call<br />
when a connection request is received. This varies by protocol <strong>and</strong><br />
is normally not changed.<br />
DEBUG Sets the debug level of the Domain Nameserver (the default is no<br />
debugging). The larger the number, the more verbose the output. A<br />
value of 0 turns off debugging.<br />
DEBUGFILE This file is used instead of the default MULTINET:NAMED.RUN<br />
file.<br />
DISABLED-NODES The list of VMScluster nodes that cannot run this server. See<br />
Chapter 10.<br />
A-1
Server Configuration Parameters<br />
A-2<br />
Table A-1 SERVER-CONFIG Service Parameters (Continued)<br />
Parameter Description<br />
ENABLED-NODES The list of VMScluster nodes that can run this server. See Chapter<br />
10.<br />
FLAGS a Various flags that control the operation of the service.<br />
INIT a The name of the internal MULTINET_SERVER routine for<br />
initializing a service. This varies by protocol <strong>and</strong> is normally not<br />
changed.<br />
LISTEN a The name of the internal MULTINET_SERVER routine for<br />
listening for connections to the service. This varies by protocol <strong>and</strong><br />
is normally not changed.<br />
LOG-ACCEPTS Specifies whether to log successful connections to the service.<br />
LOG-FILE Destination of log messages. May be a VMS filename or OPCOM<br />
to direct messages to the VMS OPCOM process.<br />
LOG-REJECTS Specifies whether to log rejected connections to the service. A<br />
connection is rejected because of the combination of the REJECT-<br />
HOSTS, REJECT-NETS, <strong>and</strong> REJECT-BY-DEFAULT parameters.<br />
MAX-SERVERS The maximum number of service processes to allow at any one<br />
time. If this limit is reached, additional connections -- up to the<br />
number specified by the BACKLOG parameter -- are accepted but<br />
not processed until one of the previous connections completes.<br />
MAXIMUM-TTL Changes the maximum time-to-live (TTL) that resource records are<br />
cached from the default of 604800 seconds (1 week) to the<br />
specified value.<br />
MINIMUM-TTL Changes the minimum time-to-live (TTL) that resource records are<br />
cached from the default of zero (0) seconds to the specified value.<br />
Note! It is recommended you use this comm<strong>and</strong> only if there is a<br />
specific need. This could cause problems in that you may<br />
be caching resource records for longer than the<br />
authoritative administrator intended.<br />
PARAMETERS Specifies service-dependent parameters passed to the initialization<br />
routine of built-in services. Normally not used for user-written<br />
services.<br />
PRESERVE-CASE Tells NAMED to keep the case of the response from the remote<br />
nameserver after doing a query.
Table A-1 SERVER-CONFIG Service Parameters (Continued)<br />
Parameter Description<br />
Server Configuration Parameters<br />
PRIORITY The VMS process priority to assign to created processes.<br />
PROGRAM The VMS filename of the image to run or merge.<br />
QUERY-LOG Toggles query logging ON <strong>and</strong> OFF. Query logging shows an<br />
informational message every time a query is received by the server.<br />
Query logging can be directed to OPCOM or a file in the<br />
MULTINET:NAMED.CONF file using the logging category<br />
queries.<br />
REJECT-BY-DEFAULT Whether to reject a connection from a host that does not match any<br />
of the ACCEPT-HOSTS, ACCEPT-NETS, REJECT-HOSTS, <strong>and</strong><br />
REJECT-NETS lists.<br />
REJECT-HOSTS The list of hosts not allowed access to this server. See Chapter 10.<br />
REJECT-MESSAGE A text string to send down the network connection when a service<br />
is rejected.<br />
REJECT-NETS The list of networks or subnetworks not allowed access to this<br />
server. See Chapter 10.<br />
REWRITE-TTL Sets the time-to-live (TTL) that load balanced resource records are<br />
cached from the default of 300 seconds (5 minutes) to the specified<br />
value.<br />
SERVICE a The name of the internal MULTINET_SERVER routine to call to<br />
perform the service. This is normally Run_Program for userwritten<br />
services.<br />
SERVICE-NAME The name of the service.<br />
SOCKET-FAMILY a The address family of the service; for example, AF_INET.<br />
SOCKET-OPTIONS a Socket options to be set via setsockopt(). See the <strong>MultiNet</strong> for<br />
OpenVMS Programmer's Reference for more information on<br />
socket options.<br />
SOCKET-PORT a The port number on which to to listen for connections.<br />
SOCKET-TYPE a The type of socket; for example, SOCK_STREAM (TCP) or<br />
SOCK_DGRAM (UDP).<br />
WORKING-SET The VMS working set to assign to created processes.<br />
A-3
a. For servers supplied with <strong>MultiNet</strong>, do not change this parameter. When adding your own<br />
servers, you usually do not need to modify the default parameters.<br />
Services Provided with <strong>MultiNet</strong><br />
Table A-2 shows the <strong>MultiNet</strong> servers that can be disabled or enabled using SERVER-CONFIG.<br />
Table A-2 SERVER-CONFIG Services Provided with <strong>MultiNet</strong><br />
Protocol Server Service Provided<br />
RPC BWNFSD Beame & Whiteside PC-NFS daemon<br />
NFS Network File System server<br />
PCNFSD PC-NFS daemon<br />
RPCBOOTPARAM RPC boot parameters for diskless hosts<br />
RPCLOCKMGR RPC lock manager<br />
RPCMOUNT RPC procedure for mounting file systems<br />
RPCPORTMAP RPC portmapper (RPC naming service)<br />
RPCQUOTAD Returns disk quota information<br />
RPCSTATUS RPC status daemon<br />
RUSERS Returns information about logged in users<br />
RWALL Broadcasts messages to users<br />
Special CLUSTERALIAS Special server for managing cluster-wide IP addresses<br />
RARP Ethernet Reverse Address Resolution Protocol<br />
UCXQIO VMS/ULTRIX Connection $QIO emulation special<br />
services<br />
VIADECNET Special server for IP-over-DECnet links<br />
TCP CHARGEN Character generator<br />
DAYTIME Returns time of day in ASCII<br />
DISCARD Discard data received<br />
ECHO Echo data received<br />
FINGER Lists information about users on host
Server Configuration Parameters<br />
Table A-2 SERVER-CONFIG Services Provided with <strong>MultiNet</strong> (Continued)<br />
Protocol Server Service Provided<br />
FTP File Transfer Protocol<br />
LPD Remote printing service<br />
NETCONTROL Remote network server control<br />
NETSTAT Return network configuration <strong>and</strong> statistics<br />
NTALK Interactive conversation with remote user (newer 4.3 BSD<br />
protocol)<br />
POP2 Post Office Protocol Version 2<br />
POP3 Post Office Protocol Version 3<br />
REXEC Remote comm<strong>and</strong> execution (with password)<br />
RLOGIN Network virtual terminal service (with BSD "R" services<br />
authentication)<br />
RSHELL Remote comm<strong>and</strong> execution (with BSD "R" services<br />
authentication)<br />
SMTP Simple Mail Transfer Protocol<br />
SSH Secure Shell server <strong>and</strong> client<br />
SYSTAT Remote system status (remote SHOW SYSTEM)<br />
TELNET Network virtual terminal service<br />
TIME Returns time of day in binary<br />
UDP BOOTP Remote booting protocol<br />
DHCP Dynamic remote booting protocol<br />
DOMAINNAME Internet Domain Name System (DNS) name service<br />
(BIND)<br />
GATED Gateway routing service (EGP, RIP, <strong>and</strong> HELLO)<br />
NTP Network Time Protocol-For time synchronization<br />
SNMP Simple Network Management Protocol agent<br />
SMUX SNMP Multiplexing Protocol<br />
A-5
Server Configuration Parameters<br />
Default Server Values<br />
A-6<br />
Table A-2 SERVER-CONFIG Services Provided with <strong>MultiNet</strong> (Continued)<br />
Protocol Server Service Provided<br />
TALK Interactive conversation with remote user (old 4.2 BSD<br />
protocol)<br />
TFTP Trivial File Transfer Protocol<br />
UDPCHARGEN Character generator<br />
UDPDAYTIME Returns current time of day in ASCII<br />
UDPDISCARD Discard data received<br />
UDPECHO Echo data received<br />
UDPTIME Returns time of day in binary<br />
Table A-3 shows the default value for <strong>MultiNet</strong> service parameters set using SERVER-CONFIG.<br />
Note that not all service parameters have defaults; hence, only those with default values are listed in<br />
this table.<br />
Note! Many default values in Table A-3 will be shown ss “Current process JPI$_xxxxx”. These will<br />
generally, but not always, correspond to the OpenVMS SYSGEN parameter “PQL_Dxxxx”. For<br />
example, JPI$_ASTLM will generally correspond to PQL_DASTLM.<br />
Table A-3 SERVER-CONFIG Default Service Values<br />
Server Parameter Default value<br />
- All Services - BACKLOG<br />
LOG-ACCEPTS<br />
LOG-FILE<br />
LOG-REJECTS<br />
MAX-SERVERS<br />
PRIORITY<br />
REJECT-MESSAGE<br />
USERNAME<br />
WORKING-SET-EXTENT<br />
WORKING-SET-QUOTA<br />
10<br />
no<br />
none<br />
no<br />
1000<br />
Current process JPI$_PRIB<br />
none<br />
no<br />
Current process JPI$_WSEXTENT<br />
Current process JPI$_WSQUOTA
Table A-3 SERVER-CONFIG Default Service Values (Continued)<br />
Server Parameter Default value<br />
ACCOUNTING PQL-ASTLM<br />
PQL-BIOLM<br />
PQL-BYTLM<br />
PQL-CPULM<br />
PQL-DIOLM<br />
PQL-ENQLM<br />
PQL-FILLM<br />
PQL-JTQUOTA<br />
PQL-PGFLQUOTA<br />
PQL-PRCLM<br />
PQL-TQELM<br />
BOOTP PQL-ASTLM<br />
PQL-BIOLM<br />
PQL-BYTLM<br />
PQL-CPULM<br />
PQL-DIOLM<br />
PQL-ENQLM<br />
PQL-FILLM<br />
PQL-JTQUOTA<br />
PQL-PGFLQUOTA<br />
PQL-PRCLM<br />
PQL-TQELM<br />
BWNFSD PQL-ASTLM<br />
PQL-BIOLM<br />
PQL-BYTLM<br />
PQL-CPULM<br />
PQL-DIOLM<br />
PQL-ENQLM<br />
PQL-FILLM<br />
PQL-JTQUOTA<br />
PQL-PGFLQUOTA<br />
PQL-PRCLM<br />
PQL-TQELM<br />
250<br />
150<br />
100000<br />
0<br />
150<br />
500<br />
100<br />
4096<br />
65536<br />
0<br />
100<br />
Server Configuration Parameters<br />
Current process JPI$_ASTLM<br />
Current process JPI$_BIOLM<br />
Current process JPI$_BYTLM<br />
Current process JPI$_CPULM<br />
Current process JPI$_DIOLM<br />
Current process JPI$_ENQLM<br />
Current process JPI$_FILLM<br />
Current process JPI$_JTQUOTA<br />
Current proces JPI$_PGFLQUOTA<br />
Current process JPI$_PRCLM<br />
Current process JPI$_TQELM<br />
A-7
Server Configuration Parameters<br />
A-8<br />
Table A-3 SERVER-CONFIG Default Service Values (Continued)<br />
Server Parameter Default value<br />
CHARGEN PQL-ASTLM<br />
PQL-BIOLM<br />
PQL-BYTLM<br />
PQL-CPULM<br />
PQL-DIOLM<br />
PQL-ENQLM<br />
PQL-FILLM<br />
PQL-JTQUOTA<br />
PQL-PGFLQUOTA<br />
PQL-PRCLM<br />
PQL-TQELM<br />
CLUSTERALIAS PQL-ASTLM<br />
PQL-BIOLM<br />
PQL-BYTLM<br />
PQL-CPULM<br />
PQL-DIOLM<br />
PQL-ENQLM<br />
PQL-FILLM<br />
PQL-JTQUOTA<br />
PQL-PGFLQUOTA<br />
PQL-PRCLM<br />
PQL-TQELM<br />
DAYTIME PQL-ASTLM<br />
PQL-BIOLM<br />
PQL-BYTLM<br />
PQL-CPULM<br />
PQL-DIOLM<br />
PQL-ENQLM<br />
PQL-FILLM<br />
PQL-JTQUOTA<br />
PQL-PGFLQUOTA<br />
PQL-PRCLM<br />
PQL-TQELM<br />
Current process JPI$_ASTLM<br />
Current process JPI$_BIOLM<br />
Current process JPI$_BYTLM<br />
Current process JPI$_CPULM<br />
Current process JPI$_DIOLM<br />
Current process JPI$_ENQLM<br />
Current process JPI$_FILLM<br />
Current process JPI$_JTQUOTA<br />
Current proces JPI$_PGFLQUOTA<br />
Current process JPI$_PRCLM<br />
Current process JPI$_TQELM<br />
Current process JPI$_ASTLM<br />
Current process JPI$_BIOLM<br />
Current process JPI$_BYTLM<br />
Current process JPI$_CPULM<br />
Current process JPI$_DIOLM<br />
Current process JPI$_ENQLM<br />
Current process JPI$_FILLM<br />
Current process JPI$_JTQUOTA<br />
Current proces JPI$_PGFLQUOTA<br />
Current process JPI$_PRCLM<br />
Current process JPI$_TQELM
Table A-3 SERVER-CONFIG Default Service Values (Continued)<br />
Server Parameter Default value<br />
DHCLIENT PQL-ASTLM<br />
PQL-BIOLM<br />
PQL-BYTLM<br />
PQL-CPULM<br />
PQL-DIOLM<br />
PQL-ENQLM<br />
PQL-FILLM<br />
PQL-JTQUOTA<br />
PQL-PGFLQUOTA<br />
PQL-PRCLM<br />
PQL-TQELM<br />
DHCP PQL-ASTLM<br />
PQL-BIOLM<br />
PQL-BYTLM<br />
PQL-CPULM<br />
PQL-DIOLM<br />
PQL-ENQLM<br />
PQL-FILLM<br />
PQL-JTQUOTA<br />
PQL-PGFLQUOTA<br />
PQL-PRCLM<br />
PQL-TQELM<br />
DISCARD PQL-ASTLM<br />
PQL-BIOLM<br />
PQL-BYTLM<br />
PQL-CPULM<br />
PQL-DIOLM<br />
PQL-ENQLM<br />
PQL-FILLM<br />
PQL-JTQUOTA<br />
PQL-PGFLQUOTA<br />
PQL-PRCLM<br />
PQL-TQELM<br />
250<br />
150<br />
100000<br />
0<br />
150<br />
500<br />
100<br />
4096<br />
65536<br />
0<br />
100<br />
250<br />
150<br />
100000<br />
0<br />
150<br />
500<br />
100<br />
4096<br />
65536<br />
0<br />
100<br />
Server Configuration Parameters<br />
Current process JPI$_ASTLM<br />
Current process JPI$_BIOLM<br />
Current process JPI$_BYTLM<br />
Current process JPI$_CPULM<br />
Current process JPI$_DIOLM<br />
Current process JPI$_ENQLM<br />
Current process JPI$_FILLM<br />
Current process JPI$_JTQUOTA<br />
Current proces JPI$_PGFLQUOTA<br />
Current process JPI$_PRCLM<br />
Current process JPI$_TQELM<br />
A-9
Server Configuration Parameters<br />
A-10<br />
Table A-3 SERVER-CONFIG Default Service Values (Continued)<br />
Server Parameter Default value<br />
DOMAINNAME PQL-ASTLM<br />
PQL-BIOLM<br />
PQL-BYTLM<br />
PQL-CPULM<br />
PQL-DIOLM<br />
PQL-ENQLM<br />
PQL-FILLM<br />
PQL-JTQUOTA<br />
PQL-PGFLQUOTA<br />
PQL-PRCLM<br />
PQL-TQELM<br />
ECHO PQL-ASTLM<br />
PQL-BIOLM<br />
PQL-BYTLM<br />
PQL-CPULM<br />
PQL-DIOLM<br />
PQL-ENQLM<br />
PQL-FILLM<br />
PQL-JTQUOTA<br />
PQL-PGFLQUOTA<br />
PQL-PRCLM<br />
PQL-TQELM<br />
FINGER PQL-ASTLM<br />
PQL-BIOLM<br />
PQL-BYTLM<br />
PQL-CPULM<br />
PQL-DIOLM<br />
PQL-ENQLM<br />
PQL-FILLM<br />
PQL-JTQUOTA<br />
PQL-PGFLQUOTA<br />
PQL-PRCLM<br />
PQL-TQELM<br />
Current process JPI$_ASTLM<br />
Current process JPI$_BIOLM<br />
Current process JPI$_BYTLM<br />
Current process JPI$_CPULM<br />
Current process JPI$_DIOLM<br />
Current process JPI$_ENQLM<br />
Current process JPI$_FILLM<br />
Current process JPI$_JTQUOTA<br />
Current proces JPI$_PGFLQUOTA<br />
Current process JPI$_PRCLM<br />
Current process JPI$_TQELM<br />
Current process JPI$_ASTLM<br />
Current process JPI$_BIOLM<br />
Current process JPI$_BYTLM<br />
Current process JPI$_CPULM<br />
Current process JPI$_DIOLM<br />
Current process JPI$_ENQLM<br />
Current process JPI$_FILLM<br />
Current process JPI$_JTQUOTA<br />
Current proces JPI$_PGFLQUOTA<br />
Current process JPI$_PRCLM<br />
Current process JPI$_TQELM
Table A-3 SERVER-CONFIG Default Service Values (Continued)<br />
Server Parameter Default value<br />
FONTSERVER PQL-ASTLM<br />
PQL-BIOLM<br />
PQL-BYTLM<br />
PQL-CPULM<br />
PQL-DIOLM<br />
PQL-ENQLM<br />
PQL-FILLM<br />
PQL-JTQUOTA<br />
PQL-PGFLQUOTA<br />
PQL-PRCLM<br />
PQL-TQELM<br />
FTP PQL-ASTLM<br />
PQL-BIOLM<br />
PQL-BYTLM<br />
PQL-CPULM<br />
PQL-DIOLM<br />
PQL-ENQLM<br />
PQL-FILLM<br />
PQL-JTQUOTA<br />
PQL-PGFLQUOTA<br />
PQL-PRCLM<br />
PQL-TQELM<br />
GATED PQL-ASTLM<br />
PQL-BIOLM<br />
PQL-BYTLM<br />
PQL-CPULM<br />
PQL-DIOLM<br />
PQL-ENQLM<br />
PQL-FILLM<br />
PQL-JTQUOTA<br />
PQL-PGFLQUOTA<br />
PQL-PRCLM<br />
PQL-TQELM<br />
Server Configuration Parameters<br />
1000<br />
500<br />
100000<br />
Current process JPI$_CPULM<br />
500<br />
500<br />
500<br />
4096<br />
65536<br />
Current process JPI$_PRCLM<br />
500<br />
Current process JPI$_ASTLM<br />
30<br />
Current process JPI$_BYTLM<br />
Current process JPI$_CPULM<br />
Current process JPI$_DIOLM<br />
Current process JPI$_ENQLM<br />
Current process JPI$_FILLM<br />
Current process JPI$_JTQUOTA<br />
Current proces JPI$_PGFLQUOTA<br />
Current process JPI$_PRCLM<br />
Current process JPI$_TQELM<br />
250<br />
150<br />
100000<br />
0<br />
150<br />
500<br />
100<br />
4096<br />
65536<br />
0<br />
100<br />
A-11
Server Configuration Parameters<br />
A-12<br />
Table A-3 SERVER-CONFIG Default Service Values (Continued)<br />
Server Parameter Default value<br />
KTELNET PQL-ASTLM<br />
PQL-BIOLM<br />
PQL-BYTLM<br />
PQL-CPULM<br />
PQL-DIOLM<br />
PQL-ENQLM<br />
PQL-FILLM<br />
PQL-JTQUOTA<br />
PQL-PGFLQUOTA<br />
PQL-PRCLM<br />
PQL-TQELM<br />
LLMR PQL-ASTLM<br />
PQL-BIOLM<br />
PQL-BYTLM<br />
PQL-CPULM<br />
PQL-DIOLM<br />
PQL-ENQLM<br />
PQL-FILLM<br />
PQL-JTQUOTA<br />
PQL-PGFLQUOTA<br />
PQL-PRCLM<br />
PQL-TQELM<br />
LPD PQL-ASTLM<br />
PQL-BIOLM<br />
PQL-BYTLM<br />
PQL-CPULM<br />
PQL-DIOLM<br />
PQL-ENQLM<br />
PQL-FILLM<br />
PQL-JTQUOTA<br />
PQL-PGFLQUOTA<br />
PQL-PRCLM<br />
PQL-TQELM<br />
250<br />
500<br />
100000<br />
0<br />
150<br />
500<br />
100<br />
4096<br />
65536<br />
0<br />
100<br />
250<br />
150<br />
100000<br />
0<br />
Current process JPI$_DIOLM<br />
Current process JPI$_ENQLM<br />
100<br />
4096<br />
65536<br />
0<br />
100<br />
Current process JPI$_ASTLM<br />
Current process JPI$_BIOLM<br />
Current process JPI$_BYTLM<br />
Current process JPI$_CPULM<br />
Current process JPI$_DIOLM<br />
Current process JPI$_ENQLM<br />
Current process JPI$_FILLM<br />
Current process JPI$_JTQUOTA<br />
Current proces JPI$_PGFLQUOTA<br />
Current process JPI$_PRCLM<br />
Current process JPI$_TQELM
Table A-3 SERVER-CONFIG Default Service Values (Continued)<br />
Server Parameter Default value<br />
NAMED PQL-ASTLM<br />
PQL-BIOLM<br />
PQL-BYTLM<br />
PQL-CPULM<br />
PQL-DIOLM<br />
PQL-ENQLM<br />
PQL-FILLM<br />
PQL-JTQUOTA<br />
PQL-PGFLQUOTA<br />
PQL-PRCLM<br />
PQL-TQELM<br />
NETCONTROL PQL-ASTLM<br />
PQL-BIOLM<br />
PQL-BYTLM<br />
PQL-CPULM<br />
PQL-DIOLM<br />
PQL-ENQLM<br />
PQL-FILLM<br />
PQL-JTQUOTA<br />
PQL-PGFLQUOTA<br />
PQL-PRCLM<br />
PQL-TQELM<br />
NETSTAT PQL-ASTLM<br />
PQL-BIOLM<br />
PQL-BYTLM<br />
PQL-CPULM<br />
PQL-DIOLM<br />
PQL-ENQLM<br />
PQL-FILLM<br />
PQL-JTQUOTA<br />
PQL-PGFLQUOTA<br />
PQL-PRCLM<br />
PQL-TQELM<br />
Server Configuration Parameters<br />
250<br />
Current process JPI$_BIOLM<br />
100000<br />
0<br />
Current process JPI$_DIOLM<br />
500<br />
100<br />
4096<br />
65536<br />
0<br />
100<br />
Current process JPI$_ASTLM<br />
Current process JPI$_BIOLM<br />
Current process JPI$_BYTLM<br />
Current process JPI$_CPULM<br />
Current process JPI$_DIOLM<br />
Current process JPI$_ENQLM<br />
Current process JPI$_FILLM<br />
Current process JPI$_JTQUOTA<br />
Current proces JPI$_PGFLQUOTA<br />
Current process JPI$_PRCLM<br />
Current process JPI$_TQELM<br />
A-13
Server Configuration Parameters<br />
A-14<br />
Table A-3 SERVER-CONFIG Default Service Values (Continued)<br />
Server Parameter Default value<br />
NFS PQL-ASTLM<br />
PQL-BIOLM<br />
PQL-BYTLM<br />
PQL-CPULM<br />
PQL-DIOLM<br />
PQL-ENQLM<br />
PQL-FILLM<br />
PQL-JTQUOTA<br />
PQL-PGFLQUOTA<br />
PQL-PRCLM<br />
PQL-TQELM<br />
NTALK PQL-ASTLM<br />
PQL-BIOLM<br />
PQL-BYTLM<br />
PQL-CPULM<br />
PQL-DIOLM<br />
PQL-ENQLM<br />
PQL-FILLM<br />
PQL-JTQUOTA<br />
PQL-PGFLQUOTA<br />
PQL-PRCLM<br />
PQL-TQELM<br />
NTP PQL-ASTLM<br />
PQL-BIOLM<br />
PQL-BYTLM<br />
PQL-CPULM<br />
PQL-DIOLM<br />
PQL-ENQLM<br />
PQL-FILLM<br />
PQL-JTQUOTA<br />
PQL-PGFLQUOTA<br />
PQL-PRCLM<br />
PQL-TQELM<br />
1000<br />
500<br />
100000<br />
Current process JPI$_CPULM<br />
DIOLM<br />
500<br />
500<br />
4096<br />
65536<br />
Current process JPI$_PRCLM<br />
500<br />
Current process JPI$_ASTLM<br />
Current process JPI$_BIOLM<br />
Current process JPI$_BYTLM<br />
Current process JPI$_CPULM<br />
Current process JPI$_DIOLM<br />
Current process JPI$_ENQLM<br />
Current process JPI$_FILLM<br />
Current process JPI$_JTQUOTA<br />
Current proces JPI$_PGFLQUOTA<br />
Current process JPI$_PRCLM<br />
Current process JPI$_TQELM<br />
Current process JPI$_ASTLM<br />
500<br />
100000<br />
Current process JPI$_CPULM<br />
500<br />
500<br />
100<br />
4096<br />
65536<br />
Current process JPI$_PRCLM<br />
100
Table A-3 SERVER-CONFIG Default Service Values (Continued)<br />
Server Parameter Default value<br />
PCNFSD PQL-ASTLM<br />
PQL-BIOLM<br />
PQL-BYTLM<br />
PQL-CPULM<br />
PQL-DIOLM<br />
PQL-ENQLM<br />
PQL-FILLM<br />
PQL-JTQUOTA<br />
PQL-PGFLQUOTA<br />
PQL-PRCLM<br />
PQL-TQELM<br />
POP2 PQL-ASTLM<br />
PQL-BIOLM<br />
PQL-BYTLM<br />
PQL-CPULM<br />
PQL-DIOLM<br />
PQL-ENQLM<br />
PQL-FILLM<br />
PQL-JTQUOTA<br />
PQL-PGFLQUOTA<br />
PQL-PRCLM<br />
PQL-TQELM<br />
POP3 PQL-ASTLM<br />
PQL-BIOLM<br />
PQL-BYTLM<br />
PQL-CPULM<br />
PQL-DIOLM<br />
PQL-ENQLM<br />
PQL-FILLM<br />
PQL-JTQUOTA<br />
PQL-PGFLQUOTA<br />
PQL-PRCLM<br />
PQL-TQELM<br />
Server Configuration Parameters<br />
Current process JPI$_ASTLM<br />
Current process JPI$_BIOLM<br />
Current process JPI$_BYTLM<br />
Current process JPI$_CPULM<br />
Current process JPI$_DIOLM<br />
Current process JPI$_ENQLM<br />
Current process JPI$_FILLM<br />
Current process JPI$_JTQUOTA<br />
Current proces JPI$_PGFLQUOTA<br />
Current process JPI$_PRCLM<br />
Current process JPI$_TQELM<br />
Current process JPI$_ASTLM<br />
Current process JPI$_BIOLM<br />
Current process JPI$_BYTLM<br />
Current process JPI$_CPULM<br />
Current process JPI$_DIOLM<br />
Current process JPI$_ENQLM<br />
Current process JPI$_FILLM<br />
Current process JPI$_JTQUOTA<br />
Current proces JPI$_PGFLQUOTA<br />
Current process JPI$_PRCLM<br />
Current process JPI$_TQELM<br />
A-15
Server Configuration Parameters<br />
A-16<br />
Table A-3 SERVER-CONFIG Default Service Values (Continued)<br />
Server Parameter Default value<br />
RACOON PQL-ASTLM<br />
PQL-BIOLM<br />
PQL-BYTLM<br />
PQL-CPULM<br />
PQL-DIOLM<br />
PQL-ENQLM<br />
PQL-FILLM<br />
PQL-JTQUOTA<br />
PQL-PGFLQUOTA<br />
PQL-PRCLM<br />
PQL-TQELM<br />
RARP PQL-ASTLM<br />
PQL-BIOLM<br />
PQL-BYTLM<br />
PQL-CPULM<br />
PQL-DIOLM<br />
PQL-ENQLM<br />
PQL-FILLM<br />
PQL-JTQUOTA<br />
PQL-PGFLQUOTA<br />
PQL-PRCLM<br />
PQL-TQELM<br />
REXEC PQL-ASTLM<br />
PQL-BIOLM<br />
PQL-BYTLM<br />
PQL-CPULM<br />
PQL-DIOLM<br />
PQL-ENQLM<br />
PQL-FILLM<br />
PQL-JTQUOTA<br />
PQL-PGFLQUOTA<br />
PQL-PRCLM<br />
PQL-TQELM<br />
250<br />
150<br />
100000<br />
0<br />
150<br />
500<br />
100<br />
4096<br />
65536<br />
0<br />
100<br />
Current process JPI$_ASTLM<br />
Current process JPI$_BIOLM<br />
Current process JPI$_BYTLM<br />
Current process JPI$_CPULM<br />
Current process JPI$_DIOLM<br />
Current process JPI$_ENQLM<br />
Current process JPI$_FILLM<br />
Current process JPI$_JTQUOTA<br />
Current proces JPI$_PGFLQUOTA<br />
Current process JPI$_PRCLM<br />
Current process JPI$_TQELM<br />
Current process JPI$_ASTLM<br />
Current process JPI$_BIOLM<br />
Current process JPI$_BYTLM<br />
Current process JPI$_CPULM<br />
Current process JPI$_DIOLM<br />
Current process JPI$_ENQLM<br />
Current process JPI$_FILLM<br />
Current process JPI$_JTQUOTA<br />
Current proces JPI$_PGFLQUOTA<br />
Current process JPI$_PRCLM<br />
Current process JPI$_TQELM
Table A-3 SERVER-CONFIG Default Service Values (Continued)<br />
Server Parameter Default value<br />
RLOGIN PQL-ASTLM<br />
PQL-BIOLM<br />
PQL-BYTLM<br />
PQL-CPULM<br />
PQL-DIOLM<br />
PQL-ENQLM<br />
PQL-FILLM<br />
PQL-JTQUOTA<br />
PQL-PGFLQUOTA<br />
PQL-PRCLM<br />
PQL-TQELM<br />
RPCBOOTPARAM PQL-ASTLM<br />
PQL-BIOLM<br />
PQL-BYTLM<br />
PQL-CPULM<br />
PQL-DIOLM<br />
PQL-ENQLM<br />
PQL-FILLM<br />
PQL-JTQUOTA<br />
PQL-PGFLQUOTA<br />
PQL-PRCLM<br />
PQL-TQELM<br />
RPCLOCKMGR PQL-ASTLM<br />
PQL-BIOLM<br />
PQL-BYTLM<br />
PQL-CPULM<br />
PQL-DIOLM<br />
PQL-ENQLM<br />
PQL-FILLM<br />
PQL-JTQUOTA<br />
PQL-PGFLQUOTA<br />
PQL-PRCLM<br />
PQL-TQELM<br />
Server Configuration Parameters<br />
Current process JPI$_ASTLM<br />
Current process JPI$_BIOLM<br />
Current process JPI$_BYTLM<br />
Current process JPI$_CPULM<br />
Current process JPI$_DIOLM<br />
Current process JPI$_ENQLM<br />
Current process JPI$_FILLM<br />
Current process JPI$_JTQUOTA<br />
Current proces JPI$_PGFLQUOTA<br />
Current process JPI$_PRCLM<br />
Current process JPI$_TQELM<br />
Current process JPI$_ASTLM<br />
Current process JPI$_BIOLM<br />
Current process JPI$_BYTLM<br />
Current process JPI$_CPULM<br />
Current process JPI$_DIOLM<br />
Current process JPI$_ENQLM<br />
Current process JPI$_FILLM<br />
Current process JPI$_JTQUOTA<br />
Current proces JPI$_PGFLQUOTA<br />
Current process JPI$_PRCLM<br />
Current process JPI$_TQELM<br />
A-17
Server Configuration Parameters<br />
A-18<br />
Table A-3 SERVER-CONFIG Default Service Values (Continued)<br />
Server Parameter Default value<br />
RPCMOUNT PQL-ASTLM<br />
PQL-BIOLM<br />
PQL-BYTLM<br />
PQL-CPULM<br />
PQL-DIOLM<br />
PQL-ENQLM<br />
PQL-FILLM<br />
PQL-JTQUOTA<br />
PQL-PGFLQUOTA<br />
PQL-PRCLM<br />
PQL-TQELM<br />
RPCPORTMAP PQL-ASTLM<br />
PQL-BIOLM<br />
PQL-BYTLM<br />
PQL-CPULM<br />
PQL-DIOLM<br />
PQL-ENQLM<br />
PQL-FILLM<br />
PQL-JTQUOTA<br />
PQL-PGFLQUOTA<br />
PQL-PRCLM<br />
PQL-TQELM<br />
RPCQUOTAD PQL-ASTLM<br />
PQL-BIOLM<br />
PQL-BYTLM<br />
PQL-CPULM<br />
PQL-DIOLM<br />
PQL-ENQLM<br />
PQL-FILLM<br />
PQL-JTQUOTA<br />
PQL-PGFLQUOTA<br />
PQL-PRCLM<br />
PQL-TQELM<br />
Current process JPI$_ASTLM<br />
Current process JPI$_BIOLM<br />
Current process JPI$_BYTLM<br />
Current process JPI$_CPULM<br />
Current process JPI$_DIOLM<br />
Current process JPI$_ENQLM<br />
Current process JPI$_FILLM<br />
Current process JPI$_JTQUOTA<br />
Current proces JPI$_PGFLQUOTA<br />
Current process JPI$_PRCLM<br />
Current process JPI$_TQELM<br />
Current process JPI$_ASTLM<br />
Current process JPI$_BIOLM<br />
Current process JPI$_BYTLM<br />
Current process JPI$_CPULM<br />
Current process JPI$_DIOLM<br />
Current process JPI$_ENQLM<br />
Current process JPI$_FILLM<br />
Current process JPI$_JTQUOTA<br />
Current proces JPI$_PGFLQUOTA<br />
Current process JPI$_PRCLM<br />
Current process JPI$_TQELM
Table A-3 SERVER-CONFIG Default Service Values (Continued)<br />
Server Parameter Default value<br />
RPCSTATUS PQL-ASTLM<br />
PQL-BIOLM<br />
PQL-BYTLM<br />
PQL-CPULM<br />
PQL-DIOLM<br />
PQL-ENQLM<br />
PQL-FILLM<br />
PQL-JTQUOTA<br />
PQL-PGFLQUOTA<br />
PQL-PRCLM<br />
PQL-TQELM<br />
RSHELL PQL-ASTLM<br />
PQL-BIOLM<br />
PQL-BYTLM<br />
PQL-CPULM<br />
PQL-DIOLM<br />
PQL-ENQLM<br />
PQL-FILLM<br />
PQL-JTQUOTA<br />
PQL-PGFLQUOTA<br />
PQL-PRCLM<br />
PQL-TQELM<br />
RUSERS PQL-ASTLM<br />
PQL-BIOLM<br />
PQL-BYTLM<br />
PQL-CPULM<br />
PQL-DIOLM<br />
PQL-ENQLM<br />
PQL-FILLM<br />
PQL-JTQUOTA<br />
PQL-PGFLQUOTA<br />
PQL-PRCLM<br />
PQL-TQELM<br />
Server Configuration Parameters<br />
Current process JPI$_ASTLM<br />
Current process JPI$_BIOLM<br />
Current process JPI$_BYTLM<br />
Current process JPI$_CPULM<br />
Current process JPI$_DIOLM<br />
Current process JPI$_ENQLM<br />
Current process JPI$_FILLM<br />
Current process JPI$_JTQUOTA<br />
Current proces JPI$_PGFLQUOTA<br />
Current process JPI$_PRCLM<br />
Current process JPI$_TQELM<br />
Current process JPI$_ASTLM<br />
Current process JPI$_BIOLM<br />
Current process JPI$_BYTLM<br />
Current process JPI$_CPULM<br />
Current process JPI$_DIOLM<br />
Current process JPI$_ENQLM<br />
Current process JPI$_FILLM<br />
Current process JPI$_JTQUOTA<br />
Current proces JPI$_PGFLQUOTA<br />
Current process JPI$_PRCLM<br />
Current process JPI$_TQELM<br />
A-19
Server Configuration Parameters<br />
A-20<br />
Table A-3 SERVER-CONFIG Default Service Values (Continued)<br />
Server Parameter Default value<br />
RWALL PQL-ASTLM<br />
PQL-BIOLM<br />
PQL-BYTLM<br />
PQL-CPULM<br />
PQL-DIOLM<br />
PQL-ENQLM<br />
PQL-FILLM<br />
PQL-JTQUOTA<br />
PQL-PGFLQUOTA<br />
PQL-PRCLM<br />
PQL-TQELM<br />
SMTP PQL-ASTLM<br />
PQL-BIOLM<br />
PQL-BYTLM<br />
PQL-CPULM<br />
PQL-DIOLM<br />
PQL-ENQLM<br />
PQL-FILLM<br />
PQL-JTQUOTA<br />
PQL-PGFLQUOTA<br />
PQL-PRCLM<br />
PQL-TQELM<br />
SMUX PQL-ASTLM<br />
PQL-BIOLM<br />
PQL-BYTLM<br />
PQL-CPULM<br />
PQL-DIOLM<br />
PQL-ENQLM<br />
PQL-FILLM<br />
PQL-JTQUOTA<br />
PQL-PGFLQUOTA<br />
PQL-PRCLM<br />
PQL-TQELM<br />
Current process JPI$_ASTLM<br />
Current process JPI$_BIOLM<br />
Current process JPI$_BYTLM<br />
Current process JPI$_CPULM<br />
Current process JPI$_DIOLM<br />
Current process JPI$_ENQLM<br />
Current process JPI$_FILLM<br />
Current process JPI$_JTQUOTA<br />
Current proces JPI$_PGFLQUOTA<br />
Current process JPI$_PRCLM<br />
Current process JPI$_TQELM<br />
Current process JPI$_ASTLM<br />
Current process JPI$_BIOLM<br />
Current process JPI$_BYTLM<br />
Current process JPI$_CPULM<br />
Current process JPI$_DIOLM<br />
Current process JPI$_ENQLM<br />
Current process JPI$_FILLM<br />
Current process JPI$_JTQUOTA<br />
Current proces JPI$_PGFLQUOTA<br />
Current process JPI$_PRCLM<br />
Current process JPI$_TQELM
Table A-3 SERVER-CONFIG Default Service Values (Continued)<br />
Server Parameter Default value<br />
SNMP PQL-ASTLM<br />
PQL-BIOLM<br />
PQL-BYTLM<br />
PQL-CPULM<br />
PQL-DIOLM<br />
PQL-ENQLM<br />
PQL-FILLM<br />
PQL-JTQUOTA<br />
PQL-PGFLQUOTA<br />
PQL-PRCLM<br />
PQL-TQELM<br />
SSH PQL-ASTLM<br />
PQL-BIOLM<br />
PQL-BYTLM<br />
PQL-CPULM<br />
PQL-DIOLM<br />
PQL-ENQLM<br />
PQL-FILLM<br />
PQL-JTQUOTA<br />
PQL-PGFLQUOTA<br />
PQL-PRCLM<br />
PQL-TQELM<br />
SYSTAT PQL-ASTLM<br />
PQL-BIOLM<br />
PQL-BYTLM<br />
PQL-CPULM<br />
PQL-DIOLM<br />
PQL-ENQLM<br />
PQL-FILLM<br />
PQL-JTQUOTA<br />
PQL-PGFLQUOTA<br />
PQL-PRCLM<br />
PQL-TQELM<br />
250<br />
150<br />
100000<br />
0<br />
150<br />
500<br />
100<br />
4096<br />
65536<br />
0<br />
100<br />
250<br />
500<br />
100000<br />
0<br />
150<br />
500<br />
100<br />
4096<br />
65536<br />
0<br />
100<br />
Server Configuration Parameters<br />
Current process JPI$_ASTLM<br />
Current process JPI$_BIOLM<br />
Current process JPI$_BYTLM<br />
Current process JPI$_CPULM<br />
Current process JPI$_DIOLM<br />
Current process JPI$_ENQLM<br />
Current process JPI$_FILLM<br />
Current process JPI$_JTQUOTA<br />
Current proces JPI$_PGFLQUOTA<br />
Current process JPI$_PRCLM<br />
Current process JPI$_TQELM<br />
A-21
Server Configuration Parameters<br />
A-22<br />
Table A-3 SERVER-CONFIG Default Service Values (Continued)<br />
Server Parameter Default value<br />
TALK PQL-ASTLM<br />
PQL-BIOLM<br />
PQL-BYTLM<br />
PQL-CPULM<br />
PQL-DIOLM<br />
PQL-ENQLM<br />
PQL-FILLM<br />
PQL-JTQUOTA<br />
PQL-PGFLQUOTA<br />
PQL-PRCLM<br />
PQL-TQELM<br />
TELNET PQL-ASTLM<br />
PQL-BIOLM<br />
PQL-BYTLM<br />
PQL-CPULM<br />
PQL-DIOLM<br />
PQL-ENQLM<br />
PQL-FILLM<br />
PQL-JTQUOTA<br />
PQL-PGFLQUOTA<br />
PQL-PRCLM<br />
PQL-TQELM<br />
TFTP PQL-ASTLM<br />
PQL-BIOLM<br />
PQL-BYTLM<br />
PQL-CPULM<br />
PQL-DIOLM<br />
PQL-ENQLM<br />
PQL-FILLM<br />
PQL-JTQUOTA<br />
PQL-PGFLQUOTA<br />
PQL-PRCLM<br />
PQL-TQELM<br />
Current process JPI$_ASTLM<br />
Current process JPI$_BIOLM<br />
Current process JPI$_BYTLM<br />
Current process JPI$_CPULM<br />
Current process JPI$_DIOLM<br />
Current process JPI$_ENQLM<br />
Current process JPI$_FILLM<br />
Current process JPI$_JTQUOTA<br />
Current proces JPI$_PGFLQUOTA<br />
Current process JPI$_PRCLM<br />
Current process JPI$_TQELM<br />
Current process JPI$_ASTLM<br />
Current process JPI$_BIOLM<br />
Current process JPI$_BYTLM<br />
Current process JPI$_CPULM<br />
Current process JPI$_DIOLM<br />
Current process JPI$_ENQLM<br />
Current process JPI$_FILLM<br />
Current process JPI$_JTQUOTA<br />
Current proces JPI$_PGFLQUOTA<br />
Current process JPI$_PRCLM<br />
Current process JPI$_TQELM
Table A-3 SERVER-CONFIG Default Service Values (Continued)<br />
Server Parameter Default value<br />
TIME PQL-ASTLM<br />
PQL-BIOLM<br />
PQL-BYTLM<br />
PQL-CPULM<br />
PQL-DIOLM<br />
PQL-ENQLM<br />
PQL-FILLM<br />
PQL-JTQUOTA<br />
PQL-PGFLQUOTA<br />
PQL-PRCLM<br />
PQL-TQELM<br />
UCXQIO PQL-ASTLM<br />
PQL-BIOLM<br />
PQL-BYTLM<br />
PQL-CPULM<br />
PQL-DIOLM<br />
PQL-ENQLM<br />
PQL-FILLM<br />
PQL-JTQUOTA<br />
PQL-PGFLQUOTA<br />
PQL-PRCLM<br />
PQL-TQELM<br />
UDPCHARGEN PQL-ASTLM<br />
PQL-BIOLM<br />
PQL-BYTLM<br />
PQL-CPULM<br />
PQL-DIOLM<br />
PQL-ENQLM<br />
PQL-FILLM<br />
PQL-JTQUOTA<br />
PQL-PGFLQUOTA<br />
PQL-PRCLM<br />
PQL-TQELM<br />
Server Configuration Parameters<br />
Current process JPI$_ASTLM<br />
Current process JPI$_BIOLM<br />
Current process JPI$_BYTLM<br />
Current process JPI$_CPULM<br />
Current process JPI$_DIOLM<br />
Current process JPI$_ENQLM<br />
Current process JPI$_FILLM<br />
Current process JPI$_JTQUOTA<br />
Current proces JPI$_PGFLQUOTA<br />
Current process JPI$_PRCLM<br />
Current process JPI$_TQELM<br />
Current process JPI$_ASTLM<br />
Current process JPI$_BIOLM<br />
Current process JPI$_BYTLM<br />
Current process JPI$_CPULM<br />
Current process JPI$_DIOLM<br />
Current process JPI$_ENQLM<br />
Current process JPI$_FILLM<br />
Current process JPI$_JTQUOTA<br />
Current proces JPI$_PGFLQUOTA<br />
Current process JPI$_PRCLM<br />
Current process JPI$_TQELM<br />
A-23
Server Configuration Parameters<br />
A-24<br />
Table A-3 SERVER-CONFIG Default Service Values (Continued)<br />
Server Parameter Default value<br />
UDPDAYTIME PQL-ASTLM<br />
PQL-BIOLM<br />
PQL-BYTLM<br />
PQL-CPULM<br />
PQL-DIOLM<br />
PQL-ENQLM<br />
PQL-FILLM<br />
PQL-JTQUOTA<br />
PQL-PGFLQUOTA<br />
PQL-PRCLM<br />
PQL-TQELM<br />
UDPDISCARD PQL-ASTLM<br />
PQL-BIOLM<br />
PQL-BYTLM<br />
PQL-CPULM<br />
PQL-DIOLM<br />
PQL-ENQLM<br />
PQL-FILLM<br />
PQL-JTQUOTA<br />
PQL-PGFLQUOTA<br />
PQL-PRCLM<br />
PQL-TQELM<br />
UDPECHO PQL-ASTLM<br />
PQL-BIOLM<br />
PQL-BYTLM<br />
PQL-CPULM<br />
PQL-DIOLM<br />
PQL-ENQLM<br />
PQL-FILLM<br />
PQL-JTQUOTA<br />
PQL-PGFLQUOTA<br />
PQL-PRCLM<br />
PQL-TQELM<br />
Current process JPI$_ASTLM<br />
Current process JPI$_BIOLM<br />
Current process JPI$_BYTLM<br />
Current process JPI$_CPULM<br />
Current process JPI$_DIOLM<br />
Current process JPI$_ENQLM<br />
Current process JPI$_FILLM<br />
Current process JPI$_JTQUOTA<br />
Current proces JPI$_PGFLQUOTA<br />
Current process JPI$_PRCLM<br />
Current process JPI$_TQELM<br />
Current process JPI$_ASTLM<br />
Current process JPI$_BIOLM<br />
Current process JPI$_BYTLM<br />
Current process JPI$_CPULM<br />
Current process JPI$_DIOLM<br />
Current process JPI$_ENQLM<br />
Current process JPI$_FILLM<br />
Current process JPI$_JTQUOTA<br />
Current proces JPI$_PGFLQUOTA<br />
Current process JPI$_PRCLM<br />
Current process JPI$_TQELM
Table A-3 SERVER-CONFIG Default Service Values (Continued)<br />
Server Parameter Default value<br />
UDPTIME PQL-ASTLM<br />
PQL-BIOLM<br />
PQL-BYTLM<br />
PQL-CPULM<br />
PQL-DIOLM<br />
PQL-ENQLM<br />
PQL-FILLM<br />
PQL-JTQUOTA<br />
PQL-PGFLQUOTA<br />
PQL-PRCLM<br />
PQL-TQELM<br />
VIADECNET PQL-ASTLM<br />
PQL-BIOLM<br />
PQL-BYTLM<br />
PQL-CPULM<br />
PQL-DIOLM<br />
PQL-ENQLM<br />
PQL-FILLM<br />
PQL-JTQUOTA<br />
PQL-PGFLQUOTA<br />
PQL-PRCLM<br />
PQL-TQELM<br />
XDM PQL-ASTLM<br />
PQL-BIOLM<br />
PQL-BYTLM<br />
PQL-CPULM<br />
PQL-DIOLM<br />
PQL-ENQLM<br />
PQL-FILLM<br />
PQL-JTQUOTA<br />
PQL-PGFLQUOTA<br />
PQL-PRCLM<br />
PQL-TQELM<br />
Server Configuration Parameters<br />
Current process JPI$_ASTLM<br />
Current process JPI$_BIOLM<br />
Current process JPI$_BYTLM<br />
Current process JPI$_CPULM<br />
Current process JPI$_DIOLM<br />
Current process JPI$_ENQLM<br />
Current process JPI$_FILLM<br />
Current process JPI$_JTQUOTA<br />
Current proces JPI$_PGFLQUOTA<br />
Current process JPI$_PRCLM<br />
Current process JPI$_TQELM<br />
Current process JPI$_ASTLM<br />
Current process JPI$_BIOLM<br />
Current process JPI$_BYTLM<br />
Current process JPI$_CPULM<br />
Current process JPI$_DIOLM<br />
Current process JPI$_ENQLM<br />
Current process JPI$_FILLM<br />
Current process JPI$_JTQUOTA<br />
Current proces JPI$_PGFLQUOTA<br />
Current process JPI$_PRCLM<br />
Current process JPI$_TQELM<br />
1000<br />
500<br />
100000<br />
Current process JPI$_CPULM<br />
500<br />
500<br />
500<br />
4096<br />
65536<br />
Current process JPI$_PRCLM<br />
500<br />
A-25
Server Configuration Parameters<br />
A-26
DNSSEC<br />
Appendix B<br />
DNSSEC<br />
Cryptographic authentication of DNS information is possible through the DNS Security (DNSSECbis)<br />
extensions, defined in RFC 4033, RFC 4034, <strong>and</strong> RFC 4035. This section describes the<br />
creation <strong>and</strong> use of DNSSEC signed zones.<br />
In order to setup a DNSSEC secure zone, there are a series of steps which must be followed.<br />
BIND9 ships with several tools that are used in this process, which are explained in more detail<br />
below. In all cases, the -h option prints a full list of parameters.<br />
NOTE: For use with <strong>MultiNet</strong> 5.4, define symbols for each of the tools, <strong>and</strong> call the symbol from<br />
the comm<strong>and</strong> line. For example, to use the dnssec-keygen tool, a symbol could be created as<br />
follows:<br />
$ keygen :== $multinet:dnssec-keygen<br />
$ keygen -h<br />
There must also be communication with the administrators of the parent <strong>and</strong>/or child zone to<br />
transmit keys. A zone’s security status must be indicated by the parent zone for a DNSSEC capable<br />
resolver to trust its data. This is done through the presence or absence of a DS record at the<br />
delegation point.<br />
For other servers to trust data in this zone, they must either be statically configured with this zone’s<br />
zone key or the zone key of another zone above this one in the DNS tree.<br />
Generating Keys<br />
The dnssec-keygen program is used to generate keys. A secure zone must contain one or more zone<br />
keys. The zone keys will sign all other records in the zone, as well as the zone keys of any secure<br />
delegated zones. Zone keys must have the same name as the zone, a name type of ZONE, <strong>and</strong> must<br />
be usable for authentication. It is recommended that zone keys use a cryptographic algorithm<br />
designated as “m<strong>and</strong>atory to implement” by the IETF; currently the only one is RSASHA1. For<br />
B-1
DNSSEC<br />
B-2<br />
convenience, run the dnssec-keygen tool in the directory the zone data files are located, do you<br />
won’t need to use full pathnames as arguments.<br />
The following comm<strong>and</strong> will generate a 768-bit RSASHA1 key for the child.example zone, the<br />
symbol keygen has been created to refer to the dnssec-keygen executable:<br />
$ keygen -a RSASHA1 -b 768 -n ZONE child-example<br />
NOTE: File names specified with the tools must conform to OpenVMS naming conventions. Be<br />
aware of using multiple dots, etc. which will generate errors upon file creation.<br />
Two output files will be produced: Kchild-example-005-12345.key <strong>and</strong> Kchild-example-005-<br />
12345.private (where 12345 is an example of a key tag). The key filenames contain the key name<br />
(child-example.), algorithm (3 is DSA, 1 is RSAMD5, 5 is RSASHA1, etc.), <strong>and</strong> the key tag (12345<br />
in this case). The private key (in the .private file) is used to generate signatures, <strong>and</strong> the public key<br />
(in the .key file) is used for signature verification. Always protect the .private key, anyone who<br />
knows it can forge signed zone data. The .private key file will be written readable <strong>and</strong> writable<br />
only by the user who runs it. <strong>Process</strong> <strong>Software</strong> recommends running the DNSSEC tools from a<br />
suitably privileged account.<br />
To generate another key with the same properties (but with a different key tag), repeat the above<br />
comm<strong>and</strong>.<br />
The dnssec-keyfromlabel program is used to get a key pair from a crypto hardware <strong>and</strong> build the<br />
key files. Its usage is similar to dnssec-keygen.<br />
The public keys can be inserted into the zone file by pasting in their contents, or better yet by<br />
including the .key file using $include statements. For example, to insert the public key for childexample,<br />
add the following $include statement to the zone file:<br />
$include Kchild-example-005-12345.key ;<br />
The zone file (for examples in this Appendix, the file name is zone.1) may look like this :<br />
$TTL 100<br />
$ORIGIN child-example.<br />
@ IN SOA a.example. a.a.example. 1 360 36 60480 12<br />
NS a.example.<br />
NS b.example.<br />
one A 10.10.10.10<br />
two A 10.10.10.100<br />
MX 10 one.zz.example.<br />
$include Kchild-example-005-12345.key ;<br />
Signing the Zone<br />
With the key included in the zone file, use the dnssec-signzone program to sign the zone.<br />
Any keyset files corresponding to secure subzones should be present. The zone signer will generate<br />
NSEC, NSEC3 <strong>and</strong> RRSIG records for the zone, as well as DS for the child zones if ‘-g’ is
DNSSEC<br />
specified. If ‘-g’ is not specified, then DS RRsets for the secure child zones need to be added<br />
manually.<br />
The following comm<strong>and</strong> signs the zone, assuming it is in a file called zone.1. By default, all zone<br />
keys which have an available private key are used to generate signatures. First define a symbol for<br />
dnssec-signzone:<br />
$ signer :== $multinet:dnssec-signzone<br />
The -o option specifies the zone origin, the default is the zone file name.<br />
$ signer -o child-example zone.1<br />
Note: You may see the message “No self signing KSK found.” This is normal as no KSK (key<br />
signing key) has been generated at this point. Only a ZSK (zone signing key) is present.<br />
One output file is produced: zone.1_signed. This file should be referenced by named.conf as the<br />
input file for the zone.<br />
The output file, zone.1_signed, should look something like this:<br />
; dnssec_signzone version 9.7.2-p3<br />
child-example. 100 IN SOA a.example. a.a.example. (<br />
1 ; serial<br />
360 ; refresh (6 minutes)<br />
36 ; retry (36 seconds)<br />
60480 ; expire (16 hours 48 minutes)<br />
12 ; minimum (12 seconds)<br />
)<br />
100 RRSIG SOA 5 1 100 20110428114855 (<br />
20110329114855 36111 child-example.<br />
rWVs/euooBTVk0MzhxHQio61rDBhzAId13sV<br />
KXphVsA64bqyayhJcCfikmxww6vq6gG0W3mR<br />
z1tbIQ7znZ0SN90dsWhEcoEaEmm1Sl6hwSVY<br />
OzaYrN8HgahzcrNlsX5l )<br />
100 NS a.example.<br />
100 NS b.example.<br />
100 RRSIG NS 5 1 100 20110428114855 (<br />
20110329114855 36111 child-example.<br />
SOrA8BihARhE+SPl/iYjB8PTqk+8lc4sEE4b<br />
CYhgcF6d9VOZtCotQFUqVKrk65xoGqf60+9R<br />
kBJr6lsOwr6mqDVCiZzVnAy1frWD8T8q5HNK<br />
nzVR8gb7AXyPtbgKqOS3 )<br />
12 NSEC one.child-example. NS SOA RRSIG NSEC DNSKEY<br />
12 RRSIG NSEC 5 1 12 20110428114855 (<br />
20110329114855 36111 child-example.<br />
L0K9USccXSgO4iYBaXDOrQ0zzrxVVRECwjAb<br />
DAeZqVec525V6kNIB5F2mCxjSJqlJ5C40vr+<br />
lCqe/EGzjxplEzqq0nSN/fCtTgXqhLL6EfZx<br />
M1lvB5C+4K4hR20neVWy )<br />
100 DNSKEY 256 3 5 (<br />
AwEAAcXIK+ljUWgMENcS9TUqnZGEFMOE5DBP<br />
WyQu5aIGSZqTTcvMWsaFtS7800LjapDB4kcs<br />
xwecfdA4I/0dUHPuHqmQREGfq/xstyxLPHKS<br />
MEkJthkVurf4MWzdX8dAVEd/GQ==<br />
) ; key id = 36111<br />
100 RRSIG DNSKEY 5 1 100 20110428114855 (<br />
20110329114855 36111 child-example.<br />
O8t91OOvLCSotc7mTG7iVr6fyeg7AA6ZuzHR<br />
GfN0dbOFzZHGxSAj2pRXPz8FC/eYz+ngy6rK<br />
23UhdklmuJN35IEA+qkXBilS7NJtEvaONOud<br />
1ANN6qQDtXyYFxnCuEN0 )<br />
one.child-example. 100 IN A 10.10.10.10<br />
100 RRSIG A 5 2 100 20110428114855 (<br />
B-3
DNSSEC<br />
B-4<br />
20110329114855 36111 child-example.<br />
o3TPUffd5dLuxoac0TVVsT8HU3MFoJtIbfXV<br />
apidfBY7IbxU6YWgPPwkYO1oKgJ3CnWmKTZQ<br />
sUB+QRE1VHn8GmPbyjbg9QfhIKZDEQyT2f7x<br />
41QDNznnKnJyYjhmbyCf )<br />
12 NSEC two.child-example. A RRSIG NSEC<br />
12 RRSIG NSEC 5 2 12 20110428114855 (<br />
20110329114855 36111 child-example.<br />
w3RXqBeiUk/njCh/nHg2s1hv9kYynGdRsp2A<br />
vYm8ahrq4pGv1DLr6uuwCT5vBfjor1l5ePBj<br />
jsIO3FLkWyO7miBpfiLLPa7umKSQLN0AZGIE<br />
/5Z7LSc80o2fzwqcBkub )<br />
two.child-example. 100 IN A 10.10.10.100<br />
100 RRSIG A 5 2 100 20110428114855 (<br />
20110329114855 36111 child-example.<br />
jQAof31o6bO4oOVlhLAt6NQkifz1l4qnfN4a<br />
viZiB0RmLYuRNnHFRAPyZLkoI8PTgCuCdV/e<br />
co1ifFnXU9UauNnK/wQw8Djurvra/YMq8f5W<br />
ZZcOReQvZUoD8mS4C3ec )<br />
100 MX 10 one.zz.example.<br />
100 RRSIG MX 5 2 100 20110428114855 (<br />
20110329114855 36111 child-example.<br />
hIQI20XS9qYdi5/3qMp1VeU0aQqBwQsugwkw<br />
mCD9gY7BrpYjMeeg3XQHY0Qx7ElqLc9Q0F3C<br />
kC0ETM5CDnUAicXCy2TOc1DAKfSOYlKRnzVd<br />
a5LlFGymsi2gVyW7VssH )<br />
12 NSEC child-example. A MX RRSIG NSEC<br />
12 RRSIG NSEC 5 2 12 20110428114855 (<br />
20110329114855 36111 child-example.<br />
OhIM8y6IGXixOUtD+ZH/bicznRtX6YrdeXxg<br />
5bD3ROSUcfpCL5YAUxfk/B9nj2n1OStle88r<br />
O7EeMB2rSiAPqYW88ZbIXXhOHsE6z3ff7Plc<br />
B3pT56MBxUh5cm2WDYTL )<br />
dnssec-signzone will also produce a keyset <strong>and</strong> dsset files <strong>and</strong> optionally a dlvset file. These are<br />
used to provide the parent zone administrators with the DNSKEYs (or their corresponding DS<br />
records) that are the secure entry point to the zone.<br />
Configuring Servers<br />
To enable named to respond appropriately to DNS requests from DNSSEC aware clients, the<br />
option dnssec-enable must be set to yes. (This is the default setting.)<br />
To enable named to validate answers from other servers, the dnssec-enable <strong>and</strong> dnssec-validation<br />
options must both be set to yes, <strong>and</strong> at least one trust anchor must be configured with a trustedkeys<br />
or managed-keys statement in named.conf.<br />
trusted-keys are copies of DNSKEY RRs for zones that are used to form the first link in the<br />
cryptographic chain of trust. All keys listed in trusted-keys (<strong>and</strong> corresponding zones) are deemed<br />
to exist <strong>and</strong> only the listed keys will be used to validated the DNSKEY RRset that they are from.<br />
managed-keys are trusted keys which are automatically kept up to date via RFC 5011 trust anchor<br />
maintenance.<br />
After DNSSEC gets established, a typical DNSSEC configuration will look something like the<br />
following. It has one or more public keys for the root. This allows answers from outside the<br />
organization to be validated. It will also have several keys for parts of the namespace the<br />
organization controls. These are here to ensure that named is immune to compromises in the<br />
DNSSEC components of the security of parent zones.
managed-keys {<br />
/* Root Key */<br />
"." initial-key 257 3 3<br />
"BNY4wrWM1nCfJ+CXd0rVXyYmobt7sEEfK3clRbGaTwS<br />
JxrGkxJWoZu6I7PzJu/E9gx4UC1zGAHlXKdE4zYIpRh<br />
aBKnvcC2U9mZhkdUpd1Vso/HAdjNe8LmMlnzY3zy2Xy<br />
4klWOADTPzSv9eamj8V18PHGjBLaVtYvk/ln5ZApjYg<br />
hf+6fElrmLkdaz MQ2OCnACR817DF4BBa7UR/beDHyp<br />
5iWTXWSi6XmoJLbG9Scqc7l70KDqlvXR3M/lUUVRbke<br />
g1IPJSidmK3ZyCllh4XSKbje/45SKucHgnwU5jefMtq<br />
66gKodQj+MiA21AfUVe7u99WzTLzY3qlxDhxYQQ20FQ<br />
97S+LKUTpQcq27R7AT3/V5hRQxScINqwcz4jYqZD2fQ<br />
dgxbcDTClU0CRBdiieyLMNzXG3";<br />
};<br />
trusted-keys {<br />
/* Key for our organization’s forward zone */<br />
example.net. 257 3 5<br />
"AwEAAaxPMcR2x0HbQV4WeZB6oEDX+r0QM6<br />
5KbhTjrW1ZaARmPhEZZe3Y9ifgEuq7vZ/z<br />
GZUdEGNWy+JZzus0lUptwgjGwhUS1558Hb<br />
4JKUbbOTcM8pwXlj0EiX3oDFVmjHO444gL<br />
kBOUKUf/mC7HvfwYH/Be22GnClrinKJp1O<br />
g4ywzO9WglMk7jbfW33gUKvirTHr25GL7S<br />
TQUzBb5Usxt8lgnyTUHs1t3JwCY5hKZ6Cq<br />
FxmAVZP20igTixin/1LcrgX/KMEGd/biuv<br />
F4qJCyduieHukuY3H4XMAcR+xia2nIUPvm<br />
/oyWR8BW/hWdzOvnSCThlHf3xiYleDbt/o<br />
1OTQ09A0=";<br />
/* Key for our reverse zone. */<br />
2.0.192.IN-ADDRPA.NET. 257 3 5<br />
"AQOnS4xn/IgOUpBPJ3bogzwc<br />
xOdNax071L18QqZnQQQAVVr+i<br />
LhGTnNGp3HoWQLUIzKrJVZ3zg<br />
gy3WwNT6kZo6c0tszYqbtvchm<br />
gQC8CzKojM/W16i6MG/eafGU3<br />
siaOdS0yOI6BgPsw+YZdzlYMa<br />
IJGf4M4dyoKIhzdZyQ2bYQrjy<br />
Q4LB0lC7aOnsMyYKHHYeRvPxj<br />
IQXmdqgOJGq+vsevG06zW+1xg<br />
YJh9rCIfnm1GX/KMgxLPG2vXT<br />
D/RnLX+D3T3UL7HJYHJhAZD5L<br />
59VvjSPsZJHeDCUyWYrvPZesZ<br />
DIRvhDD52SKvbheeTJUm6Ehkz<br />
ytNN2SN96QRk8j/iI8ib";<br />
};<br />
options { ...<br />
dnssec-enable yes;<br />
dnssec-validation yes;<br />
};<br />
DNSSEC<br />
NOTE<br />
None of the keys listed in this example are valid. In particular, the root key is not valid.<br />
When DNSSEC validation is enabled <strong>and</strong> properly configured, the resolver will reject any answers<br />
from signed, secure zones which fail to validate, <strong>and</strong> will return SERVFAIL to the client.<br />
Responses may fail to validate for any of several reasons, including missing, expired, or invalid<br />
signatures, a key which does not match the DS RRset in the parent zone, or an insecure response<br />
from a zone which, according to its parent, should have been secure.<br />
B-5
DNSSEC<br />
B-6<br />
NOTE<br />
When the validator receives a response from an unsigned zone that has a signed parent, it must<br />
confirm with the parent that the zone was intentionally left unsigned. It does this by verifying,<br />
via signed <strong>and</strong> validated NSEC/NSEC3 records, that the parent zone contains no DS records for<br />
the child.<br />
If the validator can prove that the zone is insecure, then the response is accepted. However, if it<br />
cannot, then it must assume an insecure response to be a forgery; it rejects the response <strong>and</strong><br />
logs an error.<br />
The logged error reads “insecurity proof failed” <strong>and</strong> “got insecure response; parent indicates it<br />
should be secure”.<br />
DNSSEC, DYNAMIC ZONES, AND AUTOMATIC SIGNING<br />
As of BIND 9.7.0 it is possible to change a dynamic zone from insecure to signed <strong>and</strong> back again.<br />
A secure zone can use either NSEC or NSEC3 chains.<br />
Converting from insecure to secure<br />
Changing a zone from insecure to secure can be done in two ways: using a dynamic DNS update, or<br />
the auto-dnssec zone option.<br />
For either method, you need to configure named so that it can see the K* files which contain the<br />
public <strong>and</strong> private parts of the keys that will be used to sign the zone. These files will have been<br />
generated by dnssec-keygen. You can do this by placing them in the key-directory, as specified in<br />
named.conf:<br />
zone example.net {<br />
type master;<br />
update-policy local;<br />
file "example.net";<br />
key-directory "multinet_common_root:[multinet]";<br />
};<br />
If one KSK <strong>and</strong> one ZSK DNSKEY key have been generated, this configuration will cause all<br />
records in the zone to be signed with the ZSK, <strong>and</strong> the DNSKEY RR set to be signed with the KSK<br />
as well. An NSEC chain will be generated as part of the initial signing process.<br />
Dynamic DNS update method<br />
To insert the keys via dynamic update:<br />
$ nsupdate :== $multinet:nsupdate.exe<br />
$ nsupdate<br />
> ttl 3600
DNSSEC<br />
> update add example.net DNSKEY 256 3 7<br />
AwEAAZn17pUF0KpbPA2c7Gz76Vb18v0teKT3EyAGfBfL8eQ8al35zz3Y<br />
> update add example.net DNSKEY 257 3 7 AwEAAd/7odU/<br />
64o2LGsifbLtQmtO8dFDtTAZXSX2+<br />
> send<br />
While the update request will complete almost immediately, the zone will not be completely signed<br />
until named has had time to walk the zone <strong>and</strong> generate the NSEC <strong>and</strong> RRSIG records. The NSEC<br />
record at the apex will be added last, to signal that there is a complete NSEC chain.<br />
If you wish to sign using NSEC3 instead of NSEC, you should add an NSEC3PARAM record to<br />
the initial update request. If you wish the NSEC3 chain to have the OPTOUT bit set, set it in the<br />
flags field of the NSEC3PARAM record.<br />
$ nsupdate<br />
> ttl 3600<br />
> update add example.net DNSKEY 256 3 7<br />
AwEAAZn17pUF0KpbPA2c7Gz76Vb18v0teKT3EyAGfBfL8eQ8al35zz3Y<br />
> update add example.net DNSKEY 257 3 7 AwEAAd/7odU/<br />
64o2LGsifbLtQmtO8dFDtTAZXSX2+X3e/<br />
> update add example.net NSEC3PARAM 1 1 100 1234567890<br />
> send<br />
Again, this update request will complete almost immediately; however, the record won’t show up<br />
until named has had a chance to build/remove the relevant chain. A private type record will be<br />
created to record the state of the operation (see below for more details), <strong>and</strong> will be removed once<br />
the operation completes.<br />
While the initial signing <strong>and</strong> NSEC/NSEC3 chain generation is happening, other updates are<br />
possible as well.<br />
Fully automatic zone signing<br />
To enable automatic signing, add the auto-dnssec option to the zone statement in named.conf.<br />
auto-dnssec has two possible arguments: allow or maintain.<br />
With auto-dnssec allow, named can search the key directory for keys matching the zone, insert<br />
them into the zone, <strong>and</strong> use them to sign the zone. It will do so only when it receives an rndc sign<br />
or rndc loadkeys comm<strong>and</strong>.<br />
auto-dnssec maintain includes the above functionality, but will also automatically adjust the<br />
zone’s DNSKEY records on schedule according to the keys’ timing metadata. If keys are present in<br />
the key directory the first time the zone is loaded, it will be signed immediately, without waiting for<br />
an rndc sign or rndc loadkeys comm<strong>and</strong>. (Those comm<strong>and</strong>s can still be used when there are<br />
unscheduled key changes, however.)<br />
Using the auto-dnssec option requires the zone to be configured to allow dynamic updates, by<br />
adding an allow-update or update-policy statement to the zone configuration. If this has not been<br />
done, the configuration will fail.<br />
B-7
DNSSEC<br />
Private-type records<br />
B-8<br />
The state of the signing process is signaled by private-type records (with a default type value of<br />
65534). When signing is complete, these records will have a non-zero value for the final octet (for<br />
those records which have a non-zero initial octet).<br />
The private type record format: If the first octet is non-zero then the record indicates that the zone<br />
needs to be signed with the key matching the record, or that all signatures that match the record<br />
should be removed.<br />
algorithm (octet 1)<br />
key id in network order (octet 2 <strong>and</strong> 3)<br />
removal flag (octet 4)<br />
complete flag (octet 5)<br />
Only records flagged as “complete” can be removed via dynamic update. Attempts to remove other<br />
private type records will be silently ignored. If the first octet is zero (this is a reserved algorithm<br />
number that should never appear in a DNSKEY record) then the record indicates changes to the<br />
NSEC3 chains are in progress. The rest of the record contains an NSEC3PARAM record. The flag<br />
field tells what operation to perform based on the flag bits.<br />
0x01 OPTOUT<br />
0x80 CREATE<br />
0x40 REMOVE<br />
0x20 NONSEC<br />
DNSKEY rollovers<br />
As within secure-to-secure conversions, rolling DNSSEC keys can be done in two ways: using a<br />
dynamic DNS update, or the auto-dnssec zone option.<br />
Dynamic DNS update method<br />
To perform key rollovers via dynamic update, you need to add the K* files for the new keys so that<br />
named can find them. You can then add the new DNSKEY RRs via dynamic update. named will<br />
then cause the zone to be signed with the new keys. When the signing is complete the private type<br />
records will be updated so that the last octet is non-zero.<br />
If this is for a KSK you need to inform the parent <strong>and</strong> any trust anchor repositories of the new KSK.<br />
You should then wait for the maximum TTL in the zone before removing the old DNSKEY. If it is<br />
a KSK that is being updated, you also need to wait for the DS RRset in the parent to be updated <strong>and</strong><br />
its TTL to expire. This ensures that all clients will be able to verify at least one signature when you<br />
remove the old DNSKEY.<br />
The old DNSKEY can be removed via UPDATE. Take care to specify the correct key. named<br />
will clean out any signatures generated by the old key after the update completes.
Automatic key rollovers<br />
DNSSEC<br />
When a new key reaches its activation date (as set by dnssec-keygen or dnssec-settime), if the<br />
auto-dnssec zone option is set to maintain, named will automatically carry out the key roll over. If<br />
the key’s algorithm has not previously been used to sign the zone, then the zone will be fully signed<br />
as quickly as possible. However, if the new key is replacing an existing key of the same algorithm,<br />
then the zone will be re-signed incrementally, with signatures from the old key being replaced with<br />
signatures from the new key as their signature validity periods expire. By default, this rollover<br />
completes in 30 days, after which it will be safe to remove the old key from the DNSKEY RRset.<br />
NSEC3PARAM rollovers via UPDATE<br />
Add the new NSEC3PARAM record via dynamic update. When the new NSEC3 chain has been<br />
generated, the NSEC3PARAM flag field will be zero. At this point you can remove the old<br />
NSEC3PARAM record. The old chain will be removed after the update request completes.<br />
Converting from NSEC to NSEC3<br />
To do this, you just need to add an NSEC3PARAM record. When the conversion is complete, the<br />
NSEC chain will have been removed <strong>and</strong> the NSEC3PARAM record will have a zero flag field.<br />
The NSEC3 chain will be generated before the NSEC chain is destroyed.<br />
Converting from NSEC3 to NSEC<br />
To do this, use nsupdate to remove all NSEC3PARAM records with a zero flag field. The NSEC<br />
chain will be generated before the NSEC3 chain is removed.<br />
Converting from secure to insecure<br />
To convert a signed zone to unsigned using dynamic DNS, delete all the DNSKEY records from the<br />
zone apex using nsupdate. All signatures, NSEC or NSEC3 chains, <strong>and</strong> associated NSEC3PARAM<br />
records will be removed automatically. This will take place after the update request completes.<br />
This requires the dnssec-secure-to-insecure option to be set to yes in named.conf.<br />
In addition, if the auto-dnssec maintain zone statement is used, it should be removed or changed<br />
to allow instead (or it will re-sign).<br />
Periodic re-signing<br />
In any secure zone which supports dynamic updates, named will periodically re-sign RRsets which<br />
B-9
DNSSEC<br />
B-10<br />
have not been re-signed as a result of some update action. The signature lifetimes will be adjusted<br />
so as to spread the re-sign load over time rather than all at once.<br />
NSEC3 <strong>and</strong> OPTOUT<br />
named supports creating new NSEC3 chains where all the NSEC3 records in the zone have the<br />
same OPTOUT state. named also supports UPDATES to zones where the NSEC3 records in the<br />
chain have mixed OPTOUT state. named does not support changing the OPTOUT state of an<br />
individual NSEC3 record, the entire chain needs to be changed if the OPTOUT state of an<br />
individual NSEC3 needs to be changed.<br />
Dynamic Trust Anchor Management<br />
BIND 9.7.0 introduces support for RFC 5011, dynamic trust anchor management. Using this<br />
feature allows named to keep track of changes to critical DNSSEC keys without any need for the<br />
operator to make changes to configuration files.<br />
Validating Resolver<br />
To configure a validating resolver to use RFC 5011 to maintain a trust anchor, configure the trust<br />
anchor using a managed-keys statement.<br />
Authoritative Server<br />
To set up an authoritative zone for RFC 5011 trust anchor maintenance, generate two (or more) key<br />
signing keys (KSKs) for the zone. Sign the zone with one of them; this is the “active” KSK. All<br />
KSK’s which do not sign the zone are “st<strong>and</strong>-by” keys.<br />
Any validating resolver which is configured to use the active KSK as an RFC 5011-managed trust<br />
anchor will take note of the st<strong>and</strong>-by KSKs in the zone’s DNSKEY RRset, <strong>and</strong> store them for<br />
future reference. The resolver will recheck the zone periodically, <strong>and</strong> after 30 days, if the new key<br />
is still there, then the key will be accepted by the resolver as a valid trust anchor for the zone. Any<br />
time after this 30-day acceptance timer has completed, the active KSK can be revoked, <strong>and</strong> the<br />
zone can be “rolled over” to the newly accepted key.<br />
The easiest way to place a st<strong>and</strong>-by key in a zone is to use the “smart signing” features of dnsseckeygen<br />
<strong>and</strong> dnssec-signzone. If the key has a publication date in the past, but an activation date<br />
which is unset or in the future, “dnssec-signzone -S” will include the DNSKEY record in the zone,<br />
but will not sign with it:<br />
$ dnssec-keygen -K keys -f KSK -P now -A now+2y example.net<br />
$ dnssec-signzone -S -K keys example.net<br />
To revoke a key, the new comm<strong>and</strong> dnssec-revoke has been added. This adds the REVOKED bit to
DNSSEC<br />
the key flags <strong>and</strong> re-generates the K*.key <strong>and</strong> K*.private files. After revoking the active key, the<br />
zone must be signed with both the revoked KSK <strong>and</strong> the new active KSK. (Smart signing takes care<br />
of this automatically.)<br />
Once a key has been revoked <strong>and</strong> used to sign the DNSKEY RRset in which it appears, that key<br />
will never again be accepted as a valid trust anchor by the resolver. However, validation can<br />
proceed using the new active key (which had been accepted by the resolver when it was a st<strong>and</strong>-by<br />
key).<br />
See RFC 5011 for more details on key rollover scenarios.<br />
When a key has been revoked, its key ID changes, increasing by 128, <strong>and</strong> wrapping around at<br />
65535. So, for example, the key “Kexample-net-005-10000” becomes “Kexample-net-005-10128”.<br />
If two keys have ID’s exactly 128 apart, <strong>and</strong> one is revoked, then the two key ID’s will collide,<br />
causing several problems. To prevent this, dnssec-keygen will not generate a new key if another<br />
key is present which may collide. This checking will only occur if the new keys are written to the<br />
same directory which holds all other keys in use for that zone.<br />
Older versions of BIND9 did not have this precaution. Exercise caution if using key revocation on<br />
keys that were generated by previous releases, or if using keys stored in multiple directories or on<br />
multiple machines.<br />
It is expected that a future release of BIND9 will address this problem in a different way, by storing<br />
revoked keys with their original unrevoked key ID’s.<br />
B-11
DNSSEC<br />
B-12
Reader’s Comments<br />
<strong>MultiNet</strong> for OpenVMS <strong>Installation</strong>/Introduction <strong>and</strong> Administrator’s <strong>Guide</strong>, v5.4<br />
Part Number: N-0701-54-NN-A<br />
Your comments <strong>and</strong> suggestions will help us to improve the quality of our future documentation. Please note that this<br />
form is for comments on documentation only.<br />
I rate this guide’s: Excellent Good Fair Poor<br />
Accuracy o o o o<br />
Completeness (enough information) o o o o<br />
Clarity (easy to underst<strong>and</strong>) o o o o<br />
Organization (structure of subject matter) o o o o<br />
Figures (useful) o o o o<br />
Index (ability to find topic) o o o o<br />
Ease of use o o o o<br />
1. I would like to see more/less:_________________________________________________________________<br />
2. Does this guide provide the information you need to perform daily tasks?_______________________________<br />
3. What I like best about this guide:______________________________________________________________<br />
4. What I like least about this guide:______________________________________________________________<br />
5. Do you like this guide’s binding? If not, what would you prefer?______________________________________<br />
My additional comments or suggestions for improving this guide:<br />
_____________________________________________________________________________________________<br />
_____________________________________________________________________________________________<br />
I found the following errors in this guide:<br />
Page Description<br />
_______ _______________________________________________________________________________<br />
_______ _______________________________________________________________________________<br />
Please indicate the type of user/reader that you most nearly represent:<br />
System Manager o Educator/Trainer o<br />
Experienced Programmer o Sales o<br />
Novice Programmer o Scientist/Engineer o<br />
Computer Operator o <strong>Software</strong> Support o<br />
Administrative Support o Other (please specify) o ___________________________<br />
Name:_________________________________________ Dept._____________________<br />
Company:______________________________________ Date_____________________<br />
Mailing Address:____________________________________________________________<br />
After filling out this form, FAX or mail it to:<br />
<strong>Process</strong> <strong>Software</strong>, 959 Concord Street, Framingham, MA 01701-4682<br />
Attention: Technical Publications FAX 508-879-0042 e-mail:techpubs@process.com
Symbols<br />
SSH_KNOWN_HOSTS<br />
file<br />
SYS$LOGIN<br />
31-31<br />
SYS$LOGIN<br />
31-31<br />
A<br />
ACCOUNTING.H 18-18<br />
ACL<br />
support over NFS 27-22<br />
with unmappable ACEs 27-25<br />
ACPs (Ancillary Control <strong>Process</strong>es) 29-13<br />
Add or Update User Exits 1-16<br />
ADD_GBLPAGES 1-6<br />
ADD_GBLSECTIONS 1-6<br />
ADD_SPTREQ 1-6<br />
address<br />
lease states in DHCP dump files 21-84<br />
pools for all subnets 21-82<br />
pools for specific subnets 21-81<br />
ADVISORY_CLOSE 29-15<br />
AgentX peers 23-5<br />
ARP (Address Resolution Protocol) 6-13<br />
table 11-41<br />
Aspath Clause 13-64<br />
authentication agent connection 30-3, 31-3<br />
AUTHORIZATION 31-31<br />
AUTHORIZED_KEYS 30-14<br />
auto server cache sizing 27-40<br />
Autonomous System (AS) 13-17<br />
available fonts 20-5<br />
B<br />
BIND<br />
9.7.2-p3 10-6<br />
caching-only name server 10-9<br />
master name server 10-12<br />
zone types 10-17<br />
BOOTP 21-5<br />
(Bootstrap Protocol) 21-2<br />
“to” option values 21-9<br />
clients, obtaining data for 21-5<br />
configuration file guidelines 21-10<br />
OPCOM messages 21-11<br />
options 21-7<br />
Border Gateway Protocol (BGP) 13-44<br />
break-in 30-3, 31-4<br />
C<br />
cache<br />
-timing parameters 27-38<br />
CHECK 6-3<br />
churn 13-44<br />
CIM<br />
Compaq Insight Manager 23-5<br />
remote management agent 23-5<br />
cipher<br />
3DES 30-2<br />
ARCFOUR 30-2<br />
Blowfish 30-2<br />
DES 30-2<br />
IDEA 30-2<br />
client classes 21-21<br />
cluster service<br />
names, monitoring 10-37<br />
setting up a 10-35<br />
cluster-wide aliases 27-16<br />
comm<strong>and</strong>-line interface utilities 9-3<br />
Compaq Insight Manager 23-5<br />
Index<br />
Index-1
Index<br />
setting up <strong>MultiNet</strong> to use 23-5<br />
compiled-in timezone rules 14-16<br />
concurrency parameters 27-37<br />
conditional behavior 21-24<br />
configuration<br />
recommendations 11-28<br />
tasks 9-1<br />
configuring services 9-1<br />
establishing basic IP connectivity 9-1<br />
utilities 9-1<br />
configure global parameters 10-35<br />
CRASH-ON-EXCEPTION 27-43<br />
cross-realm authentication 24-13<br />
D<br />
d2 10-34<br />
dassgn 12-16<br />
DCLTABLES.EXE file 1-6<br />
installing <strong>MultiNet</strong> comm<strong>and</strong>s 1-17<br />
debug 10-34<br />
DEBUG-MESSAGE-CACHE-SIZE 27-43<br />
DECnet<br />
client<br />
access to an IP server 25-4<br />
on the IP server 25-5<br />
encapsulation over unreliable networks 26-3<br />
-over-IP circuits 26-1<br />
-to-SMTP mail 15-39<br />
DECstation<br />
mount points 27-30<br />
systems 27-29<br />
default LPD user name 16-3<br />
definition statements 13-17<br />
defname 10-34<br />
delete-behind cache parameters 27-42<br />
destination printer 16-45<br />
DHCP<br />
(Dynamic Host Configuration Protocol) 21-2<br />
ab<strong>and</strong>oned leases 21-68<br />
address<br />
allocation 21-19<br />
pools 21-20<br />
lease state<br />
ab<strong>and</strong>oned 21-84<br />
bound 21-84<br />
free 21-85<br />
offered 21-85<br />
pinging 21-85<br />
reserved for secondary 21-85<br />
static assignment 21-85<br />
pools 21-20<br />
agent option space options 21-63<br />
clients 21-14<br />
configuration 21-14<br />
Index-2<br />
file statement<br />
backup-ack-interval 21-75<br />
backup-pool-size 21-75<br />
com-int-timeout 21-75<br />
failover-port 21-76<br />
mclt 21-76<br />
safe-period-timeout 21-76<br />
startup-delay 21-76<br />
conversion tool 21-15<br />
declaration 21-17<br />
group 21-18<br />
host 21-17, 21-18<br />
pool 21-20<br />
range 21-17<br />
shared-network 21-17<br />
subnet 21-17<br />
failover protocol 21-76<br />
lease<br />
file statement<br />
ab<strong>and</strong>oned 21-66<br />
billing class 21-67<br />
billing subclass 21-67<br />
client-hostname 21-67<br />
domain-name 21-67<br />
dynamic-bootp 21-67<br />
ends 21-67<br />
FQDN 21-67<br />
hardware 21-67<br />
hostname 21-67<br />
starts 21-67<br />
uid 21-68<br />
format 21-66<br />
leases 21-68<br />
option space option<br />
option all-subnets-local 21-55<br />
option arp-cache-timeout 21-55<br />
option bootfile-name 21-55<br />
option boot-size 21-55<br />
option broadcast-address 21-55<br />
option cookie-servers 21-55<br />
option default-ip-ttl 21-55<br />
option default-tcp-ttl 21-55<br />
option dhcp-client-identifier 21-55<br />
option dhcp-max-message-size 21-56<br />
option dhcp-parameter-request-list 21-56<br />
option dhcp-server-identifier 21-56<br />
option domain-name 21-56<br />
option domain-name-servers 21-56<br />
option extensions-path 21-57<br />
option finger-server 21-57<br />
option font-servers 21-57<br />
option host-name 21-57<br />
option ieee802-3-encapsulation 21-57<br />
option ien116-name-servers 21-57<br />
option impress-servers 21-57<br />
option interface-mtu 21-57
option ip-forwarding 21-57<br />
option irc-server 21-57<br />
option log-servers 21-57<br />
option lpr-servers 21-58<br />
option mask-supplier 21-58<br />
option max-dgram-reassembly 21-58<br />
option merit-dump 21-58<br />
option mobile-ip-home-agent 21-58<br />
option nds-context 21-58<br />
option nds-servers 21-58<br />
option nds-tree-name 21-58<br />
option netbios-dd-server 21-58<br />
option netbios-name-servers 21-58<br />
option netbios-node-type 21-58<br />
option netbios-scope 21-59<br />
option nis-domain 21-59<br />
option nisplus-domain 21-59<br />
option nisplus-servers 21-59<br />
option nis-servers 21-59<br />
option nntp-server 21-59<br />
option non-local-source-routing 21-59<br />
option ntp-servers 21-59<br />
option option 21-59<br />
option path-mtu-aging-timeout 21-59<br />
option path-mtu-plateau-table 21-59<br />
option perform-mask-discovery 21-60<br />
option policy-filter 21-60<br />
option pop-server 21-60<br />
option resource-location-servers 21-60<br />
option root-path 21-60<br />
option router-discovery 21-60<br />
option routers 21-60<br />
option router-solicitation-address 21-60<br />
option smtp-server 21-60<br />
option static-routes 21-61<br />
option streettalk-directory-assistanceserver<br />
21-61<br />
option streettalk-server 21-61<br />
option subnet-mask 21-61<br />
option swap-server 21-61<br />
option tcp-keepalive-garbage 21-61<br />
option tcp-keepalive-interval 21-61<br />
option tftp-server-name 21-62<br />
option time-offset 21-62<br />
option time-servers 21-62<br />
option trailer-encapsulation 21-62<br />
option vendor-encapsulated-options 21-62<br />
option www-server 21-62<br />
option x-display-manager 21-62<br />
option type<br />
ARRAYS 21-64<br />
BOOLEAN 21-63<br />
DATA STRING 21-64<br />
INTEGER 21-64<br />
IP-ADDRESS 21-64<br />
RECORDS 21-65<br />
TEXT 21-64<br />
options 21-16, 21-54<br />
process 21-12<br />
relay agent information option 21-62<br />
Safe-failover 21-71, 21-72<br />
lease file statement<br />
acked-sec-interval 21-76<br />
acked-sec-interval-start 21-76<br />
active 21-76<br />
backup 21-76<br />
desired-interval 21-76<br />
expired 21-76<br />
free 21-77<br />
last-partner-transaction 21-77<br />
released 21-77<br />
reset 21-77<br />
revoked 21-77<br />
safe-lease 21-77<br />
transaction-id 21-77<br />
update-count 21-77<br />
partner down state 21-77<br />
server mode<br />
primary 21-73<br />
secondary 21-73<br />
st<strong>and</strong>alone 21-74<br />
server state<br />
backup-comint 21-75<br />
backup-conflict 21-75<br />
backup-normal 21-75<br />
backup-partnerdown 21-75<br />
backup-recover 21-75<br />
failover-disabled 21-75<br />
primary-comint 21-75<br />
primary-conflict 21-75<br />
primary-normal 21-75<br />
primary-partnerdown 21-75<br />
primary-recover 21-75<br />
startup 21-75<br />
state file 21-74<br />
server parameter<br />
ACCOUNTING 21-78<br />
CONFIGFILE 21-78<br />
DEBUG 21-78<br />
DEBUG-FILE 21-78<br />
DUMPFILE 21-78<br />
IMAGE-NAME 21-78<br />
LEASEFILE 21-79<br />
LOG-DATE 21-79<br />
LOG-TO-OPCOM 21-79<br />
PROCESS-NAME 21-79<br />
SWAP 21-79<br />
SYS-ERROR 21-79<br />
SYS-OUTPUT 21-79<br />
UPDATEFILE 21-79<br />
spawning class 21-23<br />
statement<br />
Index<br />
Index-3
Index<br />
Index-4<br />
add 21-29<br />
algorithm 21-29<br />
allow <strong>and</strong> deny 21-29<br />
allow <strong>and</strong> deny in pool declarations 21-32<br />
allow <strong>and</strong> deny in scope 21-30, 21-31<br />
always-broadcast 21-32<br />
always-reply-rfc1048 21-33<br />
authoritative 21-34<br />
class 21-35<br />
default-lease-time 21-35<br />
dynamic-bootp-lease-cutoff 21-36<br />
dynamic-bootp-lease-length 21-36<br />
filename 21-36<br />
fixed-address 21-37<br />
get-lease-hostnames 21-37<br />
group 21-37<br />
hardware 21-38<br />
host 21-39<br />
if 21-40<br />
invalid-ddns-chars 21-40<br />
key 21-40<br />
key-id 21-40<br />
lease limit 21-41<br />
lease-scan-interval 21-41<br />
match 21-41<br />
match if 21-41<br />
max-delayed-acks 21-41<br />
max-lease-time 21-42<br />
min-lease-time 21-42<br />
min-secs 21-42<br />
next-server 21-43<br />
one-lease-per-client 21-43<br />
option 21-43<br />
option definition 21-43<br />
option space 21-43<br />
parameter 21-16<br />
ping 21-44<br />
ping-retries 21-44<br />
ping-timeout 21-44<br />
pool 21-44<br />
range 21-45<br />
requested-options-only flag 21-45<br />
secret 21-45<br />
secure-ddns 21-46<br />
server-identifier 21-46<br />
server-name 21-46<br />
shared-network 21-17, 21-46<br />
site-option-space 21-46<br />
spawn with 21-47<br />
subnet 21-17, 21-48<br />
use-host-decl-names 21-49<br />
use-lease-addr-for-default-route 21-49<br />
user-class 21-49<br />
vendor-class 21-49<br />
vendor-option-space 21-50<br />
subclass 21-22<br />
using 21-12<br />
DHCP client 19-1<br />
DHCPD.CONF file 21-85<br />
DIG, using to debug DNS 10-33<br />
directory <strong>and</strong> file<br />
cache parameters 27-37<br />
times 27-37<br />
DISKQUOTA limitations 29-4<br />
DNS<br />
(Domain Name System) 6-11<br />
address_match_list 10-24<br />
domains 6-11<br />
dynamic updates within DHCP 21-25<br />
host tables 6-10, 6-12<br />
incremental zone transfer 10-29<br />
load balancing 10-35<br />
logging option<br />
category 10-27<br />
channel 10-27<br />
file 10-27<br />
print-category 10-27<br />
print-severity 10-27<br />
print-time 10-27<br />
severity 10-27<br />
syslog daemon 10-27<br />
NAMED.CONF<br />
optional zone statements 10-15<br />
NAMED.CONF option<br />
allow-query 10-19<br />
allow-recursion 10-19<br />
allow-transfer 10-19<br />
also-notify 10-19<br />
blackhole 10-19<br />
check-names 10-20<br />
directory 10-20<br />
fake-iquery 10-20<br />
fetch-glue 10-20<br />
forward 10-21<br />
forwarders 10-21<br />
listen-on 10-22<br />
maintain-ixfr-base 10-22<br />
max-ixfr-log-size 10-22<br />
max-transfer-time-in 10-22<br />
min-roots 10-22<br />
notify 10-22<br />
query-source address 10-23<br />
recursion 10-23<br />
rrset-order 10-23<br />
sortlist 10-23<br />
topology 10-23<br />
transfer-format 10-23<br />
transfers-in 10-24<br />
transfer-source 10-24<br />
transfers-per-ns 10-24<br />
version 10-24
NSLOOKUP comm<strong>and</strong><br />
exit 10-34<br />
finger 10-34<br />
help 10-34<br />
ls 10-35<br />
lserver 10-34<br />
name 10-34<br />
name server 10-34<br />
root 10-34<br />
server 10-34<br />
set all 10-34<br />
set class 10-34<br />
set domain 10-34<br />
set port 10-34<br />
set query-type 10-34<br />
set retry 10-34<br />
set root 10-34<br />
set srchlist 10-34<br />
set timeout 10-34<br />
set type 10-34<br />
optional zone statement<br />
allow-query 10-15<br />
allow-transfer 10-15<br />
allow-update 10-15<br />
also-notify 10-15<br />
check-names 10-16<br />
forward 10-16<br />
forwarders 10-16<br />
hint 10-17<br />
ixfr-base 10-16<br />
master 10-17<br />
notify 10-16<br />
pubkey 10-16<br />
transfer-source 10-16<br />
resolver (client) 10-8<br />
resolvers <strong>and</strong> servers 10-8<br />
resource record sorting 10-27<br />
resource record type<br />
A 10-30<br />
CNAME 10-30<br />
HINFO 10-30<br />
KEY 10-30<br />
MB 10-30<br />
MG 10-30<br />
MINFO 10-30<br />
MR 10-30<br />
MX 10-30<br />
NS 10-30<br />
NULL 10-30<br />
NXT 10-30<br />
PTR 10-30<br />
SIG 10-30<br />
SOA 10-30<br />
SRV 10-30<br />
TXT 10-30<br />
WKS 10-31<br />
Index<br />
security 10-38<br />
server 6-11, 10-9<br />
using 10-8<br />
zone information files 10-29<br />
zone type<br />
forward 10-17<br />
slave 10-18<br />
stub 10-18<br />
DNS <strong>and</strong> BIND, Fourth Edition 10-8<br />
Documentation<br />
comments 1-xl<br />
domain name versus host name 10-13<br />
DOMAIN-NAME-SERVICE.CACHE 10-17<br />
duplicate request detection cache parameters 27-42<br />
dynamic configuration protocol 6-8<br />
BOOTP (Bootstrap Protocol) 6-9<br />
DHCP (Dynamic Host Configuration Protocol) 6-9<br />
RARP (Reverse Address Resolution Protocol) 6-8<br />
dynamic routing 13-2<br />
E<br />
EGP importation 13-63<br />
electronic mail 1-xxxvii<br />
ERRNO.H error values 25-6<br />
EXIT-ON-EXCEPTION 27-43<br />
EXPN 15-17<br />
export list 27-16<br />
exporting routes 13-68<br />
expressions 21-50<br />
Boolean 21-50<br />
data 21-51<br />
numeric 21-53<br />
extended SMTP (RFC-1869) 15-1<br />
Exterior Gateway Protocol (EGP) 13-38<br />
F<br />
FAQs 1-xxxviii<br />
fax 1-xxxviii<br />
file name<br />
defining 18-13<br />
mapping 29-6<br />
file systems on Sun hosts 27-19<br />
FILECACHE-DEBUG 27-43<br />
files<br />
GATED.CONF 13-2, 13-4<br />
SNMPD.CONF 23-6<br />
SNMPSERVER.LOG 23-13<br />
TEMPLATE_SNMPD.CONF 23-9<br />
filter routes 13-19<br />
Filter Server<br />
BLOCK_AT_DESTINATION_PORT 33-4<br />
Index-5
Index<br />
COMPONENT 33-6<br />
DEBUG 33-4<br />
DELTA_TIME 33-6<br />
DESTINATION_ADDRESS 33-6<br />
DESTINATION_PORT 33-7<br />
ENTERPRISE_STRING 33-4, 33-14<br />
EXCLUDE_ADDRESS 33-7<br />
FILTER_DURATIONS 33-7<br />
GENERIC_TRAP_ID 33-4, 33-14<br />
INCLUDE 33-4<br />
LOG_TO_LOGFILE 33-5<br />
LOG_TO_OPCOM 33-5<br />
LOG_TO_SNMP 33-5, 33-14<br />
LOGFILE 33-5<br />
MAX_COUNT 33-7<br />
OPCOM_TARGET 33-5<br />
PROTO_FILTER 33-7<br />
RULE 33-7<br />
SPECIFIC_TRAP_ID 33-5, 33-14<br />
FILTER_CONVERT 11-21, 11-28<br />
FLAG 16-40<br />
font<br />
catalogues 20-9<br />
data 20-6<br />
server 20-1<br />
adding fonts to the 20-9<br />
cache 20-9<br />
configuration checking 20-4<br />
configuration parameter<br />
alternate-server 20-2<br />
cache size 20-2<br />
catalogue 20-2<br />
client-limit 20-2<br />
default-point-size 20-2<br />
default-resolutions 20-2<br />
error-file 20-2<br />
port 20-2<br />
trusted-clients 20-2<br />
types 20-3<br />
format of<br />
COUNTRY specification 14-17<br />
RULE specification 14-19<br />
ZONE specification 14-19<br />
forward<br />
first 10-11<br />
only 10-11<br />
forwarders 10-10<br />
FTP<br />
accounting logger<br />
enabling 18-17<br />
anonymous 18-2<br />
client, configuring the 18-1<br />
log files 18-5<br />
messages, defining 18-11<br />
security, managing 18-6<br />
server<br />
Index-6<br />
login comm<strong>and</strong> procedure 18-4<br />
managing an 18-2<br />
qualifiers 18-4<br />
server connection banner 18-7<br />
session accounting 18-16<br />
accounting file record format 18-17<br />
configuration file 18-17<br />
configuring the Accounting listener 18-17<br />
enabling 18-17<br />
file format 18-17<br />
site comm<strong>and</strong><br />
SITE +VMS+ 18-11<br />
SITE NONE 18-10<br />
SITE PRIV 18-10<br />
SITE RMS BLOCK 18-11<br />
SITE RMS RECSIZE 18-11<br />
SITE RMS STREAM 18-11<br />
SITE SHOW TIME 18-10<br />
SITE SPAWN 18-11<br />
SITE VMS 18-11<br />
SITE WINDOW-SIZE 18-11<br />
using 18-10<br />
fully qualified domain name (FQDN) 10-10<br />
G<br />
GATED 6-10<br />
GateD 13-2<br />
BGP 13-2<br />
configuration<br />
file 13-2<br />
language 13-6<br />
EGP 13-2<br />
HELLO 13-2<br />
OSPF 13-2<br />
RIP 13-2<br />
route selection 13-3<br />
Router Discovery Protocol 13-2<br />
starting <strong>and</strong> stopping 13-4<br />
GateD comm<strong>and</strong><br />
DUMP GATED STATE 13-4<br />
LOAD GATED CONFIG 13-4<br />
MULTINET GATED/CHECK 13-4<br />
MULTINET GATED/SET/TRACE 13-4<br />
MULTINET GATED/SHOW/ OSPF/<br />
DESTINATIONS 13-5<br />
MULTINET GATED/SHOW/ OSPF/HOPS 13-5<br />
MULTINET GATED/SHOW/ OSPF/<br />
INTERFACES 13-5<br />
MULTINET GATED/SHOW/ OSPF/LOG 13-5<br />
MULTINET GATED/SHOW/ OSPF/NEIGHBORS 13-<br />
5<br />
MULTINET GATED/SHOW/ RIP 13-5<br />
MULTINET GATED/SHOW/OSPF/ADVERTISE 13-4<br />
MULTINET GATED/SHOW/OSPF/AS 13-5
MULTINET GATED/SHOW/OSPF/ERRORS 13-5<br />
MULTINET GATED/SHOW/OSPF/STATE 13-5<br />
MULTINET GATED/SHOW/TRACE 13-5<br />
MULTINET GATED/TOGGLE_TRACING 13-5<br />
MULTINET GATED/UPDATE_INTERFACES 13-5<br />
MULTINET STOP/GATED 13-5<br />
GENERIC 27-28<br />
gethostbyaddr( ) 10-8<br />
gethostbyname( ) 10-8<br />
global parameters 11-37<br />
guide contents 1-xxxiii<br />
H<br />
hardware clock 14-15<br />
HELLO protocol 13-27<br />
HIBERNATE-ON-EXCEPTION 27-43<br />
host<br />
definitions, adding 10-4<br />
name<br />
conformance 10-5<br />
generation 21-27<br />
table 10-2, 10-6<br />
configuring 10-3<br />
source files 10-2<br />
tables information 10-3<br />
host key<br />
creating 30-13, 31-30<br />
public part 30-13, 31-31<br />
HOST_TABLE COMPILE 10-6, 10-7<br />
HOST-ALIAS-FILE 15-21<br />
HOSTS.EQUIV 12-19<br />
I<br />
ICMP<br />
redirect messages 13-31<br />
tracing options 13-30<br />
IMAP<br />
directives file 15-26<br />
mail folders 15-25<br />
options in the global .IMAPRC file 15-27<br />
server 15-24<br />
state information files 15-28<br />
supported logical 15-28<br />
incomplete mappings 27-5<br />
installation dialog 2-4<br />
interfaces <strong>and</strong> parameters 11-11<br />
internet printing protocol 16-29<br />
interrupt vectors 11-13<br />
intruders 12-11<br />
intrusion detection 30-3, 31-4<br />
IP<br />
Index<br />
address pool availability 21-83<br />
client access to a DECnet server 25-2<br />
connectivity 11-2<br />
transport, configuring 1-14<br />
IP address<br />
checking 18-14<br />
IP-CLUSTER-ALIASES 11-39<br />
IPP<br />
allowable values 16-42<br />
client 16-29<br />
design goals 16-30<br />
encoding <strong>and</strong> transport 16-30<br />
Implementer’s <strong>Guide</strong> 16-30<br />
logging level<br />
ABORT 16-43<br />
DETAILED_TRACE 16-43<br />
ERROR 16-43<br />
FATAL 16-43<br />
FILE 16-43<br />
INFO 16-43<br />
JOB 16-43<br />
SYMBIONT 16-43<br />
WARNING 16-43<br />
logging levels 16-43<br />
model <strong>and</strong> semantics 16-30<br />
multiple printers using wildcards 16-44<br />
network printing protocol 16-29<br />
no configuration values in the INIT comm<strong>and</strong> 16-45<br />
OPCOM terminal names 16-42<br />
print comm<strong>and</strong> option<br />
COPIES 16-40<br />
DOCUMENT_FORMAT 16-40<br />
FINISHING 16-41<br />
IPP SHOW 16-46<br />
JOB_PRIORITY 16-40<br />
MEDIA 16-41<br />
MULTIPLE_DOCUMENT_HANDLING 16-41<br />
NUMBER_UP 16-40<br />
ORIENTATION 16-40<br />
PAGE_RANGE 16-41<br />
PRINTER 16-40<br />
QUALITY 16-41<br />
SIDES 16-40<br />
print comm<strong>and</strong> options 16-39<br />
print only to a specific printer 16-44<br />
print queues 16-29<br />
print symbiont 16-29<br />
protocol 16-29<br />
protocol background 16-29<br />
qualifiers<br />
/COMMENT 16-33<br />
/COPIES_DEFAULT 16-33<br />
/DEBUG 16-33<br />
/DEFAULT_DOCUMENT_FORMAT 16-34<br />
/DOCUMENT_FORMAT_DEFAULT 16-34<br />
/EXPECT_LINK_CLOSURES 16-34<br />
Index-7
Index<br />
/FINISHING_DEFAULT 16-34<br />
/FLAG_DEFAULT 16-34<br />
/INCLUDE 16-34<br />
/JOB_PRIORITY_DEFAULT 16-34<br />
/JOB_RETRY_DELAY 16-34<br />
/LOG_FILE 16-34<br />
/LOG_LEVEL 16-35<br />
/MAX_LOG_BYTES 16-35<br />
/MEDIA_DEFAULT 16-35<br />
/<br />
MULTIPLE_DOCUMENT_HANDLI<br />
NG_DEFAULT 16-37<br />
/NUMBER_UP_DEFAULT 16-38<br />
/OPCOM_LEVEL 16-38<br />
/OPCOM_TERMINAL 16-38<br />
/ORIENTATION_DEFAULT 16-38<br />
/PAGE_RANGE_DEFAULT 16-38<br />
/PRINTER_URI 16-33<br />
/QUALITY_DEFAULT 16-39<br />
/SIDES_DEFAULT 16-39<br />
/SPOOL_DIRECTORY 16-39<br />
queue configurations 16-43<br />
queue-specific settings 16-33<br />
setting up an IPP symbiont queue 16-44<br />
show comm<strong>and</strong> 16-46<br />
structure, model, <strong>and</strong> protocol 16-30<br />
submitting jobs to IPP symbiont print queues 16-45<br />
symbiont queues 16-43<br />
using queue-specific logicals 16-43<br />
two queues using a disk file 16-44<br />
IPSEC 32-1<br />
Authentication Header (AH) 32-1<br />
Encapsulating Security Payload (ESP) 32-1<br />
Internet Key Exchange (IKE) 32-2<br />
IP payload compression (IPcomp) 32-1<br />
ISC BIND 8.2.4 Nameserver 10-9<br />
K<br />
KDCs 24-14<br />
keepalive timers 12-16<br />
Kerberos 24-1<br />
administration 24-11<br />
database 24-3<br />
EDIT prompts 24-7<br />
tickets 24-2<br />
keyword value pairs 30-7<br />
L<br />
lease information for<br />
all leased IP addresses 21-81<br />
specific IP addresses 21-80<br />
Index-8<br />
license PAK<br />
installing 2-1<br />
registering <strong>and</strong> loading 2-1<br />
loadable timezone rules 14-16, 14-19<br />
local mail 15-20<br />
LocalPref 13-44<br />
log file name, specifying 18-12<br />
logical<br />
MULTINET 9-3<br />
MULTINET_ANONYMOUS_FTP_CONTROL 18-3<br />
MULTINET_ANONYMOUS_PASSWORD 12-13, 18-<br />
5<br />
MULTINET_COMMON_ROOT 1-7, 1-11<br />
MULTINET_DIRECTORY_MESSAGE_FILENAME 1<br />
8-13<br />
MULTINET_FTP_221_REPLY 18-11<br />
MULTINET_FTP_230_REPLY 18-12<br />
MULTINET_FTP_421_REPLY 18-12<br />
MULTINET_FTP_ADDRESS 12-12, 18-5<br />
MULTINET_FTP_ALL_VERSIONS 18-8<br />
MULTINET_FTP_ANONYMOUS_230_REPLY 18-12<br />
MULTINET_FTP_CONNECT_BANNER 18-7<br />
MULTINET_FTP_DELAY_TRANSFER_NEGOTIATI<br />
ON 18-1<br />
MULTINET_FTP_DISALLOW_UNIX_STYLE 18-9<br />
MULTINET_FTP_DISALLOW_WILDCARD_DELETE<br />
S 18-7<br />
MULTINET_FTP_DODROP1DOT 18-9<br />
MULTINET_FTP_DONT_REPORT_FILESIZE 18-5<br />
MULTINET_FTP_FAST_TIMEOUT 18-10<br />
MULTINET_FTP_HOSTNAME 12-13, 18-5<br />
MULTINET_FTP_INCLUDE_DEVICE_IN_NLST 18-<br />
9<br />
MULTINET_FTP_LOCAL_ADDRESS 18-5<br />
MULTINET_FTP_LOG_ALL_USERS 18-12, 18-13<br />
MULTINET_FTP_LOGFILE 18-12<br />
MULTINET_FTP_MAXIMUM_IDLE_TIME 12-13,<br />
18-10<br />
MULTINET_FTP_MAXREC 18-13<br />
MULTINET_FTP_PASSWORD_WARNING_MESSA<br />
GE 18-13<br />
MULTINET_FTP_PASSWORD_WARNING_TIME 1<br />
8-13<br />
MULTINET_FTP_RECEIVE_THRESHOLD 18-13<br />
MULTINET_FTP_SERVER_LOG_LIMIT 18-6<br />
MULTINET_FTP_SIZE_BEFORE_GET 18-1<br />
MULTINET_FTP_STRIP_VERSION 18-8<br />
MULTINET_FTP_SYST_BANNER 18-8<br />
MULTINET_FTP_UNIX_STRIP_VERSION 18-7<br />
MULTINET_FTP_UNIX_STYLE_BY_DEFAULT 18-7<br />
MULTINET_FTP_UNIX_STYLE_CASE_INSENSITIV<br />
E 18-8<br />
MULTINET_FTP_UNIX_YEAR_OLD_FILES 18-9<br />
MULTINET_IMAP_UPDATE_LOGIN_TIME 15-29<br />
MULTINET_IMAPD_LOGLEVEL 15-29<br />
MULTINET_IMAPD_MESSAGE_ONE 15-28<br />
MULTINET_IMAPD_MESSAGE_SIZE_LIMIT 15-29
MULTINET_IP_CLUSTER_ALIASES 11-39<br />
MULTINET_IPP__IGNORE_DESCRIPTION 16-32<br />
MULTINET_IPP_CONFIG 16-31<br />
MULTINET_IPP_DEFAULT_DOCUMENT_FORMAT<br />
16-31<br />
MULTINET_IPP_DOCALIAS_FILE 16-31<br />
MULTINET_IPP_IGNORE_DESCRIPTION 16-32<br />
MULTINET_IPP_JOB_RETRY_DELAY 16-32<br />
MULTINET_IPP_LOG_LEVEL 16-32<br />
MULTINET_IPP_LOGFILE 16-32<br />
MULTINET_IPP_MAX_LOG_BYTES 16-32<br />
MULTINET_IPP_MAX_STREAMS 16-32<br />
MULTINET_IPP_OPCOM_LEVEL 16-33<br />
MULTINET_IPP_OPCOM_TERMINAL 16-33<br />
MULTINET_KRBTKT_username 24-2<br />
MULTINET_LOG_MBX 30-19, 31-33<br />
MULTINET_LPD_*_*_FILETYPE 16-8<br />
MULTINET_LPD_*_*_parametername 16-5<br />
MULTINET_LPD_*_*_PASSALL 16-8<br />
MULTINET_LPD_*_typechar_parametername 16-5<br />
MULTINET_LPD_DEFAULT_USERNAME 16-3, 16-<br />
9<br />
MULTINET_LPD_KEEPALIVE 16-16<br />
MULTINET_LPD_MAXSTREAMS 16-16<br />
MULTINET_LPD_PROXY 16-3<br />
MULTINET_LPD_queuename_*_parametername 16<br />
-5<br />
MULTINET_LPD_queuename_typechar_parametern<br />
ame 16-5<br />
MULTINET_LPD_SYMBIONT_*_LFTAIL 16-16<br />
MULTINET_LPD_SYMBIONT_CONNECT_TIMERS<br />
16-15<br />
MULTINET_LPD_SYMBIONT_DEBUG 16-9, 16-15<br />
MULTINET_LPD_SYMBIONT_LFTAIL 16-16<br />
MULTINET_LPD_SYMBIONT_MAX_RETRY_INTER<br />
VAL 16-15<br />
MULTINET_LPD_SYMBIONT_RESOURCE_TIMER<br />
S 16-16<br />
MULTINET_LPD_SYMBIONT_RETRY_INTERVAL 1<br />
6-15<br />
MULTINET_NAMESERVER_RETRANS 18-10<br />
MULTINET_NAMESERVER_RETRY 18-10<br />
MULTINET_NAMESERVERS 10-9, 10-10, 10-12<br />
MULTINET_NFS_SERVER_NFS_ACL_SUPPORT_<br />
DISABLED 27-26<br />
MULTINET_NTYSMB 16-26<br />
MULTINET_NTYSMB_*_MAXTIMERMSG 16-24<br />
MULTINET_NTYSMB__MAXTIMERMSG 16-24<br />
MULTINET_NTYSMB_DEBUG 16-24, 16-27<br />
MULTINET_NTYSMB_TIMERS 16-24<br />
MULTINET_PCNFSD_PRINTER_LIMIT 27-28<br />
MULTINET_PCNFSD_QUEUE_TYPES 27-28<br />
MULTINET_POPx_DEST_FOLDER 15-31<br />
MULTINET_POPx_SOURCE_FOLDER 15-31<br />
MULTINET_PRINTER_%s_NO_TELNET 16-21<br />
MULTINET_PRINTER_%s_SUPPRESS_FF 16-21<br />
Index<br />
MULTINET_PRINTER_*_NO_FFLF_DEFAULT 16-7<br />
MULTINET_PRINTER__NO_FFLF_DEFAULT 16-7<br />
MULTINET_PRINTER__PASSALL_FILTER 16-7<br />
MULTINET_PRINTER__SUPPRESS_REMOTE_BA<br />
NNER 16-7<br />
MULTINET_PRINTER_NO_OPCOM 16-16<br />
MULTINET_PRINTER_printername_NO_TELNET 1<br />
6-20<br />
MULTINET_PRINTER_queuename_ALLOW_USER<br />
_SPEC 16-14<br />
MULTINET_PRINTER_queuename_DEFAULT_FILT<br />
ER 16-14<br />
MULTINET_PRINTER_queuename_NO_TELNET 1<br />
6-15<br />
MULTINET_PRINTER_queuename_PASSALL_FILT<br />
ER 16-14<br />
MULTINET_PRINTER_queuename_RETAIN_CR_D<br />
EFAULT 16-14<br />
MULTINET_PRINTER_queuename_SUPPRESS_FF<br />
16-15<br />
MULTINET_ROOT 1-7, 1-11, 9-3<br />
MULTINET_SEARCHDOMAINS 10-12<br />
MULTINET_SERVER_DONT_TRUNCATE_LOG 10-<br />
13<br />
MULTINET_SERVER_NOACNT 9-2<br />
MULTINET_SMTP_A1_DOMAIN 15-34<br />
MULTINET_SMTP_A1_NAME 15-34<br />
MULTINET_SMTP_ACCEPT_UNIX_LF 15-16<br />
MULTINET_SMTP_ACCEPT_UNIX_LF_BRAIN_DA<br />
MAGE 15-16<br />
MULTINET_SMTP_AM_DOMAIN 15-34<br />
MULTINET_SMTP_AM_NAME 15-34<br />
MULTINET_SMTP_APPEND_FORWARDER_TO_M<br />
X 15-20<br />
MULTINET_SMTP_BATCH_QUEUE 15-2<br />
MULTINET_SMTP_DISABLE_FOLDER_DELIVERY<br />
15-2<br />
MULTINET_SMTP_ENVELOPE_FROM_HOST 15-<br />
22<br />
MULTINET_SMTP_FROM_HOST 15-22<br />
MULTINET_SMTP_IGNORE_INTERFACE_NAMES<br />
15-20<br />
MULTINET_SMTP_MAXIMUM_822_TO_LENGTH 1<br />
5-16<br />
MULTINET_SMTP_MRGATE-NAME 15-34<br />
MULTINET_SMTP_REJECT_INVALID_DOMAINS 1<br />
5-15<br />
MULTINET_SMTP_REPLY_TO 15-13, 15-16<br />
MULTINET_SMTP_SERVER_DISABLE_VRFYEXPN<br />
15-17<br />
MULTINET_SMTP_SERVER_REJECT_FILE 15-3<br />
MULTINET_SMTP_SERVER_REJECT_INFO 15-5<br />
MULTINET_SMTP_SUPPRESS_VENDOR 15-16<br />
MULTINET_SOCKET_LIBRARY 10-8<br />
MULTINET_SSH_ACC_REJ_LOG_FILE 30-18, 31-<br />
33<br />
MULTINET_SSH_ALLOW_EXPIRED_PW 30-18<br />
Index-9
Index<br />
MULTINET_SSH_ALLOW_PREEXPIRED_PW 30-<br />
18<br />
MULTINET_SSH_DISPLAY_SYS$ANNOUNCE 30-<br />
19<br />
MULTINET_SSH_ENABLE_SSH1_CONNECTIONS<br />
30-19<br />
MULTINET_SSH_ENABLE_SSH2_CONNECTIONS<br />
31-34<br />
MULTINET_SSH_KEYGEN_MIN_PW_LEN 30-19,<br />
31-33<br />
MULTINET_SSH_LOG_ACCEPTS 30-19, 31-33<br />
MULTINET_SSH_LOG_REJECTS 30-19, 31-33<br />
MULTINET_SSH_MAX_SESSIONS 30-19, 31-33<br />
MULTINET_SSH_PARAMETERS 30-19, 31-33<br />
MULTINET_SSH_PARAMETERS_n 31-33<br />
MULTINET_SSH_USE_SYSGEN_LGI 30-20, 31-34<br />
MULTINET_SSH2_HOSTKEY_DIR 31-34<br />
MULTINET_SSH2_KNOWNHOSTS_DIR 31-34<br />
MULTINET_STREAM_DEAD_LINK_TIMEOUT 16-<br />
21<br />
MULTINET_STREAM_queuename_DEAD_LINK_TI<br />
MEOUT 16-21<br />
MULTINET_STREAM_SYMBIONT_DEBUG 16-21<br />
MULTINET_STREAM_SYMBIONT_TIMERS 16-22<br />
MULTINET_VMSMAIL_LOCASE_USERNAME 15-<br />
16<br />
MULTINET_VMSMAIL_USE_RFC822_TO_HEADER<br />
15-24<br />
MULTINET_XGATEWAY_DEBUG_LEVEL 25-6<br />
MULTINET_XGATEWAY_DECNET_server_number_<br />
HOSTNAME 25-4<br />
MULTINET_XGATEWAY_DECNET_server_number_<br />
SERVER 25-4<br />
MULTINET_XGATEWAY_TCPIP_server_number_H<br />
OSTNAME 25-2<br />
MULTINET_XGATEWAY_TCPIP_server_number_SE<br />
RVER 25-3<br />
SSH_DIR 30-18, 31-32<br />
SSH_EXE 30-18, 31-32<br />
SSH_LOG 30-18, 31-32<br />
SSH_MAX_SESSIONS 30-19, 31-33<br />
SSH_TERM_MBX 30-18, 31-33<br />
SSH2_DIR 31-32, 31-34<br />
logicals<br />
defining them system-wide 15-32<br />
LPD<br />
<strong>and</strong> stream symbiont 16-22<br />
jobs (inbound) 16-5<br />
log file, generating 16-9<br />
print jobs 16-4<br />
protocol queue 16-10<br />
server 16-1, 16-8<br />
spool directory 16-4<br />
LPD protocol 16-29<br />
LPR<br />
server 16-1<br />
lpr -v support 16-24<br />
Index-10<br />
M<br />
mail<br />
alias file 15-23<br />
aliases 15-22<br />
delivery mechanisms 15-2<br />
gateways 15-21<br />
hub 15-18<br />
messages 15-2<br />
parameter<br />
ALIAS-FILE 15-13<br />
DECNET-DOMAIN 15-13<br />
DELIVERY-RECEIPTS 15-13<br />
DISALLOW-USER-REPLY-TO 15-13<br />
FORWARDER 15-13<br />
FORWARD-LOCAL-MAIL 15-13<br />
FORWARD-REMOTE-MAIL 15-13<br />
HEADER-CONTROL 15-13<br />
HOST-ALIAS-FILE 15-13<br />
LOCAL-MAIL-FORWARDER 15-13<br />
POSTMASTER 15-13<br />
QUEUE-COUNT 15-13<br />
REPLY-CONTROL 15-14<br />
RESENT-HEADERS 15-14<br />
RETRY-INTERVAL 15-14<br />
RETURN-INTERVAL 15-14<br />
SEND-BROADCAST-CLASS 15-14<br />
SMTP-HOST-NAMES 15-14<br />
START-QUEUE-MANAGER 15-14<br />
parameters with MAIL-CONFIG 15-12<br />
queues 15-16, 15-17<br />
mail monitoring MIB<br />
MtaFailedConvertedMessages 15-9<br />
MtaReceivedMessages 15-8<br />
MtaReceivedRecipients 15-8<br />
MtaReceivedVolume 15-8<br />
MtaStoredMessages 15-8<br />
MtaStoredRecipients 15-8<br />
MtaStoredVolume 15-8<br />
MtaSuccessfulConvertedMessages 15-9<br />
MtaTransmittedMessages 15-8<br />
MtaTransmittedRecipients 15-8<br />
MtaTransmittedVolume 15-8<br />
mailbox 30-18, 31-33<br />
MAILbus 15-39<br />
mailing lists 15-23<br />
matched leases for<br />
client ID 21-83<br />
hardware addresses 21-82<br />
maximum idle time, specifying 18-10<br />
MENU-CONFIG 9-10, 12-6<br />
comm<strong>and</strong> 10-12<br />
methods of associating IP addresses <strong>and</strong> host<br />
names 10-1<br />
MIME Media Types 16-30
MIN_CHANNELCNT 1-6<br />
MIN_INTSTKPAGES 1-6<br />
MOP 27-30<br />
mount<br />
parameter settings 27-19<br />
point<br />
option usage 27-33<br />
options 27-32<br />
points, naming 27-15<br />
MTU discovery 11-41<br />
multicast support 11-40<br />
Multi-Exit Discriminator (MED) 13-44<br />
MULTINET<br />
HOSTS.EQUIV 12-19, 17-1<br />
SHOW/SNMP<br />
comm<strong>and</strong>s 23-14<br />
/ARP 23-14<br />
/COMMUNITY_NAME 23-14<br />
/CONNECTIONS 23-14<br />
/MIB_VAR 23-14<br />
/ROUTE 23-14<br />
/STATISTICS 23-14<br />
SSH_KNOWN_HOSTS 30-17<br />
SSHD_CONFIG 30-7<br />
<strong>MultiNet</strong><br />
comm<strong>and</strong>-line interface configuration tools 9-3<br />
configuration file summary 9-4<br />
definition 6-1<br />
de-installation comm<strong>and</strong> procedure 4-1<br />
directory<br />
layout 1-6<br />
structure 1-8<br />
disk space requirements 1-5<br />
distribution media 1-5<br />
documentation<br />
set 5-1<br />
font server 20-7<br />
host tables<br />
hosts 10-3<br />
IP protocol types 10-3<br />
networks 10-3<br />
services 10-3<br />
installation<br />
steps 1-1<br />
internals, underst<strong>and</strong>ing 7-4<br />
IP transport parameter checklist 1-3<br />
NFS client, use of user IDs 29-2<br />
online help 5-4<br />
organization 7-4<br />
public mailing list 1-xxxviii<br />
release notes 1-4<br />
supported<br />
devices 7-1<br />
protocols 7-3<br />
system<br />
disk back up 1-5<br />
updating system parameters 1-5<br />
Index<br />
XDM server 22-3<br />
MULTINET ACCOUNTING/INPUT 15-10, 18-18<br />
MULTINET BOOTP-SERVER.CONFIGURATION 21-<br />
16<br />
MULTINET CONVERT_UNIX_HOST_TABLE.COM 10-<br />
6<br />
MULTINET DHCPD.CONF 21-16<br />
MULTINET DHCPD.LEASES 21-16<br />
MULTINET DHCP-SERVER.CONFIGURATION 21-16<br />
MULTINET DHCP-STATE.DAT 21-16<br />
MULTINET GATED/LOAD 13-4<br />
MULTINET HOSTS.LOCAL 10-2, 10-10<br />
MULTINET HOSTS.SERVICES 10-3<br />
MULTINET INSTALL_DATABASES 10-7<br />
MULTINET NAMED.CONF 10-13<br />
file 10-9, 10-13<br />
MULTINET NETWORK_DATABASE 10-2, 10-7<br />
MULTINET SET /DECNET 26-3<br />
<strong>MultiNet</strong> SSH server 30-2, 31-2<br />
MULTINET START_SERVER 10-7<br />
MULTINET START_SMTP 10-7<br />
MULTINET_FTP_ANNOUNCE 18-7<br />
MULTINET_FTP_DONT_REPORT_FILESIZE 18-5<br />
MULTINET_FTP_NOLOGIN_EXPIRED_PASSWORD<br />
18-14<br />
MULTINET_NLPx_REMOTE_PRINTER 16-15<br />
MULTINET_NTYSMB<br />
troubleshooting 16-26<br />
MULTINET_SERVER 10-7<br />
multiple<br />
addresses 11-19<br />
mappings, adding 27-14<br />
print queues, starting 16-16<br />
queues, configuring 15-18<br />
N<br />
NAMED.CONF<br />
options 10-19<br />
zone field<br />
file 10-15<br />
masters 10-15<br />
type 10-15<br />
NET-CONFIG<br />
comm<strong>and</strong> 10-12<br />
NET-CONFIG comm<strong>and</strong><br />
SET CLUSTER-SERVICE-ADDRESS 10-36<br />
SET DOMAIN-NAMESERVERS 10-8, 10-12<br />
SET NAMESERVER-RETRANSMISSION 10-12<br />
NETCONTROL<br />
SHOW comm<strong>and</strong> 21-80<br />
STATISTICS comm<strong>and</strong> 21-84<br />
NETCU<br />
GateD comm<strong>and</strong><br />
SHOW OSPF ADVERTISE 13-4<br />
Index-11
Index<br />
SHOW OSPF ERRORS 13-5<br />
SHOW OSPF ROUTING 13-5<br />
netgroups 30-14, 31-31<br />
network<br />
configuration server, choosing 21-2<br />
definitions 10-4<br />
interface<br />
configuration overview 11-2<br />
parameters<br />
ACCM Mask 11-6<br />
Adapter 11-6<br />
Address <strong>and</strong> Control Field Compression<br />
(ACFC) 11-6<br />
Baud Rate 11-7<br />
BSD Trailer Encapsulation 11-7<br />
Communications Mode 11-7<br />
CSR 11-7<br />
Flags 11-7<br />
Hardware Device 11-7<br />
Header Compression Mode 11-8<br />
ICMP 11-8<br />
IP Address 11-8<br />
IP Address of Remote System 11-8<br />
IP Broadcast Address 11-8<br />
IP Over DECnet Peer Host’s DECnet<br />
Name 11-8<br />
IP SubNet Mask 11-8<br />
Link Level Encapsulation Mode 11-9<br />
Maximum Receive Unit (MRU) Size 11-9<br />
Point-To-Point Device IP Destination<br />
Address 11-9<br />
Protocol Compression 11-9<br />
Retry Count 11-9<br />
Termination Retry Count 11-9<br />
Timeout 11-9<br />
Vector 11-10<br />
VMS Device 11-10<br />
interfaces<br />
adding 11-5<br />
with MENU-CONFIG 11-14, 11-16<br />
with NET-CONFIG 11-13, 11-16<br />
management station (NMS) 23-1<br />
network interface device drivers 7-5<br />
network service monitoring 18-15<br />
items<br />
ApplAccumulatedInboundAssociations 15-7,<br />
18-15<br />
ApplDescription 15-7, 18-15<br />
ApplInboundAssociations 15-7, 18-15<br />
ApplIndex 15-7, 18-15<br />
ApplLastChange 15-7, 18-15<br />
ApplLastInboundActivity 15-7, 18-15<br />
ApplName 15-7, 18-15<br />
ApplOperStatus 15-7, 18-15<br />
ApplRejectedInboundAssociations 15-7, 18-<br />
15<br />
Index-12<br />
ApplUptime 15-7, 18-15<br />
ApplVersion 15-7, 18-15<br />
NFS<br />
client 29-1, 29-12<br />
architecture 29-7<br />
default file attributes 29-5<br />
mount options 29-15<br />
semantics 29-15<br />
setup 29-8<br />
systems for UID/GID mappings 27-4<br />
using BACKUP 29-14<br />
file access, controlling 27-21<br />
groups 29-10<br />
adding <strong>and</strong> deleting 27-13<br />
mode of operation 27-34<br />
server 27-2<br />
architecture 27-9<br />
cache<br />
interrupt parameters 27-37<br />
maintenance interval parameters 27-38<br />
memory requirements parameters 27-<br />
40<br />
refresh parameters 27-38<br />
size parameters 27-39<br />
channel deassignment parameters 27-38<br />
channels, file headers, <strong>and</strong> data buffers 27-<br />
37<br />
configuration 27-9<br />
global parameters 27-33<br />
memory 27-35<br />
mount point options 27-31<br />
server’s ACL support 27-26<br />
troubleshooting 27-43<br />
NFS-CONFIG 27-11<br />
utility 29-9<br />
NFSOpenVMS Server<br />
NFS?OpenVMS Server 28-1<br />
NLST/LIST comm<strong>and</strong>s 18-1<br />
IPP<br />
print comm<strong>and</strong> option<br />
16-40<br />
DNS<br />
NSLOOKUP comm<strong>and</strong><br />
set 10-34<br />
NOFDL_FILES 29-15<br />
NOLINKS 29-16<br />
NOSTREAM_CONVERSION 29-16<br />
NOUNIQUE_FILENO 29-16<br />
NOVERSIONS 29-16<br />
NOVMS_ACCESS_CHECKING 29-16<br />
NSLOOKUP, using to debug DNS 10-33<br />
NTALK A-5, A-14<br />
NTP<br />
access control comm<strong>and</strong>s 14-24<br />
NTP.CONF 14-3<br />
NTP.DRIFT 14-3
NTP.KEYS 14-3<br />
NTPDATE utility 14-26<br />
NTPDC utility 14-30<br />
NTPQ utility 14-37<br />
NTPSERVER.LOG 14-3<br />
NTPTRACE utility 14-29<br />
NTY devices 12-23<br />
NTYSMB<br />
log file, generating 16-26<br />
NTYSMB symbiont 16-24<br />
O<br />
online help 1-xxxviii<br />
OPCOM terminal name<br />
CARDS 16-42<br />
CENTRAL 16-42<br />
CLUSTER 16-42<br />
DEVICES 16-42<br />
DISKS 16-42<br />
LICENSE 16-42<br />
NETWORK 16-42<br />
NONE 16-42<br />
OPER1 16-42<br />
OPER10 16-42<br />
OPER11 16-42<br />
OPER12 16-42<br />
OPER2 16-42<br />
OPER3 16-42<br />
OPER5 16-42<br />
OPER7 16-42<br />
OPER8 16-42<br />
OPER9 16-42<br />
PRINTER 16-42<br />
SECURITY 16-42<br />
TAPES 16-42<br />
OPCOM terminal names 16-42<br />
Open Shortest Path First (OSPF) routing 13-53<br />
OpenVMS<br />
Access Control Lists (ACLs)<br />
controlling NFS file access with 27-21<br />
Alpha<br />
system parameter<br />
ADD_GBLPAGES 1-6<br />
ADD_GBLSECTIONS 1-6<br />
MIN_CHANNELCNT 1-6<br />
channel usage parameters 27-39<br />
channels 27-36<br />
text files to UNIX text files, mapping 27-8<br />
user accounts for client users, creating 27-11<br />
VAX<br />
system parameter<br />
ADD_GBLPAGES 1-6<br />
ADD_GBLSECTIONS 1-6<br />
ADD_SPTREQ 1-6<br />
MIN_CHANNELCNT 1-6<br />
MIN_INTSTKPAGES 1-6<br />
operation<br />
cancel or close 12-16<br />
OSI reference model 7-6<br />
P<br />
packet<br />
filter file 11-21<br />
filtering for security 11-20<br />
tracing options 13-56<br />
PAK (Product Authorization Key) 1-8<br />
password<br />
lifetime warnings 18-13<br />
messages<br />
defining 18-13<br />
password lifetime warnings 18-13<br />
password-based authentication 30-3<br />
patterns<br />
hostname 30-15<br />
hostnames 30-17<br />
port number 30-15<br />
PC-NFSD remote printing service 27-26<br />
permit list 21-20<br />
PING 6-3<br />
Pipelining (RFC-2197) 15-1<br />
pool permit lists 21-20<br />
POP<br />
logical names 15-30<br />
using MULTINET_POPx_FLAGS logical 15-30<br />
Post Office Protocol (POP) 15-29<br />
PPP (Point-to-Point Protocol)<br />
configuration parameters 11-33<br />
PRESERVE_DATES 29-16<br />
PRINT comm<strong>and</strong> 16-29<br />
print queue<br />
parameters, adding 16-16<br />
troubleshooting 16-27<br />
print queues 16-45<br />
print queues, configuring 16-9<br />
PRINTER 27-28<br />
printer queues 16-19<br />
printers on remote systems 16-4<br />
process memory 27-35<br />
<strong>Process</strong> <strong>Software</strong> World Wide Web server 1-xxxix<br />
protocol definitions 10-3<br />
pseudo device<br />
adding a 11-19<br />
pseudo device interface (pd) 11-19<br />
pseudoterminal 30-12, 31-29<br />
pwdlifetime 30-18<br />
Index<br />
Index-13
Index<br />
Q<br />
QIO interface 7-4<br />
queue configurations 16-43<br />
queue groups 15-18<br />
R<br />
R services<br />
configuring 12-19<br />
RLOGIN 12-19<br />
RSHELL 12-19<br />
r<strong>and</strong>om number generator 30-13, 31-31<br />
RARP (Reverse Address Resolution Protocol) 21-2<br />
clients 21-3<br />
configuration<br />
file 21-4<br />
reloading 21-5<br />
packet reception, enabling 21-3<br />
service 21-4<br />
recurse 10-34<br />
release notes, printing 2-3<br />
remote<br />
login, controlling 17-7<br />
magnetic tape server, configuring 17-1<br />
printer queues, checking 16-5<br />
remote host information 23-14<br />
remote management agent 23-5<br />
REPLY_TO header 15-16<br />
retry timers 16-15<br />
REXEC 12-21<br />
RFC<br />
1001 21-59<br />
1001/1002 21-58<br />
1002 21-59<br />
1032 10-8<br />
1033 10-8<br />
1034 10-8<br />
1035 10-8, 10-9, 21-56, 21-57, 21-59<br />
1042 21-57<br />
1084 21-5<br />
1112 10-6<br />
1122 21-55, 21-60<br />
1123 10-5, 10-6<br />
1179 21-58<br />
1191 21-59<br />
1256 21-60<br />
1869 15-1<br />
2131 21-13<br />
2132 21-13<br />
2197 15-1<br />
2565 16-30<br />
2566 16-30<br />
Index-14<br />
2567 16-30<br />
2568 16-29, 16-30<br />
2569 16-30<br />
2639 16-30<br />
2741 23-5<br />
2742 23-5<br />
2788 15-6, 18-15<br />
2789 15-6<br />
865 21-7, 21-55<br />
868 21-62<br />
887 21-60<br />
893 21-62<br />
894 21-57<br />
950 21-61<br />
951 21-5<br />
952 10-3, 10-5, 10-6<br />
RFC (Requests for Comment) 8-1<br />
RHOSTS 12-19, 12-21, 17-7<br />
rhosts authentication 30-2, 30-12, 31-30<br />
RLOGIN 10-2, 12-19, 24-11, 30-3, 31-3<br />
<strong>and</strong> RSHELL authentication cache 12-21<br />
RMT<br />
client 17-4<br />
configuration 17-1<br />
server tape drive name qualifiers 17-3<br />
RMTALLOC 17-5<br />
CD-ROM access 17-6<br />
qualifiers, using 17-7<br />
tape drive access 17-5<br />
router<br />
advertisements 13-32<br />
discovery<br />
protocol 13-32<br />
server 13-32<br />
ID 13-17<br />
router discovery 6-10<br />
routing<br />
definition 6-9<br />
dynamic 13-2<br />
table 6-10<br />
Routing Information Protocol (RIP) 13-21<br />
RSA ACE/Agent for OpenVMS 30-3<br />
RSA challenge-response authentication 30-3<br />
RSA host authentication 30-3<br />
RSA key<br />
bits 30-14<br />
comment 30-14<br />
exponent 30-14<br />
modulus 30-14<br />
options 30-14<br />
RSA key file<br />
Allowforwardingport 30-15<br />
Allowforwardingto 30-15<br />
comm<strong>and</strong> 30-15<br />
Denyforwardingport 30-15<br />
Denyforwardingto 30-15
from 30-16<br />
idle-timeout 30-16<br />
no-agent-forwarding 30-16<br />
no-port-forwarding 30-16<br />
no-X11-forwarding 30-16<br />
RSA key file examples 30-16<br />
RSA keys 30-14<br />
RSHELL 12-19, 12-21, 30-3, 31-3<br />
connection, disabling the st<strong>and</strong>ard error 12-20<br />
S<br />
Safe-failover boot file 21-73<br />
search list 10-11<br />
secure encrypted communications 30-2, 31-2<br />
Secure Shell (SSH)<br />
daemon (SSHD) 30-2, 31-2<br />
restrictions 30-1, 31-1<br />
security 30-2<br />
server 30-1, 31-1<br />
underst<strong>and</strong>ing 30-2, 31-2<br />
SSHD 30-2, 31-2<br />
security 27-3<br />
<strong>and</strong> file protections 29-4<br />
select list 12-16<br />
SERVER 27-28<br />
server<br />
access 12-10<br />
server key 30-7<br />
server listens 30-7, 31-6<br />
SERVER-CONFIG 12-2<br />
comm<strong>and</strong>s 12-3<br />
service parameters A-1<br />
services provided with <strong>MultiNet</strong> A-4, A-6<br />
utility A-1<br />
SERVER-CONFIG parameter<br />
ACCEPT-HOSTS A-1<br />
ACCEPT-NETS A-1<br />
BACKLOG A-1<br />
CONFFILE A-1<br />
CONNECTED A-1<br />
DEBUG A-1<br />
DEBUGFILE A-1<br />
DISABLED-NODES A-1<br />
ENABLED-NODES A-2<br />
FLAGS A-2<br />
INIT A-2<br />
LISTEN A-2<br />
LOG-ACCEPTS A-2<br />
LOG-FILE A-2<br />
LOG-REJECTS A-2<br />
MAXIMUM-TTL A-2<br />
MAX-SERVERS A-2<br />
MINIMUM-TTL A-2<br />
PARAMETERS A-2<br />
PRESERVE-CASE A-2<br />
PRIORITY A-3<br />
PROGRAM A-3<br />
QUERY-LOG A-3<br />
REJECT-BY-DEFAULT A-3<br />
REJECT-HOSTS A-3<br />
REJECT-MESSAGE A-3<br />
REJECT-NETS A-3<br />
REWRITE-TTL A-3<br />
SERVICE A-3<br />
SERVICE-NAME A-3<br />
SOCKET-FAMILY A-3<br />
SOCKET-OPTIONS A-3<br />
SOCKET-PORT A-3<br />
SOCKET-TYPE A-3<br />
WORKING-SET A-3<br />
servers <strong>and</strong> clients 27-2<br />
service<br />
configuration 12-1<br />
definitions 10-4<br />
ratings setting 10-36<br />
service configuration information 1-16<br />
session accounting 18-16<br />
SLIP<br />
configuration parameters 11-30<br />
underst<strong>and</strong>ing 11-28<br />
SMTP<br />
configuration file 15-1<br />
host aliases, specifying 15-21<br />
network service monitoring 15-6<br />
queues 10-7<br />
service for ALL-IN-1 users, configuring 15-32<br />
session accounting 15-9<br />
accounting file record format 15-11<br />
configuration file 15-9<br />
configuring 15-9<br />
configuring the Accounting listener 15-11<br />
file format 15-10<br />
symbiont 10-7<br />
configuring 15-16<br />
SMTP/MR<br />
configuration, completing 15-37<br />
document conversion, configuring 15-36<br />
SMTP/MR, configuring 15-33<br />
SMTP-DECnet mail gateway, configuring 15-39<br />
SMTP-HOST-NAMES 15-21<br />
SMTP-to-DECnet mail 15-40<br />
SMUX peers, adding 23-4<br />
SNMP 23-1<br />
(Simple Network Management Protocol) 6-13<br />
agent 23-2<br />
agent extensibility 23-5<br />
communities 6-14<br />
managers, agents, <strong>and</strong> trap sinks 23-1<br />
multiplexing (SMUX) protocol 23-4<br />
Index<br />
Index-15
Index<br />
services<br />
community parameters 23-9<br />
configuration file 23-6<br />
configuring 23-2<br />
extendible MIBs, supporting 23-3<br />
log file 23-13<br />
management objects, defining values 23-7<br />
traps<br />
clientcontrollable 23-12<br />
enabling/disabling 23-12<br />
generating 23-13<br />
troubleshooting 23-13<br />
traps 6-13<br />
SNMPD.CONF file 23-6<br />
software patches 1-xxxix<br />
SSH<br />
break-in 30-3<br />
changing configuration 30-11, 31-29<br />
connection <strong>and</strong> login 30-11, 31-29<br />
daemon files 31-34<br />
SSHD.LOG 31-34<br />
SSHD_MASTER.LOG 31-34<br />
enabling 30-11, 31-29<br />
expired passwords 30-5<br />
intrusion detection 30-3<br />
keyword<br />
StrictIntrusionLogging 30-3<br />
starting the server 30-9, 31-27<br />
SSH comm<strong>and</strong> line option<br />
bits 30-6, 31-6<br />
ipv4-disable 31-6<br />
ipv6-disable 31-6<br />
debug 31-6<br />
debug debug-level 30-6<br />
enable-ssh1 30-7<br />
enable-ssh2 31-6<br />
host-key-file 30-7<br />
keygen-time 30-7<br />
listen-address 30-7, 31-6<br />
port 30-7, 31-6<br />
quiet_mode 30-7, 31-7<br />
ssh1-config-file 30-6<br />
ssh2-config-file 31-7<br />
verbose 30-7, 31-7<br />
SSH_KNOWN_HOSTS<br />
file<br />
AUTHORIZED_KEYS 30-13<br />
MULTINET<br />
HOSTS.EQUIV 30-12, 31-30<br />
SHOSTS.EQUIV 30-12, 31-30<br />
SSH_HOST_KEY 30-12, 31-30<br />
SSH_HOST_KEY.PUB 30-13, 31-31<br />
SSH_KNOWN_HOSTS 30-13<br />
SSHD_CONFIG 30-13<br />
SHOSTS 30-14, 31-31<br />
SSH2<br />
Index-16<br />
SSH_RANDOM_SEED 30-13, 31-31<br />
SSH2_DIR<br />
SSHD2_CONFIG 31-31<br />
SYS$LOGIN<br />
RHOSTS 30-14, 31-31<br />
SHOSTS 30-14<br />
SSH2<br />
break-in 31-4<br />
intrusion detection 31-4<br />
keyword<br />
AllowedAuthentications 31-4<br />
RequiredAuthentications 31-4<br />
StrictIntrusionLogging 31-5<br />
SSHD 30-2, 30-12, 31-2, 31-29<br />
SSHD_MASTER 30-2, 30-12, 31-2, 31-29<br />
STAT comm<strong>and</strong> 18-7<br />
static<br />
IP routes, configuring 13-1<br />
route definitions 13-61<br />
SLIP interfaces, configuring 11-30<br />
static leases 21-68<br />
stolen key 30-16<br />
STREAM<br />
log file, generating 16-21<br />
protocol queue, configuring 16-20<br />
queues, advantages over 16-25<br />
STREAM protocol queue<br />
troubleshooting 16-21<br />
StrictIntrusionLogging 30-3<br />
subclass declaration 21-47<br />
Sun<br />
host clients, configuring 27-19<br />
microsystems hosts, booting diskless 27-31<br />
supported network interface devices 11-3<br />
SYMBIONT 27-28<br />
symbiont file<br />
MULTINET_IPP_SYMBIONT.EXE 3-1<br />
MULTINET_LPD_SYMBIONT.EXE 3-1<br />
MULTINET_NTYSMB.EXE 3-1<br />
MULTINET_SMTP_SYMBIONT.EXE 3-1<br />
MULTINET_STREAM_SYMBIONT.EXE 3-1<br />
symbiont print queues 16-45<br />
synchronized<br />
timekeeping 14-5<br />
SYS$LOGIN<br />
.RHOSTS 12-19, 17-1<br />
SYSLOG 12-25<br />
message classes 12-25<br />
system startup comm<strong>and</strong> procedure, modifying 1-15<br />
system/vendor information<br />
limiting 15-16<br />
T<br />
TALK A-6, A-22
TCP/IP<br />
concepts 6-3<br />
broadcast addresses 6-5<br />
host names 6-5<br />
IP addresses 6-3<br />
LAN (Local Area Network) hardware<br />
addresses 6-3<br />
operation 6-5<br />
physical networks 6-3<br />
subnet masks 6-4<br />
networking 6-1<br />
protocols 6-6<br />
IP (Internet Protocol) 6-6<br />
PPP (Point-to-Point Protocol) 6-8<br />
SLIP (Serial Line Internet Protocol) 6-8<br />
TCP (Transmission Control Protocol) 6-7<br />
UDP (User Datagram Protocol) 6-7<br />
TCP/IP connections 30-3, 31-3<br />
TCP/IP transport over UCX 11-38<br />
TCPDUMP 6-3, 10-2, 24-11<br />
TCPVIEW 6-3<br />
technical support 1-xxxv<br />
TELNET 10-2<br />
server 12-23<br />
TERMINAL 27-28<br />
TFTP (Trivial File Transfer Protocol) 12-17<br />
timezone<br />
parameters 27-43<br />
support 14-15<br />
timezone configuration 14-16<br />
TN3270 9-8<br />
TN5250 9-8<br />
TRACEROUTE 6-3<br />
transaction signatures 21-26<br />
traps 23-2<br />
type of service (TOS) routing 13-53<br />
typographical conventions 1-xxxv<br />
U<br />
UCX-compatible services 12-15<br />
UIC protection 27-23<br />
UID/GID mappings 27-13, 29-2, 29-8<br />
UNIX 16-29<br />
/etc/hosts file, converting 10-6<br />
bootptab file 21-11<br />
device special files 27-6<br />
devices 17-4<br />
file<br />
links 27-6<br />
names 18-9, 27-6<br />
system semantics 27-5<br />
setuid, setgid, <strong>and</strong> "sticky" file modes 27-6<br />
style listings 18-7<br />
UPPER_CASE_DEFAULT 29-16<br />
user exits, adding <strong>and</strong> updating 1-17<br />
user-specified print<br />
destinations 16-17<br />
V<br />
vc 10-34<br />
vendor encapsulated options 21-65<br />
virtual<br />
links 13-61<br />
virtual <strong>and</strong> physical memory 27-36<br />
VMS<br />
MAIL 15-23<br />
VMS_FILENAMES 29-17<br />
VMS_SERVER 29-17<br />
VMS_STYLE_CREATE<br />
mount point option 27-26<br />
VMScluster aliasing 11-39<br />
VMSINSTAL, running 1-9<br />
VMS-to-VMS negotiation 17-7<br />
VRFY 15-17<br />
W<br />
WHOIS 11-2<br />
write protection 17-8<br />
writeback cache parameters 27-41<br />
X<br />
X display management 22-1<br />
X11 connections 30-3, 31-3<br />
X11DEBUG 6-3<br />
X11-Gateway<br />
concepts 25-1<br />
debugging 25-5<br />
error messages 25-6<br />
security 25-5<br />
X11R3 displays 22-9<br />
XDM<br />
access to the XDM server 22-8<br />
administrative tasks 22-3<br />
advanced XDM resources 22-6<br />
configuration, reloading 22-8<br />
server 22-2<br />
configuration 22-4<br />
controlling the 22-6<br />
resources 22-4<br />
XDM.SERVERS file 22-11<br />
XDMCP requests 22-2<br />
Index<br />
Index-17